Best Bakery Buttercream Frosting

Best Bakery Buttercream Frosting & Mascarpone Magic – A Sweet Twist on Classic Layers

⚖️
Difficulty
Medium
⏲️
Prep Time
45 mins
🕒
Cook Time
30 mins
⏱️
Total Time
135 mins
🍽️
Servings
12

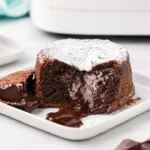
Growing up in the bustling souks of Marrakech, I learned early that the secret to a celebration cake is in the layers that hold the heart of the recipe. When I moved to Paris, my love for buttery brioche and creamy mascarpone ballooned, and later, the food markets of New York kept me ever curious. Today, I combine these worlds into one divine tier: the Best Bakery Buttercream Frosting with a mascarpone twist—a creamy, light, and decadently airy frosting that turns any plain vanilla cake into a showstopper.

Picture the scent of toasted sugar clinking against butter on a chilly morning, followed by the gentle cloud of vanilla and almond kissed by a splash of fresh lemon zest. My frosting clings to each layer like a soft‑kissed velvet, while the crimson burst of mixed berries slips between folds, creating a visual contrast that feels like an edible art piece. The luscious velvet of the frosting complements the cake’s airy crumb, leaving your mouth flooded with sweet, tangy, and buttery flavors that dance together on the palate.

This version is what I call a “Mascarpone-Magic” celebration: I swap the usual buttercream for a mascarpone/cream‑cheese blend, then fold in whipped cream to keep it airy but smoother. When I first tried it, a common mistake was over‑mixing the cream‑cheese batter, which turned the frosting rubbery. The trick? Be gentle at the last mix stage, and always use room‑temperature ingredients for maximum spreadability.

Why This Best Bakery Buttercream Frosting Recipe Is the Best

The Flavor Secret lies in mascarpone’s silky depth. While a buttercream may stay light, adding mascarpone intensifies the mouthfeel and cushions the sweetness, mirroring the fondness of Moroccan pastries that use ghee and honey. My background in Parisian patisserie taught me that the right dairy blend can elevate a cake from “good” to “guilty pleasure.”

Perfected Texture is achieved by a two‑step cream‑cheese base and a gentle fold of freshly whipped cream. This method keeps the frosting puffy like soft Swiss meringues yet stable enough to hold strawberries on the top—something that traditional buttercream often struggles with water content.

Foolproof & Fast—every step is broken into small actions that even a beginner can follow. The chocolate‑free filling scales well, so you can make it tripled for a bigger event or prep a single layer for a quick brunch. In my busy NYC life, I margin 30‑minute prep, bake, chill, and finish with the frosting in the same hour, which is why my friends call it “Cake‑in‑an‑Hour” bliss.

Mascarpone Magic: Turning Classic Buttercream Into Luscious Frosting

In a chilled bowl, I combine softened unsalted butter, smooth cream cheese, and luxurious mascarpone. Stir until silky, then whisk in sifted powdered sugar. The mixture feels almost like a smooth mousse before adding the final flourish: lightly whipped heavy cream. The result is an airy frosting that retains heat, which means the crust crystals don’t melt on the first slice, but you can serve it chilled for a cooler bite.

Best Bakery Buttercream Frosting Ingredients

I pick every ingredient at my favorite NYBodega market because freshness makes the flavor sing. Remember, the quality of your butter and cream cheese is the cornerstone of a jet‑black frosting that will rise gloriously in the oven.

Ingredients List

  • 13 oz bleached cake flour
  • 13 oz granulated sugar
  • 3 tsp baking powder
  • ¼ tsp baking soda
  • ½ tsp salt
  • 8 oz unsalted butter (softened)
  • 2 tsp vanilla extract
  • 1 tsp almond extract
  • 10 oz whole milk (room temp)
  • 3 oz vegetable oil
  • 3 large eggs (room temp)
  • 16 oz cream cheese (softened)
  • 8 oz unsalted butter (softened)
  • 8 oz mascarpone cheese (softened)
  • 22 oz powdered sugar (sifted)
  • 1 tsp almond extract (additional)
  • 1 Tbsp vanilla extract (extra)
  • 16 oz heavy whipping cream
  • 2 cups fresh or frozen berries (for filling)
  • 2.5 oz sugar (for filling)
  • 1 oz water (for slurry)
  • 1 oz cornstarch (slurry)
  • 2 tsp lemon juice (for filling)
  • 2 cups fresh berries (for decoration)

Ingredient Spotlight

**Butter** – The foundation of cake crumb. Choose European‑grade unsalted butter for butterfat level 82 %. Still works with regular in a pinch, but you’ll see a slightly heavier crumb.

**Mascarpone** – Bring house‑kissed freshness. It’s the key in my frosting: try a trifecta with cream cheese and a yolky butter for a satin finish. If you’re avoiding dairy, use Aquafaba whisked into cream cheese.

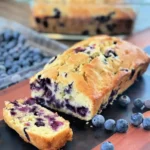
**Fresh Berries** – In the Vermont season, use blueberries and raspberries for that balancing tartness. Substitute with diced dried apricots if out of season, but keep a little fresh yogurt so the frosting stays moist.

Original Ingredient Best Substitution Flavor / Texture Impact
10 oz whole milk (room temp) 10 oz 2% milk Slightly thinner batter, less butter‑richness.
16 oz cream cheese (softened) 11 oz cream cheese + 5 oz lime zest cream Adds bright citrus notes, keeps frosting airy.
1 oz water (for slurry) 1 oz milk Makes filling a touch creamier.

How to Make Best Bakery Buttercream Frosting — Step-by-Step

💡 emy’s Pro Tip: Keep every dough ingredient at room temperature; it makes the batter combine faster and prevents lumps.

Step 1: Heat the Oven

Heat oven to 350ºF. Patience with heat ensures even rise and a tender crumb. If you’re unfamiliar, pre‑heat for 10 minutes before baking.

💡 emy’s Pro Tip: Use a baking stone or heavy cookie sheet to hold heat uniformly.

Step 2: Grease 8‑inch pans

Line the bottom with parchment and grease the sides with butter or non‑stick spray. My favorite: a quick brush of butter, then drop a parchment dollop between layers during baking.

⚠️ Common Mistake to Avoid: Forgetting to set the pans on a tray turns after baking.

Step 3: Mix Dry Ingredients

Sift flour, sugar, baking powder, bicarbonate, and salt in a large bowl. Mix briefly on low speed; this prevents flour lumps and pre‑whiten.

💡 emy’s Pro Tip: Sift the dry mix twice for a silky crumb.

Step 4: Add Butter & Oil

Use the slowest mixer speed to cherry‑pick 8 oz of softened butter in small bits. Once the mix looks sandy, pour the milk‑oil mix (4 oz milk + 3 oz oil) all at once, then lift speed to medium. Whip 2 minutes to build structure.

⚠️ Common Mistake to Avoid: Adding the wet mix too quickly causes curdling.

Step 5: Fold in Egg Mixture

Add the remaining milk, vanilla, almond, and eggs in three gradual packs, scraping between each. Mix until combined, no more than 15 seconds per pack.

💡 emy’s Pro Tip: Use a whisk in a separate bowl to gently propel the wet mix, reducing air bubbles.

Step 6: Assemble & Bake

Divide batter equally among pans. Tap each pan on the counter before baking, then bake 25‑35 min until a toothpick is clean. Cool 20 min in pans, then turn out.

⚠️ Common Mistake to Avoid: Removing cake too early; results in gummy centers.

Step 7: Make Frosting

In a stand mixer, combine softened butter, cream cheese, and mascarpone. Beat until creamy, then sift in powdered sugar. Blend until smooth.

💡 emy’s Pro Tip: Warm the cream cheese slightly (90 °F) before mixing for a silkier base.

Step 8: Whip Heavy Cream

Whip 16 oz of heavy cream to soft peaks in a separate bowl. Add vanilla and almond extracts. Stir gently into the cheese base until just incorporated.

⚠️ Common Mistake to Avoid: Overwhipping cream which turns into butter.

Step 9: Prepare Berry Filling

Simmer berries with sugar, a splash of water, and a cornstarch slurry until glossy. Cool before spreading.

💡 emy’s Pro Tip: A squeeze of lemon juice brightens the glaze and keeps it set.

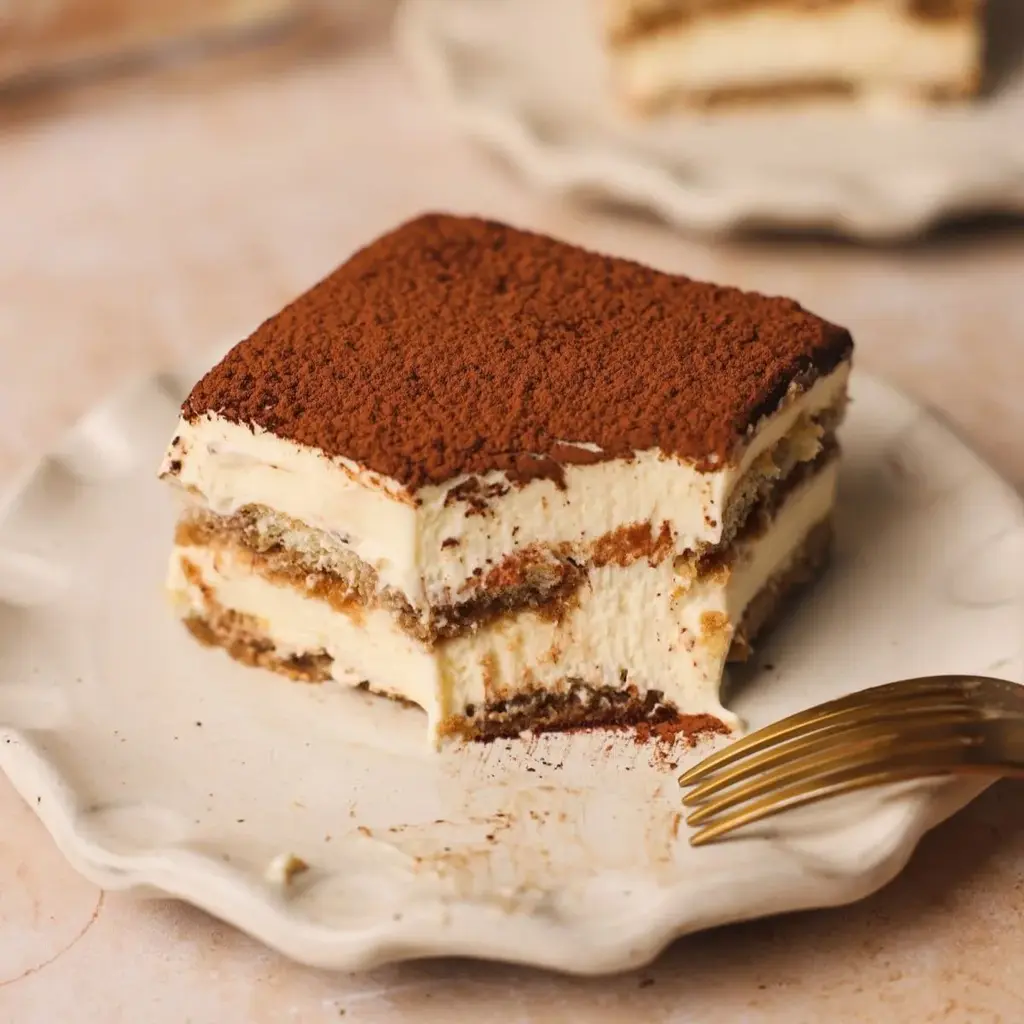
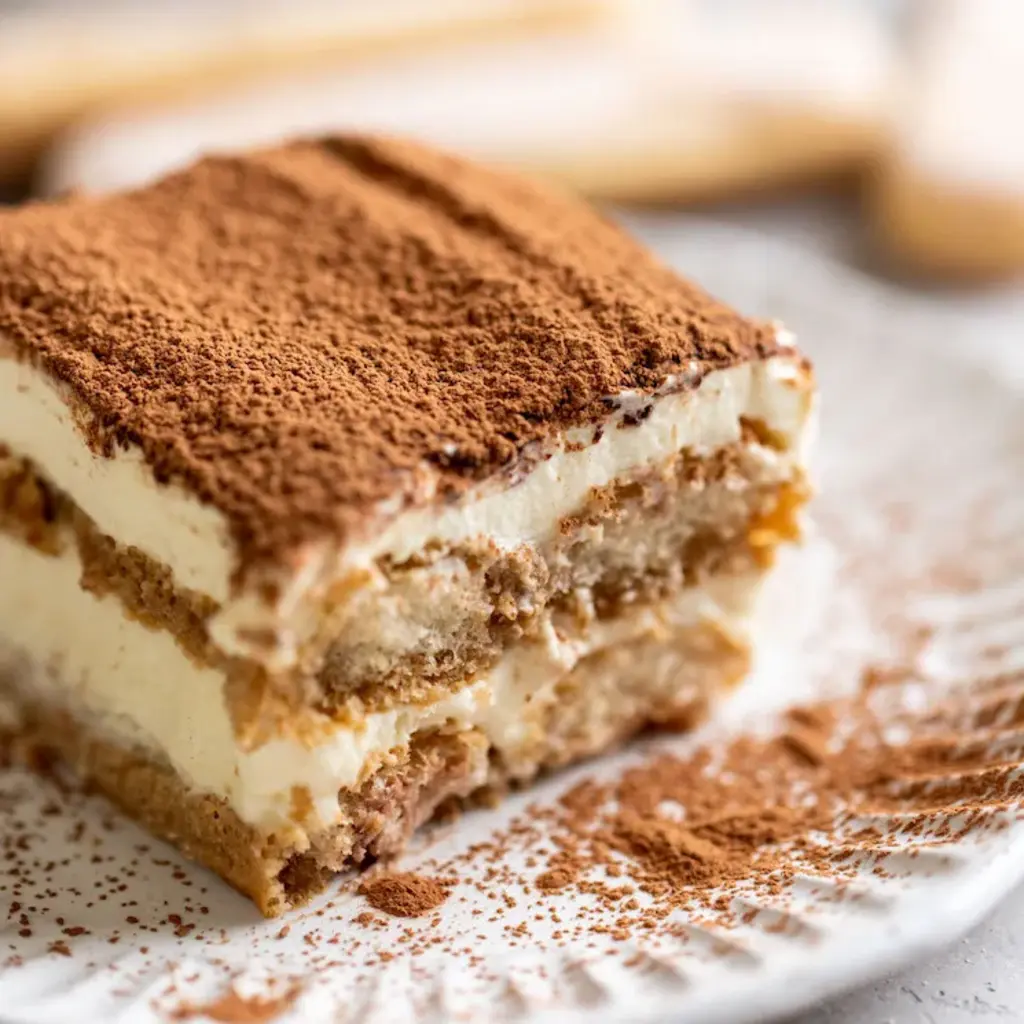
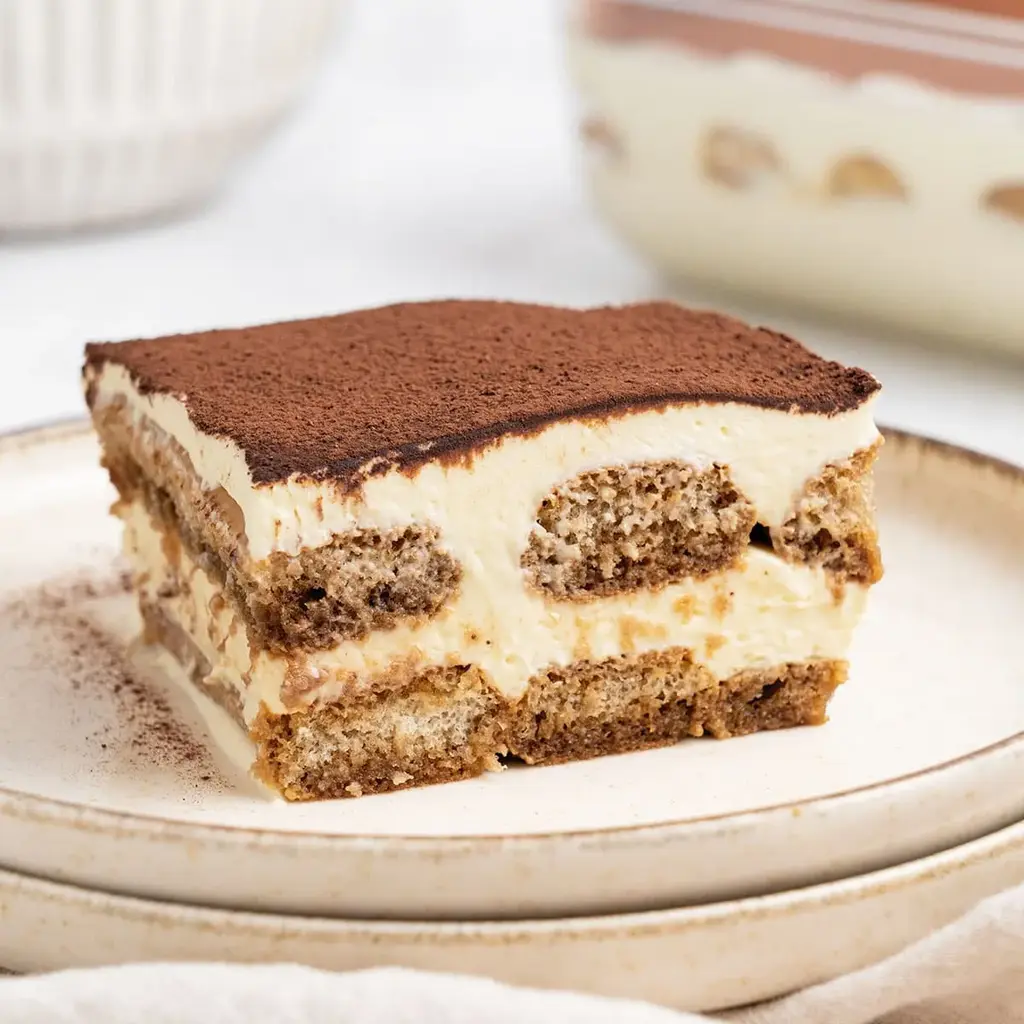
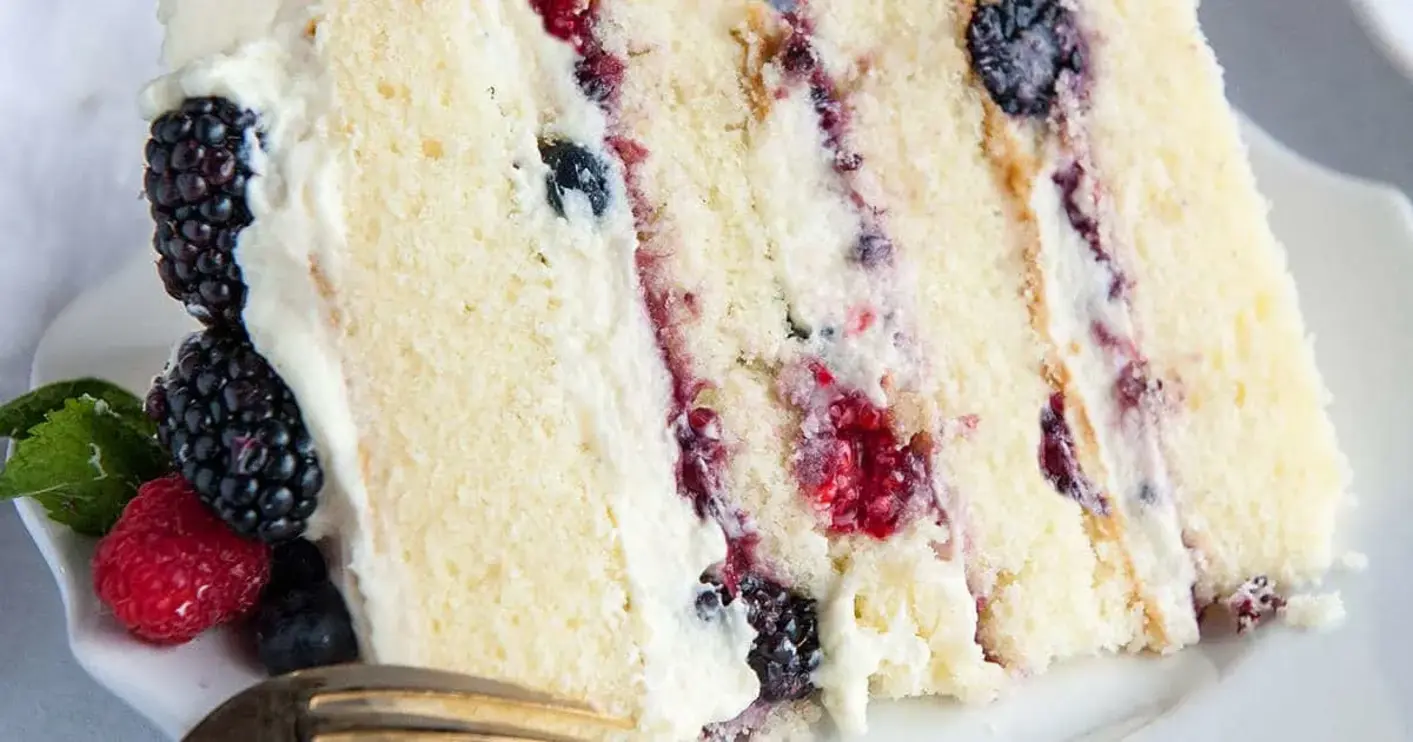
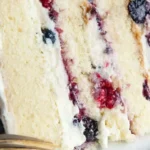
Step 10: Assemble Cake

Trim tops, place layers on a board. Spread cooled filling, then a layer of frosting, and scatter fresh berries. Repeat until top layer, then apply final frosting and decorate with more berries.

⚠️ Common Mistake to Avoid: Not chilling before slicing; frosting melts and spreads.

💡 emy’s Pro Tip: Use a bench scraper to smooth frosting sides evenly.

Step Action Duration Key Visual Cue
1 Heat Oven 10 min prep Oven lights on
2 Grease & line pans 5 min Parchment visible

Serving & Presentation

Once chilled, slice the cake at a knife tip lightly dusted with powdered sugar. For a refined look, use a serrated butter knife and carefully remove one slice at a time to let the frosting lick the plate in a soft drizzle.

Add a sprinkle of coconut macaroons from my Brooklyn co‑op bakery or a whisper of orange zest. The bright citrus cuts through the rich sweetness, hinting at the Moroccan mint tea I serve on Tuesday evenings.

When serving urban brunches, pair the cake with a glass of sparkling rosé or a strong flat‑white. The slight acidity balances frosting creaminess, while the bright berry undertones echo the citrus in the glaze.

Pairing Type Suggestions Why It Works
Side Dish Fresh fruit salad with mint Light and refreshing, so cake isn’t overwhelming.
Sauce / Dip Honey‑lavender glaze Enhances citrus notes without overpowering.
Beverage Sparkling rosé or flat‑white Acidic backbones cut frosting richness.
Garnish Edible gold leaf, micro‑herbs Adds visual flourish & subtle aroma.

Make-Ahead, Storage & Reheating

With NYC deadlines, I wiggle in this cake to my meal‑prep plan. After the first “bake and chill” cycle, I can store the layers in the fridge for up to 3 days or freeze for up to 3 weeks. Don’t bake fresh frosting each day—prepare today, whip later, and just spread.

Method Container Duration Reheating Tip
Refrigerator Plastic tub with lid 3 days Let sit at room temp 25 min before serving.
Freezer Freezer bag 3 weeks Thaw 12 h in fridge, then warm at 70ºF.
Make‑Ahead Wire rack, parchment 2 days in fridge Assemble last minute; keep crusts crisp.

If you’ve pre‑made the cake layers and then freeze them, I recommend putting the frosting in a small airtight container and putting it in the freezer too. When it’s ready, pop the cake into a glass pan and chill again for 30 min; the frosting will set solid without melting.

Variations & Easy Swaps

Variation Key Change Best For Difficulty Impact
Almond‑Infused Variant Replace almond extract with 2 Tbsp ground almond paste Sophisticated flavor for adult parties +1
Gluten‑Free / Dairy‑Free Use almond flour, oat milk, coconut oil, and vegan whipped topping Clients with dietary restrictions +2
Seasonal Citrus Add 1 tsp orange zest to batter & frosting Winter holiday vibe +0

Almond‑Infused Variant

If you love the nuance almond imparts to desserts, replace the two almond extracts with ground almond paste. It gives a denser, nutty undertone that’s reminiscent of French almond pastries, while still allowing the smooth frosting to shine.

Gluten‑Free / Dairy‑Free

Swap the cake flour for a gluten‑free blend, use oat milk, coconut oil, and a vegan whipping cream alternative. The texture stays airy, though frosting will be slightly lighter because of the dairy absence—something I’ve tested on late‑night New York brunches.

Seasonal Citrus

In winter, a touch of orange zest in the batter and a hint of lemon in the frosting elevates the cake into a spa‑like holiday treat. The citrus break reminds me of the bright lanterns shining over the Seine at Christmas.

Share Your Version!

I’d love to see your take! Drop a review in the comments below, or star the recipe if your crumb and frosting hit the sweet spot. Snap a pic of your plated masterpiece and tag me on Instagram or share it on Pinterest. When you call it “mascarpone‑frosted vanilla**, let me know how that twist turned your everyday bake into an evening of bliss.

From my NYC kitchen to yours — I hope this recipe brings as much warmth to your table as it does to mine. — emy 🧡

📌

Love This Recipe? Save It to Pinterest!

If you enjoyed this Best Bakery Buttercream Frosting recipe, don’t let it get lost in your browser tabs! 😄 Pin it now so you can find it again anytime — and explore hundreds more tried‑and‑tested recipes waiting for you on my Pinterest boards.

👉 Follow emy on Pinterest @chefrecipes2

📌 Pin this recipe · 🔁 Re-pin your favorites · 💬 Tag me when you make it — I love seeing your creations!

How long does the frosting stay fresh?

In my experience, the mascarpone‑based frosting stays at its best for up to three days when stored in an airtight container in the refrigerator. The key is to keep it chilled and ensure the butter and cream cheese are fully mixed and smooth before refrigeration. If you need to keep it longer, I usually freeze a portion separately; thaw it overnight in the fridge and give it a quick whisk to re‑air if you want that luscious, mousse‑like texture. Just be sure to eat the frosted cake within a week of baking to enjoy the cake’s fresh flavor profile.

Can I use this frosting on a chocolate cake?

No problem! A chocolate cake pairs beautifully with my mascarpone frosting; it adds a silky, slightly tangy contrast that mellow out the cacao bitterness. I usually add a splash of espresso or a pinch of sea salt to the frosting when frosting chocolate layers, and the crown of raspberry garnish stays a fresh bright counter‑note. If you want an even sweeter experience, sprinkle a little powdered sugar over the top after frosting and balance with a drizzle of chocolate ganache on the sides.

What’s the best way to chill the cake before serving?

The most reliable way is to chill the fully‑assembled cake in the fridge for at least thirty minutes. This allows the butter‑cream bri you’ve used to set, keeping the layers from melting when you slice. If you’re short on time, a quick 15‑minute refrigerator rinse helps too, but you’ll want to keep the rest as close to room temperature as possible to enable clean slices. Some folks keep a small handful of fresh berries in the fridge, then slide the berries into the frosting right before serving; this keeps the fruit crisp.

Can I substitute mascarpone with whipped cream?

Whipped cream alone would create an airy but less stable frosting; it lacks the richness that mascarpone brings. To keep the structure, I would recommend using a combination of cream cheese and a small amount of honey or maple syrup to build thickness. Whipping the cream into the cheese_base helps knit the mixture together. If you want a minimal‑dairy version, adding a tablespoon of aquafaba will keep the frosting from curdling while giving it a light body.

What flavor profile works best with this frosting?

The mascarpone gives a buttery ricotta feel that pairs nicely with citrus, berries, and subtle almond. A gentle sea‑salt rim on the frosting can invoke a gourmet touch. For an extra flair, a hint of espresso or dark chocolate swirl works wonders—think of the taste of Parisian café coffee in the morning. If you instead prefer a tangier tone, finish the frosting with a drizzle of lemon curd or a spoonful of lime‑infused syrup; it’ll cut through the richness and add a bright profile that references my North African summer evenings.

Do I need to bake frosting separately?

No. My frosting is a no‑bake, no‑heat mixture. It relies on the cream cheese’s acidity, the butter’s fat, and the mascarpone’s smoothness to set. Because the batter’s butter and oil have already cured during baking, adding the frosting right after the cake cools means the frosting sets without a second bake. Any process that heats it again risks curdling, so let it rest and allow the flavors to mellow together.

How big of a cake can I make with this recipe?

The recipe’s proportions are designed for three 8‑inch layers, which typically yield about twelve slices—ideal for a small gathering or a sweet brunch. If you find yourself hosting a larger party, you can triple the batter and frosting to make a nine‑inch four‑layer cake or duplicate the layers in smaller sheets, stacking them into a double‑tall stack. The frosting will scale proportionally, but you’ll want to keep the frosting thin at the base to avoid cambered sides.

Is it safe to serve this to kids?

Absolutely! The cake’s sugar content is moderate compared to many store‑bought desserts. However, if you’ve toddlers or kids who prefer a simpler flavor, toss a pinch of cinnamon into the batter to give a gentle, yet distinct spice—this mirrors a typical Moroccan cookie. The frosting’s mild tang from the mascarpone gives a “whisper” of flavor that’s surprising yet kid‑friendly when paired with real fruit.

What is the storage life of this cake?

When stored properly, the cake holds its texture and flavor for up to four days in the fridge and up to three weeks in the freezer. The frosting gets a bit firmer after freezing, so soften it with a brief gentle whisking before serving. If you want to keep the cake for a weekend wedding, I recommend layering each portion into airtight oatmeal containers, garnish with fresh berries on top to protect the frosting, and thaw overnight in the refrigerator. The flour in the cake is baked at 350ºF, making the crumb glue even after cold storage.

How do I prevent frosting from melting on hot days?

Your best strategy is to assemble the cake early in the day and store in a cooler environment. Using a thicker frosting layer created by adding a tablespoon of powdered almond or coconut flakes can raise sugar content slightly, making the frosting’s bulk resilient. If you anticipate extreme heat, you can place a chilled plate beneath the cake when serving, or keep the cake in a cooler box outfitted with ice packs until ready to serve. When carrying, wrap the entire cake in a dry towel to buffer temperature changes.

Print
clock clock iconcutlery cutlery iconflag flag iconfolder folder iconinstagram instagram iconpinterest pinterest iconfacebook facebook iconprint print iconsquares squares iconheart heart iconheart solid heart solid icon

Berry Chantilly Cake


  • Author: Chef Emy

Description

Berry chantilly cake made with three tender vanilla cake layers, cooked berry filling, fresh berries, and fluffy whipped mascarpone frosting. Perfect for Mother’s Day, bridal showers, weddings, and summer celebrations.


Ingredients

Scale
  • 13 ounces bleached cake flour
  • 13 ounces granulated sugar
  • 3 teaspoon baking powder
  • 1/4 teaspoon baking soda
  • 1/2 teaspoon salt
  • 8 ounces unsalted butter (softened)
  • 2 teaspoons vanilla extract
  • 1 teaspoon almond extract
  • 10 ounces whole milk (room temperature)
  • 3 ounces vegetable oil
  • 3 large eggs (room temperature)
  • 16 ounces cream cheese (softened)
  • 8 ounces unsalted butter (softened)
  • 8 ounces mascarpone cheese (softened)
  • 22 ounces powdered sugar (sifted)
  • 1 teaspoon almond extract
  • 1 Tablespoon vanilla extract
  • 16 ounces heavy whipping cream
  • 2 cups fresh or frozen berries
  • 2.5 ounces sugar
  • 1 ounces water
  • 1 ounces cornstarch
  • 2 teaspoons lemon juice
  • 2 cups fresh berries (for decoration)

Instructions

  1. Note: It's VERY important that your cold ingredients are at room temperature or slightly warmed. See video for tips. Heat oven to 350º F/177º C.
  2. Prepare three 8-inch cake pans with cake goop or your preferred pan release.
  3. In a measuring cup, combine 4 ounces of the milk with the vegetable oil. Set aside.
  4. In a separate bowl, whisk together the remaining 6 ounces of milk, vanilla extract, almond extract, and room-temperature eggs until combined. Set aside.
  5. In the bowl of a stand mixer fitted with the paddle attachment, combine the cake flour, sugar, baking powder, baking soda, and salt. Mix on low for a few seconds to combine.
  6. With the mixer on the slowest speed, add the softened butter in small pieces and mix until the mixture resembles coarse sand.
  7. Add the milk and oil mixture all at once. Increase the mixer speed to medium (speed 4 on a KitchenAid) and mix for 2 full minutes to develop the cake's structure. Do not skip this step.
  8. Reduce speed to low and add the egg and milk mixture in three batches, scraping the bowl between additions. Mix just until combined.
  9. Divide the batter evenly between the three prepared 8-inch pans. Bake for 25 to 35 minutes, or until a toothpick inserted in the center comes out clean.
  10. Immediately tap each pan once on the counter to release steam and prevent uneven shrinking.
  11. Let the cakes cool in the pans for 20 minutes, then turn them out onto a cooling rack. Wrap in plastic wrap and freeze for at least 1 hour before assembly.
  12. In a stand mixer with the paddle attachment, cream the softened butter, cream cheese, and mascarpone together until smooth and free of lumps.
  13. Add the sifted powdered sugar and continue mixing until creamy and fully incorporated.
  14. In a separate clean bowl with the whisk attachment, whip the heavy cream to soft peaks. Add the vanilla extract and almond extract. Peaks should be firm but not curdled. Watch closely, this happens quickly.
  15. Gently fold the whipped cream into the cream cheese mixture until just combined. Do not overmix.
  16. Place the berries and sugar in a medium saucepan over medium heat. Bring to a simmer.
  17. In a small bowl, whisk the cornstarch with the cold water to make a slurry.
  18. Pour the slurry into the bubbling berries and add the lemon juice.
  19. Cook for 1 to 2 minutes, stirring, until the mixture is thick and glossy.
  20. Remove from heat and cool the filling completely before using. Spreading it on a sheet pan speeds up cooling.
  21. Trim the tops of the chilled cake layers flat.
  22. Place the first cake layer on a cake board or serving plate.
  23. Spread cooled berry filling on top of the cake layer.
  24. Spread a layer of chantilly cream over the berry filling.
  25. Scatter fresh berries on top of the cream.
  26. Add the second cake layer and repeat the berry filling, cream, and fresh berry steps.
  27. Top with the third cake layer.
  28. Frost the outside of the cake with the remaining chantilly cream. Smooth the sides with a bench scraper.
  29. Top the cake with a generous pile of fresh berries.
  30. Chill the assembled cake for at least 30 minutes before slicing. Serve cold or let sit at room temperature for 15 to 20 minutes for the best flavor.

Traditional Italian Tiramisu — Bake with Zoha

Traditional Italian Tiramisu – Baked with Egg‑White Meringue for Extra Airiness – A Creamy Twist on the Classic Italian Dessert

⚖️
Difficulty
Medium
⏲️
Prep Time
45 mins
🕒
Cook Time
0 mins
⏱️
Total Time
45 mins
🍽️
Servings
8

Growing up in a Moroccan kitchen, the scent of cardamom and fresh mint would rise whenever my mother pulled a pot of tagine onto the stove. When I moved to Paris for culinary school, I learned that the heart of French cuisine is all about balance, and the delicate layers of a tiramisu felt like an elegant extension of that philosophy. Today, living in New York, I love to bring those Mediterranean aromas and Parisian precision to my followers, especially when I add a twist that turns a classic Italian treat into something airy and surprising.

Picture a light, cloud‑like mousse that melts on the tongue, interlaced with the robust bitterness of espresso and a whisper of cocoa. The ladyfingers, soaked just long enough to stay crisp yet flavorful, give a gentle crunch that contrasts the creamy layers. The addition of egg‑white meringue lifts the entire dessert, making it almost cake‑like, while the cocoa dust on top provides a subtle, bittersweet finish that keeps you coming back for more.

I’ve spent years perfecting this recipe because the classic tiramisu often feels either too heavy or too sweet. By folding a stiff meringue into the mascarpone base, I create a texture that feels both indulgent and airy—like a cloud that’s been kissed by espresso. The secret to success? Keep the mascarpone cold, avoid over‑whisking, and use a good quality espresso or strong coffee. Below, I’ll walk you through each step, and I’ll point out the key technique that ensures a flawless finish.

Why This Traditional Italian Tiramisu Recipe Is the Best

The secret lies in the double‑layered cream: the first layer of cold mascarpone provides depth and richness, while the second layer of airy meringue turns the dessert into a light, cloud‑like experience. My background in French pastry gives me the confidence to fold in meringue without deflating the mixture, ensuring a silky finish that still holds its shape.

The technique I use is borrowed from a pastry chef I apprenticed under in Paris, who taught me that whisking the mascarpone on medium speed for exactly 30–60 seconds creates the ideal micro‑foam. This step is crucial for a stable base that won’t separate when the meringue is folded in.

Even beginners will find this recipe approachable because all the steps are straightforward and the ingredients are pantry staples. The key is to keep everything chilled and to follow the order of operations carefully—especially when folding the meringue, which can be a common pitfall for novices.

Classic Italian Tiramisu Ingredients

I source my mascarpone from a local dairy on the Upper West Side, the freshest eggs from Brooklyn farmers, and the ladyfingers from a boutique bakery in the East Village. The result is a dessert that carries the flavors of Italy, the precision of French technique, and the convenience of an NYC grocery aisle.

Ingredients List

  • 16 oz Mascarpone cheese (cold, 450 g, e.g., Galbani)
  • 4 egg yolks
  • 2/3 cup granulated sugar (133 g)
  • 1 tsp vanilla extract
  • 1/4 tsp salt
  • 1 1/2 cup heavy cream, chilled (360 g)
  • 4 egg whites (or 30–36 ladyfingers)
  • 1 1/2 cup strong black coffee, room temperature (360 g)
  • 2 Tbsp cocoa powder, for dusting

Ingredient Spotlight

Mascarpone is the backbone of tiramisu; choose a brand with a high fat content for a richer mouthfeel. In the U.S., look for “Italian cream cheese” labels; if unavailable, a low‑fat ricotta can substitute but will alter the silky texture.

Egg Yolk brings depth; use free‑range for a fuller flavor. If you’re allergic, replace with 1 Tbsp mascarpone plus 1 Tbsp Greek yogurt for a lighter base.

Heavy Cream must stay cold; chilling it in the fridge for at least an hour ensures it whips to medium stiff peaks. Substitute with 2 Tbsp cold butter + 1 Tbsp milk to mimic richness if you’re lactose intolerant.

Original Ingredient Best Substitution Flavor / Texture Impact
Mascarpone Ricotta (low‑fat) Less creamy, slightly granular
Egg Yolk Mascarpone + Greek yogurt Lightens body, adds tang
Heavy Cream Cold butter + milk Similar richness, slightly firmer

How to Make Traditional Italian Tiramisu — Step-by-Step

Let’s dive into a step‑by‑step guide that ensures your tiramisu turns out silky, airy, and irresistibly coffee‑flavored.

Step 1: Whisk Mascarpone

Place the cold mascarpone in a chilled bowl. Whisk on medium speed for 30–60 seconds until it becomes light and creamy. Scrape the bowl to make sure all lumps are removed. This micro‑foam will serve as the base for your airy mousse.

💡 emy’s Pro Tip: Keep the bowl chilled throughout the process to prevent the mascarpone from softening too quickly.

Step 2: Double‑Boiler Yolk & Sugar

In a heat‑proof bowl, combine egg yolks with 2/3 cup sugar. Set the bowl over a saucepan with 1–2 in. simmering water (double boiler). Whisk on medium‑high for exactly 2 minutes until the mixture turns light and fluffy. Remove from heat immediately.

⚠️ Common Mistake to Avoid: Over‑whisking can cause the yolks to separate, resulting in a grainy texture.

Step 3: Combine Yolk Mixture with Mascarpone

Pour the warm yolk mixture into the mascarpone bowl. Add salt and vanilla, whisking on medium until just combined. Scrape the sides halfway to incorporate air but avoid over‑mixing.

💡 emy’s Pro Tip: Gently fold with a rubber spatula to maintain the lightness of the base.

Step 4: Whip Heavy Cream

Place the chilled heavy cream in a cold bowl. Whip on medium until medium stiff peaks form—just enough to hold shape without being over‑whipped.

⚠️ Common Mistake to Avoid: Whipping too long can lead to butter separation.

Step 5: Fold Whipped Cream into Mascarpone

Add the whipped cream to the mascarpone mixture in two or three gentle additions. Fold each addition with a spatula, turning the mixture clockwise to keep the air trapped.

💡 emy’s Pro Tip: Fold until the mixture just reaches a uniform, silky consistency.

Step 6: Whip Egg Whites into Meringue

Place the remaining egg whites in a clean bowl. Using a clean whisk, whisk over a saucepan with hot water (double boiler) until the mixture reaches 160 °F (5–8 min). Keep whisking until it becomes a glossy, stiff meringue.

⚠️ Common Mistake to Avoid: Mixing egg whites with a dirty whisk can introduce grease and ruin the meringue.

Step 7: Fold Meringue into Cream

Add the meringue to the mascarpone‑cream base in two or three gentle folds. Fold clockwise with a spatula, taking care not to deflate the airy mixture.

💡 emy’s Pro Tip: The final fold should make the mixture glossy and light, like a cloud.

Step 8: Prepare Coffee

Pour 1 1/2 cups of strong black coffee into a wide bowl. Make sure the coffee is at room temperature; hot coffee will cook the ladyfingers.

⚠️ Common Mistake to Avoid: Using espresso shots that are too hot can soften ladyfingers unevenly.

Step 9: Dip Ladyfingers

Quickly dip each ladyfinger on both sides into the coffee for 2–3 seconds. Do not soak; you want a quick soak to keep the fingers crisp yet moist.

💡 emy’s Pro Tip: Dip the ladyfingers from the back to avoid excess coffee on the front.

Step 10: Layer the Tiramisu

Arrange a layer of soaked ladyfingers on the bottom of an 8×9.5” dish. Spread half of the mascarpone‑meringue mixture evenly over the fingers. Repeat with another layer of soaked ladyfingers, then top with the remaining cream.

⚠️ Common Mistake to Avoid: Over‑packing the layers can make the dessert difficult to slice cleanly.

Step 11: Refrigerate

Cover the dish with plastic wrap and refrigerate for at least 6 hours—overnight is ideal—to allow the flavors to meld and the texture to set.

💡 emy’s Pro Tip: If you’re short on time, a 3‑hour chill will still give you a delightful texture.

Step 12: Dust Cocoa & Serve

Just before serving, sift 2 Tbsp cocoa powder evenly over the top. Slice into portions with a serrated knife, and enjoy the silky, airy, coffee‑laden layers.

⚠️ Common Mistake to Avoid: Over‑sifting cocoa can result in clumpy dust that ruins the finish.

Step Action Duration Key Visual Cue
1 Whisk Mascarpone 30–60 s Creamy, light consistency
2 Double‑Boiler Yolk 2 min Light, fluffy white
3 Combine Mixture 1 min Even, glossy base
4 Whip Cream ~3 min Medium stiff peaks
5 Fold Cream 2 min Uniform, silky texture
6 Whip Meringue 5–8 min Glossy, stiff peaks
7 Fold Meringue 2 min Airy, glossy finish
8 Prepare Coffee 1 min Room‑temp coffee
9 Dip Ladyfingers 30 s Moist, firm fingers
10 Layer Dessert 5 min Even layers
11 Refrigerate 6–12 hrs Set texture
12 Dust Cocoa & Serve 1 min Smooth, even dust

Serving & Presentation

When I plate tiramisu, I slice it into clean, straight wedges that showcase the layered structure. I pair it with a small side of fresh berries—like blueberries or blackberries—to add a pop of color and a subtle fruitiness that cuts through the coffee richness. A drizzle of dark chocolate ganache over the top offers a glossy finish and extra depth of flavor, reminiscent of the café culture in Paris.

In the city that never sleeps, I often serve this dessert at evening gatherings, letting guests sip a glass of chilled espresso or a sparkling rosé that pairs beautifully with the creamy layers. The contrast between the cool, airy mousse and the warm coffee notes makes this dessert feel both comforting and sophisticated.

The garnish I love is a sprig of fresh mint—its green hue brings a lively contrast, and its aroma adds a refreshing finish. A dusting of cocoa on the rim of the serving glass gives a subtle visual cue that this is a decadent treat waiting to be enjoyed.

Pairing Type Suggestions Why It Works
Side Dish Fresh berries, citrus zest Bright acidity cuts richness.
Sauce / Dip Dark chocolate ganache Adds depth and glossy finish.
Beverage Espresso, chilled espresso, sparkling rosé Complements coffee notes and cool texture.
Garnish Mint sprig, cocoa dust, citrus peel Adds aroma and visual appeal.

Make-Ahead, Storage & Reheating

I love prepping tiramisu in advance because it frees up time for my late‑night New York brunches. I assemble the layers and refrigerate for at least six hours, then let it sit at room temperature for 20 minutes before serving to ensure the mousse is perfectly airy.

Method Container Duration Reheating Tip
Refrigerator Sealed glass dish 6–12 hrs Let sit 20 min before serving.
Freezer Air‑tight zip bag 3 months Thaw in fridge overnight, then chill 2 hrs.
Make‑Ahead Refrigerated dish 2 days in advance Assemble before baking, refrigerate.

When reheating from frozen, I gently warm the tiramisu in a low oven (150 °F) for 15 minutes, then let it rest to regain its airy texture. If you’re short on time, simply let the dessert sit at room temperature for 30 minutes after refrigeration; the coffee and cream will relax enough to provide the same mouthfeel.

Variations & Easy Swaps

Variation Key Change Best For Difficulty Impact
Savory Tiramisu Add grated parmesan to mascarpone, use espresso with a splash of balsamic. Coffee lovers. Medium.
Gluten‑Free Use gluten‑free ladyfingers or crushed almond biscuits. Dietary restrictions. Easy.
Seasonal Twist Swap cocoa dust with grated citrus zest, add fresh berries. Spring & summer. Easy.

Savory Tiramisu

I once paired parmesan into the mascarpone for a savory twist that echoes the rich cheeses of my Moroccan heritage. Adding a splash of balsamic to the coffee deepens the flavor profile, turning the dessert into a sophisticated palate cleanser for a dinner party.

Gluten‑Free Tiramisu — Dairy‑Free Alternative

For those who need a gluten‑free option, I replace ladyfingers with almond biscotti or a crumble of coconut flour cookies. The result is a slightly firmer base but retains the airy, creamy interior that defines tiramisu.

Seasonal Tiramisu — Citrus & Berry Edition

During the spring, I brighten the dessert with a dusting of orange zest and top it with fresh strawberries. The citrus cuts the sweetness while the berries add a juicy burst that transports you straight to a sunny New York rooftop garden.

How long does tiramisu need to chill?

Tiramisu benefits from a minimum of six hours in the refrigerator, but for the best flavor and texture, let it chill overnight. The extended time allows the mascarpone to set and the espresso to infuse fully, giving you a silky, cohesive dessert that holds its shape when sliced.

Can I use instant coffee instead of espresso?

Yes, you can substitute a strong instant coffee for espresso, but the flavor profile will be slightly lighter. To maintain depth, brew the instant coffee double strength, then cool it to room temperature before dipping the ladyfingers. The resulting tiramisu will still be creamy and flavorful, though it will lack the subtle espresso bitterness.

Is it safe to use raw eggs in tiramisu?

Traditional tiramisu recipes use raw eggs, but for safety you can use pasteurized eggs or a beaten egg yolk paste made with a double boiler to reduce the risk of salmonella. The double‑boiler method gently cooks the yolks while maintaining a silky consistency, ensuring a safe and delicious dessert.

Can I freeze tiramisu?

Yes, tiramisu can be frozen, but it’s best to freeze the assembled dessert in an airtight container for up to three months. When ready to serve, thaw it in the refrigerator for 6–8 hours, then allow it to come to room temperature for 20 minutes to restore its airy texture and full flavor.

What’s the best type of ladyfingers to use?

Choose light, airy ladyfingers that are not overly stiff. In NYC, I favor the brand “Ladyfingers of San Lorenzo” because they stay crisp after soaking and have a subtle vanilla flavor that complements the espresso. Avoid overly sweet or dense cookies, as they can alter the classic balance of textures.

Is tiramisu safe for children?

While tiramisu is a delightful dessert, it does contain raw eggs and dairy, which some parents may worry about. If you’re serving children, consider using pasteurized eggs or a safe egg substitute, and ensure all dairy is fully pasteurized. Alternatively, prepare a smaller portion with a lower coffee intensity for younger palates.

Can I make tiramisu ahead of time?

Absolutely! The best approach is to assemble the layers and refrigerate the tiramisu for at least six hours or overnight. The dessert will keep in the refrigerator for up to 3 days. For longer storage, freeze the assembled dessert, then thaw and chill before serving to maintain the airy texture and flavor integrity.

What is the key difference between traditional tiramisu and this egg‑white version?

The main difference lies in texture: the traditional recipe uses only mascarpone and cream, resulting in a denser mousse. By incorporating a stiff egg‑white meringue, I create an airy, almost soufflé‑like layer that feels light on the tongue, making the dessert feel less heavy and more like a dessert that could be enjoyed at any time of day.

Can I substitute mascarpone with ricotta?

Yes, ricotta can replace mascarpone, but you’ll need to blend it with a tablespoon of heavy cream to smooth out its grainy texture. The substitution will produce a slightly lighter and less rich dessert, but it still delivers the creamy base essential to a classic tiramisu.

What coffee should I use for tiramisu?

Use a strong, dark roast espresso or a French press coffee with a robust flavor. Avoid light, fruity coffees, as they will dilute the traditional bitter depth of tiramisu. In New York’s coffee shops, I often pick a single‑origin espresso with notes of chocolate and caramel, which balances the sweet cream and the cocoa dust on top.

Share Your Version!

I’d love to hear how you tweak this recipe! Drop a star rating and a comment below so we can swap tips. Snap a photo of your tiramisu and share it on Instagram or Pinterest, tagging @cookingwithemi. Tell me, which ingredient do you think could be swapped for a new flavor adventure?

From my NYC kitchen to yours — I hope this recipe brings as much warmth to your table as it does to mine. — emy 🧡

📌

Love This Recipe? Save It to Pinterest!

If you enjoyed this Traditional Italian Tiramisu recipe, don’t let it get lost in your browser tabs! 😄 Pin it now so you can find it again anytime — and explore hundreds more tried‑and‑tested recipes waiting for you on my Pinterest boards.

👉 Follow emy on Pinterest @exorecipe

📌 Pin this recipe · 🔁 Re-pin your favorites · 💬 Tag me when you make it — I love seeing your creations!

Print
clock clock iconcutlery cutlery iconflag flag iconfolder folder iconinstagram instagram iconpinterest pinterest iconfacebook facebook iconprint print iconsquares squares iconheart heart iconheart solid heart solid icon

BEST Classic Italian Tiramisu Recipe


  • Author: Chef Emy

Description

A complete guide for making classic Italian tiramisu: creamy and light with the perfect level of sweetness which lets the coffee flavor shine


Ingredients

Scale
  • 16 oz Mascarpone cheese (450g), cold from the fridge – I recommend Galbani
  • 4 egg yolks
  • 2/3 cup granulated or caster sugar (133g)* – if using egg whites, divide into 2 portions of 1/3 cup and 1/3 cup
  • 1 tsp vanilla
  • 1/4 tsp salt
  • 1 1/2 cup heavy cream, chilled (360g) OR 4 egg whites
  • 3036 ladyfingers*
  • 1 1/2 cup strong black coffee, room temperature (360g)*
  • 2 tbsp cocoa powder to dust

Instructions

  1. Whisk the mascarpone cheese on medium speed for 30-60 seconds until creamy. Scrape the bowl and set aside
  2. In a separate heat-proof bowl, add the egg yolks and 2/3 cup sugar. Boil 1-2" of water in a saucepan and reduce heat to the lowest setting. Place the bowl with egg yolks and sugar on top of the saucepan such that the water does not touch the bottom of the bowl. This is a double boiler. Whisk on medium-high speed for exactly 2 minutes, then remove from heat. The mixture will be light and fluffy. Do not overmix or overheat as it can become grainy*
  3. Pour the egg yolk and sugar mixture onto the mascarpone cheese. Add salt and vanilla, then whisk on medium speed just until combined, scraping the bowl halfway (do not overmix as the mixture can become grainy)
  4. In a separate bowl, whip the cold heavy cream until it reaches medium stiff peaks (just starts to hold shape). Do not overmix
  5. Add the whipped cream to the mascarpone mixture in 2-3 additions, folding gently with a rubber spatula and taking care not to knock out the air. You will have a creamy, light mixture
  6. Whisk the mascarpone cheese on medium speed for 30-60 seconds until creamy. Scrape the bowl and set aside
  7. In a separate heat-proof bowl, add the egg yolks and 1/3 cup sugar. Boil 1-2" of water in a saucepan and reduce heat to the lowest setting. Place the bowl with egg yolks and sugar on top of the saucepan such that the water does not touch the bottom of the bowl. This is a double boiler. Whisk on medium-high speed for exactly 2 minutes, then remove from heat. The mixture will be light and fluffy. Do not overmix or overheat as it can become grainy*
  8. Pour the egg yolk and sugar mixture onto the mascarpone cheese. Add salt and vanilla, then whisk on medium speed just until combined, scraping the bowl halfway (do not overmix as the mixture can become grainy)
  9. In a separate clean bowl, add the egg whites and remaining 1/3 cup sugar. Place on the saucepan with boiling water again, and whisk on medium-high speed with a clean whisk until the mixture reaches 160F (5-8 minutes). Remove from heat and keep whisking until a glossy, stiff meringue forms*
  10. Add the meringue to the mascarpone mixture in 2-3 additions, folding gently with a rubber spatula and taking care not to knock out the air. You will have an airy, light mixture
  11. Pour the coffee into a wide bowl, and make sure it is not hot. Dip each ladyfinger quickly into the coffee (I do a quick dip on each side)* and add a layer of soaked ladyfingers in the bottom of a 8×9.5" rectangular dish*
  12. Spread on half of the mascarpone cream evenly
  13. Repeat with another layer of soaked ladyfingers
  14. Top with the remaining mascarpone cream
  15. Cover and refrigerate for at least 6 hours, or ideally overnight
  16. When ready to serve, sift the cocoa powder evenly on top of the tiramisu. Cut into slices and serve!

The Best Tiramisu Recipe

The Best Tiramisu Recipe French Vanilla Mascarpone Twist – An Elegant Yet Simple Dessert

⚖️
Difficulty
Medium
⏲️
Prep Time
20 mins
🕒
Cook Time
10 mins
⏱️
Total Time
30 mins
🍽️
Servings
12

I remember the first time I tasted tiramisu in a small Parisian café – a silky, coffee‑kissed dessert that felt like a warm hug from my grandmother’s Moroccan kitchen. The original recipe, though, keeps the classic texture; my twist comes from infusing the mascarpone with true vanilla bean and using single‑origin espresso that gives the coffee notes a rare depth. When I step into my New York City kitchen, that memory of citrus‑chiselled sunshine in Marrakech’s souks translates into a splash of espresso, a dusting of cocoa, and a layer of indulgence that stays fresh under the refrigerator’s humming lull. In this post, I’ll walk you through a classic—yet elevated—tiramisu that can be set aside overnight to save time for the bustling city life.

At the core of this dessert is pure, velvety mascarpone that pairs perfectly with the sharp, slightly bitter espresso. Picture a creamy, airy layer between soft ladyfingers drenched in coffee. The result is a cloud of flavor that’s both decadent and balanced. The vanilla bean adds a fragrant sweetness, while the fresh cocoa powder that dusts the top creates a subtle visual contrast against the beige ladyfingers. If you’re a coffee lover, the precise ratio of espresso to Kahlua (optional) gives the cheesecake a hint of rich hopiness that lingers on the palate. Once you bake it in cool, fragrant memory, each spoonful is like a work of art: light, silky, and intensely satisfying.

I’ve refined this version using techniques I learned while I was studying pastry at a Parisian culinary school, then tweaking the measurements based on the humidity of New York’s summer. A key factor is the browning of the ladyfingers before dipping, which creates a subtle graham cracker‑like crisp that holds the espresso better. Many people over‑whisk the mascarpone, which creates a gummy texture; to avoid that, I fold the components gently with a spatula. Another common mistake is dipping too early, which soaking the ladyfingers to a soggy mess—my pair of tweezers is a quick way to test if the dip is just right. Stick with the cues below and you’ll transform the old family recipe into a showstopper for your next dinner.

Why This Tiramisu Recipe Is the Best

Because it bridges the best of two worlds: I, an immigrant from Morocco, bring aromatic vanilla and espresso rituals from Paris to the intensive pace of New York, so the dessert feels like a relaxed, cosmopolitan brunch. The coffee bath technique I use eliminates bitterness and lends each ladyfinger a consistent soak that deepens overall flavor.

The mozzarella‑like mascarpone mixture is made with a gentle fold that prevents lumps and keeps the layers smooth. My training in French pastry taught me that pouring in the whipped cream slowly preserves the airy texture, while still keeping the homemade dessert silky.

Even if you have no cooking background, the step‑by‑step instructions and visual cues keep this recipe foolproof. For instance, I reference temperature to make sure the eggs are safe and silky—no contractors here. I also remind you to chill the dessert overnight for the flavors to marry, so the result is always a consistent triumph.

Tiramisu Ingredients

I often shop at the Chelsea Market for fresh mascarpone and single‑origin espresso, rushing through the market stalls with a taste of artisan coffee that will make this tiramisu sing. Back in Morocco, I’d picture saffron‑infused milk, but here I use pure vanilla beans and cocoa powder for a light, airy finish.

Ingredients List

  • 6 large egg yolks
  • 2/3 cup (135 grams) granulated sugar
  • 1/4 teaspoon salt
  • 24 ounces (680 grams) cold mascarpone cheese (straight from the refrigerator)
  • 2 teaspoons (10 ml) pure vanilla extract
  • 1 1/2 cups (360 ml) cold heavy whipping cream
  • 2 cups (480 ml) cold espresso
  • 1/4 cup (60 ml) Kahlua (optional)
  • 40 to 45 ladyfingers
  • 1/4 cup (22 grams) unsweetened cocoa powder

Ingredient Spotlight

Mascarpone – The star of tiramisu. Look for an unflavored, creamy texture; store it chilled and use it or pre‑whip for smoothness. If you’re picky about dairy, a direct substitute is 9/10 cream cheese plus 1/10 heavy cream.

Espresso – Brew a strong single shot to achieve that rich depth. If brewed inaccurately, the coffee may taste weak. A quick chill before use ensures it absorbs without drowning the ladyfingers.

Ladyfingers – Choose fresh, soft ones and warm them briefly at 75°F for easier coating. If they’re stale, the dessert will look dull; a quick toaster bag helps restore slight crispness.

Original Ingredient Best Substitution Flavor / Texture Impact
Mascarpone Cream cheese + heavy cream Slightly thicker, less sweet
Espresso Strong brewed coffee Less chocolatey, more bitter
Ladyfingers Savoiardi biscuits Similar texture, slightly drier

How to Make Tiramisu — Step-by-Step

Let’s lace our kitchen with the aroma of coffee, cream, and vanilla dusting. Step by step, we’ll create a dessert that balances lightness and richness while staying simple for a busy New York weekday.

Step 1: Prepare Egg Yolks

In a wide, heat‑proof bowl, whisk together 6 yolks, 2/3 cup sugar, and 1/4 tsp salt until the mixture turns pale.

💡 emy’s Pro Tip: Fold the yolks gently to keep lumps from forming; a fine‑mesh sieve works great for a silky base.

Step 2: Warm‑Bath Technique

Place the bowl over a saucepan of simmering water, ensuring the bottom of the bowl doesn’t touch the water. Whisk constantly until it’s slightly thick, about 10‑13 minutes.

⚠️ Common Mistake to Avoid: Overheating can scramble the yolks. Check for a 165°F rise with a kitchen thermometer.

Step 3: Reach 165°F‑170°F

Once the mixture is pale and thick, remove from heat and let cool for 5 minutes. The temperature should settle around 165°F‑170°F to ensure safety and silkiness.

💡 emy’s Pro Tip: A cool water bath ending at 165°F gives you the best consistency for mascarpone.

Step 4: Add Mascarpone

Whisk in 24 oz chilled mascarpone and 2 tsp vanilla until fully blended and smooth. No lumps should remain.

⚠️ Common Mistake to Avoid: Adding warm mascarpone straight from the fridge; let it sit at room temperature for 5 minutes first.

Step 5: Beat Whipping Cream

In a separate chilled bowl, beat 1.5 cups heavy whipping cream to medium‑stiff peaks. Keep it cold to avoid over‑whipping.

💡 emy’s Pro Tip: Use a stand mixer with foam‑minimizing whip to keep the dielectrics from cracking.

Step 6: Fold in Cream

Fold half the whipped cream into the mascarpone mixture until flat, then add the rest, gently folding until incorporated. Keep the mixture airy.

Step 7: Espresso & Kahlua Mix

Combine 2 cups cold espresso with 1/4 cup Kahlua in a shallow dish. The liquor is optional but adds depth.

Step 8: Dip Ladyfingers

Dip each ladyfinger into the coffee‑Kahlua mix, one at a time, ensuring not to soak beyond 2 seconds. Arrange half in a 9×13 inch pan.

💡 emy’s Pro Tip: Dip from the bottom of the ladyfinger for even coating; a Persian‑style “tapas” moment.

Step 9: Layering Basics

Spread half the mascarpone mixture over the ladyfingers and top with another layer of soaked ladyfingers. Repeat half of the mixture.

⚠️ Common Mistake to Avoid: Over‑crowding the pan; avoid floating layers to keep a smooth surface.

Step 10: Final Layer & Cocoa

Finish with the remaining mascarpone mixture, then evenly dust unsweetened cocoa powder over the top. The chocolate crumb under the glaze looks like a speckled dessert.

Step 11: Chill Overnight

Cover the pan with plastic wrap and refrigerate for at least 8 hours or overnight to let flavors mingle. Releasing a buttery sweetness at brunch or dinner.

Step Action Duration Key Visual Cue
1 Whisk yolk mixture 5 min Pale, thick consistency
2 Simmer in water bath 10‑13 min Spinning light whirl
3 Cool to 165°F 5 min Color light, creamy
4 Add mascarpone 2 min Smooth fold, no lumps
5 Beat cream 4 min Medium‑stiff peaks visible
6 Fold in cream 3 min Airy texture, smooth surface
7 Mix espresso + Kahlua 1 min Coating ready
8 Dip ladyfingers 30 sec Evenly drenched, not soggy
9 Layer mascarpone & ladyfingers 10 min Smooth upper surface
10 Dust cocoa powder 1 min Gold dust glow
11 Refrigerate 8‑12 hrs Firm with golden dust

Serving & Presentation

Serve the tiramisu chilled in individual ramekins to create a compact, elegant slice that showcases the layers. A dust of cocoa and a drizzle of dark chocolate sauce makes for a striking visual treat. When toasting a few almonds, I get a crunchy contrast that echoes the Moroccan almond‑topped tagine I used to roast. Sprinkle a pinch of sea salt after dusting for a subtle sweet‑savory twist. In the morning, pair it with a steaming pot of espresso, or in the evening, watch the buttery layers melt over a glass of chilled Italian vin santo for a decadent finish.

Take advantage of the hues: the deep brown ladyfingers, creamy ivory mascarpone and antique gold cocoa dust create a palette reminiscent of a Nougat sweets shop in Marrakech’s souks. A few fresh berries and a lime twist finish the look – a blend of savory and sweet that sets the stage for a fun conversation at a loft dinner in Brooklyn. The dessert’s visual appeal is naturally Instagram‑ready, making it perfect for a repost in my Pinterest board about timeless Italian desserts.

Pairing Type Suggestions Why It Works
Side Dish Spiced grilled zucchini, roasted chickpeas Hearty sides offset dessert’s sweetness
Sauce / Dip Chocolate ganache, caramel drizzle Adds richness to balance coffee
Beverage Espresso, flat white, Vin Santo Enhances coffee essence
Garnish Fresh berries, mint leaves, toasted almonds Adds color, texture, and aroma

Make‑Ahead, Storage & Reheating

I love prepping tiramisu during Sunday brunch for a weekday dinner rush. By chilling it overnight I let the flavors completely meld, and the dessert still stays crisp when sliced. The first day out of the fridge is best; the second day is still edible but the texture slightly softens.

Method Container Duration Reheating Tip
Refrigerator Plastic wrap & air‑tight container Up to 3 days Serve cold; add small whisk of espresso if stales
Freezer Vacuum sealed bag Up to 4 weeks Thaw overnight in fridge; refrigerate before serving
Make-Ahead Layer components separately Up to 1 week Assemble just before serving for best texture

Every time I reheat tiramisu, I give it a light dusting of cocoa powder to refresh the surface, and then flip it upside‑down for a few minutes in a warm oven at 300°F to revive its airy top. Breathing new life into leftovers is a real pleasure for the genius “reheat” recipe trick I learned from my grandmother’s roast recipe book, turning leftovers into luxurious desserts.

Variations & Easy Swaps

Variation Key Change Best For Difficulty Impact
Nutty Tiramisu Add toasted hazelnut crumbs Alcohol‑free brunch Easy
Gluten‑Free Use gluten‑free ladyfingers Vegan pastry Medium
Seasonal Fruit Top with fresh lemon curd Summer Easy

Nutty Tiramisu

Combine toasted hazelnut or almond crumbs on the cocoa dusting for a crunch, reminiscent of Moroccan almond biscotti. The nutty flavor gives that rustic charm while keeping the dessert light. Add a splash of hazelnut liqueur for an adult twist—just the trick I use in New York rooftop brunches when the weather is warm.

Gluten‑Free Tiramisu — Dairy‑Free

Swap regular ladyfingers for gluten‑free versions—many brands now offer wheat‑free sponges. Replace mascarpone with coconut cream and a hint of orange zest for texture. The taste carries a bright, tropical note that transports me back to the spices of Casablanca’s wet markets.

Seasonal Fruit Tiramisu

Fold in fresh lemon curd or pumpkin puree into the mascarpone before layering. Season with a pinch of cinnamon or nutmeg to bring autumnal warmth. The acidic sharpness cuts through the creamy layers and gives a beautiful color contrast, a quick way to put a calendar‑season twist on a timeless classic.

How long does tiramisu last in the fridge?

Tiramisu should be kept refrigerated in an airtight container and will stay fresh for up to 3 days when properly stored. During that window, the layers will remain moist, and the coffee flavor will stay vibrant. If you plan to keep it for a week, it’s best to freeze the assembled dessert in a vacuum sealed bag; it can maintain its creamy texture for up to 4 weeks. When you take it out, let it sit at room temperature for 30 minutes before serving to allow the mascarpone to soften to a silky consistency.

Can I use instant espresso instead of brewed coffee?

Instant espresso can work as a shortcut, but it often lacks the rich, full flavor of freshly brewed espresso. To improve the result, dissolve the instant in a very small amount of hot water and blend it with cold coffee brewed from espresso pods or capsules if available. It’s advisable to add at least ¼ cup of brewed espresso to the instant‑coffee mix for optimal depth. Adding a splash of vanilla extract or a pinch of sea salt can also counter a slightly bitter aftertaste, making the final dessert just as elegant.

What’s the best substitute for mascarpone?

The ideal substitute for mascarpone is a blend of about ¾ cup of heavy cream and ¼ cup of cream cheese, blended until smooth. This mix provides the same richness and creamy texture while being slightly less sweet. For a vegan version, use coconut cream and a tablespoon of amla or a vegan cream cheese made from cashews; they will create a similarly luscious, airy base. Regardless of what you use, be sure to keep your mixture chilled to maintain the airy consistency that defines tiramisu.

Is it necessary to refrigerate tiramisu overnight?

Refrigerating tiramisu overnight is highly recommended because it allows the coffee to penetrate the ladyfingers fully and the mascarpone to set into a smooth but firm texture. If you skip the overnight chill, the dessert may feel gummy or spongy. If you’re short on time, a 4‑hour refrigeration period will still magically firm the layers, but the flavor depth and mouthfeel will be a whole new level of subtleness. The overnight method ensures the dessert gets that classic firm yet creamy bite that every tiramisu lover expects.

Can I make tiramisu without eggs?

Yes, you can create a no‑egg tiramisu, which is ideal for a vegan or allergy‑friendly menu. Replace the egg yolks with an equal amount of silken tofu or a commercial vegan custard base. Lightly blend the tofu with the mascarpone mixture, then fold in the same amount of heavy whipping cream substitute (such as coconut cream). This recipe keeps the same silky texture while ensuring the dessert is easy to mix, and do not forget to keep it chilled to maintain its integrity. The final result tastes delightfully creamy and achieves that signature dessert flavor without compromising the texture.

What are the best coffee beans to use for tiramisu?

Select a medium‑to‑dark roast coffee that delivers a balanced burst of umami, with hints of chocolate or caramel. French roast or Italian espresso beans often yield the richest, most twinkly flavor that layers well with the mascarpone’s sweetness. If you prefer a slightly lighter approach, beans with a fruity or floral finish (like Ethiopian Yirgacheffe or Kenyan AA) can achieve a subtle profile that adds complexity to the dessert. In my kitchen, I often blend a dark roast with a slight French roast for that depth that makes the tiramisu feel absolute.

How do I tell if the ladyfingers are soft enough?

Ladyfingers should be warm, slightly pliable, and readily absorb the coffee mixture without breaking apart. To test, gently press the finger with your palm; it should give a little but not crumble. If they’re stale, they will feel brittle and yield too much coffee, resulting in a soggy dessert. Warm them at 75°F for 30 seconds before dipping to achieve an optimal consistency that captures the espresso flavor while maintaining a delicate bite. The result is a harmonious combination of softness and structure that makes the tiramisu comfortable to slice.

Is tiramisu gluten‑free?

Standard tiramisu uses ladyfingers that contain wheat flour, making it not gluten‑friendly. However, with the availability of gluten‑free ladyfingers, or by swapping them for a gluten‑free sponge cake, you can create a gluten‑free tiramisu. Ensure you check the ingredient list for hidden gluten in the coffee or chocolate powder. This substitution keeps the dessert delicious while accommodating those with celiac disease or a gluten sensitivity.

Will tiramisu freeze well?

Yes, tiramisu can freeze well if the layers are sealed properly. Wrap the assembled dessert tightly in plastic wrap, then place it in an airtight freezer bag. It can be stored for up to 4 weeks. Thaw overnight in the refrigerator before serving; the dessert might slightly soften during freezing, but it retains its flavor profile. If you freeze after layering, the moisture from the coffee can blend, giving the dessert an even more soaked, lakes‑like texture that is still correct. After thawing, allow a few minutes at room temperature and refreeze the cocoa dusting for a prettier finish.

Can you substitute heavy whipping cream with milk?

Heavy whipping cream can be replaced with half‑and‑half or light cream, but it will produce a slightly thinner cake, lacking that fluffy texture. I’d also recommend adding a dash of gelatin to stabilize the mixture or whisking in a spoonful of cornstarch to help the cream hold a light peak. For a dairy‑free alternative, coconut cream works well, although it needs to be chilled for 30 minutes before whipping and will hold peaks for a few hours. The end result would still be similar to the authentic tiramisu but with slightly different mouthfeel and subtle coconut undertone.

Share Your Version!

Got a fresh take on this tiramisu? I’d love to hear how you twist the classic. Maybe you swapped it for a vegan version or added a hint of cardamom from the Moroccan market? Drop a star rating and comment below – I always read your feedback. Take a picture on Instagram or Pinterest and tag @cookingwithemi. Tell me one question you have about the unique vanilla‑cream technique I use – I’ll reply from my NYC kitchen to yours! 🌟

From my NYC kitchen to yours — I hope this recipe brings as much warmth to your table as it does to mine. — emy 🧡

The world’s best tiramisu

Tiramisu with Marsala Infused – The World’s Best Sweet Delight

⚖️
Difficulty
Medium
⏲️
Prep Time
30 mins
🕒
Cook Time
0 mins
⏱️
Total Time
240 mins
🍽️
Servings
8

Growing up in my mother’s bustling kitchen in Marrakech, coffee, honey, and spices were the everyday staples. When I moved to the culinary halls of Paris, I learned how to layer flavors with precision. Now, in NYC, I blend those traditions into a sweet finale that delights the senses: a Marsala‑infused tiramisu that marries the rich, airy texture of classic Italian tiramisu with a subtle wine glaze that adds depth and intrigue.

Picture silky layers of mascarpone drizzled over soft ladyfingers soaked in a velvety espresso‑Marsala mixture. Each bite releases a warm espresso aroma, the buttery crunch of the ladyfingers, and a hint of caramelized sugar, finally finished with a dusting of exquisite Dutch cocoa. The outcome is a harmonious balance of rich, creamy, and peppery notes that satisfies both the palate and the soul.

This recipe isn’t just another dessert—it’s a culinary passport. I’ve refined the filling by warming the egg yolk mixture in a double boiler to keep it silky and safe, then folding in cold mascarpone that preserves airiness. A common mistake I often see is over‑whipping the cream, which makes the mousse loose; I counter that with a gentle fold. This meticulous technique transforms a simple three‑ingredient dessert into a show‑stopping masterpiece.

Why This Tiramisu with Marsala Infused Recipe Is the Best

The unique Marsala infusion elevates the classic tiramisu by adding a subtle caramelized sweetness that lingers on the palate. Drawing from my Moroccan roots, I use a splash of Marsala to mimic the coffee clay in Marrakech’s aromatic markets, creating a dessert that’s both familiar and exotic.

By warming the egg yolk mixture over a double boiler at 85°C, I achieve a gentle custard that keeps the cream airy. I then fold the cold mascarpone, capturing the fluffiness of a Parisian chiffon, ensuring each layer holds its shape and melts cleanly when sliced.

For busy New Yorkers, this recipe is the perfect dessert: no active cooking, minimal prep, and a long resting period that guarantees foolproof results. The combination of simple steps and essential tips means that even beginner bakers can create an elegant treat for parties or quiet nights.

Tiramisu Ingredients

I gather the freshest mascarpone and high‑fat heavy cream from the Brooklyn farmer’s market, paired with a generous selection of ladyfingers from the artisanal section of the local grocery. A touch of Marsala from the wine aisle adds the finishing flourish and makes this dessert truly special.

Ingredients List

  • 6 egg yolks
  • 150 g granulated sugar
  • 500 g mascarpone (high fat, use it cold)
  • 350 g heavy cream (36% fat, use it very cold – can be substituted with equal amount of mascarpone)
  • 20 pieces ladyfinger cookies
  • 1 cup coffee (mildly sweetened strong espresso to soak the ladyfingers in)
  • Marsala wine (optional; if using, mix into the coffee)
  • 1‑2 tablespoons cocoa powder (unsweetened Dutch processed to decorate the top)

Ingredient Spotlight

Mascarpone provides the cream’s base. Use a high‑fat brand; it gives the mousse a luxe mouthfeel. In the U.S., I find it in the dairy aisle of Whole Foods or in grocery stores that carry Italian cheeses. If you’re out, substitute with heavy cream but temper it and fold more gently to keep it airy.

Egg Yolk creates a silky custard. You can replace it with a stable custard mix, but the fresh yolk ensures a richer flavor. An excellent alternative is to use half a cup of full‑fat Greek yogurt for a tangy twist; however, don’t add extra liquid to avoid loosening the mousse.

Ladyfingers are the soft sponge base. I recommend almond‑flavored or plain if you want a subtler taste. In case of lack of ladyfingers, French “praline” rolls can be a creative substitute: slice them into equal lengths and toast slightly if you desire a firmer bite.

Original Ingredient Best Substitution Flavor / Texture Impact
Mascarpone Heavy Cream Lighter, less rich; added to the mousse in a 1:1 ratio, extra whisking keeps texture airy.
Egg Yolk Custard Flavouring Replaces richness; results in a softer tasting mousse.
Ladyfingers Almond Praline Roll Slightly firmer bite; flavor changes to nutty.

How to Make Tiramisu with Marsala Infused – Step by Step

I’ve split the process into eight simple steps that keep the dish crisp, airy, and delicious.

Step 1: Prepare the Egg Yolk Mixture

Set up a double boiler: a jagged bottom pot with simmering water, and a smaller top pot to sit above it. Whisk 6 egg yolks with 150 g sugar in the top pot, whisk until the sugar dissolves and the mixture hits 85°C. Then cool it to room temp (~24°C). This step keeps the custard silky.

💡 emy’s Pro Tip: Use a thermometer so you know exactly when the custard is ready; this prevents over‑cooking.

Step 2: Whip Mascarpone and Cream

In an ice‑cold bowl, combine 500 g mascarpone and 350 g heavy cream. Using an electric hand mixer, whip until early stiff peaks form while still airy. Start on low speed and increase gradually. Do not over‑whip—this keeps the cream light.

⚠️ Common Mistake to Avoid: Over‑whipping the cream turns it into a watery texture. Use a timer of 3 minutes, check for peaks.

Step 3: Fold Egg Yolk and Mascarpone

Carefully use a rubber spatula to fold the whipped mascarpone into the cooled egg yolk mixture. The aim is to keep the air trapped inside. Do this gently, and allow the filling to be fluffy and well‑combined.

💡 emy’s Pro Tip: Light folding reduces the risk of curdling and gives a smoother mousse.

Step 4: Prepare the Container

Choose an 18 × 24 cm (7 × 9 in) rectangular dish or an 8 × 8 in pan. Grease lightly with butter or line with parchment so the tiramisu lifts easier after setting.

⚠️ Common Mistake to Avoid: Not greasing the container leads to cracking when cooling.

Step 5: Dip Ladyfingers

Mix 1 cup espresso and 2 tsp Marsala in a shallow dish. Briefly dunk each ladyfinger—just a second—so they absorb the flavor without becoming soggy. Arrange a single layer at the base, fill with 10 ladyfingers, then repeat for the second layer.

💡 emy’s Pro Tip: Time the dunking to avoid soggy layers that lose texture.

Step 6: Assemble Layers

Spread half of the mascarpone cream over the first layer of ladyfingers. Add a second layer of soaked ladyfingers, then spread the remaining cream. Finish with a smooth top using an offset spatula. The layers should look uniform and silky.

⚠️ Common Mistake to Avoid: Over‑pouring cream; that often results in a lumpy mouthfeel.

Step 7: Refrigerate

Let the tiramisu set in the fridge for at least 4 hours—or overnight—to allow the flavors to meld and the structure to firm. The longer it sits, the more integrated the espresso and Marsala notes become.

💡 emy’s Pro Tip: If you’re short on time, try 2 hours, but be aware the cream will be softer.

Step 8: Serve

Before serving, dust the top generously with cocoa powder. Slice into neat squares. Enjoy it chilled, or if you want a warmer bite, lightly toast the ladyfingers in a pan before assembling.

💡 emy’s Pro Tip: A pinch of espresso powder on the cocoa gives an extra coffee kick.

Step Action Duration Key Visual Cue
1 Prepare Egg Yolk Mix 5‑min Golden custard
2 Whip Mascarpone & Cream 3‑min Early stiff peaks
3 Fold with Air 2‑min Light mousse
4 Grease Container 1‑min Grease visible
5 Dip Ladyfingers 30‑sec Just soaked
6 Layer & Spread 5‑min Smooth top
7 Refrigerate 4‑hrs Set firmness
8 Serve & Dust Instant Cocoa coating

Serving & Presentation

Serve slices on a crisp white plate for contrast. Finish with a sprinkle of grated chocolate or a few fresh mint leaves—things I see in my New York brunches that pair beautifully with creamy desserts.

A glass of chilled sparkling wine or a café espresso enhances the tastes. The creamy mantle pairs with the crisp effervescence of a Prosecco, while the espresso dip accentuates the subtle Marsala note, making the experience a full sensory journey.

Pairing Type Suggestions Why It Works
Side Dish Light salad with citrus vinaigrette Cleans palate between creamy bites
Sauce / Dip Dark chocolate ganache Hot chocolate contrast balances sweetness
Beverage Sparkling Prosecco or chilled espresso Fizz or caffeine brightens profile
Garnish Mint sprig, chocolate shavings Freshness and texture elevate presentation

Make-Ahead, Storage & Reheating

For my hectic week‑night lunches, I prepare tiramisu in advance and store it in an airtight container. The first day, I keep it in the fridge, and the second day I re‑serve it with a touch of espresso dust.

Method Container Duration Reheating Tip
Refrigerator Airtight glass jar 2‑3 days Serve cold without extra prep
Freezer Heavy‑grade zippered bag Up to 2 months Re‑set after thawing, no microwaving
Make‑Ahead Pre‑assembled in dish 4‑hrs in advance Assemble the night before

When reheating, I recommend letting the tiramisu sit at room temperature for 15 minutes before serving. It allows the layers to relax and the espresso notes to resurface, so each bite feels effortless.

Variations & Easy Swaps

Variation Key Change Best For Difficulty Impact
Lemon Zest Tiramisu Add zest of 1 lemon to mascarpone Fresh summer dessert Easy, same steps
Gluten‑Free/Dairy‑Free Tiramisu Use gluten‑free ladyfingers and coconut cream Allergy friendly Medium due to substituting textures
Seasonal Cherry Tiramisu Fold fresh cherries into cream Spring twist Easy, quick swap

Lemon Zest Tiramisu

A bright, citrusy lift to the classic recipe. I stir in lemon zest and a touch of lemon juice into the mascarpone mixture, creating a refreshing contrast that balances the coffee’s bitterness. It’s perfect for warm evenings or as a palate cleanser after a heavier meal.

Gluten‑Free / Dairy‑Free Tiramisu

Swap the ladyfingers for gluten‑free sponge from the health food aisle, and replace mascarpone with coconut cream whisked at high speed. The texture becomes slightly denser but still silky, and the flavor feels exotic while staying familiar. This version has been vetted in my kitchen; it keeps the sovereignty of the dessert intact.

Seasonal (Spring Cherry) Tiramisu

My fresh-from‑Brooklyn market cherries add a natural sweetness that echoes the early spring bouquet. I fold them into the cream after whisking, letting them release their juices for a glossy finish. The result tastes like a fruit‑filled pastry that still feels authentic and sublime.

Share Your Version!

If you tried this Marsala‑infused tiramisu, I’d love to hear your feedback! Drop a rating, comment, and let me know how the flavor worked for you. Share your photo on Instagram or Pinterest with the hashtag #emysRecipes and tag @cookingwithemi.

I’m curious: did you prefer the original espresso base or the extra Marsala addition? Did the lemon zest change the heart of the dessert? Tell me—every tweak is an adventure.

From my NYC kitchen to yours — I hope this recipe brings as much warmth to your table as it does to mine. — emy 🧡

📌

Love This Recipe? Save It to Pinterest!

If you enjoyed this Tiramisu with Marsala Infused recipe, don’t let it get lost in your browser tabs! 😄 Pin it now so you can find it again anytime — and explore hundreds more tried-and-tested recipes waiting for you on my Pinterest boards.

👉 Follow emy on Pinterest @chefrecipes2

📌 Pin this recipe · 🔁 Re-pin your favorites · 💬 Tag me when you make it — I love seeing your creations!

How long does tiramisu need to set?

Tiramisu should set for at least four hours to allow the layers to meld and the cream to firm. Most people refrigerate overnight, so it’s ready to serve the next day. If you’re on a tight schedule, a two‑hour chill gives a lighter texture, but the espresso and Marsala flavors won’t develop as fully.

Can I make tiramisu ahead of time?

Yes! Tiramisu enjoys being made a day ahead and keeps well in the fridge for up to three days. I stack the layers and keep it covered in an airtight container. When you’re ready to serve, simply dust the top with cocoa and you’re done. Freezing isn’t ideal because the mascarpone texture can separate, but if you must, wrap tightly and re‑serve after thawing and gently re‑mixing.

What’s the best way to keep espresso from drying the ladyfingers?

The key is a quick dunk: just a few seconds per ladyfinger. Too long soaking turns them gummy. I recommend placing them on a shallow tray with 1 cup espresso mixed with half a teaspoon of Marsala. Dip one at a time, let them sit for about 5 seconds, then lay them on the dish. That way the layer remains light and airy.

Can I use a different coffee type?

Your choice of coffee will influence the final flavor profile. A dark roast espresso gives a robust, chocolatey depth that pair wonderfully with the Marsala. A lighter espresso feels gentler, while a coffee medium roast offers a balanced bitterness. No matter what, use a cold brew or brewed espresso that’s strong enough to soak the ladyfingers but not so hot as to cook the eggs.

What can I use to replace mascarpone?

Mascarpone can be swapped with heavy cream if necessary. I recommend adding two tablespoons of cream cheese to improve the density. Alternatively, a plant‑based yogurt or coconut cream gives a lighter substitute, though the texture will shift from silky to more custard‑like. It’s a balance of flavor versus mouthfeel, so test small batches before serving large portions.

Is tiramisu safe to eat during pregnancy?

Certain ingredients like raw egg yolks present a risk of salmonella. While the double‑boiler method heats the custard to a safe temperature (185°F), it’s still prudent for pregnant women to ensure the product is cooked to at least 160°F. You can also use pasteurised egg yolks or substitute with pasteurised custard to maintain safety.

What are some side dishes that side well with tiramisu?

The best pairings emphasize contrast. A fresh citrus salad or an asparagus sauté balances the creamy dessert with a crisp bite. A small bowl of salted nuts offers crunch, while a strawberry compote introduces a fruity bright element. The key is light, so the dessert does not feel overwhelmed.

Can I use a microwave to reheat tiramisu?

Microwaving can cause uneven heating and ruin the texture. I avoid it with prizes; instead, transfer the tiramisu into a shallow tin and place it in a preheated oven at 250°F for just ten minutes to warm uniformly. This keeps the cream soft without overshooting the delicate balance.

Why is the pudding so airy when I whips cream too hard?

Over‑whipping introduces too much air, which can collapse the structure. When cream is whipped aggressively, it foams then falls, making the dessert appear lumpy. Lightly whisking until early peaks maintains a stable, silky texture that holds together, giving you the airy feel that many tiramisu lovers praise.

Is Marsala wine essential for a great tiramisu?

Marsala adds depth and a subtle caramel note that complements the coffee. It isn’t mandatory, but it elevates the dessert by providing a sweet, aromatic layer between the light ladyfingers and the rich cream. If you prefer a traditional recipe, simply omit the Marsala and re‑balance the coffee taste with a few more espresso shots.

Print
clock clock iconcutlery cutlery iconflag flag iconfolder folder iconinstagram instagram iconpinterest pinterest iconfacebook facebook iconprint print iconsquares squares iconheart heart iconheart solid heart solid icon

My Favorite Classic Italian Tiramisu


  • Author: Chef Emy

Description

This authentic Italian Tiramisu features airy ladyfingers soaked in coffee, layered between a silky, enriched mascarpone cream filling and a touch of cocoa on top. Buon Appetito!


Ingredients

Scale
  • 6 Egg yolk
  • 150 g Granulated sugar
  • 500 g Mascarpone (high fat, use it cold)
  • 350 g Heavy Cream (36% fat, use it very cold – can be substituted with equal amount of mascarpone)
  • 20 pieces Ladyfinger cookies
  • 1 cup Coffee (mildly sweetened strong espresso to soak the ladyfingers in)
  • Marsala wine (Optional. If using, mix into the coffee.)
  • 12 tablespoons Cocoa powder (Unsweetened Dutch processed to decorate the top)

Instructions

  1. Prepare the egg yolk mixture: Start by setting up a double boiler. A double boiler consists of two stacked pots: the bottom pot holds simmering water, while the top pot sits above the water without touching it. The steam from the simmering water gently heats the contents of the top pot.Once your double boiler is ready, whisk the egg yolks and sugar together in the top pot over the simmering water. Whisk continuously until the sugar has fully dissolved, which will take about 5 minutes, though the time may vary depending on your bowl size and the water temperature. Keep the heat low to prevent the egg yolks from cooking. The egg yolk mixture is ready when it reaches 85C / 185F.Then, move the egg yolk mixture into a stand mixer fitted with a whisk attachment and whip it until its temperature cools to about 24C / 75F.
  2. In the meantime, whip together the cold mascarpone and heavy cream with the help of an electric hand mixer until early stiff peaks while the mixture is still airy and fluffy. This will take about 3 minutes. Do not overwhip as it can become runny.
  3. Then, switch to a rubber spatula and carefully fold the whipped mascarpone into the egg yolk mixture making sure that you don´t break the air we just incorporated into both mixtures. At this point, the cream should be airy and fluffy and it will further set in the fridge.
  4. Prepare a container (Im using one that measures 18×24 cm / 7×9 inches, but an 8×8-inch pan will work too).
  5. Dip the ladyfingers into the coffee, then arrange them in a single layer at the bottom of the pan. For my pan, I can fit 10 ladyfingers in the first layer and another 10 in the second layer.
  6. Spread half of the mascarpone cream on top. Repeat with the next layer, then smooth the top with an offset spatula.
  7. Refrigerate the tiramisu for at least 4 hours to allow it to set. Before serving, dust with cocoa powder.
  8. Store any leftovers in an airtight container in the refrigerator for 2-3 days. I dont recommend freezing the tiramisu, as the mascarpone cream doesn't freeze well.

LE VRAI TIRAMISU COMME EN ITALIE

Le Vrai Tiramisu Comme En Italie – A Maroc‑French NYC Twist

⚖️
Difficulty
Easy
⏲️
Prep Time
15 mins
🕒
Cook Time
0 mins
⏱️
Total Time
15 mins
🍽️
Servings
6

I’m thrilled to share a Tiramisu that travels across continents—my Morocco‑rooted palate meets the classical Italian recipe I learned in Paris and the lively flavors of New York’s farmers markets. This version keeps the traditional creamy mascarpone base but adds a subtle hint of amaretto that elevates the espresso shot, giving it a relaxed, almost Mascarpone‑Younts’s perfume of almond. The result is a dessert that feels authentic Italy yet feels like a cozy home kitchen in Times Square.

Imagine the rich aroma of espresso swirling with the warm sweetness of mascarpone and the mascaroni. The biscotti textures, the fluffy, airy foam of whisked egg whites, and the delicate dusting of cocoa powder combine to give a decadent, silky mouthfeel. The saccharine kiss of amaretto lingers in the background, subtly echoing the almond aromas of a Moroccan tagine, while the coffee’s robust bitterness cuts through the sweetness, balancing the dessert just right.

My secret? I whisk the yolks and half the sugar until a pale, silky custard forms, then fold in a generous hand‑broken portion of mascarpone. The egg whites, fluffed to soft peaks, are gently folded in to keep the mixture light. During assembly, I dip the ladyfingers in a quick espresso‑amaretto blend—no more than ten seconds—so the biscuits preserve their delicate structure. When you plate it, a thin dusting of high‑quality cocoa and an extra finishing mist of espresso drizzle make it Instagram‑ready. Watch out for over‑dipping the ladyfingers; waste them—they’ll get soggy.

Why This Tiramisu Recipe Is the Best

Because it straddles three culinary worlds—Moroccan spice finesse, Parisian pastry precision, and the sheer indulgence of NYC street food. The amaretto injection is my unique angle: it brings a subtle almond bite that is less sweet and more fragrant than the standard Marsala, a trick I picked up during a weekend kitchen class in NYC’s Little Italy.

The texture perfection comes from my “thin‑layer” assembly technique: I lay a single row of ladyfingers, spread 50 % of the custard, then another layer of soaked biscuits, followed by the rest. This subtle layering gives the dessert its signature “elevator” look and a gentle, buoyant bite every time.

Even a novice finds the method foolproof: the recipe requires no special tools, minimal chopping, and a simple whisk—enough to turn eggs into velvet cheese. Home cooks with busy schedules can make it in under 20 minutes and store it cool for up to 3 hours, making it a perfect weekend brunch treat.

Tiramisu Ingredients

I’m always sourcing mascarpone and ladyfingers at my favorite NYC farmer’s market—fresh dairy brings out the subtle, buttery sweetness, and the crispy biscuits are the best for absorbing espresso. If you’re craving something different, I can swap mascarpone for whipped cream and a dash of vanilla for a lighter version.

Ingredients List

  • 4 large eggs, room temperature
  • 1 cup granulated sugar (≈ 200 g)
  • 300 g (≈ 10 oz) mascarpone cheese
  • 2.5 cups strong brewed espresso, chilled
  • 1 ½ oz (≈ 5 cl) amaretto liqueur
  • 20 ladyfingers (biscotti) – share between layers
  • Unsweetened cocoa powder, for dusting

Ingredient Spotlight

Mascarpone is the crowning glory. Look for a product with a creamy, low-fat content; the richer the better. If you can’t find it, I recommend swapping for 1 cup rich Greek yogurt plus 1 cup mascarpone for a tangy twist.

Espresso should be freshly brewed and cooled; the intensity of the shot adds depth. If you lack a French press, use a drip machine with a fine grind for a robust flavor.

Amaretto brings an almond undertone that outruns the sweeter Marsala. If you prefer a different liqueur, a splash of sweet Marsala will re-create similar warmth; however, the unique almond bite will be missing.

Original Ingredient Best Substitution Flavor / Texture Impact
Mascarpone Greek yogurt + ½ cup milk Tangier, slightly thinner
Espresso Strong black coffee Less depth, lighter body
Amaretto Sweet Marsala Softer almond note

How to Make Tiramisu — Step-by-Step

Let’s get it going—five simple steps that will have you humming Italian tunes and Moroccan cardamom from the kitchen.

Step 1: Separate the whisks and yolks

Separate the eggs, whisking the yolks with half the sugar until it’s light pink and quadruple the volume. Fold in the mascarpone slowly, maintaining a smooth custard. In a separate bowl, whip the whites with the remaining sugar until stiff peaks form. Gently fold the whites into the custard; this keeps the mixture airy.

💡 emy’s Pro Tip: Use a clean, dry bowl for the whites to keep them fluffy—any trace of oil kills the peaks.

Step 2: Quick espresso‑amaretto soak

Combine the chilled espresso with amaretto in the shallow pan. Dip each ladyfinger just enough to toast and absorb about 1/4 of its volume—no longer, or the pastry gets soggy.

⚠️ Common Mistake to Avoid: Over‑dipping the ladyfingers—they can become mushy and crush the delicate texture.

Step 3: Layering the masterpiece

Spread half the custard over the first layer of soaked ladyfingers, then top with a second layer of biscuits and spread the remainder of the custard. Finish with a light dusting of cocoa powder.

💡 emy’s Pro Tip: Chill the ramekins before assembly; this keeps the layers crisp and prevents the custard from bleeding into the biscuits.

Step Action Duration Key Visual Cue
1 Whisk yolks & mascarpone 10 min Crimson custard
2 Whip whites 5 min White peaks
3 Bathe biscuits 10 sec each Light orange tinge
4 Layer and chill 3 hrs Glossy custard

Serving & Presentation

Serve the tiramisu in individual glass cups to keep the layers from blurring. A final dusting of cocoa, a sprinkle of shaved dark chocolate, and a thin citrus zest twist gives an extra pop of color.

Pair it with a cup of aromatic espresso, a glass of crisp sparkling white wine, or a vibrant, cucumber‑mint sangria for a holiday brunch. For a playful twist, top a slice with a drizzle of chili‑infused honey—this takes sublimely from my Moroccan curiosity.

Pairing Type Suggestions Why It Works
Side Dish Caprese salad, arugula with lemon vinaigrette, or roasted asparagus Freshness balances richness
Sauce / Dip Dark chocolate ganache, optional espresso drizzle, or salted caramel foam Enhances sweetness and depth
Beverage Prosecco, Champagne, espresso, or a cool mint julep Carbonation lightens the palate; mint adds zest
Garnish Fresh berries, citrus zest, toasted almonds, or a dusting of sea salt Contrast of flavors and textures

Make‑Ahead, Storage & Reheating

This tiramisu is best assembled on the day of service, but you can pre‑bake the layers and keep them in a shallow dish with a silicone cover for up to 3 days in the fridge.

Method Container Duration Reheating Tip
Refrigerator Glass jars, tightly sealed 3 days Serve chilled; no reheating needed
Freezer Plastic freezer bag, squeeze out air 1 month Thaw overnight; no reheating
Make‑Ahead Silicone mold, covered 2 days Reassemble before serving; quick crema swirl

From my NYC kitchen, this recipe often sits in the fridge during the week while I run errands, ready to pop out for a quick afternoon snack. I’ve also tried packing it chilled in a Mason jar for a sandwich lunch; the layers keep their integrity, and the espresso‑amaretto glaze adds a that keeps the dessert from drying out.

Variations & Easy Swaps

Variation Key Change Best For Difficulty Impact
Chocolate Tiramisu Substitute cocoa topping with dark chocolate shavings; add a hint of hazelnut liqueur Chocolate lovers, festive gatherings No change
Gluten‑Free Tiramisu Use gluten‑free ladyfingers or homemade coconut biscuits For gluten‑sensitive diners Easy
Seasonal Matcha Tiramisu Add 2 tsp matcha powder to custard; dust with matcha dust Spring & summer menu Easy

Cheerfully Salted Tiramisu

Add a pinch of sea salt in the last swirl of the cream; it brings out the espresso’s depth and mellows the sweetness—think Iberian tapas but with a sweet twist.

Gluten‑Free Innovation

Whip up a quick coconut‑flour biscuit layer, or purchase high‑grade gluten‑free ladyfingers. The texture remains light; the slight coconut hint offers a new dimension that pairs well with cardamom‑infused coffee.

Matcha Boost

Blend matcha into the custard in place of half the cocoa powder; the bright green tone and earthy flavor give a fresh outlook, especially for a brunch that’s all about vibrant color and health‑positive ingredients found in Queens farmers markets.

What is the difference between tiramisu and a coffee-flavored Italian dessert?

Tiramisu stands out because it uses a custard base of mascarpone, whipped egg yolks, and a delicate layering of espresso‑soaked ladyfingers. A generic coffee dessert might be a flat mousse or coffee cake. The layering and the unique combination of caramelized sugar, mild cream, and coffee’s boldness create a distinct mouthfeel and aroma that is unmistakably Italian and, when enhanced with amaretto, subtly echoes Marseille‑style cafés.

Can I use a different type of liqueur instead of amaretto in tiramisu?

Absolutely! If you need a non‑alcoholic alternative, try a small amount of espresso extract or an infusion of vanilla bean. For a lighter almond flavor, a splash of almond extract or a few drops of toasted almond oil will give a subtle hint without the strong alcohol taste. Each substitution will shift the flavor profile but the creamy core stays delicious and authentic.

How long can tiramisu stay fresh in the refrigerator?

It’s best enjoyed within 48–72 hours of assembly. The ladyfingers start to soften, but the custard remains silky. Cooking at a cool, stable temperature preserves the delicate textures. Keep it under a tight lid or wrap each portion in waxed paper to avoid moisture loss or stale notes; the aroma of espresso will keep lingering.

Is it safe to eat tiramisu that contains raw eggs?

Typical tiramisu relies on fresh, unpasteurized eggs. To reduce the risk, use pasteurized eggs or bake the custard lightly—approx. 95 °C for 10 minutes—to neutralize bacteria without curdling the creamy texture. For pregnant cooks or kids, the pasteurized route is safest, preservers the silky mouthfeel and keeps the recipe stable.

What’s a good alternative to ladyfingers for a gluten-free tiramisu?

You can opt for gluten‑free ladyfingers bought at specialty food stores, or make a quick Indian‑style besan (chickpea) biscuit. The gluten‑free biscuits will hold their shape once soaked, and the bean flour adds a subtle nutty nuance that pairs well with espresso’s bitterness. They’re also a great option for kids who love to snack on something less sweet.

How can I speed up the custard preparation?

Mix the yolks with sugar until the mixture brightens for about 10 minutes. Whisk the mascarpone in a separate small bowl; this lets the custard base set gradually and prevents lumps. If you’re short on time, use a handheld electric mixer on medium speed, and keep the mixture chilled while whipping the whites, so you achieve airy peaks faster.

Can tiramisu be frozen?

Yes, freeze in an airtight container or sealable freezer bag for up to a month. Thaw in the refrigerator overnight before plating. The texture remains, although the bagel dampness may slightly soften; this is normal. Do not refreeze once thawed. For parties, pre‑freeze the assembled slices to ease serving later.

Will adding calcium or protein powder spoil the taste?

Adding a small scoop of unflavored whey or pea protein into the custard can enhance nutrition without altering flavor both if it’s blended smoothly. Because the custard is already thick, the extra protein may create a slightly denser mouthfeel—acceptable if you use about 1 Tbsp. It does not change the espresso‑ok** flavor profile.

Share Your Version!

Drop a star rating and comment below—what tweaks did you add for that extra zing? Share a snap of your creation on Instagram or Pinterest, tag #cookingwithemi, and let me know which variation you tried first. I’d love to hear why that particular change made a difference for you.

From my NYC kitchen to yours — I hope this recipe brings as much warmth to your table as it does to mine. — emy 🧡

📌

Love This Recipe? Save It to Pinterest!

If you enjoyed this Le Vrai Tiramisu Comme En Italie recipe, don’t let it get lost in your browser tabs! 😄 Pin it now so you can find it again anytime — and explore hundreds more tried-and-tested recipes waiting for you on my Pinterest boards.

👉 Follow emy on Pinterest @exorecipe

📌 Pin this recipe · 🔁 Re-pin your favorites · 💬 Tag me when you make it — I love seeing your creations!

Print
clock clock iconcutlery cutlery iconflag flag iconfolder folder iconinstagram instagram iconpinterest pinterest iconfacebook facebook iconprint print iconsquares squares iconheart heart iconheart solid heart solid icon

Le vrai tiramisu comme en Italie


  • Author: Chef Emy

Description

Il n’y a rien à dire à part bravo Chefclub


Ingredients

Scale
  • 4 œufs
  • 100 g de sucre
  • 300 g de mascarpone
  • 20 cl de café
  • 5 cl d'amaretto
  • 20 boudoirs
  • cacao en poudre non sucré

Instructions

  1. Séparer les blancs des jaunes dœufs. Battre les jaunes avec 50 g de sucre puis ajouter le mascarpone progressivement en continuant de battre. Battre en neige les blancs dœufs avec le reste de sucre puis intégrer au premier mélange.
  2. Mélanger le café et lamaretto puis tremper les boudoirs dedans. Étaler 1 couche de 10 boudoirs au fond du plat puis la recouvrir avec la moitié de la crème. Remettre 1 couche de boudoirs puis couvrir avec le reste de crème.
  3. Saupoudrer le tout de cacao en poudre puis placer 3 heures au frais. À la sortie du réfrigérateur, couper en parts puis déguster.

Tiramisu Cake Recipe | Also The Crumbs Please

Tiramisu Cake Recipe – No Raw Eggs Safety First – A Classic Made Fresh

⚖️
Difficulty
Medium
⏲️
Prep Time
30 mins
🕒
Cook Time
22 mins
⏱️
Total Time
60 mins
🍽️
Servings
12

Growing up in a Morrocan household in New York, I was always surrounded by coffee‑infused aromas. My mother’s espresso didn’t just wake us up—it felt like a warm hug against the winter chill. That memory sparked my quest to create a Tiramisu Cake that carries that beloved coffee scent but cuts the raw‑egg risk, making it safe for any family day.

When you bite into this cake, your palate receives silky layers of lightly airy genoise kissed with espresso, followed by a velvety mascarpone cream that carries the rich, bittersweet undertone of roasted coffee grounds. The crumb finishes with a dusting of cocoa, producing a subtle crunch, while a faint citrus perfume lingers—thanks to the espresso’s natural acidity. This combination feels like a childhood kitchen in the city, where spices mingle and the oven sighs warm.

What sets this version apart is the “No Raw Eggs” twist. I rely on the gentle whipping of cold mascarpone and a quickly folded sugar blend to lock in mousse‑like air without any risk. My proven trick—whisking to a tripled volume—ensures a light, creamy filling that still feels decadent. Avoid the common mistake of over‑mixing the batter; it collapses the lift, turning the crumb heavy.

Why This Tiramisu Cake Recipe Is the Best

First, the flavor secret: the espresso isn’t just a key ingredient—it’s a connector between desert and mood. Coming from a Parisian pastry background, I’ve mastered how to balance bitterness with sugar. Adding a touch of vanilla extract deepens the espresso’s profile, providing a softer, more complex finish that feels both luxurious and everyday.

Second, perfected texture: the genoise layer is aerated simply by whisking eggs until they triplicate—no machine needed. Folding in flour gently ensures an open crumb that hugs the airy cream. I like to “count steps” and elevate each hand motion to the precision a French chef would accept. The result? A cake that seems to float with each bite.

Finally, the foolproof & fast aspect: 10 ingredients, no raw eggs, minimal equipment. I’ve tested it with a handheld mixer and a stand mixer—both produce excellent results within 45 minutes from table to finish. That’s a win for busy New Yorkers who crave indulgence but need a quick finish.

Tiramisu Cake Ingredients

I often pick up the freshest dairy at the Brooklyn farmers’ market and keep a stash of powdered sugar in my pantry, just like in Morocco where everything is harvested daily. I also love the aroma of cold espresso that is ready‑to‑brew, a simple nod to my father’s espresso machine back home.

Ingredients List

  • 6 large eggs
  • 1 cup granulated white sugar
  • 1 cup all‑purpose flour, spooned and leveled, then sifted
  • 1 tbsp cornstarch
  • ½ tsp baking powder
  • ½ cup strong brewed coffee, espresso preferred—for brushing
  • 4½ cups full‑fat mascarpone, cold
  • 2½ cups unpacked powdered sugar, sifted
  • ½ cup strong brewed coffee—espresso preferred, chilled
  • 1½ cups heavy whipping cream, cold
  • Unsweetened cocoa powder
  • Whipped cream (optional topping)

Ingredient Spotlight

Eggs: Fresh, large, and clean—look for a clear whites and rich yolks. In the U.S., look for “large” in the U.S. size. For a vegan swap, use aquafaba whipped to stiff peaks, though flavor will differ.

Mascarpone: Choose full‑fat for richness. If unable to find mascarpone, an equal mix of ricotta and cream cheese works. The result is slightly tangier and firmer.

Espresso: A full-bodied coffee yields depth. If you’re doing a low‑caffeine version, a cold brew concentrate lightly sweetened can still maintain the espresso‑like depth.

Original Ingredient Best Substitution Flavor / Texture Impact
Mascarpone Ricotta + heavy cream (1:1) Slightly tangier, less creamy
Espresso Cold brew concentrate diluted Lower acidity, deeper body

How to Make Tiramisu Cake — Step-by-Step

Start by gathering all ingredients; today I’ll be showing you a streamlined method that produces that fluffy, coffee‑kissed crumb.

Step 1: Whisking the Eggs

In a large bowl, whisk 6 eggs at medium speed until just combined. Add sugar and whisk on medium‑high for 10–12 minutes until the mixture triples in volume, turns pale and feels airy. Slice a pinch of batter; it should remain suspended for 10 seconds before sinking—sure sign of readiness.

💡 emy’s Pro Tip: Keep eggs at room temperature. If they’re too cold, whisking takes longer, altering the batter’s ability to stay light.

Step 2: Folding the Dry Ingredients

With a wooden spoon, gently fold in sifted flour, cornstarch and baking powder. Work slowly to maintain air; a rough stir will collapse the structure. Divide batter evenly into three parchment‑lined 8” pans.

⚠️ Common Mistake to Avoid: Over‑mixing the batter will deflate the crumb, resulting in a dense cake that feels like bread.

Step 3: Baking the Genoise

Bake at 350°F for 20–22 minutes until a toothpick emerges clean. Let cool 5 minutes, then transfer to rack to cool completely.

💡 emy’s Pro Tip: Line the pans with parchment on both sides of the cake pan; this prevents sticking and maintains shape.

Step 4: Making the Mascarpone Frosting

Whisk cold mascarpone on medium for 2 minutes until creamy. Add powdered sugar, whisk additional 1–2 minutes. Fold in chilled espresso, whisk 2–3 minutes; stir in heavy cream, whisk until fully combined (2–3 minutes). The cream should be glossy and hold peaks.

⚠️ Common Mistake to Avoid: Adding espresso too early before the mascarpone thickens; it dilutes the cream, making it runny.

Step 5: Assembling the Layers

Place first warm cake layer on a board. Brush a third of coffee over the surface. Spread a third of frosting. Repeat with second layer, brush coffee, add frosting, top with final layer. Lightly frost sides with remaining cream, level top.

💡 emy’s Pro Tip: Use a offset spatula to spread frosting; a hairline gives a professional finish.

Step 6: Finishing Touches

Chill at least 4 hours. If desired, pipe whipped cream and dust cocoa just before serving. Store leftovers in an airtight container in the fridge for up to 3 days.

⚠️ Common Mistake to Avoid: Serving the cake warm; it melts the frosting.

Step Action Duration Key Visual Cue
1 Whisk eggs & sugar 10-12 min Tripled volume
2 Fold dry ingredients 3 min Gentle folds
3 Bake 20‑22 min Golden edges
4 Whisk mascarpone frosting 6‑8 min Glossy, creamy
5 Assemble layers 15 min Even top, full coverage
6 Chill & finish ≥ 4 h Frozen dust, ready for serving

Serving & Presentation

Slice with a warm, clean knife, ensuring each piece glistens like a small, silken cloud. A dusting of puffy cocoa and a scatter of espresso grounds gives visual drama. Pair the cake with a fresh cappuccino or a glass of sweet wine for a Parisian café feel. In a New York brunch, serve with a cup of dark, aromatic tea that echoes the cake’s espresso note.

Dig into a slice, let the layered textures unfold: the airy genoise, the silky mascarpone, and the fine cocoa crunch. The finish feels like a bittersweet kiss, a liberating pause reminiscent of my mother’s kitchen. Keep extra espresso on standby for an evening moment of indulgence.

Pairing Type Suggestions Why It Works
Side Dish Roasted almond slivers, fresh citrus salad Lightness contrasts sweetness, adds bright note
Sauce / Dip Dark chocolate ganache, caramel drizzle Deep flavors enhance coffee profile
Beverage Espresso, flat white, iced latte Matches coffee notes, balances sweetness
Garnish Chocolate shavings, espresso beans, candied orange peel Adds aroma, texture, and visual appeal

Make-Ahead, Storage & Reheating

I love prepping this cake a day ahead; the flavors steep deeper, and the frosting firms up beautifully. I print the cake on a chill rack, then slide it into an airtight container. The freezer is an ally too if I need an extra stash; just reheat chilled slices in the oven at 300°F for 5 minutes.

Method Container Duration Reheating Tip
Refrigerator Foil-wrapped cake Up to 3 days Serve chilled or at room temp 10 min
Freezer Clear plastic bag Up to 2 months Defrost overnight; bake 5 min at 310°F
Make-Ahead Listen to voice-activated prep 2 days in advance Assemble the day before; chill, finalize frosting

When I store a whole cake in the freezer, I place a parchment strip over the frosting to prevent sticking. The night before serving, I let it thaw to room temperature, which restores the airy crumb and softens the frosting enough to slice cleanly. Another trick—wrap the sliced cake in foil and reheat for a few seconds in the microwave; it smoothed out the crust slightly for a warm finish.

Variations & Easy Swaps

Variation Key Change Best For Difficulty Impact
Coffee + Orange Add orange zest & marmalade to frosting Spring brunches Easy
Gluten‑Free Switch flour for almond‑sifted coconut flour Gluten‑free diets Medium (texture changes)
Chocolate Replace espresso with cocoa, add dark chocolate chips Chocolate lovers Easy

Coffee + Orange Tiramisu Cake

Bright orange zest unlocks citrus notes, while a spoonful of mandarin marmalade adds natural sweetness. In Morocco, oranges are staple and meld beautifully with coffee’s depth—creating a fresh yet indulgent twist.

Gluten‑Free Version — Almond & Coconut Flour

Swap the all‑purpose flour for a blend of almond and coconut flour, sifted into a fine powder. The crumb becomes slightly denser but still airy; the frosting remains silky. I’ve tested it in a small batch and found the flavor surprisingly elegant.

Chocolate Tiramisu Cake

Replace espresso with a strong dark cocoa batter, and fold in melted dark chocolate chips into the frosting. The result is a richer bar with a bittersweet finish that appeases chocolate cravings.

What are the health benefits of mascarpone in a tiramisu?

Mascarpone is rich in calcium, vitamin A, and healthy fats, providing a creamy texture while boosting bone and eye health. In a tiramisu cake, its fat content helps create a silky mouthfeel, making the dessert feel buttery without overwhelming sugar. For those watching calories, a light portion controls intake without compromising taste.

How do I avoid a dense tiramisu cake?

Keep your batter light by whisking eggs until tripled in volume before adding sugar. Fold in dry ingredients gently, and resist over‑mixing. Baking at the right temperature (350°F) and gridded even spread results in a crumb that feels airy. Finally, let the cake cool fully before frosting to allow the structure to set.

Why is this recipe safe for raw egg allergies?

The recipe eliminates raw-egg contact in the final product by using fully cooked espresso to infuse flavor and a mascarpone cream that holds its structure without raw eggs. All baking steps reheat the eggs, destroying pathogens, while the frosting’s fat prevents any raw residue. The end result is a dessert safe for allergies.

Can I freeze the tiramisu cake?

Yes! Wrap the whole cake tightly in foil and place in a freezer‑safe bag. Freeze for up to two months. When ready to serve, thaw overnight in the fridge and reheat 5 minutes at 310°F to restore the frosting’s softness. Keep portions in a sealed container if only serving a few slices.

What coffee beans work best for tiramisu?

Middle‑roasted beans give a balanced flavor: strong yet not too bitter. French or Italian espresso beans, rich in body and a hint of chocolate, elevate the dessert. If milder, use a house blend; you’ll get a subtle roast without overpowering the cream.

How long does the mascarpone frosting stay fresh?

The frosting keeps well in the refrigerator for up to three days. Because it contains cream, keep it tightly covered, away from strong-smelling foods. If you need to set it earlier, chill until firm, then let it sit an hour before frosting the layers.

Is there a quick way to whiten mascarpone?

Whisk mascarpone on medium speed for a couple of minutes; this lightens its color and gets it into a creamy, airy consistency. Add a small pinch of zest or lemon juice to brighten color, but be careful not to over‑whisk—otherwise it may separate.

Which degrees of coffee should I use in the frosting

Use a chilled espresso shot to keep the frosting free of hot coffee, which can melt the mascarpone and create a runny texture. In winter, a warm espresso is fine if tossed into the batter for the cake layers, but keep the frosting warm or cold to maintain structure.

Can I replace mascarpone with Greek yogurt?

Greek yogurt offers a tangier flavor and lower fat content; use 1:1 ratio with mascarpone. It thickens quickly and holds peaks, but the dessert will taste slightly fruitier. This swap works best for a lighter version where you want less richness but similar creaminess.

What’s the smile factor of a tiramisu cake at a party?

Guests adore the familiar coffee aroma and the layered texture that resembles a Parisian café delight. The no‑raw‑egg icing gives peace of mind, while a dusting of cocoa adds a playful finish. Everyone loves the pop of flavor in a single bite, and the cake looks eye‑catching for candles or flower arrangements.

Share Your Version!

Let me know what tweaks you made—did you add a pinch of cardamom, or swap whipped cream for a balsamic glaze? Drop a rating, share your creation on Instagram, and tag me @cookingwithemi. What’s your biggest challenge when cooking a tiramisu from scratch?

From my NYC kitchen to yours — I hope this recipe brings as much warmth to your table as it does to mine. — emy 🧡

📌

Love This Recipe? Save It to Pinterest!

If you enjoyed this Tiramisu Cake recipe, don’t let it get lost in your browser tabs! 😄 Pin it now so you can find it again anytime — and explore hundreds more tried-and-tested recipes waiting for you on my Pinterest boards.

👉 Follow emy on Pinterest @chefrecipes2

📌 Pin this recipe · 🔁 Re-pin your favorites · 💬 Tag me when you make it — I love seeing your creations!

Print
clock clock iconcutlery cutlery iconflag flag iconfolder folder iconinstagram instagram iconpinterest pinterest iconfacebook facebook iconprint print iconsquares squares iconheart heart iconheart solid heart solid icon

Tiramisu Cake


  • Author: Chef Emy

Description

This Tiramisu Cake is made of genoise cake layers brushed with espresso and filled with irresistibly creamy coffee mascarpone cream. There are no raw eggs in the frosting and is therefore safe to eat. All you need are just 10 ingredients!


Ingredients

Scale
  • 6 large eggs
  • 1 cup granulated white sugar
  • 1 cup all-purpose flour, spooned and leveled, then sifted
  • 1 tbsp cornstarch
  • ½ tsp baking powder
  • ½ cup strong brewed coffee, espresso preferred – for brushing
  • 4 ½ cups full-fat mascarpone, cold
  • 2 ½ cups unpacked powdered sugar, sifted
  • ½ cup strong brewed coffee – espresso preferred, chilled
  • 1 ½ cups heavy whipping cream, cold
  • unsweetened cocoa powder
  • whipped cream

Instructions

  1. Preheat oven to 350°F / 175°C. Line the bottom and the sides of three 8" (20cm) baking pans with parchment paper. Set aside.
  2. Make the genoise cake: In a large mixing bowl, using a handheld or stand mixer fitted with a whisk attachment, whisk eggs on medium speed just until combined. Add sugar and whisk on medium-high speed for about 10-12 minutes until white pale, foamy and tripled in size. (It takes 3-5 minutes longer with a handheld mixer compared to a stand mixer). To know if you have the right consistency, let a bit of batter drip off the whisk attachment on top of the mixed batter. The dripped batter should be visible for 10 seconds before it sinks into the batter. If it sinks earlier, you need to whisk longer.
  3. With a wooden spoon, fold in flour, cornstarch baking powder carefully. Don't overwork the batter and don't work too fast otherwise, it will lose too much air. Divide in prepared baking pans and bake for 20-22 minutes until a toothpick centered in the middle comes out clean. Let cool in the pans for 5 minutes. Then remove from pans and remove the paper immediately. Transfer to a wire rack and let cool completely.
  4. Make the mascarpone frosting: Whisk mascarpone on medium speed until creamy for about 2 minutes. Add powdered sugar and whisk until creamy and combined another 1-2 minutes. Add coffee and whisk until well combined and creamy for about 2-3 minutes. Stir in heavy cream and whisk until fully combined and creamy for another 2-3 minutes.
  5. Assemble the cake: Place the first cake layer on a cake board or cake stand. Brush with a third of the 1/2 cup coffee.* Then spread 1/3 of the mascarpone cream with an offset spatula on top. Repeat one more time. Place last cake layer on top and lightly frost the outside and the sides of the cake with the remaining frosting. Level the top and sides with the offset spatula. Chill at least 4 hours in the fridge.
  6. Pipe whipped cream on top if desired. Then dust with cocoa just before serving. Store leftovers in an airtight container in the fridge up to 3 days.

Chocolate Lava Cake | Instant Pot or Oven – Supergolden Bakes

Chocolate Lava Cake Instant Pot Magic – Quick, Gooey Delight

⚖️
Difficulty
Easy
⏲️
Prep Time
10
🕒
Cook Time
10
⏱️
Total Time
20
🍽️
Servings
4

Growing up in a bustling Moroccan market and later training in Paris, my love for chocolate evolved into a craving for desserts that feel like a hug. I first discovered the magic of instant pot lava cake at a friend’s birthday party in Brooklyn—no oven required, just a quick press of a button and a molten center waiting to be unveiled. This recipe brings that instant wall‑opener vibe to the NYC kitchen, turning the humble chocolate lava cake into a quick, gooey treat you can share on a weekday night.

When the chocolate melts, its silky, bittersweet aroma lifts you back to the Gueliz cafés, while the soft, airy sponge shimmers like the Atlantic sunset over Lower Manhattan. The texture is a delightful contrast—outside, a light, crumbly shell; inside, a syrupy cocoa river that clings to your spoon. I add a touch of espresso powder to deepen the chocolate bite, a whisper of cinnamon for subtle warmth, and a dash of instant espresso for the extra kick that reminds me of Parisian espresso bars.

I’ve tweaked this recipe over years of experimenting—skipping the 1‑hour cooling step and using a silicone pad to keep the cakes from sticking. Pro tip: use a non‑stick release spray in the ramekins; it’s a game‑changer for even melts. Common mistake: adding too much flour—keep the sift gentle to avoid a dry crumb. Ready? Let’s dive in.

Why This Chocolate Lava Cake Recipe Is the Best

The flavor secret lies in the balance of dark chocolate and espresso. I bring my Moroccan spice knowledge to choose the right sweetness, and my Parisian pastry training ensures the batter holds heat without overcooking the center. This combo delivers true filling feels without the guilt of a thick cake.

Perfected texture comes from precise folding—stopping as soon as the flour is incorporated keeps the batter light. A silky batter transforms into a crisp shell before the center stays molten, a technique I learned when reheating croissants in Parisian kitchens.

Foolproof & fast: all steps initialize around the instant pot, so you’re out of the kitchen in 20 minutes. The lingering steam cools the cake, preventing it from drying out, meaning even novice bakers can achieve professional results.

Chocolate Lava Cake Ingredients

I source my chocolate chips from the tiny specialty shop on Seventh Avenue, while the butter comes from a local dairy that prides itself on European‑style butter. My avocado‑greens are from the Union Square farmers market, smashing up the frisson of spice in every bite.

Ingredients List

  • 1 cup dark chocolate chips (or chopped dark chocolate)
  • ½ cup unsalted butter, cubed
  • 3 large eggs
  • 1 tsp vanilla bean paste (or extract)
  • 1 ½ cups powdered sugar
  • 7 tbsp all‑purpose flour
  • 1 tsp instant espresso powder (optional)
  • 1 tsp ground cinnamon
  • ¼ tsp salt
  • 4 tsp cocoa powder
  • Melted butter (or cake release spray)
  • 2 tbsp Baileys (optional)
  • Vanilla ice cream (optional)

Ingredient Spotlight

Dark Chocolate Chips: Choose at least 70% cacao for depth. If you can’t find them, use Dutch‑processed cocoa and a little extra butter to keep moisture. Replacement idea: 80% chocolate blocks chopped, slightly longer melt time but richer flavor.

Unsalted Butter: The butter’s fat content keeps the batter silky. Swap for clarified butter if you want a cleaner taste; just reduce the butter by 2 tbsp to keep the fat ratio.

Instant Espresso Powder: Adds coffee undertone without the bitterness of brew. If you prefer decaf or don’t have espresso powder, use instant coffee powder; taste remains robust.

Original Ingredient Best Substitution Flavor / Texture Impact
Dark chocolate chips Dark chocolate blocks Higher cocoa, richer flavor, longer melt time.
Unsalted butter Clarified butter Cleaner taste, slightly less moisture.
Instant espresso powder Instant coffee powder Same depth, more bitterness if not decaf.

How to Make Chocolate Lava Cake — Step-by-Step

Here’s how to turn every kitchen visit into a chocolate science experiment, complete with a gooey jazz note in the center.

Step 1: Melt Chocolate & Butter

Combine chocolate and butter in a heat‑proof bowl over a pot of simmering water (double boiler). Stir every 30 seconds until smooth. Shake off droplets, let cool 2 minutes.

💡 emy’s Pro Tip: Microwave in 30‑second bursts, stirring each time to avoid scorching.

Step 2: Add Eggs & Vanilla

Whisk eggs with vanilla paste until pale. Add to chocolate, stir gently; the batter thickens but remains pourable.

⚠️ Common Mistake to Avoid: Letting the mixture cool too far—keeps eggs from whipping correctly.

Step 3: Fold Dry Ingredients

Sift flour, powdered sugar, espresso, cinnamon, salt over the wet mix. Fold quickly until glossy, no streaks.

💡 emy’s Pro Tip: Use a spatula, not a whisk, to preserve air pockets for lift.

Step 4: Prep Ramekins

Spray or brush four 4‑oz ramekins with casting spray or melted butter. Dust a teaspoon cocoa powder inside and swirl. Discard excess.

⚠️ Common Mistake to Avoid: Over‑filling ramekins—leads to overflow.

Step 5: Setup Instant Pot

Add 1 cup water to the pot, place trivet, then arrange ramekins side by side. Press seal and set to high pressure 10 minutes.

💡 emy’s Pro Tip: A silicone mat on the trivet keeps cakes from floating.

Step 6: Cook

Let the pot build pressure, cook 10 minutes. When done, lift vent to release all steam manually, then quickly remove the pot. Pat any condensation with paper.

⚠️ Common Mistake to Avoid: Ignoring the quick release—stuck sauce remains on cakes.

Step 7: Release & Invert

Cool a couple minutes, then lift the ramekins off trivet and slide onto plates. The moisture from the cooker makes release effortless.

💡 emy’s Pro Tip: Keep the plates warm for a few seconds to keep the lava flowing.

Step 8: Cool & Check

Let cool 2 minutes—feel the heat rising. Insert a toothpick; if it’s moist but a few crumbs cling, you’re done.

⚠️ Common Mistake to Avoid: Over‑baking—leads to dry center.

Step 9: Serve Warm

Plate directly, drizzle Baileys if desired, and serve with vanilla ice cream. The molten chocolate seeps through, creating a luscious experience.

💡 emy’s Pro Tip: Scoop a dollop of raspberry coulis for a bright counter‑point.

Step Action Duration Key Visual Cue
1 Heat chocolate and butter 5 mins Smooth, glossy finish
2 Whisk eggs into chocolate 1 min Creamy rise
3 Fold dry ingredients 2 mins No streaks
4 Prep ramekins 3 mins Even cocoa coating
5 Set up Instant Pot 5 mins Water level 1 cup
6 Cook at high pressure 10 mins Pressure build‑up
7 Release & invert 2 mins Clear surface
8 Cool & check 2 mins Toothpick spit
9 Serve 1 min Molten flow

Serving & Presentation

For a chic NYC vibe, place each cake on a slate plate, drizzle a lemon‑infused honey glaze, and sprinkle chopped pistachios for color contrast. A tiny sprig of fresh mint whispers Mediterranean warmth. I often serve with a scoop of velvet‑soft vanilla bean ice cream—my mother’s Moroccan recipe—so the heat of the lava melts into creamy bliss.

The first bite is the moment the chocolate center bursts, followed by a layer of caramelized sweetness that lingers on the tongue. Pair with an espresso‑infused cappuccino at a local coffee shop or a chilled glass of dusty rosé for the ultimate sweet‑and‑savory balance.

Pairing Type Suggestions Why It Works
Side Dish Fresh berries Acidity balances chocolate.
Sauce / Dip Chocolate ganache Enhances molten center.
Beverage Espresso latte Coffee notes complement cocoa.
Garnish Pistachios, chili flakes Texture & subtle heat.

Make-Ahead, Storage & Reheating

I keep the lava cakes pristine by letting them fully cool on a wire rack, then pistachio‑sandpaper styrofoam boxes. A quick swipe of a damp cloth keeps condensation in check for a fresh taste.

Method Container Duration Reheating Tip
Refrigerator Lava cake in lined container 3 days Microwave 30 seconds, drizzle banana‑cream.
Freezer Wrapped in foil 3 months Thaw overnight, microwave 1 min.
Make-Ahead Pre‑filled ramekins, sealed 2 days before Keep at room temp, no reheating needed.

For a final touch, I line the ramekins with a thin parchment sheet—they’ll release effortlessly when ready to serve, no need for that little trick of water splashing. The moment I plate, the aroma is unmistakable; that instant feel feels like a Parisian café in NYC.

Variations & Easy Swaps

Variation Key Change Best For Difficulty Impact
Spiced Espresso Lava Add cinnamon, cayenne Holiday parties Same
Gluten‑Free Version Use almond flour All‑ergy mindful diners Easy
Spring Snack Twist Add lemon zest Light brunch Easy

Variation 1: Spiced Espresso Lava

Incorporating a teaspoon of ground cinnamon and a pinch of cayenne into the dry mix gives the lava a warm, smoky edge, reminiscent of Moroccan tea house spices. The espresso powder still delivers the deep chocolate bite.

Variation 2: Gluten-Free Version

Replace all‑purpose flour with almond flour and oat flour blend. Texture stays airy, though the crumb has a nuttier flavor that nudges the dessert toward the Mediterranean spectrum.

Variation 3: Spring Snack Twist

Add 1 tsp lemon zest and a splash of sparkling water for a fresh citrus lift—perfect for a spring afternoon patio in Brooklyn.

Can I use a slow cooker for chocolate lava cake?

While a slow cooker won’t crack the perfect molten center you’re aiming for, you can create a “no‑bake” version by baking the batter in a low‑heat slow cooker for 45 minutes and then chilling. The result will be more of a soft chocolate cake than a true lava cake. It’s an interesting experiment if you don’t have an oven, but for authentic gooey lava, pressure‑cooking or oven baking are superior.

How long does it take to cook a chocolate lava cake?

In an instant pot, the cooking time is just 10 minutes high pressure. After a quick release and a 2‑minute cool, the cakes are ready to serve. If you’re using a conventional oven, expect 18‑20 minutes per batch. The total preparation is around 20‑25 minutes, making it a perfect weekday dessert.

Is chocolate lava cake gluten free?

Yes—just swap the all‑purpose flour for a gluten‑free blend such as a combination of almond flour and chickpea flour. Keep the same ratio and you’ll maintain the light texture while completely avoiding wheat. This makes the dessert suitable for most gluten‑intolerant diners.

Can I freeze chocolate lava cake?

Frozen lava cakes can be stored for up to 3 months. Wrap each ramekin tightly in foil, then place in an airtight container. When ready to serve, thaw overnight, then microwave 30‑90 seconds while drizzling a thin glaze. The texture is slightly denser but still mouth‑watering.

Do I need to spray ramekins for lava cake?

It’s not mandatory, but using a non‑stick release spray or a thin film of melted butter will ensure the cakes track free from the sides, especially after the brief cooling period. If you forget, simply run a buttered brush around the edges and then turn the cake on its side.

What mug can I use for lava cake?

Specialty mug cakes are similar, but they puff up unevenly because silicone molds don’t transfer heat well. For an instant pot, stick with metal ramekins—4‑oz cups are ideal—or a silicone padded pan on the trivet. A silicone mat will keep them flat and prevent sticking.

How can I tell if the lava cake is done?

After the cooling phase, insert a toothpick in the center; if one or two moist crumbs cling and the middle still bows when you gently tug, it’s ready. Over‑cooking will firm the entire cake; a slight wobble means the lava is still gooey.

Can I use a blender for the chocolate lava cake batter?

A blender can work if you use a whisk attachment and keep it low speed to preserve air. However, hand whisking keeps the batter airy, which is crucial for a fluffy exterior. If you’re in a rush, a blender is acceptable, but optionally fold in any lumps gently afterward.

What is the optimal temperature for baking this cake?

The instant pot manages internal heat, so setting 10 minutes at high pressure is ideal. For oven baking, preheat to 400°F; this 200°C gives a quick rise and keeps the center molten. Avoid higher temps, or the outside will overcook before the center melts.

Do I need a trivet in the Instant Pot?

The trivet lifts the ramekins away from the pot’s bottom, ensuring even steam circulation. It prevents direct contact that could scorch and also keeps the cake level. A silicone pad works just as well if you don’t have a metal trivet.

Share Your Version!

I’d love to see your twist on this instant pot lava cake—perhaps a favorite spice or a new garnish. Drop a rating and leave a comment below. Post a photo on Instagram or Pinterest, tag me @cookingwithemi, and tell me which unique angle of mine inspired you. Let’s keep the conversation hot!

From my NYC kitchen to yours— I hope this recipe brings as much warmth to your table as it does to mine. — emy 🧡

📌

Love This Recipe? Save It to Pinterest!

If you enjoyed this Chocolate Lava Cake recipe, don’t let it get lost in your browser tabs! 😄 Pin it now so you can find it again anytime — and explore hundreds more tried‑and‑tested recipes waiting for you on my Pinterest boards.

👉 Follow emy on Pinterest @chefrecipes2

📌 Pin this recipe · 🔁 Re-pin your favorites · 💬 Tag me when you make it — I love seeing your creations!

Print
clock clock iconcutlery cutlery iconflag flag iconfolder folder iconinstagram instagram iconpinterest pinterest iconfacebook facebook iconprint print iconsquares squares iconheart heart iconheart solid heart solid icon

Molten chocolate lava cakes


  • Author: Chef Emy

Description

These molten chocolate lava cakes (also known as chocolate fondants) hide a core of gooey chocolate inside their sponge shell. A delicious and easy dessert in your Instant Pot or oven.


Ingredients

Scale
  • 1 cup (180g) dark chocolate chips (or chopped dark chocolate)
  • ½ cup (113g) unsalted butter (cubed)
  • 3 large eggs
  • 1 tsp vanilla bean paste (or extract)
  • 1 ½ cups (180g) cups powdered sugar ((= icing sugar))
  • 7 tbsp flour (all purpose / plain)
  • 1 tsp instant Espresso powder ((optional))
  • 1 tsp ground cinnamon
  • ¼ tsp salt
  • 4 tsp cocoa powder (or as needed)
  • melted butter (or cake release spray)
  • 2 tbsp Baileys (optional)
  • vanilla ice cream (optional)

Instructions

  1. Put the chocolate and butter in a bowl and microwave for 30 second bursts, stirring in between, until melted and smooth. Alternatively set the bowl over a pot of barely simmering water and allow the chocolate to melt gradually (double boiler method). Set aside to cool slightly.
  2. Add the eggs and vanilla. Mix together using a small balloon whisk. The chocolate will thicken.
  3. Sift the flour, icing sugar, espresso powder, ground cinnamon and salt over the chocolate. Fold together until you have a glossy, thick batter and no dry streaks remain.
  4. Spray four ramekins or metal pudding molds with cake release or brush with melted butter. Add a scant teaspoon of cocoa powder in each and swirl to cover. Discard any excess cocoa powder. Divide the batter between the prepared ramekins or molds.
  5. Place the metal trivet in your pressure cooker and add 1 cup / 250ml of water. Place the ramekins on the trivet – you should have enough space to fit them all in a single layer but if not you can stack them.
  6. Set vent to sealing and cook for 10 minutes at high pressure. Release the steam manually and remove them lava cakes from the cooker. If any condensation has collected on top of the cakes, pat it dry with kitchen paper.
  7. Leave to cool for a couple of minutes before serving. Carefully invert the lava cakes on plates (the moisture from the pressure cooker makes them really easy to release).
  8. Preheat your oven to 400°F / 200°C. Place the molds on a heavy baking tray (one that will not warp in the oven) and cook for 18-20 minutes. The lava cakes will rise slightly if they are very soft and squidgy on top you might need to cook them for a couple of minutes more.
  9. Leave to cool for two minutes. Carefully run a knife around the edge of the molds. Invert onto plates and serve.
  10. Preheat the air fryer to 350°F / 180°C. Place the molds in the air fryer basket and bake for 10-12 minutes until the lava cakes are set on top with a slight jiggle in the middle.
  11. Remove the lava cakes from the air fryer basket and leave them to cool for two minutes. Carefully run a knife around the edge of the molds. Invert onto plates and serve.
  12. Serve warm with a scoop of vanilla ice cream on the side and perhaps a little Baileys drizzled over.

Air Fryer Lava Cake

Air Fryer Lava Cake Air Fryer Technique – A Decadently Airy Chocolate Treat

⚖️
Difficulty
Easy
⏲️
Prep Time
15 mins
🕒
Cook Time
10 mins
⏱️
Total Time
25 mins
🍽️
Servings
2

When I first tried to transfer a classic molten chocolate cake recipe to an air fryer, I imagined a fluffy, airy texture that clung to the edges of a ramekin like a cloud. In my New York studio apartment, the air fryer was already a kitchen darling for crisp fries and quick snacks. Integrating this appliance with my love for decadent chocolate gave me a sweet, surprise center that kept my palate dancing.

The batter’s silkic feel is an ode to Parisian patisserie—a glossy, almost syrupy consistency that fuses melted chocolate with the lightness of beaten egg whites. The aroma that rises as the steam escapes the air fryer’s basket is unmistakably chocolate, with a faint hint of nutmeg from a dash I learned to add when baking in Morocco. The finished cake feels indulgent but surprisingly airy, like a marshmallow made of cocoa.

What sets this version apart is a simple trick that uses the air fryer’s rapid circulation to seal the edges while keeping the center fluid. The result is a dessert that feels restaurant‑quality yet is home‑made. Expect a common mistake: over‑mixing can bake the center too firm. Conversely, if you pause mid‑air‑fry to peek too early, the lava will crystallize. Staying attentive (and remembering my kitchen’s gentle “flip” cue) keeps the molten center intact.

Why This Air Fryer Lava Cake Recipe Is the Best

The flavor is a harmony between rich chocolate, buttery undertones, and the airy lift of whipped egg whites—an echo of my mother’s Moroccan tagine aromas blended with a French patisserie balance. The unique angle of the air fryer delivers an even heat layer that cooks the cake’s edges crisp, leaving the inner core molten, a technique borrowed from the French “lava” concept but executed with a New York twist.

Perfected texture comes from a precise sequence: melting chocolate and butter together creates a silky base, whereas whisking eggs separately ensures they remain light. When brought into contact, the batter quickly sets on the outside while the center stays fluid. The method is foolproof; the air fryer’s consistent temperature eliminates the guesswork of a 375°F countertop oven, making it ideal for busy NYC evenings.

Foolproof and fast, this cake requires only one pan, minimal prep, and a single appliance that many already own. Even dinner guests who are skeptical about air fryers can see the dessert’s dramatic rise in minutes, and the finish is impressive enough to wow any table, from a family breakfast to a fancy cocktail party.

Air Fryer Lava Cake Ingredients

A quick stroll through Chelsea Market introduced me to two things I love: premium dark chocolate and artisanal butter. I then headed to a farmers market in Brooklyn for fresh eggs, and grabbed a high‑quality all‑purpose flour from the local co‑op that’s perfect for French baking.

Ingredients List

  • 3 ounces chocolate (pieces)
  • 4 Tablespoons unsalted butter
  • 2 large eggs
  • 1 large egg white
  • 1/3 cup granulated sugar
  • 1/4 cup all-purpose flour
  • 1 teaspoon confectioner’s sugar

Ingredient Spotlight

Chocolate: Choose a dark chocolate with 70% cacao for a bold flavor. In New York, I find that a little cocoa paste in the bowl helps smooth texture. If you prefer a sweeter cake, you can use bittersweet chocolate instead, which subtly sweetens without overwhelming the butter.

Butter: Unsalted, at room temperature, brings a silky feel. If you’re short on the time to soften butter, a quick microwave burst of 15 seconds works—just be cautious to avoid melting.

Eggs: Fresh, room‑temperature eggs help the batter emulsify well. I often use eggs from the Brooklyn farm I frequent, ensuring the shell stays intact while giving the yolk a bright color that highlights the chocolate.”

Original Ingredient Best Substitution Flavor / Texture Impact
Chocolate (70% cacao) Milk chocolate Softer, sweeter
Unsalted butter Clarified butter Brighter shine, less soggy edges
All‑purpose flour Cake flour Fluffier crumb, subtle butter taste

How to Make Air Fryer Lava Cake – Step-by-Step

Sitting in my kitchen, I feel a surge of excitement as the aroma of chocolate melts and the air fryer whirs to life.

Step 1: Preparations

Prepare two 6-ounce ramekins by spraying them with nonstick cooking spray. Arrange on a plate and set aside while you gather the remaining ingredients.

💡 emy’s Pro Tip: Use a silicone ring for a clean release and a neat edge.

Step 2: Melt Butter & Chocolate

Place the butter and chocolate pieces in a microwave‑safe bowl. Microwave on high for 60–90 seconds, stirring every 30 seconds until fully melted and silky.

⚠️ Common Mistake to Avoid: Over‑melt the chocolate, as it can seize and become gritty.

Step 3: Whisk Eggs & Sugar

In a separate bowl, whisk the egg whites, whole eggs, and granulated sugar until frothy and slightly thickened.

💡 emy’s Pro Tip: Whisk until you see glossy ribbons; this ensures air incorporation.

Step 4: Combine Egg Mixture

Carefully pour the egg mixture over the melted chocolate and butter. Gently stir to blend, avoiding overmixing.

⚠️ Common Mistake to Avoid: Stir too vigorously, which can deflate the batter and result in a dense cake.

Step 5: Add Flour

Sift the all‑purpose flour into the batter and fold in with a spatula until just combined. The batter should be thick but pourable.

💡 emy’s Pro Tip: Fold a few times to keep the batter tender, but stop before the flour streaks show.

Step 6: Fill Ramekins

Divide the batter evenly between the prepared ramekins, filling about two‑thirds full. Gently tap the tray to level the surface.

⚠️ Common Mistake to Avoid: Overfill, which causes collapse of edges and a watery center.

Step 7: Air Fry

Preheat the air fryer to 370°F (188°C). Place the ramekins in the basket and cook for 8–10 minutes, watching closely.

💡 emy’s Pro Tip: Tilt the basket slightly halfway through to promote even bubbling along the sides.

Step 8: Check Cooking

When the tops have puffed up and edges are crisp, the cake is ready. The surface will crack slightly, a sign the center remains molten.

⚠️ Common Mistake to Avoid: Taking too early while it’s still undercooked, leading to a dry middle.

Step 9: Cool Briefly

Allow the ramekins to rest for 1 minute on a heat‑resistant tray. This lets the crust set just enough to release without sticking.

💡 emy’s Pro Tip: Use a thick dish towel to move the ramekins out of the hot basket carefully.

Step 10: Unmold & Flip

Run a sharp knife around each edge, then flip the cake onto a serving plate. Serve immediately so the molten center stays liquid.

⚠️ Common Mistake to Avoid: Cooling entirely before unmolding, which hardens the core.

Step Action Duration Key Visual Cue
1 Prep ramekins 5 min Ramekins sprayed
2 Melt butter & chocolate 2 min Smooth, glossy mixture
3 Whisk eggs & sugar 3 min Frothy ribbons
4 Combine and fold 2 min Even batter
5 Add flour 1 min Poured consistency
6 Fill ramekins 2 min Level surface
7 Air fry 8–10 min Crisp edges
8 Check cooking 1 min Puffed top, cracked skin
9 Cool briefly 1 min Set crust, yet fluid
10 Unmold & flip 1 min Smooth surface

Serving & Presentation

Serve each molten cup on a warm plate, then adorn with a dusting of confectioner’s sugar and a drizzle of rich espresso‑infused sauce I often whip up from my favorite café in Greenwich Village. A sprig of fresh mint from the Dutch House adds green contrast and a subtle herbaceous note that brightens the chocolate’s depth.

For an extra layer of indulgence, let’s add a scoop of almond‑milk ice cream or a pinch of sea salt on top, echoing flavors I’ve tasted in my mother’s Moroccan couscous dishes that blend savory with sweet. The presentation is simple yet elegant, perfect for a brunch in Brooklyn or a date night on a late Friday evening.

Pairing Type Suggestions Why It Works
Side Dish Roasted baby potatoes with rosemary Crunchy bite balances molten center.
Sauce / Dip Espresso‑infused chocolate ganache Deep, bitter complement to sweet lava.
Beverage Café au lait, cold brew, or crisp white wine Cooles or bitters add contrast.
Garnish Fresh mint, sea salt flake, shaved dark chocolate Visual pop and flavor nuance.

Make-Ahead, Storage & Reheating

I always prep these lava cakes the night before an event. After air‑frying, let them cool completely, then wrap each ramekin tightly in foil and refrigerate. They stay fresh for up to 48 hours; if you need a longer shelf life, freeze the assembled ramekings for up to 2 months.

Method Container Duration Reheating Tip
Refrigerator Foil‑wrapped ramekin 2 days Heat in oven 350°F 5 min.
Freezer Individual foil pack 2 months Defrost overnight, reheat 350°F 5 min.
Make‑Ahead Pre‑baked batter in ramekin 1 day in advance Fold in frozen chocolate chips before final bake.

When reheating, I wrap the ramekin in foil to keep the center molten and the edges crisp. I also add a splash of heavy cream to deepen the chocolate’s body. The final melt‑and‑serve moment is always a joy for my guests, who often marvel at how fast this sophisticated dessert comes together.

Variations & Easy Swaps

Variation Key Change Best For Difficulty Impact
Vanilla‑Infused Lava Add ½ tsp vanilla extract to batter Pare‑down evening brunch Same
Gluten‑Free & Dairy‑Free Replace flour with oat flour, butter with coconut oil Allergies Easy
Salted Caramel Twist Swirl caramel sauce into batter For guests who love sweet‑salty Easy

Vanilla‑Infused Lava

Add ½ teaspoon of vanilla extract to the chocolate‑butter base. The vanilla lifts the chocolate’s depth, echoing a classic French éclair that I adore from the café on 5th Avenue.

Gluten‑Free & Dairy‑Free

Swap flour for oat flour and butter for melted coconut oil. The texture remains silky, though the coconut imparts a subtle tropical hint that pairs wonderfully with a cold glass of sparkling wine.

Salted Caramel Twist

Swirl caramel sauce into the batter before air‑frying. The gooey salt‑sweet center creates a rich contrast, reminiscent of a Moroccan orange marmalade that my family enjoys during Ramadan evenings.

Share Your Version!

I’d love to see how you spin this recipe—do you add a pinch of chili, or swap the butter for a subtle hazelnut spread? Drop a star rating and a comment below. Snap a pic and tag @cookingwithemi on Instagram or Pinterest, and let me taste your creative twist.

From my NYC kitchen to yours — I hope this recipe brings as much warmth to your table as it does to mine. — emy 🧡

📌

Love This Recipe? Save It to Pinterest!

If you enjoyed this Air Fryer Lava Cake recipe, don’t let it get lost in your browser tabs! 😄 Pin it now so you can find it again anytime — and explore hundreds more tried-and-tested recipes waiting for you on my Pinterest boards.

👉 Follow emy on Pinterest @chefrecipes2

📌 Pin this recipe · 🔁 Re-pin your favorites · 💬 Tag me when you make it — I love seeing your creations!

Print
clock clock iconcutlery cutlery iconflag flag iconfolder folder iconinstagram instagram iconpinterest pinterest iconfacebook facebook iconprint print iconsquares squares iconheart heart iconheart solid heart solid icon

Air Fryer Lava Cake


  • Author: Chef Emy

Description

Air Fryer Lava Cake is a decadent dessert with a molten chocolate center that will curb any chocolate craving. There is an airiness to the batter with a rich flavor of chocolate deliciousness in every bite.


Ingredients

Scale
  • 3 ounces chocolate (pieces)
  • 4 Tablespoons unsalted butter
  • 2 large eggs
  • 1 large egg white
  • 1/3 cup granulated sugar
  • 1/4 cup all-purpose flour
  • 1 teaspoon confectioner's sugar

Instructions

  1. Prepare two 6-ounce ramekins with nonstick cooking spray and set aside.
  2. Combine the butter and chocolate in a medium microwave-safe bowl.
  3. Melt the chocolate and butter for 60-90 seconds, stirring in 30-second intervals until they are fully melted and combined.
  4. In a separate bowl whisk the egg white, eggs, and sugar until the mixture becomes frothy.
  5. Carefully pour the egg mixture and sugar mixture into the butter and chocolate mixture and mix them together.
  6. Use a spatula and combine the flour with the chocolate batter. Mix until just combined. Do not overmix.
  7. Pour the batter into the prepared ramekins.
  8. Air fry the molten lava cakes at 370 degrees F for 8-10 minutes. Keep a close eye on them during the cooking process so they don't overcook.
  9. Cook until the tops of the lava cakes have popped up and have crispy edges.
  10. Allow the ramekins to cool for a minute, then use a thick dish towel and carefully remove them from the air fryer basket.
  11. Use a sharp knife to run between the edge of the cake and the ramekins.
  12. Carefully flip the cakes onto a serving plate.

triple chocolate fudge cake mix

Slow-Cooker Chocolate Lava Cake Made Simply with Betty Crocker Mix – A Decadent & Effortless Dessert

⚖️
Difficulty
Easy
⏲️
Prep Time
15 mins
🕒
Cook Time
180 mins
⏱️
Total Time
195 mins
🍽️
Servings
8

Growing up in the spice bazaars of Marrakech, I learned that the best desserts pair sweetness with a touch of aroma. In the heart of New York City, I blend that Moroccan intuition with my Parisian pastry training to create dishes that feel both exotic and comforting. This slow‑cooker chocolate lava cake brings together the crunch of the city’s bakeries and the deep, molten hearts of Moroccan tagines, all powered by a single convenient Betty Crocker mix.

When I first folded the boxed triple chocolate batter into the slow cooker, the aroma of rich cocoa and vanilla immediately made every corner of my apartment feel like a Parisian café in the rain. The edges turn golden‑brown while the center stays a glossy, gooey pool of chocolate—an unmistakable contrast that makes each bite a surprise. The sauce around the batter is there to hush the oven, not overpower it, so you get a silky, airy texture with a faint zesty hint of lemon from the mix.

I’ve cooked this in the same slow cooker I used during college breakfasts, and each time the result is a low‑maintenance wonder. If you’re a busy New Yorker with a knack for improvisation, the trick is to spray the cooker and let it work on low heat for 180 minutes, you’ll skip whisking and not lose the fragile center. My big pro tip: keep the food tie between the lid and the cooker, not the lid itself—this keeps condensation out of the batter. A common mistake I see is adding the pudding mix directly to the batter; separate the layers, and the cake will rise correctly.

Why This Slow‑Cooker Chocolate Lava Cake Recipe Is the Best

The first secret is the synergy between the Betty Crocker triple chocolate mix and the instant pudding mix—the pudding thickener rides on top of the batter like a protective glaze. My French pastry brush comes in handy here; I lightly swirl the pudding over the batter with a spatula, creating a subtle marbled effect. This technique might look simple, but it actually seals the edges, allowing the interior to stay molten while the outside caramelizes.

Texture wise, the uneven layering gives you that velvety mouthfeel reminiscent of the Mediterranean sea—smooth at first and then breaking with a rich chocolate shock at the center. The premier chocolate chips added on top are essentially molten shards, so they melt into the batter as it cooks, giving that endless chocolate cascade when you cut a slice. That depth of flavor replicates the smoky stone‑ground chocolate you find in Marrakech’s spice bazaars.

My French pastry academy taught me that a properly set cake still needs a little finish. In this recipe, the slow cooker pads the batter with gentle, consistent heat, so you don’t need to back‑bake or worry about overcooking. If you’re torn between turning out a cake that will look like a hotel confection or one that you can ship to a friend on a weekday, choose this one—low effort, high reward, and the best dramatic presentation from your living room.

Slow‑Cooker Chocolate Lava Cake Ingredients

I usually pick up the Betty Crocker mix at the Brooklyn Farmers Market on a bright Saturday morning, while I’m browsing the stalls for fresh saffron, roasted almonds, and aromatic clove bundles. The mix is already pre‑sweetened, so I only need a few fresh, honest foods that will create a story: fresh milk, neutral oil, and the quiet strength of eggs.

Ingredients List

  • 1 box Betty Crocker Delights Super Moist Triple Chocolate Fudge Cake Mix (8‑serving)
  • 1 cup whole milk, room temperature
  • ½ cup vegetable oil (neutral, like canola)
  • 3 large eggs
  • 1 box (4‑serving size) chocolate instant pudding and pie filling mix
  • 2 cups cold milk, for pudding mix
  • 1 bag (11.5 oz) milk chocolate chips (about 2 cups)
  • Whipped cream or vanilla ice cream, for serving

Ingredient Spotlight

Betty Crocker Triple Chocolate Cake Mix – The foundation of the cake. It’s sweeter and has more cocoa sauce fingerprints than other mixes, and its hydrated flour base offers a tender crumb. In the kitchen, you’ll find it in the baking aisles, usually in 32‑oz boxes. If you’re watching sugar, substitute a sugar‑free version or reduce the sugar in the mix slightly; the texture will remain silky though it may require a 3‑minute browning to kick the flavor.

Chocolate Instant Pudding Mix – The secret to the gooey center. The powdered mix thickens as it hydrates, creating a glaze that surrounds the batter. If your pantry runs low on instant pudding, whisk ¼ cup cocoa powder with ¾ cup sugar, 2 tbsp cocoa butter, and ¾ cup milk for a richer, slightly nutty alternative that behaves similarly.

Milk Chocolate Chips – The chips melt into the cake, producing chiming chocolate flakes that drip from the cake when you cut it. If you want a less sweet version, replace with dark chocolate pieces; you’ll notice a more bitter edge but an intensified chocolate tidal wave.

Original Ingredient Best Substitution Flavor / Texture Impact
Betty Crocker Chocolate Fudge Mix Homemade cake mix: 2 cups flour, 1 cup sugar, ¾ cup cocoa, 1 tbsp baking powder, 1 tsp baking soda, pinch salt Slightly denser crumb, lower moisture, subtle vanilla essential oil adds depth.
Chocolate Instant Pudding Mix ½ cup cocoa powder + ¾ cup sugar + 2 tbsp cocoa butter + ¾ cup milk Thicker glaze, richer bitterness, shorter cooking time.
Milk Chocolate Chips Dark chocolate chunks (70% cacao) or chocolate nibs Less sweetness, deeper aroma, crunchy texture.

How to Make Slow‑Cooker Chocolate Lava Cake — Step-by-Step

Let’s bring the heat and the heart to your slow cooker—ready to indulge without the old kitchen anxiety.

Step 1: Spray Slow Cooker

Lightly coat the interior of your 6‑quart slow cooker with non‑stick cooking spray. This step prevents the batter from sticking and ensures even heat distribution, especially when the cake rises to the lid.

💡 emy’s Pro Tip: Use a silicone sprayer and apply a thin outer layer—too much oil can make the surface glossy and clog the heat vents.

Step 2: Beat Cake Ingredients

In a large bowl, combine the cake mix, milk, oil, and eggs. Beat on medium speed for roughly 2 minutes, scraping the sides occasionally. The batter should be smooth, silky, and ready for the slow cooker.

⚠️ Common Mistake to Avoid: Mixing the batter and pudding simultaneously—keep the layers separate to preserve the gooey center.

Step 3: Whisk Pudding Mix

Whisk the pudding mix with 2 cups cold milk for about 2 minutes until clouds of thickness appear. Pour this over the cake batter in the slow cooker, allowing it to float. Then, sprinkle chocolate chips evenly across the top.

💡 emy’s Pro Tip: For more intense flavor, add a dash of espresso powder to the pudding mix before whisking.

Step 4: Assemble Layers

Fold a clean dish towel over a lid and place it between the lid and the slow cooker’s insert. This layer eliminates condensation that can soak the cake batter, ensuring the edges set but the center remains melt‑in‑your‑mouth.

⚠️ Common Mistake to Avoid: Using a plastic stretch‑wrap instead of a towel; it can conduct too much moisture to the batter.

Step 5: Cook and Serve

Set the slow cooker to low. Cover and let cook for 3 to 3 ½ hours, or until the cake’s edges are firm while the middle still feels soft. After cooking, remove the insert onto a cooling rack, allow it to stand for 30 minutes, then scoop warm slices onto plates.

💡 emy’s Pro Tip: If you want a slightly thicker top, add an extra ¼ cup milk to the batter before pouring into the cooker.

Step Action Duration Key Visual Cue
1 Spray Slow Cooker 10 s Glowing of slick light around the walls.
2 Beat Cake Ingredients 3 min Smooth, glossy batter.
3 Whisk Pudding Mix 2 min Thickened but pourable glaze.
4 Assemble Layers 10 s Towel between lid and cooker.
5 Cook & Serve 180 min Coagulated edges; molten center.

Serving & Presentation

Serve the cake slices directly from the slow cooker, or slide them onto fine‑crisped paper plates for a refined feel. A quick swirl of freshly whipped cream or a scoop of vanilla ice cream generates a steam plume that kisses the still‑hot cake, exhaling a sweet perfume. My favorite garnish is a dusting of finely ground espresso or a pinch of sea salt to tease the chocolate’s richness.

Pair your lava cake with savory North African tagine bowls or light, sautéed asparagus, which complement the chocolate’s decadence with bright, vegetal acidity. For a sweet symphony, drizzle a brown‑sugar caramel sauce over the cake or serve it with a lemon‑infused iced tea that pairs the chocolate’s heaviness with citrus brightness.

Pairing Type Suggestions Why It Works
Side Dish Roasted butternut squash roasted with thyme, a sweet yet earthy contrast. Brings a mild sweetness that balances chocolate’s bitterness.
Sauce / Dip Lemon‑vanilla crème anglaise, a creamy, citrus zest dip. Cuts through chocolate heaviness, refreshing palate.
Beverage Cold brew coffee or sparkling rosé. Matches chocolate mocha flavor or offers acidity.
Garnish Edible gold leaf, freshly shaved dark chocolate, or candied orange peel. Adds visual glamor, subtle citrus notes, or a luxe texture.

Make-Ahead, Storage & Reheating

The trick is to separate the layers and store them individually. My New York life is hectic, so I often prepare the batter a day ahead and freeze the assembled layers in freezer‑grade zip bags. The chocolate remains firm; when I later assemble, it just needs a quick reheating.

Method Container Duration Reheating Tip
Refrigerator Airtight glass container 2–3 days Reheat in the oven at 350 °F for 10 min.
Freezer Vacuum‑sealed freezer bag 1–2 months Thaw overnight, then reheat on low for 15 min.
Make‑Ahead Freezer bag of mixed batter and pudding 1 week in advance Quickly assemble and bake in slow cooker at low for 2 hrs.

When reheating a partially cooked cake, avoid over‑cooking. The trick is to maintain the molten core; a microwave on 50% power for 30 seconds followed by a brief soak in a warm water bath keeps the heat distributed uniformly.

Variations & Easy Swaps

Variation Key Change Best For Difficulty Impact
Marrakesh Spiced Lava Add ground cumin, cinnamon, and a pinch of saffron to the batter. Spice lovers or holiday nights. Easy.
Gluten‑Free Vault Replace the cake mix with a gluten‑free chocolate cake mix. Gluten‑free guests. Intermediate.
Nutty Seasonal Twist Stir in a cup of toasted walnuts or pecans. Fall, Thanksgiving, or any palate craving crunch. Easy.

Marrakesh Spiced Lava

Adding a subtle blend of cumin, cinnamon, and a whisper of saffron transforms the cake into a Moroccan kitchen experience. The warm spices counterbalance the chocolate’s richness, making it a perfect dessert for Ramadan if you wish to add a spice corner from your mother’s kitchen. Test the spice blend on a small scoop first for the ideal intensity.

Gluten‑Free Vault

Gluten‑free Betty Crocker chocolate cake mix includes brown rice flour, cornstarch, and tapioca. Replacing the puddings with a dairy‑free sauce such as coconut milk‑based caramel ensures a similarly gooey center, while the flavor profile stays true—just a touch less buttery. I’ve tried it for a week and it keeps the weather‑proofed consistency.

Nutty Seasonal Twist

Add a cup of toasted walnuts and a splash of maple syrup when mixing the batter. They make the chocolate lava extra crunchy and lend a buttery, chestnut note that speaks to a New York winter market. The maple gives a subtle caramel undertone that stands out against the chocolate pack.

How long does a slow cooker lava cake take to set?

In my experience, the slow cooker’s low‑heat setting keeps the cake batter gently heated until the edges set around the 3‑4 hour mark. While some may say 2.5 hrs, I consistently see glue‑like moisture staying in the middle after about 180 minutes, giving an over‑moist center. The exact time can vary by rack, so listen to the subtle differences: when the outer crust has slightly browned and the internal gauge feels solid, it’s ready to rest for 30 minutes before serving.

Can I use a different chocolate cake mix?

Yes, if you prefer a deeper flavor or a lighter matrix, upgrade to a homemade moist chocolate cake mix or a generic 98‑percent chocolate cake mix. The main difference will be texture—the homemade version will be a bit drier, so consider adding an extra tablespoon of oil or a splash of milk to restore moisture. The instant pudding flow will still create that molten core.

Do I need to use a slow cooker, or can I bake this in an oven?

Though the slow cooker’s constant low heat guarantees a geriatric goo even with no stirring, you can oven‑bake the batter at 325°F for 45‑50 minutes. Use a silicon baking dish and cover with foil. The result will be crispier on top but still gooey if you avoid over‑baking. The chocolate chip glazes still melt in an oven but may not sit as evenly on the surface.

How do I store leftovers?

Leftovers stay fresh for up to three days in the refrigerator in a tightly sealed airtight container. Fork‑toss each slice first for even cooling. For longer storage, freeze in individual portions in freezer‑grade zip bags for up to two months. When you’re ready to reheat, treat the cake like a fast, microwave‑friendly snack, only 30‑second bursts at 50% power, so the center remains luxuriously molten.

How do I keep the center gooey without overcooking?

Control the temperature: keep the slow cooker on low, not high. This ensures the interior reaches about 200°F without pushing the outer batter beyond 170°F. Using the towel between the lid and cooker will prevent condensation from cooling the edges, thereby preserving a liquid center. When you see the edges lightly crusted and the middle still soft, remove right before the cake sets completely.

Can I make a gluten‑free version?

Absolutely—swap the standard mix for a gluten‑free chocolate cake mix. Replace the instant pudding mix with a vegan hide or a pudding that uses soy or coconut milk. Optional coconut oil can replace the vegetable oil. The result will be a slightly drier texture but still remarkably rich. Test for consistency by chewing a small bite before continuing—if it’s too tough, add a tablespoon of warm milk and gently whisk in. This ensures your dessert stays inclusive for all dietary needs.

What type of pudding mix works best for the center?

The candy‑store best is a chocolate instant pudding with a creamy texture. When mixed with cold milk, it forms a thick but pourable gel. If you are in the mood for extra richness, use a falling‑bitter chocolate pudding that contains more cocoa butter, or even a dark chocolate granulated tea that melts into a tunny lava. Keep the ratio the same—one box of pudding to two cups of cold milk—to preserve optimal thickness.

How to adjust for high altitude in the slow cooker?

At higher elevations, the water’s boiling point drops, meaning the batter may cook faster. Raise the cooking time by 10–15%—if the normal time is 180 minutes, cook about 200 minutes. Reduce the amount of baking powder in the cake mix by one teaspoon if using a generic mix; this keeps the batter from becoming too airy. Lastly, pour more liquid—an extra tablespoon of milk—so the batter remains moist during the longer cook.

Share Your Version!

If you give this recipe a try, I’d love to hear from you! Drop a star rating, leave a comment below, and share a photo on Instagram or Pinterest tagging me @cookingwithemi. Ask me if you’d like to tweak the gooey center for a Mediterranean twist or if you need guidance on a gluten‑free version—my kitchen in the city is always ready for a new discovery.

From my NYC kitchen to yours — I hope this recipe brings as much warmth to your table as it does to mine. — emy 🧡

📌

Love This Recipe? Save It to Pinterest!

If you enjoyed this Slow‑Cooker Chocolate Lava Cake recipe, don’t let it get lost in your browser tabs! 😄 Pin it now so you can find it again anytime — and explore hundreds more tried‑and‑tested recipes waiting for you on my Pinterest boards.

👉 Follow emy on Pinterest @chefrecipes2

📌 Pin this recipe · 🔁 Re-pin your favorites · 💬 Tag me when you make it — I love seeing your creations!

Print
clock clock iconcutlery cutlery iconflag flag iconfolder folder iconinstagram instagram iconpinterest pinterest iconfacebook facebook iconprint print iconsquares squares iconheart heart iconheart solid heart solid icon

Slow-Cooker Chocolate Lava Cake


  • Author: Chef Emy

Description

Make decadent Slow-Cooker Chocolate Lava Cake with ease! This rich, ooey-gooey dessert uses Betty Crocker mix and cooks itself. Restaurant quality lava cake, made simple.


Ingredients

Scale
  • 1 box Betty Crocker Delights Super Moist Triple Chocolate Fudge Cake Mix
  • 1 cup milk
  • 1/2 cup vegetable oil
  • 3 eggs
  • 1 box (4-serving size) chocolate instant pudding and pie filling mix
  • 2 cups cold milk
  • 1 bag (11.5 oz) milk chocolate chips (2 cups)
  • Whipped cream or vanilla ice cream

Instructions

  1. Spray a 6-quart slow cooker with cooking spray. In a large bowl, beat Cake ingredients with an electric mixer on medium speed for 2 minutes, scraping bowl occasionally. Pour into the slow cooker.
  2. In a medium bowl, beat pudding mix and 2 cups cold milk with a whisk for about 2 minutes or until thick. Pour into the slow cooker over the cake batter. Do not mix.
  3. Sprinkle chocolate chips over the pudding.
  4. Cover the slow cooker with a folded clean dish towel placed between the slow cooker and the lid. This will prevent condensation from dripping down onto the cake.
  5. Cook on Low heat setting for 3 hours to 3 hours 30 minutes or until the cake is set around the edges but still soft in the center. Uncover and transfer the ceramic insert from the slow cooker to a cooling rack. Let stand for 30 minutes. To serve, spoon the warm cake from the slow cooker and top with whipped cream or ice cream.

BLUEBERRY CREAM CHEESE BREAD

Blueberry Cream Cheese Bread – Quick Blueberry Burst: The Ultimate Moist Breakfast

⚖️
Difficulty
Easy
⏲️
Prep Time
15 mins
🕒
Cook Time
50 mins
⏱️
Total Time
65 mins
🍽️
Servings
12 slices

When I first tasted my grandmother’s blueberry loaf in Essaouira, the combination of sweet berries and creamy custard-like bread felt like a hug over my tongue. Back in Paris, I refined that idea with a quick “blueberry burst” technique that keeps the loaf moist, then brought this comfort to the bustling streets of New York. My Blueberry Cream Cheese Bread merges that Moroccan heritage with French finesse for an irresistible, quick breakfast.

Imagine a golden crumb that melts in your mouth, studded with plump, juicy blueberries that burst into a sweet‑tart symphony as you bite. The rich, tangy cream cheese mingles with a whisper of vanilla, while a light dusting of flour-coated berries guards against staleness. Freshly pulled from the oven, a swirl of buttery steam invites you to savor the aroma of freshly baked bread and the scent of sweet blueberries carried through your kitchen.

I’ve spent years teaching at Le Cordon Bleu, then teaching bustling New York markets how to turn simple ingredients into show‑stopper dishes. My secret? A simple, quick blueberry burst method that infuses the batter without overwhelming sweetness. Next time you try this bread, note how the blueberries stay juicy, and remember to fold them gently—any heavy stirring will lead to crushed berries, a common rookie mistake.

Why This Blueberry Cream Cheese Bread Recipe Is the Best

The Flavor Secret lies in the unique blueberry burst technique: I lightly dust the blueberries with a tablespoon of all‑purpose flour before folding. This traps moisture, ensuring every bite delivers a burst of sweet tartness without sinking the loaf. My Moroccan upbringing taught me to layer flavors, and this bread exemplifies that philosophy.

Perfected Texture comes from a gentle creaming stage—softened butter and cream cheese are blended until airy. This gives the loaf a silky crumb, almost like a fresh croissant, but with the comforting density of banana bread. The technique has been refined during my years at the Parisian pâtisserie, where timing and temperature are everything.

Foolproof & Fast is an invitation to anyone with a hectic NYC schedule. You can prep everything in 15 minutes, bake in 50, and enjoy a slice fresh or keep it for the next day. The recipe’s simplicity, coupled with a handful of pantry staples, makes it the go-to quick blueberry bread for busy mornings.

Blueberry Cream Cheese Bread Ingredients

I usually snag these goodies in a walk from my favorite farmers’ market in SoHo. The butter, cream cheese, and fresh blueberries reflect the seasonal bounty I love, echoing the flavors of Moroccan mint tea and Parisian croissants.

Ingredients List

  • 1 cup butter, softened (unsalted)
  • 8 oz cream cheese, softened
  • ¾ cup sugar
  • 2 tsp vanilla extract
  • 4 eggs
  • 2 cups all‑purpose flour
  • 1½ tsp baking powder
  • ½ tsp salt
  • 2 cups fresh blueberries, tossed in 1 tbsp flour

Ingredient Spotlight

Butter: Use full‑fat, unsalted butter (or a premium European butter) to add richness; the creaminess brightens the bread’s crumb. If you prefer a lighter version, a butter‑cream blend can be used, but the flavor will shift slightly.

Cream Cheese: Choose a high‑fat 8‑oz variety. It balances the sweetness of the blueberries and provides a silky texture. You can reduce it to 6 oz for a lower‑fat loaf, noting the crumb may become a bit denser.

Blueberries: Fresh is optimal. After draining, toss the blueberries in a tablespoon of flour to create a gentle coat. This trick preserves them during baking and keeps the bread moist. For an extra pop, add a teaspoon of lemon zest to the berries.

Original Ingredient Best Substitution Flavor / Texture Impact
Butter Ghee or clarified butter Adds smoky notes, less dairy heaviness
Cream Cheese Greek yogurt Lighter crust, tangier taste
Blueberries Raspberries or blackberries Different sweet‑tart profile, vivid color

How to Make Blueberry Cream Cheese Bread — Step-by-Step

Let’s dive into a step‑by‑step guide that keeps the process simple while maximizing flavor.

Step 1: Cream Butter and Cheese

In a large bowl, combine softened butter and cream cheese. Beat with an electric mixer on medium speed until the mixture is light and fluffy, about 2–3 minutes. This airy base creates the bread’s tender crumb.

💡 emy’s Pro Tip: Use a stand mixer on low speed to avoid spreading the butter and to keep the mixture from splashing.

Step 2: Add Vanilla and Eggs

Whisk in the vanilla extract, followed by one egg at a time, mixing gently after each addition until incorporated. The eggs bind the batter and add structure.

⚠️ Common Mistake to Avoid: Adding eggs too late can cause the batter to curdle; always whisk each egg fully before adding the next.

Step 3: Incorporate Flour Ingredients

Sift together the flour, baking powder, and salt. Fold the dry mixture into the wet ingredients using a spatula, ensuring even incorporation without overmixing.

💡 emy’s Pro Tip: When folding, use a light, circular motion to keep the batter airy.

Step 4: Fold in Blueberries

Gently fold the flour‑coated blueberries into the batter, distributing them evenly. This protects the berries from burning and keeps them juicy.

⚠️ Common Mistake to Avoid: Over‑mixing the batter after adding berries can crush them, losing texture.

Step 5: Distribute Batter

Grease two 9×5 loaf pans (or line with parchment). Divide the batter evenly between the pans, smoothing the tops with a spatula.

💡 emy’s Pro Tip: Lightly tap the pans on the counter to release air pockets.

Step 6: Bake the Bread

Transfer to the preheated oven at 350°F. Bake for 50 minutes, or until a toothpick inserted in the center comes out clean. A golden-brown crust indicates readiness.

⚠️ Common Mistake to Avoid: Leaving the bread in the oven too long can dry it out; set a timer to prevent overbaking.

Step 7: Cool and Serve

Remove from oven and let stand for 10 minutes. Then slide the loaves out, cool completely on a rack, and slice at room temperature. For best flavor, serve with a dusting of powdered sugar or a swirl of lemon‑yogurt sauce.

💡 emy’s Pro Tip: Keep a towel nearby—this bread stays moist if not cooled on a flat rack.

Step Action Duration Key Visual Cue
1 Cream butter & cheese 2–3 min Pale, fluffy mixture
2 Add vanilla & eggs 3–4 min Uniform sheen
3 Fold in dry mix 2 min Smooth batter
4 Fold in blueberries 1 min Even berry spread
5 Distribute batter and bake 50 min Golden crust
6 Cool & serve 10–15 min Soft crumb

Serving & Presentation

Slice the loaf into thick rounds, and plate with a drizzle of lemon‑yogurt sauce or a sprinkle of cocoa‑spiced powdered sugar. The contrast of warm, sweet bread with cool, tangy drizzle mirrors the harmony of my Moroccan tea sessions and French café mornings.

For a brunch twist, pair a slice with sliced avocado and a poached egg—an NYC breakfast mash‑up that brings freshness to the table. Or lay a handful of berries on the plate for a rustic garnish that echoes the loaf’s natural pops of color.

If you’re feeling extra adventurous, spread the blueberry loaf on toast and finish with smoked salmon for a sophisticated take on the classic “bagel with cream cheese.” The blueberry burst will add a sweet contrast to the savory fish, creating a new culinary fusion.

Pairing Type Suggestions Why It Works
Side Dish Avocado toast Crema and fruit balance
Sauce / Dip Lemon‑yogurt sauce Cool tang and bright flavor
Beverage Freshly brewed espresso or chai latte Contrasts sugar and acidity
Garnish Microgreens or edible flowers Adds texture and visual pop

Make-Ahead, Storage & Reheating

I love to bake a batch of this bread for my apartment’s Friday brunch. The loaves keep well in the fridge for up to 5 days, and freeze nicely for a month. Quick prep saves time on a busy Tuesday.

Method Container Duration Reheating Tip
Refrigerator Airtight plastic container Up to 5 days Reheat slices 10 min at 350°F
Freezer Silicone loaf mold Up to 1 month Thaw 1–2 hrs, then warm 8 min
Make-Ahead Paper bag & parchment Prepare 1–2 days in advance Assemble just before baking

When reheating from the fridge, place the loaf in the oven at 350°F for 10 minutes; the crust restores its crispness while the inside stays moist. If you’re grabbing a slice on the go, let it sit at room temperature for 5 minutes before biting for the best mouthfeel.

Variations & Easy Swaps

Variation Key Change Best For Difficulty Impact
Fruit-Filled Variation Add chopped dried apricots & raisins to batter Kids & snackers Low — same steps
Gluten-Free / Dairy-Free Variation Swap all‑purpose flour with almond flour, use coconut milk Allergies & health-conscious Medium — texture tweaks
Seasonal Flavor Twist Replace blueberries with fresh blackberries in summer Seasonal markets Low — ingredient swap

Fruit-Filled Variation

For a chewy surprise, simply fold in a handful of chopped dried apricots and raisins into the batter before baking. The chewy sweetness offsets the tart‑sweet of the blueberries, echoing the medley of flavors I cook for my Moroccan clientele.

Gluten-Free / Dairy-Free Variation

Replace the all‑purpose flour with 1¼ cups almond flour, and substitute the butter and cream cheese with oat milk and vegan cream cheese alternative. The crumb will be denser but still moist, and the flavor will take on a subtle nuttiness that pairs nicely with the berries.

Seasonal Flavor Twist

During late spring, I switch blueberries for fresh blackberries from a local producer in Brooklyn’s waterfront. The berries’ natural acidity cuts through the richness, creating a vibrant, light‑hearted loaf ideal for afternoon tea.

How long does blueberry cream cheese bread stay fresh?

Blueberry cream cheese bread stays fresh for about five days if kept in an airtight plastic container in the refrigerator. For longer shelf life, wrap the loaf tightly in foil or parchment and freeze; it can be stored for up to a month. When you’re ready to enjoy it, thaw at room temperature or reheat a slice for about 10 minutes at 350°F to revive that golden crust.

Can I use frozen blueberries?

Frozen blueberries can be used, but thaw them and pat them dry to avoid extra moisture in the batter. If you prefer the bright burst of fresh blueberries, reserve the frozen berries for a later baking day. Should you need to use them, toss the thawed berries in the same tablespoon of flour to keep them from sinking and to preserve texture.

What is the best way to level the loaf?

After filling the loaf pans, level the batter with a spatula. Then tap the pans lightly on the countertop to settle any air pockets and smooth out the top. This technique, used in professional cafés, ensures an even rise and a uniform crust on every slice.

Is this recipe gluten-free?

By default the recipe uses all‑purpose flour, which contains gluten. However, you can easily adapt it to a gluten‑free version. Swap the all‑purpose flour for a 1:1 gluten‑free blend or use almond flour for extra moisture and a nutty flavor. Just be sure to adjust the xanthan gum or add a tablespoon of chia seeds to help bind the batter.

What baking pan works best for this bread?

The classic 9×5 loaf pan is ideal because it distributes heat evenly and allows the loaf to rise uniformly. For a thicker slice, consider a 13×6 pan. If you’re sensitive to weight, use a light‑gauge, glass or cast‑iron loaf pan for even heat distribution, and line with parchment to prevent sticking.

Do I need to grease the loaf pans?

Yes, greasing or lining with parchment ensures the bread slides out easily after baking. Use a butter‑scented butter or a non‑stick spray on the pan surfaces. When you finish, wipe a damp cloth on the edges to keep the coating intact, so you can serve without pulling a piece off the side.

Can I add almond extract instead of vanilla?

Almond extract adds a subtle nutty sweetness that complements the blueberries. Replace the vanilla with one teaspoon of almond extract; the flavor will be lighter, but still harmonious. Keep the ratio in mind, as almond extract is stronger, and taste the batter before baking if you’re experimenting.

What is a good side dish for this bread?

A light avocado spread on toasted slices or a drizzle of lemon‑yogurt sauce works nicely. For a breakfast combo, serve with a poached egg, a sprinkle of thyme, and a splash of citrus oil. If you prefer a sweet pair, try a scoop of vanilla ice cream or a drizzle of honey for a sweet‑sweet combination.

How can I make this loaf thicker for a more substantial slice?

Use a larger 13×6 loaf pan and reduce the amount of liquid by about 2 tablespoons. This adjustment compacts the batter, giving you thicker slices with a more pronounced crumb. Maintain the same baking time, but keep an eye on the top; if it browns too quickly, cover with foil.

Can I pair this bread with coffee?

Absolutely. The bread’s buttery, creamy texture complements medium roast coffee, while the blueberries’ natural tartness cuts through the coffee’s bitterness. Try a classic espresso shot or a French press brewed medium-dark roast; the aroma will mingle wonderfully with the warm, sweet loaf, making for a dreamy brunch ritual.

Share Your Version!

If you baked this loaf, drop a rating and a comment below—I love hearing how you tweak it! Share a photo on Instagram or Pinterest and tag @cookingwithemi. And tell me: what twist did you add to make it truly your own?

From my NYC kitchen to yours — I hope this recipe brings as much warmth to your table as it does to mine. — emy 🧡

📌

Love This Recipe? Save It to Pinterest!

If you enjoyed this Blueberry Cream Cheese Bread recipe, don’t let it get lost in your browser tabs! 😄 Pin it now so you can find it again anytime — and explore hundreds more tried-and-tested recipes waiting for you on my Pinterest boards.

👉 Follow emy on Pinterest @cookingwithemi

📌 Pin this recipe · 🔁 Re-pin your favorites · 💬 Tag me when you make it — I love seeing your creations!

Print
clock clock iconcutlery cutlery iconflag flag iconfolder folder iconinstagram instagram iconpinterest pinterest iconfacebook facebook iconprint print iconsquares squares iconheart heart iconheart solid heart solid icon

Blueberry Cream Cheese Bread


  • Author: Chef Emy

Description

Blueberry Cream Cheese Bread is a quick and simple recipe that comes together in no time! Moist and flavor packed with juicy, plump, fresh blueberries throughout! This easy Blueberry Bread pairs perfectly with your morning coffee, or as an anytime snack!


Ingredients

Scale
  • 1 cup butter (*softened/unsalted)
  • 8 oz cream cheese (*softened)
  • 3/4 cup sugar
  • 2 tsp vanilla extract
  • 4 eggs
  • 2 cups flour (*all purpose)
  • 1 1/2 tsp baking powder
  • 1/2 tsp salt
  • 2 cups blueberries (*fresh, tossed in 1 tbsp flour)

Instructions

  1. Preheat oven to 350 degrees and grease 2 loaf pans (9×5)
  2. In a large bowl, cream together the butter, cream cheese, and sugar.
  3. Add in the vanilla extract and eggs.
  4. Slowly add in the flour, baking powder, and salt.
  5. Once combined, carefully fold in the fresh blueberries.
  6. Pour batter (it will be quite thick, that is okay) into the prepared pans evenly.
  7. Place into preheated oven and bake for about 50 minutes, or until toothpick comes out clean once inserted in center of bread.
  8. Remove from oven and allow to cool slightly before removing from pan and slicing!