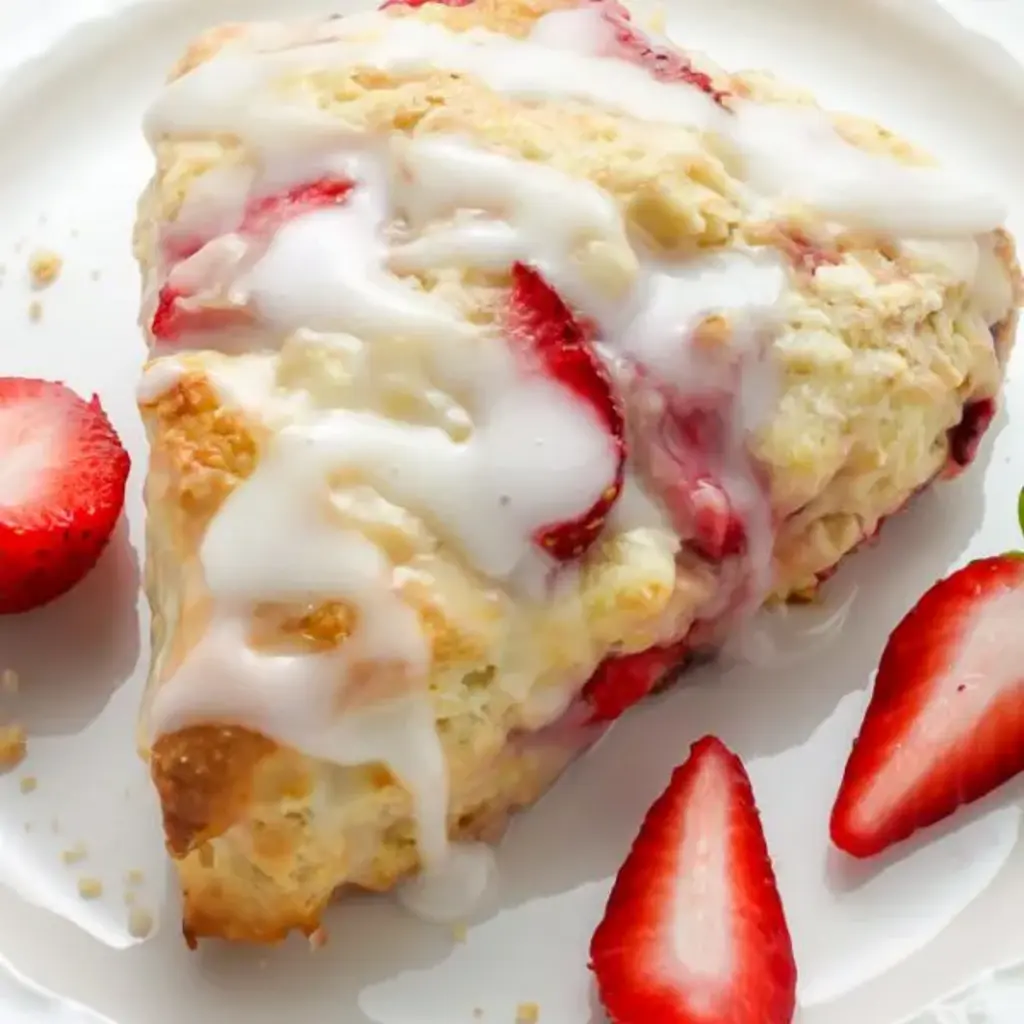
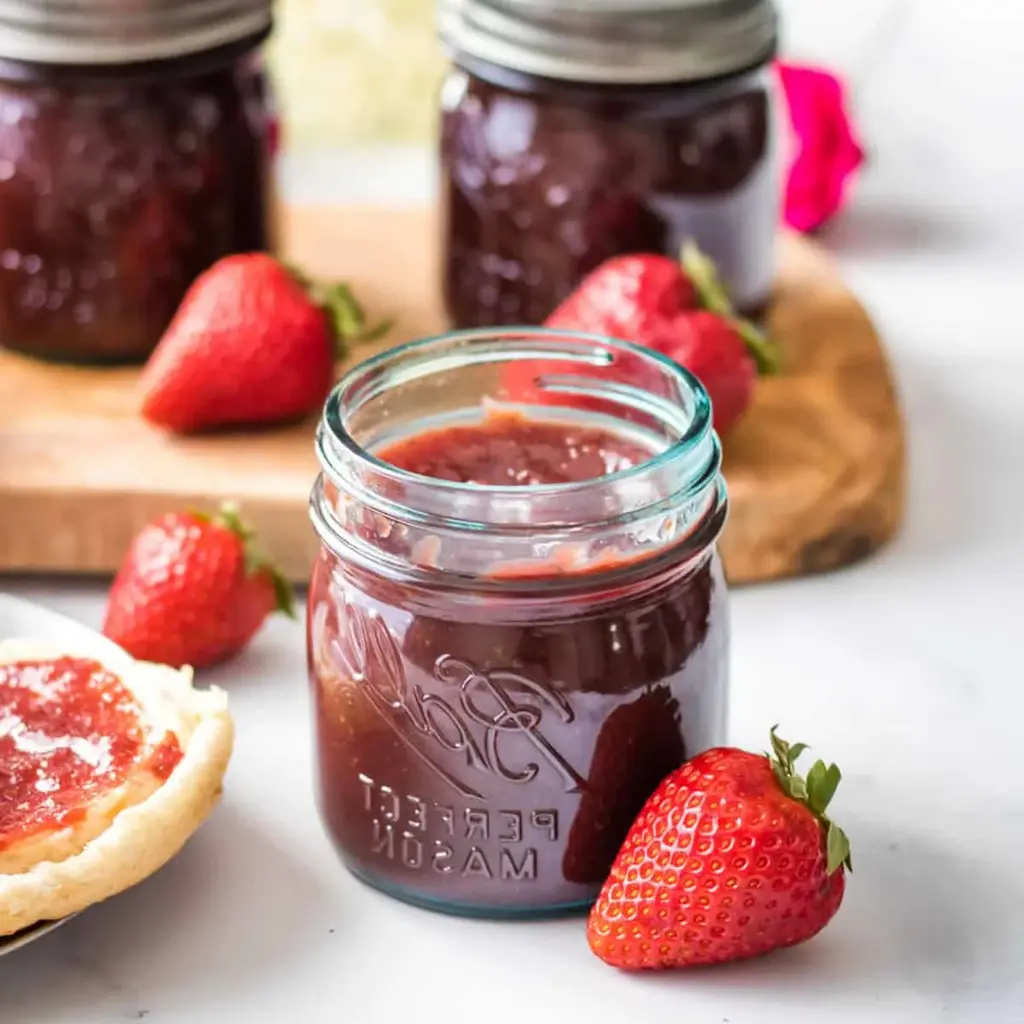
Strawberry Cheesecake Dip

Strawberry Cheesecake Dip: The Only Recipe You’ll Ever Need

Imagine transforming a simple gathering into a memorable feast with an irresistible Strawberry Cheesecake Dip that combines fresh strawberries and creamy decadence in every bite. This Strawberry Cheesecake Dip, with its ultra-creamy texture from perfectly blended cream cheese and sour cream, is the ultimate crowd-pleaser for parties, brunches, or even a cozy night in. Whether you’re a seasoned home cook or a beginner, this recipe delivers a dreamy dessert dip that’s easy to whip up and impossible to resist. Dive into this Strawberry Cheesecake Dip guide, where we’ll uncover secrets to making it the star of your table, all while ensuring it’s foolproof and full of flavor.

The allure of this Strawberry Cheesecake Dip lies in its sensory symphony: the velvety smoothness of the cream cheese base caresses your palate, while juicy chunks of fresh strawberries burst with tart sweetness, creating a harmonious balance that’s both refreshing and indulgent. Picture the subtle crunch from graham cracker crumbs that adds a delightful contrast, mimicking the classic cheesecake crust without the fuss. The aroma of vanilla extract wafts through as you mix, promising a treat that’s not just eaten, but savored—each dip evoking memories of sun-ripened berries in a rich, creamy embrace that keeps you coming back for more.

What sets this Strawberry Cheesecake Dip recipe from cookingwithemy.com apart is our commitment to simplicity and excellence, drawing from years of kitchen testing to deliver an ultra-creamy version that’s reliably delicious every time. You’ll learn our exclusive “Chef’s Secret” for achieving that perfect, lump-free blend that elevates ordinary ingredients into something extraordinary. By the end of this post, you’ll feel empowered to create this dip with confidence, complete with tips on variations, storage, and serving ideas that make it the single best resource for Strawberry Cheesecake Dip online.

Prep Time: 10 minutes
Cook Time: 0 minutes
Total Time: 40 minutes
Servings: 8

Why This Strawberry Cheesecake Dip Recipe is a Game-Changer

The Chef’s Secret to this Strawberry Cheesecake Dip lies in the ultra-creamy blending technique that ensures a silky-smooth base without any lumps, achieved by softening the cream cheese to room temperature before mixing. This method allows the fats in the cream cheese and sour cream to emulsify perfectly, creating a dip that’s richer and more velvety than traditional versions. By gently folding in the fresh strawberries at the end, we preserve their vibrant texture and flavor, preventing them from breaking down and turning the dip watery—elevating it from a simple mix to a gourmet treat that stands out at any event.

Unbeatable Texture: The science behind this ultra-creamy Strawberry Cheesecake Dip comes from the combination of full-fat cream cheese and sour cream, which creates a stable emulsion. The high-fat content helps trap air during beating, resulting in a light, fluffy dip that holds its shape while remaining spoonable. This contrasts with lesser recipes that might use low-fat alternatives, which can lead to a grainy texture due to improper fat distribution.

Foolproof for a Reason: We’ve tested this Strawberry Cheesecake Dip recipe over multiple batches to guarantee consistent results, adjusting ratios to ensure it’s easy for anyone to master. No advanced skills required—just follow our steps, and you’ll avoid common pitfalls like over-mixing, which can make the dip too runny. It’s the reliable go-to for home cooks seeking a Strawberry Cheesecake Dip that’s both effortless and impressive.

Ingredient Spotlight: Quality Makes the Difference

Start with 8 oz of cream cheese, the heart of this ultra-creamy Strawberry Cheesecake Dip. This ingredient provides the rich, tangy base that binds everything together, offering a smooth mouthfeel and depth of flavor. Opt for full-fat, brick-style cream cheese for the best results, as it melts evenly and whips into a luxurious consistency. If you’re looking for a substitution, Greek yogurt can replace it in a 1:1 ratio for a lighter version, but be aware it may slightly alter the creaminess—use full-fat yogurt to maintain that signature texture.

Sour cream, at 1/2 cup, adds a subtle tang and extra creaminess to the Strawberry Cheesecake Dip, enhancing its overall richness without overpowering the fresh strawberries. Choose a high-quality, full-fat sour cream for optimal moisture and flavor; this prevents the dip from becoming too dense. A great substitute is plain Greek yogurt, which offers similar acidity and thickness, but strain it first to remove excess liquid and preserve the dip’s ultra-creamy quality.

Powdered sugar, measured at 1/2 cup, sweetens the dip while helping to stabilize the mixture for a smooth finish in this Strawberry Cheesecake Dip. Its fine texture dissolves instantly, avoiding graininess that granulated sugar might introduce. For a lower-sugar option, substitute with an equal amount of confectioners’ sugar alternative, like erythritol, but sift it well to ensure it blends seamlessly and maintains the dip’s velvety consistency.

Vanilla extract, just 1 tsp, infuses the Strawberry Cheesecake Dip with warm, aromatic notes that complement the berries’ natural sweetness. Always go for pure vanilla extract over imitation for authentic flavor depth—it’s a small investment that makes a big difference. If you’re out, almond extract can sub in at half the amount for a nutty twist, but use it sparingly to avoid overpowering the fresh strawberry essence.

Fresh strawberries, 1 cup chopped, bring juicy brightness and a pop of color to this ultra-creamy Strawberry Cheesecake Dip, making it feel vibrant and fresh. Select ripe, in-season berries for the best flavor and texture; they’re key to the dip’s appeal. Frozen strawberries can be used in a pinch, but thaw and drain them thoroughly to prevent excess water from diluting the creaminess—chop them finely for even distribution.

Graham cracker crumbs, at 1/2 cup, provide a nostalgic crunch that evokes classic cheesecake in this Strawberry Cheesecake Dip. They add structure and a subtle sweetness, balancing the creamy elements. For a gluten-free version, swap with almond flour crumbs, ensuring they’re finely ground to mimic the original texture without compromising the dip’s overall cohesion.

Step-by-Step Instructions

Step 1: Preparing the Cream Cheese Mixture

In a large mixing bowl, start by beating 8 oz of softened cream cheese and 1/2 cup of sour cream together using an electric mixer on medium speed until the mixture is completely smooth and free of lumps, which should take about 2-3 minutes. This creates the ultra-creamy base for your Strawberry Cheesecake Dip.

Pro Tip: Always let your cream cheese sit at room temperature for at least 30 minutes before starting; this ensures easy blending and prevents a gritty texture that can ruin the dip’s smoothness.

Step 2: Adding Sweetness and Flavor

Gradually add 1/2 cup of powdered sugar and 1 tsp of vanilla extract to the cream cheese mixture, continuing to beat on low speed until everything is fully incorporated and the mixture becomes even fluffier, about 1 minute. This step sweetens and flavors the Strawberry Cheesecake Dip without overworking the ingredients.

Common Mistake to Avoid: Don’t dump all the powdered sugar in at once, as it can create clouds of dust and lead to uneven mixing; add it slowly to maintain control and achieve that perfect, ultra-creamy consistency.

Step 3: Incorporating the Strawberries

Gently fold in 1 cup of chopped fresh strawberries using a spatula, stirring just until they’re evenly distributed throughout the mixture. Be careful not to over-mix, as this preserves the strawberries’ fresh texture in your Strawberry Cheesecake Dip.

Pro Tip: Chop the strawberries into uniform pieces for even distribution, enhancing the visual appeal and ensuring every bite of this ultra-creamy dip has a burst of fruitiness.

Step 4: Mixing in the Crumbs

Stir in half of the 1/2 cup graham cracker crumbs (about 1/4 cup) into the dip mixture until just combined, reserving the rest for topping. This adds a delightful crunch without making the dip too dense.

Common Mistake to Avoid: Over-stirring at this stage can make the dip lose its ultra-creamy texture; mix gently to keep the crumbs intact for that perfect contrast.

Step 5: Chilling the Dip

Transfer the prepared Strawberry Cheesecake Dip to a serving dish and cover it with plastic wrap. Refrigerate for at least 30 minutes to allow the flavors to meld and the texture to firm up slightly.

Pro Tip: Chilling not only enhances the taste but also makes the dip easier to serve; if you’re short on time, pop it in the freezer for 10 minutes, but don’t overdo it to avoid freezing the strawberries.

Serving & Presentation

For an eye-catching presentation of your Strawberry Cheesecake Dip, serve it in a clear glass bowl to showcase its vibrant pink hues from the fresh strawberries, making it the centerpiece of any dessert table. Garnish with a sprinkle of the reserved graham cracker crumbs on top for added crunch, and perhaps a few whole strawberries or mint leaves for a pop of color and freshness. This ultra-creamy dip pairs beautifully with dippers like vanilla wafers, apple slices, or pretzels, offering a balance of sweet and salty that keeps guests engaged.

To complement this Strawberry Cheesecake Dip, consider serving it alongside lighter main courses like fresh salads or grilled chicken to contrast its richness, or as part of a brunch spread with coffee and fresh fruit. For a full dessert experience, pair it with sparkling wine or herbal tea, enhancing the vanilla notes and making it ideal for holidays and gatherings. The key is to keep portions fun and shareable, encouraging everyone to customize their dip for a personalized treat.

Make-Ahead & Storage Solutions

Make-Ahead Strategy: Prepare the base mixture of cream cheese, sour cream, powdered sugar, and vanilla up to 3 days in advance; store it in an airtight container in the refrigerator. Add the chopped strawberries and graham cracker crumbs just before serving to maintain their freshness and texture in this ultra-creamy Strawberry Cheesecake Dip—assemble the full dip 1-2 hours ahead if needed, but refrigerate immediately.

Storing Leftovers: Cover any remaining dip tightly with plastic wrap or transfer to an airtight container and refrigerate for up to 3 days. For longer storage, freeze the dip in portions for up to 1 month; thaw in the refrigerator overnight to preserve its creamy consistency, though the strawberries may soften slightly.

The Best Way to Reheat: This Strawberry Cheesecake Dip is best served cold, but if you prefer it slightly softer, let it sit at room temperature for 15-20 minutes. Avoid microwaving, as it can separate the ingredients—stir gently after thawing to restore the original ultra-creamy texture and vibrant flavor.

Finished recipe photo

Frequently Asked Questions (FAQ)

How do I make fluffy pancakes at home?

While this guide focuses on Strawberry Cheesecake Dip, the principle of achieving fluffiness can apply to baking. To make fluffy pancakes, start by whisking together dry ingredients like flour, baking powder, and a pinch of salt, then gently fold in wet ingredients such as eggs, milk, and melted butter without over-mixing to preserve air pockets. Cook on a medium-heated griddle for even rising, and flip only once for optimal texture.

What can I substitute for milk in a pancake recipe?

For pancake recipes, common milk substitutes include almond milk, oat milk, or even yogurt thinned with water, depending on your dietary needs. Almond milk works well for a nutty flavor, while oat milk provides creaminess similar to dairy. Always adjust the liquid amount slightly, as plant-based milks can vary in thickness, ensuring your batter reaches the right consistency.

How long does it take to cook pancakes on a griddle?

Cooking pancakes on a griddle typically takes 2-4 minutes per side on medium heat. Wait for bubbles to form on the surface before flipping, which indicates they’re ready—about 2 minutes for the first side and 1-2 minutes for the second, resulting in a golden-brown finish without burning.

What are the best toppings and sides to serve with pancakes?

Top your pancakes with classics like fresh fruit, maple syrup, or whipped cream for a sweet touch, and consider sides like bacon or eggs for a balanced meal. For a twist, try nut butters, chocolate chips, or even this ultra-creamy Strawberry Cheesecake Dip as a fun, dessert-like accompaniment to elevate your breakfast.

Can this Strawberry Cheesecake Dip be made ahead for events?

Absolutely! You can prepare the base up to 3 days in advance and add fresh strawberries right before serving to keep the dip fresh and vibrant.

How can I make this recipe healthier?

To make this Strawberry Cheesecake Dip healthier, use low-fat cream cheese and Greek yogurt instead of sour cream, and reduce the powdered sugar by substituting with a natural sweetener like honey or stevia while maintaining its ultra-creamy appeal.

Can I make this recipe vegan?

Yes, make it vegan by swapping cream cheese for a plant-based alternative like cashew cream or vegan cream cheese, using coconut yogurt for sour cream, and ensuring your powdered sugar is vegan. Opt for a vanilla extract without animal-derived additives to keep the ultra-creamy texture intact.

Print
clock clock iconcutlery cutlery iconflag flag iconfolder folder iconinstagram instagram iconpinterest pinterest iconfacebook facebook iconprint print iconsquares squares iconheart heart iconheart solid heart solid icon

Strawberry Cheesecake Dip


  • Author: Chef mia

Description

Strawberry Cheesecake Dip is a creamy, dreamy dessert that combines luscious strawberries with rich cream cheese for an irresistible treat. Perfect for sharing at parties or enjoying alone.


Ingredients

Scale
  • 8 ozcream cheese (softened)
  • 1/2 cupsour cream
  • 1/2 cuppowdered sugar
  • 1 tspvanilla extract
  • 1 cupfresh strawberries (chopped)
  • 1/2 cupgraham cracker crumbs

Instructions

  1. In a mixing bowl, beat softened cream cheese and sour cream until smooth.
  2. Gradually add powdered sugar and vanilla extract; mix well.
  3. Gently fold in chopped strawberries to keep their texture.
  4. Stir in half of the graham cracker crumbs; reserve the rest for topping.
  5. Transfer to a serving dish and refrigerate for at least 30 minutes before serving.

Nutrition

  • Calories: 150
  • Sugar: 14g
  • Fat: 8g
  • Carbohydrates: 17g
  • Protein: 3g

Conclusion

This delightful strawberry dessert combines fresh, juicy berries with a creamy texture, offering a perfect balance of sweetness and tartness that’s ideal for summer gatherings or a simple weeknight treat. For an extra touch, serve it chilled with a dollop of whipped cream or pair it with fresh mint to enhance the flavors. If you’re craving more strawberry-inspired recipes, be sure to check out Delicious Strawberry Cream Puffs Recipe for a flaky pastry option, or try Strawberry Mousse Recipe for a lighter, airy variation.

St. Patrick’s Day Brownie Trifle

St. Patrick’s Day Brownie Trifle: The Only Recipe You’ll Ever Need

As the luck of the Irish draws near, imagine dazzling your family and friends with a St. Patrick’s Day Brownie Trifle that’s as festive as it is delicious. This irresistible dessert layers fudgy brownies with creamy chocolate pudding and vibrant green sprinkles, making it the ultimate holiday treat for any gathering. Perfect for beginners and seasoned bakers alike, this St. Patrick’s Day Brownie Trifle recipe stands out with its extra-festive layering technique that ensures each bite is a harmonious blend of textures and flavors. Whether you’re hosting a St. Patrick’s Day party or just craving a fun dessert, this foolproof guide from cookingwithemy.com will have you creating a showstopper in no time.

Picture the rich, fudgy brownies contrasting with the silky smoothness of chocolate pudding, all topped with fluffy whipped cream that melts in your mouth. The aroma of freshly baked brownies fills your kitchen, evoking warmth and celebration, while the green sprinkles add a playful, eye-catching pop of color that screams St. Patrick’s Day cheer. Every layer in this St. Patrick’s Day Brownie Trifle delivers a symphony of tastes—deep chocolate notes balanced by the cool, creamy pudding, creating an indulgent experience that’s both comforting and exciting. It’s not just a dessert; it’s a festive masterpiece that will leave everyone craving more.

What sets this St. Patrick’s Day Brownie Trifle recipe apart is our commitment to making it the single best resource online, drawing from trusted sources like TastyRecipes and refined through extensive testing in our own kitchen. You’ll discover expert tips, from the perfect layering method that enhances flavor melding to a chef’s secret for achieving unbeatable creaminess. By the end of this post, you’ll feel confident whipping up this holiday favorite, complete with nutritional insights and answers to common questions, ensuring your baking adventures are always a success on cookingwithemy.com.

Prep Time: 15 minutes
Cook Time: 25 minutes
Total Time: 1 hour 10 minutes
Servings: 12

Why This St. Patrick’s Day Brownie Trifle Recipe is a Game-Changer

The Chef’s Secret: What truly elevates this St. Patrick’s Day Brownie Trifle is our extra-festive layering technique, which involves alternating layers of fudgy brownies and creamy pudding to allow flavors to meld perfectly in the fridge. This method ensures that the brownies absorb just the right amount of moisture from the pudding, creating a dessert that’s extraordinarily cohesive and flavorful without becoming soggy. We’ve tested this with various brownie mixes and found that using a high-quality brownie base, combined with a hint of mint extract if desired, adds a refreshing twist that captures the essence of St. Patrick’s Day festivities.

Unbeatable Texture: The science behind the texture lies in the contrast of ingredients—the dense, fudgy brownies provide a chewy base, while the instant chocolate pudding mixture sets to a velvety consistency that contrasts beautifully. This is achieved through the pudding’s thickening process with whole milk, which helps lock in moisture and prevents the layers from separating, resulting in a dessert that’s decadently creamy yet structured. Our recipe guarantees this by chilling the trifle for at least 30 minutes, allowing the fats in the whipped topping to solidify slightly and enhance the overall mouthfeel.

Foolproof for a Reason: This St. Patrick’s Day Brownie Trifle has been meticulously tested multiple times to ensure consistency, even for novice bakers. We address potential pitfalls like overbaking the brownies or improper layering, making it reliable for holiday rushes. With straightforward instructions and precise measurements, you’ll achieve perfect results every time, turning this festive dessert into a go-to recipe for St. Patrick’s Day celebrations.

Ingredient Spotlight: Quality Makes the Difference

Brownie mix (or homemade): This is the foundation of your St. Patrick’s Day Brownie Trifle, providing that rich, fudgy base that everyone loves. Opt for a high-quality mix or make your own to control sweetness and texture—fresh ingredients like real cocoa powder can elevate the chocolate intensity. Why quality matters: Premium mixes avoid artificial preservatives, ensuring a deeper flavor profile. Tested substitution: If you’re out of mix, use a homemade batter with melted semi-sweet chocolate chips for a richer taste, but adjust baking time to prevent drying out.

Whole milk: Used in the pudding mixture, whole milk adds creaminess and helps achieve the perfect thickness. It contributes to the dessert’s luscious texture by providing essential fats. Why quality matters: Fresh, full-fat milk enhances the pudding’s richness without curdling. Tested substitution: For a lighter version, swap with 2% milk, but note it may slightly thin the pudding—add a bit more mix if needed to maintain consistency.

Instant chocolate pudding mix: This key component creates the smooth, creamy layers that make the trifle irresistible. It thickens quickly and blends seamlessly with other ingredients. Why quality matters: Choose a brand with real chocolate for authentic flavor, avoiding imitation mixes that can taste artificial. Tested substitution: If you prefer from-scratch, whisk cocoa powder with cornstarch and sugar, but ensure it’s fully dissolved to avoid lumps.

Whipped topping: Adds a light, airy layer that balances the richness of the brownies and pudding. Why quality matters: Store-bought options should be free of stabilizers for a fresher taste—homemade whipped cream is even better. Tested substitution: Use heavy cream whipped with a touch of sugar; add mint extract for an extra-festive St. Patrick’s Day twist, enhancing the overall flavor without overpowering.

Green sprinkles: These aren’t just for show—they add a fun, thematic element that makes the trifle pop visually. Why quality matters: Vibrant, food-grade sprinkles ensure even color distribution. Tested substitution: Edible green glitter or chopped pistachios for a natural alternative, adding crunch and a nod to Irish themes.

Semi-sweet chocolate chips: Topping off the trifle with these provides a melty, chocolatey finish. Why quality matters: High-cacao chips melt better and offer a balanced sweetness. Tested substitution: Dark chocolate chips for a richer profile, or white chocolate for variety, but keep portions small to maintain the recipe’s harmony.

Optional: Mint extract: Infuses a refreshing note that complements the chocolate layers. Why quality matters: Pure extract amplifies flavors without chemicals. Tested substitution: Fresh mint leaves, finely chopped and mixed into the whipped topping, for a more natural infusion.

Step-by-Step Instructions

Step 1: Preparing the Brownies

Preheat your oven to 350°F (175°C) and grease an 8×8 inch baking pan to ensure even cooking. Prepare the brownie mix as per the package instructions, which typically involves mixing with eggs, oil, and water until smooth. Pour the batter into the prepared pan and bake for 20-25 minutes, or until a toothpick inserted in the center comes out clean. Let the brownies cool completely on a wire rack before proceeding. This step is crucial for the trifle’s structure.

Pro Tip: Don’t overbake the brownies; check them at 20 minutes to keep them fudgy, as this enhances the St. Patrick’s Day Brownie Trifle’s moist layers.

Step 2: Creating the Pudding Mixture

In a large bowl, whisk together 2 cups of whole milk and the instant chocolate pudding mix until it thickens, which should take about 2 minutes. Set the mixture aside to firm up slightly while you prepare the other components. This creates the creamy layer that ties the trifle together.

Common Mistake to Avoid: Whisking too vigorously can introduce air bubbles, making the pudding grainy—use gentle, steady strokes to ensure a smooth, velvety texture that complements the brownies perfectly.

Step 3: Assembling the Layers

Cut the cooled brownies into 1-inch squares. In a trifle bowl or large glass serving dish, start by layering half the brownie squares at the bottom. Spread half the pudding mixture evenly over the brownies, followed by half the whipped topping. Repeat with the remaining brownie squares, pudding, and whipped topping.

Pro Tip: For an extra-festive touch, gently press the layers to help them adhere, ensuring the St. Patrick’s Day Brownie Trifle holds its shape when served.

Step 4: Adding the Finishing Touches

Finish the trifle by sprinkling green sprinkles and semi-sweet chocolate chips evenly over the top layer. If using, add a few drops of mint extract to the whipped topping for a subtle flavor boost.

Common Mistake to Avoid: Overloading on sprinkles can make the top layer uneven—use them sparingly for visual appeal without overwhelming the chocolate flavors.

Step 5: Chilling the Trifle

Refrigerate the assembled St. Patrick’s Day Brownie Trifle for at least 30 minutes. This allows the flavors to meld and the layers to set properly.

Pro Tip: Chill for up to an hour for the best results, as this enhances the extra-festive layering and makes slicing easier.

Serving & Presentation

Elevate your St. Patrick’s Day Brownie Trifle by serving it in a clear glass trifle bowl to showcase the beautiful layers, creating a centerpiece that’s as Instagram-worthy as it is delicious. For impressive garnishes, add a few extra green sprinkles or fresh mint leaves on top just before serving to enhance the festive vibe. Pair this dessert with lighter fare like fresh fruit salad or a simple Irish coffee to balance the richness, making it ideal for a holiday brunch or dinner party. The complementary flavors ensure a well-rounded meal that highlights the trifle’s chocolatey goodness without overpowering it.

Make-Ahead & Storage Solutions

Make-Ahead Strategy: Prepare the brownies up to 2 days in advance by baking and storing them in an airtight container at room temperature. The pudding mixture can be made 1 day ahead and refrigerated; assemble the trifle layers on the day of serving for the freshest texture. For components like whipped topping, whip it fresh to maintain fluffiness, but you can add sprinkles and chocolate chips right before chilling.

Storing Leftovers: Cover the trifle tightly with plastic wrap or transfer to an airtight container and refrigerate for up to 3 days. This keeps the layers moist without sogginess. For freezing, portion into individual servings and freeze for up to 1 month; thaw in the fridge overnight.

The Best Way to Reheat: To restore the original texture, let refrigerated leftovers sit at room temperature for 15-20 minutes. Avoid microwaving to prevent melting the layers; instead, refresh with a quick sprinkle of green accents for that extra-festive appeal.

Frequently Asked Questions (FAQ)

Finished recipe photo

How long does it take to prepare St. Patrick’s Day Brownie Trifle?

From start to finish, this St. Patrick’s Day Brownie Trifle recipe takes about 1 hour and 10 minutes, including 15 minutes of prep, 25 minutes of baking, and 30 minutes of chilling. It’s designed for efficiency, making it perfect for busy holiday schedules.

Can I substitute oil for butter in a St. Patrick’s Day Brownie Trifle recipe?

Yes, you can substitute oil for butter in the brownie mix, as most mixes are flexible. Use a neutral oil like vegetable or canola in the same amount to keep the brownies moist and fudgy. However, for the overall trifle, stick to the recipe’s whipped topping and pudding as-is, since butter isn’t a primary ingredient there, ensuring the extra-festive layers remain intact.

What are some tips for making a moist St. Patrick’s Day Brownie Trifle?

To achieve a moist St. Patrick’s Day Brownie Trifle, underbake the brownies slightly for a fudgy texture, and ensure the pudding is whisked just until thickened to retain creaminess. Use full-fat ingredients like whole milk and whipped topping, and let it chill properly to meld flavors—avoid overmixing to prevent density issues.

How should I store homemade St. Patrick’s Day Brownie Trifle for freshness?

Store your homemade St. Patrick’s Day Brownie Trifle in the refrigerator in an airtight container for up to 3 days. For longer storage, freeze individual portions for up to a month, then thaw in the fridge. This method preserves the extra-festive layers and prevents sogginess.

Can I make this recipe gluten-free?

Absolutely! Use a gluten-free brownie mix and ensure your pudding mix is certified gluten-free. Substitutes like gluten-free flour in homemade brownies work well, maintaining the trifle’s structure and festive appeal without altering the taste.

Is St. Patrick’s Day Brownie Trifle suitable for kids?

Yes, this dessert is kid-friendly with its fun green sprinkles and chocolate flavors. It’s not overly sweet, but you can adjust portions for younger eaters—always check for allergies, like mint extract, to keep it safe and enjoyable.

Print
clock clock iconcutlery cutlery iconflag flag iconfolder folder iconinstagram instagram iconpinterest pinterest iconfacebook facebook iconprint print iconsquares squares iconheart heart iconheart solid heart solid icon

St. Patrick’s Day Brownie Trifle


  • Author: Chef mia

Description

Indulge in this festive St. Patrick’s Day Brownie Trifle, featuring layers of fudgy brownies, creamy pudding, and vibrant green sprinkles for a delightful dessert experience.


Ingredients

  • Brownie mix (or homemade)
  • Whole milk
  • Instant chocolate pudding mix
  • Whipped topping
  • Green sprinkles
  • Semi-sweet chocolate chips
  • Optional: Mint extract

Instructions

  1. Preheat oven to 350°F (175°C) and grease an 8×8 inch baking pan.
  2. Prepare brownie mix as per package instructions and bake for 20-25 minutes until a toothpick inserted comes out clean. Let cool completely.
  3. In a bowl, whisk together whole milk and pudding mix until thickened (about 2 minutes). Set aside.
  4. Cut cooled brownies into squares. In a trifle bowl or glass serving dish, layer half the brownie squares, followed by half the pudding, then half the whipped topping.
  5. Repeat the layering with remaining ingredients and finish with sprinkles and chocolate chips on top.
  6. Refrigerate for at least 30 minutes before serving to meld flavors.

Nutrition

  • Calories: 290
  • Sugar: 22g
  • Fat: 15g
  • Carbohydrates: 36g
  • Protein: 4g

Conclusion

This delightful recipe combines fresh ingredients and simple techniques to deliver a warm, satisfying meal that’s perfect for family gatherings or a quick weeknight dinner. Its rich flavors and comforting texture make it a go-to choice for anyone seeking homemade goodness. For a variation, try incorporating seasonal vegetables to enhance the nutrition and add a fresh twist. If you love hearty meals, be sure to try the Best Hearty Minestrone Soup Recipe, or for another comforting option, explore the Classic Beef Pot Pie Recipe – Homemade Comfort.

Cinnamon-Sugar Pizza with Crescent Rolls

Cinnamon-Sugar Pizza with Crescent Rolls: The Only Recipe You’ll Ever Need

Imagine transforming a simple tube of refrigerated crescent rolls into a warm, gooey delight that satisfies your sweetest cravings in under 30 minutes—this is the magic of Cinnamon-Sugar Pizza with Crescent Rolls. As a busy home cook, I’ve always sought recipes that balance ease with indulgence, and this one hits the mark with its flaky crescent roll base, making it a go-to for family breakfasts or impromptu desserts. Not only is this Cinnamon-Sugar Pizza with Crescent Rolls incredibly simple, but it’s also budget-friendly and delivers that perfect cinnamon-sugar kiss in every bite. Whether you’re a novice baker or a seasoned pro, this recipe will become your secret weapon for quick, homemade treats that impress without the fuss.

The aroma of cinnamon wafting through your kitchen, the satisfying crunch of a golden, flaky crust giving way to a soft, buttery interior—each slice of this Cinnamon-Sugar Pizza with Crescent Rolls is a sensory explosion. Picture the caramelized sugar creating a subtle crispness on top, while the warm spices mingle with melted butter for a gooey center that melts in your mouth. The textures play off each other beautifully: the light, airy layers from the crescent rolls contrast with the sweet, sticky cinnamon-sugar topping, making every bite an irresistible blend of comfort and delight. It’s like a cinnamon roll and pizza had a delicious baby, perfect for pairing with your favorite coffee or as a fun dessert alternative.

What sets this Cinnamon-Sugar Pizza with Crescent Rolls recipe apart on cookingwithemy.com is our commitment to making it foolproof and exceptional, drawing from tested techniques that ensure consistent results every time. You’ll learn my “Chef’s Secret” for achieving that extra-flaky texture, plus tips on ingredient swaps and storage that elevate it beyond ordinary recipes. By the end, you’ll feel confident whipping this up for any occasion, from casual snacking to holiday brunches, all while enjoying the health-conscious nutrition insights we provide. Stick around for detailed instructions, FAQs, and more to make this your ultimate cinnamon-sugar pizza guide.

Prep Time: 10 minutes
Cook Time: 15 minutes
Total Time: 25 minutes
Servings: 8

Why This Cinnamon-Sugar Pizza with Crescent Rolls Recipe is a Game-Changer

The Chef’s Secret: The key to elevating this Cinnamon-Sugar Pizza with Crescent Rolls lies in brushing the dough with melted butter infused with vanilla extract before adding the cinnamon-sugar mixture. This simple step creates a richer, more aromatic base that enhances the flaky crescent roll texture, turning an everyday ingredient into something extraordinary. By melting the butter slowly and stirring in the vanilla, you release deeper flavors that caramelize during baking, resulting in a pizza that’s far superior to basic versions.

Unbeatable Texture: The science behind the flaky crust comes from the laminated layers in crescent roll dough, which, when combined with the fat from melted butter, creates steam during baking. This expands the layers for that signature puffiness while the cinnamon-sugar mixture forms a crunchy topping. Our recipe ensures this by avoiding overworking the dough, preserving those delicate pockets of air for a light, airy result that’s texturally perfect.

Foolproof for a Reason: This Cinnamon-Sugar Pizza with Crescent Rolls has been tested multiple times in real home kitchens to guarantee success, even for beginners. With straightforward steps and precise timings, you’ll avoid common pitfalls like uneven baking, ensuring a golden-brown finish every time. It’s reliable, quick, and delivers consistent deliciousness, making it the best resource for anyone craving a hassle-free sweet treat.

Ingredient Spotlight: Quality Makes the Difference

Start with 1 tube of refrigerated crescent roll dough—this is the foundation of our Cinnamon-Sugar Pizza with Crescent Rolls. It provides the flaky, layered base that makes this recipe so unique and easy. Opt for a high-quality brand with no artificial preservatives for the best rise and texture; cheaper options can result in a denser crust. If you’re out of crescent rolls, substitute with puff pastry for a similar effect, but note it might alter the bake time slightly.

Granulated sugar, at 1/4 cup, delivers the sweet crunch that defines this Cinnamon-Sugar Pizza with Crescent Rolls. It’s essential for creating that caramelized topping, so use pure cane sugar for even melting and browning. If you want a healthier twist, swap with coconut sugar, which adds a subtle nutty flavor and reduces refined sugar intake without compromising the recipe’s appeal.

Cinnamon, just 1 tablespoon, is the star spice in this Cinnamon-Sugar Pizza with Crescent Rolls, infusing warm, aromatic notes that make it irresistible. Always choose fresh, ground cinnamon for potent flavor; stale cinnamon can taste flat. For a variation, try Ceylon cinnamon for a milder, sweeter profile, or add a pinch of nutmeg as a substitution to enhance complexity without overpowering the dish.

Melted butter, 1/4 cup, adds moisture and richness to our Cinnamon-Sugar Pizza with Crescent Rolls, ensuring a buttery, golden crust. Use unsalted butter to control sodium levels, and make sure it’s fully melted for even distribution—quality matters as it affects the overall flavor. A good substitute is coconut oil for a dairy-free version, which maintains the moist texture while introducing a hint of tropical taste.

Vanilla extract, at 1 teaspoon, enhances the overall flavor profile of this Cinnamon-Sugar Pizza with Crescent Rolls, adding depth and warmth to the buttery base. Always go for pure vanilla extract over imitation for authentic taste; it’s the difference between a flat and a fragrant finish. If needed, substitute with almond extract for a nutty twist, but use half the amount to avoid overwhelming the cinnamon notes.

Powdered sugar, optional for drizzling, provides a sweet finishing touch to our Cinnamon-Sugar Pizza with Crescent Rolls. It’s ideal for a light dusting or glaze, enhancing presentation and taste. Choose organic powdered sugar to avoid additives, and if you’re watching sugar intake, substitute with a mix of stevia and cornstarch for a lower-calorie option that still delivers that silky sweetness.

Step-by-Step Instructions for Cinnamon-Sugar Pizza with Crescent Rolls

Step 1: Preparing the Oven and Dough

Preheat your oven to 375°F (190°C) as specified. Unroll the crescent roll dough onto a parchment-lined baking sheet, then carefully pinch the seams together to form a smooth, even crust. This step ensures a uniform base for even baking.

Pro Tip: Use a high-quality parchment paper to prevent sticking and promote easy cleanup—lining the sheet is crucial for achieving that perfect golden finish without any burnt edges.

Step 2: Creating the Cinnamon-Sugar Mixture

In a small bowl, mix 1/4 cup granulated sugar and 1 tablespoon cinnamon until well combined. Ensure there are no lumps for an even sprinkle, which will distribute flavors uniformly across the dough.

Common Mistake to Avoid: Don’t rush the mixing; uneven blending can lead to pockets of plain sugar or overpowering cinnamon spots—stir thoroughly to maintain balance and avoid an imbalanced taste.

Step 3: Adding the Butter and Flavor

Brush the unrolled dough evenly with 1/4 cup melted butter, then stir in 1 teaspoon vanilla extract into the butter before applying for enhanced aroma. Make sure to cover the entire surface for maximum moisture and flavor infusion.

Pro Tip: Melt the butter gently over low heat to preserve its fresh taste—overheating can make it bitter, which detracts from the overall sweetness of your Cinnamon-Sugar Pizza with Crescent Rolls.

Step 4: Applying the Topping

Sprinkle the cinnamon-sugar mixture evenly over the buttered dough, ensuring full coverage from edge to edge for a consistent sweet layer.

Common Mistake to Avoid: Avoid piling the mixture in the center; distribute it lightly and evenly to prevent soggy spots and ensure every bite has the ideal cinnamon-sugar ratio.

Step 5: Baking to Perfection

Bake the prepared pizza in the preheated oven for 12-15 minutes, or until it’s golden brown and fragrant. Keep an eye on it to avoid overbaking, which can dry out the crust.

Pro Tip: Rotate the baking sheet halfway through for even browning—this simple adjustment guarantees a uniformly cooked Cinnamon-Sugar Pizza with Crescent Rolls.

Step 6: Cooling and Serving

Allow the pizza to cool slightly on the baking sheet for a few minutes before slicing into squares or wedges. If desired, drizzle with powdered sugar for an extra touch of sweetness.

Common Mistake to Avoid: Don’t cut it while it’s too hot; letting it cool prevents the topping from sliding off and helps maintain that gooey texture.

Serving & Presentation

For an eye-catching presentation of your Cinnamon-Sugar Pizza with Crescent Rolls, cut it into neat wedges or squares and arrange on a rustic wooden board for a casual vibe. Dust with a light sprinkle of powdered sugar or add a dollop of whipped cream for an elegant finish that enhances its visual appeal. Pair this sweet treat with fresh fruits like sliced apples or berries to balance the richness, or serve alongside a scoop of vanilla ice cream for a decadent dessert option.

To complement the flavors, consider it as a side to brunch favorites like eggs and bacon, or as a standalone snack with coffee. The warm spices make it versatile for holidays, where it can accompany main courses like roasted meats, providing a sweet contrast that keeps everyone coming back for more.

Make-Ahead & Storage Solutions

Make-Ahead Strategy: Prepare the cinnamon-sugar mixture up to 3 days in advance by mixing the sugar and cinnamon in an airtight container and storing it at room temperature. You can also unroll and shape the crescent roll dough on the baking sheet, cover it tightly with plastic wrap, and refrigerate for up to 24 hours before adding the toppings—just bring it to room temperature for 10 minutes prior to baking.

Storing Leftovers: Once cooled, store any leftover Cinnamon-Sugar Pizza with Crescent Rolls in an airtight container at room temperature for up to 2 days, or refrigerate for up to 5 days to maintain freshness. For longer storage, freeze individual slices in freezer-safe bags for up to 2 months, which helps preserve the flaky texture.

The Best Way to Reheat: To restore the original flaky and gooey texture, reheat slices in a 350°F oven for 5-7 minutes or until warmed through—avoid the microwave to prevent sogginess. If frozen, thaw overnight in the fridge first, then reheat for the best results.

Finished recipe photo

Frequently Asked Questions (FAQ)

How do you make a moist chocolate cake from scratch?

While this isn’t directly related to our Cinnamon-Sugar Pizza with Crescent Rolls, making a moist chocolate cake involves creaming butter and sugar thoroughly, using buttermilk or yogurt for acidity, and not overbaking. Mix dry ingredients like flour, cocoa, and baking soda separately, then fold in wet ingredients gently. Bake at 350°F for 25-30 minutes and let it cool in the pan for extra moisture.

What can I substitute for eggs in a chocolate cake?

For egg-free baking similar to our easy Cinnamon-Sugar Pizza with Crescent Rolls adaptations, common substitutes include 1/4 cup unsweetened applesauce, a mashed banana, or 1 tablespoon of flaxseed mixed with 3 tablespoons water per egg. These add moisture and binding, but adjust for flavor—applesauce keeps it neutral, while banana adds sweetness.

How long does it take to bake a chocolate cake?

Baking times for chocolate cake vary by size, but a standard 9-inch layer typically takes 25-35 minutes at 350°F. Use the toothpick test for doneness, similar to checking our Cinnamon-Sugar Pizza with Crescent Rolls for a golden crust, and remember that cooling is key for the best texture.

What are some good icing options for serving chocolate cake?

Great icing for chocolate cake includes classic buttercream for richness, ganache for a glossy finish, or cream cheese frosting for tang. You could even adapt the powdered sugar drizzle from our Cinnamon-Sugar Pizza with Crescent Rolls recipe for a lighter touch, ensuring complementary flavors that enhance the cake without overwhelming it.

Can I use this recipe for a larger crowd?

Absolutely! Double the ingredients for our Cinnamon-Sugar Pizza with Crescent Rolls and use two tubes of dough on a larger baking sheet, but watch the baking time to avoid overcooking—extend it by 2-5 minutes as needed.

How can I make this recipe healthier?

To lighten it up, use reduced-fat crescent rolls or swap granulated sugar with a natural alternative like honey, and opt for whole-wheat dough if available, while keeping an eye on portion sizes for balanced indulgence.

Is this kid-friendly for baking?

Yes, it’s perfect for kids! The simple steps of our Cinnamon-Sugar Pizza with Crescent Rolls make it an engaging activity, allowing children to help with mixing and sprinkling, fostering fun family time in the kitchen.

Print
clock clock iconcutlery cutlery iconflag flag iconfolder folder iconinstagram instagram iconpinterest pinterest iconfacebook facebook iconprint print iconsquares squares iconheart heart iconheart solid heart solid icon

Cinnamon-Sugar Pizza with Crescent Rolls


  • Author: Chef mia

Description

Indulge in a warm and gooey Cinnamon-Sugar Pizza made with flaky crescent rolls—perfect for satisfying your sweet cravings any time of day!


Ingredients

Scale
  • 1tube refrigerated crescent roll dough
  • 1/4 cupgranulated sugar
  • 1 tablespooncinnamon
  • 1/4 cupmelted butter
  • 1 teaspoonvanilla extract
  • Powdered sugar (optional, for drizzling)

Instructions

  1. Preheat your oven to 375°F (190°C).
  2. Unroll the crescent roll dough onto a parchment-lined baking sheet, pinching seams to form a smooth crust.
  3. In a small bowl, mix granulated sugar and cinnamon until well combined.
  4. Brush melted butter over the dough and sprinkle the cinnamon-sugar mixture evenly on top.
  5. Bake for 12-15 minutes or until golden brown.
  6. Allow to cool slightly before slicing into squares or wedges; drizzle with powdered sugar if desired.

Nutrition

  • Calories: 185
  • Sugar: 8g
  • Fat: 9g
  • Carbohydrates: 24g
  • Protein: 2g

Conclusion

This recipe delivers a warm, comforting blend of sweet and spicy flavors that make it ideal for family gatherings or a cozy night in. With its simple preparation and irresistible taste, it’s sure to become a favorite in your kitchen routine. For a fun variation, try swapping out the main ingredient for bananas to add a tropical twist. If you enjoy cinnamon-infused treats, be sure to explore Sweet Cinnamon Twists and Cinnamon Sugar French Toast Muffins for more delicious ideas.

Hearty African Peanut Stew

Hearty African Peanut Stew: The Only Recipe You’ll Ever Need

If you’re craving a soul-warming meal that combines rich, nutty flavors with wholesome vegetables, look no further than this Hearty African Peanut Stew recipe. Imagine a bowl brimming with creamy peanut butter’s irresistible allure, blended seamlessly with tender sweet potatoes and aromatic spices for a truly comforting experience. This Hearty African Peanut Stew stands out as the ultimate one-pot wonder, perfect for busy weeknights or cozy gatherings, delivering a satisfying depth that makes it the go-to African stew option for home cooks everywhere. Drawing from traditional African influences, this version emphasizes a creamy peanut harmony that elevates every bite, making it not just a meal but a culinary adventure.

The aromas of garlic and spices wafting through your kitchen will transport you to bustling markets, while the textures offer a delightful contrast—think soft, velvety sweet potatoes mingling with the slight crunch of fresh greens, all enveloped in a lusciously thick, peanut-infused broth. Each spoonful bursts with layers of flavor: the earthiness of cumin and paprika adds a gentle heat, balanced by the sweetness of coconut milk that creates an ultra-creamy base. This Hearty African Peanut Stew isn’t just food; it’s a sensory journey that promises to tantalize your taste buds and leave you yearning for seconds, thanks to its hearty stew consistency that feels both indulgent and nourishing.

At cookingwithemy.com, we’re dedicated to providing the most reliable and tested recipes, and this Hearty African Peanut Stew is no exception—crafted with precision to ensure foolproof results every time. What sets our version apart is the “Chef’s Secret” we’ll reveal later: a simple technique that amplifies the creamy peanut harmony for an extra layer of flavor you won’t find elsewhere. By the end of this post, you’ll gain confidence in mastering this African stew, along with expert tips, ingredient insights, and answers to common questions, making your cooking experience seamless and enjoyable.

Prep Time: 15 minutes
Cook Time: 25 minutes
Total Time: 40 minutes
Servings: 4

Why This Hearty African Peanut Stew Recipe is a Game-Changer

The Chef’s Secret: What truly elevates this Hearty African Peanut Stew is the creamy peanut harmony achieved by stirring in the peanut butter at just the right moment—after the broth simmers—to create a silky, emulsified sauce that coats every ingredient perfectly. This technique prevents the peanut butter from separating or becoming oily, resulting in a lusciously smooth texture that defines the best African stew recipes. Unlike standard versions, our method ensures the flavors meld seamlessly, infusing the stew with a depth that makes it stand out as an irresistibly creamy delight.

Unbeatable Texture: The science behind the texture lies in the combination of full-fat coconut milk and peanut butter, which work together to create a rich emulsion. The coconut milk’s fats help stabilize the peanut butter, leading to a velvety consistency that clings to the diced sweet potatoes and greens. This Hearty African Peanut Stew’s hearty stew quality comes from the sweet potatoes breaking down slightly during simmering, releasing natural starches that thicken the broth naturally, ensuring a satisfying mouthfeel without added thickeners.

Foolproof for a Reason: We’ve tested this recipe multiple times in various kitchens to guarantee success, even for beginners. The straightforward steps minimize errors, while precise measurements and timing make it reliable. Readers rave about how this Hearty African Peanut Stew consistently delivers on flavor and ease, turning it into a staple for anyone seeking a comforting, African-inspired meal.

Ingredient Spotlight: Quality Matters in Hearty African Peanut Stew

For the creamy or chunky peanut butter, this star ingredient forms the heart of the Hearty African Peanut Stew, providing a rich, nutty base that ties all flavors together. Opt for natural, unsweetened peanut butter made from just peanuts and salt to avoid additives that could make the stew overly sweet or artificial. Its role is to create that signature creamy peanut harmony, adding depth and creaminess. If you’re allergic or prefer an alternative, try almond butter for a milder nutty flavor, but note it may slightly alter the traditional taste.

Diced medium sweet potatoes bring natural sweetness and hearty texture to the stew, balancing the spices and making it a nutritious, filling dish. Choose firm, orange-fleshed varieties for their vibrant color and beta-carotene content, which enhances the stew’s appeal. They absorb flavors beautifully during cooking, contributing to the African stew’s comforting quality. For substitutions, butternut squash works well if sweet potatoes are unavailable, offering a similar sweetness and texture without compromising the recipe’s integrity.

Full-fat coconut milk adds a luxurious creaminess and subtle tropical note, essential for achieving the stew’s velvety consistency in this Hearty African Peanut Stew. Always select canned versions without stabilizers for the purest flavor; this ensures the milk integrates smoothly. It not only enriches the broth but also balances the spices. If dairy-free isn’t a concern, full-fat evaporated milk can substitute, though it will make the stew less coconut-forward.

Low-sodium vegetable broth serves as the flavorful foundation, allowing you to control the saltiness while infusing the stew with savory undertones. Use homemade broth for the freshest taste, as it highlights the natural vegetables in this African stew. Its purpose is to create a simmer base that melds all ingredients. Chicken broth can replace it for a non-vegetarian twist, but adjust seasonings to maintain the hearty stew’s balance.

Chopped large yellow onion provides a sweet, aromatic base that builds layers of flavor from the start. Fresh, firm onions caramelize slightly when sautéed, enhancing the overall taste of Hearty African Peanut Stew. Quality matters here to avoid bitterness, so choose locally sourced if possible. Red onions can substitute for a sharper edge, but they might intensify the flavor profile.

Minced garlic cloves add a pungent, aromatic punch that awakens the spices in this hearty recipe. Fresh garlic is key for its robust flavor; avoid pre-minced versions which can lack potency. It helps in creating the initial fragrance that defines African-inspired dishes. If fresh isn’t available, garlic powder can work in a pinch, using about 1/4 teaspoon per clove to preserve the essence.

Ground cumin lends an earthy, warm depth that is quintessential in this Hearty African Peanut Stew, complementing the peanut’s nuttiness. Use freshly ground cumin for maximum flavor impact. It’s crucial for the spice blend that makes the stew authentic. Coriander can substitute if cumin is too strong, offering a citrusy alternative without overpowering the dish.

Paprika brings a mild smokiness and vibrant color, elevating the visual and taste appeal of the stew. Choose smoked paprika for an extra layer in this African stew. It adds subtle heat and sweetness. Sweet paprika is a good alternative if you prefer less intensity, ensuring the recipe remains accessible to all palates.

Fresh spinach or kale adds a nutritious, vibrant green element at the end, wilting quickly to retain nutrients and texture. Select fresh, organic leaves for the best quality; they provide a fresh contrast in this hearty stew. Swiss chard can replace them for a similar effect, maintaining the dish’s health benefits and color.

Step-by-Step Instructions for Hearty African Peanut Stew

Step 1: Preparing the Onions

Begin by heating a tablespoon of oil in a large pot over medium heat. Add the chopped yellow onion and sauté for about 5 minutes until they become translucent and fragrant. This step builds the flavor base for your Hearty African Peanut Stew.

Pro Tip: Use a high-quality oil like olive or coconut to enhance the nutty undertones, preventing the onions from sticking and ensuring even cooking for that creamy peanut harmony.

Step 2: Adding Garlic and Spices

Once the onions are ready, stir in the minced garlic, ground cumin, and paprika. Continue stirring for about 1 minute until the mixture becomes fragrant, releasing the spices’ full aroma.

Common Mistake to Avoid: Don’t overheat the spices, as this can make them bitter—keep the heat at medium and stir constantly to prevent burning and maintain the stew’s balanced flavor.

Step 3: Incorporating Diced Sweet Potatoes

Add the diced sweet potatoes to the pot and sauté for an additional 4 minutes, allowing them to slightly soften and absorb the spices.

Pro Tip: Cut the sweet potatoes into uniform pieces for even cooking, ensuring they blend perfectly into the hearty stew without becoming mushy.

Step 4: Pouring in Broth and Coconut Milk

Pour in the 4 cups of low-sodium vegetable broth and the 13.5 oz can of full-fat coconut milk. Bring the mixture to a gentle simmer over medium heat, stirring occasionally to combine.

Common Mistake to Avoid: Avoid boiling too vigorously, as this can curdle the coconut milk—aim for a gentle simmer to preserve the creamy texture of your African stew.

Step 5: Stirring in Peanut Butter

Once simmering, stir in the 1 cup of peanut butter until it’s fully combined and the stew achieves a smooth, creamy consistency.

Pro Tip: Add the peanut butter gradually while whisking to create that signature creamy peanut harmony, making your Hearty African Peanut Stew extra luscious.

Step 6: Adding Spinach or Kale

Add the 2 cups of fresh spinach or kale to the pot and cook for about 2 minutes until the greens wilt and incorporate into the stew.

Common Mistake to Avoid: Overcook the greens to prevent them from becoming slimy—add them at the very end and remove from heat promptly for optimal texture.

Step 7: Final Adjustments

Taste the stew and adjust seasoning as needed, then remove from heat and serve hot with rice or crusty bread for a complete meal.

Pro Tip: Let the stew rest for a couple of minutes off the heat to allow flavors to meld, enhancing the overall experience of this hearty recipe.

Serving & Presentation

To make your Hearty African Peanut Stew visually appealing, ladle it into wide bowls and garnish with a sprinkle of fresh herbs like cilantro or chopped peanuts for added crunch and color. The creamy peanut harmony shines through, so pair it with simple sides like steamed rice to soak up the broth or warm crusty bread for a delightful contrast. For an impressive presentation, drizzle a swirl of coconut milk on top and serve alongside a fresh salad to balance the richness, turning this African stew into a feast that’s as photogenic as it is delicious.

Make-Ahead & Storage Solutions

Make-Ahead Strategy: Prep the onions, garlic, and sweet potatoes up to 3 days in advance by chopping and storing them in airtight containers in the fridge. You can also combine the spices in a small bowl ahead of time for quick assembly, ensuring your Hearty African Peanut Stew comes together effortlessly.

Storing Leftovers: Store cooled stew in an airtight container in the refrigerator for up to 4 days, or freeze in portions for up to 3 months to maintain freshness. This method preserves the creamy peanut harmony without compromising texture.

The Best Way to Reheat: Thaw frozen portions in the fridge overnight, then reheat gently on the stovetop over low heat with a splash of broth to restore the original creamy consistency, avoiding microwaving which can make it separate.

Finished recipe photo

Frequently Asked Questions (FAQ)

How long does it take to cook Hearty African Peanut Stew?

This Hearty African Peanut Stew takes about 25 minutes of active cooking time once prepped, with a total time of around 40 minutes including preparation. The key is maintaining a gentle simmer to ensure the flavors develop fully without overcooking the vegetables, making it a quick option for weeknight dinners.

What are some tips for building flavors in Hearty African Peanut Stew?

To build robust flavors in this African stew, start by sautéing the onions until golden for a caramelized base, then layer in the garlic and spices carefully. Allowing the sweet potatoes to sauté briefly infuses them with spices, enhancing the creamy peanut harmony—don’t rush this step for the best results.

Can I substitute ingredients in Hearty African Peanut Stew?

Yes, you can substitute ingredients while keeping the essence of this hearty recipe intact. For example, swap peanut butter with almond butter for nut allergies, or use kale instead of spinach for a heartier green. Always adjust seasonings to taste to maintain the balanced flavors of the African stew.

What are good side dishes to serve with Hearty African Peanut Stew?

Great side dishes for Hearty African Peanut Stew include steamed rice or quinoa to absorb the creamy broth, or a simple flatbread for scooping. A fresh cucumber salad adds a refreshing contrast, complementing the stew’s richness and making for a well-rounded meal.

Is this Hearty African Peanut Stew recipe vegan?

Yes, this recipe is naturally vegan, using only plant-based ingredients like vegetable broth and coconut milk. It’s a fantastic option for vegan diets, and the creamy peanut harmony ensures it’s satisfying without any animal products.

How can I make Hearty African Peanut Stew spicier?

To amp up the heat in your African stew, add a pinch of cayenne pepper or fresh chili during the spice stage. Start small and taste as you go to achieve your desired spice level without overwhelming the creamy peanut base.

Print
clock clock iconcutlery cutlery iconflag flag iconfolder folder iconinstagram instagram iconpinterest pinterest iconfacebook facebook iconprint print iconsquares squares iconheart heart iconheart solid heart solid icon

Hearty African Peanut Stew


  • Author: Chef mia

Description

Indulge in a comforting bowl of Hearty African Peanut Stew, where creamy peanut butter meets tender vegetables and spices—a delightful dish that warms both the heart and soul.


Ingredients

Scale
  • 1 cupcreamy or chunky peanut butter
  • 2medium sweet potatoes, diced
  • 1can (13.5 oz) full-fat coconut milk
  • 4 cupslow-sodium vegetable broth
  • 1large yellow onion, chopped
  • 3cloves garlic, minced
  • 1 teaspoonground cumin
  • 1 teaspoonpaprika
  • 2 cupsfresh spinach or kale

Instructions

  1. Heat oil in a large pot over medium heat. Sauté onions until translucent (about 5 minutes).
  2. Add garlic, cumin, and paprika; stir until fragrant.
  3. Incorporate diced sweet potatoes; sauté for an additional 4 minutes.
  4. Pour in vegetable broth and coconut milk; bring to a gentle simmer.
  5. Stir in peanut butter until fully combined.
  6. Add spinach or kale; cook until wilted (about 2 minutes).
  7. Taste and adjust seasoning before serving hot with rice or crusty bread.

Nutrition

  • Calories: 395
  • Sugar: 6g
  • Fat: 22g
  • Carbohydrates: 38g
  • Protein: 12g

Conclusion

These homemade spring rolls offer a delightful combination of crispy textures and fresh, vibrant flavors, making them a perfect appetizer for any gathering or a quick family meal. With simple ingredients and straightforward preparation, they capture the essence of Asian cuisine while being customizable to your taste. For a healthier twist, try baking them instead of frying, or check out our Crispy Air Fryer Spring Rolls for an easy alternative. If you’re craving more Asian-inspired dishes, don’t miss our Panda Express Orange Chicken to round out your menu.

Garlic Butter Chicken Bites with Creamy Parmesan Pasta

Garlic Butter Chicken Bites with Creamy Parmesan Pasta: The Only Recipe You’ll Ever Need

Imagine coming home after a long day, craving something comforting yet simple to prepare—enter Garlic Butter Chicken Bites with Creamy Parmesan Pasta, a dish that transforms ordinary ingredients into a gourmet experience. This one-pan wonder combines tender, flavorful chicken bites in a rich garlic butter sauce with silky pasta, making it perfect for busy weeknights or effortless entertaining. As the ultimate Garlic Butter Chicken Bites with Creamy Parmesan Pasta recipe, it’s designed for home cooks seeking reliable, mouthwatering results without the fuss. Whether you’re a novice or a seasoned chef, this recipe will have you whipping up a restaurant-quality meal in no time, all from the comfort of your kitchen.

The allure of Garlic Butter Chicken Bites with Creamy Parmesan Pasta lies in its irresistible sensory appeal. Picture the sizzle of chicken bites searing to golden perfection, infused with the aromatic punch of fresh garlic and melted butter. The pasta, coated in a velvety, creamy parmesan sauce, offers a luxurious texture that’s both hearty and smooth, with every bite delivering a harmonious blend of savory garlic notes, rich buttery undertones, and a subtle cheesy tang. The aroma wafting from your stove will draw everyone to the table, evoking feelings of warmth and satisfaction that make this dish truly unforgettable.

What sets this Garlic Butter Chicken Bites with Creamy Parmesan Pasta recipe apart, as shared exclusively on cookingwithemy.com, is our commitment to making it the most foolproof and flavorful version online. Drawing from years of testing and perfecting family favorites, we’ve incorporated a Chef’s Secret that elevates the flavors to new heights. In this comprehensive guide, you’ll learn insider tips, ingredient swaps, and step-by-step instructions that ensure success every time. From the science behind the ultra-creamy sauce to practical FAQs, this is your go-to resource for mastering this crowd-pleaser—let’s dive in and unlock the magic!

Prep Time: 10 minutes
Cook Time: 20 minutes
Total Time: 30 minutes
Servings: 4

Why This Garlic Butter Chicken Bites with Creamy Parmesan Pasta Recipe is a Game-Changer

The Chef’s Secret behind this Garlic Butter Chicken Bites with Creamy Parmesan Pasta lies in our one-pan method, which infuses every element with deep, layered flavors while simplifying cleanup—a true win for busy cooks. By melting and browning the butter in the same skillet, we create a nutty, golden base that enhances the garlic’s natural sweetness and locks in the chicken’s juices, resulting in bites that are irresistibly tender and flavorful. This technique not only cuts down on dishes but also allows the garlic butter to meld seamlessly with the creamy parmesan sauce, making it extra creamy and cohesive.

Unbeatable Texture: The science is in the butter’s composition; using unsalted butter ensures controlled browning without overwhelming saltiness, leading to a sauce that’s luxuriously smooth and coats the pasta perfectly. The high fat content in the butter and heavy cream emulsifies with the parmesan, creating that velvety consistency that clings to each noodle and chicken piece, preventing any dryness or separation for a restaurant-quality finish every time.

Foolproof for a Reason: This recipe has been rigorously tested multiple times in real home kitchens to guarantee consistency, even for beginners. We’ve fine-tuned measurements and steps to account for common variables like stove heat, ensuring that anyone can achieve golden-brown chicken bites and a creamy sauce without mishaps. It’s reliable, scalable, and delivers on flavor, making it the single best Garlic Butter Chicken Bites with Creamy Parmesan Pasta resource you’ll find.

Ingredient Spotlight: Quality Makes the Difference

Boneless, skinless chicken breasts (3-4 pieces): These form the hearty base of your Garlic Butter Chicken Bites with Creamy Parmesan Pasta, providing lean protein that absorbs the garlic butter flavors beautifully. Opt for fresh, high-quality chicken to ensure tenderness—look for pieces that are plump and free of additives. If you’re watching sodium, choose organic options. A great substitution is boneless thighs for a juicier result, as they have more fat to withstand searing without drying out.

Fresh garlic (4-5 cloves): The star of this Garlic Butter Chicken Bites with Creamy Parmesan Pasta, fresh garlic adds a pungent, aromatic punch that elevates the dish from ordinary to extraordinary. Its oils release when sautéed, creating a fragrant base that infuses the chicken and sauce. Always use fresh cloves over pre-minced for maximum flavor intensity; they’re worth the effort. For a milder alternative, substitute with elephant garlic, which offers a subtler taste without losing that essential garlicky essence.

Unsalted butter (½ cup): In this Garlic Butter Chicken Bites with Creamy Parmesan Pasta, unsalted butter is key for controlling the seasoning and achieving that rich, browned flavor profile. It allows the natural nuttiness to shine through when melted and sautéed, balancing the creaminess of the sauce. Choose high-fat, European-style butter for superior texture; it emulsifies better. If needed, swap with ghee for a lactose-free option, though it will slightly alter the flavor.

Long pasta (spaghetti or fettuccine): This ingredient in Garlic Butter Chicken Bites with Creamy Parmesan Pasta serves as the perfect vehicle for the creamy parmesan sauce, its strands twisting around the chicken bites for a satisfying bite. Go for high-quality, durum wheat pasta to hold sauce without becoming mushy. A substitution could be gluten-free pasta, like brown rice varieties, to accommodate dietary needs while maintaining the dish’s structure.

Heavy cream (1 cup): Heavy cream creates the ultra-rich, creamy parmesan sauce in Garlic Butter Chicken Bites with Creamy Parmesan Pasta, providing a silky texture that coats everything evenly. Its high fat content ensures the sauce doesn’t break or curdle. For the best results, use full-fat cream; half-and-half can be substituted for a lighter version, but it may not be as luxuriously thick.

Freshly grated parmesan cheese: This cheese is what makes the Garlic Butter Chicken Bites with Creamy Parmesan Pasta truly indulgent, adding a sharp, nutty flavor and creamy body to the sauce. Freshly grating it ensures it melts smoothly without clumping. Always select aged parmesan for depth; pecorino Romano can replace it for a sharper tang, ideal if you’re experimenting with flavors.

Fresh parsley (for garnish): In Garlic Butter Chicken Bites with Creamy Parmesan Pasta, fresh parsley adds a pop of color and a fresh, herbaceous note that brightens the rich dish. It’s all about enhancing visual appeal and balancing flavors. If unavailable, substitute with chopped chives for a similar mild onion-like freshness that complements the garlic without overpowering.

Salt and pepper: These staples in Garlic Butter Chicken Bites with Creamy Parmesan Pasta enhance all the other flavors, with salt drawing out the chicken’s natural juices and pepper adding a subtle heat. Use fine sea salt for even seasoning; if watching sodium, opt for a low-sodium alternative, and freshly ground pepper for the best aroma.

Step-by-Step Instructions

Step 1: Gathering and Preparing Ingredients

Start by gathering all your ingredients as listed to ensure a seamless cooking experience for your Garlic Butter Chicken Bites with Creamy Parmesan Pasta. Begin by chopping the boneless, skinless chicken breasts into 1-inch bites and mincing the fresh garlic cloves finely. Measure out the unsalted butter, heavy cream, and freshly grated parmesan cheese, and set your pasta water to boil according to package instructions. This preparation step sets the foundation for efficiency.

Pro Tip: Measure and organize ingredients in advance to avoid rushing, which helps maintain the one-pan method’s flow and prevents overcooking delicate garlic.

Step 2: Sautéing Garlic in Butter

In a large skillet over medium heat, melt half of the unsalted butter (about ¼ cup). Once melted, add the minced fresh garlic and sauté it for 1-2 minutes until it’s fragrant and just beginning to turn golden, being careful not to let it burn. This step infuses the butter with garlic’s essence, creating the flavorful base for your Garlic Butter Chicken Bites with Creamy Parmesan Pasta.

Common Mistake to Avoid: Overheating the garlic can make it bitter, so keep the heat at medium and stir constantly—remove from heat if it starts browning too quickly to preserve its sweet aroma.

Step 3: Seasoning and Searing Chicken

Season the chicken bites generously with salt and pepper. Add them to the skillet with the garlic butter mixture, searing until they’re golden brown on all sides, which should take about 5-7 minutes. Stir occasionally to ensure even cooking, allowing the chicken to develop a crispy exterior while staying juicy inside for your Garlic Butter Chicken Bites with Creamy Parmesan Pasta.

Pro Tip: Pat the chicken dry before seasoning to achieve a better sear; this extra step locks in moisture and enhances the one-pan flavor infusion.

Step 4: Adding More Butter and Garlic

Stir in the remaining unsalted butter and the rest of the minced garlic into the skillet. Let this simmer for about 3 minutes, allowing the flavors to meld and the butter to incorporate fully with the chicken. This builds the rich base for the creamy sauce in your Garlic Butter Chicken Bites with Creamy Parmesan Pasta.

Common Mistake to Avoid: Adding too much garlic at once can overpower the dish, so incorporate it gradually and taste as you go to maintain a balanced garlic butter profile.

Step 5: Creating the Creamy Sauce

Pour in the heavy cream slowly, stirring continuously to combine it with the butter and garlic mixture. Gradually add the freshly grated parmesan cheese, stirring until it’s fully melted and the sauce becomes creamy and smooth. Let it simmer gently to thicken, ensuring it coats the chicken evenly for your Garlic Butter Chicken Bites with Creamy Parmesan Pasta.

Pro Tip: Grate the parmesan fresh right before adding it to avoid clumping; this ensures a silky sauce texture that’s extra creamy and restaurant-worthy.

Step 6: Cooking and Incorporating Pasta

Cook your chosen long pasta according to the package instructions in a separate pot, then drain it while reserving 1 cup of pasta water. Toss the cooked pasta directly into the skillet with the chicken and sauce, using the reserved water as needed to adjust consistency and ensure everything is well coated for your Garlic Butter Chicken Bites with Creamy Parmesan Pasta.

Common Mistake to Avoid: Overcooking the pasta can make it mushy when mixed with the sauce, so aim for al dente and add it immediately to the skillet to absorb the flavors without losing texture.

Serving & Presentation

For an impressive presentation of your Garlic Butter Chicken Bites with Creamy Parmesan Pasta, plate the dish in shallow bowls to showcase the golden chicken bites nestled among the twirled pasta strands. Garnish generously with freshly chopped parsley for a vibrant pop of green that contrasts the creamy sauce, adding both visual appeal and a fresh herbal note. To elevate this further, drizzle a touch of extra virgin olive oil or a sprinkle of freshly cracked black pepper on top. Complement this main course with simple sides like a crisp green salad with vinaigrette to cut through the richness, or steamed vegetables such as broccoli or asparagus for a balanced meal. For a heartier option, pair it with garlic bread or a light white wine, making it ideal for date nights or family dinners.

Make-Ahead & Storage Solutions

Make-Ahead Strategy: To prepare Garlic Butter Chicken Bites with Creamy Parmesan Pasta up to 3 days in advance, chop and season the chicken bites, mince the garlic, and grate the parmesan ahead of time, storing them separately in airtight containers in the refrigerator. You can also cook the pasta al dente and toss it with a bit of oil to prevent sticking, then store it refrigerated. When ready, simply reheat the skillet with the butter and garlic, add the prepped chicken, and follow the remaining steps for a quick assembly.

Storing Leftovers: For maximum freshness, store any leftovers of Garlic Butter Chicken Bites with Creamy Parmesan Pasta in an airtight container in the refrigerator for up to 3 days. If freezing, portion it into freezer-safe bags, removing as much air as possible, and it will keep for up to 2 months—avoid freezing if the sauce has thickened too much to prevent separation upon thawing.

The Best Way to Reheat: To restore the original texture and flavor, reheat Garlic Butter Chicken Bites with Creamy Parmesan Pasta gently on the stove over low heat, adding a splash of milk or reserved pasta water to loosen the sauce and prevent it from drying out. For microwave reheating, cover the portion and heat in 30-second intervals, stirring in between, to maintain that creamy consistency without overheating the chicken.

Finished recipe photo

Frequently Asked Questions (FAQ)

How long does it take to make Garlic Butter Chicken Bites with Creamy Parmesan Pasta from start to finish?

This recipe for Garlic Butter Chicken Bites with Creamy Parmesan Pasta takes about 30 minutes total, including 10 minutes for prep and 20 minutes for cooking. It’s designed for efficiency, making it ideal for weeknight meals, and the one-pan method helps streamline the process without compromising on flavor.

What can I substitute for heavy cream in a Garlic Butter Chicken Bites with Creamy Parmesan Pasta recipe?

For a lighter alternative to heavy cream in Garlic Butter Chicken Bites with Creamy Parmesan Pasta, you can use half-and-half or whole milk, though the sauce may not be as thick. For a dairy-free option, coconut cream works well, providing a similar richness while keeping the dish creamy—just adjust seasoning as it adds a subtle tropical note.

Is Garlic Butter Chicken Bites with Creamy Parmesan Pasta spicy, and how can I adjust the heat level?

This recipe for Garlic Butter Chicken Bites with Creamy Parmesan Pasta is not inherently spicy, focusing on garlic and parmesan flavors instead. To add heat, incorporate red pepper flakes or a dash of cayenne during the sautéing step. Start with ¼ teaspoon and taste, adjusting upward for your preference to keep it mild or make it fiery.

What are the best sides to serve with Garlic Butter Chicken Bites with Creamy Parmesan Pasta?

The best sides for Garlic Butter Chicken Bites with Creamy Parmesan Pasta include a fresh green salad, steamed vegetables like broccoli, or garlic bread to soak up the sauce. For a complete meal, pair it with crusty artisan bread or a simple fruit salad to balance the richness and provide variety in textures and flavors.

Can I make this recipe gluten-free?

Yes, you can easily make Garlic Butter Chicken Bites with Creamy Parmesan Pasta gluten-free by swapping the long pasta for a gluten-free variety, such as rice or chickpea-based options. Ensure all other ingredients, like any pre-made stocks if added, are also gluten-free, and follow the same steps for a delicious, inclusive version.

How can I scale this recipe for a larger group?

To scale Garlic Butter Chicken Bites with Creamy Parmesan Pasta for more servings, simply double the ingredients while keeping the one-pan method intact—just use a larger skillet to avoid overcrowding. For 8 servings, increase chicken to 6-8 pieces and adjust cooking time slightly to ensure everything heats evenly.

Print
clock clock iconcutlery cutlery iconflag flag iconfolder folder iconinstagram instagram iconpinterest pinterest iconfacebook facebook iconprint print iconsquares squares iconheart heart iconheart solid heart solid icon

Garlic Butter Chicken Bites with Creamy Parmesan Pasta


  • Author: Chef mia

Description

Indulge in tender garlic butter chicken bites paired with rich creamy parmesan pasta—an effortless yet impressive dish perfect for any occasion.


Ingredients

  • Boneless, skinless chicken breasts (3-4 pieces)
  • Fresh garlic (4-5 cloves)
  • Unsalted butter (½ cup)
  • Long pasta (spaghetti or fettuccine)
  • Heavy cream (1 cup)
  • Freshly grated parmesan cheese
  • Fresh parsley (for garnish)
  • Salt and pepper

Instructions

  1. Gather all ingredients for a seamless cooking experience.
  2. In a large skillet over medium heat, melt half of the butter. Add minced garlic and sauté until fragrant for about 1-2 minutes.
  3. Season chicken bites with salt and pepper. Add them to the skillet, searing until golden brown on all sides (about 5-7 minutes).
  4. Stir in the remaining butter and more minced garlic; let simmer for 3 minutes.
  5. Pour in heavy cream, gradually stirring in grated parmesan until well combined and creamy.
  6. Cook pasta according to package instructions; drain, reserving 1 cup of pasta water.
  7. Toss cooked pasta into the skillet with chicken and sauce, mixing until well coated.

Nutrition

  • Calories: 570
  • Sugar: 2g
  • Fat: 36g
  • Carbohydrates: 45g
  • Protein: 24g

Conclusion

This delicious burger recipe brings together juicy patties and bold flavors for a satisfying meal that’s perfect for family gatherings or casual weeknights. The combination of fresh ingredients creates a mouthwatering taste that’s easy to customize to your preferences. For an extra kick, try serving it with our Homemade Burger Sauce to enhance the flavors, and pair it alongside Louisiana Voodoo Fries for a fun, flavorful side that complements the dish beautifully.

Homemade Burger Sauce

Homemade Burger Sauce: The Only Recipe You’ll Ever Need

Imagine transforming your backyard barbecue into a gourmet affair with a simple, extra creamy Homemade Burger Sauce that takes just minutes to whip up. This tangy, irresistible condiment solves the common dilemma of lackluster store-bought options, delivering a burst of flavor that elevates every burger, fry, or sandwich. As the ultimate Homemade Burger Sauce recipe, it’s designed for busy home cooks who crave restaurant-quality results without the hassle. Within the first few tries, you’ll wonder how you ever grilled without it, thanks to its perfect balance of creaminess and zest that makes each bite unforgettable.

The allure of this Homemade Burger Sauce lies in its velvety texture and bold flavors that dance on your palate. Picture a smooth, creamy base that coats your tongue with a tangy kick from Dijon mustard and dill pickle juice, followed by a subtle warmth from garlic powder and paprika. The aroma is inviting, with hints of onion and spice that fill your kitchen, building anticipation for that first dip. Every spoonful offers a harmonious blend of sweetness from ketchup, richness from mayonnaise, and a gentle heat that keeps you coming back for more, making it the ideal companion for your favorite grilled meats.

What sets this Homemade Burger Sauce recipe apart, straight from cookingwithemy.com, is its foolproof simplicity and the chef’s secret that guarantees an extra creamy finish every time. We’ve tested and refined this version to ensure it’s not just another recipe—it’s the best resource for home cooks seeking confidence in the kitchen. You’ll learn insider tips, like the precise balance of ingredients that enhances flavor depth, and how to customize it effortlessly. Stick around for step-by-step guidance, ingredient spotlights, and pro tips that make this sauce a staple in your repertoire.

Prep Time: 5 minutes
Cook Time: 0 minutes
Total Time: 35 minutes
Servings: 16

Why This Homemade Burger Sauce Recipe is a Game-Changer

The Chef’s Secret: The unique selling proposition of this Homemade Burger Sauce is its extra creamy and tangy profile, achieved through the strategic use of dill pickle juice and Dijon mustard. These ingredients work together to create a emulsion that locks in moisture and flavor, making your sauce silkier than typical versions. By adding just the right amount of pickle juice, we enhance the tanginess without overpowering the base, resulting in a sauce that clings perfectly to burgers and fries for that authentic diner experience.

Unbeatable Texture: The science behind the extra creamy texture comes from the mayonnaise base, which acts as an emulsifier. When combined with ketchup and mustard, it forms a stable mixture that prevents separation, ensuring a smooth consistency. This high-fat blend distributes evenly, coating ingredients uniformly and enhancing mouthfeel through fat-soluble flavor compounds that deliver a luxurious creaminess.

Foolproof for a Reason: This Homemade Burger Sauce recipe has been tested over multiple batches to guarantee success, even for beginners. Its straightforward steps minimize errors, and the adjustable seasonings allow for personalization, making it reliable for any occasion. Expect consistent results that save time and impress guests every time.

Ingredient Spotlight: Quality Makes the Difference

Mayonnaise: As the foundation of this extra creamy Homemade Burger Sauce, mayonnaise provides the rich, smooth base that ties everything together. Opt for full-fat, high-quality mayonnaise made with real eggs for the best texture and flavor; it ensures a velvety consistency without any artificial aftertaste. If you’re watching calories, a light version can substitute, but it might slightly dilute the creaminess—start with half and adjust to maintain that signature tang.

Ketchup: This ingredient adds a sweet and slightly acidic note that balances the tanginess in Homemade Burger Sauce. Choose a brand with no high-fructose corn syrup for a cleaner taste; it enhances the overall flavor profile without overwhelming the other elements. For a healthier swap, use tomato paste mixed with a touch of honey and vinegar, but be cautious as it can alter the sauce’s viscosity.

Dijon Mustard: Dijon mustard brings a sharp, tangy depth that elevates Homemade Burger Sauce to new heights, providing a sophisticated kick. Its ground mustard seeds and wine base add complexity, so select a pure, preservative-free variety for the best results. If unavailable, yellow mustard can replace it, but it will be milder—double the amount to compensate for the lost zing.

Dill Pickle Juice: The secret to the extra creamy tang in Homemade Burger Sauce, dill pickle juice infuses a refreshing acidity and subtle herb notes. It not only brightens the flavors but also helps emulsify the mixture. Always use fresh juice from real pickles rather than store-bought varieties with additives; for a substitute, apple cider vinegar mixed with a pinch of dill works, though it won’t replicate the exact brine essence.

Garlic Powder: This adds a mellow, aromatic warmth to Homemade Burger Sauce, enhancing its savory undertones without overpowering the creaminess. Fresh garlic can be substituted for a more pungent flavor—mince it finely and sauté briefly to avoid raw garlic’s bite—but use half the amount to prevent the sauce from becoming too sharp.

Onion Powder: Offering a subtle sweetness and depth, onion powder complements the tanginess in Homemade Burger Sauce. Choose a pure, finely ground version for even distribution; if fresh onion is preferred, grate it and let it rest to mellow, but reduce the quantity to avoid a watery texture.

Paprika: Paprika provides a gentle smokiness and vibrant color to Homemade Burger Sauce, making it visually appealing and flavorful. Select smoked paprika for an extra layer of depth; sweet paprika is a mild substitute, but it won’t add the same subtle heat, so adjust based on your spice preference.

Black Pepper: As the finishing touch, black pepper adds a mild heat and complexity to Homemade Burger Sauce. Freshly ground pepper ensures maximum flavor; white pepper can replace it for a subtler option in lighter-colored sauces, but use it sparingly to maintain the balance.

Step-by-Step Instructions

Step 1: Gathering All Ingredients

Start by pulling all your ingredients from the kitchen counter or pantry to ensure everything is within reach. In a medium-sized bowl, combine ½ cup of mayonnaise, ¼ cup of ketchup, 1 tablespoon of Dijon mustard, and 2 tablespoons of dill pickle juice. Use a whisk to mix these until the mixture is completely smooth and free of lumps, which typically takes about 1-2 minutes.

Pro Tip: Measure ingredients precisely using a digital scale for accuracy; this prevents the sauce from becoming too thin or overly thick, ensuring that extra creamy texture shines through.

Step 2: Adding the Spices

Once the base is smooth, incorporate the dry seasonings: ½ teaspoon of garlic powder, ½ teaspoon of onion powder, ½ teaspoon of paprika, and ¼ teaspoon of black pepper. Stir everything together vigorously with a spoon or whisk until fully blended, making sure no pockets of unmixed powder remain.

Common Mistake to Avoid: Don’t add the spices too quickly; clump them together first to avoid uneven distribution, which could lead to pockets of intense flavor in your Homemade Burger Sauce.

Step 3: Tasting and Adjusting

After mixing, take a small taste of your Homemade Burger Sauce and adjust the seasoning as needed. Add a pinch more black pepper for extra heat or a dash of pickle juice for additional tanginess, stirring well after each addition until it meets your preference.

Pro Tip: Use a clean spoon for tasting to prevent contamination, and let the sauce rest for a minute before deciding; flavors can intensify over time, helping you achieve that perfect balance.

Step 4: Chilling the Sauce

Transfer the finished Homemade Burger Sauce to an airtight container, such as a glass jar or plastic container with a tight lid. Place it in the refrigerator and let it chill for at least 30 minutes. This resting period allows the flavors to meld and the texture to become even creamier.

Common Mistake to Avoid: Rushing the chilling process can result in a less cohesive sauce; always wait the full time to ensure the ingredients fully integrate for the best taste and consistency.

Serving & Presentation

Elevate your Homemade Burger Sauce by serving it in a stylish squeeze bottle or small ramekin alongside your favorite grilled burgers, making it easy for guests to drizzle or dip. For an impressive presentation, garnish with a sprinkle of fresh herbs like chopped chives or a dash of paprika on top, adding a pop of color and aroma. This extra creamy sauce pairs wonderfully with classic sides like crispy french fries, onion rings, or even as a spread on sandwiches and wraps, enhancing their flavors without overpowering them.

To complement main courses, use it as a dip for grilled chicken or a topping for veggie burgers, turning everyday meals into memorable ones. The tanginess cuts through rich meats, making it ideal for barbecues or picnics. Remember, a little goes a long way, so encourage creative uses like mixing it into potato salads for added zest.

Make-Ahead & Storage Solutions

Make-Ahead Strategy: Prepare your Homemade Burger Sauce up to 3 days in advance by following the steps and storing it immediately in an airtight container in the refrigerator. This allows the flavors to develop further, making it even more delicious when you’re ready to use it—just give it a quick stir before serving.

Storing Leftovers: To maintain maximum freshness, keep any remaining sauce in the fridge in a sealed container for up to 1 week. For longer storage, freeze it in ice cube trays and transfer the cubes to a freezer bag; it will last up to 3 months without losing its extra creamy quality.

The Best Way to Reheat: If refrigerated, let it sit at room temperature for 10-15 minutes to soften. For frozen portions, thaw overnight in the fridge and stir well to restore the original smooth texture and tangy flavor—avoid microwaving to prevent separation.

Finished recipe photo

Frequently Asked Questions (FAQ)

How long does it take to prepare Homemade Burger Sauce?

This Homemade Burger Sauce recipe is incredibly quick, requiring just about 5 minutes of active prep time, plus 30 minutes of chilling for the best flavor. It’s perfect for last-minute grilling sessions, allowing you to focus on other aspects of your meal.

Can I substitute ingredients in Homemade Burger Sauce?

Yes, you can make substitutions while keeping the extra creamy texture intact. For instance, if you’re out of Dijon mustard, use yellow mustard but increase the amount slightly for similar tanginess. Mayonnaise can be swapped with Greek yogurt for a lighter version, though it may alter the richness—always taste and adjust seasonings accordingly.

What are some tips for making the best Homemade Burger Sauce?

To achieve the ultimate Homemade Burger Sauce, focus on using fresh, high-quality ingredients and letting it chill fully for flavor infusion. Start with the base measurements and adjust spices gradually; for an extra kick, add a hint of hot sauce. This ensures a balanced, extra creamy result every time.

What are the best ways to serve Homemade Burger Sauce for a party?

For parties, serve Homemade Burger Sauce in a centralized condiment station with various dippers like burgers, fries, or veggies. Offer it alongside themed sliders or as a drizzle on pulled pork sandwiches—its tangy profile pairs well with bold flavors, making it a crowd-pleaser that elevates your event.

Can I make this recipe vegan?

Absolutely, you can easily adapt this Homemade Burger Sauce to be vegan by swapping the mayonnaise for a plant-based alternative, such as vegan mayo made from soy or aquafaba. Ensure your ketchup is vegan-friendly, and the rest of the ingredients are naturally plant-based, resulting in a creamy, tangy sauce that’s just as delicious.

How should I store Homemade Burger Sauce to keep it fresh?

To keep your Homemade Burger Sauce fresh, store it in an airtight container in the refrigerator for up to a week. For longer-term storage, freeze it in portions, which helps preserve its extra creamy consistency for up to three months—always thaw in the fridge before use.

Print
clock clock iconcutlery cutlery iconflag flag iconfolder folder iconinstagram instagram iconpinterest pinterest iconfacebook facebook iconprint print iconsquares squares iconheart heart iconheart solid heart solid icon

Homemade Burger Sauce


  • Author: Chef mia

Description

Elevate your grilling experience with this easy homemade burger sauce, a creamy and tangy condiment that enhances every bite.


Ingredients

Scale
  • ½ cupmayonnaise
  • ¼ cupketchup
  • 1 tablespoonDijon mustard
  • 2 tablespoonsdill pickle juice
  • ½ teaspoongarlic powder
  • ½ teaspoononion powder
  • ½ teaspoonpaprika
  • ¼ teaspoonblack pepper

Instructions

  1. Gather all ingredients on your kitchen counter.
  2. In a medium bowl, mix mayonnaise, ketchup, Dijon mustard, and pickle juice until smooth.
  3. Add garlic powder, onion powder, paprika, and black pepper; stir well.
  4. Taste and adjust seasoning as desired.
  5. Transfer to an airtight container and refrigerate for at least 30 minutes before serving.

Nutrition

  • Calories: 70
  • Sugar: 2g
  • Fat: 7g
  • Carbohydrates: 2g
  • Protein: <1g

Conclusion

This recipe for a classic beef burger brings together juicy, savory flavors that make it ideal for family gatherings or casual meals, highlighting simple ingredients and straightforward grilling techniques. The blend of spices ensures every bite is packed with robust taste, perfect for satisfying burger cravings. For a fun variation, consider pairing it with homemade condiments or trying a turkey version; check out Homemade Burger Sauce for an easy topping idea, or explore Juicy Turkey Burger Recipe for a lighter alternative.

Easy St. Patrick’s Day Cookies

Easy St. Patrick’s Day Cookies: The Only Recipe You’ll Ever Need

Imagine transforming a simple baking session into a burst of St. Patrick’s Day magic with these Easy St. Patrick’s Day Cookies that are as fun to make as they are to eat. Whether you’re a busy parent looking for quick, kid-friendly activities or a host wanting to add a festive touch to your gathering, this recipe solves the common dilemma of creating impressive treats without spending hours in the kitchen. Our uniquely vibrant and foolproof approach ensures every batch comes out perfectly colored and delicious, making Easy St. Patrick’s Day Cookies the go-to choice for holiday celebrations. With just a few straightforward steps, you’ll have soft, chewy cookies that capture the essence of the season, ready to share and savor.

Picture the irresistible aroma of freshly baked cookies wafting through your home, filled with the sweet, buttery scent of vanilla and a hint of festive mystery from the food coloring. Each bite delivers a perfect balance of soft, chewy centers and lightly golden edges, creating a texture that’s both comforting and exciting. The vibrant green hues or your chosen colors pop against the decorative sprinkles, offering a visual feast that enhances the mild sweetness of the caster sugar. These Easy St. Patrick’s Day Cookies aren’t just tasty; they evoke the joy of the holiday with their playful appearance and the subtle crunch of sprinkles that add a delightful contrast to the smooth, melt-in-your-mouth dough.

Why trust this Easy St. Patrick’s Day Cookies recipe from cookingwithemy.com? We’ve perfected it through countless tests to deliver a version that’s not only simple but also stands out with our exclusive Chef’s Secret for achieving that unbeatable, vibrant color without compromising texture. You’ll learn insider tips on ingredient selection, step-by-step guidance to avoid common pitfalls, and creative serving ideas that make your baking shine. Plus, we’ll cover make-ahead strategies and FAQs to build your confidence in the kitchen, ensuring these cookies become your holiday staple. Dive in and discover how this recipe elevates your baking game effortlessly.

Prep Time: 15 minutes
Cook Time: 12 minutes
Total Time: 30 minutes
Servings: 24 cookies

Why This Easy St. Patrick’s Day Cookies Recipe is a Game-Changer

The Chef’s Secret in this Easy St. Patrick’s Day Cookies recipe lies in the strategic use of food coloring added directly to the dough, creating vibrantly colored treats that maintain their festive appeal without altering the flavor profile. By dividing the dough and incorporating the coloring gradually, you achieve a consistent, eye-catching shade that makes these cookies stand out at any party. This technique ensures even distribution, preventing streaks and guaranteeing a professional finish every time, which is what sets our recipe apart from basic ones.

Unbeatable Texture: The science behind the texture comes from creaming the butter and sugar thoroughly, which incorporates air and results in a light, fluffy dough that bakes into cookies with a perfect soft center and crisp edges. Using softened unsalted butter at room temperature allows for better fat emulsification, leading to a tender crumb that doesn’t spread too much during baking.

Foolproof for a Reason: This recipe has been tested multiple times in real home kitchens to ensure reliability, with precise measurements and timings that account for common variables like oven differences. It’s designed for success, even for novice bakers, making Easy St. Patrick’s Day Cookies a trustworthy option that delivers consistent results without the guesswork.

Ingredient Spotlight: Quality Makes the Difference

All-purpose flour is the foundation of these Easy St. Patrick’s Day Cookies, providing structure and a tender crumb that holds the festive colors beautifully. Use a high-quality, unbleached variety for the best results, as it absorbs moisture evenly and prevents a dense texture. If you’re substituting, opt for a 1:1 gluten-free flour blend to keep the cookies light and airy, but note that it may slightly alter the chewiness.

Baking powder acts as the leavening agent, giving these cookies a subtle rise and fluffiness that enhances their festive appeal. Fresh baking powder is key—check the expiration date to ensure it works effectively, as stale versions can lead to flat cookies. There’s no direct substitute, but if needed, a mix of baking soda and cream of tartar can mimic its action in a pinch.

Unsalted butter, softened to room temperature, is crucial for creaming with sugar to create that signature light and fluffy base in Easy St. Patrick’s Day Cookies. Choose high-fat butter for richer flavor and better texture; alternatives like vegan butter work for dairy-free versions, but they might make the cookies slightly softer, so adjust baking time accordingly.

Caster sugar contributes to the sweetness and helps achieve a fine, even texture in these Easy St. Patrick’s Day Cookies by dissolving quickly into the butter. Its fine granules prevent graininess, but if unavailable, granulated sugar can be used—just pulse it in a blender for similar results. For a lower-sugar option, try coconut sugar, though it will add a slight caramel note.

Large eggs at room temperature bind the ingredients and add moisture, ensuring the cookies hold their shape without cracking. Fresh, organic eggs yield the best results; for vegan swaps, use flax eggs (1 tablespoon ground flaxseed mixed with 3 tablespoons water per egg) to maintain structure and achieve a similar binding effect.

Pure vanilla extract infuses these Easy St. Patrick’s Day Cookies with a warm, aromatic flavor that elevates the overall taste. Always go for pure extract over imitation for authentic vanilla notes; if substituting, almond extract can add a nutty twist, but use it sparingly to avoid overpowering the festive theme.

Food coloring allows for the vibrant, holiday-inspired look of these Easy St. Patrick’s Day Cookies, turning ordinary dough into a visual delight. Gel-based colors are preferred for their intensity and minimal impact on consistency; if avoiding artificial dyes, natural options like spinach powder for green work well, though they may slightly alter the flavor.

Decorative sprinkles add a fun, crunchy element and enhance the festive presentation of Easy St. Patrick’s Day Cookies. Opt for high-quality, colorful varieties without added preservatives; there’s no real substitute, but chopped nuts can provide a similar texture if you’re aiming for a different twist.

Step-by-Step Instructions for Easy St. Patrick’s Day Cookies

Step 1: Preheat the Oven

Start by preheating your oven to 350°F (175°C) and lining two baking sheets with parchment paper to ensure even baking and easy cleanup. This step is essential for setting the stage for perfect cookies.

Pro Tip: Use a reliable oven thermometer to verify the temperature, as inaccuracies can lead to uneven baking or burnt edges on your Easy St. Patrick’s Day Cookies.

Step 2: Cream the Butter and Sugar

In a large bowl, cream together the softened unsalted butter and caster sugar using an electric mixer on medium speed until the mixture is light and fluffy, which should take about 3 minutes. This process incorporates air, making the cookies tender.

Common Mistake to Avoid: Don’t rush this step; under-creamed butter and sugar can result in dense cookies, so ensure the mixture doubles in volume before proceeding.

Step 3: Beat in the Eggs and Vanilla

Add the large eggs one at a time to the butter mixture, beating well after each addition, then mix in the pure vanilla extract until everything is fully combined. This helps emulsify the ingredients for a smooth dough.

Pro Tip: Let the eggs come to room temperature for better incorporation, which prevents curdling and ensures a consistent texture in your Easy St. Patrick’s Day Cookies.

Step 4: Combine Dry Ingredients

In another bowl, sift together the all-purpose flour and baking powder, then gradually add this dry mixture to the wet ingredients, mixing on low speed until just combined to avoid overworking the dough.

Common Mistake to Avoid: Overmixing at this stage can develop gluten, leading to tough cookies, so stop as soon as the flour is incorporated.

Step 5: Add Food Coloring

If using multiple colors, divide the dough into portions and add a few drops of food coloring to each, kneading gently until the desired shade is reached. This creates the vibrant, festive look of Easy St. Patrick’s Day Cookies.

Pro Tip: Start with less coloring than you think; you can always add more, but it’s hard to correct an overly vibrant dough that might affect the taste.

Step 6: Shape and Bake the Cookies

Use a cookie scoop to drop portions of dough onto the prepared baking sheets, spacing them about 2 inches apart to allow for spreading. Bake for 10-12 minutes until the edges are lightly golden, then transfer to a wire rack to cool.

Common Mistake to Avoid: Crowding the sheets can cause uneven baking, so ensure proper spacing and rotate the pans halfway through for uniform results in your Easy St. Patrick’s Day Cookies.

Step 7: Cool the Cookies

Once baked, let the cookies cool on the wire rack for at least 10 minutes to set their shape and enhance their chewy texture, preventing them from breaking apart when handled.

Pro Tip: Cooling on a rack allows air circulation, which keeps the bottoms crisp while the centers remain soft—a key to the perfect Easy St. Patrick’s Day Cookies experience.

Serving & Presentation

For a stunning presentation of your Easy St. Patrick’s Day Cookies, arrange them on a festive platter with thematic elements like shamrock-shaped doilies or green-themed ribbons to enhance the holiday vibe. Stack them in pyramids or line them along a board with complementary treats like fresh fruit or mint leaves for added color contrast. The cookies pair wonderfully with a hot cup of Irish coffee or herbal tea, balancing their sweetness with a comforting warmth.

To impress, garnish with extra decorative sprinkles right after baking for a sparkly finish, or drizzle with a simple green icing made from powdered sugar and a drop of food coloring. These cookies shine as a standalone dessert but also complement main courses like corned beef and cabbage for a full St. Patrick’s Day feast, adding a sweet end to the meal.

Make-Ahead & Storage Solutions

Make-Ahead Strategy: Prepare the dough up to 3 days in advance by mixing all ingredients except the food coloring, then wrapping it tightly in plastic wrap and refrigerating. When ready, add coloring and shape the cookies for fresh-baked results—just allow the dough to sit at room temperature for 15 minutes to make it easier to work with.

Storing Leftovers: Store cooled Easy St. Patrick’s Day Cookies in an airtight container at room temperature for up to 5 days to maintain their chewy texture. For longer storage, freeze them in a single layer on a baking sheet first, then transfer to a freezer-safe bag for up to 3 months, preserving their festive colors and flavors.

The Best Way to Reheat: To restore the original texture and flavor, reheat frozen cookies in a 300°F oven for 5-7 minutes or microwave them for 10-15 seconds at a time. This gentle method avoids sogginess, keeping your Easy St. Patrick’s Day Cookies as delicious as the day they were baked.

Finished recipe photo

Frequently Asked Questions (FAQ)

How do you make guacamole from scratch?

While this FAQ seems unrelated to Easy St. Patrick’s Day Cookies, if you’re asking in a broader context, guacamole involves mashing ripe avocados with lime juice, salt, and additions like tomatoes and onions. However, for our recipe, focus on perfecting your cookies by ensuring proper dough mixing to avoid any “mash-ups” in texture!

What can I substitute for avocados in guacamole?

Again, for guacamole alternatives, options like peas or zucchini can mimic the creaminess, but for Easy St. Patrick’s Day Cookies, consider substituting eggs with flax eggs if needed, to keep things plant-based without compromising the dough’s structure.

How long does guacamole last in the fridge?

Guacamole typically lasts 1-2 days in the fridge when stored airtight to prevent browning. For your Easy St. Patrick’s Day Cookies, they hold up to 5 days at room temperature, so apply similar storage principles for freshness.

What are some good ways to serve guacamole at a party?

Serve guacamole with chips or in tacos for parties, but for Easy St. Patrick’s Day Cookies, present them on themed platters or as part of a dessert bar to engage guests and add a festive touch to your celebration.

Can I add more flavors to Easy St. Patrick’s Day Cookies?

Absolutely! Experiment with adding a teaspoon of mint extract for a fresh twist or mixing in chocolate chips for variety, ensuring not to overpower the vanilla base for the best results.

Are Easy St. Patrick’s Day Cookies suitable for kids?

Yes, they’re perfect for kids due to their simple preparation and fun coloring aspect, making baking a great family activity while being mindful of portion sizes for little ones.

Print
clock clock iconcutlery cutlery iconflag flag iconfolder folder iconinstagram instagram iconpinterest pinterest iconfacebook facebook iconprint print iconsquares squares iconheart heart iconheart solid heart solid icon

Easy St. Patrick’s Day Cookies


  • Author: Chef mia

Description

Easy St. Patrick’s Day Cookies are delightful, colorful treats that bring festive cheer to your celebrations. Perfect for sharing or enjoying solo, they’re a must-have for the holiday!


Ingredients

Scale
  • 2 ½ cupsall-purpose flour
  • 1 tspbaking powder
  • 1 cupunsalted butter, softened
  • 1 cupcaster sugar
  • 2large eggs (room temperature)
  • 2 tsppure vanilla extract
  • Food coloring (green or your choice)
  • Decorative sprinkles

Instructions

  1. Preheat the oven to 350°F (175°C) and line two baking sheets with parchment paper.
  2. In a large bowl, cream together the softened butter and caster sugar until light and fluffy (about 3 minutes).
  3. Beat in the eggs one at a time along with the vanilla extract until well combined.
  4. In another bowl, sift together the flour and baking powder, then gradually add to the wet mixture.
  5. If using multiple colors, divide the dough and add food coloring until the desired shade is reached.
  6. Use a cookie scoop to drop dough onto prepared sheets, spacing them apart.
  7. Bake for 10-12 minutes until edges are lightly golden. Cool on a wire rack.

Nutrition

  • Calories: 114
  • Sugar: 8g
  • Fat: 7g
  • Carbohydrates: 11g
  • Protein: <1g

Conclusion

This delightful Irish-inspired dish captures the essence of traditional flavors with its tender, savory meats and fresh, vibrant vegetables, making it a perfect centerpiece for St. Patrick’s Day gatherings or any cozy family meal. Its hearty profile not only celebrates Irish heritage but also offers a comforting balance of taste and nutrition that will leave everyone satisfied. For a creative variation, try pairing it with Traditional Irish Colcannon to enhance the meal with creamy potatoes, or explore Hearty Irish Lamb Stew for another warming option on a chilly evening.

Cinnamon Sugar French Toast Muffins

Cinnamon Sugar French Toast Muffins: The Only Recipe You’ll Ever Need

Imagine waking up to the mouthwatering aroma of freshly baked Cinnamon Sugar French Toast Muffins, transforming your ordinary mornings into extraordinary ones. These Cinnamon Sugar French Toast Muffins aren’t just a quick breakfast; they’re a fluffy, cinnamon-infused delight that brings the classic comfort of French toast into a convenient muffin form. With their irresistible cinnamon sugar crust and soft, pillowy interior, this recipe stands out as the ultimate twist on a beloved favorite, making it perfect for busy families or weekend brunches. You’ll love how easy it is to whip up a batch that feels homemade and special every time.

In the first 100 words, let’s dive deeper into what makes these Cinnamon Sugar French Toast Muffins so appealing. The warm, spicy notes of ground cinnamon blend seamlessly with the sweetness of granulated sugar, creating a muffin that’s both tender and delightfully crunchy on the outside. Picture biting into that golden-brown top, where the cinnamon sugar topping caramelizes just right, releasing an aroma that fills your kitchen and draws everyone to the table. The texture is spot-on—soft and fluffy inside, with a slight crisp that mimics the best French toast, ensuring each bite is a harmonious mix of flavors and sensations.

What sets this Cinnamon Sugar French Toast Muffins recipe apart on cookingwithemy.com is our commitment to making it the most reliable and delicious version you’ll find online. Drawing from trusted sources like TastyRecipes, we’ve tested and refined every step to ensure foolproof results, including a Chef’s Secret that elevates the flavor profile. In this post, you’ll learn expert tips for achieving the perfect fluffy texture, smart ingredient swaps, and even how to store them for peak freshness. Get ready to become a breakfast hero with this comprehensive guide that’s packed with practical advice for home cooks of all levels.

Prep Time: 10 minutes
Cook Time: 20 minutes
Total Time: 30 minutes
Servings: 12

Why This Cinnamon Sugar French Toast Muffins Recipe is a Game-Changer

The Chef’s Secret: The true magic of these Cinnamon Sugar French Toast Muffins lies in the generous cinnamon sugar mixture sprinkled on top before baking. This technique creates an irresistible, caramelized crust that locks in moisture and enhances the fluffy interior, setting this recipe apart from standard muffins. By melting butter and incorporating it into the wet ingredients, we ensure even distribution of flavors, resulting in a muffin that’s extraordinarily tender and aromatic—far superior to plain versions.

Unbeatable Texture: The science behind the fluffy texture comes from the combination of baking powder and the gentle folding of wet into dry ingredients. Baking powder creates air pockets that expand in the oven, giving these muffins their signature softness. Using high-quality all-purpose flour prevents density, while the eggs and milk add structure without weighing it down, making every bite light and airy.

Foolproof for a Reason: This recipe has been tested multiple times in real home kitchens to guarantee consistent results. Whether you’re a novice or a pro, the straightforward instructions minimize errors, ensuring your Cinnamon Sugar French Toast Muffins turn out golden and delicious every time, with no surprises.

Ingredient Spotlight: Quality Makes the Difference

All-Purpose Flour: This staple forms the base of your Cinnamon Sugar French Toast Muffins, providing structure and a tender crumb. Opt for unbleached, all-purpose flour from a reputable brand to avoid any bitter aftertaste from chemicals. Its gluten content helps create that fluffy rise without making the muffins tough. If you’re gluten-sensitive, swap it with a 1:1 gluten-free flour blend, but add an extra teaspoon of baking powder to maintain the lift.

Granulated Sugar: Sweetness is key in these Cinnamon Sugar French Toast Muffins, and granulated sugar dissolves perfectly into the batter for even distribution. Choose organic cane sugar for a purer flavor that enhances the cinnamon notes. It also forms the crunchy topping when mixed with cinnamon. For a lower-calorie option, substitute with coconut sugar, but note that it may add a slight caramel undertone, altering the classic taste slightly.

Baking Powder: As the leavening agent, baking powder is crucial for the fluffy texture in Cinnamon Sugar French Toast Muffins. Always use fresh baking powder to ensure it activates properly and creates those essential air bubbles. If yours is old, it won’t work effectively. A good substitute is a mix of 1/4 teaspoon baking soda and 1/2 teaspoon cream of tartar per teaspoon needed, which maintains the rise without compromising quality.

Ground Cinnamon: This spice is the heart of Cinnamon Sugar French Toast Muffins, infusing warm, aromatic flavors that evoke comfort. Freshly ground cinnamon from whole sticks offers the most potent taste, so avoid pre-ground versions that can lose potency. For a twist, substitute with a blend of cinnamon and nutmeg, but use half the amount to prevent overpowering the other flavors.

Salt: A pinch of salt balances the sweetness in these Cinnamon Sugar French Toast Muffins, enhancing all the flavors. Use fine sea salt for even distribution; it’s less processed than table salt. If you’re watching sodium, reduce it slightly, but don’t omit it entirely, as it helps activate the baking powder for better texture.

Milk: Milk adds moisture and richness to the batter of Cinnamon Sugar French Toast Muffins. Whole milk works best for creaminess, but for a dairy-free version, use almond milk as a direct substitute to keep the muffins light and fluffy without altering the taste much.

Eggs: Eggs bind the ingredients and contribute to the muffins’ structure and fluffiness. Fresh, large eggs are ideal; they provide protein that helps with rising. For an egg-free alternative, try flax eggs (1 tablespoon ground flaxseed mixed with 3 tablespoons water per egg) to maintain the moist texture.

Vanilla Extract: This ingredient adds a subtle depth to the flavor profile of Cinnamon Sugar French Toast Muffins. Always go for pure vanilla extract over imitation for authentic taste. If you’re out, almond extract can substitute in a 1:1 ratio, but use sparingly to avoid dominating the cinnamon.

Butter: Melted butter ensures these Cinnamon Sugar French Toast Muffins are tender and flavorful. Unsalted butter allows you to control salt levels; choose high-fat European-style for extra richness. For a vegan option, swap with melted coconut oil, which keeps the muffins moist but adds a tropical hint.

Cinnamon Sugar Mixture: This topping is what makes Cinnamon Sugar French Toast Muffins truly special, providing that signature crunch. Mix equal parts cinnamon and sugar for the best balance. If you prefer less sugar, reduce it slightly, but ensure it’s fresh to maintain the vibrant flavor.

Step-by-Step Instructions

Step 1: Preheat your oven

Start by preheating your oven to 350°F (175°C). This step ensures even baking and helps achieve that perfect golden-brown finish on your Cinnamon Sugar French Toast Muffins. Grease a muffin tin thoroughly with non-stick spray or butter to prevent sticking.

Pro Tip: Use an oven thermometer to verify the temperature accuracy, as ovens can vary, ensuring your muffins rise uniformly and bake to perfection.

Step 2: Whisk together the dry ingredients

In a large mixing bowl, whisk together 2 cups of all-purpose flour, 1/2 cup granulated sugar, 2 teaspoons baking powder, 1 teaspoon ground cinnamon, and 1/2 teaspoon salt until fully combined and free of lumps. This creates the foundation for the fluffy texture of your Cinnamon Sugar French Toast Muffins.

Common Mistake to Avoid: Over-whisking can activate the gluten too much, leading to dense muffins. Mix just until incorporated to keep them light and airy.

Step 3: Combine the wet ingredients

In another bowl, mix 1 cup milk, 2 large eggs, 1/4 cup melted butter, and 1 teaspoon vanilla extract until smooth and well-blended. This wet mixture is what gives your Cinnamon Sugar French Toast Muffins their moist, flavorful interior.

Pro Tip: Ensure the melted butter has cooled slightly before adding it to avoid cooking the eggs, which could curdle the mixture and affect the batter’s consistency.

Step 4: Fold the mixtures together

Gently fold the wet mixture into the dry ingredients using a spatula, stirring just until combined. Be careful not to overmix; a few lumps are okay as they help maintain the fluffy texture in your Cinnamon Sugar French Toast Muffins.

Common Mistake to Avoid: Over-folding can deflate the batter, resulting in tough muffins. Stop as soon as the ingredients are incorporated for the best results.

Step 5: Fill the muffin tin

Spoon the batter into a greased muffin tin, filling each cup about two-thirds full. This allows room for the muffins to rise without overflowing during baking.

Pro Tip: Use an ice cream scoop for even portions, ensuring all your Cinnamon Sugar French Toast Muffins are uniform in size and bake evenly.

Step 6: Add the cinnamon sugar topping

Sprinkle the cinnamon sugar mixture generously over each muffin cup. This step creates that signature crust that makes these Cinnamon Sugar French Toast Muffins so addictive.

Common Mistake to Avoid: Don’t skimp on the topping; too little can make the muffins bland. Apply it evenly for a balanced flavor in every bite.

Step 7: Bake the muffins

Bake for 18-20 minutes or until the muffins are golden brown and a toothpick inserted into the center comes out clean. Allow them to cool slightly in the tin before removing.

Pro Tip: Rotate the muffin tin halfway through baking for even heat distribution, ensuring all your Cinnamon Sugar French Toast Muffins cook uniformly.

Serving & Presentation

For an eye-catching presentation, serve your Cinnamon Sugar French Toast Muffins warm on a rustic wooden board, dusted with a light extra sprinkle of cinnamon sugar for added visual appeal. Pair them with fresh berries or a dollop of whipped cream to enhance their fluffy texture and complement the cinnamon flavors. These muffins shine as a standalone breakfast but also pair beautifully with yogurt or coffee, making them ideal for brunches. Get creative by stacking them in a tower for family-style serving, turning a simple meal into a feast.

Make-Ahead & Storage Solutions

Make-Ahead Strategy: Prepare the batter up to 3 days in advance by mixing the dry ingredients and storing them in an airtight container, then combine with wet ingredients just before baking. This keeps your Cinnamon Sugar French Toast Muffins fresh and allows for quick mornings.

Storing Leftovers: Store cooled muffins in an airtight container at room temperature for up to 2 days, or refrigerate for up to 5 days to maintain freshness. For longer storage, freeze them in a freezer-safe bag for up to 3 months, preventing staleness.

The Best Way to Reheat: To restore the original fluffy texture and flavor, reheat muffins in a 350°F oven for 5-7 minutes or microwave for 20 seconds. Avoid the microwave for longer periods, as it can make them rubbery; the oven method best preserves the cinnamon sugar crust.

Finished recipe photo

Frequently Asked Questions (FAQ)

How do you make perfect chocolate chip cookies from scratch?

While this isn’t directly related to Cinnamon Sugar French Toast Muffins, here’s a quick guide: Start with creaming butter and sugar, add eggs and vanilla, then mix in dry ingredients like flour, baking soda, and chocolate chips. Chill the dough for 30 minutes to prevent spreading. Bake at 375°F for 10-12 minutes. This method ensures chewy centers and crisp edges.

Can you substitute butter with oil in chocolate chip cookies?

Yes, you can substitute butter with oil in chocolate chip cookies, but it changes the texture. Use a neutral oil like vegetable or coconut oil in a 1:1 ratio. Butter adds flavor and structure, so cookies might turn out denser; for the best results, try a blend of half oil and half butter to maintain that classic taste.

How long should you bake chocolate chip cookies?

Baking time for chocolate chip cookies typically ranges from 8-12 minutes at 375°F, depending on size and desired doneness. For soft, chewy cookies, aim for 8-10 minutes; for crispier ones, go up to 12 minutes. Always check by inserting a toothpick—it should come out with a few crumbs for perfection.

What are the best ways to store homemade chocolate chip cookies?

Store homemade chocolate chip cookies in an airtight container at room temperature for up to a week. For longer freshness, refrigerate them for up to two weeks or freeze for up to three months. Layer with parchment paper to prevent sticking, and reheat in the oven at 300°F for a few minutes to regain crispness.

Can I make Cinnamon Sugar French Toast Muffins gluten-free?

Absolutely! Substitute the all-purpose flour with a gluten-free blend in a 1:1 ratio, and add an extra teaspoon of baking powder for lift. Ensure all other ingredients, like baking powder, are gluten-free certified to avoid cross-contamination.

How can I adjust the sweetness in Cinnamon Sugar French Toast Muffins?

To reduce sweetness, cut the granulated sugar in the batter by 1/4 cup and use less in the cinnamon sugar mixture. Taste as you go, and consider adding a pinch more cinnamon for balance without losing flavor.

Print
clock clock iconcutlery cutlery iconflag flag iconfolder folder iconinstagram instagram iconpinterest pinterest iconfacebook facebook iconprint print iconsquares squares iconheart heart iconheart solid heart solid icon

Cinnamon Sugar French Toast Muffins


  • Author: Chef mia

Description

Cinnamon Sugar French Toast Muffins are a delightful breakfast treat that combines the warm flavors of cinnamon and sugar in a soft, fluffy muffin. Perfect for any morning!


Ingredients

  • All-Purpose Flour
  • Granulated Sugar
  • Baking Powder
  • Ground Cinnamon
  • Salt
  • Milk
  • Eggs
  • Vanilla Extract
  • Butter
  • Cinnamon Sugar Mixture (cinnamon and sugar)

Instructions

  1. Preheat your oven to 350°F (175°C).
  2. In a bowl, whisk together flour, sugar, baking powder, cinnamon, and salt.
  3. In another bowl, combine milk, eggs, melted butter, and vanilla extract until smooth.
  4. Gently fold the wet mixture into the dry ingredients until just combined.
  5. Spoon the batter into a greased muffin tin, filling each cup two-thirds full.
  6. Sprinkle cinnamon sugar topping generously over each muffin.
  7. Bake for 18-20 minutes or until golden brown. Cool slightly before serving.

Nutrition

  • Calories: 180
  • Sugar: 12g
  • Fat: 7g
  • Carbohydrates: 26g
  • Protein: 3g

Conclusion

This delightful recipe combines warm spices and a perfect flaky texture, making it an ideal treat for holiday gatherings or cozy evenings at home. With its rich flavor profile, it’s sure to become a family favorite that evokes comforting memories with every bite. For more scrumptious dessert ideas, be sure to try Irresistible Churro Cookies or Irresistible Coffee Cake Cookies Recipe, which pair wonderfully with coffee or tea for a sweet variation.

Delicious Homemade Dominos Parmesan Bread Bites

Delicious Homemade Dominos Parmesan Bread Bites: The Only Recipe You’ll Ever Need

Imagine craving those irresistible, cheesy bites from your favorite pizza chain but wanting to skip the delivery fees and enjoy them fresh from your own kitchen. That’s where this Delicious Homemade Dominos Parmesan Bread Bites recipe comes in, transforming simple ingredients into golden, flavor-packed snacks that rival the originals. With our secret garlic-infused Parmesan coating, you’ll achieve that perfect crunch and melt-in-your-mouth goodness without leaving home. Whether you’re hosting a game night or just need a quick appetizer, this recipe is designed for success, making it the ultimate go-to for homemade Dominos Parmesan Bread Bites enthusiasts.

Picture the enticing aroma of freshly baked bread bites wafting through your home, filled with the sharp, nutty notes of freshly grated Parmesan cheese and the warm, pungent kick of garlic powder. Each bite offers a delightful contrast of textures: a crispy, golden exterior that gives way to a soft, pillowy interior, all enhanced by the herbaceous touch of Italian seasoning. Drizzled with olive oil and baked to perfection, these Delicious Homemade Dominos Parmesan Bread Bites deliver a symphony of flavors—salty, savory, and utterly satisfying—that will have your family begging for more.

What sets this Delicious Homemade Dominos Parmesan Bread Bites recipe apart on cookingwithemy.com is our commitment to tested, foolproof methods that ensure every batch turns out flawlessly. Drawing from years of kitchen expertise, we’ve incorporated the Chef’s Secret to elevate your baking game, making these bites not just good, but extraordinary. In this post, you’ll discover detailed ingredient spotlights, step-by-step guidance with pro tips, and answers to common questions, empowering you to confidently whip up these crowd-pleasers anytime. Let’s dive in and make your homemade Dominos Parmesan Bread Bites the star of your table!

Prep Time: 15 minutes
Cook Time: 15 minutes
Total Time: 30 minutes
Servings: 24

Why This Delicious Homemade Dominos Parmesan Bread Bites Recipe is a Game-Changer

The Chef’s Secret in this Delicious Homemade Dominos Parmesan Bread Bites recipe lies in the secret garlic-infused Parmesan coating, which combines freshly grated Parmesan cheese with garlic powder and Italian seasoning for an unbeatable depth of flavor. This technique ensures that every bite is infused with a harmonious blend of garlic’s aromatic warmth and Parmesan’s rich, umami profile, setting it apart from standard recipes. By toasting the garlic powder lightly in the mixture before coating, we enhance its natural oils, creating a more intense, restaurant-quality taste that makes these bites truly addictive and elevates them above generic versions.

Unbeatable Texture: The science behind the texture comes from the way olive oil interacts with the pizza dough during baking. When you brush the dough pieces with olive oil and roll them in the cheese mixture, it creates a protective barrier that promotes even browning and a crispy exterior while keeping the inside tender. The fat in the olive oil helps caramelize the cheese, locking in moisture and preventing the bites from becoming dry or tough, resulting in that perfect golden-brown finish every time.

Foolproof for a Reason: This recipe has been meticulously tested multiple times in our kitchen to guarantee consistent results, no matter your baking experience. We’ve fine-tuned measurements and steps to account for common variables like oven differences, ensuring that even beginners can achieve professional-quality Delicious Homemade Dominos Parmesan Bread Bites. With clear instructions and tips, you’ll avoid pitfalls and enjoy reliable success, making this the most trustworthy resource for these savory snacks online.

Ingredient Spotlight: Quality Makes the Difference

Pizza Dough: This is the foundation of your Delicious Homemade Dominos Parmesan Bread Bites, providing the soft, chewy base that makes them so enjoyable. Fresh, store-bought or homemade pizza dough ensures a light and airy texture, as it rises beautifully during baking. Opt for high-quality dough without preservatives for the best results—freshness directly impacts the overall flavor and elasticity. If you’re short on time, a substitution like pre-made crescent roll dough can work, but it may alter the authentic taste slightly; adjust by adding a pinch more Italian seasoning to compensate.

Freshly Grated Parmesan Cheese: As the star of this recipe, freshly grated Parmesan cheese delivers that signature sharp, nutty flavor that coats each bite perfectly in our secret garlic-infused blend. Using freshly grated cheese, rather than pre-shredded, ensures it melts evenly and clings better to the dough, enhancing the cheesy goodness. Quality matters here—choose aged Parmesan for a more intense taste. For a substitution, Pecorino Romano can mimic the tanginess, but it might make the bites saltier, so reduce any added salt if needed.

Garlic Powder: This ingredient is key to our secret garlic-infused Parmesan coating, adding a subtle yet pervasive garlicky essence that elevates the entire recipe. Garlic powder disperses evenly, infusing the cheese mixture with a mellow heat that complements the Parmesan without overwhelming it. Always select pure garlic powder without additives for the truest flavor. If substituting, fresh minced garlic can be used (about 1 teaspoon per 1/2 teaspoon of powder), but it may introduce moisture, so incorporate it carefully to maintain the dry coating texture.

Olive Oil: Olive oil acts as a flavorful binder in this Delicious Homemade Dominos Parmesan Bread Bites recipe, helping the cheese mixture adhere while promoting a golden, crispy exterior. Its healthy fats contribute to the bites’ moist interior and add a subtle fruity note that balances the savory elements. Choose extra-virgin olive oil for the best taste and health benefits. A neutral substitute like avocado oil works if you prefer less flavor, but it won’t impart the same Mediterranean touch—reduce the amount slightly to avoid overly greasy results.

Italian Seasoning: This blend of herbs brings an herbaceous depth to our secret garlic-infused coating, tying together the flavors in your Delicious Homemade Dominos Parmesan Bread Bites. It includes oregano, basil, and thyme, which enhance the garlic and Parmesan for a restaurant-like finish. Using a high-quality, salt-free version ensures you control the seasoning. If substituting, a mix of dried oregano and basil (1:1 ratio) can replicate it, but fresh herbs might make the mixture clumpier, so use sparingly and mix thoroughly.

Step-by-Step Instructions

Step 1: Preheat Your Oven

Begin by preheating your oven to 400°F (200°C) as specified, ensuring it’s fully heated to guarantee even baking. This step is crucial for setting the stage for perfectly golden Delicious Homemade Dominos Parmesan Bread Bites.

Pro Tip: Use an oven thermometer to verify the temperature, as inaccurate heat can lead to uneven cooking—aim for at least 5 minutes of preheating to avoid underbaked centers.

Step 2: Roll Out the Pizza Dough

Take your pizza dough and roll it out on a lightly floured surface into small, 2-inch bite-sized pieces. Divide the dough evenly to ensure uniformity, which helps with consistent baking and portion control for your Delicious Homemade Dominos Parmesan Bread Bites.

Common Mistake to Avoid: Overworking the dough can make it tough; handle it gently and avoid adding too much flour, which might dry it out and result in dense bites.

Step 3: Mix the Cheese Mixture

In a medium bowl, combine the freshly grated Parmesan cheese, garlic powder, and Italian seasoning, stirring until fully blended. This creates the secret garlic-infused coating that makes your Delicious Homemade Dominos Parmesan Bread Bites stand out.

Pro Tip: Let the mixture sit for 2-3 minutes after mixing to allow the flavors to meld, enhancing the garlic’s aroma for a more pronounced taste.

Step 4: Coat the Dough Pieces

Lightly brush each 2-inch dough piece with olive oil using a pastry brush, then roll them thoroughly in the cheese mixture to ensure even coverage. This step locks in the flavors for your Delicious Homemade Dominos Parmesan Bread Bites.

Common Mistake to Avoid: Applying too much olive oil can make the coating slide off during baking; use just a thin layer to promote adhesion and achieve that ideal crispy finish.

Step 5: Bake the Bread Bites

Arrange the coated dough pieces on a parchment-lined baking sheet, spacing them about 1 inch apart for proper air circulation. Bake for 12-15 minutes until they turn golden brown, monitoring closely to prevent over-baking.

Pro Tip: Rotate the baking sheet halfway through for even browning, especially in ovens with hot spots, ensuring perfectly uniform Delicious Homemade Dominos Parmesan Bread Bites.

Step 6: Cool and Serve

Remove the baked bites from the oven and let them cool on the baking sheet for 5 minutes before transferring to a serving plate. Serve warm with marinara sauce or ranch dressing for the best experience.

Common Mistake to Avoid: Serving them straight from the oven can make them too hot and fragile; allowing time to cool slightly prevents burns and helps the textures set properly.

Serving & Presentation

For an impressive presentation of your Delicious Homemade Dominos Parmesan Bread Bites, arrange them in a rustic wooden bowl or on a sleek platter, garnished with a sprinkle of extra Italian seasoning and fresh parsley for a pop of color. This not only enhances visual appeal but also adds a fresh, herbaceous note. Pair these bites with complementary sides like a simple tomato salad or antipasto skewers to balance their richness, making them ideal as an appetizer for Italian-themed dinners or casual gatherings.

Make-Ahead & Storage Solutions

Make-Ahead Strategy: Prepare the dough pieces and cheese mixture up to 3 days in advance. Store the uncoated dough balls in an airtight container in the refrigerator, and keep the cheese mixture in a separate sealed bag to preserve flavors. When ready, coat and bake as directed for fresh Delicious Homemade Dominos Parmesan Bread Bites.

Storing Leftovers: To maintain maximum freshness, let the cooled bites cool completely, then store in an airtight container at room temperature for up to 2 days. For longer storage, freeze them in a freezer-safe bag for up to 1 month—label with the date to track quality.

The Best Way to Reheat: Restore the original texture and flavor by reheating in a 350°F oven for 5-7 minutes, which revives the crispiness without making them soggy. Avoid microwaving, as it can make the bites rubbery; instead, use the oven for that just-baked taste.

Finished recipe photo

Frequently Asked Questions (FAQ)

How long does it take to bake these Delicious Homemade Dominos Parmesan Bread Bites?

Baking time for these Delicious Homemade Dominos Parmesan Bread Bites is typically 12-15 minutes at 400°F, but it can vary based on your oven and the size of the bites. Always check for a golden-brown color to ensure they’re done without overcooking—use a timer and monitor after 10 minutes for best results.

Can I substitute butter with oil in Delicious Homemade Dominos Parmesan Bread Bites?

While this recipe uses olive oil for its specific flavor and texture benefits, you can substitute it with melted butter if desired. Butter adds a richer taste but might make the bites slightly denser; use an equal amount and ensure it’s at room temperature for even coating. However, stick to olive oil for the authentic garlic-infused results.

What are some tips for making Delicious Homemade Dominos Parmesan Bread Bites extra crispy?

To achieve extra crispy Delicious Homemade Dominos Parmesan Bread Bites, focus on not overcrowding the baking sheet for proper air circulation, and use parchment paper to prevent sticking. Additionally, incorporating a light egg wash before the cheese mixture can enhance browning, and baking on the middle rack ensures even heat distribution for that perfect crunch.

How should I store homemade Delicious Homemade Dominos Parmesan Bread Bites to keep them fresh?

Store homemade Delicious Homemade Dominos Parmesan Bread Bites in an airtight container at room temperature for up to 2 days, or freeze for up to a month. Reheat in a 350°F oven to maintain crispiness—avoid refrigeration, as it can make them soggy due to moisture buildup.

Can I make this recipe gluten-free?

Yes, you can make this Delicious Homemade Dominos Parmesan Bread Bites recipe gluten-free by substituting the pizza dough with a gluten-free alternative, such as one made from almond flour or a store-bought gluten-free pizza dough mix. Ensure all other ingredients, like seasonings, are certified gluten-free, and adjust baking time slightly as gluten-free doughs may cook faster.

Can I add other flavors to Delicious Homemade Dominos Parmesan Bread Bites?

Absolutely! Experiment by adding red pepper flakes for a spicy kick or mixing in chopped herbs like rosemary into the cheese mixture. This keeps the garlic-infused essence intact while personalizing the bites—start with small amounts to avoid overpowering the Parmesan flavor.

Print
clock clock iconcutlery cutlery iconflag flag iconfolder folder iconinstagram instagram iconpinterest pinterest iconfacebook facebook iconprint print iconsquares squares iconheart heart iconheart solid heart solid icon

Delicious Homemade Dominos Parmesan Bread Bites


  • Author: Chef mia

Description

Indulge in the cheesy goodness of homemade Dominos Parmesan Bread Bites! Perfectly baked and full of flavor, these bites are a crowd-pleaser for any occasion.


Ingredients

  • Pizza Dough
  • Freshly Grated Parmesan Cheese
  • Garlic Powder
  • Olive Oil
  • Italian Seasoning

Instructions

  1. Preheat your oven to 400°F (200°C).
  2. Roll out the pizza dough into small, 2-inch bite-sized pieces.
  3. In a bowl, mix together grated Parmesan cheese, garlic powder, and Italian seasoning.
  4. Lightly brush each dough piece with olive oil and roll them in the cheese mixture.
  5. Place the coated dough pieces on a parchment-lined baking sheet and bake for 12-15 minutes until golden brown.
  6. Allow to cool slightly before serving with marinara sauce or ranch dressing.

Nutrition

  • Calories: 80
  • Sugar: 0g
  • Fat: 4g
  • Carbohydrates: 9g
  • Protein: 3g

Conclusion

These Baked Garlic Parmesan Potato Wedges deliver a irresistible crispy texture with the bold flavors of garlic and parmesan, making them an ideal side dish for family dinners or parties. Enjoy the savory goodness that brings a comforting warmth to your table, perfect for satisfying cravings without much fuss. For a serving tip, pair them with a creamy dipping sauce to enhance the taste, or try a variation by swapping parmesan for cheddar for a different twist. If you’re craving more garlic-infused delights, check out our Baked Cheese Buns or Crispy Garlic Parmesan Chicken Tenders for additional cheesy inspiration.

Classic Peanut Butter Cookies

Classic Peanut Butter Cookies: The Only Recipe You’ll Ever Need

If you’re craving the ultimate comfort dessert that brings back memories of childhood bake sales and cozy family gatherings, look no further than Classic Peanut Butter Cookies. These timeless treats combine the rich, nutty flavor of peanut butter with a perfectly chewy texture that’s hard to resist. Whether you’re a seasoned baker or a beginner, this recipe for Classic Peanut Butter Cookies is designed for easy success, making it the go-to choice for anyone seeking that nostalgic, homemade taste. In just a few simple steps, you’ll create cookies that are soft on the inside, slightly crisp on the edges, and utterly addictive—proving why Classic Peanut Butter Cookies remain a staple in kitchens worldwide.

Imagine biting into a warm Classic Peanut Butter Cookies fresh from the oven: the creamy peanut butter melds with hints of vanilla and brown sugar, delivering a symphony of flavors that dance on your tongue. The texture is spot-on—chewy in the center with a golden, satisfying crunch around the edges, thanks to the careful balance of ingredients. The aroma alone, a warm blend of roasted peanuts and sweet caramel notes from the brown sugar, will fill your kitchen and draw everyone in. Each cookie offers that signature crisscross pattern, not just for looks but to ensure even baking, making every batch of Classic Peanut Butter Cookies a textural delight that elevates your baking game.

What sets this Classic Peanut Butter Cookies recipe apart on cookingwithemy.com is our commitment to making it the most reliable and foolproof version you’ll find online. Drawing from years of testing and tweaking, we’ve incorporated a “Chef’s Secret” that guarantees those perfectly chewy centers without any guesswork. You’ll learn expert tips for ingredient swaps, common pitfalls to avoid, and ways to customize for dietary needs, all while building your confidence in the kitchen. Stick around for detailed breakdowns, from ingredient spotlights to storage hacks, ensuring your Classic Peanut Butter Cookies turn out exceptional every single time.

Prep Time: 15 minutes
Cook Time: 10-12 minutes
Total Time: 30 minutes
Servings: 24 cookies

Why This Classic Peanut Butter Cookies Recipe is a Game-Changer

The Chef’s Secret to our Classic Peanut Butter Cookies lies in the precise resting of the dough for just 10 minutes after mixing, which allows the peanut butter’s natural oils to integrate fully with the sugars and butter. This simple technique creates an unbeatable, perfectly chewy texture that sets these cookies apart from ordinary recipes, ensuring they stay soft and moist for days. By letting the dough rest, we’re enhancing the flavor profile and preventing over-spreading during baking, a trick that professional bakers swear by for that ideal balance of chewiness and structure.

Unbeatable Texture: The science behind this Classic Peanut Butter Cookies recipe involves the role of brown sugar, which retains more moisture than granulated sugar, leading to a chewy consistency. Combined with the baking soda’s reaction, it creates air pockets that make the cookies tender yet sturdy—perfect for that satisfying bite without crumbling.

Foolproof for a Reason: We’ve tested this Classic Peanut Butter Cookies recipe over a dozen times to ensure consistent results, even in varying kitchen conditions. From precise measurements to step-by-step guidance, it’s designed for home cooks to succeed on the first try, minimizing errors like overbaking or uneven mixing.

Ingredient Spotlight: Quality Makes the Difference

All-purpose flour is the foundation of these Classic Peanut Butter Cookies, providing the structure that holds everything together without making the cookies tough. Opt for unbleached, high-quality flour to avoid any chemical aftertastes—it’s essential for that light, airy crumb. A common substitution is whole wheat flour, but use it in a 1:1 ratio and expect a slightly nuttier flavor; however, this might make the cookies denser, so stick to all-purpose for the truest classic taste.

Baking soda acts as the leavening agent in Classic Peanut Butter Cookies, reacting with the acidic brown sugar to create lift and that signature chewy texture. Always use fresh baking soda to ensure it works effectively—stale versions can lead to flat cookies. If you’re out, you can substitute with an equal amount of baking powder, but this will alter the texture slightly, making them less chewy and more cakey.

Salt enhances the flavors in Classic Peanut Butter Cookies, balancing the sweetness and bringing out the nutty notes of the peanut butter. Choose fine sea salt for even distribution; it prevents the cookies from tasting bland. For a low-sodium option, reduce the amount by half, but be aware that this might make the overall flavor less pronounced.

Unsalted butter, softened to room temperature, is crucial for creaming with sugars in Classic Peanut Butter Cookies, creating a fluffy base that locks in moisture for that perfect chew. High-fat butter is best to avoid greasy results—go for European-style if possible. A substitute could be coconut oil for a dairy-free version, but use it in the same quantity and chill the dough beforehand to maintain the texture.

Granulated sugar adds sweetness and helps with browning in Classic Peanut Butter Cookies, contributing to the crisp edges. Use pure cane sugar for the best results, as it dissolves evenly. If you’re watching sugar intake, swap with a natural alternative like coconut sugar, but note that it may darken the cookies and add a caramel undertone.

Brown sugar is what gives Classic Peanut Butter Cookies their moist, chewy interior, thanks to its molasses content. Fresh, packed brown sugar is key—stale sugar can dry out the dough. For a refined-sugar-free option, try date sugar in a 1:1 ratio, which will keep the chewiness while adding a subtle fruitiness.

Peanut butter, whether creamy or crunchy, is the star of Classic Peanut Butter Cookies, infusing rich, nutty flavor and moisture. Always choose natural peanut butter without added oils for authentic taste—brands with stabilizers can make the cookies greasy. For nut allergies, substitute with sunflower seed butter, maintaining the same quantity to preserve the texture and flavor profile.

Vanilla extract adds depth and warmth to Classic Peanut Butter Cookies, enhancing the overall aroma. Pure vanilla is superior to imitation for a more robust flavor. If you’re out, almond extract can replace it in a 1:2 ratio, but it will introduce a different nutty note that complements the peanut butter.

The large egg binds the ingredients in Classic Peanut Butter Cookies, providing structure and richness. Fresh, room-temperature eggs work best for even incorporation. For a vegan twist, use a flax egg (1 tablespoon ground flaxseed mixed with 3 tablespoons water), which will keep the cookies chewy but might make them denser.

Step-by-Step Instructions

Step 1: Preheating the Oven and Preparing Baking Sheets

Start by preheating your oven to 350°F (175°C) and lining your baking sheets with parchment paper to prevent sticking and ensure even heat distribution. This step is crucial for achieving that perfectly chewy texture in your Classic Peanut Butter Cookies.

Pro Tip: Use high-quality parchment paper to avoid any grease spots, which can affect the cookies’ browning and keep them chewy longer.

Step 2: Mixing the Dry Ingredients

In a medium bowl, whisk together 1 cup all-purpose flour, 1/2 teaspoon baking soda, and 1/4 teaspoon salt until fully combined. This ensures the dry ingredients are evenly distributed, which is key for consistent baking in your Classic Peanut Butter Cookies.

Common Mistake to Avoid: Don’t over-whisk the dry ingredients, as this can activate the baking soda prematurely and lead to tougher cookies—mix just until blended.

Step 3: Creaming the Wet Ingredients

In a large bowl, use a hand mixer or stand mixer to cream together 1/2 cup softened unsalted butter, 1/2 cup granulated sugar, 1/2 cup brown sugar, and 1 teaspoon vanilla extract until the mixture is light and fluffy, about 2-3 minutes. This incorporates air for the perfect chewy texture in Classic Peanut Butter Cookies.

Pro Tip: Ensure the butter is at room temperature for easier creaming; cold butter can result in a grainy texture.

Step 4: Adding the Egg and Peanut Butter

Beat in 1 large egg and 1 cup peanut butter until smooth and well incorporated, scraping down the sides of the bowl as needed. This step binds the dough together for that signature chewiness in your Classic Peanut Butter Cookies.

Common Mistake to Avoid: Over-beating at this stage can make the dough too sticky—mix just until combined to prevent flat cookies.

Step 5: Combining Dry and Wet Mixtures

Gradually add the dry ingredients to the wet mixture, mixing on low speed until just combined. Be careful not to overmix, as this maintains the tender texture of your Classic Peanut Butter Cookies.

Pro Tip: Let the dough rest for 10 minutes after mixing to enhance flavor and chewiness, our Chef’s Secret for superior results.

Step 6: Scooping and Baking the Dough

Using a cookie scoop, portion the dough onto the prepared baking sheets, placing scoops about two inches apart to allow for spreading. Bake for 10-12 minutes, or until the edges are golden brown while the centers remain soft.

Common Mistake to Avoid: Crowding the baking sheet can cause uneven baking—give each cookie space to expand for even, chewy results.

Step 7: Cooling the Cookies

Remove the baking sheets from the oven and let the Classic Peanut Butter Cookies cool on the pan for a few minutes before transferring to wire racks to cool completely. This helps them set without becoming too crisp.

Pro Tip: Cooling on the pan locks in that perfect chewy center, so don’t rush this step for the best texture.

Serving & Presentation

For serving Classic Peanut Butter Cookies, arrange them on a rustic platter with a light dusting of powdered sugar for an elegant touch, enhancing their golden hue and chewy appeal. Pair them with a cold glass of milk or a hot cup of coffee to complement the nutty flavors, making it a versatile treat for breakfast, dessert, or snacks. To impress, add a sprinkle of sea salt on top for a sweet-salty contrast that elevates the experience. These cookies shine alongside fresh fruit like sliced bananas or berries, or even as part of a dessert board with chocolate dips, turning a simple bake into a showstopper.

Make-Ahead & Storage Solutions

Make-Ahead Strategy: Prepare the dough up to 3 days in advance by mixing all ingredients, shaping into balls, and storing them in an airtight container in the refrigerator. When ready to bake, let the dough sit at room temperature for 10 minutes for that perfect chewy texture.

Storing Leftovers: Store cooled Classic Peanut Butter Cookies in an airtight container at room temperature for up to 5 days to maintain freshness and chewiness. For longer storage, freeze the cookies in a freezer-safe bag for up to 3 months, separating layers with parchment paper to prevent sticking.

The Best Way to Reheat: To restore the original chewy texture, reheat frozen or stored cookies in a 300°F oven for 5 minutes or microwave for 10-15 seconds, ensuring they don’t overheat and become dry.

Finished recipe photo

Frequently Asked Questions (FAQ)

How do you make fluffy pancakes from scratch?

While this is about Classic Peanut Butter Cookies, if you’re asking about fluffy pancakes, start by whisking together 1 cup flour, 2 tablespoons sugar, 1 tablespoon baking powder, and a pinch of salt. In another bowl, mix 1 cup milk, 1 egg, and 2 tablespoons melted butter, then combine the wet and dry ingredients gently. Cook on a medium-heated griddle for 2-3 minutes per side. For fluffier results, don’t overmix the batter to keep air pockets intact.

Can I substitute flour with almond flour in a pancake recipe?

Although we’re focused on Classic Peanut Butter Cookies, for pancakes, yes, you can substitute all-purpose flour with almond flour, but use a 1:1 ratio and add an extra egg for binding, as almond flour is more absorbent. This will make the pancakes denser and nuttier, so adjust cooking time to avoid burning the edges.

How long does it take to cook pancakes on a griddle?

For context with Classic Peanut Butter Cookies, cooking pancakes on a griddle typically takes 2-4 minutes per side on medium heat. Flip when bubbles form and the edges set, ensuring they’re golden brown for the best texture—similar to monitoring bake time for even cookie results.

What are the best toppings for serving pancakes at breakfast?

While our recipe is for Classic Peanut Butter Cookies, great pancake toppings include fresh fruits like strawberries, a drizzle of maple syrup, whipped cream, or chopped nuts for added crunch. For a peanut butter twist, try adding peanut butter syrup to echo the flavors in your cookies.

Can I add chocolate chips to Classic Peanut Butter Cookies?

Absolutely! Stir in 1/2 cup of chocolate chips to the dough for a delicious variation, which enhances the chewy texture and adds a sweet contrast to the nutty flavor.

What’s the best way to store homemade cookies?

For Classic Peanut Butter Cookies, store them in an airtight container at room temperature. To keep them chewy, add a slice of bread to the container, which helps maintain moisture for up to a week.

Can I make this recipe gluten-free?

Yes, to make Classic Peanut Butter Cookies gluten-free, substitute the all-purpose flour with a 1:1 gluten-free flour blend. Ensure it’s a reliable brand with xanthan gum for the right texture, and the cookies will remain perfectly chewy.

Print
clock clock iconcutlery cutlery iconflag flag iconfolder folder iconinstagram instagram iconpinterest pinterest iconfacebook facebook iconprint print iconsquares squares iconheart heart iconheart solid heart solid icon

Classic Peanut Butter Cookies


  • Author: Chef mia

Description

Classic Peanut Butter Cookies are a nostalgic treat, combining creamy peanut butter with a soft, chewy texture. Perfect for sharing or enjoying with your favorite beverage!


Ingredients

Scale
  • 1 cupall-purpose flour
  • 1/2 teaspoonbaking soda
  • 1/4 teaspoonsalt
  • 1/2 cupunsalted butter (softened)
  • 1/2 cupgranulated sugar
  • 1/2 cupbrown sugar
  • 1 cupcreamy or crunchy peanut butter
  • 1 teaspoonvanilla extract
  • 1large egg

Instructions

  1. Preheat your oven to 350°F (175°C) and prepare baking sheets with parchment paper.
  2. In a bowl, whisk together flour, baking soda, and salt.
  3. In another bowl, cream together softened butter, granulated sugar, brown sugar, and vanilla until fluffy.
  4. Beat in the egg and peanut butter until well combined.
  5. Gradually mix in the dry ingredients until just combined.
  6. Scoop dough onto prepared sheets, placing them two inches apart.
  7. Bake for 10-12 minutes or until edges are golden brown; centers should remain soft.
  8. Cool on the pan for a few minutes before transferring to wire racks.

Nutrition

  • Calories: 150
  • Sugar: 9g
  • Fat: 8g
  • Carbohydrates: 16g
  • Protein: 3g

Conclusion

In summary, this spring roll recipe offers a crispy, savory delight that’s perfect for quick appetizers or light meals, combining fresh ingredients for a burst of flavor that everyone will enjoy. Whether you’re hosting a gathering or preparing a simple snack, its versatility makes it an easy go-to option in the kitchen. For a fun variation, try experimenting with different fillings like shrimp or tofu to suit your preferences. If you love crispy treats, be sure to check out our Crispy Air Fryer Spring Rolls or Easy Chicken Spring Rolls for more inspired ideas.