Air Fryer Salmon Bites (Lemon Garlic Butter)

Air Fryer Salmon Bites (Lemon Garlic Butter) With a Quick Air‑fry Miracle – Light, Lemony Delight

⚖️
Difficulty
Easy
⏲️
Prep Time
5 mins
🕒
Cook Time
7 mins
⏱️
Total Time
12 mins
🍽️
Servings
4

Growing up in a bustling Moroccan kitchen, I learned that a pinch of patience can transform a dish. When I first set foot in the elegant classrooms of Le Cordon Bleu, I was taught that technique is the secret sauce. Now in the heart of New York City, I blend those lessons with a grocery‑market dash to create quick, Instagram‑ready meals. This Air Fryer Salmon Bites recipe is my translation of that philosophy, blending a French‑inspired lemon‑garlic butter with the Moroccan love of quick, vibrant flavors.

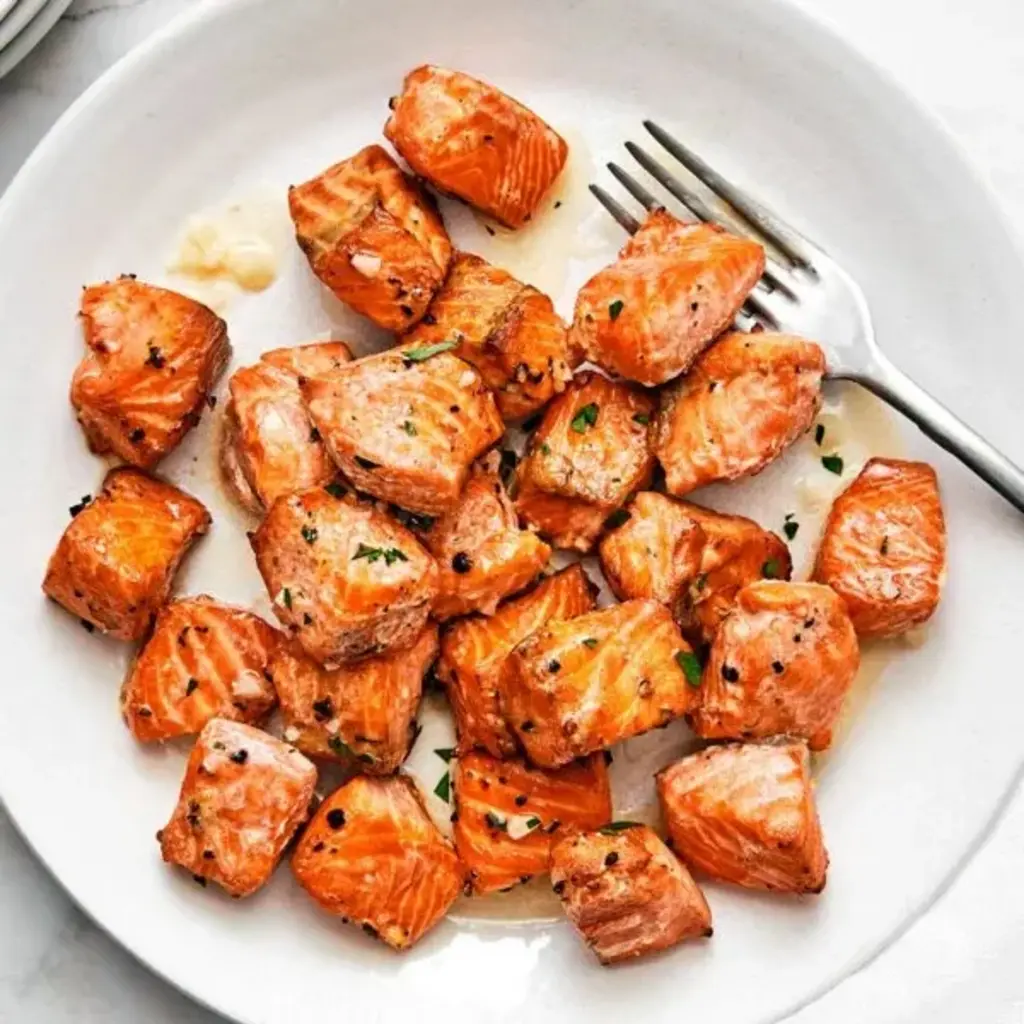
Imagine skin‑tender salmon cubes, lightly brushed with a buttery sauce laced with fresh lemon zest and minced garlic. As they sizzle in the air fryer, the butter bubbles into a glossy crust while the garlic releases a caramelized warmth that permeates each bite. The high heat creates a golden exterior that cracks like a tuned guitar string, while the inside stays melt‑in‑your-mouth soft. Garnishing with a dash of parsley instantly adds a touch of green, echoing the shawarma carts outside the famed Moroccan souks and New York’s street food carts.

I’ve refined this technique to be foolproof: the critical step is lining the air‑fry basket, preventing sauce from dripping and keeping the batter dry. A common mistake is over‑crowding the basket; spread the bites for even cooking. And remember, the elegant presentation can turn an ordinary dinner into a headline for your social feed, so set your phone on a nearby countertop for a quick snap.

Why This Air Fryer Salmon Bites (Lemon Garlic Butter) Recipe Is the Best

The flavor twist comes from my Moroccan heritage: the bright citrus of lemon mingles with the earthy charcoal of garlic, while a subtle spice of cumin in the butter adds depth. This combination unlocks a taste profile that feels both comforting, like a family dinner on a dim Thursday night, and adventurous, like a Parisian café sampling new cuisine.

Texture is perfected by air‑frying in a small, evenly spaced basket. This method crisps the outside while preserving moisture inside, so each bite offers a silky center with a crackle in the shell. My culinary school training taught me that precise heat distribution is the key to achieving that “flash‑browned” finish without drying out the filet.

It’s also the quickest “fish dinner” one can cook. From start to finish, the dish takes only 12 minutes—ideal for the busy New Yorker with a weekend brunch later or a quick weekday dinner. The simplicity of preparation also means beginners can replicate the result with minimal culinary equipment.

Air Fryer Salmon Bites (Lemon Garlic Butter) Ingredients

I find 1‑pound salmon fillets at the farmers’ market in Brooklyn, selecting a slab that’s bright pink on the sides and firm to the touch. I’d recommend visiting local organic spots where the fish is freshly filleted, as the quality is paramount to the buttery sauce’s flavor, and a touch of fresh herbs keeps the dish feeling alive.

Ingredients List

  • 1 pound skinless salmon filet, cut into 1‑inch cubes
  • ½ teaspoon kosher salt
  • ¼ teaspoon freshly ground black pepper
  • 3 tablespoons melted butter
  • 1 tablespoon lemon juice
  • 3 garlic cloves, minced

Ingredient Spotlight

Salmon – Choose a wild‑caught fillet for a cleaner, nutty flavor. If you’re buying from a grocery store, look for an “Atlantic” label; the fattier the salmon, the more buttery it will taste. For a vegan twist, substitute tender tofu cubes, marinated in the same butter‑lemon sauce.

Melted Butter – Butter adds richness that pairs beautifully with lemon and garlic. Substitute buttermilk or coconut oil for a dairy‑free version, but keep in mind the sauce texture will change subtly.

Garlic – Fresh cloves give the most fragrant heat. If you’re short on time, toasted garlic powder can fill the role; it won’t add the same depth but it will still deliver that savory bite.

Original Ingredient Best Substitution Flavor / Texture Impact
Salmon Tuna steak Will be firmer, slightly sweeter, golden once cooked.
Melted Butter Coconut oil Adds a subtle coconut note; richer, lower smokey bite.
Garlic Cloves Garlic powder Lacks the fresh bite; use sparingly.

How to Make Air Fryer Salmon Bites (Lemon Garlic Butter) — Step-by-Step

Let’s jump straight into the action. Each step is designed to keep the sauce intact while ensuring the salmon remains juicy.

Step 1: Season the Salmon

Place the salmon cubes in a mixing bowl. Add the kosher salt and freshly ground black pepper. Toss until every piece is evenly coated. This base layer of seasoning brightens the fish and prepares it for the buttery glaze.

💡 emy’s Pro Tip: Generously season each bite; the flavors marry during the quick cook and stay vibrant.

Step 2: Prepare the Lemon‑Garlic Butter Sauce

In the same bowl, whisk the melted butter, fresh lemon juice, and minced garlic until the mixture is smooth. The lemon juice should be bright, not acidic; aim for about 12 ounces of shrimp’s freshness.

⚠️ Common Mistake to Avoid: Skipping the butter or using cold butter; dried butter loses its glossy sheen and clumps.

Step 3: Air Fry the Salmon Seats

Lay a parchment liner in the air fryer basket. This step locks the sauce in, preventing it from dripping and creating a caramelized halo. Top up the seasoned salmon cubes with the sauce, ensuring each piece is bathed. Set the air fryer to 400 °F (200 °C) and cook for 5‑7 minutes, checking after 4 minutes to confirm doneness.

💡 emy’s Pro Tip: If you have a larger batch, split it into two rounds; the hit of air before the sauce shortens the cook time.

Step 4: Plate, Garnish, and Drizzle

When the salmon flakes apart easily but still feels soft in the center, remove it from the air fryer. Arrange on a plate, sprinkle with fresh parsley and a final drizzle of any leftover lemon‑garlic butter. Add a squeeze of lemon for a pop of brightness, then serve immediately with your favorite side.

⚠️ Common Mistake to Avoid: Overcooking; a 7‑minute window ensures a buttery interior while keeping the exterior crisp.

Step Action Duration Key Visual Cue
1 Season salmon cubes 5 min Even coating visible
2 Whisk sauce 3 min Glassy consistency
3 Air fry with liner 5‑7 min Golden crust and buttery sheen
4 Plate and drizzle Immediate Bright lemon sheen

Serving & Presentation

When you plate these bite‑size morsels, think of a portfolio of colors: the salmon’s pinks, the buttery glaze golden, and the green parsley garnish. Serve them atop a bed of arugula tossed with olive oil and balsamic, a quinoa salad, or a crisp cucumber salad. The robust lemon bite anchors the dish, letting the sesame‑toasted quinoa carry subtle nutty undertones from the Moroccan markets.

For a midday vibe, place the bites on a vegetarian pasta bowl: whole‑grain spaghetti, cherry tomatoes, and a splash of pesto. For an elegant evening, plate on a porcelain platter with grilled asparagus and a drizzle of extra‑virgin olive oil. A squeeze of fresh lemon after plating adds that final zing reminiscent of a Parisian café sipping a bright cocktail.

Pairing Type Suggestions Why It Works
Side Dish Roasted Brussels sprouts, quinoa salad, or cauliflower rice Adds earthiness, balancing the citrusy bite.
Sauce / Dip Tzatziki, avocado yogurt dip, or a crushed tomato salsa Adds creaminess and Savory contrast.
Beverage Sparkling rosé, crisp white wine (Sauvignon Blanc), or a ginger‑lemon sparkling water Cleanses palate, keeping the seafood crisp.
Garnish Micro‑green parsley, citrus zest, or toasted almond flakes Adds freshness and a textural pop.

Make‑ahead, Storage & Reheating

I love to prep a batch on Sunday evenings when the city still feels like a quiet market. Simply separate the sauce from the salmon; the sauce hangs good in a sealed jar for 2 days, while the salmon stays fresh if wrapped in parchment and kept in the fridge for up to 3 days.

Method Container Duration Reheating Tip
Refrigerator airtight container 2‑3 days Reheat in air fryer 3‑4 min at 350°F.
Freezer freezer bag 1‑2 months Defrost overnight, air fry 5 min.
Make‑ahead dry bowl & sauce jar up to 7 days Layer peppers, add sauce, air fry 5‑6 min.

When reheating, I always keep a splash of lemon and a drizzle of olive oil to maintain the freshly‑baked moisture. A quick finish in the air fryer preserves that delightful crunch, giving the dish life and preserving the flavor profile even after a day or two.

Variations & Easy Swaps

Variation Key Change Best For Difficulty Impact
Harissa‑Spiced Salmon Bites Add 1 tsp harissa paste into the butter‑lemon mix Spicy evenings Easy
Gluten‑Free & Dairy‑Free Use coconut oil and a dairy‑free butter substitute Allergic cookouts Easy
Spring Tomato‑Roasted Roast a handful of cherry tomatoes, toss with extra butter before air frying Seasonal spring meals Easy

Harissa‑Spiced Salmon Bites

Blend a teaspoon of North African harissa paste into the butter‑lemon sauce. The smoky heat cuts through the buttery glaze and brings a peppery kick that recalls my childhood market visits in Marrakech, where the air is rich with cumin, coriander, and sea salt.

Gluten‑Free & Dairy‑Free Variation

Swap butter for a dairy‑free margarine or coconut oil, and use a plant‑based butter substitute for the glaze. The texture stays silky, and the lemon still lifts the flavor with a bright splash, making this a safe option for guests with allergies.

Spring Tomato‑Roasted Variation

Roast halved cherry tomatoes with olive oil, salt, and fresh oregano until blistered. Toss the tomatoes with a bit of melted butter before air‑frying the salmon. The sweet tomato complement marries with the citrus, adding a sweet‑acid basket that echoes the seasonal bounty of Brooklyn’s farmer’s markets.

Can I use frozen salmon for this recipe?

Yes, frozen salmon works well, but thaw it first in the fridge or under cold running water to ensure even cooking. A quick thaw reduces the risk of over‑cooking on the outside while the inside remains fresh; just allow a 15‑minute thaw and pat it dry before seasoning.

How long can I store air‑fried salmon bites?

You can safely keep the cooked bites in the refrigerator for up to 3 days in an airtight container. For longer storage, freeze them for up to 2 months; just reheat in a preheated air fryer for 4‑5 minutes to regain that crisp exterior while preserving the buttery center.

Can I use a non‑stick pan instead of an air fryer?

Absolutely. Sauté the seasoned salmon cubes in a hot non‑stick skillet with a bit of oil for 2‑3 minutes per side. Finish with a quick pan‑sear of the lemon‑garlic butter, then serve. The result is similar, though the texture may be less uniformly roasted.

How to keep salmon moist during cooking?

Use a moisture‑retaining trick: place a small layer of parchment paper in the air fryer basket before adding the salmon. This creates a barrier that traps steam, preventing the protein from drying out and ensuring a succulent bite.

What wine pairs well with lemon‑garlic butter salmon?

A crisp, dry white—Sauvignon Blanc or Vermentino—works wonders, cutting through the buttery richness and echoing the citrus note. For a richer profile, try a light‑bodied Chardonnay that mirrors the smooth texture of the sauce.

Is this recipe allergen‑free?

By default, the recipe contains fish, dairy (butter), and gluten from parchment. To make it allergen‑friendly: use a dairy‑free butter substitute, confirm your air fryer is gluten‑free, and avoid the bark paper if sensitive. Always check ingredient labels for hidden allergens.

Can I use lemon zest instead of lemon juice?

Yes, zest adds aromatic brightness, but it lacks the acid to balance the butter. Combine zest with a splash of mild vinegar or a little honey to replicate the citrus punch while maintaining the sauce’s silky texture.

What’s the best way to serve this on a cold day?

Reheat in a quick air fry for 5 minutes, then top with a warm parsley‑olive oil drizzle. Serve over a freshly sautéed spinach bed or a glass of velvety butternut squash soup for a comforting, cozy dinner that feels like a hug.

Share Your Version!

Drop a star rating and comment below – I love hearing your twists on this air‑fry miracle. Post a photo on Instagram or Pinterest, tag @cookingwithemi, and let me see how you plated these bites. Did the harissa version hit your spice budget? Let me know!

From my NYC kitchen to yours — I hope this recipe brings as much warmth to your table as it does to mine. — emy 🧡

📌

Love This Recipe? Save It to Pinterest!

If you enjoyed this Air Fryer Salmon Bites (Lemon Garlic Butter) recipe, don’t let it get lost in your browser tabs! 😄 Pin it now so you can find it again anytime — and explore hundreds more tried‑and‑tested recipes waiting for you on my Pinterest boards.

👉 Follow emy on Pinterest @chefrecipes2

📌 Pin this recipe · 🔁 Re-pin your favorites · 💬 Tag me when you make it — I love seeing your creations!

Print
clock clock iconcutlery cutlery iconflag flag iconfolder folder iconinstagram instagram iconpinterest pinterest iconfacebook facebook iconprint print iconsquares squares iconheart heart iconheart solid heart solid icon

Air Fryer Salmon Bites (Lemon Garlic Butter)


  • Author: Chef Emy

Description

These salmon bites, coated in lemony garlic butter, are the quick and easy salmon dinner you didn’t know you needed. Top them on salads, bowls, or veggies for endless meal variety throughout the week!


Ingredients

Scale
  • 1 pound skinless salmon filet (cut into 1-inch cubes)
  • ½ teaspoon kosher salt
  • ¼ teaspoon freshly ground black pepper
  • 3 tablespoons melted butter
  • 1 tablespoon lemon juice
  • 3 garlic cloves (minced)

Instructions

  1. Season the salmon. Add the salmon to a mixing bowl and season with salt and pepper. Toss to combine.
  2. Add the sauce. To the same mixing bowl, add the butter, lemon juice, and garlic. Toss to combine.
  3. Air fry the salmon. Place a liner in the basket of the air fryer (this is key to prevent the sauce from falling through). Add the salmon along with the sauce to the lined basket and air fry at 400°F (200°C) for 5 to 7 minutes. Pro tip: Try not to crowd the salmon. If needed, cook in two batches. And there's no need to shake halfway through.
  4. Serve them up. Serve the salmon bites with your favorite sides or top on a salad or macro bowl. And don't forget to drizzle the remaining garlic lemon butter on top!

Creamy Chicken Tortilla Soup

Creamy Chicken Tortilla Soup: A Cozy Fusion of Moroccan Spices and Creamy Indulgence

⚖️
Difficulty
Easy
⏲️
Prep Time
15 mins
🕒
Cook Time
30 mins
⏱️
Total Time
45 mins
🍽️
Servings
4

Growing up in Morocco, I learned to infuse simple dishes with spices that whisper history and warmth. When I moved to Paris and later to the bustling streets of New York City, I combined those traditions with modern flavors. This Creamy Chicken Tortilla Soup marries the savory tang of rotella tomatoes, the earthy depth of cumin, and the indulgent creaminess of cheddar and cream cheese to create a comforting bowl that feels like a hug from the heart of my childhood.

Imagine a broth that balances the smoky heat from jalapeños, the sweetness of corn, and the coolness of fresh cilantro—all dancing together. The butter sautés with onions and peppers until golden, releasing nutty aromas that bridge Moroccan technique and Tex-Mex spice. The distinct twist is the addition of a creamy layer that turns an ordinary soup into a luscious, velvety experience, reminiscent of the rich sauces I mastered under the tutelage of pastry masters in Paris.

I’ve tweaked this recipe for the fast-paced life of a New Yorker—using leftover or rotisserie chicken keeps it fresh and convenient. A pro tip: keep the cheddar and cream cheese at room temperature before adding them to avoid separation. A common mistake is letting the soup bubble too vigorously early on, which can toughen the chicken—slow simmering preserves tenderness.

Why This Creamy Chicken Tortilla Soup Recipe Is the Best

The secret ingredient is my Moroccan trio—cumin, cinnamon, and a hint of smoked paprika—to give the soup a subtle warmth that feels like my grandmother’s kitchen. These spices elevate the tomato base into a fragrant, layered flavor profile that amazes even the strictest culinary purists.

Texture is perfected with a gradual heat reduction; simmering gently keeps chicken juicy and lets the corn blend smoothly, while the careful addition of cheddar and cream cheese creates a silkier mouthfeel. This method mirrors how French chefs coax sauces to freeze into creamy consistencies without thickening agents.

For busy cooks, the recipe is forgiving and fast: you can start it in a pressure cooker or on a stovetop—just follow the staged steps, and the result is a restaurant-quality bowl that you can serve at dinner or lunch in under an hour.

Creamy Chicken Tortilla Soup Ingredients

I browse the farmers market in Queens each Thursday, picking fresh jalapenos, onions, and cilantro. Back in Morocco, I’d never skip the cumin and dried tomatoes. These staples bring the same bright, savory notes to my New York kitchen.

Ingredients List

  • 2 Tablespoons butter
  • 1 small yellow onion, diced
  • 1 jalapeno pepper, diced
  • 3 cloves garlic, minced
  • 1 Tablespoon tomato paste
  • 1 15 oz. can corn, drained
  • 1 10 oz. can Rotel diced tomatoes with green chilies
  • 1 15 oz. can black beans, drained and rinsed
  • 5 cups chicken broth
  • 2 small boneless skinless chicken breasts (or 2 cups shredded chicken)
  • 1 pinch cayenne pepper
  • 1 teaspoon cumin
  • 1-2 teaspoons hot sauce
  • 1 oz. packet taco seasoning (about 3 Tbsp.)
  • 1½ cups cheddar cheese, shredded
  • 1/3 cup cream cheese, softened
  • Corn or Flour Tortillas (discard skins, use for dipping)

Ingredient Spotlight

Cheddar Cheese adds a robust, sharp flavor that warms the palate. Choose a sharp cheddar for an extra bite. If you’re lactose intolerant, gouda works well as a milder alternative, with a similar melt.

Corn brings natural sweetness, balancing the acidity of the Rotel. Look for sweet corn with kernels bright yellow—pro tip: freeze fresh corn and defrost before cooking to retain crispness.

Black Beans deepen the texture and cut through the richness. Opt for canned beans drained in a carbonated beverage to keep them firmer. Substituting garbanzo beans gives a nuttier profile, slightly altering the soup’s personality.

Original Ingredient Best Substitution Flavor / Texture Impact
Cheddar Cheese Gouda Milder nuttiness, less sharpness
Black Beans Garbanzo Beans Nuttier, firmer texture
Corn Frozen Sweet Corn Keeps crispness after thawing

How to Make Creamy Chicken Tortilla Soup — Step-by-Step

Let’s bring all those flavors together! Follow the steps below, and you’ll have a hearty soup blazing with creativity.

Step 1: Sauté Aromatics

Heat 2 Tbsp butter over medium heat in a large pot. Add diced onion and jalapeño; sauté for 5-6 minutes until translucent. Stir in minced garlic and cook one more minute until fragrant. This creates the aromatic base that grounds the soup.

💡 emy’s Pro Tip: Use a pot with a lid on slightly to trap steam and keep onions juicy while preventing over-browning.

Step 2: Add Base Ingredients

Add tomato paste, corn, Rotel, black beans, chicken broth, a pinch of cayenne, cumin, hot sauce, and taco seasoning. Stir until tomato paste is fully incorporated. Let the mixture come to a gentle bubble.

⚠️ Common Mistake to Avoid: Stir the soup too quickly after adding the beans, which can cause them to break apart.

Step 3: Simmer the Soup

Allow the soup to simmer, partially covered, for 20-25 minutes. The slow simmer keeps the chicken juicy and prevents the broth from thickening too fast.

💡 emy’s Pro Tip: Keep the heat low (about 200°F) to avoid a rapid boil that would toughen the chicken.

Step 4: Remove and Shred Chicken

Pull out the chicken breasts. Use two forks to shred while the soup is still hot; this method keeps the meat tender.

⚠️ Common Mistake to Avoid: Letting chicken sit in the soup after shredding, causing it to cool and become dry.

Step 5: Incorporate Creamy Elements

Reduce heat to low. Gradually sprinkle in shredded cheddar and softened cream cheese, stirring until fully melted and the soup becomes silky smooth.

💡 emy’s Pro Tip: Add cheese in small increments to avoid a chunky finish.

Step 6: Final Touches & Garnish

Taste for seasoning, adjust with salt or extra hot sauce. Garnish with cilantro, tortilla strips, pepper jack slices, plus lime wedges for a citrus lift. Serve hot.

⚠️ Common Mistake to Avoid: Adding garnish after the soup cools; it loses crunch and freshness.

Step Action Duration Key Visual Cue
1 Sauté aromatics 5-6 mins Onions golden
2 Add base 3 mins Simmering bubble
3 Simmer soup 20-25 mins Consistent gentle bubble
4 Shred chicken 2 mins Soft, shredded texture
5 Add cheddar & cream cheese 5 mins Creamy sheen
6 Final garnish 1 min Bright green herbs

Serving & Presentation

Spoon the velvety soup into deep bowls, letting the colorful veggies float on top. Sprinkle crisp tortilla strips, a scatter of pepper jack, and a medley of cilantro. A squeeze of lime brightens the dish and adds a citrus note reminiscent of the fresh terraces back in Morocco.

Pair this hearty bowl with a crisp green salad or a warm warm crusty baguette from my local French bakery. The combination of savory, sweet, and spicy makes it a balanced meal for lunch or dinner.

Pairing Type Suggestions Why It Works
Side Dish Garlic rice, smashed avocado, fresh salsa Adds crunch and freshness
Sauce / Dip Tzatziki, guacamole, queso fresco Complement flavors, add creaminess
Beverage Iced tea, sparkling water, light pisco Refreshes palate
Garnish Cilantro, lime wedges, tortilla strips, finely chopped onions Adds color and texture

Make-Ahead, Storage & Reheating

As a busy New Yorker, I batch this soup every Sunday, letting it cool to room temperature before refrigerating. It stays fresh for up to three days, and I reheat gently over low heat, stirring to maintain creamy texture.

Method Container Duration Reheating Tip
Refrigerator Glass jar 3 days Reheat over low heat, add a splash of broth if needed
Freezer Vacuum seal bag 2 months Defrost overnight, then simmer with broth
Make-Ahead Separate bowls for cereal 1 week in advance Assemble ingredients, keep cold, cook on the day

When reheating, bring the soup to a gentle simmer and stir in a little extra melted cheddar to reintroduce creaminess. I often measure once the soup reaches 180°F to avoid overheating, preserving the delicate textures of the chicken and vegetables.

Variations & Easy Swaps

Variation Key Change Best For Difficulty Impact
Guacamole Tortilla Twist Add diced avocado and mash into soup Crushier texture Easy
Gluten-Free / Dairy-Free Use gluten‑free tortillas, coconut milk, and dairy‑free cheeses Same flavor, new allergens Medium
Seasonal Flavor Twist Swap corn for roasted butternut squash in autumn Spicy, sweet profile Easy

Guacamole Tortilla Twist

In Paris I love avocado for its buttery texture. Adding diced avocado into the simmering soup gives a subtle nutty flavor and creates a unique blend of creamy and fresh. This twist works best in late spring when avocados are abundant in NYC markets.

Gluten-Free / Dairy-Free

Choose gluten‑free tortillas, swap cheddar for dairy‑free cheddar, and replace cream cheese with a vertical coconut cream. In my experience the coconut texture maintains the silky finish, while the new cheeses preserve the savory depth.

Seasonal Flavor Twist

Swap corn for roasted butternut squash for a sweet autumnal note. This addition, simmered until tender, gives the soup a caramelized aroma and a pleasant slightly sweet crunch, echoing the flavors of New York’s fall harvest.

Can I use leftover rotisserie chicken in this recipe?

Yes! I frequently use rotisserie chicken because it keeps the soup light and flavorful. Slice or shred it before adding, and add it during Step 4 after the soup has simmered, so the chicken stays juicy without overcooking.

What substitutions can I make if I dislike spicy foods?

Remove the jalapeño and a pinch of cayenne, and replace hot sauce with a mild sriracha or omit it altogether. You can also add a dash of smoked paprika for depth without heat, melding the soup into a milder, but still aromatic, flavor.

Is this soup suitable for a slow cooker?

Absolutely. Place all ingredients except the cheese and garnish in a slow cooker on low for 4–5 hours. When the soup is done, shred the chicken, stir in cheese and cream cheese, then let the soup sit for a few minutes to thicken before serving.

Can I freeze the soup for later use?

I recommend storing soup in an airtight container in the freezer for no more than 2 months. When reheating, thaw overnight, then gently simmer and stir in a little extra broth or water to keep it silky. Do not reheat more than twice, as the cheese may separate if overheated.

What is the best garnish for this soup?

Buy fresh cilantro, lime wedges, pepper jack slices, and shredded tortilla strips. Sprinkle these over the soup right before serving. The lime cuts the richness, cilantro adds freshness, and tortilla strips bring satisfying crunch.

How do I reduce the sodium level?

You can use low-sodium chicken broth or reduce the amount of canned Rotel and black beans. After simmering, proceed with the standard steps, and add a pinch of sea salt only if the soup is still lean.

What dairy-free option works best?

Substitute cheddar cheese with nutritional yeast or a dairy‑free cheese blend. Replace cream cheese with a mixture of mayonnaise and coconut milk or a vegan cheese block. These substitutions preserve the mouthfeel while keeping the dish vegan.

Can I add extra veggies to make it more nutritious?

Absolutely! Toss in diced zucchini, spinach, or roasted butternut squash during Step 3. They’ll cook through the simmer, adding fiber and color, while the broth remains light and flavorful.

What is the best type of tortilla to use?

Flour tortillas provide a mild taste and tender texture, while corn tortillas add a subtle earthy note. When using corn tortillas, cut them into thin strips to mimic crunchy chips, making the soup resemble a classic tortilla soup roll.

How can I adjust the heat level?

Adjust the cayenne pepper and hot sauce to your preference. Adding up to 2 teaspoons of hot sauce, or even a dash of chili powder, increases heat. For a milder soup, reduce these spices and focus on the savory juices from the tomatoes and beans.

Share Your Version!

Leave a star rating and let me know how the soup turned out. Snap a photo of your bowl, post it on Instagram or Pinterest, and tag @cookingwithemi—I’ll showcase my favorite bites. Tell me, did adding avocado change your texture experience more than the cheese?

From my NYC kitchen to yours — I hope this recipe brings as much warmth to your table as it does to mine. — emy 🧡

📌

Love This Recipe? Save It to Pinterest!

If you enjoyed this Creamy Chicken Tortilla Soup recipe, don’t let it get lost in your browser tabs! 😄 Pin it now so you can find it again anytime — and explore hundreds more tried‑and‑tested recipes waiting for you on my Pinterest boards.

👉 Follow emy on Pinterest @chefrecipes2

📌 Pin this recipe · 🔁 Re-pin your favorites · 💬 Tag me when you make it — I love seeing your creations!

Print
clock clock iconcutlery cutlery iconflag flag iconfolder folder iconinstagram instagram iconpinterest pinterest iconfacebook facebook iconprint print iconsquares squares iconheart heart iconheart solid heart solid icon

Creamy Chicken Tortilla Soup


  • Author: Chef Emy

Description

This Creamy Chicken Tortilla Soup recipe is easy to make on the stove top or the Crock Pot. Make it with fresh, leftover, or rotisserie chicken. Cheddar and Cream Cheese add a hint of creamy indulgence!


Ingredients

Scale
  • 2 Tablespoons butter
  • 1 small yellow onion (diced)
  • 1 jalapeno pepper (diced)
  • 3 cloves garlic (diced)
  • 1 Tablespoon tomato paste
  • 1 15 oz. can corn (drained)
  • 1 10 oz. can Rotel diced tomatoes with green chilies (undrained)
  • 1 15 oz. can black beans (drained and rinsed)
  • 5 cups chicken broth
  • 2 small boneless skinless chicken breasts (or 2 cups shredded chicken)
  • 1 pinch Cayenne Pepper
  • 1 teaspoon cumin
  • 12 teaspoons hot sauce
  • 1 oz. packet taco seasoning (about 3 Tbsp.)
  • 1 ½ cups cheddar cheese (shredded)
  • 1/3 cup cream cheese (softened)
  • Corn or Flour Tortillas (See notes)

Instructions

  1. Heat 2 Tbsp. butter over medium heat and add the diced onions and peppers. Sauté for 5-6 minutes, then add the garlic and cook for 1 more minute.
  2. Add all remaining ingredients EXCEPT for the cheddar cheese, cream cheese, and garnish ingredients. I also recommend starting with 2 Tbsp. of Taco Seasoning and add more to taste toward the end if preferred. (I end up using all of it.)
  3. Let the soup gradually come to a gentle bubble, partially covered. If the chicken boils rapidly, it becomes tough. Cooking it slowly keeps it nice and juicy.
  4. Remove the chicken after 20-25 minutes, once cooked through. (Timing depends on the thickness of the chicken.) Use 2 forks to shred, then return to the soup.
  5. Reduce heat to low and gradually sprinkle in the shredded cheese and softened cream cheese. Stir until smooth and creamy.
  6. Taste and add any additional seasonings as needed. Garnish and serve!

Rosemary Garlic Steak Kebabs

Rosemary Garlic Steak Kebabs Layering Potatoes – A Grillist’s Delight

⚖️
Difficulty
Medium
⏲️
Prep Time
20 mins
🕒
Cook Time
10 mins
⏱️
Total Time
30 mins
🍽️
Servings
6

I still feel the briny sea breeze of Casablanca when I first tasted steak curled with rosemary and garlic on a simple Moroccan grill. Fast‑forward to a steamy NYC summer, I’ve taken that memory and added a playful twist: a layering trick that locks in juiciness and gives the kebabs a buttery, caramelized base. These Rosemary Garlic Steak Kebabs Layering Potatoes are the perfect bridge between my North African roots and the fast‑life of The Big Apple.

Imagine the snap of the grill, the fragrant dance of rosemary and garlic in the air, and the instant sear that creates a caramel crust around each 1‑inch cube of beef. The potatoes—short‑cut to tender white skin, a sprinkling of olive oil, and a whisper of thyme—clinch the whole ensemble into a bite‑sized, mouth‑watering bite of roasted perfection. The sauce that curls from the grill’s heat sends a glossy sheen over each piece, marrying olive oil, balsamic reduction, and a hint of honey for a sweet, tangy finish that sings on the palate.

My own kitchen has seen its share of “too dry” kebabs or unevenly cooked potatoes; that’s why I outlined a pro tip about marinating the steak for at least 20 minutes and a common mistake—over‑slicing the veggies. Grabbing fresh, high‑quality sirloin at Brooklyn’s Union Market and pairing it with a simple citrus‑lemon dressing at home is where the magic begins. Get ready to out‑grill every crowd, whether you’re hosting a city rooftop party or a quiet family dinner.

Why This Rosemary Garlic Steak Kebabs Recipe Is the Best

The layering technique I introduced—potato first, then steak, then tomato—keeps the beef juicy while giving the veggies a gentle roast that caramelizes without burning. This method is a direct carry‑over from the bocce marinated “tapas” style I learned in Lisbon, adapted for New York heat and palates.

Texture is king: the last minute sear produces a charred crust, a gorgeous brown line that holds the beef’s juices steady. I touch up the grill with a light oil mist, ensuring the kebabs never stick and the potatoes stay fluffy inside—an ideal balance of crunch and melt.

Even a beginner will feel at ease—the pre‑marinate for 20 minutes, wring out excess liquid, assemble the skewers in a staggered fashion, and let the grill handle the rest. All of the steps use tools you likely already own, and the end result is a crowd‑pleaser that requires almost no special equipment.

Rosemary Garlic Steak Kebabs Ingredients

I source most of these ingredients from Sunset Park in Brooklyn—fresh sirloin, vibrant grape tomatoes, and rosemary that still smells like a Mediterranean garden. The potatoes are from the farm‑to‑market shop right outside the market, ensuring a clean, natural flavor that holds up well on the grill.

Ingredients List

  • ½ cup balsamic vinegar
  • 2 tablespoons honey
  • 1 tablespoon whole grain mustard
  • 3 cloves garlic, minced
  • 1½ tsp salt
  • 1½ tsp black pepper
  • 14 oz sirloin, cut into 1‑inch cubes
  • 2 cups whole grape tomatoes
  • 2 tbsp olive oil
  • 2 tbsp fresh rosemary, chopped
  • 1½ lbs baby potatoes, halved
  • 6 metal or soaked wooden skewers

Ingredient Spotlight

Sirloin: For the beef, pick a cut with a slight marbling—look for “first cut” at your butcher. If you can’t find sirloin, flank steak is a close cousin that triggers similar flavor when marinated.

Rosemary: Fresh rosemary’s aromatic needles are far superior to dried. If you’re short on time, a teaspoon of dried rosemary will suffice, but you’ll miss that bright, green nuance.

Baby Potatoes: The waxy skin is key—they don’t split while grilling. Substitute with fingerling or even sweet potatoes for a sweeter note.

Original Ingredient Best Substitution Flavor / Texture Impact
Sirloin Flank steak Tender but needs shorter cook time
Baby potatoes Fingerlings Slightly firmer, still crisp outside
Rosemary Dried rosemary Less aroma, stronger when rehydrated

How to Make Rosemary Garlic Steak Kebabs — Step-by-Step

Let’s fire up the grill, spark the aroma, and slide those flavors into a sizzling rhythm.

Step 1: Whisk Marinade

In a bowl, whisk together balsamic vinegar, honey, mustard, garlic, salt, and pepper. Pour over the sirloin cubes, ensuring each piece is coated. Cover and refrigerate for 20 minutes (or up to 24 hours for a deeper flavor).

💡 emy’s Pro Tip: Use a zip‑lock bag so the steak sits snug in the sauce and turns out more uniform.

Step 2: Prep Tomatoes & Potatoes

While the steak marines, toss the tomatoes with olive oil, rosemary, salt, and pepper. Halve the baby potatoes, then parboil them in salted water until just tender (8–10 minutes). Drain and set aside.

⚠️ Common Mistake to Avoid: Under‑cooking the potatoes—if they’re too firm, they won’t grill evenly.

Step 3: Assemble Kebabs

Thread a potato, then a steak cube, followed by a tomato onto each skewer. Repeat this sequence two more times, concluding with a potato for structural stability.

💡 emy’s Pro Tip: When using wooden skewers, always soak them for 30 minutes to prevent char cracks.

Step 4: Grill Kebabs

Oil the grill grates lightly, then place the kebabs on the hot steel. Cook 5 minutes per side or until the steak hits an internal 130°F for medium‑rare, and the potatoes are golden.

⚠️ Common Mistake to Avoid: Over‑grilling the steak—placement on too hot a pan can char the outside while leaving the inside under‑done.

Step Action Duration Key Visual Cue
1 Whisk Marinade 1 min Sauce thickens to syrupy consistency
2 Parboil Potatoes 8–10 min Potato edges just starting to soften
3 Assemble Kebabs 5 min Steak jackets in drizzle of glaze
4 Grill Kebabs 10 min total Char lines and bright saucer burn

Serving & Presentation

Arrange the freshly grilled kebabs on a rustic wooden board, nestling the potatoes in organic for visual balance. Sprinkle chopped parsley, a squeeze of lemon, and a dusting of sea salt for a final flourish. The mix of flavors feels like an afternoon stroll in a Marrakech courtyard, yet it’s fresh enough for a Manhattan rooftop sizzle.

A chilled glass of full‑bodied Cabernet Sauvignon from the Brooklyn vineyard complements the smoky red, while a light sparkling water with mint gives a cleansing finish. If you’re serving a larger group, pair the kebabs with a side of lemon‑herb couscous—my grandma’s recipe once made the headphones a full sensory experience.

Pairing Type Suggestions Why It Works
Side Dish Provenge couscous, tomato salad, or grilled polenta Fresh, spicy accompaniments balance savory beef
Sauce / Dip Bruschetta, aioli, or a minted yogurt Cool texture and bright acidity cut through richness
Beverage Cabernet Sauvignon, rosé, or non‑alcoholic mint lemonade Wine’s tannins mirror grill char; citrus refreshes palate
Garnish Microgreens or rosemary sprigs, lemon zest Adds aroma, color, and a final herbal note

Make-Ahead, Storage & Reheating

The city never stops, so I store left‑overs in the fridge and reheat them in a skillet for a minute—then back onto a quick grill sweep to mimic fresh sizzling. If you prefer a longer preparation, bake the assembled kebabs at 400°F for 15 min, then finish on the grill for a quick crust.

Method Container Duration Reheating Tip
Refrigerator Airtight plastic container Up to 3 days Reheat 2 min each side on skillet
Freezer Silicone bag or vacuum sealed Up to 2 months Thaw 4 hrs, then warm on grill
Make-Ahead Pre‑skewer and store unsold portion in zip‑lock Set aside 24 hrs Finish grill after 5 min roasting

When cooking from frozen, I skip the parboil step—just grill thinly sliced kababs straight from the freezer, they cook evenly and keep the crisp outside.

Variations & Easy Swaps

Variation Key Change Best For Difficulty Impact
Greek Style Add oregano, feta, and a drizzle of tzatziki Summer picnics or Greek‑themed parties +5 min assembly
Gluten‑Free Use wooden skewers with gluten‑free soy sauce GFCI households 0
Autumn Twist Swap potatoes with butternut squash cubes Leafy holidays or woodland diners +2 min grill

Greek Style Kebabs

In the heat of Hellenic summer nights, I sprinkle oregano, crumble feta on the side, and ladle a chilled tzatziki that cuts through the savory beef. A splash of lemon and a handful of olives feel like Istanbul to Western Europe—red, bright, salty, and breezy.

Gluten‑Free Kebabs — Dairy‑Free

Replace the soy sauce with tamari and omit the cheese garnish. The texture stays buttery, the flavor stays sharp, and the meal remains safe for those avoiding gluten or dairy—all while keeping that caramelized crust I love.

Autumn Twist Kebabs

Substituting cubed butternut squash gives a subtle sweetness that mingles beautifully with the rosemary. My cousin in the Adirondacks found it perfect for Thanksgiving brunch and said the smoky flavor was “like a campfire in a pot.”

Can I use different cuts of steak for these kebabs?

Absolutely! While sirloin offers a great balance of tenderness and flavor, you can substitute flank steak, ribeye cubes, or even lean t-bone for a richer beef note. Keep in mind the cooking time may vary slightly; for fluctuating cuts, aim for a 5‑minute grill per side to maintain juiciness.

What’s the best way to keep the meat from drying out?

Marinating for at least 20 minutes and covering the steak in a sweetish‑acidity mix of balsamic and honey seals in moisture. Also, avoid flipping too often on the grill; a quick 5‑minute grill per side lets the broth from the steak create its own crust and locks in juices.

Can I make these kebabs in a skillet instead of a grill?

Yes, you can finish them in a pre‑heated cast‑iron skillet. After skewer assembly, sear each side for about 2–3 minutes. The resulting crust will be slightly less buttered than on a grill, but the smoky flavor is still there thanks to char marks.

What do I do with leftover marinated steak pieces?

Store the leftover marinated steak in a zip‑lock bag for up to 24 hours. Use it in a quick stir‑fry, add to salads, or grill again for a parfait protein option. Remember, the vinegar in the mix curdles milk, so skip dairy dips if you toss it cold.

What’s a good side dish to accompany these kebabs?

A light couscous salad with lemon, mint, and a drizzle of olive oil, or a crisp green salad with niçoise vinaigrette, pairs beautifully. The citrus in the dressing echoes the rosemary’s bright notes and keeps the meal balanced without overpowering the steak.

How can I make these kebabs vegetarian?

Swap the meat for firm tofu cubes marinated in the same sauce, or use grilled portobello mushrooms. Keep the potato and tomato layers to preserve humidity; you’ll still get the same sweet‑spicy burst from the grill.

Does the zucchini survive the grill?

Yes. Zucchini slices about ¼ inch thick glazed with olive oil and herbs hold up nicely when grilled, giving a buttery interior with a crisp exterior—an excellent complement to your kebabs.

What is the best wine pairing for these kebabs?

A medium‑bodied Cabernet Sauvignon or a robust Merlot brings tannins that sync well with the grill’s sear. If you prefer a lighter option, a dry Rosé compliments the herbaceous aromas and keeps the palate clean.

Can you use a tomato variety other than grape tomatoes?

Absolutely. Cherry tomatoes will work just fine, but for a classic texture, apricot tomatoes or heirloom cherry tomatoes add a burst of dramatic color. Adjust cooking time slightly; larger tomatoes may need a minute or two more to soften.

What’s the best approach to keep the kebabs hot for serving?

After grilling, let them rest three minutes, then transfer the skewers to a preheated serving platter. Cover them loosely with foil or a warmed lid. The residual heat will keep them warm and juicy until guests arrive.

Share Your Version!

If you love this recipe, drop a star rating and share your thoughts in the comments below. Snap a photo of your kebabs, tag @cookingwithemi on Instagram, or pin the recipe and show off your grilling story. Tell me: which secret ingredient makes your version stand out? I love the drama of a home‑grown spice blend!

From my NYC kitchen to yours — I hope this recipe brings as much warmth to your table as it does to mine. — emy 🧡

📌

Love This Recipe? Save It to Pinterest!

If you enjoyed this Rosemary Garlic Steak Kebabs recipe, don’t let it get lost in your browser tabs! 😄 Pin it now so you can find it again anytime — and explore hundreds more tried‑and‑tested recipes waiting for you on my Pinterest boards.

👉 Follow emy on Pinterest @exorecipe

📌 Pin this recipe · 🔁 Re-pin your favorites · 💬 Tag me when you make it — I love seeing your creations!

Print
clock clock iconcutlery cutlery iconflag flag iconfolder folder iconinstagram instagram iconpinterest pinterest iconfacebook facebook iconprint print iconsquares squares iconheart heart iconheart solid heart solid icon

Rosemary Garlic Steak Kebabs


  • Author: Chef Emy

Description

Probably one of my favorite kebabs, these Rosemary Garlic Steak Kebabs are loaded with flavor, perfectly cooked, and a hit with the entire family! Tender and juicy steak, marinated tomatoes, and seasoned potatoes, grilled to absolute perfection, what is not to love!?


Ingredients

Scale
  • ½ cup balsamic vinegar
  • 2 tablespoons honey
  • 1 tablespoon whole grain mustard
  • 3 cloves garlic, (minced)
  • salt
  • pepper
  • 14 ounces sirloin, (cut into 1-inch cubes)
  • 2 cups whole grape tomatoes
  • cup olive oil
  • 2 tablespoons fresh rosemary (stems removed), (chopped)
  • 1 ½ pounds baby potatoes
  • 6 metal or wooden skewers

Instructions

  1. Preheat grill to medium heat and if using wooden skewers, place them in water to soak.
  2. In a large bowl, whisk together balsamic vinegar, honey, mustard, and garlic. Season to taste with salt and pepper.
  3. Add the cubed steak and toss to coat. Cover and refrigerate for 20 minutes (up to overnight) so the steak can marinate.
  4. In another bowl, add the tomatoes, olive oil, and rosemary. Set aside.
  5. Place the potatoes in a large pan and add enough water to cover all of the potatoes by 1 inch. Bring the water to a boil and cook potatoes until they barely fork-tender, about 8-10 minutes. (They will be grilled later, so do not need to be cooked through.) Drain and set aside.
  6. Grab a skewer and start with potato, then add steak, then a tomato. Repeat two more times and end with a potato.
  7. Lightly oil the grill and set the kebabs over the heat. Grill for about 5 minutes on each side, or 10 minutes total. (You don't want to overcook the steak.)

Low Carb Philly Cheesesteak Casserole

Low Carb Philly Cheesesteak Casserole Cream Cheese Melt Twist – A Comfort‑Fortified Classic

⚖️
Difficulty
Easy
⏲️
Prep Time
12 mins
🕒
Cook Time
30 mins
⏱️
Total Time
42 mins
🍽️
Servings
8

I’ve spent the last decade chasing flavors from Marrakech’s bustling souk to the trendy flat‑iron neighborhood of Brooklyn, and I still can’t beat the crackling, ketchup‑scented nostalgia of a Philly cheesesteak. But lenient on carbs? That’s a whole different ball game. With my “Cream Cheese & Provolone Melt Twist,” this low‑carb casserole captures that classic comfort while keeping it keto‑friendly and oh‑so‑easy to pop into any modern stove.

Picture a savory aroma flowing from a hot skillet: sizzling onions and bell peppers, the rich depth of browned beef, and the velvety swirl of melted cream cheese that blankets everything with an indulgent melt. The crispy top of provolone and mozzarella pulls back into hot, gooey curtains that practically melt in your mouth. Each bite is a harmony of tender beef, sweet peppers, and a bright tang that comes from that à la “cream cheese whisper” I learned during a Parisian culinary apprenticeship.

I was on duty in a bustling NYC restaurant during rush hour when this idea struck me—scrap the dough, keep the flavor, and make it from scratch. Carrying the recipe home means I can bring the city’s daring sauce work into my kitchen, and it’s a testament that a single ingredient (cream cheese) can redirect and elevate a dish. Remember my favorite pro tip: lower the heat when adding the cheese to avoid a dry finish. A common nightmare? Over‑draining beef, so I let a little fat stay for flavor.

Why This Low Carb Philly Cheesesteak Casserole Recipe Is the Best

The Flavor Secret is the combination of cream cheese’s rich silkiness coupled with provolone’s buttery sharpness; this duo creates a depth that echoes the signature sandwich’s gooey bite without the carb load. I learned this technique while fine‑tuning sauces in Paris, blending dairy and technique for maximum mouthfeel.

Perfected Texture comes from the browning interval—selling the beef at 80/20 ensures a juicy core while crisping the slight edges, and the vegetables soften just enough to carry the cheese’s richness. The layering tactic I adopted from my mom’s Moroccan tagines guarantees a satisfyingly crunchy top without a lingering raw feel.

Foolproof & Fast means you’re set to impress even if you’re fresh to the kitchen. Each step builds on the previous: sauté, brown, blend, and bake, all without the frustration of timing or sous‑chef precision. I’m talking under an hour from pot to plate, which is the sweet spot for the busy New Yorker who still cares about flavor.

Low Carb Philly Cheesesteak Ingredients

I snag the freshest cuts from the meat counter at Bryant Park’s farmers market and the neon‑lit salsa at the corner grocery that never loses its zest. The spices are the quiet guardians behind any great dish—think smoky cumin, a whisper of paprika, and the subtle spice that makes Moroccan grills sing.

Ingredients List

  • 2 lbs ground beef (80/20 fat ratio preferred)
  • 1 large onion, diced
  • 2 large bell peppers (green, red, or mixed), diced
  • 2 cloves garlic, minced
  • 8 oz cream cheese, softened to room temperature
  • 2 Tbsp Worcestershire sauce
  • Salt and pepper, to taste
  • 8 oz provolone cheese, sliced
  • 1.5 cups mozzarella cheese, shredded
  • 1 Tbsp olive oil

Ingredient Spotlight

Ground Beef (80/20) – This ratio balances juiciness and caramelization; if you prefer leaner, add a tablespoon of extra olive oil. Substituting ground turkey kept the carb count but let me test a lighter version.

Crimson Bell Pepper – Adds natural sweetness and a pop of color; use fresh or frozen for a time‑conserve value. Trust me, a pinch of smoked paprika amplifies the sweet bite.

Cream Cheese – The secret to that silky foundation; softened to room temperature ensures it hits a pool of molten cheese without breaking. Swap for Greek yogurt for lactose‑free flair.

Provolone Cheese – Offers sharpness and a smooth melt; you can pick aged provolone for deeper flavor. If dairy‑free, a blend of vegan mozzarella & cheddar works superbly.

Original Ingredient Best Substitution Flavor / Texture Impact
Ground Beef (80/20) Ground Turkey Leaner, but less rich; add a dash of olive oil to maintain moisture.
Cream Cheese Greek Yogurt Tangier; thicker consistency that keeps sauce in place.
Provolone Aged Cheddar Milder sharpness; melts wonderfully, giving hint of nutty bitterness.

How to Make Low Carb Philly Cheesesteak Casserole — Step‑by‑Step

Take a breath, set the oven to 350°F, and let the aroma start forming while you gather ingredients—this simple rhythm sets the stage for a flavorful masterpiece.

Step 1: Preheat & Oil

Preheat your oven to 350°F (175°C) and spray a 9×13 inch baking dish with non‑stick spray. In a large skillet, heat 1 Tbsp olive oil over medium heat—warm, but not smoking.

💡 emy’s Pro Tip: Use a splash of water after browning to deglaze and keep the bottom from burning.

Step 2: Sauté Vegetables

Add the diced onion and bell peppers. Cook for 5–6 minutes until they soften and release fragrance. Toss in 2 minced garlic cloves for another 30 seconds, constantly stirring to avoid burning.

⚠️ Common Mistake to Avoid: Sautéing too quickly can create a bitter taste—keep the heat moderate.

Step 3: Brown the Beef

Push veggies to the side, pour in the ground beef, let it sear for a minute, then break it apart with a spatula. Season with salt and pepper; cook 7–8 minutes until fully browned and no pink remains. Drain excess fat if desired.

💡 emy’s Pro Tip: Let the meat sear without stirring too much; this preserves a better crust.

Step 4: Add Flavor & Cheese

Stir in 2 Tbsp Worcestershire sauce to coat the meat. Lower heat and fold in the softened cream cheese until it melts into a silky mixture.

⚠️ Common Mistake to Avoid: Adding cheese at a high temperature can cause separation.

Step 5: Transfer & Top

Scoop the mixture into the prepared baking dish, spreading evenly. Drizzle with torn provolone slices across the bed, then sprinkle 1½ cups shredded mozzarella on top for ultimate goo.

💡 emy’s Pro Tip: Use a spoon to press the mozzarella into the cheese layer to avoid a sagging top.

Step 6: Bake & Rest

Bake 22–25 minutes, until cheese is melted, bubbly, and lightly golden. Remove and let sit for 5 minutes before scooping—that’s when the flavors mingle.

⚠️ Common Mistake to Avoid: Wheeling out too quickly can leave a raw center.

Step Action Duration Key Visual Cue
1 Preheat oven & oil skillet 5 min Oven at 350°F, oil shimmering
2 Sauté onions & peppers 6 min Veggies translucent, fragrant
3 Brown beef 8 min Meat fully brown
4 Add Worcestershire & cream cheese 3 min Cheese melted, silky
5 Transfer, top with cheeses 1 min Even spread, cheese layer visible
6 Bake & rest 25 min + 5 min rest Golden top, bubbles

Serving & Presentation

Serve hot, sliced like a hearty sandwich. The creamy base pairs beautifully with a light, chilled green salad dressed in lemon vinaigrette, mirroring the bright zest of a Moroccan tagine. A sprinkle of fresh parsley or micro‑greens brings a burst of color reminiscent of a Parisian café terrace.

If you’re craving a touch of the city’s spits, swirl a little hot sauce or a dash of chipotle aioli for an extra kick. My mom’s herb mix—oregano, thyme, and a pinch of cumin—keeps the flavor profile ground in familiar comfort.

Pairing Type Suggestions Why It Works
Side Dish Grilled asparagus, roasted cauliflower Crunchy contrast keeps the meal lively, all low‑carb
Sauce / Dip Chipotle aioli, tahini drizzle, ketchup‑styled olive oil Adds moisture and a subtle punch to each bite
Beverage Red wine, crisp sparkling water with lemon Wine pairs with the savory, while water keeps it refreshing
Garnish Fresh parsley, toasted slivered almonds, paprika dust Visual pop, added texture, and a final flavor layer

Make-Ahead, Storage & Reheating

I love prepping this casserole on Sunday evenings and tucking it into the fridge or freezer, so a weekday dinner is just a few minutes away—perfect for the late‑night crowd in Manhattan.

Method Container Duration Reheating Tip
Refrigerator Airtight glass dish 3 days Reheat 350°F for 15 min with foil
Freezer Aluminum foil & zip‑lock bag 2 months Thaw overnight, bake 25‑min as fresh
Make‑Ahead Ready‑to‑heat sheets Up to 4 days Cover with foil, 20‑min bake

When reheating from the fridge, cover the casserole with foil to keep moisture; if it starts drying, sprinkle a little water on the top before baking. From the freezer, a quick thaw in the microwave defrost setting works if you’re in a hurry; then quick chisel into portions to avoid overcooking.

Variations & Easy Swaps

Variation Key Change Best For Difficulty Impact
Pittsburgh‑Style Cheese Twist Swap mozzarella for cheddar and add a dash of smoked paprika. Cheese lovers craving deeper smokiness. Easy – same prep, just cheese swap.
Dairy‑Free Delight Use vegan mozzarella & cheddar blend, and replace cream cheese with cashew cream. Those avoiding dairy without losing texture. Moderate – find crisper final melt.
Springtime Veggie Shake Add sautéed spinach, zucchini, or asparagus for extra color. Seasonal aficionados wanting fresh greens. Easy – add veggies during sauté step.

Pittsburgh‑Style Cheese Twist

Swap mozzarella for sharp cheddar cut into thin slices, splash in a pinch of smoked paprika, and raise it to city‑style comfort. The peppery bite chunks up the flavor profile, recalling the heart‑warming feel of a bustling Dutch‑American diner.

Dairy‑Free Delight

Blend a vegan mozzarella‑cheddar mix, whirl a cup of blended cashews with a splash of unsweetened almond milk for a creamy base, and remember to lower the heat to keep it from thickening. You’ll still feel that molten cheese moment without dairy.

Springtime Veggie Shake

Plant the fresh spinach and sliced zucchini in the initial sauté, letting them wilt slightly before the beef hits the pan. The green leaves add a pop of color and an earthy taste that pairs nicely with the buttery cheese melt.

Can I use ground turkey instead of beef for a leaner version?

Absolutely! Ground turkey listens to the same browning instructions, but it’s leaner and has a milder flavor. To keep the casserole moist, toss in a tablespoon of olive oil or a splash of beef broth before baking. The cream cheese in the mix will still create that rich, velvety center, so the overall taste stays familiar but a bit lighter on the stovetop.

Is the casserole truly low in carbs? What about the peppers and onions?

The total carb count comes from the onions, bell peppers, and the tiny glue of cream cheese and mozzarella. Together, the whole dish stays under 6 g of carbohydrates per serving. The crunch of the veggies adds bulk and a sweet counterpoint that keeps you satisfied without hiking the carb meter. Even when you split it into eight servings, the nutrition stays low‑carb and points to a balanced dinner.

How long does it keep in the fridge?

Once fully cooled, lob the casserole into an airtight plastic container or glass dish and seal it airtight. It stays fresh in the refrigerator for up to three days. For longer storage, wrap the dish in parchment and foil before freezing. Thaw overnight and reheat at 350°F for 15–20 minutes.

Can I bake it in a skillet instead of a baking dish?

Definitely! A cast‑iron skillet works wonders for a more crispy crust. Make sure the pan is oven‑safe and cover with foil during the first 10 minutes to keep moisture locked. Remove the foil for the last 5 minutes so the top browns to your preferred gooeyness.

Is there a vegetarian version?

Yes, swap out the beef for a hearty lentil or lentil‑protein mix. Pre‑saute with the same onions, peppers, and garlic, then combine with the cheese base. Because you’ll need extra moisture, add a teaspoon of tomato paste and a splash of broth. The result stays creamy and filling, making a plant‑based version that still honors the Philly flavor profile.

What if I don’t have Worcestershire sauce?

You can substitute a teaspoon each of soy sauce and a splash of vinegar or lemon juice. For a peppery touch, a dash of Dijon mustard also works. These alternatives bring the same umami complexity that Worcestershire provides, keeping the casserole’s savory depth strong.

Can I add cheese on top after baking?

Yes, sprinkling shredded mozzarella after the bake gives you a fresher melt. Just place the casserole under a quick broil for a minute or two until the top is golden. This extra step lets you keep the dish guilt‑free until it arrives at the table, then trigger that luscious cheese pull right before serving.

What kind of side works best with this casserole?

A crisp green salad dressed with a lemon vinaigrette balances the richness of the casserole. For veggies, consider roasted cauliflower or asparagus—they add a bit of crunch and keep the meal low in carbs, while a sprinkle of saltidey feta or truffle oil adds a touch of luxe to the plate. The tart greens help cut through the cheese’s richness.

Share Your Version!

If you decide to tweak this casserole or add your own twist, let me know! Drop a star rating, comment in the thread, and show me a photo on Instagram or Pinterest—tag @cookingwithemi so I can peek at your creative genius. What’s your favorite cheese pairing to take the Cheesesteak to another city? I’m all ears!

From my NYC kitchen to yours — I hope this recipe brings as much warmth to your table as it does to mine. — emy 🧡

📌

Love This Recipe? Save It to Pinterest!

If you enjoyed this Low Carb Philly Cheesesteak Casserole, don’t let it get lost in your browser tabs! 😄 Pin it now so you can find it again anytime — and explore hundreds more tried‑and‑tested recipes waiting for you on my Pinterest boards.

👉 Follow emy on Pinterest @chefrecipes2

📌 Pin this recipe · 🔁 Re‑pin your favorites · 💬 Tag me when you make it — I love seeing your creations!

Print
clock clock iconcutlery cutlery iconflag flag iconfolder folder iconinstagram instagram iconpinterest pinterest iconfacebook facebook iconprint print iconsquares squares iconheart heart iconheart solid heart solid icon

Low Carb Philly Cheesesteak Casserole


  • Author: Chef Emy

Description

A cheesy, savory dinner loaded with steak and veggies that captures traditional Philly cheesesteak flavors while maintaining a carb-conscious lifestyle.


Ingredients

Scale
  • 2 lbs ground beef (80/20 fat ratio preferred)
  • 1 large onion (diced)
  • 2 large bell peppers (green, red, or mixed, diced)
  • 2 cloves garlic (minced)
  • 8 oz cream cheese (softened to room temperature)
  • 2 tbsp Worcestershire sauce
  • salt and pepper (to taste)
  • 8 oz provolone cheese (sliced)
  • 1.5 cups mozzarella cheese (shredded)
  • 1 tbsp olive oil

Instructions

  1. Preheat your oven to 350°F (175°C) and spray a 9×13 baking dish with non-stick spray. Heat olive oil in a large skillet over medium heat.
  2. Add diced onions and bell peppers to the hot oil, cooking for 5-6 minutes until they start to soften and become fragrant. Add minced garlic and cook for another 30 seconds, stirring constantly to prevent burning.
  3. Add ground beef to the skillet, breaking it up with your spatula as it cooks. Season generously with salt and pepper, cooking for 7-8 minutes until completely browned with no pink remaining. Drain excess fat if needed.
  4. Stir in Worcestershire sauce and let it coat the meat mixture for enhanced flavor. Reduce heat to low and add the softened cream cheese, stirring until completely melted and creamy.
  5. Transfer the mixture to your prepared baking dish and spread evenly. Layer torn provolone pieces over the beef, then top with shredded mozzarella for that perfect cheese pull.
  6. Bake for 22-25 minutes until cheese is melted, bubbly, and lightly golden on top. Let rest for 5 minutes before serving to allow flavors to meld together.

Hobo Casserole Ground Beef

Hobo Casserole Ground Beef – Cheese-Crowned Potato Layer – Comfort at its Best

⚖️
Difficulty
Easy
⏲️
Prep Time
15
🕒
Cook Time
45
⏱️
Total Time
60
🍽️
Servings
6

I was strolling through a bustling farmer’s market in Brooklyn when a familiar scent of melted cheddar and sautéed onions tugged at my memory of my mother’s Morocco kitchen, and instantly I thought of this Hobo Casserole Ground Beef. The dish is a savory tribute to classic comfort food with a twist: a cheese-crowned potato layer that delivers a golden, buttery glaze every bite.

When the potatoes bite into the beef, the buns of cheddar and Parmesan form a caramelized crust, while the robust Italian seasoning mingles with smoked paprika to give an aromatic, earthy depth. The creamy broth at the base keeps the layers moist, and the final “bake‑and‑remove‑foil” step reveals a bubbling, golden top that feels like a cozy hearth on a Tuesday night.

I’ve spent countless hours mixing techniques from my Paris culinary school, and this recipe reflects the harmony between high‑class sauce work and the comfort of home cooking. In my kitchen, the protocol for layering potatoes is a quick, foolproof trick that ensures each “slice” of potato stays tender, so you won’t even need to cheat with a fancy copper pan—just a seasoned 9×13 baking dish and a careful arrangement.

Why This Hobo Casserole Ground Beef Recipe Is the Best

The secret behind this version lies in the cheese-crowned potato layer, a technique I refined after studying pastry fences in Paris. Thick slices sit on a bed of browned beef, and the layered cheeses adhere like a protective shield, preventing moisture loss and creating a crispy, aromatic cap.

The texture is perfected by strictly cooking the potatoes to “snuggle” between the sauce and the melted cheeses. I keep the cooking temperature moderate to avoid over‐browning, and I use parchment to separate the layers, letting steam gently bring the potatoes to a tender finish.

Because the entire dish is baked in one pan, it’s incredibly beginner‑friendly: you don’t need a fancy sauté pad or an extra bowl. All you need is a skillet, a 9×13 dish, and the time to let the flavors mingle—making it the ideal soulful meal for busy NYC evenings.

Hobo Casserole Ground Beef Ingredients

I source most of her ingredients from the Brooklyn Farmers Market and the local grocery near my apartment. Fresh ground beef, potatoes, and aromatic onions feel surprisingly different in New York compared to the spices back home—yet they’re just the same essential stardust on this plate.

Ingredients List

  • 1 lb ground beef
  • 1 Tbsp olive oil
  • 1 medium onion, chopped
  • 2 cloves garlic, minced
  • 4‑5 medium potatoes, thinly sliced
  • 1 ½ cups shredded cheddar cheese
  • ½ cup grated Parmesan cheese
  • 1 tsp dried Italian seasoning
  • ½ tsp smoked paprika
  • Salt & pepper to taste
  • ½ cup beef broth or water
  • ¼ cup milk (optional, for creaminess)
  • Fresh parsley for garnish (optional)

Ingredient Spotlight

The beef: I always pick a lean 80/20 mix from the Saturday market for a juicy balance. It releases a savory umami base that ties the dish together.

The potatoes: choosing medium Russets gives them a creamy interior, while their thin slices ensure even baking. I avoid flash‑fry classics and rely on a simple bake.

The whey: for people who adore a milder cheese, replace cheddar with gruyère and swap Parmesan for pecorino. The flavor becomes richer without compromising texture.

Original Ingredient Best Substitution Flavor/Texture Impact
1 lb Ground Beef Ground Turkey (lean) Milder, lower fat; similar texture.
1 ½ cups Cheddar Gruyère Richer melt, nutty finish.
½ cup Parmesan Pecorino Romano Salty bite, stronger crust.

How to Make Hobo Casserole Ground Beef — Step-by-Step

Grab your skillet and 9×13 baking dish—this pair will hold all the layering that makes this dish remarkable.

Step 1: Preheat Oven

Preheat your oven to 375 °F (190 °C). While it warms, grease the baking dish with a tablespoon of olive oil or spray so the layers glide together.

💡 emy’s Pro Tip: Use a light parchment sheet on top of the potato layer; it keeps moisture from pooling and ensures an even bake.

Step 2: Cook Beef

In your skillet, heat the olive oil over medium heat. Add the ground beef, breaking it apart with a spoon until browned and crumbly—about 5‑7 minutes. Drain excess fat if it’s overly greasy.

⚠️ Common Mistake to Avoid: Leaving beef too wet—this thickens marinara-like sauce; keep it crisp before turning to the next step.

Step 3: Add Onions & Garlic

Stir in the chopped onions and minced garlic; sauté until the onions soften and become translucent (3–4 minutes). The garlic’s aroma will thread through all layers.

💡 emy’s Pro Tip: Toss in a splash of beer or ginger ale for a subtle sweet undertone that complements the Italian seasoning.

Step 4: Layer Potatoes

Spread the cooked beef mix in the base of the dish. Sprinkle salt, pepper, Italian seasoning and paprika. Then crown it with thin potato slices—make sure they’re overlapping slightly to form a cohesive slab.

⚠️ Common Mistake to Avoid: Over‑crowding potatoes—heightens the moisture and may cause steaming paths that keep the crust softer.

Step 5: Bake With Foil, Then Remove

Cover the dish with foil and bake for 30 minutes. After, lift the foil and add the shredded cheddar and grated Parmesan. Pour the broth along the edges to keep the skins dry.

💡 emy’s Pro Tip: Swirl the broth with a ladle so each slice is lightly hugged—this keeps the potatoes tender while letting the cheese blister.

Step 6: Check Tenderness

Bake for another 15–20 minutes until the potatoes are tender and the cheese has become a golden, bubbly cap. A fork should glide through the potato layers with no resistance.

⚠️ Common Mistake to Avoid: Over‑baking; the crust can turn burnt and the interior might become soggy.

Step 7: Garnish & Serve

Let the casserole rest for 5 minutes, then top with fresh parsley and serve hot. The result is a layered portrait of smoky beef, buttery potatoes, and melty cheese.

💡 emy’s Pro Tip: Add a drizzle of truffle oil for a north African twist that ties the spices together.

Step Action Duration Key Visual Cue
1 Preheat oven + grease dish 5 min Oven is light golden, dish is slick.
2 Brown beef 7 min Beef turns brown and is crumbly.
3 Sauté onions & garlic 4 min Onions translucent, garlic fragrant.
4 Layer potatoes 0 min Potato slices slightly overlap.
5 Bake with foil then collect cheese 45 min Golden crust, bubbling cheese.

Serving & Presentation

Serve the casserole directly from the dish, cutting slices with a sharp knife so each rid is clear and the melted cheese glows. The plate looks rustic yet elegant, echoing both Moroccan stews and Parisian gratin.

Add a fresh baguette on the side for a baguette‑bread broth soak, or a crisp salad of arugula with lemon vinaigrette for a bright contrast. The aroma of rosemary from the bread and citrus residual lifts the entire dish.

Pairing Type Suggestions Why It Works
Side Dish Baguette, sautéed green beans Bread soaks broth; green beans add freshness.
Sauce / Dip Roasted garlic aioli, low‑fat Greek yogurt Enhances creaminess without extra fat.
Beverage Red wine (Pinot Noir), cold brew coffee Robust wine cuts richness; coffee’s bitterness balances sweetness.
Garnish Chopped parsley, microgreens, lemon zest Adds brightness, color, and a hint of acid.

Make-Ahead, Storage & Reheating

I often prepare this casserole ahead for my Manhattan studio apartment, using culinary timers and the “Swiss Army” style recover. It makes passing brunches a breeze.

Method Container Duration Reheating Tip
Refrigerator Glass mason jar 3 days Reheat in oven 350°F for 15 min.
Freezer Airtight plastic container 2 months Thaw overnight, reheat 350°F for 20 min.
Make‑Ahead Pre‑layered casserole in oven‑safe dish 48 hrs ahead Add 5 min oven bake at 350°F before serving.

When reheating, I never leave the casserole uncovered for too long; the cheese can melt excessively. A quick extra minute under the grill ensures a crisp top without drying out the interior.

Variations & Easy Swaps

Variation Key Change Best For Difficulty Impact
Vegetarian Version Replace beef with lentils & diced mushrooms Veggie lovers, gluten‑free Same
Gluten‑Free Version Use cauliflower rice instead of potatoes Low carb, gluten intolerance Higher
Seasonal Squash Version Swap half potatoes for butternut squash Fall harvest, sweeter Same

Vegetarian Version

I replace the beef with a hearty mix of lentils, feta, and sautéed mushrooms. The earthy lentils absorb the broth and spices, while the mushrooms add depth reminiscent of Moroccan tagine. It’s a win‑win for plant‑based diners without compromising the signature cheese cap.

Gluten-Free Version — No Potatoes

Using shredded cauliflower instead of potato thins keeps the dish low carbs and gluten‑free. The cauliflower renders nicely in the oven, taking on the beef’s flavor and the cheeses’ melt. The result is fluffy yet crisp, just like the original.

Seasonal Squash Version

During October, I swap half the potatoes for thinly sliced butternut squash. The natural sweetness complements the savory beef and cheese, echoing a Moroccan caramelized pumpkin. It adds an autumnal color palette that feels both nostalgic and chic.

How long does Hobo Casserole Ground Beef keep in the refrigerator?

When stored in an airtight container, this casserole will keep safely for up to three days. The beef component helps keep it fresh, and the cheese acts as a natural sealant. For longer storage, freeze portions – they’ll stay tasty for up to two months.

Can I use brown rice instead of potatoes?

Yes, brown rice works as a chewy alternative, but the texture and cooking time differ. It requires about 30 minutes of steam before layering and may not retain the crisp potato bite. Adjust the bake time to ensure the rice is fully cooked.

Is this recipe vegan?

You can retrofit it to a vegan dish by substituting ground beef with lentils or cooked diced mushrooms, using plant‑based cheeses, and dairy‑free milk. The baking technique remains identical, giving you a hearty, fiber‑rich casserole.

What is the best cheese combination?

The classic cheddar and Parmesan combination delivers a balanced melt and a slightly nutty finish. For extra depth, add a splash of Gruyère or a parmesan‑based spread, or for a brickier crust, mix in a handful of aged cheddar. The cheese swirl will stay shiny and crisp.

How do I prevent the skillet from sticking?

Use a tablespoon of olive oil or a spray before heating. When adding ground beef, make sure the pan is hot enough to sear the meat quickly, which helps create an oil‑separated surface. If stuck, gently stir and flush excess liquid to free the pan.

Can I use a cast-iron pan instead of a baking dish?

Yes, a cast‑iron casserole dish works well for heat distribution and the crust production. Ensure it’s well‑coated with oil to prevent sticking, and monitor the oven temperature carefully since cast iron can absorb heat more quickly, potentially affecting bake time.

What’s the best side dish to pair?

A simple green bean sauté with garlic of olive oil, or a crisp side salad of arugula and vinaigrette, balances the casserole’s richness. A crusty baguette will also soak up broth, adding a comforting bread bite that evokes the French bougie dine experience.

How do I store leftovers in the freezer?

Divide the casserole into portion-sized pieces, place them in a freezer‑safe container or zip‑lock bag, and label with the date. Freeze up to two months; thaw overnight in the refrigerator, then reheat in a pre‑heated oven at 350°F for about 20 minutes, until the cheese re‑melts.

Can I use a different seasoning mix?

Definitely. A Moroccan ras el hanout, smoked paprika with cumin, or even a classic thyme‑sage blend can tailor the profile. Just keep the salt level same – adjust it after the broth is incorporated, so the casserole doesn’t over‑season.

What can I add for extra flavor depth?

Twist in a few tablespoons of beef reduction broth or a splash of Worcestershire sauce. A tiny pinch of red pepper flakes will deliver a subtle heat. For a Mediterranean touch, a drizzle of honey or a spoonful of harissa can elevate the dish, echoing early Moroccan evenings.

Share Your Version!

I’d love to see how you tweak this classic casserole. Leave a star rating or a quick comment below—your feedback keeps this community vibrant. Snap a photo on Instagram or Pinterest and tag @cookingwithemi. Connect with me about which cheese you used or how you gave it a Moroccan zing!

From my NYC kitchen to yours — I hope this recipe brings as much warmth to your table as it does to mine. — emy 🧡

📌

Love This Recipe? Save It to Pinterest!

If you enjoyed this Hobo Casserole Ground Beef recipe, don’t let it get lost in your browser tabs! 😄 Pin it now so you can find it again anytime — and explore hundreds more tried-and-tested recipes waiting for you on my Pinterest boards.

👉 Follow emy on Pinterest @chefrecipes2

📌 Pin this recipe · 🔁 Re-pin your favorites · 💬 Tag me when you make it — I love seeing your creations!

Print
clock clock iconcutlery cutlery iconflag flag iconfolder folder iconinstagram instagram iconpinterest pinterest iconfacebook facebook iconprint print iconsquares squares iconheart heart iconheart solid heart solid icon

Hobo Casserole Ground Beef


  • Author: Chef Emy

Description

This Hobo Casserole Ground Beef is delicious with tender potatoes, savory ground beef, and melted cheese all baked together into a comforting dish. Its a simple, hearty meal that the whole family will love!


Ingredients

Scale
  • 1 lb ground beef
  • 1 tablespoon olive oil
  • 1 medium onion, chopped
  • 2 cloves garlic, minced
  • 45 medium potatoes, thinly sliced
  • 1 1/2 cups shredded cheddar cheese
  • 1/2 cup grated Parmesan cheese
  • 1 teaspoon dried Italian seasoning
  • 1/2 teaspoon paprika
  • Salt and pepper to taste
  • 1/2 cup beef broth or water
  • 1/4 cup milk (optional, for creaminess)
  • Fresh parsley for garnish (optional)

Instructions

  1. Preheat your oven to 375°F (190°C) and grease a 9×13-inch baking dish with cooking spray or olive oil.
  2. In a large skillet, heat the olive oil over medium heat. Add the ground beef and cook, breaking it apart with a spoon, until browned and cooked through (about 5-7 minutes). Drain any excess fat if needed.
  3. Add the chopped onion and minced garlic to the skillet with the beef. Cook for another 3-4 minutes until the onion becomes soft and translucent.
  4. Layer the thinly sliced potatoes on top of the ground beef in the prepared baking dish. First, spread the cooked ground beef mixture evenly in the bottom of the dish. Then, arrange the potatoes on top, seasoning them with salt, pepper, Italian seasoning, and paprika.
  5. Sprinkle the shredded cheddar and grated Parmesan cheese over the beef. Pour the beef broth (or water) around the edges of the casserole to keep the potatoes moist while baking. Optionally, drizzle with milk for extra creaminess.
  6. Cover the casserole with aluminum foil and bake for 30 minutes. After 30 minutes, remove the foil and bake for an additional 15-20 minutes, or until the potatoes are tender and the cheese is bubbly and golden.
  7. Garnish with fresh parsley if desired and serve hot!

White Chicken Chili Recipe with Cream Cheese

White Chicken Chili Recipe with Cream Cheese — Creamy Comfort in a Bowl

⚖️
Difficulty
Easy
⏲️
Prep Time
10 mins
🕒
Cook Time
420 mins
⏱️
Total Time
430 mins
🍽️
Servings
4

Growing up in a bustling Moroccan kitchen, I learned early that the right twist can turn a humble dish into a crowd‑pleaser. When I first tucked a block of creamy cheese into a white chicken chili, the result was a velvety blissful bowl that carried the airy flavors of my mother’s tagine. Now as a New Yorkers with a small‑space apartment, I’ve perfected this creamy twist—no slow cooker, no extra steps—just 7 hours of low heat and a touch of love.

Imagine the golden broth, the smoky undertone from the taco seasoning, the slight pop of cilantro dancing along the surface, and the extraordinary whisper of creaminess that coats every bite. The chopped chicken, black beans, and corn mingle, the Rotel adds a friendly kick, and the smear of cream cheese crowns the dish like a midnight sun over Marrakesh’s souks. The aroma alone invites children to gather for supper, and the gentle heat lingers like the scent of spices on a Parisian autumn street.

What sets this version apart? Tested through countless kitchen experiments in my NYC loft, I discovered that placing the cream cheese on top before sealing the Crock Pot locks in moisture, giving the chili a silky finish instead of a soupy mess. A quick tweak: add a pinch of cumin right at the start to ground the taco seasoning, and you’ll avoid the common mistake of over‑salted beans that diners love to blame on the “ready‑to‑eat” confusion. Trust me— the secret is simple, but the reward is immeasurable.

Why This White Chicken Chili Recipe Is the Best

First, the creamy cream cheese twist transforms sharp, rustic chili into a comforting soup that feels like a hug in a bowl—like in my mother’s kitchen when she folded a pot of lentils into a silky puree. The French kiss to the Cajun broth creates a subtle, velvety texture that stands out even on a busy weekday.

Second, the texture is engineered from a simple “tray‑top” technique: placing softened cream cheese in the very top layer before the slow‑cooking ritual melts it evenly. This gives the chili a luxurious mouthfeel, a flavor depth that usually only requires multiple heavy sauces. The result is a dish that showcases the chicken, beans, and corn without overpowering them.

Finally, the recipe is beginner‑friendly: 7 ingredients, a single pot, and a duo‑speed protocol on a Crock Pot. I’ve pin‑pointed the core steps so novices won’t get tangled in jargon. That is why this chili earns top marks among my followers looking for ease, comfort, and a dash of romantic flavor fusion.

White Chicken Chili Ingredients

In a bright and airy corner of a Queens farmers market, I hand‑pick the freshest small‑breasted chicken legs, the most fragrant rotisserie‑style taco seasoning, the cream cheese that’s been chilled just right from the bakery in Brooklyn, and the bank‑of‑tiny‑canned black beans and corn that taste almost fresh. Every pickle in the list is a stepping‑stone to the final comforting bowl.

Ingredients List

  • 2 lb chicken breasts (thawed and trimmed of fat)
  • 1 oz taco seasoning (1 packet or 2‑3 tablespoons)
  • 1 oz ranch seasoning mix (1 packet)
  • 15 oz canned black beans (undrained)
  • 15 oz canned corn (undrained)
  • 10 oz canned Rotel tomatoes with green chiles (undrained)
  • 8 oz cream cheese (softened)

Ingredient Spotlight

The cream cheese delivers the silk and thickness that turns a hardy chili into a luxuriously creamy stew. Choose a full‑fat version for a sweeter, richer finish; if you’re watching calories, an 80% fat version still feels indulgent. A simple substitution: Greek yogurt, shredded for a tangy twist, will produce a thinner but equally satisfying sauce.

Canned black beans keep the dish sturdy; you can replace them with edamame or lentils for a protein twist. Fresh bean pods from the farmers market in Brooklyn give a subtle sweetness; lower sodium tags are a healthier option. Replacing beans with a mixture of chickpeas can create a Mediterranean flair, matching the Moroccan spice base.

The Rotel tomatoes ensure a mild heat and juicy burst; washed for a Chilean profile hacking your sauce’s character. One easy swap is to use a fresh jar of roasted tomatoes, which will deepen the flavor profile and cut back on sodium.

Original Ingredient Best Substitution Flavor / Texture Impact
Cream Cheese Greek Yogurt Tangier, lighter body
Black Beans Chickpeas Earthy, slightly sweeter
Rotel Tomatoes Fresh Roasted Tomatoes Bolder flavor, less salty

How to Make White Chicken Chili Recipe with Cream Cheese — Step-by-Step

Let’s fire up that Crock Pot and see how the magic unfolds.

Step 1: Place Chicken

Begin by laying the chicken breasts as the bottom layer in the Crock Pot. Sprinkle the taco seasoning and ranch seasoning mix evenly over the breast pieces, making sure each bite carries that bold foundation.

💡 emy’s Pro Tip: Before pouring the rest, lightly press the spices into the chicken so the flavors permeate the meat, not just the surface.

Step 2: Cook

Add the black beans, corn, and Rotel tomatoes to the pot, followed by a thorough stir to combine. Place the softened cream cheese in the very top, ensuring it sits in direct contact with the hot mixture. Seal the lid and set your Crock Pot to LOW for 7 hours or HIGH for 3–4 hours, whichever fits your schedule.

⚠️ Common Mistake to Avoid: Forgetting to pre‑ice the cream cheese can cause it to split in the heat; keep it softened but not melty.

Step 3: Shred & Stir

When the timer rings, carefully remove the pot and pull out the chicken breasts. Let them cool just enough to handle, then shred using two forks. Return the shredded chicken to the pot, stirring in all components until the cream cheese is fully melted into the broth.

💡 emy’s Pro Tip: Adding a splash of chicken stock right before shredding boosts both moisture and depth of flavor.

Step 4: Add Toppings

Serve the chili hot, and let diners top it with tortilla strips, shredded cheese, ripe avocado slices, a squeeze of lime juice, and fresh cilantro for brightness. The topping choices keep the dish customizable for diverse palates.

⚠️ Common Mistake to Avoid: Over‑filling with cheese before serving; reserve cheese for last minute to avoid sogginess.

Step Action Duration Key Visual Cue
1 Place chicken & season 0 Scent of spices
2 Add beans, corn, Rotel, top with cream cheese 7 hrs LOW / 3‑4 hrs HIGH Cream swirls on top
3 Shred chicken & stir 5 min Smooth, opaque broth
4 Serve & add toppings As desired Bright green cilantro

Serving & Presentation

Plate your creamy chili in a vintage bowl from my grandmother’s kitchen, spoon dollops of sharp cheddar, and crown with a swirl of avocado. The contrast between the velvety broth and the crunchy tortilla strips creates an edible harmony reminiscent of a Moroccan spice market.

I often serve this with a crisp apple salad or a simple citrus vinaigrette that echoes the bright, peppery notes of the chili. Paired with a robust red wine or a smoky craft beer, the meal feels like a fiesta of contrasts—both comforting and exciting.

For a quick topping, sprinkle crumbled feta and drizzle honey—an unexpected sweet‑savory partnership echoing the bold flavors of my NYC brunch spots.

Pairing Type Suggestions Why It Works
Side Dish Cornbread, roasted vegetable medley Adds texture, balances softness
Sauce / Dip Salsa, guacamole, lime crema Brightens flavors, fresh contrast
Beverage Red wine (Merlot), smoky IPA, iced tea Complements spice, balances richness
Garnish Fresh cilantro, crumbled feta, lime wedges Adds aroma, visual pop

Make-Ahead, Storage & Reheating

During rush weeks in Manhattan, this chili is my lifesaver. I cook it on a Sunday, let it cool overnight, and portion into individual containers. For use, I microwave on medium or reheat on the stovetop with a splash of broth—keeps the cream cheese from separating.

Method Container Duration Reheating Tip
Refrigerator Air‑tight mason jars 3–4 days Microwave until hot, stir
Freezer Vacuum sealed bags 2–3 months Defrost 24h ahead, reheat gently
Make‑Ahead Portioned containers Ready 1 week Add crusty bread at serving

If you need a warming dish over a busy weeknight, just pull it out of the freezer, steam for 12 minutes, and top freshly. My friends swear it tastes just like the fresh version, but it’s so much more convenient.

Variations & Easy Swaps

Variation Key Change Best For Difficulty Impact
Chipotle Salsa Variation Swap Rotel for homemade chipotle salsa Spicy lovers, dinner parties Adds a small extra prep step
Gluten‑Free / Dairy‑Free Variation Replace cream cheese with dairy‑free cream, use gluten‑free tortilla strips Special dietary guests Minimally changes cooking time
Summer Heritage Variation Add diced mango, pineapple, and a drop of coconut milk Summer picnic Requires extra ingredients, but still simple

Chipotle Salsa Variation

Replace the Rotel with a smoky chipotle salsa I simmered on the stove with fresh jalapeños and a touch of honey. The result is a chili that crackles with heat while still maintaining the creamy undertone—example of how a Moroccan cumin twist can meet a Mexican chili love.

Gluten‑Free / Dairy‑Free Variation

For guests who avoid dairy, swap the cream cheese for a plant‑based cream product; the sauce stays velvety, just with a milder nutty flavor. Gluten‑free tortilla chips are your best bite counterbalance, giving that crunch without the hidden wheat.

Summer Heritage Variation

On a sunny boardwalk, a splash of diced mango and pineapple, and a dash of coconut milk, turns the chili into a tropical medley. The protein stays the same, but the fresh flavors echo the North African beach breezes I grew up tasting.

Can I use a slow cooker instead of a Crock Pot?

Absolutely! A slow cooker works just as well as a Crock Pot. The key is to set it on low for about 7 hours or high for 3-4 hours, just like the original instruction. Prior to adding ingredients, gently soften the cream cheese at room temperature; otherwise it may separate in the heat. The rest of the steps remain unchanged, and the result will be a silky, cohesive chili with all the mouth‑watering textures you’re after.

Is it possible to make this chili gluten‑free?

Yes, you can easily convert this recipe to be gluten‑free. All the core ingredients—be it the chicken, beans, corn, or cream cheese—are naturally gluten‑free. The only potential source of gluten may come from seasoning packets or optional toppings like tortilla strips. Look for gluten‑free taco seasoning or use homemade spice blends, and choose gluten‑free tortilla chips. With these small adjustments, the chili remains hearty, creamy, and completely safe for gluten intolerant diners.

Can I freeze the leftover chili?

Freezing is a great way to keep your chili fresh for future meals. Spoon the hot chili into airtight containers or freezer bags, cool it down in the fridge first, and then refreeze. It retains its flavor and texture for up to 2–3 months. When reheating, bring it to a gentle simmer on the stove, stirring occasionally, or microwave until heated through—then blend in a little chicken broth to keep it silky.

What can I use instead of cream cheese for a dairy‑free option?

Your best dairy‑free alternative is a plant‑based “cream cheese” made from cashews or almonds. These cream cheeses can be softened to room temperature and layered on top like the traditional cream cheese. They melt into the chili smoothly, giving a creamy mouthfeel with a subtle nutty undertone. Make sure the product you buy has no whole milk solids for the purest dairy‑free experience.

How long does the chili stay fresh in the refrigerator?

When stored in an airtight container in the fridge, this chili will keep for 3–4 days. The creamy texture might thicken slightly, but simply reheat gently with a splash of broth or water. Make sure to check for any off smells or mold before re‑serving. Stored this way it retains its comforting flavors and is ready for a quick family meal.

Can I cook this on a stovetop instead of a slow cooker?

It is possible, but it requires a longer, monitored simmer. Combine all ingredients in a large pot, bring to a low heat, and let simmer for 90–120 minutes, stirring occasionally. The cream cheese should be added toward the final 10‑15 minutes, not at the start; this approach prevents curdling. The outcome will be just as rich and creamy once the seasoning blends into the broth.

What’s a good side dish for this chili?

A simple avocado salsa works beautifully, adding a cooling contrast to the creamy chili. The fresh avocado’s creaminess balances the sauce, while a squeeze of lime brightens the dish. Alternatively, warm cornbread or crusty rye bring hearty texture, echoing the robust flavors from my grandmother’s kitchen and the lively market stalls of New York.

Can I use a different kind of cheese instead of cream cheese?

Yes, a stick of mascarpone or a jar of cultured Greek yogurt are excellent stand‑ins. They bring a silky mouthfeel and subtle tang, but they need to be added near the end of cooking to avoid curdling. Mixing a tablespoon of cream or a splash of milk can also help keep the sauce smooth while you experiment with different cheese varieties for flavor variation.

What’s the best way to shred the chicken?

Once the chicken is pulled off the pot, let it cool just enough so your fingers can handle it. Use two forks in opposed directions to shred it into fine strands. For a smoother texture, you can tie the chicken onto a small piece of parchment and roll it like a future sausage. Finishing the shredding just before re‑mixing ensures the meat remains tender and not chewy.

Should I let the chili cool before storing it?

Yes, allowing the chili to cool to room temperature before sealing containers prevents condensation that can lead to sogginess. Also, this step helps the cream cheese to set a bit, giving the chili a creamy, tan‑rubbed mouthfeel once reheated. Store at 40°F or below; when you are ready to eat, reheat gently to re‑uncover the creamy texture.

Share Your Version!

Do let me know how this creamy twist turned out for you! Drop a star rating in the comments, share your own twist in the comment section—maybe a new spice from a Brooklyn spice vendor or a dash of local honey. Tag me on Instagram or Pinterest under @cookingwithemi for a chance to be featured. I’d love to see how I bring my Moroccan‑Parisian patina into your New York tables!

From my NYC kitchen to yours — I hope this recipe brings as much warmth to your table as it does to mine. — emy 🧡

📌

Love This Recipe? Save It to Pinterest!

If you enjoyed this White Chicken Chili recipe, don’t let it get lost in your browser tabs! 😄 Pin it now so you can find it again anytime — and explore hundreds more tried‑and‑tested recipes waiting for you on my Pinterest boards.

👉 Follow emy on Pinterest @chefrecipes2

📌 Pin this recipe · 🔁 Re-pin your favorites · 💬 Tag me when you make it — I love seeing your creations!

Print
clock clock iconcutlery cutlery iconflag flag iconfolder folder iconinstagram instagram iconpinterest pinterest iconfacebook facebook iconprint print iconsquares squares iconheart heart iconheart solid heart solid icon

White Chicken Chili Recipe with Cream Cheese


  • Author: Chef Emy

Description

This White Chicken Chili recipe with cream cheese is perfect for a chilly evening. Just dump the 7 ingredients in your Crock Pot and in a few hours you’ll have a deliciously creamy chili ready for dinner!


Ingredients

Scale
  • 2 chicken breasts (thawed and trimmed of fat)
  • 1 ounce taco seasoning (1 packet or 23 tablespoons)
  • 1 ounce ranch seasoning mix (1 packet)
  • 15 ounces canned black beans (undrained)
  • 15 ounces canned corn (undrained)
  • 10 ounces canned Rotel tomatoes with green chiles (undrained)
  • 8 ounces cream cheese

Instructions

  1. Place chicken on the bottom of a Crock Pot and cover with the remaining ingredients. The cream cheese goes on the very top.
  2. Cook chili on LOW for 6-8 hours or HIGH for 3-4 hours.
  3. When the chili is done, remove the chicken breasts and shred. Stir the chili together to mix the cream cheese and then add the shredded chicken.
  4. Top with desired toppings like tortilla strips, shredded cheese, avocados, lime juice, and cilantro.

Garlic Butter Shrimp Pasta

Garlic Butter Shrimp Pasta With Lemon Zest (Quick & Flavorful)

⚖️
Difficulty
Easy
⏲️
Prep Time
10 mins
🕒
Cook Time
20 mins
⏱️
Total Time
30 mins
🍽️
Servings
4

I still remember the first time I walked into the coastal market in New York City and smelled fresh shrimp, garlic, and citrus, and thought of my mother cooking in Marrakech with a basket of lemons. This Garlic Butter Shrimp Pasta With Lemon Zest recipe blends that Moroccan zest with a French butter technique for a dish that’s both comforting and adventurous.

The sauce is a silky cloud of butter and garlic that coats each strand of fettuccine, while the bright lemon zest and juice cut through the richness, delivering a tangy, aromatic profile that makes the dish feel lively. The shrimp adds a succulent pop, and the parmesan melts into a silky coat that brings depth of flavor and a buttery finish.

I’ve tweaked this classic Mediterranean dish multiple times in my Brooklyn kitchen, combining a quick one-pan method with a mindful balance of flavors. My key advice? Finish with a splash of lemon juice straight off the heat so the acidity stays bright—otherwise it can feel flat. A frequent rookie mistake is overcooking the shrimp; keep it slippery in the center for that mouth‑watering texture I love.

Why This Garlic Butter Shrimp Pasta Recipe Is the Best

The flavor secret lies in the subtle integration of fresh lemon zest, a quick sear of garlic, and a French butter‑sauce base that I learned under a master roux chef in Paris. The blend gives crunch, richness, and a citrus lift that transforms a simple pasta into star‑level comfort food.

The texture is perfected by cooking the pasta al dente and then tossing it in the sauce so it absorbs butter without becoming soggy. Using a high‑heat sauté before simmering gives the shrimp a slight char, while blowing off the alcohol or olive oil keeps the sauce smooth.

It’s incredibly foolproof—no special equipment or long preparation. You can make it under 30 minutes, so it’s ideal for busy weeknights or for a quick dinner after a long NYC shift.

Garlic Butter Shrimp Pasta Ingredients

In a corner of the Brooklyn farmer’s market, I hand‑pick my shrimp at the seafood stall, then head to the deli for freshly grated parmesan and the best citrus from a local vendor. It’s a quick walk that reminds me of the flavors I grew up with in Marrakesh, only with a Parisian twist.

Ingredients List

  • 12 oz fettuccine pasta
  • 1 lb raw shrimp, peeled and deveined
  • 4 cloves garlic, finely minced
  • ½ cup freshly grated Parmesan cheese
  • 4 tbsp unsalted butter
  • ¼ cup fresh lemon juice (juice of ¼ lemon)
  • ¼ tsp lemon zest (zest of ¼ lemon)
  • 2 tbsp neutral cooking oil
  • Sea salt, to taste
  • Black pepper, freshly ground, to taste

Ingredient Spotlight

Fresh Shrimp: Look for shrimp that smells sweet, not fishy, and have a firmer texture. When fresh, they’re less likely to split during cooking. If you’re office‑only, frozen shrimp that’s been thawed quickly in cold water works fine, but remove the shells for consistency.

Lemon Juice & Zest: The zest gives aroma; don’t skip it—use a microplane to preserve bright essential oils. Lemon juice’s acidity balances the butter’s heaviness. If you’re vegan, substitute with agave syrup and nutritional yeast for a savory feel.

Parmesan Cheese: Choose a genuine Parmigiano‑Reggiano for depth. A lower cheese, or a blend of Pecorino, reduces intensity but brightens the dish. A vegan flagon of nutritional yeast also provides a creamy, umami touch.

Original Ingredient Best Substitution Flavor / Texture Impact
1 lb Shrimp 1 lb Large Gills‑Off Crab Adds sweetness; slightly firmer bite.
4 tbsp Butter 4 tbsp Ghee Smokier profile; higher smoke point.
½ cup Parmesan ½ cup Pecorino Romano Brighter, saltier finish.

How to Make Garlic Butter Shrimp Pasta — Step-by-Step

Let’s get moving—this recipe’s charm lies in its simplicity. I’ll guide you from boiling the pasta to serving it in under 30 minutes.

Step 1: Cook the Pasta

Bring a large pot of salted water to a rolling boil. Add the fettuccine and cook 9–10 minutes until al dente. Drain, toss with a splash of oil, and set aside to keep from sticking.

💡 emy’s Pro Tip: Toss pasta with a teaspoon of olive oil after draining to prevent clumping.

Step 2: Aromate Garlic

Heat the cooking oil in a 10‑inch skillet over medium heat. Add the minced garlic; sauté for 1–2 minutes until fragrant but not browned. The aroma gives the base of this sauce.

⚠️ Common Mistake to Avoid: Over‑sautéing garlic causes bitterness. Keep it bright yellow.

Step 3: Simmer Sauce

Stir in butter, letting it melt. Add the lemon juice, zest, parmesan, salt, and pepper. Stir until the cheese melts and the sauce is silky. Keep the heat low to avoid thinning.

💡 emy’s Pro Tip: Use a low heat so the sauce stays rich and the lemon doesn’t evaporate.

Step 4: Cook Shrimp

Add the shrimp to the skillet, seasoning lightly with salt. Cook 3–4 minutes on each side until the shrimp turns opaque with a hint of pink center. Flip once; do not overcook.

⚠️ Common Mistake to Avoid: Leaving shrimp in sauce too long so it turns rubbery.

Step 5: Combine & Finish

Add the cooked pasta to the skillet, tossing to coat evenly. Remove from heat, garnish with freshly chopped parsley, and serve immediately.

💡 emy’s Pro Tip: Finish with a squeeze of fresh lemon right before serving to maintain brightness.

Step Action Duration Key Visual Cue
1 Boil pasta 9–10 min Al dente bite
2 Sauté garlic 1 min Fragrant, golden
3 Melt butter & add lemon 2 min Rich, citrus aroma
4 Cook shrimp 4 min Glowing pink center
5 Combine pasta & sauce 1 min Slick coating

Serving & Presentation

Twirl the pasta like a ballerina’s skirt and spoon the buttery shrimp sauce over to create a glossy, inviting plate. Sprinkle with chopped parsley, a dusting of grated parmesan and maybe a drizzle of extra‑virgin olive oil for shine.

Pair this dish with a crisp green salad topped with lemon vinaigrette, a side of steamed asparagus, or a buttery garlic bread loaf—classic in Paris but beloved in the city borough I now call home.

Serve it with a glass of dry white wine such as Sauvignon Blanc, or a chilled rosé from Provence to echo the Mediterranean vibes while staying authentically New York in taste.

Pairing Type Suggestions Why It Works
Side Dish Steamed asparagus, garlic bread Texture contrast & buttery flavor boost
Sauce / Dip Lemon‑y aioli, parsley pesto Amplify citrus & herb notes
Beverage Dry white wine, chilled rosé Acidity cuts butter, mirrors Mediterranean
Garnish Fresh parsley, lemon zest crinkle Freshness & visual pop

Make-Ahead, Storage & Reheating

When my weekday nights on Wall Street get hectic, I prep the sauce in advance and store it in a mason jar—just enough for one serving—so all I need is quick sautéing of the shrimp. The pasta stays tender if I keep it in a re‑sealed plastic bag over a day.

Method Container Duration Reheating Tip
Refrigerator airtight container 2 days Reheat with a splash of olive oil over low heat
Freezer sealed plastic bag 2 months Defrost in the fridge overnight; stir before serving
Make-Ahead Jar of sauce 3 days in advance Just sauté shrimp and toss with stored sauce

When reheating, avoid boiling the sauce; simply gently warm it in a small pot, stirring until glossy. Keep the shrimp soft by adding them at the last minute—they’ll finish cooking with the residual heat.

I love this dish for its flexibility; it suits both a spontaneous dinner and a planned meal‑prep sauce.

Variations & Easy Swaps

Variation Key Change Best For Difficulty Impact
Garlic & Herb Swap Add rosemary & thyme Culinary explorers Easy – just stir herbs in
Gluten‑Free / Dairy‑Free Use gluten‑free pasta & nutritional yeast Allergies or dietary goals Medium – tweak cooking times
Seasonal Twist Swap shrimps for scallops & add sautéed bell peppers Summer shopping trips Easy – extra sauté step

Variation 1: Garlic & Herbs Swap

Blend a few sprigs of fresh rosemary and a pinch of thyme with the garlic for a herbal rhapsody that reminds me of my mother’s garden in Marrakesh—a subtle earthy depth that counterbalances the citrus.

Variation 2 — Gluten-Free & Dairy-Free

Replace fettuccine with a textured gluten‑free pasta; sauté the shrimp in olive oil instead of butter; use a tablespoon of nutritional yeast for that parmesan‑like umami. Texture remains silky, and the dish stays comforting without dairy.

Variation 3 — Seasonal Twist

During the spring market influx, swap shrimp for fresh scallops, toss in a handful of bright bell pepper strips, and finish with a sprinkle of basil. The veggies add crunch and melt the butter sauce into a garden‑like bowl.

Share Your Version!

If you try this quick garlic butter shrimp pasta, please leave a star rating and some comments below. Snap a photo, tag me on Instagram or Pinterest at @cookingwithemi, and tell me what twist you added—did you use the herb swap or go gluten free?

From my NYC kitchen to yours — I hope this recipe brings as much warmth to your table as it does to mine. — emy 🧡

📌

Love This Recipe? Save It to Pinterest!

If you enjoyed this Garlic Butter Shrimp Pasta recipe, don’t let it get lost in your browser tabs! 😄 Pin it now so you can find it again anytime — and explore hundreds more tried-and-tested recipes waiting for you on my Pinterest boards.

👉 Follow emy on Pinterest @chefrecipes2

📌 Pin this recipe · 🔁 Re-pin your favorites · 💬 Tag me when you make it — I love seeing your creations!

How long can I store the garlic butter shrimp pasta?

When stored in an airtight container in the refrigerator, this dish keeps its flavor for up to two days. If you’re adventurous, you can freeze the assembled pasta and sauce for up to two months. Just reheat gently over low heat, stirring occasionally, to preserve the sauce’s silky texture.

Can I use frozen shrimp instead of fresh?

Yes, frozen shrimp work well, provided they’re thawed completely in cold water and patted dry to remove excess moisture. Cooking frozen shrimp directly in the pan is possible, but you’ll need to cook them a bit longer to ensure they’re pink and tender. It’s still a quick method for busy nights.

What can I use instead of Parmesan cheese?

A great alternative is Pecorino Romano, which offers a sharper, saltier flavor that still melts smoothly into the sauce. For a vegan option, nutritional yeast or a vegan parmesan blend mimics the nutty taste and provides a creamy finish. Choose based on dietary preference and the intensity you want in your dish.

Is it okay to boil the pasta and serve it without sauce?

Boiling the pasta is optional—you can skip the sauce if you’re pressed for time, but the sauce base is essential to the dish’s identity. It grounds the flavors, adds moisture, and creates the characteristic buttery, garlicky bite that defines this recipe. Without it, the pasta will taste plain and unremarkable.

Can I double the recipe for a party?

Absolutely! Doubling everything—including pasta, shrimp, butter, and sauce—will maintain the same balance of flavors. Just ensure the skillet is large enough or use a second pan for the shrimp step, and adjust the seasoning to taste. Your guests will love the extra buttery, citrusy shrimp.

What wine pairs best with this dish?

A dry white wine such as Sauvignon Blanc or a Provence rosé balances the buttery sauce and bright lemon notes. The acidity cuts through the richness, while the wine’s fruit accents echo the Mediterranean vibe. If you prefer red, a light Pinot Noir could also complement the shrimp without overpowering the dish.

How can I make this dish gluten‑free?

Simply swap the fettuccine for a gluten‑free pasta made from rice, corn, or a blend of quinoa and chickpea. These pasta types often remain tender when boiled in salted water. Follow the same sauce and shrimp steps; seasoning will stay just as delicious, offering a safe and tasty gluten‑free meal.

Can I use lemon zest from a different citrus fruit?

While lemon zest is classic, you can experiment with lime or orange zest for a different citrus kick. Lime zest adds a zesty brightness that pairs well with shrimp; orange zest offers mild sweetness that complements the buttery comfort feel. Just reduce the quantity to suit your taste preference.

Is it possible to prepare the sauce ahead of time?

Yes, the sauce can be pre‑made and refrigerated up to two days. Store it in an airtight container; reheat gently over low heat before serving. You’ll still need to cook the shrimp fresh to preserve texture. This method saves time while keeping the dish flavorful.

What’s the easiest way to avoid overcooked shrimp?

The key is to monitor the shrimp’s color; they should turn opaque but remain slightly pink in the center. Remove them from heat as soon as they turn pink, then rest them when sauces mingle. If you plant them in the sauce for a minute, they’ll retain moisture without becoming rubbery.

Print
clock clock iconcutlery cutlery iconflag flag iconfolder folder iconinstagram instagram iconpinterest pinterest iconfacebook facebook iconprint print iconsquares squares iconheart heart iconheart solid heart solid icon

Garlic Butter Shrimp Pasta


  • Author: Chef Emy

Description

xosotin chelseathông tin chuyn nhưngcâu lc b bóng đá arsenalbóng đá atalantabundesligacu th haalandUEFAevertonxosofutebol ao vivofutemaxmulticanaisonbethttps://bsport.fithttps://onbet88.ooohttps://i9bet.bizhttps://hi88.ooohttps://okvip.athttps://f8bet.athttps://fb88.cashhttps://vn88.cashhttps://shbet.atbóng đá world cupbóng đá inter milantin juventusbenzemala ligaclb leicester cityMUman citymessi lionelsalahnapolineymarpsgronaldoserie atottenhamvalenciaAS ROMALeverkusenac milanmbappenapolinewcastleaston villaliverpoolfa cupreal madridpremier leagueAjaxbao bong da247EPLbarcelonabournemouthaff cupasean footballbên l sân cbáo bóng đá mibóng đá cúp th giitin bóng đá VitUEFAbáo bóng đá vit namHuyn thoi bóng đágii ngoi hng anhSeagametap chi bong da the gioitin bong da lutrn đu hôm nayvit nam bóng đátin nong bong daBóng đá nth thao 7m24h bóng đábóng đá hôm naythe thao ngoai hang anhtin nhanh bóng đáphòng thay đ bóng đábóng đá phikèo nhà cái onbetbóng đá lu 2thông tin phòng thay đthe thao vuaapp đánh lô đdudoanxosox s gii đc bithôm nay x skèo đp hôm nayketquaxosokq xskqxsmnsoi cu ba minsoi cau thong kesxkt hôm nayth gii x sx s 24hxo.soxoso3mienxo so ba mienxoso dac bietxosodientoanx s d đoánvé s chiu xxoso ket quaxosokienthietxoso kq hôm nayxoso ktx s megax s mi nht hôm nayxoso truc tiepxoso VitSX3MIENxs d đoánxs mien bac hom nayxs miên namxsmientrungxsmn thu 7con s may mn hôm nayKQXS 3 min Bc Trung Nam Nhanhd đoán x s 3 mindò vé sdu doan xo so hom nayket qua xo xoket qua xo so.vntrúng thưng xo sokq xoso trc tipket qua xskqxs 247s min nams0x0 mienbacxosobamien hôm nays đp hôm nays đp trc tuynnuôi s đpxo so hom quaxoso ketquaxstruc tiep hom nayx s kin thit trc tipx s kq hôm nayso xo kq trc tuyenkt qu x s min bc trc tipxo so min namx s min nam trc tiptrc tip x s hôm nayket wa xsKQ XOSOxoso onlinexo so truc tiep hom nayxsttso mien bac trong ngàyKQXS3Ms so mien bacdu doan xo so onlinedu doan cau lox s kenokqxs vnKQXOSOKQXS hôm naytrc tip kt qu x s ba mincap lo dep nhat hom naysoi cu chun hôm nayso ket qua xo soXem kt qu x s nhanh nhtSX3MIENXSMB ch nhtKQXSMNkt qu m gii trc tuynGi vàng cht s OnlineĐánh Đ Con Gìdò s min namdò vé s hôm nayso mo so debach th lô đp nht hôm naycu đ hôm naykt qu x s kin thit toàn quccau dep 88xsmb rong bach kimket qua xs 2023d đoán x s hàng ngàyBch th đ min BcSoi Cu MB thn tàisoi cau vip 247soi cu ttsoi cu min phísoi cau mb vipxsmb hom nayxs vietlottxsmn hôm naycu lô đpthng kê lô kép x s min Bcquay th xsmnx s thn tàiQuay th XSMTx s chiu nayxo so mien nam hom nayweb đánh lô đ trc tuyn uy tínKQXS hôm nayxsmb ngày hôm nayXSMT ch nhtx s Power 6/55KQXS A trúng roycao th cht sbng x s đc bitsoi cu 247 vipsoi cu wap 666Soi cu min phí 888 VIPSoi Cau Chuan MBđc th des min bcthn tài cho sKt qu x s thn tàiXem trc tip x sXIN S THN TÀI TH ĐACu lô s đplô đp vip 24hsoi cu min phí 888x s kin thit chiu nayXSMN th 7 hàng tunKt qu X s H Chí Minhnhà cái x s Vit NamX S Đi PhátX s mi nht Hôm Nayso xo mb hom nayxxmb88quay thu mbXo so Minh ChinhXS Minh Ngc trc tip hôm nayXSMN 88XSTDxs than taix s UY TIN NHTxs vietlott 88SOI CU SIÊU CHUNSoiCauVietlô đp hôm nay vipket qua so xo hom naykqxsmb 30 ngàyd đoán x s 3 minSoi cu 3 càng chun xácbch th lônuoi lo chuanbt lô chun theo ngàykq xo-solô 3 càngnuôi lô đ siêu vipcu Lô Xiên XSMBđ v bao nhiêuSoi cu x3x s kin thit ngày hôm nayquay th xsmttruc tiep kt qu sxmntrc tip min bckt qu x s chm vnbng xs đc bit năm 2023soi cau xsmbx s hà ni hôm naysxmtxsmt hôm nayxs truc tiep mbketqua xo so onlinekqxs onlinexo s hôm nayXS3MTin xs hôm nayxsmn thu2XSMN hom nayx s min bc trc tip hôm naySO XOxsmbsxmn hôm nay188betlink188 xo sosoi cu vip 88lô tô vitsoi lô vitXS247xs ba mincht lô đp nht hôm naycht s xsmbCHƠI LÔ TÔsoi cau mn hom naycht lô chundu doan sxmtd đoán x s onlinerng bch kim cht 3 càng min phí hôm naythng kê lô gan min bcdàn đ lôCu Kèo Đc Bitcht cu may mnkt qu x s min bc hômSoi cu vàng 777th bài onlinedu doan mn 888soi cu min nam vipsoi cu mt vipdàn de hôm nay7 cao th cht ssoi cau mien phi 7777 cao th cht s nc ting3 càng min bcrng bch kim 777dàn de bt bion newsddxsmn188betw88w88789bettf88sin88suvipsunwintf88five8812betsv88vn88Top 10 nhà cái uy tínsky88iwinlucky88nhacaisin88oxbetm88vn88w88789betiwinf8betrio66rio66lucky88oxbetvn88188bet789betMay-88five88one88sin88bk88xbetoxbetMU88188BETSV88RIO66ONBET88188betM88M88SV88Jun-68Jun-88one88iwinv9betw388OXBETw388w388onbetonbetonbetonbet88onbet88onbet88onbet88onbetonbetonbetonbetqh88mu88Nhà cái uy tínpog79vp777vp777vipbetvipbetuk88uk88typhu88typhu88tk88tk88sm66sm66me88me888live8live8livesm66me88win798livesm66me88win79pog79pog79vp777vp777uk88uk88tk88tk88luck8luck8kingbet86kingbet86k188k188hr99hr99123b8xbetvnvipbetsv66zbettaisunwin-vntyphu88vn138vwinvwinvi68ee881xbetrio66zbetvn138i9betvipfi88clubcf68onbet88ee88typhu88onbetonbetkhuyenmai12bet-moblie12betmoblietaimienphi247vi68clupcf68clupvipbeti9betqh88onb123onbefsoi cun hũbn cáđá gàđá gàgame bàicasinosoi cuxóc đĩagame bàigii mã gic mơbu cuaslot gamecasinon hdàn đBn cácasinodàn đn hũtài xuslot gamecasinobn cáđá gàgame bàith thaogame bàisoi cukqsssoi cuc tưngbn cágame bàixóc đĩaAGAGAGAGimkokobmu88qh88xosotin chelseathông tin chuyn nhưngcâu lc b bóng đá arsenalbóng đá atalantabundesligacu th haalandUEFAevertonxosofutebol ao vivofutemaxmulticanaisonbethttps://bsport.fithttps://onbet88.ooohttps://i9bet.bizhttps://hi88.ooohttps://okvip.athttps://f8bet.athttps://fb88.cashhttps://vn88.cashhttps://shbet.atbóng đá world cupbóng đá inter milantin juventusbenzemala ligaclb leicester cityMUman citymessi lionelsalahnapolineymarpsgronaldoserie atottenhamvalenciaAS ROMALeverkusenac milanmbappenapolinewcastleaston villaliverpoolfa cupreal madridpremier leagueAjaxbao bong da247EPLbarcelonabournemouthaff cupasean footballbên l sân cbáo bóng đá mibóng đá cúp th giitin bóng đá VitUEFAbáo bóng đá vit namHuyn thoi bóng đágii ngoi hng anhSeagametap chi bong da the gioitin bong da lutrn đu hôm nayvit nam bóng đátin nong bong daBóng đá nth thao 7m24h bóng đábóng đá hôm naythe thao ngoai hang anhtin nhanh bóng đáphòng thay đ bóng đábóng đá phikèo nhà cái onbetbóng đá lu 2thông tin phòng thay đthe thao vuaapp đánh lô đdudoanxosox s gii đc bithôm nay x skèo đp hôm nayketquaxosokq xskqxsmnsoi cu ba minsoi cau thong kesxkt hôm nayth gii x sx s 24hxo.soxoso3mienxo so ba mienxoso dac bietxosodientoanx s d đoánvé s chiu xxoso ket quaxosokienthietxoso kq hôm nayxoso ktx s megax s mi nht hôm nayxoso truc tiepxoso VitSX3MIENxs d đoánxs mien bac hom nayxs miên namxsmientrungxsmn thu 7con s may mn hôm nayKQXS 3 min Bc Trung Nam Nhanhd đoán x s 3 mindò vé sdu doan xo so hom nayket qua xo xoket qua xo so.vntrúng thưng xo sokq xoso trc tipket qua xskqxs 247s min nams0x0 mienbacxosobamien hôm nays đp hôm nays đp trc tuynnuôi s đpxo so hom quaxoso ketquaxstruc tiep hom nayx s kin thit trc tipx s kq hôm nayso xo kq trc tuyenkt qu x s min bc trc tipxo so min namx s min nam trc tiptrc tip x s hôm nayket wa xsKQ XOSOxoso onlinexo so truc tiep hom nayxsttso mien bac trong ngàyKQXS3Ms so mien bacdu doan xo so onlinedu doan cau lox s kenokqxs vnKQXOSOKQXS hôm naytrc tip kt qu x s ba mincap lo dep nhat hom naysoi cu chun hôm nayso ket qua xo soXem kt qu x s nhanh nhtSX3MIENXSMB ch nhtKQXSMNkt qu m gii trc tuynGi vàng cht s OnlineĐánh Đ Con Gìdò s min namdò vé s hôm nayso mo so debach th lô đp nht hôm naycu đ hôm naykt qu x s kin thit toàn quccau dep 88xsmb rong bach kimket qua xs 2023d đoán x s hàng ngàyBch th đ min BcSoi Cu MB thn tàisoi cau vip 247soi cu ttsoi cu min phísoi cau mb vipxsmb hom nayxs vietlottxsmn hôm naycu lô đpthng kê lô kép x s min Bcquay th xsmnx s thn tàiQuay th XSMTx s chiu nayxo so mien nam hom nayweb đánh lô đ trc tuyn uy tínKQXS hôm nayxsmb ngày hôm nayXSMT ch nhtx s Power 6/55KQXS A trúng roycao th cht sbng x s đc bitsoi cu 247 vipsoi cu wap 666Soi cu min phí 888 VIPSoi Cau Chuan MBđc th des min bcthn tài cho sKt qu x s thn tàiXem trc tip x sXIN S THN TÀI TH ĐACu lô s đplô đp vip 24hsoi cu min phí 888x s kin thit chiu nayXSMN th 7 hàng tunKt qu X s H Chí Minhnhà cái x s Vit NamX S Đi PhátX s mi nht Hôm Nayso xo mb hom nayxxmb88quay thu mbXo so Minh ChinhXS Minh Ngc trc tip hôm nayXSMN 88XSTDxs than taix s UY TIN NHTxs vietlott 88SOI CU SIÊU CHUNSoiCauVietlô đp hôm nay vipket qua so xo hom naykqxsmb 30 ngàyd đoán x s 3 minSoi cu 3 càng chun xácbch th lônuoi lo chuanbt lô chun theo ngàykq xo-solô 3 càngnuôi lô đ siêu vipcu Lô Xiên XSMBđ v bao nhiêuSoi cu x3x s kin thit ngày hôm nayquay th xsmttruc tiep kt qu sxmntrc tip min bckt qu x s chm vnbng xs đc bit năm 2023soi cau xsmbx s hà ni hôm naysxmtxsmt hôm nayxs truc tiep mbketqua xo so onlinekqxs onlinexo s hôm nayXS3MTin xs hôm nayxsmn thu2XSMN hom nayx s min bc trc tip hôm naySO XOxsmbsxmn hôm nay188betlink188 xo sosoi cu vip 88lô tô vitsoi lô vitXS247xs ba mincht lô đp nht hôm naycht s xsmbCHƠI LÔ TÔsoi cau mn hom naycht lô chundu doan sxmtd đoán x s onlinerng bch kim cht 3 càng min phí hôm naythng kê lô gan min bcdàn đ lôCu Kèo Đc Bitcht cu may mnkt qu x s min bc hômSoi cu vàng 777th bài onlinedu doan mn 888soi cu min nam vipsoi cu mt vipdàn de hôm nay7 cao th cht ssoi cau mien phi 7777 cao th cht s nc ting3 càng min bcrng bch kim 777dàn de bt bion newsddxsmn188betw88w88789bettf88sin88suvipsunwintf88five8812betsv88vn88Top 10 nhà cái uy tínsky88iwinlucky88nhacaisin88oxbetm88vn88w88789betiwinf8betrio66rio66lucky88oxbetvn88188bet789betMay-88five88one88sin88bk88xbetoxbetMU88188BETSV88RIO66ONBET88188betM88M88SV88Jun-68Jun-88one88iwinv9betw388OXBETw388w388onbetonbetonbetonbet88onbet88onbet88onbet88onbetonbetonbetonbetqh88mu88Nhà cái uy tínpog79vp777vp777vipbetvipbetuk88uk88typhu88typhu88tk88tk88sm66sm66me88me888live8live8livesm66me88win798livesm66me88win79pog79pog79vp777vp777uk88uk88tk88tk88luck8luck8kingbet86kingbet86k188k188hr99hr99123b8xbetvnvipbetsv66zbettaisunwin-vntyphu88vn138vwinvwinvi68ee881xbetrio66zbetvn138i9betvipfi88clubcf68onbet88ee88typhu88onbetonbetkhuyenmai12bet-moblie12betmoblietaimienphi247vi68clupcf68clupvipbeti9betqh88onb123onbefsoi cun hũbn cáđá gàđá gàgame bàicasinosoi cuxóc đĩagame bàigii mã gic mơbu cuaslot gamecasinon hdàn đBn cácasinodàn đn hũtài xuslot gamecasinobn cáđá gàgame bàith thaogame bàisoi cukqsssoi cuc tưngbn cágame bàixóc đĩaAGAGAGAGimkokobmu88qh88


Ingredients

Scale
  • 12 oz Fettuccine
  • 1 lb Shrimp
  • 4 clove Garlic
  • ½ cup Parmesan Cheese
  • 4 tbsp Butter
  • ¼ Juice of Lemon (Juice from 1/4 of Lemon)
  • ¼ Lemon Zest (Zest from 1/4 of Lemon)
  • 2 tbsp Cooking Oil
  • Sea Salt
  • Black Pepper

Instructions

  1. In a large pot boiling salted water, cook fettuccine pasta until al dente, drain well then set aside.
  2. In a pan, heat cooking oil over medium heat. Cook garlic until fragrant for 2 minutes.
  3. Melt butter in the same pan then cooks shrimp. Stir occasionally until the shrimp turn opaque white with some pink for about 4-6 minutes.
  4. Add lemon juice, lemon zest, parmesan cheese, salt, and black pepper. Stir until combined and the parmesan cheese melted.
  5. Transfer the fettuccine into a pan, stir until evenly distributed.
  6. Garnish with parsley before serving.
  7. Enjoy!

Chipotle Honey Chicken Skewers

clock clock iconcutlery cutlery iconflag flag iconfolder folder iconinstagram instagram iconpinterest pinterest iconfacebook facebook iconprint print iconsquares squares iconheart heart iconheart solid heart solid icon

Chipotle Honey Chicken Skewers


  • Author: Chef Emy

Description

This clean-eating recipe offers sweet, tangy, and deliciously smoky flavors in a low-calorie, high-protein skewer!


Ingredients

Scale
  • 32 ounces boneless and skinless chicken breasts
  • 1/2 cup honey (raw preferred)
  • 2 tablespoons tomato paste
  • 4 tablespoons apple cider vinegar
  • 2 teaspoon chipotle chili powder
  • 1 garlic clove (very finely chopped)
  • 1/2 teaspoon salt (optional)

Instructions

  1. Slice the chicken into very thin strips with a very sharp knife. Thread accordion-style onto wooden skewers.
  2. In a small bowl, whisk together honey, tomato paste, apple cider vinegar, chipotle chili powder, chopped garlic, and optional salt. Spoon sauce over skewers.
  3. Add skewers to a hot grill and cook for 10-12 minutes, or until chicken is fully cooked, basting with sauce and turning every 2-3 minutes to evenly cook the entire skewer of chicken.
  4. Alternatively, the skewers can be baked in an oven preheated to 400 degrees for 16-18 minutes or until fully cooked.

Hobo Casserole Ground Beef

Hobo Casserole Ground Beef Cheese‑Coated Potato Layering – A Comforting Twist

⚖️
Difficulty
Easy
⏲️
Prep Time
10 mins
🕒
Cook Time
45 mins
⏱️
Total Time
55 mins
🍽️
Servings
4

I first cooked this Hobo Casserole in my Morocco‑raised kitchen, layering thin potatoes over a fragrant beef stew to create a one‑pan comfort dish. Now in my New York apartment, I add a sprinkle of Italian seasoning to ease the transition to NYC’s bodega menus, keeping it simple yet bold.

Imagine the sizzle of ground beef browning, the onion softening into a caramelized base, and the potatoes turning golden brown—each layer hugging cheese that melts into a velvety gooey blanket. The aroma of paprika and parmesan mingles with the earthy scent of potatoes, making the whole house smell like a cozy café in Paris A9.

As a professional chef who blends Moroccan spice lessons with French technique, I’ve refined this recipe to achieve a crispy top, melt‑in‑your‑mouth texture, and a slight tang from the Parmesan. My signature twist is the chestnut‑thick potato layering; it keeps the casserole crunchy inside and savory outside—chew on that! I’ll mention a pro tip that will speed up the prep and avoid over‑poured liquids that flatten the top.

Why This Hobo Casserole Ground Beef Recipe Is the Best

The Flavor Secret lies in my Moroccan spice‑inspired fondue of paprika and Italian seasoning, which adds a subtle heat that brightens the savory beef and creamy cheeses. The result is a harmonious blend that feels both comforting and adventurous—an unexpected travel across continents in every bite.

Perfected Texture comes from layering thin potato slices horizontally, letting them crisp up while the cheese melts into a golden glaze. The layered technique, borrowed from my Paris culinary school, ensures every spoonful delivers a crisp heart and a molten top, mirroring the crisp of a croissant on a buttery morning.

Foolproof & Fast means you can throw this dish in a 9×13 inch pan, let it bake, and get a hearty meal in less than an hour. You won’t have to sauté separately or worry about sous‑vide precision—just preheat, layer, bake, and voilà, comforting dinner ready for a busy NYC evening.

Hobo Casserole Ground Beef Ingredients

I source all ingredients from the local Chelsea market and in-metro produce stands that offer fresh potatoes and crisp spinach. Think of that moment with my mother in Casablanca, buying great buy‑lots of potatoes that still have that earthy aroma—this is the kind of fresh catch I bring to my casseroles.

Ingredients List

  • 1 lb ground beef
  • 1 tablespoon olive oil
  • 1 medium onion, chopped
  • 2 cloves garlic, minced
  • 4-5 medium potatoes, thinly sliced
  • 1 ½ cups shredded cheddar cheese
  • ½ cup grated Parmesan cheese
  • 1 teaspoon dried Italian seasoning
  • ½ teaspoon paprika
  • Salt and pepper to taste
  • ½ cup beef broth or water
  • ¼ cup milk (optional, for creaminess)
  • Fresh parsley for garnish (optional)

Ingredient Spotlight

Ground Beef – Choose a blend with a 85/15 fat ratio for a balanced flavor that stays juicy. A leaner cut like sirloin will dry out. Substitutes: ground turkey for lower fat, or a combination of beef and pork for richer depth.

Potatoes – I prefer russet for their ability to crisp up on top while staying fluffy inside. If you can’t find russets, Yukon gold works well—slightly sweet and silky. Substitution: sweet potato slices for a sweeter, nutrient boost, though they will soften faster.

Cheddar & Parmesan Blend – The cheddar provides gooeyness; Parmesan adds a tangy citrus finish. Swap the cheddar for mozzarella for an even stretchier melt or a sharper cheddar for a deeper flavor punch.

Italian Seasoning & Paprika – These spices create the signature Maghrebi kick. If you’re allergic to paprika, chili powder works; if you lack Italian seasoning, a mix of oregano, basil, thyme, and rosemary will do.

Original Ingredient Best Substitution Flavor / Texture Impact
Ground Beef Ground Turkey Leaner, lighter; less buttery fat
Potatoes (Russet) Sweet Potatoes Slight sweetness, richer color, quick softening
Cheddar & Parmesan Blend Mozzarella & Asiago Stretchier melt, sharper tang
Italian Seasoning & Paprika Oregano & Chili Powder More herby, mild spice

How to Make Hobo Casserole Ground Beef — Step‑by‑Step

I like to begin with a clean canvas—preheat the oven, grease the dish, and gather your ingredients for a swift assembly.

Step 1: Preheat the Oven

Set your oven to 375°F (190°C). While it heats, spray a 9×13 inch dish with oil or brush with olive oil to prevent sticking.

💡 emy’s Pro Tip: Use a silicone lid or aluminum foil to trap heat on the first 30 minutes, which keeps the potatoes moist and ensures a golden top.

Step 2: Cook the Beef

Heat the olive oil in a large skillet over medium heat. Add the ground beef, breaking it apart with a spoon. Cook until browned and cooked through—about 5–7 minutes. Drain excess fat if needed.

⚠️ Common Mistake to Avoid: Letting the beef sear too long can make it dry; keep the heat medium and stir constantly.

Step 3: Add Onion & Garlic

Introduce the chopped onion and minced garlic to the skillet. Cook until the onions are translucent (3–4 minutes). The garlic should release a fragrant aroma—this is the flavor base.

💡 emy’s Pro Tip: If you love a subtle sweetness, toast the onions a minute before adding garlic.

Step 4: Layer the Potatoes

Spread the cooked beef mixture evenly over the baking dish’s bottom. Arrange thinly sliced potatoes on top in a neat circular pattern. Sprinkle salt, pepper, Italian seasoning, and paprika over them for quick flavor.

⚠️ Common Mistake to Avoid: Skipping the seasoning before baking often leaves the potatoes bland.

Step 5: Add Cheese & Liquid

Sprinkle the shredded cheddar and grated Parmesan over the entire casserole. Pour the beef broth or water beside the potatoes, and if you like, drizzle the milk for extra creaminess.

💡 emy’s Pro Tip: Adding a side splash helps the potatoes steam, ensuring they stay tender without soaking.

Step 6: Bake Covered

Cover tightly with foil and bake for 30 minutes. After 30 minutes, remove the foil to allow the top to brown.

⚠️ Common Mistake to Avoid: Removing the foil too early causes the potatoes to dry out.

Step 7: Final Bake

Continue baking without foil for another 15–20 minutes or until the potatoes are tender and the cheese is bubbly and golden.

💡 emy’s Pro Tip: For a crispier top, switch to a broiler for the last 2 minutes—watch closely.

Step Action Duration Key Visual Cue
1 Preheat oven & oil dish 10 min Oven temperature set
2 Cook beef till browned 7 min Brown streaks
3 Sauté onion & garlic 4 min Translucent onions
4 Layer potatoes & season 0 min Even spread
5 Add cheese & liquid 0 min Melty top
6 Bake covered (30min) 30 min Piping steam
7 Bake uncovered (15–20min) 17 min Golden bubbly

Serving & Presentation

Serve the casserole straight from the pan, garnishing with fresh parsley for a pop of color. Offer a side of crisp arugula salad tossed in a lemon vinaigrette—this bright contrast mirrors the citrus notes from the parmesan. If you want a rustic touch, lightly toast some crusty baguette slices from a NYC bakery.

In my Moroccan kitchen, I pair a simple green salad dressed with olive oil and sea salt. Here in New York, I like to drizzle a splash of balsamic glaze for a sweet hit and to mimic the sweet‑tart mood of Parisian sidewalk cafés. The comforting casserole feels like a group hug, no matter the table.

Pairing Type Suggestions Why It Works
Side Dish Steamed green beans with lemon zest Light, bright contrast to rich casserole
Sauce / Dip Mint yogurt sauce, garlic aioli Adds freshness and coolness
Beverage A crisp white wine (Sauvignon Blanc) or a chilled cucumber lemonade Balance savory heft
Garnish Fresh parsley, chives, or crumbled feta Adds color and an extra herbaceous note

Make‑Ahead, Storage & Reheating

I save time by baking the casserole a day ahead and keeping it stuffed in a zip‑lock bag. In New York, that reduplicative strategy keeps my evenings quiet and my kitchen tidy.

Method Container Duration Reheating Tip
Refrigerator Lidded dish or glass jar 2 days Reheat at 350°F for 20‑25 min, cover with foil.
Freezer Plastic freezer bag 4 months Thaw overnight, bake 375°F 25‑30 min.
Make‑Ahead Freezer bags 7 days Assemble a day before, assemble thin layers, refrigerate, then bake.

When reheating, add a splash of broth or milk to keep the potatoes moist. A quick microwave 2‑minute burst can bring it back to a gently warmed, comforting dish — perfect for a blue‑sky lunch or a late‑night craving during a busy NYC day.

Variations & Easy Swaps

Variation Key Change Best For Difficulty Impact
Canadian‑style Spice Add smoked paprika, a dash of cayenne Heat‑seekers Easy
Gluten‑Free Use gluten‑free flour or parchment paper Health‑conscious Same
Seasonal Autumn Pumpkin puree in the broth, sage seasoning Fall lovers Comparable

Classic Moroccan Spice Variation

Swap out the Italian seasoning for a cumin‑coriander blend, and add a sprinkle of harissa paste. The casserole takes on a smoky, slightly tangy warmth that would fit perfectly in a Moroccan family dinner.

Gluten‑Free / Dairy‑Free Variation

Use plant‑based cheese, such as a vegan cheddar, and bake on parchment to avoid crackers. Result: silky dairy‑free texture with the same comforting crunch, tested right in my New York apartment with a 5‑minute prep time.

Seasonal Summer Feta Variation

During summer festivals, add sun‑dried tomato cubes and crumbled feta on top. The briny tang cuts through the richness, as if a Mediterranean sunset graces each spoonful, a favorite find from Brooklyn farmers’ markets.

Can I use ground turkey instead of ground beef?

Yes, ground turkey is a lighter, leaner alternative that still delivers a mild protein base. Keep the cooking time similar but monitor the texture, as turkey can lose moisture faster—adding milk or broth during baking helps the potatoes stay tender. The overall flavor remains comforting, albeit a bit less robust.

What can I do if I don’t have a 9×13 inch baking dish?

Any rectangular dish with a deep enough side to contain the layers will do. A cast‑iron skillet or a glass baking dish works well—just adjust the baking time by a few minutes if using a tighter or deeper pan. The key is to allow steam to circulate around the potatoes.

How long does this casserole last in the fridge?

It stays fresh for up to 3–4 days when stored in an airtight container in the refrigerator. Reheat in the oven at 350°F for 15 minutes to revive the bubbling cheese. For longer storage, freeze portions and reheat for 25–30 minutes after thawing.

Can I use sweet potatoes instead of regular potatoes?

Absolutely. Sweet potatoes add natural sweetness and a slightly richer texture. Slice them thin to maintain the crisp‑soft balance. You may need to reduce the liquid slightly because sweet potatoes absorb less moisture.

What’s the best cheese for a gooey top?

A blend of sharp cheddar for melt and parmesan for flavor works best. If you crave a stretchier melt, swap cheddar for mozzarella or a combination of both. Add a bit of a hard cheese like aged Gruyère for deeper depth but watch the cooking time.

How can I reduce sodium in this recipe?

Use low‑sodium broth or water and reduce the added salt. Sprinkle extra herbs—oregano, thyme, or basil—to enhance flavor without relying on salt. A splash of lemon juice or vinegar can also brighten the dish while masking sodium.

Is there a vegan version?

Yes, replace ground beef with plant‑based crumbled tofu or lentils. Use vegan cheddar and parmesan blends. Add vegetable broth instead of beef broth. The taste transforms beautifully, keeping the comforting layers while staying plant‑friendly.

What side dishes go well with this casserole?

A crisp green salad with lemon vinaigrette, roasted Brussels sprouts, or a simple cucumber and yogurt dip complement the rich casserole. On the devout, serve with a crusty artisan baguette and a chilled white wine to balance the flavors.

Share Your Version!

I’d love to hear how you’ve tweaked this Hobo Casserole. Leave a star rating and drop a comment below. Shoot a photo of your creation to Instagram or Pinterest and tag @cookingwithemi; I’ll pin the best ones onto my boards. What ingredient swap made this recipe uniquely your own?

From my NYC kitchen to yours — I hope this recipe brings as much warmth to your table as it does to mine. — emy 🧡

📌

Love This Recipe? Save It to Pinterest!

If you enjoyed this Hobo Casserole Ground Beef recipe, don’t let it get lost in your browser tabs! 😄 Pin it now so you can find it again anytime — and explore hundreds more tried‑and‑tested recipes waiting for you on my Pinterest boards.

👉 Follow emy on Pinterest @chefrecipes2

📌 Pin this recipe · 🔁 Re‑pin your favorites · 💬 Tag me when you make it — I love seeing your creations!

Print
clock clock iconcutlery cutlery iconflag flag iconfolder folder iconinstagram instagram iconpinterest pinterest iconfacebook facebook iconprint print iconsquares squares iconheart heart iconheart solid heart solid icon

Hobo Casserole Ground Beef


  • Author: Chef Emy

Description

This Hobo Casserole Ground Beef is delicious with tender potatoes, savory ground beef, and melted cheese all baked together into a comforting dish. Its a simple, hearty meal that the whole family will love!


Ingredients

Scale
  • 1 lb ground beef
  • 1 tablespoon olive oil
  • 1 medium onion, chopped
  • 2 cloves garlic, minced
  • 45 medium potatoes, thinly sliced
  • 1 1/2 cups shredded cheddar cheese
  • 1/2 cup grated Parmesan cheese
  • 1 teaspoon dried Italian seasoning
  • 1/2 teaspoon paprika
  • Salt and pepper to taste
  • 1/2 cup beef broth or water
  • 1/4 cup milk (optional, for creaminess)
  • Fresh parsley for garnish (optional)

Instructions

  1. Preheat your oven to 375°F (190°C) and grease a 9×13-inch baking dish with cooking spray or olive oil.
  2. In a large skillet, heat the olive oil over medium heat. Add the ground beef and cook, breaking it apart with a spoon, until browned and cooked through (about 5-7 minutes). Drain any excess fat if needed.
  3. Add the chopped onion and minced garlic to the skillet with the beef. Cook for another 3-4 minutes until the onion becomes soft and translucent.
  4. Layer the thinly sliced potatoes on top of the ground beef in the prepared baking dish. First, spread the cooked ground beef mixture evenly in the bottom of the dish. Then, arrange the potatoes on top, seasoning them with salt, pepper, Italian seasoning, and paprika.
  5. Sprinkle the shredded cheddar and grated Parmesan cheese over the beef. Pour the beef broth (or water) around the edges of the casserole to keep the potatoes moist while baking. Optionally, drizzle with milk for extra creaminess.
  6. Cover the casserole with aluminum foil and bake for 30 minutes. After 30 minutes, remove the foil and bake for an additional 15-20 minutes, or until the potatoes are tender and the cheese is bubbly and golden.
  7. Garnish with fresh parsley if desired and serve hot!

Grilled Lemon Chicken

Grilled Lemon Chicken Quick Lemon Marinade – A Bright, Juicy Summer Classic

⚖️
Difficulty
Easy
⏲️
Prep Time
30 mins
🕒
Cook Time
12 mins
⏱️
Total Time
42 mins
🍽️
Servings
4

When I first moved from Morocco to Paris, I learned to love citrus, but nothing beats the bright burst of lemon on a New York summer grill. That’s why I created this Grilled Lemon Chicken with a Quick Lemon Marinade that takes just 30 minutes from prep to plate. The citrus-infused sauce turns ordinary chicken breasts into a vibrant, smoky treat that’s as healthy as it is delicious. The recipe is perfect for a weekend cookout, a quick weeknight dinner, or a crowd‑pleasing dish for friends and family. I’m excited to share the secrets that give this chicken its signature brightness.

I’m not just a chef; I’m someone who’s spent years at a Parisian culinary school, then traded the Seine for the streets of Brooklyn. In my kitchen, I blend Moroccan spices, French technique, and the bold flavors of New York’s farmers markets. That mix is what brings depth to this recipe. The garlic and oregano mingle with the lemon’s acidity, while a splash of olive oil keeps the meat moist. The result is a juicy, flavorful bite that feels both exotic and familiar. Every bite is a little sun‑kissed adventure from the coast of Morocco to the heart of NYC.

Before you start, remember that patience pays off—even with a “quick” marinade. Marinating for at least 30 minutes (but no longer than two hours) allows the flavors to seep into the meat without compromising tenderness. One common mistake I’ve seen is cutting the chicken too thin in the middle, which can lead to uneven cooking. To avoid that, pat the chicken dry, then use a meat mallet to pound to an even thickness of about ½ inch. This technique ensures a quick, even grill and prevents dry spots. Also, keep an eye on the heat to avoid charring the herbs. A gentle grill and proper timing make all the difference.

Why This Grilled Lemon Chicken Recipe Is the Best

The flavor secret lies in the Quick Lemon Marinade—a blend of fresh lemon zest, bright juice, aromatic oregano, and the subtle heat of garlic. This combination cuts through the richness of the chicken and leaves a lingering citrus aftertaste that transports you to a Mediterranean patio. The balance of oil, acid, and herbs gives the meat a velvety, juicy interior that stays tender even after grilling.

The perfected texture comes from a simple technique I learned in the culinary school’s grill class: the “even‑thickness” rule. By pounding the breasts evenly, you create uniform heat transfer. This eliminates the dreaded “one side done, one side raw” scenario, and guarantees a beautiful crust while keeping the inside moist. It’s a professional trick that works for anyone, even a kitchen newbie.

Foolproof and fast, this recipe is ideal for beginners because it requires minimal prep and no fancy equipment. A grill or grill pan, a bowl, and a few fresh ingredients are all you need. The 30‑minute turnaround makes it a great option for a quick dinner or for prepping a handful of meals for the week. The result is a crowd‑pleasing dish that delivers wow‑factor without the stress.

Grilled Lemon Chicken Ingredients

I pick the fresh ingredients at the local farmers market in Brooklyn, where the produce is always a few minutes away from the street. The lemon I use is a bright, fragrant variety that delivers a clean tartness, while the olive oil comes from a small Tuscan cooperative that supplies my apartment kitchen.

Ingredients List

  • 4 (6-ounce) boneless skinless chicken breasts
  • ¼ cup olive oil
  • 1 large lemon (zest and juice, about 3 tablespoons juice)
  • 4 garlic cloves, minced
  • 1 tablespoon oregano
  • ¾ teaspoon salt
  • ½ teaspoon black pepper
  • Chopped parsley (for serving)
  • Lemon wedges (for serving)

Ingredient Spotlight

Olive Oil – The foundation of a flavorful grill. It provides a medium‑heat threshold that helps develop a caramelized crust. Look for a cold‑pressed extra‑virgin type from a reputable brand; it carries subtle fruit notes that complement the lemon. If you need a lighter smoke point, switch to avocado oil – it’s high‑smoke and will keep the chicken moist.

Lemon – The star of the dish. Fresh lemons give a bright, acidic bite that cuts through the meat’s greasiness. If you can’t find a fresh one, a splash of bottled lemon juice with a pinch of zest works, but the flavor will be slightly muted. For an even tangier profile, try lime; it has a sweeter undertone that pairs well with herbs.

Garlic – Adds depth and warmth. Minced garlic releases the oils that infuse the meat. If you’re short on time, use a teaspoon of prepared garlic paste; it will give you a clean, consistent flavor while saving minutes.

Oregano – Provides a fragrant, slightly peppery undertone. Dried oregano is convenient and long‑lasting; fresh leaves can be chopped and added at the end for a burst of green. Thyme is the best substitution if you’re looking for a milder, earthy alternative.

Original Ingredient Best Substitution Flavor / Texture Impact
Olive Oil Avocado Oil Higher smoke point, slightly neutral flavor
Lemon Lime Slightly sweeter, more tropical note
Garlic, minced Garlic Paste Consistent flavor, less watery
Oregano Thyme Milder, earthier aroma

How to Make Grilled Lemon Chicken — Step-by-Step

Let’s fire up the grill and bring this Mediterranean masterpiece to life with clear, confident steps.

Step 1: Pat and Pound

Pat the chicken dry with a paper towel. Using a meat mallet or the flat side of a skillet, pound each breast to a uniform thickness of about ½ inch. This ensures even cooking and faster heat penetration.

💡 emy’s Pro Tip: If you’re short on time, use a heavy skillet or a plastic wrap between slices to flatten them gently—no need for a full mallet.

Step 2: Prepare the Marinade

In a bowl, whisk together olive oil, lemon juice, minced garlic, oregano, salt, and pepper. Stir until the salt dissolves and the oils emulsify, creating a glossy sauce.

⚠️ Common Mistake to Avoid: Rushing the mixing can cause the herbs to clump instead of distribute evenly. Take a moment to stir fully.

Step 3: Marinate

Place the flattened chickens in the bowl, spooning the sauce over each piece. Cover tightly with plastic wrap or a lid and refrigerate for at least 30 minutes, up to 2 hours.

💡 emy’s Pro Tip: For a deeper flavor, add a pinch of smoked paprika to the mix—this adds a subtle smokiness that complements the grill.

Step 4: Grill

Preheat the grill or a grill pan to medium-high heat. Lightly oil the grates to prevent sticking. Place the chicken, cooking about 5–7 minutes per side until the internal temperature reaches 165°F and the juices run clear.

⚠️ Common Mistake to Avoid: Over‑flipping the chicken can tear the skin and cause uneven browning. Use tongs for gentle handling.

Step 5: Rest and Serve

Remove the chicken from the grill and let it rest for 5 minutes. This allows the juices to redistribute, keeping the meat moist. Sprinkle with chopped parsley and serve with fresh lemon wedges.

💡 emy’s Pro Tip: If you’re feeding a crowd, keep the finished chicken warm in a low‑heat oven (200°F) while you finish grilling the rest.

Step Action Duration Key Visual Cue
1 Pat & pound 2 min Uniform thickness visible
2 Prepare marinade Sauce glossy
3 Marinate 30 min – 2 hr Chicken coated, color uniform
4 Grill 5–7 min per side Char marks visible
5 Rest & serve 5 min rest Juice clear, parsley bright

Serving & Presentation

Plate the grilled chicken on a rustic wooden board, drizzle a few dots of fresh lemon‑herb vinaigrette, and scatter the chopped parsley for color. The bright lemon wedges add a burst of citrus that encourages diners to squeeze a squeeze onto each bite. For a pop of color, scatter a few pomegranate seeds or edible flowers—a nod to my Moroccan roots.

A classic pairing is a simple Greek salad with cucumbers, tomatoes, red onion, feta, and a drizzle of olive oil. Another option is a quinoa or couscous pilaf, which takes the meal to a Mediterranean plateau feel. If you’re looking for a lighter option, serve the chicken over a crisp mixed greens bed topped with sliced avocado and a splash of balsamic glaze.

Pairing Type Suggestions Why It Works
Side Dish Greek salad, quinoa pilaf, couscous Adds freshness & complementary flavors
Sauce / Dip Tzatziki, hummus, garlic aioli Enhances savory profile, adds creaminess
Beverage Sauvignon Blanc, crisp Chardonnay, sparkling water Bright acidity balances lemon, keeps palate fresh
Garnish Pomegranate seeds, edible flowers, lemon zest Adds color, texture, and aroma

Make-Ahead, Storage & Reheating

I love prepping for the week, especially on busy Monday evenings. For me, making a batch of grilled chicken that stays tender and flavorful throughout the week means a few simple storage tricks.

Method Container Duration Reheating Tip
Refrigerator Air‑tight container 2–3 days Reheat in grill or oven 350°F for 5 mins
Freezer Vacuum‑seal bag 1–2 months Thaw overnight, then grill briefly to warm
Make‑Ahead Separate plate with dressing 1–2 days in advance Assemble fresh before serving, keep sauce separate

When you reheat, I prefer using a quick grill to revive that char. If you’re in a hurry, a microwave is fine—just add a splash of water to keep the meat from drying. After reheating, let the chicken rest a minute before slicing; this keeps the juices locked in.

Variations & Easy Swaps

Variation Key Change Best For Difficulty Impact
Smoky Chipotle Lemon Add 1 tsp chipotle in adobo Spice lovers Easy
Gluten‑Free & Dairy‑Free Substitute almond butter for olive oil Health‑conscious Moderate
Seasonal Spring Twist Swap oregano with fresh tarragon Spring menu Easy

Smoky Chipotle Lemon

Add a teaspoon of chipotle in adobo sauce to the citrus mixture for a smoky, peppery kick. The deep, smoky flavor contrasts wonderfully with the bright lemon, creating a complex profile that feels like a Mediterranean street food favorite. I love this version on a summer patio with a glass of chilled rosé.

Gluten‑Free & Dairy‑Free

Replace the olive oil with a neutral almond butter or coconut oil to keep the dish gluten and dairy free. The oil’s mild flavor and high smoke point allow the lemon to shine, while the nutty undertone adds subtle depth. This swap maintains a juicy interior and a crisp grill line.

Seasonal Spring Twist

Swap oregano for freshly chopped tarragon, which brings a sweet, anise‑like aroma perfect for spring. Combine tarragon with lemon zest and a splash of white wine for a quick, elegant vinaigrette. The result is a bright, fragrant chicken that pairs with light vegetable sides and a crisp sparkling water.

How can I store grilled lemon chicken for later?

To keep your grilled lemon chicken fresh for a few days, wrap it tightly in aluminum foil or place it in an airtight container. Store it in the refrigerator for up to three days. When you’re ready to eat, reheat it in a preheated oven at 350°F for about 5-7 minutes or finish it briefly on the grill to restore the char. Avoid microwaving the entire chicken; a quick grill or oven finish keeps the texture juicy and preserves the bright citrus flavor.

What side dishes go best with grilled lemon chicken?

Grilled lemon chicken pairs wonderfully with fresh salads or light grain dishes. A crisp Greek salad, a quinoa or couscous pilaf, or a simple roasted vegetable medley all complement the citrusy, herbaceous flavor. If you want a richer side, a creamy tomato risotto or grilled asparagus with lemon zest works too. The key is to choose sides that add brightness and contrast—think leafy greens, fresh herbs, or a tangy yogurt dip—to keep the meal balanced and refreshing.

Can I grill the chicken over charcoal instead of gas?

Yes, charcoal will give your chicken a smokier flavor that’s hard to beat. Let the coals burn down to a gentle heat and place a heat‑resistant mat on the grill grates. Cook the chicken 5–7 minutes per side, keeping a close eye on the internal temperature to avoid flare‑ups. The charcoal’s intense heat creates a beautiful charred crust while the lemon oil keeps the interior moist, delivering a delicious Mediterranean taste.

What’s the best way to keep the chicken juicy?

Juiciness comes from a few simple steps: first, pound the breasts to an even thickness so heat penetrates quickly; second, marinate with olive oil and lemon so the acid tenderizes without drying; third, avoid over‑cooking by checking the internal temperature at 165°F; and finally, let the cooked chicken rest for a few minutes before slicing. Resting allows the juices to redistribute, ensuring each bite stays moist and flavorful.

Is it okay to use a grill pan at home?

Absolutely! A cast‑iron or stainless steel grill pan works just fine. Preheat it to medium‑high and lightly oil the surface. The grill pan mimics the grill lines, providing that desirable sear while being more controllable for indoor cooking. Just make sure the pan is hot enough to avoid sticking, and flip the chicken only once for best results.

Can I marinate the chicken overnight?

Marinating overnight is fine, but keep the chicken in the refrigerator and use a tight container or zip‑top bag to prevent it from absorbing other odors. An overnight soak can intensify the flavors even more, but it’s important not to go beyond 24 hours because the acid may begin to break down the protein too much, resulting in a mushy texture. For best results, stick to 30 minutes to 2 hours.

What if I’m allergic to gluten or dairy?

This recipe is naturally gluten‑free and dairy‑free, so there’s no issue there. If you’re sensitive to certain ingredients like wheat‑based spice blends or store‑bought marinades, always read labels. For added safety, opt for fresh, unflavored spices and produce, and use simple olive oil and lemon for the sauce.

What’s a quick alternative to grilling if I’m stuck inside?

Use a pan‑sear method in a heavy skillet on high heat. Brush the pan with a little more oil and cook the chicken pieces for 5–7 minutes per side, just as you would on a grill. The high heat will create a similar crust; finishing under a broiler for a minute adds that last bit of char. It’s a great indoor substitute when weather’s unfavorable.

Can I use bone‑in chicken for this recipe?

Yes—bone‑in chicken thighs or drumsticks can be marinated in the same way. Cooking times will be slightly longer: about 9–12 minutes per side on a hot grill. The bone adds extra flavor and makes the dish hearty, but keep the internal target temperature at 165°F and let it rest to maintain moisture.

What’s a healthier version of grilled lemon chicken?

To keep the dish low‑fat, swap olive oil for a light spray or use a non‑stick grill surface that requires no added fat. You can also increase the proportion of lemon juice to reduce sodium, and add fresh herbs like basil or cilantro for extra flavor. Pair it with steamed vegetables or a salad for a light, balanced plate.

Share Your Version!

I’d love to see how you tweak this classic. Drop a star rating, leave a comment, and let me know if you added a twist that makes it even more special. If you post a photo on Instagram or Pinterest, tag @cookingwithemi so I can see your creations. And tell me—what’s your go‑to herb that makes grilled chicken unforgettable?

From my NYC kitchen to yours — I hope this recipe brings as much warmth to your table as it does to mine. — emy 🧡

📌

Love This Recipe? Save It to Pinterest!

If you enjoyed this Grilled Lemon Chicken recipe, don’t let it get lost in your browser tabs! 😄 Pin it now so you can find it again anytime — and explore hundreds more tried-and-tested recipes waiting for you on my Pinterest boards.

👉 Follow emy on Pinterest @exorecipe

📌 Pin this recipe · 🔁 Re-pin your favorites · 💬 Tag me when you make it — I love seeing your creations!

Print
clock clock iconcutlery cutlery iconflag flag iconfolder folder iconinstagram instagram iconpinterest pinterest iconfacebook facebook iconprint print iconsquares squares iconheart heart iconheart solid heart solid icon

Grilled Lemon Chicken


  • Author: Chef Emy

Description

Grilled lemon chicken is a tender, juicy and savory grilling recipe that is perfect for summer. It’s light, healthy and beaming with Mediterranean flavor!


Ingredients

Scale
  • 4 (6-ounce) boneless skinless chicken breasts
  • ¼ cup olive oil
  • 1 large lemon (zest and juice (about 3 tablespoons juice))
  • 4 garlic cloves (minced)
  • 1 tablespoon oregano
  • ¾ teaspoon salt
  • ½ teaspoon black pepper
  • Chopped parsley (for serving)
  • Lemon wedges (for serving)

Instructions

  1. Pat chicken dry and pound chicken if some parts are too thick so the pieces are even in thickness. Combine the olive oil, lemon juice, garlic, oregano, salt and pepper in a bowl. Add chicken and toss well to combine. Cover and marinate for at least 30 minutes, but no more than 2 hours.
  2. Preheat the grill or grill pan to medium-high heat. Place the chicken on the grill for 5-7 minutes. Use tongs to flip over and cook on the other side for 5-7 more minutes, or until juices run dry.
  3. Remove chicken from the grill. Sprinkle with parsley and serve with lemon wedges, if desired.