Table of Contents
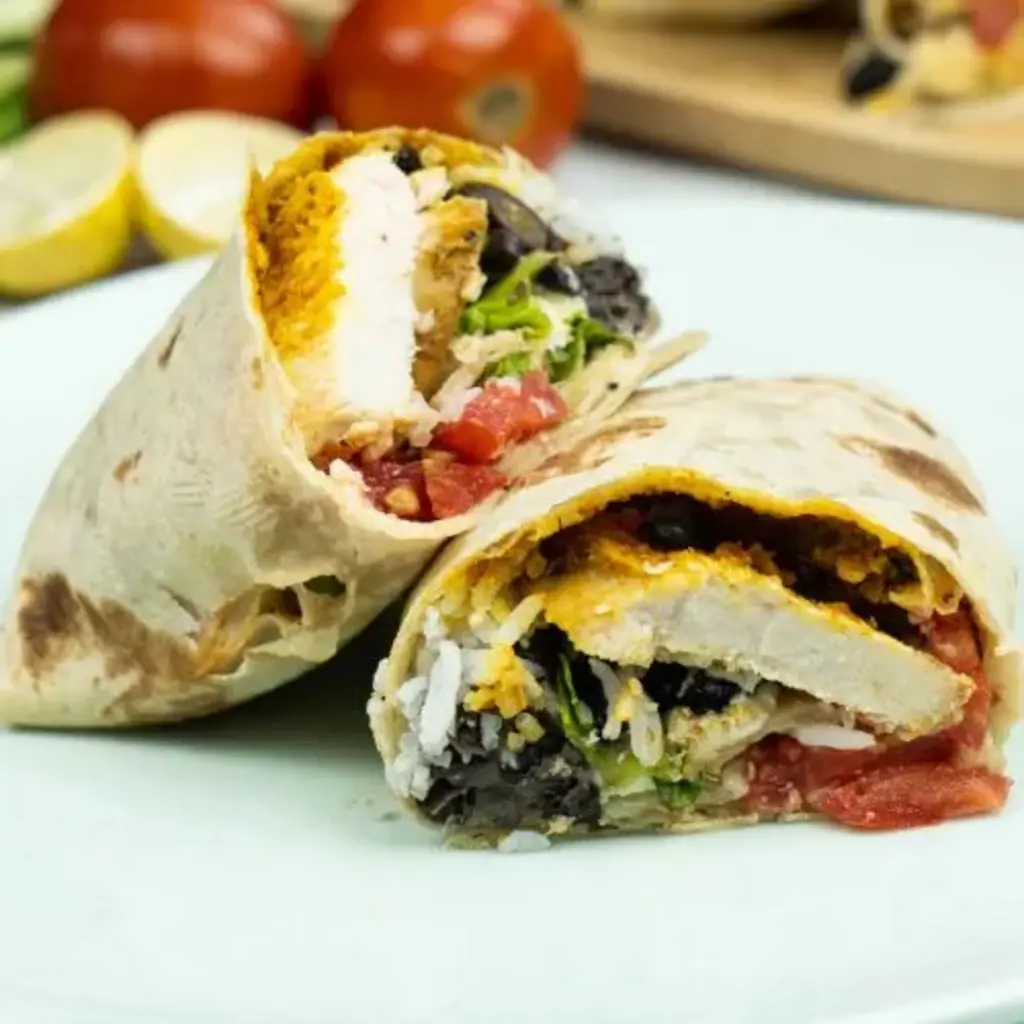
Chipotle Ranch Grilled Chicken Burrito Layered Marinade for Smoky Flavor – A zesty wrap you can roll in no time
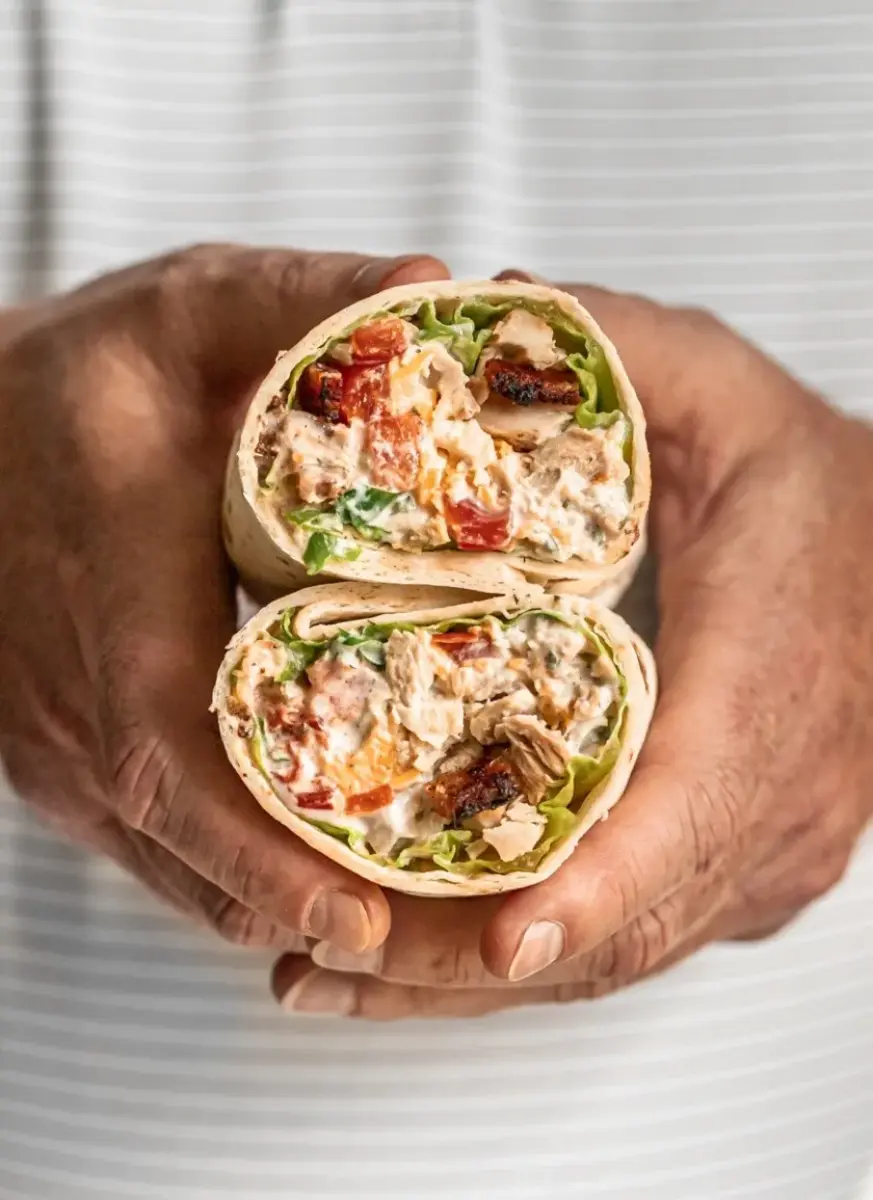
I’m standing in the brick‑thick kitchen of my mom’s home in Marrakech, with the scent of cumin and smoked paprika echoing from the pot. That aroma has followed me through Parisian culinary school and into my New York City loft. I bring that blend of Moroccan boldness, French technique, and the lively energy of the city into every plate I craft. This time, I’m debuting a Chipotle Ranch Grilled Chicken Burrito that marries smoky chipotle, creamy ranch, and a vibrant salsa all wrapped together in a warm tortilla—suitable for the hurried weekday or a weekend delight.
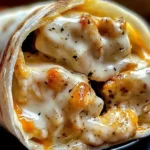
As soon as the grill sears, the sizzling chicken releases a caramelized crust laced with tiny, smoky hints of chipotle. The tang of ranch cooling the heat, the crunch of lettuce, and the burst of diced tomato create a handheld symphony. The subtle sweetness of corn adds a silky counterpoint, while fresh cilantro finishes it off with a fragrant freshness that is almost ticklish to the soul.
I’ve spent years because the method matters—especially when coffee runs low! That is why I layer my spice medleys before braising the chicken. Doing that preserves the dense flavor and reduces the dreaded dry texture. A quick pro tip: let the chicken rest after grilling to lock in juices. The common mistake I see? Rushing the tortilla; warm, pliable tortillas hold the burrito structure without tearing.
Why This Chipotle Ranch Grilled Chicken Burrito Recipe Is the Best
Because of my North African heritage, I always layer flavors. The smoky chipotle seared into the chicken gives depth, while the ranch that is chromed to a cream brings balance. The patio at my mom’s house started this idea; envision walnuts on a spice paste…that’s exactly how I pack this burrito.
The grill technique I learned at Le Cordon Bleu—searing the breast just enough to create an external char that seals juices—offers a luxurious tenderness. The high heat followed by a quick wrap means the tortilla stays soft and doesn’t burn; each bite delivers molten cheese and crunchy veggies without being soggy.
The secret that makes it foolproof is the pre‑marination for at least twenty minutes; this gives time for the aromatics to permeate. Even a novice knows to keep the grill marginally hot. That’s why this recipe works every time, with minimal fuss and trophy taste.
Chipotle Ranch Grilled Chicken Burrito Ingredients
I keep a Little Havana stall next to my farm market. Fresh ingredients from there make a real difference. Today’s list brings together familiar U.S. staples with a hint of Moroccan spice.
Ingredients List
- 2 boneless (skinless) chicken breasts
- 2 tablespoons olive oil
- 2 tablespoons lime juice
- 1 tablespoon chipotle chili powder
- 1 teaspoon smoked paprika
- 1 teaspoon garlic powder
- 1 teaspoon onion powder
- 1 teaspoon cumin
- Salt and pepper to taste
- 4 large flour tortillas
- 1 cup cooked white or brown rice
- 1 cup black beans (drained and rinsed)
- 1 cup shredded cheddar or Monterey Jack cheese
- 1 cup shredded lettuce
- ½ cup diced tomatoes
- ½ cup corn kernels (optional)
- ¼ cup chopped cilantro (optional)
- ½ cup chipotle ranch dressing
Ingredient Spotlight
Chicken breast: the cornerstone of this burrito. Choose bone‑less cut for lean, tender meat. If you can find organic, the slightly sweet flavor is worth the extra cost, but regular is fine. To save cost or add a twist, swap for sliced flank steak; it cooks faster and gives a different texture.
Chipotle chili powder: supplies the smoky heat. I personally use a mix from the Moroccan spice aisle because it has a more earthy sweetness. If you can’t find it, fresh chipotle flakes will do but may be less unpredictable.
Cheddar or Monterey Jack: the hallmark of ·the creamy melt. Cheddar brands with a buttery finish give a deeper taste; Jack offers a more mild, melty bite. If you’re vegan, try smoked mozzarella or cashew cheese; the smoky depth stays but the melt is lighter.
| Original Ingredient | Best Substitution | Flavor / Texture Impact |
|---|---|---|
| White rice | Brown rice | Denser, nuttier bite; retains heat better. |
| Mesa vegetable corn | Frozen corn | Same sweetness, easier prep. |
| Cheddar/montly Jack cheese | Swiss or provolone | Milder melt; slightly saltier. |
How to Make Chipotle Ranch Grilled Chicken Burrito — Step-by-Step
Let’s roll! I’ll take you through each stage from prep to final heat.
Step 1: Whisk the Marinade
In a bowl, whisk together the olive oil, lime juice, chipotle chili powder, smoked paprika, garlic powder, onion powder, cumin, salt, and pepper. The lime keeps the bread from drying out.
💡 emy’s Pro Tip: Let the mixture sit for at least a minute after whisking so the spices meld.
Step 2: Coat the Chicken
Coat the chicken breasts with the marinades, cover, and refrigerate for at least 20 minutes (up to 2 hours for stronger flavor). This step locks in juiciness!
⚠️ Common Mistake to Avoid: Over‑marinating can make the chicken too spicy.
Step 3: Preheat the Grill
Heat your grill or grill pan to medium‑high. I typically preheat between 350‑400°F (175‑200°C). A hot pan is essential to lock in juices.
💡 emy’s Pro Tip: Lightly oil the grill grates to prevent sticking.
Step 4: Grill the Chicken
Grill the marinated chicken for 6‑8 mins per side, until the internal temp hits 165°F. Watch for the charcoal brown lines on the outside.
⚠️ Common Mistake to Avoid: Turning too often; give an even seal.
Step 5: Warm the Tortillas
Heat each tortilla in a dry skillet or microwave until pliable and warm. It lowers tearing risk during rolling.
💡 emy’s Pro Tip: Wipe a clean kitchen towel over the skillet to cushion the heat.
Step 6: Assemble
Spread 1‑2 tablespoons chipotle ranch in the center. Then layer rice, black beans, sliced chicken, cheese, lettuce, tomatoes, corn, and cilantro. Roll tightly from the bottom.
💡 emy’s Pro Tip: Start by folding the ends first to keep the filling inside.
Step 7: Grill the Burrito (Optional)
For a crispy shell, lightly grill the wrapped burrito for 1‑2 mins per side, pressing gently.
💡 emy’s Pro Tip: Brush a little olive oil to get a golden crisp.
| Step | Action | Duration | Key Visual Cue |
|---|---|---|---|
| 1 | Whisk the Marinade | 3‑5 mins | Foamy orange base |
| 2 | Marinate Chicken | 20‑120 mins | Chicken glistening |
| 3 | Preheat Grill | 5 mins | Heat pustular |
| 4 | Grill Chicken | 12‑16 mins total | Firm orange char |
| 5 | Warm tortillas | 2‑3 mins | Soft and pliable |
| 6 | Assemble | 5‑7 mins | Wrapped with all layers |
| 7 | Final grill | 2‑4 mins | Golden crust |
Serving & Presentation
Serve vertically for a dramatic presentation, cutting it in half across the middle. Sprinkle with extra cilantro and a sprinkling of corn; the kaleidoscope of colors makes it Instagram ready. You can garnish with a dollop of lime crema—if you practiced that on a Sunday in the city, you’ll know the tang is unforgettable.
A neighbor in the East Village once sent me a photo of him serving these with a bowl of black bean soup. That pairing makes the night feel quintessentially New York—heart‑warming and portable.
| Pairing Type | Suggestions | Why It Works |
|---|---|---|
| Side Dish | Coleslaw, avocado slices, or roasted sweet potatoes | Adds crunch, balancing creamy ranch. |
| Sauce / Dip | Salsa roja, guacamole, or a lime yogurt sauce | Fresh acidity brightens the bite. |
| Beverage | Iced hibiscus tea, a cold beer, or a crisp Mexican lager | Cool complements heat. |
| Garnish | Crushed tortilla chips, extra cilantro, or lime wedges | Adds crunch and fresh zing. |
Make-Ahead, Storage & Reheating
NYC life is fast, yet planning ahead keeps me hungry and calm. I assemble a few burritos and wrap them in parchment, then refrigerate. That way, I can pop them into the toaster oven or simply steam them later exactly when I’m ready.
| Method | Container | Duration | Reheating Tip |
|---|---|---|---|
| Refrigerator | Reusable zip‑lock bag or covered tin | 1‑2 days | Steam in microwave 2 mins; flip & reheat 1‑2 mins. |
| Freezer | Ziploc freezer bag | 3 months | Thaw overnight; rehearse 3‑4 mins in oven. |
| Make‑Ahead | Storage container with parchment paper | 1‑2 days | If frozen, defrost & finish grilling the tortilla for freshness. |
When I’m prepping for a flight, I pre‑assemble a batch and let each wrap “drink” the rice and beans to maintain moisture. Then I use a double‑sided spatula to heat in the skillet for an instant crisp. The chips in the street food carts in Midtown remind me of that crispy delight that should never be missed.
Remember, burritos keep their best bite when served within a day of assembly, but they can be safely frozen for up to three months if you stash them in flimsy but airtight bags. When reheating, sprinkle orange zest to revive that Moroccan flicker.
Variations & Easy Swaps
| Variation | Key Change | Best For | Difficulty Impact |
|---|---|---|---|
| Guacamole Twist | Add mashed avocado layers | Soda enthusiasts | Easy |
| Gluten‑Free Option | Switch tortillas for corn bundles | Dairy‑free fans | Same level |
| Summer Salad Spin | Replace rice with quinoa | Health‑savvy guests | Need extra prep |
Guacamole Twist
Add a layer of smashed avocado and lime zest for a luscious creamy texture that complements the tangy ranch and the pepper spice, creating an oasis of coolness that’s reminiscent of a cool breeze across the Atlas Mountains.
Gluten‑Free Option (Gluten‑free / Dairy‑Free)
Swap semolina tortillas for corn‑based wraps you can find in the store’s ethnic aisle. The corn has a subtle sweetness that pairs nicely with black beans; it displaces the need for a dairy‑rich cheese. When plating, the batter’s crispness edges slightly softer, giving a slightly different mouthfeel but still delicious.
Summer Salad Spin (Seasonal or Flavor Twist)
For a spring harvest vibe, cover the burrito with a quinoa salad spiced with lemon and fennel. That grain’s nutty finish reduces the bright color making it echo a fresh garden’s palette. The result best suits health‑seeking evening meals in bright Manhattan apartments.
How long does the chicken stay moist once marinated?
I keep the chicken in the refrigerator in a sealed container for up to 2 hours, and the marrow stays moist because the lime juice helps to tenderize the protein. Beyond two hours, the tang of lime can rub off, but the texture remains satisfactory. If you marinate overnight, the flavor intensifies, but watch for a slight mushiness if the acid gets too intense. In an FDR‑fitted fridge, the chicken stays slick and juicy within the safe window of two hours, with the prime compliment being no added moisture.
Can I use frozen chicken instead of fresh?
Yes, using thawed frozen chicken works fine. I always defrost overnight or use the quick‑defrost setting. The key is ensuring you pat the slices dry after thaw; that prevents a soggy center. The marinating stage still works; the heat will grill out any chill. The surface may flake more but that’s normal; reheat in a skillet to crisp.
Is cheese mandatory?
In this burrito I use cheese for a creamy surprise at the bite, but feel free to skip it or swap it with a blend of goat cheese for a tangier profile. If the Texas DHS is your vibe, bottled lime ricotta can replace hot cheese. I’ve tried it in a vegan version, and the taste still holds up pretty well. Memory of a Moroccan market where you’d almost always find spicy cheese, I deeply original.
What toppings should I avoid making it soggy?
Lightly dressing the tortilla with a cool, thick chipotle ranch helps to keep it sealed. Air‑dry lettuce and tomatoes keep dryness. Adding hot salsa or a watery sauce before wrapping will cause the tortilla to soften. My rule: layer water‑rich veggies last, then wrap, if truly you desire that water droplet. If I feel the burrito is steaming, pop it in the oven for 2 mins until the outside crisps back up.
Where can I get the best chipotle chili powder?
Try the spice stalls at the Southwest American market in Brooklyn; they stock a mild or hot chipotle blend that is fresher than the store grade. My mother would consider the tune of a smoky tang; that’s the aroma of slightly charred spice. Another choice is to sift fresh chipotle peppers from a Mexican grocery store and grind them for ideal heat.
Can I use grilled chicken from a buffet?
Yes, but the added sodium can raise the floor. If you’re buffeting, trim around excess fat and re‑marinate for a few minutes to neutralize sodium. Once you add your own spice mix, the grill’s smoky essence is enhanced and the burrito becomes so delicious no matter the source. It’s a feast for casual kitchens, balancing cost and taste.
How to cut the burrito after it’s finished?
Position a sharp knife on a stable cutting board and rotate the burrito in a circle. I favor a technique that part of wedge opens like a sunburst, revealing slices of chili, lettuce, and glistening ranch bright. The cut can be logged into a paper towel to avoid dripping. When served, I show it proudly to plate.
Do I need to use storage bags?
Using a zip‑lock bag ensures air‑tightness, preventing condensation that can soften the tortilla. I wrap each burrito with parchment to keep moisture away from the bread. If you’re in a hurry, a folded paper towel works the same, but glass introduces agate; atmosphere supports derivative nay. It works in the upper middle; the bag’s advantage is the water‑free environment.
How many calories per serving?
Approximately 550 kcal. This figure accounts for the whole burrito, including tortilla wrap, seasoned chicken, rice, beans, and the chipotle ranch dressing. Adjustments such as using low‑fat cheese or skipping the ranch can bring the calorie count down for a diet‑friendly version. My own cooking shows that tweaking an ingredient can alter the final energy value without drastically changing flavor.
Will the burritos stay fresh for the whole weekend?
If stored properly in a freezer or fridge, they remain fresh for up to a week. Each layer will maintain the structure. I always place a damp paper towel over the wrap before refrigeration to keep it from drying out. Thawing should be done overnight and reheating as described. The end result is a tasty brunch option that can be served even on Sunday morning.
Share Your Version!
I’d love to know how you tilt the classics—maybe you used roasted poblano instead of fresh tomatoes. Drop your experiences in the comments or leave a star rating so we can all savor this recipe’s heart. Stack a lovely photo of your burrito on Instagram or Pinterest and tag @cookingwithemi to let me see the real world magic. Tell me, what spice in this burrito you’d want to double down on and why?
From my NYC kitchen to yours — I hope this recipe brings as much warmth to your table as it does to mine. — emy 🧡
Love This Recipe? Save It to Pinterest!
If you enjoyed this Chipotle Ranch Grilled Chicken Burrito recipe, don’t let it get lost in your browser tabs! 😄 Pin it now so you can find it again anytime — and explore hundreds more tried‑and‑tested recipes waiting for you on my Pinterest boards.
👉 Follow emy on Pinterest @exorecipe
📌 Pin this recipe · 🔁 Re-pin your favorites · 💬 Tag me when you make it — I love seeing your creations!
If you’re on the hunt for a quick, flavor‑packed meal, hit the like button and tag your fellow foodie friends in the comments! Show me your twists and variations here, and let’s keep the culinary conversation rolling. 🍴

Chipotle Ranch Grilled Chicken Burrito
Description
The Chipotle Ranch Grilled Chicken Burrito is a flavorful and satisfying Mexican-inspired dish thats perfect for a quick weeknight dinner or a hearty lunch.Juicy grilled chicken is seasoned with smoky spices and paired with rice, beans, fresh vegetables, and a tangy chipotle ranch dressing, all wrapped in a warm tortilla.
Ingredients
- 2 boneless (skinless chicken breasts)
- 2 tablespoons olive oil
- 2 tablespoons lime juice
- 1 tablespoon chipotle chili powder
- 1 teaspoon smoked paprika
- 1 teaspoon garlic powder
- 1 teaspoon onion powder
- 1 teaspoon cumin
- Salt and pepper to taste
- 4 large flour tortillas
- 1 cup cooked white or brown rice
- 1 cup black beans (drained and rinsed)
- 1 cup shredded cheddar or Monterey Jack cheese
- 1 cup shredded lettuce
- 1/2 cup diced tomatoes
- 1/2 cup corn kernels (optional)
- 1/4 cup chopped cilantro (optional)
- 1/2 cup chipotle ranch dressing
Instructions
- In a bowl, whisk together olive oil, lime juice, chipotle chili powder, smoked paprika, garlic powder, onion powder, cumin, salt, and pepper.
- Coat the chicken breasts in the marinade. Cover and refrigerate for at least 20 minutes (or up to 2 hours for more flavor).
- Preheat your grill or grill pan to medium-high heat.
- Grill the marinated chicken breasts for 6-8 minutes per side, or until the internal temperature reaches 165°F (74°C).
- Remove from heat and let rest for 5 minutes before slicing into strips.
- Warm the tortillas in a dry skillet or microwave until pliable.
- Heat the black beans and rice if they are not already warm.
- Lay each tortilla flat and spread 1-2 tablespoons of chipotle ranch dressing in the center.
- Add a layer of rice, black beans, grilled chicken strips, shredded cheese, lettuce, tomatoes, and corn (if using).
- Sprinkle chopped cilantro on top for added freshness.
- Fold the sides of the tortilla inward, then roll it up tightly from the bottom to form a burrito.
- Serve immediately or lightly grill the wrapped burrito for a crispy exterior.