Perfect Homemade Stuffing Recipe – The Ultimate Side

perfect-homemade-stuffing-recipe

Is there any dish that whispers “home” quite like a classic stuffing? For many of us, the very aroma of onions and celery sautéing in butter instantly transports us to cherished holiday gatherings and the comforting warmth of family kitchens. That nostalgic feeling, however, often clashes with the stress of achieving the right texture and flavor balance. This recipe for the ultimate Perfect Homemade Stuffing changes everything. It delivers that soul-satisfying, nostalgic taste without any guesswork, ensuring your side dish becomes the star of the table.

What Is Perfect Homemade Stuffing

At its heart, Perfect Homemade Stuffing is a beautiful and simple dish built from dried bread cubes, aromatics, herbs, and rich broth. Unlike its boxed counterpart, this from-scratch version gives you complete control over the ingredients and, consequently, the final flavor and texture. You can choose a rustic, artisanal loaf for a sturdier bite or a soft white bread for a more delicate consistency. Furthermore, you can customize it endlessly with additions like sausage, apples, or nuts, making it uniquely yours every time. This versatility is precisely why it matters so much for your holiday feast or even a special Sunday dinner. It is the ultimate comfort food that complements your main course perfectly. Crafting this dish from scratch might seem daunting, but the process is incredibly straightforward and deeply rewarding. In fact, the method shares a similar hands-on, fulfilling approach to creating a show-stopping dessert like our ultimate chocolate cake. Ultimately, this recipe fits our blog’s tone because we believe the best food is made with intention, love, and a few pro tips to guarantee success. We focus on reliable, tested recipes that build your confidence in the kitchen, whether you are baking a cake or preparing the savory sides. For instance, getting your stuffing moistness just right requires a similar attention to detail as achieving the perfect bake on our classic vanilla cupcakes.

Why I Love This Recipe

This recipe for Perfect Homemade Stuffing holds a special place in my heart because it is the one my grandmother always made. I vividly remember standing on a stool next to her, carefully tearing the day-old bread into pieces as she chopped the celery. She taught me that the secret was not in fancy ingredients, but in patiently toasting the bread and sautéing the vegetables until they were just soft enough. Now, whenever I make it, the smell fills my kitchen and brings back those wonderful memories. It is my absolute mission to share that same feeling of tradition and culinary confidence with you, so you can create your own lasting food memories around the table.

Health and Nutrition

Why it’s good for your body

This Perfect Homemade Stuffing delivers a powerful nutritional punch. For instance, whole grain bread provides a fantastic source of dietary fiber. Consequently, this fiber actively supports healthy digestion and helps you feel full and satisfied. Additionally, the celery and onions contribute essential vitamins and antioxidants. These nutrients naturally combat inflammation and support your overall cellular health.

Furthermore, you control the sodium and fat content when you prepare this dish yourself. Unlike many store-bought versions, your Perfect Homemade Stuffing avoids unnecessary preservatives and hidden sugars. Moreover, herbs like sage and thyme do more than just add flavor; they also offer their own set of micronutrients and health-promoting properties. Therefore, every serving supports your well-being from the inside out.

Ultimately, this classic side dish becomes a wholesome addition to your meal. Enjoy your Perfect Homemade Stuffing knowing it fuels your body with quality ingredients.

How it fits in a healthy lifestyle

This stuffing fits beautifully into a balanced diet, especially when you pair it with lean proteins and plenty of vegetables. You can easily adapt the recipe to meet specific health goals, making it a versatile choice for any table. For a heart-healthy version, simply use a low-sodium broth and a whole grain bread. If you’re managing your protein intake, consider stirring in some cooked lentils for a plant-based boost.

Thinking about your overall wellness journey is key. For more inspiration on building a nourishing plate, explore our guide on creating a balanced diet. And if you’re looking for other dishes that complement this healthy approach, our collection of healthy side dishes offers plenty of delicious options. Enjoy it mindfully as part of a varied and colorful eating pattern.

Print
clock clock iconcutlery cutlery iconflag flag iconfolder folder iconinstagram instagram iconpinterest pinterest iconfacebook facebook iconprint print iconsquares squares iconheart heart iconheart solid heart solid icon

Perfect Homemade Stuffing


  • Author: Chef Emy

Description

A classic, savory stuffing with toasted bread, aromatic vegetables, and herbs, perfect for holiday meals or cozy dinners.
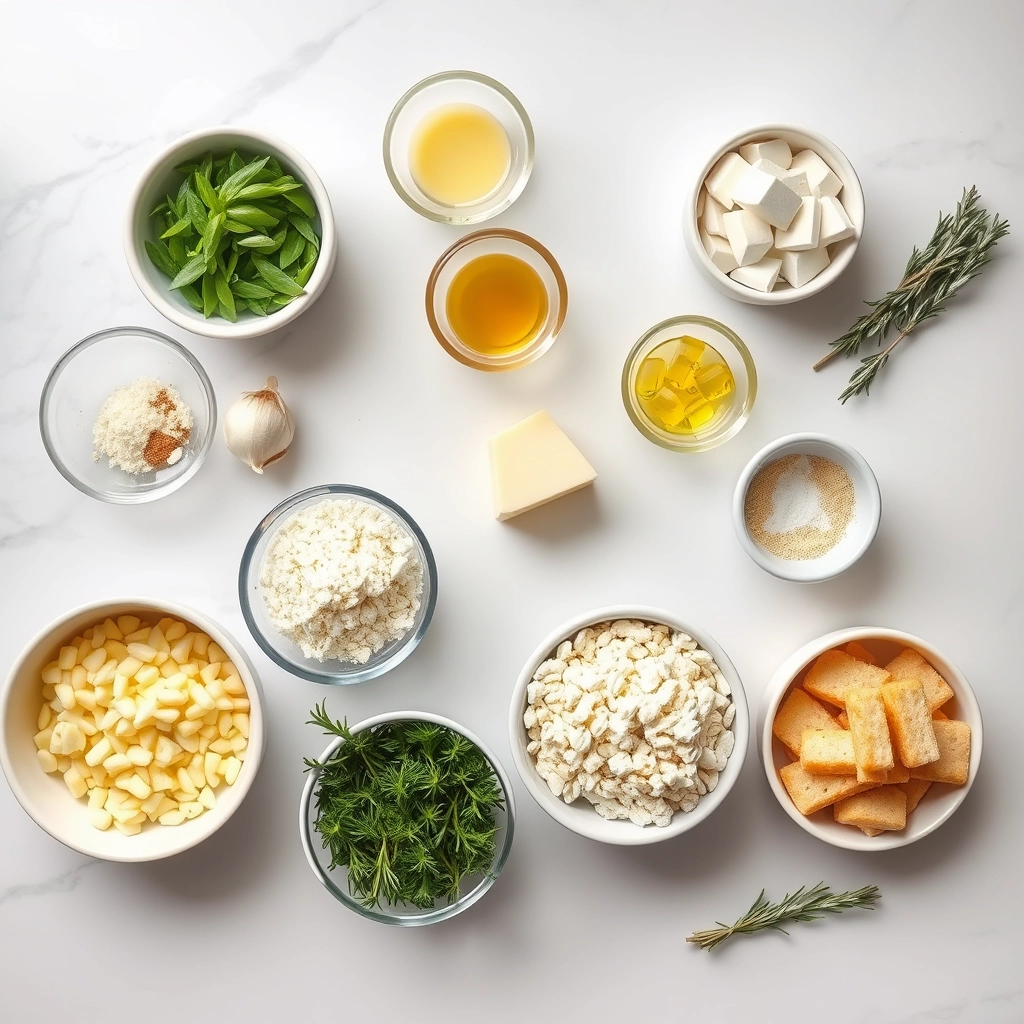
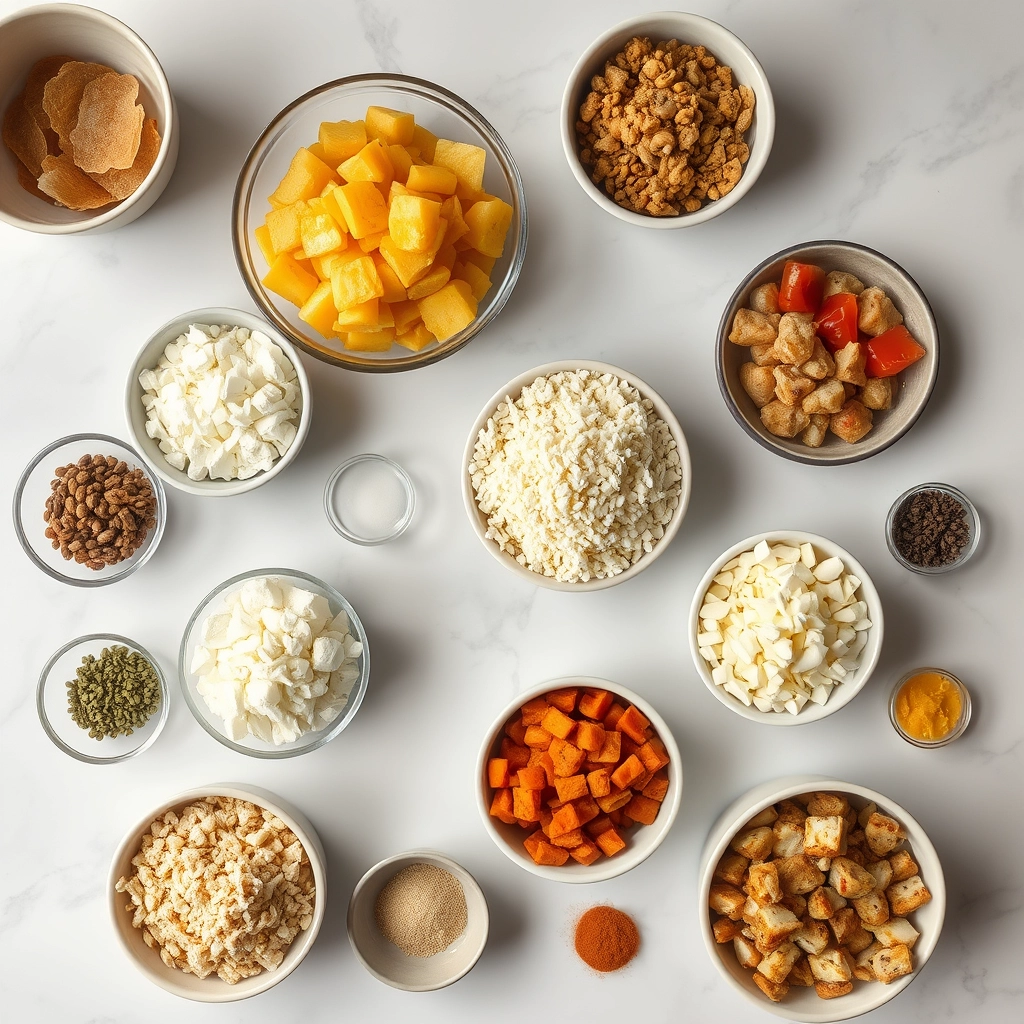

Ingredients

Scale

For the Crust:

  • 1 loaf day-old bread, cubed
  • 1/2 cup unsalted butter
  • 1 large onion, diced
  • 3 celery stalks, diced
  • 2 cloves garlic, minced
  • 2 tsp dried sage
  • 1 tsp dried thyme
  • 1/2 tsp black pepper
  • 1 tsp salt
  • 2 cups chicken or vegetable broth
  • 2 large eggs, beaten

Instructions

1. Prepare the Crust:

  1. Preheat oven to 350°F (175°C). Spread bread cubes on a baking sheet and toast for 10-15 minutes until lightly crisp.
  2. Melt butter in a large skillet over medium heat. Add onion and celery; cook until softened, about 5-7 minutes. Add garlic, sage, thyme, pepper, and salt; cook for 1 minute more.
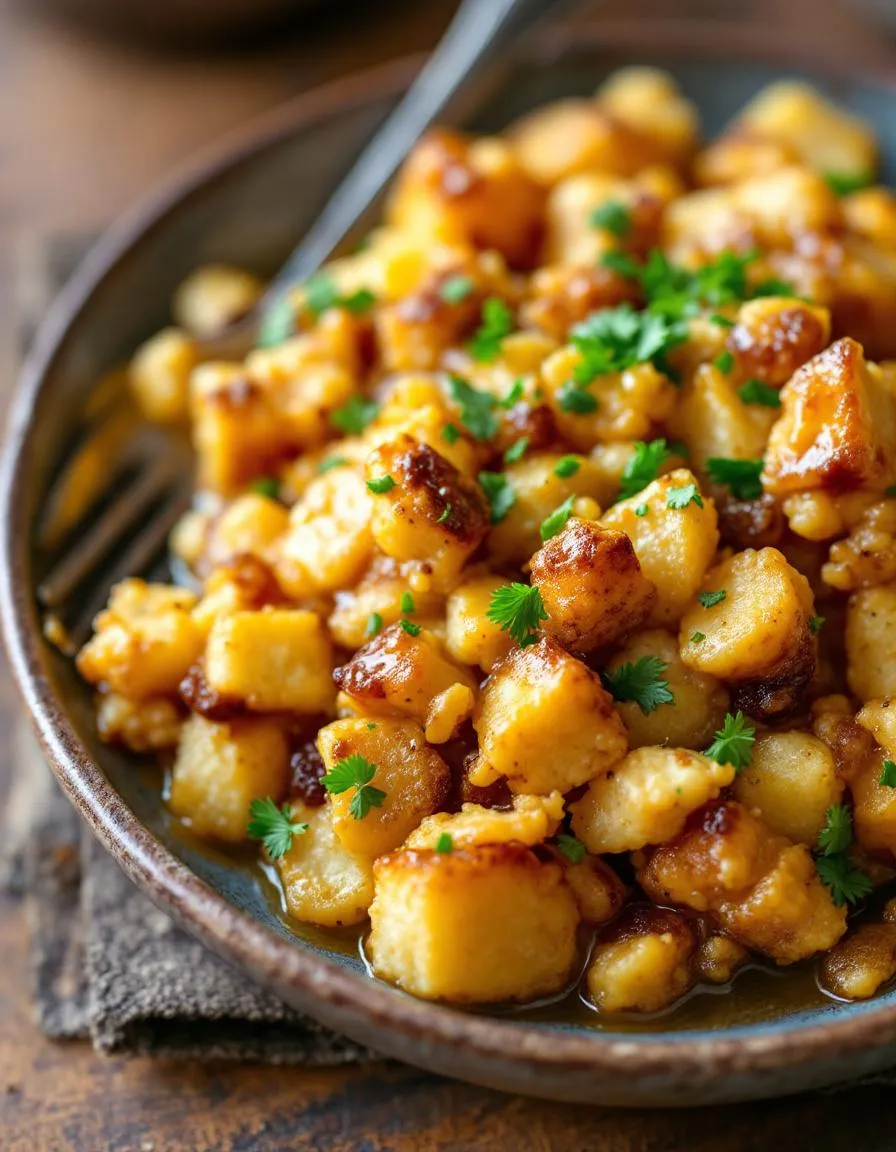
  3. In a large bowl, combine toasted bread cubes and vegetable mixture. Gradually pour in broth and beaten eggs, tossing gently until evenly moistened.
  4. Transfer to a greased baking dish, cover with foil, and bake for 25 minutes. Remove foil and bake for another 10-15 minutes until top is golden.

Notes

You can customize the seasonings to taste.

How to Prepare This Dish

Steps and time-saving tips

First, preheat your oven to 375°F and grab a large baking dish. Next, melt a generous amount of butter in a sizable skillet over medium heat. Then, toss in your diced onions and celery, sautéing them until they turn beautifully soft and translucent. This step builds a crucial flavor base for your Perfect Homemade Stuffing. Meanwhile, spread your cubed bread on a separate baking sheet and toast it lightly in the oven for about ten minutes; this prevents a soggy final result. In a large mixing bowl, gently combine the toasted bread cubes with your sautéed vegetables. Subsequently, pour in your broth gradually, using a fork to toss everything together until the liquid distributes evenly. Be careful not to over-mix, as you want to maintain some texture. Finally, transfer the mixture to your greased baking dish, cover it with foil, and bake for 30 minutes. For a crispy top, remove the foil and bake for another 15 minutes. A fantastic time-saving tip is to cube and dry your bread a day or two ahead, storing it in a bag on your counter. Additionally, you can chop all your vegetables the night before to make the assembly incredibly quick and simple.

Mistakes I’ve made and learned from

I have absolutely learned the hard way that using fresh, soft bread is the quickest path to a mushy, disappointing stuffing. My first attempt turned into a bread pudding consistency that nobody wanted. Now, I always ensure my bread is thoroughly dried or lightly toasted first, which makes all the difference. Another common error I made was over-packing the mixture into the baking dish. This created a dense, brick-like texture instead of the light, fluffy Perfect Homemade Stuffing we all crave. I learned to spoon it in gently and avoid pressing it down. Getting the broth ratio right was also a challenge; too little is dry, too much is soggy. I finally found that adding it slowly and letting the bread absorb it for a few minutes before baking is the secret. For more on balancing flavors and textures, my guide on creating the ultimate holiday side dives deeper. And if you’re worried about timing, my tips for preparing dishes in advance can help you master the big dinner logistics.

Cultural Connection and Variations

Where this recipe comes from

Every family seems to have its own cherished version of this classic dish. My grandmother always insisted that the secret to her Perfect Homemade Stuffing was toasting the bread cubes until they were golden brown. She would then fold in a generous amount of sage and thyme from her garden. This ritual marked the official start of the holiday season in our house. Furthermore, the dish itself has roots that stretch across the Atlantic. The British call it “forcemeat” or stuffing, while in Germany, a similar dish might include marjoram and liver. Similarly, in the southern United States, cooks often add oysters or cornbread for a distinctive regional twist. In France, they might use a baguette and chestnuts. Ultimately, this versatility is what makes the dish so special. Everyone claims their version is the best, and they are all correct. Consequently, creating your own Perfect Homemade Stuffing becomes a personal culinary signature.

How it fits in today’s cooking

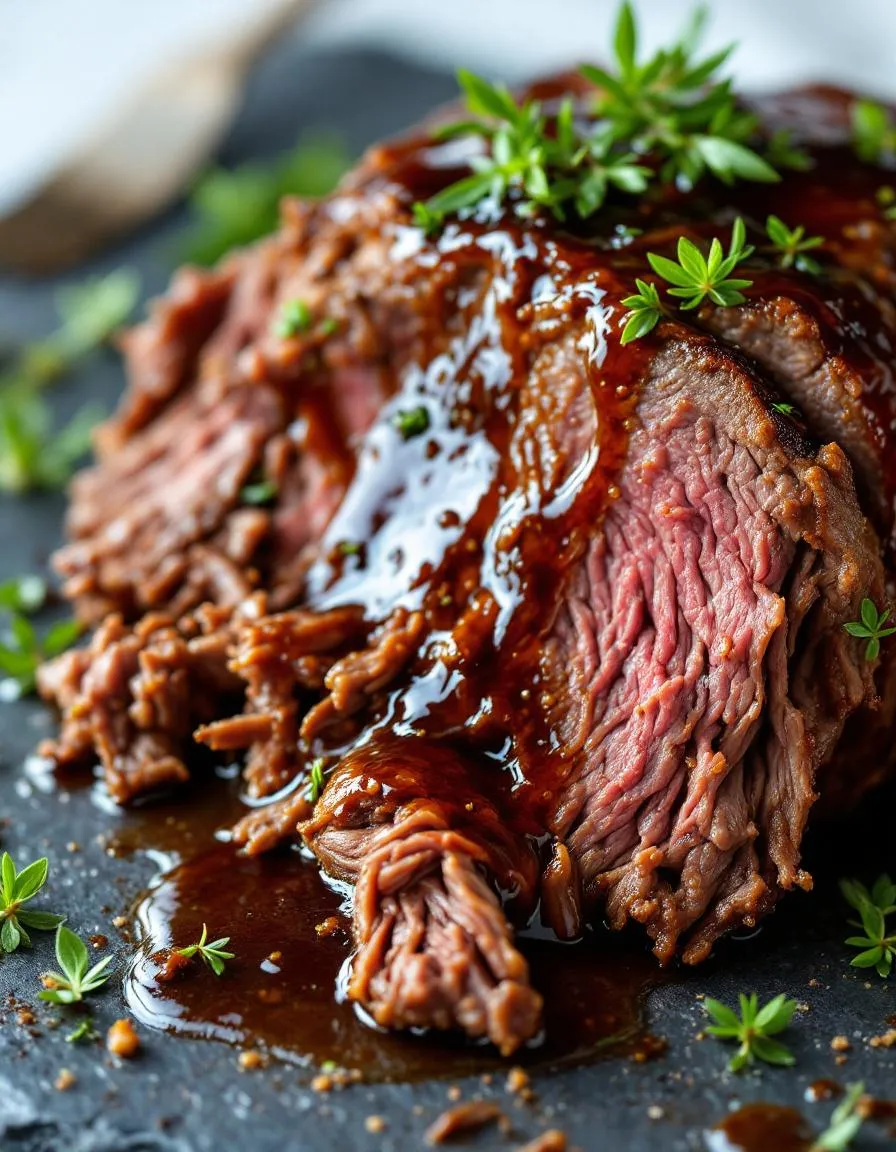
Thankfully, this beloved side dish has never fallen out of fashion. It remains the heart of the holiday table, evoking powerful feelings of nostalgia and comfort. Modern cooks, however, are brilliantly adapting the recipe for contemporary tastes and diets. For instance, many now use gluten-free bread or load it with wild mushrooms and leeks for a vegetarian feast. Meanwhile, others are incorporating it into their weekly meal prep, serving a smaller portion alongside a simple roast chicken for a cozy weeknight dinner. Its role has expanded far beyond a once-a-year treat. Additionally, its appeal lies in its simplicity and the way it makes a house smell absolutely incredible. Ultimately, whether you are making a traditional holiday spread or a comforting family meal, a great stuffing recipe is a cornerstone of home cooking. It pairs just as beautifully with a holiday turkey as it does with a new favorite, like a hearty beef stew, proving its timeless versatility.

Taste and Texture

What makes it delicious

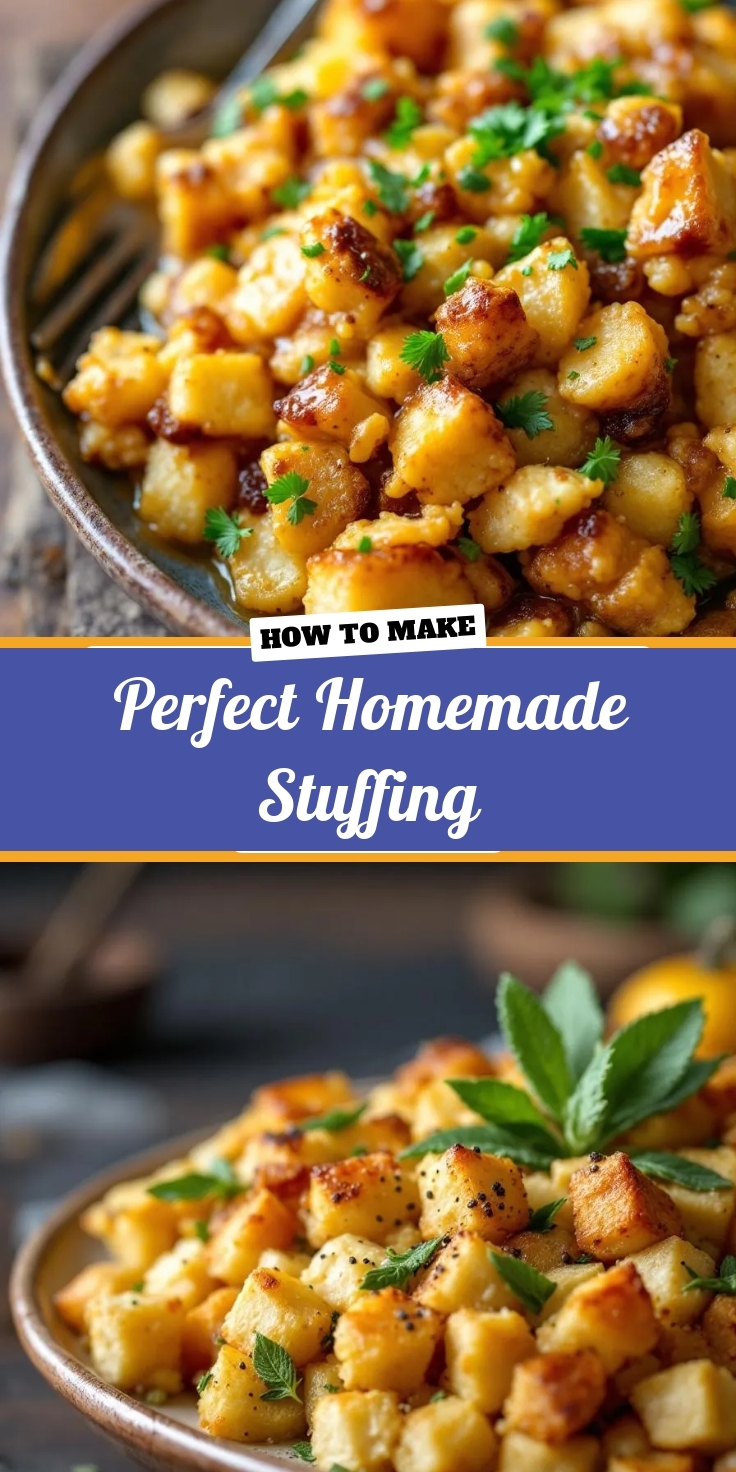
This Perfect Homemade Stuffing delivers a symphony of comforting textures and savory aromas. You first notice the soft, pillowy interior of the bread, which soaks up the rich broth and melted butter. Meanwhile, the top and edges bake into a delightfully crisp, golden-brown crust. Celery and onion provide a crucial savory foundation and a subtle, satisfying crunch in every bite. Fresh herbs like sage and thyme release their fragrant, earthy notes, making your entire kitchen smell incredible. Ultimately, this Perfect Homemade Stuffing is a masterclass in contrast, balancing chewy, soft, and crisp elements in one unforgettable side dish.

Boosting the flavor

For an even more memorable dish, consider a few simple ingredient swaps. Firstly, try using a crusty sourdough loaf instead of traditional bread for a tangy depth of flavor. You can also mix in chopped apples or dried cranberries for a sweet contrast that cuts through the savoriness. Secondly, do not hesitate to experiment with fresh herb combinations; rosemary and tarragon make brilliant additions. For a truly show-stopping finish, consider serving it with a side of our rich homemade gravy or a dollop of savory herb compound butter melting over the top. These small changes will elevate your holiday table with minimal extra effort.

Tips for Success

Best practices for results

First, always dry your bread thoroughly because this creates the ideal texture for your Perfect Homemade Stuffing. Furthermore, do not forget to generously season your broth mixture since the bread will absorb all that flavor. Additionally, gently combine the wet and dry ingredients to prevent a mushy final product. Finally, let the finished stuffing rest for a few minutes before serving so that everything sets perfectly.

Mistakes to avoid

A common mistake involves using bread that is too soft, which unfortunately results in a soggy texture. Instead, ensure your cubes are very dry and stale for the best absorption. Moreover, many people under-season their mixture, so always taste your broth before adding it. For more guidance on building flavor profiles, explore our guide on essential herbs and spices. Also, avoid over-mixing the stuffing once you add the liquid, as this can break down the bread. Consequently, for perfect doneness every time, check the internal temperature with a reliable thermometer like the one we recommend in our kitchen essentials review.

Serving and Pairing Suggestions

How to serve this dish

Present your Perfect Homemade Stuffing in a beautiful rustic casserole dish for a truly inviting tablescape. Alternatively, you can scoop individual portions onto each guest’s plate for a more formal presentation. Furthermore, garnish the top with a handful of freshly chopped parsley or thyme to add a vibrant pop of color. This dish truly shines during holiday feasts, but it also makes a comforting centerpiece for a cozy Sunday family dinner.

For a special brunch, consider serving a scoop of Perfect Homemade Stuffing alongside scrambled eggs and roasted tomatoes. Ultimately, its savory, herbaceous flavor profile makes it a versatile star for any occasion.

What goes well with it

A rich, savory gravy is the ultimate partner for this Perfect Homemade Stuffing. Its moisture and deep flavor beautifully complement the stuffing’s herby and textured crumb. Similarly, a bright and tangy cranberry sauce provides a delightful sweet and tart contrast that cuts through the richness.

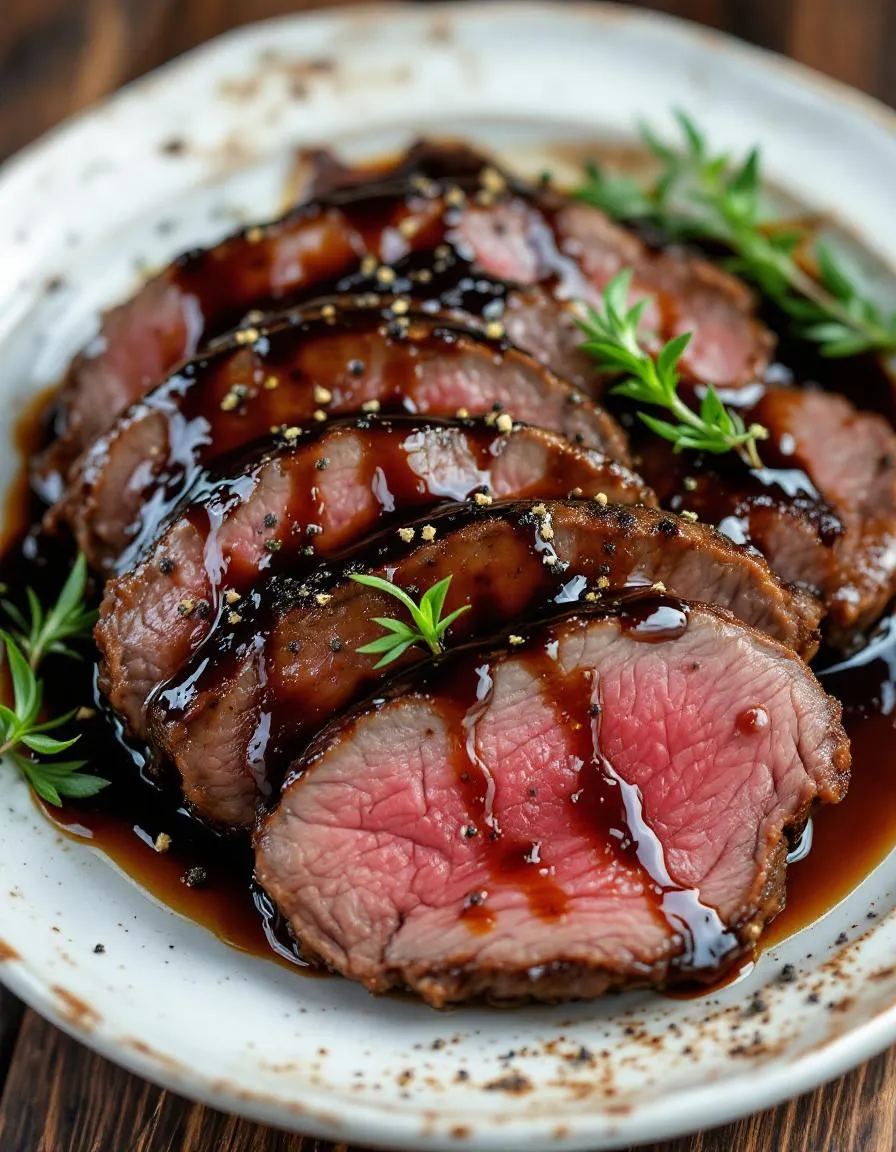
For your main protein, this stuffing pairs wonderfully with our succulent Herb Roasted Turkey Breast. Moreover, a crisp, chilled glass of Sauvignon Blanc or a dry Riesling offers a refreshing counterpoint to the dish’s hearty notes. Finally, complete your meal with a light, creamy dessert like our classic Vanilla Bean Panna Cotta for a perfect sweet finish.

What is the best bread to use for homemade stuffing?

A sturdy, day-old bread is best for Perfect Homemade Stuffing as it soaks up the broth without becoming mushy. Excellent choices include a French baguette, sourdough, or classic cornbread for a Southern twist. Using a variety of breads can add wonderful texture and flavor to your final dish.

Can you make stuffing ahead of time and reheat it?

Absolutely! You can assemble your Perfect Homemade Stuffing a day in advance, keep it covered in the refrigerator, and then bake it just before serving. To reheat, cover it with foil and warm it in a 350°F oven until heated through, which helps maintain its moisture and flavor.

How do you keep homemade stuffing from getting dry?

The key to moist stuffing is using enough broth and fat. Ensure your bread cubes are fully saturated with a mixture of stock and melted butter before baking. Covering the dish with foil for the first part of baking traps steam, which is crucial for preventing dry Perfect Homemade Stuffing.

What can I add to stuffing to make it more flavorful?

Boost flavor by sautéing aromatics like onions, celery, and garlic in butter first. Fresh herbs like sage, thyme, and rosemary are classic additions. For extra depth, consider adding cooked sausage, dried cranberries, or toasted nuts to your Perfect Homemade Stuffing recipe.

Best Slow Cooker Short Ribs – Fall-Off-The-Bone

best-slow-cooker-short-ribs

There is something truly magical about walking into a home filled with the rich, comforting aroma of a meal that has been simmering all day. It feels like a warm hug, a promise of something deeply satisfying waiting for you. Frankly, we all crave that kind of effortless, soul-warming comfort, especially on our busiest days. That is precisely why these SLOW COOKER SHORT RIBS have become my ultimate go-to. They deliver restaurant-quality, fall-off-the-bone tenderness without you having to slave away in the kitchen. This recipe transforms a humble cut of beef into an extraordinary, company-worthy feast with minimal effort, letting your crockpot do all the heavy lifting.

About This Recipe

So, what exactly are SLOW COOKER SHORT RIBS? Essentially, they are a magnificent dish featuring beef short ribs that cook low and slow in a savory braising liquid until they become incredibly tender. The connective tissue and fat slowly render down, consequently basting the meat from within and creating a succulent, flavorful experience. This cooking method matters immensely because it takes a tougher, more affordable cut of meat and transforms it into something luxurious and melt-in-your-mouth delicious. Furthermore, this approach to SLOW COOKER SHORT RIBS perfectly fits the tone of our blog, which champions achievable, flavor-forward recipes that make you feel like a kitchen hero.

We believe that incredible food should not be complicated. Therefore, this recipe provides that perfect set-it-and-forget-it convenience, allowing you to enjoy a fantastic dinner without the stress. For instance, you can easily prep everything in the morning and then come home to a ready-made masterpiece. This method is a game-changer for weeknight dinners and also ideal for casual weekend entertaining. If you enjoy this hands-off approach to cooking, you might also love our popular Slow Cooker Pulled Pork, which uses a similar low-and-slow technique for incredibly juicy results. Ultimately, mastering a dish like SLOW COOKER SHORT RIBS builds confidence in the kitchen and provides a reliable, impressive meal to add to your regular rotation. Moreover, the rich, savory flavors pair wonderfully with so many sides, especially a simple, creamy Garlic Mashed Potatoes recipe that soaks up every last drop of the incredible sauce.

Why I Love This Recipe

This recipe for SLOW COOKER SHORT RIBS holds a special place in my heart because it was the first truly impressive meal I ever made for my now-husband. I wanted to create something that felt fancy and indulgent but that I could actually pull off without a culinary degree. The slow cooker gave me that confidence. I remember the nervous excitement of layering the ingredients that morning and the pure triumph I felt hours later when the meat literally fell apart at the touch of a fork. Now, it is our celebratory dinner for every major life event, from promotions to anniversaries, because it always feels like a occasion. It is my ultimate proof that the most memorable meals are not just about the food, but about the joy and connection they create.

Health and Nutrition

Why it’s good for your body

Ultimately, slow cooker short ribs provide a fantastic source of high-quality protein, which is essential for building and repairing your muscles. Furthermore, this dish delivers a significant amount of collagen and gelatin from the long cooking process. Consequently, these compounds support joint health and may even improve skin elasticity. Additionally, the bone-in nature of the ribs releases valuable minerals like calcium and magnesium into the rich cooking liquid.

Moreover, you can easily pack your slow cooker short ribs with a variety of vegetables. For instance, adding carrots, onions, and celery boosts the fiber and vitamin content of your meal. Therefore, you create a well-rounded, nutrient-dense dinner in a single pot. Importantly, choosing a leaner cut and trimming visible fat beforehand makes this dish a healthier option. Finally, a well-prepared batch of slow cooker short ribs offers a deeply satisfying and nourishing experience for your whole body.

How it fits in a healthy lifestyle

This dish fits beautifully into a balanced eating plan. For anyone following a high-protein diet, these ribs are a perfect centerpiece. You can also easily make this recipe gluten-free by ensuring your broth and other sauces are certified gluten-free. Pair your short ribs with a light, crisp salad or a side of quinoa to create a complete and satisfying meal that fuels your body without weighing you down.

Planning meals like this ahead of time is a cornerstone of healthy eating. Consider preparing a large batch on a Sunday for easy lunches throughout the week. For more ideas on building a nutritious weekly menu, check out our guide on easy meal prep ideas. Remember, a healthy lifestyle is all about balance and enjoyment. If you’re looking for a lighter protein option to rotate into your diet, our grilled lemon herb chicken is another fantastic and flavorful choice.

Print
clock clock iconcutlery cutlery iconflag flag iconfolder folder iconinstagram instagram iconpinterest pinterest iconfacebook facebook iconprint print iconsquares squares iconheart heart iconheart solid heart solid icon

Slow Cooker Short Ribs


  • Author: Chef Emy

Description

Tender, fall-off-the-bone beef short ribs cooked low and slow in a rich, savory sauce.


Ingredients

Scale

For the Crust:

  • 3 lbs beef short ribs
  • 1 large onion, chopped
  • 4 cloves garlic, minced
  • 2 cups beef broth
  • 1/2 cup red wine
  • 2 tbsp tomato paste
  • 1 tbsp Worcestershire sauce
  • 1 tsp dried thyme
  • Salt and black pepper to taste
  • 2 tbsp cornstarch (optional, for thickening)

Instructions

1. Prepare the Crust:

  1. Season short ribs generously with salt and pepper.
  2. Place chopped onion and minced garlic in the bottom of the slow cooker.
  3. Arrange short ribs on top of the vegetables.
  4. In a bowl, whisk together beef broth, red wine, tomato paste, Worcestershire sauce, and thyme. Pour over the short ribs.
  5. Cover and cook on low for 8 hours, or until meat is very tender.
  6. Optional: For a thicker sauce, mix cornstarch with 2 tbsp water and stir into the slow cooker during the last 30 minutes of cooking.

Notes

You can customize the seasonings to taste.

How to Prepare This Dish

Steps and time-saving tips

First, pat your SLOW COOKER SHORT RIBS completely dry with paper towels; this crucial step guarantees a beautiful sear. Meanwhile, generously season all sides with salt and pepper. Next, heat a tablespoon of oil in a large skillet over medium-high heat. Carefully sear the ribs for a few minutes on each side until they develop a deep, brown crust; this builds a fantastic flavor foundation. After that, transfer the ribs to your slow cooker. Now, use the same skillet to sauté your chopped onions and garlic for just a minute until fragrant. Subsequently, deglaze the pan with your red wine, scraping up all those delicious browned bits. Then, pour this entire mixture over the ribs in the cooker. Simply add your remaining sauce ingredients like broth, tomato paste, and Worcestershire sauce, stirring everything together gently. Finally, set your slow cooker on low for 8 hours; the long, slow cook time is what makes these SLOW COOKER SHORT RIBS so incredibly tender. For a great time-saving tip, you can quickly sear the ribs the night before and store them in the fridge. Moreover, you can also whisk the sauce ingredients together ahead of time. Ultimately, you will have a magnificent, restaurant-quality meal with minimal active effort.

Mistakes I’ve made and learned from

I learned the importance of searing the hard way; I once skipped it to save ten minutes and ended up with pale, bland SLOW COOKER SHORT RIBS that lacked depth. Now, I never skip building that flavorful crust. Another common mistake I made was using lean cuts of meat, which simply don’t hold up to the long cooking process. Fortunately, I discovered that choosing the right cut is everything for tender results, a lesson I also applied when perfecting my Perfect Pot Roast. I also used to lift the lid constantly to check on progress, which let out precious heat and drastically increased the cooking time. I’ve since learned to trust the process and keep that lid sealed tight. Finally, I’ve found that balancing the sauce is key; a splash of vinegar at the end can brighten the entire dish, a trick I picked up from my journey with Hearty Beef Stew. These small fixes truly transform your results.

Cultural Connection and Variations

Where this recipe comes from

My grandmother’s kitchen always smelled of rich, savory braises, a tradition that our modern SLOW COOKER SHORT RIBS recipe lovingly continues. Originally, this dish finds its roots in various global cuisines that celebrate tough cuts of meat. For instance, Korean galbi jjim braises short ribs with soy and pear, while Italian brasato simmers them in red wine. Consequently, every culture that values nose-to-tail eating has its own beautiful version. Meanwhile, my family’s version, which we serve for every major gathering, leans heavily on red wine and aromatic herbs. We always argued over who got the marrow from the bone, the ultimate prize for any patient diner. Ultimately, this humble cut teaches us about resourcefulness and the magic of low, slow heat. Therefore, making SLOW COOKER SHORT RIBS feels like participating in a worldwide, timeless ritual of turning simple ingredients into something extraordinary.

How it fits in today’s cooking

This classic dish fits perfectly into our busy modern lives, especially since the slow cooker does most of the work. Furthermore, it remains a star of comfort food, providing a deeply satisfying meal after a long day. Many home cooks now adapt the recipe for their Instant Pot to save time, yet they still achieve that fall-off-the-bone tenderness. Moreover, it’s a fantastic make-ahead option for busy weeknights or a stress-free holiday centerpiece. For a complete comforting meal, I love to serve these short ribs alongside some perfect garlic mashed potatoes to soak up all that incredible sauce. Additionally, if you’re looking for the ideal sweet ending to this rich dinner, a slice of classic New York cheesecake truly makes the whole experience unforgettable. Ultimately, this dish proves that deep, traditional flavor absolutely has a place in today’s kitchen.

Taste and Texture

What makes it delicious

These Slow Cooker Short Ribs deliver a profoundly rich and savory experience. First, the aroma of garlic, red wine, and herbs will fill your kitchen, creating an incredibly fragrant promise of the meal to come. Ultimately, the meat itself becomes the star, offering a texture that is fall-apart tender and luxuriously juicy. Each bite of these Slow Cooker Short Ribs melts in your mouth, while the deeply developed, umami-packed sauce coats everything in a glossy, velvety embrace.

Boosting the flavor

For an extra layer of complexity, consider searing the short ribs until they develop a dark, caramelized crust before they go into the slow cooker. Furthermore, a finishing sprinkle of flaky sea salt or a dash of bright, chopped parsley right before serving can elevate the entire dish. Alternatively, a spoonful of our vibrant chimichurri sauce introduces a fantastic herby and acidic contrast that cuts through the richness beautifully. Finally, serving these ribs over a creamy base, like our creamy garlic mashed potatoes, soaks up every last drop of the incredible sauce.

Tips for Success

Best practices for results

First, always sear your meat thoroughly because this crucial step builds a rich flavor foundation for your SLOW COOKER SHORT RIBS. Furthermore, trim any large pieces of excess fat from the ribs to prevent your dish from becoming overly greasy. Meanwhile, arrange your vegetables in an even layer at the bottom of the pot so they can act as a natural rack for the meat. Finally, resist the urge to lift the lid during cooking, as this releases valuable heat and steam, significantly increasing the cooking time.

Mistakes to avoid

A common mistake is using a sauce that is too thin, which can result in a braising liquid that lacks body. For a richer, thicker sauce that clings to the meat, consider making a simple slurry with cornstarch at the end. Additionally, do not skip the searing step; otherwise, you will miss out on the deep, caramelized notes that define amazing SLOW COOKER SHORT RIBS. If you are unsure about how to properly sear meat, our guide on how to sear meat offers fantastic visual guidance. Moreover, avoid overcooking the ribs until they become mushy; instead, aim for meat that is fall-apart tender but still retains some texture. For more ideas on what to serve alongside this hearty dish, explore our list of perfect side dishes that complement rich mains beautifully.

Serving and Pairing Suggestions

How to serve this dish

For a truly stunning presentation, serve these slow cooker short ribs directly from the pot. Alternatively, transfer them to a large, elegant platter for family style dining. Generously spoon the rich, glossy cooking liquid over the top. Then, finish with a bright sprinkle of fresh chopped parsley or chives. This touch of green adds a beautiful color contrast. These ribs make a fantastic centerpiece for a holiday gathering or a special weekend dinner. Ultimately, their fall-off-the-bone tenderness and deep flavor always impress guests.

What goes well with it

First, you absolutely need something to soak up the incredible sauce. We highly recommend serving these slow cooker short ribs over a bed of our perfect creamy garlic mashed potatoes. The creamy texture beautifully balances the rich, savory meat. Furthermore, a crisp, acidic side cuts through the richness. A simple arugula salad with lemon vinaigrette provides that perfect fresh crunch. Finally, a bold red wine like a Cabernet Sauvignon or Malbec makes an excellent drink pairing. Its robust character stands up to the intense flavor of the short ribs without overpowering them.

How long does it take to cook short ribs in a slow cooker?

For the most tender and fall-off-the-bone results, cook your SLOW COOKER SHORT RIBS on the LOW setting for 7 to 9 hours. Cooking on HIGH is possible and will take about 4 to 5 hours, but the low and slow method yields a more succulent and flavorful final dish.

Do you have to brown short ribs before slow cooking?

While not strictly mandatory, browning the short ribs in a hot skillet before adding them to the slow cooker is highly recommended. This crucial step, known as the Maillard reaction, creates a deep, rich flavor foundation and a more appealing color that significantly enhances the overall taste of your SLOW COOKER SHORT RIBS.

What is the best liquid to cook short ribs in?

A combination of beef broth and red wine, such as a Cabernet Sauvignon or Merlot, creates an excellent braising liquid. The broth provides a savory base while the wine adds complexity and acidity that tenderizes the meat and balances the richness of the finished SLOW COOKER SHORT RIBS.

Why are my slow cooker short ribs tough?

Tough short ribs are almost always a sign of undercooking. This cut is full of connective tissue that requires a long, slow cooking time to break down and become tender. If your ribs are tough, simply continue cooking them on low until the meat easily shreds with a fork.

Creamy Chicken and Mushroom Soup – Easy Recipe

creamy-chicken-mushroom-soup

There is something profoundly comforting about a bowl of homemade soup, especially when the weather turns chilly. Imagine, if you will, the rich, savory aroma of sautéed mushrooms and tender chicken simmering in a velvety, herb-infused broth. This feeling of warmth and contentment is exactly what you get with a classic creamy chicken and mushroom soup. It is a hug in a bowl, a simple yet deeply satisfying meal that transforms basic ingredients into something truly magical. Furthermore, it promises to soothe your soul and delight your taste buds with every single spoonful.

About Creamy Chicken and Mushroom Soup

This creamy chicken and mushroom soup is the ultimate comfort food. Essentially, it combines juicy, succulent chicken with earthy, savory mushrooms in a luxuriously smooth and creamy base. The beauty of this dish lies in its incredible depth of flavor, which comes from slowly building layers with ingredients like garlic, thyme, and a good-quality stock. Consequently, every spoonful delivers a complex and hearty experience that far surpasses anything you can find in a can. Moreover, it is a wonderfully versatile recipe that you can easily adapt based on what you have in your pantry, making it a practical choice for any night of the week.

This particular recipe matters because it proves that creating a restaurant-quality meal at home is not only possible but also surprisingly simple. We believe that great food should be accessible to everyone, which is why our recipes, like our popular One Pan Lemon Herb Chicken and Veggies, focus on clear instructions and achievable results. This creamy chicken and mushroom soup perfectly fits our blog’s tone of approachable, family-friendly cooking that never sacrifices flavor. It is a nourishing, one-pot wonder that brings everyone to the table. Additionally, a warm bowl of this soup pairs wonderfully with a slice of homemade bread for the perfect cozy meal, much like our classic Ultimate Banana Bread does for a sweet treat.

Why I Love This Recipe

This creamy chicken and mushroom soup holds a special place in my heart because it was my grandmother’s go-to remedy for everything from a rainy day to a case of the sniffles. I vividly remember standing on a stool in her kitchen, watching her stir the big pot, and the way the entire house would smell like comfort. She taught me that the key was patience, allowing the mushrooms to release their full flavor and the soup to simmer until it reached perfect harmony. Now, whenever I make it for my own family, that same sense of warmth and well-being fills our home, creating new memories around the same timeless recipe.

Health and Nutrition

Why it’s good for your body

This creamy chicken and mushroom soup truly nourishes your body from the inside out. First, the lean chicken breast provides a fantastic source of high-quality protein. Consequently, this protein supports muscle repair and keeps you feeling full and satisfied long after your meal. Moreover, the mushrooms contribute a powerful array of nutrients; they are one of the few natural food sources of vitamin D, which is crucial for immune function and bone health.

Additionally, this creamy chicken and mushroom soup offers a generous dose of selenium and B vitamins from its fungi. These nutrients collectively help your body convert food into usable energy. Furthermore, if you use low-sodium broth, this dish becomes a heart-healthy choice that manages blood pressure. Ultimately, the combination of protein, vitamins, and minerals creates a well-rounded meal. Therefore, enjoying a bowl of this creamy chicken and mushroom soup does more than just warm you up; it actively fuels your body’s daily needs.

How it fits in a healthy lifestyle

This creamy chicken and mushroom soup fits perfectly into a balanced eating plan. It acts as a fantastic high-protein option for lunch that prevents the common afternoon energy slump. For anyone following a gluten-free diet, this soup is naturally compliant, especially when you thicken it with cornstarch or a gluten-free flour blend instead of regular all-purpose flour.

You can also easily tailor this dish to support specific health goals. For instance, using a light coconut milk or Greek yogurt base instead of heavy cream creates a lighter, yet still luxuriously creamy, version. Pairing a bowl with a simple side salad makes for a complete and satisfying meal that covers all your nutritional bases. If you are looking for more ways to incorporate healthy proteins into your week, explore our guide to easy meal prep ideas. For another comforting and nutritious bowl, you will love our hearty vegetable lentil soup recipe next.

Print
clock clock iconcutlery cutlery iconflag flag iconfolder folder iconinstagram instagram iconpinterest pinterest iconfacebook facebook iconprint print iconsquares squares iconheart heart iconheart solid heart solid icon

Creamy Chicken and Mushroom Soup


  • Author: Chef Emy

Description

A rich and comforting soup with tender chicken, earthy mushrooms, and a velvety cream base.


Ingredients

Scale

For the Crust:

  • 2 tbsp olive oil
  • 1 lb boneless chicken breast, diced
  • 8 oz cremini mushrooms, sliced
  • 1 medium onion, chopped
  • 2 cloves garlic, minced
  • 4 cups chicken broth
  • 1 cup heavy cream
  • 1 tsp dried thyme
  • Salt and pepper to taste
  • 2 tbsp fresh parsley, chopped

Instructions

1. Prepare the Crust:

  1. Heat olive oil in a large pot over medium heat. Add chicken and cook until no longer pink, about 5-7 minutes. Remove and set aside.
  2. In the same pot, add mushrooms and onion. Sauté until softened, about 5 minutes. Add garlic and cook for 1 minute until fragrant.
  3. Pour in chicken broth and bring to a simmer. Return chicken to the pot, add thyme, salt, and pepper. Simmer for 10 minutes.
  4. Stir in heavy cream and heat through without boiling. Garnish with fresh parsley before serving.

Notes

You can customize the seasonings to taste.

How to Prepare This Dish

Steps and time-saving tips

First, gather all your ingredients. This simple step saves you from frantic searches later. Next, heat a large pot or Dutch oven over medium heat. Add your butter and olive oil, letting them melt together. Then, add the diced onions and minced garlic, sautéing until they become fragrant and translucent. Now, introduce your sliced mushrooms. Cook them until they release their liquid and turn a beautiful golden brown. After that, sprinkle the flour over the mushroom mixture. Stir constantly for about one minute to cook off the raw flour taste. Gradually pour in your chicken broth, whisking vigorously to prevent any lumps from forming. This is the base of your incredible CREAMY CHICKEN AND MUSHROOM SOUP. Bring the mixture to a gentle simmer. Finally, stir in the shredded cooked chicken, heavy cream, and fresh thyme. Let everything heat through gently; do not let it boil. Season generously with salt and black pepper. For a time-saving tip, use a store-bought rotisserie chicken. Also, you can slice your mushrooms in a food processor to cut your prep time in half.

Mistakes I’ve made and learned from

I have absolutely curdled this soup more times than I care to admit by rushing the final step. Adding cold cream directly into a boiling hot broth is a surefire way to ruin your smooth texture. Now, I always temper the cream first. I ladle a small amount of the hot soup into a bowl with the cream, whisk it together, and then slowly stir it back into the pot. This gentle introduction prevents curdling every single time. Another mistake was using bland, under-seasoned broth. A truly great CREAMY CHICKEN AND MUSHROOM SOUP relies on a deeply flavorful base. I learned to taste and adjust my seasoning at the very end, after all the components have melded together. For more on building flavor, my guide on choosing the right herbs was a game-changer. And if you’re worried about texture, my tips for avoiding curdled sauces will give you the confidence to create a perfectly silky soup.

Cultural Connection and Variations

Where this recipe comes from

My grandmother always called this soup “a hug in a bowl,” and for good reason. She would make her legendary CREAMY CHICKEN AND MUSHROOM SOUP every time the first chill of autumn arrived. Interestingly, her version used morel mushrooms foraged from the woods behind her house, a tradition she brought with her from her family in rural Poland. Consequently, the base was always a rich, homemade chicken stock, never from a box.

Around the world, cooks put their own spin on this classic. In France, they might enrich it with crème fraîche and tarragon, creating a velvety, elegant starter. Meanwhile, across the American Midwest, many families add wild rice for extra heartiness, turning it into a full meal. Some Scandinavian versions even incorporate a splash of dill-infused aquavit for a unique, warming kick. Ultimately, every culture embraces the comforting combination of tender chicken and earthy mushrooms.

My own recipe honors my grandmother’s foundation but incorporates easier-to-find cremini mushrooms. This CREAMY CHICKEN AND MUSHROOM SOUP still carries the soul of her cooking, bridging generations with every single spoonful.

How it fits in today’s cooking

This soup absolutely thrives in modern kitchens because it delivers deep comfort with straightforward ingredients. Furthermore, it fits perfectly into our current love for cozy, seasonal meals that we can meal prep for busy weeks. Many home cooks now adapt it for their Instant Pot, significantly cutting down the simmering time without sacrificing any flavor.

You can easily find a place for it in your weekly rotation, especially alongside other simple, satisfying dishes. For instance, it pairs wonderfully with a crisp, green salad for a light yet complete dinner. Similarly, a warm, buttery roll is its perfect companion for a truly comforting experience. This versatility makes it a timeless favorite.

It also shines as the star of a holiday gathering or a quiet weeknight. Ultimately, a bowl of this soup provides a moment of warmth and nostalgia, which we all crave. For another comforting classic that uses similar skills, try our popular Easy Chicken Pot Pie. And if you are looking for more cozy dinner inspiration, our complete guide to Comfort Food Dinners has plenty of ideas.

Taste and Texture

What makes it delicious

This CREAMY CHICKEN AND MUSHROOM SOUP delivers a deeply savory and earthy flavor profile. Earthy mushrooms and aromatic thyme create a fragrant, comforting aroma that fills your kitchen. Each spoonful feels luxuriously velvety and rich against your palate. Tender, shredded chicken adds a satisfying, hearty chew to the smooth backdrop. Ultimately, the creamy base perfectly balances the savory umami notes from the mushrooms. You will love the cozy, luxurious experience of this CREAMY CHICKEN AND MUSHROOM SOUP.

Boosting the flavor

For an even more robust flavor, consider a few simple upgrades. First, a splash of dry white wine deglazes the pan and introduces a wonderful acidity. Alternatively, a dollop of homemade pesto swirled in at the end adds a bright, herby kick. Furthermore, crispy toppings like crumbled bacon or garlicky croutons provide a fantastic contrasting crunch. A final sprinkle of fresh parsley or chives lifts the entire dish with a pop of color and freshness. For a side that soaks up every last drop, try serving it with a slice of our rustic no-knead bread.

Tips for Success

Best practices for results

Always pat your chicken thighs dry with a paper towel before seasoning them; this step ensures you get a beautiful, golden sear. Furthermore, take the time to properly sauté your mushrooms until they release all their moisture and turn a deep brown color, as this builds a rich flavor base. For the creamiest texture, gradually whisk the half-and-half into your roux over medium-low heat to prevent any curdling. Ultimately, let your finished CREAMY CHICKEN AND MUSHROOM SOUP rest for about ten minutes before serving, which allows the flavors to fully meld together beautifully.

Mistakes to avoid

A common mistake is rushing the initial steps and crowding the pan with chicken. Consequently, the meat steams instead of sears, so always cook in batches to guarantee that perfect golden-brown color. Additionally, avoid adding your liquid all at once to the hot roux, as this can sometimes lead to a lumpy sauce; instead, slowly pour it in while whisking constantly. For more guidance on getting your soup bases just right, check out our guide on how to fix a lumpy gravy, as the technique is very similar. Finally, do not let your soup reach a rolling boil after adding the dairy, because this can cause it to separate and become grainy. If you are looking for a great way to use up any leftover chicken, our easy chicken pot pie is another fantastic comfort food recipe to try next.

Serving and Pairing Suggestions

How to serve this dish

Ladle this CREAMY CHICKEN AND MUSHROOM SOUP into deep, pre-warmed bowls for a cozy experience. Consequently, this simple step keeps every spoonful hot and comforting. For a beautiful finish, garnish each serving with a sprinkle of fresh parsley and a generous crack of black pepper. Moreover, a final drizzle of cream or a dollop of sour cream adds a lovely visual contrast. Serve this CREAMY CHICKEN AND MUSHROOM SOUP as the star of a casual weeknight dinner or as an elegant starter for a holiday feast. Ultimately, its rich aroma and inviting appearance promise to delight your guests.

What goes well with it

For a truly satisfying meal, pair this soup with a slice of crusty artisan bread. Specifically, our easy no knead bread recipe offers the perfect texture for dipping and soaking up every last bit of the creamy broth. Additionally, a crisp, simple side salad provides a refreshing counterpoint to the soup’s richness. Furthermore, a glass of chilled Chardonnay or a light Pinot Noir beautifully complements the earthy mushroom and savory chicken flavors. For a non-alcoholic option, consider sparkling apple cider; its subtle sweetness wonderfully balances the dish’s creamy, umami notes.

What is the best mushroom to use for creamy chicken and mushroom soup?

Cremini or baby bella mushrooms are the best choice for a rich, earthy flavor in your creamy chicken and mushroom soup. While white button mushrooms work in a pinch, cremini mushrooms have a deeper, more robust taste that holds up beautifully against the creamy broth. You can also use a mix of wild mushrooms like shiitake for an even more complex flavor profile.

Can I make creamy chicken and mushroom soup in a slow cooker?

Absolutely! For a slow cooker version, simply add all ingredients except the dairy to the crockpot and cook on low for 6-7 hours. Stir in the cream or milk during the last 30 minutes of cooking to prevent curdling. This method makes the chicken incredibly tender and allows the flavors to meld together perfectly for a comforting creamy chicken and mushroom soup.

How can I thicken my chicken and mushroom soup without flour?

You can create a creamy consistency without flour by using a cornstarch slurry (mix 2 tablespoons cornstarch with ¼ cup cold water) stirred in at the end of cooking. Alternatively, blend a portion of the cooked soup, including some mushrooms, until smooth and stir it back into the pot. This puree method adds body and intensifies the mushroom flavor in your creamy chicken and mushroom soup.

How long does homemade creamy chicken and mushroom soup last in the fridge?

Properly stored in an airtight container, your homemade soup will stay fresh in the refrigerator for 3 to 4 days. The creamy base may separate slightly upon reheating, so gently warm it on the stove over low heat while stirring frequently. For best results, avoid boiling the soup when reheating to maintain its smooth, creamy texture.

Ultimate Stout Braised Beef Pot Pie Recipe

ultimate-stout-braised-beef-pot-pie

There is something deeply comforting about a classic pot pie, but let us be honest, sometimes we crave a version that truly stands apart. Imagine tender beef, slow-braised in a rich, dark stout until it practically melts, all enveloped in a flaky, golden pastry crust. This Stout Braised Beef Pot Pie is that dish. It transforms a humble comfort food into a show-stopping centerpiece, perfect for a cozy family dinner or impressing guests on a chilly evening. Furthermore, it fills your kitchen with an incredible aroma that promises a meal you will not soon forget.

About This Recipe

This Stout Braised Beef Pot Pie is not your average weeknight dinner. Instead, it is a culinary project that yields incredible rewards. The process begins with searing chunks of beef to create a flavorful foundation. Next, we deglaze the pot with a robust stout, which adds a complex, malty depth that you simply cannot achieve with other liquids. The beer braises the meat for hours, resulting in an exceptionally tender and flavorful filling. Subsequently, we combine this rich beef with classic vegetables like carrots, peas, and onions, all swimming in a luxuriously thick gravy.

This recipe matters because it takes a beloved comfort food and elevates it to a gourmet experience without being overly complicated. Moreover, it perfectly fits the tone of our blog, which celebrates from-scratch cooking that feels both special and approachable. If you enjoy the process of building deep flavors, you will appreciate this method. For instance, the slow braise is key to developing the rich taste profile. Additionally, the homemade crust makes all the difference, providing a buttery, flaky contrast to the savory filling. Ultimately, this dish is a celebration of patience and good ingredients, much like our favorite sourdough discard recipes that transform something simple into something spectacular.

While this meal is hearty on its own, it pairs beautifully with a simple side. A light, crisp salad is the perfect accompaniment to balance the richness of the pie. For inspiration on a fantastic pairing, check out our guide to crafting the perfect Classic Caesar Salad. This combination ensures a well-rounded and utterly satisfying dining experience that everyone will love.

Why I Love This Recipe

I love this Stout Braised Beef Pot Pie because it reminds me of cool autumn evenings gathered around the table with my family. The long, slow braise fills the entire house with a warm, inviting scent that builds anticipation for the meal to come. Furthermore, I find the process of making the pastry from scratch incredibly therapeutic. There is a genuine sense of accomplishment when you pull that golden-brown crust out of the oven, knowing you created something truly magnificent from a few simple ingredients. Ultimately, this dish represents more than just food. It is about creating lasting memories and sharing the profound comfort of a meal made with care.

Health and Nutrition

Why it’s good for your body

This Stout Braised Beef Pot Pie delivers a powerful nutritional punch. First, the beef chuck provides a fantastic source of high-quality protein, which is essential for building muscle and keeping you full. Additionally, this protein supports tissue repair and a healthy metabolism throughout your day.

Furthermore, the vegetables hidden inside create a well-rounded meal. Carrots contribute beta-carotene for excellent eye health, while peas add fiber and essential vitamins. Meanwhile, the onions and garlic offer natural anti-inflammatory properties that support your immune system.

Moreover, cooking with stout beer introduces a unique benefit. Importantly, dark stout contains antioxidants from the barley and hops, which can help combat oxidative stress. Consequently, enjoying this Stout Braised Beef Pot Pie means you are treating your body to a complex array of nutrients. Finally, the slow-cooking process tenderizes the meat and allows the flavors to meld, making every bite both delicious and nourishing.

How it fits in a healthy lifestyle

You can absolutely enjoy this hearty Stout Braised Beef Pot Pie as part of a balanced diet. Think of it as a complete meal packed with protein, vegetables, and complex carbohydrates that provide sustained energy. For those focused on muscle building or recovery, its high protein content makes it an ideal post-workout meal. If you are managing your carb intake, you can easily adapt the recipe by using a gluten-free pastry for the crust.

Balance is key, so pair a serving with a light side salad for added freshness and fiber. This approach fits perfectly into a lifestyle that values wholesome, satisfying meals without deprivation. Cooking it at home allows you to control the sodium and quality of ingredients, making it a smarter choice than many store-bought alternatives. For more ideas on incorporating balanced meals into your routine, explore our guide on easy meal prep for beginners.

Print
clock clock iconcutlery cutlery iconflag flag iconfolder folder iconinstagram instagram iconpinterest pinterest iconfacebook facebook iconprint print iconsquares squares iconheart heart iconheart solid heart solid icon

Stout Braised Beef Pot Pie


  • Author: Chef Emy

Description

A rich and hearty pot pie featuring tender stout-braised beef and vegetables in a savory gravy, topped with a flaky pastry crust.


Ingredients

Scale

For the Crust:

  • 2 lbs beef chuck, cubed
  • 1 bottle stout beer
  • 2 cups beef broth
  • 1 large onion, diced
  • 2 carrots, diced
  • 2 celery stalks, diced
  • 3 cloves garlic, minced
  • 2 tbsp tomato paste
  • 2 tbsp all-purpose flour
  • 2 tbsp olive oil
  • 1 tsp thyme
  • 1 sheet puff pastry, thawed
  • 1 egg, beaten (for egg wash)
  • Salt and pepper to taste

Instructions

1. Prepare the Crust:

  1. Preheat oven to 350°F. Heat olive oil in a Dutch oven and brown beef cubes on all sides. Remove and set aside.
  2. Sauté onion, carrots, and celery until softened. Add garlic and tomato paste; cook for 1 minute. Stir in flour and cook another minute.
  3. Return beef to pot. Pour in stout and beef broth. Add thyme, salt, and pepper. Bring to a simmer, cover, and braise in oven for 2 hours until beef is tender.
  4. Increase oven to 400°F. Transfer beef and vegetables to a pie dish. Roll out puff pastry to cover dish, crimp edges, and brush with egg wash. Cut slits in top for steam.
  5. Bake for 25-30 minutes until pastry is golden and filling is bubbly. Let rest 10 minutes before serving.

Notes

You can customize the seasonings to taste.

How to Prepare This Dish

Steps and time-saving tips

First, pat your beef chunks completely dry with paper towels. This crucial step guarantees a beautiful, deep sear instead of a steam. Next, heat a heavy Dutch oven over medium-high heat and sear the meat in batches. Do not crowd the pan. Meanwhile, you can chop your vegetables. After you remove the beef, sauté the onions, carrots, and celery right in those flavorful browned bits. Then, simply stir in the tomato paste and let it cook for a minute. Now, pour in the stout and beef broth, and finally, return the seared beef to the pot. Bring everything to a gentle simmer, cover it, and let your oven do the work for a few hours. Honestly, the slow braising is the easiest part. For a major time-saver, use store-bought puff pastry for the top. Just brush it with an egg wash for that gorgeous, golden finish. Your kitchen will smell absolutely incredible.

Mistakes I’ve made and learned from

I have definitely learned a few lessons the hard way with this Stout Braised Beef Pot Pie. My biggest mistake was rushing the sear on the beef. I added too much to the pot at once, which dropped the pan temperature and made the meat steam instead of developing that rich, caramelized crust. Now I sear in small, patient batches for the best flavor. Another common issue I faced was a soggy bottom crust, which was a total heartbreaker after all that work. I finally solved this by ensuring my filling was completely cool before I assembled the pie. This tip was a game-changer I picked up from my deep dive into perfecting pie crust techniques. Also, do not skip venting the top pastry. I once created a volcanic eruption of filling because I forgot to cut slits, which is a key part of handling savory pastry correctly. Learn from my mess.

Cultural Connection and Variations

Where this recipe comes from

This Stout Braised Beef Pot Pie tells a story of resourcefulness and cold weather cooking. Essentially, it combines two classic traditions: the rich, slow-cooked stews of Ireland and the humble, pastry-topped pies of Britain. Families would often use tougher cuts of meat, braising them for hours in dark stout to achieve incredible tenderness. The beer not only tenderizes the beef but also adds a deep, malty complexity that water or broth simply cannot provide.

Different regions put their own spin on the concept. In some parts of France, for instance, cooks might use a red wine instead of stout and add mushrooms. Meanwhile, an American Midwest version could feature a flaky biscuit topping rather than a full pastry crust. My own family always makes our Stout Braised Beef Pot Pie with a hint of thyme and a extra handful of peas, a small tweak that makes it uniquely ours.

This dish truly shines during the colder months. It transforms a simple supper into a celebratory meal, perfect for gathering everyone around the table. Ultimately, every family seems to have their own cherished method for building this comforting masterpiece.

How it fits in today’s cooking

This classic dish absolutely holds its place in modern kitchens. Today, we appreciate it for its incredible make-ahead potential and its powerful comfort food status. Furthermore, it fits perfectly into our routines, whether we need a spectacular Sunday dinner or a cozy weeknight meal.

Many contemporary cooks cleverly adapt the recipe for convenience. For example, they might use a pre-made pie crust or even prepare the filling in a slow cooker. This dish also pairs wonderfully with other hearty favorites. Personally, I love serving a slice alongside a simple easy side salad to cut through the richness.

It remains a star of holiday gatherings and seasonal feasts, especially in the fall and winter. Consequently, its heartwarming qualities make it a timeless favorite. For a sweet ending to such a robust meal, a decadent chocolate dessert always completes the experience on a high note.

Taste and Texture

What makes it delicious

This Stout Braised Beef Pot Pie delivers a deeply savory and complex flavor profile. Initially, you notice the rich, malty notes from the stout beer, which meld beautifully with the tender, shredded beef. Meanwhile, the vegetables provide a sweet and earthy counterpoint, creating a perfectly balanced filling. The flaky, buttery pastry crust offers a delightful textural contrast to the hearty, velvety stew beneath it. Each forkful of this Stout Braised Beef Pot Pie is a warm, comforting, and utterly satisfying experience.

Boosting the flavor

For an extra layer of savory depth, stir a tablespoon of tomato paste into the filling as you cook. Additionally, a splash of Worcestershire sauce will amplify the umami character beautifully. Consider topping your finished pie with a sprinkle of fresh thyme or a handful of sharp cheddar cheese for a burst of freshness and richness. If you enjoy making your own pastry, our perfect flaky pie crust recipe will elevate the texture even further. Finally, serve it alongside a simple herb salad to cut through the richness for a complete meal.

Tips for Success

Best practices for results

Always chill your pastry dough thoroughly before rolling it out, as this prevents shrinkage and ensures a flaky crust. Furthermore, use a high-quality stout for the braising liquid to build a rich, complex flavor base for your Stout Brained Beef Pot Pie. Additionally, allow the beef filling to cool slightly before topping it with pastry to help the bottom crust cook evenly. Finally, always brush the top crust with an egg wash for a beautifully golden and professional finish.

Mistakes to avoid

Avoid rushing the braising process; otherwise, your beef will turn out tough. Instead, cook it low and slow until it becomes fork-tender for the best results. Moreover, do not skip the step of venting the top crust, as steam needs to escape to prevent a soggy top. For more guidance on achieving the perfect pastry, read our guide on how to make pie crust. Additionally, ensure your filling is not too watery before baking; a thick, hearty consistency is key. If you are unsure about your sauce, you can always reference our tips for how to thicken a sauce effectively.

Serving and Pairing Suggestions

How to serve this dish

Present your Stout Braised Beef Pot Pie piping hot from the oven. For a truly rustic feel, serve it right in the skillet or baking dish at the center of your table. Alternatively, carefully plate individual portions to showcase the flaky, golden crust and rich filling. Furthermore, a simple garnish of fresh chopped parsley or thyme adds a beautiful pop of color and freshness. This hearty dish absolutely shines on a chilly evening, making it perfect for holiday gatherings or a comforting weekend supper.

What goes well with it

First, a simple side salad cuts through the richness beautifully. Our classic Arugula Salad with Lemon Vinaigrette offers a peppery, bright contrast that complements the deep flavors. Next, a robust red wine like a Cabernet Sauvignon mirrors the stout’s malty notes in your Stout Braised Beef Pot Pie. Finally, for a truly decadent meal, consider starting with a light soup such as our favorite Creamy Tomato Basil Soup. Consequently, this combination creates a well-balanced and utterly satisfying dining experience.

What is the best stout to use for braising beef?

For the richest flavor in your Stout Braised Beef Pot Pie, choose a dry Irish stout like Guinness. Its roasted barley notes and slight bitterness complement the beef without making the dish overly sweet. Avoid sweet or chocolate-heavy stouts, as they can overpower the savory herbs in the filling.

Can I make Stout Braised Beef Pot Pie ahead of time?

Absolutely! In fact, making the stout-braised beef filling a day or two in advance allows the flavors to deepen and meld together beautifully. Simply let the filling cool completely, store it in the refrigerator, and then assemble and bake your pot pie when you’re ready to serve.

Can I use puff pastry instead of pie crust for the top?

Yes, puff pastry is an excellent alternative that creates a wonderfully flaky and impressive golden-brown top. Just remember that puff pastry bakes best when started in a hot oven, so you may need to adjust your baking temperature slightly compared to a traditional pie crust recipe for your Stout Braised Beef Pot Pie.

What cut of beef is best for a pot pie?

Chuck roast is the ideal cut for Stout Braised Beef Pot Pie because it’s well-marbled with fat, which breaks down during the long, slow braising process. This results in incredibly tender, flavorful meat that shreds easily and holds up perfectly in the rich, stout-based gravy.

Best Healthy Autumn Harvest Bowl Recipe

best-healthy-autumn-harvest-bowl

As the vibrant leaves begin to turn and a crisp chill fills the air, we naturally crave meals that are both deeply nourishing and soul-warmingly delicious. Furthermore, finding a dish that truly captures the essence of the season without spending hours in the kitchen can feel like a challenge. Consequently, this is precisely why I created this incredibly satisfying Healthy Autumn Harvest Bowl. It is a celebration of fall’s finest produce, all tossed together in one glorious, colorful, and wholesome meal that will make you feel amazing from the inside out.

What Is This Autumn Harvest Bowl

Essentially, a Healthy Autumn Harvest Bowl is a complete, balanced meal built in a single dish. It typically features a foundation of hearty grains or greens, topped with roasted seasonal vegetables, a lean protein, and a flavorful dressing. This particular recipe, however, is a symphony of sweet roasted sweet potatoes and Brussels sprouts, hearty quinoa, crisp apples, and crunchy pecans. Ultimately, it all gets drizzled with a tangy maple-tahini dressing that ties every single element together perfectly.

Moreover, this kind of meal matters because it delivers maximum flavor and nutrition with minimal effort. It fits a modern, health-conscious lifestyle without sacrificing an ounce of comfort. Additionally, it is naturally gluten-free and easily adaptable to be vegan, making it a fantastic option for serving to a diverse group of friends or family. This approach to cooking aligns perfectly with our philosophy of creating easy weeknight dinners that don’t compromise on health or taste. We believe that eating well should be a joyful and simple experience, especially during the busy autumn months.

Furthermore, the beauty of this Healthy Autumn Harvest Bowl lies in its versatility. You can truly make it your own by swapping ingredients based on what you have on hand. For instance, try using butternut squash instead of sweet potato or walnuts instead of pecans. It is the perfect vehicle for cleaning out your fridge and reducing food waste. If you are looking for more inspiration on how to use seasonal ingredients, our guide on making the most of seasonal produce offers plenty of creative ideas. This recipe is more than just a meal; it is a template for healthy, seasonal eating all year long.

Why I Love This Recipe

I genuinely love this Healthy Autumn Harvest Bowl because it reminds me of cozy weekend farmers’ market trips and gathering around the table with my family. The aroma of sweet potatoes and rosemary roasting in the oven instantly makes our house feel like a warm, welcoming haven. Personally, I appreciate how the recipe makes healthy eating feel indulgent and deeply satisfying, not restrictive. It is my go-to meal for potlucks because it always earns rave reviews, and it reliably fuels our bodies for evening walks to see the best fall foliage. This bowl truly embodies the comforting and vibrant spirit of the season for me.

Health and Nutrition

Why it’s good for your body

This Healthy Autumn Harvest Bowl truly nourishes your body from the inside out. For instance, the sweet potatoes and butternut squash deliver a powerful dose of vitamin A, which actively supports healthy vision and a strong immune system. Moreover, the kale and Brussels sprouts provide essential fiber and vitamin K, promoting excellent digestion and bone health.

Additionally, the quinoa and chickpeas in this dish create a complete protein profile. Consequently, this combination helps you build and repair muscle tissue while also keeping you feeling full and satisfied for hours. Furthermore, the healthy fats from the olive oil dressing allow your body to absorb all the fat-soluble vitamins from the vegetables more effectively.

Ultimately, the Healthy Autumn Harvest Bowl acts as a vibrant, antioxidant-rich meal that fights inflammation. Therefore, you can enjoy this delicious bowl knowing you are giving your body a wide spectrum of nutrients. Finally, each ingredient works in harmony to fuel your day with steady, lasting energy.

How it fits in a healthy lifestyle

This Healthy Autumn Harvest Bowl seamlessly fits into almost any healthy eating plan. It naturally aligns with a gluten-free lifestyle thanks to its quinoa base, and it packs a plant-powered protein punch that vegetarians and vegans will love. The high fiber content supports heart health and aids in digestion, making it a fantastic choice for anyone focusing on wellness.

You can easily enjoy this bowl as a satisfying lunch that prevents afternoon slumps or as a nutrient-dense dinner. For more inspiration on building balanced plates, explore our guide to effortless weekly meal prep. This recipe is wonderfully adaptable, allowing you to swap ingredients based on what’s in season or what you have on hand, which helps you reduce food waste and stick to your healthy habits.

Print
clock clock iconcutlery cutlery iconflag flag iconfolder folder iconinstagram instagram iconpinterest pinterest iconfacebook facebook iconprint print iconsquares squares iconheart heart iconheart solid heart solid icon

Healthy Autumn Harvest Bowl


  • Author: Chef Emy

Description

A nutritious and colorful bowl featuring roasted seasonal vegetables, quinoa, and a tangy maple-mustard dressing.


Ingredients

Scale

For the Crust:

  • 1 cup quinoa, rinsed
  • 2 cups vegetable broth
  • 1 small butternut squash, peeled and cubed
  • 2 sweet potatoes, peeled and cubed
  • 1 apple, diced
  • 1/2 red onion, sliced
  • 2 tablespoons olive oil
  • 1 teaspoon smoked paprika
  • 1/2 teaspoon cinnamon
  • Salt and pepper to taste
  • 4 cups fresh spinach
  • 1/4 cup pumpkin seeds
  • For dressing: 3 tablespoons olive oil, 2 tablespoons apple cider vinegar, 1 tablespoon maple syrup, 1 teaspoon Dijon mustard

Instructions

1. Prepare the Crust:

  1. Preheat oven to 400°F (200°C). Toss butternut squash, sweet potatoes, apple, and red onion with olive oil, smoked paprika, cinnamon, salt, and pepper. Spread on baking sheet and roast for 25-30 minutes until tender.
  2. While vegetables roast, cook quinoa in vegetable broth according to package instructions. Fluff with fork and set aside.
  3. Whisk together dressing ingredients: olive oil, apple cider vinegar, maple syrup, and Dijon mustard until emulsified.
  4. Assemble bowls: divide spinach among bowls, top with quinoa, roasted vegetables, and drizzle with dressing. Sprinkle with pumpkin seeds before serving.

Notes

You can customize the seasonings to taste.

How to Prepare This Dish

Steps and time-saving tips

First, preheat your oven to 400°F to get a head start on roasting. Meanwhile, chop your sweet potatoes and Brussels sprouts into uniform, bite-sized pieces; this ensures everything cooks evenly and gets perfectly crispy. Toss them in a large bowl with a generous drizzle of olive oil, salt, pepper, and your favorite warming spices like smoked paprika. Spread the veggies in a single layer on a parchment-lined baking sheet; this step is crucial for avoiding soggy results and makes cleanup a breeze. Roast for about 25 minutes, or until the edges are caramelized and tender. While that’s happening, cook your quinoa according to package directions using vegetable broth instead of water for a major flavor boost. Next, whisk together a simple maple-tahini dressing right in the bottom of your serving bowl; you will save yourself from washing an extra dish. Finally, assemble your Healthy Autumn Harvest Bowl by layering the fluffy quinoa, those gorgeous roasted vegetables, a handful of massaged kale, and a sprinkle of toasted pecans. Drizzle that creamy dressing over the top just before serving for a truly satisfying meal.

Mistakes I’ve made and learned from

I have definitely learned a few lessons the hard way with this Healthy Autumn Harvest Bowl. My biggest mistake was overcrowding the baking sheet in a rush, which steamed the vegetables instead of roasting them. I ended up with a soft, lackluster mess instead of those crispy, caramelized bits that make this dish so special. Now, I always use two sheets if necessary, giving each piece plenty of breathing room. Another error was adding the dressing too early, especially if I had leftovers. The kale would wilt into a sad state, and the quinoa soaked up all the liquid. I solved this by storing the components separately and assembling individual portions at mealtime. This meal prep strategy keeps everything fresh and vibrant for days. Also, toasting the nuts is a non-negotiable step I used to skip; it adds a deep, rich flavor that completely elevates the final bowl, much like the techniques I learned from my favorite guide to gluten-free baking which emphasizes the importance of texture.

Cultural Connection and Variations

Where this recipe comes from

My love for this Healthy Autumn Harvest Bowl began in my grandmother’s kitchen, where the first crisp fall day always meant a pilgrimage to the farmer’s market. Consequently, we would return with baskets overflowing with every jewel-toned vegetable we could find. She saw this meal not just as dinner, but as a celebration of the season’s final, generous bounty. Essentially, we were preserving summer’s warmth in a single, nourishing dish before winter’s arrival.

Around the world, similar traditions celebrate the harvest. For instance, in parts of Europe, roasted root vegetables with grains form the heart of many Michaelmas feasts. Meanwhile, across North America, indigenous communities have long honored the “three sisters”—corn, beans, and squash—a holy trinity that often finds a beautiful home in a modern Healthy Autumn Harvest Bowl. Alternatively, in my own family, we sometimes add a sprinkle of smoked paprika for a subtle kick, a small twist that makes it uniquely ours.

How it fits in today’s cooking

This dish fits perfectly into our modern need for meals that are both wholesome and convenient. Thankfully, the core philosophy of the Healthy Autumn Harvest Bowl celebrates adaptability. Busy weeknights demand simplicity, so many cooks now use pre-chopped squash or instant grains to get a fantastic dinner on the table fast. Moreover, its vibrant, colorful nature makes it a superstar for meal prep, ensuring you eat well all week long.

Its relevance extends beyond everyday cooking into our cherished holiday traditions. Consequently, it has become a beloved vegetarian centerpiece at my Friendsgiving table, offering a stunning and satisfying option alongside other seasonal favorites. For more autumn inspiration, explore our complete guide to fall baking secrets that complement this bowl beautifully. Ultimately, this recipe embodies how we cook today: we honor whole foods, value our time, and gather around dishes that make us feel good. It’s the ideal example of how a classic concept gets a contemporary, healthy spin, much like the creative approaches you’ll find in our collection of healthy dessert options.

Taste and Texture

What makes it delicious

This Healthy Autumn Harvest Bowl greets you with a wonderfully fragrant aroma of roasted squash and sweet maple. Each forkful delivers a satisfying contrast of textures. You will experience the creamy, almost buttery softness of the sweet potato against the hearty, chewy farro. Meanwhile, the crisp apple and toasted pecans provide a delightful crunch. Ultimately, the warm cinnamon and savory rosemary tie all the earthy, sweet, and savory notes together beautifully. The overall experience of this Healthy Autumn Harvest Bowl is both deeply comforting and invigorating.

Boosting the flavor

For an even more flavorful experience, consider a few simple tweaks. Firstly, a drizzle of our creamy tahini dressing adds a rich, nutty dimension that complements the sweet vegetables perfectly. Alternatively, crumble some tangy goat cheese or feta on top for a salty, creamy contrast. If you enjoy a bit of heat, a pinch of red pepper flakes or a dash of smoked paprika will warmly spice up the entire dish. Furthermore, explore different herb profiles with our guide to using fresh herbs to find your perfect pairing. Finally, always remember to finish with a generous squeeze of fresh lemon juice to make all the flavors pop.

Tips for Success

Best practices for results

Always roast your vegetables in a single layer to guarantee they caramelize instead of steam. Furthermore, use a preheated sheet pan for an extra crispy texture on your squash and sweet potatoes. Meanwhile, allow your cooked grains to cool completely before assembling your Healthy Autumn Harvest Bowl to prevent a soggy base. Finally, always taste and adjust the seasoning of your dressing just before drizzling it over the bowl.

Mistakes to avoid

A common mistake is overcrowding the sheet pan, which steams the vegetables and prevents proper browning. Instead, use two pans to ensure everything has enough space. Additionally, do not add the dressing too early; otherwise, your grains will become mushy. For more on creating the perfect texture, read our guide on how to cook quinoa perfectly every time. Another error is under-seasoning the components as you cook. Consequently, make sure you season each layer, from the roasting veggies to your protein, for a flavorful Healthy Autumn Harvest Bowl. If you are using chicken, our tips for meal prepping chicken will ensure it stays juicy and delicious.

Serving and Pairing Suggestions

How to serve this dish

For a truly stunning presentation, serve your Healthy Autumn Harvest Bowl in a wide, shallow bowl. This style beautifully showcases all the vibrant colors and textures. Furthermore, garnish each bowl with an extra sprinkle of toasted pumpkin seeds and a few fresh pomegranate arils for a festive touch. This dish truly shines as a centerpiece for a holiday potluck or a cozy weekend brunch with friends.

You can also make individual portions ahead of time for a quick, grab-and-go lunch. Simply layer the ingredients in a mason jar, starting with the dressing at the bottom, then the grains, and finally the more delicate greens and roasted vegetables on top. When you are ready to eat, just shake your Healthy Autumn Harvest Bowl to combine everything for a fresh and satisfying meal.

What goes well with it

A warm, crusty slice of bread is the perfect companion for your Healthy Autumn Harvest Bowl. It is ideal for scooping up every last bit of the creamy tahini dressing and roasted vegetable goodness. For a truly special pairing, consider serving it alongside our popular Vegan Cornbread, which adds a subtly sweet and comforting element.

When considering beverages, a crisp, hard apple cider wonderfully complements the sweet and savory notes in this dish. Alternatively, a warm mug of spiced tea also makes a fantastic pairing. Finally, if you want to start your meal with a light appetizer, our refreshing Roasted Beet Salad prepares your palate for the hearty, earthy flavors of the main bowl.

What is in an autumn harvest bowl?

A classic Healthy Autumn Harvest Bowl typically features a base of grains like quinoa or farro, roasted autumn vegetables such as sweet potatoes, Brussels sprouts, and butternut squash, a lean protein like chicken or chickpeas, and a flavorful dressing. It’s a hearty and nutritious meal that celebrates the best produce of the fall season. The beauty of this dish is its versatility, allowing you to mix and match your favorite seasonal ingredients.

How do you meal prep an autumn harvest bowl?

To meal prep a Healthy Autumn Harvest Bowl, roast your vegetables and cook your grains in large batches at the beginning of the week. Store each component separately in airtight containers in the refrigerator. When ready to eat, simply assemble a bowl with your desired portions of grains, roasted veggies, protein, and greens, then add your dressing. This method keeps the ingredients fresh and prevents sogginess.

What dressing goes on a harvest bowl?

A maple-Dijon vinaigrette, tahini-lemon sauce, or a simple apple cider vinaigrette pairs perfectly with a Healthy Autumn Harvest Bowl. These dressings complement the sweet and savory flavors of the roasted vegetables without overpowering them. The key is to choose a dressing with a balance of acidity, sweetness, and richness to tie all the components together deliciously.

Is a harvest bowl healthy?

Yes, a properly assembled Healthy Autumn Harvest Bowl is an exceptionally nutritious meal. It is packed with fiber from whole grains and vegetables, vitamins from colorful produce, and plant-based or lean protein. By controlling the ingredients and dressing portions, you create a balanced meal that supports energy levels and overall health, making it a fantastic choice for a wholesome lunch or dinner.

Ultimate Witch’s Cauldron Beef Stew Recipe

ultimate-witchs-cauldron-beef-stew

As the air turns crisp and the leaves begin their fiery transformation, we all crave something deeply comforting and magically hearty. There is something truly special about gathering around a table with loved ones, sharing stories and a meal that warms you from the inside out. This yearning for connection and comfort is exactly why I am so excited to share my ultimate autumn creation. This Witch’s Cauldron Beef Stew is more than just a meal. It is a bubbling pot of cozy memories waiting to be made, perfect for a chilly evening that calls for a little culinary magic.

About This Recipe

So, what exactly is Witch’s Cauldron Beef Stew? Essentially, it is a rich and deeply flavorful beef stew that embodies the essence of fall. The name playfully hints at the mysterious, slow-simmered depth of flavor we achieve, as if brewed in a magical cauldron. This dish matters because it transforms simple, humble ingredients into an extraordinary dining experience. Furthermore, it fills your kitchen with an incredible aroma that promises a delicious payoff. This recipe fits our blog’s tone perfectly because we celebrate approachable, from-scratch cooking that delivers maximum flavor without unnecessary complexity. You will find that this stew is incredibly forgiving and versatile. For instance, you can easily customize the vegetables based on what you have on hand. Ultimately, this Witch’s Cauldron Beef Stew is the hearty, one-pot wonder your autumn menu has been missing. It pairs wonderfully with a simple side, perhaps some of our favorite Easy Homemade Dinner Rolls for dipping into that glorious broth. Moreover, if you are planning a full Halloween feast, this stew makes a spectacular centerpiece that is both impressive and utterly satisfying.

Why I Love This Recipe

This Witch’s Cauldron Beef Stew holds a special place in my heart because it reminds me of my grandmother’s kitchen. She never measured a thing, yet her stew was always perfect. I have worked for years to capture that same feeling of effortless, soul-warming goodness in a reliable recipe. I love how the long, slow cook tenderizes the beef into utter perfection and allows the flavors to meld into something truly magical. It is my go-to dish for potlucks and family gatherings because it always feels like a generous hug in a bowl. Serving this stew, especially with a slice of our decadent Chocolate Caramel Cake for dessert, creates a complete and memorable meal that everyone adores.

Health and Nutrition

Why it’s good for your body

Witch’s Cauldron Beef Stew delivers a powerful nutritional punch in every single bowl. First, the lean beef provides a fantastic source of high-quality protein, which is essential for building muscle and keeping you feeling full and satisfied for hours. Additionally, this protein supports strong bones and a healthy immune system.

Furthermore, the colorful array of vegetables like carrots, celery, and potatoes packs a serious vitamin and mineral boost. Consequently, your body gets a healthy dose of fiber, which is wonderful for digestive health and maintaining steady energy levels. Moreover, the slow-cooking process not only deepens the flavor but also helps preserve these vital nutrients.

Ultimately, this hearty stew is a complete and balanced meal all by itself. Therefore, enjoying a warm bowl of Witch’s Cauldron Beef Stew means you are nourishing your body with everything it needs. Finally, the combination of protein, complex carbs, and healthy fats makes it a truly wholesome choice for any day.

How it fits in a healthy lifestyle

This stew fits beautifully into a balanced eating plan. It’s naturally gluten-free, making it a fantastic option for anyone with sensitivities, and its high-protein content supports muscle repair after a workout. You can easily make it ahead for a practical, healthy lunch that keeps you on track.

For those watching their sodium, simply adjust the broth you use. Pairing a bowl with a simple side salad creates a perfectly rounded meal. If you’re looking for more high-protein ideas to power your week, explore our guide to easy high-protein meals. Cooking a big batch of Witch’s Cauldron Beef Stew is also a brilliant meal prep strategy for busy families. For more inspiration on planning your nutritious meals, check out our healthy meal prep tips.

Print
clock clock iconcutlery cutlery iconflag flag iconfolder folder iconinstagram instagram iconpinterest pinterest iconfacebook facebook iconprint print iconsquares squares iconheart heart iconheart solid heart solid icon

Witch’s Cauldron Beef Stew


  • Author: Chef Emy

Description

A hearty, mystical beef stew perfect for chilly nights, simmered to tender perfection with root vegetables and aromatic herbs.


Ingredients

Scale

For the Crust:

  • 2 lbs beef stew meat, cubed
  • 2 tbsp olive oil
  • 1 large onion, chopped
  • 3 cloves garlic, minced
  • 4 cups beef broth
  • 1 cup red wine
  • 3 carrots, sliced
  • 2 potatoes, cubed
  • 2 parsnips, sliced
  • 1 tsp dried thyme
  • 1 tsp smoked paprika
  • Salt and pepper to taste
  • 2 tbsp flour
  • 1 bay leaf

Instructions

1. Prepare the Crust:

  1. Heat olive oil in a large pot over medium-high heat. Brown the beef cubes on all sides, then remove and set aside.
  2. Sauté onion and garlic in the same pot until softened. Sprinkle with flour and cook for 1 minute.
  3. Deglaze with red wine, scraping up any browned bits. Add beef broth and bring to a simmer.
  4. Return beef to the pot. Add carrots, potatoes, parsnips, thyme, paprika, bay leaf, salt, and pepper.
  5. Cover and simmer on low heat for 1.5 to 2 hours, until beef is tender and vegetables are cooked.
  6. Remove bay leaf before serving. Adjust seasoning if needed.

Notes

You can customize the seasonings to taste.

How to Prepare This Dish

Steps and time-saving tips

First, pat your beef stew meat completely dry with paper towels. This crucial step guarantees a beautiful, deep sear instead of steam. Next, heat a generous amount of oil in your heaviest pot or Dutch oven over medium-high heat. Then, sear the meat in batches, making sure not to crowd the pan. Meanwhile, chop your aromatic vegetables like onions, carrots, and celery. After you remove the final batch of beef, immediately add those vegetables to the hot pot. Sauté them until they just begin to soften and become fragrant. Subsequently, stir in the tomato paste and let it cook for a full minute to deepen its flavor. Now, pour in your red wine to deglaze the pot, scraping up all those delicious browned bits from the bottom. Finally, add the seared beef back in along with your broth, herbs, and seasonings. Bring everything to a gentle simmer, then cover and let it cook low and slow until the meat is incredibly tender. For a fantastic time-saving tip, you can chop all your vegetables the night before and store them in an airtight container in the fridge. Additionally, this Witch’s Cauldron Beef Stew tastes even better the next day, so feel free to make it ahead!

Mistakes I’ve made and learned from

I have definitely learned a few lessons the hard way with this Witch’s Cauldron Beef Stew. My biggest mistake was rushing the searing process; I would add too much beef to the pot at once, which caused the meat to steam and boil in its own juices instead of developing that rich, caramelized crust. The stew tasted bland and lacked depth because I missed out on all that flavor. Another error was adding my potatoes and carrots at the very beginning. They completely disintegrated into mush after hours of cooking! Now, I add my heartier root vegetables about halfway through the simmering time so they hold their shape perfectly. Getting the seasoning right was also a challenge. I once made a wildly oversalted stew because I used a very salty broth and didn’t taste it until the very end. Now, I always use a low-sodium broth as my base and season gradually, tasting as I go. It is a much safer approach, especially when using a powerful Dutch oven that really concentrates flavors. Trust me, learning from these blunders will save your stew!

Cultural Connection and Variations

Where this recipe comes from

This Witch’s Cauldron Beef Stew bubbles with a history that stretches far beyond its Halloween namesake. While we love the spooky imagery, the dish itself is a timeless peasant staple from chilly Northern Europe. Families in Ireland, France, and beyond would slowly simmer tough cuts of meat with root vegetables in a single pot over the hearth. Consequently, this method tenderized the meat and stretched a few ingredients into a feast for many. My own grandmother, for instance, always added a generous splash of stout to her pot, claiming it gave the broth a richer, magical darkness.

As the recipe traveled, different cultures added their own signature twists. In Belgium, they often use local beer and serve it with frites. Meanwhile, a Hungarian version might lean heavily on sweet paprika for a vibrant color and smoky flavor. Some Caribbean cooks even introduce scotch bonnet peppers and coconut milk for a entirely different, tropical experience. Ultimately, every region makes the Witch’s Cauldron Beef Stew its own, proving that the best recipes are those we adapt and share.

How it fits in today’s cooking

This stew absolutely thrives in modern kitchens because it delivers deep, cozy comfort with minimal effort. Busy home cooks adore it for meal prep Sundays, as the flavor only improves after a day or two in the fridge. Furthermore, it fits perfectly into our current love for set-it-and-forget-it appliances. People readily adapt the classic recipe for their slow cookers or Instant Pots, making a hearty dinner achievable on even the most chaotic weeknights.

It also remains a cornerstone of autumn and winter holiday gatherings. A steaming pot of this stew becomes the edible centerpiece of a Halloween party or a comforting post-Thanksgiving meal. For another fantastic make-ahead meal that brings everyone to the table, explore our popular Easy Chicken Pot Pie. And if you are searching for the perfect sweet ending to your cozy stew dinner, you must try our Classic Apple Crisp. Ultimately, this humble stew continues to connect us through its simplicity, warmth, and incredible adaptability.

Taste and Texture

What makes it delicious

This Witch’s Cauldron Beef Stew delivers a deeply savory and soul-warming experience. Tender chunks of beef simply melt in your mouth, while the carrots and potatoes soak up the rich, herb-infused broth. Consequently, each spoonful bursts with a comforting, hearty flavor. The aroma alone, fragrant with thyme and bay leaf, will fill your kitchen with an incredibly inviting scent. Ultimately, the texture is a perfect balance of soft vegetables and fall-apart meat, making every bite of Witch’s Cauldron Beef Stew deeply satisfying.

Boosting the flavor

For an even more robust flavor, consider a few simple tweaks. First, stir in a tablespoon of tomato paste to caramelize with the onions; this adds a wonderful depth and slight sweetness. Alternatively, a splash of red wine while deglazing the pot introduces a sophisticated, complex acidity. Furthermore, a dollop of our creamy horseradish sauce on top just before serving provides a brilliant, spicy kick that cuts through the richness. Finally, serve your stew alongside a slice of crusty no-knead bread for the ultimate dipping experience.

Tips for Success

Best practices for results

Always sear your beef chunks in batches to develop a deep, flavorful fond in the pot. Furthermore, use a full-bodied red wine for deglazing to build a rich base for your Witch’s Cauldron Beef Stew. Consequently, you will create a more complex and satisfying broth. Simmer the stew gently and patiently to ensure the beef becomes incredibly tender without becoming tough.

Mistakes to avoid

Avoid rushing the searing process, as crowding the pot steams the meat instead of browning it. For the best results, always pat your beef dry first. Moreover, do not skip the deglazing step, as it incorporates all the flavorful bits from the bottom of the pot. Additionally, be careful not to under-salt your stew; however, you can learn how to fix a bland stew if you need to make a correction later. Finally, ensure you use the correct cut of meat; for instance, choosing a tough, well-marbled cut will yield the most tender result after long cooking.

Serving and Pairing Suggestions

How to serve this dish

Present your Witch’s Cauldron Beef Stew in a rustic, heavy pot for a truly enchanting tablescape. Furthermore, ladle generous portions into deep, warm bowls to keep the magic hot. Garnish each serving with a bright sprinkle of fresh parsley, which beautifully contrasts the rich, dark broth. This hearty stew absolutely shines on a crisp autumn evening or during festive holiday gatherings. Ultimately, its comforting aroma and deep flavors create a memorable centerpiece for any cozy occasion.

What goes well with it

First, a thick slice of crusty sourdough bread is perfect for sopping up every last bit of the savory broth. Alternatively, a simple side salad with a tangy vinaigrette cuts through the stew’s richness beautifully. For a drink pairing, a robust red wine like a Cabernet Sauvignon complements the deep umami notes of the Witch’s Cauldron Beef Stew. Finally, consider serving it alongside our incredibly fluffy Garlic Herb Dinner Rolls for the ultimate comfort food experience. Moreover, a scoop of our creamy Parmesan Risotto makes an exceptionally luxurious and satisfying side dish.

What cut of beef is best for Witch’s Cauldron Beef Stew?

Chuck roast is the best cut for Witch’s Cauldron Beef Stew because it’s well-marbled and becomes incredibly tender when slow-cooked. This cut breaks down over the long cooking time, infusing the stew with rich flavor and a melt-in-your-mouth texture. Avoid lean cuts, as they can become tough and dry.

Can I make Witch’s Cauldron Beef Stew in a slow cooker?

Absolutely! This hearty Witch’s Cauldron Beef Stew adapts perfectly to a slow cooker. After browning the beef and sautéing the vegetables, simply transfer everything to your slow cooker and cook on low for 7-8 hours. This method allows the flavors to develop deeply, making it a convenient set-and-forget meal.

What makes it a “Witch’s Cauldron” stew?

The name “Witch’s Cauldron” evokes the idea of a magical, bubbling pot filled with a mysterious and hearty brew. This stew earns its name from its deep, dark color, rich combination of ingredients, and the slow, simmering cooking process that seems to transform simple components into something truly enchanting and flavorful.

How can I thicken my Witch’s Cauldron Beef Stew?

The easiest way to thicken your Witch’s Cauldron Beef Stew is to create a slurry by whisking 2 tablespoons of cornstarch or flour with an equal amount of cold water or broth. Stir this mixture into the simmering stew and cook for a few more minutes until it reaches your desired consistency. Alternatively, you can mash some of the softened potatoes against the side of the pot.

Easy Golden Crust Garlic Rosemary Focaccia Muffins

easy-golden-crust-focaccia-muffins

There is something truly magical about the aroma of garlic and rosemary filling your kitchen. It promises warmth, comfort, and a taste of rustic, homemade goodness that feels like a hug. Now, imagine capturing that entire feeling into a single, irresistible, pull-apart bite. That is exactly what you get with these Golden Crust Garlic Rosemary Focaccia Muffins. They transform the classic, beloved Italian bread into a perfectly portioned, shareable treat that is as fun to make as it is to eat. Get ready to fall in love with baking all over again.

About This Recipe

So, what exactly are Golden Crust Garlic Rosemary Focaccia Muffins? Essentially, they are a brilliant twist on traditional focaccia. Instead of baking one large sheet pan of bread, we portion the iconic dimpled dough into a muffin tin. Consequently, each individual muffin bakes up with an incredible amount of that coveted golden crust. Moreover, we infuse the olive oil-rich dough with fresh rosemary and roasted garlic, creating an incredibly fragrant and flavorful experience in every single bite.

This recipe matters because it delivers immense flavor with a surprisingly approachable process. For instance, you do not need any special skills to create these stunning muffins. The dough comes together easily, and the muffin tin does most of the work for you, ensuring a perfect shape every time. Furthermore, their individual size makes them ideal for so many occasions. They are the perfect side for a cozy weeknight soup, an impressive addition to a weekend brunch spread, or a guaranteed hit at any potluck or party. Ultimately, this recipe fits our blog’s mission perfectly: to provide creative, reliable, and downright delicious baking projects that bring joy to your home kitchen. If you are looking for another show-stopping side, you must try our Perfect Dinner Rolls next.

While we adore classic recipes, we also love innovative treats that surprise and delight. These focaccia muffins do exactly that. They honor the timeless flavors of Italian baking while presenting them in a modern, convenient, and utterly charming format. Therefore, whether you are a seasoned baker or just starting your journey, this recipe welcomes you. In fact, the process is so straightforward that it builds confidence. For more beginner-friendly inspiration, explore our guide on Baking Basics 101 to solidify your skills.

Why I Love This Recipe

I love this recipe because it reminds me of my grandmother’s kitchen, where a large loaf of focaccia always sat on the counter. However, these muffins add a playful and personal twist that feels entirely new. I adore the way the roasted garlic melts into the dough, creating little pockets of savory sweetness, and how the rosemary perfume fills my entire home. Most importantly, I love how these Golden Crust Garlic Rosemary Focaccia Muffins bring people together. There is something about a basket of warm, individual breads that encourages sharing, conversation, and pure, simple joy around the table.

Health and Nutrition

Why it’s good for your body

Golden Crust Garlic Rosemary Focaccia Muffins offer more than just incredible flavor; they also provide some genuine health perks. For instance, olive oil forms the heart of the recipe, delivering a dose of heart-healthy monounsaturated fats. Furthermore, these fats actively support good cholesterol levels and overall cardiovascular wellness.

Additionally, fresh rosemary does much more than add an aromatic touch. This powerful herb contains antioxidants and anti-inflammatory compounds, which can help protect your cells from damage. Moreover, the garlic packs its own punch with allicin, a compound known for its potential immune-boosting properties.

Consequently, enjoying one of these savory muffins means you are treating your body to beneficial nutrients. You can feel good about serving Golden Crust Garlic Rosemary Focaccia Muffins because they combine wholesome ingredients with robust flavor. Ultimately, this makes them a satisfying and smarter choice than many other baked snacks.

How it fits in a healthy lifestyle

These savory muffins perfectly complement a balanced approach to eating. You can easily enjoy one as a satisfying side with a large salad for a complete lunch, or pair it with a bowl of soup for a cozy dinner. Their portion-controlled muffin size naturally helps with mindful eating, allowing you to savor the experience without overindulging.

If you are exploring more ways to incorporate wholesome grains into your diet, consider our guide on baking with whole wheat flour for your next batch. For those days when you need a quick and nutritious start, Golden Crust Garlic Rosemary Focaccia Muffins also make a fantastic grab-and-go option. They keep you full and energized, especially when compared to sugar-laden pastries. Remember, a healthy lifestyle is all about balance and enjoying the foods you love, like these delicious muffins. Find more inspiration for smart eating in our collection of healthy weeknight dinners that the whole family will enjoy.

Print
clock clock iconcutlery cutlery iconflag flag iconfolder folder iconinstagram instagram iconpinterest pinterest iconfacebook facebook iconprint print iconsquares squares iconheart heart iconheart solid heart solid icon

Golden Crust Garlic Rosemary Focaccia Muffins


  • Author: Chef Emy

Description

Fluffy, savory muffins with a golden crust, infused with garlic and fresh rosemary, perfect as a side or snack.


Ingredients

Scale

For the Crust:

  • 2 cups all-purpose flour
  • 1 tbsp sugar
  • 1 tsp salt
  • 1 packet instant yeast
  • 3/4 cup warm water
  • 1/4 cup olive oil
  • 2 cloves garlic, minced
  • 2 tbsp fresh rosemary, chopped
  • Coarse sea salt for topping

Instructions

1. Prepare the Crust:

  1. In a bowl, combine flour, sugar, salt, and yeast. Add warm water and 2 tbsp olive oil; mix until a dough forms.
  2. Knead dough on a floured surface for 5 minutes. Place in an oiled bowl, cover, and let rise for 1 hour.
  3. Preheat oven to 375°F (190°C). Punch down dough and divide into 12 muffin cups. Brush with remaining olive oil, sprinkle garlic, rosemary, and sea salt.
  4. Bake for 18-20 minutes until golden. Cool slightly before serving.

Notes

You can customize the seasonings to taste.

How to Prepare This Dish

Steps and time-saving tips

First, whisk together your warm water, yeast, and a pinch of sugar in a large bowl. Let this mixture sit for about five minutes until it becomes frothy. Meanwhile, combine your flour and salt in a separate bowl. Next, pour the yeast mixture and olive oil into the dry ingredients. Stir everything together with a wooden spoon until a shaggy, sticky dough forms. Turn this dough out onto a lightly floured surface and knead it for just five minutes until it feels smooth. Place the dough back into an oiled bowl, cover it with a damp cloth, and let it rise in a warm spot for one hour. For a fantastic time-saving tip, you can prepare the dough the night before and let it do its first rise slowly in the refrigerator. After the rise, gently punch the dough down and divide it into twelve equal portions. Press each portion into a well-greased muffin tin. Now, create those signature dimples in the top of each Golden Crust Garlic Rosemary Focaccia Muffin with your fingertips. Generously drizzle more olive oil into every little crevice. Finally, sprinkle on the minced garlic, fresh rosemary, and a flaky sea salt. Bake them in a preheated oven until they achieve a deep, golden brown crust.

Mistakes I’ve made and learned from

I learned the hard way that using cold water straight from the tap will completely stall your yeast, resulting in dense, flat muffins that are more like hockey pucks than light, airy bread. Now, I always use a thermometer to ensure my water is between 105-115°F for the perfect proofing environment. Another common mistake I made was skimping on the oil in the muffin tin. This led to a frustrating situation where my beautiful Golden Crust Garlic Rosemary Focaccia Muffins stubbornly stuck to the pan, tearing their gorgeous crusts. I’ve since learned to be very generous with the oil for an effortless release every single time. Getting your oven temperature right is another crucial step for baking success, something I finally mastered after a few too many pale loaves. For more on this, my guide on finding your oven’s true temperature was a game-changer. And if you’re new to working with yeast, don’t worry. My post on yeast baking for beginners covers all the common pitfalls so you can avoid my early errors.

Cultural Connection and Variations

Where this recipe comes from

Our story starts in the sun-drenched villages of Liguria, Italy, where bakers first perfected the art of dimpled, olive oil-rich focaccia. However, we took that classic communal bread and gave it a personal, portable twist. Frankly, we wanted everyone to get their own perfect, golden corner piece. My nonna always said the best part of any meal was breaking bread together, and these individual muffins capture that spirit of shared joy perfectly. Across Italy, bakers might stud their loaves with salty olives or sweet grapes, depending on the region and the season. Some families even hide a whole garlic clove in the dough for one lucky eater to find. Our version, however, celebrates the timeless pairing of earthy rosemary and pungent garlic, creating a flavor that feels both rustic and elegant. Ultimately, every bite of these Golden Crust Garlic Rosemary Focaccia Muffins tells a story of Italian tradition meeting modern convenience.

Furthermore, variations of this concept pop up globally. In other parts of the world, cooks might incorporate herbs like sage or thyme, or even top their muffins with a sprinkle of cheese for an extra savory kick. The beauty of this recipe lies in its incredible adaptability. You truly can make it your own. For instance, my aunt always adds a pinch of red pepper flakes for a subtle heat that we all adore. Whether you stick to the classic or experiment with your own additions, the result always feels like a warm hug. Consequently, baking a batch of Golden Crust Garlic Rosemary Focaccia Muffins connects your kitchen to a rich, culinary heritage that spans generations and continents.

How it fits in today’s cooking

These muffins have seamlessly found their place in our contemporary kitchens. They are the ultimate crowd-pleaser for everything from holiday feasts to casual weeknight dinners. Modern cooks love them because they bake quickly and freeze beautifully, making meal prep a total breeze. Moreover, their individual size makes them perfect for packed lunches, picnics, or as a sophisticated side for soups and salads. They bring a touch of artisanal bakery charm to your table without any fuss. For a complete meal, try pairing them with a hearty Creamy Tuscan Chicken; the flavors complement each other perfectly.

Additionally, their versatility shines through in modern adaptations. Many people now use them as a base for miniature sandwiches or simply split them warm and dunk them into a rich, extra virgin olive oil. They fit wonderfully into a brunch spread alongside other baked goods. In fact, they are a fantastic savory option if you are also serving something sweet like our popular Cinnamon Swirl Bread. Ultimately, this recipe remains relevant because it delivers incredible flavor and a comforting experience, proving that some traditions only get better with time.

Taste and Texture

What makes it delicious

These Golden Crust Garlic Rosemary Focaccia Muffins deliver a powerful sensory experience. Initially, your nose catches the warm, fragrant aroma of roasted garlic and earthy rosemary. Then you bite into a satisfyingly crisp, golden crust that gives way to a soft, chewy, and airy interior. The olive oil infuses every bite with a rich, fruity depth, while the flaky sea salt provides a delightful crunch and bursts of savory flavor. Ultimately, the combination of textures and robust, aromatic taste makes each muffin incredibly moreish.

Boosting the flavor

For an even more flavorful experience, consider a few simple tweaks. First, try folding a half cup of shredded parmesan or asiago cheese into the batter for a sharp, salty kick. Alternatively, a drizzle of our honey balsamic glaze right before serving creates a stunning sweet and savory contrast. Furthermore, a side of sun-dried tomato pesto for dipping introduces a tangy, umami-rich element that perfectly complements the garlic and herbs. Finally, a sprinkle of chili flakes before baking will add a welcome touch of heat.

Tips for Success

Best practices for results

Always use warm water to activate your yeast for the best rise. Furthermore, generously grease your muffin tin to guarantee your Golden Crust Garlic Rosemary Focaccia Muffins release easily. Do not skip the second proofing time, as this step creates that signature airy texture. Finally, use fresh rosemary and minced garlic for the most potent and aromatic flavor.

Mistakes to avoid

Avoid overmixing your batter, as this mistake develops too much gluten and results in a tough muffin. Instead, gently fold the ingredients until they are just combined. Additionally, do not underproof your dough; otherwise, your muffins will be dense. For more guidance on this crucial step, read our article on achieving perfect dough consistency. Moreover, ensure your oven is fully preheated before baking to achieve that golden crust. If your baked goods often stick, our guide on essential baking tools recommends the best pans and liners for flawless results every time.

Serving and Pairing Suggestions

How to serve this dish

Immediately present your Golden Crust Garlic Rosemary Focaccia Muffins for maximum impact. For instance, arrange them in a rustic basket lined with a checkered cloth. Alternatively, place them directly on a wooden board for a charming family-style feel. Always garnish with a final sprinkle of flaky sea salt and a few fresh rosemary sprigs. Consequently, this simple touch makes them incredibly inviting. Serve these warm, savory muffins at your next holiday gathering or a casual weekend brunch. Ultimately, their pull-apart shape and golden top create a beautiful, shareable centerpiece.

What goes well with it

First, dunk these warm muffins into a rich, velvety tomato soup. The garlic and rosemary flavors perfectly complement the soup’s bright acidity. For a heartier meal, pair them with our exquisite Creamy Tuscan Chicken. The muffins eagerly soak up the delicious creamy sauce. Finally, enjoy a glass of crisp, chilled Chardonnay alongside them. Notably, the wine’s notes of citrus and oak provide a wonderful contrast to the savory, herby notes of your Golden Crust Garlic Rosemary Focaccia Muffins. Moreover, they make an exceptional side for our vibrant Mediterranean Orzo Salad.

What is the secret to getting a golden crust on focaccia muffins?

The key to that signature golden crust is a combination of a hot oven and a generous amount of high-quality olive oil. Preheating your baking pan or muffin tin in the oven before adding the dough helps create an instant sear on the bottom. Brushing the tops of your Golden Crust Garlic Rosemary Focaccia Muffins with more olive oil before baking ensures a beautifully crisp and golden-brown finish.

Can I make the dough for garlic rosemary focaccia muffins ahead of time?

Absolutely! This dough is perfect for making ahead. After the first rise, you can punch it down, cover it tightly, and store it in the refrigerator for up to 24 hours. When you’re ready to bake, let the dough come to room temperature, shape it into your muffin tin, let it rise again, and then bake. This actually allows the garlic and rosemary flavors to develop even more.

What can I serve with these savory muffins?

These versatile muffins are fantastic alongside a wide variety of dishes. They are the perfect accompaniment to soups, stews, and salads, or can be served as a unique bread basket item at a dinner party. You can also split them open to make mini sandwiches or simply enjoy them warm from the oven with a drizzle of balsamic glaze and olive oil for dipping.

Can I use dried rosemary instead of fresh for this recipe?

While fresh rosemary is highly recommended for its potent, aromatic flavor, you can substitute dried rosemary in a pinch. Use about one-third the amount of dried rosemary compared to fresh, as dried herbs are more concentrated. Crush the dried needles between your fingers before adding them to release their oils and ensure the best flavor in your Golden Crust Garlic Rosemary Focaccia Muffins.

Easy Slow Cooker Balsamic Glazed Roast Beef

easy-slow-cooker-balsamic-roast-beef

Imagine coming home after a long day to the incredible aroma of a perfectly cooked roast that has been simmering all day. You open the door to a smell that feels like a warm hug, a promise of a delicious, home-cooked meal with zero last-minute effort. This isn’t a fantasy; it’s the magic of your slow cooker. Today, we’re making that dream a reality with a dish that is both impressively elegant and wonderfully simple: our incredible Slow Cooker Balsamic Glazed Roast Beef. It’s the ultimate set-it-and-forget-it dinner that delivers restaurant-quality flavor right to your weeknight table.

About This Recipe

So, what exactly is this Slow Cooker Balsamic Glazed Roast Beef? Fundamentally, it is a tough, affordable cut of beef, like a chuck roast, transformed through hours of gentle cooking into something magnificently tender and flavorful. The magic happens with a simple yet powerful glaze of balsamic vinegar, brown sugar, and savory seasonings. This glaze slowly caramelizes on the roast, creating a sweet, tangy, and deeply savory crust that perfectly complements the succulent, pull-apart meat inside. This recipe matters because it solves the eternal dilemma of wanting to serve a spectacular, comforting meal without spending all your time in the kitchen. Consequently, it fits our blog’s philosophy perfectly: we champion recipes that are approachable, reliable, and deliver maximum flavor for minimal effort.

Moreover, this dish is a true crowd-pleaser that suits any occasion. For instance, it is fancy enough for a Sunday dinner with guests yet easy enough for a casual Wednesday night. The hands-off slow cooker method truly empowers you to walk away and focus on other things, whether that’s whipping up a side dish or simply relaxing. Speaking of sides, this roast beef pairs beautifully with so many options. Firstly, you can serve it over a bed of creamy mashed potatoes to soak up the glorious juices. Alternatively, try it with our simple Garlic Herb Roasted Potatoes for a crispy contrast. Furthermore, the leftover meat makes for absolutely phenomenal sandwiches the next day, especially on a crusty roll with a little horseradish sauce. In fact, if you love easy, transformative recipes, you must also try our Slow Cooker Pulled Pork for another hands-off dinner winner.

Why I Love This Recipe

This Slow Cooker Balsamic Glazed Roast Beef holds a special place in my heart because it was the first “fancy” meal I ever confidently served to my in-laws. I remember the nervous excitement I felt that day, worrying about timing and everything being perfect. The slow cooker eliminated all that stress entirely. I simply prepared it in the morning, and by the time they arrived, the house smelled amazing and dinner was already done. Their compliments and the empty platter at the end of the night were a true victory. Now, it is my ultimate go-to recipe for creating those same feelings of warmth and accomplishment without any of the anxiety, and it never, ever fails me.

Health and Nutrition

Why it’s good for your body

This Slow Cooker Balsamic Glazed Roast Beef truly nourishes your body from the inside out. First, it provides a fantastic source of high-quality protein, which actively supports muscle repair and keeps you feeling full and satisfied for hours. Furthermore, the lean cut of beef delivers essential nutrients like iron and zinc, which are crucial for your energy levels and immune system function.

Additionally, the simple balsamic glaze offers its own benefits. In fact, balsamic vinegar contains antioxidants that help protect your cells from damage. As a result, this dish becomes more than just a meal; it becomes a proactive choice for your well-being. Moreover, the slow cooking process naturally tenderizes the meat without needing excessive fats or oils.

Consequently, you enjoy a incredibly flavorful and juicy main course that is also surprisingly wholesome. Ultimately, this Slow Cooker Balsamic Glazed Roast Beef delivers a powerful nutritional punch in every single bite. Therefore, you can feel great about serving it to your family any day of the week.

How it fits in a healthy lifestyle

This Slow Cooker Balsamic Glazed Roast Beef fits seamlessly into a balanced eating plan. It naturally aligns with high-protein and gluten-free diets, making it a versatile centerpiece for various nutritional goals. The lean protein helps manage hunger, which can support weight management efforts. Pair your roast beef with a side of roasted vegetables for a complete, fiber-rich meal that covers all your bases.

Planning meals ahead is key to maintaining a healthy routine, and this recipe is a perfect make-ahead option. You can easily incorporate the leftovers into your weekly lunch rotation for a satisfying and convenient option. For another great high-protein idea that works well with healthy meal prep, check out our grilled lemon herb chicken. This approach helps you stay on track with your goals without sacrificing an ounce of flavor.

Print
clock clock iconcutlery cutlery iconflag flag iconfolder folder iconinstagram instagram iconpinterest pinterest iconfacebook facebook iconprint print iconsquares squares iconheart heart iconheart solid heart solid icon

Slow Cooker Balsamic Glazed Roast Beef


  • Author: Chef Emy

Description

Tender roast beef with a sweet and tangy balsamic glaze, cooked to perfection in your slow cooker.


Ingredients

Scale

For the Crust:

  • 34 lb beef chuck roast
  • 1 cup beef broth
  • 1/2 cup balsamic vinegar
  • 1/4 cup honey
  • 2 tbsp soy sauce
  • 4 cloves garlic, minced
  • 1 tsp dried thyme
  • 1 tsp dried rosemary
  • 1/2 tsp black pepper
  • 1 tbsp cornstarch (optional, for thickening)

Instructions

1. Prepare the Crust:

  1. Place beef roast in slow cooker.
  2. In a bowl, whisk together beef broth, balsamic vinegar, honey, soy sauce, garlic, thyme, rosemary, and pepper. Pour over roast.
  3. Cover and cook on low for 8 hours or high for 4-5 hours, until beef is tender.
  4. Remove beef from slow cooker and let rest. If desired, whisk cornstarch into cooking liquid and simmer until thickened to create a glaze.
  5. Slice beef and serve with glaze drizzled on top.

Notes

You can customize the seasonings to taste.

How to Prepare This Dish

Steps and time-saving tips

First, pat your roast beef completely dry with paper towels. This crucial step helps the savory glaze stick beautifully and promotes a gorgeous sear. Meanwhile, whisk together your balsamic glaze, broth, soy sauce, honey, and minced garlic in a separate bowl. Next, generously season the meat on all sides with salt and pepper. Now, heat a tablespoon of oil in a large skillet over medium-high heat. Carefully sear the roast for a few minutes per side until you achieve a rich, brown crust. This process locks in those incredible juices. Then, simply place the seared roast into your slow cooker and pour the whisked glaze mixture over the top. Finally, cover the slow cooker and set it to low for 7-8 hours. The long, gentle cooking time transforms the beef into a fall-apart tender masterpiece. For a time-saving tip, you can mix your glaze ingredients the night before. Just store it in the fridge and give it a quick whisk before using it. Another great tip is to use pre-minced garlic from a jar to speed up your prep time without sacrificing flavor.

Mistakes I’ve made and learned from

I learned the hard way that skipping the sear is a major mistake for this Slow Cooker Balsamic Glazed Roast Beef. The first time I made it, I just placed the raw roast directly into the pot, and while it was still tasty, it lacked that deep, caramelized flavor we all love. Searing is non-negotiable for the best results. Another lesson was about the cut of meat. I once used a very lean cut, and it turned out a bit drier than I wanted. Now, I always opt for a well-marbled chuck roast because the fat renders down and makes the beef incredibly succulent. If you’re new to using your appliance, my guide on slow cooker maintenance can help you avoid common pitfalls. And if you love this recipe, you must try my hearty beef stew next—it uses a similar low-and-slow philosophy for maximum tenderness.

Cultural Connection and Variations

Where this recipe comes from

My family’s love affair with this dish started with my grandmother, who never owned a slow cooker but perfected a stovetop pot roast with a tangy, sweet vinegar kick. She called it her “Sunday gravy,” a name that always made us kids laugh. Ultimately, her method required constant tending. Conversely, the modern Slow Cooker Balsamic Glazed Roast Beef captures her spirit but hands busy families their time back.

Globally, cultures embrace the beautiful combination of sweet and sour with beef. For instance, in Italy, they might use a rich *agrodolce* reduction. Meanwhile, in other regions, families might add star anise for a deeper warmth or use apple cider vinegar for a fruitier tang. Furthermore, every cook adds their own signature; some swear by a splash of coffee for depth, while others toss in fresh herbs from the garden.

This particular version, however, celebrates that universal craving for melt-in-your-mouth meat with a glossy, flavorful punch. The slow cooker does the heavy lifting, but the soul of the dish remains timeless. Preparing a Slow Cooker Balsamic Glazed Roast Beef always feels like continuing a story that started generations ago at my nonna’s table.

How it fits in today’s cooking

This recipe absolutely thrives in our modern kitchens. It seamlessly fits into busy weeknights, yet it feels special enough for a holiday gathering. Moreover, the set-it-and-forget-it nature of the slow cooker empowers us to enjoy classic flavors without being chained to the stove.

Today’s cooks brilliantly adapt the recipe to fit various diets and pantries. For example, many easily swap the balsamic for a pomegranate molasses for a different twist. Others might serve the tender beef over creamy polenta instead of traditional mashed potatoes. If you are looking for the perfect side, our creamy garlic mashed potatoes create the ultimate comfort food plate.

This dish truly embodies the idea of effortless entertaining. You can easily double the recipe for a crowd without any extra stress. Ultimately, it provides that coveted “wow” factor with minimal active effort. For a fantastic dessert to follow this hearty meal, a slice of our classic New York cheesecake makes the perfect ending. This roast beef continues to earn its place in our regular rotation, proving some traditions only get better with time.

Taste and Texture

What makes it delicious

This Slow Cooker Balsamic Glazed Roast Beef delivers a truly mouthwatering experience. The balsamic vinegar reduces into a tangy, slightly sweet glaze that deeply penetrates the meat. As a result, you get incredibly tender, pull-apart beef that simply melts in your mouth. Meanwhile, the savory notes of garlic and onion create a rich, fragrant aroma that fills your kitchen. Ultimately, the final dish balances savory, sweet, and tangy flavors in every single bite.

Boosting the flavor

Fortunately, you can easily customize this dish to suit your taste. For a richer, deeper flavor, try adding a tablespoon of soy sauce or Worcestershire sauce to the glaze. Alternatively, stir in a spoonful of tomato paste for extra umami richness. Furthermore, serving it with a bright, creamy sauce creates a wonderful contrast. For instance, a quick horseradish cream or a dollop of garlic aioli cuts through the richness perfectly. Similarly, a side of our Creamy Garlic Mashed Potatoes soaks up the glorious juices. Finally, complete your meal with a crisp, refreshing side like our Easy Cucumber Salad to balance the hearty beef.

Tips for Success

Best practices for results

Always sear your roast on all sides first because this crucial step builds a deep, rich flavor foundation for your Slow Cooker Balsamic Glazed Roast Beef. Furthermore, use a sharp knife to thinly slice the meat against the grain for the most tender results. Meanwhile, remember to let the roast rest for a full ten minutes before carving; consequently, the juices will redistribute perfectly. Finally, always baste the roast with the glaze during the last hour of cooking to create a beautifully caramelized exterior.

Mistakes to avoid

Avoid overfilling your slow cooker with vegetables, as this can prevent even cooking and steam the meat instead of roasting it. For the best results, check out our guide on how to choose a slow cooker to ensure you have the right size. Additionally, do not skip deglazing the searing pan with a bit of broth; otherwise, you will lose those delicious browned bits that add so much flavor to your sauce. Moreover, ensure you use a quality balsamic vinegar for the glaze since a cheaper, overly acidic one can negatively impact the final taste. For more on selecting the right ingredients, our article on essential pantry staples is a great resource.

Serving and Pairing Suggestions

How to serve this dish

First, transfer your Slow Cooker Balsamic Glazed Roast Beef to a beautiful wooden cutting board or a large platter. Consequently, this creates a rustic and inviting centerpiece for your table. For a truly stunning presentation, generously spoon the rich, residual glaze from the crockpot over the top. Furthermore, a final flourish of fresh chopped rosemary or a sprinkle of flaky sea salt elevates the dish visually and adds a burst of flavor.

This incredibly versatile main course suits both casual family dinners and elegant holiday gatherings. Alternatively, slice it thin for incredible sandwiches that will make any lunch or brunch feel special. Ultimately, let the deep, tangy-sweet aroma of your Slow Cooker Balsamic Glazed Roast Beef welcome everyone to the table.

What goes well with it

For a classic comfort food pairing, serve this roast alongside a heap of creamy mashed potatoes. The potatoes beautifully soak up the exquisite balsamic glaze, creating a perfect bite every time. Additionally, a side of our simple Roasted Asparagus with Garlic introduces a crisp, green element that cuts through the richness.

When selecting a drink, a medium-bodied red wine like a Merlot complements the savory notes without overpowering them. Conversely, for a non-alcoholic option, a sparkling cherry juice offers a festive and flavorful fizz that mirrors the dish’s sweet and tangy profile. Finally, complete your feast with a light dessert, such as a slice of our refreshing No Bake Lemon Cheesecake, which cleanses the palate wonderfully.

What cut of beef is best for slow cooker balsamic glazed roast beef?

A chuck roast is the ideal cut for this recipe. Its high fat content and marbling break down beautifully during the long, slow cooking process, resulting in a tender and flavorful Slow Cooker Balsamic Glazed Roast Beef that shreds easily. Other good options include a rump roast or a bottom round roast.

Can I make balsamic glazed roast beef without a slow cooker?

Yes, you can adapt this recipe for an oven. Cook it covered at a low temperature, around 300°F (150°C), for several hours until the beef is fork-tender. However, the slow cooker is preferred as it provides exceptionally moist, hands-off cooking that perfectly infuses the meat with the tangy-sweet glaze.

How do I thicken the balsamic glaze for the roast?

After removing the cooked beef, pour the juices from the slow cooker into a saucepan and bring them to a simmer. Create a cornstarch slurry by mixing one tablespoon of cornstarch with two tablespoons of cold water, then whisk it into the simmering liquid until the glaze thickens to your desired consistency.

What should I serve with slow cooker balsamic roast beef?

This dish pairs wonderfully with creamy mashed potatoes, which are perfect for soaking up the rich glaze. For a complete meal, add a side of roasted carrots or green beans and a simple garden salad. The savory-sweet flavor of the Slow Cooker Balsamic Glazed Roast Beef is incredibly versatile.

Easy Harvest Bowls with Fig Balsamic Vinaigrette

easy-harvest-bowls-fig-balsamic

As the air turns crisp and the leaves begin their fiery transformation, we all crave meals that truly capture the soul of the season. We want something that feels both nourishing and deeply satisfying, a celebration of autumn’s bounty on a single plate. That is exactly the experience these Harvest Bowls with Fig Balsamic Vinaigrette deliver. This recipe wraps you in a warm, comforting embrace, combining sweet, savory, and tangy flavors that dance together perfectly. Ultimately, it is the kind of wholesome, vibrant dish that makes you feel good from the inside out, proving that healthy eating never has to sacrifice an ounce of flavor.

About This Recipe

Harvest Bowls with Fig Balsamic Vinaigrette are a quintessential autumn meal, featuring a hearty base of grains and roasted vegetables topped with a uniquely delicious homemade dressing. This dish primarily celebrates the best of fall produce. For example, we roast sweet potatoes and Brussels sprouts until they are caramelized and tender. Then, we add protein-packed chickpeas, fluffy quinoa, creamy goat cheese, and crunchy pecans for a perfect textural contrast. However, the true star of the show is undoubtedly the fig balsamic vinaigrette. This dressing masterfully blends the deep, jammy sweetness of fig preserves with the sharp tang of balsamic vinegar, creating a flavor profile that elevates every single component in the bowl.

This recipe matters because it perfectly aligns with a desire for meals that are both nutritious and incredibly satisfying. Furthermore, it is naturally gluten-free and easily adaptable for vegans, making it a fantastic option for various dietary needs. A great Harvest Bowl with Fig Balsamic Vinaigrette strikes a beautiful balance between earthy, sweet, savory, and tangy notes in every single bite. Consequently, it fits our blog’s tone of approachable, everyday gourmet cooking perfectly. We always strive to create recipes that feel special yet are completely achievable for home cooks, just like our popular Vegan Blueberry Muffins. This bowl is a complete meal that is as beautiful to look at as it is delicious to eat, embodying the essence of thoughtful, seasonal cooking.

Moreover, preparing a meal like this allows you to practice the art of building flavors and textures, a fundamental skill in creating dishes that truly sing. Similarly, understanding how to craft a well-balanced dressing is a game-changer for any home chef, much like mastering the perfect crumb in a classic coffee cake. In fact, the principles of balancing sweet and tangy elements in this vinaigrette can be applied to many other dressings and marinades. For inspiration on another seasonal favorite, you might also enjoy our Pumpkin Chocolate Chip Cookies for a sweet finish to your autumn feast. Ultimately, this recipe empowers you to create a restaurant-quality dish right in your own kitchen.

Why I Love This Recipe

I genuinely love this recipe because it feels like my personal welcome mat to the fall season. The process of roasting the vegetables fills my kitchen with an aroma that is pure comfort, and whisking together the fig balsamic vinaigrette is a simple act that always feels a little bit magical. This dish reminds me of weekend farmers’ market trips, searching for the most vibrant produce to bring home. It is my go-to meal for both a quick weeknight dinner and a impressive lunch for friends because it consistently delivers on flavor and makes everyone feel nourished and happy. For me, these Harvest Bowls with Fig Balsamic Vinaigrette are more than just a recipe; they are a delicious tradition.

Health and Nutrition

Why it’s good for your body

Harvest Bowls with Fig Balsamic Vinaigrette actively fuel your body with essential nutrients. For instance, the base of leafy greens and quinoa provides a powerful dose of fiber and plant-based protein. Consequently, this combination supports healthy digestion and keeps you feeling full and satisfied for hours.

Moreover, the vibrant array of roasted vegetables delivers a wide spectrum of antioxidants. These compounds fight oxidative stress in your body. Additionally, the homemade Fig Balsamic Vinaigrette offers a healthier alternative to store-bought dressings. It uses natural sweetness from figs instead of refined sugars.

Furthermore, the healthy fats from ingredients like nuts or avocado aid in nutrient absorption. Ultimately, enjoying a Harvest Bowl with Fig Balsamic Vinaigrette means you are consuming a meal rich in vitamins, minerals, and healthy fats. Therefore, your body gets the balanced nutrition it truly deserves.

How it fits in a healthy lifestyle

This harvest bowl seamlessly fits into almost any healthy eating plan. It is naturally gluten-free and can easily be made vegan by omitting cheese, making it perfect for a gluten-free lifestyle. The balance of complex carbs, lean protein, and good fats makes it an ideal meal for sustaining energy levels throughout a busy afternoon.

You can also meal prep the components ahead of time for a quick, healthy lunch that prevents less nutritious takeout choices. The fig balsamic vinaigrette itself is a heart-healthy choice, as it relies on olive oil and whole fruits for its flavor profile. For more inspiration on building wholesome meals that support your goals, explore our guide on practical meal prepping. This dish truly supports a sustainable and enjoyable approach to healthy living.

Print
clock clock iconcutlery cutlery iconflag flag iconfolder folder iconinstagram instagram iconpinterest pinterest iconfacebook facebook iconprint print iconsquares squares iconheart heart iconheart solid heart solid icon

Harvest Bowls with Fig Balsamic Vinaigrette


  • Author: Chef Emy

Description

A hearty and nutritious bowl featuring roasted vegetables, grains, and a sweet-tangy fig balsamic vinaigrette.


Ingredients

Scale

For the Crust:

  • 1 cup quinoa, rinsed
  • 2 cups vegetable broth
  • 1 sweet potato, cubed
  • 1 cup Brussels sprouts, halved
  • 1 apple, sliced
  • 4 cups mixed greens
  • 1/2 cup pecans, toasted
  • 1/4 cup dried cranberries
  • 1/4 cup olive oil
  • 2 tbsp balsamic vinegar
  • 2 tbsp fig jam
  • 1 tsp Dijon mustard
  • Salt and pepper to taste

Instructions

1. Prepare the Crust:

  1. Preheat oven to 400°F. Toss sweet potato and Brussels sprouts with 1 tbsp olive oil, salt, and pepper. Roast for 20-25 minutes until tender.
  2. Cook quinoa in vegetable broth according to package instructions. Let cool slightly.
  3. Whisk together olive oil, balsamic vinegar, fig jam, Dijon mustard, salt, and pepper for the vinaigrette.
  4. Assemble bowls with mixed greens, quinoa, roasted vegetables, apple slices, pecans, and cranberries.
  5. Drizzle with fig balsamic vinaigrette and serve immediately.

Notes

You can customize the seasonings to taste.

How to Prepare This Dish

Steps and time-saving tips

First, preheat your oven to 400°F to roast the vegetables. Meanwhile, chop your sweet potatoes and Brussels sprouts into bite-sized pieces. Toss them with olive oil, salt, and pepper on a large baking sheet. Roasting everything on a single sheet saves you both time and cleanup. While the vegetables roast, prepare your farro or quinoa according to package directions. Next, whisk together the Fig Balsamic Vinaigrette in a small bowl or jar. Simply combine fig jam, balsamic vinegar, olive oil, and a touch of Dijon mustard. Whisk vigorously until the dressing is smooth and emulsified. Once the grains are fluffy and the vegetables are caramelized, let everything cool slightly. Finally, assemble your Harvest Bowls with Fig Balsamic Vinaigrette by layering the grains, roasted veggies, fresh arugula, creamy goat cheese, and crunchy pecans. Drizzle that gorgeous vinaigrette over the top right before serving. For a fantastic make-ahead option, store all the components separately in the fridge. This way, you can quickly assemble a fresh, crisp bowl for lunch all week long.

Mistakes I’ve made and learned from

I used to drown my beautiful Harvest Bowls with Fig Balsamic Vinaigrette in way too much dressing, making the arugula wilt and the entire dish soggy within minutes. Now, I always serve the vinaigrette on the side and let everyone drizzle their own. This keeps every component perfectly textured. Another big lesson was overcooking the grains. A mushy base really brings the whole bowl down. I finally learned that nailing the perfect how to cook quinoa technique is absolutely crucial for the right fluffy, chewy texture. Also, don’t skip toasting your nuts. I once threw raw pecans on top and their bland flavor was a total letdown. Toasting them for just a few minutes in a dry pan, like I do for my roasted vegetable salad, unlocks a deep, nutty flavor that completely elevates the final dish.

Cultural Connection and Variations

Where this recipe comes from

My grandmother always said the best meals tell a story of the land. Consequently, her version of Harvest Bowls with Fig Balsamic Vinaigrette was a love letter to autumn in the Midwest. She would use wild black walnuts and the last of the season’s greens. Meanwhile, across the Atlantic, Mediterranean cooks might prepare a similar bowl. They often swap in farro or couscous and top it with briny feta cheese and Kalamata olives. Their vinaigrette, however, still celebrates the sweet, earthy fig.

In my own family, we argue over the best squash to roast. Personally, I champion sweet potato, but my aunt swears by delicata. Furthermore, some regions might add a handful of spicy arugula or even some roasted chicken for heartiness. Ultimately, the beauty of this dish is its flexibility. Every cook imparts a piece of their own harvest story into the bowl. This global conversation makes Harvest Bowls with Fig Balsamic Vinaigrette a truly special dish.

How it fits in today’s cooking

This recipe absolutely thrives in modern kitchens. Firstly, it perfectly captures the farm-to-table movement with its focus on fresh, seasonal produce. Busy home cooks also love it for meal prep; you can easily assemble components ahead for a fast, healthy lunch. Moreover, its beautiful, colorful layers make it a star on any holiday table, especially alongside other incredible Thanksgiving side dishes.

Today, people often adapt it to fit dietary needs. For instance, they might use quinoa for a protein boost or a dairy-free cheese alternative. Ultimately, it provides a nourishing and satisfying experience that fits our current desire for wholesome food. It’s the kind of meal that feels both special and simple, much like enjoying a perfect slice of gluten-free cinnamon coffee cake on a cozy morning.

Taste and Texture

What makes it delicious

These Harvest Bowls with Fig Balsamic Vinaigrette deliver a stunning symphony of flavors and textures in every single bite. You experience an immediate sweet and tangy punch from the rich, fruity vinaigrette, which perfectly coats the hearty base of grains and greens. Furthermore, roasted sweet potatoes and squash offer a wonderfully creamy and soft contrast to the crunchy toasted pecans and crisp apple slices. Ultimately, the creamy goat cheese melts slightly onto the warm components, creating a luxurious and fragrant finish that makes these Harvest Bowls with Fig Balsamic Vinaigrette utterly irresistible.

Boosting the flavor

You can easily amplify the savory depth of this dish with a few clever tweaks. For instance, try crumbling a bit of crispy bacon or my favorite Candied Pecans over the top for an extra layer of salty sweetness and crunch. Additionally, a spoonful of a complementary sauce can work wonders; a drizzle of this creamy Lemon Tahini Dressing introduces a bright, nutty dimension that pairs beautifully with the fig. Finally, do not hesitate to add a pinch of smoked paprika or a sprinkle of fresh herbs like thyme to elevate the entire bowl with minimal effort.

Tips for Success

Best practices for results

Always whisk your vinaigrette vigorously to create a stable emulsion, which ensures your Harvest Bowls with Fig Balsamic Vinaigrette have a perfectly coated and flavorful base. Furthermore, roast your vegetables in a single layer on the baking sheet so they caramelize beautifully instead of steaming. For the best texture and temperature contrast, serve your bowls immediately after assembling them with the warm components.

Mistakes to avoid

A common error is overdressing the greens, which can make your entire Harvest Bowl soggy; instead, always add the vinaigrette just before serving. Additionally, do not skip toasting the nuts and seeds, as this crucial step unlocks their full flavor and adds a necessary crunch. For more guidance on getting your dressings just right, read our guide on how to make vinaigrette. Moreover, if your grains seem sticky or mushy, you likely did not fluff them with a fork after cooking; consequently, this simple step prevents clumping. For perfect grains every time, check out our tips for how to cook quinoa.

Serving and Pairing Suggestions

How to serve this dish

For a truly stunning presentation, serve your Harvest Bowls with Fig Balsamic Vinaigrette in a wide, shallow bowl. This style beautifully showcases all the colorful layers and textures. Moreover, drizzle the vinaigrette around the edge just before serving for a professional touch. Consequently, every bite will be bursting with flavor.

Consider these Harvest Bowls for your next holiday potluck or a special weekend brunch. They truly shine as a vibrant and healthy centerpiece. Finally, garnish with a final sprinkle of pomegranate arils and fresh herbs for a festive and visually appealing finish.

What goes well with it

A crisp, chilled white wine like Sauvignon Blanc perfectly complements the sweet and tangy notes of the fig balsamic vinaigrette. Alternatively, a sparkling water with a squeeze of lemon makes a wonderfully refreshing non-alcoholic option.

For a heartier meal, pair your Harvest Bowls with Fig Balsamic Vinaigrette with a side of warm, crusty bread. We especially love our easy Garlic Herb Focaccia for dipping into any extra dressing. Additionally, a simple cup of soup creates a fantastic lunch combination. Try our creamy Roasted Tomato Basil Soup for a cozy and satisfying pairing.

What is in a harvest bowl?

A classic harvest bowl combines roasted autumn vegetables like sweet potatoes and Brussels sprouts with hearty grains such as quinoa or farro, fresh greens like kale or arugula, a protein like grilled chicken or chickpeas, and a creamy cheese like goat cheese or feta. The combination is then brought together with a rich, sweet, and tangy Fig Balsamic Vinaigrette, making it a complete and satisfying meal.

What is fig balsamic vinaigrette made of?

Fig balsamic vinaigrette typically blends fig jam or preserves with aged balsamic vinegar, extra virgin olive oil, Dijon mustard, and a touch of honey or maple syrup for sweetness. Whisking these ingredients together creates a perfectly emulsified, luxurious dressing that clings beautifully to the ingredients in your Harvest Bowl with Fig Balsamic Vinaigrette.

Can I make a harvest bowl ahead of time?

Yes, you can easily meal prep Harvest Bowls with Fig Balsamic Vinaigrette. Store the roasted vegetables, cooked grains, and protein separately from the fresh greens and dressing. Assemble your bowl just before eating to keep the greens crisp and prevent the ingredients from getting soggy. Keep the fig balsamic vinaigrette in a small sealed container until you’re ready to enjoy.

Is a harvest bowl healthy?

Absolutely. A well-constructed Harvest Bowl with Fig Balsamic Vinaigrette is a nutritional powerhouse. It provides a balanced mix of complex carbohydrates from the grains and vegetables, fiber from the greens and veggies, and protein from your chosen source. The healthy fats in the olive oil-based vinaigrette also help your body absorb the fat-soluble vitamins from the meal.

Easy Minestrone with Sausage and Pesto Recipe

easy-minestrone-sausage-pesto

There is something profoundly comforting about a steaming bowl of soup on a crisp evening, especially one that feels like a warm embrace from the inside out. If you are searching for a meal that is both deeply nourishing and bursting with robust flavor, your quest ends here. Today, we are diving into a recipe that transforms the classic Italian staple into a heartier, more satisfying experience. Get ready to fall in love with this incredible Minestrone with Sausage and Pesto from The Food Charlatan, a dish that promises to become an instant classic in your weekly rotation.

About This Recipe

Minestrone with Sausage and Pesto from The Food Charlatan is not your average vegetable soup. Essentially, this recipe builds upon the traditional foundation of a minestrone, which typically includes beans, pasta, and a medley of vegetables. However, the addition of savory Italian sausage introduces a rich, meaty depth that makes the soup incredibly substantial. Furthermore, a generous swirl of vibrant homemade pesto just before serving elevates every single spoonful with a bright, herbaceous freshness that truly makes this version stand out. Consequently, this dish manages to be both rustic and elegant, perfect for a casual family dinner yet impressive enough for company.

This particular recipe matters because it delivers restaurant-quality flavor with straightforward, approachable steps. Moreover, it fits the cozy, from-scratch cooking philosophy we champion here, focusing on whole ingredients that you can feel good about serving. The soup is incredibly versatile; for instance, you can easily adapt it based on what is in your pantry or garden. Additionally, it makes a large pot, meaning you will have delicious leftovers that often taste even better the next day. If you enjoy mastering foundational recipes, you will appreciate our guide on how to make the perfect basil pesto to use in this soup. Ultimately, this minestrone is a complete meal in a bowl, offering a perfect balance of protein, vegetables, and carbs that will satisfy even the heartiest of appetites.

Why I Love This Recipe

I have a very personal connection to this Minestrone with Sausage and Pesto from The Food Charlatan because it became a staple during a particularly hectic season of life. One snowy weekend, I needed to create a meal that could feed a crowd with minimal effort, and this recipe delivered beyond my expectations. The aroma of garlic, sausage, and herbs filling my kitchen created an instant sense of calm and anticipation. Now, it is my go-to dish for potlucks and whenever a friend needs a comforting meal, much like the reliable simplicity of a classic yellow cake for celebrations. Every time I make it, I remember that cooking is not just about feeding people; it is about creating warmth and connection, and this soup does exactly that.

Health and Nutrition

Why it’s good for your body

Minestrone with Sausage and Pesto from The Food Charlatan truly nourishes your body from the inside out. Fundamentally, this hearty soup delivers a powerful combination of protein and fiber. Consequently, this duo works together to keep you feeling full and satisfied for hours. Moreover, the lean sausage provides high-quality protein which actively supports muscle repair and maintenance.

Additionally, the vegetable-packed broth offers a wealth of vitamins and antioxidants. For instance, ingredients like carrots, celery, and tomatoes contribute essential nutrients like vitamin A and lycopene. Furthermore, the beans add a significant boost of soluble fiber, which actively promotes healthy digestion and gut health. Ultimately, every spoonful of Minestrone with Sausage and Pesto from The Food Charlatan is a step toward better wellness.

Finally, the homemade pesto does more than just add incredible flavor. Importantly, basil and olive oil provide anti-inflammatory benefits and support heart health. Therefore, you can feel great about enjoying a bowl of this comforting and nutrient-dense Minestrone with Sausage and Pesto from The Food Charlatan.

How it fits in a healthy lifestyle

This minestrone fits seamlessly into a balanced eating plan. It’s a fantastic make-ahead option for busy weeknights, ensuring you have a healthy meal ready to go instead of opting for takeout. The recipe is naturally packed with protein and vegetables, making it a complete and satisfying meal in one bowl.

For those following specific dietary goals, this soup is wonderfully adaptable. You can easily use a gluten-free pasta to keep it celiac-friendly. The lean protein from the sausage and the fiber from the beans and vegetables also make it a great choice for a heart-healthy diet. If you’re looking for more inspiration for wholesome, family-friendly meals, explore our collection of healthy dinner ideas.

Enjoying this minestrone is a simple and delicious strategy for getting more vegetables into your day. It’s the perfect example of how eating well doesn’t have to be complicated or bland. For more tips on building a nutritious pantry that makes cooking easier, check out our guide on essential healthy pantry staples.

Print
clock clock iconcutlery cutlery iconflag flag iconfolder folder iconinstagram instagram iconpinterest pinterest iconfacebook facebook iconprint print iconsquares squares iconheart heart iconheart solid heart solid icon

Minestrone with Sausage and Pesto


  • Author: Chef Emy

Description

A hearty Italian soup featuring savory sausage, fresh vegetables, and a swirl of basil pesto for a flavorful finish.


Ingredients

Scale

For the Crust:

  • 1 lb Italian sausage, casings removed
  • 1 onion, diced
  • 2 carrots, diced
  • 2 celery stalks, diced
  • 3 cloves garlic, minced
  • 1 (28 oz) can diced tomatoes
  • 6 cups chicken broth
  • 1 zucchini, diced
  • 1 (15 oz) can cannellini beans, drained and rinsed
  • 1 cup ditalini pasta
  • 1 tsp dried oregano
  • 1/2 tsp red pepper flakes
  • Salt and black pepper to taste
  • 1/4 cup basil pesto
  • Grated Parmesan cheese for serving

Instructions

1. Prepare the Crust:

  1. In a large pot, brown the sausage over medium-high heat, breaking it into crumbles. Drain excess fat if needed.
  2. Add onion, carrots, and celery. Cook until softened, about 5-7 minutes. Stir in garlic and cook for 1 minute until fragrant.
  3. Pour in diced tomatoes and chicken broth. Bring to a boil, then reduce heat and simmer for 10 minutes.
  4. Add zucchini, beans, pasta, oregano, red pepper flakes, salt, and pepper. Simmer for another 10-12 minutes until pasta is tender.
  5. Ladle soup into bowls. Swirl a spoonful of pesto into each serving and top with grated Parmesan cheese.

Notes

You can customize the seasonings to taste.

How to Prepare This Dish

Steps and time-saving tips

First, grab your largest soup pot and brown the sausage over medium-high heat. Crumble it with your spoon as it cooks for the perfect texture. Meanwhile, chop your onions, carrots, and celery. This classic combo, called a soffritto, builds a deep flavor base for your Minestrone with Sausage and Pesto from The Food Charlatan. Next, add those chopped veggies directly to the pot with the browned sausage. Sauté everything until the onions turn soft and translucent. Then, stir in the garlic and let its aroma bloom for just one minute. Pour in your broth, canned tomatoes, and a hearty handful of dried herbs. Bring the pot to a lively boil before reducing the heat to a gentle simmer. Let the soup bubble away for at least twenty minutes; this allows the flavors to meld together beautifully. Finally, stir in your pasta and any quick-cooking veggies like zucchini or spinach. For a brilliant time-saving tip, use pre-shredded carrots and pre-chopped onion from the grocery store salad bar. Also, consider cooking the pasta separately and adding it to each bowl to prevent it from becoming mushy in leftovers.

Mistakes I’ve made and learned from

I have absolutely learned the hard way that not all sausages are created equal for this recipe. Once, I used a super lean chicken sausage and ended up with a broth that lacked the rich, savory depth I craved. Now, I always opt for a sausage with a bit more fat content, like a classic Italian variety, to build a better foundation. Another common blunder I made was rushing the simmering step. Impatience led to a soup where the flavors hadn’t fully married, tasting more like seasoned water than a robust Minestrone with Sausage and Pesto from The Food Charlatan. Letting it simmer for the full time is non-negotiable for maximum flavor. For more on building flavor, my post on the ultimate guide to soup covers this in detail. And if you’re worried about your veggies, my tips on knife skills 101 will make prep a breeze and ensure everything cooks evenly.

Cultural Connection and Variations

Where this recipe comes from

Minestrone tells a beautiful story of Italian ingenuity. Traditionally, this hearty soup never followed a strict recipe. Instead, Italian home cooks would craft it from whatever seasonal vegetables they had available. Consequently, every region, and even every family, boasts its own signature version. Some use pasta, others prefer rice or beans. The addition of savory sausage and a vibrant pesto swirl, however, gives this particular Minestrone with Sausage and Pesto from The Food Charlatan a uniquely rich and deeply flavorful character. My own family’s version always includes a generous spoonful of pesto, a trick I learned from a friend whose grandmother hailed from Genoa, the birthplace of pesto itself. Furthermore, across Italy, you might find a Tuscan minestrone without tomatoes or a Ligurian version that always includes a dollop of pesto right at the end. Ultimately, this recipe celebrates that spirit of adaptation, making it your own with what you love and have on hand.

This Minestrone with Sausage and Pesto from The Food Charlatan builds on that wonderful tradition of flexibility. For instance, during the summer, I might load it with zucchini and fresh basil from the garden. Conversely, in the colder months, heartier vegetables like butternut squash and kale take center stage. The beauty of this dish truly lies in its ability to transform with the seasons, much like it has for generations in Italian kitchens. It’s a comforting, one-pot meal that always feels both nourishing and deeply satisfying.

How it fits in today’s cooking

This minestrone recipe fits perfectly into our modern desire for meals that are both wholesome and convenient. It’s an ideal make-ahead lunch for a busy week, as the flavors only improve after a day or two in the fridge. Moreover, it serves as a fantastic vessel for cleaning out the vegetable drawer, reducing food waste in the most delicious way possible. You can easily adapt it to be vegetarian by skipping the sausage and using a robust vegetable broth, or make it gluten-free by choosing the right pasta. For a cozy weekend dinner, I love pairing a big bowl with a slice of warm, crusty bread. In fact, a simple Easy Focaccia is the perfect companion for soaking up every last bit of the savory broth.

Despite its rustic roots, this soup absolutely holds its own at a dinner party. It makes for a stunning and comforting starter that welcomes guests. Ultimately, it bridges the gap between everyday cooking and special occasion meals with effortless grace. After a long day, nothing beats a bowl of this hearty soup. And if you’re looking for a sweet finish to your meal, a slice of Classic Coffee Cake provides the perfect contrast. This minestrone remains a timeless classic because it nourishes the body and the soul, no matter the occasion.

Taste and Texture

What makes it delicious

This Minestrone with Sausage and Pesto from The Food Charlatan delivers a deeply savory and satisfying experience. First, the rich, garlicky sausage and fragrant basil pesto create a robust and aromatic broth that fills your kitchen with an incredible smell. Meanwhile, each spoonful offers a delightful contrast of textures, from the tender, chewy pasta and soft beans to the slight crunch of fresh zucchini. Ultimately, the pesto swirls in a burst of herbal, nutty flavor that elevates every single bite. This Minestrone with Sausage and Pesto from The Food Charlatan truly is a hearty and comforting bowl.

Boosting the flavor

For an even more dynamic bowl, consider a few simple tweaks. Firstly, a dollop of creamy ricotta or a sprinkle of parmesan cheese on top adds a wonderful salty, creamy element that melts beautifully into the hot soup. If you want to add a spicy kick, a pinch of red pepper flakes or a dash of hot sauce will wake up all the other flavors. Additionally, serving this minestrone with a warm, crusty piece of bread is perfect for soaking up every last drop of the delicious broth. For more inspiration on building flavor, explore our guide on creating the perfect cheese board to find complementary toppings. Furthermore, a bright, simple side salad can balance the heartiness of the soup; our easy salad dressing recipe comes together in minutes.

Tips for Success

Best practices for results

First, always brown the sausage thoroughly to build a deep, savory foundation for your Minestrone with Sausage and Pesto from The Food Charlatan. Furthermore, use a high-quality chicken stock, as it forms the soul of the soup. Do not rush the simmering process; instead, allow the flavors to meld together beautifully. Finally, stir in the pesto just before serving to preserve its vibrant, fresh flavor and gorgeous green color.

Mistakes to avoid

One common error is overcooking the vegetables, which can turn them mushy. Therefore, add delicate ingredients like zucchini and pasta towards the end of the cooking time. Additionally, avoid using bland broth, as it will make the entire soup taste flat. For a foolproof solution, always taste and season your soup in layers, a technique we detail in our guide on how to season soup perfectly. Another mistake is adding cheese rinds that are too waxy, which can leave an unpleasant film. Conversely, if you want to use that trick for umami, ensure you use a high-quality, properly stored Parmesan. You can learn more about selecting the best ingredients in our ultimate guide to Italian cheeses.

Serving and Pairing Suggestions

How to serve this dish

Serve this Minestrone with Sausage and Pesto from The Food Charlatan piping hot in a deep, rustic bowl to showcase its hearty texture. Furthermore, garnish each serving with an extra swirl of pesto, a sprinkle of Parmesan cheese, and a few fresh basil leaves for a beautiful, restaurant-quality finish. This dish truly shines as the star of a casual weeknight dinner, yet it also makes a wonderfully comforting meal for a chilly weekend lunch. Ultimately, presenting it with a side of crusty bread for dipping completes the entire cozy experience.

What goes well with it

Firstly, a thick slice of warm, crusty bread is absolutely essential for soaking up every last bit of the flavorful broth. For a perfect homemade option, try our incredibly easy No Knead Bread, which bakes up with a crackling crust and soft interior. Secondly, a simple, crisp side salad provides a refreshing contrast to the rich soup. Our popular Italian Salad, with its tangy vinaigrette and crunchy romaine, offers a bright and zesty complement. Finally, for a drink pairing, a medium-bodied red wine like a Chianti or a chilled glass of sparkling water with lemon both cut through the richness beautifully.

What kind of sausage is best for Minestrone with Sausage and Pesto from The Food Charlatan?

Italian sausage is highly recommended for this recipe. You can use either mild or hot Italian sausage depending on your preferred spice level. The fennel and garlic flavors in Italian sausage perfectly complement the other ingredients in this Minestrone with Sausage and Pesto from The Food Charlatan.

Can I make this minestrone soup ahead of time?

Yes, this soup is an excellent make-ahead meal. The flavors actually deepen and improve after sitting for a day. Simply store it in an airtight container in the refrigerator and reheat it on the stovetop, adding a fresh dollop of pesto just before serving.

Is there a way to make this recipe gluten-free?

Absolutely. To make this Minestrone with Sausage and Pesto gluten-free, simply substitute the pasta with a gluten-free variety like brown rice pasta or quinoa pasta. Also, ensure your sausage is certified gluten-free, as some brands may contain fillers.

Can I use store-bought pesto for this minestrone recipe?

While The Food Charlatan’s homemade pesto is fantastic, a high-quality store-bought pesto will work in a pinch. Look for a refrigerated brand with a short ingredient list for the best flavor. Stir it in at the end to preserve its fresh, vibrant taste.