“`html
Table of Contents
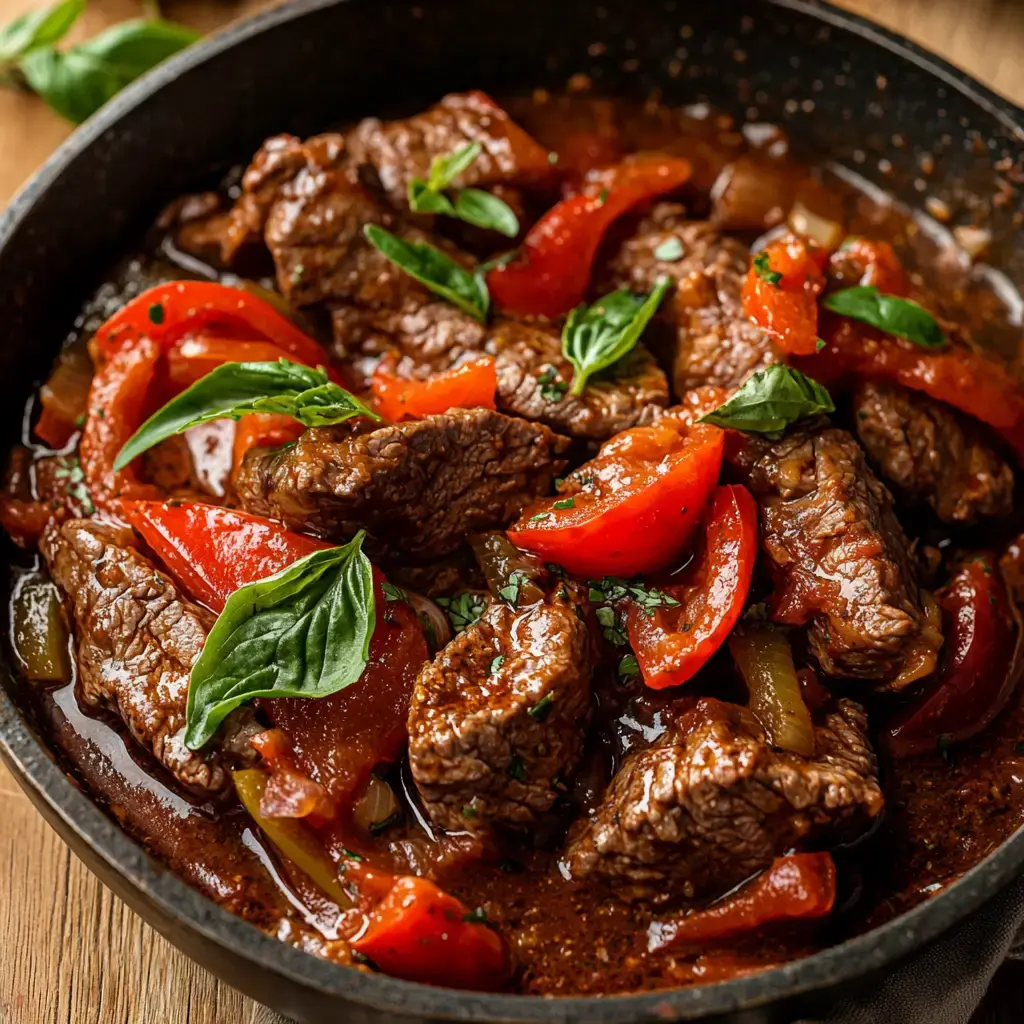
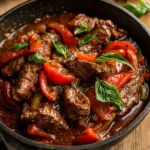
Classic Steak Pizzaiola Recipe
Are You Craving a Flavor-Packed Dinner That’s Both Comforting and Impressive?
If you’re on the hunt for a meal that brings the rustic charm of Italian cuisine right to your dinner table without requiring hours in the kitchen, you’ve come to the right place. The aroma of simmering tomatoes, garlic, and herbs mingling with perfectly cooked steak is simply irresistible. Steak Pizzaiola is a classic Italian-American dish that transforms a humble cut of steak into a culinary masterpiece. Historically, “pizzaiola” referred to a style of cooking used by pizza makers, often involving tomatoes, garlic, and oregano. This method, when applied to steak, creates a deeply flavorful and tender result. But what exactly is this dish, and how can you recreate its authentic magic at home? We’ll guide you through every flavorful step, ensuring your Classic Steak Pizzaiola is a resounding success.
A Symphony of Flavors: Ingredients for Steak Pizzaiola
The beauty of Steak Pizzaiola lies in its simplicity and the quality of its ingredients. Each component plays a crucial role in building the rich, savory sauce that envelops the tender steak.
- 2 (about 6-8 oz each) Ribeye Steaks or Sirloin Steaks: Choose well-marbled cuts for maximum flavor and tenderness. Ribeye offers a rich, buttery taste, while sirloin provides a good balance of flavor and lean meat.
- Substitution: Flank steak or strip steak can also work. For a leaner option, consider top round, though it might require a slightly longer simmer time to achieve tenderness.
- 2 tablespoons Olive Oil: Extra virgin olive oil is preferred for its robust flavor, but a good quality regular olive oil will also suffice.
- Substitution: Avocado oil or grapeseed oil are neutral alternatives.
- 1 large Onion, thinly sliced: Yellow or sweet onions lend a pleasant sweetness and depth to the sauce.
- Substitution: Shallots can offer a more delicate flavor.
- 4 cloves Garlic, minced: Freshly minced garlic provides an essential pungent aroma and flavor.
- Substitution: Garlic powder can be used in a pinch, but it won’t deliver the same vibrant kick (use about 1 teaspoon).
- 1 (28 ounce) can Crushed Tomatoes: Good quality crushed tomatoes form the heart of the pizzaiola sauce, providing a tangy, slightly sweet base.
- Substitution: Diced tomatoes will work, but the sauce will have more texture. You can also use whole peeled tomatoes and crush them yourself.
- 1 teaspoon Dried Oregano: This classic herb is quintessential to Italian cooking and brings an earthy, slightly peppery note.
- Substitution: A mix of dried thyme and basil can create a similar herbal profile.
- 1/2 teaspoon Red Pepper Flakes (optional): For a gentle warmth that complements the other flavors. Adjust to your preference.
- Substitution: A pinch of cayenne pepper or a dash of your favorite hot sauce.
- 1/4 cup Dry Red Wine (optional): Adds depth and complexity to the sauce.
- Substitution: Beef broth or an equal amount of water.
- Salt and freshly ground Black Pepper: To taste. Essential for enhancing all the other flavors.
- Fresh Basil leaves, for garnish: Adds a burst of fresh, aromatic flavor and a vibrant green finish.
- Substitution: Fresh parsley leaves can also be used.
- Optional additions: Sliced mushrooms, bell peppers, or a splash of balsamic vinegar.
Time Well Spent: Recipe Timing
This recipe is designed for efficiency without sacrificing flavor. It’s a fantastic weeknight meal that feels special, yet comes together relatively quickly.
Compared to the average steak recipe, which can often take longer due to marinating or more complex cooking methods, Steak Pizzaiola offers a streamlined approach to preparing a delicious steak dinner. While many recipes might involve grilling or broiling, this pan-simmering method infuses the steak with sauce and tenderizes it beautifully within a reasonable timeframe.

Crafting Your Classic Steak Pizzaiola: Step-by-Step
Follow these simple steps to create a mouthwatering Steak Pizzaiola that will impress your family and friends.
Step 1: Prep Your Ingredients
Begin by patting your steaks completely dry with paper towels. This is a crucial step for achieving a good sear. Season both sides liberally with salt and freshly ground black pepper. Prepare your onion by thinly slicing it and mincing the garlic. If you’re using any optional vegetables like mushrooms or bell peppers, slice them now as well.
Step 2: Sear the Steak
Heat 1 tablespoon of olive oil in a large, heavy-bottomed skillet or Dutch oven over medium-high heat until it shimmers. Carefully place the seasoned steaks into the hot skillet. Sear for about 2-3 minutes per side, until a beautiful golden-brown crust forms. Don’t overcrowd the pan; cook steaks in batches if necessary. Once seared, remove the steaks from the skillet and set them aside on a plate. They will finish cooking in the sauce.
Step 3: Sauté the Aromatics
Reduce the heat to medium. Add the remaining 1 tablespoon of olive oil to the same skillet. If there’s a lot of rendered fat from the steak, you might not need the full amount. Add the thinly sliced onion to the skillet and sauté for 5-7 minutes, stirring occasionally, until softened and translucent. Add the minced garlic (and any optional mushrooms or bell peppers, if using) and cook for another 1-2 minutes until fragrant, being careful not to burn the garlic.
Step 4: Build the Sauce
Pour in the red wine (if using) and scrape up any browned bits from the bottom of the pan. Let it simmer and reduce by about half, which should take 1-2 minutes. This deglazing step adds tremendous flavor. Stir in the crushed tomatoes, dried oregano, and red pepper flakes (if using). Bring the sauce to a gentle simmer. Season with salt and pepper to taste. Remember that the steak will also have been seasoned, so be mindful of salt at this stage.
Step 5: Simmer and Finish
Nestle the seared steaks back into the skillet, ensuring they are partially submerged in the sauce. Reduce the heat to low, cover the skillet (or Dutch oven), and let it simmer gently for about 15-25 minutes. The exact time will depend on the thickness of your steaks and your desired level of doneness. The steak should be tender and cooked through. For medium-rare, aim for an internal temperature of 130-135°F (54-57°C). For medium, aim for 135-140°F (57-60°C).
Once cooked, remove the steaks from the sauce, let them rest for 5 minutes on a cutting board. Spoon some of the warm pizzaiola sauce over the steaks. Garnish generously with fresh basil leaves.
Nutritional Snapshot (Approximate per serving, without sides)
- Calories: 450-600 (depending on steak cut and fat content)
- Protein: 35-45g
- Fat: 25-40g
- Carbohydrates: 10-15g
- Fiber: 3-5g
Please note: These are estimates and can vary based on specific ingredients and portion sizes.
Smarter Swaps for a Lighter Pizzaiola
While Steak Pizzaiola is already quite balanced, you can make it even healthier without sacrificing its delicious character:
- Leaner Protein: Opt for leaner cuts of steak like top round or even chicken breast (adjust cooking time accordingly).
- More Veggies: Bulk up the sauce with extra vegetables like zucchini, eggplant, or spinach. Sauté them alongside the onions for added fiber and nutrients.
- Reduced Oil: Use a non-stick skillet and a lighter hand with the olive oil. You might only need a tablespoon total for sautéing.
- Half the Wine: If concerned about alcohol or calories, use half the amount of wine or skip it entirely, opting for broth instead.
Perfect Pairings for Your Steak Pizzaiola
Steak Pizzaiola is versatile enough to be served in several delicious ways:
- With Pasta: Toss your favorite pasta (spaghetti, linguine, or penne) with the extra sauce.
- Over Polenta: Creamy polenta is a beautiful, comforting base for the steak and sauce.
- With Crusty Bread: Perfect for soaking up every last drop of that glorious sauce.
- Alongside Greens: A simple side salad with a vinaigrette provides a fresh contrast.
Avoid These Pitfalls: Common Mistakes to Dodge
- Not Drying the Steak: Insufficiently dried steak will steam instead of sear, failing to develop that crucial flavorful crust.
- Overcrowding the Pan: This lowers the pan temperature, leading to steamed meat and a less appealing texture.
- Burning the Garlic: Burnt garlic turns bitter and will negatively impact the entire dish.
- Not Seasoning Properly: Both the steak and the sauce need adequate seasoning to bring out their best flavors.
Savoring Leftovers: Storing Your Steak Pizzaiola
Allow the Steak Pizzaiola to cool completely before storing. Transfer any leftovers to an airtight container and refrigerate for up to 3 days. Reheat gently on the stovetop or in the oven, adding a splash of water or broth if the sauce seems too thick. The flavors often meld and deepen beautifully overnight.

Frequently Asked Questions (FAQs)
***Are there specific steak cuts that work best for Pizzaiola?***
While ribeye and sirloin are excellent choices due to their marbling and flavor, cuts like flank steak, strip steak, or even leaner top round can be used. For leaner cuts, you might need to adjust the simmering time to ensure tenderness.
***Can I make this dish ahead of time?***
You can prepare the sauce a day in advance and store it in the refrigerator. When ready to serve, reheat the sauce, sear the steak, and then simmer the steak in the sauce as directed. This can save you time on busy nights.
***What is the best way to tell if the steak is done?***
The most accurate method is to use an instant-read meat thermometer. For medium-rare, aim for 130-135°F (54-57°C); for medium, 135-140°F (57-60°C). You can also use the touch test, but it requires practice and can be less precise.
***Why is drying the steak so important?***
Drying the surface of the steak with paper towels is critical for achieving a proper sear. Moisture on the surface creates steam, which prevents the steak from browning and developing that delicious, flavorful crust we’re aiming for.
***Can I add vegetables to the sauce?***
Absolutely! Sliced mushrooms, bell peppers, zucchini, or even a handful of spinach can be added to the sauce to boost flavor and nutrition. Sauté them with the onions, or add them during the simmering stage.
A Taste of Italian Comfort
Steak Pizzaiola is more than just a meal; it’s an experience. It’s the perfect dish to impress a loved one, celebrate a small victory, or simply treat yourself to something truly delicious. The combination of tender steak, rich tomato-herb sauce, and aromatic garlic is a timeless classic for a reason. Give this recipe a try, and let the robust flavors transport you to an Italian trattoria. Don’t forget to share your creations in the comments below!
How to Make the Best Steak Pizzaiola Recipe
Description
For extra flavor, marinate the steaks in olive oil, garlic, and herbs for 30 minutes before cooking.Add a dash of red pepper flakes for some heat.
Ingredients
- 4 boneless ribeye or flank steaks
- 2 tbsp olive oil
- 1 medium onion, thinly sliced
- 4 cloves garlic, minced
- 1 cup cherry tomatoes, halved
- 1 can (14 oz) crushed tomatoes
- 1 tsp dried oregano
- 1 tsp dried basil
- Salt and pepper to taste
- Fresh basil leaves for garnish
- Grated Parmesan cheese (optional)
Instructions
Notes
For extra flavor, marinate the steaks in olive oil, garlic, and herbs for 30 minutes before cooking.Add a dash of red pepper flakes for some heat.
“`