End your day with a delicious, comforting, and satisfying dinner! Whether you’re looking for quick and easy weeknight meals, cozy comfort food, or elegant dishes for special occasions, we have the perfect recipes for you.
From hearty casseroles and one-pan wonders to savory pastas, juicy meats, and flavorful vegetarian options, our collection is designed to make dinnertime effortless and enjoyable.
Busy schedule? No problem! Try our slow cooker meals, sheet pan dinners, and 30-minute recipes to save time without sacrificing flavor. Whatever your craving, these recipes will bring warmth and joy to your table every night. 🍽️✨
Strawberry Kiss Cookies (Soft, Pretty & Easy!)
Bake the cutest cookies with these soft and sweet Strawberry Kiss Cookies! Made with strawberry flavor and topped with a chocolate or vanilla kiss, they’re the perfect treat for Valentine’s Day, spring parties, or anytime you want a pretty pink cookie. Quick, simple, and always a crowd favorite add this recipe to your dessert boards!
8 tablespoons (1/2 cup) butter, melted and slightly cooled
1 large egg
4 ounces cream cheese, softened
Optional: powdered sugar or pink granulated sugar
30 chocolate Hersheys Kisses, unwrapped
Instructions
Notes
Chilling the dough prevents spreading and keeps cookies thick.
Expect light cracking when adding the chocolate kiss.
Store cookies in an airtight container at room temperature for up to 3 days.
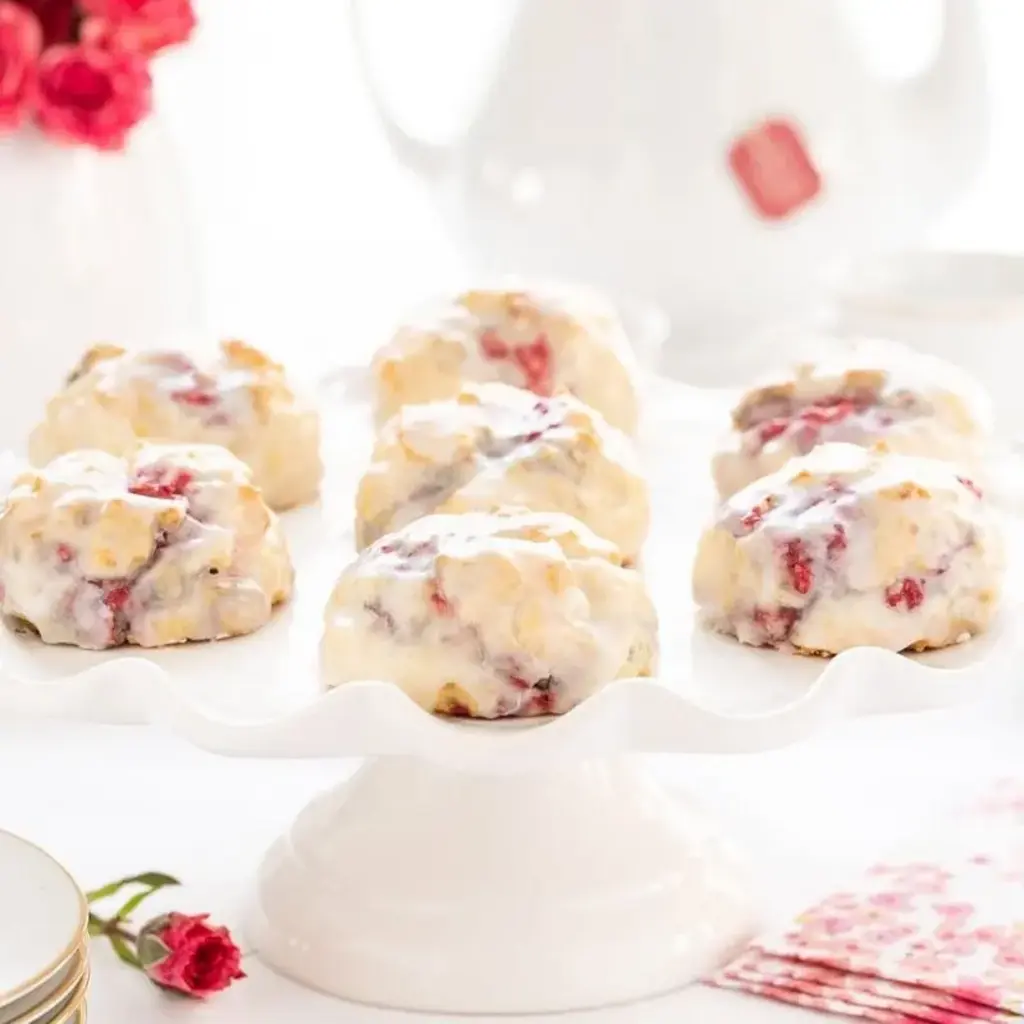
These heavenly, melt-in-your-mouth Lemon Raspberry Scones are not only ridiculously delicious, they’re also ridiculously easy and come together so quickly!
Ingredients
Scale
1 cup heavy cream
8 tablespoons butter
2 cups all purpose flour
6 tablespoons sugar
1 tablespoon baking powder
½ teaspoon baking soda
½ teaspoon salt
zest of 1 medium size lemon
½ cup fresh raspberries
Instructions
Preheat the oven to 400 degrees. Line a sheet pan with parchment paper (you'll need 2 sheet pans for smaller scones). Set an oven rack on the middle level of the oven. Measure 1 cup heavy cream and place in the freezer while proceeding with the recipe. (You want the cream to be in the freezer 10-15 minutes.)
Place butter in a microwave safe bowl, cover with a paper towel and heat on high for 1 minute. If not completely melted, return to microwave for 10 second intervals till melted. Set aside to cool a bit while prepping other ingredients.
Whisk flour, baking powder, baking soda, sugar, lemon zest and salt in a medium-size bowl. Stir to combine.
After heavy cream has been chilled in the freezer for 10-15 minutes, combine it with the melted butter. Stir with a fork until butter forms small clumps or globules (see the picture above in the post).
Add butter/cream mixture to dry ingredients and stir with rubber spatula until all flour is incorporated and batter pulls away from sides of bowl. The batter will be very thick, like a cookie dough. Don't over mix it, but you do make sure all the little flour bits are incorporated.
Break each raspberry in half and sprinkle them evenly over the top of the batter. Stir once or twice, gently to mix the berries throughout the dough.
Spray a cookie scooper (see notes above) or large spoon with non-stick cooking spray. Scoop up scones in mounds onto prepared pan. When you scoop, try to get some of the raspberries into each portion. Space the scones at least 2-inches apart to allow for some spreading.
Refrigerate scones for at least 15 minutes or up to an hour. If you don't have room for 2 sheet pans in your refrigerator, put them all on one to chill. Then separate before baking.
Bake for 18-22 minutes or until light golden brown. Transfer to a wire cooling rack.
While the scones are baking, make the lemon glaze. Combine the powdered sugar, milk (or half and half) and lemon juice in a medium-size bowl. Whisk well until smooth to make a thick, but spoonable glaze. (If glaze is too thin, add a bit more powdered sugar, if too thick add add a little more cream.)
Place a sheet pan or piece of foil under the cooling rack and spoon the glaze over scones to cover completely, allowing any excess to drip onto the sheet pan or foil.
If you can wait, let scones sit for 15 minutes to let glaze set before serving.
Notes
See Café Tips above in the post for more detailed instructions and tips.
Nutrition
Calories:282kcal
Sugar:16g
Protein:3g
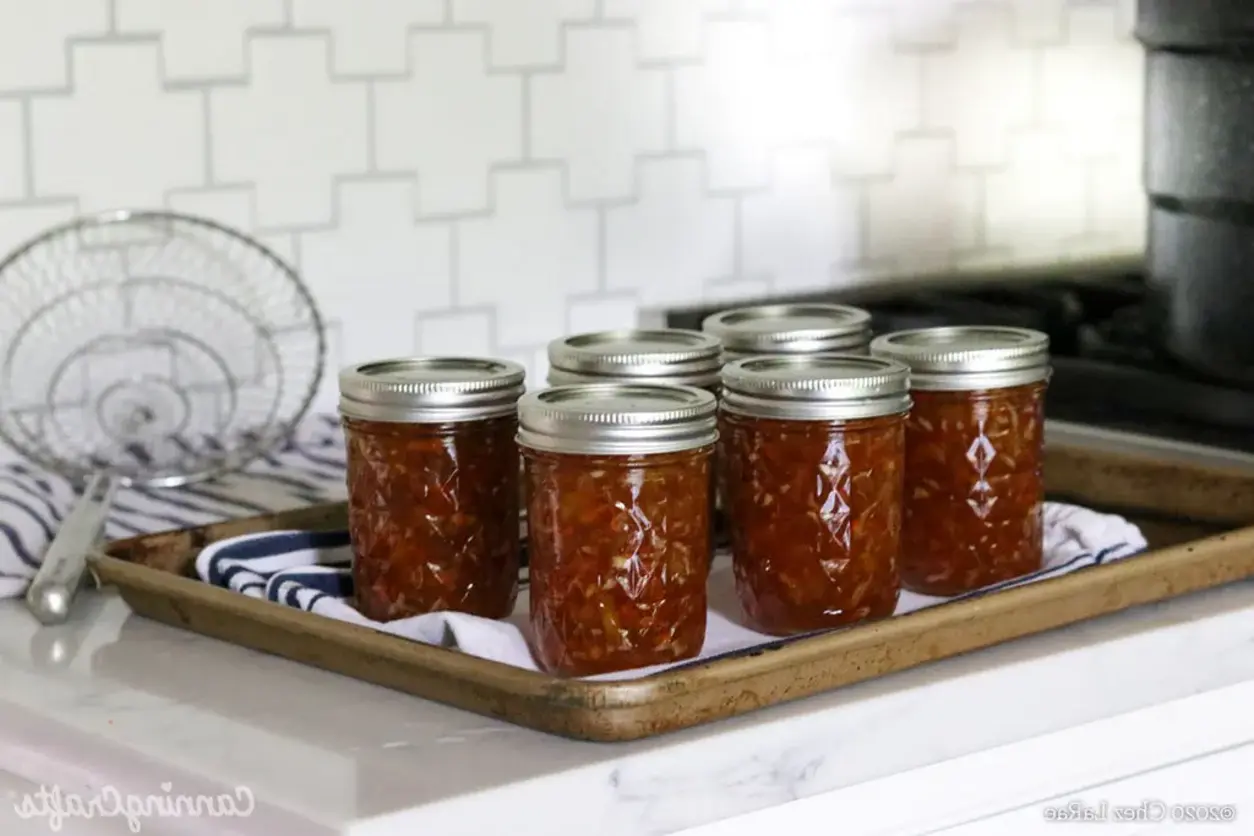
Carrot Cake Jam Canning Recipe – CanningCrafts
Carrot cake lovers, what if you could preserve the rich flavors of this delicious cake in a jar? Shredded orange carrots, chopped apples, juicy pineapples, coconut, and nuts suspended in a lovely spiced jam. Get the water bath canning recipe on CanningCrafts.com | #canningcrafts #canning #foodpreservation #preserving #homecanning #canningrecipes #recipe #canningjam #jam #carrotcake #carrotcakejam
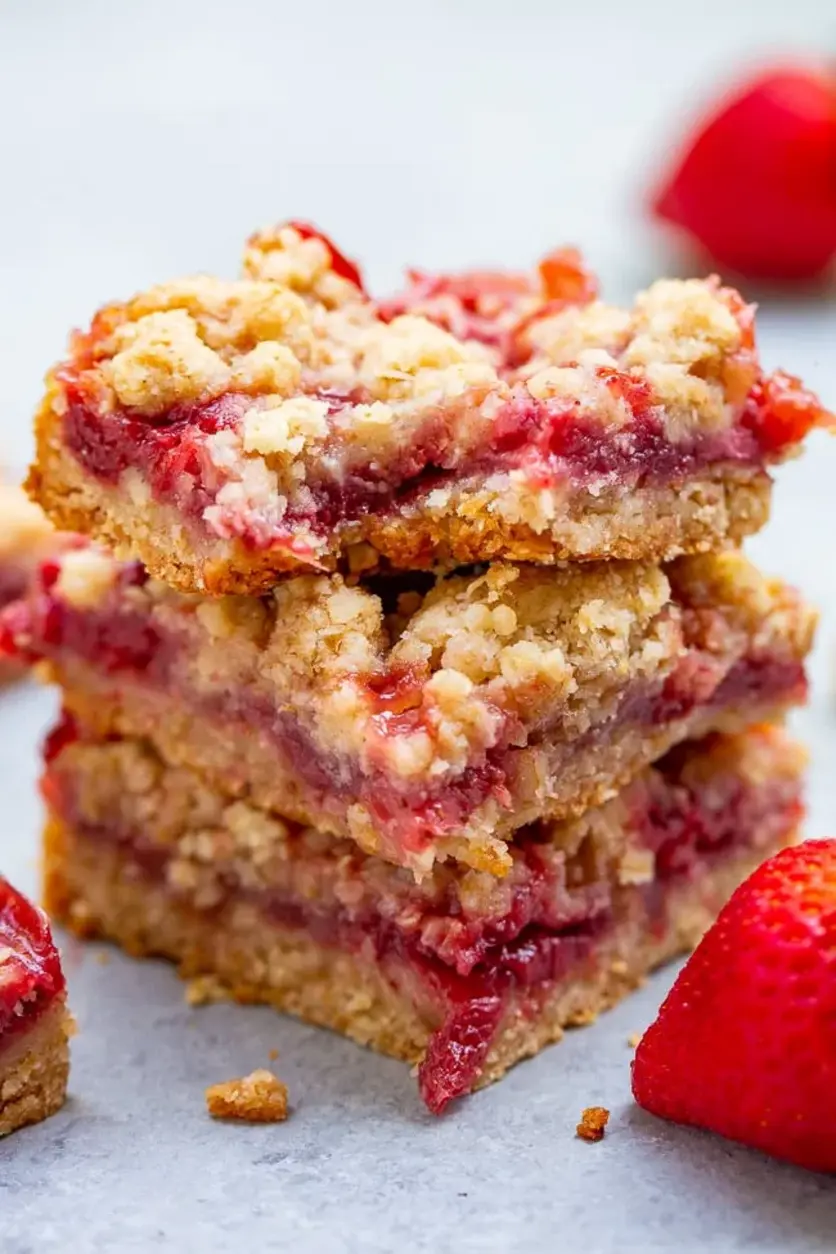
These buttery bars are bursting with fresh strawberries! Just 10 minutes of prep, so EASY because the crust and crumble are one and the same, and a crowd FAVORITE every time!
Ingredients
Scale
½ cup unsalted butter, melted
1 cup all-purpose flour
¾ cup old-fashioned oats
½ cup granulated sugar
¼ cup light brown sugar, packed
½ teaspoon salt, or to taste
Instructions
Crust and Crumble Topping:Preheat oven to 350F. Line an 8-inch square pan with aluminum foil and spray with cooking spray; set aside. Lining the pan helps with cleanup and is recommended.
In a large, microwave-safe bowl melt the butter, about 1 minute on high power.
Add the flour, oats, sugars, optional salt, and stir to combine. Mixture will be dry and sandy with some larger, well-formed crumble pieces.
Set 1 heaping cup mixture aside to be sprinkled on later as crumble topping.
Transfer remaining mixture to prepared pan, and using a spatula or your fingers, hard-pack the mixture to create an even, smooth, flat crust; set aside.
In a large mixing bowl (same one used for crust and crumble is okay), add all ingredients and toss to combine. If sugar hasnt dissolved fully thats okay because it liquifies while baking.
Evenly distribute strawberry mixture over the crust.
Evenly sprinkle with the reserved heaping 1 cup crumble topping mixture. Before sprinkling, I squeeze the mixture in my palm to encourage bigger crumble pieces to form.
Bake for about 50 minutes, or until edges are set and center has just set. Crumble topping should appear set and very pale golden and the strawberry filling mixture will be bubbling along the edges. Bars may take longer than 50 to 55 minutes if the strawberries are very juicy. Watch your bars, not the clock, when evaluating doneness.
Place pan on a wire rack and allow bars to cool for at least 1 hour before slicing and serving. If you try to slice bars before theyve cooled completely, theyll be extremely messy and could fall apart.
Notes
Oats: Dont use quick cook or instant, because theyre finer and behave like flour and will make the mixture too dry.
Storage: Bars will keep airtight at room temperature for up to 1 week, in the fridge for up to 10 days, or in the freezer for up to 6 months.
Adapted from Blueberry Oatmeal Crumble Bars.
Nutrition
Calories:308cal
Sugar:27g
Protein:2g
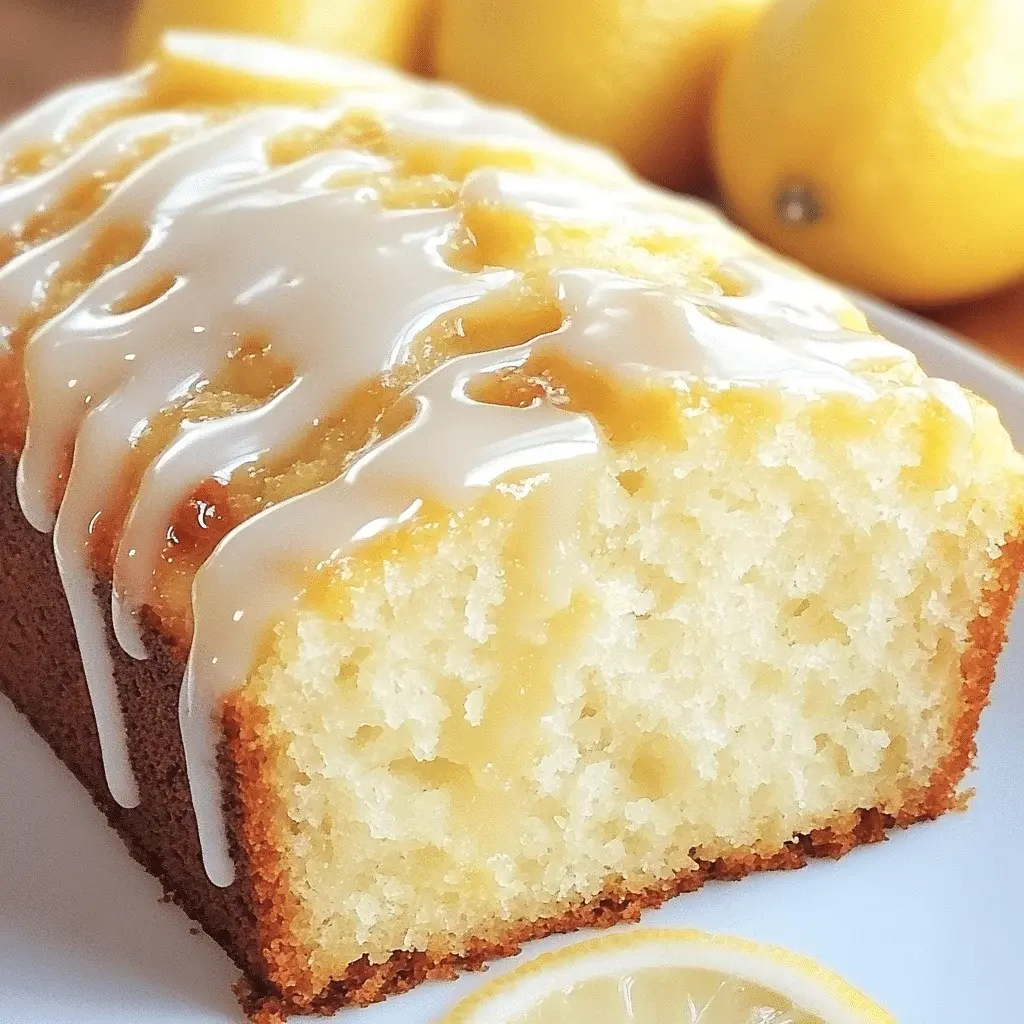
Starbucks Copycat Lemon Loaf
If you’ve ever savored the tangy, moist, and perfectly sweet Lemon Loaf from Starbucks, you’ll be thrilled to know you can recreate it at home. This Starbucks Copycat Lemon Loaf is easy to make, packed with citrusy goodness, and perfect for breakfast, dessert, or an afternoon treat.
This Starbucks-inspired Lemon Loaf is perfectly moist and bursting with bright lemon flavor. Topped with a simple lemon glaze, its the perfect treat to pair with your morning coffee or tea.
Ingredients
Scale
1 1/2 cups all-purpose flour
1/2 tsp baking powder
1/2 tsp baking soda
1/4 tsp salt
3 large eggs
1 cup granulated sugar
1/2 cup sour cream or Greek yogurt
1/2 cup vegetable oil
2 tbsp unsalted butter, melted
2 tbsp lemon zest (from about 2 lemons)
1/4 cup fresh lemon juice
1 tsp vanilla extract
1/2 tsp lemon extract
1 cup powdered sugar
23 tbsp fresh lemon juice
1/2 tsp lemon zest (optional, for garnish)
Instructions
Prepare for Baking: Preheat your oven to 350°F (175°C). Grease and line a 9×5-inch loaf pan with parchment paper.
Mix the Dry Ingredients: In a medium bowl, whisk together the flour, baking powder, baking soda, and salt. Set aside.
Prepare the Wet Ingredients: In a large mixing bowl, whisk together the eggs, sugar, sour cream, oil, and melted butter until smooth.
Stir in the lemon zest, lemon juice, vanilla extract, and lemon extract.
Combine the Mixtures: Gradually add the dry ingredients to the wet ingredients, stirring gently until just combined. Be careful not to overmix.
Bake the Loaf: Pour the batter into the prepared loaf pan and smooth the top.
Bake for 45-50 minutes, or until a toothpick inserted into the center comes out clean.
Let the loaf cool in the pan for 10 minutes, then transfer it to a wire rack to cool completely.
Make the Lemon Glaze: In a small bowl, whisk together the powdered sugar and 2-3 tablespoons of lemon juice until smooth. Adjust the consistency as needed.
Glaze and Serve: Once the loaf is completely cool, drizzle the lemon glaze over the top. Garnish with lemon zest if desired.
Slice and enjoy!
Notes
For extra lemon flavor, you can add an additional 1/2 tsp of lemon extract or more lemon zest to the batter.
Store the loaf in an airtight container at room temperature for up to 3 days or refrigerate for up to 1 week.
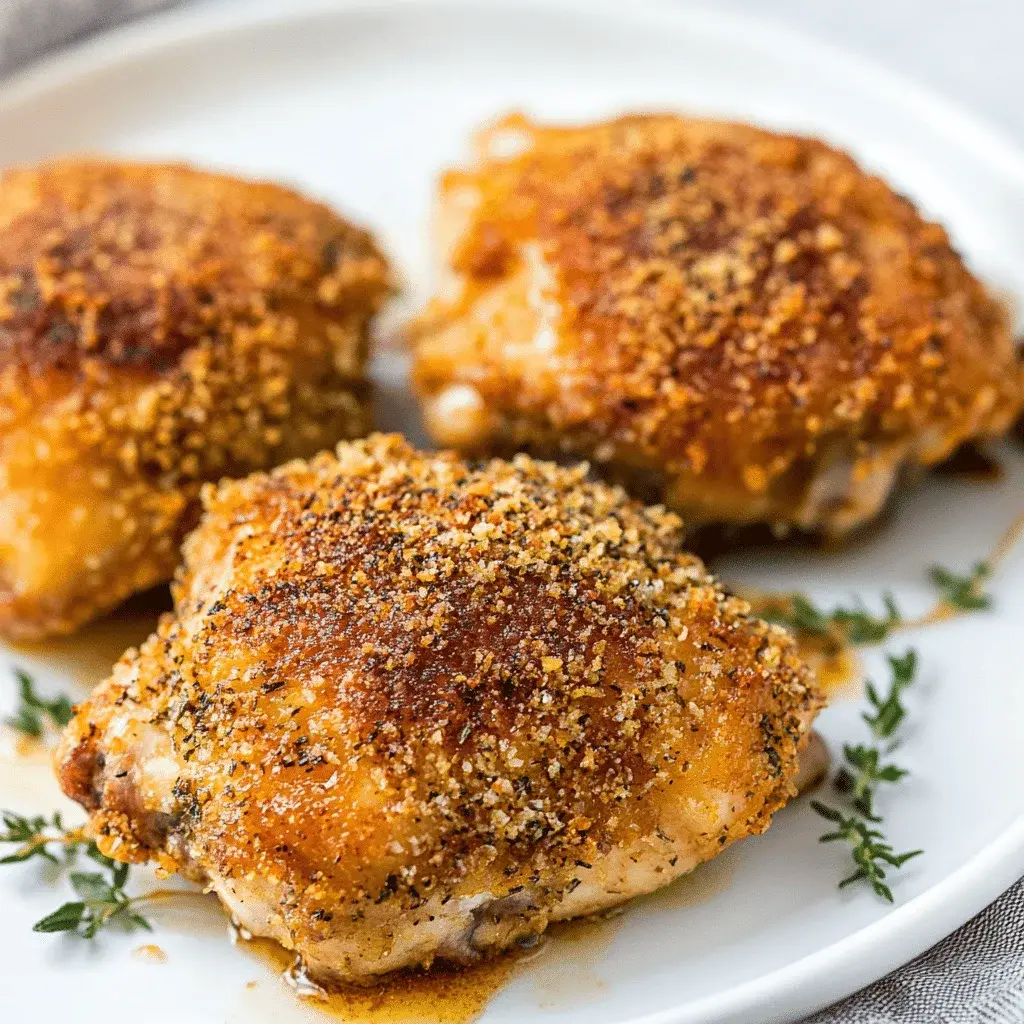
Did you know that chicken thighs are the most forgiving and flavorful cut of poultry for home cooks? According to USDA data, their higher fat content (about 13g per thigh) compared to chicken breasts makes them incredibly resistant to drying out, ensuring juicy results every time. This baked chicken thighs recipe is your secret weapon for transforming a simple weeknight staple into a crispy, golden, and deeply satisfying meal that will have everyone asking for seconds. The magic lies in the perfect harmony of a savory Parmesan and breadcrumb crust, a tangy mustard base, and aromatic Italian seasoning that permeates every bite. Forget about bland, dry chicken—this recipe delivers maximum flavor with minimal effort, proving that a truly delicious dinner doesn’t have to be complicated.
Ingredients List
Gather these simple ingredients for the ultimate crispy baked chicken thighs. I’ve included substitutions to make this recipe work for you.
6-8 bone-in, skin-on chicken thighs (about 2.5 lbs): The bone and skin are crucial for locking in moisture and creating that irresistible crispy top. You’ll hear a satisfying sizzle as they bake. Substitution: Boneless, skinless thighs work but reduce bake time by 5-7 minutes to prevent dryness.
1/2 cup grated Parmesan cheese: Use the finely grated kind from the canister for the best adhesion and a salty, umami punch. Substitution: Pecorino Romano for a sharper bite, or nutritional yeast for a dairy-free option.
1/2 cup Panko breadcrumbs: These Japanese-style crumbs are lighter and crispier than traditional breadcrumbs, creating an airy, shattering crust. Substitution: Regular breadcrumbs or crushed pork rinds for a keto version.
1/4 cup Dijon mustard: Acts as the flavorful “glue” for the coating, adding a complex tang that cuts through the richness. Substitution: Whole grain mustard for texture, or mayonnaise for a richer, milder base.
2 tbsp olive oil: Helps crisp the skin and prevents sticking. You’ll smell its fruity aroma as it heats.
1 tbsp Italian seasoning: A fragrant blend of oregano, basil, thyme, and rosemary that fills your kitchen with a warm, Mediterranean scent.
1 tsp garlic powder & 1 tsp onion powder: Provide a savory, allium depth without the risk of burning that fresh garlic might have.
1 tsp smoked paprika (optional): Adds a subtle, smoky sweetness and a beautiful red hue to the final crust.
Salt and black pepper to taste: Season generously! The salt will draw out the chicken’s natural juices, creating a self-basting effect.
Timing
Prep Time 15 minutes
Cook Time 40-45 minutes
Total Time ~60 minutes
Compared to the average baked chicken recipe that requires 30+ minutes of marinating, this recipe is a speed demon. The active prep is a swift 15 minutes, and the oven does the rest of the work. The total hands-off baking time of 40-45 minutes is standard for achieving perfectly cooked, juicy thigh meat and a deeply bronzed, crispy coating. It’s about 20% faster than many fussy recipes that require flipping or basting, making it ideal for busy evenings.
Step-by-Step Instructions
Step 1: Prepare the Chicken
Preheat your oven to 400°F (200°C). This high heat is key for crisping the skin quickly. While it heats, pat your chicken thighs completely dry with paper towels. This is the single most important step for crispiness—water is the enemy of browning. Place the dry thighs on a plate and season both sides liberally with salt and pepper. Let them sit for 5 minutes; this brief rest allows the seasoning to penetrate.
Step 2: Create the Flavorful Coating
In a medium bowl, combine the Panko breadcrumbs, grated Parmesan, Italian seasoning, garlic powder, onion powder, and smoked paprika (if using). Use your fingers to mix, ensuring the oils from the Parmesan are evenly distributed. In a separate small bowl, whisk together the Dijon mustard and olive oil until it forms a smooth, spreadable paste. The mustard will have a sharp, vinegary scent that promises big flavor.
Step 3: Coat and Bake
Line a large baking sheet with parchment paper or foil for easy cleanup. Take one seasoned chicken thigh and, using a pastry brush or the back of a spoon, coat the top (skin-side) and sides evenly with the mustard-oil mixture. The mustard acts as your edible glue. Immediately dip and press the coated side into the breadcrumb mixture, forming an even, generous layer. Place the thigh, crust-side up, on the prepared baking sheet. Repeat with all thighs, ensuring they are not touching on the sheet to allow for proper air circulation and even crisping.
Step 4: Rest and Serve
Bake in the preheated oven for 40-45 minutes. You’ll know they’re done when the crust is a deep golden brown and the internal temperature at the thickest part (avoiding the bone) registers 165°F (74°C) on a meat thermometer. The juices should run clear. Once out of the oven, resist the urge to cut in immediately! Let the chicken rest on the baking sheet for 5-10 minutes. This allows the frantic juices to redistribute throughout the meat, guaranteeing every bite is succulent.
Nutritional Information
Estimated per serving (1 chicken thigh):
Calories: 320-350 kcal
Protein: 28g (An excellent source for muscle repair and satiety)
Fat: 20g (Primarily from the chicken skin and olive oil, providing richness)
Carbohydrates: 5g (Mostly from the breadcrumb coating)
Fiber: <1g
Sodium: ~450mg (Varies with seasoning; can be reduced by using low-sodium Parmesan)
Healthier Alternatives
You can easily adapt this recipe for various dietary needs without sacrificing the crispy, flavorful experience:
For Lower Fat/Cals: Use boneless, skinless thighs and an olive oil cooking spray instead of brushing on oil. Swap half the Parmesan for 2 tbsp of nutritional yeast.
Keto/Low-Carb: Replace Panko with 1/2 cup of finely crushed pork rinds or almond flour mixed with 1/4 cup of Parmesan. The crust will be equally crunchy and flavorful.
Gluten-Free: Use certified gluten-free Panko breadcrumbs or crushed gluten-free crackers. The Dijon mustard is typically gluten-free, but always check the label.
Dairy-Free: Omit the Parmesan. Boost flavor by adding 1 tsp of nutritional yeast to the crumb mix and an extra 1/2 tsp of smoked paprika or onion powder.
Serving Suggestions
These versatile chicken thighs are the star of the plate. Pair them with:
For a Comfort Meal: Creamy mashed potatoes or cauliflower mash to soak up the juices, and simple steamed green beans.
For a Lighter Plate: A vibrant arugula salad with a lemon vinaigrette or roasted Mediterranean vegetables (zucchini, bell peppers, red onion).
For a Hearty Feast: Buttery egg noodles or a wild rice pilaf. The crispy bits from the baking sheet are delicious stirred into the rice.
Common Mistakes
Not Drying the Chicken: Skipping the pat-dry step leads to steam, which prevents browning and results in a soggy crust.
Crowding the Pan: Placing thighs too close together steams them instead of roasting them. Always use a large enough sheet.
Skipping the Rest: Cutting into the chicken immediately causes all the precious juices to spill out, leaving you with drier meat.
Using Fresh Garlic: Minced fresh garlic in the coating will burn in the hot oven and taste bitter. Stick with garlic powder.
Storing Tips
Refrigeration: Store leftovers in an airtight container for up to 4 days. The crust will soften but the flavor remains excellent.
Freezing: Freeze fully cooked and cooled thighs on a baking sheet, then transfer to a freezer bag for up to 3 months. Thaw overnight in the fridge.
Reheating: To recrisp the skin, reheat in a 375°F (190°C) oven or toaster oven for 10-15 minutes. Avoid the microwave, which will make the coating rubbery.
Conclusion
This baked chicken thighs recipe is a testament to how a few smart techniques—drying the skin, using a flavorful binder, and baking at high heat—can create a restaurant-quality dish right in your home kitchen. It’s reliably juicy, irresistibly crispy, and packed with the savory flavors of Parmesan, mustard, and herbs. It’s the kind of simple, satisfying recipe that earns a permanent spot in your weekly rotation. Give it a try tonight and experience the difference for yourself! Don’t forget to snap a photo of your golden-brown masterpiece and share it with us—we love seeing your creations!
Loved this recipe? Pin it to your “Easy Dinners” board on Pinterest to save it for later, and share it with a friend who needs a delicious weeknight win!
Frequently Asked Questions (FAQs)
***Can I use chicken breasts instead of thighs?***
You can, but be cautious. Breasts are leaner and cook faster. Use boneless, skinless breasts and reduce the baking time to 25-30 minutes, checking the internal temperature early to prevent dryness. The result will be less juicy than thighs.
***My breadcrumb coating isn’t sticking. What did I do wrong?***
The mustard-oil mixture must be applied evenly and generously—it’s the essential glue. Also,
Lemon Raspberry Cookies
These lemon raspberry cookies are a sweet lemon cookie base made using both lemon zest and juice, and studded with raspberries in every bite. They’re soft and chewy with a perfectly balanced sweet and tart flavor.
These lemon raspberry cookies are a sweet lemon cookie base made using both lemon zest and juice, and studded with raspberries in every bite. They’re soft and chewy with a perfectly balanced sweet and tart flavor.
Ingredients
Scale
½ cup (100 g) granulated sugar
1 large lemon zested
½ cup (113.5 g) butter room temperature
¼ cup (55 g) brown sugar
1 large egg yolk
1 tablespoon lemon juice about half a lemon
1 teaspoon vanilla
½ teaspoon (0.5 teaspoon) salt
½ teaspoon (0.5 teaspoon) baking powder
¼ teaspoon (0.25 teaspoon) baking soda
1¼ cups (175 g) all-purpose flour
¾ cup (75 g) frozen raspberries, chopped small
flaked salt for sprinkling
Instructions
Preheat oven to 350 F. Line 2 baking sheets with parchment paper.
In a large mixing bowl mix together granulated sugar and lemon zest with fingers, allowing the zest to open up and become more fragrant.
Add butter and brown sugar and mix on medium-high speed for about 3-4 minutes, or until light and fluffy. Add egg yolk, vanilla and lemon juice and mix together.
Slowly mix in salt, baking powder, baking soda and flour being careful not to over mix. I usually stop when I still have some flour remnants around the bowl.
Chop or break up frozen raspberries into little pieces and lightly fold into cookie dough. You don't want to mix too much or the juice will bleed all through the dough.
Scoop the dough into large balls, I like to use a 3 tablespoon cookie scoop for these. Place 5 cookie dough balls on your lined baking sheet. Sprinkle with flaked salt.
Bake the cookies for 12-15 minutes. You're looking for a nice light golden brown around the edges. Let them sit on then pan after baking to finish cooking slightly in the middle.
Notes
Do not take the raspberries out of the freezer until you are ready to add them to the cookie dough. And then once added you will want to bake as soon as possible. This will help keep the dough from turning a red or purple hue from the juice.
You can also use fresh raspberries, but I found that frozen seemed to work better.
I have given both cups and grams as measurements. Grams will be more precise, especially when measuring flour. If you dont have a kitchen scale, no problem! Just lightly spoon flour into your measuring cup to insure its not packed in there. Light and fluffy is the key.
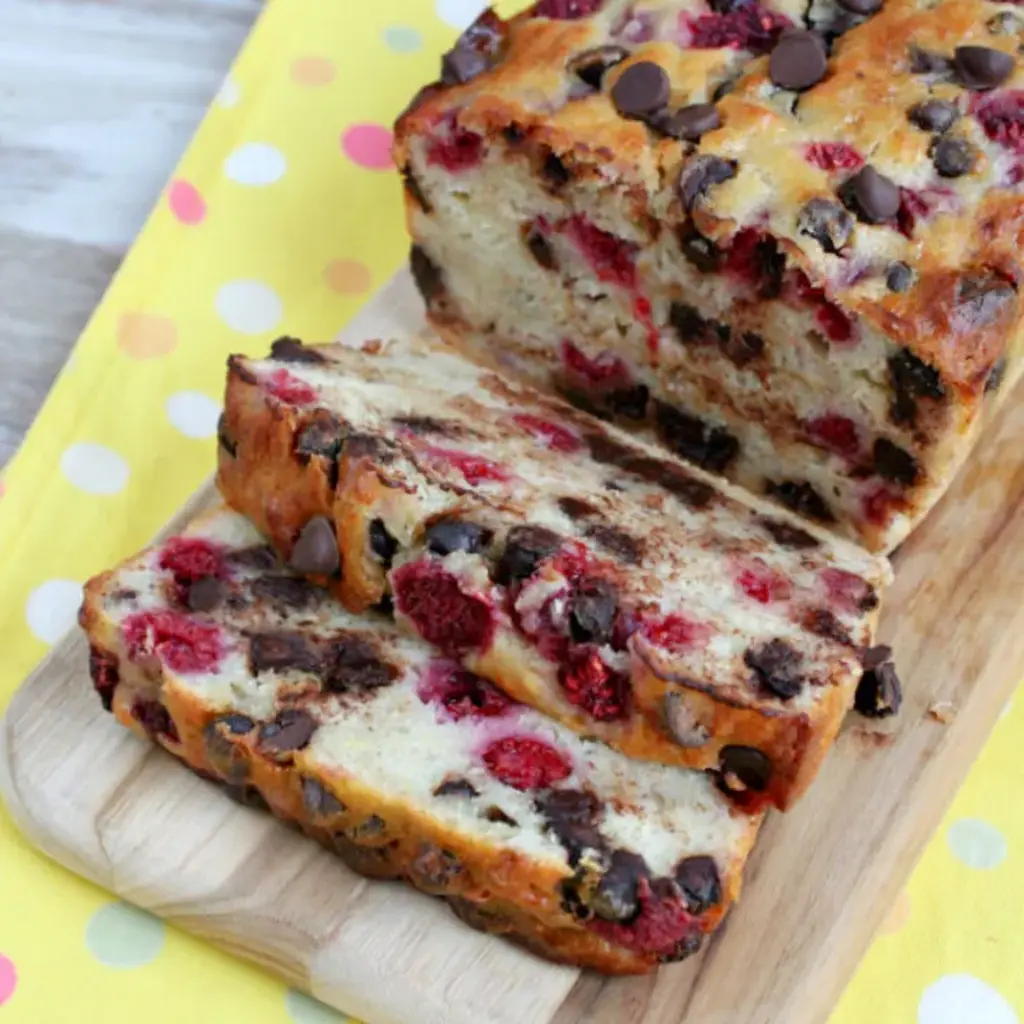
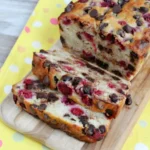
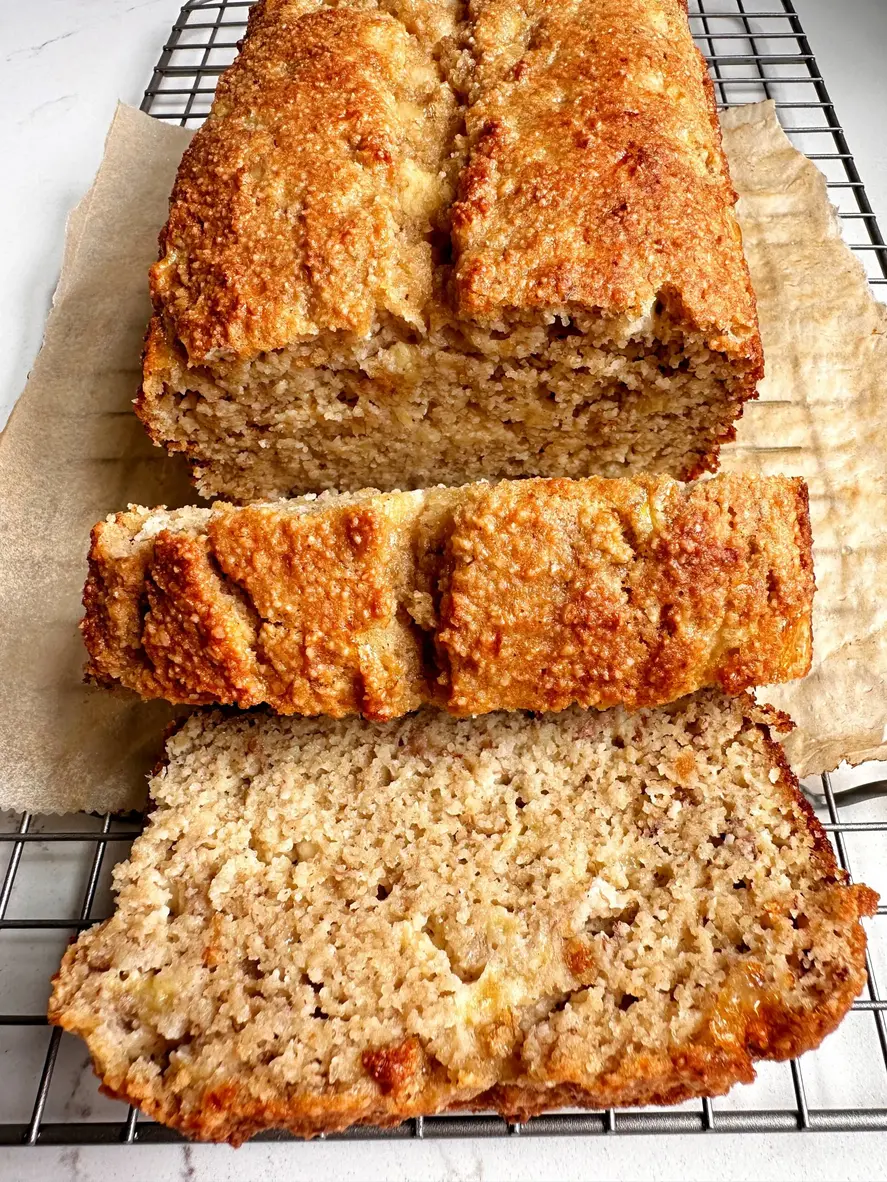
For when you need a little something more in your banana bread!
Ingredients
Scale
2 cups all purpose flour
¾ teaspoon baking soda
½ teaspoon salt
1 cup granulated white sugar
4 tablespoons (½ stick) unsalted butter, at room temperature
2 large eggs
1½ cups mashed ripe banana (about 3 bananas)
cup plain low fat yogurt
1 teaspoon vanilla extract
1 cup dark chocolate chunks or chips
1 cup halved raspberries, tossed in 1 tablespoon all-purpose flour
Instructions
Preheat oven to 350°F. Spray a 9×5-inch loaf pan with cooking spray.
In a medium bowl, whisk together the flour, baking soda and salt.
In a separate large bowl, beat the sugar and butter with an electric mixer at medium speed until well blended (about 1 minute). Add the eggs one at a time, beating well after each addition. Add the banana, yogurt, and vanilla; beat until blended. Stir in the flour mixture; just until moist. Don't over-mix. Stir in the chocolate chunks and then gently stir in the raspberries. If you want, you can sprinkle a few additional chocolate chunks and raspberries on the top to make it look pretty.
Spoon the batter into the prepared pan. Bake for 50 to 60 minutes or until a wooden pick inserted in center comes out clean. Cool 15 minutes in the pan on a wire rack. Remove from pan and cool completely on the wire rack.
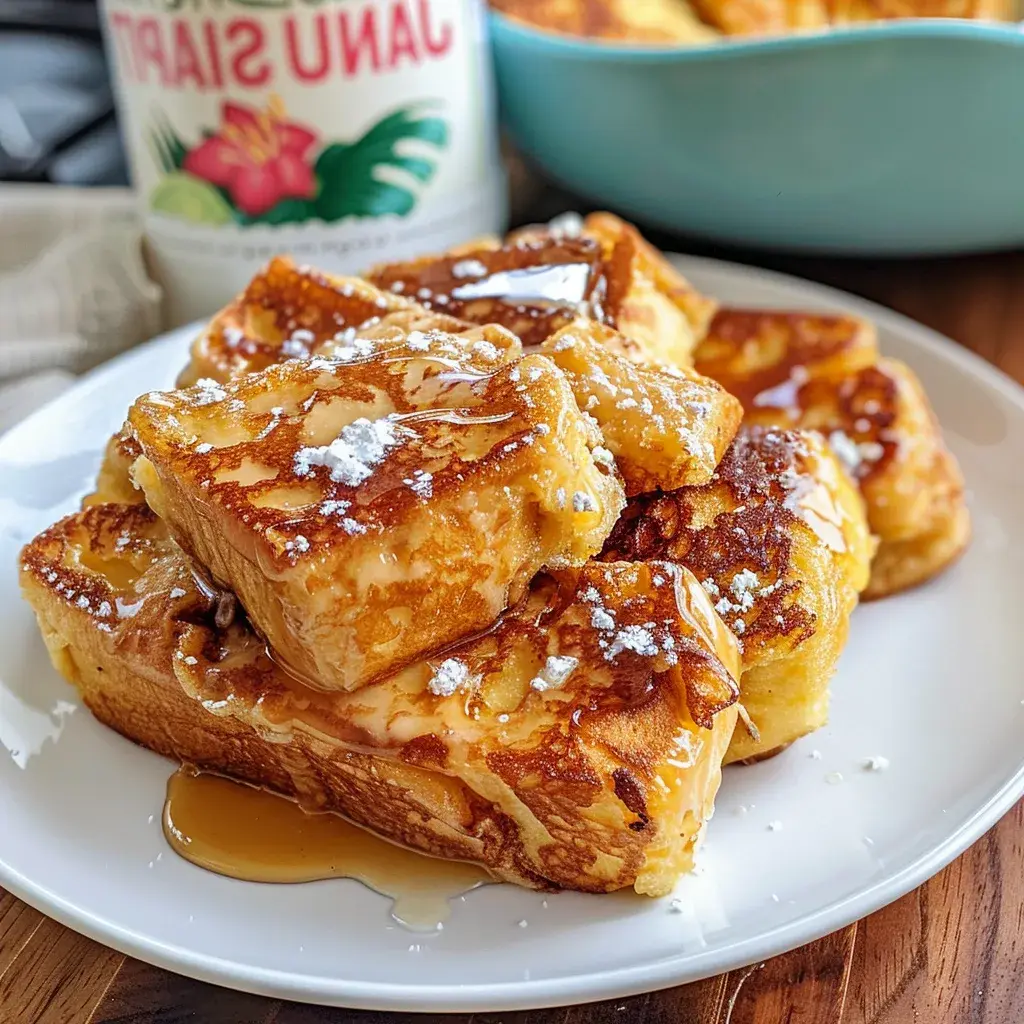
Oh friends, have I got a treat for you today! This Hawaiian Roll French Toast is, hands down, one of the most delicious breakfast creations Ive ever sunk my teeth into. Were talking sweet, pillowy clouds of cinnamon-sugar bliss that practically melt in your mouth.
Ingredients
Scale
1 12 pack Kings Hawaiian Rolls
3 large eggs
3/4 cup half and half or whole milk
1 tablespoon vanilla extract
1 teaspoon ground cinnamon
2 tablespoons brown sugar
Pinch of salt
4 tablespoons butter for cooking
Powdered sugar fresh fruit, maple syrup for serving
Instructions
In a large bowl, whisk together the eggs and half and half until fully combined.
Whisk in the vanilla, cinnamon, brown sugar, and salt until incorporated.
Use a toothpick or skewer to poke several holes in the bottom of each roll so the custard can soak in.
Working in batches, dip the rolls into the custard mixture and let soak for 30 seconds, turning to coat all sides. Dont soak longer or theyll get soggy.
Melt 2 tablespoons of butter in a nonstick skillet or griddle over medium-low heat.
Cook the soaked rolls for 30-60 seconds per side until golden brown, turning carefully with a spatula to get all sides crispy.
Serve the hawaiian roll french toast warm, dusted with powdered sugar and topped with fresh berries and maple syrup if desired.
3 tablespoons maple syrup (adjust to taste if you want sweeter)
2 teaspoon vanilla extract
2 1/2 cups almond flour**
1 teaspoon baking soda
2 teaspoons cinnamon
Optional mix-in’s: walnuts, chocolate chips or blueberries are all great
Instructions
Preheat oven to 350 degrees and line a loaf pan with parchment paper and grease
In a large bowl, mix together the bananas, eggs, cottage cheese, maple syrup and vanilla until smooth
Mix in the almond flour, baking soda and cinnamon until fully combined (depending on the brand cottage cheese you use, it may be chunky – that is ok!)
Pour batter into loaf pan and bake in oven for about 50 minutes, covering with foil after 30 minutes or so if the top is starting to brown a bit
Remove from oven once cooked (I stick a toothpick in to test)
Allow the bread to cool then slice and enjoy!
Notes
*Store banana bread in airtight container for 3 days, 5 days in fridge or 2 months in freezer
**Gluten-free baking flour and all purpose flour are not 1:1 subs for almond flour
Hi I'm Emy
I’m passionate about sharing a diverse collection of sweet and savory recipes that I’ve meticulously tested and perfected in my own kitchen.