End your day with a delicious, comforting, and satisfying dinner! Whether you’re looking for quick and easy weeknight meals, cozy comfort food, or elegant dishes for special occasions, we have the perfect recipes for you.
From hearty casseroles and one-pan wonders to savory pastas, juicy meats, and flavorful vegetarian options, our collection is designed to make dinnertime effortless and enjoyable.
Busy schedule? No problem! Try our slow cooker meals, sheet pan dinners, and 30-minute recipes to save time without sacrificing flavor. Whatever your craving, these recipes will bring warmth and joy to your table every night. 🍽️✨
Strawberry Cream Cheese Cookies
Cream Cheese Strawberry Cake Mix Cookies are some of the most delicious cookies I’ve ever made. These cookies are creamy, strawberry melt in your mouth goodness.
Preheat the oven to 350 F and line pans with parchment paper.
Pour fresh lemon juice over chopped strawberries, and drain them after a few minutes.
Whisk together 1 1/4 cup all-purpose flour, salt, and baking powder and set aside.
Beat butter with sugar and cream cheese until its light and fluffy.
Add egg and vanilla and mix well.
Gradually add the flour mixture and mix until its well combined.
Stir in chopped white chocolate.
Sprinkle strawberries with 1-2 tablespoons flour, toss them until all strawberries are coated with a thin layer of flour, and then stir them gently in the batter.
Drop a heaping tablespoon of batter onto the pan leaving an inch of space between.
Set the cookies in the refrigerator for 5-10 minutes before baking.
Sprinkle the cookies with sanding sugar if you want, but do not overdo it because they are sweet enough.
Bake for 13-15 minutes( until the edges become golden brown).
Let them cool for a few minutes in the pan then transfer them to a wire rack to cool completely.
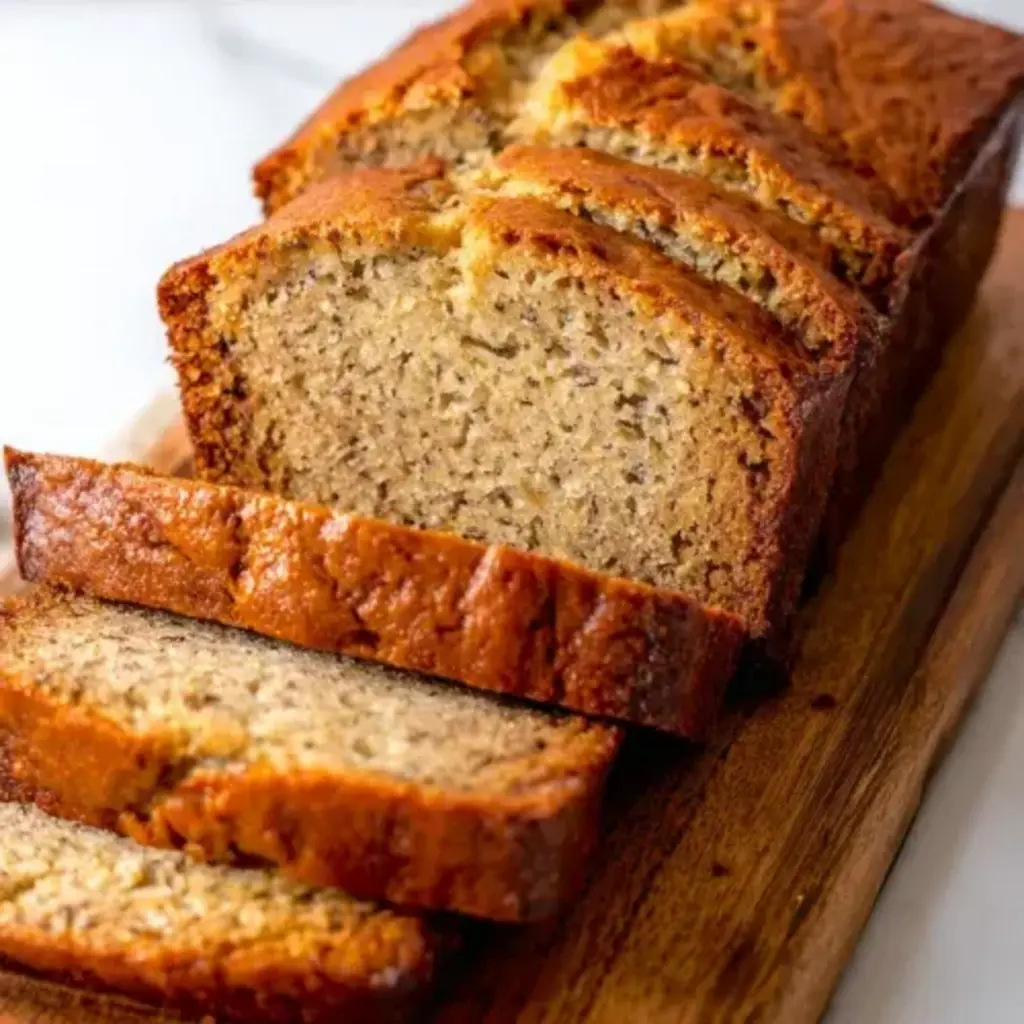
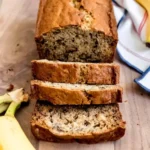
This Banana Bread Recipe Is Foolproof and So Good
If you’ve got ripe bananas and a craving for something cozy, this easy banana bread recipe is what you need. No mixer, no stress—just a moist, homemade loaf that’s perfect for beginners or busy days. Use pantry staples and have a loaf ready in under an hour. Save this simple recipe for when you want something sweet, fast, and totally satisfying. Make it today and keep it pinned for your next bunch of brown bananas.
This easy, moist banana bread recipe uses simple ingredients you probably already have. It’s soft, flavorful, and perfect for breakfast, snacks, or gifting.
Ingredients
Scale
3 ripe bananas mashed
1/3 cup melted butter
3/4 cup sugar
1 large egg beaten
1 teaspoon vanilla extract
1 teaspoon baking soda
1/4 teaspoon salt
1 1/2 cups all-purpose flour
Instructions
Preheat oven to 350°F (175°C).
Grease a 9×5-inch loaf pan or line it with parchment paper.
In a large bowl, mash the bananas with a fork until smooth.
Stir in the melted butter until well combined.
Add sugar, beaten egg, and vanilla extract. Mix until everything is evenly blended.
Sprinkle baking soda and salt over the mixture and stir gently.
Add the flour and stir just until the flour disappearsdo not overmix.
Pour the batter into the prepared loaf pan and spread it evenly.
Bake for 50 to 60 minutes, or until a toothpick inserted into the center comes out clean.
Let the banana bread cool in the pan for 10 minutes.
Transfer to a wire rack to cool completely before slicing.
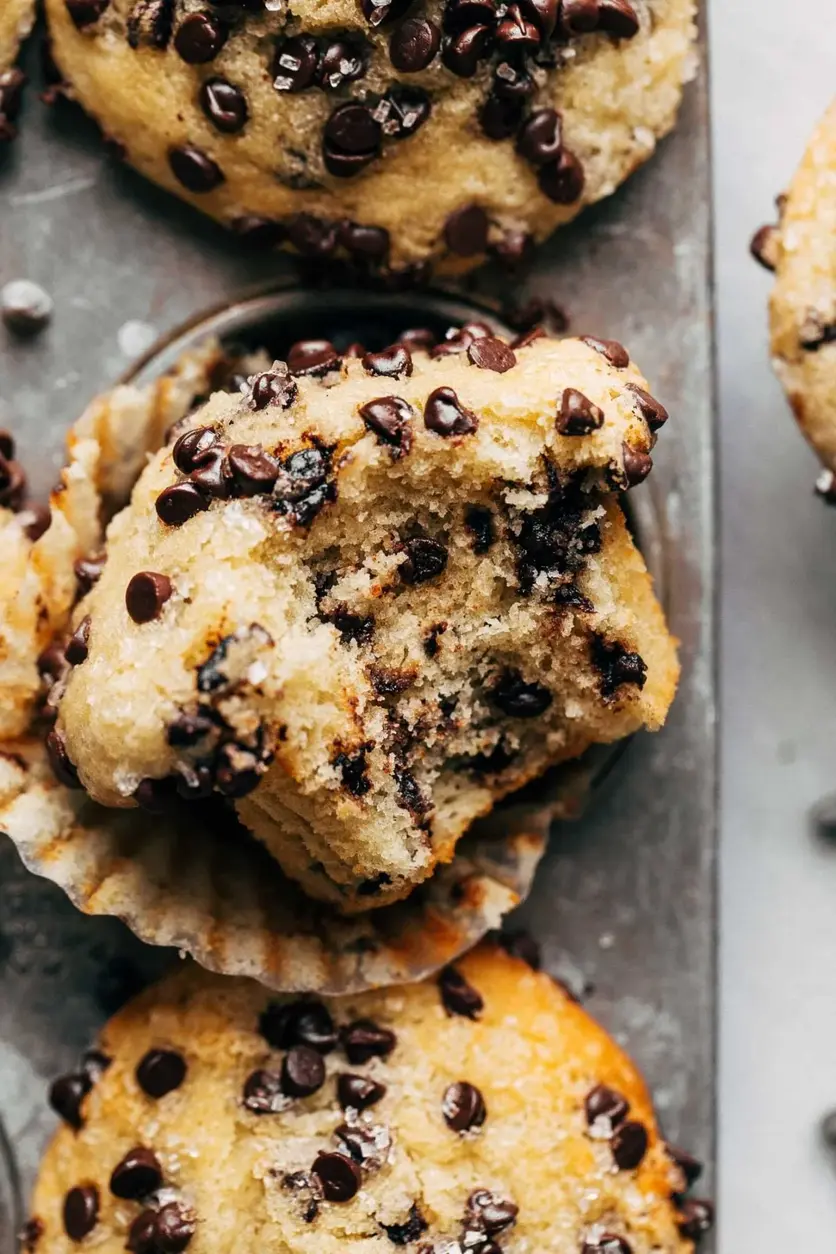
This is the BEST chocolate chip banana bread. Its incredibly moist, full of bananas, and loaded with mini chocolate chipsaka everything you could ever want in a banana bread. Theres a reason why its one of my most popular recipes!
Ingredients
Scale
1 1/2 cups (380g) ripe and mashed banana (3–4 medium bananas), measured
1/2 cup (100g) packed light brown sugar
1/2 cup (100g) granulated sugar
1/2 cup (112g) unsalted butter, melted
2 large eggs
1 tsp vanilla extract
1/2 cup (120g) 2% Greek yogurt (sour cream also works)
3/4 cup (140g) mini chocolate chips + a handful more for sprinkling on top
Instructions
Preheat your oven to 325F and grease and line a 9×5 loaf pan with parchment paper.
In a bowl, whisk together the flour, baking soda, and salt. Set aside.
In a separate bowl, mix together the melted butter and sugars until you reach a paste-like consistency. This may take some vigorous whisking for a minute or two. You can either use a whisk or an electric mixer with the paddle attachment.
Add in your mashed bananas followed by the eggs, yogurt, and vanilla.
Once all of your wet ingredients are mixed together, fold in the dry ingredients. Then, fold in the chocolate chips.
Pour the batter into your prepared loaf pan and spread it even. Sprinkle extra chocolate chips on top if you like.
Bake for 1 hour to 1 hour 15 minutes or until a toothpick comes out with a few moist crumbs. Let it cool completely before removing from the pan. Store at room temperature in an air-tight container.
Now dig in! Make sure to leave a comment below to let me know how it went!
Notes
*GLUTEN FREE OPTION Use my gluten free banana bread recipe and add chocolate chips!
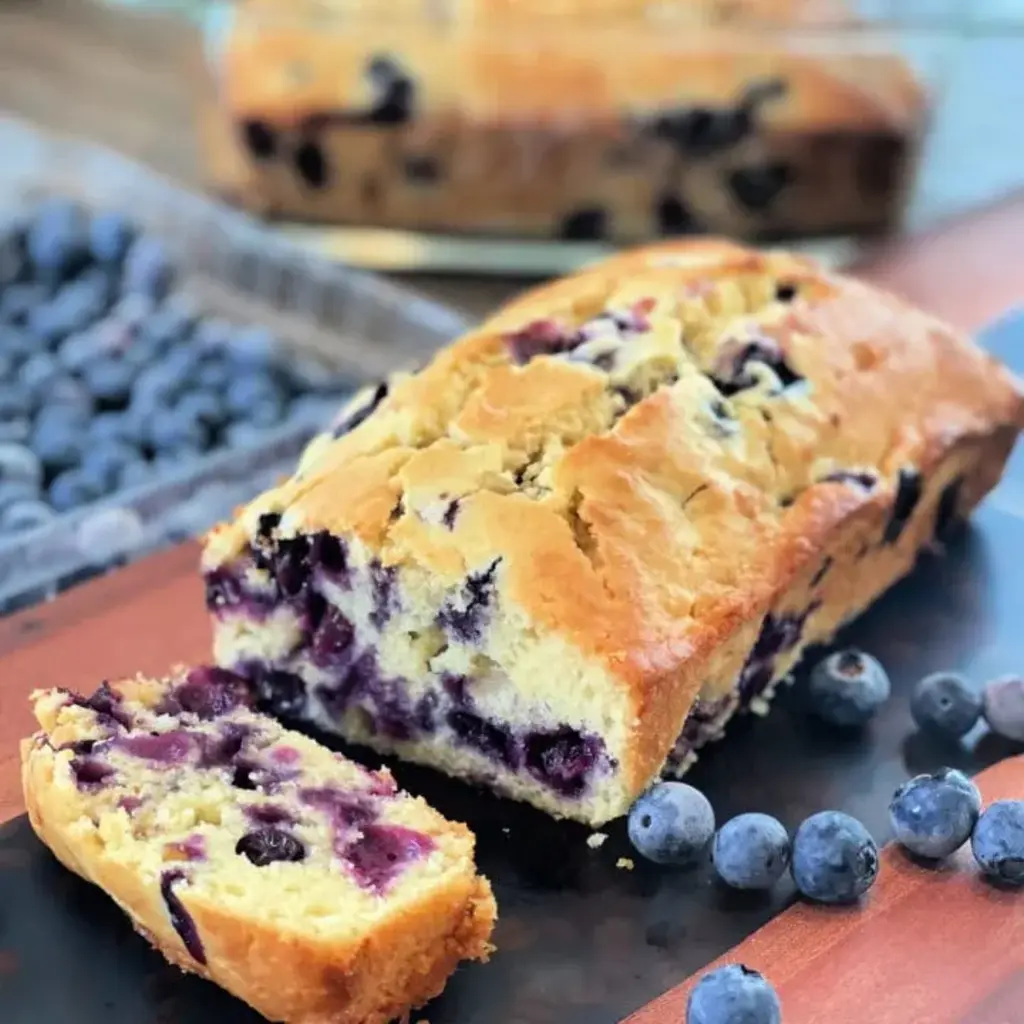
Blueberry Cream Cheese Bread is a quick and simple recipe that comes together in no time! Moist and flavor packed with juicy, plump, fresh blueberries throughout! This easy Blueberry Bread pairs perfectly with your morning coffee, or as an anytime snack!
Ingredients
Scale
1 cup butter *softened/unsalted
8 oz cream cheese *softened
¾ cup sugar
2 teaspoon vanilla extract
4 eggs
2 cups flour *all purpose
1 ½ teaspoon baking powder
½ teaspoon salt
2 cups blueberries *fresh, tossed in 1 tablespoon flour
Instructions
Preheat oven to 350 degrees and grease 2 loaf pans (9×5)
In a large bowl, cream together the butter, cream cheese, and sugar.
Add in the vanilla extract and eggs.
Slowly add in the flour, baking powder, and salt.
Once combined, carefully fold in the fresh blueberries.
Pour batter (it will be quite thick, that is okay) into the prepared pans evenly.
Place into preheated oven and bake for about 50 minutes, or until toothpick comes out clean once inserted in center of bread.
Remove from oven and allow to cool slightly before removing from pan and slicing!
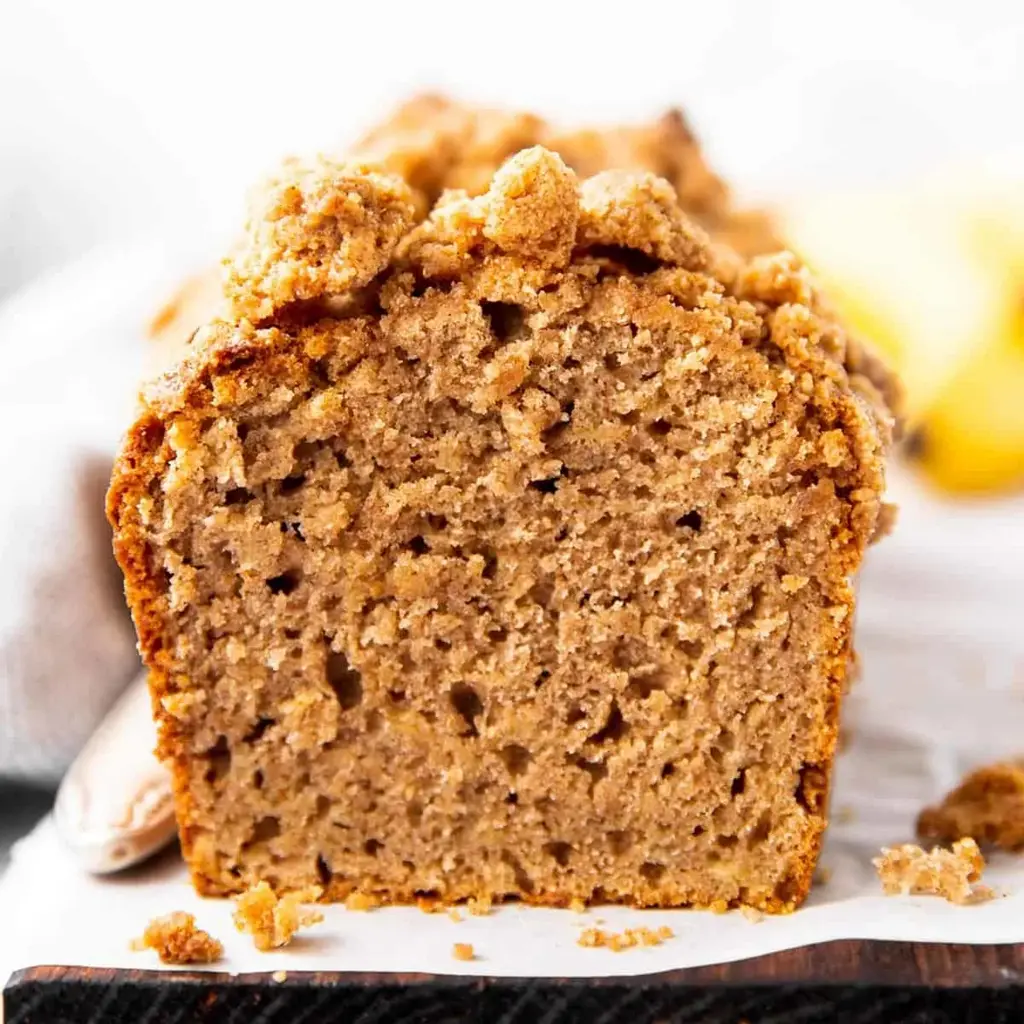
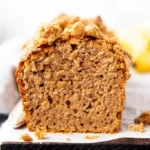
This is an easy banana bread with a delicious crumb topping and full of warm cinnamon flavors.
Ingredients
Scale
2 large eggs
1 cup mashed bananas
¾ cup sugar can reduce to ½ cup for a less sweet version
cup oil
½ cup Greek yogurt
Instructions
Prep: Heat the oven to 360°F. Grease and line a 9×5 inch loaf pan.
Make topping: For the crumb topping, place the flour, brown sugar and cinnamon in a medium bowl. Rub in the butter with your fingertips until crumbs form. Refrigerate until ready to use.
Combine dry ingredients: Add all dry ingredients to a large mixing bowl. Stir together until well combined.
Combine wet ingredients: Stir together all wet ingredients in a separate large measuring jug until well combined.
Assemble bread: Pour wet into dry ingredients and fold together just until flour is moistened (a few lumps are fine). Place the batter in the prepared loaf tin and evenly sprinkle with the crumb topping.
Bake the banana bread: Bake for around 50-60 minutes, or until a toothpick inserted comes out clean. Cool in the pan for 10 minutes, then remove to a wire cooling tray to cool completely (remember to peel off the parchment paper, too!)
Notes
A note about the whole wheat: You can definitely tell this bread is made with whole wheat flour. I like this addition because it gets some fiber into my kids! You can generally use any of these flour combinations in this recipe:
If you want a more dessert-y bread and dont care about the whole wheat, try my Cinnamon Swirl Banana Bread. If you want a refined sugar free, whole wheat banana bread, try my Healthy Banana Bread. And if you want an in-depth guide on making banana bread with whole wheat flour in general, my guide to making whole wheat banana bread is for you!
Stirring the batter: Do NOT overmix the batter, or youll end up with a dense and chewy banana bread. Use a wooden spoon or a spatula to combine it, never a whisk or a mixer.
Muffins: This bread recipe also works great as muffins, bake for around 20 minutes.
Moisture: This recipe has a few healthy swaps. They dont make it super special health food But the Greek yogurt in there especially helps to make a moist banana bread even though I make this bread with 100% whole wheat flour!
Its also important not to overmix the batter, or youll end up with a dense and gummy loaf vs a fluffy and moist one.
Crumb toppings and streusels are some of my favorite things on top of a baked good.
I love them on Banana Crumb Muffins, on Pumpkin Streusel Bread, on Cinnamon Crunch Zucchini Bread See? Favorite thing ever ?
The keys to a good topping are to
Pretty ripe definitely soft with lots of brown spots.
However, I do NOT like banana bread made with extra super ripe bananas you know, the entirely black ones. They just turn too alcoholic for my taste.
Banana bread keeps quite well. Wrap it tightly in foil or stick it into an airtight container to keep it moist.
I like storing it in the fridge for up to 5 days.
Wrap the cooled bread tightly in plastic wrap, then in aluminum foil. Label and freeze for up to 3 months.
Defrost on a wire cooling tray on the counter. You can warm it in the oven for a few minutes, if you like.
TIP: I like freezing quick breads in individual slices, separated by parchment paper. That way I can always pull out just as many as I need, AND they defrost a lot faster than an entire bread!
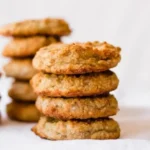
These banana bread cookies are a fun healthy snack that are crazy easy to make. They call for only 6 ingredients but feel free to add in any of the optional ingredients!
Ingredients
Scale
1 1/2 cups almond flour
1/4 teaspoon baking soda
1/8 teaspoon sea salt
1/4 teaspoon cinnamon
1 tablespoon pure maple syrup
1 1/4 cup overly ripe mashed bananas about 4 medium bananas
Instructions
Preheat the oven to 350 and line a baking sheet with parchment paper.
Add the almond flour, baking soda, salt, and cinnamon to a bowl and mix well.
Mash the bananas with a fork and add them to the dry ingredients (I mash, then measure).
Add the maple syrup and the egg if using.
Mix until all the ingredients are evenly incorporated.
Use a 1.5 tablespoon cookie scoop to scoop the dough onto the baking sheet.
Gently flatten the cookies with a fork or back of a spoon.
Bake for 26-30 minutes until the middles have set and aren't wet (mine were perfect at 28 minutes)
After the cookies come out of the oven, place them on a wire rack to cool.
Let the cookies come to room temperature before eating.
Store in an air tight container in the fridge for up to 5 days.
Notes
These cookies wont spread too much so I put all 15 cookies on one baking sheet, so I wont have to bake 2 batches.
For this recipe I used a 1.5 tablespoon cookie scoop.
**These cookies are almost entirely sweetened by bananas, so make sure your bananas are really overripe!**
Substitutions:
Regular Flour
Im unable to test regular flour because of my gluten allergy so I cannot guarantee your results, but others have tried it and said 1 1/4 cup of regular flour worked well. However, others have also tried the 1 1/4 flour substituiton and not liked it. So bake at your own risk. I would recommend following the recipe as written.
Nut Free
This recipe was orignially published on July 11, 2019 and was updated and republished on March 11, 2024.
Easy One-Bowl BEST Banana Bread Recipe – House of Nash Eats
Super moist, EASY, and delicious, this is the Best Banana Bread recipe ever! It’s our favorite way to use up overripe bananas and it freezes really well too!
Ingredients
Scale
3–4 ripe bananas (about 2 cups mashed)
1/3 cup salted butter melted
3/4 cup (150g) granulated sugar
1 large egg beaten
1 teaspoon pure vanilla extract
1 teaspoon baking soda
1 teaspoon baking powder
1/4 teaspoon ground cinnamon
1/8 teaspoon salt
1 1/2 cups (212g) all-purpose flour
1 cup chopped walnuts or chocolate chips, plus extra for topping if desired
Instructions
Preheat oven to 350 (177). Lightly grease and flour an 8.5×4.5-inch loaf pan or spray with baking spray.
In a large bowl, combine the mashed bananas with the melted butter, then add the sugar, egg, and vanilla. Stir well with a large wooden spoon.3-4 ripe bananas, ⅓ cup salted butter, ¾ cup (150g) granulated sugar, 1 large egg, 1 teaspoon pure vanilla extract
Sprinkle the baking soda, baking powder, cinnamon, and salt over the banana mixture. Stir to combine.1 teaspoon baking soda, 1 teaspoon baking powder, ¼ teaspoon ground cinnamon, ⅛ teaspoon salt
Add flour and walnuts or chocolate chips (if desired), and stir just until no streaks of flour remain. Pour the batter into the prepared loaf pan.1 ½ cups (212g) all-purpose flour, 1 cup chopped walnuts
Bake for 50-60 minutes, until a knife inserted in the center of the loaf comes out clean. Cool in the pan for 10 minutes, then turn out onto a wire rack and cool completely. Slice into 10 thick slices and serve.
Notes
Notes Storage: Store your banana bread in a ziploc bag or in another airtight container on the counter for a few days. Refrigerating it will help it last a day or two longer. But after about 5 days banana bread starts tasting stale, even if it has been wrapped tightly or kept in an airtight container in the fridge. Baking time: If your bread pans are larger or smaller than mine, your bake time might be on the shorter or longer side, respectively. Muffins: This banana bread recipe can also be made as muffins. Just divide between the cups of a muffin tin and bake for 20-24 minutes until muffins are done and a toothpick inserted into the center of a muffin comes out clean. This recipe can be found on page 50 of my cookbook, House of Nash Eats Everyday!
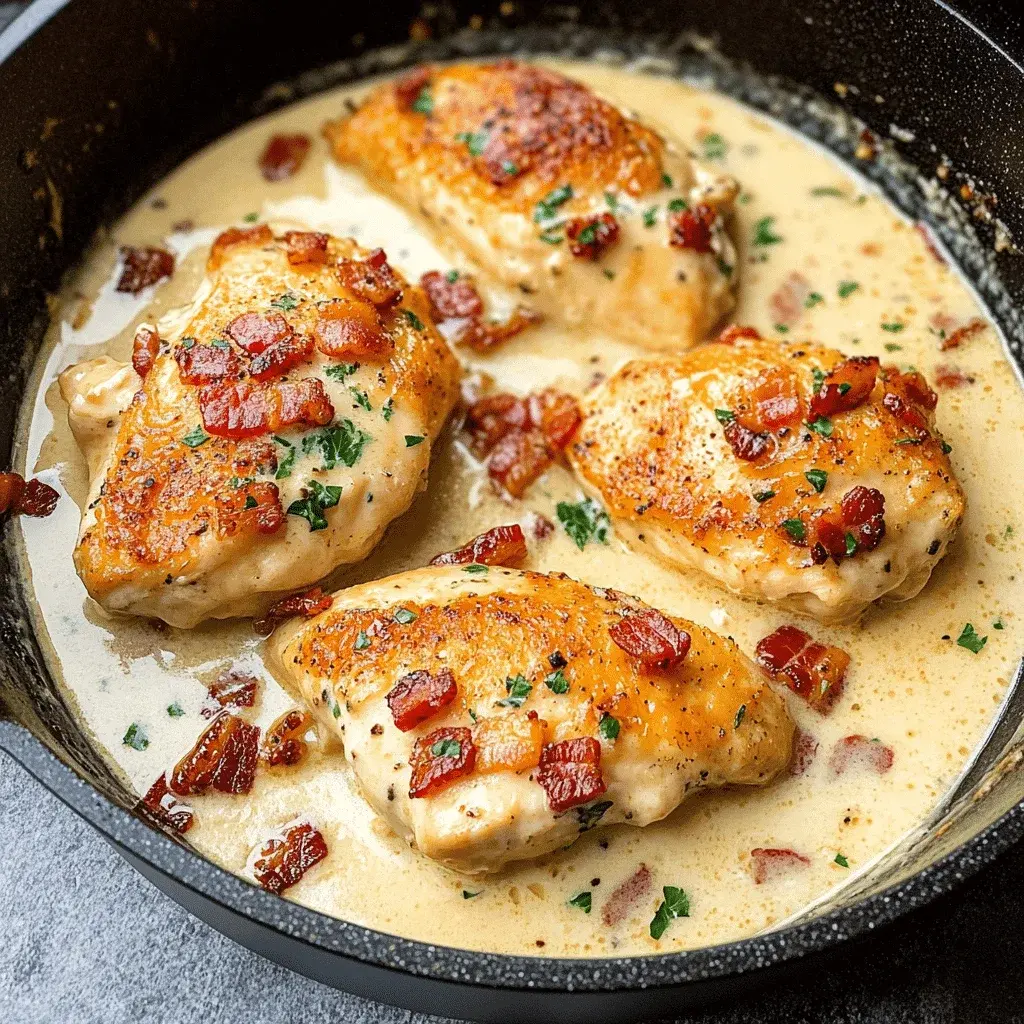
Did you know that over 70% of home cooks cite “too many dishes to clean” as a major deterrent to cooking on weeknights? That’s where the magic of a one pan chicken recipe like this Creamy Bacon Chicken comes in. Imagine tender, juicy chicken breasts, crisped to perfection, then bathed in a velvety, smoky sauce studded with savory bacon bits—all created in a single skillet with minimal cleanup. This dish is the ultimate answer to the eternal question of how to create a restaurant-quality, comforting meal without the stress and mess. It’s the perfect union of convenience and decadence, proving that a truly satisfying dinner doesn’t require a culinary degree or a mountain of pots and pans. Get ready to fall in love with a recipe that will become a steadfast hero in your weekly rotation.
Ingredients List
Gather these simple ingredients for a flavor-packed meal. I’ve included sensory notes and easy swaps to make this recipe your own.
4 boneless, skinless chicken breasts (about 1.5 lbs): Look for plump, even-sized pieces for uniform cooking. Substitution: Chicken thighs offer richer flavor and are more forgiving if slightly overcooked.
6 slices thick-cut bacon, chopped: The smoky, salty foundation. Substitution: Pancetta or turkey bacon (adjust cooking time as it can burn faster).
1 medium yellow onion, finely diced: Adds a sweet, aromatic base.
3 cloves garlic, minced: For that essential pungent, savory kick.
1 cup chicken broth: Use low-sodium to control the salt level. Substitution: Vegetable broth or dry white wine for a brighter note.
1 cup heavy cream: The key to the luscious, silky texture. Substitution: Half-and-half or full-fat coconut milk for a dairy-free version (sauce will be less thick).
1 cup freshly grated Parmesan cheese: Adds nutty, salty depth and helps thicken the sauce. Substitution: Pecorino Romano or Asiago.
1 tsp smoked paprika: Enhances the bacon’s smokiness with a warm, red hue.
1 tsp dried thyme (or 1 tbsp fresh): Earthy, floral notes that complement the cream.
2 tbsp olive oil or butter: For searing the chicken to a beautiful golden brown.
Salt and freshly ground black pepper to taste.
Fresh parsley, chopped (for garnish): A pop of color and fresh flavor.
Timing
Prep Time 15 minutes
Cook Time 25 minutes
Total Time 40 minutes
At just 40 minutes from start to finish, this one pan chicken recipe is a true weeknight warrior. Compared to the average creamy pasta or casserole dish that can take over an hour with multiple components, this streamlined process shaves off precious time without sacrificing an ounce of flavor. The active cooking time is focused and efficient, leaving you more time to relax and enjoy your meal.
Step-by-Step Instructions
Step 1: Prepare Your Ingredients
This is your “mise en place” moment, and it’s crucial for a smooth one-pan experience. Pat the chicken breasts completely dry with paper towels—this is the secret to a perfect sear, not a steam. Season both sides generously with salt, pepper, and the smoked paprika. Dice your onion, mince the garlic, chop the bacon, grate the Parmesan, and measure out your broth and cream. Having everything ready means you can move seamlessly through the cooking process without burning anything.
Step 2: Cook the Bacon
Place your large skillet or cast-iron pan over medium heat. Add the chopped bacon and cook, stirring occasionally, until it’s crispy and has rendered its fat, about 6-8 minutes. Using a slotted spoon, transfer the bacon to a paper towel-lined plate. Leave that glorious bacon fat in the pan—that’s liquid gold for flavoring the entire dish.
Step 3: Sear the Chicken
Increase the heat to medium-high. If the pan seems dry, add a tablespoon of olive oil. Carefully place the seasoned chicken breasts in the hot bacon fat. Sear without moving them for 5-7 minutes per side, until they develop a deep golden-brown crust. They do not need to be cooked through at this stage. Remove the chicken to a clean plate and set aside. It will finish cooking in the sauce later.
Step 4: Build the Creamy Sauce
Reduce the heat to medium. In the same pan, add the diced onion to the remaining fat and cook until soft and translucent, about 3-4 minutes. Add the minced garlic and dried thyme, cooking for just 30 seconds until fragrant—be careful not to burn the garlic. Pour in the chicken broth, using a wooden spoon to scrape up all the delicious browned bits (fond) from the bottom of the pan. This is where the deep flavor lives! Let the broth simmer for 2-3 minutes to reduce slightly.
Step 5: Simmer and Serve
Lower the heat to medium-low. Stir in the heavy cream and half of the cooked bacon. Bring the mixture to a gentle simmer—do not let it boil vigorously or the cream may separate. Add the grated Parmesan cheese, stirring constantly until it melts completely and the sauce thickens beautifully, about 2-3 minutes. Taste and adjust seasoning with salt and pepper. Return the seared chicken breasts (and any accumulated juices) to the pan, nestling them into the sauce. Spoon some sauce over the top. Cover the pan and let it simmer gently for 8-10 minutes, or until the chicken is cooked through (internal temperature of 165°F). Garnish with the remaining crispy bacon and fresh chopped parsley before serving.
Nutritional Information
(Per serving, based on 4 servings. Values are approximate.)
Calories: ~580 kcal
Protein: 42g
Total Fat: 42g (Saturated Fat: 20g)
Carbohydrates: 6g (Dietary Fiber: 1g, Sugars: 3g)
Sodium: ~850mg (varies with broth and bacon used)
Healthier Alternatives
You can lighten up this creamy bacon chicken without sacrificing its soul-satisfying essence. For a lower-fat version, use center-cut bacon or turkey bacon. Swap the heavy cream for half-and-half blended with a teaspoon of cornstarch (to maintain thickness) or use full-fat plain Greek yogurt stirred in at the very end off the heat to prevent curdling. Increase the vegetable content by adding a cup of sliced mushrooms with the onions or a handful of fresh spinach wilted into the finished sauce. Using low-sodium broth and reducing added salt can also help manage sodium levels.
Serving Suggestions
This rich and creamy dish pairs beautifully with simple sides that can soak up the incredible sauce. Serve it over a bed of fluffy mashed potatoes, buttery egg noodles, or steamed white rice. For a low-carb option, try cauliflower rice, zucchini noodles, or a simple side salad with a sharp vinaigrette to cut through the richness. A crusty baguette is also non-negotiable for mopping up every last drop of sauce from your plate.
Common Mistakes
Not Drying the Chicken: Wet chicken steams instead of sears, leading to a pale, rubbery exterior.
Crowding the Pan: Searing too many chicken breasts at once lowers the pan temperature, causing them to release moisture and boil. Cook in batches if necessary.
Boiling the Cream Sauce: A rapid boil can cause the cream to separate or become greasy. Maintain a gentle simmer.
Using Pre-Grated Parmesan: It often contains anti-caking agents that prevent it from melting smoothly into the sauce. Freshly grated is always superior.
Overcooking the Chicken: Since it finishes cooking in the sauce, check for doneness a minute or two early to ensure it stays juicy.
Storing Tips
Allow leftovers to cool completely before transferring to an airtight container. Store in the refrigerator for up to 3 days. The sauce will thicken significantly when chilled. To reheat, gently warm it in a skillet over low heat, adding a splash of chicken broth or cream to loosen the sauce back to its original creamy consistency. I do not recommend freezing this dish, as the dairy-based sauce can separate and become grainy upon thawing.
Conclusion
This One Pan Creamy Bacon Chicken recipe is more than just a meal; it’s a reliable, delicious solution for busy evenings. It proves that incredible flavor doesn’t require complexity. With its perfect balance of smoky bacon, tender chicken, and a luxuriously creamy sauce, it’s a dish that feels indulgent yet is deceptively simple to execute. Give it a try this week and transform your dinner routine. Don’t forget to pin this recipe and share your creation with us in the comments below—we love seeing your kitchen triumphs!
Made this recipe? Tag @spicemingle on Instagram with your photos! We feature our favorite home cooks every week.
Frequently Asked Questions (FAQs)
***Can I make this creamy bacon chicken ahead of time?***
You can prep components ahead. Cook the bacon, chop the veggies, and season the chicken the day before. Store separately in the fridge. When ready to cook, simply sear the chicken and proceed with the recipe. I don’t recommend assembling and cooking the entire dish ahead, as the chicken can become overcooked upon reheating.
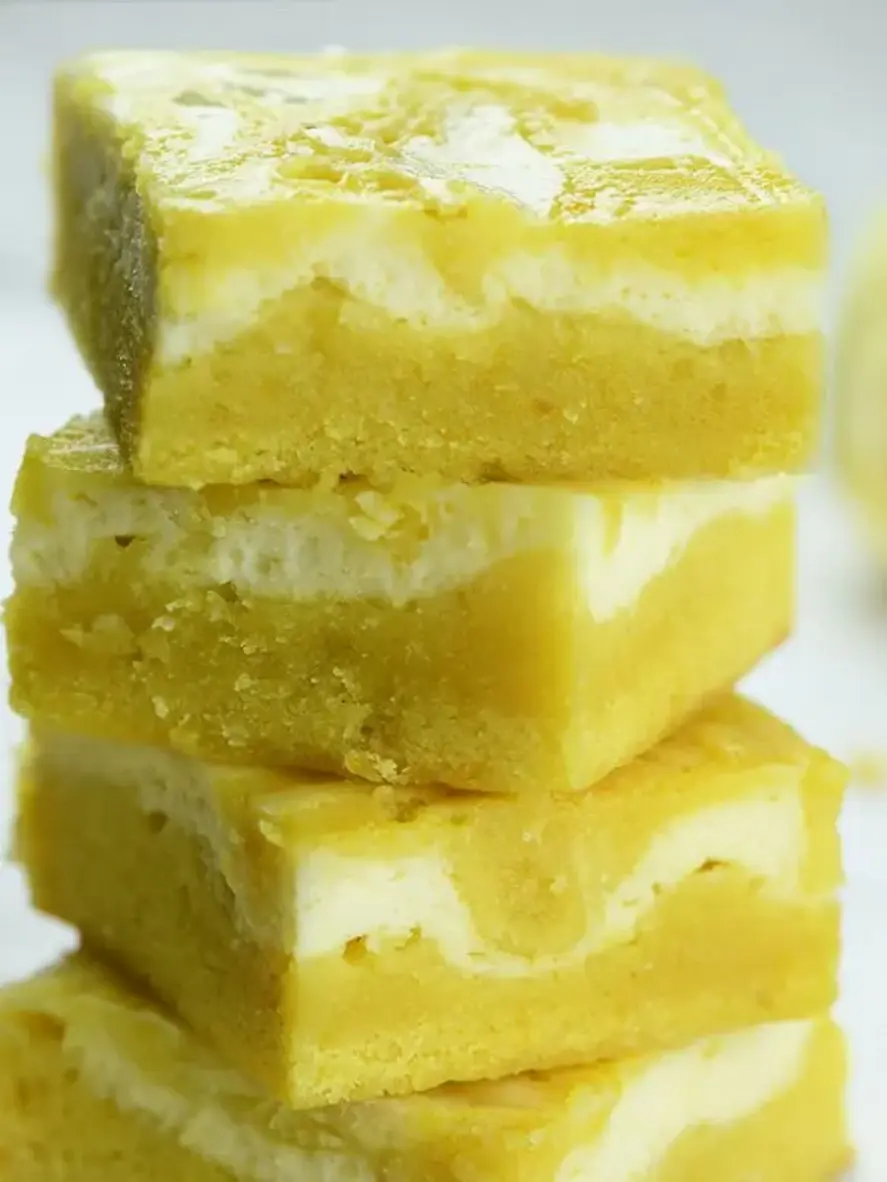
These chocolate chip banana bars taste just like banana blondies! They’re tender, moist, and the perfect way to use up ripe bananas.
Ingredients
Scale
1/2 cup (1 stick) unsalted butter, room temperature 113g
1 cup packed light brown sugar 200g
1 large egg, room temperature 56g
1 1/2 tsp vanilla extract or vanilla bean paste 6g
1/2 tsp fine salt 3g
1 cup all-purpose flour 125g
1 cup mashed overripe banana about 2 large bananas 250g
3/4 cup chocolate chips, chopped 125g
Instructions
Preheat the oven to 350°F / 175°C. Line an 8×8-inch baking dish with parchment paper and spray with cooking spray. Set aside.
In a large bowl or the bowl of a stand mixer, cream together 1/2 cup unsalted butter and 1 cup brown sugar with a stand mixer or hand mixer. Mix on a medium-high speed for about 2 minutes, until the mixture becomes lighter in color. You can also make this batter by hand with a whisk, but the butter will need to be quite soft.
Add in 1 large egg, 1 1/2 tsp vanilla extract, and 1/2 tsp fine salt. Mix on a medium-low speed until combined. Scrape the sides and bottom of the bowl as needed with a rubber spatula.
Mix in 1 cup of all-purpose flour and mix on low until just combined.
Fold 1 cup mashed banana into the batter until they're fully incorporated.
Then fold in 3/4 cup mini chocolate chips or chopped chocolate chips, saving a few to sprinkle on top of the batter before they're baked.
Pour the batter into the prepared pan and sprinkle a few additional bits of chocolate on top of the batter.
Bake for 33-37 minutes, until the edges are golden brown, and the center is baked through. Rotate the pan halfway through to help the bars bake evenly.
Remove the pan from the oven and let it cool on a wire rack. Let the bars fully cool in the pan. Once cool, gently remove the bars from the pan and cut into 16 squares using a sharp, warm knife. Wipe the blade after each cut with a paper towel to get nice, clean cuts.
These bars can sit at room temperature for a few days or be covered with plastic wrap or stored in an airtight container in the fridge for up to a week.
Notes
If you need to make any substitutions or swaps in this recipe, please see the section in the post above on ingredient substitutions.
These chocolate chip banana bars can be made in advance! They can be stored in an airtight container at room temperature for a few days, in the fridge for up to a week, or in the freezer for up to a month.
Just be sure to separate them a bit and place parchment between each layer of bars! This will help prevent them from sticking to each other if theyre stacked.
This recipe can also be doubled and made in a quarter sheet pan (9x 13). Bake for 37-42 minutes, or until the edges look golden brown and the center looks set.
These bars bake up best in a light-colored metal pan.
However, if you need to bake these bars in a glass baking pan, reduce the baking temperature by 25 degrees (to 325 F) and bake them for about 5 minutes less. Glass doesnt heat up as quickly as metal, but becomes very hot once heated up.