End your day with a delicious, comforting, and satisfying dinner! Whether you’re looking for quick and easy weeknight meals, cozy comfort food, or elegant dishes for special occasions, we have the perfect recipes for you.
From hearty casseroles and one-pan wonders to savory pastas, juicy meats, and flavorful vegetarian options, our collection is designed to make dinnertime effortless and enjoyable.
Busy schedule? No problem! Try our slow cooker meals, sheet pan dinners, and 30-minute recipes to save time without sacrificing flavor. Whatever your craving, these recipes will bring warmth and joy to your table every night. 🍽️✨
Growing up in Marin’s Moroccan kitchen, the scent of ras el hanout mingled with the peppery steam of Parisian sauté pans. I carried that spice‑filled memory to my NYC apartment, searching for dishes that blend heritage with street‑right convenience. That quest landed me on the Ranch Garlic Parmesan Chicken Skewers, a recipe that marries classic ranch tang, creamy parmesan, and the boldness of garlic into a quick one‑pan affair. The first time I plated these skewers at a friends’ gathering, the crowd loved how the flavors danced together, and I knew I had found a kitchen staple worthy of my blog.
Each bite of these skewers is a symphony: the buttery, herbaceous ranch coats chicken juicy meat, while the parmesan slices curl into golden, crunchy ribbons. Garlic releases its mellow sweetness, then hits the palate with a subtle kick. The char on the grill braids smoky aromas, and the finished skewer glistens with a glossy sheen when olive oil meets heat. Fresh herbs sprinkled at the end give it that bright, almost citrusy finish that immediately transports the dish to a sunny outdoor patio.
I’ve tweaked countless recipes, but the genius of this version lies in its two‑step mixer: a quick instant‑blend of ranch and parmesan, that browns and crisps perfectly in sixty seconds. I also discovered that skewering the chicken before it hits the grill creates a tender center without dry flip‑irons. If you’re new to grilling, rest easy: this is beginner‑friendly and forgiving, and I’ll point out one mistake to avoid—over‑marinating, which can cause the chicken to become mushy.
Why This Ranch Garlic Parmesan Chicken Skewers Recipe Is the Best
The flavor secret is the instant sauté of minced garlic and dry parmesan in olive oil—an approach my French culinary school taught me to bind ingredients before they reach the heat. That trick locks moisture while building a crispy crust that keeps the chicken juicy inside.
The perfected texture comes from threading the chicken on skewers before starting the grill; this keeps the meat uniformly exposed and avoids the dreaded “cheese melt” that leaves the rest of the skewer lopsided. I also add a quick brush of olive oil to all sides at the last minute, giving the outside a flash crisp that resembles a delicate confit.
It is foolproof and fast because it uses common pantry staples and a two‑pot method. You can prep a batch in ten minutes, then grill five in fifteen—exactly the time you need for a New Yorker’s lunch break or a quick weekend dinner.
Ranch Garlic Parmesan Chicken Skewers Ingredients
In the aisles of Chelsea Market, I round up premium bird and fresh herbs with the same devotion my mother had for spices in Marrakech’s souks. When I whisk the simple blend, I taste that blend‑of‑autumn, the way mustard greens dance in a Moroccan broth.
Ingredients List
1 lb boneless, skin‑less chicken breast, cut into 1‑inch cubes
1/2 cup ranch dressing (full‑fat)
3/4 cup grated parmesan cheese
2 cloves garlic, minced
2 tbsp olive oil, plus extra for brushing
1 tsp smoked paprika
1/2 tsp salt, plus more to taste
Freshly cracked black pepper (to taste)
1 cup cherry tomatoes (optional)
Fresh basil leaves for garnish
Ingredient Spotlight
Ranch Dressing: Use a creamy dressing with a hint of buttermilk for depth. Look for a brand that’s not too sweet; cut the flavor with fresh garlic. Substitute with a Greek yogurt blend if you prefer a tangier note, though it may slightly soften the crust.
Parmesan: Aged 24‑month cheese brings a nutty sharpness. If it’s hard to find, try Grana Padano— it’s milder but still gives a robust crunch when melted.
Chicken: Boneless breast keeps things lean; but cut up thighs for extra moisture and chewiness. Thighs also accept the seasoning better because of their higher fat content.
Original Ingredient
Best Substitution
Flavor / Texture Impact
Ranch Dressing
Greek Yogurt + mustard
Tangier, lighter, less sweet
Parmesan
Grana Padano
Less sharp, smoother melt
Chicken Breast
Chicken Thigh
More juiciness, firmer bite
How to Make Ranch Garlic Parmesan Chicken Skewers — Step-by-Step
Grab a sheet pan, a skillet, and some bamboo sticks—protein drills! Together they’ll transform a handful of ingredients into a star plate in less than thirty minutes.
Step 1: Prep Marinade
Whisk the ranch, parmesan, garlic, olive oil, smoked paprika, salt, and pepper in a bowl until a silky paste forms. Keep the bowl beside the skillet so you can stash it down in two minutes.
💡 emy’s Pro Tip: Use a whisk—coarsely ground parmesan sticks better into the liquid, creating a thicker coating that clings to chicken.
Step 2: Marinate Chicken
Coat the chicken cubes in the paste, ensuring each piece is splashed. Let them rest on a rack for 5 minutes; this short pause lets the flavors seep in without soaking.
⚠️ Common Mistake to Avoid: Overnight marination can break down the chicken’s texture, turning it mushy.
Step 3: Thread Skewers
Press the cubes onto soaked skewers, alternating with cherry tomatoes if using, leaving a half‑inch gap. This spacing allows the heat to circulate adequately.
💡 emy’s Pro Tip: Use longer skewers if you’re caring about string interference; they read the char edges better.
Step 4: Grill
Heat a medium‑high grill or griddle to 400°F. Brush all sides of the skewers with olive oil. Cook 4‑5 minutes per side, rotating for even browning. When the edges are crisp and the juices run clear, the chicken is done.
⚠️ Common Mistake to Avoid: Skewers over‑cook on the outside while remaining raw inside—use a meat thermometer (165°F).
Step 5: Serve
Platter the skewers with fresh basil on top, add a small ramekin of ranch‑garlic sauce for dipping, and enjoy with a cold glass of Pinot.
💡 emy’s Pro Tip: Let the skewers rest for two minutes after grilling—this redistributes juices and locks flavor.
Step
Action
Duration
Key Visual Cue
1
Whisk Marinade
2 min
Thick, glossy paste
2
Coat Chicken
5 min
Even coating
3
Thread Skewers
3 min
Spaced pieces
4
Grill
9 min
Char marks, aroma
5
Rest & Serve
2 min
Juices redistributed
Serving & Presentation
Thin slices of baguette, feta crumbles, and a drizzle of herbed olive oil sit beside the skewers, turning the plate into a picnic atmosphere. I like to scatter bright cilantro leaves that echo Moroccan flavor notes.
The best way to plate is to arrange the skewers in a circle, lift the zig‑zag onto a shallow platter, and add a spoonful of cool ranch sauce in the center. A splash of fresh lemon juice brightens the dish, while the basil highlights the autumnal Italian terpenes that exist in both the dish and my travels.
Pairing Type
Suggestions
Why It Works
Side Dish
Steamed asparagus or roasted bell pepper
Acidic freshness balances the richness
Sauce / Dip
Garlic aioli or tahini dip
Complementary garlicky notes
Beverage
Chilled Sauvignon Blanc or light lager
Brings brightness
Garnish
Miniature basil leaves, microgreens
Adds color and herbal aroma
Make-Ahead, Storage & Reheating
I love prepping during a quiet Sunday, wrapping the skewers in parchment then patting them to dryness. When I return to the kitchen with a buzzing lunch crowd, I just pop them onto a quick grill or a 350°F oven for five minutes.
Method
Container
Duration
Reheating Tip
Refrigerator
Airtight glass jar
3 days
Reheat in oven 350°F 5 mins
Freezer
Lid‑sealed zip bag
2 months
Bring to room temp 20 mins before grilling
Make-Ahead
Wax paper on grill rack
1 week in fridge
Finish in a hot grill 5 mins
If you’re a window‑shopping fan, keep the skewers wrapped in foil with a slice of lemon inside to preserve moisture. When it’s time to dish, a quick squeeze of lemon brings the dish back fresh.
Variations & Easy Swaps
Variation
Key Change
Best For
Difficulty Impact
Spicy Moroccan Twist
Add 1 tsp harissa paste to the mix
Heat lovers
Easy
Gluten-Free / Dairy-Free
Use dairy‑free ranch & chickpea flour crumble
Diet‑kept guests
Moderate
Seasonal Summer Swap
Replace tomatoes with grilled peaches
Fruit lovers
Easy
Spicy Moroccan Twist
I blend harissa with the ranch sauce, giving each skewer a subtle warmth that echoes the streets of Fez. The peppery flavor pairs beautifully with grilled peaches in my summer swap.
Gluten-Free / Dairy-Free
I replace regular ranch with a homemade dairy‑free version (aquafaba, tahini, and lemon). For the parmesan crunch, I grind roasted chickpeas seasoned with smoked paprika. The result holds similar texture but with a nutty depth.
Seasonal Summer Swap
I swap cherry tomatoes for sliced grilled peaches. The sweet fruit complements the garlic‑ranch base, delivering a caramelized, tan hard‑boiled finish that reminds me of August afternoons in Manhattan.
How long should I marinate the chicken for optimal flavor?
I recommend marinating for a quick 5‑minute pulse in the fridge. While a longer soak can deepen flavor, it risks breaking down the chicken’s proteins and making the meat mushy. A short burst lets the ranch‑parmesan paste cling, delivering a juicy center and a crisp coating that keeps the texture bright even after grilling.
Can I use bone‑in chicken for this recipe?
Absolutely! Bone‑in thighs or drumsticks bring a richer flavor and more juiciness. Just make sure to cut the meat into bite‑sized pieces and cook a bit longer—vitamin‐rich bone marrow will add extra umami to the secret sauce.
What is the best way to keep the parmesan from melting into a sauce?
Coating the chicken in the ground parmesan early forms a protective crust that browns when grilled. If you still find fat pooling, add a light dusting of chickpea flour before grilling; it firms the crust and holds the parmesan in place while the heat sears the meat.
Which wood chips do you recommend for smokier skewers?
Apple or cherry wood chips give a subtle, sweet smoke that complements the ranch and parmesan. If you can’t get wood chips, a short burst of maple syrup before the final minute of grilling will simulate a gentle smokiness, as the sugar caramelizes just right.
How can I serve this recipe at a larger gathering?
Set up a grill station or use a sheet pan. Scale up the recipe by doubling or tripling the marination bowl. Keep the skewers on damp paper towels to avoid sticking, then turn them in a single batch of 10‑12 pieces in a big grill or slow‑cook on a flat pan. Add a small salad mix and a tuna crisp to satisfy a crowd.
What microwavable guide remains safe for reheating this dish?
Because the sauce contains dairy, avoid microwaving for more than 30 seconds each time—reheat in a small saucepan or a 250°F oven. That ensures the parmesan stays crisp while the chicken stays juicy without turning the whole thing soggy.
Can I swap chicken for another protein?
Certainly! Peruvian fish or tofu slices work as well. Prepare them in the same marinades and grill accordingly. Fish will need a shorter cook (3‑4 min each side). Tofu should be pre‑pressed and pressed for 15 minutes to remove moisture, then marinated for twelve minutes for the host’s tenderness.
Is gluten‑free seasoning safe for those with celiac disease?
Yes, both the ranch dressing and parmesan are naturally gluten‑free. If you find a syndicated “flavored” ranch containing wheat, look for a certified gluten free line or make your own blend by seasoning plain Greek yogurt with garlic and herbs.
What beverage pairings work best with these skewers?
A chilled rosé or gem‑tone Sauvignon Blanc cuts through the creamy ranch and balances the char. For those preferring non‑alcoholic, a sparkling peach soda or cucumber‑mint soda gives a refreshing contrast that brightens the savory notes.
How can I handle leftover sauce that’s too thick?
Thin a splash of water, low‑fat milk or even a dab of Caesar dressing; this keeps the sauce smooth and keeps the parmesan from forming a hard crust that may make the dish feel heavy.
Share Your Version!
If you’re taking the plunge, the real joy is seeing your family’s smile. Drop a comment below or give me a five‑star rating—your feedback warms my north‑of‑the‑city kitchen. Capture a photo, tag me or post a Reel with @cookingwithemi, and let me taste what your creative twist looks like.
If you have a special ingredient that salvages the traditional run, I’d love to hear about it. Did the spiral of fresh mint add a fresh burst? Or did you layer in a whisper of smoky paprika? Ask away, and let’s keep our recipe family buzzing.
From my NYC kitchen to yours — I hope this recipe brings as much warmth to your table as it does to mine. — emy 🧡
📌
Love This Recipe? Save It to Pinterest!
If you enjoyed this Ranch Garlic Parmesan Chicken Skewers recipe, don’t let it get lost in your browser tabs! 😄 Pin it now so you can find it again anytime — and explore hundreds more tried-and-tested recipes waiting for you on my Pinterest boards.
Chinese Orange Chicken Crunchy Orange Twist – A NYC Kitchen Classic
⚖️
Difficulty
Medium
⏲️
Prep Time
20 mins
🕒
Cook Time
25 mins
⏱️
Total Time
45 mins
🍽️
Servings
4
Growing up in the aromatic markets of Marrakesh, I learned early that flavor is born from the proper blend of sweet, salty, and umami. A few years back in Paris I refined that concept by mastering sauce reduction techniques, only to carry those lessons across the Atlantic to the bustling farmers’ markets of Brooklyn where citrus blooms all year long. Today, I’m thrilled to share my version of the classic Chinese Orange Chicken, but with a crunchy twist that keeps the batter light and the sauce glossy. Every bite is a festival of textures, the crunch mirroring the bright zest that lifts the entire dish—my signature touch.
The first thing you’ll notice is the citrus splash that comes from freshly squeezed orange juice and a generous pinch of orange zest. When the sauce simmers, a caramelized glaze develops, coating the chicken in a glossy, slightly syrupy sheen. Beneath the sweet surface, a subtle heat from red chili flakes gives warmth, while a hint of garlic powder ensures depth. The chicken’s exterior, doubled in flour and cornstarch, yields a delicate, almost translucent crust that’s crisp without being greasy. Together they create a sensory harmony of sweet, savory, and tangy flavors, accentuated by the natural brightness of citrus and a whisper of toasted sesame.
I’ve spent countless evenings experimenting in my NYC kitchen, always keeping an eye on consistency and flavor balance. One pro tip I’ve learned is to let the orange sauce thicken just enough so it clings to the chicken without becoming syrupy—this gives you the ideal “sticky” finish. A common mistake that often sneaks in is frying the chicken too hot; it may crisp quickly but then lose its juicy interior. To avoid this, monitor the oil temperature closely with a thermometer and maintain it at 350°F. Finally, reserve a little sauce to drizzle over rice or quinoa for a complete meal that’s both satisfying and vibrant.
Why This Chinese Orange Chicken Recipe Is the Best
First, the flavor palette is a culmination of my Moroccan roots—think sweet, spiced, and aromatic—mixed with the precise sauce craft honed in Paris. The bright orange notes come from real juice and zest, offering a fresh, tangy bite while the sweetened glaze showcases caramelization brilliance I learned while pastry‑making.
Second, the batter employs a unique double‑coating technique that yields a crispy, airy shell. When the cornstarch and flour meet, the result is a delicate crunch that yields after the first bite, revealing succulent chicken beneath—perfect for diners who crave texture.
Lastly, the method’s simplicity ensures it works for beginners without sacrificing elegance. Each step is a step toward flavorful mastery, so even when time is scarce, you’ll end up with a dish that feels luxurious in every bite.
Chinese Orange Chicken Ingredients
I usually scout my favorite farmers’ market in Brooklyn for the freshest oranges, and the same day I pick out the crispest bell peppers that will pair perfectly with the sweet sauce. This mix of kitchen memories and the vibrant produce of NYC makes the dish feel homey yet distinctly international.
Ingredients List
4 Boneless Skinless Chicken Breasts (cut into bite‑size pieces)
3 Eggs (whisked)
1/3 cup Cornstarch
1/3 cup Flour
Salt
Oil (for frying)
1 cup Orange Juice (freshly squeezed)
1/2 cup Sugar
2 Tablespoons Rice Vinegar (or White Vinegar)
2 Tablespoons Soy Sauce (use tamari for a gluten‑free dish)
Orange Juice – The base of the sauce; choose a thick, sweet variety for depth. In most U.S. grocery stores, a 1‑cup bottle works, but if you can find fresh oranges, squeeze the juice yourself. Substitution: Lemon juice will deliver acidity but will lighten the sweetness.
Soy Sauce – Provides umami and saltiness. When selecting tuna‑free tamari, look for a darker hue, which indicates a richer flavor. Substitution: Coconut aminos keeps the sauce gluten‑free while giving a subtle nutty undertone.
Cornstarch – Essential for crisp batter and sauce thickening. Use grade‑A cornstarch; it’s finer and provides a silky finish. Substitution: Arrowroot powder works well, especially if you’re avoiding wheat‑based thickeners.
Original Ingredient
Best Substitution
Flavor / Texture Impact
Soy Sauce
Coconut Aminos
Less salty, nutty undertone, still umami.
Cornstarch (Batter)
Arrowroot Powder
Gluten‑free, yields same crispness.
Fresh Orange Juice
Orange Juice concentrate
More intense citrus flavor, less water content.
How to Make Chinese Orange Chicken — Step-by-Step
Ready to bring this bright, crispy masterpiece to life? Let’s dive into the steps that make this dish shine.
Step 1: Create Orange Sauce
In a medium pot, combine 1 cup orange juice, 1/2 cup sugar, 2 Tbsp rice vinegar, 2 Tbsp soy sauce, 1/4 tsp ginger, 1/4 tsp garlic powder, and 1/2 tsp red chili flakes. Heat gently for 3 minutes until the sugar dissolves.
💡 emy’s Pro Tip: Stir every 30 seconds to prevent the sugar from crystallizing on the bottom.
Step 2: Thicken Sauce
Whisk 1 Tbsp cornstarch with 2 Tbsp water to create a smooth slurry. Slowly pour into the warm orange mixture while whisking. Continue simmering for 5 minutes until the sauce thickens.
⚠️ Common Mistake to Avoid: Adding the slurry too fast can cause clumps.
Step 3: Finish with Zest
Remove from heat and stir in orange zest. Let the sauce cool a bit to maintain its glossy sheen.
💡 emy’s Pro Tip: Toss in additional zest just before serving to preserve its bright aroma.
Step 4: Prep Dry Coating
Combine 1/3 cup flour, 1/3 cup cornstarch, and a generous pinch of salt in a shallow dish. Stir until evenly mixed.
⚠️ Common Mistake to Avoid: Skipping the salt can leave the chicken tasting flat.
Step 5: Beat Eggs
Whisk 3 eggs in a separate shallow dish until frothy.
💡 emy’s Pro Tip: Use beaten eggs to create a velvety coating.
Step 6: Dip Chicken
Coat each chicken bite first in the beaten eggs, then dredge in the flour‑cornstarch mixture. Shake off excess and set aside on a paper‑towel‑lined plate.
⚠️ Common Mistake to Avoid: Leaving the batter too thick; it will crack when fried.
Step 7: Heat Oil
Fill a heavy‑bottomed pot with 2–3 inches of oil. Heat over medium‑high until it reaches 350°F (use a thermometer for precision).
💡 emy’s Pro Tip: A drop of sauce will sizzle loudly, indicating readiness.
Step 8: Fry Chicken
Working in small batches, fry chicken for 2–3 minutes, turning often until golden brown and cooked through. Drain on paper towels, repeating for remaining pieces.
⚠️ Common Mistake to Avoid: Overcrowding the pan; it lowers oil temperature and yields soggy coating.
Step 9: Toss with Sauce
Return chicken to the pot (or a large skillet), pour the thickened orange sauce, and toss until evenly coated. Reserve a splash of sauce for serving over rice or noodles.
💡 emy’s Pro Tip: Toss gently to keep the crispy texture intact.
Step
Action
Duration
Key Visual Cue
1
Combine sauce ingredients
3 min
Sugar fully dissolved
2
Add slurry & simmer
5 min
Glossy glaze forms
3
Add zest
1 min
Bright citrus aroma
4
Prepare coating
2 min
Even flour‑cornstarch mix
5
Beat eggs
1 min
Foamy consistency
6
Coat chicken
2 min
Thin, even batter
7
Heat oil
5 min
Oil reaches 350 °F
8
Fry chicken
2–3 min per side
Golden brown crust
9
Toss with sauce
1 min
Even coating, glossy glaze
Serving & Presentation
Plate the crispy orange chicken atop a bed of fluffy jasmine rice, drizzling the reserved sauce to add a glossy sheen. Sprinkle finely sliced green onions and an extra pinch of orange zest to give a fresh burst of color and aroma.
For a twist of Moroccan inspiration, add a handful of toasted almond slivers — they provide a nutty crunch that pairs beautifully with the sweet glaze. Pairing this dish with a crisp white wine, like a lightly oaked Chardonnay, gives a perfect balance; if you love sparkling, a dry Champagne can add a celebratory note.
Pairing Type
Suggestions
Why It Works
Side Dish
Steamed Broccoli
Vegetable crunch balances sauce sweetness.
Sauce / Dip
Plain Greek Yogurt with cumin
Cool creaminess cuts through citrus.
Beverage
Dry Riesling or sparkling wine
Acidic profile brightens flavors.
Garnish
Sesame seeds and lime wedge
Adds texture and an extra citrus pop.
Make-Ahead, Storage & Reheating
When my week gets hectic, I often prepare this orange chicken in bulk and keep it in the fridge for quick lunches. The sauce’s firmness improves over time, giving it that thick, silky glaze we all love.
Method
Container
Duration
Reheating Tip
Refrigerator
Sealed glass jar
3 days
Heat in skillet 2 min each side.
Freezer
Vacuum seal bag
2 months
Thaw overnight, re‑simmer on low.
Make-Ahead
Air‑tight container
4 hrs
Store sauce separately, toss before serving.
When reheating, I always keep the sauce warm or add a splash of water to avoid it thickening too much. A quick 30‑second microwave or sauté will revive the crispness. If you’re in a hurry, steam it in a pot with a light pan underneath to keep the chicken from drying out.
I’ve also found that adding a few fresh orange segments while reheating brings back the juicy aroma right back to your kitchen—it’s a simple step that makes all the difference.
Variations & Easy Swaps
Variation
Key Change
Best For
Difficulty Impact
Pomegranate Molasses Variation
Replace sugar with pomegranate molasses.
Smoky, tangy dinner.
Minor
Gluten‑Free Variation
Use almond flour & tapioca starch.
Allergy friendly.
Moderate
Sesame‑Spring Variation
Add toasted sesame seeds & snow peas.
Spring‑time bright.
Minor
Pomegranate Molasses Variation
Swap half the sugar with pomegranate molasses for a deep, slightly tart sweetness that pairs beautifully with the citrus notes. The result is a sauce that carries a subtle smoky depth, reminiscent of Moroccan tagine flavors I’ve enjoyed in Marrakech.
Gluten‑Free Variation — Dairy‑Free
Replace flour and cornstarch with a blend of almond flour and tapioca starch to keep the coating crisp. Use coconut aminos instead of soy sauce for a buttery‑sweet umami flavor. The texture stays crunchy while the sauce remains silky and inviting.
Sesame‑Spring Variation
Introduce toasted sesame seeds and crisp snow peas to create a bright, fresh plate that feels like a bustling NYC farmer’s market in late spring. The subtle nutty flavor of sesame complements the orange glaze for a harmonious finish.
How long does Chinese Orange Chicken keep in the refrigerator?
It can stay fresh for up to three days when stored in an airtight container in the refrigerator. The sauce will slightly thicken as it cools, but this actually helps the coating cling to the chicken. Always ensure the temperature stays below 40°F and reheat the chicken gently to preserve the crispness, using a quick pan‑simmer or 30‑second microwave burst.
Can I use honey instead of sugar in the orange sauce?
Absolutely—honey adds a floral sweetness that pairs well with orange. Replace the 1/2 cup sugar with an equal amount of honey and reduce the liquid slightly (about 1 tablespoon less) to maintain the proper consistency. The sauce will thicken faster, so keep an eye on it and stir often. For a lighter version, use a 50/50 mixture of honey and honey‑derived syrup. Remember to simmer until the honey caramelizes slightly, which deepens its flavor.
What oil yields the best crunch for frying?
High smoke‑point oils like peanut, canola, or grapeseed work best for achieving a crisp coating. Peanut oil imparts a subtle nutty aroma that complements the sauce, while canola provides a neutral base that lets the flavors shine. Avoid oils with strong flavors or low smoke points, such as olive oil, as they can burn and affect the taste. Use a thermometer to keep the oil at 350°F; too high and your chicken will burn, too low and it will absorb excess oil.
How can I make this dish vegetarian?
Swap out the chicken for tofu or tempeh, seasoned just like the chicken. Press the tofu to remove moisture, dice it, and dip it in egg—use a plant‑based milk substitute or an egg replacer if vegan. Coat with the flour‑cornstarch mixture and fry until golden. The sauce will cling just as well, and the orange zest will give a bright finish. Optionally, add sliced bell peppers for more texture.
Should I fry the chicken whole or in pieces?
Cutting the chicken into bite‑size pieces reduces the cooking time and ensures even frying, preventing a soggy center. Larger, chunkier pieces can become over‑cooked externally while remaining under‑done inside. The small pieces also allow the sauce to coat every surface, giving that signature bite‑sized flavor explosion that pairs with the crisp exterior.
Can I deep‑fry the chicken instead of pan‑frying?
Deep‑frying works wonderfully if you have an oil burner or a deep pot. The larger volume of oil maintains a steady 350°F, producing a more uniform crunch. Just lower the pieces slowly to avoid splattering and allow them to cool on paper towels. Be sure to keep the oil at a consistent temperature, as deep‑frying tends to have more heat loss when you add the chicken.
What’s the difference between tomato ketchup and the sauce used in this recipe?
While ketchup is primarily made from tomatoes, this orange sauce relies on fresh citrus, vinegar, and soy sauce, creating a bright, tangy profile distinct from tomato ketchup’s sweetness and acidity. The addition of orange zest and a small amount of sugar gives it a glossy sheen and sweet‑spicy balance that you won’t find in typical ketchup. It’s a great example of how the same base—sugar, acid, and oil—can transform into a completely different flavor.
Why does the sauce thicken after the chicken is removed from heat?
The cornstarch slurry thickens under heat, but once removed from the heat source the starch continues to hydrate and set. This “set” process occurs slowly, giving the sauce a more stable, elastic consistency that coats the chicken without becoming runny. If you finish the sauce gently on the stove, it may still be thin, so letting it cool for a minute helps achieve the silky texture that’s perfect for this dish.
Where can I buy fresh oranges that make the best sauce?
Look for oranges from local farmers’ markets in the early hours—such oranges are firm, brightly colored, and naturally sweet. In New York City, the Union Square Greenmarket or Brooklyn Flea Market offer fresh, unadulterated fruit. Buy organically or from a small orchard vendor, so the juice is free from added sugars that can alter the balance of the glaze. Once you have the juice, zest the orange as you would; the zest adds bright essential oils that make the sauce sing.
Is it better to keep the sauce warm while tossing the chicken?
Yes, a warm sauce helps the coating adhere immediately, preventing it from drying out before the chicken fully cooks. If you’re making a large batch, rewarm the sauce on low heat for a few extra minutes as you transfer pieces in; it should still be glossy. Cooling the sauce too fast can result in a thicker glaze that is harder to spread evenly over the crispy pieces.
Share Your Version!
I’d love to hear how you personalize this dish—maybe you swapped the sauce base, or added a surprise ingredient from your favorite neighborhood market. Share your tweaks in the comments below and let me know how it turned out.
Take a photo of your vibrant plated dish and tag me on Instagram or Pinterest at @cookingwithemi. I’m always amazed by your creativity and ready to celebrate your culinary adventures.
From my NYC kitchen to yours — I hope this recipe brings as much warmth to your table as it does to mine. — emy 🧡
📌
Love This Recipe? Save It to Pinterest!
If you enjoyed this Chinese Orange Chicken recipe, don’t let it get lost in your browser tabs! 😄 Pin it now so you can find it again anytime — and explore hundreds more tried‑and‑tested recipes waiting for you on my Pinterest boards.
In a medium pot, add orange juice, sugar, vinegar, soy sauce, ginger, garlic, and red chili flakes. Heat for 3 minutes.
In a small bowl, whisk 1 Tablespoon of cornstarch with 2 Tablespoons of water to form a paste. Add to orange sauce and whisk together. Continue to cook for 5 minutes, until the mixture begins to thicken. Once the sauce is thickened, remove from heat and add orange zest.
To make chicken:
Place flour and cornstarch in a shallow dish or pie plate. Add a generous pinch of salt. Stir.
Whisk eggs in shallow dish.
Dip chicken pieces in egg mixture and then flour mixture. Place on plate.
Heat 2 -3 inches of oil in a heavy-bottomed pot over medium-high heat. Using a thermometer, watch for it to reach 350 degrees.
Working in batches, cook several chicken pieces at a time. Cook for 2 – 3 minutes, turning often until golden brown. Place chicken on a paper-towel-lined plate. Repeat.
Toss chicken with orange sauce. You may reserve some of the sauce to place on rice. Serve it with a sprinkling of green onion and orange zest, if so desired.
Teriyaki Chicken Skewers
Table of Contents
Teriyaki Chicken Skewers with a Smoky-Sweet Glaze – The Ultimate Grilled Dinner
⚖️
Difficulty
Medium
⏲️
Prep Time
15 mins
🕒
Cook Time
25 mins
⏱️
Total Time
1hr 10mins
🍽️
Servings
4 servings
When I think of teriyaki chicken skewers, I’m transported back to my first trip to Tokyo’s bustling Tsukiji Market after finishing culinary school in Paris. The scent of soy caramelizing on the grill, the smoky sweetness of the glaze, and the perfect char on each piece of chicken — it was love at first bite. Back here in my NYC kitchen, I’ve spent years refining this version, blending that Japanese street-food magic with a trick I learned from my mother: a touch of honey and a slow-simmered sauce for a deep, sticky finish. This isn’t just a recipe; it’s a weeknight dinner that feels like a special occasion.
Imagine this: tender chunks of chicken thigh, marinated in a rich, glossy teriyaki sauce that’s been simmered until it coats the back of a spoon. As the skewers hit the hot grill, that sauce caramelizes into a smoky-sweet crust, with hints of garlic, ginger, and a whisper of sesame oil. Each bite bursts with umami — the soy sauce’s saltiness balanced perfectly by brown sugar and honey — while the edges get a beautiful, slightly charred crisp. The aroma alone will bring everyone running to the kitchen, promising a dinner that’s both comforting and surprisingly elegant for a simple cookout.
What sets my teriyaki chicken skewers apart is the technique: I make a homemade teriyaki sauce that’s thicker, glossier, and more flavorful than anything from a bottle. The secret? Simmering the sauce until it’s reduced and sticky, then using half as a marinade and the rest for basting during grilling. This two-step approach ensures every bite is deeply flavored, not just coated. Today, I’ll share my pro tip for achieving that perfect char without burning, plus a common mistake home cooks make that leads to dry chicken. Trust me — once you try this method, you’ll never go back to store-bought again.
Why This Teriyaki Chicken Skewers Recipe Is the Best
The flavor secret of this recipe is the homemade sauce, which I build from the ground up: soy sauce, brown sugar, honey, fresh ginger, garlic, and rice vinegar are simmered into a glossy, deeply savory glaze. My Parisian training taught me the importance of balancing sweet, salty, and acidic notes — and this sauce nails it every time. The honey, a trick learned from my mother’s Moroccan kitchen, adds a floral sweetness that caramelizes beautifully on the grill, creating a crust that’s pure magic.
For perfect texture, I use chicken thighs — their higher fat content means they stay juicy even over high heat. The key step is marinating for at least 30 minutes to let the sauce penetrate the meat. Then, grilling over medium heat with frequent turning ensures even cooking without burning the sugar in the glaze. This approach, honed during my time at Le Cordon Bleu, gives you skewers that are tender inside with a sticky, caramelized outside.
This recipe is foolproof and fast for beginners because the sauce-making is simple — just combine ingredients in a saucepan and simmer. The grilling process is forgiving; you can adjust heat as needed. Plus, the hands-on time is minimal: about 15 minutes of prep, then the grill does the work. Even if you’re new to grilling, the step-by-step instructions and visual cues (like when the sauce thickens or the chicken hits 165°F) make it impossible to mess up. It’s weeknight-friendly but impressive enough for guests.
Teriyaki Chicken Skewers Ingredients
I love sourcing my ingredients from the Union Square Greenmarket in NYC — the ginger and garlic are always fresh and fragrant. For the soy sauce, I recommend Kikkoman low-sodium; it’s my go-to because it lets you control the saltiness without overwhelming the other flavors. The brown sugar and honey remind me of the sweet-spiced dishes my mother made in Morocco — a beautiful bridge between Japanese technique and North African warmth.
Ingredients List
2 lbs. chicken thighs (or breasts) cut into 1-inch cubes
2 tbsp cornstarch
1 cup water
1/3 cup brown sugar
1/3 cup low-sodium soy sauce
2 cloves garlic, minced
1 tbsp rice vinegar
1/2 tbsp fresh ginger, minced
1 tbsp honey
1/2 tsp sesame oil
8 wooden or metal skewers
Sesame seeds for garnish (optional)
Chopped green onion for garnish
Ingredient Spotlight
Soy sauce is the backbone of the teriyaki flavor; I recommend low-sodium to avoid an overly salty finish, and tamari works as a gluten-free substitute. Fresh ginger and garlic are non-negotiable—bottled versions lack the bright, spicy kick that makes this sauce sing. Brown sugar provides that molasses-like sweetness that caramelizes perfectly on the grill; you can substitute coconut sugar for a deeper flavor profile.
Original Ingredient
Best Substitution
Flavor / Texture Impact
Soy sauce (low-sodium)
Tamari or coconut aminos
Slightly saltier, with a milder umami; coconut aminos are sweeter.
Brown sugar
Coconut sugar or maple syrup
Mapley flavor with less deep caramelization; coconut sugar adds earthiness.
Chicken thighs
Chicken breasts or extra-firm tofu
Breasts are leaner, so reduce grilling time; tofu needs pressing for moisture.
Rice vinegar
Apple cider vinegar
Slightly fruitier, but acidity remains balanced.
How to Make Teriyaki Chicken Skewers — Step-by-Step
Ready to fire up the grill? Let me walk you through each step so you can be confident and relaxed.
Step 1: Make the Teriyaki Sauce
In a small bowl, whisk together 2 tbsp cornstarch and 1 cup water until smooth. In a medium saucepan, combine this slurry with the brown sugar, soy sauce, minced garlic, rice vinegar, ginger, honey, and sesame oil. Place over medium heat, stirring constantly — the sauce will start to bubble and thicken within 3-5 minutes. Cook until it reaches a glossy, dark brown consistency that coats the back of a spoon. Remove from heat and let it cool completely; you can speed this up by placing the pan in the fridge for 15 minutes.
💡 emy’s Pro Tip: Whisk the cornstarch slurry again just before pouring into the saucepan — cornstarch settles fast, and lumps will ruin the texture.
Step 2: Marinate the Chicken
Once the sauce is completely cool, place the chicken cubes in a large ziplock bag. Pour half of the sauce over the chicken — reserve the other half for basting. Gently squeeze the bag to coat every piece evenly. Marinate in the fridge for at least 30 minutes, though 2-3 hours will yield deeper flavor. If short on time, 20 minutes will still give you great taste.
⚠️ Common Mistake to Avoid: Don’t pour the full sauce into the marinade — the reserved half is essential for basting later, giving you that final glossy finish.
Step 3: Skewer the Chicken
Thread the marinated chicken onto skewers, leaving a small gap between each piece for even grilling. If using wooden skewers, soak them in water for 30 minutes first to prevent burning. Aim for about 5-6 pieces per skewer, depending on length.
💡 emy’s Pro Tip: Don’t overcrowd the skewers — a little space allows the heat to circulate, ensuring all sides char beautifully.
Step 4: Grill the Skewers
Preheat your grill to medium heat (about 350°F). Lightly oil the grates to prevent sticking. Place the skewers on the grill and cook for 20-30 minutes total, turning every 3-4 minutes with tongs. During the last 3 turns, baste with the reserved teriyaki sauce. The chicken is done when it reaches an internal temperature of 165°F and has a beautiful char.
⚠️ Common Mistake to Avoid: Avoid high heat — it will burn the sugar in the glaze before the chicken cooks through. Medium heat is your friend for a sticky, not burnt, finish.
Step
Action
Duration
Key Visual Cue
1
Make sauce
5 min simmer
Glossy, dark brown, coats spoon
2
Marinate
30+ minutes
Chicken coated evenly
3
Grill
20-30 min total
Internal temp 165°F, charred edges
4
Baste
During last 3 turns
Glossy, sticky layer forms
Serving & Presentation
Pull the skewers off the grill and let them rest for just a minute — this locks in those juices. Arrange them on a platter, then shower with chopped green onion and a sprinkle of sesame seeds. The green adds a fresh bite against the sweet glaze, and the sesame gives a nutty crunch. Serve over steamed jasmine rice or, as I love in my NYC home, with a side of charred broccoli from the same grill.
For a Moroccan twist, I sometimes serve these skewers with a side of harissa-tinged couscous or a cucumber-tomato salad dressed with lemon and mint. It’s a fun nod to the flavors of my childhood while keeping the Japanese star front and center. For a complete meal, consider adding a bowl of miso soup or a simple seaweed salad for extra umami.
As a busy NYC food blogger, I rely on make-ahead meals. This teriyaki chicken skewers recipe is ideal: you can marinate the chicken up to 24 hours in advance, which actually deepens the flavor. The sauce can be made up to a week ahead and kept in an airtight jar in the fridge. For meal prep, assemble the skewers the night before, then just grill when you’re ready. It’s a real time-saver for those hectic weeknights.
Method
Container
Duration
Reheating Tip
Refrigerator
Airtight container
Up to 4 days
Reheat in a skillet over medium heat, adding a splash of water
Freezer
Freezer-safe ziplock bag
Up to 3 months
Thaw overnight in fridge, then reheat in oven at 350°F for 10 mins
The most delicious marinated teriyaki chicken grilled to perfection and finished with a delicious teriyaki sauce. Serve with a sprinkle of sesame seeds, fresh chopped green onions over steamed rice.
Ingredients
Scale
2 lbs. chicken thighs (or breasts) (cut into 1" cubes)
2 tbsp cornstarch
1 cup water
1/3 cup brown sugar
1/3 cup soy sauce (*low sodium recommended )
2 cloves garlic (minced )
1 tbsp rice vinegar
1/2 tbsp fresh ginger (minced )
1 tbsp honey
1/2 tsp sesame oil
8 skewers
sesame seed
chopped green onion
Instructions
First make the sauce: Combine cornstarch and water in a small bowl. In a medium saucepan, add remaining ingredients along with the cornstarch/water mixture. Stirring frequently, bring sauce to a simmer. Cook until sauce lightly thickens. Sauce will be dark brown. Once sauce has thickened up, remove from heat and let cool completely. (place in fridge to speed up the process)
Once the sauce is completely cooled, place cubed chicken in a large ziplock bag. Pour half of the sauce over the chicken and gently shake to coat chicken. Let chicken marinate in the fridge for at least 30 minutes. Place remaining sauce aside for later.
When the chicken is done marinating, place your chicken on skewers and heat the grill to medium heat.
Once the grill is hot, place skewers on lightly oiled grill. Turn the skewers every 3-4 minutes until the chicken is cooked through (internal temp 165 degrees), about 20-30 minutes. During the last few turns baste with remaining teriyaki sauce.
Remove skewers from grill and serve with chopped green onion and a sprinkle of sesame seeds(optional).
Chicken Taco Soup
Table of Contents
Chicken Taco Soup: Creamy Rotel Tomato Soup in 35 Minutes
⚖️
Difficulty
Easy
⏲️
Prep Time
10 mins
🕒
Cook Time
25 mins
⏱️
Total Time
35 mins
🍽️
Servings
6
Let me tell you a story about this Chicken Taco Soup. It all started one chilly November evening in my tiny New York City apartment. I had just come home from a long day at the culinary school in Paris, and I was craving something deeply comforting that reminded me of my mother’s kitchen in Morocco. In her kitchen, she always made a rich, slow-simmered tomato soup with warm spices, but here in the city that never sleeps, I needed something faster — but just as soulful. That night, I raided my pantry and discovered a can of Rotel tomatoes, a block of cream cheese, and leftover rotisserie chicken. That’s when this creamy Rotel chicken taco soup was born — a recipe that tastes like it simmered all day but is on the table in just 35 minutes.
Imagine a bowl filled with a velvety, coral-hued broth that clings to every tender shred of chicken. The first sip hits you with a gentle warmth from the chili powder and smoked paprika, followed by the bright acidity of the Rotel tomatoes and green chilies. Then comes the creamy, luscious finish from the melted cream cheese, which rounds out all the bold flavors. Each spoonful is packed with tender black beans, sweet corn, and bits of red bell pepper, adding texture and color. The aroma alone — smoky, tangy, and creamy — will fill your kitchen and draw everyone to the table. It’s the kind of soup that warms you from the inside out, perfect after a frosty walk in Brooklyn or a hectic day at work.
What makes this Chicken Taco Soup truly special is the secret I learned during my pastry training in Paris: tempering the cream cheese so it incorporates seamlessly into the broth without curdling. I’ll show you exactly how to do that, plus my favorite pro tip for making this soup even more luxurious. I’ve tested this recipe dozens of times in my own kitchen, and the most common mistake people make is adding the cream cheese straight from the fridge — trust me, it’s a game-changer to soften it first. With my step-by-step guidance, you’ll have a restaurant-quality bowl of comfort that’s foolproof and fast. Let’s get cooking!
Why This Chicken Taco Soup Recipe Is the Best
The Flavor Secret: The real magic of this creamy Rotel chicken taco soup lies in the combination of the Rotel diced tomatoes and green chilies with the cream cheese. Growing up in Morocco, my mother often used preserved lemons and fresh herbs to add brightness to her stews. I’ve taken that same principle of balancing acidity with richness and applied it here. The tangy, slightly spicy Rotel tomatoes cut through the velvety cream cheese, creating a broth that’s both luxurious and vibrant. It’s the same technique I used in Paris for velvety sauces — a splash of acidity to lift the cream — and it works beautifully here.
Perfected Texture: That luscious, silky texture you get in every bowl is no accident. After years of working with creamy sauces in French cuisine, I’ve learned that the key to a perfectly smooth cream cheese broth is to soften the cream cheese to room temperature before adding it to the pot. Then, you cut it into small cubes and stir it in slowly over gentle heat. This prevents it from breaking and gives you a soup that’s thick and velvety, never grainy or greasy. It’s a pro-level technique that any home cook can master.
Foolproof & Fast: Unlike many slow-cooker or dump-and-go recipes, this chicken taco soup comes together on the stovetop in just 35 minutes. It’s designed for busy evenings when you need a hearty, satisfying dinner without a lot of fuss. The step-by-step process is incredibly forgiving — even if you’re new to cooking, you’ll get a perfect result. Plus, it uses pantry staples like canned beans and corn, and rotisserie chicken makes it even quicker. I’ve made this for friends in Manhattan and for family in New Jersey, and everyone always asks for the recipe.
Creamy Rotel Chicken Taco Soup Ingredients
When I make this creamy Rotel chicken taco soup, I head to my local market in Chelsea or the bodega down the street. I love the lively energy of the Union Square Greenmarket, but for this recipe, the canned goods from any grocery store work perfectly. It reminds me of my mother’s pantry in Morocco, where she always had jars of preserved vegetables and spices ready. Here in NYC, I keep these ingredients on hand for a quick, satisfying meal that feels like a warm hug.
Cream Cheese (softened) — This is the star of the show for the creamy broth. It must be at room temperature, or left out for 30–60 minutes before use. I always use Philadelphia brand because it melts the smoothest. If you’re in a rush, you can microwave the cream cheese in 10-second intervals until just soft, but don’t overheat it. A great dairy-free substitute is full-fat coconut cream, which adds a slight sweetness — just know the flavor will be a little different.
Ro-tel Diced Tomatoes & Green Chilies — These canned tomatoes are a shortcut to big flavor. They come in original (mild) or hot varieties, depending on your spice preference. I love the original for this soup because it adds a gentle heat without overpowering. If you can’t find Rotel, substitute with one 14.5-ounce can of fire-roasted diced tomatoes plus one 4-ounce can of chopped green chiles. The smokiness from the fire-roasted tomatoes is a lovely substitute.
Smoked Paprika — This spice is my secret weapon, learned from my Parisian chef. Unlike regular paprika, smoked paprika adds a deep, woodsy flavor that mimics the smokiness of a charcoal grill. It pairs beautifully with the cumin and chili powder. If you don’t have smoked paprika, you can use regular sweet paprika, but you’ll miss that beautiful smoky depth. I love the one from The Spice House here in NYC.
Original Ingredient
Best Substitution
Flavor / Texture Impact
Cream cheese (softened)
Full-fat coconut cream
Slightly sweeter, dairy-free, thinner broth
Ro-tel tomatoes & chilies
Fire-roasted diced tomatoes + green chiles
Smokier, slightly different spice profile
Smoked paprika
Regular sweet paprika
Less smoky, still good flavor
How to Make Chicken Taco Soup — Step-by-Step
Don’t worry — this creamy Rotel chicken taco soup is incredibly easy. I’ll walk you through each step so you can create a restaurant-quality bowl at home. Let’s get started!
Step 1: Sauté the Onion
Add the olive oil and chopped onion to a large soup pot. Sauté over medium-high heat for 5 minutes, until the onion is softened and translucent. This builds the aromatic foundation for the soup. Stir occasionally to prevent the onion from browning too much.
⚠️ Common Mistake to Avoid: Overcrowding the pot. If your pot is too small, the onion will steam instead of sautéing. Use a 4- to 5-quart pot for best results.
Step 2: Add Remaining Soup Ingredients
To the pot, add the chicken broth, Rotel tomatoes (with juices), drained and rinsed black beans, drained corn, chopped red bell pepper, chili powder, garlic powder, ground cumin, and smoked paprika. Stir everything together to combine. The pot will be very full — that’s fine!
💡 emy’s Pro Tip: Don’t skip rinsing the black beans! The canning liquid can be starchy and often contains added sodium. Rinsing them under cold water ensures a cleaner flavor and better texture in the soup.
Step 3: Bring to a Boil and Simmer
Increase the heat to high and bring the soup to a rolling boil. Once it reaches a boil, reduce the heat to low so the soup is simmering gently. Let it simmer uncovered for 5 minutes. While the soup simmers, you can prepare your toppings — dice the avocado, chop the cilantro, and shred the cheese.
⚠️ Common Mistake to Avoid: Boiling the soup too vigorously. A gentle simmer is key to melding the flavors without cooking off too much liquid. You want the broth to be full and flavorful.
Step 4: Add the Cream Cheese
Cut the softened cream cheese into smaller pieces (about 1-inch cubes). Add them to the simmering soup. Stir gently but continuously until the cream cheese is fully melted and incorporated into the broth. This may take a few minutes. The soup will turn a beautiful, creamy coral color.
💡 emy’s Pro Tip: For the smoothest results, ensure your cream cheese is truly at room temperature. If it’s too cold, it will form lumps. You can also warm the cream cheese in the microwave for 15–20 seconds before cutting. This is the technique I learned in Paris for emulsifying dairy into sauces.
Step 5: Stir in the Chicken
Add the shredded cooked chicken to the pot. Stir to combine, then let the soup cook for another 5–7 minutes over low heat, until the chicken is warmed through. The soup should be thick and creamy, with the chicken tender and evenly distributed.
⚠️ Common Mistake to Avoid: Overcooking the chicken. Since you’re using pre-cooked rotisserie chicken, you only need to heat it through. Simmering it too long can make the chicken dry and stringy.
Step 6: Season and Serve
Taste the soup and season with salt and pepper as needed. Remember that the chicken broth and Rotel tomatoes already contain some sodium, so start with a pinch of salt and adjust. Ladle the soup into bowls and top with your favorite toppings — shredded Mexican cheese, diced avocado, fresh cilantro, and tortilla strips all work beautifully.
💡 emy’s Pro Tip: For an extra burst of freshness, squeeze a wedge of lime over each bowl before serving. The acidity cuts through the richness of the cream cheese and brightens up the whole dish.
Step
Action
Duration
Key Visual Cue
1
Sauté onion in oil
5 mins
Onion is translucent and softened
2
Add all other ingredients (except cream cheese & chicken)
1 min
Pot is full of colorful ingredients
3
Bring to a boil, then simmer
5 mins
Gentle bubbles on the surface
4
Add cream cheese pieces, stir to melt
3–4 mins
Soup turns thick and coral-colored
5
Stir in shredded chicken
5–7 mins
Chicken is heated through
6
Season and serve
2 mins
Soup is creamy and bubbling
Serving & Presentation
This creamy Rotel chicken taco soup is a meal in itself, but I love to serve it with a few accompaniments that make it feel even more special. When I’m hosting friends in my Brooklyn apartment, I set out a toppings bar so everyone can customize their bowl. It’s a fun way to bring a little bit of a NYC dinner party vibe to a cozy weeknight meal. I usually add a side of warm cornbread or crusty sourdough to soak up every last drop of that velvety broth.
For garnishes, I go with classic flavors: a generous sprinkle of shredded Mexican cheese, a spoonful of creamy diced avocado, and a handful of fresh cilantro. My Parisian training taught me that presentation matters, so I always add a swirl of sour cream or a few tortilla strips on top for the perfect Instagram-worthy bowl. And if I have it, a few pickled jalapeños add a bright, tangy pop that cuts through the richness — a trick I picked up from a street food vendor in the LES.
This soup also pairs beautifully with a simple side salad dressed with lime vinaigrette, or a side of Mexican rice. For a summer twist, serve it with chilled watermelon or a crisp Corona with lime. Whatever you choose, this chicken taco soup is sure to become a favorite in your home.
Pairing Type
Suggestions
Why It Works
Side Dish
Cornbread, sourdough, or warm tortillas
Soaks up the creamy broth perfectly
Sauce / Dip
Sour cream, lime crema, or avocado sauce
Adds cool, tangy contrast
Beverage
Corona with lime, Michelada, or sparking water
Crisp, refreshing, cuts the richness
Garnish
Ground Beef Orzo with Tomato Cream Sauce
Table of Contents
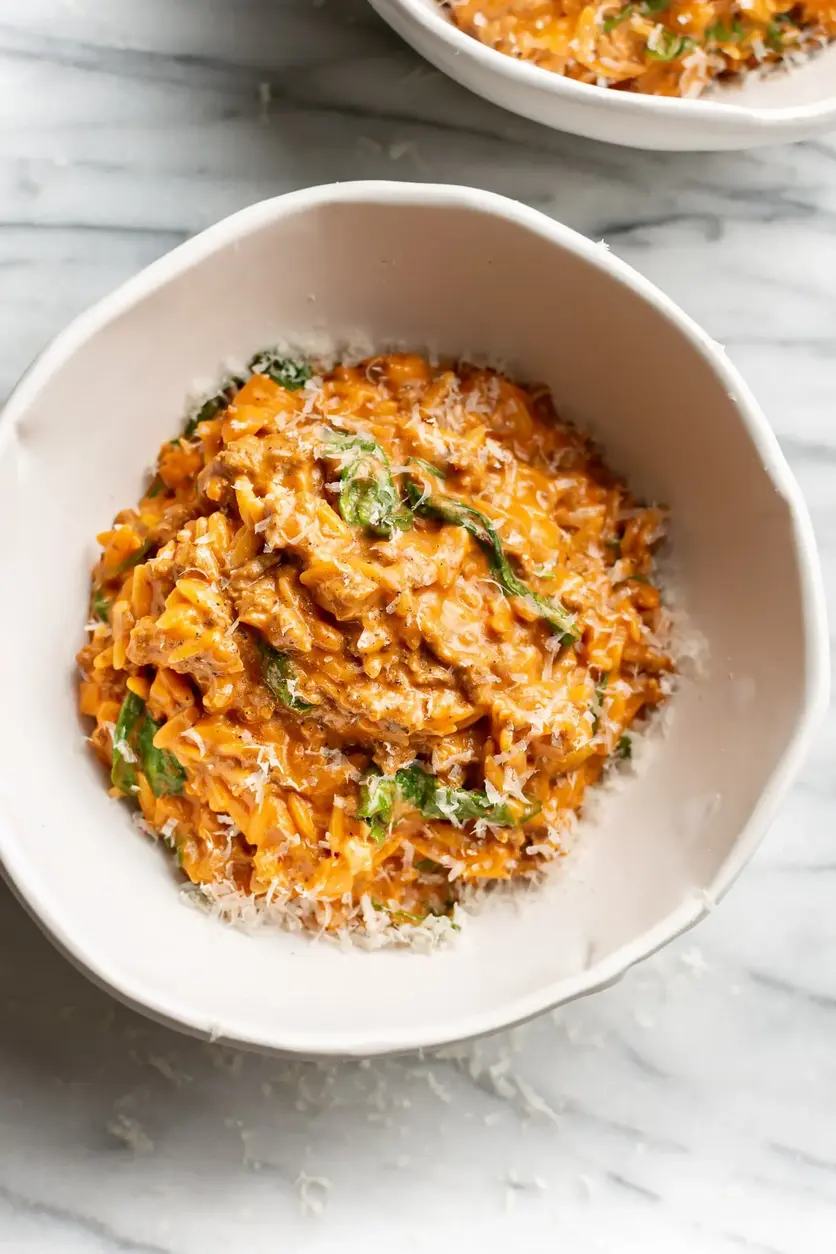
Ground Beef Orzo with Tomato Cream Sauce – A Quick One-Pot Comfort Meal
⚖️
Difficulty
Easy
⏲️
Prep Time
10 mins
🕒
Cook Time
20 mins
⏱️
Total Time
30 mins
🍽️
Servings
4
I still remember the first time I made this ground beef orzo with tomato cream sauce for a busy weeknight dinner in my NYC kitchen. It was one of those evenings when I needed something warm, creamy, and deeply satisfying—but didn’t have the energy to hover over multiple pots. This one pot ground beef orzo recipe was born from that need: it’s a creamy, comforting, and delicious meal that comes together in just 30 minutes, and I honestly think it’s the perfect solution for anyone who loves hearty flavors with minimal cleanup. Growing up in Morocco, my mother made dishes that simmered for hours, but here in the city, time is precious. I wanted that same soulful taste, just faster.
The beauty of this dish lies in its creamy tomato sauce—rich from heavy cream, bright from tomato sauce, and balanced with a touch of Worcestershire that adds that savory depth you can’t quite name. The orzo absorbs all that goodness, plumping up into tender, risotto-like pearls. The ground beef browns with onion and garlic, and a sprinkle of Italian seasoning ties it all together. When you lift the lid after the final rest, the steam carries the aroma of parmesan melting into spinach. It’s the kind of bowl that makes you pause, take a deep breath, and feel thankful for simple things.
I’ve tested this recipe a dozen times in my tiny East Village kitchen, and I can tell you the key is patience with the bubbling stage—don’t rush it. A common mistake people make is boiling the liquid too hard, which reduces the sauce too fast and leaves the orzo undercooked. My French culinary training taught me to control heat with intention. Let the pot gently bubble, not aggressively boil. I also love stirring in fresh baby spinach at the very end—it wilts perfectly in the residual heat, adding color and nutrients. This version is foolproof, creamy, and deeply satisfying. I’m excited to share it with you.
Why This Ground Beef Orzo Recipe Is the Best
The Flavor Secret: My take on this creamy ground beef orzo uses a double hit of savory depth—Worcestershire sauce and beef broth. It’s a trick I picked up while training in Paris: layering umami gives you that rich, slow-cooked flavor in under 30 minutes. The cream rounds out the acidity of the tomato sauce, making every spoonful velvety and balanced.
Perfected Texture: Here’s the chef’s trick: by cooking the orzo directly in the sauce mixture and stirring every few minutes, you release the starches naturally. The result is a creamy, risotto-like consistency without the constant stirring. I’ve fine-tuned the liquid-to-pasta ratio so the orzo stays al dente and the sauce clings beautifully to every piece.
Foolproof & Fast: Even if you’re a beginner, this recipe works. It’s all done in one pot, and I’ve included visual cues so you know exactly when to add each ingredient. No special equipment—just a good Dutch oven or soup pot. That’s the kind of reliable cooking I love to share: approachable, delicious, and stress-free.
Ground Beef Orzo Ingredients
I found my favorite lean ground beef at the Union Square farmers market—it makes a real difference in this dish. The smell of browning beef with onion and garlic always takes me back to my mother’s kitchen in Morocco, where she’d cook ground meat with warm spices. Here in NYC, I use Italian seasoning to bridge North African warmth with Italian-American comfort. Let’s look at what you’ll need.
Ingredients List
1 pound lean ground beef
1/2 medium onion (chopped)
3-4 cloves garlic (minced)
1/2 teaspoon crushed red pepper flakes (optional)
1/2 teaspoon Italian seasoning
1 cup uncooked orzo pasta
1 (14 ounce) can tomato sauce
3/4 cup beef broth
1 cup heavy/whipping cream
1 teaspoon Worcestershire sauce
1/2 cup freshly grated parmesan cheese
2 cups (packed) fresh baby spinach
Salt & pepper (to taste)
Ingredient Spotlight
Lean Ground Beef: I recommend at least 85/15 lean-to-fat ratio. It browns beautifully without making the dish greasy. If you use a fattier blend, spoon off excess fat after browning—too much fat can make the sauce separate. In a pinch, ground turkey works, but the flavor will be milder.
Orzo Pasta: This small, rice-shaped pasta is the heart of the dish. It absorbs the creamy tomato sauce while cooking, creating a risotto-like texture. I always use regular semolina orzo—whole wheat orzo takes longer to cook and may need extra liquid. Look for traditional brands like De Cecco or Barilla.
Heavy Cream: The cream gives the sauce its luscious, velvety body. For the best result, use heavy cream or whipping cream (at least 35% milk fat). Half-and-half will work but produce a thinner sauce. In a pinch, coconut cream (the thick part from a can of coconut milk) adds a slight sweetness and works for dairy-free.
Freshly Grated Parmesan: Pre-shredded cheeses often contain anti-caking agents that can make the sauce grainy. I always grate a hunk of Parmigiano-Reggiano by hand for the smoothest melt. It adds that nutty, salty finish that ties the whole dish together. Pecorino Romano is a sharper alternative.
Original Ingredient
Best Substitution
Flavor / Texture Impact
Lean Ground Beef
Ground Turkey (93/7)
Milder flavor; add extra Worcestershire and a pinch of smoked paprika
Heavy Cream
Half-and-Half + 1 tbsp butter
Slightly thinner sauce; butter adds richness back
Orzo Pasta
Small shells or ditalini
Similar texture; adjust cooking time as needed (check package)
How to Make Ground Beef Orzo — Step-by-Step
Trust me, you’ve got this. I walk you through every step with visual cues so you know exactly when to add the next ingredient. Let’s cook!
Step 1: Brown the Beef
Add the ground beef to a soup pot or Dutch oven and break it up a little with your spoon. Let it cook, without stirring, over medium-high heat for 5 to 6 minutes. This gives the beef a beautiful brown crust that adds deep flavor.
💡 emy’s Pro Tip: Don’t move the beef around too much while it’s browning. Let it sit and develop a good sear. That golden brown color equals more flavor in every bite.
Step 2: Add Onion & Garlic
Add the chopped onion to the pot and stir, breaking the beef into small pieces. Cook for about 5 minutes until the onion softens. If there’s a lot of excess fat, spoon some out—but if using lean beef, leave it in—it adds flavor. Stir in the minced garlic, red pepper flakes (if using), Italian seasoning, and orzo. Cook for about one minute until the orzo is lightly toasted.
⚠️ Common Mistake to Avoid: Don’t skip toasting the orzo. This quick step (about 1 minute) keeps the pasta from turning mushy and helps it hold its shape in the sauce.
Step 3: Add Liquids & Simmer
Stir in the tomato sauce, beef broth, heavy cream, and Worcestershire sauce. Once it starts to bubble, reduce the heat to medium or medium-low so it gently simmers. Cook uncovered for 10 minutes, stirring fairly often so the orzo doesn’t stick to the bottom of the pot.
💡 emy’s Pro Tip: The key is a gentle bubble—not a rapid boil. If the liquid is bubbling vigorously, turn the heat down a notch. You want the orzo to absorb the liquid gradually, not have the liquid evaporate too quickly.
Step 4: Finish with Cheese & Spinach
Take the pot off the heat. Stir in the freshly grated parmesan and the baby spinach. Cover the pot for about 3 to 5 minutes—this lets the spinach wilt into the sauce and the parmesan melt completely. The residual heat also helps the sauce thicken to a creamy consistency. Season with salt and pepper to taste, and serve immediately.
⚠️ Common Mistake to Avoid: Don’t stir in the spinach too early or over high heat—it can become tough and lose its bright green color. Let the residual heat do the work for perfect wilted spinach every time.
Step
Action
Duration
Key Visual Cue
1
Brown beef
5-6 min
Deep brown crust on beef
2
Cook onion, garlic, orzo
5 min
Onion translucent, orzo lightly golden
3
Simmer sauce
10 min
Sauce gently bubbling, orzo swelling
4
Rest with cheese & spinach
3-5 min
Spinach wilted, sauce thick, creamy
Serving & Presentation
I love serving this ground beef orzo in wide, shallow bowls so you can appreciate its creamy, saucy texture. A generous pile on each plate, topped with an extra sprinkle of freshly grated parmesan and a few turns of black pepper. Sometimes I add a pinch of fresh parsley or basil for a pop of green—it reminds me of the herb gardens in my mother’s courtyard in Morocco.
For an NYC-style meal, I pair it with a crisp green salad dressed with lemon vinaigrette—the brightness cuts through the richness. A side of crusty sourdough from a local Bronx bakery is perfect for mopping up every last bit of sauce. And if you want to channel a bit of Parisian bistro energy, a glass of light red wine like a Beaujolais is my favorite match.
This dish is also beautiful for casual entertaining. It’s hearty enough to stand alone, but you can turn it into a dinner party centerpiece by serving it in a large rustic platter with roasted vegetables on the side.
Pairing Type
Suggestions
Why It Works
Side Dish
Crisp green salad with lemon vinaigrette, roasted asparagus, or garlic bread
Bright acidity and crunch balance the creamy richness
Sauce / Dip
Extra parmesan, red pepper flakes, or balsamic glaze drizzle
Enhances savory notes and adds optional heat
Beverage
Medium-bodied red wine (Beaujolais, Pinot Noir), or sparkling water with lemon
Wine complements the tomato-cream; bubbles cleanse the palate
Garnish
Fresh parsley, basil, or microgreens; a shaving of parmesan
Adds color, freshness, and a touch of elegance
Make-Ahead, Storage & Reheating
In my busy NYC schedule, I love making a double batch of this ground beef orzo on Sunday for quick lunches during the week. It stores beautifully and the flavors actually deepen overnight. Here’s how I handle it.
Method
Container
Duration
Reheating Tip
Refrigerator
Airtight container
3–4 days
Add a splash of broth or water and reheat gently on stovetop
Freezer
Freezer-safe bag or container
2 months
Thaw overnight in fridge, then reheat with a splash of cream
This one pot ground beef orzo recipe comes together in just 30 minutes and is a creamy, comforting, and delicious meal for busy weeknights!
Ingredients
Scale
1 pound lean ground beef
1/2 medium onion (chopped)
3–4 cloves garlic (minced)
1/2 teaspoon crushed red pepper flakes (optional)
1/2 teaspoon Italian seasoning
1 cup uncooked orzo pasta
1 (14 ounce) can tomato sauce
3/4 cup beef broth
1 cup heavy/whipping cream
1 teaspoon Worcestershire sauce
1/2 cup freshly grated parmesan cheese
2 cups (packed) fresh baby spinach
Salt & pepper (to taste)
Instructions
Add the ground beef to a soup pot/Dutch oven and break it up a little bit with your spoon. Let it cook, without stirring, over medium-high heat for 5-6 minutes.
Add the onion to the pot and stir/break the beef up into small pieces. Let it cook for another 5 minutes or so. If there's a lot of excess fat (like if you didn't use lean beef), spoon some of it out. Otherwise, leave it in the pot.
Stir in the garlic, red pepper flakes, Italian seasoning, and orzo. Cook for about a minute.
Stir in the tomato sauce, beef broth, cream, and Worcestershire sauce. Once it starts to bubble, continue cooking for 10 minutes, uncovered, stirring fairly often (so the orzo doesn't stick to the bottom of the pot). You will likely need to turn the heat down a bit (to medium or even medium-low). It should gently bubble vs. boil (you don't want the liquid to reduce too much before the pasta has cooked).
Take the pot off the heat, stir in the parmesan and spinach, and cover the pot for about 3-5 minutes or until it has thickened up to your liking. Season with salt & pepper as needed and serve immediately. See more troubleshooting tips in the blog post and notes below.
Air Fryer Jalapeno Popper Hasselback Chicken
Table of Contents
Air Fryer Jalapeno Popper Hasselback Chicken – A Bold Low-Carb Dinner
⚖️
Difficulty
Easy
⏲️
Prep Time
10 mins
🕒
Cook Time
16 mins
⏱️
Total Time
26 mins
🍽️
Servings
2
I’ll never forget the first time I had a jalapeno popper — it was at a Super Bowl party in my first year in New York City, and I was completely hooked on that creamy, spicy, cheesy bite. Growing up in Morocco, my mother’s kitchen was filled with the warmth of harissa and preserved lemons, but this American classic felt like a whole new world of heat — briny jalapeños, rich cream cheese, and the irresistible crunch of bacon. So, when I started experimenting with low-carb dinners, I knew I had to capture that same jalapeno popper energy in an easy, keto-friendly weeknight meal. This Air Fryer Jalapeno Popper Hasselback Chicken is my bold answer: all the spicy, cheesy goodness of the classic appetizer, stuffed into tender chicken breasts and cooked to perfection in under 30 minutes. It’s a five-ingredient dinner that feels indulgent but fits perfectly into your meal plan.
Imagine slicing into a perfectly golden chicken breast and seeing a creamy, molten cheese filling studded with pickled jalapeños and smoky bacon. The first thing you’ll notice is the aroma — a heady mix of sharp cheddar and that tangy vinegar kick from the pickled peppers. The texture is what really sets this dish apart: the chicken stays incredibly juicy thanks to the air fryer’s rapid circulation, while the top gets a slight golden crust. That final sprinkle of cheddar in the last minute of cooking turns into a bubbly, browned blanket that seals in all the flavors. Each bite is a perfect combination of cool cream cheese, spicy heat, and salty bacon — a flavor bomb that will have you reaching for seconds without any of the guilt.
Now, you might think that chicken gets dry and boring when you cut slits into it, but the Hasselback technique is actually brilliant for keeping it moist. By slicing the chicken almost all the way through, you create pockets that hold the filling right next to the meat, so every bite is seasoned from the inside out. In my Paris culinary school, we used a similar technique for fish en papillote, but here in my NYC kitchen, I’ve adapted it for the air fryer to make it weeknight-friendly and foolproof. 💡 emy’s Pro Tip: Don’t skip the step of using pickled jalapeños; their briny acidity cuts through the richness of the cheese and bacon beautifully, and they have a consistent heat level that fresh jalapeños can’t guarantee. A common mistake is slicing too deep or too shallow — you want about 6 slits, cutting about ¾ of the way through, so the chicken holds together but opens up beautifully when cooked.
Why This Air Fryer Jalapeno Popper Hasselback Chicken Recipe Is the Best
The flavor secret to this dish lies in how I layer the filling. Instead of just mixing everything together, I reserve half the cheddar for the topping. This two-step approach — stuffing and then melting a final cheese layer — creates both a creamy interior and a crispy, golden crust. It’s a technique I learned while perfecting French gratins at Le Cordon Bleu: the cheese that melts on top gets a different, more intense flavor from direct heat, giving you two distinct cheese experiences in one bite. The sugar-free bacon keeps the keto macros on track while delivering that essential smoky, savory punch.
Perfected texture is all about the Hasselback cut. By making even, parallel slits, you maximize the surface area that comes into contact with the filling and the hot air in the air fryer. This ensures the chicken cooks evenly — no dry edges or raw centers — while the filling stays creamy and doesn’t leak out. The air fryer at 350°F is the sweet spot: it’s hot enough to cook the chicken through in 15 minutes without drying it out, and the final minute at the same temperature with extra cheese creates that bubbling, irresistible finish. I always check for an internal temperature of 165°F for safety, but I pull it right at that moment for maximum juiciness.
Foolproof and fast: this recipe is designed for both busy weeknights and lazy weekends. With only five ingredients and 10 minutes of prep, it’s a meal that comes together while you set the table. There’s no marinating, no complicated techniques — just a simple stir, a few strategic cuts, and the air fryer does the rest. Even if you’re new to air frying, this is a great starter recipe because it’s forgiving. The bacon is already cooked and crumbled, so you don’t have to worry about it burning. And because it’s naturally gluten-free and low-carb, it’s a crowd-pleaser for a wide range of diets.
Air Fryer Jalapeno Popper Hasselback Chicken Ingredients
When I moved to New York, I was amazed at the variety of ingredients available at the Union Square Greenmarket. But this recipe relies on just five simple, pantry-friendly ingredients that I can find at any neighborhood grocery store, from the Fairway on the Upper West Side to a bodega in Brooklyn. The key is choosing quality, particularly with the cheese and bacon, since they carry the flavor load. Here’s what you’ll need for this spicy, creamy, keto-friendly dinner.
Cream Cheese: This is the backbone of the filling, providing that classic jalapeno popper richness and tang. Use full-fat, brick-style cream cheese for the best texture and keto macros. Let it soften at room temperature for 15-20 minutes so it blends easily. Substitution: For a dairy-free version, use a plant-based cream cheese alternative; just choose one that’s thick and creamy to avoid it melting into a puddle during air frying.
Pickled Jalapeños: I use pickled jalapeños from a jar for their consistent heat and tangy brine, which perfectly balances the fatty cheese and bacon. They are already soft, so they won’t release more liquid during cooking. Substitution: To add heat, you can use fresh jalapeños (seeded and finely diced), but they’ll be milder and less acidic. For a different pepper profile, try pickled Serrano peppers for a more intense kick.
Sharp Cheddar Cheese: Sharp cheddar brings a robust, nutty flavor that stands up to the jalapeño and bacon. Pre-shredded cheese works in a pinch, but I recommend buying a block and shredding it yourself — it melts more smoothly and has a better flavor. Substitution: Smoked gouda adds a beautiful smoky depth, while Monterey Jack is milder and melts even more gooey. For extra heat, use pepper jack cheese.
Original Ingredient
Best Substitution
Flavor / Texture Impact
Sugar-free bacon
Regular bacon (cooked and crumbled)
Adds 2-3g carbs; slightly sweeter flavor
Pickled jalapeños
Fresh jalapeños (seeded, minced)
Milder heat; less acidic; can be more watery
Sharp cheddar
Smoked gouda or pepper jack
Smokier or spicier; similarly meltable
How to Make Air Fryer Jalapeno Popper Hasselback Chicken — Step-by-Step
Making this dish is easier than you might think. Once you master the Hasselback cut, you’ll want to use this technique for all kinds of stuffed chicken recipes. Let me walk you through each step with plenty of tips so you get perfect results every time.
Step 1: Prepare the Filling
In a medium bowl, stir together the crumbled bacon, softened cream cheese, chopped pickled jalapeños, and 1/4 cup of the shredded cheddar cheese. Mix until everything is evenly combined and a thick, spreadable paste forms. Make sure the cream cheese is truly softened — if it’s too cold, the mixture will be lumpy. You can gently microwave the cream cheese for 10-15 seconds to speed this up.
⚠️ Common Mistake to Avoid: Overmixing the filling. Stir just until combined — overworking the cream cheese can make it greasy. Aim for a rustic, chunky texture.
Step 2: Hasselback the Chicken
Place one chicken breast on a cutting board. Using a sharp knife, cut about 6 evenly-spaced slits across the top of the chicken, cutting about 3/4 of the way through — be careful not to cut all the way through. The slits should be about 1/2 inch apart and deep enough to hold the filling. For clean cuts, use a sharp knife and slice perpendicular to the grain of the chicken. Repeat with the second breast.
💡 emy’s Pro Tip: To make slicing easier and more precise, place the chicken breast in the freezer for 10 minutes before cutting. This firms it up, allowing you to make clean, even slits without tearing the meat.
Step 3: Stuff the Chicken
Using a small spoon or your fingers (clean hands work best!), carefully stuff the cream cheese mixture into each slit. Don’t overfill — you want the filling to sit level with the surface of the chicken, not mounded on top. If you have extra filling, you can spread it gently over the top of the chicken, but keep it light. The chicken will expand slightly as it cooks, so the pockets should be full enough to hold the filling without spilling out.
⚠️ Common Mistake to Avoid: Overstuffing the slits can cause the filling to ooze out during air frying. A thin layer of filling in each pocket is enough to infuse flavor.
Step 4: Air Fry the Chicken
Place the stuffed chicken breasts in your air fryer basket, leaving space between them for air circulation. Set the air fryer to Air Fry at 350°F. Cook for 15 minutes. With 1 minute of time left, carefully open the air fryer (watch for hot steam!) and sprinkle the remaining 1/4 cup shredded cheddar cheese evenly over the top of each chicken breast. Close the air fryer and let it cook for the final minute.
💡 emy’s Pro Tip: For extra crispy cheese topping, switch to the “Broil” or “High” setting for the last 30 seconds if your air fryer has that option. Keep a close eye to prevent burning.
Step 5: Rest and Serve
After the cooking cycle ends, carefully remove the chicken from the air fryer using tongs. Let it rest on a cutting board or plate for 2-3 minutes. This step is crucial — it allows the juices to redistribute and the cheese to set slightly so it doesn’t all run off when you cut into it. Slice through the Hasselback cuts to serve, and enjoy every cheesy, spicy, bacon-filled bite.
⚠️ Common Mistake to Avoid: Skipping the resting time. Cutting straight into the chicken will cause the filling and juices to spill onto the plate, making the dish less juicy and messy.
Step
Action
Duration
Key Visual Cue
1
Mix filling
2 minutes
Smooth, chunky paste
2
Slice chicken
2 minutes
6 even slits, 3/4 depth
3
Stuff filling
3 minutes
Filling flush with surface
4
Air fry
15 minutes + 1 minute
Golden, bubbly cheese
5
Rest
2-3 minutes
Cheese sets, juices settle
Serving & Presentation
This Air Fryer Jalapeno Popper Hasselback Chicken is a showstopper right out of the basket. To serve, place each breast on a plate and slice along the existing Hasselback cuts — this reveals all those gorgeous layers of chicken, cheese, and jalapeños. A simple sprinkle of fresh cilantro or chopped chives over the top adds a pop of color and freshness that cuts through the richness. I love serving it with a side of sour cream for dipping, which is how we enjoy spicy dishes in my Moroccan household — the cool dairy tames the heat without dulling the flavor.
For a complete low-carb meal, pair this chicken with roasted asparagus or a simple avocado salad — the creamy avocado mirrors the cheese filling, while a squeeze of lime brightens everything. From my Paris days, I often serve it with a side of steamed green beans tossed in butter and garlic; the elegance of that simple French side balances the bold, rustic flavors of the chicken. For a heartier option, a cauliflower rice pilaf with toasted almonds works wonderfully and keeps the meal keto-friendly.
Pairing Type
Suggestions
Why It Works
Side Dish
Roasted broccoli, cauliflower rice, avocado salad
Low-carb, adds texture and freshness
Sauce / Dip
Sour cream, ranch dressing, avocado crema
Cools the spice, adds creamy contrast
Beverage
Michelada, sparkling lime water, light lager
Citrus cuts fat and heat; beer complements cheese
Garnish
Fresh cilantro, chopped chives, pickled red onions
Adds brightness and visual appeal
Make-Ahead, Storage & Reheating
As a busy NYC cook, I’m all about making my week easier. This recipe is great for meal prep because you can assemble the chicken ahead of time and air fry it when you’re ready. Storing leftovers is straightforward, and with the right reheating method, you can enjoy that juicy, cheesy experience again the next day.
Air Fryer Jalapeno Popper Hasselback Chicken is a super spicy low carb meal with tons of cheese and bacon. Only 5 ingredients are needed to make this gluten-free, keto friendly meal.
Ingredients
Scale
4 slices sugar-free bacon, (cooked and crumbled)
2 ounces cream cheese, (softened)
1/4 cup pickled jalapenos, (chopped)
1/2 cup shredded sharp cheddar cheese, (divided)
2 boneless, skinless chicken breasts
Instructions
In a medium bowl, stir together bacon, cream cheese, jalapenos, and 1/4 cup shredded cheddar cheese.
Cut about 6 slits across the top of the chicken, being careful not to cut all the way through.
Stuff the cream cheese mixture into the slits.
Place chicken in air fryer basket and set to Air Fry at 350 for 15 minutes. With 1 minute of time left, open the Air Fryer and sprinkle the remaining cheese on top. Air Fry for the last minute.
Teriyaki Chicken Skewers
Table of Contents
Teriyaki Chicken Skewers with a Perfectly Sticky Sauce – Juicy, Glazed, and Better Than Takeout
⚖️
Difficulty
Easy
⏲️
Prep Time
35 mins
🕒
Cook Time
25 mins
⏱️
Total Time
60 mins
🍽️
Servings
4
I still remember the first time I made a teriyaki chicken skewers recipe that truly tasted like the ones from my favorite NYC hole-in-the-wall spot. I had just moved to New York after my Paris training, and I was craving that deep, salty-sweet glaze that only comes from a sauce that’s been simmered with care. My mother’s kitchen in Morocco taught me patience with marinades, and my French chef instructors drilled into me the importance of a perfectly balanced sauce. This recipe is the marriage of those worlds: a homemade teriyaki sauce that clings to every chunk of chicken like a sticky, glossy hug. The unique angle here is my double-sauce technique — you marinate the chicken in half the sauce, then baste with the other half during the last few minutes of grilling. This builds layers of flavor that no store-bought bottle can touch.
Imagine pulling a skewer off the grill: the chicken is charred at the edges, glistening with a dark, caramelized teriyaki glaze. The aroma of soy, ginger, and garlic mingles with the faint smokiness from the grill. When you take a bite, the chicken is incredibly tender and juicy, the sauce coating your lips with that irresistible blend of sweet brown sugar and savory soy. The sesame seeds add a nutty crunch, while the sliced green onions provide a fresh, sharp contrast. It’s a dish that sings with umami, and it’s deceptively simple to pull off.
This isn’t just any skewer recipe. As a trained chef, I’ve tested this a dozen times to get the sauce consistency just right — not too thin, not a sticky brick. My secret? A touch of rice vinegar and honey in the sauce balances the soy and brown sugar beautifully. The biggest common mistake people make is skipping the cornstarch slurry, which gives the sauce that signature cling. But don’t worry, I’ll walk you through every step. And if you’re short on time, I’ll share a 💡 emy’s Pro Tip for speeding up the marinade without losing flavor.
Why This Teriyaki Chicken Skewers Recipe Is the Best
The Flavor Secret: This recipe uses a homemade teriyaki sauce that’s deeply savory with a perfect hit of sweetness. My French training taught me the art of reduction, so I simmer the sauce until it lightly coats a spoon — not too thick, but with just enough body to stick to the meat. The ginger and garlic are fresh, not powdered, which makes all the difference. It’s a sauce that tastes complex but comes together in one saucepan.
Perfected Texture: The key to juicy chicken skewers is not just the marinade but the cooking method. I grill them over medium heat, turning every 3–4 minutes, which allows the chicken to cook through without burning the sugars in the sauce. By basting with reserved sauce during the last few turns, you get that sticky, caramelized exterior while the inside stays moist. This technique, straight from my Parisian sauce training, ensures every bite is perfect.
Foolproof & Fast: Even for a beginner, this recipe is forgiving. The chicken marinates in just 30 minutes (though longer is better), and the grilling time is precise. I’ve designed this to be a weeknight dinner that feels special. The sauce can be made ahead, and the skewers cook quickly. Plus, the cleanup is minimal — it’s all done on one grill and in one saucepan.
Teriyaki Chicken Skewers Ingredients
I source my chicken thighs from the Union Square Greenmarket, where the pasture-raised birds have so much more flavor. The soy sauce I always keep on hand is a good-quality low-sodium brand from a Japanese market near my Brooklyn apartment — it’s richer without being too salty. The ginger and garlic I buy fresh from my local produce stand, because they really make the sauce sing. It reminds me of the bustling spice souks in Marrakech, where every ingredient is chosen for its peak potency.
Ingredients List
2 lbs. chicken thighs (or breasts), cut into 1-inch cubes
2 tbsp cornstarch
1 cup water
1/3 cup brown sugar
1/3 cup low-sodium soy sauce (recommended)
2 cloves garlic, minced
1 tbsp rice vinegar
1/2 tbsp fresh ginger, minced
1 tbsp honey
1/2 tsp sesame oil
8 skewers (soaked in water for 30 minutes if wooden)
Sesame seeds, for garnish (optional)
Chopped green onions, for garnish
Ingredient Spotlight
Chicken Thighs: They are more forgiving than breasts and stay juicy even when marinated and grilled. Look for boneless, skinless thighs for easy cubing. If you use breasts, reduce cooking time by a few minutes to avoid drying them out.
Low-Sodium Soy Sauce: This is critical for controlling the saltiness of the sauce. If you only have regular soy sauce, reduce it slightly or add a touch more water. In a pinch, tamari works beautifully for a gluten-free option.
Fresh Ginger: Never substitute dried ginger here. The fresh kind provides a bright, peppery warmth that is essential to a true teriyaki flavor. Peel it with a spoon and mince it finely. I keep a knob in the freezer for easy grating.
Original Ingredient
Best Substitution
Flavor / Texture Impact
Chicken Thighs
Chicken Breast (cubed)
Slightly leaner, can be drier if overcooked; reduce cooking time by 5-10 minutes.
Low-Sodium Soy Sauce
Tamari (gluten-free) or Coconut Aminos
Tamari is nearly identical; coconut aminos are slightly sweeter and less salty — reduce sugar by 1 tbsp.
Brown Sugar
Honey or Maple Syrup
Honey adds floral notes; maple syrup gives a woodsy sweetness. Both may make the sauce slightly thinner — simmer a minute longer.
How to Make Teriyaki Chicken Skewers — Step-by-Step
This process is so straightforward, you’ll wonder why you ever bought bottled teriyaki sauce. Let’s make the most incredible grilled chicken skewers at home, starting with the heart of the recipe: the sauce.
Step 1: Make the Teriyaki Sauce
In a small bowl, whisk together 2 tbsp cornstarch and 1 cup water until smooth. In a medium saucepan, combine the cornstarch mixture with 1/3 cup brown sugar, 1/3 cup low-sodium soy sauce, 2 minced garlic cloves, 1 tbsp rice vinegar, 1/2 tbsp fresh minced ginger, 1 tbsp honey, and 1/2 tsp sesame oil. Stir everything together. Place the saucepan over medium heat and bring it to a simmer, stirring frequently. You’ll see the mixture begin to darken and thicken after about 3-4 minutes. Once it’s thick enough to lightly coat the back of a spoon (like a syrup), remove from heat. Let the sauce cool completely — you can speed this up by placing the pan in the fridge for 15 minutes.
💡 emy’s Pro Tip: To avoid lumps in your sauce, make sure the cornstarch is fully dissolved in the cold water before adding it to the hot pan. A whisk is your best friend here!
Step 2: Marinate the Chicken
Once the sauce is completely cool, place your 2 lbs. of cubed chicken thighs into a large ziplock bag. Pour half of the cooled teriyaki sauce over the chicken (about 1/2 cup). Seal the bag and gently shake to coat every piece evenly. Place the bag in the refrigerator and let the chicken marinate for at least 30 minutes. Reserve the remaining sauce in a sealed container and set it aside — you’ll use it for basting later.
⚠️ Common Mistake to Avoid: Never marinate with warm or hot sauce. It will partially cook the chicken and make the texture rubbery. Always let the sauce cool completely, even if you have to speed-chill it in the freezer for 10 minutes.
Step 3: Skewer and Prep the Grill
When the chicken is done marinating, thread the cubes onto 8 skewers. Don’t pack them too tightly — leave a tiny gap between pieces to allow for even cooking. Preheat your grill to medium heat (about 350°F to 375°F). Lightly oil the grill grates using a paper towel soaked in vegetable oil and held with tongs. This prevents sticking and helps you get those beautiful grill marks.
💡 emy’s Pro Tip: If using wooden skewers, soak them in water for at least 30 minutes before threading the chicken. This prevents them from catching fire on the grill. You can also use metal skewers — just cut the chicken into slightly larger cubes so they don’t fall off.
Step 4: Grill and Baste
Place the skewers on the hot, oiled grill. Cook for 20-30 minutes total, turning them every 3-4 minutes to ensure all sides get even heat and those beautiful char marks. The chicken is done when an internal thermometer reads 165°F. During the last 5-6 minutes of grilling, brush each skewer generously with the reserved teriyaki sauce. This final basting is what gives them that irresistible, sticky glaze.
⚠️ Common Mistake to Avoid: Don’t baste with the sauce too early! The sugar in the sauce will burn and turn bitter if it’s exposed to direct high heat for too long. Always reserve the basting for the last 5-6 minutes of cooking.
Step 5: Rest and Serve
Remove the skewers from the grill and let them rest for 2-3 minutes on a cutting board. This allows the juices to redistribute. Arrange the skewers on a serving platter, then sprinkle with sesame seeds and chopped green onions. Serve immediately over steamed rice with extra sauce on the side, if you like.
Step
Action
Duration
Key Visual Cue
1
Make Sauce
10 mins
Sauce darkens & coats spoon
2
Marinate Chicken
30+ mins
Chicken is evenly coated
3
Skewer & Grill
20-30 mins
Char marks, internal temp 165°F
4
Rest & Serve
3 mins
Juices settle, glaze sets
Serving & Presentation
I love serving these Teriyaki Chicken Skewers family-style on a large wooden board, like the one I picked up at the Brooklyn Flea market. The contrast of the dark, glossy chicken against the white sesame seeds and bright green onions is stunning. For a complete meal, I pile the skewers on a bed of fluffy steamed jasmine rice, which soaks up any extra sauce. A side of quick-pickled cucumber salad — a nod to the fresh salads my mother made in Morocco — adds a bright, acidic contrast to the rich chicken.
For a summer cookout, I thread the chicken onto skewers and serve them with grilled pineapple wedges and a cold soba noodle salad. The sweetness of the pineapple echoes the sauce, and the nutty soba noodles are a perfect canvas for a miso-ginger dressing. If you want to go full NYC fusion, serve them with a side of miso-glazed eggplant or crispy rice paper rolls. And don’t forget a big squeeze of fresh lime over everything just before serving — it brightens the whole plate.
Sesame seeds, sliced green onions, pickled ginger, lime wedges
Adds crunch, freshness, and acidity to balance the rich glaze.
Make-Ahead, Storage & Reheating
As a busy NYC mom and food blogger, I rely on make-ahead meals to keep my week running smoothly. This Teriyaki Chicken Skewers recipe is perfect for that. I often make the sauce on Sunday and marinate the chicken overnight (or even for 24 hours for deeper flavor). Then on a weeknight, all I have to do is skewer and grill. It’s a lifesaver when I’m rushing to get dinner on the table after a long day.
Method
Baked Parmesan Zucchini Fries
Table of Contents
Baked Parmesan Zucchini Fries: Extra Crispy & Cheesy – The Best Way to Eat Your Veggies!
⚖️
Difficulty
Easy
⏲️
Prep Time
15 mins
🕒
Cook Time
20 mins
⏱️
Total Time
35 mins
🍽️
Servings
4
I still remember the first time I made these Baked Parmesan Zucchini Fries in my tiny Parisian apartment, fresh out of culinary school. I was homesick for Morocco, missing my mother’s vegetable tagine, and craving something — anything — that felt like home. But I had a pile of summer zucchini from the market and a block of real Parmesan. That night, I created a recipe that blended my French training in breading technique with the bold, cheesy comfort I grew up loving. These Baked Parmesan Zucchini Fries became an instant staple: crispy, golden, and absolutely irresistible. They are not just another vegetable side dish — they’re the star of the table.
Imagine this: you bite through a perfectly crispy, golden-brown crust that shatters slightly, giving way to a tender, sweet zucchini interior. The Parmesan adds a nutty, salty depth that lingers on your tongue, while the Italian seasoning whispers of oregano and basil. There’s no sogginess here — just pure, satisfying crunch. The key is in the three-step breading process I learned in Paris: a light flour dusting to seal in moisture, a quick dip in egg to bind, and a thick, generous coating of Parmesan-spiked breadcrumbs that bakes into a shatteringly crisp shell. Each fry is a contrast of textures and a celebration of simple, honest ingredients.
Now, cooking in my New York City kitchen, I’ve perfected this recipe for busy weeknights and entertaining alike. My version is foolproof because I’ve tested every variable: the oven temperature, the breadcrumb-to-cheese ratio, and the trick to avoiding sticky pans. Here’s my promise: no silicone mats, no parchment paper that steals your crunch. Just a well-oiled sheet pan and a chef’s know-how. I’ll share my pro tip for the crispiest results and the common mistake that ruins most homemade zucchini fries. Get ready to make the best Baked Parmesan Zucchini Fries of your life — crispy, cheesy, and baked to perfection.
Why This Baked Parmesan Zucchini Fries Recipe Is the Best
The flavor secret here is the double dose of Parmesan — I use it both in the breadcrumb mixture and as a finish. This isn’t just a sprinkle on top; it’s a core component that melts and browns into a craggy, golden crust. Growing up in Morocco, I learned that cheese, when used properly, elevates any dish from simple to spectacular. Here, the Parmesan brings a savory, umami kick that zucchini, a naturally mild vegetable, absolutely craves. Combined with garlic powder and Italian seasoning, every fry is packed with flavor from the inside out.
Perfected texture is my obsession, and this recipe delivers because of a technique I mastered in Parisian pastry kitchens: the three-step breading method. First, a thin coating of seasoned flour creates a dry surface for the egg to cling to. Then, the egg wash acts as glue. Finally, the breadcrumb-Parmesan mixture provides a thick, crunchy armor. The flour prevents the zucchini from releasing too much moisture during baking, which is the #1 cause of soggy fries. I also insist on baking at a high 425°F, which creates steam that escapes quickly, leaving a crisp exterior and tender interior — never mushy.
This recipe is foolproof and fast because it requires only 20 minutes of baking time and uses basic pantry staples. I designed it for the home cook who wants impressive results without deep-frying. You don’t need any special equipment — just a sheet pan and three shallow dishes. Plus, it’s naturally gluten-free adaptable (I’ll show you how) and can be prepped ahead for parties. Whether you’re a novice or a seasoned cook, these Baked Parmesan Zucchini Fries will come out perfectly every time. Trust me — I’ve made them dozens of times for my NYC food blog readers, and the feedback is unanimous: they’re the best.
Baked Parmesan Zucchini Fries Ingredients
I love sourcing my ingredients from the Union Square Greenmarket in NYC, especially during summer when zucchini is at its peak. My mother in Morocco always said the best dishes start with the freshest produce — and here, the star is the humble zucchini. I pair it with good-quality Parmesan, which I grate myself from a block (the pre-grated stuff just doesn’t melt the same way). For the breadcrumbs, I use plain panko-style for extra crunch, a trick I picked up from a French chef who insisted on texture in every dish. Let’s gather what you’ll need.
Ingredients List
cooking spray OR oil (for the pan)
1/3 cup flour
1/2 teaspoon garlic powder
1/4 teaspoon salt
1 large egg
3/4 cup breadcrumbs (panko preferred)
1/3 cup grated Parmesan cheese
1 tablespoon Italian seasoning
1/2 teaspoon garlic powder (for breadcrumb mix)
1/4 teaspoon salt (for breadcrumb mix)
ground black pepper (to taste)
1 pound zucchini (cut into 1/2-inch sticks)
Ingredient Spotlight
Zucchini is the foundation. Look for firm, medium-sized zucchini with shiny skin — avoid giant ones that are watery and seedy. The flour acts as a moisture barrier, crucial for crispiness. I use all-purpose, but you can substitute with rice flour for a gluten-free option; it works beautifully because it creates a very light, crunchy coating. The Parmesan is the MVP — always use freshly grated Parmigiano-Reggiano from a block, not the canister. It melts evenly and has a far superior flavor. For a dairy-free alternative, use nutritional yeast combined with finely ground almonds, but expect a different, still delicious, nutty profile. Finally, the breadcrumbs: panko gives the crispiest result; if you only have regular breadcrumbs, the texture will be less crunchy but still good.
Original Ingredient
Best Substitution
Flavor / Texture Impact
All-purpose flour
Rice flour or cornstarch
Gluten-free; lighter, crispier coating; no flavor change
Parmesan cheese
Nutritional yeast + almond flour (dairy-free)
Nutty, cheesy flavor; less melting; slightly different texture
Panko breadcrumbs
Regular breadcrumbs or crushed pork rinds (low-carb)
Less crunchy with regular crumbs; pork rinds add extra crisp and savory flavor
Italian seasoning
Dried oregano + dried basil + dried thyme mixed
Very similar; customize herb intensity to taste
Large egg
Buttermilk or plain yogurt (thinned)
Similar binding; buttermilk adds tang; yogurt makes coating slightly thicker
How to Make Baked Parmesan Zucchini Fries — Step-by-Step
Making these fries is easier than you think. I’ve broken it down into simple steps so you can follow along without any fuss. Remember, the key is organization: set up your breading station like a pro, and you’ll have crispy, golden fries in no time.
Step 1: Prep the Oven and Pan
Preheat your oven to 425°F. Coat a large baking sheet generously with cooking spray or a thin layer of oil. I recommend using a light-colored, heavy-gauge sheet pan for even browning. For easy cleanup, you can line the pan with aluminum foil, but be aware that the fries may be slightly less crispy than directly on the oiled metal. Do NOT use silicone baking mats or parchment paper — I’ve tested both, and they trap steam, resulting in soggy, sad fries.
💡 emy’s Pro Tip: For the crispiest results, place the prepared baking sheet in the oven while it preheats. The hot oil will immediately start crisping the bottom of the fries once they hit the pan.
Step 2: Set Up Your Breading Station
In a shallow dish or a large zip-loc bag, combine the flour, 1/2 teaspoon garlic powder, and 1/4 teaspoon salt. In a second shallow dish, beat the egg until frothy. In a third shallow dish (I love using a 7×11 baking pan for this), mix the breadcrumbs, Parmesan, Italian seasoning, remaining 1/2 teaspoon garlic powder, 1/4 teaspoon salt, and a generous grind of black pepper. Arrange them in order: flour, egg, breadcrumbs.
⚠️ Common Mistake to Avoid: Don’t skip the flour step! Many recipes skip it, but this is what prevents the egg from making the zucchini soggy. Without the flour, the moisture from the zucchini will seep through and ruin your crisp coating.
Step 3: Coat the Zucchini Fries
Working with a few zucchini sticks at a time, first toss them in the flour mixture until lightly coated. Shake off any excess. Then dip each floured stick into the beaten egg, letting any excess drip off. Finally, press them firmly into the breadcrumb mixture, turning to coat thickly on all sides. Place the coated fries on the prepared baking sheet in a single layer, not touching.
💡 emy’s Pro Tip: Use one hand for the wet ingredients (egg) and one hand for the dry (flour and breadcrumbs) to keep your hands from getting clumpy. This mess-free French technique speeds up the whole process!
Step 4: Bake to Crispy Perfection
Bake the zucchini fries for 20 minutes total, turning them once halfway through. Use an offset spatula to carefully flip each fry — if you used enough oil, they shouldn’t stick. If they do, don’t rip them away; gently loosen them with the spatula. They are done when golden brown and crispy on the outside, with a tender interior. Serve immediately with your favorite dipping sauce.
⚠️ Common Mistake to Avoid: Overcrowding the pan! If the fries are too close together, they’ll steam instead of bake, leading to a soft, un-crisp texture. Use two pans if necessary, or bake in batches.
Step
Action
Duration
Key Visual Cue
1
Prep oven & pan
5 mins
Preheated to 425°F, pan oiled
2
Set up breading station
5 mins
Three shallow dishes in order
3
Coat zucchini fries
10 mins
Evenly coated, no bare spots
4
Bake & flip
20 mins
Golden brown, crispy, slightly puffed
Serving & Presentation
These Baked Parmesan Zucchini Fries are best served immediately, fresh from the oven, while they’re still wonderfully crisp. I like to pile them on a large wooden platter or a white serving board for contrast — it reminds me of the rustic tables at my mother’s home in Morocco. For a touch of NYC sophistication, I garnish with a sprinkle of flaky sea salt, a few fresh basil leaves, and a light dusting of extra grated Parmesan. The visual appeal is irresistible: golden-brown sticks with flecks of green herbs and melted cheese.
As for pairings, these fries are incredibly versatile. In my Parisian-trained mind, they’re a perfect side for a grilled steak or a roasted chicken. But in my NYC weeknight reality, I love them alongside a juicy burger or a simple salad with a tangy vinaigrette. For dips, you can’t go wrong with classic marinara sauce, creamy ranch, or a spicy sriracha mayo. I also love a cool, herbed yogurt dip — a nod to the Middle Eastern and North African flavors of my childhood. No matter how you serve them, they’ll disappear fast.
Not just another vegetable side dish: Crispy Baked Parmesan Zucchini Fries are the best way to make this summer star!
Ingredients
Scale
cooking spray OR oil
1/3 cup flour
1/2 teaspoon garlic powder
1/4 teaspoon salt
1 large egg
3/4 cup breadcrumbs
1/3 cup grated Parmesan cheese
1 tablespoon Italian seasoning
1/2 teaspoon garlic powder
1/4 teaspoon salt
ground black pepper (to taste)
1 pound zucchini (cut into 1/2-inch sticks)
Instructions
Prep: Preheat the oven to 425°Coat a baking sheet with oil or cooking spray (you can line it with aluminum foil for easier clean up, the fries could turn out a little less crispy though – do NOT use silicone baking mats or parchment, or the fries will be soggy).
Prepare breading: Mix all ingredients for the flour mix in a shallow dish OR in a large zip-loc bag. Place the egg in a separate shallow dish and beat well. Mix all ingredients for the parmesan breadcrumbs in a third shallow dish – I like using a 7×11 baking pan.
Coat zucchini: Thinly coat the zucchini fries first with the flour mix, then coat with beaten egg. Finally, thickly coat with the breadcrumb mix.
Bake: Bake on the prepared baking sheet for 20 minutes, or until crispy, turning once. If the zucchini sticks to the pan, don't just rip it away – use an offset spatula to loosen it (if you use enough oil or cooking spray, it will not stick). Serve immediately with your favorite dips.
Skillet Zucchini and Mushrooms
Table of Contents
Skillet Zucchini and Mushrooms – Seared to Perfection
⚖️
Difficulty
Easy
⏲️
Prep Time
10 mins
🕒
Cook Time
20 mins
⏱️
Total Time
30 mins
🍽️
Servings
4
My mother’s kitchen in Morocco always smelled like sizzling butter and warm spices, and this skillet zucchini and mushrooms with a perfectly seared finish brings me right back to those golden afternoons. Growing up, vegetables were never an afterthought—they were the centerpiece of many meals, often cooked low and slow with aromatic herbs. When I moved to New York City after my classical training in Paris, I knew I wanted to create a quick side dish that captured that same soulful depth. This recipe does exactly that: it’s the sauteed mushrooms and zucchini my family craves on busy weeknights, and it comes together in under 30 minutes.
The beauty of this dish lies in the contrast—the zucchini stays tender but never mushy, while the mushrooms develop those deep, nutty, browned edges that make you want to eat them straight from the pan. A silky butter sauce, fragrant with garlic and fresh herbs, coats every piece. The aroma that fills your kitchen is pure comfort: earthy, savory, with just a whisper of sweetness from the onions. I love serving this alongside a simple roast chicken or grilled fish, but honestly, I’ve eaten it straight from the skillet as a light supper more times than I can count.
What makes my version different is a two-step cooking method I learned during my pastry and sauce work in Paris. By searing the zucchini first and setting it aside, then browning the mushrooms in plenty of butter, each vegetable keeps its distinct texture and flavor. You avoid the dreaded soggy zucchini or rubbery mushroom. This foolproof technique, combined with a splash of vegetable broth at the end to create a quick pan sauce, ensures a restaurant-quality result every time. 💡 emy’s Pro Tip: Pat your mushrooms completely dry before cooking—any moisture will prevent that gorgeous golden browning.
Why This Skillet Zucchini and Mushrooms Recipe Is the Best
The flavor secret here is the marriage of butter and olive oil. I start with a touch of olive oil for its high smoke point, then finish with butter for that rich, nutty, unmistakable French-style finish. It’s a technique I rely on in my NYC kitchen every day, and it transforms simple zucchini and mushrooms into something truly crave-worthy. The garlic is added at the very end—just 20 seconds—so it perfumes the dish without turning bitter.
Perfected texture comes from the sear-and-set-aside method. By cooking the zucchini slices until they’re fork-tender but still hold their shape, then returning them only at the end to heat through, you avoid overcooking. The mushrooms get their own time in the pan to release their moisture and then brown deeply. This is a classic chef’s trick for multi-vegetable sautés, and it works every single time.
This recipe is foolproof and fast, even for beginner cooks. You don’t need any special equipment—just a large skillet and a knife. The steps are straightforward, the timing is forgiving, and the result is consistently delicious. Plus, it’s endlessly adaptable: throw in whatever herbs you have, swap the broth for white wine, or add a pinch of red pepper flakes for heat. It’s the kind of recipe you’ll memorize after making it once.
Sauteed Mushrooms and Zucchini Ingredients
I pick up my zucchini and mushrooms at the Union Square Greenmarket in NYC, where the summer squash is always firm and glossy, and the button mushrooms are earthy and fresh. The smell of the market in July—tomato vines, basil, and damp soil—reminds me of the souks in Marrakech. For the best results, choose ingredients that look and feel vibrant.
Ingredients List
1 tablespoon olive oil
3 tablespoons butter (divided)
2 small zucchini (cut into thin, half moon slices)
Salt and black pepper (to taste)
1 small yellow onion (finely diced)
1 pound small button mushrooms (cleaned and patted dry)
3 to 4 cloves garlic (minced)
2 teaspoons fresh chopped herbs (or 1 teaspoon dried herbs; thyme and oregano are great)
¼ cup vegetable broth
Chopped fresh parsley (for garnish)
Grated parmesan (for garnish, optional)
Ingredient Spotlight
Zucchini: This is the star summer squash that gives the dish its tender, mild backbone. Look for small to medium zucchini that feel heavy for their size, with shiny, unblemished skin. If your zucchini is larger, it may be watery—halve it lengthwise and scoop out the seeds before slicing. In a pinch, yellow summer squash works perfectly and adds a pretty color contrast.
Button Mushrooms: These little umami bombs are the earthier half of the duo. Choose firm, white or tan mushrooms with closed caps—that’s a sign of freshness. Never wash them under running water; they’ll absorb moisture and steam instead of brown. Instead, wipe them clean with a damp paper towel. Cremini mushrooms are a great substitute if you want a deeper, meatier flavor.
Butter: This is the backbone of the rich, silky sauce. I use unsalted butter so I can control the salt level. During my pastry training in Paris, I learned to use good-quality butter—it makes a real difference. If you need a dairy-free option, use a high-quality vegan butter or substitute all olive oil (about 3 tablespoons total), though the flavor will be less rich.
Fresh Herbs: Thyme and oregano are my go-to for this dish—they’re robust enough to stand up to the mushrooms without overwhelming the zucchini. If you’re using dried herbs, add them with the garlic, as they need heat to release their oils. A mix of fresh parsley, chives, or even a pinch of dried basil also works beautifully.
Original Ingredient
Best Substitution
Flavor / Texture Impact
Zucchini
Yellow summer squash
Similar texture; slightly sweeter flavor. No adjustment needed.
Button mushrooms
Cremini or baby bella mushrooms
Deeper, earthier flavor. Same cooking time.
Butter
Vegan butter or olive oil
Less rich and creamy. Use 3 tbsp olive oil if omitting butter entirely.
Vegetable broth
Dry white wine or chicken broth
Wine adds acidity and complexity; chicken broth adds richness.
How to Make Skillet Zucchini and Mushrooms — Step-by-Step
This recipe is so straightforward you’ll memorize it after one go. Follow these steps for perfect results every time.
Step 1: Sear the Zucchini
Add olive oil and 1/2-tablespoon butter to a large skillet over medium-high heat. Once the butter foams, add the zucchini slices in a single layer if possible. Season with salt and pepper. Cook for 3 to 4 minutes, flipping once halfway, until they’re tender and lightly golden on the edges. Remove the zucchini to a plate and set aside. If there’s any liquid in the skillet, carefully wipe it out with a paper towel.
💡 emy’s Pro Tip: Don’t overcrowd the skillet. If your pan is small, cook the zucchini in two batches. Crowding lowers the temperature and causes steaming instead of searing.
Step 2: Sauté the Onions
Return the skillet to the burner and add the remaining 2.5 tablespoons of butter. Melt over medium-high heat. Stir in the finely diced yellow onion and cook for 2 minutes, until just softened and translucent. The butter will start to smell nutty.
⚠️ Common Mistake to Avoid: Don’t let the onions brown too deeply at this stage. They should soften but remain pale—they’ll continue cooking with the mushrooms.
Step 3: Brown the Mushrooms
Add the cleaned and patted-dry button mushrooms to the skillet. Cook for 5 to 7 minutes, stirring occasionally, until they release their moisture and then begin to brown nicely. The mushrooms will shrink and develop deep golden patches. This is where the real flavor builds.
💡 emy’s Pro Tip: Patience is key here. Let the mushrooms sit undisturbed for a minute or two between stirs to encourage browning. If you stir constantly, they’ll steam.
Step 4: Add Garlic and Herbs
Stir in the minced garlic and your chopped fresh herbs (or dried herbs). Cook for just 20 seconds, stirring constantly, until fragrant. Garlic burns quickly, so keep a close eye on it.
Step 5: Combine and Finish
Return the reserved zucchini to the skillet. Gently mix everything together and cook for 1 minute, until the zucchini is heated through. Pour in the vegetable broth and let it bubble for 2 minutes, scraping up any browned bits from the bottom of the pan. Taste and adjust salt and pepper. Remove from heat. Sprinkle generously with fresh parsley and grated parmesan if desired. Serve immediately.
Step
Action
Duration
Key Visual Cue
1
Sear zucchini
3–4 mins
Lightly golden edges, fork-tender
2
Sauté onions
2 mins
Softened and translucent
3
Brown mushrooms
5–7 mins
Deep golden patches, moisture released
4
Add garlic & herbs
20 seconds
Fragrant, garlic is pale
5
Combine & finish
3 mins
Broth bubbles, zucchini hot
Serving & Presentation
I love serving this skillet zucchini and mushrooms in a wide, shallow bowl so the buttery sauce pools at the bottom. A generous sprinkle of fresh parsley and a shower of grated parmesan add color and a salty, savory finish. It’s the kind of side dish that looks rustic and elegant at once—perfect for a weeknight dinner or a holiday table.
This dish pairs beautifully with so many mains. I often serve it alongside a simple roasted chicken, grilled salmon, or a seared steak. It also works wonderfully as a topping for creamy polenta, tossed with pasta, or spooned over crusty bread for a light vegetarian meal. A squeeze of lemon juice just before serving brightens everything up.
The mild, buttery vegetables complement rich proteins without overpowering them.
Sauce / Dip
Spoon over creamy polenta, toss with pasta, serve on crusty bread
The pan sauce soaks into carbs, making the dish a satisfying vegetarian main.
Beverage
Crisp Sauvignon Blanc, dry rosé, or a light lager
Acidity in wine cuts the butter; a light beer refreshes the palate.
Garnish
Fresh parsley, grated parmesan, lemon zest, red pepper flakes
Adds freshness, saltiness, brightness, or heat to balance richness.
Make-Ahead, Storage & Reheating
I love meal-prepping this side for my busy NYC week. It stores beautifully, and with the right reheating method, it tastes almost as good as fresh. Here’s how I handle it.
Method
Container
Duration
Reheating Tip
Refrigerator
Airtight container
3–4 days
Reheat in a skillet over medium heat with a splash of broth or water. Cover for 1 minute to steam, then uncover to crisp the edges.
Freezer
Freezer-safe airtight container
Up to 2 months
Thaw overnight in the fridge, then reheat in a skillet. Texture will be softer; best used in pasta or omelets.
Easy Creamy White Chicken Enchiladas
Table of Contents
Easy Creamy White Chicken Enchiladas – A Quick Dinner Saver
⚖️
Difficulty
Easy
⏲️
Prep Time
15 mins
🕒
Cook Time
25 mins
⏱️
Total Time
40 mins
🍽️
Servings
8 enchiladas
Are you looking for quick and easy dinner recipes that your whole family will actually devour? These Easy Creamy White Chicken Enchiladas are my go-to for those chaotic weeknights when I need something fast, comforting, and utterly delicious. Growing up in Morocco, my mother taught me that the best meals don’t have to be complicated—they just need to be made with love and the right shortcuts. Now that I’m a busy NYC food blogger and mom, I rely on rotisserie chicken for this dish, and it never fails. The magic of these cream cheese chicken enchiladas lies in their simplicity: a handful of pantry staples come together to create a rich, creamy sauce that tastes like you’ve been simmering it for hours. I first made this version after a long day at the Union Square farmers market, craving something that felt like a warm hug. Trust me, this is the kind of meal that makes picky eaters ask for seconds.
I’ll never forget the first time I made these for a dinner party in my tiny Parisian apartment. My French-trained chef instructor would be proud—I took a classic Mexican-inspired dish and gave it a creamy, decadent twist that feels both familiar and elevated. The aroma of the white sauce, with garlic powder and taco seasoning, fills your kitchen with a promise of something special. Each bite is a perfect harmony: the tender, shredded chicken folded into a creamy filling, all wrapped in a soft flour tortilla and blanketed with a luscious, velvety white sauce. The Monterey Jack cheese melts into bubbly golden pockets on top, while the diced green chiles add a subtle, earthy heat that balances the richness beautifully. It’s the kind of dinner that makes everyone at the table pause and smile, even after a long day.
What sets my Easy Creamy White Chicken Enchiladas apart is the technique I learned in culinary school—building a simple roux with butter and flour to create a perfectly smooth, thick white sauce without any heavy cream. This French method ensures your sauce clings to every enchilada without getting runny or separating. I also use a generous amount of cream cheese mixed directly into the chicken, which adds a tangy richness that you just can’t get from other recipes. My special secret? A single tablespoon of taco seasoning—not the whole packet—that adds depth without overpowering. If you’ve ever struggled with soggy enchiladas or a watery sauce, I’ll show you exactly how to avoid those pitfalls. Whether you’re a beginner cook or a seasoned home chef, these enchiladas are foolproof and ready in about 40 minutes from start to finish.
Why This Easy Creamy White Chicken Enchiladas Recipe Is the Best
The Flavor Secret: The combination of cream cheese and Monterey Jack cheese is pure genius. The cream cheese, softened and mixed directly into the chicken, brings a tangy creaminess that makes the filling irresistible. It’s a trick I picked up from a pastry chef in Paris, where they taught me to incorporate soft cheeses into savory bakes for body and flavor. Unlike many recipes that rely on heavy cream or canned soup, this white sauce is made from scratch with a simple roux, chicken broth, sour cream, and green chiles. The result is a sauce that’s rich, smooth, and deeply flavorful, with just the right amount of zip from the chiles and taco seasoning.
Perfected Texture: The key to flawless enchiladas is avoiding that dreaded soggy bottom. By mixing the cream cheese directly into the chicken (instead of melting it into the sauce), you get a firm, cohesive filling that holds its shape. The sauce, thickened with the roux, clings beautifully to the tortillas without making them mushy. When you bake them, the tortillas stay perfectly tender, and the cheese on top melts into a bubbling, golden crust. It’s the kind of texture that makes you want to eat every last bite with a spoon—no sad, water-logged enchiladas here!
Foolproof & Fast: This recipe is practically my MVP for weeknight dinners. Because we use rotisserie chicken, there’s zero effort involved—just shred, mix, and roll. The sauce comes together in a single saucepan in under 10 minutes, while you’re prepping the tortillas. Everything bakes in a 9×13 dish, making cleanup a breeze. I’ve tested this dozens of times for my NYC cooking classes, and even kids can manage the rolling part with a little guidance. Whether you’re feeding a crowd on a Tuesday or meal-prepping for the week, these enchiladas deliver on taste, texture, and speed every single time.
Easy Creamy White Chicken Enchiladas Ingredients
I always pick up my ingredients from the Fairway market on the Upper West Side—they have the best rotisserie chickens and fresh peppers. The beauty of this recipe is that most items are pantry staples you probably already have on hand. Let me walk you through everything you’ll need.
Ingredients List
8 flour tortillas (soft taco size)
3 cups shredded chicken (I use Rotisserie)
2 cups shredded Monterey Jack cheese (or pepper jack)
4 ounces softened cream cheese
2 tsp garlic powder
3 tbsp butter
3 tbsp flour
1 tbsp taco seasoning (NOT the whole packet)
1 (14.5oz) can of chicken broth (2 cups)
3/4 cup sour cream
1 (4oz) can of diced green chiles
Ingredient Spotlight
Monterey Jack cheese is my top choice for this recipe because it melts beautifully and has a mild, buttery flavor that lets the cream cheese and seasonings shine. If you want a little more kick, swap in pepper jack for a spicy twist. Cream cheese is non-negotiable here—it’s what gives the filling that luscious, tangy richness. Make sure it’s softened to room temperature so it blends smoothly with the chicken. Rotisserie chicken is my ultimate shortcut for quick weeknight meals, but leftover cooked chicken or shredded turkey works just as well. As for the flour, all-purpose is fine, but if you’re gluten-free, a 1:1 gluten-free flour blend works beautifully in the roux.
Original Ingredient
Best Substitution
Flavor / Texture Impact
Monterey Jack cheese
Pepper jack or cheddar
Adds heat (pepper jack) or sharper flavor (cheddar)
Rotisserie chicken
Leftover cooked chicken, turkey, or canned shredded chicken
Slightly drier if using canned; otherwise similar texture
Sour cream
Plain Greek yogurt
Thicker, slightly more tangy; use full-fat for best results
Cream cheese
Neufchâtel cheese
Slightly lower fat, same tangy creaminess
How to Make Easy Creamy White Chicken Enchiladas — Step-by-Step
Don’t worry—this is easier than you think! Let me walk you through each step with all my chef-trained tips so you get perfect results every time.
Step 1: Preheat and Prep
Preheat your oven to 350°F (175°C) and grease a 9×13 baking dish with butter or nonstick spray. This step ensures your enchiladas won’t stick to the bottom, and it helps the tortillas crisp up slightly on the edges. While the oven heats, take your cream cheese out of the fridge so it softens—this is crucial for a smooth filling.
💡 emy’s Pro Tip: If you’re short on time, soften the cream cheese in the microwave for about 15–20 seconds on low power. Just be careful not to melt it—you want it soft, not liquid.
Step 2: Mix the Filling
In a medium bowl, combine the shredded chicken with the softened cream cheese, garlic powder, and about half of the shredded cheese (around 1 cup). Stir everything together until the cream cheese is fully incorporated and the mixture is creamy and evenly distributed. This filling will be wonderfully rich and flavorful.
⚠️ Common Mistake to Avoid: Don’t overmix the filling or add too much liquid. The filling should be thick and hold together—if it’s too wet, your enchiladas will get soggy. Also, make sure the cream cheese is evenly mixed so every bite has that tangy goodness.
Step 3: Stuff the Tortillas
Evenly divide the chicken mixture among your 8 flour tortillas. Spoon about a generous 1/3 cup of filling down the center of each tortilla, then roll them up tightly. Place them seam-side down in your prepared baking dish, nestling them close together so they hold each other in place.
💡 emy’s Pro Tip: To make rolling easier, warm the tortillas in the microwave for about 20 seconds wrapped in a damp paper towel. This makes them pliable and less likely to crack.
Step 4: Make the White Sauce
In a saucepan over medium heat, melt the butter. Once it’s bubbling, whisk in the flour and taco seasoning until a smooth paste forms—this is your roux. Let it cook for about 1 minute to remove the raw flour taste. Gradually pour in the chicken broth while whisking constantly to avoid lumps. Continue whisking until the mixture thickens and becomes smooth, about 3–4 minutes. Then add 1/2 cup of the shredded cheese and whisk until fully melted and incorporated.
⚠️ Common Mistake to Avoid: Don’t add the sour cream or green chiles until after the sauce has thickened and is off the heat. Adding them too early or boiling the sauce can cause the sour cream to curdle, leaving you with a lumpy, separated sauce. Also, keep whisking the roux continuously—lumps are your enemy here!
Step 5: Finish the Sauce
Remove the saucepan from the heat. Stir in the sour cream and the can of diced green chiles, whisking gently until everything is completely dissolved and the sauce is silky smooth. Do not let it boil—just warm it through for about 1 minute. The sauce will be thick, creamy, and studded with little bits of green chile.
💡 emy’s Pro Tip: For a smoother sauce, drain the green chiles slightly before adding them. This prevents excess liquid from thinning out your sauce. If you prefer a little more heat, use the undrained version for extra chili flavor.
Step 6: Assemble and Bake
Pour the prepared white sauce evenly over the enchiladas, making sure every tortilla gets a generous coating. Sprinkle the remaining cheese (about 1/2 cup) over the top for that golden, bubbly crust. Bake in the preheated oven for 22–25 minutes, until the sauce is bubbling and the edges are lightly golden. Then, switch the oven to broil for 2–3 minutes to brown the cheese on top—watch it carefully so it doesn’t burn.
⚠️ Common Mistake to Avoid: Don’t skip the broiling step! It gives you that beautiful, slightly crispy cheese layer that makes these enchiladas irresistible. But stay close to the oven—broilers work fast, and burnt cheese is a sad thing.
Step
Action
Duration
Key Visual Cue
1
Preheat & grease dish
5 mins
Oven at 350°F
2
Mix filling
5 mins
Creamy, thick mixture
3
Stuff & roll tortillas
10 mins
Tight rolls, seam-side down
4
Make white sauce
8 mins
Thick, smooth, no lumps
5
Add sour cream & chiles
1 min
Silky, pale cream color
6
Pour sauce, top with cheese, bake & broil
25–28 mins
Bubbling sauce, golden brown cheese top
Serving & Presentation
I love serving these enchiladas straight from the oven, when the cheese is still bubbling and the sauce is perfectly creamy. A classic presentation is to place two enchiladas on a warm plate, spoon a little extra sauce from the dish over the top, and finish with a sprinkle of fresh cilantro or sliced green onions for a pop of color. The adults in my family always reach for the hot sauce—Cholula or Valentina are my favorites—but you could also serve with a dollop of sour cream or a drizzle of crema. In my NYC kitchen, I often pair these with a simple side salad dressed with lime juice and olive oil, or a bowl of black beans for extra protein. If you’re feeding a crowd, set out bowls of refried beans, Spanish rice, and warm tortilla chips with salsa to complete the feast.
Growing up in Morocco, my mother would serve hearty fillings wrapped in bread, so enchiladas always remind me of her hands in the kitchen. Now, as a trained chef, I appreciate how this dish bridges my past and present—it’s comfort food elevated with technique. The creamy white sauce contrasts beautifully with the golden cheese crust, and the soft tortillas soak up all that goodness. For a special touch, add a squeeze of fresh lime over each serving—the acidity cuts through the richness and brightens every bite. This is the kind of meal that makes you feel like a culinary hero, even on the busiest of nights.
Pairing Type
Suggestions
Why It Works
Side Dish
Spanish rice, refried beans, black beans, green salad with lime dressing
Adds texture, protein, and color; rice absorbs any extra sauce
Sauce / Dip
Hot sauce (Cholula, Valentina, Sriracha), sour cream, cilantro-lime crema
Are you looking for quick and easy dinner recipes for your family? These cream cheese chicken enchiladas never disappoint! They are so simple to make thanks to rotisserie chicken. This is a great last minute meal for busy weeknights and picky kids.
Ingredients
Scale
8 flour tortillas ((soft taco size))
3 cups shredded chicken ((I use Rotisserie))
2 cups shredded monterey jack cheese ((or pepper jack))
4 ounces softened cream cheese
2 tsp garlic powder
3 tbsp butter
3 tbsp flour
1 tbsp taco seasoning ((NOT the whole packet))
1 (14.5oz) can of chicken broth ((2 cups))
3/4 cup sour cream
1 (4oz) can of diced green chiles
Instructions
Preheat oven to 350° F and grease a 9×13 baking dish.
In a medium size bowl, mix the chicken with the cream cheese, garlic powder, and HALF of the shredded cheese (about 1 cup).
Evenly stuff the mixture into your flour tortillas and place them into your prepared pan.
In a sauce pan over medium heat, melt the butter and then stir in the flour and taco seasoning. Add the chicken broth and whisk until smooth; allow the mixture to heat up for a few minutes until warm. Add 1/2 a cup of the shredded cheese and whisk until well incorporated.
Stir in the sour cream and can of chiles; whisk for just a minute or until the sour cream is completely dissolved, but do not allow it to boil.
Pour the sauce over the enchiladas and top with remaining cheese.
Bake for 22-25 minutes and then switch the broiler on for a few minutes to brown the cheese.
The adults in the family like to serve these with hot sauce! Refried beans and spanish rice are also delicious on the side.
Hi I'm Emy
I’m passionate about sharing a diverse collection of sweet and savory recipes that I’ve meticulously tested and perfected in my own kitchen.