End your day with a delicious, comforting, and satisfying dinner! Whether you’re looking for quick and easy weeknight meals, cozy comfort food, or elegant dishes for special occasions, we have the perfect recipes for you.
From hearty casseroles and one-pan wonders to savory pastas, juicy meats, and flavorful vegetarian options, our collection is designed to make dinnertime effortless and enjoyable.
Busy schedule? No problem! Try our slow cooker meals, sheet pan dinners, and 30-minute recipes to save time without sacrificing flavor. Whatever your craving, these recipes will bring warmth and joy to your table every night. 🍽️✨
Crockpot Thai Peanut Chicken
Let your slow cooker do the work with this Crockpot Thai Peanut Chicken! It’s a creamy, flavorful dish packed with tender chicken, rich peanut sauce, and vibrant Thai-inspired flavors. Perfect for busy weeknights, this recipe will have your home smelling amazing and your taste buds thanking you.
This flavorful and easy-to-make Crockpot Thai Peanut Chicken combines tender chicken pieces simmered in a rich, creamy peanut sauce with a hint of spice. Served over rice or noodles and garnished with fresh herbs and chopped peanuts, its a delightful meal that brings the taste of Thai cuisine to your home.
Ingredients
Scale
1 1/2 pounds boneless, skinless chicken breasts or thighs
1 cup canned coconut milk
3/4 cup natural peanut butter (creamy or crunchy)
3 tablespoons low-sodium soy sauce
2 tablespoons honey
2 tablespoons rice wine vinegar
1 tablespoon freshly grated ginger
3 cloves garlic, minced
1/2 teaspoon crushed red pepper flakes (adjust to taste)
1 tablespoon lime juice
2 tablespoons cornstarch mixed with 2 tablespoons water (optional, for thickening)
Chopped fresh cilantro, for garnish
Chopped peanuts, for garnish
Cooked rice or rice noodles, for serving
Instructions
Prepare the Sauce: In a medium bowl, whisk together the coconut milk, peanut butter, soy sauce, honey, rice wine vinegar, grated ginger, minced garlic, and crushed red pepper flakes until smooth.
Arrange Chicken in Slow Cooker: Place the chicken breasts or thighs in the bottom of a 6-quart slow cooker. Pour the prepared peanut sauce over the chicken, ensuring each piece is well-coated.
Slow Cook: Cover the slow cooker and cook on low for 4 to 5 hours, or until the chicken is tender and fully cooked.
Shred the Chicken: Once cooked, remove the chicken from the slow cooker and shred it using two forks. Return the shredded chicken to the slow cooker, stirring it into the sauce.
Thicken the Sauce (Optional): If a thicker sauce is desired, stir in the cornstarch slurry (2 tablespoons cornstarch mixed with 2 tablespoons water) and the lime juice. Cover and cook on high for an additional 20 to 30 minutes, or until the sauce has thickened to your liking.
Serve: Serve the Thai peanut chicken over cooked rice or rice noodles. Garnish with chopped fresh cilantro and chopped peanuts.
Notes
For added vegetables, consider adding sliced bell peppers or shredded zucchini to the slow cooker along with the chicken.
Adjust the level of crushed red pepper flakes to control the spiciness of the dish.
Leftovers can be stored in an airtight container in the refrigerator for up to 3 days.
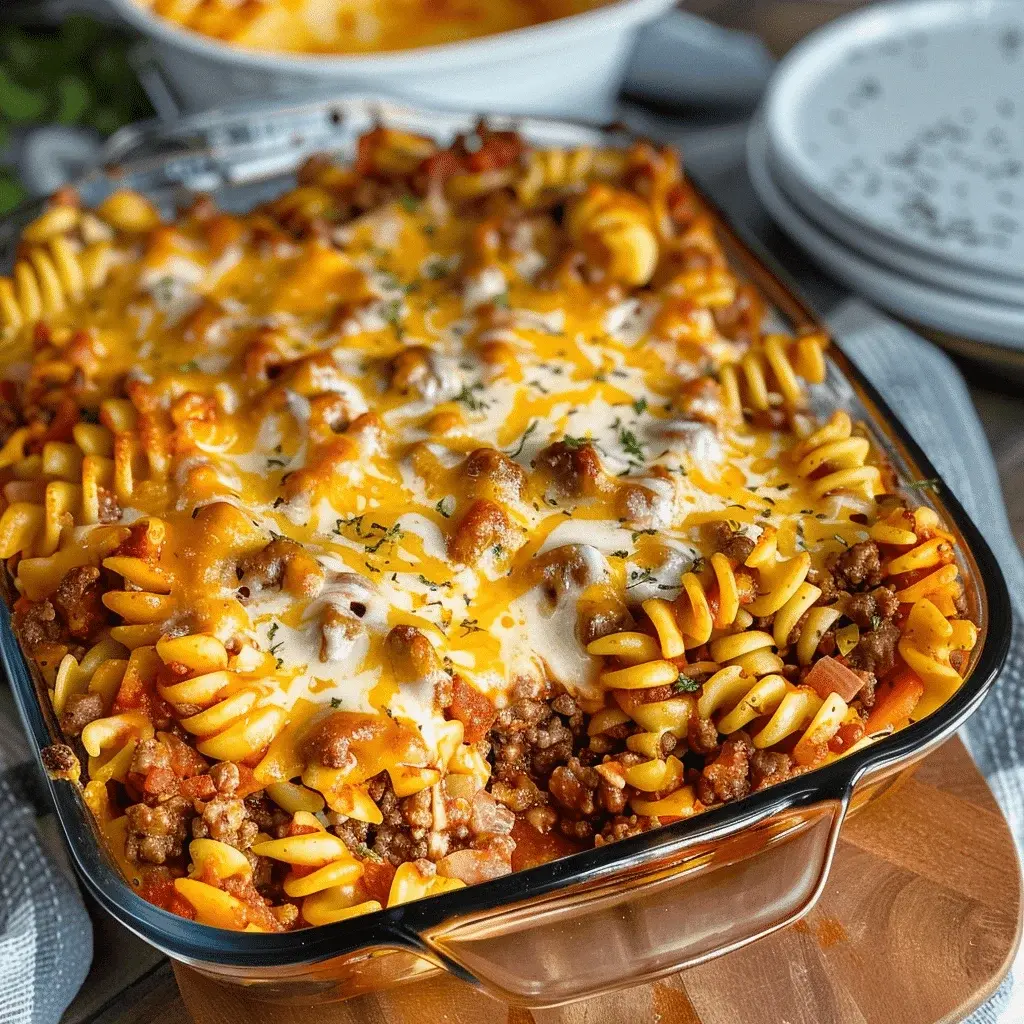
Did you know that over 70% of American families seek comforting, one-dish meals for their busy weeknights? If you’re searching for a hearty, family-friendly dinner that delivers on flavor and convenience, this Hamburger Casserole is your perfect solution. This dish masterfully combines lean ground beef, tender pasta, vibrant mixed vegetables, and a rich, savory tomato sauce, all crowned with a blanket of melted, golden cheese. It’s the ultimate comfort food that transforms simple ingredients into a satisfying culinary hug. Whether you’re a seasoned home cook or just starting out, this recipe is designed for success, offering a delicious answer to the perennial question: “What’s for dinner?” Let’s dive into creating a meal that will have everyone asking for seconds.
Ingredients List
Gather these simple, flavorful ingredients to build layers of taste and texture. I’ve included substitutions to accommodate dietary needs without sacrificing the soul of the dish.
1 lb Lean Ground Beef (90/10): The star protein, providing a savory, meaty base. For a lighter version, use ground turkey or a plant-based crumble. The lean cut ensures flavor without excess grease.
1 medium Yellow Onion, diced: Adds a sweet, aromatic foundation. Shallots or a ½ teaspoon of onion powder can work in a pinch.
2 cloves Garlic, minced: For that essential pungent, warm depth. ½ teaspoon of garlic powder is a suitable swap.
8 oz Elbow Macaroni or Rotini Pasta: The classic, comforting carb that holds the sauce beautifully. For a gluten-free option, use brown rice or chickpea pasta.
2 cups Frozen Mixed Vegetables (peas, carrots, corn, green beans): A colorful, nutrient-packed burst of sweetness and crunch. Feel free to use fresh, steamed vegetables if preferred.
1 (24 oz) jar Marinara Sauce or 3 cups Homemade Tomato Sauce: The rich, tangy, and herbal liquid that binds everything together. For a deeper flavor, try a roasted garlic or mushroom pasta sauce.
1 cup Beef Broth: Enhances the meaty flavor and helps cook the pasta to perfection. Vegetable broth works well for a lighter taste.
1 tsp Dried Italian Seasoning: A fragrant blend of oregano, basil, thyme, and rosemary that sings of comfort.
Salt and Black Pepper to taste: The essential flavor enhancers.
2 cups Shredded Cheddar Cheese, divided: Creates the iconic, gooey, golden-brown top layer and a creamy interior. A Monterey Jack blend or a dairy-free shred will also melt beautifully.
Optional Garnish: Fresh chopped parsley or chives for a pop of color and freshness.
Timing
Prep Time 15 minutes
Cook Time 35 minutes
Total Time 50 minutes
This Hamburger Casserole clocks in at under an hour from start to finish. Compared to the average casserole recipe that can take 75+ minutes with pre-cooking components separately, this version is streamlined. The magic lies in the “one-pan” method where the pasta cooks directly in the sauce, absorbing maximum flavor and saving you both time and dishwashing duty. It’s a weeknight warrior that delivers maximum comfort with minimal effort.
A bubbling, cheesy Hamburger Casserole ready to be served.
Step-by-Step Instructions
Step 1: Preheat & Prep
Preheat your oven to 375°F (190°C). This ensures a perfectly hot environment for baking and browning. While it heats, grab your ingredients. Dice the onion and mince the garlic—this little bit of prep makes the cooking process smooth and enjoyable.
Step 2: Brown the Beef
In a large, deep skillet or Dutch oven over medium-high heat, cook the ground beef, breaking it up with a spoon. We’re looking for a nice, even brown crust—that’s where the flavor is! About 5-7 minutes in, when the beef is halfway cooked, add the diced onion and minced garlic. The sizzle and aroma are your cues that flavor is building. Cook until the beef is no longer pink and the onions are soft and translucent.
Step 3: Build the Sauce
This is where the magic happens. Drain any excess grease from the beef mixture. Then, stir in the uncooked pasta, frozen vegetables, marinara sauce, beef broth, and Italian seasoning. Season generously with salt and pepper. Give it a good stir, ensuring every piece of pasta is coated in that rich, tomatoey liquid. Bring the mixture to a lively simmer.
Step 4: Simmer & Cheese
Once simmering, reduce the heat to medium-low, cover the skillet, and let it cook for about 12-15 minutes. You’ll hear gentle bubbling—this is the pasta absorbing the broth and becoming tender. Remove the lid and give it a stir. The sauce should have thickened slightly. Turn off the heat and stir in one cup of the shredded cheddar cheese. Watch as it melts into a creamy, dreamy sauce that clings to every ingredient.
Step 5: Bake to Perfection
If your skillet is oven-safe, you can bake it right there! Otherwise, transfer the mixture to a greased 9×13 inch baking dish. Sprinkle the remaining cup of cheese evenly over the top. Place it in your preheated oven and bake for 15-20 minutes, or until the cheese is completely melted, bubbly, and has those irresistible golden-brown spots.
Step 6: Rest & Serve
Patience is a virtue! Let the casserole rest for 5-10 minutes after pulling it from the oven. This allows the flavors to settle and makes serving much cleaner. Garnish with fresh parsley or chives for a beautiful finish.
Nutritional Information
(Approximate values per serving, based on 6 servings):
Calories: ~480 kcal
Protein: 28g – Excellent for muscle repair and satiety.
Carbohydrates: 42g – Provides sustained energy, primarily from the pasta and vegetables.
Dietary Fiber: 5g – Aids digestion, thanks to the veggies and whole-grain pasta option.
Total Fat: 22g
Saturated Fat: 10g – Using lean beef and reduced-fat cheese can lower this.
Sodium: ~850mg – Opt for low-sodium broth and sauce to control this.
Healthier Alternatives
You can easily adapt this recipe to fit various dietary goals without losing its comforting essence:
Boost Protein & Fiber: Swap regular pasta for a legume-based pasta (like lentil or chickpea). It adds 5-10g more protein and fiber per serving.
Reduce Fat & Calories: Use 93% lean ground turkey or chicken. Substitute full-fat cheese with a blend of part-skim mozzarella and a sharp, flavorful reduced-fat cheddar.
Lower Carbs: Replace half the pasta with cauliflower rice or diced zucchini. Add it in Step 3; it will cook in the sauce.
Dairy-Free/Vegan: Use a plant-based ground “meat,” nutritional yeast (2-3 tbsp) in the sauce for cheesiness, and your favorite melting vegan cheese on top.
Hidden Veggies: Puree an extra cup of vegetables (like spinach, carrots, or mushrooms) into the marinara sauce before adding it. It’s a genius way to pack in nutrients.
Serving Suggestions
This casserole is a complete meal on its own, but these pairings can elevate your dinner table:
Fresh & Crisp: A simple side salad with a tangy vinaigrette cuts through the richness perfectly.
Warm & Buttery: Garlic bread or soft, warm dinner rolls are ideal for soaking up every last bit of sauce.
Light & Tangy: A side of quick-pickled cucumbers or red onions adds a bright, acidic contrast.
For the Kids: Serve with a side of apple slices or a small cup of fruit cocktail.
Common Mistakes
Overcooking the Pasta Before Baking: Remember, the pasta cooks in the sauce. If you pre-boil it, you’ll end up with mushy pasta after baking. Trust the process!
Not Draining the Beef: Leaving too much grease can make the final dish oily. A quick drain makes a cleaner, more flavorful casserole.
Skimping on Seasoning: The broth, sauce, and cheese contain salt, but the raw pasta and beef need seasoning too. Taste the mixture before baking and adjust.
Using a Shallow Pan: Ensure your skillet or baking dish is deep enough. The liquid needs room to bubble without spilling over in the oven.
Skipping the Rest Time: Serving immediately leads to a soupy, messy plate. Letting it rest allows the sauce to thicken and set.
Storing Tips
Refrigeration: Cool completely, then store in an airtight container for up to 4 days. The flavors often meld and improve by the second day!
Freezing: This casserole freezes beautifully. Assemble and bake, then cool completely. Wrap the entire dish (or individual portions) tightly in plastic wrap and foil. Freeze for up to 3 months. Thaw overnight in the fridge before reheating.
Reheating: For best results, reheat in the oven at 350°F (175°C) until warmed through (20-30 minutes for a full dish). Add a splash of broth or water if it seems dry. The microwave works for single servings, but may soften the crispy cheese topping.
Craving a dessert that’s truly irresistible? This decadent chocolate cream cheese bread pudding recipe guarantees a luscious, gooey center every time. Made with sweet bread, rich chocolate, and tangy cream cheese, it’s a surprisingly easy and family-friendly treat perfect for any occasion. Get the full recipe on the blog!
Want a tasty meal? Try this Street Corn Chicken Rice Bowl! It’s full of yummy flavors. You can add what you like to make it yours. This dish is perfect for a quick lunch or dinner. Get ready to enjoy a delicious bowl that’s simple to put together. Tap to see how to make this colorful and fresh meal.
Indulge in the vibrant flavors of the Street Corn Chicken Rice Bowl, a delightful dish that brings together juicy chicken thighs, smoky grilled corn, and creamy Cotija cheese. Perfect for busy weeknights or lively gatherings with friends, this customizable bowl lets you tailor each serving with your favorite toppings like avocado or black beans. Ready in just about 50 minutes, it’s not only quick and easy to prepare but also packed with nutritious ingredients. Each bite offers a delicious explosion of flavor that will leave your taste buds craving more!ezstandalone.cmd.push(function { ezstandalone.showAds(145); });
Ingredients
Scale
4 boneless, skinless chicken thighs
1 cup sweet corn kernels
3 cups cooked rice
½ cup Cotija cheese
Lime juice and wedges
1 tablespoon avocado oil
1 teaspoon chili powder
½ teaspoon garlic powder
½ teaspoon salt
¼ teaspoon black pepper
¼ cup thinly sliced red onion
½ cup sour cream
2 tablespoons mayonnaise
1 teaspoon chili powder
Salt and pepper, to taste
Instructions
Marinate chicken thighs with lime juice, avocado oil, chili powder, garlic powder, salt, and pepper for 15-30 minutes.
Heat a skillet over medium-high heat and cook the marinated chicken for 8-10 minutes per side until golden brown; slice after resting.
In a bowl, mix grilled corn, red onion, sour cream, mayonnaise, Cotija cheese, chili powder, salt, and pepper. Squeeze lime juice for zest.
Reheat cooked rice and divide among bowls; top with sliced chicken and street corn mixture.
Garnish with extra Cotija cheese, cilantro, and lime wedges.
Nutrition
Calories:610
Sugar:3g
Protein:36g
Tasty Buffalo Chicken Bacon Mozzarella Bombs
Indulge in game‑day perfection with these Buffalo Chicken Bacon Mozzarella Bombs — a savory appetizer that blends spicy buffalo chicken, smoky bacon, and gooey mozzarella into bite-sized bombs. This buffalo chicken bacon bombs recipe makes a crowd-pleasing snack or party food favorite. Whether you’re searching for easy party appetizers or cheesy chicken bites, this recipe has you covered. Tap to discover how to make them! #GameDaySnacks #ChickenAppetizer #BaconLovers
Buffalo Chicken Bacon Mozzarella Bombs are a delicious fusion of savory flavors and crispy texture, making them perfect for any gathering.
Ingredients
Scale
8 oz Mozzarella Cheese Cut into cubes
6 slices Cooked Bacon Crumble before use
1 lb Ground Chicken Substitute with ground turkey or lean beef if desired
1/2 cup Buffalo Sauce Adjust for spice preference
Instructions
Prepare mozzarella by cutting it into small cubes, approximately one inch each, and set aside.
Crumble the cooked bacon into smaller bits and wrap a piece of bacon around each mozzarella cube completely.
In a bowl, mix ground chicken with garlic powder, onion powder, paprika, salt, black pepper, and half of the buffalo sauce until well combined.
Flatten a handful of chicken mixture in your palm, place the bacon-wrapped mozzarella in the center, and encase it with the chicken into a ball shape.
Roll each bomb in flour, dip in beaten eggs, then coat with breadcrumbs.
Heat oil to 350°F (175°C) for frying or preheat oven to 400°F (200°C). Cook for 5-6 minutes in oil or 18-20 minutes in the oven until crispy.
Drizzle remaining buffalo sauce over cooked bombs, serve hot.
Notes
Refrigerate assembled bombs before cooking for better shape and crispiness. Use panko for extra crunch when coating.
Nutrition
Calories:250kcal
Sugar:1g
Protein:15g
Irresistible Honey Mustard BLT Chicken Sliders for Quick and Easy Entertaining
Treat your guests to these delicious Honey Mustard BLT Chicken Sliders! Packed with crispy fried chicken, creamy avocado, and crispy bacon, these sliders are perfect for entertaining or a quick family meal. Drizzle with extra honey mustard for a delightful twist. Try this easy recipe today! #ChickenSliders #EasyRecipes #EntertainingIdeas #FoodieFavorites
Split the pretzel slider buns in half and place on a baking sheet. Evenly distribute cheese over both halves and sprinkle with bacon.
Place them under the broiler for a few minutes or until the cheese has melted and the buns are warm and golden brown.
Meanwhile, toss chopped chicken fingers with honey mustard until coated.
Once the slider buns are ready, add the honey mustard fried chicken, then add avocado, tomato, and a sprinkle of flaky salt.
Close up the buns and pull them apart. Serve with more honey mustard for dipping.
Notes
Feel free to substitute the cheese or add extra veggies for flavor and crunch.
Nutrition
Calories:350kcal
Sugar:2g
Protein:18g
Street Corn Chicken Rice Bowl Making a Flavorful Weeknight Meal
Street Corn Chicken Rice Bowl offers smoky, tangy, and creamy flavors combined in one satisfying meal you will want to make often. This recipe uses juicy chicken thighs seasoned just right alongside charred corn for amazing texture in your bowl. If you love easy weeknight dinners that pack a big flavor punch, this hearty street corn chicken rice bowl is perfect for your rotation. You get great taste without spending hours in the kitchen. Save this for later
This vibrant rice bowl combines juicy chicken thighs, smoky grilled corn, creamy Cotija cheese, and a tangy lime sauce. With endless topping options, its a versatile and flavorful dish perfect for lunch or dinner.
Ingredients
Scale
4 boneless skinless chicken thighs
1 tablespoon lime juice
1 tablespoon avocado oil
1 teaspoon chili powder
½ teaspoon garlic powder
½ teaspoon salt
¼ teaspoon black pepper
Instructions
In a mixing bowl, combine lime juice, avocado oil, chili powder, garlic powder, salt, and black pepper. Coat the chicken thighs with the marinade and let them rest in the fridge for 15-30 minutes.
Heat a skillet over medium-high heat. Cook the chicken for 8-10 minutes per side, or until fully cooked and golden. Remove from the skillet, let rest for a few minutes, then slice into strips.
In a mixing bowl, combine the grilled corn, red onion, sour cream, mayonnaise, Cotija cheese, and chili powder. Season with salt, pepper, and a squeeze of lime juice to taste.
Reheat the cooked rice with a splash of water until warm and fluffy.
Divide the warm rice into serving bowls. Top with sliced chicken, a generous portion of the street corn topping, extra Cotija cheese, and fresh cilantro. Garnish with lime wedges.
Serve warm with an optional squeeze of lime juice.
Notes
Char the Corn: Grilling or charring the corn adds a smoky flavor that elevates the dish. Reheat Rice: Add a splash of water to keep rice moist when reheating. Optional Toppings: Customize with avocado, black beans, pico de gallo, or jalapeños for extra flavor and texture.
Fiery Chicken Ramen : Spicy & Indulgent!
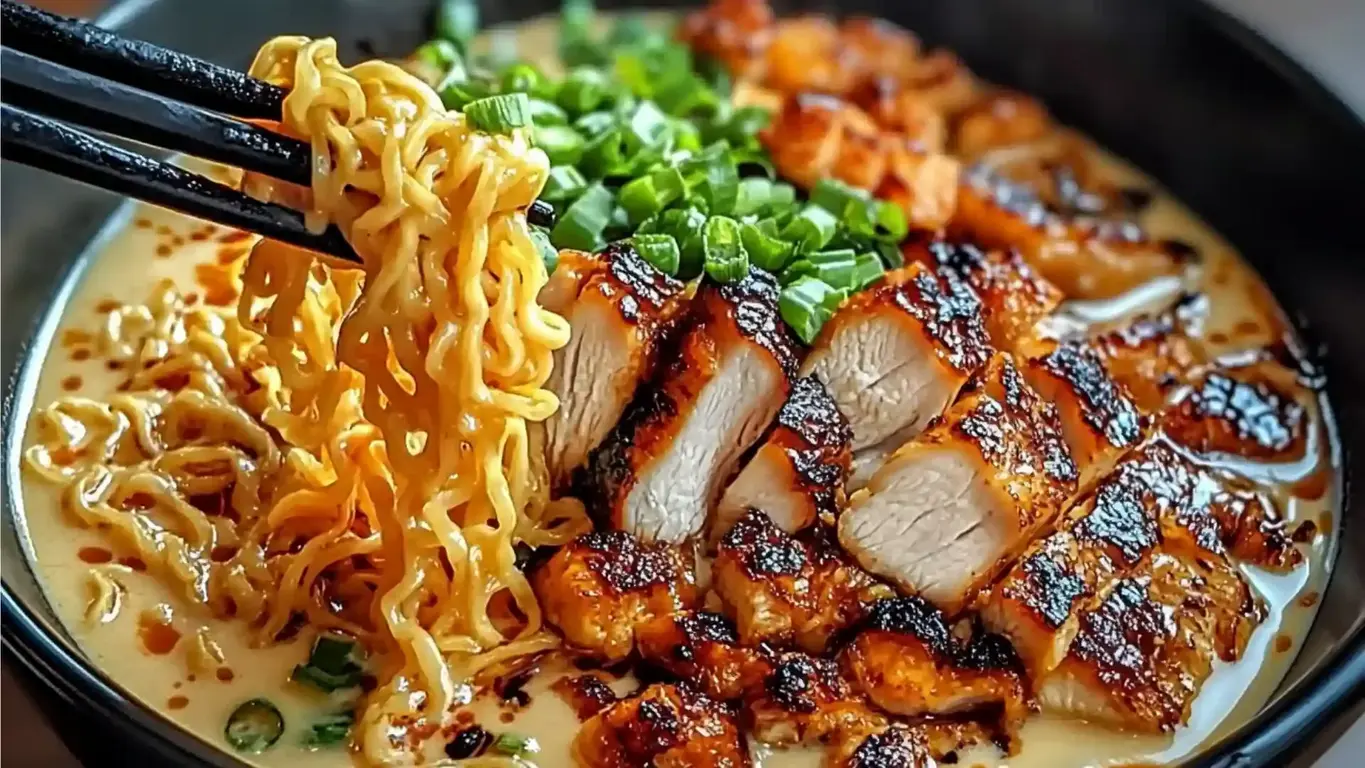
Warm up with this fiery chicken ramen with creamy garlic sauce! This spicy chicken ramen bowl is loaded with bold flavors, tender chicken, and a rich, garlicky broth. A must-try for ramen lovers! #FieryChickenRamenWithCreamyGarlic #SpicyChickenRamenBowlWithCreamSauce #RomanNoodleRecipesChicken #FireChickenRamen #EasyAsianDinnerIdeas
If youre craving a spicy chicken ramen bowl with cream sauce, this Fiery Chicken Ramen with Creamy Garlic Sauce is the ultimate fusion of heat, richness, and umami. Tender, flavorful chicken is coated in a bold, spicy sauce, then paired with perfectly cooked ramen noodles and a luscious, garlicky cream sauce that balances the spice with velvety smoothness.
Ingredients
Scale
2 boneless, skinless chicken breasts, sliced into strips
1 tablespoon soy sauce
1 teaspoon sesame oil
1 teaspoon cornstarch
1 teaspoon smoked paprika
1 teaspoon chili powder
½ teaspoon cayenne pepper (adjust to taste)
½ teaspoon black pepper
1 tablespoon vegetable oil
2 tablespoons butter
4 cloves garlic, minced
1½ cups heavy cream (or half-and-half for a lighter version)
½ cup chicken broth
½ teaspoon salt
½ teaspoon black pepper
½ teaspoon red pepper flakes (optional, for extra heat)
½ cup grated Parmesan cheese
2 packs ramen noodles (discard seasoning packets)
1 teaspoon sesame oil
½ cup sliced green onions
½ cup shredded carrots (optional, for crunch)
1 soft-boiled egg, halved (for topping)
Sesame seeds & nori strips, for garnish
Instructions
In a bowl, mix the soy sauce, sesame oil, cornstarch, smoked paprika, chili powder, cayenne pepper, and black pepper.
Add the sliced chicken and toss to coat. Let marinate for 10 minutes while you prepare the sauce.
Heat 1 tablespoon vegetable oil in a large skillet over medium-high heat. Add the chicken and cook for 5-6 minutes until golden and fully cooked. Set aside.
In a saucepan over medium heat, melt the butter and sauté the minced garlic for 30 seconds until fragrant.
Pour in the heavy cream and chicken broth, stirring constantly.
Add the salt, black pepper, and red pepper flakes, then let it simmer for 2-3 minutes until slightly thickened.
Stir in the grated Parmesan cheese, mixing until smooth. Remove from heat.
Bring a pot of water to a boil and cook the ramen noodles according to package instructions.
Drain, toss with 1 teaspoon sesame oil, and set aside.
Divide the ramen noodles into serving bowls.
Spoon the creamy garlic sauce over the noodles.
Top with the fiery chicken, green onions, shredded carrots, and a soft-boiled egg.
Garnish with sesame seeds and nori strips.
Serve immediately and enjoy!
Notes
Control the Heat Adjust the cayenne and red pepper flakes to your spice preference.
Use Fresh Ramen If available, fresh ramen noodles elevate the dish.
Balance the Flavors The creamy sauce helps tone down the heat, but a squeeze of fresh lime juice can also enhance the flavors.
Nutrition
Calories:220
Protein:25g
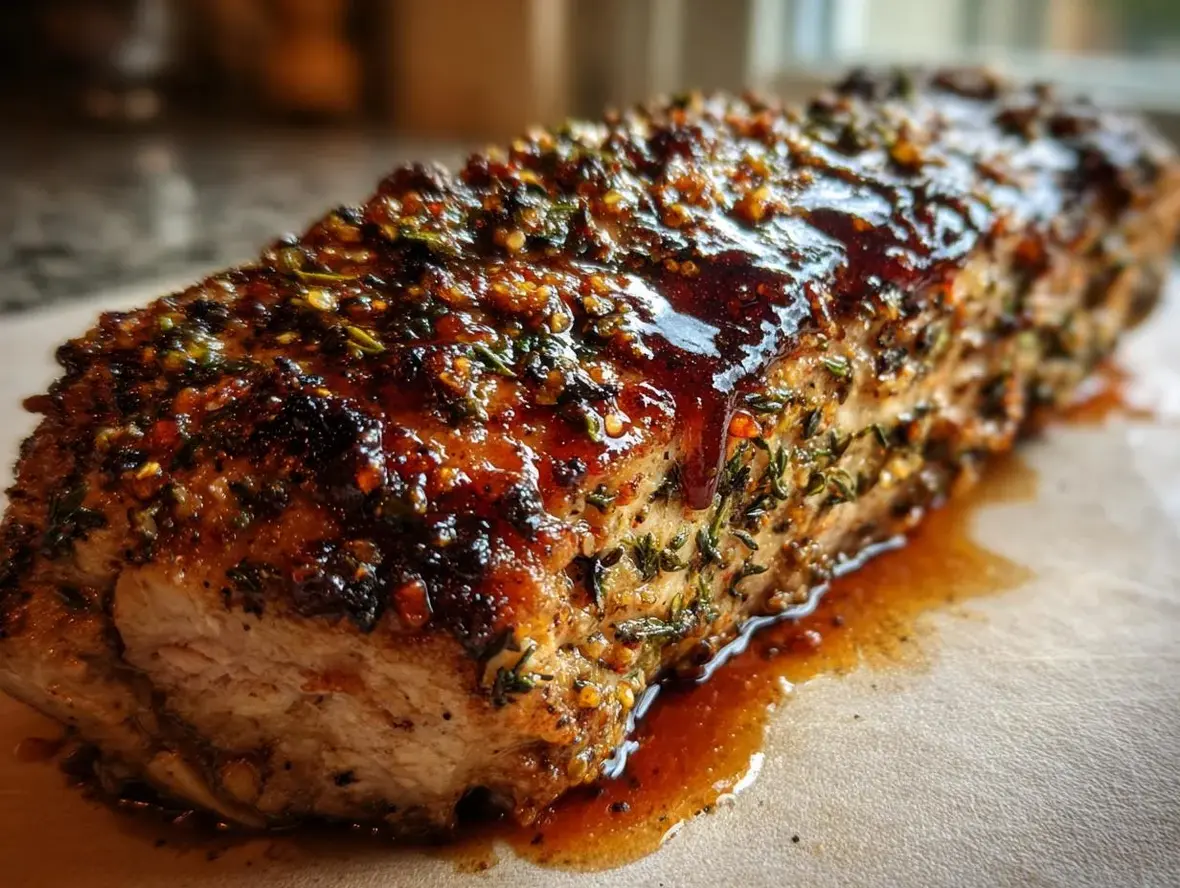
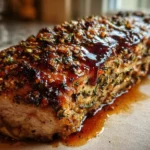
Delicious Herb Crusted Pork Loin: 1 Amazing Recipe
Delicious Herb Crusted Pork Loin: 1 Amazing Recipe 4
A succulent pork loin coated in a flavorful herb crust and finished with a sweet and tangy apple cider glaze. This dish is perfect for a special occasion or a comforting weeknight meal.
Ingredients
Scale
1 (3-pound) boneless pork loin roast
2 tablespoons olive oil
1 teaspoon salt
1/2 teaspoon black pepper
1 cup panko breadcrumbs
1/4 cup chopped fresh parsley
2 tablespoons chopped fresh rosemary
1 tablespoon chopped fresh thyme
2 cloves garlic, minced
1/2 cup apple cider
2 tablespoons Dijon mustard
1 tablespoon honey
Instructions
Preheat your oven to 375°F (190°C).
Pat the pork loin dry with paper towels.
Rub the pork loin with olive oil, salt, and pepper.
In a small bowl, combine panko breadcrumbs, parsley, rosemary, thyme, and minced garlic.
Press the herb mixture firmly onto all sides of the pork loin.
Place the pork loin in a roasting pan.
Roast for 20 minutes.
While the pork is roasting, whisk together apple cider, Dijon mustard, and honey in a small saucepan. Bring to a simmer over medium heat and cook for 5 minutes, until slightly thickened.
After 20 minutes, brush half of the glaze over the pork loin.
Continue roasting for another 20-30 minutes, or until the internal temperature reaches 145°F (63°C). Brush with the remaining glaze during the last 10 minutes of cooking.
Let the pork loin rest for 10 minutes before carving.
Notes
For a crispier crust, you can broil the pork loin for the last 1-2 minutes of cooking, watching carefully to prevent burning.
If you dont have fresh herbs, you can use 1 tablespoon of dried mixed herbs.
Adjust the sweetness of the glaze by adding more or less honey.
Nutrition
Calories:350
Sugar:15g
Protein:30g
Easy Street Corn Chicken Bowl
This Easy Street Corn Chicken Bowl is full of flavor and so simple to whip up! It’s perfect for a quick weeknight dinner or a tasty meal prep option.
Delicious Tasty Street Corn Chicken Bowl recipe with step-by-step instructions.
Ingredients
Scale
4 boneless, skinless chicken thighs
1 tbsp freshly squeezed lime juice
1 tbsp avocado oil
1 tsp chili powder
1 tsp ground cumin
1/2 tsp garlic powder or 2 cloves garlic, minced
1/2 tsp salt
1/4 tsp ground black pepper
Instructions
In a bowl, combine 1 tablespoon of freshly squeezed lime juice, 1 tablespoon of avocado oil, 1 teaspoon chili powder, 1 teaspoon ground cumin, 1/2 teaspoon garlic powder (or 2 cloves garlic, minced), 1/2 teaspoon salt, and 1/4 teaspoon ground black pepper. Add the 4 boneless, skinless chicken thighs and toss until theyre coated evenly with the marinade. Cover and refrigerate for 15 to 30 minutes to allow the flavors to infuse.
Heat a skillet over medium-high heat. Add a touch of oil if needed, then place the marinated chicken thighs (from Step 1) in the pan. Sear for 8 to 10 minutes per side, or until the chicken is cooked through and nicely browned on the outside. Remove the chicken from the skillet and allow it to rest for a few minutes before slicing it into strips. I like to let the chicken rest for 510 minutes so the juices stay inside and the meat stays juicy.
In a bowl, mix together 1 cup sweet corn kernels (either grilled or sautéed from frozen), 1/4 cup sliced red onion, 1/2 cup sour cream, 2 tablespoons mayonnaise, 1/2 cup crumbled Cotija cheese, and 1 teaspoon chili powder. Season the mixture with salt, pepper, and 1 tablespoon lime juice to taste. Stir until all ingredients are well combined. You can prepare this topping while the chicken is cooking.
Add the 3 cups of prepared rice to a microwave-safe bowl or saucepan with a splash of water. Heat until the rice is warm and fluffy, fluffing with a fork before serving. For extra flavor, I sometimes stir in a little chopped cilantro at this stage.
To assemble, divide the warmed rice (from Step 4) among serving bowls. Top each bowl with sliced chicken (from Step 2) and a generous scoop of the street corn topping (from Step 3). Sprinkle extra Cotija cheese and scatter fresh cilantro leaves over the top. Garnish with lime wedges from 1 lime. If desired, add a drizzle of the reserved sour cream and a sprinkle of Tajín or chili powder for extra flavor. Serve warm with an extra squeeze of lime if you like.
Hi I'm Emy
I’m passionate about sharing a diverse collection of sweet and savory recipes that I’ve meticulously tested and perfected in my own kitchen.