Table of Contents
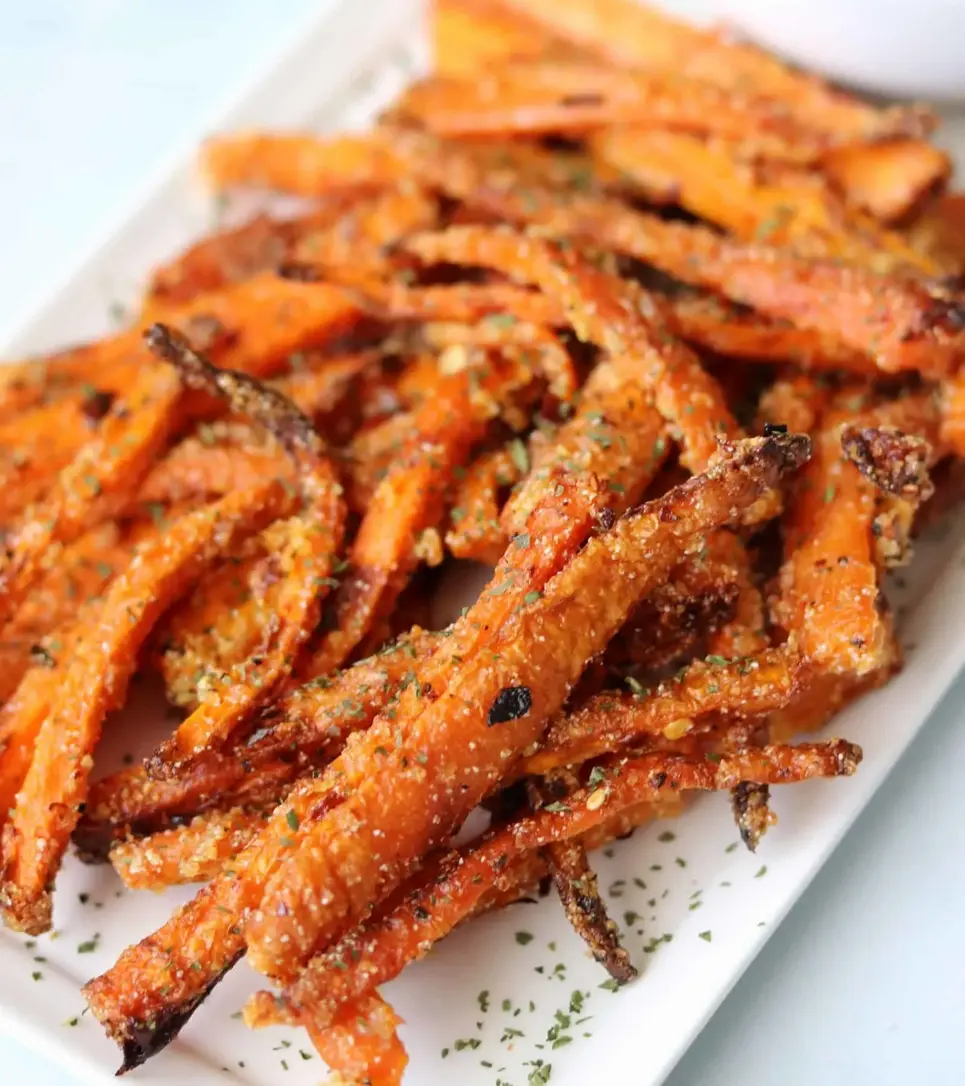
Air Fryer Carrot Fries: Crispy, Spicy, Garlic Parmesan – A Healthy Snack Reinvented
Growing up in Morocco, the kitchen was always the heart of our home. My mother, with her skilled hands and intuitive palate, could transform simple vegetables into wondrous dishes. While an air fryer was certainly not part of her traditional toolkit, the spirit of using fresh ingredients to create something delicious and wholesome lives on in recipes like these easy Air Fryer Carrot Fries. I remember watching her meticulously peel and chop vegetables, turning them into vibrant salads or slow-cooked tagines. This recipe for crispy, spicy, garlic parmesan carrot fries evokes that same simple elegance, but with a modern, New York twist. It’s a testament to how traditional flavors and global techniques can meet right in your own kitchen.
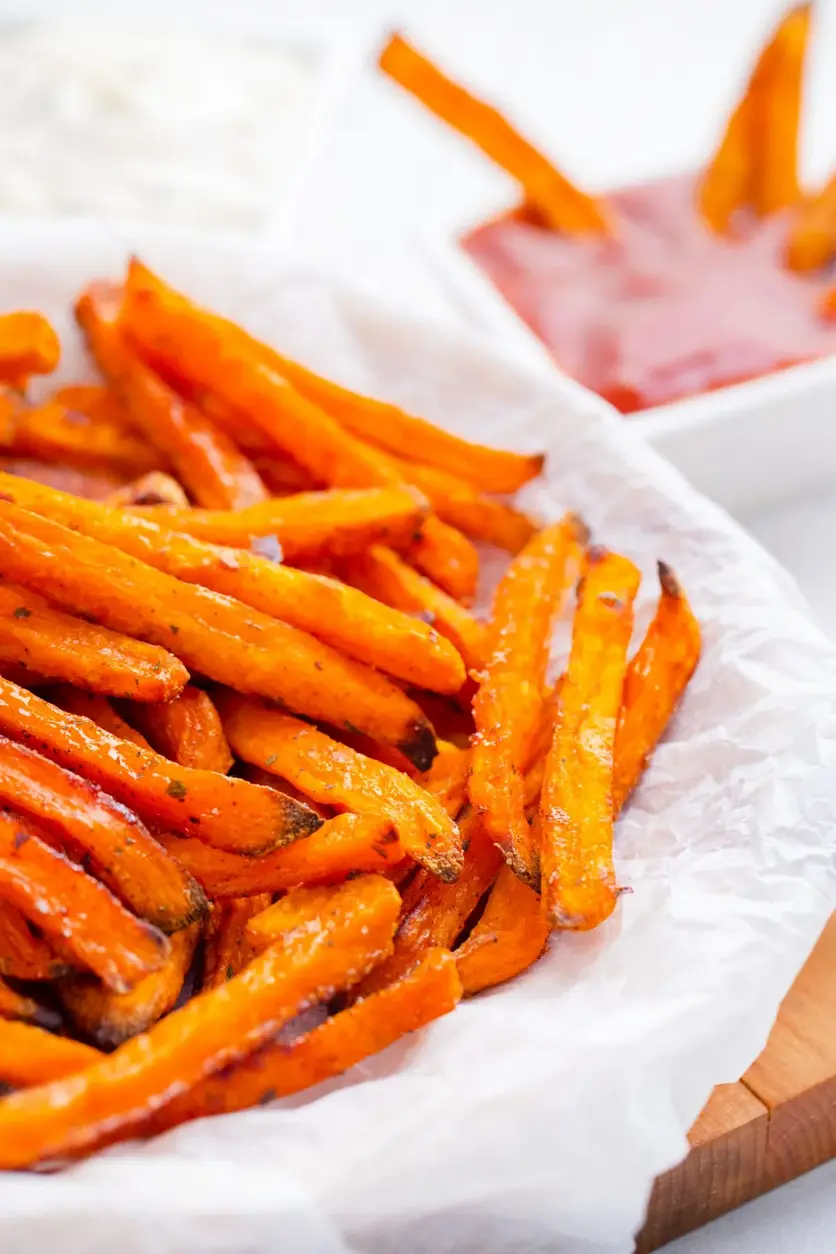
Imagine the aroma filling your kitchen: a sweet earthiness from the carrots, brightened by pungent garlic, and a hint of spice from red pepper flakes, all mingling with the savory notes of Parmesan cheese. The magic of the air fryer transforms humble carrots into something truly irresistible – think golden, tender-crisp on the outside, and delightfully sweet on the inside. The creamy sriracha dip, which I swear is a taste of NYC’s vibrant food scene, offers a cooling counterbalance, making each bite an explosion of flavor and texture. It’s the perfect harmony of sweet, spicy, savory, and even a touch umami, proving that healthy eating can be incredibly indulgent.
I’ve spent years perfecting the art of French cuisine in Paris, and what I learned about precision and technique translates beautifully even to these simple *airfryer recipes easy* dishes. My secret to these perfectly crispy carrot fries lies in a unique double-toss method and precise garlic preparation, ensuring every frie is evenly coated and full of flavor. I’ll share a pro tip for achieving that gorgeous golden-brown exterior without drying out the carrots, and we’ll steer clear of a common mistake that can leave your “fries” soggy. Trust me, with my guidance, you’ll be whipping up these delightful garlic parmesan carrot fries like a seasoned chef in no time!
Why This Air Fryer Carrot Fries Recipe Is the Best
What sets these Air Fryer Carrot Fries apart is the incredible depth of flavor we build with minimal effort. The crushed garlic, infused into the olive oil, blankets the carrots, creating a robust aromatic base. This isn’t just about throwing a few spices together; it’s about layering flavors thoughtfully, a principle I lived by in my Parisian culinary training. The garlic parmesan crust, kissed with a hint of red pepper for that perfect kick, elevates these from a simple side to a standout snack or appetizer that truly satisfies.
The texture is where this recipe truly shines. Thanks to the power of the air fryer, we achieve that coveted crispy exterior without the excessive oil of deep-frying. The strategic cut of the carrots, as I’ll show you, maximizes surface area for browning while keeping the inside tender and sweet. Shaking the basket halfway through isn’t just a suggestion; it’s a critical step to ensure uniform crispiness, reminiscent of the careful rotation my mother taught me for baking even pastries back home in Morocco.
Not only are these Air Fryer Carrot Fries incredibly delicious, but they are also wonderfully foolproof and fast. This is one of those *airfryer recipes easy* enough for even a novice cook to master, yet impressive enough for seasoned home chefs. Prep takes mere minutes, and the air fryer does the rest, meaning you can have a healthy, tempting snack on the table in under 30 minutes. It’s perfect for busy weeknights in my bustling NYC apartment or when you need a quick, wholesome nibble for guests.
Airfryer Recipes Easy Ingredients
The beauty of these garlic parmesan carrot fries lies in their simplicity, using ingredients you likely already have in your pantry or can easily find at your local farmers market here in NYC. I love seeing the vibrant array of carrots at the Union Square Greenmarket – sometimes I even find heirloom varieties that add an extra pop of color!
Ingredients List
- 3-4 (150-180g) Carrots
- 1 Tbsp (16g) Olive Oil
- 1 clove Garlic, crushed
- 2 Tbsp (15g) Reduced Fat Grated Parmesan
- 1/4 tsp Crushed Red Pepper, optional
- 1 pinch Freshly Cracked Black Pepper, optional
Ingredient Spotlight
Carrots: Look for firm, bright orange carrots with smooth skin. Avoid any that are wilted or have soft spots. Carrots are the star here, providing natural sweetness and a good source of vitamins. If you can’t find fresh carrots, pre-cut carrot sticks will work in a pinch, but you might need to adjust cooking time slightly.
Olive Oil: A good quality extra virgin olive oil binds the seasonings and helps achieve that crispy exterior. Its fruity notes complement the carrots beautifully. If you’re out, avocado oil or even a neutral vegetable oil can be substituted, though you’ll miss some of the rich flavor. Just ensure it has a high smoke point for air frying.
Garlic: Fresh garlic is key for pungent, aromatic flavor. When I crush it, I’m aiming to release those vital oils. If fresh isn’t available, 1/2 teaspoon of garlic powder can be used, but fresh is always my preference for the most vibrant taste.
Reduced Fat Grated Parmesan: This provides a salty, umami kick and helps form a savory crust. “Reduced fat” works wonderfully here without sacrificing flavor, especially for this crispy, spicy, garlic parmesan recipe. Regular grated Parmesan or even nutritional yeast (for a dairy-free option) can be used, though the texture might vary slightly.
| Original Ingredient | Best Substitution | Flavor / Texture Impact |
|---|---|---|
| Carrots | Sweet potato, parsnips, zucchini | Sweet potato will be sweeter and softer, parsnips offer an earthy almost nutty flavor, zucchini will be much softer and require less cooking time. |
| Olive Oil | Avocado oil, Grapeseed oil | Avocado oil offers a neutral flavor and high smoke point. Grapeseed oil is also neutral but might make the fries slightly less aromatic. |
| Fresh Garlic | 1/2 tsp garlic powder | Less pungent and fresh flavor, but still provides a foundational garlic taste. |
| Reduced Fat Grated Parmesan | Nutritional Yeast, regular Parmesan | Nutritional yeast provides a cheesy, umami flavor but won’t crisp up quite the same way. Regular Parmesan works just as well with slightly more fat. |
How to Make Air Fryer Carrot Fries — Step-by-Step
Making these crispy Air Fryer Carrot Fries is incredibly straightforward. Just follow these steps, and you’ll have a delightful snack in no time!
Step 1: Prepare the Garlic Oil
Add the crushed garlic to the olive oil and stir well. To crush garlic like a pro, peel and chop a clove, then sprinkle a bit of kosher salt on top. Press the flat of your knife down firmly and drag the garlic across a cutting board. This creates a thick, flavorful paste that infuses the oil beautifully.
💡 emy’s Pro Tip: The salt acts as an abrasive, helping to break down the garlic fibers and release more of its essential oils, making your garlic flavor more intense and evenly distributed.
Step 2: Prepare the Carrots
Wash and thoroughly dry your carrots. Remove the tops. Cut each carrot in half crosswise, then cut each half lengthwise into two to create flat surfaces. From the larger end, you should be able to cut three strips, and from the smaller end, two strips. Aim for pieces that are roughly uniform in size – about 1/4 to 1/2 inch thick – so they cook evenly.
⚠️ Common Mistake to Avoid: Cutting the carrots too thick or unevenly. This leads to some fries being undercooked and others overcooked or burnt. Consistency is key for uniform crispiness.
Step 3: Coat the Carrots
Place the prepared carrot fries in a medium bowl. Pour the garlic-infused olive oil mixture over them. Toss vigorously until all the carrot pieces are well coated. Every surface needs a little oil to become crispy and carry the flavor.
Step 4: Add the Parmesan Mixture
In a small bowl, mix the Parmesan with the crushed red pepper (if using) and black pepper. Sprinkle half of this mixture over the oil-coated carrot fries. Toss again to distribute evenly. Repeat with the remaining Parmesan mixture, ensuring a second, thorough coating. This double-toss ensures a beautiful, savory crust.
💡 emy’s Pro Tip: Layering the Parmesan like this ensures maximum adhesion and a more robust cheesy crust. It’s a technique I learned for breading in Paris, adapted for lighter airfryer recipes easy to make perfect cheesy fries.
Step 5: Arrange in Air Fryer
Add the coated carrot fries to your air fryer basket or onto a baking sheet in a single, even layer. Do not overcrowd the basket; air circulation is crucial for crispiness. If you have too many, cook them in batches.
Step 6: Air Fry to Perfection
Air fry at 350°F (175°C) for 16-20 minutes. About halfway through the cooking time (around 8-10 minutes), shake the basket vigorously. This ensures all sides get exposed to the hot air, leading to crispier fries. Continue cooking until they are golden brown and tender-crisp.
⚠️ Common Mistake to Avoid: Forgetting to shake the basket! Without shaking, the fries on the bottom will steam instead of crisp, leading to uneven texture.
Step 7: Serve and Enjoy
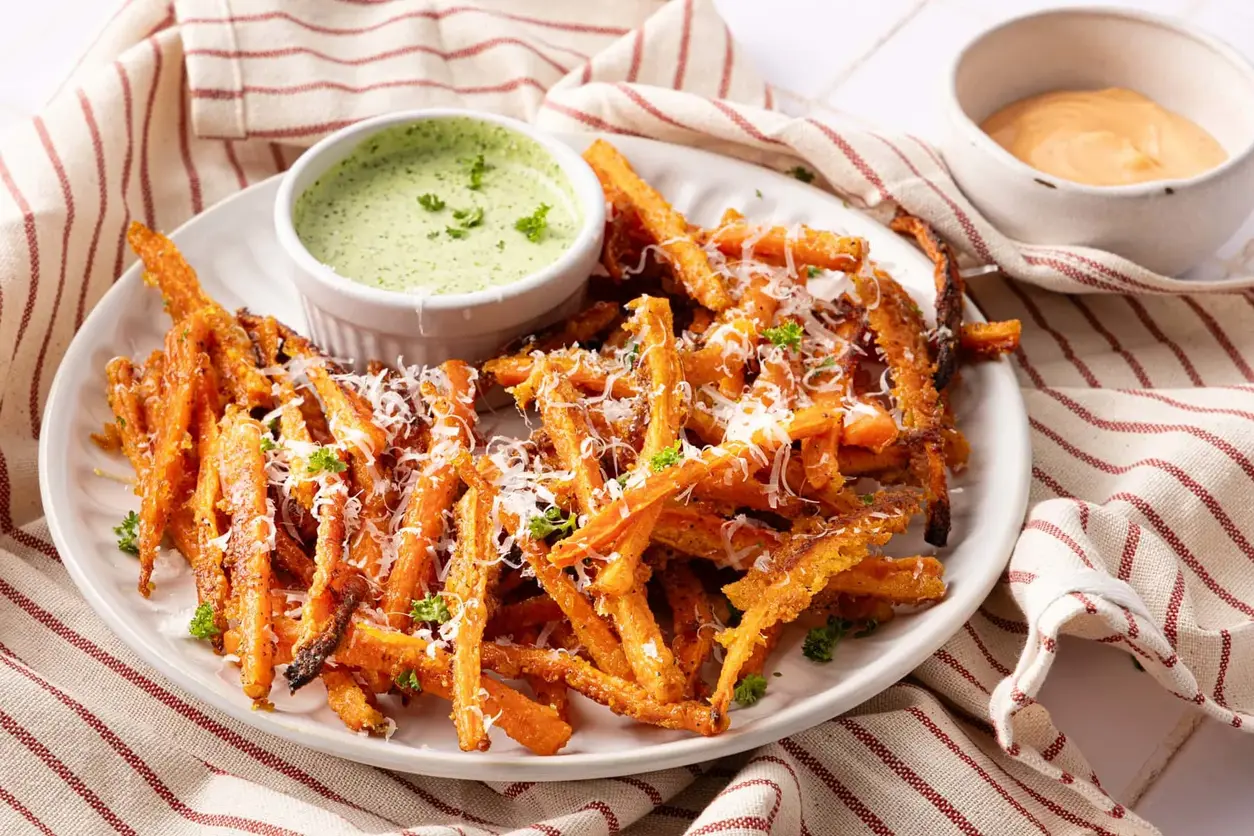
Once cooked, immediately transfer the Air Fryer Carrot Fries to a serving dish. Top with freshly chopped parsley or parsley flakes for a pop of color and freshness. Serve hot with your favorite dip, like the creamy sriracha dip I often make, and dig in!
| Step | Action | Duration | Key Visual Cue |
|---|---|---|---|
| 1 | Prepare Garlic Oil | 2 min | Garlic paste in oil |
| 2 | Prepare Carrots | 5 min | Uniform 1/4-1/2 inch strips |
| 3 | Coat with Oil | 1 min | Carrots glistening with oil |
| 4 | Add Parmesan Mixture | 1 min | Fully coated with cheesy spice |
| 5 | Arrange in Air Fryer | 1 min | Single layer in basket |
| 6 | Air Fry | 16-20 min | Golden brown, tender-crisp |
| 7 | Serve | — | Garnished with fresh parsley |
Serving & Presentation
These crispy, spicy, garlic parmesan carrot fries are a feast for the eyes as much as the palate! To present them beautifully, pile them high on a rustic wooden board or a simple white platter to let their vibrant color shine. A sprinkle of fresh, finely chopped parsley – or even a few sprigs of fresh dill – adds a touch of gourmet elegance. I often serve them in a small ceramic bowl, making them feel special, whether it’s a casual snack or part of a larger meal.
For me, the perfect accompaniment is a creamy, slightly tangy dip. My go-to is a simple mix of Greek yogurt or crème fraîche with a swirl of sriracha and a squeeze of lime – it’s a nod to the vibrant flavors I adore from New York City’s diverse culinary scene. You could also try a cool mint yogurt sauce, reminiscent of North African flavors, or even a spicy harissa aioli for an extra kick. The contrast of the warm, crispy fries with a cool, creamy dip is simply divine.
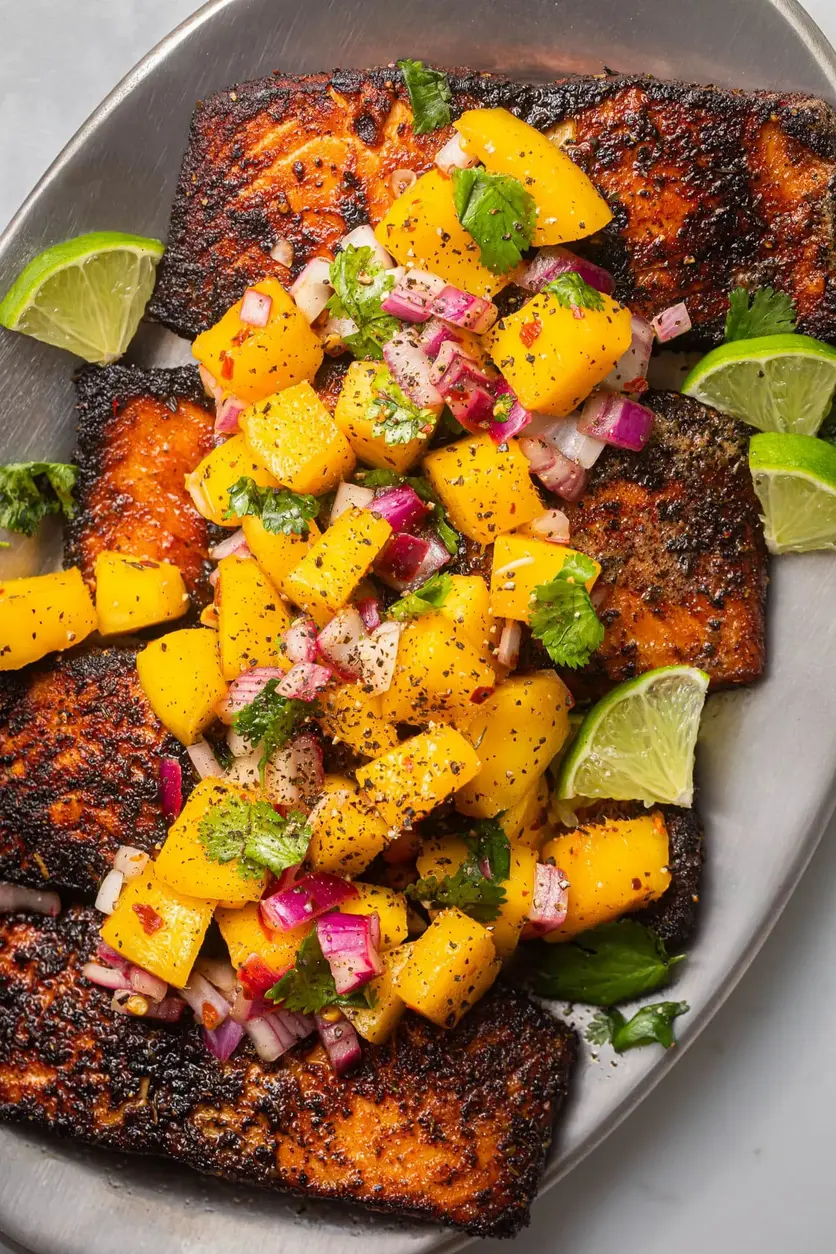
These carrot fries are incredibly versatile, making them a fantastic side dish for so many meals. I love serving them alongside grilled chicken or fish for a light, healthy dinner. They pair beautifully with a classic American burger turned gourmet, or as a vibrant alternative to potato fries with a hearty sandwich. You can even serve them as an elegant appetizer at your next gathering – they always disappear fast!
| Pairing Type | Suggestions | Why It Works |
|---|---|---|
| Side Dish | Grilled salmon, roasted chicken, turkey burgers | A healthy and flavorful alternative to traditional potato fries. Their sweetness complements savory proteins. |
| Sauce / Dip | Creamy sriracha dip, lemon-tahini, honey-mustard | The cool, creamy texture and tangy or spicy flavors provide a perfect contrast to the warm, savory fries. |
| Beverage | Sparkling water with lemon, light white wine (Sauvignon Blanc), mint green tea | Refreshing drinks that cleanse the palate and enhance the flavors without overpowering them. |
| Garnish | Fresh chopped parsley, a squeeze of fresh lime, sesame seeds | Adds a burst of freshness, brightens the color, and provides textural interest for a professional finish. |
Make-Ahead, Storage & Reheating
Living in NYC with a busy schedule means I’m always looking for ways to streamline my cooking without sacrificing flavor. While these Air Fryer Carrot Fries are best enjoyed fresh, you can definitely make them ahead or store leftovers to enjoy later – though they lose a little crispness, they’re still delicious!
| Method | Container | Duration | Reheating Tip |
|---|---|---|---|
| Refrigerator | Airtight container | 3-4 days | Air fryer (350°F for 5-7 min) or toaster oven |
| Freezer | Freezer-safe bag/container | Up to 1 month | Thaw completely, then air fry as above |
| Make-Ahead | Pre-cut carrots, dry spice mix | Carrots 2 days in advance, spice mix indefinitely | Toss and air fry just before serving for best crispness. |
To maintain some of that lovely crispiness when reheating, your air fryer truly is your best friend. A quick 5-7 minutes at 350°F will bring them back to a delightful, warm state, much better than a microwave would. If you don’t have an air fryer, a toaster oven or even a regular oven set to 375°F (190°C) for 10-15 minutes will work, just keep an eye on them. You want them hot and somewhat crisp, not dried out.
When preparing ahead for a party, I often prep my carrots and make my Parmesan spice mix a day in advance. Store the cut carrots in an airtight container in the fridge, and the spice mix in a small bag or jar at room temperature. Then, just before serving, it’s a quick toss and into the air fryer. This saves precious time and ensures you get those perfectly crispy, spicy, garlic parmesan carrot fries every time!
Variations & Easy Swaps
What I love about cooking, whether it’s a grand French dinner or simple airfryer recipes easy enough for anyone, is the space for creativity. These Air Fryer Carrot Fries are a fantastic canvas for various flavor profiles and dietary needs!
| Variation | Key Change | Best For | Difficulty Impact |
|---|---|---|---|
| Sweet and Spicy | Add a pinch of cinnamon and a drizzle of maple syrup | Those who enjoy a touch of sweetness with their heat, reminiscent of Moroccan tagines. | No change |
| Dairy-Free | Substitute Parmesan with nutritional yeast | Individuals with dairy intolerances or those following a vegan diet. | No change |
| Herby Lemon-Zest | Add fresh thyme/rosemary and lemon zest | A bright, aromatic twist for a Mediterranean or French-inspired side. | Slight increase for fresh herbs prep. |
Sweet and Spicy Carrot Fries
For a flavor profile that transports me back to my mother’s kitchen in Morocco, try adding a tiny pinch of cinnamon or even ras el hanout to the Parmesan mixture. After air frying, drizzle a touch of maple syrup or honey over the hot fries. The cinnamon enhances the carrot’s natural sweetness, while the subtle spice blend adds warmth and depth, providing a delightful counterpoint to the red pepper flakes. This variation is especially good as a festive side dish.
Dairy-Free Carrot Fries
If dairy isn’t an option, fear not! You can easily make these carrot fries vegan and dairy-free. Simply substitute the grated Parmesan with an equal amount of nutritional yeast. Nutritional yeast provides a remarkably cheesy, umami flavor that will still give you that savory satisfaction without the dairy. The texture might be slightly less ‘crusty’ but the flavor is fantastic and still a healthy twist on classic fries.
Herby Lemon-Zest Carrot Fries
For a brighter, more aromatic take, inspired by my culinary training in French kitchens, add about 1/2 teaspoon of finely chopped fresh thyme or rosemary and the zest of half a lemon to the olive oil and garlic mixture. The herbs impart an earthy, fragrant note, and the lemon zest adds a zesty brightness that lifts the entire dish. This variation pairs beautifully with roasted chicken or a light fish and is a wonderful way to use fresh herbs from my favorite NYC farmers markets.
Can I make Air Fryer Carrot Fries without an air fryer?
Absolutely! If you don’t have an air fryer, you can easily bake these crispy, spicy, garlic parmesan carrot fries in a regular oven. Preheat your oven to 400°F (200°C) and arrange the coated carrot strips in a single layer on a baking sheet lined with parchment paper. Bake for 20-30 minutes, flipping them halfway through, until they are tender-crisp and nicely caramelized. The texture will be slightly different from air-fried, but still incredibly delicious and a wonderful, healthy alternative to traditional fries.
What’s the best way to get truly crispy carrot fries?
For truly crispy carrot fries, there are a few golden rules I live by. First, ensure your carrots are completely dry after washing them; excess moisture leads to steaming, not crisping. Second, don’t overcrowd the air fryer basket or baking sheet. Air circulation is paramount for achieving that perfect crunch, so cook in batches if necessary. Finally, shaking the basket (or flipping on a baking sheet) halfway through cooking ensures even exposure to heat, allowing all sides to become delightfully golden and crisp. It’s a trick I learned that applies to many airfryer recipes easy or complex.
Can I use other root vegetables for this recipe?
Yes, you can certainly experiment with other root vegetables using the same method for these easy airfryer recipes. Sweet potatoes and parsnips are fantastic alternatives, offering different flavor profiles. Sweet potatoes will be softer and sweeter, while parsnips have a slightly spicier, earthy taste. Just be mindful of their differing moisture content and density, as this might slightly alter their optimal cooking times. Always aim for uniform cuts for even crisping.
How can I make these carrot fries spicier?
If you’re a fan of heat like I am, there are several ways to amp up the spice in these garlic parmesan carrot fries! You can increase the amount of crushed red pepper flakes in the Parmesan mixture to 1/2 teaspoon or even 1 teaspoon depending on your preference. Another option is to add a pinch of cayenne pepper or a dash of your favorite hot sauce to the olive oil mixture. For an intense heat, a tiny bit of finely minced fresh jalapeño or serrano pepper added to the oil would also work wonders. Just be sure to balance it with the creamy sriracha dip!
What are the nutritional benefits of Air Fryer Carrot Fries?
These Air Fryer Carrot Fries offer several nutritional benefits, making them a much healthier alternative to traditional fried snacks. Carrots are an excellent source of beta-carotene, which the body converts to Vitamin A, crucial for vision and immune function. They also provide dietary fiber, potassium, and antioxidants. By air frying, we use significantly less oil than deep-frying, reducing the fat and calorie content while still achieving a satisfying crunch. It’s a smart and delicious way to get your daily dose of vegetables, particularly when you’re looking for easy airfryer recipes that are also nutritious.
Share Your Version!
I hope you’ve enjoyed creating these crispy, spicy, garlic parmesan Air Fryer Carrot Fries as much as I do! There’s nothing more rewarding than seeing my recipes come to life in your kitchens. Please, don’t be shy – I would absolutely love to hear about your experience. How did you serve them? Did you try any of the variations? What dips did you pair them with?
Leave a star rating and comment below to let me and other home cooks know how they turned out for you. And if you capture a snapshot, share your beautiful creations on Instagram or Pinterest and tag @cookingwithemy. I adore seeing your culinary adventures! Did you manage to get that perfect crispiness, or did you make an extra special creamy sriracha dip? Tell me all about it!
From my NYC kitchen to yours — I hope this recipe brings as much warmth to your table as it does to mine. — emy 🧡
Love This Recipe? Save It to Pinterest!
If you enjoyed this Air Fryer Carrot Fries recipe, don’t let it get lost in your browser tabs! 😄 Pin it now so you can find it again anytime — and explore hundreds more tried-and-tested recipes waiting for you on my Pinterest boards.
👉 Follow emy on Pinterest @chefrecipes2
📌 Pin this recipe · 🔁 Re-pin your favorites · 💬 Tag me when you make it — I love seeing your creations!
Air Fryer Carrot Fries
Description
Crispy, spicy, garlic parmesan carrot fries with creamy sriracha dip.
Ingredients
- 3–4 (150-180g) Carrots
- 1 Tbsp (16g) Olive Oil*
- 1 clove Garlic, crushed
- 2 Tbsp (15g) Reduced Fat Grated Parmesan
- 1/4 tsp Crushed Red Pepper, optional
- 1 pinch Freshly Cracked Black Pepper, optional
Instructions
- Add the crushed garlic to the olive and stir well. (To crush the garlic, peel and chop a clove. Then sprinkle a bit of kosher salt on top, press the flat of your knife down firmly, and drag the garlic across the cutting board. This should create a thick paste.)
- Wash and dry the carrots. Remove the tops and cut them in half. Then cut each half in two to create flat surfaces. You should be able to cut 3 strips from the larger end and 2 strips from the smaller end.
- Toss the carrot fries in the olive oil and garlic mixture.
- Mix the parmesan with the red and black pepper. Sprinkle half the mixture over the coated carrot fries. Toss and repeat with the remaining parmesan mixture.
- Add the carrot fries to an air fryer basket or on a baking sheet in an even layer.
- Air fry at 350 for 16-20 minutes, shaking halfway through for crispier carrot fries. (If you're baking, bake for a similar time and temp.)
- Top with freshly chopped parsley or parsley flakes and dig in!