Table of Contents: Your Guide to Perfect Shrimp Fried Rice
The 20-Minute Weeknight Hero: Our Ultimate Easy Shrimp Fried Rice Recipe
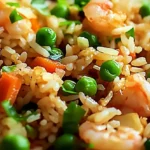
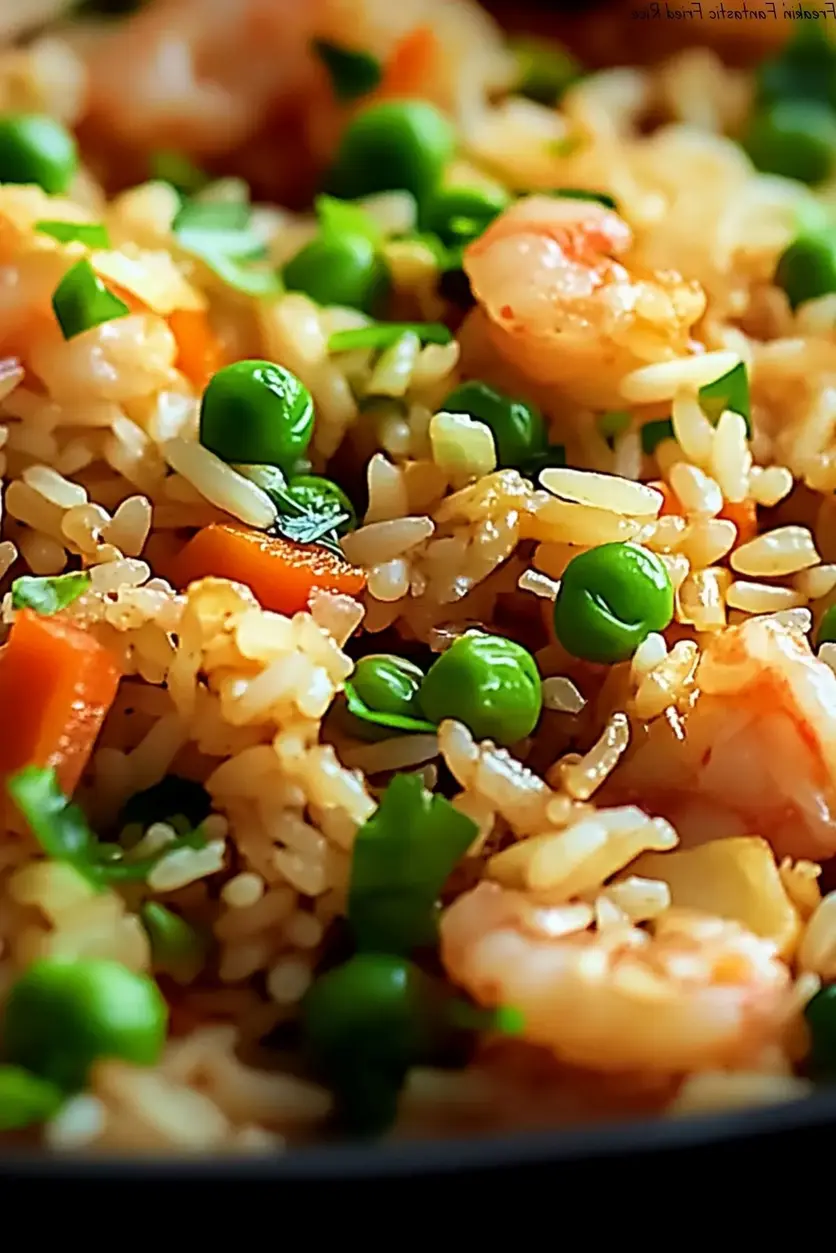
Skip the delivery wait and expensive prices. This easy shrimp fried rice recipe delivers authentic, sizzling Chinese takeout flavor faster than you can say “wok hei,” all from the comfort of your kitchen.

| Prep Time | Cook Time | Total Time | Servings | Difficulty |
|---|---|---|---|---|
| 10 minutes | 10 minutes | 20 minutes | 4 people | Easy |
Why This Easy Shrimp Fried Rice Recipe Beats Calling for Takeout
Let’s be honest: we all have those nights. You’re tired, hungry, and the thought of a complicated dinner recipe makes you want to reach for the takeout menu. But what if you could have something better—fresher, healthier, and more flavorful—in the same amount of time it takes for delivery to arrive? That’s the magic of this easy shrimp fried rice.
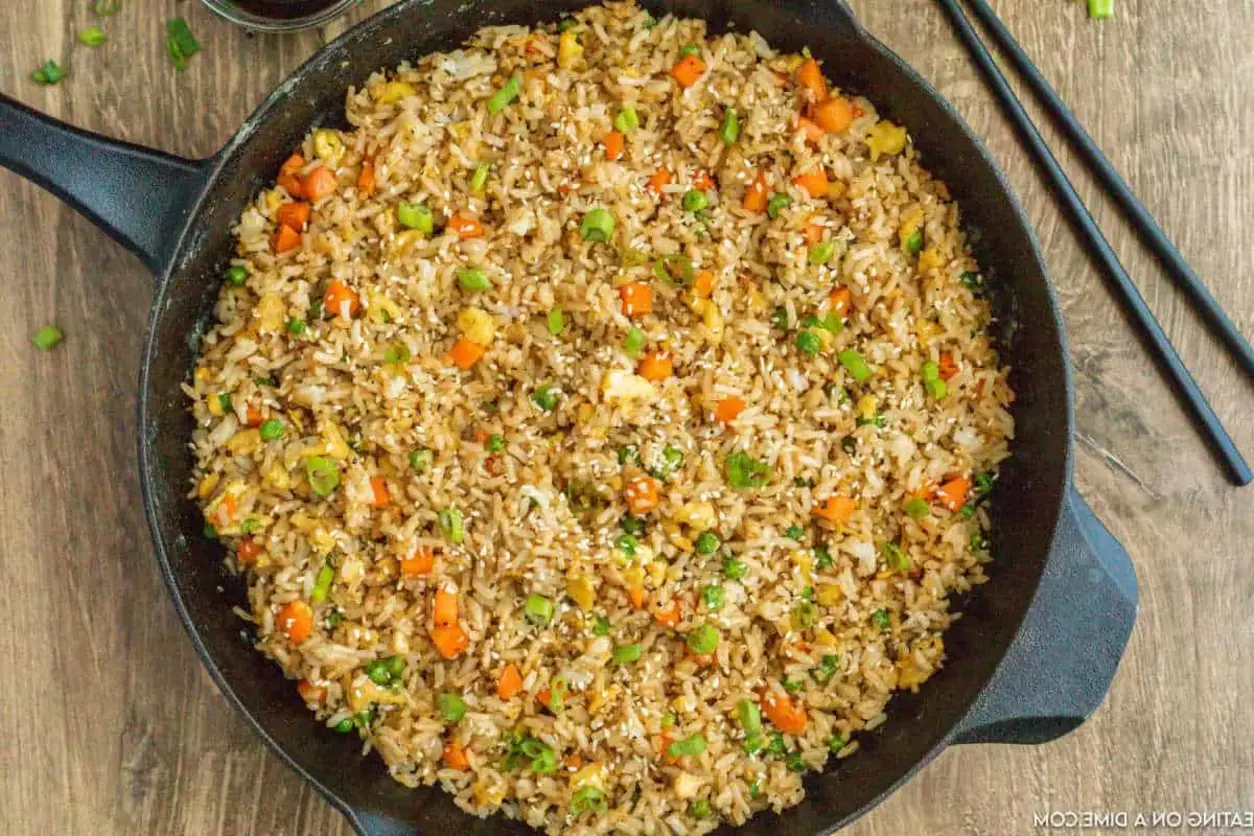
Here at Cooking With Emy, we believe weeknight dinners shouldn’t be a compromise. This isn’t just a stir-fry; it’s a masterclass in efficiency and flavor. We’re taking plump, juicy shrimp, fluffy day-old rice, and a symphony of aromatics, and transforming them into a complete, satisfying meal in one pan. The sizzle of the wok, the aroma of garlic and ginger filling your kitchen, and the vibrant colors of peas and carrots coming together is a cooking experience that a cardboard takeout box simply can’t match.
This recipe is engineered for success. We’ll guide you through every crucial step, from properly seasoning your shrimp to achieving that coveted separate, slightly chewy grain in your rice. By the end of this post, you’ll not only have a fantastic dinner on the table but also the confidence to make fried rice a regular in your rotation.
The Secret to “Wok Hei” (Breath of the Wok) in Your Home Kitchen
What makes restaurant fried rice so good? It’s often attributed to “wok hei,” the elusive, smoky essence imparted by a blazing-hot commercial wok. While we can’t perfectly replicate that at home without a jet engine, we can get incredibly close with a few key techniques that make this the best easy shrimp fried rice recipe.
First, the rice. Using day-old, chilled rice is non-negotiable. Freshly cooked rice is too moist and steamy, leading to a gummy, clumpy mess. Chilled rice has dried out slightly, allowing each grain to stay distinct and fry perfectly. Second, high heat and minimal crowding. We cook in batches—shrimp first, then aromatics, then eggs—to ensure everything sears instead of steams. Third, the seasoning balance. We use tamari or coconut aminos for a rich, umami depth without overpowering saltiness, and a finish of toasted sesame oil for that nutty fragrance that ties the whole dish together.
This recipe respects these principles while keeping everything accessible and simple. You don’t need special equipment—a large skillet works fine if you don’t have a wok. You’re using common vegetables and pantry staples. The result is a dish that feels special, tastes complex, but is built on straightforward, foolproof steps.
Ingredient Deep Dive: Building Blocks of Flavor
Great fried rice starts with great ingredients. Each component here plays a specific role. Let’s break down the shopping list and why each item matters.
| Ingredient | Quantity | Notes & Why It Matters |
|---|---|---|
| Large Shrimp | 1 pound | Peeled and deveined. Size 21/25 or 26/30 are perfect. They cook quickly and stay juicy. |
| Kosher Salt & White Pepper | 1 tsp salt, ½ tsp pepper | White pepper is traditional for its earthy heat that blends seamlessly. Black pepper works in a pinch. |
| Avocado Oil | 3 tablespoons | High smoke point is crucial for stir-frying. Canola or peanut oil are excellent substitutes. |
| Onion, Scallions, Garlic, Ginger | ½ onion, 2 scallions, 2 cloves garlic, ½ tsp ginger | The aromatic foundation. Fresh ginger and garlic are key—avoid powdered here. |
| Frozen Peas and Carrots | 1 ½ cups | The classic veggie mix. Frozen is ideal—they’re pre-chopped, quick-cooking, and retain bright color. |
| Large Eggs | 3 | Beaten. They add protein and rich, pillowy texture. |
| Cooked White Rice | 4 cups | DAY-OLD AND CHILLED. This is the most important ingredient tip for perfect texture. |
| Tamari or Coconut Aminos | 3 tablespoons | Tamari is a richer, less salty soy sauce. Coconut aminos are a great gluten-free, slightly sweeter alternative. |
| Toasted Sesame Oil | 2 teaspoons | Always add at the end. Its flavor is delicate and diminishes with high heat. |
Step-by-Step Instructions for Foolproof Fried Rice
Follow these steps in order for the best results. Have all your ingredients chopped, measured, and within arm’s reach of the stove (this is called “mise en place”). Once you start cooking, it goes fast!
Step 1: Season the Shrimp
In a medium bowl, toss the peeled and deveined shrimp with 1 teaspoon of kosher salt and ½ teaspoon of ground white pepper. This simple seasoning layer is the first building block of flavor. Set the shrimp aside while you prep your other ingredients.
Step 2: Sear the Shrimp to Perfection
Heat a large wok or heavy-bottomed skillet over medium-high heat. Add 2 tablespoons of avocado oil and heat until it shimmers. Add the shrimp in a single layer—don’t crowd the pan. Cook for 1-2 minutes until the bottoms turn pink and opaque, then flip and cook for another 30 seconds. The shrimp should be just cooked through (they will curl into a loose “C” shape). Immediately transfer them to a clean plate. They will finish cooking later when added back to the rice.
Step 3: Sauté the Aromatics
In the same wok (no need to clean it), you’ll have delicious shrimp fond. Add the diced onion and the white parts of the sliced scallions. Stir-fry for about 1 minute until they begin to soften. Add the minced garlic and ginger and cook for just 30 seconds more until incredibly fragrant. Be careful not to burn the garlic.
Step 4: Cook the Veggies and Eggs
Add the frozen peas and carrots directly to the wok (no need to thaw). Stir-fry for 1-2 minutes until they are heated through and vibrant. Next, push the veggie mixture to one side of the wok. Pour the beaten eggs into the empty space. Let them set for a few seconds, then quickly scramble them with your spatula until they are softly set and still slightly moist.
Step 5: The Grand Finale – Stir-Fry Everything Together
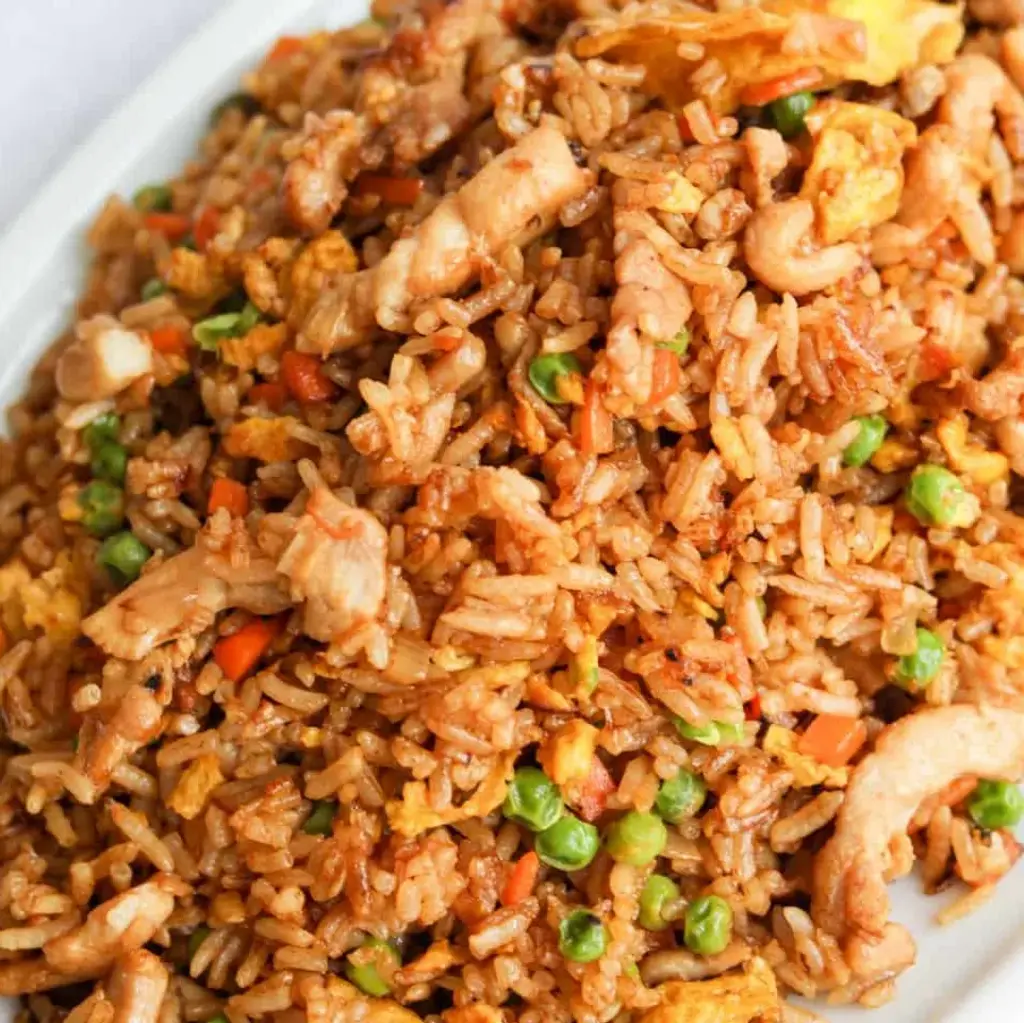
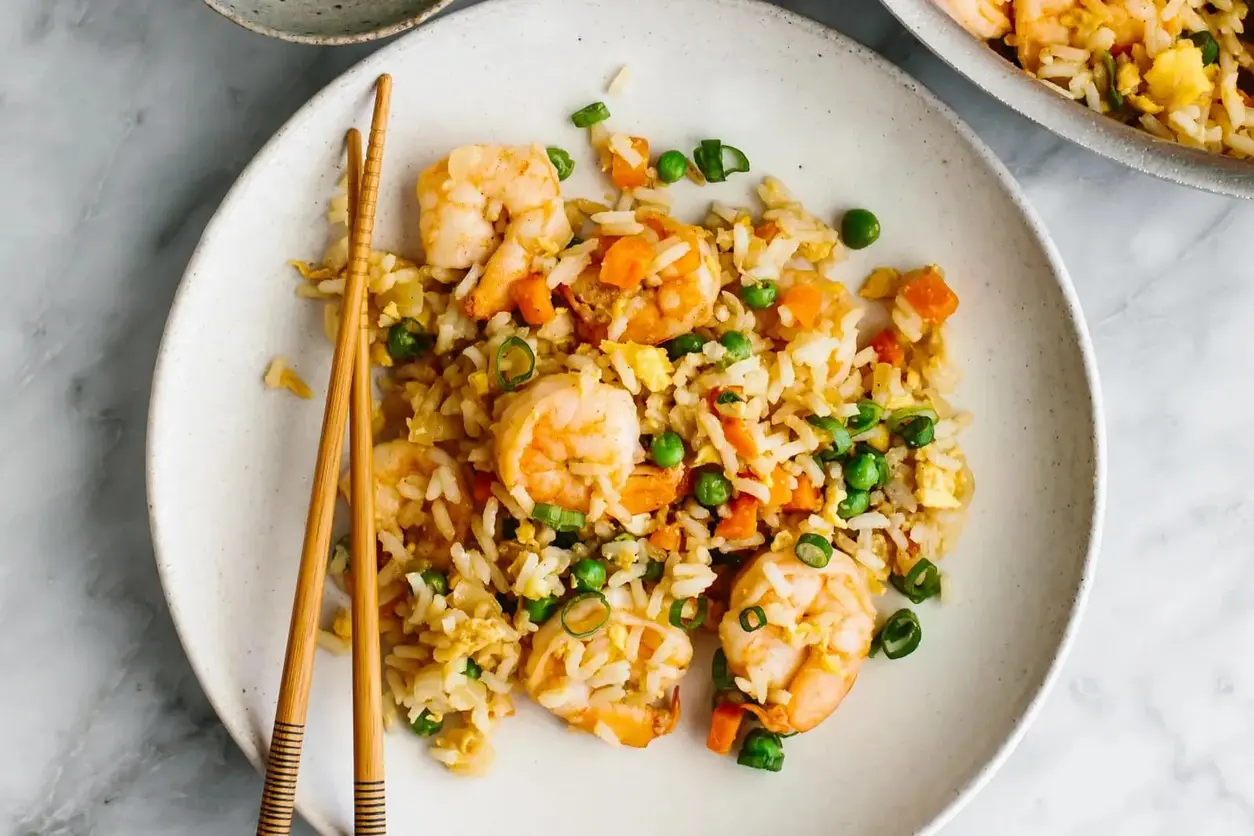
Now, add the cold, day-old rice to the wok. Use your spatula to break up any clumps. Pour the tamari (or coconut aminos) and toasted sesame oil over the rice. Increase the heat to high and stir-fry vigorously for 2-3 minutes, ensuring the sauce is evenly distributed and the rice is heated through. Finally, add the cooked shrimp and any accumulated juices back into the wok. Toss everything together for one final minute to reheat the shrimp. Taste and adjust seasoning if needed.
Step 6: Garnish and Serve
Remove the wok from the heat. Stir in most of the green parts of the scallions, reserving some for a fresh garnish on top. Your easy shrimp fried rice is ready to serve immediately while it’s hot and sizzling.
Serving Suggestions & Perfect Pairings
This easy shrimp fried rice is a complete meal on its own, packed with protein, veggies, and carbs. But if you want to turn it into a full Asian-inspired feast, here are our favorite pairings:
As a Main Course: Serve it straight from the wok into deep bowls. The simplicity is beautiful.
With Classic Sides: Pair it with a light, refreshing cucumber salad dressed with rice vinegar, or some simple steamed broccoli or bok choy drizzled with oyster sauce.
For a Takeout-Style Spread: Serve alongside our Easy Egg Drop Soup to start, and finish with some store-bought or homemade fortune cookies.
Garnish Galore: Set out small bowls of extra tamari, chili crisp or sriracha for heat, and chopped fresh cilantro or extra sliced scallions so everyone can customize their bowl.
Storage, Reheating, & Meal Prep Guide
Fried rice is famously great as leftovers, making it a fantastic meal prep option.
Storage: Allow the fried rice to cool completely, then transfer it to an airtight container. It will keep in the refrigerator for up to 3-4 days.
Reheating for Best Results: The microwave can make rice soggy. For best texture, reheat in a wok or skillet over medium heat with a tiny splash of water or broth. Cover for a minute to steam, then uncover and stir-fry until hot. This restores the texture far better. You can also spread it on a baking sheet and reheat in a 350°F oven for 10-15 minutes.
Can You Freeze It? Yes, but with a caveat. The texture of the shrimp and rice will soften slightly upon thawing. Store in a freezer-safe container for up to 2 months. Thaw overnight in the fridge before reheating on the stovetop.
Creative Variations on Your New Favorite Recipe
Once you’ve mastered this base recipe, the wok is your oyster! Here are some delicious twists to try:
| Variation | Ingredient Swap/Add-In | Flavor Profile |
|---|---|---|
| Pork & Shrimp Fried Rice | Add ½ cup diced Chinese char siu pork or cooked ham with the shrimp. | Savory, smoky, and extra hearty. |
| Spicy Kimchi Fried Rice | Add 1 cup chopped kimchi (with juice) when you add the rice. Omit the peas and carrots. | Tangy, fermented, and spicy. Top with a fried egg. |
| Pineapple “Hawaiian” Fried Rice | Add 1 cup fresh diced pineapple with the veggies. Use spam or ham instead of shrimp. | Sweet, salty, and tropical. |
| Vegetarian Delight | Omit shrimp. Add 1 cup cubed extra-firm tofu (pressed and pan-fried) and 1 cup chopped mushrooms. | Earthy, umami-rich, and completely plant-based. |
| Thai Basil Fried Rice | Stir in 1 cup fresh Thai basil leaves at the very end. Use a splash of fish sauce in the seasoning. | Anise-like fragrance with a savory depth. |
Your Top Easy Shrimp Fried Rice Questions, Answered
Can I use freshly cooked rice?
We strongly advise against it. Fresh rice is too moist and will result in mushy, clumpy fried rice. If you’re in a bind, cook your rice with slightly less water, spread it on a baking sheet, and chill it in the freezer for 30 minutes to dry it out.
What’s the best rice to use?
Long-grain white rice like Jasmine or Basmati is ideal. They have less starch than short-grain rice (like sushi rice), so the grains stay separate and fluffy after frying.
I don’t have a wok. What can I use?
A large, heavy-bottomed skillet (like cast iron or stainless steel) is a perfect substitute. The key is having a pan with plenty of surface area so you can stir-fry without overcrowding.
Can I use different vegetables?
Absolutely! Bell peppers, corn, broccoli florets, or snap peas are all great. Just chop them small so they cook quickly. For harder veggies like broccoli, blanch them briefly in boiling water first.
Is white pepper really necessary?
It provides an authentic, earthy flavor, but black pepper is a fine substitute. The visual difference (no black specks) is the main reason white pepper is used in many Asian cuisines.
My fried rice is soggy. What went wrong?
The two most common culprits are 1) using fresh, warm rice, or 2) overcrowding the wok/pan, which lowers the temperature and causes ingredients to steam instead of fry. Cook in batches if needed.
Can I make this gluten-free?
Yes! Ensure your tamari is gluten-free (most are) or use coconut aminos. Also, double-check that your toasted sesame oil and other sauces are certified GF.
How do I get more of that “restaurant” smoky flavor?
Two tricks: First, make sure your wok or pan is screaming hot before adding ingredients. Second, try the “longyau” technique: swirl a thin layer of oil in the hot wok until it smokes lightly, then pour it out and add fresh oil for cooking. This seasons the pan and adds a subtle wok aroma.
Love This Recipe? Save It For Later!
Pin this image to your Dinner Ideas or Asian Recipes board on Pinterest so you always have this easy shrimp fried rice recipe handy.
Follow us on Pinterest @cookingwithemy for more quick and delicious dinner inspiration!
[PINTEREST-EMBED: Image of the finished Shrimp Fried Rice in a bowl, garnished with scallions, with text overlay “Easy 20-Minute Shrimp Fried Rice – cookingwithemy.com”]
Shrimp Fried Rice (Easy 20-Min Recipe)
Description
This shrimp fried rice highlights the best of Chinese takeout in a quick 20 minute recipe. Aka – it’s the best stir-fry recipe for dinner! Watch the video below to see how I make it in my kitchen.
Ingredients
Scale
- 1 pound large shrimp (peeled and deveined)
- 1 teaspoon kosher salt
- ½ teaspoon ground white pepper
- 3 tablespoons avocado oil
- ½ small onion (diced)
- 2 green scallions (thinly sliced (white and green parts separated))
- 2 garlic cloves (minced)
- ½ teaspoon minced ginger
- 1 ½ cup frozen peas and carrots
- 3 large eggs (beaten)
- 4 cups cooked white rice
- 3 tablespoons tamari soy sauce or coconut aminos
- 2 teaspoons toasted sesame oil
Instructions
- Season the shrimp. In a medium bowl, season the shrimp with salt and pepper. Set aside.
- Sear the shrimp. Heat 2 tablespoons of avocado oil in a large wok or skillet over medium-high heat until shimmering. Add the shrimp in a single layer and cook for 1 to 2 minutes, then flip and cook for another 30 seconds, until just cooked through and opaque. Remove to a plate.
- Add the aromatics. Add the onion, white parts of the green onion, garlic, and ginger, and stir-fry for a minute, until fragrant.
- Cook the veggies. Add the frozen carrots and peas (no need to thaw), and stir-fry for 1 to 2 minutes until warmed through.
- Cook the eggs. Move the veggies to the side, then add the beaten eggs and quickly scramble them until they’re pillowy soft.
- Stir-fry the rice, seasoning, and shrimp. Add the rice, shrimp, soy sauce, and sesame oil, and stir-fry until the rice and shrimp are warmed through, about 2 minutes.
- Garnish with green onions. Stir in the green parts of the green onions before serving.