Table of Contents
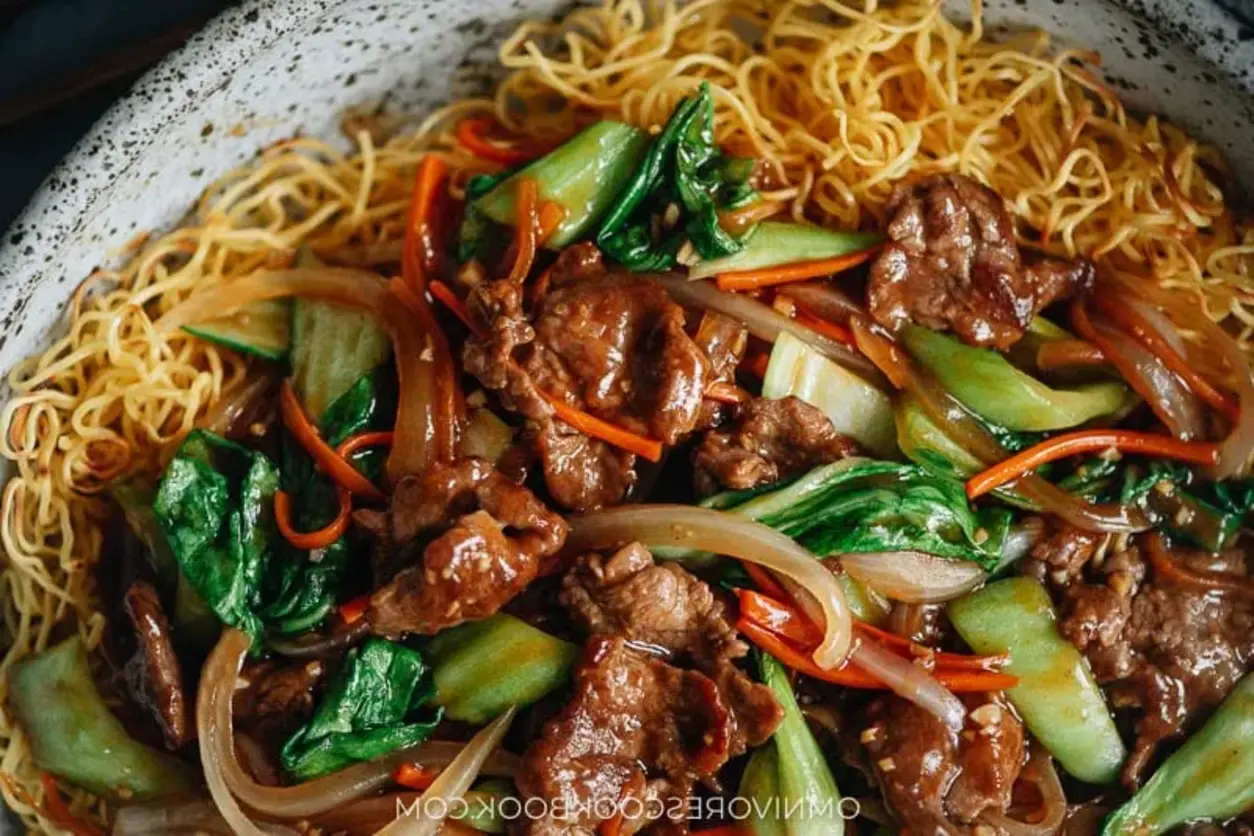
The Ultimate 10-Minute Pan Fried Noodles: Your New Weeknight Hero
| Prep Time | Cook Time | Total Time | Servings | Difficulty |
|---|---|---|---|---|
| 5 minutes | 5 minutes | 10 minutes | 2 people | Easy |
The 10-Minute Dinner Revolution
We hear it all the time: “I’m too busy to cook.” At Cooking With Emy, we believe a delicious, satisfying homemade meal should never be a luxury reserved for weekends. That’s why we’re obsessed with our 10-Minute Pan Fried Noodles. This isn’t just another stir-fry; it’s a culinary shortcut that delivers restaurant-quality flavor in less time than it takes to decide on and wait for delivery. Using a single pan and a handful of pantry staples, you can transform simple ingredients into a dish that’s caramelized, savory, and utterly addictive. Forget the soggy, greasy takeout containers. This recipe is about reclaiming your weeknights with a meal that’s faster, fresher, and far more rewarding.

The magic lies in the technique and the balance of the sauce. By using fresh noodles and a blisteringly hot pan, we achieve that coveted wok hei—the “breath of the wok”—that smoky, charred essence that defines great stir-fries. Whether you’re a college student, a busy parent, or just someone who values their time, this recipe is designed to fit seamlessly into your life. It’s customizable, forgiving, and proof that incredible food doesn’t require hours of effort.
Why This Recipe Beats Takeout Every Single Time
Let’s be honest: ordering in is tempting. But after you make these pan fried noodles once, you’ll discover compelling reasons to make them your go-to.
Control & Quality: You control the sodium, the oil, and the freshness of every component. No more mysterious sauces or questionable vegetable quality.
The Speed Factor: From fridge to plate in a flat 10 minutes. Most delivery apps can’t even promise that.
Endless Customization: This recipe is a blueprint. Swap in your favorite protein, use up leftover veggies, or adjust the sauce to be sweeter, spicier, or gluten-free. It’s your canvas.
The “Wok Hei” at Home: The high-heat sear in a single pan creates layers of flavor—sweet caramelization from the sauce, aroma from the garlic and green onion, and a subtle smokiness—that simply cannot be replicated in a steamed takeout container.
Ingredients & Smart Swaps
Simplicity is the soul of this dish. Here’s what you’ll need, along with our trusted substitution guide.
| Ingredient | Quantity | Purpose & Best Substitutes |
|---|---|---|
| Fresh Noodles | 10.5 oz (300g) | The star. Provides chew and soaks up sauce. Sub: Dried ramen or udon (cook first), or even spaghetti in a real pinch. |
| Neutral Oil | 2 tbsp | For high-heat frying. Sub: Avocado, vegetable, or canola oil. |
| Garlic, minced | 2 cloves | Aromatic base. Sub: 1/2 tsp garlic powder added with the sauce. |
| Green Onions | 2 stalks | Freshness and bite. Separate white/light green parts (for cooking) from dark green (for garnish). |
| Bean Sprouts | 1 cup | Crunch and freshness. Sub: Shredded cabbage, snap peas, matchstick carrots, or bell peppers. |
| Soy Sauce | 2 tbsp | Salty, umami backbone. Sub: Tamari (gluten-free) or coconut aminos (less salty). |
| Dark Soy Sauce | 1/2 tbsp | For color and a deeper, molasses-like flavor. Sub: Add 1/4 tsp more regular soy sauce + a pinch of brown sugar. |
| Sugar | 1/2 tbsp | Balances saltiness and aids caramelization. Sub: Honey or maple syrup. |
| White Pepper | 1/8 tsp | Distinctive, earthy heat. Sub: Freshly ground black pepper. |
| Water | 1 tbsp | Helps distribute the sauce evenly. |
| Sesame Oil | 1 tsp | Finishing aroma. Do not cook with it—add at the end. |
Step-by-Step Instructions for Perfect Noodles
Follow these steps closely for foolproof, caramelized noodles every time.
- Mise en Place (Get Everything Ready): This is non-negotiable for a 10-minute recipe. Mince your garlic, cut your green onions, and measure your bean sprouts. In a small bowl, whisk together the soy sauces, sugar, white pepper, and water until the sugar dissolves. This is your flavor powerhouse.
- Prepare the Noodles: Cook your fresh noodles according to package directions—this usually means a quick 1-2 minute boil. Immediately drain and rinse under cold water to stop the cooking and remove excess starch. Toss with a tiny bit of oil to prevent sticking. This step ensures they fry up instead of steam.
- Heat the Pan: Place your largest skillet, wok, or non-stick pan over medium-high heat. Let it get properly hot for about 60 seconds. Add the neutral oil and swirl to coat.
- Build the Aromatics: Add the minced garlic and the white/light green parts of the green onions. Stir-fry for just 30-60 seconds until incredibly fragrant. Do not let the garlic brown.
- Fry the Noodles: Add the drained, cooled noodles to the pan. Use tongs or two spatulas to toss and combine them with the aromatics for about 1 minute. Spread them out in an even layer and let them sit for 30 seconds to develop a slight sear.
- Add the Sauce & Caramelize: Pour your pre-mixed sauce evenly over the noodles. Toss continuously for 2-3 minutes. You’ll see the magic happen: the sauce will reduce, thicken, and coat every strand, turning a rich, glossy brown. This is the caramelization you’re after.
- Finish with Veggies & Aroma: Add the bean sprouts and the reserved dark green parts of the green onions. Toss for one final minute, just until the bean sprouts are slightly wilted but still crunchy. Remove the pan from the heat.
- The Final Touch: Drizzle the teaspoon of sesame oil over the top and give one final toss. This preserves its delicate nutty aroma.
- Serve Immediately: Plate your noodles right away while they’re hot, sizzling, and at their peak texture.
Serving & Pairing Ideas
These noodles are a complete meal on their own, but here’s how to build a fantastic spread.
As a Main Course: For a heartier meal, add protein directly to the stir-fry. Add thinly sliced chicken breast, shrimp, or flank steak to the hot oil before the aromatics. Cook through, remove, then add back with the noodles. For tofu, use extra-firm, press it, cube it, and pan-fry until crispy before starting.
Perfect Pairings: Serve alongside a simple cucumber salad dressed with rice vinegar, a quick egg drop soup, or steamed dumplings (store-bought is perfectly fine!). For a beverage, a crisp lager, iced green tea, or sparkling water with lime complements the savory flavors beautifully.
Storage & Reheating Like a Pro
While best fresh, leftovers can still be delicious with the right technique.
Storage: Let the noodles cool completely, then store in an airtight container in the refrigerator for up to 3 days.
Reheating (The Right Way): The microwave will make them soggy. Reheat them in a non-stick skillet over medium heat with a tiny splash of water. Cover for a minute to steam, then uncover and stir-fry to re-crisp the edges. This restores their texture remarkably well.
Creative Variations to Keep It Exciting
This recipe is your playground. Here are some of our favorite twists:
- Spicy Sichuan: Add 1-2 tsp chili crisp or a few dried red chilies with the garlic.
- Thai-Inspired: Swap the sauce for 2 tbsp oyster sauce, 1 tbsp fish sauce, and a squeeze of lime juice. Garnish with cilantro and crushed peanuts.
- Teriyaki Glaze: Use a store-bought or homemade teriyaki sauce instead of the soy sauce blend. Add broccoli florets.
- Vegetable Lover’s: Use a mix of bell peppers, mushrooms, carrots, and baby corn. Add them right after the garlic to stir-fry before adding the noodles.
- Breakfast Noodles: Top the finished noodles with a perfectly fried runny egg. The yolk becomes a rich, additional sauce.
Frequently Asked Questions (FAQ)
Can I use dried noodles instead of fresh?
Absolutely. Cook dried noodles (like ramen or linguine) according to package directions until al dente. Drain, rinse with cold water, and proceed with the recipe. The texture will be slightly different but still excellent.
My noodles are sticking to the pan! What did I do wrong?
This usually means the pan wasn’t hot enough before adding the oil/noodles, or the noodles were too wet. Ensure your pan is preheated, your noodles are well-drained and cooled, and you’re using enough oil. A non-stick pan is very forgiving for this recipe.
How can I make this gluten-free?
Use 100% buckwheat soba noodles or rice noodles, and substitute the soy sauces with tamari (ensure it’s gluten-free) or coconut aminos.
Can I make this recipe vegan?
It’s almost there! Just ensure your noodles don’t contain egg, and the recipe is naturally vegan. Double-check your dark soy sauce, as some brands may contain traces of animal products.
What’s the best type of pan to use?
A carbon steel wok is ideal, but a large cast-iron skillet, stainless steel skillet, or non-stick frying pan will work perfectly. The key is having a large surface area for evaporation and searing.
Can I add other vegetables?
Yes! Add harder vegetables like carrots or broccoli with the garlic to cook longer. Add softer veggies like spinach or baby bok choy at the very end, just to wilt.
Why rinse the noodles in cold water?
Rinsing stops the cooking process, removes excess surface starch that causes clumping, and cools them down so they fry instead of steam when they hit the hot pan.
Can I double or triple this recipe?
You can, but don’t overcrowd the pan. Cook in batches if necessary. Overcrowding will steam the noodles instead of frying them, leading to a mushy texture.
Love This Recipe? Save It For Later!
Did these 10-Minute Pan Fried Noodles save your weeknight? Pin this image to your Quick Dinner Ideas or Asian Recipes board on Pinterest so you always have it handy!
Follow us on Pinterest @cookingwithemy for more fast, flavorful recipes.
Recipe developed and tested by The Kitchen Team at Cooking With Emy. We love seeing your creations! Tag us on social media with #CookingWithEmy.
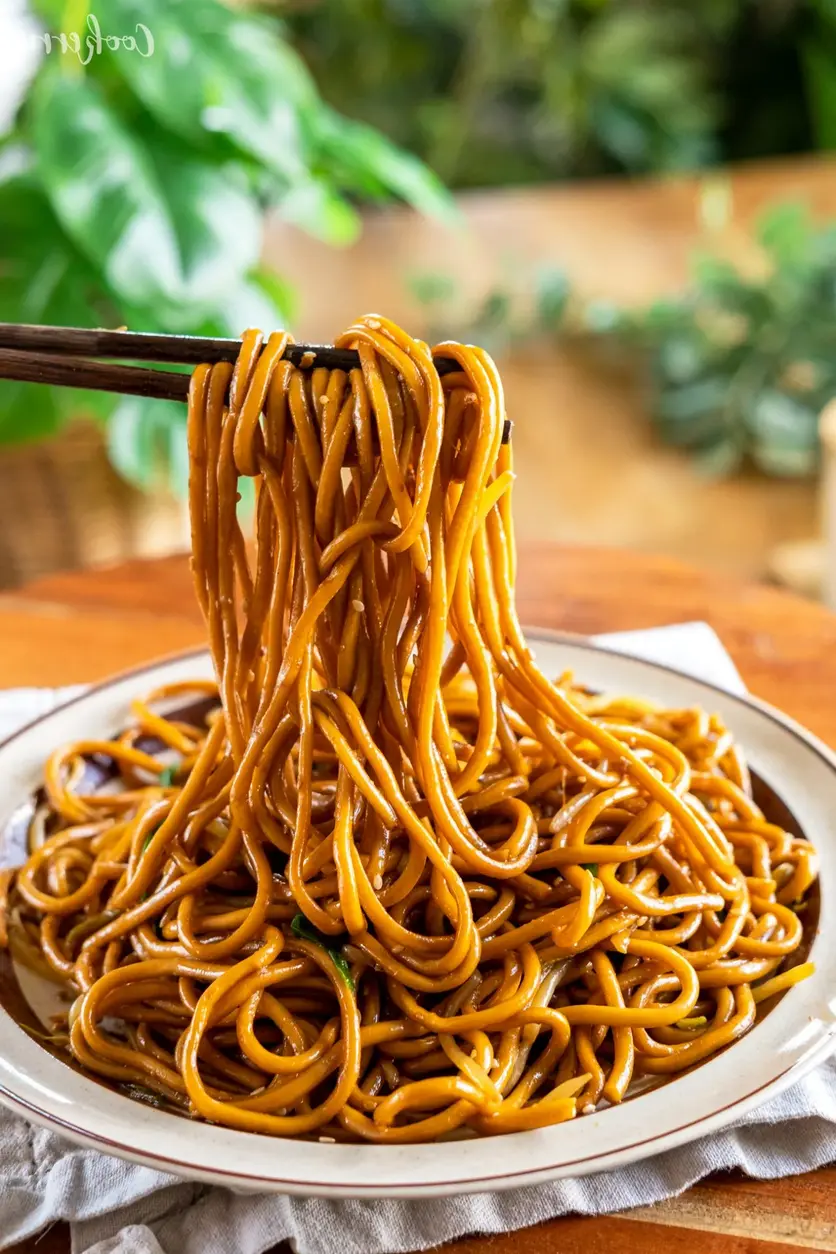
10-Minute Pan Fried Noodles
Description
These quick & easy pan fried noodles are made with a handful of ingredients in a single pan, making it the perfect meal to add to your dinner rotation. Tossed in a savory sauce and aromatic vegetables, these stir-fried noodles are packed with flavor and can easily be customized to your liking.
Ingredients
Scale
- 300 g fresh noodles (see notes below)
- 2 tbsp neutral oil
- 2 cloves garlic (minced)
- 2 green onions (cut lengthwise in 2″ pieces)
- 1 cup bean sprouts (or other vegetables)
- 1 tsp sesame oil (to finish)
- 2 tbsp soy sauce
- 1/2 tbsp dark soy sauce
- 1/2 tbsp sugar
- 1/8 tsp white pepper (or black pepper)
- 1 tbsp water
Instructions
- Combine the sauce ingredients in a bowl and prepare the noodles as per package instructions. Rinse the noodles under cold water, drain, and set aside.
- Heat oil in a wok or a large pan over medium heat. Add garlic and white parts of green onion and cook until fragrant. Add noodles and mix to combine.
- Pour in the sauce and cook for about 2-3 minutes until the noodles are caramelized. Add bean sprouts, reserved green onion, and sesame oil to finish. Enjoy!