“`html
Table of Contents
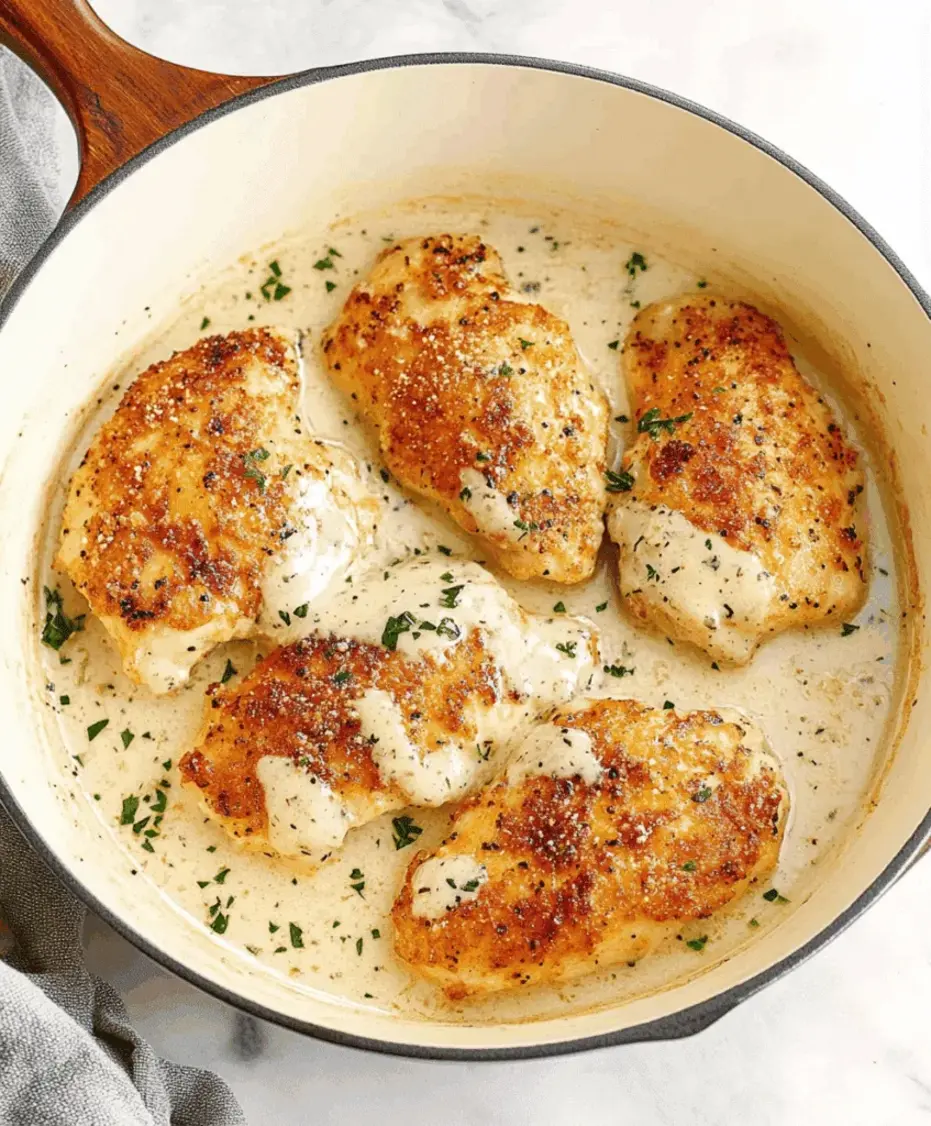
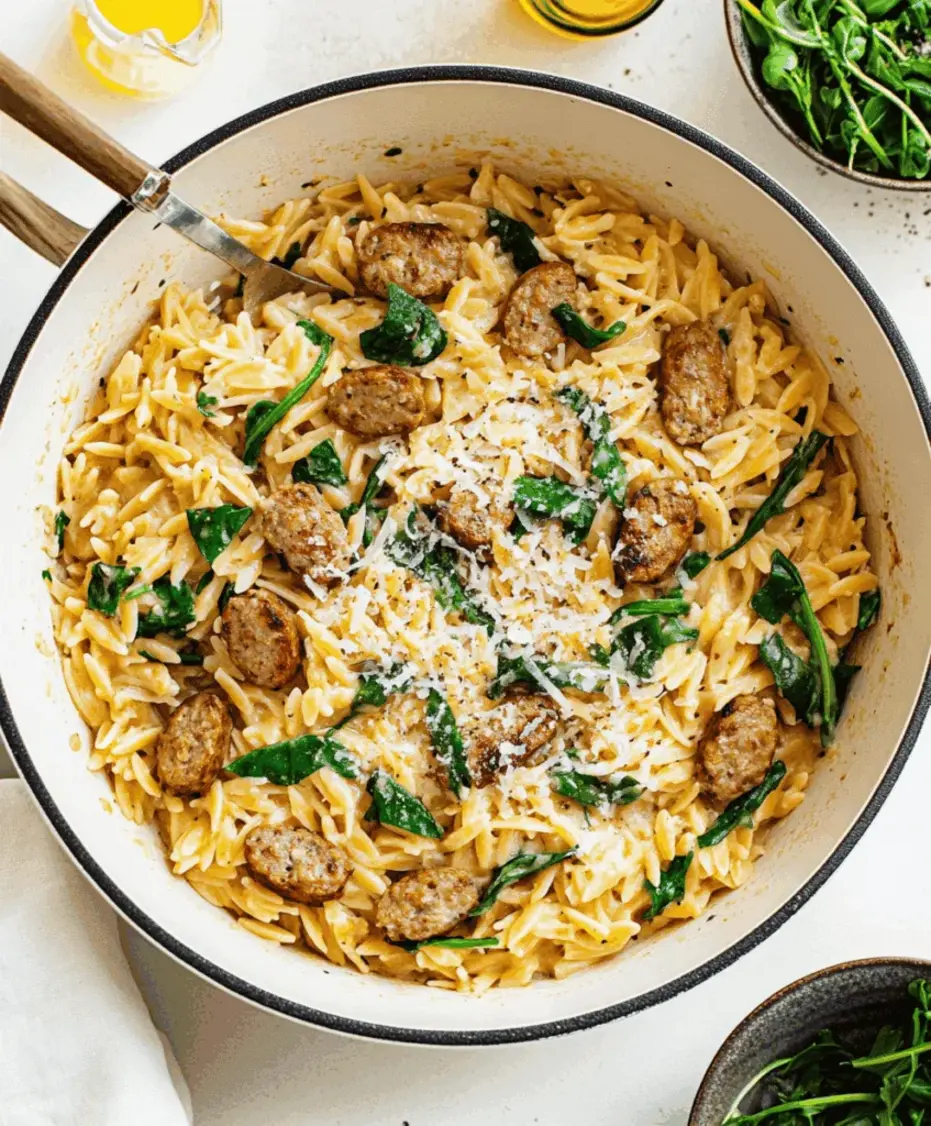
Creamy Chicken Sausage Orzo Recipe
Introduction
Did you know that according to a recent survey, over 70% of home cooks prioritize recipes that are both comforting and can be prepared in under 45 minutes? If you’re part of that majority searching for the perfect balance of flavor, convenience, and nutrition, this creamy chicken sausage orzo recipe is your culinary answer. It’s the one-pan wonder that transforms simple ingredients into a luxurious, family-friendly feast without the fuss of multiple pots and a mountain of dishes. Imagine juicy, savory chicken sausage mingling with tender, rice-shaped orzo pasta, all enveloped in a velvety, herb-infused sauce. This dish is more than just a meal; it’s a weeknight lifesaver that delivers restaurant-quality taste from your own kitchen. Whether you’re juggling a hectic schedule, meal prepping for the week ahead, or simply craving something deeply satisfying, this recipe is engineered for success. Let’s dive into how you can create this creamy, protein-packed masterpiece that’s guaranteed to earn a permanent spot in your dinner rotation.
Ingredients List
Gather these simple ingredients for a symphony of flavor and texture. Each component plays a crucial role in building the dish’s comforting profile.
- 1 tbsp Olive Oil: For sautéing; provides a fruity, aromatic base. Substitution: Avocado oil or butter.
- 12 oz (340g) Chicken Sausage: Seek out Italian-style or smoked varieties for a burst of savory, garlicky flavor. Look for casings that promise a satisfying, juicy snap when browned. Substitution: Pork sausage, turkey sausage, or plant-based sausage links.
- 1 medium Yellow Onion, diced: The sweet, foundational aroma that builds depth.
- 3-4 cloves Garlic, minced: For that essential pungent, warm kick.
- 1 ½ cups (300g) Uncooked Orzo Pasta: Not to be confused with rice, this small pasta has a unique ability to absorb flavors while maintaining a delightfully tender, slightly chewy bite.
- 2 ½ cups (600ml) Chicken Broth: The liquid gold that cooks the orzo and forms the sauce’s backbone. Use low-sodium to control salt levels. Substitution: Vegetable broth.
- 1 cup (240ml) Heavy Cream: The star for lush, indulgent creaminess. It should be at room temperature to prevent curdling. Substitution: See “Healthier Alternatives” below.
- 1 cup (100g) Freshly Grated Parmesan Cheese: Adds a salty, nutty, umami-rich dimension and helps thicken the sauce. Pre-grated cheese contains anti-caking agents that can make the sauce grainy.
- 2 cups (about 60g) Fresh Spinach: Wilted in at the end for a pop of color and a subtle, earthy freshness.
- 1 tsp Dried Italian Seasoning: A convenient blend of oregano, basil, thyme, and rosemary.
- ½ tsp Crushed Red Pepper Flakes (optional): For a gentle, warming heat.
- Salt and Freshly Ground Black Pepper: To taste. Season in layers!
- Fresh Parsley or Basil, chopped (for garnish): Adds a final touch of bright, herbal aroma and visual appeal.
Timing
10 minutes
25 minutes
35 minutes
At just 35 minutes total, this recipe is a true weeknight warrior. Compared to the average one-pan pasta dish which can take 45-50 minutes, this creamy chicken sausage orzo shaves off precious time without sacrificing an ounce of flavor. The efficiency comes from the orzo’s small size, which cooks faster than traditional pasta shapes, and the use of pre-cooked chicken sausage that simply needs browning. You’ll have a complete, gourmet-feeling meal on the table in the time it takes to order and wait for delivery.
Step-by-Step Instructions
Step 1: Prepare Your Ingredients
Success in a fast-paced recipe like this hinges on mise en place (having everything in its place). Dice your onion, mince the garlic, grate the Parmesan cheese, and measure out your broth, cream, and orzo. Slice the chicken sausage into ½-inch thick rounds. This upfront organization makes the cooking process seamless and stress-free.
Step 2: Brown the Chicken Sausage
Heat the olive oil in a large, deep skillet or Dutch oven over medium-high heat. Add the sausage slices in a single layer, resisting the urge to overcrowd the pan. Let them cook undisturbed for 2-3 minutes per side until they develop a beautiful, caramelized brown crust. This step isn’t just about cooking the sausage; it’s about building fond—those delicious browned bits stuck to the pan—which will become the foundation of your sauce’s flavor. Remove the sausage to a plate and set aside.
Step 3: Sauté the Aromatics
In the same pan with the sausage drippings and fond, reduce the heat to medium. Add the diced onion and cook for 4-5 minutes until softened and translucent. Stir in the minced garlic, dried Italian seasoning, and red pepper flakes (if using), and cook for just 30-60 seconds until fragrant. Be vigilant here—burnt garlic tastes bitter. You should be greeted by an incredible aroma that tells you the flavor base is ready.
Step 4: Toast the Orzo
Add the uncooked orzo to the pan with the aromatics. Stir constantly for 1-2 minutes, allowing the orzo to toast slightly and become lightly golden. This crucial step adds a subtle nutty flavor to the pasta and helps it maintain a better texture during cooking, preventing it from becoming mushy.
Step 5: Simmer to Perfection
Pour in the chicken broth, using a wooden spoon to gently scrape up all the glorious browned fond from the bottom of the pan. This is where the magic happens—that fond dissolves into the broth, creating a deeply flavorful cooking liquid. Bring the mixture to a lively simmer, then reduce the heat to medium-low. Cover the pan and let it cook for 10-12 minutes, stirring occasionally, until the orzo is al dente and has absorbed most of the liquid.
Step 6: Finish with Cream and Cheese
Reduce the heat to low. Stir in the room-temperature heavy cream and the browned sausage (along with any accumulated juices). Let it warm through for 2 minutes. Remove the pan from the heat entirely. Now, stir in the freshly grated Parmesan cheese until it melts smoothly into the sauce. Finally, fold in the fresh spinach—the residual heat will wilt it perfectly. Season generously with salt and black pepper to taste. The sauce will continue to thicken as it sits for a minute.
Nutritional Information
Estimated per serving (based on 4 servings):
- Calories: ~650 kcal
- Protein: ~32g (Excellent source, primarily from sausage and cheese)
- Carbohydrates: ~55g (Mainly from orzo, providing energy)
- Fat: ~35g (A mix from cream, cheese, and sausage; contributes to satiety and creaminess)
- Fiber: ~3g (From spinach and orzo)
- Note: Nutritional values are estimates. For precise dietary tracking, use a calculator with your specific brand ingredients.
Healthier Alternatives
You can easily lighten up this creamy chicken sausage orzo without sacrificing its comforting soul:
- For the Cream: Substitute full-fat heavy cream with half-and-half, whole milk, or even a combination of 2% milk and a tablespoon of cream cheese or a roux (1 tbsp butter + 1 tbsp flour cooked before adding broth) for thickness. For a dairy-free version, use full-fat canned coconut milk—it provides a similar richness.
- For the Sausage: Opt for chicken or turkey sausage labeled “low-fat” or “lean.” Always check the sodium content.
- For the Cheese: Use a reduced-fat Parmesan or a sharp, flavorful cheese like Pecorino Romano—you can use less because its flavor is more potent.
- Boost Veggies: Double the spinach or add other quick-cooking veggies like diced zucchini, sun-dried tomatoes, or mushrooms with the onions.
Serving Suggestions
This dish is a complete meal in a bowl, but it pairs beautifully with:
- A Crisp Salad: A simple arugula salad with a lemon vinaigrette cuts through the richness.
- Garlic Bread: For the ultimate comfort food experience, use it to scoop up every last bit of sauce.
- Steamed Vegetables: Like broccoli or asparagus, for an extra nutrient boost.
- A Glass of Wine: A medium-bodied white like Chardonnay or a light red like Pinot Noir complements the creamy, savory flavors.
Garnish generously with fresh parsley or basil and an extra sprinkle of Parmesan right before serving.
Common Mistakes
- Overcrowding the Pan when Browning Sausage: This steams the sausage instead of searing it, preventing the formation of flavorful fond. Cook in batches if necessary.
- Using Pre-Grated Parmesan: It often contains cellulose, which can prevent smooth melting and create a grainy sauce. Take the extra minute to grate it fresh.