“`html
Table of Contents
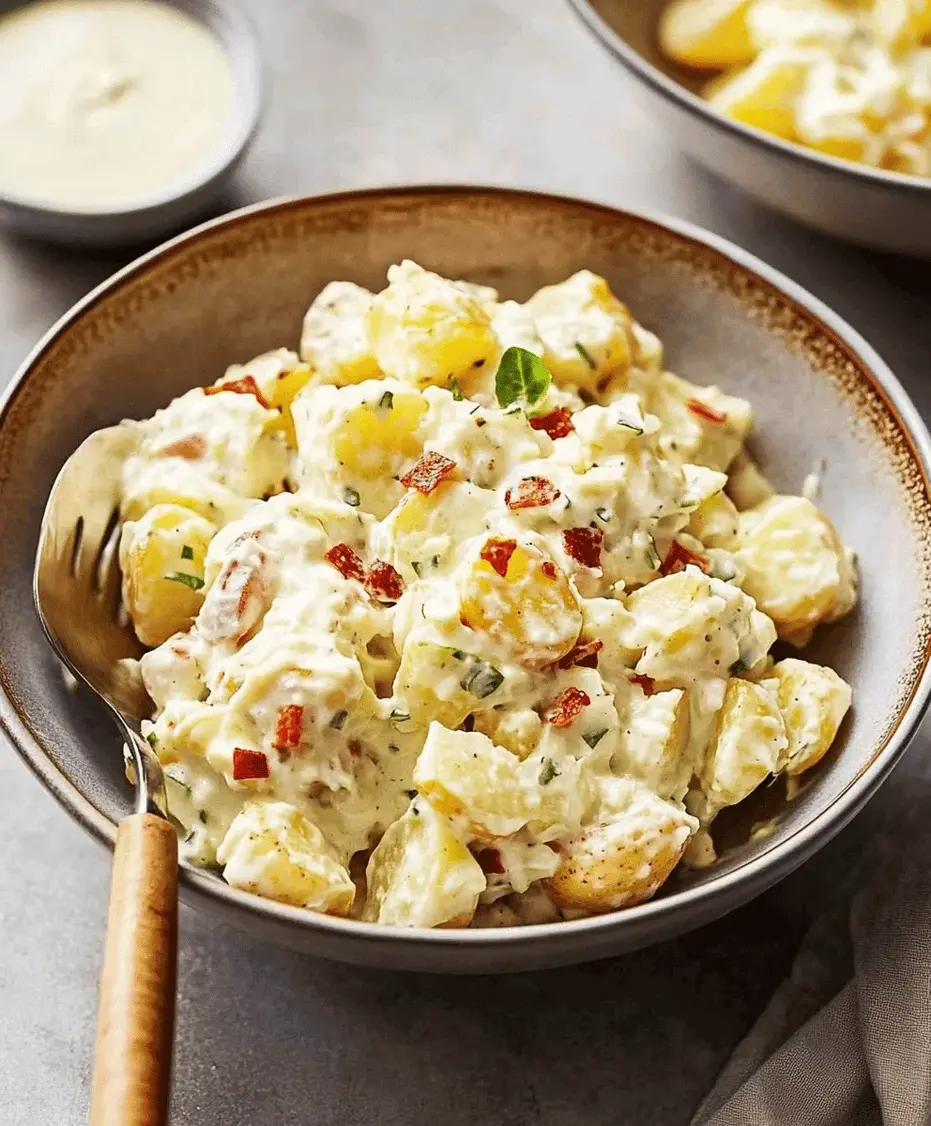
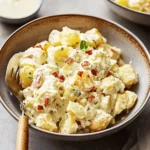
World’s Best Potato Salad Recipe
Introduction
Did you know that potato salad is the #1 most-searched side dish recipe in the United States during the summer months? With over 5 million Google searches annually, it’s clear that everyone is on a quest for the perfect version. Today, I’m sharing what I truly believe is the world’s best potato salad recipe. This isn’t just another bland, mayonnaise-heavy side. This is a symphony of textures and flavors, featuring creamy mayo, tangy mustard, and perfectly tender potatoes that hold their shape. It’s the ultimate crowd-pleaser, designed to be the star of your picnic blanket, the talk of your BBQ, and the dish that disappears first at any gathering. The secret lies in the balance and a few chef-approved techniques that elevate it from good to legendary.
Ingredients List
Gathering the right ingredients is the first step to potato salad perfection. Here’s what you’ll need for about 8 servings:
- Potatoes (3 lbs / 1.4 kg): Yukon Gold are ideal. They have a naturally buttery flavor and a waxy texture that holds up beautifully without becoming mushy. Substitution: Red potatoes are an excellent second choice.
- Mayonnaise (1 ¼ cups): Use full-fat, high-quality mayo for the richest, creamiest base. Substitution: For a tangier twist, substitute ½ cup of the mayo with full-fat sour cream or Greek yogurt.
- Dijon Mustard (3 tablespoons): This adds a complex, sharp tang that cuts through the richness. Substitution: Whole grain mustard for more texture, or yellow mustard for a classic American flavor.
- Celery (4 stalks, finely diced): Provides a crucial, refreshing crunch and a subtle earthy note.
- Red Onion (½ cup, finely diced): Soak in cold water for 10 minutes to mellow the sharp bite while keeping the vibrant color and flavor.
- Fresh Dill & Parsley (¼ cup each, chopped): The dill offers a bright, anise-like aroma, while parsley adds freshness. Don’t use dried here—fresh is non-negotiable.
- Hard-Boiled Eggs (4, chopped): Adds protein, richness, and a classic, comforting texture.
- Sweet Pickle Relish (3 tablespoons): The secret sweet-and-sour ingredient that brings all the flavors into harmony.
- Seasonings: 1 tsp celery seed, 1 tsp smoked paprika, ½ tsp garlic powder, salt and freshly ground black pepper to taste.
Timing
While the total time is nearly 3 hours, note that 2 hours of that is hands-off chilling, which is absolutely critical for flavor development. Most average recipes suggest a 30-minute chill, but that’s simply not enough for the ingredients to marry properly. This extra time is what separates a good potato salad from the world’s best potato salad.
Step-by-Step Instructions
Step 1: Prepare the Potatoes
Scrub the potatoes clean but do not peel them. The skin adds flavor, texture, and nutrients. Cut them into uniform, ¾-inch cubes. This size ensures even cooking. Place them in a large pot and cover with cold, well-salted water (like the sea!). Bring to a boil, then reduce to a gentle simmer. Cook for 12-15 minutes, or just until a fork can pierce a cube with slight resistance. You want them tender, not falling apart. Immediately drain and spread them in a single layer on a baking sheet to steam dry and cool slightly. This prevents a watery salad.
Step 2: Make the Dressing
While the potatoes cool, let’s build the flavor powerhouse. In a large mixing bowl, combine the mayonnaise, Dijon mustard, sweet pickle relish, celery seed, smoked paprika, and garlic powder. Whisk vigorously until completely smooth and emulsified. Taste it now—it should be boldly flavored, as it will mellow once mixed with the potatoes. Season with a pinch of salt and pepper.
Step 3: Combine and Chill
To the bowl with the dressing, add the cooled potatoes, diced celery, drained red onion, chopped hard-boiled eggs, and fresh herbs. Using a large rubber spatula, fold everything together gently but thoroughly. Be careful not to smash the potatoes. Once combined, cover the bowl tightly with plastic wrap and refrigerate for at least 2 hours, preferably overnight. This chilling time is non-negotiable—it allows the potatoes to fully absorb the dressing and the flavors to deepen profoundly.
Nutritional Information
(Per serving, approximately 1 cup)
- Calories: 320 kcal
- Carbohydrates: 25g
- Protein: 6g
- Fat: 22g (Saturated: 3.5g)
- Fiber: 3g
- Sugar: 4g
- Sodium: 380mg
Healthier Alternatives
You can lighten this recipe without sacrificing the creamy, tangy soul of the dish:
- Mayo Swap: Replace half the mayonnaise with plain, full-fat Greek yogurt. It maintains creaminess and adds a protein boost and probiotic benefits.
- Potato Power: Use a mix of Yukon Gold and sweet potatoes for added vitamins and a lower glycemic index.
- Reduced Sodium: Use low-sodium mustard and omit added salt, relying on the celery seed and herbs for flavor.
- Oil-Based Dressing: For a mayo-free version, create a vinaigrette with olive oil, apple cider vinegar, mustard, and herbs. The texture will be different but still delicious.
Serving Suggestions
This potato salad is incredibly versatile. Serve it chilled straight from the fridge. It’s the perfect partner for grilled classics like burgers, hot dogs, barbecue chicken, or ribs. For a fuller spread, pair it with baked beans, coleslaw, and corn on the cob. For a non-traditional twist, use it as a hearty topping for a green salad or serve it alongside a quiche for brunch.
Common Mistakes
- Overcooking the Potatoes: This leads to a mushy, glue-like texture. Cook just until fork-tender.
- Skipping the Chill Time: Serving it warm or lukewarm means the flavors haven’t melded. Patience is key.
- Underseasoning the Dressing: Season the dressing aggressively before adding potatoes, as they will dilute the flavor.
- Using Dried Herbs: They lack the vibrant, fresh flavor needed. Always use fresh dill and parsley.
Storing Tips
Store leftovers in an airtight container in the refrigerator. Properly stored, it will stay fresh and delicious for 3-4 days. The flavors often taste even better on the second day. Do not freeze potato salad, as the mayonnaise will separate and the vegetables will become watery and limp upon thawing.

Conclusion
This world’s best potato salad recipe is more than just a side dish; it’s a guaranteed hit that brings people together. With its perfect balance of creamy, tangy, crunchy, and fresh elements, it’s a recipe you’ll return to for every summer event and family gathering. The extra care in selecting ingredients and allowing proper chill time makes all the difference. I encourage you to make it, share it, and make it your own. Don’t forget to pin this recipe and tag @spicemingle on social media when you serve up your masterpiece—we love seeing your creations!
Made this recipe? Rate it 5 stars below and leave a comment telling us about your picnic or BBQ!
FAQs
***Can I make this potato salad ahead of time?***
Absolutely! In fact, I highly recommend it. Making it a day in advance allows the flavors to develop fully, resulting in a more delicious salad.
***My potato salad turned out watery. What happened?***
This is usually caused by not cooling the potatoes properly after boiling. Ensure you drain them well and spread them out to steam dry and cool completely before mixing with the dressing.
***What’s the best way to hard-boil eggs for this recipe?***
Place eggs in a saucepan, cover with cold water by 1 inch. Bring to a full boil, then cover, remove from heat, and let sit for 12 minutes. Transfer to an ice bath to stop cooking. This method yields perfect, easy-to-peel eggs with no green ring.
***I don’t like raw onion. What can I use instead?***
Soaking the diced red onion in cold water for 10 minutes drastically mellows its bite. If you still want to avoid it, try using 2-3 finely sliced green onions (scallions) for a milder flavor.
***Is there a vegan version of this recipe?***
Yes! Use a high-quality vegan mayonnaise, omit the eggs, and add ½ cup of finely chopped dill pickles for extra texture. Consider adding a tablespoon of nutritional yeast to the dressing for a slightly “eggy” umami flavor.
World’s Best Potato Salad Recipe
Description
Discover the world’s best potato salad recipe featuring creamy mayo, tangy mustard, and tender potatoes. Perfect for picnics, BBQs, and gatherings.
Ingredients
- 2pounds Yukon Gold potatoes, peeled and diced
- ¾ cupmayonnaise
- 2 tablespoonsyellow mustard
- 2 tablespoonsapple cider vinegar
- 1 teaspoonsugar
- ½ teaspoonsalt
- ½ teaspoonblack pepper
- 3large hard-boiled eggs, chopped
- ½ cupcelery, diced
- ¼ cupred onion, diced
- 2 tablespoonssweet pickle relish
- 1 tablespoonfresh dill, chopped (optional)
Instructions
Notes
For extra flavor, refrigerate overnight.
Substitute Greek yogurt for a lighter version.
Adjust seasoning to taste.
Nutrition
- Calories: 320
- Sugar: 3g
“`