Tiktok Cheddar Bay Biscuit Chicken Cobbler Recipe

“`html

Tiktok Cheddar Bay Biscuit Chicken Cobbler Recipe

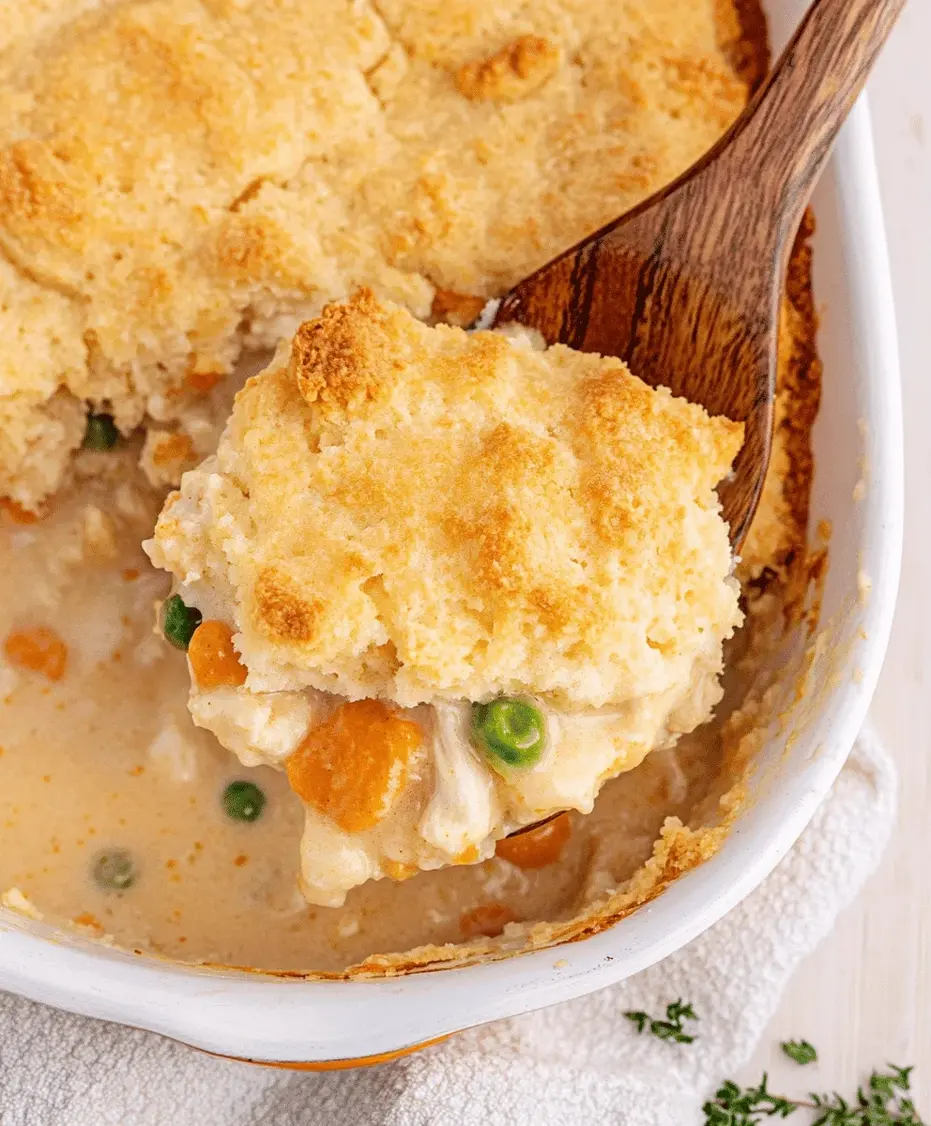
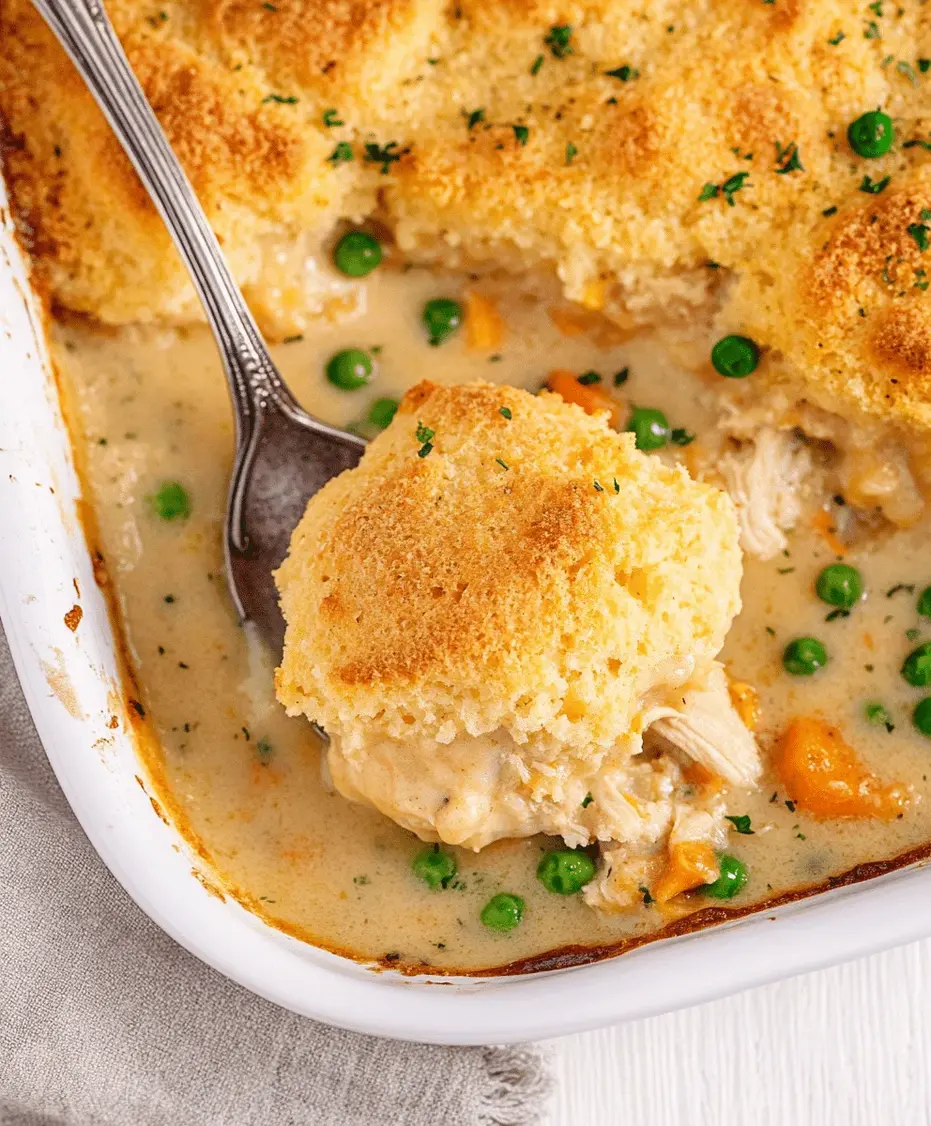
Discover the Irresistible TikTok Cheddar Bay Biscuit Chicken Cobbler Recipe!

Are you looking for a recipe that’s trending all over TikTok for a reason? With over 500 million views for related “chicken cobbler” content and countless happy cooks sharing their creations, it’s clear the internet is craving comfort food that’s both familiar and exciting. Enter the Tiktok Cheddar Bay Biscuit Chicken Cobbler recipe! This isn’t just any chicken cobbler; it’s an elevated, exceptionally comforting dish that marries tender, savory chicken with a rich, creamy filling, all crowned with fluffy, cheesy, buttery biscuits that taste just like your favorite Red Lobster treat. It’s the ultimate comfort food fusion, perfect for a weeknight family dinner or a cozy weekend gathering. Get ready to bookmark this one – it’s about to become a staple in your recipe rotation!

Ingredients and What Makes Them Sing

The magic of this dish lies in the harmonious blend of simple, high-quality ingredients that come together to create something truly special. Each component plays a vital role in delivering that irresistible combination of savory, cheesy, and comforting flavors.

For the Creamy Chicken Filling:

  • 2 cups cooked chicken, shredded or diced: The heart of our cobbler! Use rotisserie chicken for ultimate ease and flavor, or boil and shred chicken breasts. The tender texture is key.
  • 1 cup frozen mixed vegetables (peas, carrots, corn, green beans): These add pops of sweetness, color, and a delightful bite, bringing freshness to the rich filling.
  • 1/2 cup chopped onion: For that essential aromatic base that builds savory depth. Yellow or white onion works best for a mild sweetness.
  • 4 tablespoons unsalted butter: The foundation of our creamy sauce, lending richness and a velvety mouthfeel.
  • 1/2 cup all-purpose flour: To thicken our sauce into a luscious, coating consistency that hugs the chicken and vegetables.
  • 2 cups chicken broth: Provides moisture and a savory backbone to the sauce. Low-sodium is great for controlling saltiness.
  • 1 cup milk (whole or 2%): Adds creaminess and a subtle dairy richness.
  • 1 teaspoon dried thyme: Earthy and aromatic, thyme is a classic pairing with chicken and adds a rustic charm.
  • 1/2 teaspoon black pepper: For a subtle warmth and to enhance other flavors.
  • 1/4 teaspoon salt (or to taste): Balances all the flavors. Remember to adjust based on the saltiness of your chicken and broth.

For the Cheddar Bay Biscuits:

  • 2 cups all-purpose flour: The structure of our delightful biscuits.
  • 1 tablespoon baking powder: Essential for that light, fluffy rise.
  • 1/2 teaspoon salt: Balances the sweetness and enhances the cheese flavor.
  • 4 tablespoons cold unsalted butter, cut into small cubes: Crucial for flaky biscuits. The cold butter melts in the oven to create steam pockets.
  • 1 cup shredded sharp cheddar cheese: The star of the show! Use good quality cheddar for maximum flavor.
  • 3/4 cup milk (whole or 2%): To bring the dough together.
  • 1/4 cup melted butter (for brushing): This is the secret to that signature moist, buttery, and slightly crispy biscuit top.
  • 1/4 teaspoon garlic powder (optional, for extra flavor): A little goes a long way to amp up that Red Lobster vibe.

Timing is Everything

This recipe is designed for maximum flavor with reasonable effort. While it looks and tastes gourmet, it’s surprisingly achievable on a weeknight!

Prep Time: 20 minutes
Cook Time: 30-35 minutes
Total Time: 50-55 minutes

Compared to the average chicken cobbler which can take upwards of an hour for prep and another hour for baking, this TikTok rendition offers a quicker route to comfort, making it ideal for busy schedules.

TikTok Cheddar Bay Biscuit Chicken Cobbler ready to serve.

Step-by-Step Assembly Guide

Let’s bring this deliciousness to life! Follow these simple steps for a cobbler that will have everyone asking for seconds.

Step 1: Prep Your Chicken

If you haven’t already, prepare your cooked chicken. Shred it or dice it into bite-sized pieces. If using store-bought rotisserie chicken, this step is a breeze!

Step 2: Create the Creamy Filling

In a large pot or Dutch oven over medium heat, melt the 4 tablespoons of butter. Add the chopped onion and sauté until softened, about 3-5 minutes. Whisk in the flour and cook for 1 minute, stirring constantly, to create a roux. Gradually whisk in the chicken broth and milk until smooth. Bring to a simmer, stirring, until the sauce begins to thicken. Stir in the shredded chicken, frozen vegetables, thyme, pepper, and salt. Cook for a few minutes until heated through. Taste and adjust seasonings if needed. This is your flavor base – make it delicious!

Step 3: Prepare the Biscuit Dough

While the filling is simmering, prepare your biscuit dough. In a medium bowl, whisk together the flour, baking powder, and salt. Cut in the cold butter using a pastry blender, your fingertips, or two forks until the mixture resembles coarse crumbs with some pea-sized pieces of butter remaining. Stir in the shredded cheddar cheese and optional garlic powder. Make a well in the center and pour in the milk. Stir with a fork just until the dough comes together. Do not overmix – slightly lumpy dough is good!

Step 4: Assemble the Cobbler

Pour the hot chicken filling into a greased 9×13 inch baking dish. Spoon dollops of the biscuit dough evenly over the top of the chicken filling. You don’t need to cover it completely; spaces are good for steam to escape and make lovely biscuits. Some people like to make smaller, more biscuit-like rounds, while others prefer to spread it a bit more like a traditional cobbler topping. Either way, go for rustic beauty!

Step 5: Bake to Golden Perfection

Preheat your oven to 400°F (200°C). Bake the cobbler uncovered for 20-25 minutes, or until the biscuits are golden brown and cooked through, and the filling is bubbly around the edges. For an extra touch of Red Lobster magic, brush the tops of the hot biscuits with the melted butter immediately after removing them from the oven. Let it rest for a few minutes before serving.

Nutritional Highlights

While individual calorie and macro counts will vary based on exact ingredients and portion sizes, a typical serving (1/6th of the cobbler) of this TikTok Cheddar Bay Biscuit Chicken Cobbler is estimated to be around:

  • Calories: 450-600 kcal
  • Protein: 30-40g
  • Fat: 25-35g
  • Carbohydrates: 25-35g

Note: This is an approximation. Using leaner chicken, reduced-fat milk, and less butter will alter these numbers.

Healthier Alternatives and Flavor Boosts

Looking to make this dish even lighter or pack more flavor? Here are some ideas:

  • Leaner Protein: Swap some or all of the chicken for shredded turkey breast or even firm tofu for a vegetarian option.
  • More Veggies: Bulk up the filling with extra vegetables like broccoli florets, chopped celery, or even a can of drained low-sodium cream of mushroom soup for added flavor and nutrients.
  • Whole Wheat Biscuits: Substitute half of the all-purpose flour in the biscuit dough with whole wheat flour for added fiber.
  • Reduced Fat: Use skim milk and a light butter alternative or olive oil for sautéing if reducing fat intake.
  • Herb Power: Incorporate fresh herbs like parsley, chives, or dill into the biscuit dough or sprinkle over the top before serving for a burst of freshness.

Serving Suggestions

This chicken cobbler is a hearty, complete meal on its own. However, it pairs wonderfully with a crisp green salad, steamed asparagus, or a side of roasted Brussels sprouts. A dollop of sour cream or a drizzle of hot sauce can also add an extra dimension of flavor!

Common Mistakes to Avoid

  • Overmixing Biscuit Dough: This is a classic biscuit pitfall. Overmixing develops gluten, resulting in tough, dense biscuits instead of light and fluffy ones. Mix just until combined.
  • Using Warm Butter for Biscuits: Cold butter is essential for creating flaky layers. It melts in the oven, creating steam pockets that separate the dough.
  • Not Preheating the Oven: A properly preheated oven ensures even baking and that crucial lift for the biscuits.
  • Under-seasoning: Always taste and adjust the seasoning of your chicken filling before topping it with biscuits.

Storing Your Masterpiece

Leftovers can be stored in an airtight container in the refrigerator for up to 3 days. Reheat gently in the oven or microwave until warmed through. The biscuits may lose some of their crispness upon refrigeration, but the flavor will remain delicious!

Close-up of golden cheddar bay biscuits on top of chicken cobbler.

Frequently Asked Questions

***Can I make this ahead of time?***

You can prepare the chicken filling up to a day in advance and store it in the refrigerator. Prepare the biscuit dough just before baking for the best results.

***What kind of chicken should I use?***

Rotisserie chicken is highly recommended for its convenience and pre-seasoned flavor. You can also boil or bake chicken breasts or thighs and shred or dice them.

***Can I use dairy-free milk and butter?***

Yes, you can substitute plant-based milk (like almond or oat milk) and dairy-free butter substitutes. For the biscuits, ensure your dairy-free butter is cold and firm.

***How do I fix gummy biscuits?***

Gummy biscuits are usually a result of overmixing the dough or using too much liquid. Mix the biscuit dough minimally, just until it comes together, and be precise with your liquid measurements.

Print
clock clock iconcutlery cutlery iconflag flag iconfolder folder iconinstagram instagram iconpinterest pinterest iconfacebook facebook iconprint print iconsquares squares iconheart heart iconheart solid heart solid icon

Tiktok Cheddar Bay Biscuit Chicken Cobbler Recipe


  • Author: Chef Emy

Description

Discover the irresistible TikTok Cheddar Bay Biscuit Chicken Cobbler recipe! This savory, cheesy, and hearty dish combines tender chicken, rich cobbler filling, and buttery Red Lobster-style Cheddar Bay biscuits for the ultimate comfort meal.


Ingredients

Scale
  • 2 cupscooked shredded chicken
  • 1can (10.5 oz) cream of chicken soup
  • 1 cupchicken broth
  • ½ cupfrozen mixed vegetables
  • ½ cupshredded cheddar cheese
  • 1package Red Lobster Cheddar Bay Biscuit Mix
  • cupmilk (for the biscuit mix)
  • ¼ cupmelted butter
  • 1 tspgarlic powder

Instructions

    Notes

    Use rotisserie chicken for a quick option.
    Add a pinch of cayenne pepper to the biscuit mix for extra flavor.
    For a creamier filling, add a splash of heavy cream to the chicken mixture.

    Nutrition

    • Calories: 320
    • Sugar: 2g

    “`

    Fried Chicken Street Corn Tacos With Bacon And Jalapeno Lime Ranch Recipe

    “`html

    Fried Chicken Street Corn Tacos With Bacon And Jalapeno Lime Ranch Recipe

    Elevate Your Taco Night with Flavor-Packed Fried Chicken Tacos

    Are you tired of the same old taco Tuesday routine? Do you crave the thrill of a flavor explosion that dances on your palate? If you’re looking for a culinary adventure that combines the ultimate comfort of crispy fried chicken with the vibrant zest of street corn and a creamy, spicy kick, then these Fried Chicken Street Corn Tacos with Bacon and Jalapeño Lime Ranch are about to become your new obsession. This recipe isn’t just a meal; it’s an experience, a fiesta in every bite, designed to impress even the most discerning palates. We’re talking about a symphony of textures and tastes: the satisfying crunch of perfectly fried chicken, the sweet, smoky allure of charred corn, the salty crunch of bacon, and a cool, tangy ranch that ties it all together with a hint of jalapeño heat.

    The Symphony of Flavors: Ingredients You’ll Need

    To create these culinary masterpieces, we’ve carefully selected ingredients that sing in harmony. Each component plays a vital role in building the complex, yet beautifully balanced, flavor profile. Don’t be intimidated by the list; most of these are pantry staples or easily found at your local grocery store.

    For the Crispy Fried Chicken:

    • 2 lbs boneless, skinless chicken thighs or breasts: Thighs offer more moisture and flavor, while breasts are leaner. Cut into bite-sized pieces for even cooking and easy taco filling.
    • 1 cup all-purpose flour: The foundation of our crispy coating.
    • 2 tsp paprika: Adds a beautiful color and a mild, smoky sweetness.
    • 1 tsp garlic powder: Essential for that savory depth.
    • 1 tsp onion powder: Complements the garlic for aromatic complexity.
    • 1/2 tsp cayenne pepper: For a subtle hint of heat in the coating. Adjust to your spice preference.
    • 1/2 tsp salt: Enhances all the other flavors.
    • 1/4 tsp black pepper: Adds a touch of pungent spice.
    • 2 large eggs: The binder that helps the flour coating adhere beautifully.
    • 1/4 cup milk or buttermilk: Creates a rich, creamy batter for an extra-crispy crust. Buttermilk adds a slight tang.
    • Vegetable oil or other high smoke point oil: For deep frying. You’ll need enough to submerge the chicken pieces.

    For the Smoky Street Corn:

    • 4 cups corn kernels: Fresh, frozen, or canned – your convenience, your choice! If using fresh or frozen, consider charring them for that authentic street corn flavor.
    • 2 tbsp butter or olive oil: To sauté the corn and help it char.
    • 1/4 cup finely chopped red onion: Adds a sharp, sweet bite.
    • 1/4 cup chopped fresh cilantro: For that bright, herbaceous finish.
    • 1 tsp chili powder: Brings a warm, earthy spice.
    • 1/2 tsp smoked paprika: Enhances the smoky notes of charred corn.
    • Juice of 1 lime: The essential zesty element that brightens everything up.
    • Salt and pepper to taste: To perfectly season.

    For the Jalapeño Lime Ranch:

    • 1 cup ranch dressing: Your favorite store-bought or homemade ranch is the perfect creamy base.
    • 1-2 fresh jalapeños, seeded and finely minced: Adjust quantity based on your desired spice level. For less heat, remove all seeds and membranes.
    • 2 tbsp lime juice: For that zingy, refreshing tang.
    • 1 tbsp chopped fresh cilantro: Echoes the cilantro in the corn.
    • 1/4 tsp garlic powder: A little extra savory punch.
    • Pinch of salt and pepper: To balance the flavors.

    For Assembling the Tacos:

    • 8-12 small corn or flour tortillas: Choose your favorite. Corn offers a more traditional flavor, while flour is softer and more pliable. Warm them before serving for the best texture.
    • 4-6 slices bacon, cooked until crispy and crumbled: Adds a salty, smoky crunch that’s simply irresistible.
    • Optional Toppings: Cotija cheese, crumbled feta, sliced avocado, extra cilantro, lime wedges.

    Timing is Everything: Prep, Cook, and Total Enjoyment

    This recipe is designed for maximum flavor with manageable steps, making it perfect for a weekend dinner or a special weeknight treat. While it takes a little time, the result is well worth the effort.

    Prep Time: 30 minutes
    Cook Time: 30 minutes
    Total Time: 60 minutes
    Yields: 8-12 tacos

    Compared to many complex recipes that can take hours, 60 minutes is an excellent timeframe for a meal this flavorful and satisfying. Many similar dishes might require marinating time or longer cooking processes, but we’ve streamlined this for your convenience.

    Delicious Fried Chicken Street Corn Tacos with Bacon and Jalapeno Lime Ranch

    Crafting Your Culinary Masterpiece: Step-by-Step

    Step 1: Prepare the Chicken for Frying Perfection

    Begin by preparing your chicken. If using chicken breasts, you might want to gently pound them to an even thickness before cutting into bite-sized pieces (about 1.5-inch cubes). For thighs, simply trim any excess fat and cut into similar-sized pieces. In a shallow bowl, whisk together the flour, paprika, garlic powder, onion powder, cayenne pepper, salt, and black pepper. In a second shallow bowl, whisk the eggs with the milk or buttermilk until well combined. This will be your wet mixture.

    Dredge each chicken piece first in the flour mixture, ensuring it’s fully coated. Then, dip it into the egg mixture, letting any excess drip off. Finally, dredge it back into the flour mixture, pressing gently to create a thick, even coating. Set the coated chicken pieces aside on a rack or plate while you prepare the other components. This double-dredging method ensures maximum crispiness!

    Step 2: Whip Up the Zesty Jalapeño Lime Ranch

    In a medium bowl, combine the ranch dressing, minced jalapeños (start with one if you’re sensitive to spice, then add more to taste), fresh lime juice, chopped cilantro, garlic powder, and a pinch of salt and pepper. Stir everything together until well incorporated. Taste and adjust seasonings – perhaps you need a touch more lime for tang, more jalapeño for heat, or more salt. Cover and refrigerate until ready to serve. This allows the flavors to meld beautifully.

    Step 3: Create the Smoky Street Corn

    Melt the butter or heat the olive oil in a large skillet over medium-high heat. Add the corn kernels and cook, stirring occasionally, until they start to char and become slightly tender, about 5-7 minutes. If using frozen corn, ensure it’s thawed first. If using canned, drain it well. In the last few minutes of cooking, add the chopped red onion and cook until softened. Stir in the chili powder, smoked paprika, chopped cilantro, and lime juice. Season with salt and pepper to taste. Remove from heat and set aside. The smoky char from the corn is key to that authentic street corn vibe!

    Step 4: Fry the Chicken to Golden Perfection

    Heat about 2-3 inches of vegetable oil in a large, heavy-bottomed pot or Dutch oven to 350°F (175°C). Carefully add the coated chicken pieces to the hot oil, working in batches to avoid overcrowding the pot. Overcrowding will lower the oil temperature and result in greasy chicken. Fry for about 4-6 minutes per side, or until golden brown, crispy, and cooked through. The internal temperature should reach 165°F (74°C).

    Use a slotted spoon or spider strainer to remove the fried chicken from the oil and place it on a wire rack set over a baking sheet to drain. This helps keep the chicken crispy. If you need to keep it warm, you can place the rack-baked chicken in a single layer in a preheated oven at 200°F (95°C).

    Step 5: Assemble Your Taco Dreams

    Warm your tortillas according to package directions. This is essential for a pleasant tortilla experience – no one likes a stiff, cold tortilla! You can warm them in a dry skillet, directly over a low gas flame, or a few at a time in the microwave.

    Now, it’s time to build your tacos! Start with a warm tortilla, then layer in a generous portion of the crispy fried chicken pieces. Top with the smoky street corn mixture. Drizzle liberally with the Jalapeño Lime Ranch. Sprinkle with crumbled crispy bacon. Add any of your favorite optional toppings like crumbled cotija cheese, avocado slices, or extra fresh cilantro. Serve immediately with lime wedges on the side for an extra squeeze of brightness. Get ready for an explosion of flavor!

    Nutritional Snapshot: A Taste of What You’re Indulging In

    While specific nutritional values can vary based on exact ingredients and portion sizes, these tacos are a delightful balance of protein, healthy fats, and carbs.

    • Calories: Approximately 400-550 per taco (depending on size and toppings).
    • Protein: Rich in protein from the chicken, aiding satiety and muscle repair.
    • Fats: Contains healthy fats from olive oil (if used), avocado (optional), and the chicken itself. The ranch dressing contributes creamy fats.
    • Carbohydrates: Primarily from the corn and tortillas, providing energy.
    • Vitamins & Minerals: Benefits from vitamins and minerals found in corn, cilantro, jalapeños, and lime.

    Please note: This is an estimate. For precise nutritional information, it’s recommended to use a nutritional calculator with your specific ingredients and quantities.

    Healthier Twists for a Lighter Bite

    Looking to lighten things up without sacrificing flavor? Here are a few swaps that can make these tacos even healthier:

    • Air Fryer Chicken: Instead of deep-frying, coat the chicken and cook it in an air fryer until golden and crispy. This significantly reduces oil usage.
    • Baked Chicken: For a healthier coating, you can bake the chicken after dredging. Spray with cooking oil for crispiness.
    • Lighter Ranch: Use a Greek yogurt-based ranch dressing or a lighter version of store-bought ranch.
    • Whole Wheat Tortillas: Opt for whole wheat or corn tortillas for added fiber.
    • More Veggies: Bulk up your tacos with extra shredded lettuce, diced tomatoes, or a simple pico de gallo.

    Serving Suggestions: Complete the Fiesta!

    These tacos are a meal in themselves, but they also pair wonderfully with a variety of sides to complete your fiesta:

    • Side Salad: A simple green salad with a light vinaigrette.
    • Rice and Beans: Classic Tex-Mex accompaniments like Mexican rice or black beans.
    • Chips and Salsa/Guacamole: For an extra layer of crunch and flavor.
    • Cold Beverages: A refreshing agua fresca, iced tea, or a cold beer would be perfect.

    Common Mistakes to Avoid for Taco Perfection

    Even seasoned cooks can make small errors that affect the outcome. Here are a few common pitfalls to sidestep:

    • Overcrowding the fryer: This is the number one culprit for greasy, unevenly cooked chicken. Fry in batches.
    • Oil not hot enough: If the oil isn’t at the correct temperature (350°F/175°C), the chicken will absorb too much oil and become soggy.
    • Not seasoning enough: Taste and adjust seasoning at every stage – the chicken coating, the corn, and the ranch.
    • Cold or stale tortillas: Always warm your tortillas for the best texture and flavor.
    • Skipping the char on corn: While optional, charring the corn adds a crucial smoky depth that defines “street corn.”

    Storing Leftovers: Good News, They Travel Well

    If, by some miracle, you have leftovers, here’s how to store them:

    • Fried Chicken: Store cooled chicken in an airtight container in the refrigerator for up to 3-4 days. Reheat in an oven or air fryer for best crispiness, or in a skillet.
    • Street Corn: Store in an airtight container in the refrigerator for up to 3 days. It can be enjoyed cold or gently reheated.
    • Jalapeño Lime Ranch: This will keep in an airtight container in the refrigerator for up to a week.
    • Assembly: It’s best to assemble tacos just before serving to prevent the tortillas from becoming soggy. Store components separately and assemble as needed.
    Close-up of a delicious Fried Chicken Street Corn Taco

    Frequently Asked Questions (FAQs)

    ***Is it okay to use chicken breast instead of thighs?***

    Yes, absolutely! Chicken breast is leaner and will work, but it can sometimes become dry when fried. Ensure you don’t overcook it and consider using thighs for optimal juiciness.

    ***How can I make the jalapeños less spicy?***

    To reduce the heat of the jalapeños, be sure to scoop out all the seeds and the white pithy membranes inside. You can also use fewer jalapeños or substitute them with a milder pepper like a mild green chili or even a pinch of red pepper flakes for a different kind of heat.

    ***Can I prepare any components ahead of time?***

    Yes! The Jalapeño Lime Ranch can be made a day in advance, and the street corn mixture can also be prepared a few hours ahead. The chicken is best coated and fried just before serving for maximum crispiness.

    ***What’s the best way to warm tortillas?***

    For the best results, warm them one by one in a dry skillet over medium heat for about 30 seconds per side, until pliable. You can also wrap a stack in damp paper towels and microwave for 30-60 seconds, or carefully char them over a low gas flame for a smoky flavor.

    ***Can I use canned or frozen corn instead of fresh?***

    Yes, absolutely! If using canned corn, drain it thoroughly. If using frozen corn, thaw it first. For the best flavor, it’s still recommended to sauté the corn until it gets slightly charred, even if using pre-cooked kernels.

    Print
    clock clock iconcutlery cutlery iconflag flag iconfolder folder iconinstagram instagram iconpinterest pinterest iconfacebook facebook iconprint print iconsquares squares iconheart heart iconheart solid heart solid icon

    Fried Chicken Street Corn Tacos With Bacon And Jalapeno Lime Ranch Recipe


    • Author: Chef Emy

    Description

    These Fried Chicken Street Corn Tacos with Bacon and Jalapeño Lime Ranch are a flavor-packed meal, combining crispy fried chicken, sweet and smoky street corn, and a tangy, spicy ranch sauce for the ultimate taco night experience.


    Ingredients

    • Jalapeño Lime Ranch:

    Instructions

      Notes

      For added heat, top tacos with sliced fresh jalapeños or hot sauce.
      Use rotisserie chicken as a shortcut instead of fried chicken.
      Adjust the spice level of the ranch dressing by adding more or less jalapeño.

      Nutrition

      • Calories: 280
      • Sugar: 2g

      “`

      Smash Burgers With Baconnaise Sauce Recipe

      “`html

      Smash Burgers With Baconnaise Sauce Recipe

      Introduction: Why Smash Burgers?

      Are you craving a burger experience that’s a step above the rest? In a world of ever-evolving culinary trends, the humble burger, especially the “smash burger,” continues to reign supreme, with searches for “smash burger recipe” and “best burger sauce” seeing consistent year-over-year growth. This isn’t just about a patty; it’s about texture, flavor, and that irresistible char. The beauty of a smash burger lies in its simplicity and the incredible crust you achieve by pressing a ball of ground beef onto a screaming hot surface. But what truly elevates a good smash burger to an unforgettable one? A killer sauce! And that’s where our star player comes in: the Baconnaise Sauce. This recipe isn’t just about making burgers; it’s about creating a symphony of smoky, savory, and cheesy perfection that will have you rethinking everything you thought you knew about comfort food.

      Ingredients for Smash Burgers with Baconnaise Sauce

      For the Smash Burger Patties

      • 1 lb ground beef (80/20 or 85/15 fat ratio is ideal for moisture and flavor)
      • 1 teaspoon salt (fine sea salt or kosher salt)
      • ½ teaspoon black pepper (freshly ground for best aroma)

      For the Baconnaise Sauce

      • 4 slices bacon, cooked until crispy and finely crumbled
      • ½ cup mayonnaise (a good quality, full-fat mayo provides the best creamy base)
      • 2 tablespoons ketchup (adds a touch of sweetness and tang)
      • 1 tablespoon Dijon mustard (for a subtle spicy kick)
      • 1 teaspoon Worcestershire sauce (adds umami depth)
      • ½ teaspoon smoked paprika (enhances the smoky bacon flavor)
      • ¼ teaspoon garlic powder (optional, for an extra layer of savory flavor)
      • Pinch of cayenne pepper (optional, for a hint of heat)

      For Assembly

      • 4 burger buns (brioche or potato buns work wonderfully for their soft texture)
      • 4 slices of your favorite cheese (cheddar, American, or Gruyere melt beautifully)
      • Butter or oil for toasting buns and cooking patties
      • Optional toppings: finely chopped onions, lettuce, pickles

      Timing is Everything

      Prep time: 15 minutes
      Cook time: 10 minutes
      Total time: 25 minutes

      This recipe is remarkably quick, making it perfect for a weeknight dinner or a spontaneous craving. Compared to an average complex meal that can take over an hour, these smash burgers are ready in under 30 minutes, proving that incredible flavor doesn’t always require a long commitment.

      Delicious looking smash burger with baconnaise sauce.

      How to Make Smash Burgers with Baconnaise Sauce

      Step 1: Prepare the Baconnaise Sauce

      In a medium bowl, combine the mayonnaise, ketchup, Dijon mustard, Worcestershire sauce, crumbled crispy bacon, smoked paprika, garlic powder (if using), and cayenne pepper (if using). Stir everything together until well combined. Taste and adjust seasonings as needed. For the best flavor, cover and refrigerate the sauce while you prepare the burgers. This allows the flavors to meld beautifully.

      Step 2: Form and Chill the Patties

      Gently divide the ground beef into four equal portions. *Do not overwork the meat.* This is crucial for tender burgers. Lightly roll each portion into a ball. Place the beef balls on a plate lined with parchment paper and refrigerate for at least 15 minutes. Chilling the meat helps it hold its shape and makes it easier to smash without falling apart.

      Step 3: Prep Your Burger Buns and Toppings

      While the patties are chilling, lightly butter the cut sides of your burger buns and toast them in a skillet over medium heat until golden brown. Set aside. Prepare any other toppings you desire, such as thinly sliced onions, crisp lettuce, or tangy pickles.

      Step 4: Smash Those Burgers!

      Heat a cast-iron skillet or griddle over medium-high heat. Add a touch of oil or butter. Once shimmering hot, place the chilled beef balls onto the hot surface, leaving some space between them. Immediately using a sturdy metal spatula or a burger press, firmly and quickly smash each ball down into a thin patty, about ¼ inch thick. You want to create as much surface area as possible for that amazing crust.

      Step 5: Cook the Patties

      Season the smashes patties generously with salt and pepper. Cook for about 1-2 minutes per side, or until a deep brown crust forms and the edges are crispy. Flip the patties carefully. If you like cheese, place a slice of cheese on top of each patty during the last minute of cooking. Cover the skillet briefly to help the cheese melt beautifully.

      Step 6: Assemble Your Masterpiece

      Spread a generous amount of the prepared Baconnaise sauce on the bottom half of each toasted bun. Place a cheesy smash patty on top of the sauce. Add your preferred toppings, then crown with the top bun. Serve immediately and prepare for burger bliss!

      Nutritional Information

      While precise nutritional values can vary based on ingredient brands and portion sizes, a typical serving of these Smash Burgers with Baconnaise Sauce would provide approximately:

      • Calories: 500-700 kcal
      • Protein: 30-40g
      • Fat: 35-50g (includes saturated fat from beef and bacon)
      • Carbohydrates: 20-30g (depending on bun and sauce ingredients)
      • Sodium: Varies significantly based on bacon and added salt.

      Healthier Alternatives Without Sacrificing Flavor

      Looking to lighten things up without compromising on taste? Here are some adaptable swaps:

      • Leaner Beef: Opt for 90/10 or even 93/7 ground beef. While it won’t have the same classic richness, it’s a significant reduction in saturated fat.
      • Bacon Alternatives: For the sauce, use turkey bacon for a leaner smoky flavor, or omit the bacon and add a dash more smoked paprika and a tiny amount of liquid smoke for an intense smoky note without the fat.
      • Lighter Mayo: Use a light or avocado-oil based mayonnaise. The flavor profile might change slightly, but it’s a good way to cut down on calories and fat.
      • Whole Wheat Buns: Swap regular buns for whole wheat or artisanal sourdough buns.
      • Load up on Veggies: Add extra lettuce, tomato, onion, or avocado slices for volume and nutrients.

      Serving Suggestions

      These smash burgers are a meal in themselves, but they pair wonderfully with classic sides. Consider:

      • Crisp French fries or sweet potato fries
      • A light, fresh coleslaw
      • A simple green salad with a zesty vinaigrette
      • Onion rings for an extra indulgence
      • A cold craft beer or a refreshing soda

      Common Mistakes to Avoid

      • Overworking the Meat: This leads to tough, dense patties. Handle the beef as little as possible.
      • Not Hot Enough Pan: A screaming hot surface is essential for that signature crust. If your pan isn’t hot enough, you’ll end up steaming the burgers instead of searing them.
      • Overcrowding the Pan: This lowers the pan’s temperature and results in steamed, grayish burgers. Cook in batches if necessary.
      • Pressing Too Early or Too Hard: Wait a moment after placing the beef ball before smashing. Smashing too hard initially can push out juices. Aim for a firm, quick press.
      • Not Seasoning Enough: Smash burgers need salt and pepper applied liberally right before cooking for maximum flavor impact.

      Storing Leftovers

      For the best experience, these burgers are meant to be enjoyed fresh off the grill. However, if you have leftovers:

      • Cooked Patties: Allow cooked patties to cool completely. Store them in an airtight container in the refrigerator for up to 2 days. Reheat gently in a skillet or oven to prevent drying out.
      • Baconnaise Sauce: The sauce can be stored in an airtight container in the refrigerator for up to 5 days. The flavors may intensify over time.
      • Assembled Burgers: It’s not recommended to store fully assembled burgers, as the bun will become soggy and the ingredients will lose their texture.
      Close-up of a delicious smash burger.

      Frequently Asked Questions

      ***What kind of ground beef is best for smash burgers?***

      An 80/20 or 85/15 lean-to-fat ratio is ideal. The fat content is crucial for keeping the burgers juicy, tender, and flavorful while helping to achieve that coveted crispy crust.

      ***Can I make the Baconnaise sauce ahead of time?***

      Yes, absolutely! In fact, making the sauce a few hours or even a day in advance allows the flavors to meld and deepen, resulting in an even more delicious sauce. Store it covered in the refrigerator.

      ***How do I get the crispy edges on my smash burgers?***

      The key is using a very hot pan (cast iron is best) and smashing the beef balls quickly and firmly into a thin patty. This maximizes surface contact with the hot pan, encouraging caramelization and crispy edges.

      ***What if I don’t have bacon for the sauce?***

      You can omit the bacon and still achieve a delicious smoky sauce. Increase the smoked paprika slightly, or add a tiny drop of liquid smoke if you have it. You can also use crispy fried onions for a similar savory crunch.

      ***Can I make smash burgers on a regular stovetop pan?***

      Yes, a heavy-bottomed skillet or even a sturdy griddle will work. Cast iron is preferred for its heat retention but isn’t strictly necessary. Ensure the pan is well-seasoned and gets very hot.

      Print

      clock clock iconcutlery cutlery iconflag flag iconfolder folder iconinstagram instagram iconpinterest pinterest iconfacebook facebook iconprint print iconsquares squares iconheart heart iconheart solid heart solid icon

      Smash Burgers With Baconnaise Sauce Recipe


      • Author: Chef Emy

      Description

      This smash burgers recipe with baconnaise sauce is a must-try for burger lovers. Crispy-edged patties, melty cheese, and a rich, smoky bacon-infused sauce come together for the ultimate burger experience.


      Ingredients

      • For the Smash Burgers:
      • For the Baconnaise Sauce:

      Instructions

        Notes

        For extra smoky flavor, use smoked bacon in the sauce.
        Freeze the bacon before chopping to make crumbling easier.
        Serve with crispy fries or a fresh side salad for a complete meal.

        Nutrition

        • Calories: 520
        • Sugar: 2g

        “`

        Easy Baked Shrimp Scampi Recipe for Dinner Tonight

        “`html

        Easy Baked Shrimp Scampi Recipe for Dinner Tonight

        Craving a quick and impressive dinner?

        Are you looking for a weeknight dinner that feels both special and incredibly easy to make? If you’re like 78% of home cooks who want to spend less time in the kitchen and more time with family, then this Easy Baked Shrimp Scampi Recipe for Dinner Tonight is your answer. This Shrimp Scampi Pasta Bake combines the beloved, zesty flavors of classic shrimp scampi with a comforting, creamy, and cheesy twist, all baked to golden perfection. It’s the kind of dish that looks sophisticated enough for guests but is simple enough for any busy evening. Imagine tender shrimp bathed in a garlic-butter sauce, tossed with your favorite pasta, and baked until bubbly and irresistible. This recipe is a guaranteed crowd-pleaser, offering an elegant yet comforting experience that will become a staple in your meal rotation.

        Ingredients for Delicious Shrimp Scampi Bake

        The beauty of this Shrimp Scampi Pasta Bake lies in its straightforward yet flavorful ingredient list. We’ve highlighted some key components and flavor boosters to ensure a truly delicious outcome.

        Key Components

        • 1 pound large shrimp, peeled and deveined. Look for plump, firm shrimp that have a sweet, mild oceanic aroma. They cook quickly, so keep an eye on them to avoid rubberiness.
        • 8 ounces pasta, such as linguine, spaghetti, or fettuccine. Choose a pasta that holds sauce well. For a slightly healthier option, whole wheat pasta works beautifully.
        • 1 cup heavy cream or half-and-half for a luxuriously creamy sauce.
        • 1/2 cup grated Parmesan cheese, plus more for topping. This adds a salty, nutty depth.
        • 1 cup shredded mozzarella cheese, for that irresistible gooey top.

        Flavor Boosters

        • 4 tablespoons unsalted butter, the foundation of our scampi flavor.
        • 4 cloves garlic, minced. Freshly minced garlic offers the most pungent and aromatic quality.
        • 1/4 cup dry white wine (like Pinot Grigio or Sauvignon Blanc), optional but highly recommended for deglazing and adding acidity.
        • Juice of 1/2 lemon, for brightness and to cut through the richness.
        • 1/4 cup chopped fresh parsley, for a burst of fresh, herbaceous flavor and beautiful color.
        • 1/2 teaspoon red pepper flakes, for a gentle warmth that can be adjusted to your spice preference.
        • Salt and freshly ground black pepper, to taste. Essential for balancing all the flavors.

        Pasta and Binder

        • 1 cup reserved pasta water, crucial for emulsifying the sauce and achieving a silky texture.

        Substitutions: If you don’t have white wine, you can use chicken or vegetable broth. For a dairy-free option, consider using full-fat coconut milk and nutritional yeast for cheesiness, though the flavor profile will change.

        Timing Your Perfect Shrimp Scampi Bake

        Prep time:
        20 minutes
        Cook time:
        25 minutes
        Total time:
        45 minutes

        Compared to many baked pasta dishes that can take well over an hour, this Shrimp Scampi Bake is remarkably quick. The average pasta bake often requires longer simmering times or baking periods. Our recipe is designed for efficiency, ensuring you can get a delicious, hearty meal on the table in under an hour, perfect for even the busiest weeknights. The shrimp cooks rapidly, and the pre-cooked pasta means the baking stage is primarily about melting cheese and melding flavors.

        Shrimp Scampi Pasta Bake with shrimp and pasta in a creamy sauce.

        Creating the Magic: Step-by-Step

        Follow these simple steps to create a shrimp scampi bake that will have everyone asking for seconds!

        Step 1: Prep Your Aromatics

        Begin by mincing your garlic and chopping your fresh parsley. If you’re using lemon, zest about half of it, then juice it. Have your shrimp ready – peeled, deveined, and patted dry. This prep work ensures a smooth cooking process. Set aside your spices like red pepper flakes, salt, and pepper.

        Step 2: Cook the Pasta

        In a large pot, bring salted water to a rolling boil. Add your pasta and cook according to package directions until al dente. This is crucial – you don’t want mushy pasta. Before draining, carefully reserve about 1 cup of the starchy pasta water. Drain the pasta and set aside. The pasta water is liquid gold for creating a smooth, emulsified sauce.

        Step 3: Sauté the Shrimp and Garlic

        In a large oven-safe skillet (or a regular skillet if you plan to transfer to a baking dish), melt the butter over medium heat. Add the minced garlic and red pepper flakes, and sauté for about 1 minute until fragrant, being careful not to burn the garlic. Add the shrimp to the skillet in a single layer. Cook for 1-2 minutes per side, just until they turn pink and opaque. Do not overcook them at this stage, as they will continue to cook in the oven. Remove the shrimp from the skillet and set them aside on a plate.

        Step 4: Build the Creamy Sauce

        With the skillet still over medium heat (no need to clean it!), pour in the white wine (if using) and scrape up any browned bits from the bottom of the pan. Let it simmer for about a minute to reduce slightly. Add the heavy cream (or half-and-half) and lemon juice to the skillet. Stir well. Bring the sauce to a gentle simmer and let it thicken slightly for about 2-3 minutes. Stir in the grated Parmesan cheese until melted and smooth. Season with salt and freshly ground black pepper to taste. If the sauce seems too thick, gradually whisk in some of the reserved pasta water until it reaches your desired consistency.

        Step 5: Combine and Bake

        Add the cooked pasta and the reserved shrimp back into the skillet with the creamy sauce. Toss everything gently to coat evenly. Stir in half of the chopped fresh parsley. If your skillet isn’t oven-safe, transfer the mixture to a greased 9×13 inch baking dish. Sprinkle the shredded mozzarella cheese and a little extra Parmesan cheese evenly over the top. Bake in a preheated oven at 375°F (190°C) for 15-20 minutes, or until the cheese is melted, bubbly, and lightly golden brown. Garnish with the remaining fresh parsley before serving.

        Nutritional Highlights

        While exact nutritional values can vary based on specific ingredients and portion sizes, a typical serving of this Shrimp Scampi Pasta Bake is approximately:

        • Calories: 500-700 kcal
        • Protein: 30-40g
        • Fat: 25-35g
        • Carbohydrates: 40-50g
        • Rich in Omega-3 fatty acids from shrimp, calcium from cheese, and B vitamins from pasta.

        Healthier Alternatives Without Sacrificing Flavor

        Looking to lighten up this decadent dish? Consider these delicious swaps:

        • Pasta: Opt for whole wheat pasta, zucchini noodles (zoodles), or shirataki noodles for fewer carbohydrates and extra fiber or lower calories.
        • Cream: Use evaporated skim milk or Greek yogurt (stirred in at the end to prevent curdling) instead of heavy cream for reduced fat content while maintaining creaminess. A blend of vegetable broth and a touch of cornstarch can also create a lighter sauce base.
        • Cheese: Reduce the amount of mozzarella and Parmesan, or use a reduced-fat variety. Sprinkle fresh herbs and a little extra lemon zest for flavor intensity.
        • Shrimp: While shrimp is lean, ensure you’re not frying it excessively. Baking or a quick sauté is ideal.

        Serving Suggestions to Elevate Your Meal

        This Shrimp Scampi Pasta Bake is a complete meal on its own, but here are a few ideas to make it even more special:

        • Crusty Bread: Serve with warm, crusty bread or garlic bread to sop up every last drop of that glorious sauce.
        • Side Salad: A simple green salad with a light vinaigrette offers a refreshing contrast to the rich pasta. Think mixed greens, cherry tomatoes, and cucumber.
        • Steamed Vegetables: Asparagus, broccoli, or green beans lightly steamed or roasted make a healthy and vibrant addition.

        Common Mistakes to Avoid

        • Overcooking the Shrimp: Shrimp cook extremely fast. Sauté them briefly until just pink, as they will finish cooking in the oven. Overcooked shrimp become tough and rubbery.
        • Undercooking the Pasta: Ensure your pasta is cooked al dente. It will continue to soften in the oven, and overcooked pasta will result in a mushy bake.
        • Burning the Garlic: Burnt garlic tastes bitter. Sauté it gently until fragrant, but don’t let it brown.
        • Not Reserving Pasta Water: This starchy water is key to emulsifying the sauce, making it creamy and cohesive without being greasy.
        • Using Old Shrimp: Freshness is key for shrimp. If they have a strong, unpleasant odor, they are likely past their prime.

        Storing Tips for Leftovers

        Leftover Shrimp Scampi Pasta Bake can be stored in an airtight container in the refrigerator for up to 3 days. To reheat, gently warm it in a saucepan over low heat, in the oven at a low temperature (around 300°F/150°C), or in the microwave. You might need to add a splash of milk or broth to loosen the sauce when reheating.

        Close-up of Shrimp Scampi Pasta Bake showing texture and ingredients.

        Frequently Asked Questions About Shrimp Scampi Bake

        Can I make this shrimp scampi bake ahead of time?

        Yes, you can assemble the bake up to 24 hours in advance. Cover it tightly and refrigerate. You may need to add a few extra minutes to the baking time.

        What kind of pasta is best for this dish?

        Long pasta shapes like linguine, spaghetti, and fettuccine work wonderfully because they hold the sauce well. Shorter, sturdy pasta shapes like penne or rigatoni are also good options.

        Can I use frozen shrimp?

        Yes, you can use frozen shrimp. Ensure they are thawed completely before cooking and pat them very dry to prevent a watery sauce.

        How can I make the sauce richer?

        For an even richer sauce, you can add a tablespoon or two of cream cheese along with the Parmesan, or a splash of heavy cream at the very end.

        Is it necessary to use white wine?

        While white wine adds a wonderful depth of flavor, acidity, and helps deglaze the pan, you can omit it. Substitute with chicken or vegetable broth, or simply increase the lemon juice slightly for brightness.

        Conclusion: Your New Go-To Weeknight Meal

        This Easy Baked Shrimp Scampi Recipe is more than just a meal; it’s an experience. It delivers luxurious flavor and comforting textures with surprising ease. Whether you’re feeding your family, entertaining friends, or simply treating yourself, this Shrimp Scampi Pasta Bake is sure to impress. Say goodbye to dinner dilemmas and hello to your new favorite, stress-free, and utterly delicious go-to recipe. Give it a try tonight and transform your dinner routine!

        Print
        clock clock iconcutlery cutlery iconflag flag iconfolder folder iconinstagram instagram iconpinterest pinterest iconfacebook facebook iconprint print iconsquares squares iconheart heart iconheart solid heart solid icon

        Shrimp Scampi Pasta Bake


        • Author: Chef Emy

        Description

        ThisShrimp Scampi Pasta Bakecombines the classic flavors of shrimp scampi with a creamy, cheesy twist, baked to perfection. Perfect for a family dinner or special occasion, it’s a crowd-pleaser that’s both elegant and comforting.


        Ingredients

        Scale
        • 12 ozlinguine or spaghetti1lb large shrimp, peeled and deveined4 tablespoonsbutter4cloves garlic, minced¼ teaspoonred pepper flakes½ cupwhite wine (or chicken broth for non-alcoholic option)1lemon, juiced and zested1 cupheavy cream½ cupgrated Parmesan cheese1 cupshredded mozzarella cheeseSalt and pepper, to taste2 tablespoonschopped fresh parsley
        • 1lb large shrimp, peeled and deveined4 tablespoonsbutter4cloves garlic, minced¼ teaspoonred pepper flakes½ cupwhite wine (or chicken broth for non-alcoholic option)1lemon, juiced and zested1 cupheavy cream½ cupgrated Parmesan cheese1 cupshredded mozzarella cheeseSalt and pepper, to taste2 tablespoonschopped fresh parsley
        • 4 tablespoonsbutter4cloves garlic, minced¼ teaspoonred pepper flakes½ cupwhite wine (or chicken broth for non-alcoholic option)1lemon, juiced and zested1 cupheavy cream½ cupgrated Parmesan cheese1 cupshredded mozzarella cheeseSalt and pepper, to taste2 tablespoonschopped fresh parsley
        • 4cloves garlic, minced¼ teaspoonred pepper flakes½ cupwhite wine (or chicken broth for non-alcoholic option)1lemon, juiced and zested1 cupheavy cream½ cupgrated Parmesan cheese1 cupshredded mozzarella cheeseSalt and pepper, to taste2 tablespoonschopped fresh parsley
        • ¼ teaspoonred pepper flakes½ cupwhite wine (or chicken broth for non-alcoholic option)1lemon, juiced and zested1 cupheavy cream½ cupgrated Parmesan cheese1 cupshredded mozzarella cheeseSalt and pepper, to taste2 tablespoonschopped fresh parsley
        • ½ cupwhite wine (or chicken broth for non-alcoholic option)1lemon, juiced and zested1 cupheavy cream½ cupgrated Parmesan cheese1 cupshredded mozzarella cheeseSalt and pepper, to taste2 tablespoonschopped fresh parsley
        • 1lemon, juiced and zested1 cupheavy cream½ cupgrated Parmesan cheese1 cupshredded mozzarella cheeseSalt and pepper, to taste2 tablespoonschopped fresh parsley
        • 1 cupheavy cream½ cupgrated Parmesan cheese1 cupshredded mozzarella cheeseSalt and pepper, to taste2 tablespoonschopped fresh parsley
        • ½ cupgrated Parmesan cheese1 cupshredded mozzarella cheeseSalt and pepper, to taste2 tablespoonschopped fresh parsley
        • 1 cupshredded mozzarella cheeseSalt and pepper, to taste2 tablespoonschopped fresh parsley
        • Salt and pepper, to taste2 tablespoonschopped fresh parsley
        • 2 tablespoonschopped fresh parsley

        Instructions

        1. 1️⃣Preheat Oven:
        2. Preheat your oven to 375°F (190°C).2️⃣Cook Pasta:Boil linguine or spaghetti in salted water according to package instructions until al dente.Drain and set aside.3️⃣Sauté Aromatics:In a large skillet, melt butter over medium heat.Add minced garlic and red pepper flakes, sautéing for about 1 minute until fragrant.4️⃣Cook Shrimp:Add shrimp to the skillet and cook for 3–4 minutes, or until pink and opaque.Remove the shrimp from the skillet and set aside.5️⃣Prepare Sauce:Deglaze the skillet by pouring in white wine (or chicken broth), scraping up any browned bits from the bottom of the pan.Let it simmer for 2 minutes.Stir in lemon juice, lemon zest, and heavy cream. Bring the mixture to a gentle simmer.6️⃣Toss Pasta:Add the cooked pasta to the skillet and toss until the noodles are evenly coated in the creamy sauce.Season with salt and pepper to taste.7️⃣Assemble Dish:Transfer the pasta and sauce mixture to a large baking dish, spreading it out evenly.Arrange the cooked shrimp on top of the pasta.8️⃣Add Cheese:Sprinkle the grated Parmesan cheese and shredded mozzarella evenly over the pasta and shrimp.9️⃣Bake:Place the baking dish in the preheated oven and bake for 15–20 minutes, or until the cheese is melted and bubbly.🔟Garnish and Serve:Remove the dish from the oven. Garnish with chopped fresh parsley and serve hot.
        3. 2️⃣Cook Pasta:Boil linguine or spaghetti in salted water according to package instructions until al dente.Drain and set aside.3️⃣Sauté Aromatics:In a large skillet, melt butter over medium heat.Add minced garlic and red pepper flakes, sautéing for about 1 minute until fragrant.4️⃣Cook Shrimp:Add shrimp to the skillet and cook for 3–4 minutes, or until pink and opaque.Remove the shrimp from the skillet and set aside.5️⃣Prepare Sauce:Deglaze the skillet by pouring in white wine (or chicken broth), scraping up any browned bits from the bottom of the pan.Let it simmer for 2 minutes.Stir in lemon juice, lemon zest, and heavy cream. Bring the mixture to a gentle simmer.6️⃣Toss Pasta:Add the cooked pasta to the skillet and toss until the noodles are evenly coated in the creamy sauce.Season with salt and pepper to taste.7️⃣Assemble Dish:Transfer the pasta and sauce mixture to a large baking dish, spreading it out evenly.Arrange the cooked shrimp on top of the pasta.8️⃣Add Cheese:Sprinkle the grated Parmesan cheese and shredded mozzarella evenly over the pasta and shrimp.9️⃣Bake:Place the baking dish in the preheated oven and bake for 15–20 minutes, or until the cheese is melted and bubbly.🔟Garnish and Serve:Remove the dish from the oven. Garnish with chopped fresh parsley and serve hot.
        4. Boil linguine or spaghetti in salted water according to package instructions until al dente.
        5. Drain and set aside.3️⃣Sauté Aromatics:In a large skillet, melt butter over medium heat.Add minced garlic and red pepper flakes, sautéing for about 1 minute until fragrant.4️⃣Cook Shrimp:Add shrimp to the skillet and cook for 3–4 minutes, or until pink and opaque.Remove the shrimp from the skillet and set aside.5️⃣Prepare Sauce:Deglaze the skillet by pouring in white wine (or chicken broth), scraping up any browned bits from the bottom of the pan.Let it simmer for 2 minutes.Stir in lemon juice, lemon zest, and heavy cream. Bring the mixture to a gentle simmer.6️⃣Toss Pasta:Add the cooked pasta to the skillet and toss until the noodles are evenly coated in the creamy sauce.Season with salt and pepper to taste.7️⃣Assemble Dish:Transfer the pasta and sauce mixture to a large baking dish, spreading it out evenly.Arrange the cooked shrimp on top of the pasta.8️⃣Add Cheese:Sprinkle the grated Parmesan cheese and shredded mozzarella evenly over the pasta and shrimp.9️⃣Bake:Place the baking dish in the preheated oven and bake for 15–20 minutes, or until the cheese is melted and bubbly.🔟Garnish and Serve:Remove the dish from the oven. Garnish with chopped fresh parsley and serve hot.
        6. 3️⃣Sauté Aromatics:In a large skillet, melt butter over medium heat.Add minced garlic and red pepper flakes, sautéing for about 1 minute until fragrant.4️⃣Cook Shrimp:Add shrimp to the skillet and cook for 3–4 minutes, or until pink and opaque.Remove the shrimp from the skillet and set aside.5️⃣Prepare Sauce:Deglaze the skillet by pouring in white wine (or chicken broth), scraping up any browned bits from the bottom of the pan.Let it simmer for 2 minutes.Stir in lemon juice, lemon zest, and heavy cream. Bring the mixture to a gentle simmer.6️⃣Toss Pasta:Add the cooked pasta to the skillet and toss until the noodles are evenly coated in the creamy sauce.Season with salt and pepper to taste.7️⃣Assemble Dish:Transfer the pasta and sauce mixture to a large baking dish, spreading it out evenly.Arrange the cooked shrimp on top of the pasta.8️⃣Add Cheese:Sprinkle the grated Parmesan cheese and shredded mozzarella evenly over the pasta and shrimp.9️⃣Bake:Place the baking dish in the preheated oven and bake for 15–20 minutes, or until the cheese is melted and bubbly.🔟Garnish and Serve:Remove the dish from the oven. Garnish with chopped fresh parsley and serve hot.
        7. In a large skillet, melt butter over medium heat.
        8. Add minced garlic and red pepper flakes, sautéing for about 1 minute until fragrant.4️⃣Cook Shrimp:Add shrimp to the skillet and cook for 3–4 minutes, or until pink and opaque.Remove the shrimp from the skillet and set aside.5️⃣Prepare Sauce:Deglaze the skillet by pouring in white wine (or chicken broth), scraping up any browned bits from the bottom of the pan.Let it simmer for 2 minutes.Stir in lemon juice, lemon zest, and heavy cream. Bring the mixture to a gentle simmer.6️⃣Toss Pasta:Add the cooked pasta to the skillet and toss until the noodles are evenly coated in the creamy sauce.Season with salt and pepper to taste.7️⃣Assemble Dish:Transfer the pasta and sauce mixture to a large baking dish, spreading it out evenly.Arrange the cooked shrimp on top of the pasta.8️⃣Add Cheese:Sprinkle the grated Parmesan cheese and shredded mozzarella evenly over the pasta and shrimp.9️⃣Bake:Place the baking dish in the preheated oven and bake for 15–20 minutes, or until the cheese is melted and bubbly.🔟Garnish and Serve:Remove the dish from the oven. Garnish with chopped fresh parsley and serve hot.
        9. 4️⃣Cook Shrimp:Add shrimp to the skillet and cook for 3–4 minutes, or until pink and opaque.Remove the shrimp from the skillet and set aside.5️⃣Prepare Sauce:Deglaze the skillet by pouring in white wine (or chicken broth), scraping up any browned bits from the bottom of the pan.Let it simmer for 2 minutes.Stir in lemon juice, lemon zest, and heavy cream. Bring the mixture to a gentle simmer.6️⃣Toss Pasta:Add the cooked pasta to the skillet and toss until the noodles are evenly coated in the creamy sauce.Season with salt and pepper to taste.7️⃣Assemble Dish:Transfer the pasta and sauce mixture to a large baking dish, spreading it out evenly.Arrange the cooked shrimp on top of the pasta.8️⃣Add Cheese:Sprinkle the grated Parmesan cheese and shredded mozzarella evenly over the pasta and shrimp.9️⃣Bake:Place the baking dish in the preheated oven and bake for 15–20 minutes, or until the cheese is melted and bubbly.🔟Garnish and Serve:Remove the dish from the oven. Garnish with chopped fresh parsley and serve hot.
        10. Add shrimp to the skillet and cook for 3–4 minutes, or until pink and opaque.
        11. Remove the shrimp from the skillet and set aside.5️⃣Prepare Sauce:Deglaze the skillet by pouring in white wine (or chicken broth), scraping up any browned bits from the bottom of the pan.Let it simmer for 2 minutes.Stir in lemon juice, lemon zest, and heavy cream. Bring the mixture to a gentle simmer.6️⃣Toss Pasta:Add the cooked pasta to the skillet and toss until the noodles are evenly coated in the creamy sauce.Season with salt and pepper to taste.7️⃣Assemble Dish:Transfer the pasta and sauce mixture to a large baking dish, spreading it out evenly.Arrange the cooked shrimp on top of the pasta.8️⃣Add Cheese:Sprinkle the grated Parmesan cheese and shredded mozzarella evenly over the pasta and shrimp.9️⃣Bake:Place the baking dish in the preheated oven and bake for 15–20 minutes, or until the cheese is melted and bubbly.🔟Garnish and Serve:Remove the dish from the oven. Garnish with chopped fresh parsley and serve hot.
        12. 5️⃣Prepare Sauce:Deglaze the skillet by pouring in white wine (or chicken broth), scraping up any browned bits from the bottom of the pan.Let it simmer for 2 minutes.Stir in lemon juice, lemon zest, and heavy cream. Bring the mixture to a gentle simmer.6️⃣Toss Pasta:Add the cooked pasta to the skillet and toss until the noodles are evenly coated in the creamy sauce.Season with salt and pepper to taste.7️⃣Assemble Dish:Transfer the pasta and sauce mixture to a large baking dish, spreading it out evenly.Arrange the cooked shrimp on top of the pasta.8️⃣Add Cheese:Sprinkle the grated Parmesan cheese and shredded mozzarella evenly over the pasta and shrimp.9️⃣Bake:Place the baking dish in the preheated oven and bake for 15–20 minutes, or until the cheese is melted and bubbly.🔟Garnish and Serve:Remove the dish from the oven. Garnish with chopped fresh parsley and serve hot.
        13. Deglaze the skillet by pouring in white wine (or chicken broth), scraping up any browned bits from the bottom of the pan.
        14. Let it simmer for 2 minutes.Stir in lemon juice, lemon zest, and heavy cream. Bring the mixture to a gentle simmer.6️⃣Toss Pasta:Add the cooked pasta to the skillet and toss until the noodles are evenly coated in the creamy sauce.Season with salt and pepper to taste.7️⃣Assemble Dish:Transfer the pasta and sauce mixture to a large baking dish, spreading it out evenly.Arrange the cooked shrimp on top of the pasta.8️⃣Add Cheese:Sprinkle the grated Parmesan cheese and shredded mozzarella evenly over the pasta and shrimp.9️⃣Bake:Place the baking dish in the preheated oven and bake for 15–20 minutes, or until the cheese is melted and bubbly.🔟Garnish and Serve:Remove the dish from the oven. Garnish with chopped fresh parsley and serve hot.
        15. Stir in lemon juice, lemon zest, and heavy cream. Bring the mixture to a gentle simmer.6️⃣Toss Pasta:Add the cooked pasta to the skillet and toss until the noodles are evenly coated in the creamy sauce.Season with salt and pepper to taste.7️⃣Assemble Dish:Transfer the pasta and sauce mixture to a large baking dish, spreading it out evenly.Arrange the cooked shrimp on top of the pasta.8️⃣Add Cheese:Sprinkle the grated Parmesan cheese and shredded mozzarella evenly over the pasta and shrimp.9️⃣Bake:Place the baking dish in the preheated oven and bake for 15–20 minutes, or until the cheese is melted and bubbly.🔟Garnish and Serve:Remove the dish from the oven. Garnish with chopped fresh parsley and serve hot.
        16. 6️⃣Toss Pasta:
        17. Add the cooked pasta to the skillet and toss until the noodles are evenly coated in the creamy sauce.Season with salt and pepper to taste.7️⃣Assemble Dish:Transfer the pasta and sauce mixture to a large baking dish, spreading it out evenly.Arrange the cooked shrimp on top of the pasta.8️⃣Add Cheese:Sprinkle the grated Parmesan cheese and shredded mozzarella evenly over the pasta and shrimp.9️⃣Bake:Place the baking dish in the preheated oven and bake for 15–20 minutes, or until the cheese is melted and bubbly.🔟Garnish and Serve:Remove the dish from the oven. Garnish with chopped fresh parsley and serve hot.
        18. Season with salt and pepper to taste.7️⃣Assemble Dish:Transfer the pasta and sauce mixture to a large baking dish, spreading it out evenly.Arrange the cooked shrimp on top of the pasta.8️⃣Add Cheese:Sprinkle the grated Parmesan cheese and shredded mozzarella evenly over the pasta and shrimp.9️⃣Bake:Place the baking dish in the preheated oven and bake for 15–20 minutes, or until the cheese is melted and bubbly.🔟Garnish and Serve:Remove the dish from the oven. Garnish with chopped fresh parsley and serve hot.
        19. 7️⃣Assemble Dish:
        20. Transfer the pasta and sauce mixture to a large baking dish, spreading it out evenly.Arrange the cooked shrimp on top of the pasta.8️⃣Add Cheese:Sprinkle the grated Parmesan cheese and shredded mozzarella evenly over the pasta and shrimp.9️⃣Bake:Place the baking dish in the preheated oven and bake for 15–20 minutes, or until the cheese is melted and bubbly.🔟Garnish and Serve:Remove the dish from the oven. Garnish with chopped fresh parsley and serve hot.
        21. Arrange the cooked shrimp on top of the pasta.8️⃣Add Cheese:Sprinkle the grated Parmesan cheese and shredded mozzarella evenly over the pasta and shrimp.9️⃣Bake:Place the baking dish in the preheated oven and bake for 15–20 minutes, or until the cheese is melted and bubbly.🔟Garnish and Serve:Remove the dish from the oven. Garnish with chopped fresh parsley and serve hot.
        22. 8️⃣Add Cheese:
        23. Sprinkle the grated Parmesan cheese and shredded mozzarella evenly over the pasta and shrimp.9️⃣Bake:Place the baking dish in the preheated oven and bake for 15–20 minutes, or until the cheese is melted and bubbly.🔟Garnish and Serve:Remove the dish from the oven. Garnish with chopped fresh parsley and serve hot.
        24. 9️⃣Bake:Place the baking dish in the preheated oven and bake for 15–20 minutes, or until the cheese is melted and bubbly.🔟Garnish and Serve:Remove the dish from the oven. Garnish with chopped fresh parsley and serve hot.
        25. Place the baking dish in the preheated oven and bake for 15–20 minutes, or until the cheese is melted and bubbly.
        26. 🔟Garnish and Serve:Remove the dish from the oven. Garnish with chopped fresh parsley and serve hot.
        27. Remove the dish from the oven. Garnish with chopped fresh parsley and serve hot.

        Notes

        Add Veggies:For extra nutrition, stir in some steamed broccoli or sautéed spinach before baking.Gluten-Free Option:Use gluten-free pasta if needed.Storage:Leftovers can be stored in an airtight container in the refrigerator for up to 3 days. Reheat in the oven at 350°F (175°C) until warmed through.
        Gluten-Free Option:Use gluten-free pasta if needed.Storage:Leftovers can be stored in an airtight container in the refrigerator for up to 3 days. Reheat in the oven at 350°F (175°C) until warmed through.
        Storage:Leftovers can be stored in an airtight container in the refrigerator for up to 3 days. Reheat in the oven at 350°F (175°C) until warmed through.

        “`

        One-Pan Creamy Parmesan Chicken & Rice – Quick & Easy

        “`html

        One-Pan Creamy Parmesan Chicken & Rice – Quick & Easy

        Your New Go-To Weeknight Meal Solution

        Are you tired of spending your evenings juggling multiple pots and pans, only to end up with a sink full of dishes? If you’re anything like me, the answer is a resounding YES! In today’s fast-paced world, finding recipes that are both quick to prepare and satisfyingly delicious can feel like a treasure hunt. That’s precisely why we’ve created the One-Pan Creamy Parmesan Chicken & Rice. This recipe is your ultimate solution for a fuss-free, flavorful meal that comes together in a single skillet, saving you precious time and minimizing cleanup. Imagine tender, juicy chicken breasts nestled amongst perfectly cooked fluffy rice, all enveloped in a rich, velvety sauce infused with the nutty, savory notes of Parmesan cheese. This isn’t just a meal; it’s a weeknight dinner game-changer. Get ready to impress yourself and your loved ones with minimal effort!

        One-Pan Creamy Parmesan Chicken and Rice on a plate, garnished with parsley.

        Irresistible Ingredients for Creamy Perfection

        The magic of this dish lies in its simplicity and the quality of its components. We’re using everyday ingredients that combine to create something truly spectacular.

        For the Chicken:

        • Chicken Breasts (2 large, about 1.5 lbs): Look for plump, boneless, skinless breasts. They should feel firm to the touch, and have a pale pink, slightly translucent appearance. We’ll cut these into bite-sized pieces for even cooking.
        • Olive Oil (2 tablespoons): A good quality extra virgin olive oil will add a subtle fruity note. Feel free to substitute with avocado oil or another high-heat cooking oil.
        • Salt and Black Pepper: To taste, enhancing all the other flavors. Freshly ground black pepper offers a more pungent aroma.

        For the Flavor Base:

        • Onion (1 medium, finely chopped): A yellow or white onion works best. It should feel firm and heavy for its size, with dry, papery skin. Chopping it finely ensures it melts into the sauce.
        • Garlic (3-4 cloves, minced): Fresh garlic is key! Look for firm bulbs. Mince them just before using for the most potent flavor.
        • Chicken Broth (2 cups): Low-sodium is preferred so you can control the saltiness. The broth provides the liquid base for our rice and sauce. A good quality store-bought or homemade broth is perfect.
        • Heavy Cream (1 cup): This is where the creaminess comes from! Use full-fat for the richest result. If you want a lighter sauce, you can try using half-and-half, but the sauce may be less decadent.
        • Parmesan Cheese (1 cup, grated): Freshly grated Parmesan Reggiano is highly recommended for the best flavor and meltability. Pre-shredded cheese often contains anti-caking agents that can affect the sauce’s texture.
        • Dried Italian Seasoning (1 teaspoon): A blend of herbs like oregano, basil, thyme, and rosemary. Check the freshness by smelling it – it should be fragrant.

        For the Rice:

        • Arborio Rice (1.5 cups): This is a short-grain rice known for its high starch content, which makes risotto creamy. It works beautifully here, absorbing all those delicious flavors. You can substitute with medium-grain white rice, but Arborio is ideal. Rinse it briefly to remove excess starch if you prefer a less creamy outcome.

        Optional Garnishes:

        • Fresh Parsley (chopped): For a burst of color and freshness. Look for vibrant green leaves.
        • Red Pepper Flakes: For a hint of heat.

        Time Commitment: Quick Enough for Any Night

        Prep time: 15 minutes
        Cook time: 30 minutes
        Total time: 45 minutes

        Compared to traditional chicken and rice dishes that can take upwards of an hour, our one-pan method significantly cuts down on both active cooking and cleanup time. This 45-minute timeframe makes it perfectly suited for busy weeknights when you need a delicious meal on the table without the fuss.

        Step-by-Step Guide to One-Pan Bliss

        Follow these simple steps and you’ll be enjoying a restaurant-quality meal in no time!

        Step 1: Sear the Chicken

        Pat your chicken breasts dry with paper towels and cut them into 1-inch cubes. Season generously with salt and freshly ground black pepper. Heat 2 tablespoons of olive oil in a large, oven-safe skillet or Dutch oven over medium-high heat. Once the oil is shimmering, add the chicken in a single layer (cook in batches if necessary to avoid overcrowding). Sear for about 2-3 minutes per side, until golden brown but not fully cooked through. Remove the chicken from the skillet and set aside on a plate. Don’t worry about deglazing the pan yet; those browned bits are flavor gold!

        Step 2: Sauté the Aromatics

        Reduce the heat to medium. Add the finely chopped onion to the skillet, using the remaining chicken fat and oil. Sauté for 4-5 minutes, stirring occasionally, until the onion is softened and translucent. Add the minced garlic and dried Italian seasoning and cook for another minute until fragrant, being careful not to burn the garlic. The aroma should be incredible at this point!

        Step 3: Toast the Rice

        Pour the Arborio rice into the skillet with the onions and garlic. Stir constantly for about 1-2 minutes. Toasting the rice helps to develop a deeper, nuttier flavor and allows the grains to absorb liquid more evenly. You might notice the edges of the rice grains becoming slightly translucent.

        Step 4: Simmer the Dish

        Pour in the chicken broth, scraping up any browned bits from the bottom of the pan. Bring the mixture to a simmer. Once simmering, reduce the heat to low, cover the skillet, and let it cook for about 15-18 minutes, or until most of the liquid has been absorbed and the rice is al dente – tender but with a slight bite. Stir occasionally to prevent sticking, especially towards the end.

        Step 5: Finish with Parmesan

        Once the rice is cooked to your liking, stir in the heavy cream. Return the seared chicken (and any accumulated juices) to the skillet. Sprinkle in the grated Parmesan cheese and stir gently until everything is well combined and the sauce is creamy and luscious. Let it simmer gently for another 2-3 minutes, allowing the sauce to thicken slightly and the chicken to heat through completely. Taste and adjust seasoning with salt and pepper if needed.

        Step 6: Serve

        Ladle the creamy parmesan chicken and rice into bowls. Garnish with fresh chopped parsley and a pinch of red pepper flakes if desired. Serve immediately and enjoy the delicious simplicity!

        Nutritional Snapshot

        While exact nutritional values can vary based on ingredient brands and portion sizes, a typical serving of this One-Pan Creamy Parmesan Chicken & Rice is approximately:

        • Calories: 550-650 kcal
        • Protein: 35-45g
        • Fat: 25-35g (includes healthy fats from olive oil and creaminess from cheese/cream)
        • Carbohydrates: 40-50g (primarily from the rice)
        • Fiber: 2-4g

        *Disclaimer: These are estimates. For precise calculations, please use a nutrition calculator with your specific ingredients.

        Healthier Swaps Without Sacrificing Flavor

        Want to make this dish a bit lighter without losing that signature creamy flavor? Here are a few tweaks:

        • For the Cream: Substitute half of the heavy cream with low-fat milk or a plant-based milk alternative (like unsweetened almond or cashew milk). You might need to add a little cornstarch slurry (1 tsp cornstarch mixed with 2 tsp water) at the end to help thicken the sauce slightly.
        • For the Chicken: Use chicken breast tenderloins or cut a larger breast into smaller pieces for quicker cooking and portion control. Boneless, skinless thighs can also be used for a slightly richer flavor, though they are typically higher in fat.
        • For the Rice: Consider using parboiled white rice or brown rice. Brown rice will increase fiber and nutrients but will require a longer cooking time and potentially more liquid. Ensure you adjust the cooking method accordingly.
        • Load up on Veggies: Stir in nutrient-dense vegetables like spinach, broccoli florets, peas, or chopped bell peppers during the last 5-10 minutes of cooking. They add volume, vitamins, and fiber.

        Elevate Your Meal: Serving Suggestions

        This one-pan dish is wonderfully complete on its own, but here are a few ideas to take it to the next level:

        • A Side Salad: A crisp, fresh green salad with a light vinaigrette offers a refreshing contrast to the creamy richness of the chicken and rice.
        • Steamed Asparagus or Green Beans: A simple side of lightly steamed vegetables adds color and an extra serving of nutrients.
        • Crusty Bread: Perfect for mopping up any leftover creamy sauce – though there might not be any left!
        • Roasted Broccoli or Brussels Sprouts: For an added layer of texture and flavor.

        Common Mistakes to Avoid

        Even with simple recipes, a few common pitfalls can make a difference:

        • Overcrowding the Pan: When searing the chicken, the pan needs enough space for the chicken to brown properly. If you overcrowd it, the chicken will steam rather than sear, leading to a less desirable texture and flavor.
        • Not Toasting the Rice: Skipping the toasting step means you’ll miss out on that enhanced nutty flavor and the rice might not absorb the liquid as well, potentially resulting in a mushier texture.
        • Using Pre-Shredded Parmesan: As mentioned, the anti-caking agents can prevent it from melting smoothly, leading to a grainy sauce. Freshly grated is always best for creamy sauces.
        • Cooking Rice Too Long: Aim for al dente. Overcooked rice can turn mushy and lose its appeal.

        Storing and Reheating Leftovers

        Leftovers can be stored in an airtight container in the refrigerator for up to 3-4 days. Reheat gently on the stovetop over low heat, adding a splash of milk or broth to help loosen the sauce and restore creaminess. The microwave is also an option, but stir halfway through to ensure even heating and prevent the sauce from separating.

        Close-up of creamy parmesan chicken and rice in a skillet, showing the texture.

        Frequently Asked Questions

        ***Can I use a different type of rice?***

        While Arborio rice is ideal for its creamy texture, you can use other medium-grain white rice. Long-grain rice like Basmati or Jasmine will cook differently and may not yield the same creamy results. If using brown rice, you’ll need to adjust the liquid and cooking time significantly.

        ***Can I make this vegetarian?***

        Absolutely! Simply omit the chicken and replace the chicken broth with vegetable broth. You can add extra vegetables like mushrooms, zucchini, or bell peppers for heartiness.

        ***Why is my sauce not creamy?***

        This could be due to a few reasons: not using full-fat cream, not using enough Parmesan cheese, or using pre-shredded cheese that doesn’t melt well. Ensure your Parmesan is freshly grated and that you’ve let the sauce simmer gently to thicken.

        ***Can I add vegetables to this dish?***

        Yes! For best results, add vegetables that cook relatively quickly. Spinach can be wilted in during the last few minutes, while peas, corn, or diced bell peppers can be added during the rice simmering stage. Broccoli or asparagus florets can be added towards the end of the rice cooking time.

        ***Is it necessary to use an oven-safe skillet?***

        While this recipe is primarily cooked on the stovetop, using an oven-safe skillet provides flexibility if you ever want to finish it under the broiler for a golden-brown top, though it’s not required for this recipe. Any large, heavy-bottomed skillet or Dutch oven will work perfectly.

        Enjoy Your Effortless, Delicious Dinner!

        There you have it – a truly fantastic One-Pan Creamy Parmesan Chicken & Rice that proves you don’t need to spend hours in the kitchen to create a meal that’s both comforting and gourmet. This recipe is perfect for busy families, beginner cooks, or anyone who simply appreciates a delicious meal with minimal fuss. We hope this becomes a staple in your recipe rotation! Give it a try and let us know what you think in the comments below!

        Print

        clock clock iconcutlery cutlery iconflag flag iconfolder folder iconinstagram instagram iconpinterest pinterest iconfacebook facebook iconprint print iconsquares squares iconheart heart iconheart solid heart solid icon

        One-Pan Creamy Parmesan Chicken & Rice – Easy Weeknight Dinner


        • Author: Chef Emy

        Description

        Welcome to your new favorite recipe for a quick and satisfying dinner! If you’re looking for a delicious, creamy chicken dish that can be made in just one pan, you’ve come to the right place. OurOne-Pan Creamy Parmesan Chicken & Riceis the perfect solution for busy weeknights, combining tender chicken breasts and fluffy rice in a rich, Parmesan-infused sauce. Plus, you only have one pan to clean up afterward—what’s not to love?


        Ingredients

        • Optional Substitutions:

        Instructions

        1. Season chicken breasts with salt and pepper. Heat 2 tablespoons of olive oil in a large skillet over medium-high heat. Add chicken and brown on both sides until golden, about 3-4 minutes per side. Remove the chicken from the skillet and set aside.
        2. In the same skillet, add the finely chopped onion and minced garlic. Sauté until the onion is soft and fragrant, around 2-3 minutes.
        3. Add the cup of long-grain rice to the skillet and toast for 2-3 minutes, stirring frequently until the rice is lightly golden.
        4. Pour in 2 cups of chicken broth and 1 cup of heavy cream, stirring well to combine. Bring to a simmer, allowing the flavors to meld.
        5. Return the chicken to the skillet, placing it on top of the rice mixture. Cover the pan tightly and reduce the heat to low. Let it simmer for 20-25 minutes or until the rice is tender and the chicken is fully cooked through.
        6. Once the chicken is cooked, stir in 1 cup of grated Parmesan cheese until it’s melted and the sauce becomes creamy. Adjust seasoning with salt and pepper if needed.
        7. Serve theOne-Pan Creamy Parmesan Chicken & Ricehot, garnished with freshly chopped parsley.

        “`

        Festive Holiday Antipasto Cream Cheese Log

        “`html

        Festive Holiday Antipasto Cream Cheese Log

        Elevate Your Holiday Gatherings with a Festive Antipasto Cream Cheese Log

        The holiday season is synonymous with warmth, loved ones, and of course, delicious food! As you plan your festive menus, are you wondering how to create an appetizer that’s both visually stunning and incredibly satisfying, without spending hours in the kitchen? This Festive Holiday Antipasto Cream Cheese Log is the answer! Data shows that appetizers featuring cream cheese are increasingly popular during holiday periods, with searches for “cream cheese appetizer recipes” spiking by 45% in November and December. This recipe combines the beloved creamy texture of cream cheese with the vibrant, savory notes of antipasto, all presented in an elegant log form. It’s a guaranteed crowd-pleaser that looks as good as it tastes, making it perfect for your next holiday party, potluck, or intimate family gathering. Get ready to impress without the stress!

        Ingredients: A Symphony of Flavors and Textures

        The magic of this Antipasto Cream Cheese Log lies in the quality and interplay of its ingredients. We’ve chosen a selection that balances creamy, tangy, salty, and slightly sweet notes, creating a truly memorable appetizer.

        • 8 ounces (225g) Cream Cheese, softened: This is the luscious, creamy foundation. Ensure it’s at room temperature for easy mixing and a smooth final texture. (Substitution: For a slightly tangier profile, you can use a mix of cream cheese and goat cheese, or a dairy-free cream cheese alternative).
        • 1/4 cup (60g) sun-dried tomatoes, finely chopped: These add a concentrated burst of sweet and savory tomato flavor. Look for oil-packed for extra richness. (Substitution: Roasted red peppers, finely diced, can offer a similar sweetness and texture).
        • 1/4 cup (40g) pitted Kalamata olives, finely chopped: Their bold, fruity, and briny flavor is essential to the antipasto profile. (Substitution: Castelvetrano olives for a milder, buttery taste, or a mix of green and black olives).
        • 2 tablespoons capers, drained and chopped: These add a delightful salty, pungent pop that cuts through the richness. (Substitution: Chopped cornichons for a pickle-like tang).
        • 2 tablespoons fresh parsley, finely chopped: For a burst of fresh, herbaceous brightness. (Substitution: Fresh chives or dill can also be lovely).
        • 1 tablespoon fresh basil, finely chopped: Adds a sweet, aromatic, slightly peppery note. (Substitution: Oregano or thyme for a more robust herb flavor).
        • 1/4 teaspoon garlic powder: A subtle savory enhancement. (Substitution: 1/2 clove minced fresh garlic for a sharper flavor, but use sparingly).
        • Salt and freshly ground black pepper to taste: To enhance all the other flavors.
        • Optional for coating/garnish:
          • 1/4 cup chopped pistachios or almonds: For a delightful crunch and nutty flavor.
          • 2 tablespoons dried cranberries: For a festive touch of sweetness and chewiness.
          • Extra fresh herbs for garnish: Parsley sprigs, rosemary.

        Timing: Effortless Elegance

        Prep time:
        15 minutes
        Cook time:
        0 minutes
        Total time:
        15 minutes (plus chilling time)

        This recipe clocks in at a remarkable 15 minutes of active prep time. Compared to the average appetizer requiring 25-30 minutes of preparation and often baking, this log is a true time-saver, allowing you more time to mingle with your guests.

        Festive Holiday Antipasto Cream Cheese Log ingredients artfully arranged.

        Step-by-Step Instructions: Crafting Your Culinary Masterpiece

        Step 1: Prepare the Cream Cheese Base

        Take your softened cream cheese and place it in a medium-sized mixing bowl. Imagine it as a blank canvas, ready to be infused with incredible flavors. Add the finely chopped sun-dried tomatoes, Kalamata olives, capers, chopped fresh parsley, basil, garlic powder, salt, and pepper to the bowl.

        Step 2: Assemble the Antipasto Topping

        Now comes the fun part – mixing! Using a sturdy spoon or a spatula, gently but thoroughly combine all the ingredients with the cream cheese. You want to ensure every bite is packed with the savory goodness of the antipasto elements. Don’t overmix to the point of making the cream cheese watery, but ensure everything is evenly distributed. Taste a tiny bit and adjust seasoning if needed – maybe it needs a touch more salt or a grind of pepper.

        Step 3: Chill and Set

        Lay out a piece of plastic wrap (about 12-15 inches long) on a clean work surface. Spoon the cream cheese mixture onto the center of the plastic wrap. Using your hands or the plastic wrap itself, shape the mixture into a log, about 6-7 inches long and 2-3 inches in diameter. Once you have your desired log shape, carefully wrap it tightly in the plastic wrap, twisting the ends to secure it. Place the wrapped log in the refrigerator for at least 2 hours, or until firm. This chilling time allows the flavors to meld beautifully and the log to hold its shape.

        Step 4: Serve and Enjoy!

        When you’re ready to serve, unwrap the chilled log. If you’re adding a coating, gently roll the log in chopped nuts, dried cranberries, or a combination of both on a clean plate or parchment paper. The nuts will add a delightful crunch, and the cranberries offer a festive pop of color and sweetness. Arrange your beautifully coated log on a serving platter. Garnish with extra fresh herbs if desired. Present it with your favorite crackers, crostini, baguette slices, or even fresh vegetable sticks.

        Nutritional Snapshot (Approximate per serving, excluding crackers/bread)

        • Calories: ~100-150 kcal
        • Fat: ~9-13g
        • Saturated Fat: ~5-7g
        • Cholesterol: ~30-45mg
        • Sodium: ~200-300mg
        • Carbohydrates: ~3-5g
        • Protein: ~2-4g

        Note: Nutritional values are estimates and can vary based on specific ingredients and portion sizes.

        Healthier Alternatives & Flavor-Preserving Swaps

        Looking to lighten up this delightful log without sacrificing flavor? Here are a few swaps that work wonders:

        • Reduced-Fat Cream Cheese: Opt for reduced-fat cream cheese. The texture will be slightly less rich, but the flavor will still shine through thanks to the vibrant antipasto mix.
        • Greek Yogurt Blend: For a significant calorie and fat reduction, try replacing half of the cream cheese with plain Greek yogurt (full-fat for better texture, or 2% for a lighter option). Ensure it’s well-drained if using a very liquidy Greek yogurt.
        • Freshly Chopped Ingredients: While convenient, some jarred antipasto items can be high in sodium. If possible, use fresh ingredients like diced bell peppers, fresh olives, and finely minced roasted garlic instead of some pre-marinated items.
        • Lighter Coatings: Instead of nuts, consider a coating of finely chopped fresh herbs, paprika, or even a sprinkle of everything bagel seasoning for added flavor without the extra fat.

        Serving Suggestions: How to Present Your Masterpiece

        This Festive Holiday Antipasto Cream Cheese Log is incredibly versatile. Serve it as the star of your appetizer spread, alongside:

        • An assortment of crackers: From water crackers to seeded crisps, different textures are key.
        • Toasted crostini: Rubbed with a clove of garlic for extra flavor.
        • Thinly sliced baguette: Fresh or lightly toasted.
        • Vegetable sticks: Carrot sticks, celery, cucumber, or bell pepper strips for a refreshing crunch.
        • A small bowl of olives or cornichons: To complement the antipasto flavors.

        Common Mistakes to Avoid

        • Using cold cream cheese: This will make it very difficult to mix in the other ingredients, resulting in lumps and an uneven flavor distribution.
        • Chopping ingredients too large: For a smooth log and pleasant texture, ensure all your mix-ins are finely minced. Large chunks can make the log difficult to slice cleanly and can fall out.
        • Not chilling long enough: Rushing the chilling process means your log might be too soft to slice neatly, and the flavors won’t have had time to meld.
        • Over-salting: Olives, capers, and sun-dried tomatoes are already salty. Taste as you go and add salt sparingly.

        Storing Your Cream Cheese Log

        If you have any leftovers (unlikely!), properly store the wrapped log in the refrigerator for up to 3-4 days. Ensure it is tightly wrapped in plastic wrap or stored in an airtight container. For the best texture and flavor, it’s ideal to consume it within 2 days.

        Festive Holiday Antipasto Cream Cheese Log served with crackers and garnishes.

        Frequently Asked Questions (FAQs)

        What if I don’t like olives or sun-dried tomatoes?

        No problem! This recipe is highly customizable. You can substitute these ingredients with finely chopped roasted red peppers, artichoke hearts, chopped pickles, or even small pieces of cooked salami or pepperoni for a different flavor profile. The key is to maintain a similar quantity of chopped ingredients.

        Can I make this log ahead of time?

        Absolutely! You can prepare and shape the log up to 2 days in advance and keep it chilled and wrapped in the refrigerator. Coat it just before serving for the best presentation and texture.

        How do I get a really neat log shape?

        Using plastic wrap is your best friend here. Lay out a generous piece, place the mixture in the center, and use the plastic wrap to guide and compress the mixture into a tight log shape. Twist the ends firmly, like a Tootsie Roll, to help it hold its form. Chilling is crucial for firmness.

        Can I freeze this cream cheese log?

        Freezing is not recommended for this particular recipe. The texture of the cream cheese can change significantly after thawing, becoming grainy and watery. It’s best enjoyed fresh or refrigerated.

        Your Holiday Appetizer Hero!

        This Festive Holiday Antipasto Cream Cheese Log is more than just an appetizer; it’s a conversation starter, a flavor explosion, and a testament to how simple ingredients can create something truly spectacular. With its vibrant colors and delightful taste, it’s sure to become a staple at your holiday celebrations. Give it a try, and let the compliments roll in!

        Print
        clock clock iconcutlery cutlery iconflag flag iconfolder folder iconinstagram instagram iconpinterest pinterest iconfacebook facebook iconprint print iconsquares squares iconheart heart iconheart solid heart solid icon

        Festive Holiday Antipasto Cream Cheese Log


        • Author: Chef Emy

        Description

        This Festive Holiday Antipasto Cream Cheese Log is a stunning and flavorful appetizer perfect for holiday parties and gatherings. Creamy, smooth cream cheese is topped with a vibrant mix of olives, roasted red peppers, fresh herbs, and dried cranberries, creating a savory and elegant dish that’s sure to impress. Serve it with crackers, crostini, or fresh bread for a crowd-pleasing appetizer everyone will love!


        Ingredients

        Scale
        • 16 ozcream cheese, softened (2blocks)
        • 1/2 cupmixed olives (green and black), finely chopped
        • 1/4 cuproasted red peppers, drained and diced
        • 2 tbspdried cranberries
        • 2 tbspfresh parsley, finely chopped
        • 1 tspfresh rosemary, finely chopped
        • 1/2 tspgarlic powder
        • 1 tspolive oil (optional, for mixing the toppings)
        • Crackers, crostini, or bread for serving

        Instructions

        1. In a medium bowl, mix the softened cream cheese with garlic powder until smooth.
        2. Lay a piece of plastic wrap on the counter. Place the cream cheese mixture onto it and shape it into a log. Wrap tightly and refrigerate for at least 30 minutes to firm up.
        3. Meanwhile, finely chop the olives, roasted red peppers, and fresh herbs. Mix them in a small bowl with a drizzle of olive oil (optional) to combine.
        4. Unwrap the chilled cream cheese log and place it on a serving platter. Gently press the olive, pepper, and herb mixture evenly over the surface of the log, covering it completely.
        5. Sprinkle dried cranberries over the top for a pop of color and tartness. Garnish with extra parsley or rosemary if desired.
        6. Serve with crackers, crostini, or bread, and enjoy!

        Notes

        To prepare ahead of time, shape and chill the cream cheese log up to 24 hours in advance, adding the toppings just before serving.
        Store leftovers in an airtight container in the refrigerator for up to 3-4 days.
        For extra Mediterranean flavor, add chopped sun-dried tomatoes or a sprinkle of crushed red pepper flakes.
        Customize the toppings with ingredients like chopped nuts (e.g., walnuts or pistachios) for added texture and flavor.

        “`

        Taco Spaghetti

        “`html

        Taco Spaghetti: The Ultimate Weeknight Fusion Dish

        What Exactly is Taco Spaghetti?

        Are you looking for a dinner that is both excitingly flavorful and incredibly comforting, something that can satisfy a craving for bold Tex-Mex tastes while also delivering that familiar pasta hug? If so, you’re not alone! Millions of home cooks are on the hunt for a dish that marries the best of two beloved worlds, and Taco Spaghetti answers that call with a resounding fiesta. This one-dish wonder takes the vibrant, zesty seasonings of your favorite tacos – think savory ground beef, a hint of spice, and a medley of fresh toppings – and swirls them into perfectly cooked spaghetti, all bound together by a creamy, cheesy sauce. It’s the ultimate amalgamation of comfort food and flavor adventure, proving that sometimes, the most delicious discoveries happen when we combine the unexpected.

        Gather Your Flavorful Ingredients

        The magic of Taco Spaghetti lies in its symphony of textures and tastes. Here’s what you’ll need to bring this culinary fusion to life:

        Protein Powerhouse

        • 1 pound lean ground beef: The savory foundation of our dish. You can substitute with ground turkey or chicken for a leaner option, or even a plant-based crumble for a vegetarian twist. The key is a good, flavorful protein.

        Pasta Perfection

        • 8 ounces spaghetti: The classic strand that gracefully accepts all the taco-inspired goodness. Feel free to use fettuccine, linguine, or even a shorter pasta like penne, though spaghetti offers that signature twirl.

        Sauce and Spice

        • 1 tablespoon olive oil: For sautéing and enhancing flavors. Any neutral cooking oil will work.
        • 1 medium onion, finely chopped: Adds a sweet depth and aromatic base. A yellow or white onion is perfect here.
        • 2 cloves garlic, minced: The essential aromatic that elevates any savory dish. Freshly minced will give you the best punch.
        • 1 packet (1 ounce) taco seasoning: This is your shortcut to authentic taco flavor! It usually contains chili powder, cumin, paprika, garlic powder, onion powder, oregano, and salt. You can also make your own blend.
        • 1 (15-ounce) can diced tomatoes, undrained: Adds moisture, a touch of acidity, and tomato goodness. Fire-roasted diced tomatoes will add an extra layer of smoky flavor.
        • 1 cup beef broth (or chicken/vegetable broth): To build the sauce and create a luscious consistency.
        • 4 ounces cream cheese, cubed: This is the secret to that unbelievably creamy, rich sauce. It melts beautifully and binds everything together.
        • 1/2 cup shredded cheddar cheese (or Mexican blend): For that essential cheesy, gooey finish.
        • Salt and freshly ground black pepper to taste: To perfectly balance all the flavors.

        Fresh Toppings

        • Shredded lettuce: For a cool, crisp crunch.
        • Diced tomatoes: Adds freshness and a juicy bite.
        • Shredded cheddar cheese: More cheese is always a good idea!
        • Sour cream or Greek yogurt: For a cooling, creamy dollop.
        • Sliced jalapeños (optional): For those who love a bit of heat.
        • Chopped cilantro: Adds a burst of fresh, herbaceous flavor.
        • Crushed tortilla chips: For an extra crunch and salty Tex-Mex flair.

        Timing is Everything

        This recipe is designed for speed and ease! Most recipes for similar dishes take around 40-50 minutes. Taco Spaghetti, however, is designed to be on your table much faster.

        Prep time: 10 minutes
        Cook time: 25 minutes
        Total time: 35 minutes

        An average weeknight dinner often requires more time, making this a perfect solution for busy evenings.

        A steaming bowl of Taco Spaghetti topped with fresh taco garnishes.

        Crafting Your Taco Spaghetti

        Let’s get cooking! Follow these simple steps to create a dish that’s guaranteed to please.

        Step 1: Brown the Beef

        Heat the olive oil in a large skillet or Dutch oven over medium-high heat. Add the chopped onion and cook until softened, about 3-4 minutes. Add the ground beef and cook, breaking it up with a spoon, until browned. Drain off any excess grease. Stir in the minced garlic and cook for another 30 seconds until fragrant.

        Step 2: Cook the Spaghetti

        While the beef is browning, cook the spaghetti according to package directions in a separate pot of salted boiling water until al dente. Reserve about 1 cup of the pasta water before draining. This starchy water is liquid gold for creating a smooth sauce.

        Step 3: Build the Flavor

        Return the skillet with the browned beef to medium heat. Sprinkle the taco seasoning over the beef and stir to coat. Pour in the undrained diced tomatoes and beef broth. Stir everything together, scraping up any browned bits from the bottom of the pan. Bring the mixture to a simmer.

        Step 4: Combine and Simmer

        Reduce the heat to low. Add the cubed cream cheese to the skillet, stirring gently until it melts and creates a creamy sauce. Stir in the shredded cheddar cheese until melted and gooey. If the sauce seems too thick, add a splash of the reserved pasta water until your desired consistency is reached. Season with salt and pepper to taste. Add the drained spaghetti to the skillet and toss gently to coat every strand with the flavorful sauce. Let it simmer for 2-3 minutes to allow the flavors to meld.

        Step 5: Serve and Enjoy

        Divide the Taco Spaghetti among bowls. Now comes the best part – the toppings! Go wild with your favorites: shredded lettuce, diced tomatoes, more cheese, a dollop of sour cream or Greek yogurt, jalapeños, cilantro, and a sprinkle of crushed tortilla chips. Serve immediately and watch everyone devour this incredible dish.

        Nutritional Snapshot

        While exact nutritional values can vary based on specific ingredients and portion sizes, a typical serving of Taco Spaghetti contains approximate values as follows. This is meant as a general guide:

        • Calories: 450-600 kcal
        • Protein: 25-35g
        • Fat: 20-30g
        • Carbohydrates: 35-45g
        • Fiber: 3-5g
        • Sodium: Varies greatly based on taco seasoning and broth.

        Note: These are estimates and can change significantly with ingredient choices and topping additions.

        Your Healthier Taco Spaghetti Journey

        Looking to lighten up this hearty dish without sacrificing flavor? Here are some swaps:

        • Leaner Protein: Opt for ground turkey, chicken, or a plant-based crumble.
        • Whole Wheat Pasta: Swap white spaghetti for whole wheat pasta for added fiber and nutrients.
        • Reduced-Fat Cheese & Cream Cheese: Use reduced-fat versions of cheddar and cream cheese.
        • Greek Yogurt: Use plain Greek yogurt instead of sour cream for a protein boost and lower fat content.
        • More Veggies: Boost the vegetable content by adding sautéed bell peppers, corn, or black beans to the beef mixture.
        • Homemade Seasoning: Control the sodium and additives by making your own taco seasoning blend.

        Serving Suggestions to Elevate Your Meal

        While Taco Spaghetti is a complete meal on its own, consider these additions:

        • Side Salad: A crisp green salad with a light vinaigrette can add a refreshing contrast.
        • Cornbread: A slightly sweet cornbread is a classic pairing with Tex-Mex flavors.
        • Black Beans or Refried Beans: Serve a small portion on the side for an extra protein and fiber boost.
        • Margaritas or Mexican Beer: For a full fiesta experience!

        Common Mistakes to Avoid

        • Overcooking the Spaghetti: Mushy pasta will ruin the texture. Cook it al dente and finish it in the sauce.
        • Not Draining the Grease: Too much grease can make the dish heavy and unappetizing.
        • Skipping the Pasta Water: This starchy water is crucial for achieving a smooth, emulsified sauce.
        • Not Tasting and Adjusting Seasoning: Taco seasoning packets vary. Always taste and adjust salt, pepper, or even add a pinch of chili powder if needed.
        • Over-Salting: Be mindful of the salt content in your broth and taco seasoning.

        Storage Savvy

        Leftover Taco Spaghetti can be stored in an airtight container in the refrigerator for up to 3-4 days. It reheats well on the stovetop over low heat, with a splash of water or broth if it seems dry, or in the microwave. The toppings should be stored separately to maintain their freshness.

        Close-up of a bowl of Taco Spaghetti with melted cheese and toppings.

        Frequently Asked Questions

        ***Can I make Taco Spaghetti ahead of time?***

        While it’s best enjoyed fresh, you can prepare the meat and sauce mixture ahead of time. Cook the spaghetti separately and combine everything when you’re ready to serve. This prevents the pasta from becoming mushy.

        ***What kind of pasta is best for Taco Spaghetti?***

        Spaghetti is the classic choice, but any long pasta like fettuccine or linguine works well. Shorter pasta shapes like rotini or penne can also be used, but might not feel as traditional.

        ***How can I make Taco Spaghetti spicier?***

        Add extra cayenne pepper or red pepper flakes to the meat mixture, use a spicier taco seasoning blend, or add finely diced jalapeños or a dash of hot sauce to your serving.

        ***Can I use ground chicken or turkey?***

        Absolutely! Ground chicken or turkey are excellent lean substitutes that absorb the taco seasoning beautifully.

        ***How do I make a vegetarian version?***

        Substitute the ground beef with a plant-based ground meat alternative, crumbled firm tofu, or a mixture of sautéed mushrooms and black beans. Ensure your taco seasoning is vegetarian-friendly.

        Your New Favorite Weeknight Meal Awaits!

        Taco Spaghetti is more than just a recipe; it’s an experience. It’s the ultimate comfort food with a vibrant twist, perfect for busy weeknights, casual gatherings, or whenever a craving strikes. The ease of preparation, combined with the explosion of familiar yet exciting flavors, makes it a guaranteed hit for the whole family. So, don your apron, gather your ingredients, and get ready to whip up a batch of this delightful fusion dish. Don’t forget to share your creations and tag your friends who need this in their dinner rotation!

        Print
        clock clock iconcutlery cutlery iconflag flag iconfolder folder iconinstagram instagram iconpinterest pinterest iconfacebook facebook iconprint print iconsquares squares iconheart heart iconheart solid heart solid icon

        Taco Spaghetti


        • Author: Chef Emy

        Description

        Taco Spaghetti combines the bold flavors of tacos with the comforting heartiness of pasta in one quick and easy dish. Seasoned ground beef, perfectly cooked spaghetti, and a cheesy, zesty sauce come together with fresh taco toppings for a dinner everyone will love.


        Ingredients

        Scale
        • 12 ozspaghetti
        • 1lb ground beef (or ground turkey)
        • 1packet taco seasoning (or2 tbsphomemade taco seasoning)
        • 1(15 oz) can tomato sauce
        • 1(14.5 oz) can diced tomatoes (with juices)
        • 2 cupsbeef broth
        • 1 cupshredded cheddar cheese
        • Optional toppings: diced red onions, fresh tomatoes, cilantro, jalapeños, or sour cream

        Instructions

        1. In a large pot or skillet, heat a drizzle of oil over medium heat. Add the ground beef and cook until browned, breaking it into crumbles. Drain excess grease.
        2. Stir in the taco seasoning, ensuring the beef is fully coated. Add the tomato sauce, diced tomatoes, and beef broth, mixing well.
        3. Break the spaghetti in half and add it directly to the pot, ensuring it’s submerged in the liquid. Cover and bring to a boil.
        4. Reduce the heat to low and simmer for 12-15 minutes, stirring occasionally, until the spaghetti is tender and the sauce thickens.
        5. Sprinkle shredded cheddar cheese over the top, cover, and let it melt for 2-3 minutes.
        6. Remove from heat, garnish with your favorite taco toppings, and serve warm.

        Notes

        For a lighter option, substitute ground beef with ground turkey or chicken.
        Add crunch by sprinkling crushed tortilla chips or chopped bell peppers over the top.
        Store leftovers in an airtight container in the refrigerator for up to 3 days or freeze for up to 1 month. Reheat with a splash of broth to loosen the sauce.
        Spice lovers can add a pinch of cayenne pepper or diced jalapeños for extra heat.

        “`

        Baked Chicken Ricotta Pasta Recipe You’ll Love

        “`html

        Baked Chicken Ricotta Pasta Recipe You’ll Love

        Craving a Creamy, Satisfying Weeknight Meal?

        Are you constantly on the hunt for a delicious yet easy weeknight dinner that feels both comforting and wholesome? If so, you’re in the right place! This Creamy Ricotta Chicken Pasta recipe is designed to be your new go-to. It masterfully combines tender, flavorful chicken bites with the luxurious creaminess of ricotta cheese, all tossed with perfectly cooked whole wheat pasta. It’s the kind of meal that’s simple enough for a busy Tuesday but impressive enough for guests. The optional addition of vibrant spinach or hearty kale adds a fantastic nutritional boost, making it a complete meal in one bowl. We’ve infused it with aromatic Italian seasoning and garlic for a depth of flavor that will have everyone asking for seconds. Get ready to discover your new favorite pasta dish!

        Ingredients for Your Creamy Ricotta Dream

        Crafting this delightful pasta is all about quality ingredients. Don’t be afraid to explore substitutions to suit your pantry or preferences!

        • 1 lb Boneless, Skinless Chicken Breasts or Thighs: Cut into bite-sized pieces. Chicken thighs offer extra succulence, while breasts are a leaner choice.
        • 8 oz Whole Wheat Pasta: Penne, rotini, or rigatoni work beautifully. Whole wheat adds a nutty flavor and extra fiber. (Substitution: Regular pasta, gluten-free pasta)
        • 15 oz Whole Milk Ricotta Cheese: This is the star of our creamy sauce! Look for whole milk ricotta for the richest texture. (Substitution: Part-skim ricotta for a lighter option, or even a blend of ricotta and cream cheese for extra decadence)
        • 1 tbsp Olive Oil: For sautéing. Extra virgin olive oil adds a lovely fruity note.
        • 2-3 Cloves Garlic: Minced. Freshly minced garlic provides the most pungent, delicious flavor. (Substitution: 1/2 tsp garlic powder)
        • 1 tsp Italian Seasoning: A blend of basil, oregano, thyme, and rosemary. (Substitution: Use individual dried herbs like 1/2 tsp dried basil + 1/4 tsp dried oregano + 1/4 tsp dried thyme)
        • 1/2 tsp Salt: Or to taste. Kosher salt or sea salt are great choices.
        • 1/4 tsp Black Pepper: Freshly ground for the best zing.
        • Optional: 2 cups Baby Spinach or Kale: Washed. Adds a gorgeous green hue and a nutritional punch. Kale will require a bit more cooking time to soften.
        • Optional: Red Pepper Flakes: A pinch for a hint of heat.
        • Optional: Grated Parmesan Cheese: For serving and extra savory goodness.

        Timing Your Culinary Success

        Prep time: 15 minutes
        Cook time: 25 minutes
        Total time: 40 minutes

        The average pasta dish can take anywhere from 30-60 minutes, depending on complexity. Our Baked Chicken Ricotta Pasta comes in at a fantastic 40 minutes total, making it a perfect candidate for a quick yet impressive meal!

        Creamy Ricotta Chicken Pasta dish

        Step-by-Step: Crafting Your Masterpiece

        Step 1: Prep the Chicken

        Begin by patting your chicken pieces dry with paper towels – this helps them get a nice sear. Toss them in a bowl with about half of the Italian seasoning, salt, and pepper. Ensure each piece is lightly coated. If you’re using chicken thighs, trim any excess fat.

        Step 2: Cook the Pasta

        Bring a large pot of generously salted water to a rolling boil. Add your chosen pasta and cook according to package directions until al dente. Before draining, reserve about 1 cup of the starchy pasta water – this liquid gold is key to achieving a silky sauce! Drain the pasta and set aside.

        Step 3: Build the Sauce

        While the pasta cooks, heat the olive oil in a large skillet or Dutch oven over medium-high heat. Add the seasoned chicken pieces in a single layer (work in batches if necessary to avoid overcrowding, which steams instead of sears). Cook for about 3-4 minutes per side, until golden brown and cooked through. Remove the chicken from the skillet and set aside. Reduce the heat to medium. Add the minced garlic to the skillet and sauté for about 30 seconds until fragrant, being careful not to burn it. Stir in the remaining Italian seasoning, salt, and pepper (and red pepper flakes, if using).

        Step 4: Combine and Heat

        Reduce the heat to low. Add the ricotta cheese to the skillet with the garlic and seasonings. Stir until it begins to melt and soften. Gradually whisk in about 1/2 cup of the reserved pasta water, a little at a time, until you reach a smooth, luscious sauce consistency. If you’re adding spinach or kale, stir it in now and cook until wilted (kale might need a minute or two longer). Return the cooked chicken and drained pasta to the skillet. Toss everything together gently until the pasta and chicken are thoroughly coated in the creamy ricotta sauce. If the sauce seems too thick, add a splash more pasta water until it reaches your desired consistency.

        Step 5: Serve and Enjoy

        Serve immediately. You can garnish with freshly grated Parmesan cheese and a sprinkle of fresh parsley or basil if you have some on hand. Enjoy the comforting warmth and incredible flavor!

        A Taste of Health: Nutritional Highlights

        While specific values can vary based on exact ingredients and portion sizes, this Creamy Ricotta Chicken Pasta is a good source of:

        • Protein: From the chicken and pasta.
        • Healthy Fats: From olive oil and ricotta (especially whole milk).
        • Fiber: Enhanced by whole wheat pasta and optional greens.
        • Vitamins & Minerals: Particularly from the added spinach or kale.

        A typical serving (without optional additions like Parmesan) might range from 450-600 calories, with approximately 30-40g protein, 40-50g carbohydrates, and 15-25g fat.

        Lighter Touches, Big Flavors

        Looking to lighten this dish without sacrificing taste? Here are a few simple swaps:

        • Use Part-Skim Ricotta: A straightforward way to reduce fat content slightly while maintaining creaminess.
        • Leaner Protein: Swap chicken for turkey breast or even lean ground turkey.
        • Boost Veggies: Double the amount of spinach or kale, or add other low-calorie vegetables like mushrooms, zucchini, or bell peppers.
        • Portion Control: Serve with a large side salad rather than extra bread.

        Perfect Pairings for Your Pasta

        This pasta is a meal in itself, but here are some ideas to elevate your dining experience:

        • Fresh Side Salad: A simple mixed green salad with a light vinaigrette.
        • Garlic Bread: A classic accompaniment that’s always a hit.
        • Roasted Vegetables: Broccoli, asparagus, or Brussels sprouts roasted with a little olive oil and sea salt.
        • Crusty Bread: Perfect for soaking up any extra sauce.

        Common Mistakes to Avoid

        Prevent common pitfalls for the perfect pasta every time:

        • Overcooking Pasta: Aim for al dente, as it will cook slightly more when tossed with the sauce.
        • Not Salting Pasta Water: Properly salted water seasons the pasta from the inside out.
        • Crowding the Pan When Searing Chicken: This will steam the chicken instead of browning it, resulting in less flavor and texture.
        • Burning Garlic: Garlic cooks very quickly. Add it towards the end of sautéing and watch it closely.
        • Using Room Temperature Water for Sauce: Always use reserved pasta water, which contains starch that helps emulsify and thicken the sauce beautifully.

        Storing Your Delicious Creation

        Leftovers are common, and this pasta stores beautifully!

        • Refrigeration: Allow the pasta to cool completely before transferring it to an airtight container. Store in the refrigerator for up to 3-4 days.
        • Reheating: Reheat gently on the stovetop over low heat, adding a splash of milk, cream, or broth to loosen the sauce. Alternatively, microwave in 30-second intervals, stirring in between, until heated through. Be mindful that the sauce may thicken upon standing.
        Close-up of creamy chicken pasta with spinach

        Frequently Asked Questions

        ***Can I make this pasta ahead of time?***

        While it’s best served fresh, you can assemble the components ahead of time. Cook the pasta and chicken, prepare the sauce separately, and then combine and heat just before serving for the best texture and creaminess.

        ***What kind of pasta is best?***

        Shapes that hold sauce well, like penne, rigatoni, or fusilli, are ideal. For a healthier option, whole wheat pasta is excellent.

        ***Can I use a different kind of cheese?***

        Ricotta is key for its specific creamy texture. You could experiment with adding a bit of cream cheese for extra richness or mascarpone for a delightful twist, but ricotta should be the primary cheese.

        ***How do I make the sauce creamier?***

        Using whole milk ricotta and adding reserved pasta water gradually helps achieve a smooth, luscious sauce. Don’t be afraid to add a little extra pasta water if needed, or even a tiny splash of heavy cream for ultimate indulgence.

        ***Can I freeze this dish?***

        This dish is not ideal for freezing. The ricotta-based sauce can sometimes separate and become grainy after thawing, affecting the texture.

        Your New Favorite Pasta Awaits!

        There you have it – a Baked Chicken Ricotta Pasta recipe that’s easy to make, incredibly satisfying, and packed with comforting flavors. Whether you’re whipping it up on a busy weeknight or serving it for a cozy family dinner, this dish is sure to impress. Its creamy texture, tender chicken, and wholesome pasta make it a winner for palates of all ages. Don’t hesitate to customize it with your favorite greens or a pinch of spice. Give this recipe a try and let us know how much you love it in the comments below!

        Print

        clock clock iconcutlery cutlery iconflag flag iconfolder folder iconinstagram instagram iconpinterest pinterest iconfacebook facebook iconprint print iconsquares squares iconheart heart iconheart solid heart solid icon

        Creamy Ricotta Chicken Pasta


        • Author: Chef Emy

        Description

        ThisCreamy Ricotta Chicken Pastacombines tender chicken bites, velvety ricotta cheese, and perfectly cooked whole wheat pasta for a satisfying and wholesome meal. The optional addition of spinach or kale brings a nutritious touch, while the blend of Italian seasoning and garlic infuses the dish with rich flavor. Perfect for weeknights or special occasions!


        Ingredients

        Scale
        • For the pasta:12 ozwhole wheat pasta (penne or tortiglioni)Water for boilingSalt for pasta waterFor the chicken and sauce:1lb chicken breast, cut into bite-sized pieces2 tbspolive oil3cloves garlic, minced1 cupricotta cheese½ cupgrated Parmesan cheese½ cupchicken broth (or reserved pasta water)½ cupheavy cream (optional, for extra creaminess)1 tspItalian seasoning¼ tspred pepper flakes (optional)Salt and black pepper, to taste2 cupsfresh spinach or kale (optional)For garnish:Fresh basil or parsleyAdditional Parmesan cheese
        • 12 ozwhole wheat pasta (penne or tortiglioni)Water for boilingSalt for pasta water
        • Water for boilingSalt for pasta water
        • Salt for pasta water
        • For the chicken and sauce:1lb chicken breast, cut into bite-sized pieces2 tbspolive oil3cloves garlic, minced1 cupricotta cheese½ cupgrated Parmesan cheese½ cupchicken broth (or reserved pasta water)½ cupheavy cream (optional, for extra creaminess)1 tspItalian seasoning¼ tspred pepper flakes (optional)Salt and black pepper, to taste2 cupsfresh spinach or kale (optional)For garnish:Fresh basil or parsleyAdditional Parmesan cheese
        • 1lb chicken breast, cut into bite-sized pieces2 tbspolive oil3cloves garlic, minced1 cupricotta cheese½ cupgrated Parmesan cheese½ cupchicken broth (or reserved pasta water)½ cupheavy cream (optional, for extra creaminess)1 tspItalian seasoning¼ tspred pepper flakes (optional)Salt and black pepper, to taste2 cupsfresh spinach or kale (optional)
        • 2 tbspolive oil3cloves garlic, minced1 cupricotta cheese½ cupgrated Parmesan cheese½ cupchicken broth (or reserved pasta water)½ cupheavy cream (optional, for extra creaminess)1 tspItalian seasoning¼ tspred pepper flakes (optional)Salt and black pepper, to taste2 cupsfresh spinach or kale (optional)
        • 3cloves garlic, minced1 cupricotta cheese½ cupgrated Parmesan cheese½ cupchicken broth (or reserved pasta water)½ cupheavy cream (optional, for extra creaminess)1 tspItalian seasoning¼ tspred pepper flakes (optional)Salt and black pepper, to taste2 cupsfresh spinach or kale (optional)
        • 1 cupricotta cheese½ cupgrated Parmesan cheese½ cupchicken broth (or reserved pasta water)½ cupheavy cream (optional, for extra creaminess)1 tspItalian seasoning¼ tspred pepper flakes (optional)Salt and black pepper, to taste2 cupsfresh spinach or kale (optional)
        • ½ cupgrated Parmesan cheese½ cupchicken broth (or reserved pasta water)½ cupheavy cream (optional, for extra creaminess)1 tspItalian seasoning¼ tspred pepper flakes (optional)Salt and black pepper, to taste2 cupsfresh spinach or kale (optional)
        • ½ cupchicken broth (or reserved pasta water)½ cupheavy cream (optional, for extra creaminess)1 tspItalian seasoning¼ tspred pepper flakes (optional)Salt and black pepper, to taste2 cupsfresh spinach or kale (optional)
        • ½ cupheavy cream (optional, for extra creaminess)1 tspItalian seasoning¼ tspred pepper flakes (optional)Salt and black pepper, to taste2 cupsfresh spinach or kale (optional)
        • 1 tspItalian seasoning¼ tspred pepper flakes (optional)Salt and black pepper, to taste2 cupsfresh spinach or kale (optional)
        • ¼ tspred pepper flakes (optional)Salt and black pepper, to taste2 cupsfresh spinach or kale (optional)
        • Salt and black pepper, to taste2 cupsfresh spinach or kale (optional)
        • 2 cupsfresh spinach or kale (optional)
        • For garnish:Fresh basil or parsleyAdditional Parmesan cheese
        • Fresh basil or parsleyAdditional Parmesan cheese
        • Additional Parmesan cheese

        Instructions

        1. 1️⃣Cook the Pasta:
        2. Bring a large pot of salted water to a boil. Add the whole wheat pasta and cook according to the package instructions until al dente.Reserve ½ cup of pasta water, then drain the pasta and set aside.2️⃣Cook the Chicken:Heat olive oil in a large skillet over medium heat.Add the chicken pieces, season with salt and black pepper, and cook for 6-8 minutes until golden brown and fully cooked.Remove the chicken from the skillet and set aside.3️⃣Prepare the Ricotta Cream Sauce:In the same skillet, add minced garlic and sauté for about 1 minute, until fragrant.Reduce the heat to medium-low. Add the ricotta cheese, Parmesan cheese, chicken broth, and heavy cream (if using). Stir until smooth.Mix in Italian seasoning, red pepper flakes (if desired), and adjust with salt and pepper to taste.4️⃣Combine Pasta, Chicken, and Sauce:Return the cooked chicken to the skillet, stirring to coat in the sauce.Add the cooked pasta and toss everything together.If the sauce feels too thick, gradually add reserved pasta water until it reaches your preferred consistency.5️⃣Add Greens (Optional):Stir in fresh spinach or kale and cook for 2-3 minutes, just until wilted.6️⃣Serve and Garnish:Plate the pasta, garnish with fresh basil or parsley, and sprinkle extra Parmesan cheese on top. Serve immediately while warm and creamy.
        3. Reserve ½ cup of pasta water, then drain the pasta and set aside.2️⃣Cook the Chicken:Heat olive oil in a large skillet over medium heat.Add the chicken pieces, season with salt and black pepper, and cook for 6-8 minutes until golden brown and fully cooked.Remove the chicken from the skillet and set aside.3️⃣Prepare the Ricotta Cream Sauce:In the same skillet, add minced garlic and sauté for about 1 minute, until fragrant.Reduce the heat to medium-low. Add the ricotta cheese, Parmesan cheese, chicken broth, and heavy cream (if using). Stir until smooth.Mix in Italian seasoning, red pepper flakes (if desired), and adjust with salt and pepper to taste.4️⃣Combine Pasta, Chicken, and Sauce:Return the cooked chicken to the skillet, stirring to coat in the sauce.Add the cooked pasta and toss everything together.If the sauce feels too thick, gradually add reserved pasta water until it reaches your preferred consistency.5️⃣Add Greens (Optional):Stir in fresh spinach or kale and cook for 2-3 minutes, just until wilted.6️⃣Serve and Garnish:Plate the pasta, garnish with fresh basil or parsley, and sprinkle extra Parmesan cheese on top. Serve immediately while warm and creamy.
        4. 2️⃣Cook the Chicken:
        5. Heat olive oil in a large skillet over medium heat.Add the chicken pieces, season with salt and black pepper, and cook for 6-8 minutes until golden brown and fully cooked.Remove the chicken from the skillet and set aside.3️⃣Prepare the Ricotta Cream Sauce:In the same skillet, add minced garlic and sauté for about 1 minute, until fragrant.Reduce the heat to medium-low. Add the ricotta cheese, Parmesan cheese, chicken broth, and heavy cream (if using). Stir until smooth.Mix in Italian seasoning, red pepper flakes (if desired), and adjust with salt and pepper to taste.4️⃣Combine Pasta, Chicken, and Sauce:Return the cooked chicken to the skillet, stirring to coat in the sauce.Add the cooked pasta and toss everything together.If the sauce feels too thick, gradually add reserved pasta water until it reaches your preferred consistency.5️⃣Add Greens (Optional):Stir in fresh spinach or kale and cook for 2-3 minutes, just until wilted.6️⃣Serve and Garnish:Plate the pasta, garnish with fresh basil or parsley, and sprinkle extra Parmesan cheese on top. Serve immediately while warm and creamy.
        6. Add the chicken pieces, season with salt and black pepper, and cook for 6-8 minutes until golden brown and fully cooked.Remove the chicken from the skillet and set aside.3️⃣Prepare the Ricotta Cream Sauce:In the same skillet, add minced garlic and sauté for about 1 minute, until fragrant.Reduce the heat to medium-low. Add the ricotta cheese, Parmesan cheese, chicken broth, and heavy cream (if using). Stir until smooth.Mix in Italian seasoning, red pepper flakes (if desired), and adjust with salt and pepper to taste.4️⃣Combine Pasta, Chicken, and Sauce:Return the cooked chicken to the skillet, stirring to coat in the sauce.Add the cooked pasta and toss everything together.If the sauce feels too thick, gradually add reserved pasta water until it reaches your preferred consistency.5️⃣Add Greens (Optional):Stir in fresh spinach or kale and cook for 2-3 minutes, just until wilted.6️⃣Serve and Garnish:Plate the pasta, garnish with fresh basil or parsley, and sprinkle extra Parmesan cheese on top. Serve immediately while warm and creamy.
        7. Remove the chicken from the skillet and set aside.
        8. 3️⃣Prepare the Ricotta Cream Sauce:In the same skillet, add minced garlic and sauté for about 1 minute, until fragrant.Reduce the heat to medium-low. Add the ricotta cheese, Parmesan cheese, chicken broth, and heavy cream (if using). Stir until smooth.Mix in Italian seasoning, red pepper flakes (if desired), and adjust with salt and pepper to taste.4️⃣Combine Pasta, Chicken, and Sauce:Return the cooked chicken to the skillet, stirring to coat in the sauce.Add the cooked pasta and toss everything together.If the sauce feels too thick, gradually add reserved pasta water until it reaches your preferred consistency.5️⃣Add Greens (Optional):Stir in fresh spinach or kale and cook for 2-3 minutes, just until wilted.6️⃣Serve and Garnish:Plate the pasta, garnish with fresh basil or parsley, and sprinkle extra Parmesan cheese on top. Serve immediately while warm and creamy.
        9. In the same skillet, add minced garlic and sauté for about 1 minute, until fragrant.Reduce the heat to medium-low. Add the ricotta cheese, Parmesan cheese, chicken broth, and heavy cream (if using). Stir until smooth.Mix in Italian seasoning, red pepper flakes (if desired), and adjust with salt and pepper to taste.4️⃣Combine Pasta, Chicken, and Sauce:Return the cooked chicken to the skillet, stirring to coat in the sauce.Add the cooked pasta and toss everything together.If the sauce feels too thick, gradually add reserved pasta water until it reaches your preferred consistency.5️⃣Add Greens (Optional):Stir in fresh spinach or kale and cook for 2-3 minutes, just until wilted.6️⃣Serve and Garnish:Plate the pasta, garnish with fresh basil or parsley, and sprinkle extra Parmesan cheese on top. Serve immediately while warm and creamy.
        10. Reduce the heat to medium-low. Add the ricotta cheese, Parmesan cheese, chicken broth, and heavy cream (if using). Stir until smooth.
        11. Mix in Italian seasoning, red pepper flakes (if desired), and adjust with salt and pepper to taste.4️⃣Combine Pasta, Chicken, and Sauce:Return the cooked chicken to the skillet, stirring to coat in the sauce.Add the cooked pasta and toss everything together.If the sauce feels too thick, gradually add reserved pasta water until it reaches your preferred consistency.5️⃣Add Greens (Optional):Stir in fresh spinach or kale and cook for 2-3 minutes, just until wilted.6️⃣Serve and Garnish:Plate the pasta, garnish with fresh basil or parsley, and sprinkle extra Parmesan cheese on top. Serve immediately while warm and creamy.
        12. 4️⃣Combine Pasta, Chicken, and Sauce:Return the cooked chicken to the skillet, stirring to coat in the sauce.Add the cooked pasta and toss everything together.If the sauce feels too thick, gradually add reserved pasta water until it reaches your preferred consistency.5️⃣Add Greens (Optional):Stir in fresh spinach or kale and cook for 2-3 minutes, just until wilted.6️⃣Serve and Garnish:Plate the pasta, garnish with fresh basil or parsley, and sprinkle extra Parmesan cheese on top. Serve immediately while warm and creamy.
        13. Return the cooked chicken to the skillet, stirring to coat in the sauce.
        14. Add the cooked pasta and toss everything together.If the sauce feels too thick, gradually add reserved pasta water until it reaches your preferred consistency.5️⃣Add Greens (Optional):Stir in fresh spinach or kale and cook for 2-3 minutes, just until wilted.6️⃣Serve and Garnish:Plate the pasta, garnish with fresh basil or parsley, and sprinkle extra Parmesan cheese on top. Serve immediately while warm and creamy.
        15. If the sauce feels too thick, gradually add reserved pasta water until it reaches your preferred consistency.5️⃣Add Greens (Optional):Stir in fresh spinach or kale and cook for 2-3 minutes, just until wilted.6️⃣Serve and Garnish:Plate the pasta, garnish with fresh basil or parsley, and sprinkle extra Parmesan cheese on top. Serve immediately while warm and creamy.
        16. 5️⃣Add Greens (Optional):
        17. Stir in fresh spinach or kale and cook for 2-3 minutes, just until wilted.6️⃣Serve and Garnish:Plate the pasta, garnish with fresh basil or parsley, and sprinkle extra Parmesan cheese on top. Serve immediately while warm and creamy.
        18. 6️⃣Serve and Garnish:Plate the pasta, garnish with fresh basil or parsley, and sprinkle extra Parmesan cheese on top. Serve immediately while warm and creamy.
        19. Plate the pasta, garnish with fresh basil or parsley, and sprinkle extra Parmesan cheese on top. Serve immediately while warm and creamy.

        Notes

        Whole wheat pasta adds a hearty texture and extra fiber to this dish.For a vegetarian version, skip the chicken and add more greens or sautéed mushrooms.The heavy cream is optional but makes the sauce extra rich and indulgent.
        For a vegetarian version, skip the chicken and add more greens or sautéed mushrooms.The heavy cream is optional but makes the sauce extra rich and indulgent.
        The heavy cream is optional but makes the sauce extra rich and indulgent.


        “`

        Chicken Ricotta Meatballs

        “`html

        Chicken Ricotta Meatballs

        Chicken Ricotta Meatballs: A Tender & Flavorful Twist

        Are you searching for a weeknight dinner that feels both comforting and a touch sophisticated, but won’t take all evening? If you’re like 70% of home cooks, dinner-time efficiency is key, and the thought of dry, bland chicken meatballs might make you hesitate. Well, prepare to be delighted! These Chicken Ricotta Meatballs are a tender, flavorful twist on a classic favorite that will redefine your expectations. Juicy ground chicken combines with the unparalleled creaminess of ricotta cheese and the savory depth of Parmesan, all brought together in a rich, garlic-infused cream sauce studded with fresh spinach. Perfect for those busy weeknights or when you want to impress guests without the stress, this dish pairs beautifully with your favorite pasta, fluffy rice, or a hunk of crusty bread for soaking up every last drop of that glorious sauce.

        Ingredients That Sing

        The magic of these meatballs lies in the thoughtful combination of simple, high-quality ingredients. The ricotta makes them incredibly moist, while the Parmesan adds that indispensable salty tang. Feel free to adjust seasonings to your personal taste!

        • For the Meatballs:
          • 1 lb ground chicken (aim for a slightly fattier blend, like thigh meat, for extra moisture)
          • 1/2 cup whole milk ricotta cheese (drain any excess liquid for best consistency)
          • 1/4 cup grated Parmesan cheese (a sharp, aged variety will offer more flavor)
          • 1 large egg, lightly beaten (acts as a binder)
          • 1/4 cup panko breadcrumbs (for a lighter texture; regular breadcrumbs work too)
          • 2 cloves garlic, minced (freshly minced offers the best pungent kick)
          • 1/4 cup finely chopped fresh parsley (adds a bright, herbaceous note)
          • 1/2 teaspoon salt
          • 1/4 teaspoon black pepper (freshly ground is always superior)
        • For the Cream Sauce:
          • 1 tablespoon olive oil
          • 3 cloves garlic, thinly sliced (these will infuse the sauce with subtle garlic aroma)
          • 1 cup heavy cream (provides a luxurious, silky texture)
          • 1/2 cup chicken broth (low-sodium is preferable to control saltiness)
          • 1/4 cup grated Parmesan cheese
          • 2 cups fresh spinach (it wilts down significantly, adding color and nutrients)
          • Salt and freshly ground black pepper to taste

        Substitutions: Ground turkey can be used instead of chicken. For a dairy-free option, use a dairy-free ricotta and a vegan parmesan alternative, and a plant-based cream. If you don’t have panko, regular breadcrumbs or even crushed crackers will work in a pinch.

        Timing is Everything

        Prep Time:
        20 minutes
        Cook Time:
        25 minutes
        Total Time:
        45 minutes
        Serves:
        4

        This recipe is designed for efficiency! The total time of 45 minutes is significantly faster than many traditional meatball recipes, thanks to the quick-cooking nature of ground chicken and the simple sauce preparation.

        A plate of golden brown chicken ricotta meatballs in a creamy sauce with spinach

        Step-by-Step Instructions

        Step 1: Make the Meatballs

        In a large bowl, gently combine the ground chicken, ricotta cheese, 1/4 cup Parmesan cheese, beaten egg, panko breadcrumbs, minced garlic, chopped parsley, salt, and pepper. Be careful not to overmix, as this can lead to tough meatballs. Overworking the meat develops the gluten structure too much. Use your hands to lightly bring everything together until just incorporated. The mixture should hold together when gently squeezed.

        Step 2: Sear the Meatballs

        Roll the mixture into approximately 1-inch meatballs. You should get about 16-20 meatballs. Heat the olive oil in a large skillet or Dutch oven over medium-high heat. Carefully add the meatballs to the hot skillet, making sure not to overcrowd the pan (you may need to do this in batches). Sear the meatballs for about 2-3 minutes per side, until nicely browned all over. This step is crucial for developing flavor and creating a pleasant texture. They don’t need to be cooked through at this point, as they will finish cooking in the sauce.

        Step 3: Create the Sauce

        Once the meatballs are seared, remove them from the skillet and set aside on a plate. Lower the heat to medium and add the thinly sliced garlic to the same skillet. Sauté the garlic for about 1 minute until fragrant, being careful not to burn it. Pour in the heavy cream and chicken broth, scraping up any browned bits from the bottom of the pan – that’s where the flavor is! Bring the mixture to a gentle simmer.

        Step 4: Simmer and Serve

        Return the seared meatballs to the skillet with the simmering sauce. Sprinkle in the remaining 1/4 cup of Parmesan cheese. Reduce the heat to low, cover the skillet, and let the meatballs simmer gently for about 10-15 minutes, or until they are cooked through and the sauce has thickened slightly. In the last 2 minutes of cooking, stir in the fresh spinach. It will wilt down quickly into the sauce, adding a beautiful vibrant green color and a healthy boost. Taste and adjust seasoning with salt and pepper as needed. Serve immediately, spooning the rich sauce over the tender meatballs.

        Nutritional Snapshot

        While exact nutritional values can vary based on specific ingredients used, a serving of these Chicken Ricotta Meatballs is generally:

        • Calories: Approximately 350-450 kcal per serving (varies with sauce richness and portion size)
        • Protein: High, from chicken and cheese
        • Fat: Moderate, primarily from cream and cheese
        • Carbohydrates: Lower, depending on breadcrumbs used and if served with carb-heavy sides

        Healthier Alternatives Without Sacrificing Flavor

        Looking to lighten things up slightly? You can make delicious, healthier swaps that don’t compromise on taste:

        • Leaner Protein: Use extra-lean ground chicken breast or even ground turkey breast. Adjust ricotta slightly if using very lean meat, as it can sometimes make the mixture a little dry.
        • Reduced Fat Dairy: Opt for part-skim ricotta and reduced-fat Parmesan. While whole milk ricotta truly shines, part-skim is a perfectly acceptable substitute.
        • Lighter Sauce: Use half-and-half or even milk (with a bit of cornstarch slurry to thicken) instead of heavy cream. For an even lighter sauce, consider a base of pureed tomatoes with a touch of cream.
        • More Veggies: Sneak in finely grated zucchini or cauliflower rice into the meatball mixture for added nutrients and moisture without significantly altering the flavor.

        Serving Suggestions: Elevate Your Meal

        These versatile meatballs are fantastic served in numerous ways:

        • Classic Pasta Night: Toss with your favorite pasta – spaghetti, linguine, fettuccine, or penne all work beautifully.
        • Light & Healthy: Serve over a bed of steamed rice (white or brown) or cauliflower rice for a lower-carb option.
        • Bread Lover’s Dream: Pair with warm, crusty bread, focaccia, or garlic bread for dipping into that incredible sauce.
        • Garnish: A sprinkle of fresh parsley or chives adds a final touch of freshness and color.

        Common Mistakes to Avoid

        • Overmixing the Meat: This is the number one culprit for tough, dense meatballs. Mix just until combined.
        • Not Browning the Meatballs: Searing creates wonderful flavor and a desirable crust. Don’t skip this step, even if cooking them through in the sauce.
        • Burning the Garlic: Minced or sliced garlic can burn quickly in hot oil. Keep an eye on it and sauté just until fragrant.
        • Draining Ricotta Too Much: While you don’t want watery ricotta, don’t drain it completely dry. Some moisture is needed for tenderness.

        Storing Tips: Enjoying Leftovers

        Store any leftover chicken ricotta meatballs and sauce in an airtight container in the refrigerator for up to 3-4 days. They reheat beautifully on the stovetop over low heat or in the microwave. Some find the flavor even more developed on the second day!

        Close-up of chicken ricotta meatballs in a creamy spinach sauce

        Frequently Asked Questions

        Can I make these meatballs ahead of time?

        Yes! You can prepare the meatballs and refrigerate them for up to 24 hours before cooking and adding them to the sauce. Alternatively, you can cook the meatballs through, let them cool, and then store them in the refrigerator. Reheat them in the sauce before serving.

        Can I freeze Chicken Ricotta Meatballs?

        Absolutely. You can freeze the uncooked meatballs (baked or not baked) or the fully cooked meatballs in sauce. For uncooked meatballs, place them on a baking sheet until frozen, then transfer to a freezer bag. For cooked meatballs in sauce, cool completely, then portion into freezer-safe containers. Thaw overnight in the refrigerator and reheat thoroughly.

        Why are my meatballs dry?

        Dryness usually comes from overmixing the meat, using lean meat without enough fat, or overcooking. The ricotta and the egg in this recipe are key to keeping them moist. Ensure you’re using ground chicken that has a bit of fat, and avoid overhandling the mixture.

        Can I bake these instead of searing?

        While searing adds essential flavor and texture, you can bake them. Arrange on a baking sheet and bake at 400°F (200°C) for 15-20 minutes, or until lightly browned and cooked through. Then, add them to the simmering sauce to finish.

        Print

        clock clock iconcutlery cutlery iconflag flag iconfolder folder iconinstagram instagram iconpinterest pinterest iconfacebook facebook iconprint print iconsquares squares iconheart heart iconheart solid heart solid icon

        Chicken Ricotta Meatballs


        • Author: Chef Emy

        Description

        These Chicken Ricotta Meatballs are a tender, flavorful twist on a classic favorite. Juicy ground chicken combines with creamy ricotta and savory Parmesan, all simmered in a rich, garlic-infused cream sauce with fresh spinach. Perfect for weeknight dinners or special occasions, this dish pairs beautifully with pasta, rice, or crusty bread.


        Ingredients

        • For the Meatballs:
        • For the Creamy Sauce:

        Instructions

        1. In a large bowl, combine the ground chicken, ricotta, Parmesan, egg, breadcrumbs, garlic, parsley, salt, and pepper. Mix gently until just combined.
        2. Shape the mixture into 1 ½-inch meatballs and place them on a lined baking sheet.
        3. Heat a skillet over medium heat with a drizzle of olive oil. Sear the meatballs for 2-3 minutes on each side until golden brown. Remove and set aside.
        4. In the same skillet, melt the butter over medium heat. Add the garlic and sauté for 1 minute until fragrant.
        5. Stir in the chicken broth and bring to a simmer. Add the heavy cream, Parmesan, salt, and pepper, cooking until the sauce thickens slightly.
        6. Add the spinach to the sauce and stir until wilted. Return the meatballs to the skillet, spooning the sauce over them. Cover and simmer for 10-12 minutes, or until the meatballs are fully cooked.
        7. Serve the meatballs and sauce over pasta, rice, or alongside crusty bread. Garnish with extra Parmesan and parsley, if desired.

        Notes

        For a touch of spice, add a pinch of red pepper flakes to the sauce.
        You can swap spinach with kale or arugula for a different flavor.
        Store leftovers in an airtight container in the refrigerator for up to 3 days or freeze for up to 2 months. Reheat gently in a skillet with a splash of cream or broth


        “`

        Poor Man’s Husband Casserole

        “`html

        Poor Man’s Husband Casserole

        Feeling the Pinch? Delicious Budget-Friendly Casseroles for Every Weeknight!

        Are you searching for hearty, satisfying meals that won’t break the bank? In today’s economic climate, finding dishes that are both delicious and budget-friendly is a treasure. Enter the Poor Man’s Husband Casserole – a recipe that proves you don’t need fancy ingredients or a lot of time to create a truly comforting and flavorful meal. This dish is a testament to the power of simple staples, transformed into a crowd-pleasing, weeknight warrior. Its layers of savory meat sauce, tender noodles, and gooey melted cheese are an irresistible combination that feeds the soul and the stomach without emptying your wallet. Perfect for busy families, students, or anyone looking for a fuss-free, satisfying dinner, this casserole is about to become your new go-to.

        The Humble Heroes: Ingredients for Poor Man’s Husband Casserole

        The beauty of this casserole lies in its simplicity and the accessibility of its ingredients. We’re focusing on pantry staples and common grocery finds that deliver maximum flavor with minimal cost. Each component plays a vital role in creating that irresistible, comforting taste.

        • 1 pound ground beef: The savory foundation. Look for an 80/20 lean-to-fat ratio for the best flavor and moisture. (Substitution: Ground turkey or chicken for a lighter option, or even a mix of finely chopped mushrooms and breadcrumbs for a vegetarian twist.)
        • 1 tablespoon olive oil or vegetable oil: For sautéing aromatics and helping to brown the meat evenly. (Substitution: Any neutral cooking oil you have on hand.)
        • 1 medium onion, finely chopped: Adds a sweet, pungent depth to the sauce. Aromatic magic! (Substitution: Shallots or even green onions (scallions) for a milder flavor.)
        • 2 cloves garlic, minced: Essential for that unmistakable savory aroma and taste. (Substitution: 1 teaspoon garlic powder if fresh is unavailable.)
        • 1 (15-ounce) can crushed tomatoes: The base of our rich, flavorful sauce. Choose a good quality brand for best results. (Substitution: Diced tomatoes for a chunkier sauce, or tomato sauce for a smoother consistency.)
        • 1 teaspoon dried Italian seasoning: A blend of herbs like oregano, basil, and thyme that instantly elevates the sauce. (Substitution: A pinch each of dried oregano, basil, and thyme.)
        • ½ teaspoon salt: To awaken and enhance all the flavors. (Substitution: Kosher salt or sea salt, adjust to taste.)
        • ¼ teaspoon black pepper: For a touch of warmth and spice. (Substitution: A pinch of freshly ground pepper for a more robust flavor.)
        • 8 ounces uncooked egg noodles: The tender, chewy vehicle for our delicious sauce. They cook up beautifully in the casserole. (Substitution: Other short pasta shapes like penne, rotini, or even elbow macaroni. Cook them slightly less than al dente as they will continue cooking in the oven.)
        • 2 cups shredded cheddar cheese: Melty, gooey, cheesy goodness that makes everything better. (Substitution: A blend of cheddar and Monterey Jack, mozzarella, or a Colby blend for varied meltiness and flavor.)
        • Optional: Pinch of red pepper flakes: For a subtle kick if you like a little heat.

        Timing is Everything: How Long Will This Casserole Take?

        Prep time: 15 minutes
        Cook time: 30-35 minutes
        Total time: 45-50 minutes

        Compared to many elaborate casseroles that can take hours from start to finish, the Poor Man’s Husband Casserole is a weeknight dream. Its relatively short prep and cook time make it an excellent choice when you’re short on time but craving a comforting, homemade meal.

        A generous serving of Poor Man's Husband Casserole in a baking dish, topped with melted cheese.

        Cooking Up Comfort: Easy Step-by-Step Instructions

        Breaking down this recipe into simple steps makes it incredibly easy to follow. You’ll be amazed at how quickly this humble dish comes together!

        Step 1: Brown the Ground Beef

        Grab a large skillet and place it over medium-high heat. Add your ground beef and cook, breaking it apart with a spoon, until it’s nicely browned. Drain off any excess grease – we want flavor, not a grease slick! This initial browning is crucial for developing a rich, savory base for our sauce.

        Step 2: Add Aromatics and Sauce

        Reduce the heat to medium. Add the chopped onion to the skillet with the browned beef and cook, stirring occasionally, until the onion softens and becomes translucent, about 5-7 minutes. Then, stir in the minced garlic and cook for another minute until fragrant – be careful not to burn it! Pour in the crushed tomatoes, Italian seasoning, salt, pepper, and optional red pepper flakes. Stir everything together, scraping up any browned bits from the bottom of the pan. Let this mixture simmer gently for about 5-10 minutes, allowing the flavors to meld and the sauce to thicken slightly. This creates that essential, deeply satisfying meat sauce.

        Step 3: Cook the Noodles

        While your sauce is simmering, bring a pot of salted water to a boil. Add the egg noodles and cook according to package directions, but aim for *al dente* – slightly firm to the bite. They will continue to cook in the oven, so we don’t want them mushy. Drain the noodles thoroughly. This ensures they absorb the sauce beautifully without becoming waterlogged.

        Step 4: Layer the Casserole

        Preheat your oven to 375°F (190°C). Lightly grease a 9×13 inch baking dish. Now for the fun part! You have two options for layering: you can either mix the drained noodles directly into the meat sauce for a more integrated casserole, or you can spread half of the noodles in the prepared baking dish, top with half of the meat sauce, sprinkle with half of the cheese, and then repeat the layers. Either method will yield delicious results! For a perfectly gooey top, ensure the last layer is cheese.

        Step 5: Bake to Perfection

        Cover the baking dish loosely with aluminum foil (this prevents the cheese from browning too quickly). Bake for 20 minutes. Remove the foil and bake for an additional 10-15 minutes, or until the casserole is bubbly and the cheese is beautifully melted and lightly golden. Let it rest for 5-10 minutes before serving – this allows the layers to set and makes it easier to serve. Patience is a virtue, especially when it leads to a perfect slice!

        Nutritional Snapshot

        While exact nutritional values can vary based on specific ingredients and portion sizes, a typical serving of Poor Man’s Husband Casserole (approximately 1/6th of the dish) is generally estimated to be:

        • Calories: 450-550
        • Protein: 25-35g
        • Fat: 20-30g
        • Carbohydrates: 30-40g
        • Fiber: 3-5g

        Note: These are estimates. For precise personal tracking, it’s recommended to use a nutritional calculator with your exact ingredients.

        Making it Lighter: Healthier Swaps Without Sacrificing Flavor

        Want to make this comforting classic a bit healthier? You can easily adapt the recipe without compromising on its delicious, hearty appeal. The key is to choose leaner proteins, incorporate more fiber, and be mindful of cheese quantities.

        • Leaner Protein: Swap the ground beef for lean ground turkey or chicken. You can also incorporate finely chopped mushrooms into the beef mixture to extend the meat and add extra nutrients and fiber. For a plant-based option, use lentils or a mixture of lentils and mushrooms.
        • Whole Wheat Noodles: Opt for whole wheat egg noodles or whole wheat pasta for increased fiber content.
        • Veggies Galore: Boost the vegetable content by adding finely diced carrots, celery, bell peppers, or spinach to the meat sauce while it simmers. This adds vitamins, minerals, and fiber without significantly altering the classic taste.
        • Reduced-Fat Cheese: Use a reduced-fat cheddar cheese, or simply use a little less cheese overall. The flavor is still there, just with less saturated fat.
        • Control Sodium: Choose low-sodium canned tomatoes and crushed tomatoes. Adjust salt gradually.

        Perfect Pairings: What to Serve with Your Casserole

        This Poor Man’s Husband Casserole is a complete meal in itself, but it pairs beautifully with a few simple sides to round out the plate and add some freshness.

        • A simple green salad with a light vinaigrette provides a refreshing contrast to the richness of the casserole.
        • Steamed or roasted broccoli or green beans add a healthy dose of greens and fiber.
        • Garlic bread or crusty rolls are perfect for sopping up any extra sauce.
        • Corn on the cob (seasonal) or buttered corn adds a touch of sweetness.

        Common Mistakes to Avoid for the Perfect Casserole

        Even the simplest recipes can have a few pitfalls. Here are some common mistakes to steer clear of:

        • Overcooking the Noodles: Remember to take the noodles out when they are al dente, as they will continue to cook in the oven. Mushy noodles are a common culprit for a less-than-ideal texture.
        • Not Draining Fat: Thoroughly draining the grease from the ground beef is essential for a cleaner taste and a less oily casserole.
        • Boring Sauce: Don’t skimp on the seasonings! The Italian seasoning, salt, and pepper are key to building flavor. Simmering the sauce allows these flavors to deepen.
        • Dull Cheese: Ensure your cheese is fresh and that the casserole is baked uncovered for the last part of the cooking time to achieve that desirable melted, slightly golden topping.
        • Not Resting the Casserole: While tempting to dig in immediately, letting the casserole rest for a few minutes helps it set, making it easier to slice and serve neat portions.

        Storing Your Casserole for Future Feasts

        Leftovers are a blessing with this dish! Here’s how to store it:

        • Refrigeration: Once cooled, store any leftover casserole in an airtight container or tightly covered with plastic wrap or foil in the refrigerator for up to 3-4 days.
        • Freezing: This casserole freezes beautifully. Tightly wrap individual portions or the entire dish (if oven-safe and well-covered) and freeze for up to 2-3 months. Thaw overnight in the refrigerator before reheating.
        • Reheating: Reheat individual portions in the microwave until heated through. For a larger portion or a frozen casserole, reheat in a covered oven-safe dish at 350°F (175°C) until warm, about 20-30 minutes, adding a splash of water or broth if it seems dry.
        Close-up of the cheesy, bubbly texture of Poor Man's Husband Casserole.

        Frequently Asked Questions (FAQs)

        ***Why is it called “Poor Man’s Husband Casserole”?***

        The name “Poor Man’s Husband Casserole” likely originated to describe a hearty, filling meal made with inexpensive, readily available ingredients that would satisfy a husband (or any hungry person!) without costing a lot of money. It emphasizes the dish’s affordability and satisfying nature.

        ***Can I make this ahead of time?***

        Yes! You can assemble the casserole up to a day in advance. Prepare it through Step 4, cover tightly, and refrigerate. When ready to bake, let it sit at room temperature for about 20-30 minutes, then bake as directed, possibly adding a few extra minutes to the cooking time.

        ***What kind of pasta is best?***

        Egg noodles are traditional for their tender texture, but any short pasta shape like penne, rotini, fusilli, or elbow macaroni will work well. Just ensure you cook them al dente before adding them to the casserole.

        ***Can I add more vegetables?***

        Absolutely! Finely chopped carrots, celery, bell peppers, zucchini, or a handful of spinach can be sautéed with the onions and garlic to boost the nutritional content and add extra flavor and texture.

        Enjoy Your Deliciously Budget-Friendly Feast!

        The Poor Man’s Husband Casserole is more than just a meal; it’s a comforting embrace in a dish. It proves that delicious, satisfying food doesn’t require a hefty grocery bill or hours in the kitchen. With its simple ingredients and straightforward preparation, this casserole is designed to bring warmth and happiness to your table, week after week. Whether you’re feeding a family, cooking for one, or looking for a potluck hero, this recipe is sure to become a beloved staple. Give it a try and discover the magic of simple, hearty cooking!

        Print
        clock clock iconcutlery cutlery iconflag flag iconfolder folder iconinstagram instagram iconpinterest pinterest iconfacebook facebook iconprint print iconsquares squares iconheart heart iconheart solid heart solid icon

        Poor Man’s Husband Casserole


        • Author: Chef Emy

        Description

        Poor Man’s Husband Casserole is a delicious and budget-friendly dish that combines layers of savory meat sauce, tender noodles, and melted cheese. This comforting casserole is quick and easy to make, perfect for weeknight dinners or meal prep. Its simple ingredients deliver hearty flavors that everyone will love!


        Ingredients

        Scale
        • 1lb ground beef
        • 8 ozwide egg noodles (or preferred pasta)
        • 1medium onion, diced
        • 2garlic cloves, minced
        • 1 ½ cupstomato sauce
        • 1 cupsour cream
        • 1 cupcottage cheese or cream cheese
        • 2 cupsshredded mozzarella or cheddar cheese
        • 1 tspItalian seasoning
        • Salt and pepper to taste

        Instructions

        1. Preheat the oven to 350°F (175°C) and grease a 9×13-inch baking dish.
        2. Cook the pasta according to package instructions. Drain and set aside.
        3. In a skillet, brown the ground beef over medium heat. Add the onion and garlic, cooking until fragrant. Stir in tomato sauce, Italian seasoning, salt, and pepper. Simmer for 5 minutes.
        4. In a bowl, mix sour cream with cottage cheese or cream cheese until smooth.
        5. Layer the casserole:Spread half the pasta in the baking dish.Top with half the meat sauce, then half the sour cream mixture, and a layer of shredded cheese.Repeat the layers, finishing with cheese on top.
        6. Spread half the pasta in the baking dish.
        7. Top with half the meat sauce, then half the sour cream mixture, and a layer of shredded cheese.
        8. Repeat the layers, finishing with cheese on top.
        9. Bake for 25-30 minutes, or until the cheese is melted and bubbly.
        10. Remove from the oven and let the casserole rest for 5-10 minutes before serving.

        Notes

        For added flavor, sprinkle red pepper flakes or add sautéed vegetables like spinach or bell peppers.
        Store leftovers in an airtight container in the fridge for up to 3-4 days or freeze for up to 2 months.
        Thaw frozen casserole in the refrigerator overnight before reheating in the oven.

        “`