“`html
Table of Contents
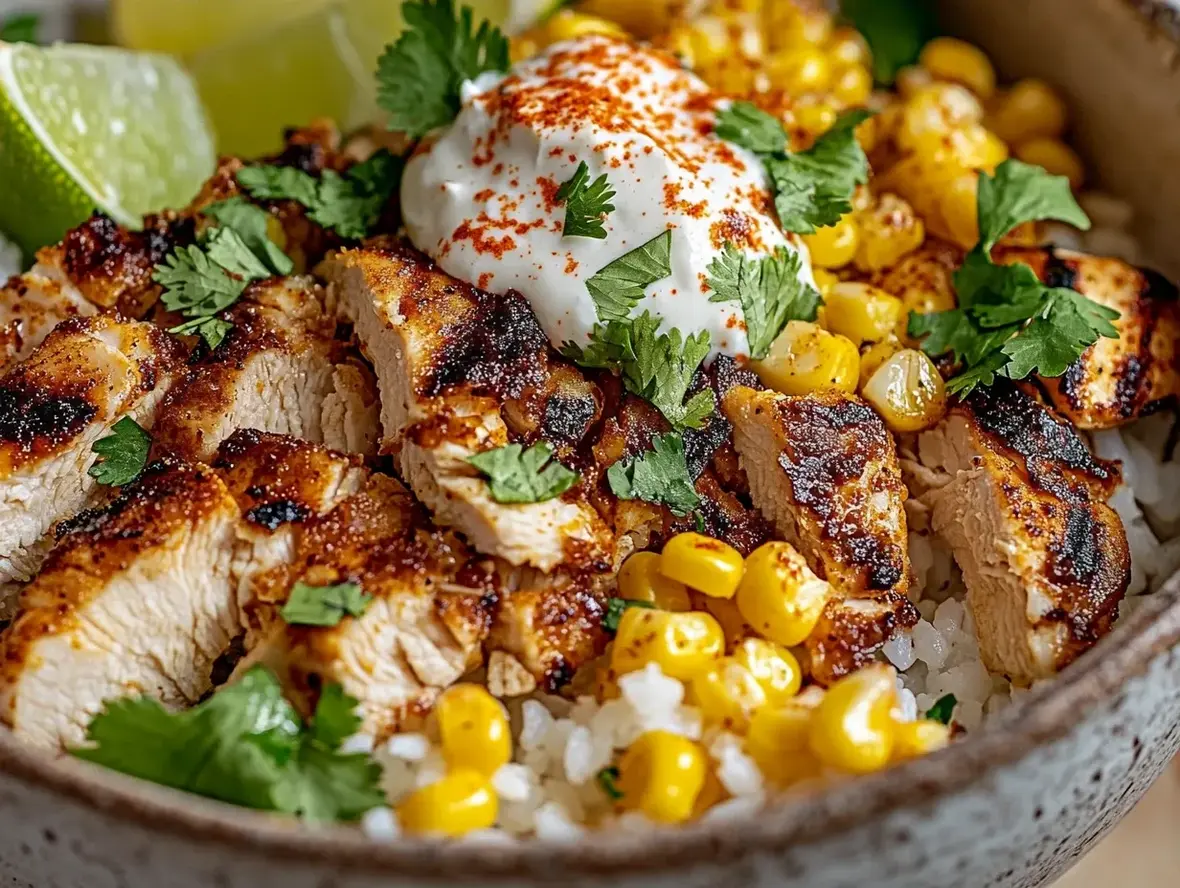
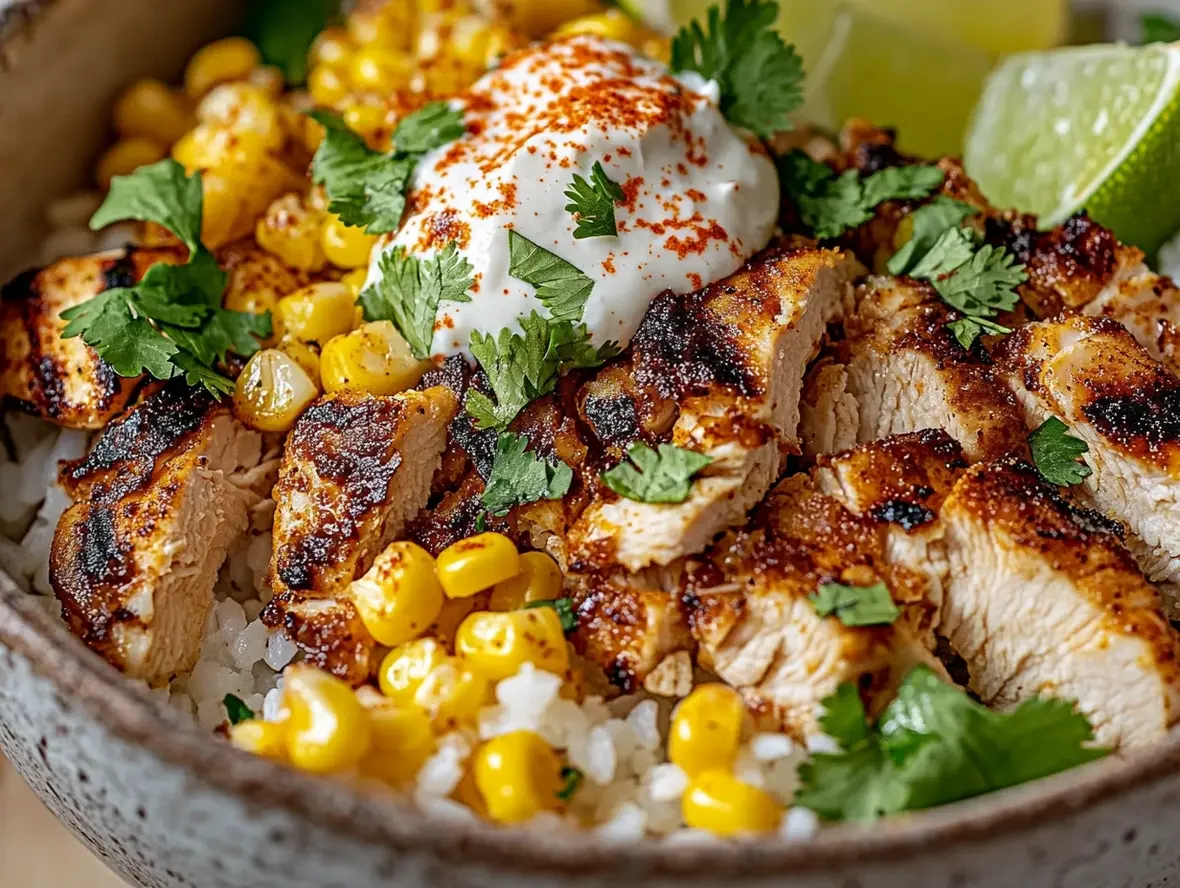
Delicious Street Corn Chicken Rice Bowl Recipe
Craving a Flavor-Packed Meal in Under 30 Minutes?
Are you tired of the same old weeknight dinners? Do you find yourself Googling “quick and easy meals” more often than you’d like to admit? If you’re nodding along, you’re in for a treat! This vibrant and zesty Street Corn Chicken Rice Bowl is your answer to delicious, Mexican-inspired cuisine that’s ready in a flash. It artfully combines tender, juicy chicken with the sunshine sweetness of corn, all brought together by a luscious, creamy sauce and served over fluffy rice. It’s a dish that doesn’t just fill your stomach; it tantalizes your taste buds and brings a burst of joy to your plate. Packed with flavor and incredibly satisfying, this recipe is destined to become a go-to in your culinary rotation, perfect for busy weeknights or casual weekend gatherings.
Ingredients: A Symphony of Flavors
The magic of this Street Corn Chicken Rice Bowl lies in the harmonious blend of fresh ingredients. Each component plays a crucial role in creating that unforgettable street corn flavor profile, with a few delightful twists.
For the Chicken: Juicy and Marinated
- 1.5 lbs Boneless, Skinless Chicken Thighs or Breasts: Thighs will offer more moisture and flavor, while breasts are a leaner option. Cut into bite-sized pieces for quick cooking.
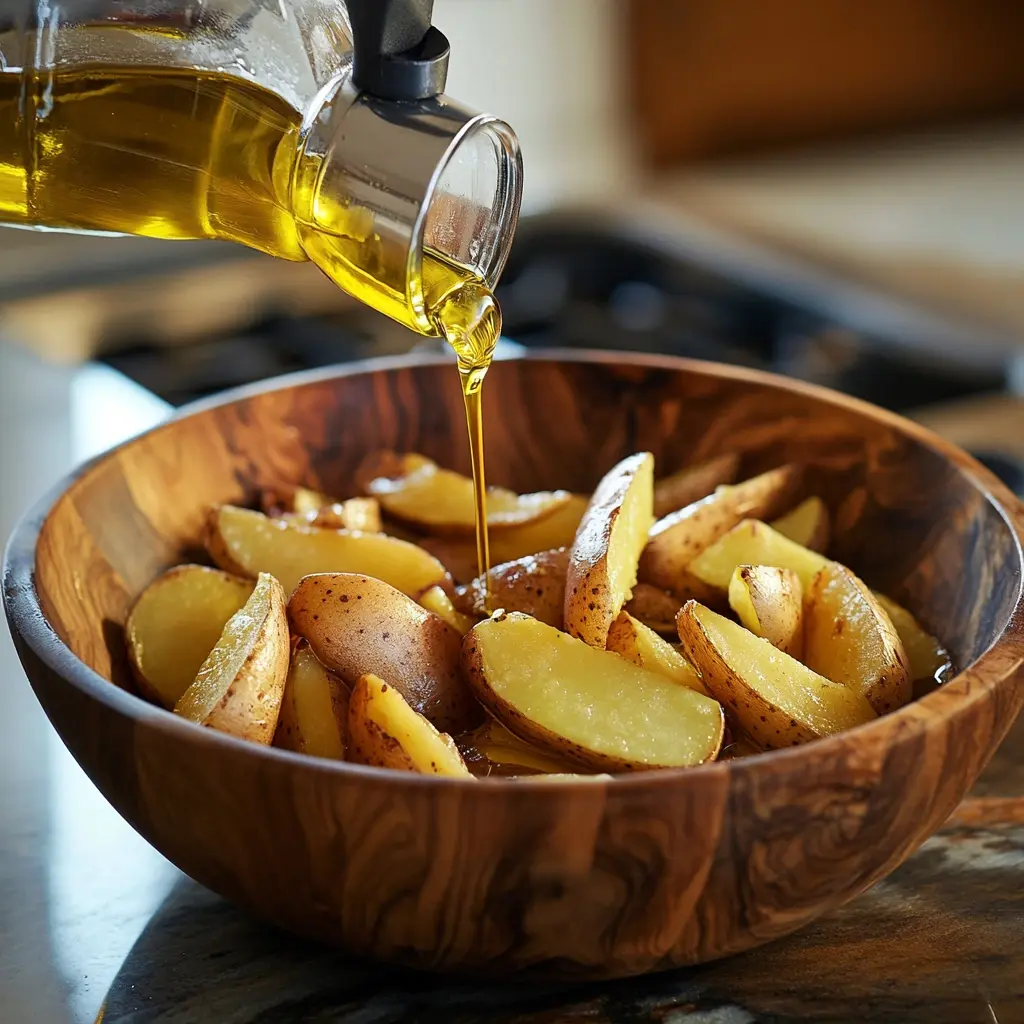
- 2 tbsp Olive Oil: A good quality olive oil acts as the base for our marinade, helping to tenderize the chicken.
- 1 tsp Chili Powder: Adds a mild warmth and a beautiful reddish hue.
- 1/2 tsp Cumin: Earthy and warm, cumin is essential for that authentic Mexican flavor.
- 1/4 tsp Smoked Paprika: For a subtle smoky depth that complements the other spices.
- 1/4 tsp Garlic Powder: A convenient way to add garlic flavor without fresh cloves.
- Salt and Black Pepper to Taste: Essential for enhancing all the other flavors.
For the Rice: The Fluffy Foundation
- 2 cups Cooked Rice: Jasmine or basmati rice works wonderfully, providing a fragrant and fluffy base. Leftover rice is perfect for this!
- 1 tbsp Butter or Olive Oil: To keep the rice from clumping and add a touch of richness.
- Pinch of Salt: Simple seasoning for the rice.
For the Corn Topping: Sweet and Tangy
- 2 cups Corn Kernels (Fresh, Frozen, or Canned): Sweet corn is key! If using frozen, thaw first. If using canned, drain well. Roasted corn takes this to another level.
- 1 tbsp Olive Oil: To help sauté the corn and bring out its sweetness.
- 1/2 tsp Chili Powder: For a hint of spice.
- 1/4 tsp Cumin: Enhances the corn’s natural flavor.
- Juice of 1/2 Lime: The bright, zesty element that defines street corn.
- 2 tbsp Chopped Fresh Cilantro: For a burst of freshness and herbaceous notes.
- Salt to Taste: To balance the flavors.
- Optional: 1/4 cup Crumbled Cotija Cheese (or Feta): The traditional salty, crumbly cheese. Feta is a great substitute.
For the Creamy Sauce: The Luscious Binder
- 1/2 cup Mayonnaise: The creamy base. Full-fat will yield the richest flavor.
- 2 tbsp Sour Cream or Greek Yogurt: Adds tanginess and lightens the mayo.
- Juice of 1 Lime: More citrus for that essential zing.
- 1 tsp Chili Powder: For color and subtle heat.
- 1/2 tsp Cumin: To echo the spice notes.
- Pinch of Cayenne Pepper (Optional): For an extra kick if you like it spicy.
- Salt and Pepper to Taste.
For Assembly: The Finishing Touches
- Optional Garnishes: Sliced avocado, extra cilantro, lime wedges, diced red onion, pickled jalapeños.
Timing and Prep: A Speedy Culinary Adventure
This recipe is designed for speed and flavor. With most ingredients prepped simultaneously, you can have a delicious, hearty meal on the table in just 30 minutes. This is significantly faster than the average one-hour meal, making it a weeknight hero. The key is efficient multitasking: while the chicken marinates briefly and cooks, prepare the rice, sauté the corn, and whip up the sauce.
Step-by-Step Instructions: Bringing it All Together
Step 1: Marinate and Cook the Chicken
In a medium bowl, toss the bite-sized chicken pieces with olive oil, chili powder, cumin, smoked paprika, garlic powder, salt, and pepper. Let it marinate for at least 10 minutes while you start on the other components. Heat a tablespoon of olive oil in a large skillet or cast-iron pan over medium-high heat. Add the marinated chicken in a single layer (cook in batches if necessary to avoid overcrowding) and cook for 5-7 minutes, stirring occasionally, until browned and cooked through. Remove chicken from the skillet and set aside.
Step 2: Prepare the Rice
If you don’t have pre-cooked rice, start preparing it according to package directions. If using leftover rice, gently reheat it in a saucepan with a tablespoon of butter or olive oil and a pinch of salt until warmed through.
Step 3: Make the Corn Topping
In the same skillet used for the chicken (no need to wash it!), add another teaspoon of olive oil if needed. Add the corn kernels, chili powder, and cumin. Sauté for 3-5 minutes until the corn is tender-crisp and slightly caramelized. Remove from heat and stir in the lime juice, chopped cilantro, and salt to taste. If using, gently fold in the crumbled cotija cheese.
Step 4: Whip Up the Creamy Sauce
While the corn is sautéing, whisk together the mayonnaise, sour cream (or Greek yogurt), lime juice, chili powder, cumin, and cayenne pepper (if using) in a small bowl. Season with salt and pepper to taste. This sauce should be creamy, tangy, and slightly spicy – the perfect complement to the other elements.
Step 5: Assemble the Bowls
Divide the warm rice among four bowls. Top generously with the cooked chicken, followed by the street corn mixture. Drizzle liberally with the creamy sauce. Add your favorite optional garnishes like sliced avocado, extra cilantro, a squeeze of fresh lime, or some thinly sliced red onion. Serve immediately and enjoy the explosion of flavors!
Nutritional Information: A Guilt-Free Indulgence
This recipe is designed to be satisfying and balanced. A typical serving boasts:
- Calories: Approximately 550-650 kcal (this can vary based on portion size and specific ingredients used, e.g., chicken breast vs. thigh, full-fat vs. light mayo).
- Protein: High, primarily from chicken and dairy. ~35-45g.
- Carbohydrates: From rice and corn. ~40-50g.
- Fat: From mayo, oil, and cheese. ~25-35g.
Note: Nutritional information is an estimate and can vary.
Healthier Alternatives: Lighten Up Without Sacrificing Flavor
Looking to make this even healthier? Here are some simple swaps:
- For the Chicken: Use chicken breast instead of thighs for a leaner protein source.
- For the Rice: Opt for brown rice or quinoa for added fiber and nutrients. Cauliflower rice is a low-carb alternative.
- For the Creamy Sauce: Replace half the mayonnaise with plain Greek yogurt (0% or 2% fat) for a lighter, tangier sauce with more protein. You can also reduce the amount of mayo and add a touch more lime juice or water to reach desired consistency.
- For the Corn: Use fire-roasted corn for an extra layer of flavor without added fat.
- Cheese: Use sparingly or omit the cotija/feta if you’re watching sodium or fat intake.
Serving Suggestions: Elevate Your Bowl
These bowls are a complete meal on their own, but here are some ideas to enhance them:
- Add Freshness: Top with diced avocado, cherry tomatoes, or finely chopped red bell peppers for extra color and texture.
- Spice it Up: Include sliced jalapeños (fresh or pickled) or a dash of your favorite hot sauce.
- Crunch Factor: A sprinkle of toasted pepitas (pumpkin seeds) or a few tortilla strips can add a satisfying crunch.
- Extra Tang: Serve with extra lime wedges on the side for an extra burst of freshness.
Common Mistakes to Avoid
To ensure your Street Corn Chicken Rice Bowl is a triumph:
- Overcrowding the Pan: When cooking the chicken, don’t overcrowd the skillet. This will steam the chicken instead of searing it, resulting in less flavor and a less appealing texture. Cook in batches if necessary.
- Under-seasoning: Taste and adjust seasoning at each stage, especially for the corn topping and the creamy sauce. Salt is essential for bringing out the full flavor of each ingredient.
- Skipping the Lime Juice: The citrus from the lime is crucial for cutting through the richness and creating the signature street corn tang. Don’t skip it!
- Using Bland Corn: If using canned corn, ensure it’s well-drained. If possible, opt for sweet corn varieties or even roasted corn for a deeper flavor.
Storing Tips: Keep the Flavor Fresh
While best enjoyed fresh, leftovers can be stored:
- Assembly: Store the cooked chicken, rice, and corn topping in separate airtight containers in the refrigerator for up to 3 days. Store the creamy sauce separately.
- Reheating: Reheat the chicken, rice, and corn gently on the stovetop or in the microwave. Assemble the bowl and add the sauce and fresh toppings just before serving. The sauce is best used within 3-4 days.
Frequently Asked Questions
***What kind of chicken is best for this recipe?***
Boneless, skinless chicken thighs are recommended for their tenderness and flavor. However, chicken breasts work well too if you prefer a leaner option. Just be mindful not to overcook them.
***Can I make the components ahead of time?***
Yes! You can marinate the chicken, cook the rice, and even prepare the corn topping and sauce a day in advance. Store them separately in the refrigerator and assemble just before serving for the best texture.
***What if I don’t have cotija cheese?***
Feta cheese is an excellent substitute for cotija. If you don’t have either, you can omit the cheese, or use a sprinkle of grated Parmesan for a salty finish.
***Is this recipe spicy?***
The base recipe has a mild spice level from the chili powder. You can easily adjust the heat by adding more or less chili powder, a pinch of cayenne pepper to the sauce, or by including fresh or pickled jalapeños as a garnish.
***Can I make this recipe vegetarian?***
Absolutely! For a vegetarian version, omit the chicken and consider adding seasoned black beans, roasted sweet potatoes, or crispy tofu as your protein source. Ensure your spices are vegetarian-friendly.
Your New Go-To Flavor Fiesta!
This Delicious Street Corn Chicken Rice Bowl is more than just a meal; it’s an experience. It’s a quick, easy, and incredibly satisfying way to bring the vibrant flavors of Mexican street food right to your kitchen table. From the perfectly seasoned chicken to the sweet, tangy corn and the luscious creamy sauce, every bite is a celebration. Don’t wait for a special occasion to whip up this masterpiece. Give it a try tonight and prepare for the compliments!
Tried this recipe? We’d love to hear about it! Share your creations in the comments below or tag us on social media!

Street Corn Chicken Rice Bowl
Description
This vibrant, zesty rice bowl combines juicy chicken, sweet corn, and creamy toppings for a Mexican-inspired meal that’s quick, satisfying, and packed with flavor.
Ingredients
- 1lb chicken breast, diced.1 tablespoonolive oil.1 teaspoonchili powder.Salt and pepper, to taste.
- 1 tablespoonolive oil.1 teaspoonchili powder.Salt and pepper, to taste.
- 1 teaspoonchili powder.Salt and pepper, to taste.
- Salt and pepper, to taste.
- 2 cupscooked rice.1 cupcooked corn kernels.
- 1 cupcooked corn kernels.
- ¼ cupsour cream.1 tablespoonmayonnaise.1clove garlic, minced.½ teaspoonpaprika.
- 1 tablespoonmayonnaise.1clove garlic, minced.½ teaspoonpaprika.
- 1clove garlic, minced.½ teaspoonpaprika.
- ½ teaspoonpaprika.
- ¼ cupcrumbled cotija cheese.¼ cupchopped cilantro.1lime, cut into wedges.
- ¼ cupchopped cilantro.1lime, cut into wedges.
- 1lime, cut into wedges.
Instructions
- Season the diced chicken with chili powder, salt, and pepper.
- Heat olive oil in a skillet over medium-high heat. Add the chicken and cook for6–8 minutes, stirring occasionally, until golden brown and fully cooked through. Remove from heat and set aside.2️⃣Prepare the Dressing:In a small bowl, whisk together the sour cream, mayonnaise, minced garlic, and paprika until smooth. Adjust the seasoning if desired.3️⃣Assemble the Bowls:Divide the cooked rice amongfour bowls.Top each bowl with an equal portion of the cooked chicken and corn.4️⃣Add Toppings:Drizzle each bowl with the creamy dressing.Sprinkle with crumbled cotija cheese and chopped cilantro.5️⃣Serve:Add a lime wedge to each bowl. Squeeze the lime over the top just before eating for a burst of freshness.
- In a small bowl, whisk together the sour cream, mayonnaise, minced garlic, and paprika until smooth. Adjust the seasoning if desired.
- Divide the cooked rice amongfour bowls.Top each bowl with an equal portion of the cooked chicken and corn.4️⃣Add Toppings:Drizzle each bowl with the creamy dressing.Sprinkle with crumbled cotija cheese and chopped cilantro.5️⃣Serve:Add a lime wedge to each bowl. Squeeze the lime over the top just before eating for a burst of freshness.
- Top each bowl with an equal portion of the cooked chicken and corn.
- Drizzle each bowl with the creamy dressing.Sprinkle with crumbled cotija cheese and chopped cilantro.5️⃣Serve:Add a lime wedge to each bowl. Squeeze the lime over the top just before eating for a burst of freshness.
- Sprinkle with crumbled cotija cheese and chopped cilantro.
- Add a lime wedge to each bowl. Squeeze the lime over the top just before eating for a burst of freshness.
Notes
Make It Spicy: Add a pinch of cayenne pepper to the chicken seasoning or mix hot sauce into the dressing for a fiery kick.Rice Options: Use brown rice, cauliflower rice, or quinoa for a healthy twist.Roasted Corn: For extra flavor, roast the corn kernels in a skillet with a bit of butter and paprika before adding them to the bowl.Storage: Leftovers can be stored in an airtight container in the fridge for up to 3 days. Reheat before serving, and add fresh toppings like cilantro and lime.
Rice Options: Use brown rice, cauliflower rice, or quinoa for a healthy twist.Roasted Corn: For extra flavor, roast the corn kernels in a skillet with a bit of butter and paprika before adding them to the bowl.Storage: Leftovers can be stored in an airtight container in the fridge for up to 3 days. Reheat before serving, and add fresh toppings like cilantro and lime.
Roasted Corn: For extra flavor, roast the corn kernels in a skillet with a bit of butter and paprika before adding them to the bowl.Storage: Leftovers can be stored in an airtight container in the fridge for up to 3 days. Reheat before serving, and add fresh toppings like cilantro and lime.
Storage: Leftovers can be stored in an airtight container in the fridge for up to 3 days. Reheat before serving, and add fresh toppings like cilantro and lime.
“`