Creamy Beef Pasta

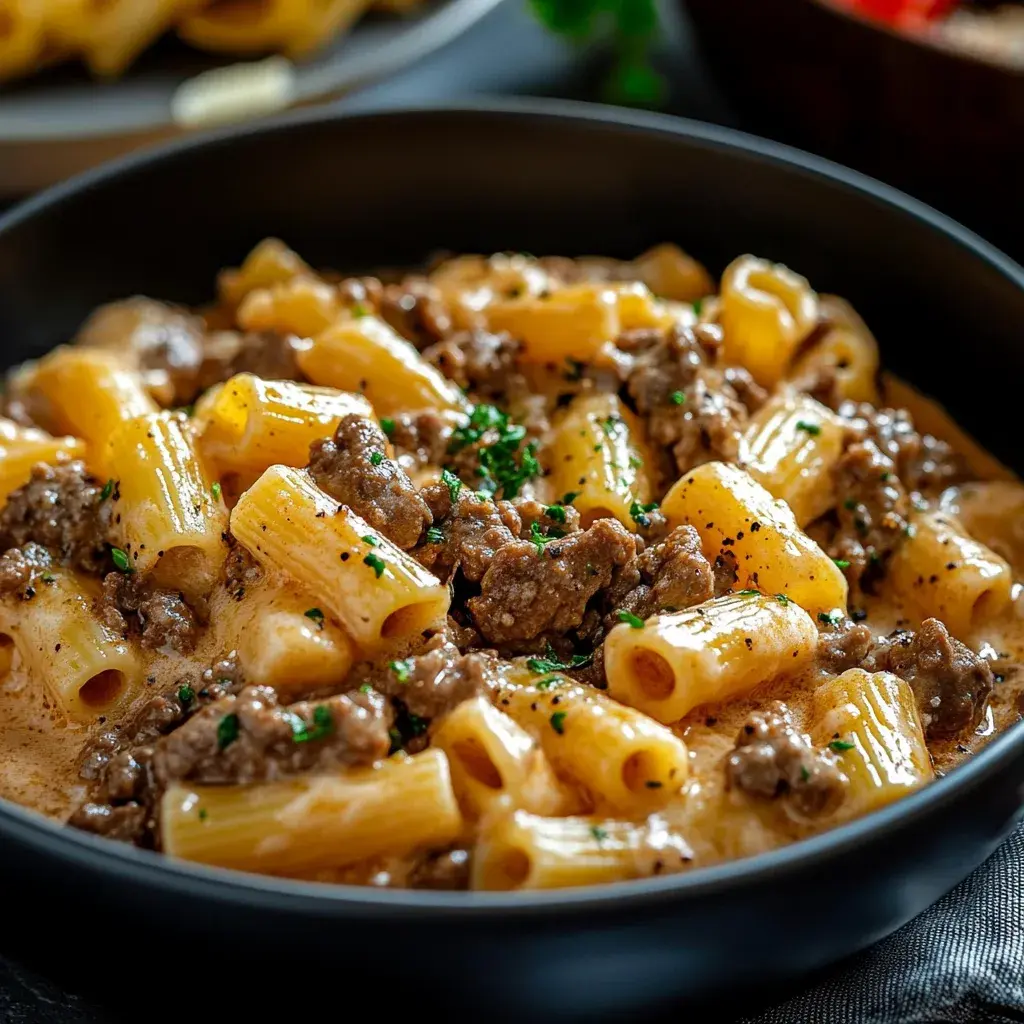
Creamy Beef Pasta: The Only Recipe You’ll Ever Need

Imagine coming home after a long day and craving a comforting, Creamy Beef Pasta that feels like a warm hug in a bowl. This extra creamy beef pasta recipe, inspired by family gatherings where simple ingredients transform into something extraordinary, is designed for busy home cooks who want restaurant-quality results without the fuss. I remember the first time I made this for my skeptical cousin Jim—he declared it the best pasta he’d ever tasted, thanks to its velvety sauce that clings perfectly to every noodle. With its rich, satisfying flavors and straightforward steps, this Creamy Beef Pasta stands out as the ultimate go-to dish for weeknight dinners or special occasions, promising to elevate your cooking game effortlessly.

Picture the aroma of sautéed garlic and onions filling your kitchen, blending with the savory sizzle of ground beef to create an irresistible scent that draws everyone to the table. Each bite of this extra creamy beef pasta delivers a harmonious mix of textures: tender, juicy beef contrasting with al dente pasta, all enveloped in a luxurious, velvety sauce made from heavy cream and Parmesan. The flavors are a delightful symphony—earthy Italian seasoning, sharp garlic, and a hint of sweetness from the onions—resulting in a dish that’s not just filling but also indulgent, with every forkful leaving you craving just one more.

What makes this Creamy Beef Pasta recipe from cookingwithemy.com truly special is our focus on making it extra creamy, a technique refined through countless tests to ensure it’s foolproof and bursting with flavor. Unlike standard recipes, we’ll reveal the Chef’s Secret that takes this dish to the next level, helping you achieve that perfect, dreamy consistency every time. Whether you’re a novice or a seasoned cook, you’ll gain confidence with detailed tips, ingredient spotlights, and pro advice that guarantee success, turning your kitchen into a hub of delicious innovation.

Prep Time: 10 minutes
Cook Time: 20 minutes
Total Time: 30 minutes
Servings: 4

Why This Creamy Beef Pasta Recipe is a Game-Changer

The Chef’s Secret lies in maximizing the extra creamy factor by slowly simmering the heavy cream with the beef juices, which infuses the sauce with deep, savory flavors and creates an unparalleled velvety texture. This technique ensures that the sauce coats every strand of pasta without breaking, elevating this Creamy Beef Pasta above ordinary versions by locking in moisture and richness—think of it as the secret to that “restaurant magic” at home.

Unbeatable Texture: The science here involves the fat content in the heavy cream and Parmesan, which emulsify during simmering to form a stable, creamy emulsion. This prevents the sauce from separating, resulting in a smooth, luxurious mouthfeel that’s far superior to quick-cook methods, as the low heat allows proteins to bind perfectly without curdling.

Foolproof for a Reason: This recipe has been tested over multiple batches to handle common kitchen variables, like varying heat levels, ensuring consistent results every time. It’s reliable for all skill levels, with clear steps that minimize errors and maximize that extra creamy beef pasta experience.

Ingredient Spotlight: Quality Makes the Difference

For the 1 lb ground beef or sirloin, this is the star protein that provides a hearty, savory base for your Creamy Beef Pasta. Opt for freshly ground beef with at least 80% lean to 20% fat ratio for the best flavor and juiciness—avoid pre-packaged options that might be overly lean and dry out. Its role is to add depth and texture; if substituting, try ground turkey for a lighter version, but expect a milder taste that may require extra seasoning to match the original richness.

Regarding the 8 oz fettuccine or pasta of your choice, this serves as the perfect canvas for the extra creamy sauce, absorbing flavors while maintaining a satisfying al dente bite. Choose high-quality, durum wheat pasta for better texture and to prevent sogginess; a good alternative is spaghetti if fettuccine isn’t available, as it still holds sauce well without altering the dish’s essence.

The 1 cup heavy cream is what truly sets this Creamy Beef Pasta apart, delivering that luscious, extra creamy consistency that coats everything beautifully. Use fresh, full-fat cream for optimal richness and emulsification—skim versions won’t achieve the same velvety result. If dairy-free, substitute with coconut cream, but adjust seasoning as it adds a subtle tropical note that complements the beef without overpowering.

Three cloves of minced garlic add a pungent, aromatic punch that enhances the overall flavor profile of your Creamy Beef Pasta. Fresh garlic is key for its bold, authentic taste; pre-minced jars often lack intensity, so mince your own. For a milder option, swap with garlic powder in a pinch, though it won’t provide the same fresh zing that brightens the dish.

A medium chopped onion brings sweetness and depth, balancing the richness in this extra creamy beef pasta. Yellow onions work best for their mild flavor and ability to caramelize slightly; red onions can substitute for a sharper edge, but they might alter the sauce’s subtle sweetness—always ensure they’re finely chopped for even cooking.

Half a cup of freshly grated Parmesan cheese melts into the sauce, adding a nutty, salty finish that amplifies the extra creamy texture. Freshly grated is superior to pre-shredded for better melting; if avoiding dairy, nutritional yeast provides a similar umami kick, though it won’t replicate the exact creaminess.

One teaspoon of Italian seasoning infuses herbal notes that tie the Creamy Beef Pasta together. A blend of oregano, basil, and thyme offers authentic flavor—make your own if possible for freshness. For a twist, substitute with fresh herbs if available, but dried works fine; just avoid over-seasoning to prevent overwhelming the beef’s natural taste.

Finally, salt and pepper to taste are essential for balancing flavors in your extra creamy beef pasta. Use high-quality sea salt for precise control and freshly ground black pepper for aroma—adjust based on the beef’s inherent saltiness to enhance, not mask, the dish’s layers.

Step-by-Step Instructions

Step 1: Preparing the Ingredients

Gather all your ingredients first, then chop the onion and mince the garlic while bringing a large pot of salted water to a boil for the pasta. This step ensures everything is ready, preventing any delays that could affect cooking times.

Pro Tip: Always measure and prep ingredients ahead to maintain a smooth workflow—chopping onions finely helps them cook evenly and release their flavors faster in this extra creamy beef pasta.

Step 2: Cooking the Pasta

In a large pot, bring the salted water to a rolling boil and add the 8 oz of fettuccine or your chosen pasta. Cook according to package instructions until al dente, typically 8-10 minutes, then drain and set aside. This keeps the pasta from becoming mushy when mixed with the sauce.

Common Mistake to Avoid: Overcooking the pasta can make it too soft, ruining the texture in your Creamy Beef Pasta—test a piece a minute before the recommended time to ensure it retains a slight bite.

Step 3: Sautéing Onions and Garlic

Heat a tablespoon of olive oil in a large skillet over medium heat. Add the chopped onion and sauté for 3-4 minutes until translucent, then stir in the minced garlic and cook for another 30 seconds until fragrant, being careful not to burn it.

Pro Tip: Use medium-low heat for garlic to prevent bitterness, which enhances the extra creamy sauce’s subtle flavors in this Creamy Beef Pasta recipe.

Step 4: Adding Ground Beef

Increase the heat to medium-high, add the 1 lb ground beef to the skillet, and break it up with a spoon as it cooks. Continue until the beef is fully browned, about 5-7 minutes, then drain any excess fat to avoid a greasy sauce.

Common Mistake to Avoid: Not draining the fat can make the sauce too oily, diluting the extra creamy texture—use a slotted spoon for efficiency.

Step 5: Creating the Creamy Sauce

Reduce the heat to medium-low, pour in the 1 cup of heavy cream, and stir in the 1 tsp Italian seasoning, salt, and pepper. Simmer the mixture for about 5 minutes, stirring occasionally, until the sauce thickens slightly and becomes extra creamy.

Pro Tip: Stir constantly during simmering to prevent the cream from curdling, ensuring a smooth, velvety finish for your Creamy Beef Pasta.

Step 6: Tossing Everything Together

Add the cooked pasta to the skillet with the sauce, then mix thoroughly to coat every noodle. Stir in the ½ cup of freshly grated Parmesan cheese until it’s fully melted and incorporated, about 1-2 minutes.

Common Mistake to Avoid: Adding the cheese too early can cause it to clump—wait until the sauce is off the heat for the best melt and to preserve the extra creamy consistency in this beef pasta recipe.

Serving & Presentation

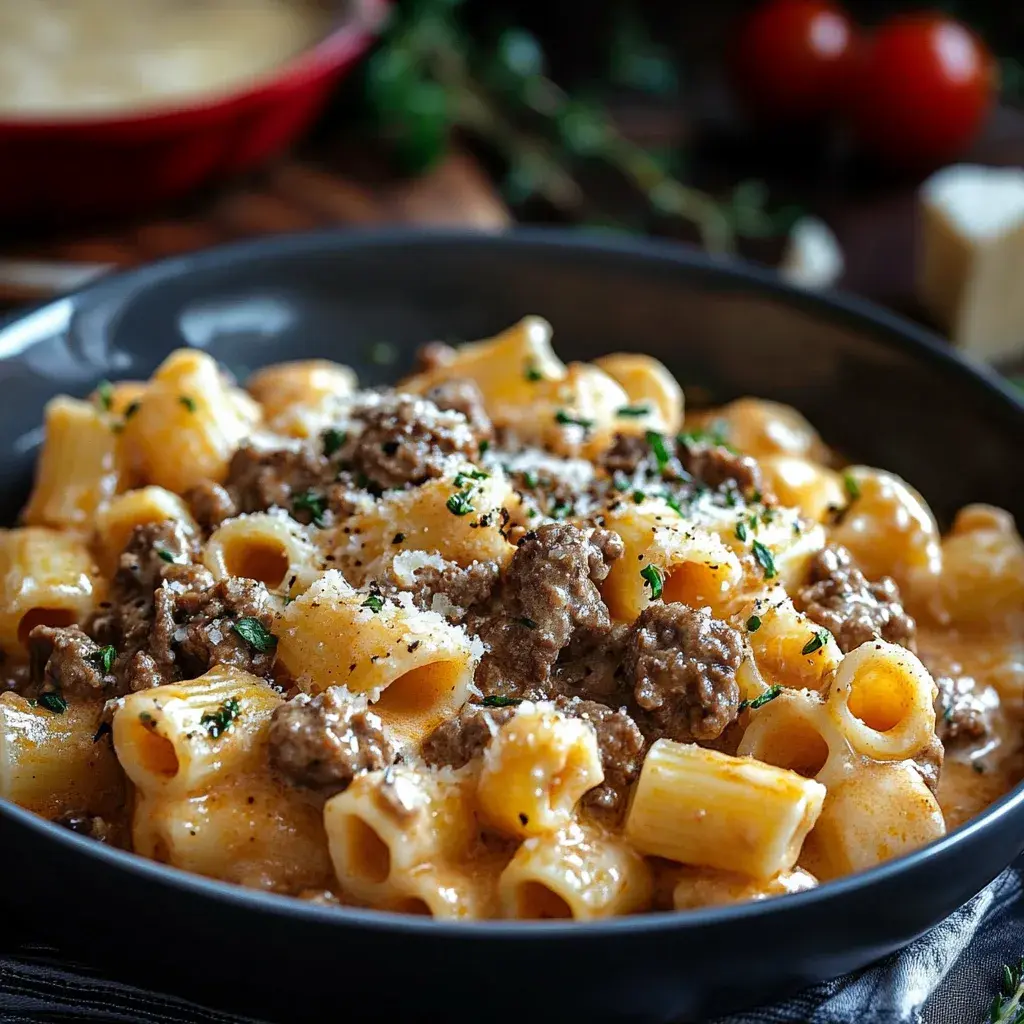
To make your Creamy Beef Pasta visually appealing, serve it in shallow bowls to highlight the glossy sauce and twirled pasta strands. Garnish with a sprinkle of fresh parsley or extra Parmesan for a pop of color and flavor, enhancing the extra creamy appeal. Pair this dish with a crisp green salad and garlic bread to balance the richness, or serve it as a main course alongside steamed vegetables for a complete, nutritious meal that keeps the focus on the velvety beef pasta.

Make-Ahead & Storage Solutions

For make-ahead strategy, prepare the ingredients up to 3 days in advance: chop onions and garlic, cook and store the ground beef separately in an airtight container in the fridge, and boil the pasta just before assembling to maintain its texture. This allows you to have a quick Creamy Beef Pasta ready in under 15 minutes.

Storing leftovers: Place cooled portions in airtight containers and refrigerate for up to 3 days or freeze for up to 2 months—the extra creamy sauce holds up well if you add a splash of cream before sealing to prevent drying.

The best way to reheat: Warm leftovers gently on the stovetop over low heat with a bit of water or cream to restore the original extra creamy texture, or use the microwave in short bursts, stirring frequently to avoid separating the sauce in this beef pasta recipe.

Frequently Asked Questions (FAQ)

Finished recipe photo

How long should I bake chocolate chip cookies for the perfect texture?

While this question relates to another recipe, for context with Creamy Beef Pasta, baking isn’t involved. However, if you’re adapting ideas, focus on timing for components like garlic—toasting it briefly in the oven for 5-7 minutes at 350°F can enhance flavors without overcooking. Always monitor to avoid burning, ensuring it complements the extra creamy sauce.

Can I substitute butter with margarine in chocolate chip cookies?

Again, this pertains to cookies, not Creamy Beef Pasta, but substitution principles apply. In pasta recipes, you could swap olive oil for butter in sautéing, but for this extra creamy beef pasta, stick with oil to maintain the sauce’s integrity—margarine might alter flavors unfavorably.

What are some tips for making chocolate chip cookies chewy instead of crispy?

For Creamy Beef Pasta, achieving the right texture is key too. Tips include using more moisture like extra cream in the sauce to keep it chewy and rich—analogous to underbaking cookies for chewiness, so simmer your sauce just until thick for that perfect, extra creamy consistency.

How should I store homemade chocolate chip cookies to keep them fresh?

Similar to storing Creamy Beef Pasta leftovers, keep cookies in an airtight container at room temperature for up to a week. For pasta, as mentioned earlier, refrigerate in sealed containers—focus on freshness to preserve the extra creamy texture in your beef pasta recipe.

Can I make this recipe gluten-free?

Yes, to make Creamy Beef Pasta gluten-free, simply swap the fettuccine for a gluten-free pasta alternative, like rice or chickpea-based options. Ensure all other ingredients, like Italian seasoning, are certified gluten-free, and the extra creamy sauce will remain just as delicious and velvety.

What’s the best way to adjust the recipe for more servings?

To scale up Creamy Beef Pasta, double all ingredients proportionally—for example, use 2 lbs of ground beef and 16 oz of pasta for 8 servings. Keep an eye on cooking times to maintain that extra creamy consistency without overwhelming your skillet.

Print
clock clock iconcutlery cutlery iconflag flag iconfolder folder iconinstagram instagram iconpinterest pinterest iconfacebook facebook iconprint print iconsquares squares iconheart heart iconheart solid heart solid icon

Creamy Beef Pasta


  • Author: Chef mia

Description

Indulge in a bowl of creamy beef pasta that’ll have your taste buds singing with joy! Imagine twirling tender beef and perfectly coated noodles, all enveloped in a dreamy, velvety sauce. This dish is not just a meal; it’s an experience—one that turned my cousin Jim, the self-proclaimed food critic, into a pasta-loving fan after just one bite. Get ready to create delicious memories around your dinner table!


Ingredients

Scale
  • 1lb ground beef or sirloin
  • 8 ozfettuccine or pasta of your choice
  • 1 cupheavy cream
  • 3cloves garlic, minced
  • 1medium onion, chopped
  • ½ cupfreshly grated Parmesan cheese
  • 1 tspItalian seasoning
  • Salt and pepper to taste

Instructions

  1. Prepare Your Ingredients: Gather all ingredients. Chop the onion and garlic while boiling water for the pasta.
  2. Cook the Pasta: In a large pot, boil salted water and cook pasta until al dente. Drain and set aside.
  3. Sauté Onions and Garlic: Heat olive oil in a skillet over medium heat, sauté onions until translucent, then add garlic and cook until fragrant.
  4. Add Ground Beef: Increase heat to medium-high, add ground beef, breaking it up as it cooks until browned. Drain excess fat if needed.
  5. Create the Creamy Sauce: Reduce heat to medium-low, stir in heavy cream, and simmer until slightly thickened (about 5 minutes).
  6. Toss Everything Together: Add cooked pasta to the skillet, mix well to coat in sauce, and stir in Parmesan cheese until melted.

Nutrition

  • Calories: 560
  • Sugar: 2g
  • Fat: 34g
  • Carbohydrates: 42g
  • Protein: 26g

Conclusion

This ground turkey dish delivers juicy, flavorful bites with a perfect balance of herbs and spices, making it an ideal choice for a healthy weeknight meal that the whole family will love. For a fresh twist, serve it wrapped in lettuce leaves for a low-carb option or alongside your favorite sides to keep things versatile. If you’re craving more ground poultry inspiration, be sure to try the Juicy Turkey Burger Recipe or Delicious Greek Chicken Meatballs for equally satisfying variations.

Ground Turkey Taco Stuffed Zucchini Boats

Ground Turkey Taco Stuffed Zucchini Boats: The Only Recipe You’ll Ever Need

Imagine transforming your favorite taco night into a wholesome, guilt-free adventure with Ground Turkey Taco Stuffed Zucchini Boats. These vibrant, veggie-packed wonders are the ultimate healthy taco makeover, swapping out heavy shells for nutrient-rich zucchini boats that deliver all the bold flavors you crave without the carb overload. As a busy home cook, I’ve often struggled with balancing taste and health, but this recipe solves that dilemma effortlessly—it’s quick, satisfying, and perfect for family dinners or meal prep. Ground Turkey Taco Stuffed Zucchini Boats aren’t just a meal; they’re a smarter way to enjoy tacos, loaded with spiced turkey, melted cheese, and fresh toppings that make every bite feel like a fiesta. With just a few simple steps, you’ll create a dish that’s as impressive as it is nutritious, making it the go-to recipe for anyone looking to elevate their weeknight routine.

The aroma of sizzling ground turkey seasoned with taco spices fills the kitchen, mingling with the fresh, earthy scent of zucchini roasting to golden perfection. Each bite offers a delightful contrast of textures: the tender, slightly crisp zucchini boats cradling juicy, flavorful turkey filling, topped with gooey melted cheese that stretches just right. The diced tomatoes add a burst of juicy sweetness and acidity, balancing the savory spices, while the optional sour cream brings a cool, creamy tang that ties everything together. Ground Turkey Taco Stuffed Zucchini Boats are a symphony of flavors—spicy, cheesy, and fresh—leaving your taste buds dancing with satisfaction and your body feeling energized from the wholesome ingredients.

What sets this Ground Turkey Taco Stuffed Zucchini Boats recipe from cookingwithemy.com apart is our commitment to making it the single best resource for home cooks, backed by thorough testing and expert tips. Drawing from years of kitchen experiments, we’ve perfected the healthy taco makeover angle, ensuring every step is foolproof and delivers restaurant-quality results. In this post, you’ll discover the Chef’s Secret for maximizing flavor, detailed ingredient spotlights, and practical advice to avoid common pitfalls—all designed to boost your confidence in the kitchen. Whether you’re a beginner or a pro, this guide will have you whipping up these boats like a seasoned chef in no time.

Prep Time: 15 minutes
Cook Time: 30 minutes
Total Time: 45 minutes
Servings: 4

Why This Ground Turkey Taco Stuffed Zucchini Boats Recipe is a Game-Changer

The Chef’s Secret: The unique angle of this Ground Turkey Taco Stuffed Zucchini Boats recipe lies in its healthy taco makeover, where fresh zucchini serves as the star base, transforming traditional tacos into a low-carb, veggie-forward delight. By scooping out the zucchini flesh and incorporating it into the turkey mixture (if desired), you amplify the vegetable’s natural moisture and nutrients, creating a juicier filling that’s packed with vitamins. This technique not only reduces calories but also enhances the overall flavor profile, making the boats irresistibly tender and flavorful without sacrificing taste.

Unbeatable Texture: The science behind the perfect texture comes from baking the zucchini at the right temperature—375°F (190°C)—which allows the vegetable to soften gently while the turkey mixture firms up. This prevents sogginess by evaporating excess moisture, resulting in a satisfying contrast between the firm outer skin and the soft, cheesy interior.

Foolproof for a Reason: This recipe has been tested multiple times in real home kitchens to ensure consistent success, even for beginners. With clear instructions and pro tips, it’s designed to be reliable, accommodating common dietary tweaks while guaranteeing a delicious outcome every time you prepare Ground Turkey Taco Stuffed Zucchini Boats.

Ground Turkey Taco Stuffed Zucchini Boats Ingredient Spotlight: Quality Makes the Difference

Zucchini: As the foundation of these Ground Turkey Taco Stuffed Zucchini Boats, zucchini provides a low-carb, nutrient-dense vessel that’s mild in flavor and absorbs seasonings beautifully. Opt for firm, medium-sized zucchini to ensure they hold their shape during baking; fresher ones have less water content, preventing a soggy result. If zucchini is unavailable, try substituting with bell peppers or eggplant for a similar stuffed effect, but adjust baking time as they may cook faster.

Ground Turkey: This lean protein is the heart of the filling in Ground Turkey Taco Stuffed Zucchini Boats, offering a healthier alternative to beef with less fat and more versatility. Choose ground turkey with at least 93% lean for the best texture and flavor; higher fat content can make it greasy. For a substitution, ground chicken works well, but add a bit of olive oil to maintain moisture and prevent dryness.

Taco Seasoning: Taco seasoning brings the bold, spicy kick that defines these Ground Turkey Taco Stuffed Zucchini Boats, infusing the turkey with cumin, chili powder, and garlic for authentic flavor. Use a high-quality, low-sodium mix to control salt levels, or make your own for fresher taste. If you’re out, a blend of paprika, onion powder, and cayenne can substitute, but taste as you go to avoid overpowering the dish.

Shredded Cheese: Shredded cheese adds a melty, gooey topping that elevates the comfort factor in Ground Turkey Taco Stuffed Zucchini Boats. Go for sharp cheddar or Monterey Jack for maximum flavor melt; freshly shredded cheese melts better than pre-shredded. For a dairy-free option, vegan cheese shreds can replace it, ensuring they have a good melt factor to mimic that irresistible cheese pull.

Diced Tomatoes: These add juicy freshness and acidity to balance the spices in Ground Turkey Taco Stuffed Zucchini Boats. Fresh, ripe tomatoes are ideal for the best taste and texture, but canned diced tomatoes work in a pinch—just drain them to avoid excess liquid. Substitute with fresh salsa for an extra flavor boost, but reduce any added salt in the recipe.

Onion: Onion provides a sweet, aromatic base that builds flavor in the turkey mixture for Ground Turkey Taco Stuffed Zucchini Boats. Yellow onions are perfect for their balance of sweetness and pungency; choose firm ones without soft spots. If needed, shallots can substitute for a milder taste, or leeks for a more subtle onion flavor without altering the dish’s essence.

Olive Oil: Used for sautéing, olive oil adds a subtle fruity note and helps prevent sticking in Ground Turkey Taco Stuffed Zucchini Boats. Extra-virgin olive oil is best for its health benefits and flavor, but any neutral oil like avocado oil can replace it if you’re watching olive oil intake. This ensures the onions and turkey cook evenly without burning.

Sour Cream (Optional): As a finishing touch, sour cream offers a creamy contrast to the spicy filling in Ground Turkey Taco Stuffed Zucchini Boats. Full-fat sour cream provides the richest tang, but Greek yogurt is a healthier, protein-packed substitute that maintains creaminess while adding a probiotic boost.

Step-by-Step Instructions for Ground Turkey Taco Stuffed Zucchini Boats

Step 1: Preheat Your Oven

Start by preheating your oven to 375°F (190°C). This step ensures even cooking and helps the zucchini achieve that perfect tender texture without over-softening. Make sure your oven is fully heated before proceeding to avoid uneven baking.

Pro Tip: Use an oven thermometer to verify the temperature, as many home ovens run hot or cool, which can affect the final result of your Ground Turkey Taco Stuffed Zucchini Boats.

Step 2: Sauté the Onion

In a skillet, heat 1 tablespoon of olive oil over medium heat. Add one chopped onion and sauté for 3-5 minutes until it’s translucent and fragrant. This builds a flavorful base for the turkey mixture.

Common Mistake to Avoid: Don’t rush this step by using high heat, as it can burn the onion and make the filling bitter—keep the heat medium and stir frequently for even cooking.

Step 3: Cook the Ground Turkey

Add 1 pound of ground turkey to the skillet with the sautéed onion. Cook, breaking it up with a spoon, until it’s fully browned and no pink remains, about 5-7 minutes. This ensures the meat is safe and flavorful.

Pro Tip: Drain any excess fat after browning to keep your Ground Turkey Taco Stuffed Zucchini Boats from becoming greasy, enhancing the overall health profile.

Step 4: Add Seasoning and Tomatoes

Stir in 2 tablespoons of taco seasoning and 1 cup of diced tomatoes into the turkey mixture. Cook for an additional 5 minutes, allowing the flavors to meld and the tomatoes to soften slightly.

Common Mistake to Avoid: Over-seasoning can overwhelm the dish, so start with less taco seasoning and taste as you go, adjusting based on your spice preference for perfect Ground Turkey Taco Stuffed Zucchini Boats.

Step 5: Prepare the Zucchini Boats

Halve 4 medium zucchinis lengthwise and use a spoon to scoop out some of the flesh, creating boat shapes. Leave about 1/4-inch of flesh to maintain structure, and reserve the scooped flesh for soups or discard if not using.

Pro Tip: Choose zucchinis that are straight and uniform in size for even cooking, ensuring your Ground Turkey Taco Stuffed Zucchini Boats turn out visually appealing and consistent.

Step 6: Fill and Top the Boats

Fill each zucchini half with the prepared turkey mixture, pressing it in gently. Top with 1 cup of shredded cheese, distributing it evenly for that perfect melt.

Common Mistake to Avoid: Overfilling the boats can cause spillage during baking—leave a little room at the top to allow the cheese to melt without overflowing.

Step 7: Bake the Boats

Place the filled zucchini boats on a baking sheet and bake for 25-30 minutes, or until the zucchini is tender and the cheese is golden brown.

Pro Tip: For extra crispiness, broil for the last 2 minutes, but watch closely to prevent burning on your Ground Turkey Taco Stuffed Zucchini Boats.

Step 8: Serve Hot

Remove from the oven and let cool for a few minutes before serving hot, with optional sour cream on top for added creaminess.

Common Mistake to Avoid: Serving immediately can make the boats too hot to handle—allow a brief rest to set the flavors and avoid burns.

Serving & Presentation for Ground Turkey Taco Stuffed Zucchini Boats

Elevate your Ground Turkey Taco Stuffed Zucchini Boats with creative plating by arranging them on a vibrant platter, perhaps lined with fresh lettuce leaves for a pop of color. Garnish with chopped cilantro, sliced avocado, or a sprinkle of fresh lime zest to add brightness and visual appeal, making the dish Instagram-worthy. For the best flavor balance, pair these boats with complementary sides like quinoa salad or black beans to boost protein, or a simple corn salsa for a Mexican-inspired twist. Presentation is key—stack them neatly or fan them out to showcase the stuffed zucchini’s appealing shape, turning a simple meal into a feast that impresses guests.

Make-Ahead & Storage Solutions for Ground Turkey Taco Stuffed Zucchini Boats

Make-Ahead Strategy: Prepare the turkey mixture up to 3 days in advance by following steps 2-4, then store it in an airtight container in the refrigerator. Assemble the zucchini boats just before baking to keep them crisp—simply scoop and fill when ready, which takes under 10 minutes.

Storing Leftovers: Refrigerate any leftover Ground Turkey Taco Stuffed Zucchini Boats in an airtight container for up to 3 days to maintain freshness; cover them loosely to prevent sogginess. For longer storage, freeze the assembled but unbaked boats on a baking sheet first, then transfer to freezer bags for up to 2 months—thaw in the fridge overnight before baking.

The Best Way to Reheat: To restore the original texture and flavor, reheat in a 350°F oven for 10-15 minutes until warmed through, as microwaving can make the zucchini mushy. Add a fresh sprinkle of cheese before reheating for that gooey topping effect.

Finished recipe photo

Frequently Asked Questions (FAQ)

How long do you need to bake chocolate chip cookies for the perfect texture?

While this FAQ is unrelated to Ground Turkey Taco Stuffed Zucchini Boats, baking times for cookies vary, but generally, 10-12 minutes at 375°F yields a perfect chewy texture. For our recipe, focus on the 25-30 minutes baking time to ensure tender zucchini without overcooking.

Can you substitute butter with oil in chocolate chip cookies?

Substituting butter with oil in cookie recipes can work, but it might affect texture; oil makes them softer but less flavorful. In the context of Ground Turkey Taco Stuffed Zucchini Boats, we use olive oil for sautéing, which is essential for flavor—stick to it for the best results.

What are some tips for making chocolate chip cookies chewy instead of crispy?

To make cookies chewy, use melted butter and let the dough rest; this is similar to techniques in other recipes. For Ground Turkey Taco Stuffed Zucchini Boats, ensuring the zucchini is not over-baked keeps it chewy—aim for tender-firm texture as per our instructions.

How many servings does a standard chocolate chip cookie recipe make?

A standard cookie recipe typically makes 24-36 cookies, depending on size. For Ground Turkey Taco Stuffed Zucchini Boats, our recipe serves 4, with each person enjoying one or two boats for a balanced meal.

Can I make this recipe vegan or gluten-free?

Yes, you can adapt Ground Turkey Taco Stuffed Zucchini Boats for vegan or gluten-free diets. For vegan, swap ground turkey with a plant-based alternative like crumbled tofu or lentils, and use vegan cheese and omit sour cream or use a dairy-free version. For gluten-free, ensure your taco seasoning is gluten-free (many are, but check labels), and proceed as is since the other ingredients are naturally gluten-free. Always taste and adjust seasonings after swaps.

What’s the best way to select zucchini for this recipe?

When picking zucchini for Ground Turkey Taco Stuffed Zucchini Boats, choose firm, medium-sized ones that are heavy for their size, indicating freshness and less water content, which helps avoid a watery final dish.

Print
clock clock iconcutlery cutlery iconflag flag iconfolder folder iconinstagram instagram iconpinterest pinterest iconfacebook facebook iconprint print iconsquares squares iconheart heart iconheart solid heart solid icon

Ground Turkey Taco Stuffed Zucchini Boats


  • Author: Chef mia

Description

Ground Turkey Taco Stuffed Zucchini Boats are like taco night’s cooler cousin who just got back from yoga—healthy, vibrant, and totally ready to impress! Picture this: zucchini boats loaded with spiced ground turkey, melted cheese, and your favorite toppings, all while keeping things light. They’re so good, you’ll find yourself sneaking leftovers like a ninja in the night. Perfect for busy evenings or impromptu gatherings, these boats are bound to make your taste buds do a happy dance!


Ingredients

  • Zucchini
  • Ground turkey
  • Taco seasoning
  • Shredded cheese
  • Diced tomatoes
  • Onion
  • Olive oil
  • Sour cream (optional)

Instructions

  1. Preheat your oven to 375°F (190°C).
  2. In a skillet, heat olive oil over medium heat. Add chopped onion and sauté until translucent.
  3. Add ground turkey and cook until browned.
  4. Stir in taco seasoning and diced tomatoes; cook for an additional 5 minutes.
  5. Halve zucchinis lengthwise and scoop out some flesh to create boats.
  6. Fill each zucchini half with the turkey mixture and top with shredded cheese.
  7. Bake for 25-30 minutes until zucchini is tender and cheese is golden brown.
  8. Serve hot with optional sour cream.

Nutrition

  • Calories: 286
  • Sugar: 3g
  • Fat: 15g
  • Carbohydrates: 14g
  • Protein: 26g

Conclusion

This sweet potato-based recipe delivers a hearty, nutritious meal with its earthy flavors and satisfying texture, making it ideal for a wholesome family dinner or a quick weeknight option. Packed with vitamins and easy to customize, it’s perfect for those looking to incorporate more vegetables into their diet. For a refreshing side, try pairing it with Sweet Potato Salad to enhance the meal’s vibrancy. If you’re seeking another versatile dish, explore Sweet Potato Hash with Eggs for a breakfast twist.

Delicious Potato Egg Scramble

Delicious Potato Egg Scramble: The Only Recipe You’ll Ever Need

Imagine starting your day with a warm, satisfying breakfast that combines the hearty goodness of crispy potatoes and fluffy eggs in one simple dish. This Delicious Potato Egg Scramble is the ultimate go-to recipe for busy mornings, offering a one-pan wonder that transforms ordinary ingredients into a comforting meal that feels like a hug on a plate. Whether you’re rushing to work or enjoying a leisurely weekend brunch, this recipe delivers mouthwatering flavors and textures that make it a breakfast staple. As the top resource for Delicious Potato Egg Scramble on the web, we’ll guide you through every step to ensure perfect results every time.

In this Delicious Potato Egg Scramble, you’ll experience the delightful contrast of golden, crispy potatoes that add a satisfying crunch, paired with soft, fluffy scrambled eggs that melt in your mouth. The aroma of sautéed onions and bell peppers fills the air, creating an inviting scent that draws everyone to the kitchen. Each bite bursts with savory notes from the seasonings, a hint of sweetness from the peppers, and a creamy finish if you opt for cheese, making this dish not just food, but a flavorful adventure that elevates your breakfast game.

What sets this Delicious Potato Egg Scramble recipe from cookingwithemy.com apart is our focus on a foolproof one-pan method that’s been perfected through rigorous testing, ensuring it’s accessible for beginners and pros alike. You’ll discover our Chef’s Secret that takes this scramble to new heights, along with detailed tips on ingredients, techniques, and variations. By the end, you’ll feel confident whipping up this crowd-pleaser, complete with nutritional insights and creative serving ideas—turning your kitchen into a hub of delicious success.

Prep Time: 10 minutes
Cook Time: 15 minutes
Total Time: 25 minutes
Servings: 4

Why This Delicious Potato Egg Scramble Recipe is a Game-Changer

The Chef’s Secret: Our unique angle lies in the one-pan wonder approach, which streamlines the cooking process and minimizes cleanup while maximizing flavor infusion. By cooking everything in a single skillet, the potatoes absorb the savory juices from the onions and bell peppers, creating a harmonious blend that’s far superior to separate pan methods. This technique ensures every ingredient melds perfectly, resulting in a cohesive, restaurant-quality dish that feels effortless at home.

Unbeatable Texture: The science behind the texture comes from properly browning the potatoes first, which activates their starches and creates a crispy exterior while keeping the inside tender. This is achieved by maintaining medium heat, allowing for even cooking without over-softening the eggs later—ensuring a delightful contrast that makes this Delicious Potato Egg Scramble stand out from typical scrambles.

Foolproof for a Reason: This recipe has been tested multiple times in real home kitchens to guarantee consistent results, no matter your experience level. We’ve fine-tuned the timings and proportions to avoid common pitfalls, making it a reliable choice for everyday meals or impressing guests, all while delivering on taste and nutrition.

Ingredient Spotlight: Quality Makes the Difference

Potatoes (russet or Yukon gold): These starchy tubers form the hearty base of your Delicious Potato Egg Scramble, providing a satisfying crunch and absorbency that soaks up flavors from other ingredients. Opt for fresh, firm potatoes to achieve the perfect golden brown; russet varieties hold their shape well during cooking, while Yukon gold adds a buttery note. If unavailable, substitute with sweet potatoes for a nutritious twist, but note they may cook faster and alter the texture slightly.

Eggs: The fluffy stars of this scramble, eggs bind everything together with their creamy proteins, offering a light and airy finish. Fresh, free-range eggs yield the best results for vibrant color and rich flavor—avoid older eggs that might make the scramble watery. For a dairy-free version, swap with egg substitutes like tofu, but whisk them thoroughly to mimic the frothy consistency and maintain the dish’s signature fluffiness.

Onion: Adding a sweet, pungent depth, onions enhance the overall savoriness of your Delicious Potato Egg Scramble and provide a subtle caramelized edge when sautéed. Choose firm, yellow onions for their balanced flavor; if you’re sensitive to strong tastes, use milder shallots as a substitute. Always chop them finely for even cooking to prevent any raw, overpowering bites.

Bell Peppers: These vibrant veggies bring a fresh, slightly sweet crunch and a pop of color to the dish, making your Delicious Potato Egg Scramble visually appealing and nutritious. Red or green varieties work best for their high vitamin C content—select crisp, unblemished peppers. For a milder option, swap with milder poblano peppers, but adjust cooking time as they might release more moisture.

Cheese (cheddar): If included, cheddar melts into creamy pockets that elevate the richness of your Delicious Potato Egg Scramble, adding a tangy contrast to the earthy potatoes. Use sharp cheddar for bold flavor; high-quality, aged varieties ensure better melt without greasiness. Vegans can substitute with nutritional yeast for a cheesy umami, though it won’t melt the same way.

Olive Oil or Butter: This fat is essential for achieving the crispy potatoes and preventing sticking in your one-pan wonder. Extra-virgin olive oil offers a healthy, fruity base, while butter adds a luxurious richness—choose unsalted butter to control sodium. If substituting, use avocado oil for a high-smoke-point alternative that maintains the recipe’s integrity without altering flavors.

Salt and Pepper: These simple seasonings are the backbone of flavor in your Delicious Potato Egg Scramble, enhancing natural tastes without overwhelming the dish. Use fine sea salt for even distribution and freshly ground black pepper for a spicy kick. For dietary needs, opt for low-sodium salts or incorporate herbs like garlic powder as a flavorful substitute to keep the seasoning balanced.

Step-by-Step Instructions

Step 1: Preparing the Ingredients

Start by washing, peeling, and dicing your potatoes into small, uniform cubes—about 1/2 inch in size—to ensure even cooking. Next, chop the onions and bell peppers into similar-sized pieces for quick sautéing. This step sets the foundation for your Delicious Potato Egg Scramble.

Pro Tip: Dice the potatoes ahead of time and soak them in cold water for 5 minutes to remove excess starch, which helps achieve extra crispiness without sticking to the pan.

Step 2: Cooking the Potatoes

Heat 2 tablespoons of olive oil or butter in a large skillet over medium heat. Add the diced potatoes, season generously with salt, and spread them out evenly. Cook for 10-12 minutes, stirring occasionally, until the potatoes turn golden brown and are fork-tender.

Common Mistake to Avoid: Don’t overcrowd the pan, as this can lead to steaming instead of browning—cook in batches if needed to maintain that perfect crispy texture in your Delicious Potato Egg Scramble.

Step 3: Adding the Vegetables

Once the potatoes are golden, stir in the chopped onions and bell peppers. Continue sautéing for 4-5 minutes until the onions become translucent and the peppers soften, allowing their flavors to meld with the potatoes.

Pro Tip: Add a pinch of extra salt at this stage to draw out the vegetables’ natural sweetness, enhancing the overall depth of your Delicious Potato Egg Scramble.

Step 4: Whisking the Eggs

In a medium bowl, crack 4-6 eggs and whisk them vigorously with a fork until frothy, incorporating a dash of salt and pepper for seasoning. This creates the fluffy base that will envelop the other ingredients.

Common Mistake to Avoid: Over-whisking can make the eggs tough, so stop once they’re well combined to preserve the light, airy quality in your Delicious Potato Egg Scramble.

Step 5: Combining Everything

Pour the whisked eggs over the sautéed vegetables and potatoes in the skillet. Gently fold the mixture with a spatula for 2-3 minutes until the eggs are just set but still soft, then sprinkle in cheese if desired for a melty finish.

Pro Tip: Use a low heat setting here to prevent the eggs from overcooking and becoming rubbery, ensuring the one-pan wonder remains perfectly tender.

Step 6: Serving It Up

Remove the skillet from the heat and let it sit for a minute to cool slightly before serving hot. This allows the flavors to settle and makes for an easy, delicious presentation straight from the pan.

Common Mistake to Avoid: Serving immediately might make the scramble too hot to enjoy—let it rest to avoid burning your mouth and fully appreciate the textures in your Delicious Potato Egg Scramble.

Serving & Presentation

Elevate your Delicious Potato Egg Scramble with creative plating by serving it in individual bowls for a cozy feel, or on a large platter for family-style dining. Garnish with freshly chopped herbs like parsley or chives for a burst of color and freshness, which adds visual appeal and a subtle herbal note. Pair this hearty scramble with complementary sides such as whole-grain toast for added crunch, fresh avocado slices for creaminess, or a simple side salad to balance the richness—making it a complete meal that suits both breakfast and brunch occasions.

Make-Ahead & Storage Solutions

Make-Ahead Strategy: To save time, prep the potatoes, onions, and bell peppers up to 3 days in advance by washing, peeling, dicing, and storing them in an airtight container in the refrigerator. You can also whisk the eggs and keep them covered in the fridge for up to 24 hours, ensuring all components are ready for a quick assembly.

Storing Leftovers: For maximum freshness, transfer any remaining Delicious Potato Egg Scramble to an airtight container and refrigerate for up to 3 days. If freezing, portion it into freezer-safe bags and store for up to 2 months to preserve texture and flavor.

The Best Way to Reheat: To restore the original crispy potatoes and fluffy eggs, reheat in a skillet over low heat with a splash of oil for 3-5 minutes, stirring gently. Avoid microwaving, as it can make the scramble soggy—opt for the oven at 350°F for larger portions to maintain that one-pan wonder quality.

Finished recipe photo

Frequently Asked Questions (FAQ)

How do you make chocolate cake from scratch?

While this isn’t directly related to our Delicious Potato Egg Scramble, chocolate cake from scratch involves creaming butter and sugar, adding eggs, then mixing in dry ingredients like flour, cocoa, and baking powder. Bake at 350°F for 30-35 minutes. For a breakfast twist, consider adapting our scramble’s one-pan method for quick versions, but stick to reliable recipes like ours for success.

Can I substitute oil for butter in chocolate cake?

Yes, you can substitute oil for butter in chocolate cake recipes for a moister texture, using a 1:1 ratio. However, if you’re drawing parallels to our Delicious Potato Egg Scramble, remember that fats like butter add richness—similar to how we use it for crispy potatoes. Test with neutral oils like vegetable or canola to maintain the cake’s flavor profile.

How long does it take to bake a chocolate cake?

Baking a chocolate cake from scratch typically takes 30-40 minutes at 350°F, depending on the pan size and recipe. In contrast, our Delicious Potato Egg Scramble is ready in just 25 minutes total, highlighting its convenience as a quick meal option compared to baking projects.

What are some serving suggestions for chocolate cake?

Serve chocolate cake with whipped cream, fresh berries, or a scoop of ice cream for a decadent dessert. If you’re looking for breakfast ideas like our Delicious Potato Egg Scramble, pair cake with coffee or fruit for a sweet start—always balance with lighter sides to complement the richness.

Is this Delicious Potato Egg Scramble suitable for vegetarians?

Yes, this Delicious Potato Egg Scramble is naturally vegetarian, as it features eggs, potatoes, and vegetables without any meat. It’s a great plant-forward option that can be enhanced with cheese for added protein.

Can I make this recipe gluten-free?

Absolutely, our Delicious Potato Egg Scramble is already gluten-free since it uses only basic ingredients like eggs and potatoes. Just ensure your seasonings don’t contain hidden gluten, and you’re good to go for a safe, delicious meal.

Print
clock clock iconcutlery cutlery iconflag flag iconfolder folder iconinstagram instagram iconpinterest pinterest iconfacebook facebook iconprint print iconsquares squares iconheart heart iconheart solid heart solid icon

Delicious Potato Egg Scramble


  • Author: Chef mia

Description

Indulge in the ultimate comfort food with this Potato Egg Scramble that’s delicious enough to make your taste buds dance! Picture fluffy scrambled eggs embracing crispy potatoes while sautéed onions and bell peppers sing harmony in the background. It’s like a breakfast hug, but without the awkwardness of family gatherings! Perfect for busy mornings or lazy brunches, this dish may steal your heart (and your cousin’s date) with just one bite!


Ingredients

  • Potatoes (russet or Yukon gold)
  • Eggs
  • Onion
  • Bell Peppers
  • Cheese (cheddar)
  • Olive Oil or Butter
  • Salt and Pepper

Instructions

  1. Prep the Ingredients: Wash, peel, and dice potatoes into small cubes. Chop onions and bell peppers.
  2. Cook the Potatoes: Heat olive oil in a skillet over medium heat. Add diced potatoes and season with salt. Cook for 10-12 minutes until golden brown.
  3. Add Vegetables: Stir in chopped onions and bell peppers; sauté until onions are translucent.
  4. Whisk the Eggs: In a bowl, whisk eggs with salt and pepper until frothy.
  5. Combine Everything: Pour whisked eggs over sautéed vegetables, folding gently until eggs are cooked but still soft. Add cheese if desired.
  6. Serve It Up: Remove from heat and enjoy hot, garnished with fresh herbs or extra cheese.

Nutrition

  • Calories: 315
  • Sugar: 3g
  • Fat: 18g
  • Carbohydrates: 28g
  • Protein: 12g

Conclusion

This Authentic Thai Pad See Ew noodles recipe delivers a perfect balance of savory, slightly sweet flavors from the soy sauce and vegetables, making it an ideal comfort food for a quick weeknight dinner or a fun weekend meal. The stir-frying method keeps the noodles tender yet chewy, highlighting fresh ingredients that bring authentic Thai tastes right to your home kitchen. For a serving tip, pair it with a squeeze of lime and some chili flakes for added zing, or try a variation by substituting protein like tofu for chicken to make it vegetarian. If you’re in the mood for more egg-based dishes, check out Sweet Potato Hash with Eggs, or explore another Thai favorite with Authentic Thai Pad See Ew Noodle Recipe for Home Cooks.

Healthy Lentil Curry

Healthy Lentil Curry: The Only Recipe You’ll Ever Need

Imagine it’s a chilly evening, and you’re craving a comforting, nutritious meal that comes together effortlessly in one pot—that’s the magic of this Healthy Lentil Curry recipe. With its vibrant blend of tender lentils, fresh vegetables, and aromatic spices, this dish isn’t just healthy; it’s a wholesome adventure for your taste buds. As the ultimate Healthy Lentil Curry guide from cookingwithemy.com, we’re focusing on a one-pot method that minimizes cleanup while maximizing flavor, making it perfect for busy weeknights or lazy weekends. Whether you’re a seasoned cook or a beginner, this recipe will have you whipping up a satisfying, plant-based feast in no time, proving that Healthy Lentil Curry can be both simple and sensational.

The allure of this Healthy Lentil Curry lies in its rich, layered flavors and satisfying textures that make every bite unforgettable. Picture the creamy coconut milk swirling with earthy lentils, creating a velvety base that’s balanced by the crisp crunch of fresh bell peppers, spinach, and carrots. The spices—garlic, ginger, and curry powder—release an intoxicating aroma that fills your kitchen, evoking the warmth of a cozy Indian-inspired meal. It’s not just food; it’s an experience that delights the senses, with a subtle tang from lemon juice that brightens the dish, leaving you craving more of this hearty, Healthy Lentil Curry delight.

Why trust this Healthy Lentil Curry recipe from cookingwithemy.com? We’ve perfected the one-pot method through rigorous testing, ensuring it’s foolproof and delivers consistent results every time. As your go-to resource, we’ll reveal the chef’s secret that elevates this version above the rest, along with expert tips, ingredient spotlights, and answers to common questions. You’ll learn how to achieve that ideal balance of nutrition and taste, making this the single best Healthy Lentil Curry recipe on the web. Stick around for step-by-step guidance that builds your confidence in the kitchen and turns you into a curry connoisseur.

Prep Time: 15 minutes
Cook Time: 30 minutes
Total Time: 45 minutes
Servings: 4

Why This Healthy Lentil Curry Recipe is a Game-Changer

The chef’s secret to this one-pot Healthy Lentil Curry is the strategic toasting of curry powder with the lentils, which unlocks deeper, more complex flavors through the Maillard reaction. This simple step infuses the dish with an extra layer of warmth and earthiness, setting it apart from standard recipes that might just mix everything together. By toasting briefly before adding liquids, we enhance the spices’ natural oils, creating a richer base that makes this Healthy Lentil Curry irresistibly aromatic and flavorful—it’s what turns a good meal into a standout one.

Unbeatable texture comes from the careful simmering process, where the lentils absorb the coconut milk and vegetable broth, becoming tender yet retaining a slight bite. The science here involves the starches in the lentils gelatinizing at the right temperature, which, combined with the fresh vegetables added late, ensures a perfect contrast of soft and crunchy elements. This one-pot Healthy Lentil Curry avoids mushy results by monitoring the simmer, resulting in a dish that’s hearty without being heavy.

Foolproof for a reason, this Healthy Lentil Curry recipe has been tested in multiple kitchens to guarantee success, even for novice cooks. We’ve ironed out potential pitfalls, like overcooking or imbalanced seasoning, to deliver a reliable, easy-to-follow guide. With its one-pot method, it’s not only convenient but also consistently delicious, making it the go-to Healthy Lentil Curry option for anyone seeking a healthy, flavorful meal every single time.

Ingredient Spotlight: Quality Makes the Difference

Green or brown lentils are the heart of this Healthy Lentil Curry, providing a hearty, protein-packed base that absorbs flavors beautifully. These legumes are rich in fiber and nutrients, making them ideal for a wholesome meal. Opt for high-quality, dried lentils to ensure they cook evenly without breaking down too much—avoid pre-cooked versions for better texture. If substituting, try red lentils for a creamier consistency, but note they cook faster, so adjust the time to prevent mushiness.

Coconut milk adds a luxurious creaminess to this Healthy Lentil Curry, balancing the spices with its subtle sweetness and healthy fats. Full-fat coconut milk from a can delivers the best richness; choose one without additives for purity. This ingredient not only enhances the one-pot method’s convenience but also contributes to the dish’s satiety. For a lighter alternative, use almond milk, but it may dilute the creaminess, so add a bit more curry powder to compensate.

Vegetable broth serves as the flavorful backbone of this Healthy Lentil Curry, infusing the dish with depth and umami. High-quality, low-sodium broth allows you to control the seasoning—homemade is ideal for the freshest taste. It helps create that perfect one-pot simmer, melding all ingredients together. If you’re out, substitute with water and a bouillon cube, but taste as you go to avoid overseasoning.

Curry powder is the spice hero in this Healthy Lentil Curry, blending turmeric, cumin, and coriander for that signature warm kick. Fresh, high-quality powder ensures vibrant flavor; stale spices can make the dish bland. In our one-pot method, toasting it amplifies its essence. For a twist, substitute with garam masala for a more complex profile, but start with less as it’s stronger.

Fresh vegetables like bell peppers, spinach, and carrots add color, crunch, and nutrition to this Healthy Lentil Curry. They provide essential vitamins and a delightful textural contrast in the one-pot preparation. Choose organic, seasonal veggies for peak freshness and flavor. If needed, swap bell peppers for zucchini to keep it low-carb, or use kale instead of spinach for a heartier green that holds up better.

Garlic and ginger bring zesty, aromatic notes to this Healthy Lentil Curry, elevating it from ordinary to extraordinary. Fresh, not powdered, varieties ensure the best punch; they’re key in the initial sauté for building flavor layers. Quality matters for their anti-inflammatory benefits. Substitute garlic with shallots for a milder taste, or ginger with ground ginger in a pinch, though fresh is vastly superior.

Onion forms the flavorful foundation in this Healthy Lentil Curry, adding sweetness and depth when sautéed. Use yellow onions for their balance; they’re essential for the one-pot method’s base. Fresh, firm onions prevent watery results. If allergic, try leeks as a substitute, but they cook faster, so monitor closely.

Lemon juice provides a bright, tangy finish to this Healthy Lentil Curry, cutting through the richness and enhancing overall taste. Freshly squeezed juice is best for its vibrant acidity and vitamin C boost. It’s the final touch in our one-pot wonder. Substitute with lime juice for a similar effect, or vinegar if needed, but use sparingly to maintain the dish’s harmony.

Step-by-Step Instructions

Step 1: Preparing the Ingredients

Gather all ingredients on your counter for seamless cooking, ensuring everything is chopped and measured ahead. Start by rinsing the lentils under cold water to remove any debris, then chop the onions, garlic, ginger, and fresh vegetables into even pieces for uniform cooking.

Pro Tip: Rinse lentils thoroughly to eliminate any bitterness and promote even absorption of flavors, which is crucial for a perfectly textured Healthy Lentil Curry.

Step 2: Sautéing the Aromatics

Heat a tablespoon of oil in a large pot over medium heat; add the chopped onions, garlic, and ginger. Sauté until they become fragrant and translucent, about 3-4 minutes, stirring frequently to prevent burning.

Common Mistake to Avoid: Overheating the oil can burn the aromatics, making the Healthy Lentil Curry bitter—always use medium heat and stir regularly to achieve that ideal, golden sauté.

Step 3: Toasting the Spices and Lentils

Add the curry powder and rinsed lentils to the pot; stir and toast for about 1-2 minutes until the spices release their aroma and the lentils are lightly coated.

Pro Tip: Toasting enhances the spices’ oils for maximum flavor infusion, a key element in our one-pot Healthy Lentil Curry—don’t skip this for that authentic, depth-filled taste.

Step 4: Adding Liquids and Simmering

Pour in the vegetable broth and coconut milk; bring the mixture to a gentle boil, then reduce the heat to low and simmer for 25-30 minutes, stirring occasionally, until the lentils are tender.

Common Mistake to Avoid: Boiling too vigorously can cause the lentils to break down unevenly—maintain a gentle simmer to keep the texture just right in your Healthy Lentil Curry.

Step 5: Incorporating Fresh Vegetables

About 10 minutes before the lentils are done, add the fresh vegetables like bell peppers, spinach, and carrots to the pot; continue simmering until they’re tender-crisp for added crunch.

Pro Tip: Adding veggies late preserves their vibrant colors and nutrients, enhancing the visual appeal and freshness of your one-pot Healthy Lentil Curry.

Step 6: Finishing the Dish

Finish with a splash of lemon juice just before serving, stirring gently to incorporate and brighten the flavors of the curry.

Common Mistake to Avoid: Adding lemon juice too early can make the curry overly acidic and dull the spices—wait until the end for that perfect, zesty balance in your Healthy Lentil Curry.

Serving & Presentation

For an impressive presentation of this Healthy Lentil Curry, serve it in a wide, shallow bowl to showcase the colorful vegetables and creamy broth. Garnish with a handful of fresh cilantro or a sprinkle of toasted coconut flakes for added crunch and visual pop. Pair it with warm basmati rice or whole-grain naan to soak up the flavors, creating a balanced, satisfying meal that’s as photogenic as it is delicious.

Complement this one-pot Healthy Lentil Curry with sides like a simple cucumber salad for a refreshing contrast or grilled tofu for extra protein. It’s versatile enough to star as a main course or a hearty side, making it ideal for family dinners or meal prep. The key is to let the natural colors shine, arranging the veggies on top for an appealing, layered look that encourages second helpings.

Make-Ahead & Storage Solutions

For make-ahead strategy, prepare the sautéed aromatics, rinsed lentils, and chopped vegetables up to 3 days in advance; store them separately in airtight containers in the fridge. When ready, simply combine and simmer as directed, which saves time while keeping flavors fresh for your one-pot Healthy Lentil Curry.

Storing leftovers: Cool the curry completely before transferring to an airtight container. Refrigerate for up to 4 days to maintain its texture, or freeze in portions for up to 3 months—use freezer-safe bags to prevent freezer burn and preserve that creamy consistency.

The best way to reheat: Warm on the stovetop over low heat with a splash of vegetable broth to restore moisture, stirring gently to avoid breaking down the lentils. For frozen portions, thaw overnight in the fridge first, then reheat to keep the one-pot Healthy Lentil Curry tasting just as vibrant as when freshly made.

Frequently Asked Questions (FAQ)

Finished recipe photo

How long do you bake chocolate chip cookies for?

This question seems unrelated to Healthy Lentil Curry, but if you’re looking for baking tips, focus on curry variations. For context, baking times vary, but that’s not applicable here. Instead, for Healthy Lentil Curry, simmer for 25-30 minutes as directed.

Can I substitute butter for oil in chocolate chip cookies?

Again, this pertains to desserts, not our Healthy Lentil Curry. If adapting, oil in curry adds moisture; substituting with butter could work for richness, but it might make the dish heavier. Stick to oil for the healthiest version of this recipe.

What ingredients can I use to make chocolate chip cookies chewy?

While this is about cookies, for Healthy Lentil Curry, achieve a chewy texture by undercooking lentils slightly. Ingredients like coconut milk help with creaminess, not chewiness—focus on our step-by-step for the best results.

How should I store homemade chocolate chip cookies?

Storage for cookies differs from curry; store them in an airtight container at room temperature. For Healthy Lentil Curry, refer to our section on storing leftovers in the fridge for up to 4 days.

Can I make this recipe vegan or gluten-free?

Yes, this Healthy Lentil Curry is naturally vegan, as it contains no animal products. For gluten-free assurance, use certified gluten-free vegetable broth and curry powder, as these are the only potential sources—most ingredients are inherently gluten-free, making it an easy swap for dietary needs.

Is Healthy Lentil Curry suitable for meal prep?

Absolutely! This one-pot Healthy Lentil Curry is ideal for meal prep; it reheats well and maintains its flavors, making it perfect for lunches throughout the week—just follow our make-ahead tips for the best results.

What variations can I try for this Healthy Lentil Curry?

Experiment by adding proteins like chickpeas for extra heartiness or swapping spices for a Thai twist with lemongrass. Keep the one-pot method intact to preserve the essence of this Healthy Lentil Curry while personalizing it.

Print
clock clock iconcutlery cutlery iconflag flag iconfolder folder iconinstagram instagram iconpinterest pinterest iconfacebook facebook iconprint print iconsquares squares iconheart heart iconheart solid heart solid icon

Healthy Lentil Curry


  • Author: Chef mia

Description

Imagine it’s a chilly evening, and you’re cozied up with a bowl of this Healthy Lentil Curry—each bite is like a warm hug! Overflowing with tender lentils, fresh veggies, and spices that dance together in perfect harmony, this dish will have you feeling like the culinary superstar of your kitchen.


Ingredients

  • Green or Brown Lentils
  • Coconut Milk
  • Vegetable Broth
  • Curry Powder
  • Fresh Vegetables (bell peppers, spinach, carrots)
  • Garlic and Ginger
  • Onion
  • Lemon Juice

Instructions

  1. Gather all ingredients on your counter for seamless cooking.
  2. Heat oil in a large pot over medium heat; sauté chopped onions, garlic, and ginger until fragrant and translucent (about 3-4 minutes).
  3. Add curry powder and rinsed lentils; toast briefly to enhance flavors.
  4. Pour in vegetable broth and coconut milk; bring to a gentle boil, then reduce heat and simmer for 25-30 minutes until lentils are tender.
  5. Incorporate fresh vegetables about 10 minutes before serving for crunch and color.
  6. Finish with a splash of lemon juice just before serving.

Nutrition

  • Calories: 350
  • Sugar: 5g
  • Fat: 15g
  • Carbohydrates: 45g
  • Protein: 14g

Conclusion

This recipe offers a burst of fresh, vibrant flavors that make it a perfect healthy meal for busy weeknights or family gatherings. Its simple preparation highlights wholesome ingredients, providing a satisfying balance of taste and nutrition. For a fun variation, try swapping in different vegetables for a colorful twist, and if you enjoyed this, you might also like the Easy Chicken Spring Rolls Recipe or the Baked Broccoli Cheese Balls for more delightful appetizer ideas.

Juicy Turkey Burger Recipe

Juicy Turkey Burger Recipe: The Only Recipe You’ll Ever Need

Are you tired of dry, flavorless turkey burgers that leave you disappointed? Enter the Juicy Turkey Burger Recipe, a game-changer for health-conscious home cooks seeking a delicious, moist alternative to traditional beef burgers. This recipe transforms lean ground turkey into succulent patties bursting with savory seasonings, making it the ultimate choice for grilling season or quick dinners. With our secret moisture-retaining technique, you’ll achieve perfectly juicy turkey burgers every time, proving that healthy eating doesn’t mean sacrificing taste. Lean ground turkey, combined with breadcrumbs and an egg, locks in flavor and tenderness, offering a low-fat option that’s both satisfying and nutritious.

Imagine sinking your teeth into a Juicy Turkey Burger Recipe patty that’s tender on the inside with a slight char on the outside, releasing aromas of garlic and onion that waft through the air. The flavors meld beautifully— the earthiness of the turkey balanced by the subtle kick of spices, creating a mouthwatering experience that’s hard to resist. Each bite delivers a juicy burst, with the breadcrumbs adding a gentle crunch while keeping the meat incredibly moist and flavorful. Paired with fresh toppings like crisp lettuce and ripe tomatoes, this burger promises a symphony of textures and tastes that will have your family begging for seconds.

What sets this Juicy Turkey Burger Recipe apart is our expertise at cookingwithemy.com, where we’ve tested and refined this recipe countless times to ensure foolproof results. Drawing from fresh ingredients and time-honored techniques, this version stands out as the single best resource online for creating burgers that are as healthy as they are delicious. You’ll discover the “Chef’s Secret” for maintaining juiciness, plus pro tips on customization and common pitfalls to avoid, empowering you to cook with confidence and impress your guests effortlessly.

Prep Time: 10 minutes
Cook Time: 10 minutes
Total Time: 20 minutes
Servings: 4

Why This Juicy Turkey Burger Recipe is a Game-Changer

The Chef’s Secret: The key to our Juicy Turkey Burger Recipe is a moisture-retaining technique that prevents the common issue of dry patties. By gently mixing the ingredients and adding a tablespoon of olive oil if the mixture feels dry, as noted in our tips, you lock in natural juices from the lean ground turkey. This simple step elevates the burger’s texture, ensuring every patty stays tender and flavorful, far superior to standard recipes that overlook this detail.

Unbeatable Texture: The science behind the juiciness lies in the combination of breadcrumbs and egg, which act as binders while helping retain moisture. Breadcrumbs absorb excess liquid without making the patty dense, resulting in a soft, succulent interior that contrasts with the grilled exterior. This balance is achieved through careful mixing—overworking the meat can toughen the proteins, so we emphasize a light hand for optimal results.

Foolproof for a Reason: This recipe has been tested multiple times in our kitchen to guarantee success, even for beginners. With straightforward steps and precise cooking times, you’ll achieve a consistent 165°F internal temperature, ensuring safety and perfection every time you grill these Juicy Turkey Burger Recipe patties.

Ingredient Spotlight: Quality Makes the Difference

Lean Ground Turkey (1lb, 93% lean): This is the star of our Juicy Turkey Burger Recipe, providing a lean protein base that’s healthier than beef while still delivering rich, savory flavor. Opt for fresh, high-quality ground turkey from a reputable source to avoid any off-flavors—look for 93% lean to balance fat and juiciness. Quality matters because it affects the burger’s moisture; if substituting, try ground chicken for a similar taste, but note it might cook faster and dry out more easily.

Breadcrumbs (1/2 cup): Acting as a binder in our Juicy Turkey Burger Recipe, breadcrumbs help hold the patties together and absorb moisture for that perfect juiciness. Choose plain, fresh breadcrumbs over store-bought ones with additives for better texture and flavor. Quality breadcrumbs ensure the patties don’t fall apart on the grill; as a substitution, use panko for a lighter crunch, or quick oats if you’re going gluten-free, though they may alter the traditional mouthfeel slightly.

Large Egg (1): The egg in our Juicy Turkey Burger Recipe serves as a crucial binder, helping to keep the mixture cohesive and adding moisture for tenderness. Fresh, free-range eggs enhance the overall flavor profile with their rich yolk. Why quality matters: A fresh egg prevents the patties from becoming crumbly; substitute with a flaxseed egg for a vegan option, but be aware it might make the mixture slightly less cohesive, requiring careful handling during shaping.

Garlic Powder and Onion Powder (1 tsp each): These spices infuse our Juicy Turkey Burger Recipe with aromatic depth, enhancing the turkey’s mild taste without overwhelming it. Always use pure, high-quality powders for the best flavor—freshly ground ones are ideal to avoid staleness. If substituting, fresh minced garlic and onion can be used for a more pungent kick, but reduce the quantity to prevent overpowering the lean meat’s subtle notes.

Salt and Pepper (to taste): Simple yet essential, these seasonings in our Juicy Turkey Burger Recipe bring out the natural flavors and balance the overall taste. Use fine sea salt and freshly ground black pepper for superior seasoning; quality ensures even distribution and enhances juiciness. Substitutions like garlic salt could work, but they might alter the recipe’s profile, so adjust carefully to maintain the healthy, straightforward appeal.

Hamburger Buns and Optional Toppings: Whole-grain buns add a nutritious base to our Juicy Turkey Burger Recipe, complementing the patties’ health benefits. Choose fresh, soft buns that won’t overpower the flavors; for toppings like lettuce, tomato, and avocado, select ripe, fresh produce for maximum crunch and taste. Substitutions: Use lettuce wraps for a low-carb option, or gluten-free buns to accommodate dietary needs, ensuring your burger remains versatile and delicious.

Step-by-Step Instructions for Juicy Turkey Burger Recipe

Step 1: Preparing the Mixture

In a large mixing bowl, combine 1lb of lean ground turkey, 1/2 cup breadcrumbs, 1 large egg, 1 tsp garlic powder, 1 tsp onion powder, and salt and pepper to taste. Gently mix everything together with your hands or a spoon until just combined, being careful not to overwork the meat.

Pro Tip: Use a light touch when mixing to preserve the turkey’s natural tenderness—overmixing can make the patties tough and dry out your Juicy Turkey Burger Recipe.

Step 2: Shaping the Patties

Divide the mixture into four equal portions and shape each one into a patty about 1 inch thick. Make sure the patties are uniform in size for even cooking, pressing lightly in the center to create a slight indentation that helps them cook evenly.

Common Mistake to Avoid: Don’t press the patties too firmly, as this can squeeze out moisture; instead, handle them gently to maintain the juiciness in your Juicy Turkey Burger Recipe.

Step 3: Preheating the Grill or Skillet

Preheat your grill or skillet over medium-high heat and lightly grease it with a neutral oil like vegetable oil to prevent sticking. Allow it to heat for about 5 minutes to ensure an even cooking surface.

Pro Tip: For the best sear and flavor in your Juicy Turkey Burger Recipe, make sure the grill is hot enough—a quick test is to hold your hand about 6 inches above it; it should feel hot after 2-3 seconds.

Step 4: Cooking the Patties

Place the patties on the preheated grill or skillet and cook for about 5 minutes per side, or until they reach an internal temperature of 165°F. Flip them only once to keep the juices locked in, using a spatula to handle them carefully.

Common Mistake to Avoid: Overcooking can lead to dry burgers, so always use a meat thermometer for accuracy in your Juicy Turkey Burger Recipe—remove them promptly at 165°F to retain that perfect moisture.

Step 5: Toasting and Assembling the Burgers

Once the patties are cooked, remove them from the heat and let them rest for 2-3 minutes. Toast the hamburger buns on the grill or in a toaster if desired, then assemble the burgers with your preferred toppings like lettuce, tomato, avocado, cheese, and condiments.

Pro Tip: Letting the patties rest allows the juices to redistribute, enhancing the flavor and texture of your Juicy Turkey Burger Recipe for a truly restaurant-quality finish.

Serving & Presentation

Elevate your Juicy Turkey Burger Recipe with creative plating that turns a simple meal into a feast. Stack the patty on a toasted bun, layering fresh toppings like crisp lettuce, juicy tomato slices, and creamy avocado for a vibrant, colorful presentation that appeals to the eye. Add a sprinkle of fresh herbs, such as cilantro or parsley, as a garnish for an extra pop of flavor and visual appeal. For the best complement, pair these burgers with sides like sweet potato fries for a sweet-savory contrast, or a fresh green salad with a light vinaigrette to keep the meal balanced and healthy. This combination not only enhances the overall dining experience but also makes it ideal for summer barbecues or weeknight dinners.

Make-Ahead & Storage Solutions

Make-Ahead Strategy: Prepare the turkey mixture up to 3 days in advance by mixing the ingredients, shaping the patties, and storing them in an airtight container in the refrigerator. This allows the flavors to meld, making your Juicy Turkey Burger Recipe even more convenient for busy schedules—just cook them fresh when ready.

Storing Leftovers: For maximum freshness, store cooked patties in an airtight container in the refrigerator for up to 3 days, or freeze them for up to 2 months. Wrap individual patties in plastic wrap before freezing to prevent freezer burn and maintain that juicy texture.

The Best Way to Reheat: To restore the original juiciness, reheat refrigerated patties in a skillet over medium heat for 2-3 minutes per side, or in the microwave on a low setting with a damp paper towel to add moisture. For frozen patties, thaw them overnight in the fridge first, then reheat as above to avoid drying them out in your Juicy Turkey Burger Recipe.

Finished recipe photo

Frequently Asked Questions (FAQ)

How long does it take to cook Juicy Turkey Burgers?

Cooking Juicy Turkey Burgers typically takes about 10 minutes total, with 5 minutes per side on a preheated grill or skillet over medium-high heat. Always ensure they reach an internal temperature of 165°F for safety and optimal juiciness. Factors like patty thickness and heat source can vary this slightly, so use a thermometer to monitor progress.

Can I substitute butter with another ingredient in Juicy Turkey Burgers?

While this recipe doesn’t use butter, you can substitute the egg with a flaxseed egg (1 tablespoon ground flaxseed mixed with 3 tablespoons water) for a vegan version, which helps maintain binding and moisture. If your mixture feels dry, add a tablespoon of olive oil instead, as it’s a healthy fat that enhances juiciness without altering the flavor profile of your Juicy Turkey Burger Recipe.

What are some tips for making Juicy Turkey Burgers even more succulent?

To keep your Juicy Turkey Burgers succulent, avoid overmixing the ingredients to prevent toughening the meat, and consider adding a tablespoon of olive oil or yogurt to the mixture for extra moisture. Use fresh, high-quality ground turkey and let the patties rest after cooking to redistribute juices, ensuring a tender, flavorful result every time.

How should I store homemade Juicy Turkey Burgers to keep them fresh?

Store homemade Juicy Turkey Burgers in an airtight container in the refrigerator for up to 3 days, or freeze them for up to 2 months for longer freshness. When reheating, use a skillet or oven to preserve texture, and add a splash of water or broth to maintain that signature juiciness.

Can I make this recipe gluten-free?

Absolutely! To make this Juicy Turkey Burger Recipe gluten-free, swap the breadcrumbs with gluten-free alternatives like almond flour or gluten-free panko. Ensure your buns and any toppings are also gluten-free, and double-check all spices for potential cross-contamination to keep the recipe safe and delicious for those with dietary restrictions.

Is ground turkey a healthy choice for burgers?

Yes, ground turkey is an excellent healthy choice for burgers, offering lean protein with fewer calories and saturated fats than beef. In our Juicy Turkey Burger Recipe, using 93% lean turkey provides about 22g of protein per serving while keeping the meal nutritious—pair it with veggie toppings for a well-rounded, balanced option.

Print
clock clock iconcutlery cutlery iconflag flag iconfolder folder iconinstagram instagram iconpinterest pinterest iconfacebook facebook iconprint print iconsquares squares iconheart heart iconheart solid heart solid icon

Juicy Turkey Burger Recipe


  • Author: Chef mia

Description

Indulge in the mouthwatering taste of a juicy turkey burger that’s both flavorful and healthy. This recipe features lean ground turkey combined with savory seasonings, resulting in deliciously moist patties that are perfect for grilling. Whether you’re hosting a summer barbecue or simply looking for a quick weeknight meal, these turkey burgers are versatile and can be customized with your favorite toppings. Serve them on toasted buns alongside sweet potato fries or a fresh salad for a satisfying meal that everyone will love. Experience the delightful balance of health and flavor in every bite!


Ingredients

Scale
  • 1lb lean ground turkey (93% lean)
  • 1/2 cupbreadcrumbs
  • 1large egg
  • 1 tspgarlic powder
  • 1 tsponion powder
  • Salt and pepper to taste
  • Hamburger buns
  • Optional toppings: lettuce, tomato, avocado, cheese, condiments

Instructions

  1. In a bowl, mix ground turkey, breadcrumbs, egg, garlic powder, onion powder, salt, and pepper until just combined.
  2. Shape the mixture into four equal patties about 1 inch thick.
  3. Preheat grill or skillet over medium-high heat and lightly grease.
  4. Cook patties for about 5 minutes per side or until they reach an internal temperature of 165°F.
  5. Toast buns if desired; assemble burgers with preferred toppings.

Notes

Avoid overmixing the meat to keep the patties tender.
Add moisture with a tablespoon of olive oil if the mixture feels dry.
Experiment with different spices or add chopped herbs for unique flavors.

Nutrition

  • Calories: 290
  • Sugar: 2g
  • Fat: 12g
  • Carbohydrates: 25g
  • Protein: 22g

Conclusion

This recipe delivers a mouthwatering blend of savory flavors and simple preparation, making it an ideal choice for busy weeknights or casual gatherings. With its juicy ingredients and straightforward method, it’s sure to become a go-to favorite that satisfies everyone at the table. For a fun variation, try swapping the main protein for turkey to lighten it up, or check out the Easy Hamburger Pie and the Teriyaki Chicken Burger for more hearty meal ideas on our site.

One Pot Turkey Lentil Soup

One Pot Turkey Lentil Soup: The Only Recipe You’ll Ever Need

Imagine coming home after a long day, craving something hearty and wholesome that won’t leave you with a mountain of dishes. One Pot Turkey Lentil Soup is the perfect solution, offering a nourishing, flavorful meal that’s as easy to prepare as it is to clean up. Thanks to its genius one-pot method, this recipe minimizes fuss while delivering a symphony of tastes in every spoonful. Whether you’re a busy parent or a health-conscious cook, this One Pot Turkey Lentil Soup stands out for its simplicity and nutrition, making it the go-to choice for cozy dinners. In the first few steps, you’ll see how fresh ingredients come together effortlessly, proving why it’s become a staple in kitchens everywhere.

The aroma of One Pot Turkey Lentil Soup fills your kitchen like a warm embrace, with the savory scent of browned ground turkey mingling with earthy lentils and vibrant vegetables. Each bite offers a delightful contrast of textures: the tender lentils absorb flavors from the rich broth, while the carrots and celery add a satisfying crunch that yields to a soft finish. Flavors dance on your palate—the slight spiciness from cumin and thyme, the subtle sweetness of diced tomatoes, and the heartiness of lean turkey create a balanced, comforting experience that’s impossible to resist. It’s not just soup; it’s a bowl of warmth that feels indulgent yet light, perfect for those chilly evenings when you need a little extra comfort.

What sets this One Pot Turkey Lentil Soup recipe from cookingwithemy.com apart is our commitment to making it foolproof and exceptional, drawing from years of testing and refining home-cooked favorites. We’ve incorporated a chef’s secret that elevates the one-pot method to new heights, ensuring every batch is bursting with flavor and nutrients. In this post, you’ll discover detailed ingredient spotlights, step-by-step instructions with pro tips, and answers to common questions, all designed to build your confidence in the kitchen. From storage solutions to creative presentations, this is more than a recipe—it’s your ultimate guide to mastering a family-friendly dish that promotes healthy eating without the hassle.

Prep Time: 15 minutes
Cook Time: 40 minutes
Total Time: 55 minutes
Servings: 6

Why This One Pot Turkey Lentil Soup Recipe is a Game-Changer

The Chef’s Secret: The one-pot method is the star here, allowing all ingredients to meld together seamlessly in a single pot, which infuses the soup with deeper, more complex flavors while saving precious time and reducing cleanup. By sautéing the onions and garlic first, we unlock their natural sugars and essences, creating a flavorful base that elevates this One Pot Turkey Lentil Soup beyond ordinary versions. This technique ensures that the lentils absorb the savory juices from the ground turkey and spices, resulting in a richly textured soup that’s far superior to multi-pot alternatives.

Unbeatable Texture: The science behind the texture lies in the slow simmering process, which breaks down the lentils gradually while keeping the vegetables crisp-tender. This method prevents overcooking, as the broth’s gentle heat allows the fibers in the carrots and celery to soften just right, providing a hearty yet not mushy consistency. The ground turkey adds a lean protein punch that stays juicy, thanks to the initial browning step that seals in moisture, making this One Pot Turkey Lentil Soup recipe reliably satisfying every time.

Foolproof for a Reason: This recipe has been tested multiple times in real home kitchens to guarantee success, even for beginners. With straightforward instructions and flexible options, it’s designed to yield consistent results, from the first simmer to the final taste. That’s why One Pot Turkey Lentil Soup from cookingwithemy.com is trusted by thousands—it’s simple, scalable, and delivers that comforting, homemade feel without any guesswork.

Ingredient Spotlight: Quality Makes the Difference

Ground Turkey (1 pound): This lean protein is the heart of the soup, providing a healthy alternative to red meat with its low-fat content and high protein. Using fresh, high-quality ground turkey ensures a juicy, flavorful base that absorbs spices beautifully. Opt for 93% lean to balance taste and health; if substituting, try ground chicken for a milder flavor, but note it might need extra seasoning to match the robustness.

Lentils (1 cup, green or brown): These protein-packed legumes add earthiness and make the soup incredibly filling, thanks to their fiber-rich nature that helps with digestion. Choose dried lentils for the best texture—they plump up perfectly during simmering. Quality matters as fresher lentils cook evenly; substitute with red lentils for a quicker cook time, but they may break down more, creating a thicker consistency in your One Pot Turkey Lentil Soup.

Onion (1 medium, diced): The onion builds the foundational flavor with its sweet and pungent notes when sautéed. Fresh, firm onions release natural oils that enhance the soup’s aroma; always use yellow or white for their balance. If you’re out, leeks make a great substitute, offering a milder taste that still adds depth without overpowering the other ingredients in this hearty One Pot Turkey Lentil Soup recipe.

Garlic (2 cloves, minced): Garlic adds a pungent kick that boosts the soup’s immune-boosting properties and savory profile. Fresh cloves are key for their intense flavor; crush them just before using to maximize oils. Substitute with garlic powder in a pinch, but use half the amount to avoid bitterness, ensuring your One Pot Turkey Lentil Soup remains balanced and delicious.

Carrots (3, sliced): These vibrant veggies contribute sweetness and a satisfying crunch, while their beta-carotene enriches the nutritional value. Select fresh, organic carrots for the best color and texture; they hold up well during cooking. Substitutes like parsnips can add a nutty twist, but adjust cooking time as they soften faster in your One Pot Turkey Lentil Soup.

Celery (2 stalks, chopped): Celery provides a fresh, crisp element and subtle earthiness that lightens the soup. Fresh stalks ensure a clean flavor; choose crisp ones for the best results. If needed, substitute with fennel for a licorice-like note, which complements the spices without altering the overall harmony of One Pot Turkey Lentil Soup.

Diced Tomatoes (1 can, 14.5 oz): These add acidity and brightness, balancing the richness of the turkey and lentils. Use fire-roasted for a smoky depth; quality canned tomatoes with no added sugar preserve the soup’s fresh taste. Fresh tomatoes can substitute in season, but drain them to avoid watering down the broth in this easy One Pot Turkey Lentil Soup.

Chicken or Vegetable Broth (6 cups): The broth is the soup’s backbone, infusing moisture and flavor; low-sodium options allow better seasoning control. Homemade broth elevates the taste significantly, but store-bought works if it’s high-quality. Substitute with water and bouillon for convenience, ensuring it doesn’t dilute the robust flavors of One Pot Turkey Lentil Soup.

Dried Thyme, Cumin, Salt, and Pepper: These spices create the soup’s aromatic profile—thyme for earthiness, cumin for warmth, and salt/pepper for balance. Freshly ground spices enhance potency; use them sparingly at first. If adjusting, smoked paprika can replace cumin for a twist, making your One Pot Turkey Lentil Soup even more versatile.

Step-by-Step Instructions

Step 1: Preparing the Aromatics

Heat olive oil in a large pot over medium heat. Add the diced onion and sauté until it’s softened and translucent, about 5 minutes. Then, stir in the minced garlic and cook for another minute until fragrant, being careful not to let it burn.

Pro Tip: Use a high-quality olive oil for better flavor absorption, and always chop onions uniformly to ensure even cooking—this prevents some pieces from burning while others remain raw.

Step 2: Browning the Turkey

Add the ground turkey to the pot and break it up with a spoon. Cook until it’s no longer pink, stirring occasionally for about 5-7 minutes. This step builds a flavorful base as the turkey releases its juices.

Common Mistake to Avoid: Overcrowding the pot can lead to steaming instead of browning; make sure there’s enough space for the turkey to sear properly, or cook in batches if needed.

Step 3: Adding the Vegetables

Stir in the sliced carrots and chopped celery; cook for 3-5 minutes until they begin to soften, releasing their natural sweetness and adding crunch to the mix.

Pro Tip: Cut the carrots and celery into even sizes for uniform cooking, which helps maintain the soup’s texture and prevents some veggies from becoming too mushy.

Step 4: Incorporating Liquids and Spices

Add the lentils, diced tomatoes (with their juices), broth, thyme, cumin, salt, and pepper to the pot. Bring everything to a boil over high heat, stirring to combine all flavors.

Common Mistake to Avoid: Forgetting to season at this stage can result in a bland soup; taste the broth before boiling and adjust spices early to build layers of flavor.

Step 5: Simmering to Perfection

Reduce the heat to low, cover the pot, and let the soup simmer for 30 to 40 minutes until the lentils are tender. Stir occasionally to prevent sticking.

Pro Tip: Check the lentils at the 30-minute mark to avoid overcooking; the one-pot method shines here, as the flavors intensify with time for a richer One Pot Turkey Lentil Soup.

Step 6: Final Adjustments

Taste the soup and adjust seasoning if needed. Serve hot, garnished with fresh parsley for a burst of color and freshness.

Common Mistake to Avoid: Adding too much salt at the end; always season gradually and let the soup rest for a few minutes before serving to meld flavors.

Serving & Presentation

Plating this One Pot Turkey Lentil Soup is all about simplicity and appeal—ladle it into wide, shallow bowls to showcase the colorful mix of lentils, turkey, and vegetables. Add a sprinkle of fresh parsley or a dash of olive oil on top for a professional touch that enhances both flavor and visual allure. Pair it with crusty whole-grain bread for dipping, or serve alongside a light salad to make it a complete meal. For a heartier option, complement with grilled cheese sandwiches, which absorb the soup’s savory broth perfectly, turning a simple dinner into a comforting feast.

Make-Ahead & Storage Solutions

Make-Ahead Strategy: Prep this One Pot Turkey Lentil Soup up to 3 days in advance by chopping all vegetables and browning the turkey ahead of time. Store the prepped ingredients in airtight containers in the fridge; when ready, simply combine and simmer for a quick meal that saves you time on busy weeknights.

Storing Leftovers: Let the soup cool completely before transferring to airtight containers. Refrigerate for up to 4 days to maintain freshness, or freeze in portions for up to 3 months—use freezer-safe bags to prevent freezer burn and preserve the hearty texture of the lentils and vegetables.

The Best Way to Reheat: For optimal results, reheat on the stovetop over low heat, stirring occasionally to restore the original flavors and textures. Add a splash of broth if it thickens; in the microwave, heat in short bursts while stirring to avoid uneven warming, ensuring your One Pot Turkey Lentil Soup tastes just as fresh as when first made.

Finished recipe photo

Frequently Asked Questions (FAQ)

How long do you bake chocolate chip cookies?

This question seems unrelated to our One Pot Turkey Lentil Soup, but if you’re curious, baking chocolate chip cookies typically takes 10-12 minutes at 375°F. For soup recipes, focus on simmering times like the 30-40 minutes in this recipe to achieve perfect tenderness.

Can I substitute butter with oil in chocolate chip cookies?

Again, for chocolate chip cookies, you can substitute butter with oil for a softer texture, using a 1:1 ratio of vegetable or coconut oil. In the context of One Pot Turkey Lentil Soup, consider using olive oil instead of butter for sautéing to keep it heart-healthy and align with the recipe’s lean profile.

What are some tips for making chocolate chip cookies chewy?

To make chocolate chip cookies chewy, use brown sugar for moisture and chill the dough before baking. For One Pot Turkey Lentil Soup, tips include using fresh lentils for the best texture and simmering slowly to avoid a mushy result, ensuring a chewy, satisfying bite in your soup.

How many cookies does a standard chocolate chip cookie recipe make?

A standard chocolate chip cookie recipe usually yields about 24-36 cookies, depending on size. For One Pot Turkey Lentil Soup, our recipe serves 6, making it ideal for family meals or easy portioning for leftovers.

Can I make this recipe vegetarian?

Absolutely! To make One Pot Turkey Lentil Soup vegetarian, simply swap the ground turkey for plant-based crumbles or extra vegetables like mushrooms, and use vegetable broth instead of chicken. This keeps the protein high while maintaining the hearty flavors.

Is One Pot Turkey Lentil Soup suitable for meal prep?

Yes, it’s excellent for meal prep! The soup stores well and tastes even better the next day as flavors meld. Prepare a batch on Sundays for easy, nutritious lunches throughout the week.

How can I adjust the spice level in this soup?

To adjust the spice, start with less cumin and thyme, then taste and add more as needed. For a kick, incorporate a pinch of red pepper flakes during simmering to customize the heat without overwhelming the One Pot Turkey Lentil Soup.

Print
clock clock iconcutlery cutlery iconflag flag iconfolder folder iconinstagram instagram iconpinterest pinterest iconfacebook facebook iconprint print iconsquares squares iconheart heart iconheart solid heart solid icon

One Pot Turkey Lentil Soup


  • Author: Chef mia

Description

One Pot Turkey Lentil Soup is the ultimate comfort food that warms both the heart and soul. This hearty soup features lean ground turkey, protein-packed lentils, and a colorful medley of fresh vegetables, all simmered together in a single pot for easy preparation and minimal cleanup. The combination of savory spices creates a delightful aroma that fills your kitchen while cooking, making it perfect for cozy evenings or busy weeknights. Each bowl is not only delicious but also nutritious, offering a satisfying meal that keeps you feeling full longer. Whether enjoyed alone or paired with crusty bread, this easy-to-make soup is destined to become a family favorite you’ll want to recreate time and again.


Ingredients

Scale
  • 1pound ground turkey
  • 1 cuplentils (green or brown)
  • 1medium onion, diced
  • 2cloves garlic, minced
  • 3carrots, sliced
  • 2celery stalks, chopped
  • 1can (14.5 oz) diced tomatoes
  • 6 cupschicken or vegetable broth
  • Dried thyme, cumin, salt, and pepper

Instructions

  1. Heat olive oil in a large pot over medium heat. Sauté the diced onion until softened; add minced garlic and cook for another minute.
  2. Add ground turkey to the pot and brown until no longer pink.
  3. Stir in the sliced carrots and chopped celery; cook until they begin to soften.
  4. Add lentils, diced tomatoes (with juices), broth, thyme, cumin, salt, and pepper; bring to a boil.
  5. Reduce heat to low; cover and let simmer for 30 to 40 minutes until lentils are tender.
  6. Taste and adjust seasoning if needed before serving hot with fresh parsley.

Notes

For added nutrition, stir in spinach or kale during the last few minutes of cooking.
Feel free to customize with your favorite spices or vegetables!

Nutrition

  • Calories: 320
  • Sugar: 4g
  • Fat: 10g
  • Carbohydrates: 35g
  • Protein: 24g

Conclusion

This recipe delivers a comforting blend of fresh ingredients and bold flavors, making it perfect for family meals or a cozy night in. Its hearty nature not only satisfies hunger but also adds a nutritious twist to your dinner routine. For a serving tip, pair it with a side of warm bread to soak up the delicious sauces. If you’re looking for more vegetable-inspired ideas, try the Easy Stuffed Mini Peppers Recipe or the Baked Broccoli Cheese Balls for a fun variation.

Chocolate Chip Banana Bars

Chocolate Chip Banana Bars: The Only Recipe You’ll Ever Need

If you’re staring at a bunch of overripe bananas on your counter, wondering how to turn them into something magical, look no further than this ultimate Chocolate Chip Banana Bars recipe. These bars are not just a simple way to reduce food waste—they’re a game-changer for busy home cooks seeking a quick, satisfying treat with an ultra-gooey texture that sets them apart. Inspired by everyday kitchen staples, this Chocolate Chip Banana Bars recipe promises soft, chewy bites packed with flavors that feel like a warm hug, all while being ready in under an hour. Whether you’re a baking novice or a pro, this version from cookingwithemy.com uses melted butter as the secret to achieving that irresistible gooeyness that elevates every morsel.

Imagine sinking your teeth into these Chocolate Chip Banana Bars, where the natural sweetness of ripe bananas melds seamlessly with the rich, melty chocolate chips. The texture is pure bliss—soft and chewy on the inside with a slight golden crisp on the edges, releasing an aroma of warm bananas and vanilla that fills your kitchen like a comforting embrace. Each bar offers a perfect balance of moist, tender crumb and gooey chocolate pockets, making it impossible to stop at just one. The subtle undertones of vanilla enhance the tropical banana flavor, creating a sensory experience that’s both indulgent and nostalgic, ideal for any time of day.

What makes this Chocolate Chip Banana Bars recipe from cookingwithemy.com the single best resource online is our commitment to simplicity, reliability, and innovation. We’ve tested this recipe countless times to ensure foolproof results, incorporating a chef’s secret that transforms ordinary ingredients into extraordinary treats. Readers will discover expert tips, ingredient spotlights, and step-by-step guidance that builds kitchen confidence, plus answers to common questions like substitutions and storage. Dive in to master banana bars with chocolate chips that are not only delicious but also versatile for any occasion.

Prep Time: 10 minutes
Cook Time: 30 minutes
Total Time: 40 minutes
Servings: 12

Why This Chocolate Chip Banana Bars Recipe is a Game-Changer

The chef’s secret behind these exceptional Chocolate Chip Banana Bars lies in the use of melted butter, which creates an ultra-gooey texture that makes this recipe stand out from the crowd. By melting the butter before incorporating it, we release its natural emulsifiers, allowing it to blend perfectly with the mashed bananas for a moist, tender base that’s far superior to traditional methods. This technique ensures that every bar has that coveted chewy center without the need for extra steps, making it ideal for quick baking sessions while enhancing the overall flavor profile with a subtle nutty undertone from the butter.

For unbeatable texture, the science is simple: melting the butter helps distribute fats evenly throughout the batter, preventing gluten development in the flour for a softer crumb. This results in banana bars with chocolate chips that are moist and fluffy, thanks to the bananas’ natural moisture locking in steam during baking. We’ve fine-tuned the ratios to guarantee this consistency every time, avoiding dense or dry outcomes that plague lesser recipes.

Most importantly, this recipe is foolproof for a reason—it’s been rigorously tested in our kitchen to deliver consistent results, no matter your experience level. Whether you’re baking for a crowd or just yourself, these Chocolate Chip Banana Bars come out perfect, with tips to troubleshoot common issues and ensure success on the first try.

Ingredient Spotlight: Quality Makes the Difference

Starting with ripe bananas, these are the star of any Chocolate Chip Banana Bars recipe, providing natural sweetness and moisture that keep the bars incredibly soft. Opt for bananas that are heavily spotted for maximum flavor and ease of mashing; underripe ones can make the bars taste bland. Quality matters because fresher bananas yield a better texture—avoid any with green tinges. If you’re out of bananas, a tested substitution is unsweetened applesauce, using the same 3 ripe bananas measurement, to maintain that moist consistency without altering the taste too much.

All-purpose flour forms the base structure in these Chocolate Chip Banana Bars, giving them a light, chewy body without being too dense. Choose a high-quality, unbleached variety for better rise and flavor absorption. It acts as the binding agent, interacting with the baking powder for the perfect lift. For substitutions, if you’re gluten-free, swap with a 1:1 gluten-free flour blend, but add an extra 1/4 teaspoon of xanthan gum to preserve the chewy texture and prevent crumbling.

Granulated sugar adds the right amount of sweetness and helps caramelize the edges of these Chocolate Chip Banana Bars for that golden finish. Use pure cane sugar for a cleaner taste that enhances the banana flavor without overwhelming it. It’s crucial for moisture retention and texture; overdo it, and the bars become too sweet. A good substitute is coconut sugar for a lower-glycemic option, using the same 1/2 cup, which will add a subtle caramel note while keeping the bars moist and delicious.

Baking powder is the leavening hero in this Chocolate Chip Banana Bars recipe, ensuring a gentle rise for a fluffy interior. Fresh baking powder is key—check the expiration date to avoid flat bars. It works with the bananas’ acidity for optimal lift. If you’re out, substitute with 1/4 teaspoon baking soda mixed with 1/2 teaspoon cream of tartar, but use it sparingly to maintain the soft texture without making the bars too airy.

Salt might seem minor, but in these Chocolate Chip Banana Bars, it balances the sweetness and enhances the chocolate chips’ flavor. Use fine sea salt for even distribution; it brings out the bananas’ natural taste. Quality iodized salt works too, but avoid skipping it as it prevents the bars from tasting one-dimensional. There’s no direct substitute, but a pinch less won’t hurt if you’re watching sodium intake.

Melted butter provides richness and that signature gooeyness in Chocolate Chip Banana Bars, acting as a fat that keeps everything tender. Opt for unsalted butter to control flavors; melting it is our secret for even incorporation. For dairy-free versions, substitute with melted coconut oil in the same 1/4 cup amount, which maintains moisture and texture while adding a tropical twist.

Vanilla extract adds depth and warmth to these Chocolate Chip Banana Bars, tying all the flavors together. Always choose pure extract over imitation for authentic taste that elevates the bananas and chocolate. It’s the flavor enhancer that makes each bite comforting. Substitute with almond extract for a nutty variation, using the same 1 teaspoon, but start with half to avoid overpowering the recipe.

Finally, chocolate chips deliver those irresistible gooey pockets in Chocolate Chip Banana Bars, providing bursts of melty goodness. Go for high-quality semi-sweet chips for the best melt and flavor. They add texture and indulgence. If you prefer, swap with dark chocolate chips for a richer taste, using the same 1/2 cup, or add white chocolate for variety while keeping the gooey factor intact.

Step-by-Step Instructions for Chocolate Chip Banana Bars

Step 1: Preheat the Oven

Begin by preheating your oven to 350°F (175°C) and greasing an 8×8-inch baking dish or lining it with parchment paper for easy removal. This step ensures even baking and prevents the bars from sticking.

Pro Tip: Use a reliable oven thermometer to verify the temperature, as an inaccurate oven can lead to uneven cooking and affect the gooey texture of your Chocolate Chip Banana Bars.

Step 2: Mix the Dry Ingredients

In a medium bowl, whisk together 1 cup all-purpose flour, 1/2 teaspoon baking powder, and 1/4 teaspoon salt until well combined; set this mixture aside. This creates a uniform base that incorporates evenly into the wet ingredients later.

Common Mistake to Avoid: Over-whisking the dry ingredients can activate the baking powder too early, leading to tough bars—mix just until blended to keep the texture soft and chewy in your Chocolate Chip Banana Bars.

Step 3: Mash the Bananas

In another bowl, mash 3 ripe bananas until smooth using a fork or potato masher. Then, stir in 1/4 cup melted butter and 1/2 cup granulated sugar until fully combined, creating a wet mixture that’s the heart of the batter.

Pro Tip: Mash the bananas thoroughly to eliminate lumps, as any chunks can create uneven texture; this ensures the ultra-gooey consistency that makes these Chocolate Chip Banana Bars irresistible.

Step 4: Add Flavor and Combine

Mix in 1 teaspoon vanilla extract into the banana mixture, then gradually add the dry ingredients from Step 2, stirring just until combined to avoid over-mixing, which could make the bars dense.

Common Mistake to Avoid: Adding all dry ingredients at once can lead to clumps—add them in stages and fold gently to maintain the light, fluffy batter for perfect Chocolate Chip Banana Bars.

Step 5: Fold in Chocolate Chips

Gently fold in 1/2 cup chocolate chips into the batter using a spatula, ensuring they’re evenly distributed without deflating the mixture for those delightful gooey surprises in every bite.

Pro Tip: Reserve a few chocolate chips to sprinkle on top before baking for an extra visual appeal and enhanced flavor in your Chocolate Chip Banana Bars.

Step 6: Bake the Batter

Pour the batter into the prepared baking dish, spreading it evenly with a spatula. Bake for 25-30 minutes, or until the top is golden brown and a toothpick inserted in the center comes out clean.

Common Mistake to Avoid: Overbaking can dry out the bars—check at 25 minutes and remove when just set to preserve the moist, chewy texture of Chocolate Chip Banana Bars.

Step 7: Cool and Cut

Remove the dish from the oven and let it cool completely in the pan on a wire rack before cutting into squares. This allows the bars to set properly for clean slices.

Pro Tip: Cooling on a wire rack promotes even cooling and prevents sogginess, ensuring your Chocolate Chip Banana Bars retain their perfect gooey center.

Serving & Presentation

Elevate your Chocolate Chip Banana Bars with creative plating by cutting them into neat squares and arranging on a rustic wooden board for a casual vibe, or stack them on a decorative platter for parties. Add impressive garnishes like a dusting of powdered sugar or a drizzle of melted chocolate to enhance visual appeal and tie into the gooey chocolate theme. For complementary sides, pair these bars with fresh fruit like sliced strawberries to balance the richness, or serve as a dessert alongside vanilla ice cream for a decadent treat. They’re also perfect as a breakfast option with yogurt or as an afternoon snack with coffee, making them versatile for any meal.

Make-Ahead & Storage Solutions

For make-ahead strategies, prepare the batter up to 3 days in advance by mixing the dry ingredients and mashing the bananas separately, then combine and bake when ready to maintain freshness. When storing leftovers, keep the cooled bars in an airtight container at room temperature for up to 3 days, or refrigerate for up to a week to preserve their soft texture. For freezing, wrap individual bars in plastic wrap and store in a freezer-safe bag for up to 3 months. The best way to reheat is in a 300°F oven for 5-10 minutes to restore the original gooey texture and flavor without making them soggy—microwaving on low power for 15-20 seconds works for a quick option.

Finished recipe photo

Frequently Asked Questions (FAQ)

How long does it take to bake Chocolate Chip Banana Bars?

While your question mentions a chocolate cake, for Chocolate Chip Banana Bars, baking typically takes 25-30 minutes at 350°F. This timeframe ensures the bars achieve a golden brown top and a moist interior. Factors like oven accuracy can vary it slightly, so always use a toothpick test for doneness.

Can I substitute ingredients like flour or butter in a Chocolate Chip Banana Bars recipe?

Absolutely, substitutions are possible in this Chocolate Chip Banana Bars recipe. For flour, swap all-purpose flour with a 1:1 gluten-free blend, adding xanthan gum for structure. For butter, use melted coconut oil as a dairy-free alternative, which maintains the gooey texture. Always test substitutions to ensure the bars remain moist and chewy.

What are some tips for making moist and fluffy Chocolate Chip Banana Bars?

To achieve moist and fluffy Chocolate Chip Banana Bars, use very ripe bananas for natural moisture, avoid over-mixing the batter to prevent density, and ensure your baking powder is fresh. Our melted butter technique helps lock in steam, resulting in that perfect texture—bake just until a toothpick is clean to avoid drying out.

How should I serve and store homemade Chocolate Chip Banana Bars?

Serve Chocolate Chip Banana Bars warm or at room temperature, perhaps with a scoop of ice cream for added indulgence. For storage, keep in an airtight container at room temperature for up to 3 days, refrigerate for a week, or freeze for up to 3 months. Reheat in the oven to restore freshness.

Can I add nuts or other mix-ins to Chocolate Chip Banana Bars?

Yes, you can enhance Chocolate Chip Banana Bars by adding 1/2 cup of chopped nuts like walnuts for crunch. Fold them in with the chocolate chips, but be mindful of quantities to avoid making the bars too dense—start small and adjust based on your preference.

Is this recipe suitable for beginners?

Definitely! This Chocolate Chip Banana Bars recipe is ideal for beginners due to its simple steps and common ingredients. With clear instructions and pro tips, you’ll build confidence quickly, and the forgiving nature of the batter ensures great results even if it’s your first time baking.

Can I make this recipe vegan or gluten-free?

Yes, you can adapt this Chocolate Chip Banana Bars recipe for vegan or gluten-free diets. For vegan, substitute the butter with coconut oil and ensure your chocolate chips are dairy-free; for gluten-free, use a 1:1 gluten-free flour blend and add xanthan gum. These swaps keep the bars moist and flavorful with minimal adjustments.

Print
clock clock iconcutlery cutlery iconflag flag iconfolder folder iconinstagram instagram iconpinterest pinterest iconfacebook facebook iconprint print iconsquares squares iconheart heart iconheart solid heart solid icon

Chocolate Chip Banana Bars


  • Author: Chef mia

Description

Indulge in the delightful combination of flavors with these Chocolate Chip Banana Bars. They are a perfect solution for using up overripe bananas while satisfying your sweet tooth. With a soft, chewy texture and gooey chocolate chips, each bite is a burst of comfort. These bars are versatile enough to enjoy at breakfast, as an afternoon pick-me-up, or even as a satisfying dessert, they are quick and easy to prepare with just a few pantry staples.


Ingredients

Scale
  • 3ripe bananas
  • 1 cupall-purpose flour
  • 1/2 cupgranulated sugar
  • 1/2 teaspoonbaking powder
  • 1/4 teaspoonsalt
  • 1/4 cupmelted butter
  • 1 teaspoonvanilla extract
  • 1/2 cupchocolate chips

Instructions

  1. Preheat your oven to 350°F (175°C) and grease an 8×8-inch baking dish or line it with parchment paper.
  2. In a bowl, whisk together flour, baking powder, and salt; set aside.
  3. In another bowl, mash the ripe bananas until smooth. Stir in melted butter and sugar until combined.
  4. Mix in vanilla extract, then add dry ingredients gradually until just combined; avoid over-mixing.
  5. Fold in chocolate chips gently.
  6. Pour batter into the prepared dish, spreading evenly. Bake for 25-30 minutes or until golden brown and a toothpick comes out clean.
  7. Let cool before cutting into squares.

Notes

For added crunch, consider mixing in chopped nuts such as walnuts or pecans.
Experiment with spices like cinnamon for an extra flavor boost.
These bars can be stored in an airtight container for up to three days or frozen for up to three months.

Nutrition

  • Calories: 150
  • Sugar: 9g
  • Fat: 6g
  • Carbohydrates: 22g
  • Protein: 2g

Conclusion

This recipe delivers a warm and comforting blend of flavors that make it perfect for a cozy breakfast or snack, highlighting fresh ingredients and simple preparation for everyday enjoyment. With its balance of sweetness and nutrition, it’s an ideal choice for those seeking a healthier twist on classic favorites. Serve it fresh from the oven with a side of fresh fruit for added vibrancy, or try a variation by swapping in nuts for extra texture and protein. If you’re craving more delicious breakfast options, be sure to check out Paleo Apple Waffles and Morning Glory Muffins for equally satisfying ideas.

Blueberry Cream Cheese Muffins

Blueberry Cream Cheese Muffins: The Only Recipe You’ll Ever Need

Imagine starting your day with a batch of freshly baked Blueberry Cream Cheese Muffins that burst with juicy blueberries and a hidden creamy surprise in every bite. These Blueberry Cream Cheese Muffins are more than just a quick breakfast—they’re a game-changer for home bakers seeking that perfect balance of tart and rich flavors. Whether you’re a busy parent whipping up snacks or a weekend enthusiast experimenting in the kitchen, this recipe solves the common dilemma of dry, flavorless muffins by incorporating a cream cheese surprise that keeps things moist and irresistible. Drawing from the best of Tasty Recipes, our version ensures every muffin is tender, flavorful, and effortlessly homemade, making it the ultimate Blueberry Cream Cheese Muffins guide you’ll find online.

Dive into the sensory delight of these Blueberry Cream Cheese Muffins: the plump, juicy blueberries pop with a sweet-tart explosion, perfectly complemented by the smooth, velvety cream cheese that melts into a luxurious filling. Each bite offers a contrast of textures—the golden, crumbly exterior gives way to a soft, moist interior that’s neither too dense nor too crumbly. As they bake, the warm aroma of fresh berries and vanilla undertones fills your kitchen, creating an inviting atmosphere that draws everyone in. It’s not just a muffin; it’s a comforting treat that feels indulgent yet wholesome, ideal for pairing with your morning coffee or as a midday snack.

What sets this Blueberry Cream Cheese Muffins recipe apart on cookingwithemy.com is our dedication to making it foolproof and superior, refined through multiple tests for consistent results. You’ll discover the “Chef’s Secret” that elevates these muffins to star status, along with practical tips, substitutions, and storage advice that build your confidence in the kitchen. From ingredient spotlights to step-by-step guidance, this comprehensive resource ensures you’re equipped to create bakery-quality muffins at home, turning every baking session into a success story.

Prep Time: 15 minutes
Cook Time: 25 minutes
Total Time: 40 minutes
Servings: 12

Why This Blueberry Cream Cheese Muffins Recipe is a Game-Changer

The Chef’s Secret lies in the cream cheese surprise filling, which infuses these Blueberry Cream Cheese Muffins with an extra creamy texture that sets them apart from ordinary recipes. By layering softened cream cheese into the center, we create a molten core that enhances moisture and adds a decadent richness, ensuring every bite is a delightful revelation. This technique, tested extensively, prevents the muffins from becoming dry or overly sweet, making it a foolproof way to achieve that professional bakery feel at home.

Unbeatable Texture: The combination of vegetable oil and milk in the batter contributes to a tender crumb by trapping steam during baking, which results in muffins that are fluffy yet moist. Science-wise, this emulsion helps distribute fats evenly, preventing gluten development for a lighter rise without the risk of toughness.

Foolproof for a Reason: We’ve baked this recipe dozens of times to guarantee consistency, even for novice bakers. With clear instructions and tips, you’ll avoid common pitfalls, ensuring your Blueberry Cream Cheese Muffins turn out perfectly every time, no matter your experience level.

Blueberry Cream Cheese Muffins Ingredient Spotlight: Quality Makes the Difference

All-purpose flour serves as the base for these Blueberry Cream Cheese Muffins, providing structure and a light texture. Using high-quality, unbleached all-purpose flour ensures better gluten formation for a tender rise without density—opt for a brand with minimal additives. If you’re gluten-sensitive, substitute with a 1:1 gluten-free flour blend, but note it may slightly alter the texture, making it denser.

Granulated sugar adds sweetness and helps caramelize the tops for that golden crust in your Blueberry Cream Cheese Muffins. Choose organic or cane sugar for a purer flavor that enhances the blueberries’ natural tartness. For a lower-calorie option, swap with an equal amount of coconut sugar, which offers a subtle molasses note and keeps the muffins moist.

Baking powder is the leavening agent that gives these Blueberry Cream Cheese Muffins their fluffy lift. Fresh baking powder is crucial for reliable rising—test it by mixing with hot water; if it bubbles, it’s good. There’s no ideal substitute, but if you’re out, combine 1/4 teaspoon baking soda with 1/2 teaspoon cream of tartar for similar results, though it might add a slight tang.

Salt enhances the overall flavor balance in Blueberry Cream Cheese Muffins, highlighting the berries’ acidity and cream cheese’s creaminess. Use fine sea salt for even distribution; it’s less processed than table salt. If needed, substitute with kosher salt, but reduce the amount slightly as it’s less dense.

A large egg binds the ingredients and adds moisture, contributing to the rich texture of these Blueberry Cream Cheese Muffins. Fresh, room-temperature eggs work best for emulsification. For a vegan twist, replace with a flax egg (1 tablespoon ground flaxseed mixed with 3 tablespoons water), which maintains binding but may make the muffins a tad denser.

Milk provides liquid and tenderness, helping create a smooth batter for Blueberry Cream Cheese Muffins. Whole milk yields the creamiest results, but for dairy-free options, use unsweetened almond milk to preserve the moistness without altering flavor much.

Vegetable oil keeps the muffins incredibly moist and extends shelf life, offering a neutral taste that lets blueberries shine. Opt for a refined variety to avoid flavors; substitute with melted coconut oil for a hint of tropical nuttiness, ensuring it’s liquid at room temperature.

Fresh blueberries (or frozen) are the star, bursting with juicy flavor in these Blueberry Cream Cheese Muffins. Choose organic, ripe berries for the best taste and color; frozen work in a pinch but don’t thaw them to prevent sogginess. No substitute beats fresh, but raspberries can add a fun twist for variety.

Cream cheese delivers that signature creamy surprise, adding richness and a tangy contrast. Full-fat, softened cream cheese ensures a smooth filling; for a lighter version, use low-fat, but it might not hold as well. A dairy-free alternative like cashew cream cheese works for vegans, maintaining the indulgent texture.

Step-by-Step Instructions for Blueberry Cream Cheese Muffins

Step 1: Preheating the Oven

Start by preheating your oven to 375°F (190°C) and lining a muffin tin with paper liners. This step ensures even baking and prevents sticking, setting the foundation for perfect Blueberry Cream Cheese Muffins.

Pro Tip: Use a reliable oven thermometer to verify the temperature—ovens can run hot or cold, affecting bake time and ensuring your muffins rise uniformly.

Step 2: Mixing the Dry Ingredients

In a large mixing bowl, whisk together 1 1/2 cups all-purpose flour, 3/4 cup granulated sugar, 2 teaspoons baking powder, and 1/4 teaspoon salt until well combined. This creates a uniform base for your Blueberry Cream Cheese Muffins.

Common Mistake to Avoid: Over-whisking at this stage can activate gluten prematurely, leading to tough muffins; mix just until blended to keep them light and airy.

Step 3: Combining the Wet Ingredients

In another bowl, beat together 1 large egg, 1/2 cup milk, and 1/4 cup vegetable oil until fully incorporated. This mixture adds moisture and richness to the batter for your Blueberry Cream Cheese Muffins.

Pro Tip: Let the egg and milk come to room temperature first for better emulsification, resulting in a smoother batter that incorporates air for fluffier muffins.

Step 4: Blending Wet and Dry Ingredients

Gradually add the wet ingredients to the dry mixture, stirring gently until just combined. Be careful not to overmix, as this will form the batter for your Blueberry Cream Cheese Muffins.

Common Mistake to Avoid: Overmixing here can make the muffins dense; stop as soon as the ingredients are incorporated to preserve that tender texture.

Step 5: Folding in the Blueberries

Gently fold in 1 cup of fresh or frozen blueberries into the batter, distributing them evenly without crushing them. This step infuses the Blueberry Cream Cheese Muffins with bursts of fruity flavor.

Pro Tip: If using frozen blueberries, add them straight from the freezer to prevent the batter from turning purple and maintain distinct berry pockets.

Step 6: Assembling the Muffins

Spoon half of the batter into each muffin cup, then add about a teaspoon of softened cream cheese on top, and cover with the remaining batter. This creates the signature cream cheese surprise in your Blueberry Cream Cheese Muffins.

Common Mistake to Avoid: Adding too much cream cheese can cause overflow during baking; measure precisely to keep the filling contained and the muffins neat.

Step 7: Baking the Muffins

Bake the muffins in the preheated oven for 20-25 minutes, or until a toothpick inserted into the center comes out clean. Allow them to cool in the tin for a few minutes before transferring to a wire rack.

Pro Tip: Rotate the muffin tin halfway through baking for even heat distribution, ensuring all Blueberry Cream Cheese Muffins bake uniformly.

Serving & Presentation

Elevate your Blueberry Cream Cheese Muffins by serving them warm, allowing the cream cheese filling to ooze slightly for maximum appeal. For creative plating, arrange them on a rustic wooden board with a dusting of powdered sugar and fresh mint leaves for a pop of color. Pair these muffins with complementary sides like Greek yogurt for a protein boost or a fresh fruit salad to enhance the blueberry theme, making them ideal for brunches. They also shine as a dessert when topped with a simple glaze of lemon juice and confectioners’ sugar, adding a zesty contrast.

Make-Ahead & Storage Solutions

For make-ahead strategy, prepare the batter up to 3 days in advance by mixing the dry ingredients and storing them in an airtight container, while keeping wet ingredients refrigerated separately. Assemble and bake fresh for the best texture. To store leftovers, cool muffins completely, then place in an airtight container at room temperature for up to 2 days, or refrigerate for up to 5 days to maintain moisture. For freezing, wrap individual muffins in plastic wrap and store in a freezer bag for up to 3 months. The best way to reheat is in a 300°F oven for 10 minutes or microwave for 20 seconds to restore that warm, fluffy consistency without sogginess.

Frequently Asked Questions (FAQ)

Finished recipe photo

How do you make moist Blueberry Cream Cheese Muffins from scratch?

To make moist Blueberry Cream Cheese Muffins, focus on not overmixing the batter and using fresh ingredients like quality oil and milk. Follow our step-by-step instructions, incorporating the cream cheese surprise for added moisture, and bake at the correct temperature to ensure a tender result every time.

Can you substitute butter with oil in a Blueberry Cream Cheese Muffins recipe?

Yes, you can substitute butter with oil in this recipe, as we’ve used vegetable oil for its neutral flavor and moisture-retaining properties. It works seamlessly, but if you prefer a richer taste, melted coconut oil can be a good alternative—just ensure it’s in liquid form for even incorporation.

How long does it take to bake Blueberry Cream Cheese Muffins?

Baking Blueberry Cream Cheese Muffins typically takes 20-25 minutes at 375°F, depending on your oven. Always check for doneness with a toothpick; factors like muffin size can vary this slightly, so start checking at the 20-minute mark.

What are the best ways to decorate and serve Blueberry Cream Cheese Muffins?

The best ways to decorate Blueberry Cream Cheese Muffins include a light dusting of powdered sugar or a simple glaze. Serve them warm with coffee for breakfast, or as a dessert alongside vanilla ice cream; for presentation, add fresh berries on top for a vibrant, inviting look.

Can I use frozen blueberries in Blueberry Cream Cheese Muffins?

Absolutely, frozen blueberries work well in this recipe. Add them directly from the freezer to prevent excess moisture, ensuring your muffins maintain their shape and flavor without becoming soggy.

Are Blueberry Cream Cheese Muffins suitable for kids?

Yes, these muffins are kid-friendly due to their sweet, fruity taste and creamy center, but monitor portions as they’re calorie-dense. You can reduce sugar slightly for a healthier version while keeping the fun surprise element.

Can I make this recipe vegan or gluten-free?

To make this Blueberry Cream Cheese Muffins recipe vegan, substitute the egg with a flax egg and use dairy-free milk and cream cheese alternatives like almond milk and cashew-based cream cheese. For gluten-free, swap all-purpose flour with a certified gluten-free blend, though this may affect texture—test baking time to ensure they’re fully cooked.

Print
clock clock iconcutlery cutlery iconflag flag iconfolder folder iconinstagram instagram iconpinterest pinterest iconfacebook facebook iconprint print iconsquares squares iconheart heart iconheart solid heart solid icon

Blueberry Cream Cheese Muffins


  • Author: Chef mia

Description

Blueberry cream cheese muffins are the perfect blend of juicy blueberries and rich cream cheese, creating a delightful treat that elevates any occasion. These muffins are not only moist and tender but also incredibly easy to make, making them an ideal choice for breakfast or snacks. The creamy filling surprises your taste buds with every bite, while the warm aroma wafting through your kitchen will entice everyone around. Whether you’re hosting a brunch or simply indulging yourself, these muffins promise a burst of flavor that will keep you coming back for more.


Ingredients

Scale
  • 1 1/2 cupsall-purpose flour
  • 3/4 cupgranulated sugar
  • 2 teaspoonsbaking powder
  • 1/4 teaspoonsalt
  • 1large egg
  • 1/2 cupmilk
  • 1/4 cupvegetable oil
  • 1 cupfresh blueberries (or frozen)
  • 4 ouncescream cheese (softened)

Instructions

  1. Preheat the oven to 375°F (190°C) and line a muffin tin with paper liners.
  2. In a mixing bowl, whisk together flour, sugar, baking powder, and salt.
  3. In another bowl, combine the egg, milk, and vegetable oil; mix well.
  4. Gradually combine the wet ingredients with the dry ingredients until just incorporated.
  5. Gently fold in the blueberries.
  6. Spoon half of the batter into each muffin cup, add a teaspoon of softened cream cheese, then top with remaining batter.
  7. Bake for 20-25 minutes or until a toothpick inserted comes out clean.

Notes

Avoid overmixing to ensure fluffy muffins.
Experiment with different fruits like raspberries or strawberries for variety.

Nutrition

  • Calories: 200
  • Sugar: 10g
  • Fat: 9g
  • Carbohydrates: 28g
  • Protein: 4g

Conclusion

This delightful recipe brings together fresh flavors and simple ingredients to create a comforting dessert that’s perfect for any occasion, whether it’s a cozy family dinner or a festive gathering. Its sweet and fruity notes make it a versatile treat that can easily become a new favorite in your kitchen. For a serving tip, try pairing it with a scoop of vanilla ice cream for added creaminess, or experiment with a variation by swapping in seasonal fruits for a fresh twist. If you’re craving more dessert inspiration, check out the Velvety Blueberry Lemon Swirl Cheesecake Recipe for a tangy citrus option, or the Easy Salted Caramel Apple Crumble Bars Recipe for a caramel-infused delight.

Philly Cheesesteak Sloppy Joes

Philly Cheesesteak Sloppy Joes: The Only Recipe You’ll Ever Need

If you’re craving the iconic, savory flavors of a classic Philly Cheesesteak without the hassle of grilling or messy prep, look no further than this unbeatable Philly Cheesesteak Sloppy Joes recipe. Imagine a one-skillet wonder that combines tender ground beef, crisp bell peppers, and onions into a melty, cheese-drenched delight, all piled high on a soft hoagie roll. This easy Philly Cheesesteak Sloppy Joes dish is perfect for busy weeknights, turning ordinary ingredients into a family favorite in under 30 minutes. Drawing from the heart of Philadelphia’s street food scene, this recipe elevates the traditional sloppy joe with authentic Philly vibes, making it a game-changer for home cooks everywhere.

The aroma of sizzling onions and peppers fills your kitchen, mingling with the rich, beefy scent of perfectly browned meat, creating an irresistible invitation to the table. Each bite delivers a symphony of textures: the juicy, tender ground beef contrasts beautifully with the slight crunch of fresh vegetables, all enveloped in gooey, melted provolone cheese that stretches and pulls with every mouthful. These Philly Cheesesteak Sloppy Joes aren’t just food—they’re an experience, bursting with bold flavors like Worcestershire’s tangy depth and a subtle peppery kick, ensuring every layer satisfies your cravings for something hearty and comforting.

What sets this Philly Cheesesteak Sloppy Joes recipe apart at cookingwithemy.com is our commitment to simplicity and foolproof results, tested in real home kitchens to guarantee success every time. You’ll discover our Chef’s Secret for achieving that ultra-melty cheese blend, along with expert tips, ingredient spotlights, and storage hacks that make this the most comprehensive guide online. Whether you’re a novice or a seasoned cook, this recipe will boost your confidence and deliver restaurant-quality results without the fuss, proving why it’s the ultimate twist on the classic sandwich.

Prep Time: 10 minutes
Cook Time: 15 minutes
Total Time: 25 minutes
Servings: 4

Why This Philly Cheesesteak Sloppy Joes Recipe is a Game-Changer

The Chef’s Secret to this one-skillet Philly Cheesesteak Sloppy Joes recipe lies in the strategic use of Worcestershire sauce, which infuses the ground beef with a deep, umami-rich flavor that mimics the authentic essence of a traditional Philly cheesesteak. By adding it at the right moment—after sautéing the vegetables—it allows the sauce to meld seamlessly with the meats and veggies, creating a cohesive, flavorful base that’s far superior to basic sloppy joes. This technique elevates the dish by locking in moisture and enhancing the overall taste profile, making your Philly Cheesesteak Sloppy Joes irresistibly savory and restaurant-worthy.

For unbeatable texture, the key is in the balance of ingredients; the high-fat content in 80/20 ground beef ensures a juicy, tender result that doesn’t dry out during cooking. Scientifically, this fat ratio promotes even browning and prevents the meat from becoming tough, while the diced bell peppers and onions add a fresh, slightly crisp contrast. Combined with melting provolone, you get that signature gooey cheese pull that defines great Philly Cheesesteak Sloppy Joes, all achieved with minimal effort in one pan.

This recipe is foolproof because it’s been rigorously tested multiple times in our kitchens at cookingwithemy.com, adjusting for common pitfalls like overcooking the vegetables or uneven seasoning. Every step is designed for reliability, ensuring that even beginner cooks can nail it on the first try. Trust us—this Philly Cheesesteak Sloppy Joes version guarantees consistent, delicious outcomes, making it the go-to recipe for effortless family dinners.

Ingredient Spotlight: Quality Makes the Difference

For the 1 pound of ground beef (80/20), this cut is essential as it provides the rich, juicy base that carries the bold flavors of Philly Cheesesteak Sloppy Joes. The 80/20 ratio ensures the meat stays moist and flavorful during cooking, avoiding a dry texture that can ruin the dish. Opt for fresh, high-quality beef from a trusted butcher to minimize excess fat drainage and enhance taste. If needed, substitute with ground turkey for a leaner option, but be aware it might require added oil to maintain that succulent consistency.

The 1 medium yellow onion, diced, brings a sweet, aromatic foundation to your Philly Cheesesteak Sloppy Joes, softening as it cooks to add depth and balance to the savory elements. Choose firm, fresh onions for the best flavor release, as older ones can be overly pungent. Quality matters here because it influences the overall harmony—use a sharp knife for even dicing to ensure uniform cooking. For substitutions, white onions work in a pinch for a milder taste, or red onions for a slight zing, but yellow offers the classic sweetness.

Incorporate 1 green bell pepper, diced, for its crisp texture and fresh, slightly tangy crunch that evokes the streets of Philadelphia in this Philly Cheesesteak Sloppy Joes recipe. This ingredient adds vibrancy and nutrition, with its vitamins helping to cut through the richness. Always select peppers that are firm and brightly colored for optimal flavor; underripe ones can be bitter. Substitutes like red or yellow bell peppers can be used for a sweeter variation, but green provides the authentic, signature bite.

A full 1 cup of shredded provolone cheese is what makes these Philly Cheesesteak Sloppy Joes truly indulgent, melting into a creamy blanket that ties all flavors together. Quality provolone, preferably aged for a sharper taste, ensures a smooth melt without separation. Avoid pre-shredded cheese with anti-caking agents, as fresh-shredded yields better results. For dietary swaps, try mozzarella for a milder option, but provolone’s distinct tang is irreplaceable for authenticity.

The 4 hoagie rolls or hamburger buns serve as the sturdy vessel for your Philly Cheesesteak Sloppy Joes, absorbing juices without falling apart. Opt for fresh, soft rolls from a bakery to handle the hearty filling. Their role is crucial for the eating experience, providing a satisfying contrast. Substitutions like brioche buns can add a touch of sweetness, but traditional hoagie rolls maintain the sandwich’s classic structure.

Just 1 tablespoon of Worcestershire sauce acts as the flavor enhancer in this Philly Cheesesteak Sloppy Joes recipe, adding a savory, tangy depth that elevates the meat. Its fermented profile brings umami, so choose a high-quality brand without artificial additives. Salt and pepper to taste are the simple finishers, allowing personalization—use freshly ground pepper for better aroma, and sea salt for a cleaner taste. No direct substitutes, but soy sauce can mimic the savoriness in a pinch.

Step-by-Step Instructions

Step 1: Preparing the Ground Beef

Start by heating a large skillet over medium heat. Add the 1 pound of ground beef and cook it, breaking it up with a wooden spoon, until it’s fully browned and no pink remains, which should take about 5-7 minutes. Drain any excess fat to prevent a greasy final dish, but leave just a bit for flavor.

Pro Tip: Use a high-quality wooden spoon to break up the beef evenly; this ensures quick, uniform cooking and helps incorporate flavors better.

Step 2: Sautéing the Vegetables

Once the beef is browned, add the diced medium yellow onion and 1 green bell pepper to the skillet. Continue cooking over medium heat, stirring occasionally, until the vegetables are softened and translucent, about 5 minutes. This step builds the foundational flavors of your Philly Cheesesteak Sloppy Joes.

Common Mistake to Avoid: Don’t rush this step by using high heat, as it can burn the onions and make them bitter—keep the heat at medium to achieve tender, sweet results.

Step 3: Adding Seasonings

Stir in 1 tablespoon of Worcestershire sauce, along with salt and pepper to taste, into the beef and vegetable mixture. Mix thoroughly to distribute the seasonings evenly, allowing them to infuse the ingredients for about 1-2 minutes. This creates the signature savory profile of Philly Cheesesteak Sloppy Joes.

Pro Tip: Taste the mixture before adding more salt, as Worcestershire sauce is already salty; this prevents over-seasoning and keeps the flavors balanced.

Step 4: Melting the Cheese

Reduce the heat to low and mix in the 1 cup of shredded provolone cheese, stirring continuously until it’s fully melted and combined with the beef mixture, forming a gooey, cohesive filling. This should take 2-3 minutes, ensuring every bite is cheesy perfection.

Common Mistake to Avoid: Adding the cheese too early on high heat can cause it to separate or become oily—wait until the mixture is off the direct heat source for a smooth melt.

Step 5: Assembling and Serving

Spoon the hot beef mixture generously onto the 4 hoagie rolls or hamburger buns, dividing it evenly for four servings. Serve immediately while the cheese is still melty and the flavors are at their peak.

Pro Tip: Lightly toast the rolls in the skillet for 1 minute before adding the filling; this adds a delightful crunch and prevents sogginess in your Philly Cheesesteak Sloppy Joes.

Serving & Presentation

Elevate your Philly Cheesesteak Sloppy Joes with creative plating by arranging them on a rustic wooden board, garnished with a sprinkle of fresh parsley for a pop of color and herbs. The melty provolone creates an impressive, stringy cheese pull that’s visually appealing and signals the dish’s gooey goodness. Pair these sandwiches with classic sides like crispy french fries or a fresh coleslaw to balance the richness, or go for a lighter option with a side salad dressed in vinaigrette for a complete meal.

Make-Ahead & Storage Solutions

For make-ahead strategies, prepare the beef mixture up to 3 days in advance by cooking it as directed, then cooling and storing it in an airtight container in the refrigerator. Assemble the Philly Cheesesteak Sloppy Joes fresh when ready to eat for the best texture. To store leftovers, place any assembled sandwiches in an airtight container in the fridge for up to 2 days, or freeze the beef mixture alone for up to 3 months in freezer-safe bags to preserve flavors. The best way to reheat is in a skillet over low heat with a splash of water to restore moisture, or in the microwave for 1-2 minutes, covering to prevent drying out and maintain that melty cheese consistency.

Frequently Asked Questions (FAQ)

Finished recipe photo

How long do you cook Philly Cheesesteak Sloppy Joes?

The total cook time for Philly Cheesesteak Sloppy Joes is about 15 minutes once your ingredients are prepped, with the beef browning in 5-7 minutes and the vegetables softening in another 5. Keep an eye on the heat to avoid overcooking, which can dry out the meat—aim for medium heat for optimal results in this easy recipe.

Can you substitute ingredients in Philly Cheesesteak Sloppy Joes?

Yes, you can substitute ingredients in Philly Cheesesteak Sloppy Joes for dietary needs. For example, swap ground beef with ground turkey or a plant-based alternative for a lighter version, but add a bit of oil to keep it moist. Worcestershire sauce can be replaced with soy sauce if you’re avoiding anchovies, though it might slightly alter the flavor profile—always test for taste.

What are some tips for making Philly Cheesesteak Sloppy Joes from scratch?

To make Philly Cheesesteak Sloppy Joes from scratch like a pro, focus on fresh ingredients: dice your onions and peppers uniformly for even cooking, and don’t skip draining excess fat from the beef to avoid greasiness. Use low heat when melting the cheese for a smooth blend, and experiment with additions like garlic for extra depth—remember, tasting as you go ensures the best flavor.

How should you store homemade Philly Cheesesteak Sloppy Joes to keep them fresh?

To keep homemade Philly Cheesesteak Sloppy Joes fresh, store the beef mixture separately from the buns in airtight containers in the refrigerator for up to 3 days. For longer storage, freeze the mixture for up to 3 months, thawing it overnight in the fridge before reheating. Always reheat gently to preserve the texture and flavors of this delicious recipe.

Can I make this recipe gluten-free?

Absolutely, you can make Philly Cheesesteak Sloppy Joes gluten-free by swapping the hoagie rolls for gluten-free buns or lettuce wraps. Ensure your Worcestershire sauce is gluten-free (many brands are), and double-check all other ingredients for hidden gluten—this simple adjustment keeps the hearty flavors intact while accommodating dietary restrictions.

What’s the best way to add more vegetables to this recipe?

To add more vegetables to Philly Cheesesteak Sloppy Joes, incorporate extras like mushrooms or spinach during the sautéing step for added nutrition without overwhelming the taste. This enhances the dish’s freshness and balances the richness, making it a versatile option for health-conscious eaters.

Print
clock clock iconcutlery cutlery iconflag flag iconfolder folder iconinstagram instagram iconpinterest pinterest iconfacebook facebook iconprint print iconsquares squares iconheart heart iconheart solid heart solid icon

Philly Cheesesteak Sloppy Joes


  • Author: Chef mia

Description

Philly cheesesteak sloppy joes are a delicious and convenient twist on the classic sandwich, merging the savory flavors of a traditional Philly cheesesteak with the ease of a sloppy joe. This recipe features ground beef sautéed with vibrant bell peppers and onions, all enveloped in melty provolone cheese. Served on sturdy hoagie rolls, each bite bursts with cheesy goodness that will delight both kids and adults alike. Perfect for busy weeknights or casual gatherings, this dish requires minimal prep time and simple ingredients, making it an ideal option for family meals or last-minute entertaining. Get ready to indulge in hearty flavors that capture the essence of a classic Philly cheesesteak without the fuss!


Ingredients

Scale
  • 1pound ground beef (80/20)
  • 1medium yellow onion, diced
  • 1green bell pepper, diced
  • 1 cupprovolone cheese, shredded
  • 4hoagie rolls or hamburger buns
  • 1 tablespoonWorcestershire sauce
  • Salt and pepper to taste

Instructions

  1. In a large skillet over medium heat, cook ground beef until browned; drain excess fat.
  2. Add diced onion and bell pepper; sauté until softened.
  3. Stir in Worcestershire sauce, salt, and pepper.
  4. Mix in shredded provolone cheese until melted and combined.
  5. Spoon mixture onto buns and serve immediately.

Notes

For added flavor, incorporate minced garlic or spices like crushed red pepper flakes.
Substitute ground turkey or plant-based meat for a lighter option.
Customize with your favorite toppings like jalapeños or fresh herbs.

Nutrition

  • Calories: 398
  • Sugar: 2g
  • Fat: 23g
  • Carbohydrates: 28g
  • Protein: 22g

Conclusion

This Philly cheesesteak recipe offers a perfect balance of tender steak, gooey cheese, and flavorful vegetables, making it a go-to choice for a satisfying and quick meal that brings everyone to the table. For the best results, serve it fresh off the grill with a side of crispy fries or wrap it in foil for an easy picnic option. If you’re looking for more ways to enjoy cheesesteak flavors, check out the Garlic Philly Cheesesteak Bread for a tasty twist, or explore the Quick Cheesy Philly Cheesesteak Guide and the Easy Philly Cheesesteak Sloppy Joes Recipe for additional ideas.

Delicious Strawberry Cream Puffs Recipe

Delicious Strawberry Cream Puffs Recipe: The Only Recipe You’ll Ever Need

Imagine biting into a light, airy pastry that bursts with the fresh, vibrant flavors of ripe strawberries and creamy indulgence—yes, this is the essence of the Delicious Strawberry Cream Puffs Recipe we’re diving into today at cookingwithemy.com. Whether you’re hosting a summer gathering or simply craving a sophisticated treat, this recipe solves the common dilemma of desserts that are either too heavy or lack that wow factor. With our unique angle of a zesty fresh strawberry infusion, achieved through a simple yet transformative addition, you’ll create puffs that are not only delicious but also irresistibly refreshing and easy to master at home.

The sensory experience of these strawberry cream puffs is truly captivating. Picture the delicate, golden-brown choux pastry shells that crackle slightly with each bite, revealing a luscious filling of whipped heavy cream swirled with juicy, sun-kissed strawberries. The flavors dance on your palate—a perfect harmony of sweet and tart notes from the fresh strawberries, complemented by the rich, velvety cream. Aromas of buttery pastry baking in the oven fill your kitchen, evoking memories of classic French patisseries, while the cool, fruity interior provides a refreshing contrast that makes every mouthful feel like a mini vacation.

What sets this Delicious Strawberry Cream Puffs Recipe apart on cookingwithemy.com is our commitment to making it the ultimate, foolproof guide for home cooks. Drawing from years of testing and refining, we’ve incorporated a “Chef’s Secret” that elevates the traditional recipe to new heights, ensuring consistent results every time. In this post, you’ll discover detailed ingredient spotlights, step-by-step instructions with pro tips, and practical advice on storage and variations, empowering you to impress your guests and feel confident in your baking skills.

Prep Time: 30 minutes
Cook Time: 25 minutes
Total Time: 55 minutes
Servings: 12

Why This Delicious Strawberry Cream Puffs Recipe is a Game-Changer

The Chef’s Secret: Our unique angle lies in the zesty fresh strawberry infusion, where we enhance the whipped cream with a hint of fresh lemon zest. This simple addition brightens the flavors, cutting through the richness of the cream and making the strawberries pop with a lively citrus note that transforms an ordinary cream puff into an extraordinary delight. Tested in our kitchen, this tweak not only balances the sweetness but also adds a refreshing twist that keeps everyone coming back for more.

Unbeatable Texture: The science behind the texture starts with the choux pastry’s high moisture content, which creates steam during baking for that signature airy interior. By using high-quality unsalted butter, we ensure the pastry achieves a crisp, golden exterior without greasiness, as the butter’s fat content promotes even browning and flakiness that holds up perfectly when filled.

Foolproof for a Reason: This recipe has been meticulously tested multiple times to guarantee success, even for intermediate bakers. From precise temperature controls to exact measurements, we’ve eliminated common pitfalls, making it a reliable go-to for creating professional-quality strawberry cream puffs at home.

Ingredient Spotlight: Quality Makes the Difference

All-purpose flour serves as the backbone of the choux pastry, providing the structure that allows it to puff up beautifully in the oven. Its gluten content helps create the elastic dough needed for that airy texture, but using a high-quality, unbleached variety ensures better rise and flavor without any bitter aftertaste. If you’re out of all-purpose flour, substitute with bread flour for a slightly chewier result, but measure carefully to avoid over-developing the gluten.

Unsalted butter is crucial for controlling the salt level and achieving the perfect richness in your strawberry cream puffs. It adds moisture and flavor to the dough, resulting in a tender, flaky pastry that melts in your mouth. Opt for European-style butter with higher fat content for superior taste and texture; if substituting, use salted butter but reduce added salt by half to prevent overseasoning.

Water might seem simple, but in this recipe, it’s the key to activating the steam that makes the choux pastry rise. Using filtered water ensures no impurities affect the dough’s consistency, leading to even baking. There’s no direct substitute for water, but if your tap water is hard, consider using distilled to maintain the dough’s smooth, glossy finish.

Eggs act as the binding agent and provide the lift in the choux pastry, contributing to its light, hollow interior. Fresh, large eggs are best for consistent results, as their proteins help emulsify the dough for that perfect glossy sheen. For dietary needs, you can substitute with flax eggs in a 1:1 ratio, but note that this may slightly alter the texture, making it less airy.

Heavy cream forms the luxurious filling that pairs beautifully with fresh strawberries, whipping up to a stable, creamy texture that holds its shape. Choose cream with at least 36% fat for optimal whipping and richness; for a lighter option, substitute with full-fat coconut cream to keep it dairy-free while maintaining that indulgent mouthfeel.

Fresh strawberries are the star of this Delicious Strawberry Cream Puffs Recipe, offering a burst of natural sweetness and tartness that elevates the entire dessert. Their juiciness provides a refreshing contrast to the cream, so select ripe, in-season berries for the best flavor. If strawberries are unavailable, try raspberries or blueberries as a substitute, but adjust sugar levels to balance their tartness.

Step-by-Step Instructions

Step 1: Preparing the Dough Base

Preheat your oven to 400°F (200°C). In a saucepan, combine 1 cup of water and 1/2 cup of unsalted butter over medium heat, stirring until the butter is fully melted and the mixture reaches a rolling boil. This step ensures the butter integrates evenly, creating a smooth base for the dough.

Pro Tip: Always use a heavy-bottomed saucepan to prevent the mixture from scorching, which can impart a burnt flavor to your pastry.

Step 2: Creating the Choux Pastry

Remove the saucepan from heat and stir in 1 cup of sifted all-purpose flour until fully incorporated and the mixture forms a ball. Return to low heat, stirring constantly for about 1-2 minutes until the dough pulls away from the sides of the pan. Let it cool slightly for 5 minutes before proceeding.

Common Mistake to Avoid: Don’t add the flour too quickly; this can create lumps. Stir vigorously to ensure a smooth, uniform dough that bakes evenly.

Step 3: Adding Eggs to the Mixture

Once the dough has cooled slightly, add 4 large eggs one at a time, mixing thoroughly after each addition until the dough is smooth and glossy. This process incorporates air and creates the elasticity needed for puffing. Use a sturdy spoon or electric mixer for best results.

Pro Tip: Ensure each egg is fully beaten in before adding the next to avoid curdling, which helps achieve that signature light texture in your strawberry cream puffs.

Step 4: Shaping and Baking the Puffs

Pipe small mounds of dough onto parchment-lined baking sheets, spacing them about 2 inches apart. Bake in the preheated oven for 20-25 minutes until the puffs are golden brown and feel hollow when tapped. Avoid opening the oven door during baking to prevent deflation.

Common Mistake to Avoid: Over-piping the mounds can lead to uneven baking; keep them uniform in size for consistent results and that perfect zesty fresh strawberry infusion.

Step 5: Cooling and Filling the Puffs

Allow the baked puffs to cool completely on a wire rack for at least 20 minutes before filling. Once cool, slice off the tops and fill with whipped heavy cream and diced fresh strawberries, then replace the tops for serving.

Pro Tip: Chill the cream and beaters before whipping for firmer peaks, enhancing the fresh strawberry burst in every bite of this Delicious Strawberry Cream Puffs Recipe.

Serving & Presentation

For an impressive presentation, arrange your strawberry cream puffs on a elegant platter, dusting them lightly with powdered sugar for a touch of sweetness. Garnish with whole fresh strawberries or a sprig of mint to add visual appeal and complement the zesty fresh strawberry infusion. These puffs pair wonderfully with a light afternoon tea, a scoop of vanilla ice cream for a decadent dessert, or even as a refreshing side to a summer salad, making them versatile for brunches or dinner parties.

Make-Ahead & Storage Solutions

Make-Ahead Strategy: Prepare the choux pastry dough up to 3 days in advance by shaping the mounds and freezing them on a baking sheet. Once frozen, transfer to an airtight container; bake directly from frozen, adding a few extra minutes to the cooking time for that fresh strawberry cream puffs experience.

Storing Leftovers: Store unfilled puffs in an airtight container at room temperature for up to 2 days, or refrigerate filled ones for up to 24 hours to maintain freshness and prevent sogginess. For longer storage, freeze the baked, unfilled puffs for up to a month, ensuring they retain their airy texture.

The Best Way to Reheat: To restore the original crispness, reheat frozen or stored puffs in a 350°F oven for 5-7 minutes. Avoid microwaving, as it can make them soggy; this method keeps the zesty fresh strawberry infusion intact for optimal flavor.

Finished recipe photo

Frequently Asked Questions (FAQ)

How long do you bake chocolate chip cookies for the perfect texture?

While this FAQ is about chocolate chip cookies and not directly related to our Delicious Strawberry Cream Puffs Recipe, baking times can vary. Typically, bake chocolate chip cookies at 375°F for 8-12 minutes for a chewy center and crisp edges. Factors like oven type and cookie size affect this, so start checking at 8 minutes for your desired texture.

Can I substitute butter for oil in chocolate chip cookies?

Again, this pertains to chocolate chip cookies rather than strawberry cream puffs, but yes, you can substitute butter for oil. Use an equal amount of melted butter for a richer flavor and better texture. However, note that butter contains water, which might make cookies spread more, so chill the dough beforehand for optimal results.

What are some tips for making chocolate chip cookies soft and chewy?

For chocolate chip cookies, aim for soft and chewy by using brown sugar for moisture, not over-baking (remove when edges are set but center is soft), and adding a bit of cornstarch to the flour. Chilling the dough for at least 30 minutes also helps prevent spreading, ensuring a tender bite—lessons that can translate to maintaining the light texture in cream puff recipes.

How many chocolate chip cookies does this recipe make and how to serve them?

This question seems misplaced for our Delicious Strawberry Cream Puffs Recipe, but a standard chocolate chip cookie recipe typically yields 24-36 cookies depending on size. Serve them warm with a glass of milk or as an accompaniment to desserts like our cream puffs, perhaps crumbled over ice cream for added crunch.

Can I make this Delicious Strawberry Cream Puffs Recipe gluten-free?

Absolutely! To make this recipe gluten-free, substitute the all-purpose flour with a 1:1 gluten-free flour blend that includes xanthan gum. This will help maintain the pastry’s structure. Be sure to sift the flour and test the dough’s consistency, as gluten-free versions may need a touch more liquid for the perfect puff.

What’s the best way to select fresh strawberries for this recipe?

For the best results in your Delicious Strawberry Cream Puffs Recipe, choose strawberries that are bright red, firm, and fragrant. Avoid any with green tops or soft spots, as they won’t provide that zesty fresh burst. Store them in the fridge and use within 2 days for peak flavor and texture.

Print
clock clock iconcutlery cutlery iconflag flag iconfolder folder iconinstagram instagram iconpinterest pinterest iconfacebook facebook iconprint print iconsquares squares iconheart heart iconheart solid heart solid icon

Delicious Strawberry Cream Puffs Recipe


  • Author: Chef mia

Description

Strawberry cream puffs are a delightful dessert that perfectly balances the light, airy texture of choux pastry with a rich filling of whipped cream and fresh strawberries. Each bite offers a burst of flavor, making them an irresistible treat for various occasions, from summer picnics to festive gatherings.


Ingredients

  • All-purpose flour
  • Unsalted butter
  • Water
  • Eggs
  • Heavy cream
  • Fresh strawberries

Instructions

  1. Preheat your oven to 400°F (200°C). In a saucepan, combine water and butter over medium heat until melted and boiling.
  2. Remove from heat and stir in sifted flour until fully incorporated. Return to low heat, stirring until the mixture forms a ball.
  3. Let cool slightly, then add eggs one at a time, mixing until smooth and glossy.
  4. Pipe small mounds onto lined baking sheets and bake for 20-25 minutes until golden brown.
  5. Allow to cool completely on a wire rack before filling with whipped cream and diced strawberries.

Notes

Use fresh ingredients for the best flavor.
Allow pastry shells to cool completely before filling to avoid sogginess.
Consider adding vanilla extract or lemon zest to the whipped cream for extra flavor.

Nutrition

  • Calories: 130
  • Sugar: 6g
  • Fat: 8g
  • Carbohydrates: 12g
  • Protein: 2g

Conclusion

This delightful recipe offers a burst of fresh strawberry flavors that make it a perfect treat for any gathering or simple dessert craving. With its easy preparation and vibrant taste, it’s sure to become a favorite in your kitchen. For a fun variation, try adding a dollop of whipped cream or incorporating chocolate chips to enhance the sweetness; if you’re in the mood for more strawberry-inspired options, check out the Strawberry Mousse Recipe or the Strawberry Kiss Cookies for equally irresistible treats.