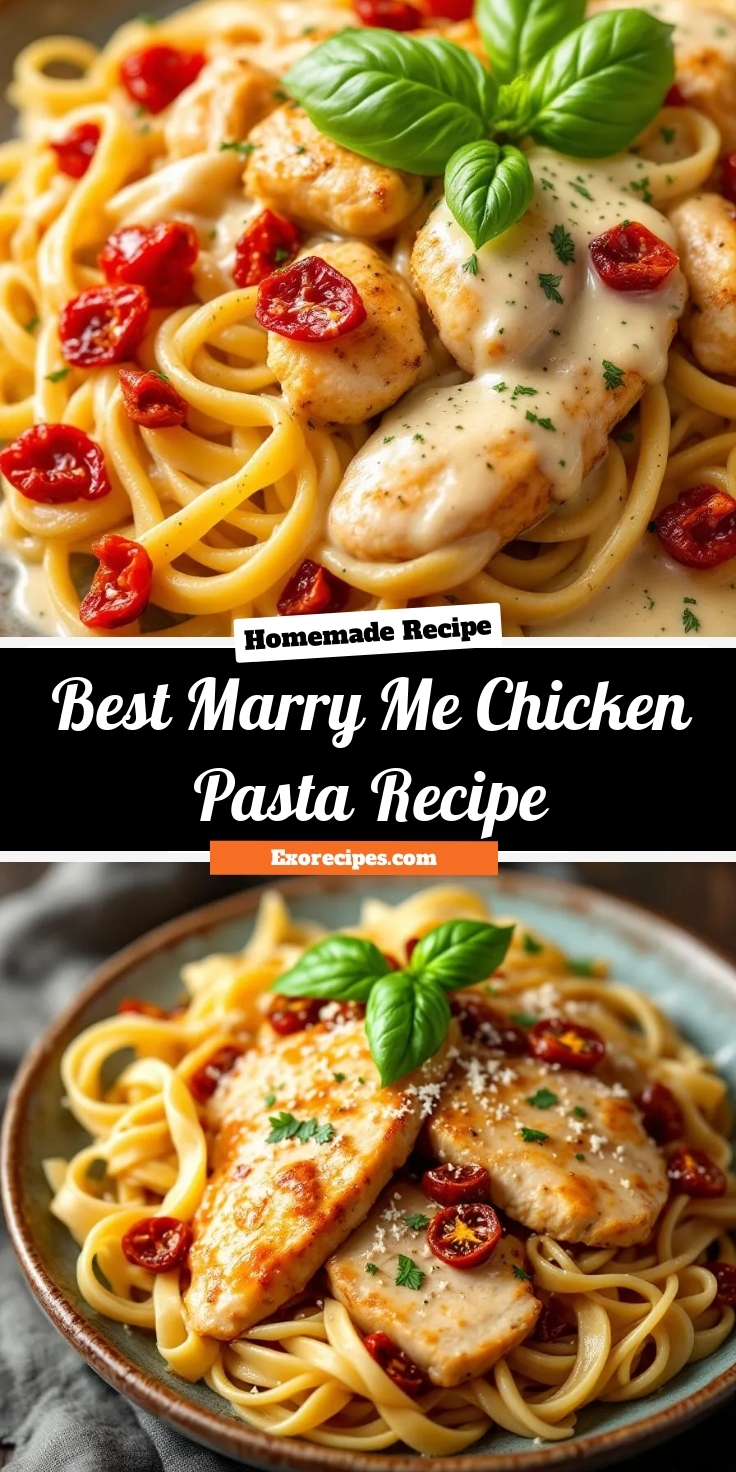
Introduction
Have you ever needed a dinner recipe so incredibly delicious it feels like a grand romantic gesture? This is that dish. Marry Me Chicken with Pasta promises a culinary experience so memorable it could truly steal someone’s heart. Furthermore, it turns an ordinary weeknight into a special occasion without any extraordinary effort. Ultimately, this one-pan wonder delivers restaurant-quality flavor right in your own kitchen, making it the perfect meal to express love for your family or that special someone.
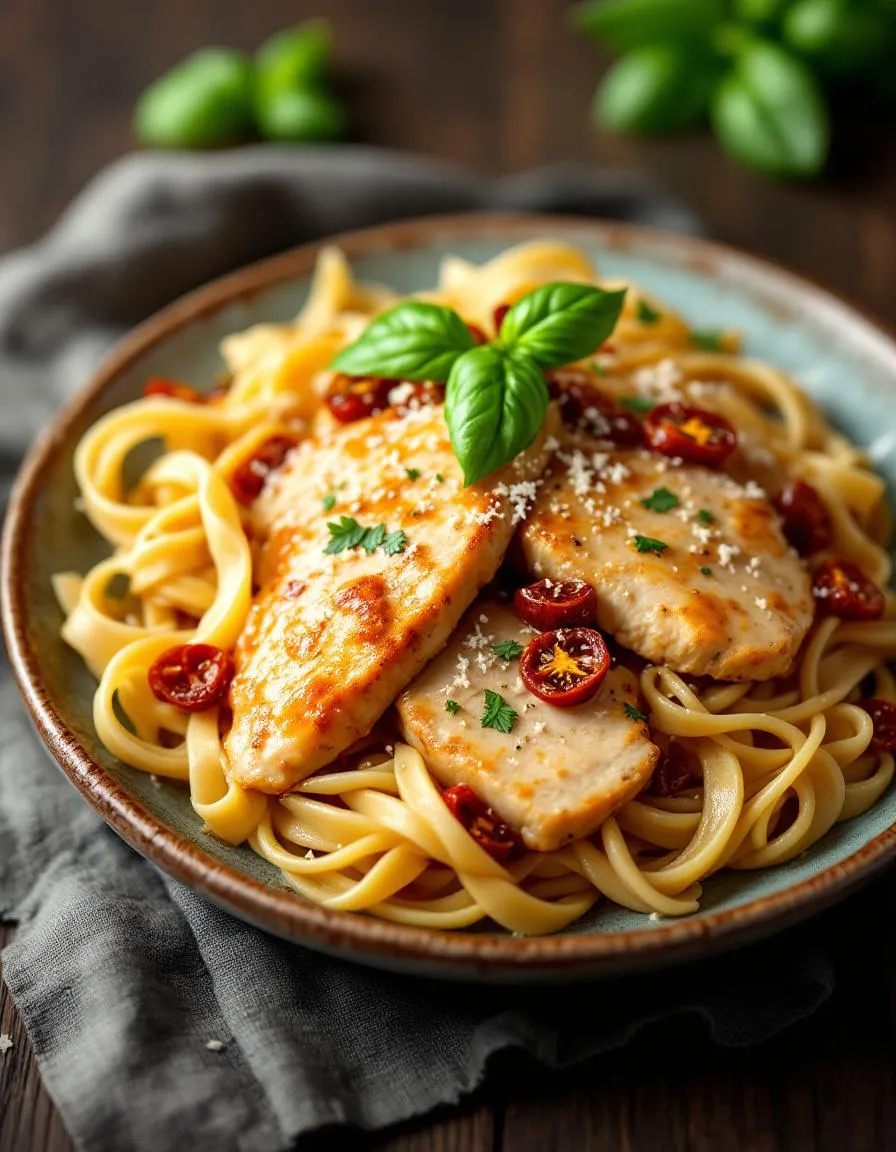
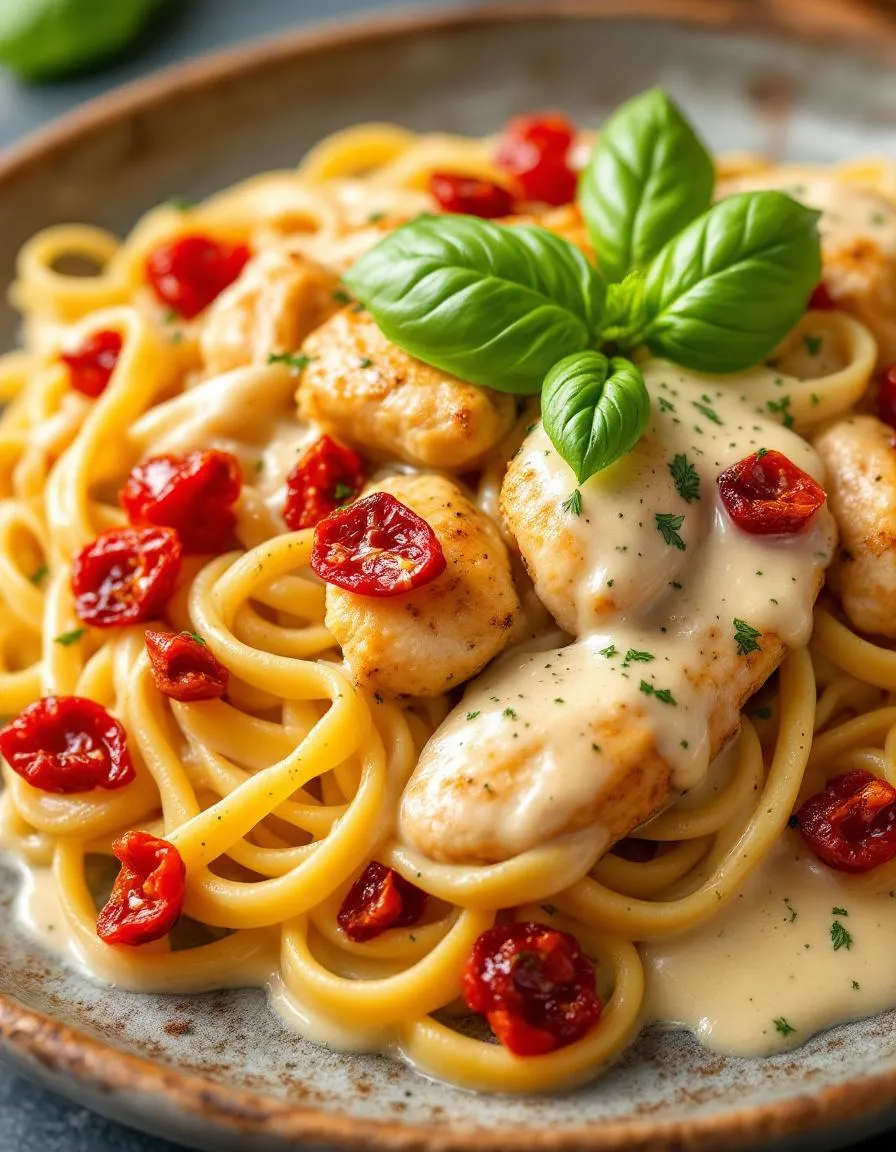
Marry Me Chicken with Pasta is a viral sensation for a very good reason. This dish features tender, pan-seared chicken breasts simmered in a luxurious, creamy sun-dried tomato and Parmesan sauce, all served over a bed of your favorite pasta. The name itself hints at its legendary power, suggesting a meal so flawless it could inspire a marriage proposal. Moreover, it matters because it solves the eternal dilemma of creating a meal that is both impressively elegant and deceptively simple to prepare. Consequently, it fits our blog’s tone perfectly, as we champion recipes that empower home cooks to create magic without stress. For instance, if you adore creamy pasta dishes, you might also love our classic Creamy Tuscan Chicken Pasta. Additionally, the beauty of this recipe lies in its versatility. You can easily adapt it to suit your pantry, perhaps by using a different pasta shape or adding a pinch of red pepper flakes for heat. Essentially, it provides a fantastic foundation for creativity while guaranteeing a spectacular result every single time. Therefore, whether you are cooking for a date night, a family celebration, or simply to treat yourself, this recipe delivers on its bold promise.
Why I Love This Recipe
This Marry Me Chicken with Pasta recipe holds a special place in my heart because it was the first meal I ever cooked for my now-husband when we moved in together. I remember the way the aroma of garlic and sun-dried tomatoes filled our tiny apartment and how his face lit up after the first bite. It instantly became our celebratory dish for birthdays, promotions, and even just making it through a tough week. I also love how it comes together in one pan, which means cleanup is a breeze, letting us spend more time together at the table. For another fantastic one-pan wonder, check out our One Pan Lemon Herb Salmon. This dish truly represents how simple, heartfelt cooking can create the most cherished memories.
Health and Nutrition
Why it’s good for your body
Marry Me Chicken with Pasta delivers a powerful combination of lean protein and complex carbohydrates. Consequently, this meal provides sustained energy, keeping you full and focused for hours. The chicken breast, a fantastic source of high-quality protein, actively supports muscle repair and a healthy metabolism.
Moreover, the creamy sauce, often made with sun-dried tomatoes and garlic, packs a serious nutritional punch. Sun-dried tomatoes, for instance, offer a concentrated source of antioxidants like lycopene. These compounds help your body combat oxidative stress. Additionally, garlic provides allicin, a compound known for its immune-boosting properties.
Furthermore, you can easily customize this dish to boost its benefits. You might use whole-wheat pasta for extra fiber, which promotes digestive health. Ultimately, Marry Me Chicken with Pasta proves that eating well does not mean sacrificing incredible flavor. This dish truly nourishes your body from the inside out.
How it fits in a healthy lifestyle
Marry Me Chicken with Pasta fits beautifully into a balanced eating plan. You can easily tailor it to meet specific health goals without compromising on its delicious taste. For a high-protein option that supports muscle building and satiety, simply ensure you use a generous portion of lean chicken breast.
If you follow a gluten-free lifestyle, swapping regular pasta for your favorite gluten-free brand makes this dish completely accessible. The heart-healthy fats from olive oil and the nutrients in the spinach or sun-dried tomatoes also contribute to cardiovascular wellness. This kind of flexible recipe makes sticking to your goals much easier. For more inspiration on crafting meals that support your fitness journey, explore our guide on high-protein meal prep.
Thinking about your overall dietary patterns is key. Enjoying Marry Me Chicken with Pasta alongside a simple side salad creates a perfectly rounded meal. It’s all about making smart choices that you can maintain long-term. For tips on building other nutritious and satisfying dishes, check out our thoughts on creating a balanced diet.
How to Prepare This Dish
Steps and time-saving tips
First, gather all your ingredients for the Marry Me Chicken with Pasta. This simple prep step, called mise en place, saves you from frantic searching later. Next, generously season your chicken breasts with salt and pepper. Meanwhile, bring a large pot of salted water to a boil for your pasta. Cook the pasta until it is just al dente, then drain it, reserving a cup of the starchy water. For a brilliant time-saving tip, use this waiting time to mince your garlic and sun-dried tomatoes. Now, heat a tablespoon of olive oil from the sun-dried tomato jar in a large skillet. Sear the chicken over medium-high heat until it develops a beautiful golden crust on each side. Remove the chicken and set it aside on a plate. Consequently, you will create the incredible sauce in that same skillet. Add the garlic and cook until fragrant, about thirty seconds. Then, pour in the chicken broth, using your whisk to scrape up all those delicious browned bits from the pan. Afterwards, stir in the heavy cream, grated parmesan, and those chopped sun-dried tomatoes. Finally, return the chicken to the skillet, let the sauce simmer until it thickens beautifully, and then fold in your cooked pasta. Serve your Marry Me Chicken with Pasta immediately with an extra sprinkle of parmesan and fresh basil.
Mistakes I’ve made and learned from
I have definitely learned a few lessons the hard way with this Marry Me Chicken with Pasta recipe. My biggest mistake was overcrowding the skillet when searing the chicken. I was impatient and wanted to cook it all at once, but that just steamed the chicken instead of giving it that perfect, crispy sear. Now, I cook in batches for a much better result. Another common error involves the sauce. I once added the parmesan cheese straight from the fridge into a very hot liquid, and it seized up into little clumps instead of melting smoothly. The key is to take the skillet off the direct heat and let it cool slightly before whisking in the cheese. For perfectly cooked chicken every time, I now swear by using a reliable meat thermometer. And if your sauce ever breaks or looks a bit greasy, don’t panic. A simple trick I learned from my guide on fixing broken sauces can rescue it in seconds.
Cultural Connection and Variations
Where this recipe comes from
Marry Me Chicken with Pasta, despite its fairy-tale name, actually has humble roots in Italian-American home cooking. Furthermore, it tells a story of romance and comfort. Families often prepare it for special occasions, believing its rich, creamy sauce and tender chicken could win over any heart. Consequently, the name stuck and spread like wildfire.
Interestingly, regional variations pop up everywhere. In some Italian households, for instance, nonnas might swap the heavy cream for a lighter tomato-based sauce, letting fresh basil shine. Alternatively, others might add a kick with spicy Calabrian chilies. My own family, however, always insists on using sundried tomatoes for a deeper, tangier flavor profile. Ultimately, every cook puts their own signature on this beloved dish.
Globally, the concept adapts beautifully. In France, for example, chefs might use tarragon and a splash of cognac. Meanwhile, a Greek version could feature kalamata olives and feta cheese. The core idea of a luxurious, proposal-worthy chicken pasta dish, however, remains wonderfully constant. This versatility truly makes Marry Me Chicken with Pasta a global classic.
How it fits in today’s cooking
Today, this dish perfectly fits our desire for impressive yet achievable meals. Busy home cooks, for instance, love how it delivers restaurant-quality flavor on a weeknight. Moreover, its creamy, comforting nature makes it a fantastic choice for a cozy date night in or a family celebration.
Modern adaptations keep it exciting and relevant. Many people now use gluten-free pasta or coconut milk to suit dietary needs. Others might prepare a big batch for meal prep, as it reheats beautifully for lunch. Additionally, its rich sauce pairs wonderfully with a simple side, making it a complete and satisfying dinner. For another fantastic make-ahead meal that everyone loves, consider our popular Easy Chicken Pot Pie.
Ultimately, it remains a staple because it feels both special and familiar. Whether you are cooking for a holiday or just need a reliable comfort food, this recipe delivers. For a sweet ending to your meal, a slice of our Classic New York Cheesecake provides the perfect finish. Consequently, Marry Me Chicken with Pasta continues to earn its place at our modern tables.
Taste and Texture
What makes it delicious
Marry Me Chicken with Pasta delivers a truly luxurious experience. First, you smell the fragrant garlic and sun-dried tomatoes simmering in creamy sauce. Each bite combines tender, juicy chicken with perfectly al dente pasta. Furthermore, the parmesan and cream create a velvety, rich texture that coats your mouth wonderfully. Meanwhile, a hint of basil cuts through the richness with a fresh, aromatic finish. Ultimately, this dish balances savory, creamy, and slightly sweet notes for a memorable meal.
Boosting the flavor
You can easily elevate your Marry Me Chicken with Pasta with a few creative twists. For instance, try adding a pinch of red pepper flakes to introduce a gentle, warming heat. Alternatively, swap the heavy cream for a lighter option like crème fraîche to add a delightful tang. Topping your finished dish with freshly grated parmesan and a sprinkle of chopped parsley provides a final flavor boost and a pop of color. For more inspiration on building incredible flavors, explore our guide on essential pantry spices. Additionally, consider serving it with a simple side salad; our easy Italian dressing recipe makes the perfect companion.
Tips for Success
Best practices for results
Always pat your chicken breasts completely dry with a paper towel before seasoning; consequently, you will achieve a much better sear. Furthermore, use heavy cream for your sauce rather than a lighter milk to guarantee a rich, luxurious texture that will not break. Additionally, do not rush the process of reducing your sauce; let it simmer gently until it properly coats the back of a spoon. Finally, always reserve a cup of starchy pasta water before draining, as it is the secret weapon for perfectly sauced Marry Me Chicken with Pasta.
Mistakes to avoid
Avoid overcrowding your skillet when searing the chicken, because this mistake will steam the meat instead of creating a beautiful golden crust. For perfect results, cook in batches if necessary. Moreover, do not add garlic too early into the hot pan, as it can burn incredibly quickly and create a bitter flavor; instead, add it just before your liquids. Also, resist the urge to use pre-shredded cheese, which often contains anti-caking agents that prevent smooth melting. For a flawlessly creamy sauce, always freshly grate your parmesan, just like we recommend for our Creamy Tuscan Chicken. Finally, never pour your hot sauce over pasta that is completely dry; instead, always toss it in the pan to ensure every single strand is coated. For more guidance on pairing sauces and shapes, our guide on How to Cook Pasta Al Dente is a fantastic resource.
Serving and Pairing Suggestions
How to serve this dish
Present your Marry Me Chicken with Pasta family-style for a truly inviting tablescape. Transfer the entire dish to a large, shallow serving platter to let those creamy sun-dried tomatoes and vibrant herbs take center stage. Furthermore, garnish with an extra sprinkle of fresh basil and a few shavings of Parmesan cheese for a beautiful, restaurant-quality finish. This approach makes your Marry Me Chicken with Pasta perfect for a date night or even a holiday gathering. Alternatively, plate individual portions in warm, shallow bowls to keep every bite cozy and delicious.
What goes well with it
For a complete meal, start with a crisp, simple side salad. A classic Caesar salad provides a wonderful crunchy contrast to the rich, creamy pasta. Moreover, its sharp, garlicky dressing cuts through the decadence of your Marry Me Chicken with Pasta beautifully. Next, consider a side of perfectly roasted asparagus or our favorite Garlic Butter Steak Bites for a surf-and-turf twist. Finally, a glass of chilled Pinot Grigio or even a non-alcoholic sparkling cider complements the dish’s creamy sauce and herbs perfectly. For a sweet ending, our No Bake Cheesecake offers a light and refreshing finale.
Marry Me Chicken with Pasta is a popular creamy Italian-inspired dish where tender chicken breasts are seared and simmered in a rich sauce made with sun-dried tomatoes, garlic, herbs, and heavy cream. The name comes from its incredibly delicious flavor, which is so good it might just prompt a marriage proposal. The creamy chicken and sauce are then served over your favorite pasta, like fettuccine or penne, for a complete and romantic meal.
The name “Marry Me Chicken” is a playful testament to how irresistibly delicious the dish is, with the legend being that someone loved it so much they proposed after eating it. The combination of creamy sauce, savory sun-dried tomatoes, and Parmesan cheese creates a luxurious flavor profile that feels special and impressive. Serving it with pasta turns it into a hearty, proposal-worthy meal that’s perfect for a date night.
Yes, boneless, skinless chicken thighs are an excellent substitute for breasts in Marry Me Chicken with Pasta. Thighs are often more flavorful and juicy, and they hold up well to the simmering process in the creamy sauce. Just ensure they are cooked through to an internal temperature of 165°F (74°C) before serving over your pasta.
Ribbon pasta like fettuccine or pappardelle is classic because their broad, flat surfaces hold the creamy sauce beautifully. Short pasta shapes with nooks, such as rigatoni or penne, are also fantastic choices as they trap the sauce and bits of sun-dried tomato. Ultimately, the best pasta for Marry Me Chicken is your personal favorite, as the rich sauce complements almost any variety.
Marry Me Chicken with Pasta
Description
A romantic and creamy chicken dish with sun-dried tomatoes and herbs, served over pasta. So delicious it might just lead to a proposal!
Ingredients
For the Crust:
- 1 lb chicken breasts, sliced
- 8 oz fettuccine pasta
- 1 cup heavy cream
- 1/2 cup chicken broth
- 1/2 cup grated parmesan cheese
- 1/3 cup sun-dried tomatoes, chopped
- 3 cloves garlic, minced
- 1 tsp Italian seasoning
- 1/2 tsp red pepper flakes
- 2 tbsp olive oil
- Salt and pepper to taste
- Fresh basil for garnish
Instructions
1. Prepare the Crust:
- Cook pasta according to package directions. Drain and set aside.
- Season chicken with salt, pepper, and Italian seasoning. Heat olive oil in a large skillet over medium-high heat and cook chicken until golden, about 5-6 minutes per side. Remove and set aside.
- In the same skillet, add garlic and red pepper flakes, cooking for 1 minute until fragrant. Pour in chicken broth to deglaze, scraping up any browned bits.
- Reduce heat to medium. Stir in heavy cream, parmesan cheese, and sun-dried tomatoes. Simmer for 2-3 minutes until sauce thickens slightly.
- Return chicken to the skillet and simmer for another 2 minutes. Serve chicken and sauce over cooked pasta, garnished with fresh basil.
Notes
You can customize the seasonings to taste.