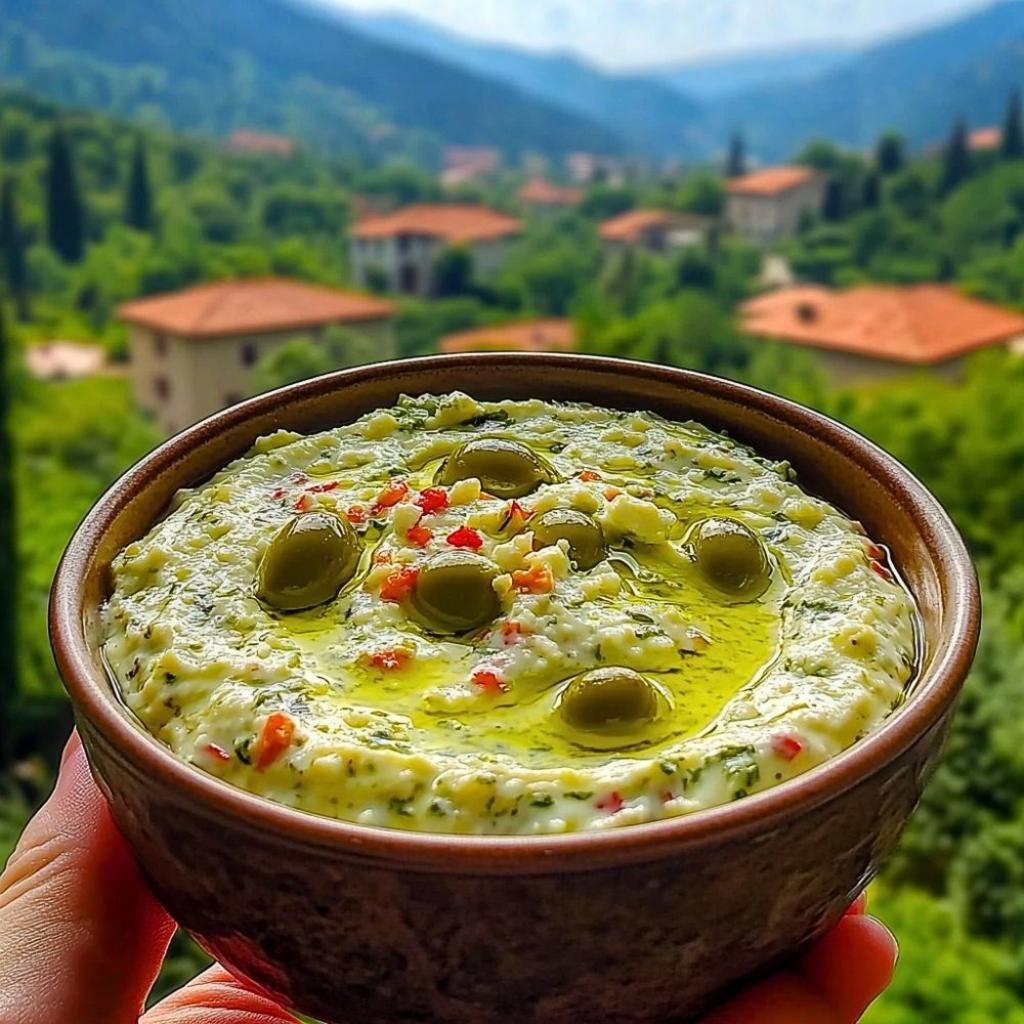
Green Olive and Feta Cheese Dip

“`html

Green Olive and Feta Cheese Dip

Craving a Quick and Flavorful Appetizer?

Are you looking for an appetizer that’s incredibly easy to make, bursting with vibrant Mediterranean flavors, and guaranteed to impress your guests? In a world where weeknight dinners often demand speed without sacrificing taste, many home cooks are searching for recipes that deliver maximum flavor with minimal effort. Introducing the Green Olive and Feta Cheese Dip – a creamy, tangy, and briny delight that perfectly answers that craving. This dip is more than just an appetizer; it’s a celebration of sunshine-filled ingredients, bringing together the salty punch of green olives, the creamy tang of feta cheese, the aromatic kick of garlic, and the fresh zest of herbs. Whether you’re hosting a last-minute gathering or simply want to elevate your snack game, this dip comes together in a remarkable 10 minutes, making it a true weeknight wonder. Get ready to discover your new go-to appetizer that pairs beautifully with everything from crisp pita bread to fresh, crunchy vegetables.

Ingredients for Green Olive and Feta Cheese Dip

The beauty of this dip lies in its simplicity and the quality of its core ingredients. Here’s what you’ll need to create this Mediterranean masterpiece:

  • 8 ounces Feta Cheese: Opt for a good quality block feta packed in brine for the best creamy texture and authentic flavor. Crumbled feta can sometimes be drier. (Substitution: Goat cheese can offer a similar tang but with a slightly different texture. For a dairy-free version, explore firm cashew-based cheeses, though flavor will differ.)
  • 1 cup Green Olives: Pitted green olives are essential. Kalamata olives can be used for a richer, fruitier flavor, but green olives provide that distinct briny sharpness. Ensure they are drained. (Substitution: Mix green and black olives for a more complex olive flavor profile.)
  • 2-3 cloves Garlic: Fresh garlic is key for that pungent kick. Adjust the amount based on your preference for garlic intensity. (Substitution: 1/2 teaspoon garlic powder can be used in a pinch, but fresh garlic offers superior flavor.)
  • 2 tablespoons Cream Cheese: Full-fat cream cheese adds an extra layer of creaminess and helps bind the dip. Let it soften to room temperature for easier blending. (Substitution: Greek yogurt (full-fat) can be used for a tangier, lighter creaminess, but the dip might be slightly less rich.)
  • 1 tablespoon Fresh Lemon Juice: Brightens all the flavors and cuts through the richness. (Substitution: 1 teaspoon white wine vinegar or apple cider vinegar can be used, but lemon juice offers a cleaner, fresher taste.)
  • 1 tablespoon Olive Oil: Extra virgin olive oil for richness and to help with the blending process. (Substitution: avocado oil or grapeseed oil.)
  • 2 tablespoons Fresh Parsley: Finely chopped. Its fresh, slightly peppery flavor is a classic pairing. (Substitution: Fresh dill or chives also work wonderfully.)
  • 1 tablespoon Fresh Mint (optional): Finely chopped. Adds an unexpected burst of freshness. (Substitution: More parsley or a pinch of dried mint.)
  • Pinch of Black Pepper: Freshly ground, to taste.
  • Optional: Red Pepper Flakes: For a touch of heat.

Timing is Everything

Prep Time: 10 minutes
Cook Time: 0 minutes
Total Time: 10 minutes

This dip is a champion of quick preparation! With an average prep time of just 10 minutes, it significantly beats the typical 20-30 minutes or more often required for homemade dips that involve cooking or extensive chopping. The ‘cook time’ is essentially zero, making it perfect for those moments when you need an impressive appetizer in a flash. The total time commitment is incredibly low, allowing you to whip this up right before guests arrive or for a spontaneous snack attack.
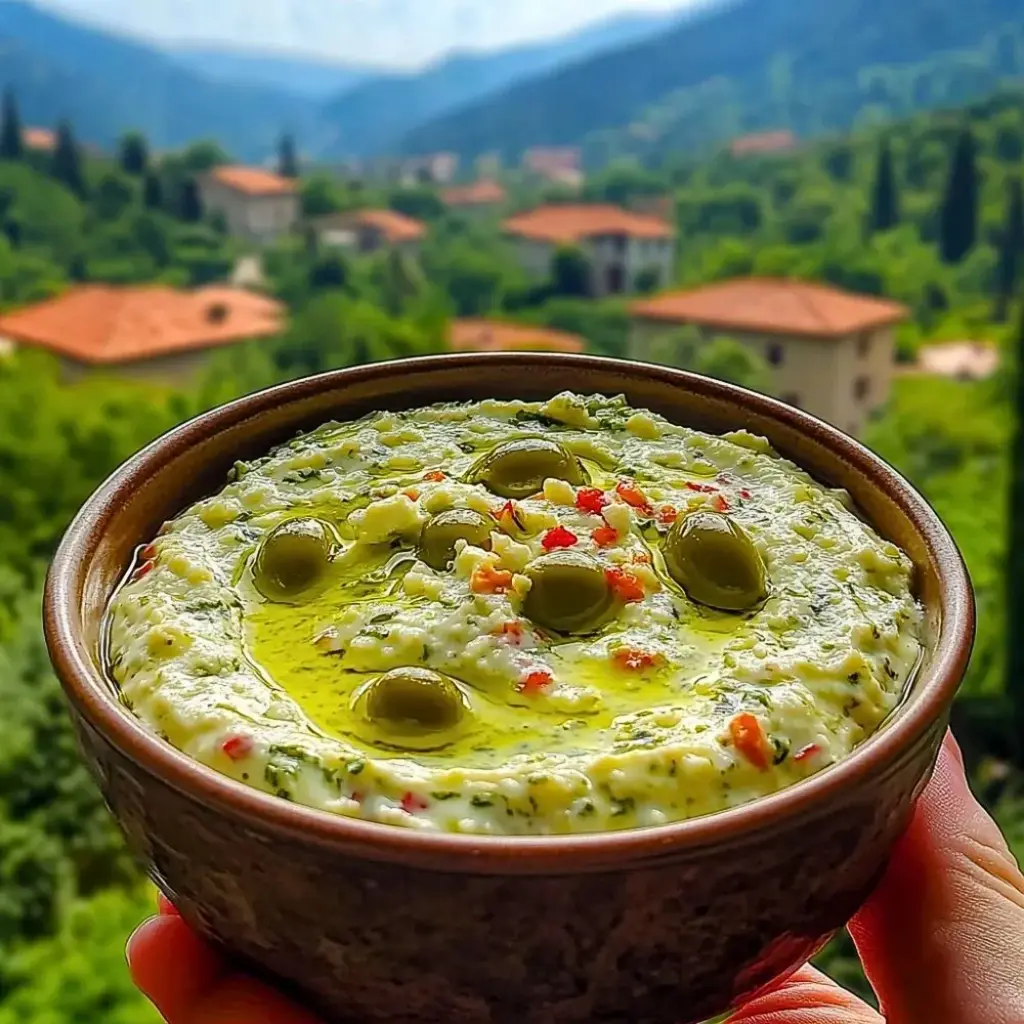
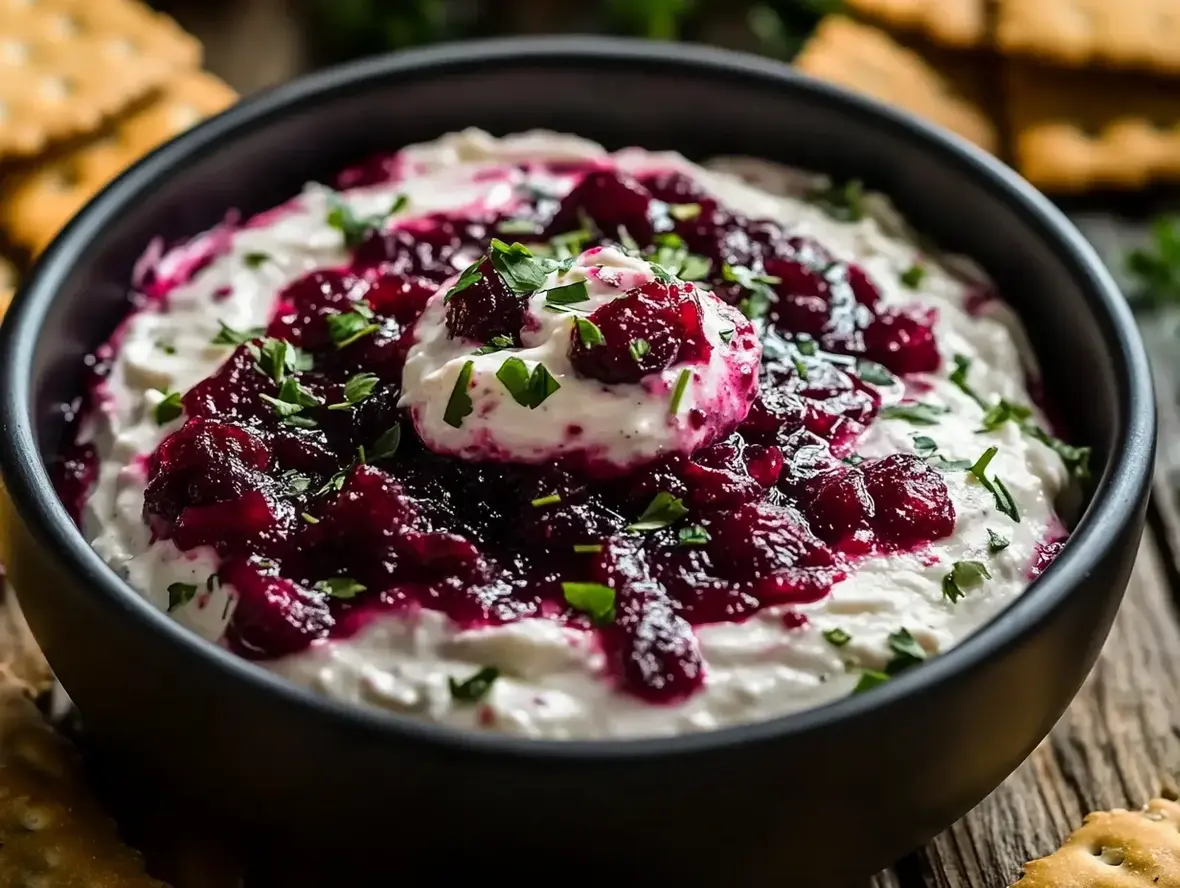
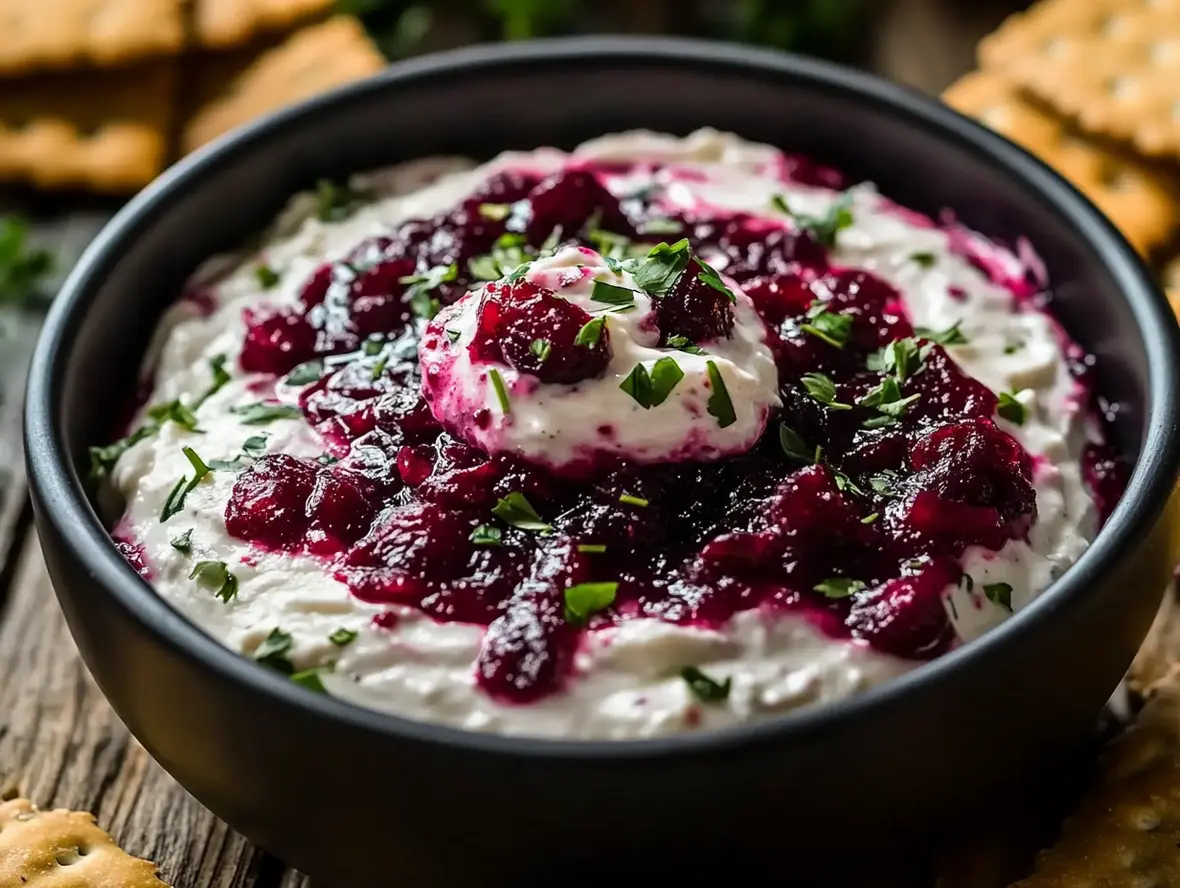
Green Olive and Feta Cheese Dip in a bowl with pita bread and vegetables.

Step-by-Step Instructions

Step 1: Gather Your Ingredients

Before you start blending, lay out all your ingredients. Ensure your feta cheese is at room temperature, and if you’re using block feta, give it a quick pat dry. Pit your green olives if they aren’t already. Mince your garlic finely, and chop your fresh herbs (parsley and mint, if using). Having everything prepped and ready makes the blending process smooth and efficient.

Step 2: Process the Feta

In the bowl of a food processor, add the block feta cheese. Pulse a few times until it’s broken down into smaller, crumbly pieces. You don’t want it completely pulverized yet, just broken up to make space for the other ingredients.

Step 3: Add the Olives and Garlic

Add the drained green olives and the minced garlic to the food processor with the feta. If you’re adding a pinch of red pepper flakes for heat, now’s the time to toss them in.

Step 4: Introduce the Herbs and Lemon

Now, add the softened cream cheese, fresh lemon juice, olive oil, chopped parsley, and mint (if using) to the food processor. This is where the magic starts to happen, bringing together the tangy, creamy, and herbaceous elements.

Step 5: Blend Until Creamy

Secure the lid on your food processor and blend until the mixture is mostly smooth and creamy. You might want to scrape down the sides of the bowl a couple of times to ensure everything is incorporated evenly. The consistency should be spreadable but still have a little texture from the feta and olives.

Step 6: Taste and Adjust

Open the lid and taste your dip. Does it need more tang? Add a little more lemon juice. Is it a bit too thick? A tiny splash more olive oil or a tablespoon of water can help. Does it need a bit more oomph? A grind of fresh black pepper is your friend. Adjust seasonings to your personal preference until it sings!

Step 7: Serve and Enjoy

Transfer the dip to a serving bowl. For an extra touch, you can drizzle a little more olive oil over the top and garnish with a sprinkle of fresh parsley or a few reserved chopped olives. Serve immediately with your favorite dippers.

Nutritional Information

Please note: Nutritional values are estimates and can vary based on specific ingredients and portion sizes. This information is for guidance only.

  • Calories: Approximately 150-180 per ¼ cup serving
  • Fat: Approximately 12-15g (primarily from feta, cream cheese, and olive oil)
  • Saturated Fat: Approximately 5-7g
  • Cholesterol: Approximately 30-40mg
  • Sodium: Moderately high due to feta and olives (approx. 300-400mg per serving, can vary greatly)
  • Carbohydrates: Approximately 2-4g
  • Protein: Approximately 6-8g

Healthier Alternatives

While this dip is already quite flavorful with its core ingredients, you can make some smart swaps to lighten it up without sacrificing taste:

  • Reduce Cream Cheese: Substitute a portion of the cream cheese with plain Greek yogurt (full-fat or low-fat). This adds creaminess and protein while reducing fat content.
  • Lower Sodium Feta: If sodium is a concern, look for “low sodium” feta cheese options, or rinse your feta thoroughly under cold water before using to remove excess salt.
  • Leaner Olives: While olives are a key flavor component, their sodium content can be high. Rinsing them thoroughly before adding to the food processor can help reduce sodium.
  • Boost Veggies: Increase the amount of fresh herbs like parsley and mint. You can also add finely chopped bell peppers or sun-dried tomatoes (not oil-packed) for extra nutrients and flavor complexity.

Serving Suggestions

This versatile dip is perfect for a variety of occasions and accompaniments:

  • Classic Pairings: Serve with warm pita bread, crusty baguette slices, or toasted sourdough.
  • Veggies Galore: Offer a colorful array of raw vegetables like carrot sticks, celery sticks, cucumber slices, bell pepper strips, and cherry tomatoes.
  • Crackers and Breads: Any type of cracker, from whole wheat to rice crackers, will work beautifully.
  • As a Spread: Use it as a flavorful spread for sandwiches or wraps.
  • Garnish: A sprinkle of fresh parsley, a drizzle of olive oil, or a few reserved chopped olives makes it visually appealing.

Common Mistakes to Avoid

  • Over-processing: Stop blending once the dip is creamy and smooth. Over-processing can turn it into a paste.
  • Using stale ingredients: Fresh garlic and herbs make a huge difference in flavor.
  • Not tasting and adjusting: Feta and olives vary in saltiness. Always taste and adjust seasonings (lemon, pepper, salt if needed) before serving.
  • Skipping the cream cheese/yogurt: This ingredient is crucial for achieving a smooth, cohesive dip consistency.

Storing Tips

This Green Olive and Feta Cheese Dip is best enjoyed fresh, but it can be stored for future enjoyment. Keep any leftovers in an airtight container in the refrigerator for up to 3-4 days. The flavors may even meld and deepen over time, making it even more delicious on the second day! Before serving again, give it a good stir. If it has thickened slightly, you can stir in a teaspoon of olive oil or a tablespoon of water to reach your desired consistency.
Close-up of Green Olive and Feta Cheese Dip being scooped with a pita chip.

Conclusion

This Green Olive and Feta Cheese Dip is a testament to how simple ingredients can create extraordinary flavor. In just minutes, you can whip up a dip that’s bursting with the bright, briny, and creamy notes of the Mediterranean. It’s the perfect appetizer to have on hand for unexpected guests or to liven up any gathering. So, the next time you’re in need of a quick, delicious, and impressive dish, reach for this recipe and let the vibrant flavors transport you. Don’t hesitate to experiment with herbs or add a touch of spice – make it your own!

Frequently Asked Questions

***Can I make this dip ahead of time?***
Yes, you can make this dip a day or two in advance. Store it in an airtight container in the refrigerator. The flavors will meld beautifully. Give it a good stir before serving, and add a touch more olive oil or water if it has thickened too much.

***What if I don’t have a food processor?***
You can achieve a similar result by finly mincing the feta cheese and olives by hand, then mashing them together with a fork in a bowl. You’ll want to mash the garlic very finely or use a garlic press. It might be slightly less smooth but will still be delicious!

***Can I freeze this dip?***
Since this dip contains dairy (feta and cream cheese) and herbs, freezing is not recommended. The texture can become watery and grainy upon thawing. It’s best enjoyed fresh or stored in the refrigerator.

***How long does the dip last in the refrigerator?***
Stored in an airtight container, the dip should last for 3 to 4 days in the refrigerator. Always check for any off smells or textures before consuming.

***Can I make it spicy?***
Absolutely! Add a pinch of red pepper flakes to the food processor along with the olives and garlic for a mild kick. You can also add a dash of your favorite hot sauce if you prefer more heat.

Print
clock clock iconcutlery cutlery iconflag flag iconfolder folder iconinstagram instagram iconpinterest pinterest iconfacebook facebook iconprint print iconsquares squares iconheart heart iconheart solid heart solid icon

Green Olive and Feta Cheese Dip


  • Author: Chef Emy

Description

ThisGreen Olive and Feta Cheese Dipis a creamy, tangy, and briny delight perfect for any occasion. Packed with Mediterranean flavors like feta, green olives, garlic, and fresh herbs, it’s an easy appetizer that comes together in just 10 minutes. Serve it with pita, bread, or fresh veggies for a crowd-pleasing dish!


Ingredients

Scale
  • 8 oz(225g) feta cheese block (preferably in brine)
  • 1/2 cuppitted green olives (such as Castelvetrano), plus extra for garnish
  • 3 tbspextra virgin olive oil, plus more for drizzling
  • 1small garlic clove, minced
  • 1 tbspfresh parsley, chopped
  • 1 tspfresh dill, chopped
  • 1 tbspfresh lemon juice
  • Pinch of red pepper flakes (optional)
  • Freshly cracked black pepper, to taste

Instructions

  1. Prepare Ingredients:Roughly chop the green olives and crumble the feta cheese for easy blending.
  2. Blend the Dip:In a food processor, combine the feta cheese, green olives, garlic, parsley, dill, olive oil, and lemon juice. Pulse until smooth and creamy.
  3. Adjust Consistency:If the dip is too thick, add more olive oil or a small splash of water to reach your desired texture.
  4. Season and Taste:Add a pinch of red pepper flakes and freshly cracked black pepper. Taste and adjust seasoning if needed.
  5. Garnish:Transfer the dip to a bowl, drizzle with extra olive oil, and garnish with whole green olives, red pepper flakes, and fresh herbs for a beautiful finish.
  6. Serve:Serve immediately with warm pita bread, crusty bread, or fresh vegetables like cucumbers, carrots, and bell peppers.

Notes

Use high-quality feta packed in brine for the best flavor and creaminess.
Castelvetrano olives provide a mild, buttery flavor, but you can use any green olives you prefer.
This dip can be made a day ahead—store it in the fridge and bring it to room temperature before serving.
For a smoother dip, add a little extra olive oil while blending; for a chunkier texture, pulse less.
To add crunch, top with chopped toasted walnuts or almonds before serving.

“`

🥣 Thai Chicken Soup Recipe – Easy & Flavorful Comfort in a Bowl!

“`html

Thai Chicken Soup Recipe – Easy & Flavorful Comfort in a Bowl!

Ingredients for Flavorful Thai Chicken Soup

Creating this Thai Chicken Soup is an adventure for your senses, with each ingredient playing a vital role in building its complex yet harmonious flavor profile. We’ve aimed for a balance of aromatic spices, creamy richness, and a touch of freshness. Don’t worry if you don’t have an exact ingredient; substitutions are often very forgiving!

Prep Time: 20 Minutes
Cook Time: 30 Minutes
Total Time: 50 Minutes

The Heart of the Soup: Aromatics & Protein

  • 1 tbsp Coconut Oil or neutral oil (For sautéing, imparts a subtle tropical note. Vegetable or canola oil works too.)
  • 1 lb Boneless, Skinless Chicken Thighs or Breasts (Thighs tend to stay more tender and moist, but breasts are leaner. Cut into bite-sized pieces.)
  • 1 Medium Onion, finely chopped (Provides a sweet, pungent base. Shallots can be used for a milder flavor.)
  • 2-3 cloves Garlic, minced (The aromatic soul of many savory dishes. Freshly minced is best for maximum impact.)
  • 1 inch Ginger, grated or minced (Adds a warm, zesty kick that’s quintessential in Thai cooking. Fresh ginger is key here!)
  • 1-2 Red Chilies, thinly sliced (optional) (For a gentle warmth. Adjust to your spice preference. Remove seeds for less heat.)

The Soul of the Soup: Broth & Flavor Base

  • 4 cups Chicken Broth (Low-sodium is recommended to control saltiness. Vegetable broth can be used for a vegetarian option.)
  • 1 (13.5 oz) can Full-Fat Coconut Milk (This is crucial for that signature creamy, rich texture and subtle sweetness. Don’t use “light” coconut milk if you want full flavor.)
  • 2 tbsp Red Curry Paste (Store-bought or homemade. This paste is packed with chilies, lemongrass, galangal, and spices, forming the flavor backbone. Adjust amount based on curry paste ingredients and your spice tolerance.)
  • 1 tbsp Fish Sauce (Provides umami depth and saltiness. A staple in Southeast Asian cooking. Soy sauce or tamari can be used as a vegetarian alternative, but the flavor will be different.)
  • 1 tbsp Soy Sauce or Tamari (Adds another layer of savory flavor. Use tamari for gluten-free.)
  • 1 stalk Lemongrass, bruised and cut into 3-inch pieces (optional but recommended) (If you can find it, its citrusy, floral aroma elevates the soup. Smash it with the back of a knife to release its oils.)
  • 1 tbsp Brown Sugar or Honey (To balance the complex flavors and a hint of sweetness. Maple syrup can also work.)
  • Juice of 1/2 Lime (For that essential bright, tangy finish that cuts through the richness.)

The Garnish: Freshness & Texture

  • Fresh Cilantro, chopped (For a burst of fresh, herbaceous flavor. Parsley can be a substitute if you’re not a fan of cilantro.)
  • Fresh Mint, chopped (optional) (Adds a refreshing cooling note that complements the spices beautifully.)
  • Lime wedges, for serving (To allow each person to add more zing.)
  • Sliced Red Chilies or Sriracha, for serving (optional) (For those who like it extra spicy!)

Perfectly Timed Comfort

This Thai Chicken Soup is designed for maximum flavor with minimal fuss. Most recipes of this complexity take around 60-75 minutes, but we’ve streamlined the process to bring this delicious bowl to your table in under an hour. It’s the ideal weeknight meal solution that doesn’t compromise on taste!

Prep Time: 20 Minutes
Cook Time: 30 Minutes
Total Time: 50 Minutes

A steaming bowl of Thai Chicken Soup with fresh garnishes.

Step-by-Step: Crafting Your Thai Chicken Soup

Let’s get cooking! Follow these simple steps to create a truly memorable Thai Chicken Soup that will warm you from the inside out.

Step 1: Prepare the Aromatics

Our flavor journey begins with building a robust aromatic base. Heat the coconut oil in a large pot or Dutch oven over medium heat until shimmering. Add the chopped onion and sauté until it begins to soften and become translucent, about 4-5 minutes. Next, stir in the minced garlic, grated ginger, and sliced red chilies (if using). Cook for another minute until fragrant, being careful not to burn the garlic.

Step 2: Sear the Chicken

Push the aromatics to one side of the pot and add the bite-sized chicken pieces. Sear the chicken for about 2-3 minutes per side, until it’s lightly golden. You don’t need to cook it through at this stage; we’re just building a little color and flavor. Once seared, stir the chicken into the aromatics.

Step 3: Build the Broth

Now it’s time to create the liquid magic. Sprinkle the red curry paste over the chicken and aromatics. Stir well, coating everything and cooking the paste for about a minute to toast the spices and deepen its flavor. Pour in the chicken broth, scraping up any browned bits from the bottom of the pot – that’s pure flavor! Add the full-fat coconut milk, fish sauce, soy sauce (or tamari), bruised lemongrass pieces (if using), and brown sugar. Stir everything together until well combined.

Step 4: Simmer and Infuse

Bring the soup to a gentle simmer over medium heat. Once simmering, reduce the heat to low, cover the pot, and let it cook for at least 15-20 minutes. This simmering time allows the chicken to cook through completely and, more importantly, for all those wonderful Thai flavors to meld and deepen into a rich, aromatic broth. The longer it simmers (within reason), the more the flavors will develop.

Step 5: Add the Finishing Touches

Remove the lemongrass pieces from the soup (they’ve done their job!). Stir in the fresh lime juice. Taste the soup and adjust seasonings as needed. You might want a little more fish sauce for saltiness, more sugar for sweetness, or a bit more lime juice for tang. This is your moment to perfect the balance!

Step 6: Serve and Enjoy

Ladle the hot soup into bowls. Garnish generously with chopped fresh cilantro, mint (if using), and a few sliced red chilies for those who crave extra heat. Serve immediately with lime wedges on the side, allowing everyone to customize their bowl.

Nutritional Snapshot

While individual ingredient brands and portions can slightly alter these values, a typical serving of this Thai Chicken Soup is approximately:

  • Calories: 350-450 kcal
  • Protein: 25-35g
  • Fat: 20-30g (mostly from coconut milk)
  • Carbohydrates: 10-15g
  • Sodium: Varies based on broth and fish sauce used.

Healthier Swaps Without Sacrificing Flavor

Looking to lighten things up? This recipe is quite adaptable! Here are a few ideas:

  • Chicken: Opt for boneless, skinless chicken breasts for a leaner protein choice.
  • Coconut Milk: Use “light” coconut milk. Be aware this will result in a less creamy and rich soup, so you might adjust spices slightly. Alternatively, use a blend of light and full-fat coconut milk.
  • Veggies: Load up on extra non-starchy vegetables like bok choy, spinach, bell peppers, broccoli florets, or snap peas. Add them in the last 5-10 minutes of simmering.
  • Broth: Use a very low-sodium broth and adjust seasoning with extra herbs and a touch more fish sauce or soy sauce rather than salt itself.

Elevate Your Serving Presentation

This soup is a star on its own, but here are some ideas to make it even more special:

  • Rice: Serve with a side of steamed jasmine rice to soak up every last drop of the delicious broth.
  • Noodles: Add cooked rice noodles or ramen noodles directly to the bowls for a more substantial meal.
  • Garnishes: Go all out with toppings! Besides cilantro and lime, consider chopped peanuts, toasted sesame seeds, or a drizzle of chili oil.

Common Mistakes to Avoid

Don’t let a few simple errors dim the shine of your soup. Keep these in mind:

  • Burning Garlic & Ginger: These aromatics cook quickly. Sauté them gently until fragrant, not browned and bitter.
  • Not Toasting Curry Paste: Cooking the curry paste for a minute before adding liquid helps release its fragrant oils and deepens its flavor.
  • Using “Light” Coconut Milk Only: This is a common shortcut, but it significantly compromises the soup’s signature creamy texture and rich flavor.
  • Overcrowding the Pot: Give your ingredients space to cook and meld flavors properly.
  • Skipping the Lime: The fresh lime juice is essential for balancing the rich, savory, and spicy notes. Don’t skip it!

Storing Your Delicious Soup

Leftovers are a good thing! Store any unused Thai Chicken Soup in an airtight container in the refrigerator for up to 3-4 days. The flavors often deepen overnight, making it even tastier the next day. Reheat gently on the stovetop or in the microwave. If the soup seems too thick after refrigeration, you can thin it out with a little extra chicken broth or water during reheating.

Close-up of the Thai Chicken Soup showing ingredients and broth.

Frequently Asked Questions

***Can I make this soup vegetarian or vegan?***

Absolutely! To make it vegetarian, use vegetable broth instead of chicken broth. For vegan, in addition to vegetable broth, ensure your red curry paste is vegan-friendly (some contain shrimp paste) and use soy sauce or tamari instead of fish sauce. You can replace the chicken with extra firm tofu or a mix of vegetables like mushrooms and bell peppers.

***How spicy is this soup? Can I control the heat?***

The heat level depends heavily on your red curry paste and whether you add fresh chilies. Most red curry pastes range from mild to medium. For less heat, use less curry paste, omit the fresh chilies, or remove the seeds and membranes from the chilies, as that’s where most of the capsaicin resides. For more heat, add more fresh chilies or a pinch of cayenne pepper to the broth.

***What is lemongrass and where can I find it?***

Lemongrass is a tall, stalky herb with a distinct citrusy, floral aroma and flavor. It’s a staple in Southeast Asian cuisine. You can usually find it fresh in the produce section of well-stocked supermarkets or at Asian grocery stores. If you can’t find fresh, you might find dried lemongrass or lemongrass paste in some specialty aisles.

***Can I use other types of protein?***

Yes! This soup base is versatile. You could use shrimp (add them in the last few minutes of cooking as they cook quickly), thinly sliced beef or pork (sear them before adding the aromatics), or even firm tofu for a vegetarian option.

Enjoy Your Bowl of Thai Comfort!

There you have it – a simple yet incredibly satisfying Thai Chicken Soup that brings the vibrant flavors of Thailand right into your kitchen. It’s a dish that nourishes the body and warms the soul, perfect for any day of the week. Don’t hesitate to make this recipe your own by adjusting the spice level or adding your favorite vegetables. We encourage you to try it and let us know how it turns out in the comments below! Happy cooking!

Print
clock clock iconcutlery cutlery iconflag flag iconfolder folder iconinstagram instagram iconpinterest pinterest iconfacebook facebook iconprint print iconsquares squares iconheart heart iconheart solid heart solid icon

Thai Chicken Soup Recipe – Flavorful, Easy, and Comforting Meal


  • Author: Chef Emy

Description

Discover how to make a delicious Thai Chicken Soup that’s perfect for any occasion. With bold Thai flavors, tender chicken, and creamy coconut broth, this dish is a must-try for fans of both hearty soups and Thai cuisine. Whether you’re looking for a cozy meal to enjoy on a cold day or a satisfying dish to impress guests, this recipe has you covered.


Ingredients

Scale
  • 2medium carrots(chopped)
  • 1medium red bell pepper(chopped)
  • ½medium yellow onion(chopped)
  • 2-inch piece of ginger(minced)
  • 4cloves garlic(minced)
  • 4 tablespoonsred curry paste
  • 2 tablespoonsfish sauce
  • 2 tablespoonssoy sauce(use gluten-free if needed)
  • 1 tablespoonpalm sugar(or brown sugar)
  • 3 cupschicken stock
  • 4boneless, skinless chicken thighs
  • 215-ounce cans coconut milk
  • 1lime(juiced)
  • 8 ouncesrice vermicelli(cooked according to package directions)
  • Optional toppings:Lime wedges, sautéed mushrooms, cilantro, cherry tomatoes, black pepper

Instructions

  1. Chop the carrots, red bell pepper, and onion.
  2. Mince the ginger and garlic.
  3. Add the chopped vegetables, ginger, garlic, red curry paste, fish sauce, soy sauce, palm sugar, chicken stock, and chicken thighs to the slow cooker.
  4. Stir well to ensure all ingredients are evenly distributed.
  5. Cover the slow cooker and cook on low for 8-10 hours until the chicken is tender.
  6. Remove the chicken thighs from the slow cooker and shred them using two forks.
  7. Return the shredded chicken to the slow cooker.
  8. Pour in the coconut milk and add the lime juice. Stir well.
  9. Let the soup warm for another 10-15 minutes before serving.
  10. Place the cooked rice vermicelli in bowls and ladle the Thai Chicken Soup over the top.
  11. Serve with any optional toppings like lime wedges, sautéed mushrooms, cilantro, cherry tomatoes, and a sprinkle of black pepper.

Notes

Use Fresh Ingredients: Fresh ginger and garlic add a more vibrant flavor to the soup.
Make It Spicy: Add chopped Thai chilies if you want extra heat.
Vegetarian Option: Replace chicken with tofu and use vegetable broth for a vegetarian version.
Storage Tip: The soup base (without the vermicelli) can be stored in the refrigerator for up to 4 days.

“`

Easy Baked Broccoli Cheese Balls Recipe for Healthy Snacking

“`html

Easy Baked Broccoli Cheese Balls Recipe for Healthy Snacking

Are You Craving a Deliciously Addictive Snack That Fuels Your Body?

In today’s fast-paced world, finding snacks that are both healthy and incredibly satisfying can feel like a quest. How often do you find yourself reaching for processed chips or sugary treats, only to regret it an hour later? If you’re nodding along, you’re not alone! Many of us struggle to balance taste with nutrition, especially when it comes to appetizers or quick bites. That’s where these Easy Baked Broccoli Cheese Balls come in. Imagine perfectly golden-brown spheres, delightfully crispy on the outside and wonderfully gooey with melted cheese and tender broccoli on the inside. These aren’t just any cheese balls; they’re a testament to how healthy ingredients can transform into something truly irresistible. Baked to golden perfection and pairing exquisitely with your favorite dips like marinara or ranch, they offer a guilt-free way to indulge. Whether you’re planning a party, looking for a kid-friendly snack, or simply want to add more vegetables to your diet in a fun way, this recipe is your new best friend. Say goodbye to boring snacks and hello to a world of flavor and wholesome goodness!

The Star Ingredients for Your Broccoli Cheese Balls

The magic of these broccoli cheese balls lies in their simple yet effective combination of wholesome ingredients. We want to create a delightful texture – a slight crunch from the baking process, a tender bite from the broccoli, and a creamy, cheesy core. Here’s what you’ll need:

  • 1 cup finely chopped broccoli florets: The star of our show! Aim for very small pieces, almost like couscous. This ensures they cook through and integrate seamlessly. For a milder flavor and softer texture, you can lightly steam or blanch your broccoli before chopping.
  • 1 cup shredded cheddar cheese: Sharp cheddar offers the most robust flavor, but feel free to use a medium or mild cheddar if you prefer. A good quality cheese will melt beautifully and contribute to that irresistible gooey center.
  • 1/4 cup grated Parmesan cheese: This adds a salty, nutty depth that complements the cheddar perfectly. Freshly grated Parmesan always tastes best!
  • 1 large egg, lightly beaten: The binder that holds all our delicious ingredients together, ensuring your cheese balls keep their shape.
  • 1/2 cup breadcrumbs (panko preferred): We’ll use some for the filling and some for coating. Panko breadcrumbs create an exceptional crispy crust, but regular breadcrumbs work too.
  • 1/4 cup all-purpose flour: This helps create a cohesive dough and aids in the coating process.
  • 1/2 teaspoon garlic powder: For a savory aromatic kick that elevates the overall flavor profile.
  • 1/4 teaspoon onion powder: Adds a subtle sweetness and savory undertone.
  • Salt and black pepper to taste: Essential for bringing out all the flavors. Start with a pinch and adjust as needed.
  • Optional: Pinch of cayenne pepper: For a very subtle hint of heat that can be surprisingly addictive!

Substitutions:

  • Cheese: Monterey Jack, Gruyere, or a blend of your favorite melty cheeses can be swapped in for cheddar.
  • Breadcrumbs: Almond flour or finely crushed crackers can work as gluten-free alternatives for the coating.
  • Herbs: A tablespoon of finely chopped fresh chives or parsley can add a fresh, herbaceous note.

Timing: Your Quick Guide to Perfect Broccoli Cheese Balls

Prep Time: 15 minutes

Quick preparation is key!

Cook Time: 18-22 minutes

Baking time for golden perfection.

Total Time: 33-37 minutes

Faster than ordering takeout!

Compared to many appetizer recipes, these baked broccoli cheese balls are remarkably speedy. While some dips might require simmering or elaborate prep, this recipe focuses on simple assembly and efficient baking, making it ideal for last-minute cravings or unexpected guests. The average appetizer often takes longer to prepare and cook, so you’re saving valuable time without sacrificing flavor or appeal.

Golden baked broccoli cheese balls on a baking sheet

Step-by-Step Magic: Crafting Your Broccoli Cheese Balls

Get ready to create these delightful bites with ease. Follow these simple steps for a snack that’s sure to impress!

Step 1: Prep the Broccoli

First things first, let’s get our star ingredient ready! If you haven’t already, finely chop your broccoli florets. You’re aiming for pieces that are small enough to bind well within the cheese mixture, akin to finely minced herbs or even couscous. For an even smoother texture and to ensure the broccoli is tender, you can quickly steam or blanch the chopped broccoli for about 2-3 minutes, then drain it very thoroughly. Squeeze out any excess moisture – this is crucial to prevent your cheese balls from becoming soggy.

Step 2: Mix the Cheese Base

In a medium bowl, combine the finely chopped broccoli, shredded cheddar cheese, grated Parmesan cheese, beaten egg, 1/4 cup of breadcrumbs (this is for the filling), flour, garlic powder, onion powder, salt, and pepper. If you’re feeling a little adventurous, add that tiny pinch of cayenne pepper now. Gently mix everything together until it’s just combined. Don’t overmix, as this can make the cheese balls tough. The mixture should be thick enough to hold its shape.

Step 3: Form the Balls

Now for the fun part! Place the remaining 1/4 cup of breadcrumbs (panko preferred for extra crispiness) in a shallow dish or plate. Take about one tablespoon of the broccoli-cheese mixture and roll it between your palms to form a compact ball. Repeat this with the rest of the mixture. If the mixture feels a bit sticky, lightly dampen your hands with water. Once you have your balls formed, gently roll each one in the breadcrumbs, coating them evenly. This outer layer of breadcrumbs will give our cheese balls that delightfully crispy exterior we’re aiming for.

Step 4: Bake to Perfection

Preheat your oven to 400°F (200°C). Line a baking sheet with parchment paper – this is a little trick to prevent sticking and make cleanup a breeze! Arrange the breadcrumb-coated broccoli cheese balls on the prepared baking sheet, ensuring they have a little space between them so they bake evenly. Pop them into the preheated oven and bake for 18-22 minutes, or until they are beautifully golden brown and firm to the touch. You might want to flip them halfway through for even browning if your oven tends to heat unevenly.

Nutritional Snapshot: Fueling Your Snacking

While a precise breakdown depends on exact ingredients and portion sizes, these baked broccoli cheese balls are a more nutritious choice compared to many fried appetizers. Each ball (approximately one of 12-15 from this recipe) typically contains:

  • Calories: Around 70-100 kcal
  • Protein: Good source from cheese and egg
  • Fiber: Contributes from broccoli and whole wheat breadcrumbs (if used)
  • Vitamins & Minerals: Broccoli provides essential vitamins like C and K, while cheese offers calcium.

This makes them a fantastic option for a satisfying snack that offers more than just empty calories.

Healthier Swaps Without Sacrificing Flavor

We love this recipe as is, but if you’re looking for even more health-conscious options, consider these swaps. The goal is to maintain that delicious cheesy, savory flavor profile while boosting nutrients or reducing certain components:

  • Whole Wheat Breadcrumbs: Swap all-purpose breadcrumbs for whole wheat for added fiber and nutrients.
  • Reduced-Fat Cheese: Use a good quality reduced-fat cheddar or a blend that melts well. While it might slightly alter the texture, it significantly cuts down on saturated fat.
  • Almond Flour Coating: For a gluten-free and potentially lower-carb option, use almond flour instead of breadcrumbs for coating.
  • Extra Veggies: Finely chopped spinach or even shredded zucchini (well-drained) can be added to the mixture for an extra nutritional boost. Just be mindful of adding too much moisture.
  • Less Cheese (Carefully!): You can try slightly reducing the cheese and increasing the finely chopped broccoli or adding a bit more binder (like a touch more egg white or a small amount of psyllium husk) if you’re aiming for lower fat and calories.

Serving Suggestions: Elevate Your Snack Game

These baked broccoli cheese balls are incredibly versatile! Serve them warm straight from the oven for the best texture and flavor. They are fantastic on their own, but here are some ideas to make them even more special:

  • Classic Dips: Marinara sauce for a comforting Italian twist, or creamy ranch dressing for a cool, zesty counterpoint.
  • Spicy Kick: A sriracha mayo or a chipotle aioli adds a welcome fiery element.
  • Tangy Options: A honey mustard dip or a light vinaigrette can offer a refreshing contrast.
  • Kid-Friendly Favorite: Serve them as a fun appetizer or even a side dish with meals. They’re often a great way to get picky eaters to enjoy their greens!
  • Party Platter: Arrange them artfully with other appetizers like vegetable sticks, mini quiches, or chicken wings for a crowd-pleasing spread.

Common Pitfalls to Avoid for Perfect Broccoli Cheese Balls

Even with simple recipes, a few common mistakes can lead to less-than-ideal results. Here’s how to steer clear:

  • Over-moist Broccoli: Not draining the broccoli well enough is the number one culprit for soggy cheese balls. Squeeze out as much liquid as humanly possible!
  • Too Wet Mixture: If your mixture is too sticky to form balls, it might be too wet. Try adding a tablespoon more breadcrumbs or flour at a time until it’s manageable.
  • Overmixing: Mixing the ingredients too vigorously can develop gluten and make the final product tough. Mix until just combined.
  • Not Preheating the Oven: Baking in a lukewarm oven will result in pale, undercooked cheese balls. Ensure your oven is at the correct temperature before they go in.
  • Crowding the Baking Sheet: Give your cheese balls some personal space! If they’re too close, they’ll steam rather than bake, leading to a softer exterior.

Storing and Reheating Your Delicious Creations

Got leftovers? Lucky you! Here’s how to keep your broccoli cheese balls tasting great:

  • Refrigeration: Store cooled cheese balls in an airtight container in the refrigerator for up to 3-4 days.
  • Reheating: For the best crispiness, reheat in a preheated oven at 350°F (175°C) for about 5-10 minutes, or until warmed through and the crust is re-crisped. Microwaving is an option, but they will lose some of their crunchiness.
  • Freezing: Unbaked cheese balls can be frozen on a baking sheet until solid, then transferred to a freezer bag for up to 2-3 months. Bake directly from frozen, adding a few extra minutes to the cooking time. Cooked and cooled cheese balls can also be frozen, though texture might be slightly affected upon reheating.
Close-up of a broccoli cheese ball with a cheesy interior

Frequently Asked Questions

***Can I make these vegan?***

Yes, with a few modifications! You’ll need to swap the egg for a flax egg (1 tbsp flaxseed meal + 3 tbsp water, rested for 5 minutes) or a commercial egg replacer. For the cheese, use your favorite vegan cheddar and Parmesan alternatives. The binding might be slightly different, so you may need to adjust the breadcrumbs or flour slightly to achieve the right consistency.

***Why are my broccoli cheese balls not holding their shape?***

This usually indicates the mixture is too wet. Ensure your broccoli is very well-drained. You might need to add a tablespoon or two more breadcrumbs or flour to the mixture until it’s firm enough to roll into balls.

***Can I use frozen broccoli?***

Absolutely! Thaw frozen broccoli completely and, most importantly, squeeze out as much excess water as possible before chopping and using it. This step is critical for preventing a soggy texture.

***Can I air fry these?***

Yes! Air frying is a fantastic alternative to baking. Preheat your air fryer to 375°F (190°C). Arrange the coated cheese balls in a single layer (you may need to work in batches) and air fry for 10-14 minutes, or until golden brown and crispy, flipping halfway through.

***How do I make them gluten-free?***

Substitute gluten-free breadcrumbs for the coating and use a gluten-free flour blend (or almond flour) in the mixture. Ensure your cheese is also gluten-free, as some processed cheeses can contain additives. Certified gluten-free oats, finely ground, can also be used for coating.

Print

clock clock iconcutlery cutlery iconflag flag iconfolder folder iconinstagram instagram iconpinterest pinterest iconfacebook facebook iconprint print iconsquares squares iconheart heart iconheart solid heart solid icon

Baked Broccoli Cheese Balls


  • Author: Chef Emy

Description

These crispy-on-the-outside, cheesy-on-the-inside broccoli cheese balls are a healthy, delicious snack or appetizer. They’re baked to golden perfection and pair wonderfully with marinara or ranch dip.


Ingredients

Scale
  • Broccoli: 2 cups broccoli florets, finely chopped.Binding Ingredients:1 cupbreadcrumbs.1 ½ cupsshredded cheddar cheese.⅓ cupgrated Parmesan cheese.2eggs.2 tbspall-purpose flour.Seasonings:½ tspgarlic powder.½ tsponion powder.Salt and pepper, to taste.Cooking Spray: As needed for greasing the baking sheet.
  • Binding Ingredients:1 cupbreadcrumbs.1 ½ cupsshredded cheddar cheese.⅓ cupgrated Parmesan cheese.2eggs.2 tbspall-purpose flour.Seasonings:½ tspgarlic powder.½ tsponion powder.Salt and pepper, to taste.Cooking Spray: As needed for greasing the baking sheet.
  • 1 cupbreadcrumbs.1 ½ cupsshredded cheddar cheese.⅓ cupgrated Parmesan cheese.2eggs.2 tbspall-purpose flour.
  • 1 ½ cupsshredded cheddar cheese.⅓ cupgrated Parmesan cheese.2eggs.2 tbspall-purpose flour.
  • cupgrated Parmesan cheese.2eggs.2 tbspall-purpose flour.
  • 2eggs.2 tbspall-purpose flour.
  • 2 tbspall-purpose flour.
  • Seasonings:½ tspgarlic powder.½ tsponion powder.Salt and pepper, to taste.Cooking Spray: As needed for greasing the baking sheet.
  • ½ tspgarlic powder.½ tsponion powder.Salt and pepper, to taste.
  • ½ tsponion powder.Salt and pepper, to taste.
  • Salt and pepper, to taste.
  • Cooking Spray: As needed for greasing the baking sheet.

Instructions

  1. 1️⃣Preheat the Oven:Preheat your oven to400°F (200°C). Prepare a baking sheet by lining it with parchment paper or lightly greasing it with cooking spray.2️⃣Prepare the Broccoli:Steam the broccoli florets until tender-crisp, about3–5 minutes.Allow the broccoli to cool slightly, then finely chop it into small pieces.3️⃣Mix the Ingredients:In a large mixing bowl, combine the chopped broccoli, breadcrumbs, shredded cheddar cheese, Parmesan cheese, eggs, and flour.Season with garlic powder, onion powder, salt, and pepper.Stir the mixture until it is well combined and holds together.4️⃣Shape the Balls:Roll small portions of the mixture into1-inch ballsusing your hands.Place the balls on the prepared baking sheet, spacing them slightly apart.5️⃣Bake:Bake in the preheated oven for20–25 minutes, or until the balls are golden brown.For extra crispiness, switch to the broil setting and broil the cheese balls for an additional1–2 minutes, watching carefully to avoid burning.6️⃣Serve:Allow the broccoli cheese balls to cool slightly before serving.Serve warm with your favorite dipping sauce, such as marinara or ranch.
  2. Steam the broccoli florets until tender-crisp, about3–5 minutes.
  3. Allow the broccoli to cool slightly, then finely chop it into small pieces.3️⃣Mix the Ingredients:In a large mixing bowl, combine the chopped broccoli, breadcrumbs, shredded cheddar cheese, Parmesan cheese, eggs, and flour.Season with garlic powder, onion powder, salt, and pepper.Stir the mixture until it is well combined and holds together.4️⃣Shape the Balls:Roll small portions of the mixture into1-inch ballsusing your hands.Place the balls on the prepared baking sheet, spacing them slightly apart.5️⃣Bake:Bake in the preheated oven for20–25 minutes, or until the balls are golden brown.For extra crispiness, switch to the broil setting and broil the cheese balls for an additional1–2 minutes, watching carefully to avoid burning.6️⃣Serve:Allow the broccoli cheese balls to cool slightly before serving.Serve warm with your favorite dipping sauce, such as marinara or ranch.
  4. In a large mixing bowl, combine the chopped broccoli, breadcrumbs, shredded cheddar cheese, Parmesan cheese, eggs, and flour.
  5. Season with garlic powder, onion powder, salt, and pepper.Stir the mixture until it is well combined and holds together.4️⃣Shape the Balls:Roll small portions of the mixture into1-inch ballsusing your hands.Place the balls on the prepared baking sheet, spacing them slightly apart.5️⃣Bake:Bake in the preheated oven for20–25 minutes, or until the balls are golden brown.For extra crispiness, switch to the broil setting and broil the cheese balls for an additional1–2 minutes, watching carefully to avoid burning.6️⃣Serve:Allow the broccoli cheese balls to cool slightly before serving.Serve warm with your favorite dipping sauce, such as marinara or ranch.
  6. Stir the mixture until it is well combined and holds together.4️⃣Shape the Balls:Roll small portions of the mixture into1-inch ballsusing your hands.Place the balls on the prepared baking sheet, spacing them slightly apart.5️⃣Bake:Bake in the preheated oven for20–25 minutes, or until the balls are golden brown.For extra crispiness, switch to the broil setting and broil the cheese balls for an additional1–2 minutes, watching carefully to avoid burning.6️⃣Serve:Allow the broccoli cheese balls to cool slightly before serving.Serve warm with your favorite dipping sauce, such as marinara or ranch.
  7. Roll small portions of the mixture into1-inch ballsusing your hands.Place the balls on the prepared baking sheet, spacing them slightly apart.5️⃣Bake:Bake in the preheated oven for20–25 minutes, or until the balls are golden brown.For extra crispiness, switch to the broil setting and broil the cheese balls for an additional1–2 minutes, watching carefully to avoid burning.6️⃣Serve:Allow the broccoli cheese balls to cool slightly before serving.Serve warm with your favorite dipping sauce, such as marinara or ranch.
  8. Place the balls on the prepared baking sheet, spacing them slightly apart.5️⃣Bake:Bake in the preheated oven for20–25 minutes, or until the balls are golden brown.For extra crispiness, switch to the broil setting and broil the cheese balls for an additional1–2 minutes, watching carefully to avoid burning.6️⃣Serve:Allow the broccoli cheese balls to cool slightly before serving.Serve warm with your favorite dipping sauce, such as marinara or ranch.
  9. Bake in the preheated oven for20–25 minutes, or until the balls are golden brown.For extra crispiness, switch to the broil setting and broil the cheese balls for an additional1–2 minutes, watching carefully to avoid burning.6️⃣Serve:Allow the broccoli cheese balls to cool slightly before serving.Serve warm with your favorite dipping sauce, such as marinara or ranch.
  10. For extra crispiness, switch to the broil setting and broil the cheese balls for an additional1–2 minutes, watching carefully to avoid burning.6️⃣Serve:Allow the broccoli cheese balls to cool slightly before serving.Serve warm with your favorite dipping sauce, such as marinara or ranch.
  11. Allow the broccoli cheese balls to cool slightly before serving.Serve warm with your favorite dipping sauce, such as marinara or ranch.
  12. Serve warm with your favorite dipping sauce, such as marinara or ranch.

Notes

Make-Ahead Option: Roll the balls ahead of time and refrigerate until ready to bake.Gluten-Free Version: Substitute the breadcrumbs and flour with gluten-free alternatives.Cheese Alternatives: Experiment with other cheese blends like mozzarella or Gouda for a unique flavor.Storage: Leftovers can be stored in an airtight container in the refrigerator for up to 3 days. Reheat in the oven for best results.
Gluten-Free Version: Substitute the breadcrumbs and flour with gluten-free alternatives.Cheese Alternatives: Experiment with other cheese blends like mozzarella or Gouda for a unique flavor.Storage: Leftovers can be stored in an airtight container in the refrigerator for up to 3 days. Reheat in the oven for best results.
Cheese Alternatives: Experiment with other cheese blends like mozzarella or Gouda for a unique flavor.Storage: Leftovers can be stored in an airtight container in the refrigerator for up to 3 days. Reheat in the oven for best results.
Storage: Leftovers can be stored in an airtight container in the refrigerator for up to 3 days. Reheat in the oven for best results.


“`

Party Bites That Everyone Will Love – Top Iowa Snacks

“`html

Party Bites That Everyone Will Love – Top Iowa Snacks

Looking for the Ultimate Party Snack? Iowa-Approved Bites That Disappear Fast!

Are you tired of the same old chips and dip at your gatherings? Do you find yourself searching for that perfect appetizer that’s both incredibly satisfying and astonishingly easy to make? In Iowa, we know a thing or two about comfort food that brings people together. That’s why we’re diving into a recipe for “Party Bites That Everyone Will Love – Top Iowa Snacks.” These aren’t just any snacks; they are bite-sized parcels of joy, featuring a creamy, savory beef filling encased in flaky, golden crescent rolls. Imagine the delight on your guests’ faces as they bite into these warm, flavorful morsels – they’re perfect for game days, holidays, casual get-togethers, or simply when you crave a snack that truly hits the spot. This recipe is designed for maximum flavor with minimal fuss, ensuring you can spend more time enjoying your company and less time in the kitchen. Get ready to become the host with the most, armed with a crowd-pleasing recipe that will have everyone asking for seconds!

Irresistible Ingredients For Your Party Bites

The magic of these party bites lies in the simplicity and quality of the ingredients. We’ve chosen components that are readily available and contribute to a rich, savory, and utterly comforting profile. Here’s what you’ll need to create these delightful Iowa snacks:

  • Ground Beef: 1 pound of good quality ground beef is the hearty foundation. A lean to regular blend (e.g., 80/20) works wonderfully, providing a juicy texture. For an even richer flavor, you could opt for 85/15.
  • Cream Cheese: 8 ounces of softened cream cheese acts as the luscious binder for our beef filling, lending a delightful tang and creamy richness. Ensure it’s fully softened to easily incorporate with the beef and seasonings.
  • Onion: 1/2 cup of finely chopped yellow onion adds a subtle sweet and pungent layer of flavor that complements the beef beautifully. Red onion can also be used for a slightly different sweet note.
  • Garlic Powder: 1 teaspoon of garlic powder provides that essential savory aroma and taste without the moisture of fresh garlic, ensuring a smoother filling.
  • Worcestershire Sauce: 1 tablespoon of Worcestershire sauce brings a complex umami depth with a hint of tang and spice, elevating the beef mixture significantly.
  • Salt and Black Pepper: To taste. Standard kosher salt and freshly ground black pepper are best for optimal flavor enhancement.
  • Crescent Rolls: 2 (8-ounce) cans of refrigerated crescent rolls. These are the golden, flaky vessels for our filling. Select full-size rolls for easier wrapping.
  • Egg Wash (Optional): 1 egg, beaten with 1 tablespoon of water, for a glossy, golden-brown finish. This step is purely for aesthetics but highly recommended.
  • Sesame Seeds or Poppy Seeds (Optional): For a beautiful sprinkle on top that adds a subtle nutty flavor and visual appeal.

Substitutions & Notes:

  • Meat Variation: While beef is traditional, you could experiment with ground turkey or a mix of ground pork and beef for a slightly different flavor profile.
  • Spice Level: For a touch of heat, add a pinch of red pepper flakes or a dash of hot sauce to the beef mixture.
  • Herbs: Freshly chopped parsley or chives can be stirred into the filling after cooking for a burst of freshness.

The Perfect Timing: Prep, Cook, and Enjoy

One of the best things about these Iowa party bites is their efficiency. They strike a wonderful balance between being quick enough for a last-minute craving and impressive enough for a planned event.

Prep Time: 15 minutes
Cook Time: 15-18 minutes
Total Time: Approximately 30-33 minutes

Compared to many appetizer recipes that often require extensive chopping, simmering, or multiple stages, these party bites are remarkably swift. The average appetizer might take upwards of 45 minutes to an hour from start to finish, especially if it involves complex sauces or dough preparation. Our Iowa snacks boast a significantly shorter hands-on and total time, making them a go-to for busy hosts.

Golden brown crescent rolls filled with savory beef mixture, arranged on a platter.

Crafting Your Delicious Iowa Party Bites: Step-by-Step

Follow these easy steps to create an appetizer that perfectly embodies the spirit of Iowa hospitality. The process is straightforward, ensuring a stress-free cooking experience.

Step 1: Prep the Savory Beef Filling

In a medium skillet over medium-high heat, cook the ground beef until it’s thoroughly browned. As it cooks, break it up into smaller crumbles. Once browned, drain off any excess grease. This step is crucial for a clean, non-greasy filling.

Add the finely chopped onion to the skillet with the drained beef. Cook for another 3-5 minutes, or until the onion has softened and become translucent. Stir in the garlic powder, Worcestershire sauce, salt, and pepper. Cook for an additional minute, allowing the flavors to meld.

Remove the skillet from the heat. Add the softened cream cheese to the beef mixture. Stir vigorously until the cream cheese is completely melted and has created a thick, creamy, and cohesive filling. Taste and adjust seasonings if necessary. Set aside to cool slightly, which will make it easier to handle.

Step 2: Assemble Your Golden Bites

While the beef filling cools a bit, preheat your oven to 375°F (190°C). Lightly grease a baking sheet or line it with parchment paper for easy cleanup.

Unroll the crescent roll dough. You’ll notice perforated lines. Carefully separate the triangles. If you’re using standard crescent rolls, you’ll likely need to pinch the seams together to form a solid triangle. For a more substantial bite, you can stretch each triangle slightly or even cut a larger triangle into two smaller, more manageable triangles for mini bites.

Spoon about 1 to 1.5 tablespoons of the savory beef filling onto the wider end of each crescent roll triangle. You don’t want to overfill, or they’ll be difficult to seal and might burst during baking.

Starting from the wide end, tightly roll up the dough around the filling, ensuring the filling is completely enclosed. Pinch the seams gently to seal them, especially along the shorter sides, to prevent the filling from escaping. Place each assembled bite seam-side down on the prepared baking sheet, leaving a little space between them.

Step 3: Bake to Golden Perfection

If you’re using an egg wash, gently brush the tops of each crescent roll bite with the beaten egg. This will give them a beautiful, glossy sheen. Sprinkle with sesame seeds or poppy seeds, if desired, for added texture and visual appeal.

Bake in the preheated oven for 15-18 minutes, or until the crescent rolls are puffed up and deeply golden brown. Keep an eye on them, as ovens can vary. You want them beautifully golden, not burnt.

Once baked, carefully transfer the party bites to a wire rack to cool for a few minutes before serving. This allows the filling to set slightly and makes them easier to handle.

Nutritional Snapshot: What You’re Enjoying

While these party bites are designed for enjoyment and indulgence, it’s helpful to have a general idea of their nutritional profile. These are approximate values per serving (assuming 16 bites per recipe, thus 2 bites per serving):

  • Calories: ~200-250 kcal
  • Protein: ~8-10g
  • Fat: ~12-15g
  • Carbohydrates: ~15-20g
  • Sodium: Varies based on crescent roll brand and added salt.

Note: Nutritional values can vary significantly based on specific ingredients used (e.g., fat content of ground beef, brand of crescent rolls) and portion size.

Smarter Swaps for Healthier Indulgence

Want to enjoy these delicious Iowa snacks with a slightly lighter touch? Here are a few flavor-preserving swaps:

  • Leaner Protein: Opt for extra-lean ground beef (93% lean or higher) or ground turkey to reduce saturated fat.
  • Whole Wheat Crescent Rolls: Check your grocery store for whole wheat or whole grain crescent roll options.
  • Reduced-Fat Cream Cheese: Use reduced-fat cream cheese for a similar creamy texture with fewer calories and less fat. The flavor difference is often minimal.
  • Veggie Boost: Finely mince mushrooms or zucchini and sauté them with the onions. They add moisture and nutrients without significantly altering the flavor profile, and help extend the filling.
  • Reduced Sodium: Use low-sodium Worcestershire sauce and be mindful of added salt.

Serving Suggestions to Wow Your Guests

These versatile party bites are a star on their own, but here are a few ideas to elevate your appetizer spread:

  • Dipping Sauces: Serve with a side of tangy ketchup, zesty mustard, a creamy ranch dressing, or even a spicy sriracha mayo for an extra flavor kick.
  • Garnish: A sprinkle of fresh chopped parsley or chives on the finished bites adds a touch of professional flair and a hint of freshness.
  • Part of a Platter: Arrange them on a festive platter alongside other appetizers like cheese and crackers, mini meatballs, or vegetable crudités for a complete spread.
  • Game Day Ready: Perfect alongside wings, nachos, and a cold beverage for the ultimate game day feast.

Avoiding Common Pitfalls

To ensure your party bites turn out perfectly every time, be aware of these common mistakes:

  • Overfilling the Rolls: Too much filling makes it hard to seal the crescent rolls, increasing the chance of leaks during baking.
  • Not Sealing Properly: Pinching the seams tightly is essential. A loose seal will lead to a messy baking sheet and potential loss of filling.
  • Using Cold Cream Cheese: Ensure your cream cheese is softened. Cold cream cheese will result in lumps in your filling and won’t bind as effectively.
  • Baking at the Wrong Temperature: Too high a temperature can burn the outside before the inside is cooked. Too low, and they may not get golden and flaky.
  • Not Draining Grease: Excess grease from the ground beef can make the filling oily and the bottom of the bites soggy.

Keeping Your Party Bites Fresh

These bites are best enjoyed fresh from the oven, but they do store well:

  • Refrigeration: Once cooled, store any leftovers in an airtight container in the refrigerator for up to 3 days.
  • Reheating: To reheat, place them on a baking sheet in a preheated oven at 300°F (150°C) for 5-10 minutes, or until warmed through. Microwaving is an option but can make them slightly less crispy.
  • Freezing: You can also freeze baked and cooled party bites. Wrap them individually in plastic wrap, then place them in a freezer-safe bag or container. Reheat directly from frozen in a 350°F (175°C) oven for about 15-20 minutes.
A close-up of a creamy, savory beef-filled crescent roll bite, showcasing its flaky texture.

Frequently Asked Questions

***Is it necessary to use cream cheese?***

Yes, cream cheese is key to creating a rich, creamy, and cohesive filling that binds the beef and seasonings together. It also adds a delightful tang.

***Can I make the beef filling ahead of time?***

Absolutely! The beef filling can be made up to 2 days in advance and stored in an airtight container in the refrigerator. You may need to gently reheat it slightly before assembling the bites to make it easier to spoon.

***What can I serve these with besides ketchup?***

They pair wonderfully with a variety of dips! Consider ranch dressing, honey mustard, a spicy aioli, or even a mild barbecue sauce.

***Can I use homemade biscuit dough instead of crescent rolls?***

You could, but the texture will be different. Crescent rolls provide that signature flaky, buttery crust. Homemade biscuit dough might be denser and less flaky.

***How do I prevent the bottoms from getting soggy?***

Ensure you drain the beef mixture well, don’t overfill the rolls, and bake them on a properly preheated oven. Using parchment paper can also help prevent sticking and sogginess.

Print
clock clock iconcutlery cutlery iconflag flag iconfolder folder iconinstagram instagram iconpinterest pinterest iconfacebook facebook iconprint print iconsquares squares iconheart heart iconheart solid heart solid icon

Iowa Party Bites Recipe


  • Author: Chef Emy

Description

These delicious, bite-sized appetizers are packed with creamy, savory beef filling wrapped in golden crescent rolls. Perfect for game days, parties, or a quick snack that everyone will love!


Ingredients

Scale
  • 1lb ground beef1(8 oz) package cream cheese, softened1packet ranch seasoning mix1package crescent roll dough (8-count)1 tbspbutter, melted1 tspgarlic powderSalt and pepper to taste
  • 1(8 oz) package cream cheese, softened1packet ranch seasoning mix1package crescent roll dough (8-count)1 tbspbutter, melted1 tspgarlic powderSalt and pepper to taste
  • 1packet ranch seasoning mix1package crescent roll dough (8-count)1 tbspbutter, melted1 tspgarlic powderSalt and pepper to taste
  • 1package crescent roll dough (8-count)1 tbspbutter, melted1 tspgarlic powderSalt and pepper to taste
  • 1 tbspbutter, melted1 tspgarlic powderSalt and pepper to taste
  • 1 tspgarlic powderSalt and pepper to taste
  • Salt and pepper to taste

Instructions

  1. 1️⃣Preheat the Oven:Preheat your oven to 375°F (190°C).Grease a baking sheet or line it with parchment paper for easy cleanup.2️⃣Cook the Beef:Heat a large skillet over medium heat.Add the ground beef and cook until browned, breaking it apart with a spoon. Drain any excess fat.3️⃣Prepare the Filling:Stir in the softened cream cheese, ranch seasoning mix, garlic powder, salt, and pepper.Cook for 2–3 minutes, stirring frequently, until the cream cheese is fully melted and the mixture is creamy and combined.4️⃣Assemble the Bites:Unroll the crescent roll dough and separate it into 8 triangles.Place a spoonful of the beef mixture in the center of each triangle.Fold the corners of the dough over the filling to form a bite-sized pocket. Pinch the edges to seal.5️⃣Bake:Arrange the stuffed crescent rolls on the prepared baking sheet.Brush the tops with melted butter for a golden finish.Bake for 12–15 minutes or until the crescent rolls are golden brown and cooked through.6️⃣Serve:Remove from the oven and let cool slightly before serving.Serve warm and enjoy these savory treats!
  2. Preheat your oven to 375°F (190°C).
  3. Grease a baking sheet or line it with parchment paper for easy cleanup.2️⃣Cook the Beef:Heat a large skillet over medium heat.Add the ground beef and cook until browned, breaking it apart with a spoon. Drain any excess fat.3️⃣Prepare the Filling:Stir in the softened cream cheese, ranch seasoning mix, garlic powder, salt, and pepper.Cook for 2–3 minutes, stirring frequently, until the cream cheese is fully melted and the mixture is creamy and combined.4️⃣Assemble the Bites:Unroll the crescent roll dough and separate it into 8 triangles.Place a spoonful of the beef mixture in the center of each triangle.Fold the corners of the dough over the filling to form a bite-sized pocket. Pinch the edges to seal.5️⃣Bake:Arrange the stuffed crescent rolls on the prepared baking sheet.Brush the tops with melted butter for a golden finish.Bake for 12–15 minutes or until the crescent rolls are golden brown and cooked through.6️⃣Serve:Remove from the oven and let cool slightly before serving.Serve warm and enjoy these savory treats!
  4. 2️⃣Cook the Beef:Heat a large skillet over medium heat.Add the ground beef and cook until browned, breaking it apart with a spoon. Drain any excess fat.3️⃣Prepare the Filling:Stir in the softened cream cheese, ranch seasoning mix, garlic powder, salt, and pepper.Cook for 2–3 minutes, stirring frequently, until the cream cheese is fully melted and the mixture is creamy and combined.4️⃣Assemble the Bites:Unroll the crescent roll dough and separate it into 8 triangles.Place a spoonful of the beef mixture in the center of each triangle.Fold the corners of the dough over the filling to form a bite-sized pocket. Pinch the edges to seal.5️⃣Bake:Arrange the stuffed crescent rolls on the prepared baking sheet.Brush the tops with melted butter for a golden finish.Bake for 12–15 minutes or until the crescent rolls are golden brown and cooked through.6️⃣Serve:Remove from the oven and let cool slightly before serving.Serve warm and enjoy these savory treats!
  5. Heat a large skillet over medium heat.
  6. Add the ground beef and cook until browned, breaking it apart with a spoon. Drain any excess fat.3️⃣Prepare the Filling:Stir in the softened cream cheese, ranch seasoning mix, garlic powder, salt, and pepper.Cook for 2–3 minutes, stirring frequently, until the cream cheese is fully melted and the mixture is creamy and combined.4️⃣Assemble the Bites:Unroll the crescent roll dough and separate it into 8 triangles.Place a spoonful of the beef mixture in the center of each triangle.Fold the corners of the dough over the filling to form a bite-sized pocket. Pinch the edges to seal.5️⃣Bake:Arrange the stuffed crescent rolls on the prepared baking sheet.Brush the tops with melted butter for a golden finish.Bake for 12–15 minutes or until the crescent rolls are golden brown and cooked through.6️⃣Serve:Remove from the oven and let cool slightly before serving.Serve warm and enjoy these savory treats!
  7. 3️⃣Prepare the Filling:Stir in the softened cream cheese, ranch seasoning mix, garlic powder, salt, and pepper.Cook for 2–3 minutes, stirring frequently, until the cream cheese is fully melted and the mixture is creamy and combined.4️⃣Assemble the Bites:Unroll the crescent roll dough and separate it into 8 triangles.Place a spoonful of the beef mixture in the center of each triangle.Fold the corners of the dough over the filling to form a bite-sized pocket. Pinch the edges to seal.5️⃣Bake:Arrange the stuffed crescent rolls on the prepared baking sheet.Brush the tops with melted butter for a golden finish.Bake for 12–15 minutes or until the crescent rolls are golden brown and cooked through.6️⃣Serve:Remove from the oven and let cool slightly before serving.Serve warm and enjoy these savory treats!
  8. Stir in the softened cream cheese, ranch seasoning mix, garlic powder, salt, and pepper.
  9. Cook for 2–3 minutes, stirring frequently, until the cream cheese is fully melted and the mixture is creamy and combined.4️⃣Assemble the Bites:Unroll the crescent roll dough and separate it into 8 triangles.Place a spoonful of the beef mixture in the center of each triangle.Fold the corners of the dough over the filling to form a bite-sized pocket. Pinch the edges to seal.5️⃣Bake:Arrange the stuffed crescent rolls on the prepared baking sheet.Brush the tops with melted butter for a golden finish.Bake for 12–15 minutes or until the crescent rolls are golden brown and cooked through.6️⃣Serve:Remove from the oven and let cool slightly before serving.Serve warm and enjoy these savory treats!
  10. 4️⃣Assemble the Bites:Unroll the crescent roll dough and separate it into 8 triangles.Place a spoonful of the beef mixture in the center of each triangle.Fold the corners of the dough over the filling to form a bite-sized pocket. Pinch the edges to seal.5️⃣Bake:Arrange the stuffed crescent rolls on the prepared baking sheet.Brush the tops with melted butter for a golden finish.Bake for 12–15 minutes or until the crescent rolls are golden brown and cooked through.6️⃣Serve:Remove from the oven and let cool slightly before serving.Serve warm and enjoy these savory treats!
  11. Unroll the crescent roll dough and separate it into 8 triangles.
  12. Place a spoonful of the beef mixture in the center of each triangle.Fold the corners of the dough over the filling to form a bite-sized pocket. Pinch the edges to seal.5️⃣Bake:Arrange the stuffed crescent rolls on the prepared baking sheet.Brush the tops with melted butter for a golden finish.Bake for 12–15 minutes or until the crescent rolls are golden brown and cooked through.6️⃣Serve:Remove from the oven and let cool slightly before serving.Serve warm and enjoy these savory treats!
  13. Fold the corners of the dough over the filling to form a bite-sized pocket. Pinch the edges to seal.5️⃣Bake:Arrange the stuffed crescent rolls on the prepared baking sheet.Brush the tops with melted butter for a golden finish.Bake for 12–15 minutes or until the crescent rolls are golden brown and cooked through.6️⃣Serve:Remove from the oven and let cool slightly before serving.Serve warm and enjoy these savory treats!
  14. 5️⃣Bake:
  15. Arrange the stuffed crescent rolls on the prepared baking sheet.Brush the tops with melted butter for a golden finish.Bake for 12–15 minutes or until the crescent rolls are golden brown and cooked through.6️⃣Serve:Remove from the oven and let cool slightly before serving.Serve warm and enjoy these savory treats!
  16. Brush the tops with melted butter for a golden finish.Bake for 12–15 minutes or until the crescent rolls are golden brown and cooked through.6️⃣Serve:Remove from the oven and let cool slightly before serving.Serve warm and enjoy these savory treats!
  17. Bake for 12–15 minutes or until the crescent rolls are golden brown and cooked through.
  18. 6️⃣Serve:Remove from the oven and let cool slightly before serving.Serve warm and enjoy these savory treats!
  19. Remove from the oven and let cool slightly before serving.Serve warm and enjoy these savory treats!
  20. Serve warm and enjoy these savory treats!

Notes

For extra flavor, sprinkle shredded cheese over the beef mixture before wrapping it in the dough.Experiment with additional spices or add chopped veggies (like bell peppers or onions) to the filling for variety.To save time, the beef mixture can be prepared ahead and refrigerated until ready to assemble.
Experiment with additional spices or add chopped veggies (like bell peppers or onions) to the filling for variety.To save time, the beef mixture can be prepared ahead and refrigerated until ready to assemble.
To save time, the beef mixture can be prepared ahead and refrigerated until ready to assemble.

“`

Crispy Fried Cheese Bites Recipe Everyone Loves

“`html

Crispy Fried Cheese Bites Recipe Everyone Loves

The Ultimate Crispy Fried Cheese Bites: A Crowd-Pleasing Recipe

Who doesn’t love a perfectly fried, gooey cheese center encased in a crunchy, golden-brown shell? These crispy fried cheese bites are more than just an appetizer; they are a culinary hug, a guaranteed conversation starter, and a testament to the simple joys of well-executed comfort food. Whether you’re hosting a game night, planning a holiday spread, or simply craving a delightful snack, this recipe is your secret weapon. We’ve honed this method to ensure maximum crispiness and an irresistibly melty interior, making it a beloved recipe that truly lives up to its name. Get ready to impress your guests (and yourself!) with these little bites of heaven.

Ingredients and Preparation

The beauty of these fried cheese bites lies in their simplicity, requiring just a few pantry staples and your favorite cheese. We’ve also included some ideas for substitutions to tailor them to your taste preferences. Remember, the quality of your cheese significantly impacts the final flavor, so choose wisely!

  • 1 pound cheese (e.g., mozzarella, cheddar, Monterey Jack, Gruyère), cut into 1-inch cubes. For mozzarella, opt for low-moisture, full-fat varieties for the best melt and less sogginess. For cheddar or Monterey Jack, consider blocks rather than pre-shredded to avoid anti-caking agents that can affect crispiness.
  • 1 cup all-purpose flour. You can also use gluten-free flour blend for a gluten-free version.
  • 2 large eggs, lightly beaten. For an egg-free option, you can use 1/4 cup of milk mixed with 1 tablespoon of cornstarch or a flax egg (1 tbsp flaxseed meal + 3 tbsp water, let sit for 5 minutes).
  • 1.5 cups panko breadcrumbs. Panko provides the superior crunch. Regular breadcrumbs can be used, but the texture will be less airy and crispy. For an extra layer of flavor, mix in some grated Parmesan cheese into the breadcrumbs.
  • 1 teaspoon salt. Adjust to taste, especially if using a salty cheese like Parmesan.
  • 1/2 teaspoon black pepper.
  • Pinch of garlic powder, optional. Adds an extra savory note.
  • Vegetable oil or canola oil, for frying (about 3-4 cups, depending on your pot). A neutral-flavored oil with a high smoke point is crucial for deep frying.

Timing and Yield: Efficiency Meets Deliciousness

This recipe is designed for speed and simplicity, making it an ideal choice for busy hosts. While the “average” fried cheese recipe might take around 45 minutes, this optimized version aims for efficiency without sacrificing quality.

Prep Time: 15 minutes
Cook Time: 10-15 minutes
Total Time: 25-30 minutes
Yield: Approx. 20-25 bites

Compared to other fried appetizers, the relatively short preparation and cooking times make these a weeknight-friendly indulgence or a quick fix for unexpected guests. The majority of the preparation time is spent on the breading station and the actual frying, which goes by in a flash once the oil is hot.

Golden brown crispy fried cheese bites on a serving platter

Crafting Your Crispy Fried Cheese Bites

Follow these easy steps to achieve perfect crispy fried cheese bites every single time. The key is a good breading process and proper oil temperature.

Step 1: Prepare the Cheese

Start by cubing your chosen cheese into roughly 1-inch pieces. If the cheese is too soft at room temperature, chilling it in the freezer for about 15-20 minutes can make it easier to handle and less likely to stick to your fingers. Pat the cheese cubes thoroughly dry with paper towels. This step is very important as excess moisture can cause the breading to not adhere well and can also cause the oil to splatter.

Step 2: Set Up the Breading Station

Prepare three shallow dishes or bowls. In the first dish, place the all-purpose flour. In the second dish, whisk the eggs until they are well beaten. In the third dish, combine the panko breadcrumbs with salt, pepper, and optional garlic powder. Stir to ensure the seasonings are evenly distributed throughout the breadcrumbs.

Step 3: Bread the Cheese

Now, let’s get these cheese cubes coated! Working with one cheese cube at a time, roll it in the flour, ensuring it’s completely coated. Tap off any excess flour. Next, dip the floured cheese cube into the beaten eggs, letting any excess drip off. Finally, roll the egg-coated cube in the seasoned panko breadcrumbs, pressing gently to make sure the crumbs adhere well and create a thick, even coating. Place the breaded cheese cubes on a plate or baking sheet. Repeat this process for all cheese cubes. For an extra crispy coating and to ensure the breading stays on during frying, you can double-bread the cheese. After the first round of breading, dip them back into the egg and then the breadcrumbs again.

Double Breading Tip:

For that extra crispy exterior and to minimize the risk of cheese leakage, repeat the egg and breadcrumb dip process. The doubled coating creates a more robust barrier.

Step 4: Heat the Oil

In a heavy-bottomed pot or Dutch oven, pour enough vegetable oil to reach a depth of about 2-3 inches. Heat the oil over medium-high heat until it reaches 350°F (175°C). It’s crucial to maintain this temperature; use a kitchen thermometer to monitor it. If the oil is too cool, the bites will be greasy; if it’s too hot, the exterior will burn before the cheese melts.

Pro Tip: If you don’t have a thermometer, you can test the oil by dropping a few breadcrumbs into it. They should sizzle immediately and float to the top.

Step 5: Fry to Golden Perfection

Carefully add 4-5 breaded cheese cubes to the hot oil at a time, making sure not to overcrowd the pot. Overcrowding will lower the oil temperature and result in soggy bites. Fry for 2-3 minutes, or until the bites are a deep golden brown and crispy. Use a slotted spoon or spider strainer to gently turn them as they fry to ensure even browning.

Step 6: Drain and Serve

Once golden and delicious, remove the fried cheese bites from the hot oil using your slotted spoon and transfer them to a wire rack set over a baking sheet. This allows excess oil to drain off, keeping them crispy. You can also drain them on a plate lined with paper towels, but a wire rack is preferable for maintaining crispness. Serve immediately while they are piping hot and the cheese is wonderfully gooey!

Nutritional Snapshot

While these are an indulgence, here’s a general idea of the nutritional content per serving (assuming 4-5 bites per serving. Exact values will vary based on cheese type and portion size).

  • Calories: 250-350 kcal
  • Protein: 10-15g
  • Fat: 18-25g (Saturated Fat: 8-12g)
  • Carbohydrates: 15-20g
  • Fiber: 1-2g
  • Sodium: 500-700mg (highly dependent on cheese and added salt)

Disclaimer: Nutritional information is an estimate and can vary significantly based on ingredients used and serving size.

Healthier Twists on Fried Cheese Bites

Craving that cheesy goodness but want to lighten things up? Here are some delicious swaps that don’t compromise on flavor as much as you might think:

  • Air Fryer Method: For a significantly reduced fat option, try air frying. Lightly spray the breaded cheese bites with cooking oil and air fry at 375°F (190°C) for 7-10 minutes, flipping halfway through, until golden and crispy.
  • Oven-Baked: Place breaded cheese cubes on a parchment-lined baking sheet. Lightly spray or brush with oil. Bake at 400°F (200°C) for 10-15 minutes, flipping halfway, until golden brown and the cheese is melted.
  • Whole Wheat Breadcrumbs: Swap standard panko for whole wheat panko or breadcrumbs for added fiber.
  • Reduced-Fat Cheese Options: While they may not melt quite as luxuriously, using reduced-fat mozzarella or Monterey Jack can lower the overall fat content. Just be prepared for a slightly different texture.
  • Lighter Breading: Experiment with finely ground nuts (like almonds or walnuts) mixed with breadcrumbs for added nutrients and healthier fats.

Serving Suggestions: Elevate Your Appetizer Game

These crispy fried cheese bites are versatile! Here’s how to make them shine:

  • Classic Marinara: Serve with a warm, marinara sauce for dipping. The sweet acidity cuts through the richness of the cheese.
  • Spicy Aioli: Mix sriracha or your favorite hot sauce into mayonnaise for a spicy kick.
  • Honey or Balsamic Glaze: A drizzle of honey or a balsamic glaze adds a touch of sweetness that pairs beautifully with savory cheese.
  • Ranch Dressing: A cool, creamy ranch is always a crowd-pleaser.
  • With a Salad: Add a few bites to a fresh green salad for a decadent crunch and protein boost.
  • Party Platter: Arrange them alongside other appetizers like mini quiches, stuffed mushrooms, or chicken wings for a complete spread.

Common Mistakes to Avoid

To ensure flawless fried cheese bites every time, steer clear of these common pitfalls:

  • Oil Temperature Too Low: This leads to greasy, soggy bites as they absorb too much oil.
  • Oil Temperature Too High: The exterior will burn before the cheese has a chance to melt into a gooey center.
  • Overcrowding the Pot: This significantly drops the oil temperature and leads to uneven, sad, pale bites. Fry in batches!
  • Not Drying the Cheese: Moisture is the enemy of crispy breading. Ensure cheese cubes are patted dry.
  • Skipping Double Breading (for some cheeses): Cheeses that melt very quickly can sometimes leak. A double breading offers extra security.
  • Using Pre-Shredded Cheese: The anti-caking agents can prevent the breading from adhering properly.

Storing Your Delicious Creations

Fried cheese bites are best enjoyed fresh, immediately after frying. However, if you find yourself with leftovers (unlikely, but possible!), here’s how to handle them:

  • Refrigeration: Allow cooled bites to dry completely before storing them in an airtight container in the refrigerator for up to 2 days.
  • Reheating: To restore crispiness, reheat them in a preheated oven (375°F/190°C) or an air fryer for 5-8 minutes until heated through and re-crisped. Microwaving will result in a chewy, undesirable texture.

We strongly recommend consuming them immediately for the best experience!

Close-up of a crispy fried cheese bite being dipped in marinara sauce

Frequently Asked Questions

What is the best cheese for fried cheese bites?

Low-moisture mozzarella, cheddar, Monterey Jack, and Gruyère are excellent choices. For an extra gourmet touch, a blend of cheeses works wonderfully. Avoid very soft cheeses like cream cheese or fresh mozzarella, as they tend to melt too quickly and leak out.

Can I freeze fried cheese bites before frying?

Yes, you can! After breading the cheese cubes, place them in a single layer on a baking sheet and freeze until solid (about 1-2 hours). Then, transfer them to a freezer-safe bag or container. Fry them directly from frozen, adding a few extra minutes to the cooking time.

Why is my cheese leaking out when frying?

This usually happens if the cheese is too soft, the oil is too hot, or the breading isn’t adhering well. Ensure your cheese is firm and well-chilled, maintain a steady oil temperature of 350°F (175°C), and consider double-breading for extra security.

Can I make these ahead of time?

You can prepare the breaded cheese bites and freeze them (see FAQ 2). Frying them immediately before serving is crucial for the best texture and melted cheese effect. If you fry them ahead, they will lose their crispiness.

What can I serve with fried cheese bites besides marinara?

Absolutely! Serve them with a variety of dipping sauces like ranch, honey mustard, spicy aioli, sweet chili sauce, or even a simple garlic butter.

Ready to Indulge?

These Crispy Fried Cheese Bites are a testament to how simple ingredients can create something truly extraordinary. They are the perfect blend of creamy, gooey cheese and satisfyingly crunchy breading, making them an irresistible treat for any occasion. Whether you’re a seasoned cook or a beginner, this recipe is approachable and rewarding. So gather your ingredients, follow these simple steps, and prepare to be amazed by how quickly these beloved bites disappear. Don’t delay – whip up a batch today and experience cheesy perfection!

Print
clock clock iconcutlery cutlery iconflag flag iconfolder folder iconinstagram instagram iconpinterest pinterest iconfacebook facebook iconprint print iconsquares squares iconheart heart iconheart solid heart solid icon

Easy Fried Cheese Bites


  • Author: Chef Emy

Description

Crispy, golden on the outside and melty on the inside, these fried cheese bites are an easy-to-make, irresistible snack. Perfect for parties, game nights, or just indulging in cheesy goodness! Serve with marinara or your favorite dipping sauce for the ultimate treat.


Ingredients

Scale
  • 10 ozmozzarella string cheese (or10sticks)1 cupItalian bread crumbs1 cupflour2eggs1/4 cupmilkCayenne pepper (optional, for added spice)
  • 1 cupItalian bread crumbs1 cupflour2eggs1/4 cupmilkCayenne pepper (optional, for added spice)
  • 1 cupflour2eggs1/4 cupmilkCayenne pepper (optional, for added spice)
  • 2eggs1/4 cupmilkCayenne pepper (optional, for added spice)
  • 1/4 cupmilkCayenne pepper (optional, for added spice)
  • Cayenne pepper (optional, for added spice)

Instructions

  1. 1️⃣Cut the Cheese:Slice each mozzarella stick into bite-sized pieces, about 1-inch long.
  2. Place the flour in one.Whisk together the eggs and milk in the second.Pour the Italian bread crumbs into the third and mix in a pinch of cayenne pepper if you like a little heat.3️⃣Bread the Cheese Bites:Roll each mozzarella piece in the flour, ensuring it’s fully coated. Then dip it into the egg mixture, letting the excess drip off. Finally, coat it evenly with the bread crumbs. Repeat this process for all the cheese pieces.4️⃣Chill:Arrange the breaded cheese bites on a tray and freeze them for at least 20-30 minutes. This step helps them hold their shape during frying.5️⃣Fry:Heat oil in a large skillet or deep fryer to 350°F (175°C). Carefully drop the cheese bites into the hot oil, frying them in small batches to avoid overcrowding. Cook for 1-2 minutes, or until golden and crispy.6️⃣Drain and Serve:Remove the fried cheese bites with a slotted spoon and place them on a paper towel-lined plate to drain excess oil. Serve immediately with marinara sauce, ranch dressing, or your favorite dip.
  3. Whisk together the eggs and milk in the second.
  4. Pour the Italian bread crumbs into the third and mix in a pinch of cayenne pepper if you like a little heat.3️⃣Bread the Cheese Bites:Roll each mozzarella piece in the flour, ensuring it’s fully coated. Then dip it into the egg mixture, letting the excess drip off. Finally, coat it evenly with the bread crumbs. Repeat this process for all the cheese pieces.4️⃣Chill:Arrange the breaded cheese bites on a tray and freeze them for at least 20-30 minutes. This step helps them hold their shape during frying.5️⃣Fry:Heat oil in a large skillet or deep fryer to 350°F (175°C). Carefully drop the cheese bites into the hot oil, frying them in small batches to avoid overcrowding. Cook for 1-2 minutes, or until golden and crispy.6️⃣Drain and Serve:Remove the fried cheese bites with a slotted spoon and place them on a paper towel-lined plate to drain excess oil. Serve immediately with marinara sauce, ranch dressing, or your favorite dip.
  5. 3️⃣Bread the Cheese Bites:Roll each mozzarella piece in the flour, ensuring it’s fully coated. Then dip it into the egg mixture, letting the excess drip off. Finally, coat it evenly with the bread crumbs. Repeat this process for all the cheese pieces.4️⃣Chill:Arrange the breaded cheese bites on a tray and freeze them for at least 20-30 minutes. This step helps them hold their shape during frying.5️⃣Fry:Heat oil in a large skillet or deep fryer to 350°F (175°C). Carefully drop the cheese bites into the hot oil, frying them in small batches to avoid overcrowding. Cook for 1-2 minutes, or until golden and crispy.6️⃣Drain and Serve:Remove the fried cheese bites with a slotted spoon and place them on a paper towel-lined plate to drain excess oil. Serve immediately with marinara sauce, ranch dressing, or your favorite dip.
  6. 4️⃣Chill:Arrange the breaded cheese bites on a tray and freeze them for at least 20-30 minutes. This step helps them hold their shape during frying.
  7. 5️⃣Fry:Heat oil in a large skillet or deep fryer to 350°F (175°C). Carefully drop the cheese bites into the hot oil, frying them in small batches to avoid overcrowding. Cook for 1-2 minutes, or until golden and crispy.6️⃣Drain and Serve:Remove the fried cheese bites with a slotted spoon and place them on a paper towel-lined plate to drain excess oil. Serve immediately with marinara sauce, ranch dressing, or your favorite dip.
  8. 6️⃣Drain and Serve:Remove the fried cheese bites with a slotted spoon and place them on a paper towel-lined plate to drain excess oil. Serve immediately with marinara sauce, ranch dressing, or your favorite dip.

Notes

Freezing the bites before frying is crucial to prevent the cheese from leaking out.For a healthier version, bake the breaded cheese bites at 400°F (200°C) for 10-12 minutes or until golden.Experiment with different cheeses like cheddar or pepper jack for a fun twist!
For a healthier version, bake the breaded cheese bites at 400°F (200°C) for 10-12 minutes or until golden.Experiment with different cheeses like cheddar or pepper jack for a fun twist!
Experiment with different cheeses like cheddar or pepper jack for a fun twist!

“`

Dill Pickle Chex Mix

“`html

Dill Pickle Chex Mix

Craving a Snack That Pops? You’re Not Alone!

Did you know that according to Google Trends, searches for “pickle snacks” have seen a significant surge, particularly in recent years? This isn’t just a fleeting trend; it’s a testament to our evolving palates and a growing desire for bold, tangy flavors in our everyday bites. If you’re one of the millions searching for that perfect salty, sour, and incredibly satisfying crunch, then you’ve landed in the right place. Get ready to elevate your snack game with this Dill Pickle Chex Mix – a flavor explosion that will have you reaching for more!

Tangy, Crunchy Ingredients You’ll Need

The magic of this Dill Pickle Chex Mix lies in its simple yet potent combination of ingredients. We’re talking about that satisfying crunch from your favorite cereals, elevated by the unmistakable zest of dill pickles.

  • Cereal Blend: 3 cups Rice Chex, 3 cups Corn Chex, 2 cups Wheat Chex. This trio provides the perfect base – crispy, a little nutty, and delightfully varied in texture. Substitution: Feel free to swap in other low-sugar cereals like Cheerios or Kix for added variety, but avoid overly sweet ones.
  • Savory Fat: 1/2 cup (1 stick) unsalted butter. This is the vehicle for all that delicious flavor. Substitution: Ghee or a neutral oil like avocado oil can be used, though butter adds a richness.
  • Pickle Power: 1/4 cup dill pickle juice. The star of the show! This liquid gold imparts that signature dill pickle tang. Substitution: If you don’t have juice, finely minced dill pickles (about 2 tablespoons) can be used, but the juice integrates more smoothly.
  • Aromatic Elements: 1 tablespoon Worcestershire sauce. Adds depth and umami. Substitution: Soy sauce or tamari (for gluten-free) can work in a pinch.
  • Seasoning Symphony: 1 teaspoon garlic powder, 1 teaspoon onion powder, 1/2 teaspoon dried dill, 1/4 teaspoon black pepper. This blend is key to that classic dill pickle flavor profile. Substitution: Use fresh minced garlic (about 1 clove) and shallots (about 1 tablespoon) if you prefer, but be mindful they may toast differently.
  • The Salty Finish: 1 teaspoon kosher salt (or to taste). Enhances all the other flavors.
Prep Time: 15 minutes
Cook Time: 60 minutes
Total Time: 1 hour 15 minutes

Compared to many snack mixes that require constant stirring or shorter baking times, this Dill Pickle Chex Mix has a slightly longer bake to achieve maximum crispness, but the hands-on time is minimal. The 60 minutes in the oven allows the flavors to meld beautifully.

Dill Pickle Chex Mix ingredients laid out

Crafting Your Dill Pickle Chex Mix: Step-by-Step

Let’s get to the good stuff! Making this Dill Pickle Chex Mix is a straightforward process that yields incredibly rewarding results. Follow these simple steps for snack perfection.

Step 1: Preheat and Prepare for Pickle Perfection

First things first, get your oven ready! Preheat it to 250°F (120°C). This low and slow temperature is crucial for drying out the Chex mix without burning it, ensuring a perfectly crisp texture. Next, grab a large baking sheet – a 13×18 inch one is ideal. Line it with parchment paper for easy cleanup. This step is all about setting the stage for those delicious flavors to come!

Step 2: Mix the Flavor Base

In a medium saucepan, melt the butter over low heat. Once melted, stir in the dill pickle juice, Worcestershire sauce, garlic powder, onion powder, dried dill, black pepper, and kosher salt. Whisk it all together until everything is well combined and fragrant. Let this mixture simmer gently for about a minute to allow the flavors to meld. This aromatic liquid is where all the tangy goodness originates!

Step 3: Coat the Chex Mix

Now, it’s time to bring everything together. In a very large bowl, combine all your cereals – the Rice Chex, Corn Chex, and Wheat Chex. Pour the warm pickle-butter mixture evenly over the cereal. Gently stir and toss with a large spoon or spatula until every single piece of cereal is coated in that delightful, tangy seasoning. Ensure no dry spots remain; we want flavor in every bite!

Step 4: Bake to Golden Crunch

Spread the coated cereal mixture evenly onto your prepared baking sheet. Make sure it’s a single layer so that everything bakes and crisps up uniformly. Place the baking sheet into your preheated oven. Bake for 1 hour, stirring every 15 minutes. This stirring is essential to ensure even toasting and prevent any part from becoming too dark. You’re looking for a deep, golden hue and an irresistible aroma.

Step 5: Cool and Season

Once the baking time is up, carefully remove the baking sheet from the oven. Let the Chex mix cool completely on the baking sheet. As it cools, it will become wonderfully crisp. For an extra punch of pickle flavor, you can sprinkle a little more dried dill or a pinch of salt over it once it’s slightly cooled. Resist the urge to dive in too soon – the cooling is part of the process!

Step 6: Indulge or Store

Once fully cooled, your Dill Pickle Chex Mix is ready to be enjoyed! Break it apart if it’s clumped together and serve it in a bowl. If by some miracle you have any leftovers, transfer them to an airtight container.

Nutritional Snapshot

While specific nutritional values can vary based on exact ingredient brands and portion sizes, here’s a general idea of what you can expect per serving (approximately 1/4 cup):

  • Calories: Around 150-180 kcal
  • Fat: 8-10g (mostly from butter)
  • Carbohydrates: 15-20g
  • Protein: 2-3g
  • Sodium: Varies widely based on salt added and Worcestershire sauce.

(Disclaimer: This is an estimate. For precise information, calculate using your specific ingredients.)

Healthier Twists to Keep the Flavor

Looking to lighten up this delicious snack without sacrificing that signature dill pickle punch? Try these simple swaps:

  • Reduced Butter: Use half the butter called for and supplement with pickle juice or a light olive oil.
  • Whole Grains: Focus on whole-grain cereals like fully whole-wheat Chex or whole-grain Cheerios for added fiber.
  • Reduced Salt: Be judicious with the added salt, especially if you’re using a saltier dill pickle juice. Taste test as you go!
  • Veggie Boost: While not a direct swap, serving this alongside fresh veggies like cucumber or bell pepper sticks can add a nutritious balance.

Serve It Up!

This Dill Pickle Chex Mix is incredibly versatile. Serve it:

  • As a party snack that’s sure to be a conversation starter.
  • For lunchbox surprises that kids and adults will love.
  • As a movie night munchie to jazz up your usual popcorn.
  • With a cold beverage – the tanginess pairs wonderfully with a crisp beer or iced tea.

Common Pitfalls and How to Avoid Them

Even with a simple recipe, a few common mistakes can happen:

  • Over-browning: This happens if the oven is too hot or it’s baked for too long. Stick to the 250°F (120°C) rule and keep an eye on it.
  • Uneven Coating: Not stirring thoroughly means some cereal pieces won’t get that delicious pickle flavor. Ensure every piece is coated before baking.
  • Not Cooling Properly: The Chex mix needs to cool completely to achieve maximum crispness. Patience is key here!
  • Too Much Salt: It’s easy to over-salt, especially if your pickle juice is already briney. Taste and adjust cautiously.

Keep it Fresh: Storing Your Dill Pickle Chex Mix

To maintain the delightful crunch, store your cooled Dill Pickle Chex Mix in an airtight container at room temperature. It should stay deliciously crisp for up to a week. Avoid refrigerating, as this can make it soggy. If it does seem to lose some crispness, you can refresh it in a low oven (around 200°F/95°C) for about 10-15 minutes.

A bowl of Dill Pickle Chex Mix ready to be served

Frequently Asked Pickle Questions

***Can I use sweet pickle juice instead of dill?***

We strongly recommend sticking with dill pickle juice! Sweet pickle juice will significantly alter the flavor profile and won’t give you that classic dill pickle tang we’re after.

***What if I don’t have a low-temperature oven?***

If your oven doesn’t go as low as 250°F (120°C), try using the lowest setting it has, perhaps around 275°F (135°C), and keep a very close eye on the mix, stirring more frequently to prevent burning.

***Can I add other ingredients like pretzels or nuts?***

Absolutely! Mini pretzels and your favorite nuts (like peanuts or cashews) can be added along with the Chex mix in Step 3. Adjust baking time slightly if needed, watching carefully for any signs of burning.

***How do I make it spicier?***

For a spicy kick, add a pinch of cayenne pepper or red pepper flakes to the seasoning mixture in Step 2. You could also toss with a bit of your favorite hot sauce after baking and before it cools completely.

Print

clock clock iconcutlery cutlery iconflag flag iconfolder folder iconinstagram instagram iconpinterest pinterest iconfacebook facebook iconprint print iconsquares squares iconheart heart iconheart solid heart solid icon

Dill Pickle Chex Mix


  • Author: Chef Emy

Description

ThisDill Pickle Chex Mixis a tangy, crunchy snack bursting with bold dill pickle flavor! With a mix of Chex cereal, pretzels, cheese crackers, and a zesty seasoning blend, it’s the perfect treat for game nights, parties, or anytime snacking. Simple to make and completely addictive, this recipe will be a hit with pickle lovers!


Ingredients

Scale
  • 3 cupsRice Chex cereal
  • 3 cupsCorn Chex cereal
  • 2 cupsmini pretzels
  • 2 cupscheese crackers (like Cheez-Its)
  • 1/4 cupunsalted butter, melted
  • 1/4 cupdill pickle juice
  • 1packet (1 oz) ranch seasoning mix
  • 1 tablespoondried dill weed
  • 1 teaspoongarlic powder
  • Optional: Small dill pickle chips or spears for garnish

Instructions

  1. Preheat the oven to250°F (120°C)and line a large baking sheet with parchment paper.
  2. In a large mixing bowl, combineRice Chex,Corn Chex,mini pretzels, andcheese crackers. Stir to mix.
  3. In a separate bowl, whisk togethermelted butter,dill pickle juice,ranch seasoning mix,dried dill weed, andgarlic powder.
  4. Pour the butter mixture over the Chex mix, stirring gently to coat everything evenly.
  5. Spread the mix evenly onto the prepared baking sheet in a single layer.
  6. Bake for45-50 minutes, stirring every 15 minutes, until the mix is golden and crispy.
  7. Remove from the oven and let cool completely. If desired, toss in small dill pickle chips or spears for extra flavor.
  8. Serve immediately or store in an airtight container for up to 1 week.

Notes

For an extra punch of dill flavor, add 1 teaspoon more of dried dill weed.
To add a little heat, sprinkle in 1/4 teaspoon cayenne pepper before baking.
This snack mix can be stored at room temperature for up to 1 week or frozen for up to 1 month.


“`

Pasta Salad With Tortellini Easy and Delicious Recipe

“`html

Pasta Salad With Tortellini Easy and Delicious Recipe

Tired of Bland Salads? Discover Your New Favorite Tortellini Pasta Salad!

Are you looking for a crowd-pleasing dish that’s incredibly simple to make but tastes like it came from a gourmet kitchen? In today’s fast-paced world, finding recipes that are both delicious and easy can feel like a treasure hunt. With an average of 30 minutes spent searching for weeknight meal ideas, it’s easy to fall into a rut. But what if I told you there’s a pasta salad ready to rescue your mealtime? This pasta salad with tortellini is not just easy to prepare; it’s a flavor explosion waiting to happen! Packed with fresh ingredients and a zesty dressing, it’s perfect for potlucks, picnics, or a satisfying quick lunch. Get ready to impress your family and friends with this versatile and utterly delicious recipe that will quickly become a go-to in your culinary repertoire.

Fresh and Flavorful Ingredients

The magic of this tortellini pasta salad lies in its vibrant combination of fresh ingredients and a perfectly balanced dressing. Feel free to adapt this list to your preferences – that’s the beauty of homemade!

  • 1 (19-ounce) package refrigerated cheese tortellini: The star of the show! These tender pasta pockets are delightful. (Substitution: You can use tri-color cheese tortellini for a visual pop, or even a different pasta shape like rotini or penne if tortellini is unavailable.)
  • 1 cup cherry tomatoes, halved: Bursting with juicy sweetness.
  • 1/2 cup cucumber, diced: For a cool, crisp crunch.
  • 1/2 cup red bell pepper, diced: Adds a sweet, slightly peppery note and vibrant color.
  • 1/4 cup red onion, finely chopped: Offers a sharp, pungent bite. (Substitution: If raw onion is too strong, soak it in cold water for 10 minutes before dicing, or use milder green onions.)
  • 1/2 cup black olives, sliced: For a savory, briny flavor.
  • 1/4 cup fresh parsley, chopped: Adds a burst of herbaceous freshness.
  • 1/4 cup grated Parmesan cheese: For a salty, umami finish.

For the Dressing:

  • 1/2 cup olive oil: The base of our flavorful dressing.
  • 1/4 cup red wine vinegar: Provides a tangy, bright acidity.
  • 1 teaspoon dried Italian seasoning: A fragrant blend of herbs.
  • 1/2 teaspoon garlic powder: For a mellow garlic flavor without the sharp bite of fresh garlic.
  • 1/2 teaspoon salt: Enhances all the flavors.
  • 1/4 teaspoon black pepper: Adds a touch of gentle heat.

Effortless Preparation: Timing is Everything

This recipe is designed for maximum flavor with minimal effort. Notice how the prep time is significantly less than the average pasta salad recipe, making it perfect for busy schedules!

Prep time:
15 minutes
Cook time:
0 minutes (for pasta only)
Total time:
15 minutes (plus chilling time)

Compared to other pasta salads requiring extensive chopping or lengthy cooking times, this tortellini version shines with its speed and simplicity. The total active time is incredibly low, allowing you to get this delicious dish on the table in a flash.

Delicious tortellini pasta salad mixed with fresh vegetables and dressing

Step-by-Step to Deliciousness

Follow these simple steps to create a tortellini pasta salad that’s bursting with flavor and texture.

Boil the Tortellini

Bring a large pot of salted water to a rolling boil. Add the refrigerated tortellini and cook according to package directions, typically 3-5 minutes, until al dente (tender but still firm to the bite). Drain the tortellini and immediately rinse with cold water to stop the cooking process and prevent sticking. Set aside to drain thoroughly.

Prepare the Vegetables

While the tortellini is cooking, prepare your fresh ingredients. Halve the cherry tomatoes, dice the cucumber and red bell pepper, finely chop the red onion, slice the black olives, and chop the fresh parsley. Having all your veggies prepped before the pasta is cooked will streamline the process.

Make the Dressing

In a small bowl or a jar with a tight-fitting lid, combine the olive oil, red wine vinegar, Italian seasoning, garlic powder, salt, and black pepper. Whisk vigorously or shake the jar until the dressing is well emulsified and thoroughly combined. Taste and adjust seasoning if needed. You want a dressing that is zesty and flavorful enough to coat every component.

Combine Ingredients

In a large mixing bowl, combine the drained tortellini, halved cherry tomatoes, diced cucumber, diced red bell pepper, chopped red onion, and sliced black olives. Add the chopped fresh parsley and grated Parmesan cheese.

Chill and Serve

Pour the prepared dressing over the tortellini and vegetable mixture. Toss gently to ensure all ingredients are evenly coated with the dressing. For best results and to allow the flavors to meld beautifully, cover the bowl and refrigerate for at least 30 minutes before serving. This chilling time is crucial for a truly flavorful salad. Serve chilled.

Nutritional Snapshot

While exact nutritional values can vary based on specific ingredients and portion sizes, a typical serving of this tortellini pasta salad is estimated to contain:

  • Calories: Approximately 350-450 kcal
  • Protein: 10-15g
  • Fat: 20-30g (primarily from olive oil and cheese)
  • Carbohydrates: 30-40g
  • Fiber: 3-5g

This data is an estimate and can be adjusted by modifying ingredient quantities or choosing different types of tortellini and dressing components.

Lighter and Fresher: Healthier Alternatives

Looking to lighten up this dish? Here are a few simple swaps that maintain great flavor:

  • Lighter Dressing: Swap half the olive oil for plain Greek yogurt or use a vinaigrette made with less oil and more vinegar or lemon juice.
  • Whole Wheat Tortellini: If available, opt for whole wheat tortellini for added fiber.
  • Boost Veggies: Increase the quantity of vegetables like broccoli florets (lightly steamed), spinach, or bell peppers for extra nutrients and fiber, and to potentially reduce the pasta-to-veggie ratio.
  • Lean Protein: Add grilled chicken breast, shrimp, or chickpeas for a protein boost that can help make the salad more filling and balanced.

Serving Suggestions: Beyond the Bowl

This tortellini pasta salad is incredibly versatile. Serve it as:

  • A delightful main course salad, perhaps with a side of crusty bread.
  • A perfect side dish for grilled meats, chicken, or fish.
  • A go-to for potlucks, picnics, barbecues, and family gatherings.
  • A convenient and satisfying lunch option for meal prep.

Common Mistakes to Avoid

To ensure your pasta salad is a hit every time:

  • Overcooking the Tortellini: Mushy tortellini will make your salad less appealing. Cook until just al dente.
  • Not Rinsing the Tortellini: Rinsing prevents them from sticking together.
  • Dressing Too Early or Too Late: Dressing the salad too far in advance can make it soggy, but too late might mean flavors don’t meld. Dress about 30 minutes to an hour before serving for optimal flavor.
  • Skipping the Chill Time: Allowing the salad to chill lets the flavors deepen and meld together wonderfully.

Storing Tips for Freshness

Store any leftover tortellini pasta salad in an airtight container in the refrigerator. It’s best consumed within 3-4 days. If the salad seems a little dry after refrigeration, you can toss it with a drizzle of olive oil or extra dressing before serving.

Close-up of tortellini pasta salad ingredients before mixing

Your New Go-To Tortellini Pasta Salad

This easy and delicious tortellini pasta salad recipe is a testament to how simple ingredients can create a sensational dish. With minimal effort, you can whip up a vibrant, flavorful salad that’s perfect for any occasion. Whether you’re a seasoned cook or just starting in the kitchen, this recipe is foolproof and incredibly rewarding. Give it a try and experience the fresh, satisfying taste for yourself!

Frequently Asked Questions

***Can I make this pasta salad ahead of time?***

Yes! This salad is excellent for making ahead. It’s best to assemble all the ingredients and dress the salad about 30-60 minutes before serving. You can also chop vegetables and prepare the dressing the day before.

***What can I add to make this salad more substantial?***

For a heartier salad, consider adding cooked chicken breast, shrimp, chickpeas, white beans, or even some hard-boiled eggs. Avocado also adds a lovely creaminess.

***Can I use dried tortellini instead of fresh?***

Absolutely! If using dried tortellini, you’ll need to cook them according to package directions and then rinse with cold water. The cooking time will be longer than for refrigerated tortellini.

***How long does this salad stay fresh in the refrigerator?***

This tortellini pasta salad will stay fresh in an airtight container in the refrigerator for about 3-4 days. The vegetables will remain crisper if not dressed until closer to serving, but it holds up well dressed.

***Can I freeze this pasta salad?***

It’s generally not recommended to freeze pasta salad, especially with fresh vegetables and a vinaigrette dressing, as the texture can become mushy and unappealing upon thawing.

Print
clock clock iconcutlery cutlery iconflag flag iconfolder folder iconinstagram instagram iconpinterest pinterest iconfacebook facebook iconprint print iconsquares squares iconheart heart iconheart solid heart solid icon

Salami-Mozzarella Tortellini Pasta Salad


  • Author: Chef Emy

Description

ThisSalami-Mozzarella Tortellini Pasta Saladis a delightful medley of flavors and textures, perfect for picnics, potlucks, or as a refreshing meal on a warm day. The tender tortellini pairs beautifully with the savory salami, creamy mozzarella, and crisp veggies, all tossed in a tangy Italian dressing.


Ingredients

Scale
  • For the salad:1(16 oz) package tortellini pasta1 cupsalami, diced1 cupmozzarella cheese, cubed or pearl-sized1 cupcherry tomatoes, halved1 cupcucumber, dicedFor the dressing:3 tbspolive oil2 tbspvinegar1 tspItalian seasoningSalt, to tastePepper, to taste
  • 1(16 oz) package tortellini pasta1 cupsalami, diced1 cupmozzarella cheese, cubed or pearl-sized1 cupcherry tomatoes, halved1 cupcucumber, dicedFor the dressing:3 tbspolive oil2 tbspvinegar1 tspItalian seasoningSalt, to tastePepper, to taste
  • 1 cupsalami, diced
  • 1 cupmozzarella cheese, cubed or pearl-sized1 cupcherry tomatoes, halved1 cupcucumber, dicedFor the dressing:3 tbspolive oil2 tbspvinegar1 tspItalian seasoningSalt, to tastePepper, to taste
  • 1 cupcherry tomatoes, halved1 cupcucumber, dicedFor the dressing:3 tbspolive oil2 tbspvinegar1 tspItalian seasoningSalt, to tastePepper, to taste
  • 1 cupcucumber, diced
  • For the dressing:3 tbspolive oil2 tbspvinegar1 tspItalian seasoningSalt, to tastePepper, to taste
  • 3 tbspolive oil2 tbspvinegar1 tspItalian seasoningSalt, to tastePepper, to taste
  • 2 tbspvinegar
  • 1 tspItalian seasoningSalt, to tastePepper, to taste
  • Salt, to tastePepper, to taste
  • Pepper, to taste

Instructions

  1. 1️⃣Cook the Tortellini:Prepare the tortellini according to the package instructions. Once cooked, drain and allow it to cool completely.2️⃣Combine Salad Ingredients:In a large mixing bowl, combine the cooled tortellini, diced salami, chopped mozzarella, halved cherry tomatoes, and diced cucumber.3️⃣Make the Dressing:In a small bowl, whisk together olive oil, vinegar, Italian seasoning, salt, and pepper until well blended.4️⃣Dress the Salad:Drizzle the dressing over the tortellini mixture. Toss until all the ingredients are evenly coated.5️⃣Refrigerate:Cover the salad and refrigerate for at least 30 minutes before serving to let the flavors meld.
  2. 2️⃣Combine Salad Ingredients:In a large mixing bowl, combine the cooled tortellini, diced salami, chopped mozzarella, halved cherry tomatoes, and diced cucumber.3️⃣Make the Dressing:In a small bowl, whisk together olive oil, vinegar, Italian seasoning, salt, and pepper until well blended.4️⃣Dress the Salad:Drizzle the dressing over the tortellini mixture. Toss until all the ingredients are evenly coated.5️⃣Refrigerate:Cover the salad and refrigerate for at least 30 minutes before serving to let the flavors meld.
  3. 3️⃣Make the Dressing:In a small bowl, whisk together olive oil, vinegar, Italian seasoning, salt, and pepper until well blended.
  4. 4️⃣Dress the Salad:Drizzle the dressing over the tortellini mixture. Toss until all the ingredients are evenly coated.5️⃣Refrigerate:Cover the salad and refrigerate for at least 30 minutes before serving to let the flavors meld.
  5. 5️⃣Refrigerate:Cover the salad and refrigerate for at least 30 minutes before serving to let the flavors meld.

Notes

Customize the veggies by adding bell peppers, red onions, or olives for added variety.This salad can be made a day ahead, making it a convenient choice for gatherings.
This salad can be made a day ahead, making it a convenient choice for gatherings.

“`

ranberry Jalapeño Dip A Holiday Favorite

“`html

Cranberry Jalapeño Dip: A Holiday Favorite

Why Cranberry Jalapeño Dip is a Holiday Must-Have

Are you looking for an appetizer that’s both incredibly easy to make and guaranteed to wow your holiday guests? If you’re aiming to elevate your festive spread without spending hours in the kitchen, you’re in the right place! This Cranberry Jalapeño Dip isn’t just a recipe; it’s a holiday tradition waiting to happen, a vibrant explosion of sweet, tangy, and spicy notes that will have everyone reaching for more.

The Perfect Balance of Flavors

The magic of this dip lies in its sophisticated yet approachable flavor profile. Imagine the tartness of fresh cranberries, elegantly balanced by the sweet creaminess of cream cheese, and then, the unexpected kick from finely diced jalapeños. This interplay of contrasting tastes creates a sensory experience that is both comforting and exciting. It’s the kind of appetizer that sparks conversation and leaves a lasting impression, making your holiday gatherings truly memorable.

Simplicity and Show-Stopping Appeal

In a season often filled with elaborate culinary endeavors, this Cranberry Jalapeño Dip stands out for its remarkable ease of preparation. You can whip it up in mere minutes, yet its presentation is undeniably festive and appealing. Draped with ruby-red cranberries and flecked with green jalapeño, it adds a pop of color to any appetizer table, making it a visually stunning centerpiece that complements its incredible taste. It’s the perfect example of how simple ingredients can create something extraordinary.

A festive bowl of Cranberry Jalapeño Dip garnished with cranberries and jalapeño slices.

Ingredients You’ll Need

The beauty of this dip is its short, accessible ingredient list. You likely have many of these staples in your pantry already!

  • 8 ounces Cream Cheese, softened: This forms the luscious, creamy base of your dip. Make sure it’s at room temperature for the smoothest result. Substitution: Neufchâtel cheese for a slightly lighter version.
  • 1 cup Whole Berry Cranberry Sauce: This brings the essential tartness and vibrant color. Use a good quality, whole berry sauce for the best texture. Substitution: Homemade cranberry sauce or a mix of cranberry sauce and a tablespoon of orange zest for an extra citrusy zing.
  • 1-2 fresh Jalapeños, finely diced: This is where the delightful heat comes from! Adjust the quantity based on your spice preference. Remove the seeds and membranes for less heat. Substitution: Serrano peppers for more heat, or pimentos for a milder, sweeter pepper flavor.
  • 1/4 cup finely chopped Red Onion: Adds a subtle sharpness and crunch. Substitution: Shallots for a milder allium flavor.
  • 2 Tablespoons fresh Cilantro, chopped: Provides a fresh, herbaceous counterpoint to the richness. Substitution: Fresh parsley for a less assertive herbaceous note.
  • Pinch of Salt: To enhance all the flavors.
  • Optional: A drizzle of honey or maple syrup: If your cranberry sauce is particularly tart or you prefer a sweeter dip.

Timing is Everything

One of the most appealing aspects of this Cranberry Jalapeño Dip is its minimal time commitment. While the average appetizer can often require an hour or more of hands-on time and chilling, this recipe is a breeze.

Prep time: 15 minutes
No Cook time
Total time: 15 minutes

This incredibly quick preparation time means you can assemble it even at the last minute, making it a weeknight entertaining savior or a foolproof addition to your holiday potluck rotation. There’s no cooking involved, just a simple assembly of delicious ingredients.

Step-by-Step Instructions

Let’s get this party started! Making this dip is as easy as mixing a few things together.

Step 1: Prep Your Jalapeños and Onion

First things first, let’s get our flavor builders ready. Take your fresh jalapeños and dice them as finely as you can. Remember to remove the seeds and membranes if you’re sensitive to heat – this is where most of the spice resides. If you want a milder dip, a single jalapeño might be enough. For those who love a good kick, feel free to use two! Next, take your red onion and chop it into small, uniform pieces. The goal here is to have these small flavor bursts distributed evenly throughout the dip, so fine dicing is key.

Step 2: Combine the Base

In a medium-sized mixing bowl, add your softened cream cheese. This is the foundation, so ensure it’s soft enough to mix easily – leaving it out on the counter for about an hour should do the trick. Now, add the whole berry cranberry sauce to the bowl. Don’t worry if it looks a little chunky; that’s part of its charm. Stir these two ingredients together until they are well combined and you have a smooth, homogenous mixture. A whisk or a sturdy spoon works best here.

Step 3: Add the Flavor Boosters

Now it’s time to introduce the star players: the finely diced jalapeños, the chopped red onion, and the fresh cilantro. Add these vibrant ingredients into the cream cheese and cranberry mixture. Also, sprinkle in a pinch of salt. This little bit of salt is crucial as it will enhance all the other flavors in the dip. If you’re using them, now is also the time to add a drizzle of honey or maple syrup if you desire a touch more sweetness. Stir everything together until all the ingredients are thoroughly incorporated. Give it a taste test at this point – does it need more salt? More jalapeño? More sweetness? Adjust to your liking!

Step 4: Chill and Serve

While this dip is delicious served immediately, a short chill time can help the flavors meld even better. Cover the bowl with plastic wrap or transfer the dip to a serving dish and cover. Refrigerate for at least 30 minutes. This chilling period allows the cream cheese to firm up slightly and the flavors to deepen and harmonize. Once chilled, give it a quick stir, garnish with a few extra reserved cranberries or jalapeño slices if you like, and serve!

Nutritional Information

While this dip is a treat, it’s good to have an idea of its nutritional profile:

  • Calories: Approximately 150-200 per serving (depending on exact ingredients and serving size).
  • Fat: Primarily from cream cheese, around 12-15g per serving.
  • Carbohydrates: Around 10-15g per serving, largely from the cranberry sauce and a touch from the vegetables.
  • Protein: About 3-5g per serving, also from the cream cheese.
  • Sugar: Varies based on the sweetness of your cranberry sauce.

Please note: This is an estimated nutritional breakdown and can vary based on specific brands and quantities used.

Healthier Alternatives

Looking for ways to lighten up this delicious dip without sacrificing flavor? Here are a few smart swaps:

  • Lighter Cream Cheese: Opt for Neufchâtel cheese or a light cream cheese to reduce fat content. You could also blend part cream cheese with Greek yogurt for added creaminess and protein while cutting fat.
  • Reduced-Sugar Cranberry Sauce: Choose cranberry sauces with less added sugar or make your own using a natural sweetener like stevia or erythritol.
  • Focus on Fresh Ingredients: The jalapeños, onion, and cilantro provide fiber and vitamins. Embrace them!
  • Portion Control: Serve with whole-grain crackers or a generous amount of fresh vegetables like cucumber slices, bell pepper strips, or carrot sticks to make it a more balanced snack.

Serving Suggestions

This dip is incredibly versatile! Here are some of our favorite ways to serve it:

  • Classic Crackers: Toasted baguette slices, water crackers, or sturdy whole-wheat crackers are perfect vehicles for this dip.
  • Fresh Veggies: A colorful platter of sliced bell peppers, cucumber rounds, celery sticks, and carrot sticks offers a refreshing crunch.
  • Pretzel Crisps: Their slightly salty, chewy texture is a fantastic contrast.
  • Fruit: Slices of apple or pear can offer a sweet, crisp counterpoint.
  • On a Cheese Board: Serve in a small bowl as part of a larger cheese and charcuterie spread.

Common Mistakes to Avoid

Even with a simple recipe, a few common pitfalls can be avoided:

  • Using Cold Cream Cheese: This leads to a lumpy, unappetizing texture. Always ensure your cream cheese is properly softened.
  • Overpowering Spice: If you’re not used to spicy food, start with just half a jalapeño. You can always add more, but you can’t take it away! Remember to remove seeds and membranes.
  • Not Tasting and Adjusting: Flavors can vary greatly between cranberry sauces and jalapeños. Taste your dip before serving and adjust salt, sweetness, or spice as needed.
  • Skipping the Chill Time (if possible): While it’s good immediately, chilling allows the flavors to marry and the dip to set up slightly, improving the overall experience.

Storing Your Cranberry Jalapeño Dip

Leftovers are a good problem to have! Store any remaining Cranberry Jalapeño Dip in an airtight container in the refrigerator. It will stay fresh for up to 3-4 days. Give it a good stir before serving again, as the ingredients might separate slightly.

Close-up of Cranberry Jalapeño Dip with crackers and vegetables.

Frequently Asked Questions

***Can I make this dip ahead of time?***

Absolutely! This dip is perfect for making ahead. In fact, it’s often better when allowed to chill for at least an hour to let the flavors meld. You can make it up to 2 days in advance and store it in the refrigerator.

***How spicy is this dip?***

The spice level depends entirely on how many jalapeños you use and whether you include the seeds and membranes. With one jalapeño with seeds removed, it’s usually mildly to moderately spicy. With two jalapeños and seeds/membranes included, it can be quite spicy. Always taste and adjust!

***Can I use dried cranberries instead of cranberry sauce?***

You can, but it will change the texture and flavor significantly. If you use dried cranberries, you’ll want to soak them in warm water or juice to rehydrate them and potentially add more liquid and sweetener to compensate for the lack of sauce. For the intended creamy texture and flavor, whole berry cranberry sauce is highly recommended.

***What if I don’t have fresh jalapeños?***

You can use jarred pickled jalapeño slices, finely chopped, but be mindful that they can be saltier and have a different flavor profile. Start with a small amount and adjust to your taste.

***Can I make this dip vegan?***

Yes, you can adapt this recipe for a vegan version by using vegan cream cheese (there are many great options available now) and ensuring your cranberry sauce is vegan-friendly. The jalapeños, onion, and cilantro are naturally vegan.

Conclusion

Cranberry Jalapeño Dip is more than just an appetizer; it’s a festive experience in a bowl. Its effortless preparation, coupled with its vibrant flavors and colors, makes it an indispensable addition to any holiday gathering. Whether you’re hosting a large party or enjoying a cozy night in, this sweet and spicy delight is sure to be a hit. So, gather your ingredients, get mixing, and get ready to impress your guests with this holiday favorite! Don’t wait – whip up this Cranberry Jalapeño Dip for your next celebration and watch it disappear!

Print

clock clock iconcutlery cutlery iconflag flag iconfolder folder iconinstagram instagram iconpinterest pinterest iconfacebook facebook iconprint print iconsquares squares iconheart heart iconheart solid heart solid icon

Holiday Cranberry Jalapeño Cream Cheese Dip


  • Author: Chef Emy

Description

A festive and flavorful dip with the perfect balance of sweet, tangy, and spicy! This creamy appetizer is ideal for holiday gatherings and pairs beautifully with crackers, crostini, or fresh veggies.


Ingredients

Scale
  • 8 ozcream cheese, softened1/2 cupcranberry sauce (homemade or store-bought)1–2fresh jalapeños, seeded and finely chopped1 tbspfresh cilantro, chopped (optional)1/2 cupshredded cheddar cheese (optional, for topping)Salt and pepper, to tasteFor serving: Crackers, crostini, or fresh veggies (e.g., cucumber, bell peppers, carrots)
  • 1/2 cupcranberry sauce (homemade or store-bought)1–2fresh jalapeños, seeded and finely chopped1 tbspfresh cilantro, chopped (optional)1/2 cupshredded cheddar cheese (optional, for topping)Salt and pepper, to tasteFor serving: Crackers, crostini, or fresh veggies (e.g., cucumber, bell peppers, carrots)
  • 12fresh jalapeños, seeded and finely chopped1 tbspfresh cilantro, chopped (optional)1/2 cupshredded cheddar cheese (optional, for topping)Salt and pepper, to tasteFor serving: Crackers, crostini, or fresh veggies (e.g., cucumber, bell peppers, carrots)
  • 1 tbspfresh cilantro, chopped (optional)1/2 cupshredded cheddar cheese (optional, for topping)Salt and pepper, to tasteFor serving: Crackers, crostini, or fresh veggies (e.g., cucumber, bell peppers, carrots)
  • 1/2 cupshredded cheddar cheese (optional, for topping)Salt and pepper, to tasteFor serving: Crackers, crostini, or fresh veggies (e.g., cucumber, bell peppers, carrots)
  • Salt and pepper, to tasteFor serving: Crackers, crostini, or fresh veggies (e.g., cucumber, bell peppers, carrots)
  • For serving: Crackers, crostini, or fresh veggies (e.g., cucumber, bell peppers, carrots)

Instructions

  1. 1️⃣Prepare the base: In a medium mixing bowl, beat the softened cream cheese with a hand mixer or a spoon until it’s smooth and creamy.2️⃣Mix in the flavors: Add the cranberry sauce, finely chopped jalapeños, and cilantro (if using). Stir until the ingredients are evenly combined.3️⃣Season: Taste the mixture and add salt and pepper as needed to enhance the flavors.4️⃣Optional topping: If desired, sprinkle shredded cheddar cheese over the top. Place the dip in the refrigerator for10–15 minutesto firm up slightly before serving.5️⃣Serve: Transfer the dip to a serving bowl. Garnish with extra jalapeño slices or a sprinkle of chopped cilantro for a festive presentation. Serve with your choice of crackers, crostini, or fresh veggies.
  2. 2️⃣Mix in the flavors: Add the cranberry sauce, finely chopped jalapeños, and cilantro (if using). Stir until the ingredients are evenly combined.3️⃣Season: Taste the mixture and add salt and pepper as needed to enhance the flavors.4️⃣Optional topping: If desired, sprinkle shredded cheddar cheese over the top. Place the dip in the refrigerator for10–15 minutesto firm up slightly before serving.5️⃣Serve: Transfer the dip to a serving bowl. Garnish with extra jalapeño slices or a sprinkle of chopped cilantro for a festive presentation. Serve with your choice of crackers, crostini, or fresh veggies.
  3. 3️⃣Season: Taste the mixture and add salt and pepper as needed to enhance the flavors.
  4. 4️⃣Optional topping: If desired, sprinkle shredded cheddar cheese over the top. Place the dip in the refrigerator for10–15 minutesto firm up slightly before serving.5️⃣Serve: Transfer the dip to a serving bowl. Garnish with extra jalapeño slices or a sprinkle of chopped cilantro for a festive presentation. Serve with your choice of crackers, crostini, or fresh veggies.
  5. 5️⃣Serve: Transfer the dip to a serving bowl. Garnish with extra jalapeño slices or a sprinkle of chopped cilantro for a festive presentation. Serve with your choice of crackers, crostini, or fresh veggies.

Notes

Heat level: For a milder dip, use just one jalapeño or substitute with diced green bell pepper. For more spice, include the jalapeño seeds.Cranberry sauce: Homemade cranberry sauce with a hint of orange zest can elevate the flavor. If using store-bought, choose one with whole cranberries for texture.Make ahead: This dip can be made up to a day in advance. Cover and refrigerate, but let it sit at room temperature for 15 minutes before serving for easier dipping.
Cranberry sauce: Homemade cranberry sauce with a hint of orange zest can elevate the flavor. If using store-bought, choose one with whole cranberries for texture.Make ahead: This dip can be made up to a day in advance. Cover and refrigerate, but let it sit at room temperature for 15 minutes before serving for easier dipping.
Make ahead: This dip can be made up to a day in advance. Cover and refrigerate, but let it sit at room temperature for 15 minutes before serving for easier dipping.


“`

Chicken Bacon Ranch Sliders A Must-Try Recipe

“`html

Chicken Bacon Ranch Sliders: A Must-Try Recipe

Are you searching for a crowd-pleasing appetizer or a satisfying weeknight meal that’s bursting with flavor and surprisingly easy to make? Chicken Bacon Ranch Sliders are the answer! In a world where busy schedules often lead to less exciting food choices, these sliders offer a delightful combination of savory chicken, crispy bacon, and creamy ranch, all nestled within soft slider buns. This recipe is designed to be straightforward, ensuring even novice cooks can achieve restaurant-worthy results. Perfect for game days, potlucks, birthday parties, or even a quick and delicious lunch, these sliders are guaranteed to become a fast favorite.

Flavor-Packed Ingredients

The magic of these sliders lies in the quality and synergy of their components. We’ve carefully selected ingredients that deliver a punch of taste and texture, making each bite an experience. Below you’ll find everything you need, along with some tips for substitutions and what to look for.

  • For the Chicken Filling:
    • 1 lb boneless, skinless chicken breasts or thighs, cooked and shredded (rotisserie chicken is a fantastic shortcut!) – aim for tender, moist chicken that shreds easily.
    • 8 slices of bacon, cooked until crispy and crumbled – look for good quality bacon with a nice balance of fat and meat for ultimate crispiness.
    • 1/2 cup ranch dressing (your favorite brand or homemade) – choose a creamy, tangy ranch that complements the other flavors.
    • 1/4 cup shredded cheddar cheese (or a cheddar-jack blend) – mild or sharp, depending on your preference for cheese intensity.
    • 2 tablespoons finely diced green onions (scallions) – for a fresh, oniony crunch and color.
    • Salt and freshly ground black pepper to taste – seasoning is key to bringing out all the flavors.
  • For the Sliders:
    • 12 slider buns (like King’s Hawaiian or brioche rolls) – soft, slightly sweet buns are ideal, offering a delightful contrast to the savory filling.
    • 1/4 cup melted butter – for brushing onto the buns, creating a golden-brown, irresistible crust.
    • 1 teaspoon garlic powder – infuses the butter with a savory aroma and taste.

Perfect Timing for Effortless Creation

Prep Time: 15 minutes
Cook Time: 20-25 minutes
Total Time: 35-40 minutes

Compared to many appetizer recipes that can take hours, these Chicken Bacon Ranch Sliders are remarkably quick. The preparation is minimal, especially if you use pre-cooked chicken. Baking time is also quite efficient, ensuring you can get these delicious sliders to your table in under an hour.

Chicken Bacon Ranch Sliders ready to be served

Step-by-Step Instructions

Step 1: Prep the Chicken

If you’re not using rotisserie chicken, now’s the time to cook your chicken breasts or thighs. You can poach them, bake them, or even grill them until they’re cooked through and tender. Once cooked, let them cool slightly, then shred them using two forks or your hands. You should have about 2 cups of shredded chicken. If using a food processor, pulse it gently to avoid making it mushy. Place the shredded chicken in a medium bowl, ready for its flavor transformation.

Step 2: Cook the Bacon

While your chicken is cooling or being prepped, cook the bacon until it’s wonderfully crispy. You can do this in a skillet on the stovetop or bake it in the oven for more even cooking and less splatter. Once crispy, transfer the bacon to a paper towel-lined plate to drain any excess grease. After it has cooled a bit, crumble it into small pieces. Set aside the crumbled bacon; its smoky, salty crunch is a vital element of these sliders.

Step 3: Assemble the Sliders

This is where all the delicious components come together! In the bowl with your shredded chicken, add the crumbled crispy bacon, ranch dressing, shredded cheddar cheese, and diced green onions. Gently mix everything together until the chicken is well coated with the ranch dressing and all ingredients are evenly distributed. Season with salt and freshly ground black pepper to your liking. Taste and adjust seasonings if necessary – remember, this is your flavor base!

Now, prepare your slider buns. Slice the entire package of slider buns horizontally, keeping them connected if possible. Arrange the bottom halves of the buns in a 9×13 inch baking dish or on a baking sheet. Generously spoon the chicken bacon ranch mixture evenly over the bottom buns, spreading it edge to edge. Place the top halves of the buns back on top, completing the slider formation.

Step 4: Bake to Perfection

In a small bowl, whisk together the melted butter and garlic powder. Brush this savory mixture evenly over the tops of the slider buns. This will create a beautifully golden, slightly toasted, and incredibly flavorful crust that takes these sliders to the next level. Preheat your oven to 350°F (175°C). Cover the baking dish or baking sheet loosely with aluminum foil (this helps the steam, keeping the buns soft while the filling heats through). Bake for 15 minutes.

After 15 minutes, carefully remove the foil. Continue baking for another 5-10 minutes, or until the cheese is melted and bubbly and the tops of the buns are lightly golden brown and slightly crispy. Keep a close eye on them to prevent burning. Once they’re perfectly baked, remove the sliders from the oven and let them rest for a few minutes before serving. This allows the flavors to meld and makes them easier to handle.

Nutritional Snapshot

While exact nutritional values can vary based on ingredients used (especially the brand of ranch and cheese), a typical serving of these sliders is rich in protein and fat, offering a satisfyingly indulgent experience. Here’s a general estimate per slider (assuming 12 sliders per recipe):

  • Calories: Approximately 250-350 kcal
  • Protein: 15-20g
  • Fat: 18-25g
  • Carbohydrates: 15-20g
  • Sodium: Varies significantly based on bacon and ranch dressing.

Healthier Alternatives & Flavor-Preserving Swaps

Looking to make these sliders a bit lighter without sacrificing taste? Here are a few smart swaps:

  • Chicken: Opt for lean chicken breast. For even more health benefits, consider using air-fried or baked chicken instead of pan-fried.
  • Bacon: Use turkey bacon for a leaner alternative, or a reduced-sodium bacon. You can also use less bacon and supplement with a smoky paprika for flavor.
  • Ranch Dressing: Use a lighter version of ranch dressing, or make your own with Greek yogurt as a base. You can also incorporate herbs and spices like dill, chives, and garlic powder into Greek yogurt for a lighter, zesty dressing.
  • Cheese: Use a reduced-fat cheddar or Monterey Jack cheese.
  • Buns: Whole wheat slider buns can add fiber.

Serving Suggestions

These sliders are incredibly versatile. They are a stellar appetizer on their own, perfect for dipping into extra ranch or a side of your favorite salsa. For a more substantial meal, serve them with classic sides like potato salad, coleslaw, sweet potato fries, or a fresh green salad. They also pair wonderfully with a cold beverage, making them ideal for game day viewing parties!

Common Mistakes to Avoid

  • Overcooking the Chicken: Dry chicken will make for dry sliders. Ensure your chicken is moist and tender before shredding.
  • Under-seasoning: Bacon and ranch add saltiness, but don’t forget to taste and adjust seasonings for the chicken mixture itself. A little salt and pepper go a long way.
  • Mushy Buns: While you want soft buns, over-baking or steaming them without the foil can lead to a soggy bottom. Keep an eye on them during the final baking stage.
  • Uneven Distribution: Make sure the chicken mixture is spread evenly across all the buns so every slider gets a good amount of filling.

Storing Tips

Leftover Chicken Bacon Ranch Sliders can be stored, covered tightly, in the refrigerator for up to 2-3 days. For best results, reheat them in a moderate oven or a toaster oven to revive the crispness of the buns and heat the filling through. Microwaving is an option, but the buns may become a bit soft.

Close-up of a Chicken Bacon Ranch Slider bite

Frequently Asked Questions

Can I make the chicken mixture ahead of time?

Yes! The chicken, bacon, and ranch mixture can be prepared up to a day in advance and stored in an airtight container in the refrigerator. This makes assembly even quicker when you’re ready to bake.

What kind of chicken is best for this recipe?

Boneless, skinless chicken breasts or thighs work well. Rotisserie chicken is the ultimate shortcut for perfectly tender, pre-cooked chicken. If cooking from raw, poaching or baking until tender and then shredding is recommended.

Can I freeze these sliders?

It’s best to serve these sliders fresh. While you can freeze the assembled but unbaked sliders, the texture of the buns might be compromised upon thawing and baking. If freezing baked sliders, they may not hold up as well to reheating.

What if I don’t have slider buns?

You can use regular dinner rolls or even split a loaf of soft bread like challah or brioche horizontally and cut it into portions. Just adjust baking time as needed.

Print

clock clock iconcutlery cutlery iconflag flag iconfolder folder iconinstagram instagram iconpinterest pinterest iconfacebook facebook iconprint print iconsquares squares iconheart heart iconheart solid heart solid icon

Chicken Bacon Ranch Sliders


  • Author: Chef Emy

Description

TheseChicken Bacon Ranch Slidersare the perfect blend of savory and cheesy goodness. Made with shredded chicken, creamy Ranch dressing, turkey bacon, and melted cheddar, they’re a crowd-pleasing appetizer or quick dinner option.


Ingredients

Scale
  • 4 cupscooked chicken, shredded1 cupRanch dressing1/2 cupturkey bacon, cooked and crumbled3 tbspParmesan cheese15Hawaiian sweet rolls, sliced in half2 cupsshredded cheddar cheese1/4 cupbutter, melted1 tspgarlic powder
  • 1 cupRanch dressing1/2 cupturkey bacon, cooked and crumbled3 tbspParmesan cheese15Hawaiian sweet rolls, sliced in half2 cupsshredded cheddar cheese1/4 cupbutter, melted1 tspgarlic powder
  • 1/2 cupturkey bacon, cooked and crumbled3 tbspParmesan cheese15Hawaiian sweet rolls, sliced in half2 cupsshredded cheddar cheese1/4 cupbutter, melted1 tspgarlic powder
  • 3 tbspParmesan cheese15Hawaiian sweet rolls, sliced in half2 cupsshredded cheddar cheese1/4 cupbutter, melted1 tspgarlic powder
  • 15Hawaiian sweet rolls, sliced in half2 cupsshredded cheddar cheese1/4 cupbutter, melted1 tspgarlic powder
  • 2 cupsshredded cheddar cheese1/4 cupbutter, melted1 tspgarlic powder
  • 1/4 cupbutter, melted1 tspgarlic powder
  • 1 tspgarlic powder

Instructions

  1. 1️⃣Preheat Oven:Preheat your oven to 350°F (175°C). Lightly grease a 9×13-inch baking pan.2️⃣Prepare the Rolls:Place the bottom halves of the sliced Hawaiian rolls in the prepared baking pan.3️⃣Make the Chicken Mixture:In a mixing bowl, combine the shredded chicken, Ranch dressing, crumbled turkey bacon, and Parmesan cheese. Mix until evenly coated.4️⃣Assemble the Sliders:Spread the chicken mixture evenly over the bottom halves of the rolls.Sprinkle the shredded cheddar cheese evenly over the chicken mixture.Place the top halves of the rolls on top to form sandwiches.5️⃣Prepare Garlic Butter:In a small bowl, mix the melted butter with garlic powder.Brush the garlic butter generously over the tops of the rolls.6️⃣Bake the Sliders:Cover the baking pan with aluminum foil and bake in the preheated oven for 15 minutes, or until the cheese is melted and the sliders are heated through.Remove the foil and bake for an additional 2-3 minutes to lightly brown the tops.7️⃣Serve:Remove from the oven and let cool slightly before serving. Serve warm and enjoy!
  2. 2️⃣Prepare the Rolls:
  3. Place the bottom halves of the sliced Hawaiian rolls in the prepared baking pan.3️⃣Make the Chicken Mixture:In a mixing bowl, combine the shredded chicken, Ranch dressing, crumbled turkey bacon, and Parmesan cheese. Mix until evenly coated.4️⃣Assemble the Sliders:Spread the chicken mixture evenly over the bottom halves of the rolls.Sprinkle the shredded cheddar cheese evenly over the chicken mixture.Place the top halves of the rolls on top to form sandwiches.5️⃣Prepare Garlic Butter:In a small bowl, mix the melted butter with garlic powder.Brush the garlic butter generously over the tops of the rolls.6️⃣Bake the Sliders:Cover the baking pan with aluminum foil and bake in the preheated oven for 15 minutes, or until the cheese is melted and the sliders are heated through.Remove the foil and bake for an additional 2-3 minutes to lightly brown the tops.7️⃣Serve:Remove from the oven and let cool slightly before serving. Serve warm and enjoy!
  4. 3️⃣Make the Chicken Mixture:In a mixing bowl, combine the shredded chicken, Ranch dressing, crumbled turkey bacon, and Parmesan cheese. Mix until evenly coated.4️⃣Assemble the Sliders:Spread the chicken mixture evenly over the bottom halves of the rolls.Sprinkle the shredded cheddar cheese evenly over the chicken mixture.Place the top halves of the rolls on top to form sandwiches.5️⃣Prepare Garlic Butter:In a small bowl, mix the melted butter with garlic powder.Brush the garlic butter generously over the tops of the rolls.6️⃣Bake the Sliders:Cover the baking pan with aluminum foil and bake in the preheated oven for 15 minutes, or until the cheese is melted and the sliders are heated through.Remove the foil and bake for an additional 2-3 minutes to lightly brown the tops.7️⃣Serve:Remove from the oven and let cool slightly before serving. Serve warm and enjoy!
  5. In a mixing bowl, combine the shredded chicken, Ranch dressing, crumbled turkey bacon, and Parmesan cheese. Mix until evenly coated.
  6. 4️⃣Assemble the Sliders:Spread the chicken mixture evenly over the bottom halves of the rolls.Sprinkle the shredded cheddar cheese evenly over the chicken mixture.Place the top halves of the rolls on top to form sandwiches.5️⃣Prepare Garlic Butter:In a small bowl, mix the melted butter with garlic powder.Brush the garlic butter generously over the tops of the rolls.6️⃣Bake the Sliders:Cover the baking pan with aluminum foil and bake in the preheated oven for 15 minutes, or until the cheese is melted and the sliders are heated through.Remove the foil and bake for an additional 2-3 minutes to lightly brown the tops.7️⃣Serve:Remove from the oven and let cool slightly before serving. Serve warm and enjoy!
  7. Spread the chicken mixture evenly over the bottom halves of the rolls.Sprinkle the shredded cheddar cheese evenly over the chicken mixture.Place the top halves of the rolls on top to form sandwiches.5️⃣Prepare Garlic Butter:In a small bowl, mix the melted butter with garlic powder.Brush the garlic butter generously over the tops of the rolls.6️⃣Bake the Sliders:Cover the baking pan with aluminum foil and bake in the preheated oven for 15 minutes, or until the cheese is melted and the sliders are heated through.Remove the foil and bake for an additional 2-3 minutes to lightly brown the tops.7️⃣Serve:Remove from the oven and let cool slightly before serving. Serve warm and enjoy!
  8. Sprinkle the shredded cheddar cheese evenly over the chicken mixture.
  9. Place the top halves of the rolls on top to form sandwiches.5️⃣Prepare Garlic Butter:In a small bowl, mix the melted butter with garlic powder.Brush the garlic butter generously over the tops of the rolls.6️⃣Bake the Sliders:Cover the baking pan with aluminum foil and bake in the preheated oven for 15 minutes, or until the cheese is melted and the sliders are heated through.Remove the foil and bake for an additional 2-3 minutes to lightly brown the tops.7️⃣Serve:Remove from the oven and let cool slightly before serving. Serve warm and enjoy!
  10. 5️⃣Prepare Garlic Butter:In a small bowl, mix the melted butter with garlic powder.Brush the garlic butter generously over the tops of the rolls.6️⃣Bake the Sliders:Cover the baking pan with aluminum foil and bake in the preheated oven for 15 minutes, or until the cheese is melted and the sliders are heated through.Remove the foil and bake for an additional 2-3 minutes to lightly brown the tops.7️⃣Serve:Remove from the oven and let cool slightly before serving. Serve warm and enjoy!
  11. In a small bowl, mix the melted butter with garlic powder.
  12. Brush the garlic butter generously over the tops of the rolls.6️⃣Bake the Sliders:Cover the baking pan with aluminum foil and bake in the preheated oven for 15 minutes, or until the cheese is melted and the sliders are heated through.Remove the foil and bake for an additional 2-3 minutes to lightly brown the tops.7️⃣Serve:Remove from the oven and let cool slightly before serving. Serve warm and enjoy!
  13. 6️⃣Bake the Sliders:Cover the baking pan with aluminum foil and bake in the preheated oven for 15 minutes, or until the cheese is melted and the sliders are heated through.Remove the foil and bake for an additional 2-3 minutes to lightly brown the tops.7️⃣Serve:Remove from the oven and let cool slightly before serving. Serve warm and enjoy!
  14. Cover the baking pan with aluminum foil and bake in the preheated oven for 15 minutes, or until the cheese is melted and the sliders are heated through.
  15. Remove the foil and bake for an additional 2-3 minutes to lightly brown the tops.7️⃣Serve:Remove from the oven and let cool slightly before serving. Serve warm and enjoy!
  16. 7️⃣Serve:Remove from the oven and let cool slightly before serving. Serve warm and enjoy!
  17. Remove from the oven and let cool slightly before serving. Serve warm and enjoy!

Notes

Make-Ahead Option:Assemble the sliders up to step 5, cover tightly, and refrigerate for up to 12 hours. Bake as directed when ready to serve.Serving Suggestions:Serve with a side of celery sticks, a salad, or chips for a complete meal or party snack.Turkey Bacon Tip:Cook the turkey bacon until crispy for the best texture and flavor in the sliders.Storage:Store leftovers in an airtight container in the refrigerator for up to 2 days. Reheat in the oven at 300°F until warmed through.
Serving Suggestions:Serve with a side of celery sticks, a salad, or chips for a complete meal or party snack.Turkey Bacon Tip:Cook the turkey bacon until crispy for the best texture and flavor in the sliders.Storage:Store leftovers in an airtight container in the refrigerator for up to 2 days. Reheat in the oven at 300°F until warmed through.
Turkey Bacon Tip:Cook the turkey bacon until crispy for the best texture and flavor in the sliders.Storage:Store leftovers in an airtight container in the refrigerator for up to 2 days. Reheat in the oven at 300°F until warmed through.
Storage:Store leftovers in an airtight container in the refrigerator for up to 2 days. Reheat in the oven at 300°F until warmed through.


“`

Tuna Tartare Magic: Fresh, Zesty, Irresistible

“`html

Tuna Tartare Magic: Fresh, Zesty, Irresistible

Introduction: Zesty Tuna Tartare Delight

Are you looking for a show-stopping appetizer that requires minimal cooking and maximum flavor? Search no further! This Tuna Tartare recipe is an ode to simplicity and freshness, transforming high-quality tuna into a vibrant, zesty, and utterly delectable dish. Imagine delicate cubes of ruby-red tuna, brightened with citrus, and subtly spiced – it’s a gourmet experience you can easily recreate at home. Ideal for a light lunch, an elegant starter for a dinner party, or a healthy, satisfying snack, this tartare is proof that simple ingredients, handled with care, can create something truly magical. We’ll guide you through each step, ensuring your tuna tartare is as visually appealing as it is delicious.

Fresh & Zesty Ingredients

The key to an exceptional tuna tartare lies in the quality of your ingredients. We’re aiming for a symphony of fresh, bright, and complementary flavors.

Sushi-Grade Tuna

  • 1 lb Sushi-Grade Tuna Loin: This is the star! Look for a deep, uniform red color, firm texture, and no fishy odor. It should be labeled “sushi-grade” or “sashimi-grade” for raw consumption safety. The flavor is clean, mild, and slightly oceanic.
    • Substitution: If sushi-grade isn’t available, very fresh, high-quality tuna that is suitable for searing and then chilling thoroughly can be a last resort, but raw consumption is not recommended.

Aromatics and Fresh Herbs

  • 1/4 cup finely diced Red Onion: Adds a sharp, pungent bite that cuts through the richness of the tuna.
    • Substitution: Shallots offer a milder, sweeter onion flavor. Scallions (green parts only) provide a gentler allium note.
  • 2 tablespoons finely chopped fresh Chives: Their delicate, mild oniony flavor and bright green color are essential.
    • Substitution: Finely chopped parsley or a mix of parsley and a tiny bit of dill can work.
  • 2 tablespoons finely chopped fresh Cilantro (optional): Adds a fragrant, citrusy herbaceousness.
    • Substitution: If you’re not a cilantro fan, omit it or use a bit more parsley.
  • 1 small Jalapeño or Serrano Pepper, finely minced (seeds removed for less heat): Provides a gentle warmth and a subtle kick that awakens the palate. The aroma is fresh and slightly vegetal.
    • Substitution: A pinch of red pepper flakes can add heat without the fresh pepper flavor.

Acids and Seasonings

  • 2 tablespoons fresh Lemon Juice: The quintessential bright, zesty component that brightens all the flavors.
  • 1 tablespoon fresh Lime Juice: Adds a slightly different, more complex citrusy tang.
    • Substitution: You can use all lemon juice or all lime juice if preferred. A splash of rice vinegar can also be used for acidity.
  • 1-2 tablespoons good quality Olive Oil (extra virgin): Adds a smooth, fruity richness and helps bind the ingredients.
    • Substitution: Avocado oil or a neutral oil like grapeseed can be used if you want a less pronounced olive oil flavor.
  • 1 teaspoon Soy Sauce or Tamari: Provides umami depth and a savory saltiness.
    • Substitution: Coconut aminos for a soy-free option.
  • 1/2 teaspoon Dijon Mustard: Adds a subtle tang and helps emulsify the dressing.
  • Salt and freshly ground Black Pepper: To taste. Use flaky sea salt for a gentle crunch and freshly cracked black pepper for its pungent aroma.

Optional Add-Ins

  • 1 tablespoon Capers, drained and chopped: For a briny, salty pop.
  • 1/4 Avocado, finely diced: For a creamy, luxurious texture. Add just before serving to prevent browning.
  • A dash of Sriracha or a few drops of sesame oil: For extra heat or nutty aroma.

The Magic of Timing

Prep time
15 minutes
Chill time
15-30 minutes
Total time
30-45 minutes

Comparison: This recipe is significantly faster than many cooked seafood dishes, with active prep time similar to or slightly longer than making a simple salad, but yielding a much more elegant result. The chilling time is crucial for flavor melding, not extensive cooking.

Beautifully presented tuna tartare with fresh garnishes

Crafting Your Tuna Tartare Masterpiece

Creating this vibrant tartare is more art than science. It’s about careful preparation and gentle handling.

Step 1: Prepare the Star of the Show – The Tuna

Begin by ensuring your tuna is thoroughly chilled. Using a very sharp knife (a large chef’s knife or a specialized fish knife is ideal), carefully trim away any thin membranes or connective tissue. Then, dice the tuna into uniform, small cubes, about 1/4 to 1/2 inch in size. Aim for consistency for both texture and presentation. Place the diced tuna into a clean, chilled bowl. It’s vital to handle the tuna minimally and keep it cold to maintain its pristine texture and color.

Step 2: Mince and Dice – Building Flavor Layers

Finely dice the red onion, chives, cilantro (if using), and jalapeño. The finer the dice, the better they will integrate into the tartare, distributing their flavors evenly without overwhelming the delicate tuna. If you are using capers, chop them as well. Ensure all your aromatic ingredients are chopped uniformly. Remember to remove the seeds and membranes from the jalapeño if you prefer less heat; a little goes a long way!

Step 3: Gently Combine – The Art of Tartare

In a separate small bowl, whisk together the lemon juice, lime juice, olive oil, soy sauce (or tamari), and Dijon mustard. This will form your zesty dressing. Season this dressing with a pinch of salt and freshly ground black pepper. Now, add the diced onion, chives, cilantro, and minced jalapeño (and capers, if using) to the bowl with the diced tuna. Pour about half of the dressing over the tuna mixture. Using a rubber spatula or two spoons, very gently fold everything together. You want to coat the tuna without mashing it.

Step 4: Chill and Meld – Allowing Flavors to Symphony

Cover the bowl tightly with plastic wrap and refrigerate for at least 15-30 minutes. This chilling period is crucial. It allows the flavors to meld beautifully and the tuna to firm up slightly, enhancing its texture. Taste the tartare after chilling and adjust seasoning if needed – perhaps a touch more salt, pepper, or acidity. If you’re adding avocado, dice and fold it in very gently just before serving.

Step 5: Plate Your Masterpiece

To serve, you can either spoon the tartare directly onto plates or use a ring mold for a more structured, elegant presentation. If using a mold, pack the tartare loosely into the ring mold and carefully lift the mold away. Alternatively, you can serve it elegantly scooped onto small plates or in attractive glasses.

Step 6: Garnish and Serve with Flair

Garnish your tuna tartare with a few extra chive sprigs, a sprinkle of black sesame seeds, a drizzle of extra olive oil, or a tiny dollop of extra-spicy aioli on the side. Serve immediately while it’s perfectly chilled and fresh. This is best enjoyed within hours of preparation.

Your Nutritional Snapshot

A typical serving (approx. 4 oz) of this Tuna Tartare is a nutritional powerhouse:

  • Calories: ~250-300 (depending on oil content)
  • Protein: ~30-35g
  • Fats: ~12-18g (rich in Omega-3s)
  • Carbohydrates: ~5-8g
  • Vitamins & Minerals: Excellent source of Vitamin D, B12, selenium, and iodine.

Healthier Twists on Tartare

Looking to make this even healthier without sacrificing flavor? Here are some simple swaps:

  • Reduce Oil: Use a lesser amount of high-quality olive oil or a lighter, neutral oil. Adjust the citrus and soy sauce to compensate for moisture and flavor.
  • Leaner Protein: While tuna is already lean, consider other fish like salmon or even lean, cooked chicken (though this deviates significantly from traditional tartare).
  • Avocado Addition: Instead of adding it to the tartare, serve a small side of diced avocado for healthy fats, ensuring the tartare itself isn’t overloaded.
  • Spice it Up: Rely on fresh chili for heat rather than pre-made sauces that might contain added sugars or sodium.

Perfect Pairings: How to Serve

Tuna tartare is incredibly versatile. Here are some serving ideas:

  • Classic: Serve with thin triangles of toasted baguette, artisanal crackers, or crisp endive spears.
  • Salad Style: Place a portion of tartare on a bed of mixed greens, drizzled with a light vinaigrette.
  • Asian Fusion: Serve atop a small mound of seasoned sushi rice or with delicate wonton crisps. Add a touch of toasted sesame oil to the dressing.
  • Dietary Friendly: Serve in cucumber cups or on large lettuce leaves for a low-carb, gluten-free option.

Common Tartare Pitfalls to Sidestep

Avoid these common mistakes for tartare perfection:

  • Using Sub-Par Tuna: This is the most critical point. Always use the freshest, highest-quality tuna available.
  • Over-Mixing: Be gentle! Over-handling can make the tuna mushy and unappealing.
  • Over-Seasoning: Start light with salt and pepper, especially since soy sauce adds saltiness. You can always add more.
  • Not Chilling Long Enough: The chilling period allows flavors to meld and the texture to improve. Don’t skip it!
  • Chopping Too Coarsely: Small, uniform dice ensures a pleasant mouthfeel and even flavor distribution.

Savoring the Zest: Storing Leftovers

Tuna tartare is best enjoyed fresh, immediately after preparation and chilling. If you have leftovers, they should be stored in an airtight container in the coldest part of your refrigerator for no more than 24 hours.

Important Note: Due to the raw nature of the fish, freshness is paramount. If the tartare has been sitting out for more than a couple of hours, it is best discarded for food safety reasons. The texture and flavor will also degrade significantly over time, even when refrigerated.

Close-up of tuna tartare ingredients being mixed

Frequently Asked Questions (FAQs)

***Is it safe to eat raw tuna tartare?***

Yes, provided you use high-quality, sushi-grade or sashimi-grade tuna specifically meant for raw consumption. This indicates the fish has been handled and often frozen according to strict guidelines to eliminate parasites. Always purchase from a reputable fishmonger and look for proper labeling.

***Can I prepare the tuna tartare ahead of time?***

You can prepare the tartare and chill it for up to 1-2 hours before serving. However, for optimal freshness and texture, it’s best to prepare it as close to serving time as possible, certainly within 4 hours. Avoid adding delicate ingredients like avocado until just before serving.

***What does “sushi-grade” tuna mean?***

“Sushi-grade” is not an officially regulated term, but it generally means the fish is of high enough quality to be eaten raw. Reputable sellers use this term to indicate that the fish has been handled with extreme care and has often undergone freezing processes to kill any potential parasites, making it safe for raw consumption.

***Can I substitute other types of fish?***

While this recipe is perfected for tuna, you could experiment with other high-quality, sushi-grade fish like salmon, hamachi (yellowtail), or a firm white fish like sea bass. Each will offer a different flavor and texture profile.

***My tuna tartare is watery. What did I do wrong?***

This can happen if the tuna wasn’t patted dry sufficiently, or if it sat too long after being diced and released its natural juices. Ensure you pat the tuna very dry before dicing and don’t let the diced tuna sit for extended periods before mixing. Also, be careful not to “squeeze” the tuna when mixing.

Conclusion: Your Simple Gourmet Masterpiece

There you have it – Tuna Tartare Magic! This recipe proves that you don’t need to be a Michelin-star chef to create an impressive and delicious dish. With a focus on fresh, quality ingredients and a gentle touch, you can whip up this zesty, elegant tartare in no time. It’s perfect for impressing guests, treating yourself, or adding a healthy, flavorful option to your meal rotation. Don’t hesitate to try it this week and experience the delightful freshness for yourself!

Print
clock clock iconcutlery cutlery iconflag flag iconfolder folder iconinstagram instagram iconpinterest pinterest iconfacebook facebook iconprint print iconsquares squares iconheart heart iconheart solid heart solid icon

Tuna Tartare: A Luxurious Treat You’ll Crave


  • Author: Chef Sara

Description

Tuna Tartare offers a fresh, bold flavor perfect for seafood lovers. Enjoy this gourmet dish as an appetizer or a light meal that wows every time!


Ingredients

Scale
  • 8 oz sushi-grade fresh tuna, finely diced
  • 1 tablespoon capers, chopped
  • 1 small shallot, finely minced
  • 1 tablespoon fresh lemon juice
  • 2 tablespoons fresh herbs (such as parsley, chives, or cilantro), chopped
  • Salt and freshly ground black pepper, to taste

Instructions

    “`