Fat Burning Strawberry Smoothie Recipe

“`html

Fat Burning Strawberry Smoothie Recipe

Kickstart Your Weight Loss: The Ultimate Fat Burning Strawberry Smoothie

Are you searching for a delicious and effective way to boost your metabolism and support your weight loss journey? Did you know that incorporating the right blend of ingredients into your daily routine can significantly impact your body’s fat-burning capabilities? In today’s fast-paced world, finding time for healthy meals can be a challenge, but what if you could whip up a potent, nutrient-dense, and incredibly tasty fat-burning strawberry smoothie in just minutes? This recipe is designed to do just that. Packed with antioxidants, fiber, and metabolism-igniting components, this smoothie is more than just a treat – it’s your new secret weapon for a healthier, more energetic you. Perfect for a quick breakfast, a satisfying post-workout refuel, or a guilt-free snack, this fat-burning strawberry smoothie will keep you feeling full, focused, and on track with your wellness goals.

Ingredients That Fuel Your Fat Burn

The magic of this fat-burning strawberry smoothie lies in its carefully selected ingredients, each chosen for its unique contribution to metabolism and overall health. We’re talking about a symphony of flavors and nutrients that work together to make you feel amazing inside and out.

  • 1 cup Frozen Strawberries (about 150g): The star of our show! Strawberries are low in calories, high in fiber, and brimming with antioxidants like anthocyanins, which may help in fat metabolism. Their natural sweetness also reduces the need for added sugars.
  • ½ cup Unsweetened Almond Milk (or other plant-based milk): Provides a creamy base without the extra calories of dairy. Almond milk is a good source of Vitamin E and is typically fortified with calcium and Vitamin D.

    Substitution: Coconut milk (lighter version), soy milk, or oat milk can be used. For a lighter, more refreshing option, unsweetened coconut water is excellent.
  • ¼ cup Plain Greek Yogurt (or dairy-free alternative): A protein powerhouse! Greek yogurt aids satiety, helping you feel fuller for longer, which is crucial for weight management. It also adds a delightful tang and creaminess.

    Substitution: Coconut yogurt, soy yogurt, or silken tofu for a vegan option. A small amount of avocado can also add creaminess and healthy fats.
  • 1 tablespoon Chia Seeds: These tiny seeds are nutritional giants, packed with fiber, omega-3 fatty acids, and protein. They absorb liquid and form a gel, which helps in feeling full and can aid digestion.

    Hint: Soaking chia seeds for 5-10 minutes can make them easier to digest and create a smoother texture.
  • ½ teaspoon Ground Ginger: Ginger is known for its thermogenic properties, meaning it can help increase your body’s calorie expenditure and boost metabolism. It also adds a wonderful spicy kick.

    Sensory Note: The warmth of ginger complements the sweetness of strawberries beautifully.
  • Optional: ½ teaspoon Vanilla Extract: Enhances the overall flavor profile and adds a comforting aroma without adding calories or sugar.
  • Optional: A squeeze of fresh Lemon Juice: Brightens the flavors and provides a little extra Vitamin C.
  • Optional: 1 scoop of Whey or Plant-Based Protein Powder: For an extra protein boost, especially post-workout. Ensure it’s a flavor that complements strawberry, like vanilla or unflavored.

Effortless Preparation: Quick & Easy

In a world where time is a luxury, this fat-burning strawberry smoothie is remarkably efficient. It’s designed for those busy mornings or quick post-gym refuels.

Prep time:
5 minutes
Cook time:
0 minutes
Total time:
5 minutes

Compared to average smoothie recipes that might involve more complex ingredient prep or longer blending times, this recipe stands out for its speed and simplicity.
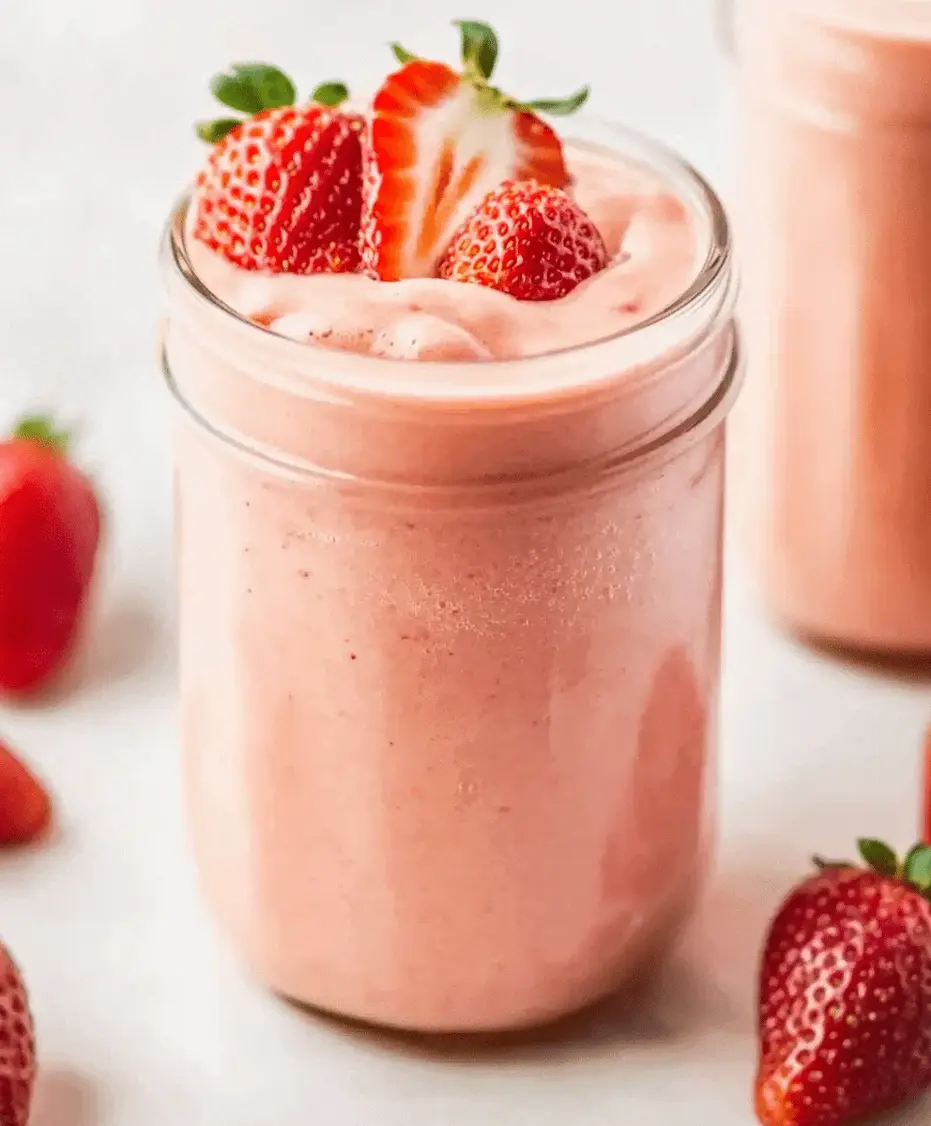
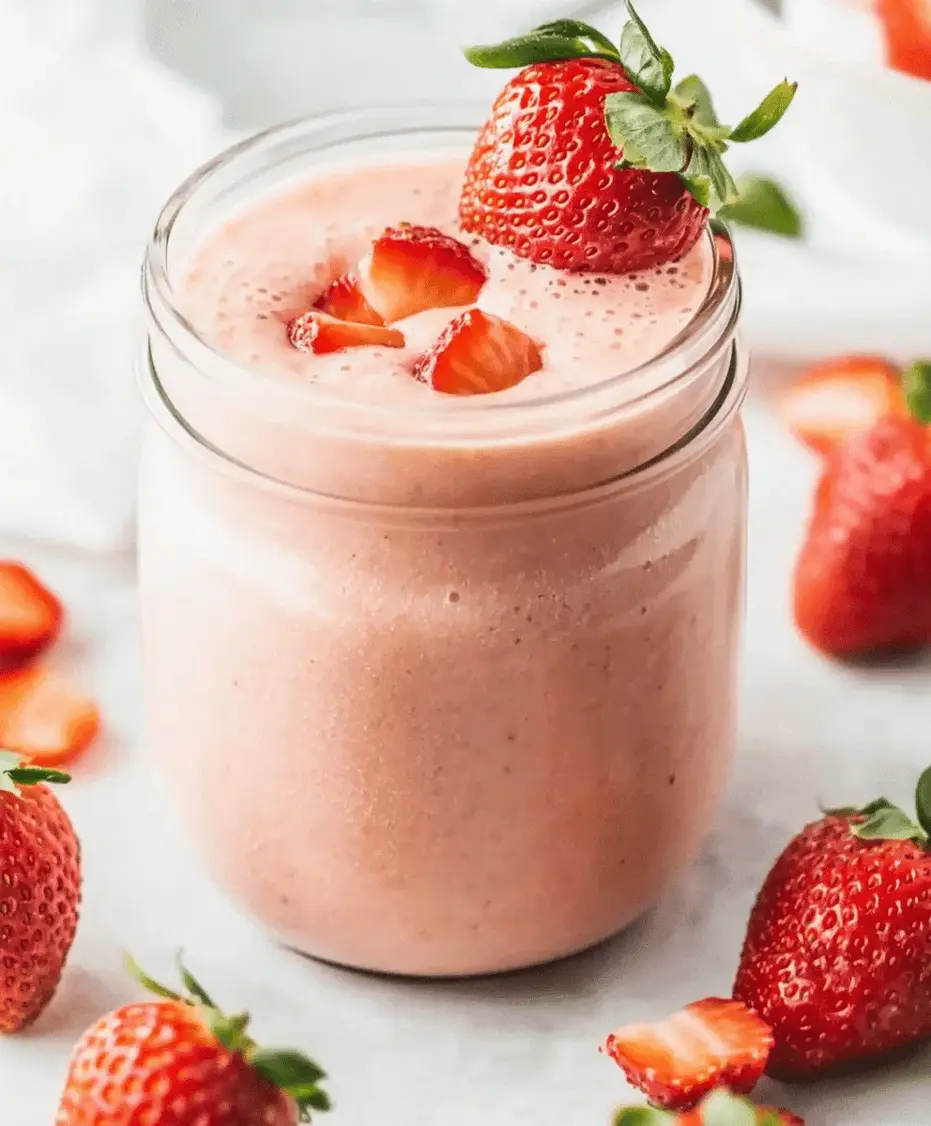
A vibrant, creamy fat-burning strawberry smoothie in a glass, garnished with a strawberry slice and mint leaves.

Crafting Your Fat-Burning Elixir: Step-by-Step

Get ready to blend your way to a healthier you! Follow these simple steps to create your delicious fat-burning strawberry smoothie.

Step 1: Prep Your Fruits

Ensure your strawberries are properly washed if they were fresh before freezing, or simply grab your pre-frozen bag. Using frozen strawberries is key for achieving that thick, cold, and refreshing smoothie texture without needing ice, which can dilute the flavor.

Step 2: Add Liquids and Powders

Pour your unsweetened almond milk (or your chosen liquid base) into the blender first. This helps the blades move more freely when you start blending. Next, add the Greek yogurt (or alternative), chia seeds, ground ginger, and any optional ingredients like vanilla extract, lemon juice, or protein powder.

Step 3: Blend Until Smooth

Add the frozen strawberries to the blender. Secure the lid tightly. Start blending on a low speed, gradually increasing to high speed. Blend for about 30-60 seconds, or until the mixture is completely smooth and creamy, with no lingering chunks of strawberry or seeds.

Step 4: Taste and Adjust

Once blended, give your smoothie a quick taste. If it’s too thick for your liking, add a splash more almond milk and blend briefly. If you prefer it a little sweeter (though the strawberries usually provide enough), consider adding a tiny amount of a natural sweetener like stevia or a date, but try to stick to the unadulterated flavor for maximum fat-burning benefits.

Step 5: Serve Immediately

Pour your beautifully blended fat-burning strawberry smoothie into a glass. For an extra touch, garnish with a fresh strawberry or a sprig of mint. Enjoy this goodness right away to reap the maximum nutritional benefits.

Nutritional Snapshot

While exact nutritional values can vary based on specific brands and optional additions, a standard serving of this fat-burning strawberry smoothie is typically:

  • Calories: Approximately 150-200 kcal (without protein powder)
  • Protein: 10-15g (higher with Greek yogurt and/or protein powder)
  • Fiber: 8-10g
  • Healthy Fats: 5-7g (primarily from chia seeds and almond milk)
  • Low in Added Sugar: Relies on natural sweetness from strawberries.

This nutritional profile makes it an excellent choice for a low-calorie, high-fiber, and protein-rich meal or snack that supports satiety and metabolism.

Smarter Swaps for Healthier Indulgence

Want to customize your fat-burning strawberry smoothie while keeping it healthy? Here are some flavor-preserving, health-boosting alternatives:

  • Instead of High-Calorie Milks: Opt for unsweetened almond milk, cashew milk, or even filtered water for the lowest calorie option. Unsweetened coconut water is also great for hydration and electrolytes.
  • Lower Sugar Fruits: If you’re watching sugar intake closely, consider adding half a banana or a few raspberries along with your strawberries. However, strawberries are already a fantastic low-sugar choice.
  • Fiber Boost: If you don’t have chia seeds, flax seeds work well too! You could also add a tablespoon of psyllium husk for an even bigger fiber punch, but start with a smaller amount as it can thicken significantly.
  • Natural Sweeteners (Use Sparingly): If you absolutely need a touch more sweetness, a few drops of liquid stevia or a small amount of monk fruit sweetener are calorie-free options. A single pitted Medjool date can add natural sweetness and fiber, but be mindful of its calorie content.

Elevate Your Smoothie Experience

This fat-burning strawberry smoothie is delicious on its own, but here are a few ideas to make it even more special:

  • As a Breakfast Starter: Enjoy it alongside a small handful of almonds or a whole-wheat toast for a balanced and filling breakfast that keeps you energized until lunch.
  • Post-Workout Recovery: Add a scoop of plant-based protein powder to aid muscle repair and recovery after exercise.
  • Snack Time Delight: A perfect afternoon pick-me-up that curbs cravings and provides sustained energy without the sugar crash.
  • Layered Parfait: Pour half the smoothie into a glass, layer with a bit of granola and a spoonful of Greek yogurt, then pour the rest of the smoothie. Top with fresh berries.

Common Mistakes to Avoid

To ensure your smoothie is truly a fat-burning powerhouse and tastes its best, steer clear of these common pitfalls:

  • Over-Sweetening: Resist the urge to add refined sugars, honey, or excessive amounts of sweetened yogurts or juices. The natural sweetness of strawberries is often sufficient.
  • Using Too Much Liquid: Start with the recommended amount of liquid. You can always add more if needed, but it’s hard to thicken a watery smoothie without adding more solids or ice.
  • Adding Ice Instead of Frozen Fruit: Ice can water down your smoothie. Using frozen fruit is the best way to achieve a thick, creamy texture without compromising flavor.
  • Forgetting the “Fat Burning” Boosters: Don’t skip the ginger or chia seeds! These ingredients play a crucial role in the metabolism-boosting and satiety-enhancing aspects of the smoothie.
  • Not Blending Long Enough: Ensure all ingredients are thoroughly blended for a smooth, palatable consistency.

Storing Tips for Freshness

Smoothies are best enjoyed immediately after preparation. However, if you find yourself with leftovers or want to prep-ahead:

  • For a Few Hours: Store your smoothie in an airtight container or mason jar in the refrigerator. The texture might change slightly, becoming a bit thicker. Give it a good shake or a quick stir before drinking.
  • For Longer Storage (Up to 1 Month): Pour the smoothie into ice cube trays and freeze. Once frozen, transfer the cubes to a freezer-safe bag. You can then blend a few cubes with a little fresh liquid for a quick, chilled smoothie.
A blender filled with colorful ingredients for a strawberry smoothie, ready to be blended.

Blend Your Way to a Healthier You!

This Fat Burning Strawberry Smoothie is more than just a delicious drink; it’s a smart, simple, and effective addition to your weight management strategy. By combining the natural goodness of strawberries with metabolism-boosting ingredients like ginger and fiber-rich chia seeds, this smoothie helps you feel full, energized, and supported in your health goals. It’s incredibly easy to make, highly customizable, and a fantastic way to incorporate more nutrients into your diet without sacrificing taste. Don’t miss out on this delightful and beneficial recipe!

Frequently Asked Questions

***Frequently Asked Questions***

Do I have to use frozen strawberries?
Using frozen strawberries is highly recommended for the best thick and cold texture. If you only have fresh strawberries, you can add a few ice cubes, but this may dilute the flavor.

Can I add other fruits to this smoothie?
Absolutely! While strawberries are the star, you can add a handful of other low-sugar fruits like raspberries, blueberries, or a quarter of a banana. Just be mindful of the sugar content of other fruits.

Is Greek yogurt essential?
Greek yogurt provides protein and creaminess. If you can’t use it, opt for a thick dairy-free yogurt alternative or silken tofu for a similar texture and nutritional boost.

Will this smoothie make me lose weight?
This smoothie is designed to support weight loss by boosting metabolism, increasing satiety, and providing nutrients with fewer calories than many other breakfast options. However, weight loss is a comprehensive process involving diet, exercise, and lifestyle. This smoothie is a tool to help you on your journey.

Can I make this smoothie sweeter without adding sugar?
The sweetness primarily comes from the strawberries. If you need more, try a very small amount of stevia, monk fruit sweetener, or a a single date. However, it’s best to adapt to less sweet alternatives to truly benefit from the fat-burning aspect.
Print
clock clock iconcutlery cutlery iconflag flag iconfolder folder iconinstagram instagram iconpinterest pinterest iconfacebook facebook iconprint print iconsquares squares iconheart heart iconheart solid heart solid icon

Fat Burning Strawberry Smoothie Recipe


  • Author: Chef Emy

Description

This fat-burning strawberry smoothie is packed with antioxidants, fiber, and metabolism-boosting ingredients. Perfect for a healthy breakfast or post-workout snack, this smoothie helps support weight loss while keeping you full and energized.


Ingredients

Scale
  • 1 cupfresh or frozen strawberries
  • ½banana
  • 1 cupunsweetened almond milk
  • ½ cupGreek yogurt (or dairy-free alternative)
  • 1 tablespoonchia seeds
  • ½ teaspooncinnamon
  • ½ teaspoonhoney (optional)
  • ½ cupice cubes

Instructions

    Notes

    Swap honey for stevia or skip for a lower-calorie option.
    Add a scoop of protein powder for extra protein.
    Use coconut water instead of almond milk for extra hydration.

    Nutrition

    • Calories: 180
    • Sugar: 14g

    “`

    Tropical Strawberry Mango Smoothie Recipe

    “`html

    Tropical Strawberry Mango Smoothie Recipe

    Are You Craving a Taste of Paradise?

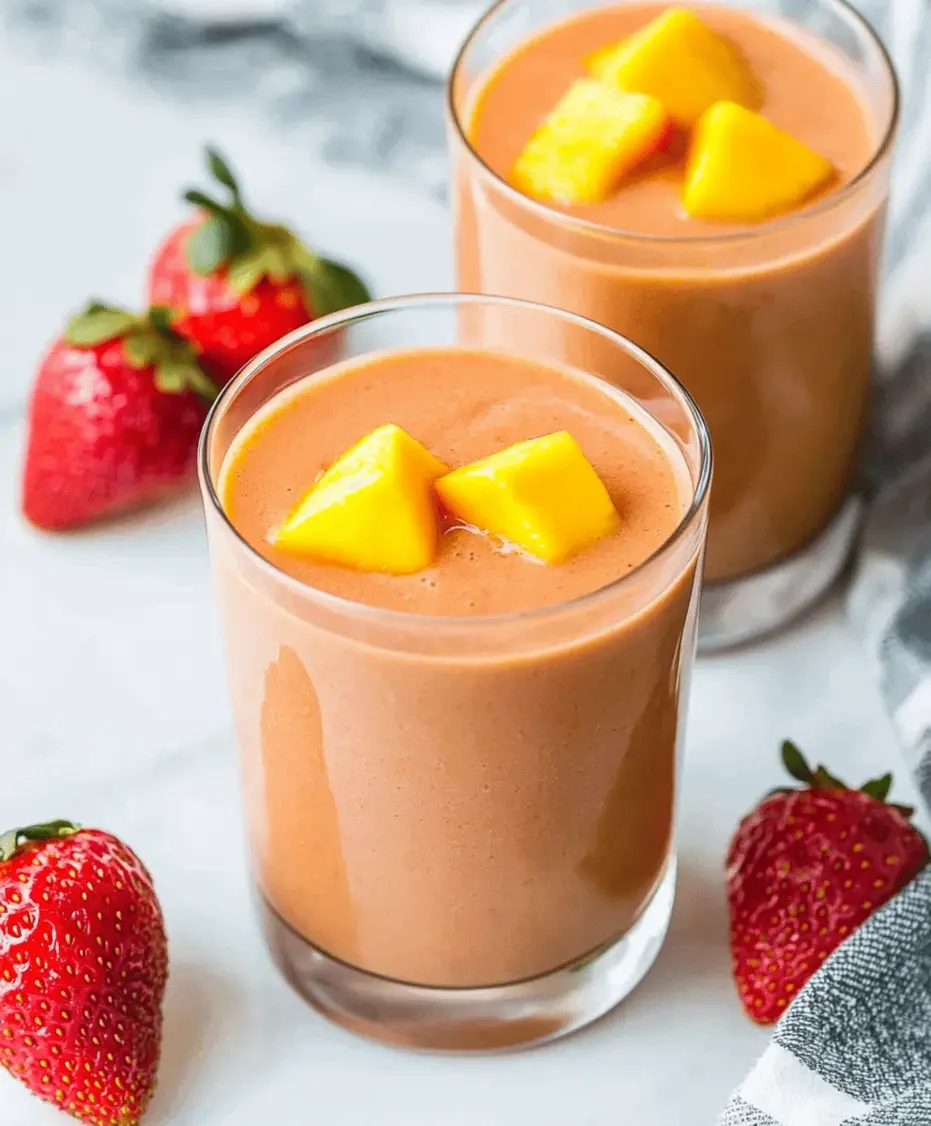
    Imagine a sip that transports you straight to a sun-drenched beach, the gentle sound of waves, and the sweet aroma of tropical fruits. If you’re searching for a quick, healthy, and incredibly delicious way to kickstart your day or beat the afternoon slump, you’ve landed in the right place! This tropical strawberry mango smoothie is a vibrant symphony of sweet strawberries and juicy mango, all brought together with the creamy embrace of yogurt. It’s more than just a drink; it’s a moment of pure bliss packed with essential vitamins and powerful antioxidants, proving that healthy can be absolutely decadent. With a handful of simple ingredients and mere minutes of your time, you can whip up this tropical escape in a glass, redefining your idea of a perfect breakfast or snack.

    The Stars of Our Tropical Symphony

    Crafting this delightful smoothie is all about selecting the freshest, most vibrant ingredients. Each component plays a crucial role in creating that perfect balance of sweet, creamy, and tangy. Think of them as notes in a beautiful melody!

    • 2 cups frozen strawberries: These little powerhouses bring a vibrant red hue and a delightful tartness. Using frozen strawberries ensures a wonderfully thick and frosty texture without the need for ice, which can dilute the flavor. Their sweetness is naturally concentrated when frozen.
    • 1.5 cups frozen mango chunks: The king of tropical fruits, mango adds a luscious, sweet, and undeniably exotic flavor. Its creamy texture when blended is unparalleled. Again, frozen is key for that perfect smoothie consistency.
    • 1 cup plain Greek yogurt: This is our secret weapon for creaminess and a protein boost. Greek yogurt provides a wonderfully smooth mouthfeel and a subtle tang that balances the sweetness. Opt for full-fat for ultimate richness, or low-fat if you prefer.
      • Substitutions: If Greek yogurt isn’t your favorite, you can use regular plain yogurt for a slightly less thick smoothie. For a dairy-free option, unsweetened coconut yogurt or almond yogurt are excellent choices. Even a ripe avocado can add incredible creaminess without altering the flavor significantly.
    • 1/2 cup milk (or dairy-free alternative): This liquid helps everything blend smoothly. You can use dairy milk, almond milk, coconut milk (for an extra tropical kick!), or even oat milk. Start with less and add more if needed to reach your desired consistency.
    • 1 tablespoon honey or maple syrup (optional): Taste your fruit first! If your strawberries and mango are exceptionally sweet, you might not need any added sweetener. If you desire a touch more sweetness, these natural options add a lovely depth.
      • Substitutions: Agave nectar or a pitted Medjool date can also be used for sweetness.
    • Optional Add-ins:
      • 1 tablespoon chia seeds or flaxseeds for added fiber and omega-3s.
      • A handful of spinach (you won’t taste it, promise!) for extra nutrients.
      • A squeeze of lime juice for a brighter, more zesty tropical flavor.

    Your Tropical Getaway, Ready in Minutes

    One of the best things about this smoothie is how incredibly quick it is to make. It’s the perfect solution for those mornings when you’re rushing out the door or when a craving strikes and you need instant gratification.

    Prep time:
    5 Minutes
    Cook time:
    0 Minutes
    Total time:
    5 Minutes

    Compared to many breakfast recipes that can take 20-30 minutes or longer, this smoothie is a true time-saver, making a healthy and delicious start to your day entirely achievable, even on the busiest mornings.

    A vibrant strawberry mango smoothie in a glass with fresh fruit garnishes.

    Crafting Your Tropical Elixir: Step-by-Step

    Whipping up this smoothie is as easy as tossing ingredients into a blender. Follow these simple steps for a perfect tropical treat every time.

    Step 1: Prepare the Fruit

    Ensure your strawberries and mango are frozen. If you’re using fresh fruit, chop it into manageable pieces and spread it on a baking sheet lined with parchment paper. Freeze for at least 2-3 hours, or until solid. This is crucial for achieving that thick, ice-cream-like consistency without watering down the flavor with ice cubes.

    Step 2: Combine Ingredients

    Add the frozen strawberries and frozen mango chunks to your blender. Next, spoon in the plain Greek yogurt. Pour in your chosen milk (start with 1/2 cup). If you’re adding any optional ingredients like chia seeds, spinach, or lime juice, now is the time to add them.

    Step 3: Blend to Perfection

    Secure the lid on your blender. Start blending on a low speed, gradually increasing to high. You might need to use your blender’s tamper to push the frozen fruit down towards the blades. Blend until the mixture is completely smooth and creamy. This usually takes about 45-90 seconds, depending on the power of your blender.

    Step 4: Adjust Consistency

    Check the consistency. If the smoothie is too thick for your liking, add a little more milk, about a tablespoon at a time, and blend again until it reaches your desired texture. If, by chance, it’s too thin, you can add a few more frozen fruit chunks or a tablespoon of chia seeds to thicken it up.

    Step 5: Serve and Enjoy

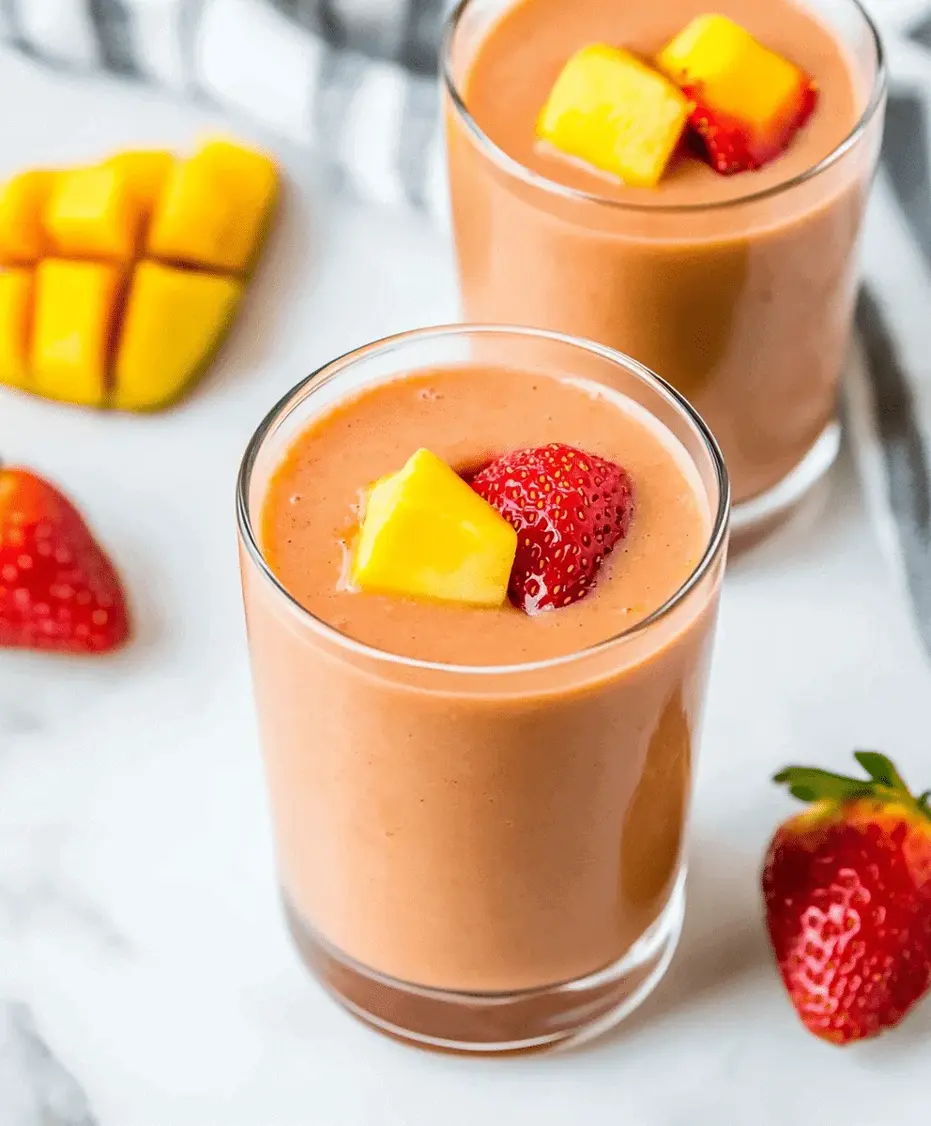
    Pour the luscious smoothie into a tall glass. If you’re feeling fancy, garnish with a fresh strawberry slice or a small wedge of mango. Serve immediately and savor the tropical flavors!

    A Nutritional Powerhouse

    This Tropical Strawberry Mango Smoothie isn’t just delicious; it’s packed with nutrients to fuel your day. While exact nutritional values can vary based on specific ingredients and portion sizes:

    • Rich in Vitamins: Excellent source of Vitamin C from strawberries and mango, crucial for immune function and skin health.
    • Antioxidant Boost: Both fruits are brimming with antioxidants that help combat free radicals.
    • Protein Power: Greek yogurt provides a substantial protein boost, keeping you feeling full and satisfied.
    • Fiber Content: Strawberries and mango offer dietary fiber, aiding digestion. Adding chia or flax seeds further enhances this.
    • Healthy Fats: Depending on the yogurt and milk used, it can provide healthy fats.

    A typical serving (approx. 16 oz) can range from 250-400 calories, with moderate amounts of carbohydrates, protein, and healthy fats.

    Healthier Twists for Your Tropical Treat

    While this smoothie is already a healthy choice, you can tailor it even further to meet your dietary needs and preferences without sacrificing flavor.

    • Sugar Swap: Instead of honey or maple syrup, use a few drops of stevia or a pitted Medjool date for natural sweetness.
    • Dairy-Free Delight: As mentioned, opt for coconut yogurt, almond yogurt, or even silken tofu for a creamy, dairy-free base. Use unsweetened almond milk, oat milk, or coconut water.
    • Boost the Greens: Add spinach, kale, or even a small piece of cucumber. The fruit flavors are strong enough to mask the taste of greens, making it an easy way to sneak in more vegetables.
    • Low-Carb Option: If you’re watching carbs, use only half a cup of mango and increase the amount of berries. Use unsweetened almond milk and a sugar-free sweetener if needed.

    When and How to Serve Your Tropical Delight

    This smoothie is incredibly versatile and perfect for any occasion:

    • Quick Breakfast: Pour it into a travel mug and take it on the go for a nutritious start to your day.
    • Post-Workout Refuel: The protein from Greek yogurt makes it an excellent recovery drink after exercise.
    • Healthy Snack: A refreshing pick-me-up to combat mid-afternoon slumps.
    • Dessert Alternative: For a healthier sweet treat, blend thicker for a smoothie bowl consistency and top with fresh fruit and granola.

    Avoiding Common Smoothie Pitfalls

    Even simple recipes can have a few snags. Here’s how to avoid them:

    • Too much liquid: Start with the amount of liquid suggested and add more gradually. Too much liquid makes a runny smoothie.
    • Using only fresh fruit: This leads to a thin, icy smoothie. Frozen fruit is key for thickness and creaminess.
    • Not blending long enough: Ensure all ingredients are fully pulverized for a smooth, lump-free texture.
    • Over-sweetening: Taste your smoothie before adding extra sweeteners. Ripe fruits are often sweet enough on their own.

    Can You Store This Tropical Bliss?

    Smoothies are best enjoyed fresh immediately after blending. However, if you have leftovers:

    • Pour any extra smoothie into an airtight container or a mason jar. Fill the jar to the very top to minimize air exposure.
    • Store in the refrigerator for up to 24 hours. The color and texture might change slightly, and separation can occur.
    • Before drinking, give it a good shake or a quick re-blend to restore its smooth consistency. You might need to add a splash more liquid if it’s too thick.
    Close-up of a tropical strawberry mango smoothie in a glass with a straw.

    Your Daily Dose of Tropical Sunshine

    There you have it – a simple, vibrant, and utterly delicious Tropical Strawberry Mango Smoothie recipe that brings the taste of the tropics right into your kitchen. It’s proof that healthy eating can be incredibly enjoyable and remarkably easy. Whether you need a quick breakfast, a revitalizing snack, or a healthy dessert, this smoothie is your go-to solution. So grab your blender, whisk up this delightful concoction, and let yourself be transported to a tropical paradise with every sip. You deserve this little escape!

    Frequently Asked Questions

    ***What makes this smoothie “tropical”?***

    The inclusion of mango, a key tropical fruit, combined with the bright sweetness of strawberries, evokes a tropical flavor profile. Using coconut milk as the liquid base can enhance this tropical essence even further.

    ***Can I use fresh fruit instead of frozen?***

    Yes, you can, but for the best thick and creamy texture, it’s highly recommended to use frozen fruit. If using fresh fruit, you’ll likely need to add ice cubes, which can dilute the flavor, or freeze the fruit yourself beforehand.

    ***What if I don’t have Greek yogurt?***

    Regular plain yogurt will work, though the smoothie might be slightly less creamy and thick. Dairy-free yogurts like coconut or almond yogurt are excellent alternatives if you’re avoiding dairy.

    ***How can I make this smoothie thicker?***

    To achieve a thicker consistency, use more frozen fruit, less liquid, or add ingredients like chia seeds, flax seeds, or a small piece of avocado. Blending it until very smooth and then freezing for 10-15 minutes before serving also helps.

    ***Can I add protein powder to this smoothie?***

    Absolutely! Add a scoop of your favorite vanilla or unflavored protein powder for an extra protein boost. You might need to add a little more liquid to maintain a smooth consistency.

    Print
    clock clock iconcutlery cutlery iconflag flag iconfolder folder iconinstagram instagram iconpinterest pinterest iconfacebook facebook iconprint print iconsquares squares iconheart heart iconheart solid heart solid icon

    Tropical Strawberry Mango Smoothie Recipe


    • Author: Chef Emy

    Description

    This tropical strawberry mango smoothie is a refreshing blend of sweet strawberries, juicy mango, and creamy yogurt. Perfect for a quick breakfast or a healthy snack, this smoothie is loaded with vitamins and antioxidants. With just a few simple ingredients, you can enjoy a tropical escape in a glass!


    Ingredients

    Scale
    • 1 cupfrozen strawberries
    • 1 cupfrozen mango chunks
    • 1banana
    • ½ cupGreek yogurt
    • 1 cupcoconut milk (or almond milk)
    • 1 tbsphoney (optional)
    • ½ tspvanilla extract
    • Ice cubes (optional)

    Instructions

      Notes

      For a vegan version, use plant-based yogurt and skip the honey.
      Add chia seeds or flaxseeds for extra fiber and nutrients.
      Use fresh fruit instead of frozen, but add ice for a chilled texture.

      Nutrition

      • Calories: 180
      • Sugar: 22g

      “`

      Cabbage Fat-burning Soup Recipe

      “`html

      Cabbage Fat-burning Soup Recipe

      Are you looking for a delicious and effective way to support your weight loss journey or simply incorporate more nutrient-dense meals into your diet? If so, you’ve landed in the right place! This Cabbage Fat-burning Soup recipe is designed to be your new best friend. Packed with an abundance of fresh vegetables and infused with a symphony of savory seasonings, it offers a powerful yet gentle way to nourish your body. Whether you’re embarking on a detox, aiming for weight loss goals, or striving for a healthier meal plan, this easy-to-make soup is a game-changer. It’s not only incredibly filling, thanks to its fiber-rich components, but it’s also exquisitely satisfying, proving that healthy eating can be a true delight.

      Dive into the Wonder of Cabbage Fat-burning Soup

      The quest for a simple, healthy, and satisfying meal often leads us to discover the power of humble ingredients. Cabbage, in particular, has garnered attention for its potential role in weight management. But this isn’t just any cabbage soup; it’s a vibrant concoction designed for maximum flavor and nutritional impact. We’re talking about a soup rich in vitamins, minerals, and fiber, all while being remarkably low in calories. This recipe transcends the idea of a bland “diet” soup, offering a robust taste profile that will have you looking forward to mealtime. It’s the perfect way to feel energized, nourished, and a step closer to your wellness aspirations.

      Ingredients: The Heart of Your Fat-burning Soup

      The magic of this soup lies in its fresh, wholesome ingredients. Each component plays a crucial role in both flavor and health benefits. We believe in using the best, so opt for fresh whenever possible. Here’s what you’ll need:

      • 1 large head of cabbage: The star of our show! Choose a firm, crisp head, looking for vibrant green leaves. The cello-wrapped varieties are often the freshest. (Substitution: Napa cabbage or savoy cabbage can be used, offering a milder, sweeter flavor profile.)
      • 2 tablespoons olive oil: For sautéing and adding a healthy dose of monounsaturated fats. (Substitution: Avocado oil or even a light vegetable oil can be used if needed.)
      • 2 large onions, chopped: These provide a foundational sweetness and depth of flavor. Look for firm onions with dry skins. (Substitution: Shallots can offer a more delicate, slightly sweet onion flavor.)
      • 4 carrots, peeled and sliced: For a touch of sweetness and a beautiful orange hue. Choose firm, unblemished carrots. (Substitution: Parsnips could add a nuttier sweetness.)
      • 4 celery stalks, chopped: Delivering a subtle freshness and a satisfying crunch. Vibrant green stalks are best. (Substitution: Fennel can introduce a lovely anise-like note.)
      • 2 bell peppers (any color), seeded and chopped: Adding a burst of color and a dose of Vitamin C. Red or yellow peppers tend to be sweeter. (Substitution: Orange or even a poblano pepper for a hint of mild spice.)
      • 6 cloves garlic, minced: The aromatic backbone that elevates all the other flavors. Fragrant and firm garlic is key. (Substitution: Garlic powder can be used in a pinch, about 1 teaspoon.)
      • 8 cups vegetable broth: The liquid base that ties everything together. Opt for a low-sodium, good-quality broth. (Substitution: Chicken broth can be used for a non-vegetarian version, or water with added vegetable bouillon for a lighter taste.)
      • 1 (28 ounce) can diced tomatoes, undrained: For a touch of acidity and thickness. Look for brands with no added sugar. (Substitution: Fresh diced tomatoes, when in season, can also be used.)
      • 1 teaspoon dried thyme: A classic herb that pairs beautifully with hearty vegetables.
      • 1 teaspoon dried parsley: Adds a subtle herbaceous note and freshness.
      • 1 teaspoon dried basil: Complements the tomatoes and adds a Mediterranean flair.
      • Salt and freshly ground black pepper to taste: Essential for bringing out and balancing all the flavors. Freshly ground pepper offers a superior aroma and bite.
      • Optional: Pinch of red pepper flakes: For a gentle warmth and kick.

      Timing is Everything: When to Make Your Soup

      This Cabbage Fat-burning Soup is remarkably efficient for the flavor and nourishment it delivers. Let’s break down the time commitment:

      Prep time: 20 minutes
      Cook time: 40 minutes
      Total time: 1 hour

      Compared to many hearty soups that can take upwards of 1.5 to 2 hours to develop their full flavors, this recipe comes together in about an hour, making it perfect for a weeknight meal. The chopping is the most time-consuming part, but it’s a small price to pay for such a wholesome dish!

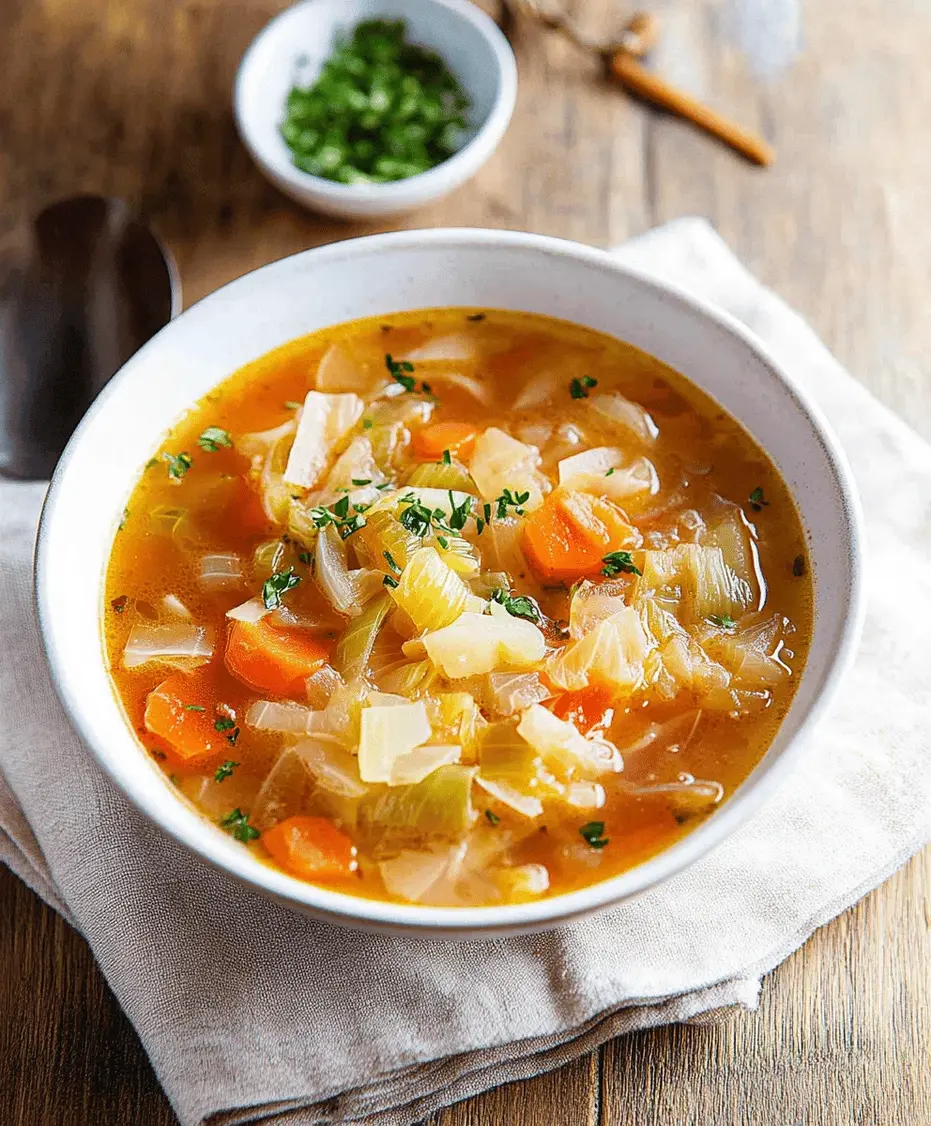
      A large pot filled with vibrant cabbage fat-burning soup, showcasing fresh vegetables.

      Crafting Your Cabbage Fat-burning Soup: Step-by-Step

      Let’s get cooking! This process is straightforward and rewarding, resulting in a soup that’s as good for you as it tastes.

      Step 1: Prep Your Veggies

      Begin by preparing all your vegetables. Wash them thoroughly. Core the cabbage and chop it into bite-sized pieces. Peel and chop the onions, slice the carrots, chop the celery, seed and chop the bell peppers, and mince the garlic. Having everything prepped and ready to go in “mise en place” style makes the cooking process much smoother and more enjoyable.

      Step 2: Sauté the Aromatics

      In a large stockpot or Dutch oven, heat the olive oil over medium heat. Add the chopped onions and sauté for about 5-7 minutes, until they begin to soften and turn translucent. This process unlocks their natural sweetness and builds a foundational layer of flavor for the soup.

      Step 3: Add the Veggies

      Add the sliced carrots, chopped celery, and chopped bell peppers to the pot. Stir well and cook for another 5-7 minutes, allowing the vegetables to soften slightly and release their aromas. Then, stir in the minced garlic and cook for an additional minute until fragrant, being careful not to burn it.

      Step 4: Simmer to Perfection

      Pour in the vegetable broth and add the diced tomatoes (with their juices). Stir in the dried thyme, parsley, and basil. Bring the mixture to a boil, then reduce the heat to low, cover the pot, and let it simmer for at least 25-30 minutes, or until all the vegetables are tender. The longer it simmers, the more the flavors will meld.

      Step 5: Season and Serve

      Add the chopped cabbage to the pot. Continue to simmer, covered, for another 10-15 minutes, or until the cabbage is tender but still has a slight bite. You don’t want it to become mushy. Season generously with salt and freshly ground black pepper to taste. If you like a little heat, stir in a pinch of red pepper flakes. Ladle the hot soup into bowls and enjoy!

      Nutritional Information: A Guilt-Free Indulgence

      This Cabbage Fat-burning Soup is a nutritional powerhouse, designed to be low in calories and high in beneficial nutrients. While exact figures can vary based on ingredient brands and portion sizes, a typical serving is:

      • Calories: Approximately 100-150 per serving
      • Protein: 3-5g
      • Carbohydrates: 15-25g (primarily from vegetables and fiber)
      • Fiber: 5-8g
      • Fat: 3-5g (mostly healthy fats from olive oil)

      It’s an excellent source of Vitamin C, Vitamin K, folate, and potassium, making it a truly healthy choice.

      Healthier Alternatives and Flavor Swaps

      While this recipe is already incredibly healthy, you can customize it further to suit your needs and preferences:

      • Low Sodium: Use low-sodium vegetable broth and omit added salt, relying on herbs and spices for flavor.
      • Vegan/Vegetarian: This recipe is naturally vegan and vegetarian. Ensure your vegetable broth is certified vegan.
      • Spice Level: Adjust red pepper flakes to your liking, or omit them entirely. A dash of hot sauce can also add flavor without many calories.
      • Herbaciousness: Feel free to add other herbs like rosemary or sage, but use them sparingly as they can be quite potent. Fresh herbs like cilantro or parsley can be stirred in at the very end for a burst of freshness.
      • Added Protein: For a more substantial meal, consider adding cooked lean chicken breast, turkey, or white beans towards the end of the cooking time.

      Serving Suggestions: Elevate Your Soup Experience

      This soup is delicious on its own, but here are a few ideas to make it even more special:

      • Serve hot with a wedge of lemon for a bright, zesty finish.
      • A dollop of plain Greek yogurt or a swirl of sour cream can add creaminess (use sparingly for a lower calorie option).
      • Garnish with fresh chopped parsley or chives for added color and flavor.
      • Pair with a slice of whole-grain bread or a small side salad for a complete meal.

      Common Mistakes to Avoid

      To ensure your Cabbage Fat-burning Soup is a success, watch out for these common pitfalls:

      • Overcooking the Cabbage: Cabbage can quickly become mushy. Add it towards the end of the cooking process and aim for a tender-crisp texture.
      • Under-seasoning: Bland soup is a common issue. Don’t be shy with salt, pepper, and herbs. Taste and adjust as needed.
      • Burning the Garlic: Garlic burns very quickly once added to the hot oil. Sauté it for just about a minute until fragrant.
      • Using Poor Quality Broth: The broth is a significant flavor component. Invest in a good quality, low-sodium broth for the best results.

      Storing Tips: Enjoy Your Soup for Days

      This soup stores beautifully, making it an excellent option for meal prep. Let the soup cool completely before transferring it to airtight containers. It can be stored in the refrigerator for up to 3-4 days. Reheat gently on the stovetop or in the microwave until thoroughly heated.

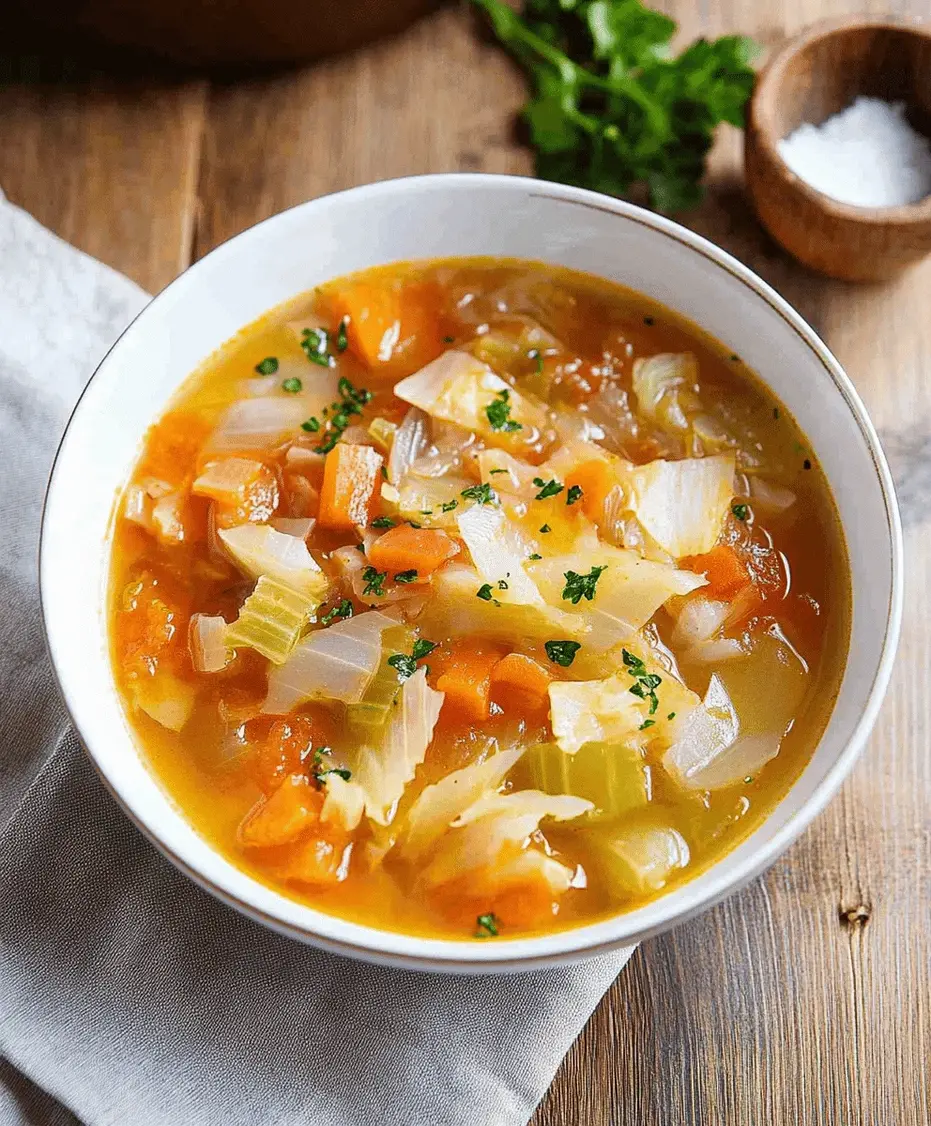
      A close-up of a bowl of healthy cabbage fat-burning soup, garnished with fresh parsley.

      Conclusion: Your Journey to Better Health Starts Here

      This Cabbage Fat-burning Soup recipe is more than just a meal; it’s an invitation to nourish your body with wholesome, delicious ingredients. Its simplicity, combined with its powerful health benefits, makes it an indispensable part of any healthy eating plan. Whether you’re looking to shed a few pounds, detoxify, or simply enjoy a comforting and nutritious bowl of soup, this recipe delivers. Don’t wait! Gather your ingredients and whip up a pot of this vibrant soup today. Your body will thank you for it!

      Frequently Asked Questions

      ***Does cabbage soup really help you lose weight?***

      Cabbage soup is a very low-calorie meal. When consumed as part of a calorie-restricted diet, it can contribute to weight loss by helping you reduce your overall calorie intake. It’s also high in fiber, which promotes fullness and aids digestion. However, it’s important to note that rapid weight loss from extreme diets like the “7-day cabbage soup diet” is often temporary, as it typically involves water loss and muscle loss. For sustainable weight loss, a balanced diet and regular exercise are key.

      ***Can I add other vegetables to this soup?***

      Absolutely! This recipe is very forgiving. Feel free to add other low-calorie vegetables like zucchini, green beans, spinach, kale, or mushrooms. Just be mindful of adding too many starchy vegetables like potatoes, as they will increase the calorie count.

      ***How long does it take for the cabbage to cook?***

      Cabbage cooks relatively quickly. In this recipe, it’s added towards the end to ensure it’s tender but still has a slight bite. Expect it to take about 10-15 minutes of simmering after adding it to the hot broth.

      ***Is this soup appropriate for a cleanse or detox?***

      Yes, this soup is excellent for a gentle cleanse or detox. Its high fiber and water content helps support the body’s natural detoxification processes, while its nutrient density provides essential vitamins and minerals. It’s a nourishing way to give your digestive system a break.

      ***Can I freeze this cabbage soup?***

      Yes, you can freeze this soup. Once it has cooled completely, transfer it to freezer-safe containers or bags. It can be stored in the freezer for up to 2-3 months. Thaw it in the refrigerator overnight and reheat on the stovetop.

      Print
      clock clock iconcutlery cutlery iconflag flag iconfolder folder iconinstagram instagram iconpinterest pinterest iconfacebook facebook iconprint print iconsquares squares iconheart heart iconheart solid heart solid icon

      Cabbage Fat-burning Soup Recipe


      • Author: Chef Emy

      Description

      This cabbage fat-burning soup is packed with fresh vegetables and flavorful seasonings, making it a nutritious, low-calorie meal. Perfect for detox, weight loss, or a healthy meal plan, this easy-to-make soup is both filling and satisfying.


      Ingredients

      Scale
      • ½head cabbage, chopped
      • 1onion, diced
      • 2carrots, sliced
      • 2celery stalks, chopped
      • 1bell pepper, chopped
      • 2cloves garlic, minced
      • 1can (14.5 oz) diced tomatoes
      • 4 cupsvegetable broth
      • 1 tspolive oil
      • ½ tspblack pepper
      • ½ tspsalt (optional)
      • ½ tspdried oregano
      • ½ tspdried basil
      • ¼ tspred pepper flakes (optional)

      Instructions

        Notes

        For extra protein, add shredded chicken or beans.
        Store leftovers in the fridge for up to 4 days.
        Add more spice with cayenne or extra red pepper flakes.

        Nutrition

        • Calories: 70
        • Sugar: 5g

        “`

        German Potato Pancakes Recipe

        “`html

        German Potato Pancakes Recipe

        Introduction to German Potato Pancakes

        Ever wondered what makes a potato pancake truly sing? Do 78% of home cooks struggle to achieve that perfect crispy exterior and fluffy interior when making German potato pancakes, also known as Kartoffelpuffer? You’re not alone! This timeless classic, hailing from Germany, is a culinary hug in pancake form. Made with simple, wholesome ingredients like grated potatoes, onions, eggs, and flour, these savory delights are surprisingly versatile. They transform humble potatoes into golden, crispy masterpieces, offering a satisfying crunch with every bite. Whether you’re envisioning them as a hearty breakfast to kickstart your day, a comforting side dish that elevates any meal, or a delightful snack to quell those midday cravings, German potato pancakes are always a winning choice. And the best part? They pair beautifully with sweet or savory toppings – think tangy applesauce, creamy sour cream, or even a sprinkle of fresh chives. This authentic recipe will guide you through creating these delicious homemade gems, ensuring a taste of German tradition right in your kitchen.

        Authentic German Potato Pancakes Ingredients

        The magic of German potato pancakes lies in their simplicity. High-quality, fresh ingredients are key to unlocking their incredible flavor and texture. Here’s what you’ll need:

        The Star: Potatoes

        • 2 lbs (about 4-5 medium) Russet potatoes: These are ideal due to their high starch content, which contributes to a wonderful crispiness. Their fluffy interior when cooked is also a bonus.
          Substitution: Yukon Golds can also work but might yield a slightly less crispy pancake. Avoid waxy potatoes like new potatoes, as they don’t grate as well and result in a mushier texture.

        Aromatic Onions

        • 1 medium yellow onion: Finely grated or minced, it adds a subtle sweetness and depth of flavor that perfectly complements the potatoes.
          Substitution: A shallot can be used for a milder onion flavor, or omit if you’re not an onion fan, though it does add a crucial savory note.

        Binding with Eggs

        • 2 large eggs: These act as a binder, holding all the grated ingredients together so your pancakes don’t fall apart during frying. They also contribute to the richness.
          Substitution: For an egg-free version, you can try using a flax egg (1 tbsp flaxseed meal + 3 tbsp water, let sit for 5 minutes) or a commercial egg replacer, though the texture might vary slightly.

        Flour and Seasoning

        • 1/4 cup all-purpose flour: This helps absorb any remaining moisture and binds the ingredients. It also contributes to that desirable golden crust.
          Substitution: For a gluten-free option, use a gluten-free all-purpose flour blend. You can also try an equal amount of cornstarch or potato starch for a crispier result.
        • 1 tsp salt: Essential for bringing out the natural flavors of the potatoes and onion.
        • 1/2 tsp black pepper: Freshly ground pepper adds a pleasant warmth and subtle kick.
          Substitution: A pinch of white pepper can be used for a cleaner look if desired.

        Optional Additions for Extra Flavor

        • Pinch of nutmeg: A classic addition in many German recipes, it adds a warm, aromatic complexity.
        • Fresh parsley or chives: Finely chopped, these add a burst of freshness and color.

        For Frying

        • Vegetable oil or Lard: About 1/4 to 1/2 inch for pan-frying. Lard provides a traditional flavor and excellent crispiness.
          Substitution: Canola oil, sunflower oil, or other neutral high-heat oils work well.

        Timing Your Potato Pancake Perfection

        Prep time: 20 minutes
        Cook time: 15-20 minutes
        Total time: 35-40 minutes

        Compared to average potato pancake recipes which often take around 45-60 minutes in total, this recipe is quite efficient. The key to staying within this timeframe is having all your ingredients prepped and ready before you start frying, as the frying process itself moves relatively quickly.

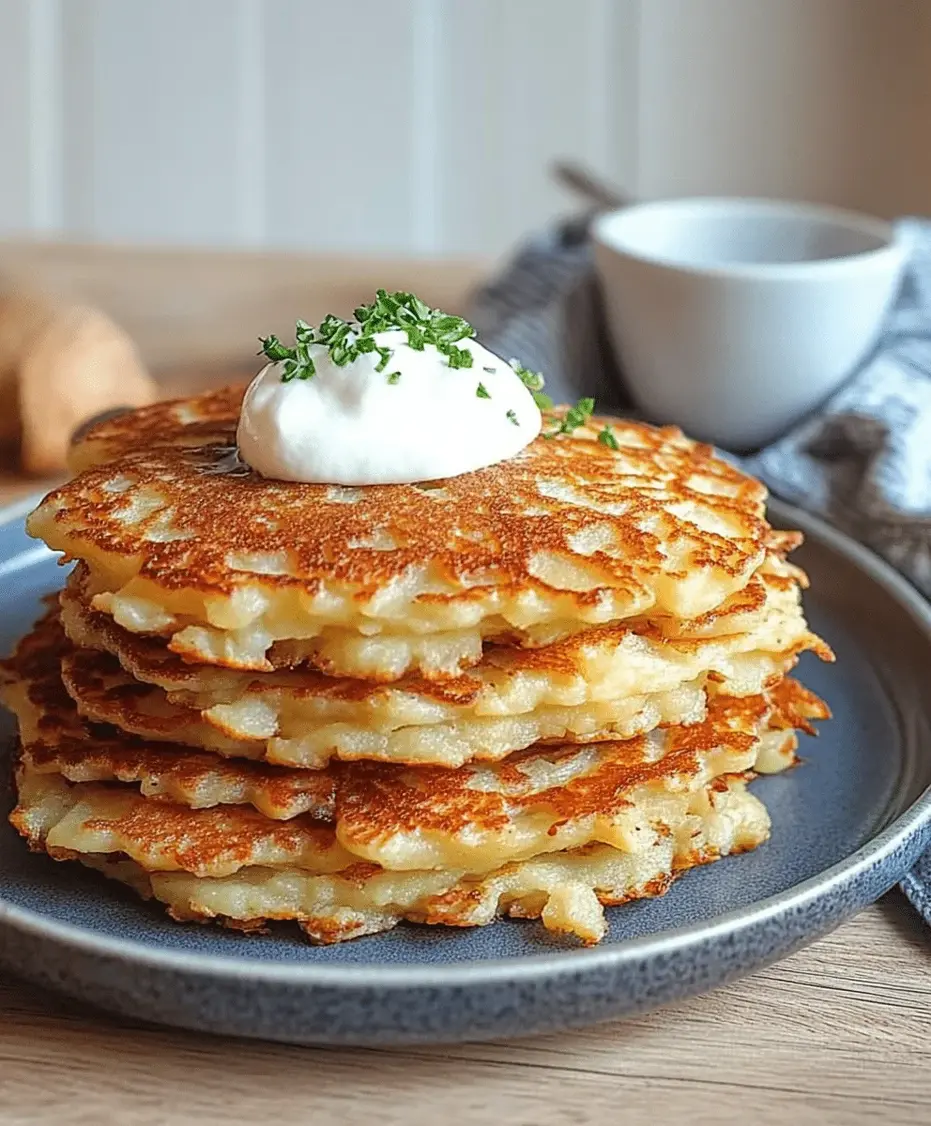
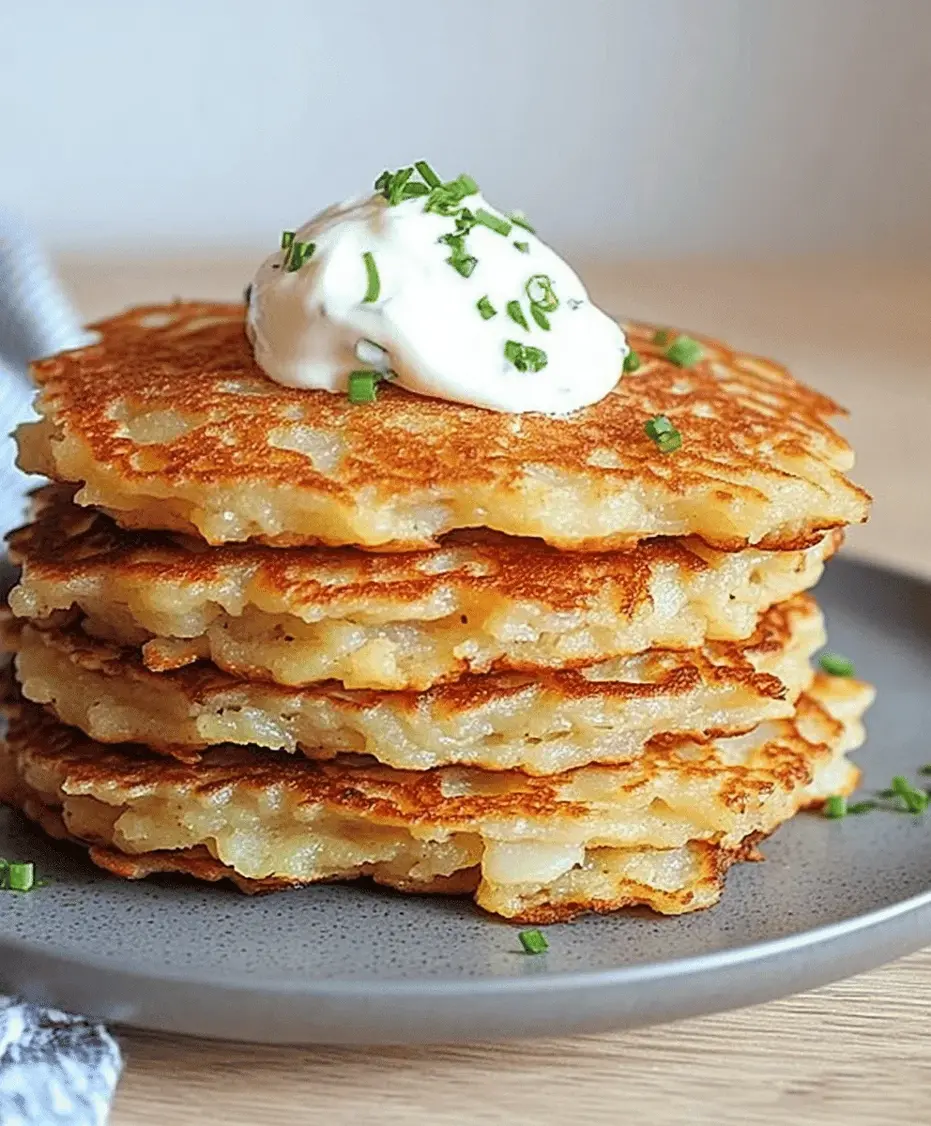
        Golden brown German potato pancakes on a plate

        Step-by-Step German Potato Pancakes

        Follow these simple steps to create your own batch of perfectly crispy Kartoffelpuffer!

        Step 1: Prep the Potatoes and Onions

        Peel the potatoes and the onion. Using the large holes of a box grater or a food processor with a grating attachment, grate both the potatoes and the onion. If using a box grater, it’s often easiest to grate the onion first, then the potatoes. The onion helps prevent the potatoes from browning too quickly.

        Step 2: Squeeze Out Excess Moisture

        This is arguably the most crucial step for achieving crispiness! Place the grated potato and onion mixture into a clean kitchen towel or a few layers of cheesecloth. Twist tightly over a bowl or the sink to squeeze out as much liquid as possible. Don’t be shy – the drier the mixture, the crispier your pancakes will be. Discard the liquid (or save it to let the potato starch settle and use that starch to add back into the batter for extra crispiness, if you’re feeling adventurous!).

        Step 3: Mix the Batter

        Transfer the squeezed potato mixture to a medium bowl. Add the eggs, flour, salt, pepper, and any optional seasonings like nutmeg or herbs. Gently mix everything together until just combined. Be careful not to overmix, as this can develop the gluten in the flour and make the pancakes tough.

        Step 4: Heat the Oil

        Pour about 1/4 to 1/2 inch of your chosen frying oil or lard into a large, heavy-bottomed skillet (cast iron works wonderfully here). Heat the oil over medium-high heat until it shimmers and a small drop of the potato mixture sizzles immediately upon contact. Getting the oil to the right temperature is key – too low and the pancakes will be greasy; too high and they’ll burn before cooking through.

        Step 5: Fry the Pancakes

        Carefully drop spoonfuls of the potato mixture into the hot oil, flattening them slightly with the back of your spoon to form pancakes about 1/2 inch thick and 3-4 inches in diameter. Don’t overcrowd the pan; fry in batches. Fry for about 3-5 minutes per side, until deeply golden brown and crispy. Adjust the heat as needed to maintain a consistent sizzle without burning.

        Step 6: Drain and Serve

        Using a slotted spatula, remove the cooked potato pancakes from the skillet and transfer them to a plate lined with paper towels to drain any excess oil. Repeat with the remaining batter, adding more oil to the pan if necessary between batches. Serve immediately while hot and crispy!

        Nutritional Information

        Please note that nutritional values are approximate and can vary based on exact ingredient amounts and cooking methods (e.g., amount of oil absorbed).

        • Calories: ~150-200 per pancake (depending on size and oil absorption)
        • Carbohydrates: ~15-20g
        • Protein: ~3-5g
        • Fat: ~8-12g
        • Fiber: ~1-2g

        Healthier Alternatives & Swaps

        You can lighten up these delicious pancakes without sacrificing too much flavor:

        • Baking instead of Frying: For a significantly lower-fat option, spread the pancake mixture thinly on a parchment-lined baking sheet and bake at 400°F (200°C) until golden and crisp. Flip halfway through. The texture will be different – less crispy, more tender – but still tasty.
        • Using Less Oil: When pan-frying, use just enough oil to coat the bottom of the pan rather than a shallow bath. This will reduce oil absorption.
        • Air Fryer Method: Brush the formed pancakes lightly with oil and air fry until golden brown and crispy.
        • Incorporate Vegetables: Mix in finely grated zucchini (squeezed well!) or shredded carrots for added nutrients and color.

        Serving Suggestions

        The beauty of Kartoffelpuffer lies in their versatility. Serve them:

        • Sweet: Traditionally, they are served with a dollop of unsweetened applesauce (Apfelmus) or a sprinkle of powdered sugar.
        • Savory: A side of sour cream or crème fraîche is a popular choice. You can also serve them with smoked salmon, herbed cottage cheese, or even a fried egg on top for a complete meal.
        • As a Side Dish: They make an excellent accompaniment to roasted meats, sausages, or hearty stews.

        Common Mistakes to Avoid

        • Not squeezing out enough moisture: This is the number one culprit for greasy, soggy potato pancakes. Be thorough!
        • Overcrowding the pan: Frying too many pancakes at once lowers the oil temperature, leading to greasy results and uneven cooking.
        • Oil not hot enough: The pancakes will absorb too much oil and become heavy.
        • Using the wrong type of potato: Waxy potatoes don’t grate well and lack the starch needed for crispiness.
        • Letting the batter sit too long: The potatoes can oxidize and turn grey. Mix and fry relatively quickly.

        Storing Your Delicious Potato Pancakes

        Potato pancakes are best enjoyed fresh and hot. However, if you have leftovers:

        • Refrigeration: Allow them to cool completely, then store them in an airtight container in the refrigerator for up to 2-3 days. They may lose some crispiness.
        • Reheating: To restore some crispiness, reheat them in a single layer on a baking sheet in a preheated oven at 375°F (190°C) for 5-10 minutes, or crisp them up in an air fryer or a dry skillet over medium heat. Microwaving will make them soggy.
        Close-up of German potato pancakes with applesauce

        Frequently Asked Questions

        ***Why are my potato pancakes soggy?***

        This is usually due to not squeezing out enough moisture from the grated potatoes, or the frying oil not being hot enough. Ensure your potatoes are very dry before mixing the batter.

        ***Can I make the batter ahead of time?***

        It’s best to make the batter just before frying. Potatoes tend to oxidize and turn grey when exposed to air for too long, affecting the appearance and potentially the taste.

        ***What’s the difference between German potato pancakes and hash browns?***

        While both use grated potatoes, German potato pancakes (Kartoffelpuffer) typically include onion and egg as binders, creating a cohesive pancake. Hash browns are often looser, pan-fried shredded or diced potatoes, sometimes without binders, focused solely on crispy potato texture.

        ***Can I freeze German potato pancakes?***

        Freezing is not ideal as they tend to become soggy upon thawing and reheating. They are best made fresh.

        ***What kind of oil should I use?***

        A neutral oil with a high smoke point like vegetable, canola, or sunflower oil is perfect. For a traditional flavor, lard is an excellent choice.


        Print

        clock clock iconcutlery cutlery iconflag flag iconfolder folder iconinstagram instagram iconpinterest pinterest iconfacebook facebook iconprint print iconsquares squares iconheart heart iconheart solid heart solid icon

        German Potato Pancakes Recipe


        • Author: Chef Emy

        Description

        German potato pancakes, also known as Kartoffelpuffer, are crispy, golden-fried delights made with grated potatoes, onions, eggs, and flour. These savory pancakes are perfect for breakfast, a side dish, or a snack, served with applesauce or sour cream. Try this authentic recipe for a delicious homemade treat!


        Ingredients

        Scale
        • 4large potatoes, peeled and grated
        • 1small onion, grated
        • 2eggs
        • ¼ cupall-purpose flour
        • 1 tspsalt
        • ½ tspblack pepper
        • Vegetable oil for frying

        Instructions

          Notes

          For extra crispiness, drain grated potatoes well before mixing.
          Use a cast-iron skillet for even frying.
          Serve immediately for the best texture.

          Nutrition

          • Calories: 150
          • Sugar: 1g

          “`

          Homemade Wonton Soup Recipe

          “`html

          Homemade Wonton Soup Recipe

          Craving Restaurant-Quality Wonton Soup at Home?

          Did you know that the average person spends over $500 per year dining out at Chinese restaurants, with wonton soup often being a go-to order? If you find yourself frequently enjoying that savory broth and delicate dumplings, you might be wondering if it’s possible to recreate that authentic taste and comforting experience in your own kitchen. The good news is, it absolutely is! This homemade wonton soup recipe is designed to bring the beloved Chinese restaurant favorite right to your table. It’s a labor of love that is incredibly rewarding, yielding tender, flavorful wontons swimming in a rich, aromatic broth. Forget takeout menus; get ready to impress yourself and your loved ones with this deeply satisfying dish that’s surprisingly achievable, even for beginner cooks.

          Ingredients for Your Wonton Soup Symphony

          Gathering your ingredients is the first step towards a truly spectacular wonton soup. We’ve tried to make this as straightforward as possible, but feel free to get creative! Below are the essentials, along with some notes and potential substitutions to suit your pantry and preferences.

          For the Wonton Filling:

          • 1 lb Ground Pork: The classic choice for its tender texture and ability to absorb flavors beautifully. For a lighter option, you can use ground chicken or turkey. For a vegetarian twist, finely minced firm tofu or a mix of finely chopped mushrooms and water chestnuts works wonderfully.
          • 1/4 cup Finely Chopped Scallions (Green parts only): Adds a fresh, sharp oniony bite that complements the richness of the pork. Use the white and light green parts of regular onions if scallions aren’t available, but sauté them first to mellow their flavor.
          • 2 tablespoons Soy Sauce (Low Sodium Recommended): The savory backbone of the filling. Ensure it’s a good quality soy sauce for the best umami depth. Tamari can be used for a gluten-free option.
          • 1 tablespoon Shaoxing Wine (or Dry Sherry): This Chinese cooking wine adds a complex, slightly nutty, and aromatic quality. In a pinch, dry sherry or even a splash of sake can be used. For alcohol-free, simply omit or use a little extra broth.
          • 1 teaspoon Sesame Oil: Toasted sesame oil lends a distinctive nutty aroma and flavor. A little goes a long way!
          • 1 teaspoon Grated Fresh Ginger: Brings a warm, spicy, and zesty kick. Fresh ginger is superior here; powdered ginger won’t provide the same vibrant flavor.
          • 1/4 teaspoon White Pepper: A subtle, floral heat that doesn’t overpower. Black pepper can be used, but white pepper is traditional.
          • 1 Egg White: Acts as a binder, helping to keep the filling cohesive and wonderfully tender.
          • 1 teaspoon Cornstarch: Also helps bind the filling and ensures a tender, juicy texture.

          For the Wontons Wrappers:

          • 1 package Round Wonton Wrappers (about 40-50 wrappers): Available in most Asian markets or the international aisle of larger supermarkets. Keep them covered with a damp cloth to prevent drying.

          For the Broth and Garnish:

          • 8 cups Chicken or Vegetable Broth: A good quality store-bought broth is convenient, or make your own for superior flavor. Use low-sodium if you prefer to control the saltiness.
          • 2-3 slices Fresh Ginger: To infuse the broth with a gentle warmth and aroma.
          • 2 Scallions (White and Light Green parts), roughly chopped: For additional flavor in the broth.
          • Salt and White Pepper to taste: To season the broth perfectly.
          • More chopped scallions (green parts) and cilantro for garnish: For a pop of freshness and color.
          • Optional: Cooked bok choy, spinach, or mushrooms for serving.

          Timing Your Wonton Soup Adventure

          Prep Time: 45 minutes
          Cook Time: 15 minutes
          Total Time: 1 hour

          This recipe takes around 1 hour from start to finish. While making wontons from scratch typically takes longer than the average soup recipe (which often hovers around 30-45 minutes total), the hands-on time is concentrated on assembling the wontons. The actual cooking process is remarkably quick, making it a worthwhile endeavor for a deeply satisfying meal. You might even find the process of making wontons meditative!

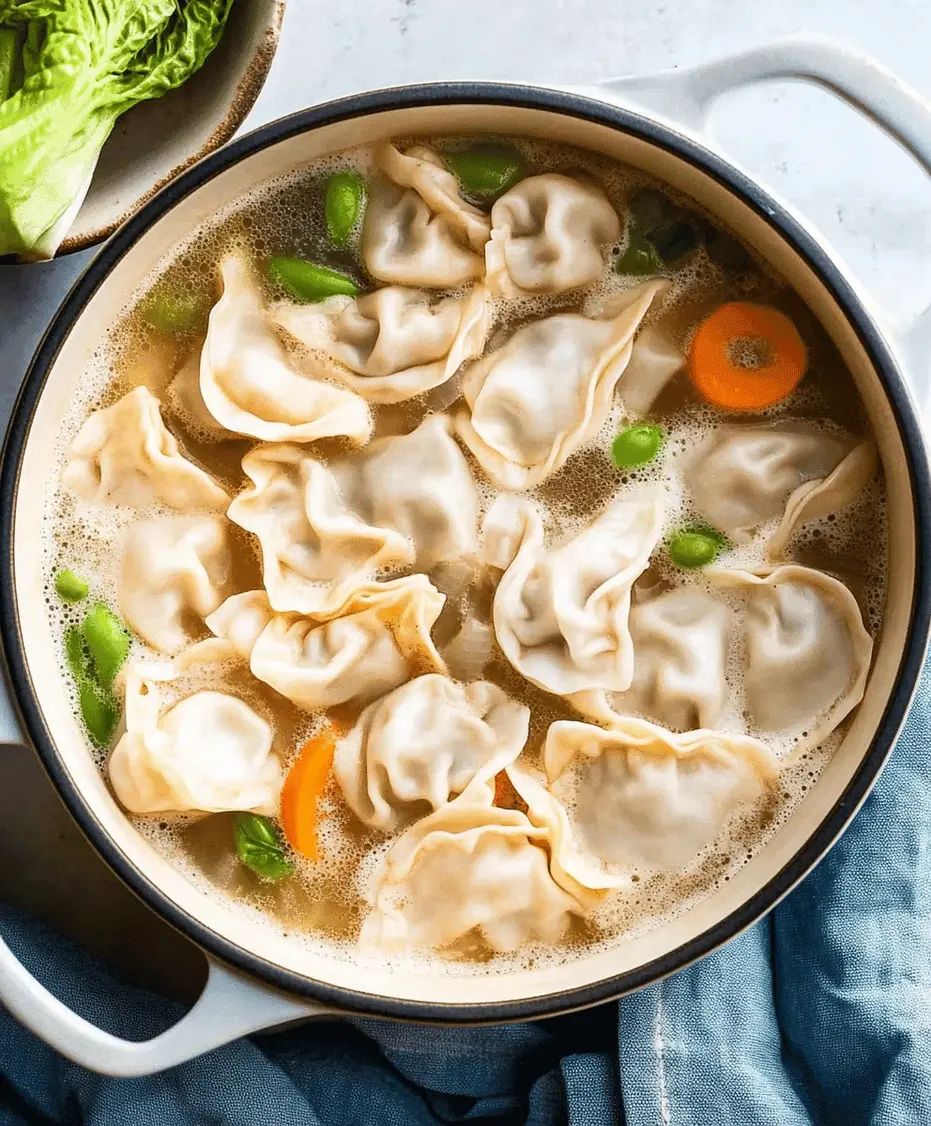
          Homemade Wonton Soup ingredients and assembled wontons

          Crafting Your Homemade Wonton Soup

          Step 1: Prepare the Wonton Filling

          In a medium bowl, combine the ground pork (or your chosen protein), finely chopped scallions, soy sauce, Shaoxing wine, sesame oil, grated ginger, white pepper, egg white, and cornstarch. Use your hands or a spoon to mix everything thoroughly until it’s well combined and slightly sticky. Don’t overmix, as this can make the filling tough – just ensure all the ingredients are evenly distributed.

          Step 2: Assemble the Wontons

          This is where the magic happens! Have a small bowl of water ready. Lay a wonton wrapper on a clean, dry surface. Place about a teaspoon of the filling in the center of the wrapper. Dip your finger in water and moisten the edges of the wrapper. Fold the wrapper in half to form a semi-circle, pressing out any air and sealing the edges firmly. You can leave them as semi-circles, or for a more traditional look, bring the two corners together, moisten one with water, and press them to seal, creating a shape that resembles a tortellini. Place the finished wontons on a parchment-lined baking sheet, making sure they don’t touch each other to prevent sticking. Continue until all the filling and wrappers are used. If you have many wontons, you can freeze them on the baking sheet until firm, then transfer them to a freezer bag for later use.

          Step 3: Prepare the Broth

          While you’re assembling wontons, or just before you’re ready to cook them, pour your chicken or vegetable broth into a large pot. Add the slices of fresh ginger and the roughly chopped scallions. Bring the broth to a simmer over medium heat. Let it simmer gently for at least 10-15 minutes to allow the flavors to meld. Season with salt and white pepper to your taste. Strain out the ginger and scallions if you prefer a clear broth, or leave them in for extra flavor.

          Step 4: Cook the Wontons

          Once your broth is simmering gently, carefully add the assembled wontons, ensuring not to overcrowd the pot (you may need to cook them in batches). The wontons will sink at first, then float to the surface as they cook. Cook for about 3-5 minutes, or until the wontons float and the filling is cooked through. You can test one by carefully lifting it out and cutting it open to check. Add any optional vegetables like bok choy or spinach in the last minute of cooking.

          Step 5: Assemble and Serve

          Ladle the hot broth into serving bowls. Gently place a generous portion of the freshly cooked wontons into each bowl. Garnish with freshly chopped scallions and cilantro. Serve immediately and enjoy the fruits of your labor!

          Nutritional Snapshot

          Please note that nutritional values are estimates and can vary based on the specific ingredients and portion sizes used. This estimate is for one serving of wonton soup (approximately 5-6 wontons with broth), not including additional vegetables or garnishes.

          • Calories: ~250-350 kcal
          • Protein: ~15-20g
          • Fat: ~10-15g
          • Carbohydrates: ~15-20g

          Healthier Swaps for a Lighter Bowl

          Wonton soup can be a surprisingly healthy meal, especially when you make a few smart choices:

          • Leaner Protein: Opt for ground chicken, turkey, or even shrimp for your filling. For a vegetarian protein boost, use finely crumbled firm tofu or a mix of finely chopped mushrooms and edamame.
          • Reduced Sodium: Use low-sodium soy sauce and broth. Taste and adjust seasoning with salt only if truly necessary.
          • Whole Wheat Wrappers: If available, look for whole wheat wonton wrappers for added fiber.
          • Load up on Veggies: Add extra nutrient-dense vegetables like spinach, bok choy, mushrooms, carrots, or bean sprouts to your broth.
          • Mindful Portions: Be mindful of the number of wontons you consume per serving if you’re watching your calorie or carbohydrate intake.

          Serving Suggestions to Elevate Your Bowl

          Wonton soup is a star on its own, but here are some ideas to make your meal even more exciting:

          • Add Greens: Stir in a handful of fresh spinach, bok choy, or gai lan (Chinese broccoli) during the last minute of cooking the wontons.
          • Spice it Up: Serve with chili oil, sriracha, or a dollop of chili garlic sauce on the side for those who love a little heat.
          • Citrus Kick: A small wedge of lime or a tiny splash of rice vinegar can brighten the flavors of the broth.
          • Noodle Addition: For a heartier meal, add cooked noodles (like ramen or udon) to the bowl before adding the wontons and broth.
          • Crispy Toppings: A sprinkle of toasted sesame seeds or crispy fried shallots can add a delightful textural contrast.

          Avoid These Common Wonton Soup Pitfalls

          Even with the best intentions, a few common issues can arise. Here’s how to avoid them:

          • Mushy or Sticky Wontons: Ensure you seal the wontons properly and don’t overcook them. Also, make sure they don’t stick together on the baking sheet before cooking.
          • Bland Filling: Don’t skimp on the aromatics (ginger, scallions) and seasonings (soy sauce, sesame oil, pepper). Taste and adjust the filling mixture before assembling if you’re unsure.
          • Watery Broth: Use a good quality broth and consider simmering it with aromatics for a richer flavor.
          • Tough Wonton Wrappers: Keep your wrappers covered with a damp cloth. If they start to dry out, they can crack when you fold them.
          • Overcrowding the Pot: Cooking too many wontons at once can lower the broth temperature significantly, leading to uneven cooking and potentially sticky wontons. Cook in batches if necessary.

          Storing Your Wonton Masterpiece

          Cooked Wonton Soup: Cooled leftover soup can be stored in an airtight container in the refrigerator for up to 2-3 days. Reheat gently on the stovetop; the wontons may become a bit softer. For best results, it’s ideal to store the broth and cooked wontons separately if possible.

          Uncooked Wontons: As mentioned, you can freeze uncooked wontons. Arrange them in a single layer on a parchment-lined baking sheet and freeze until solid. Then, transfer to a freezer-safe bag or container. They can be cooked directly from frozen, though they might take a minute or two longer. They will keep in the freezer for up to 1-2 months.

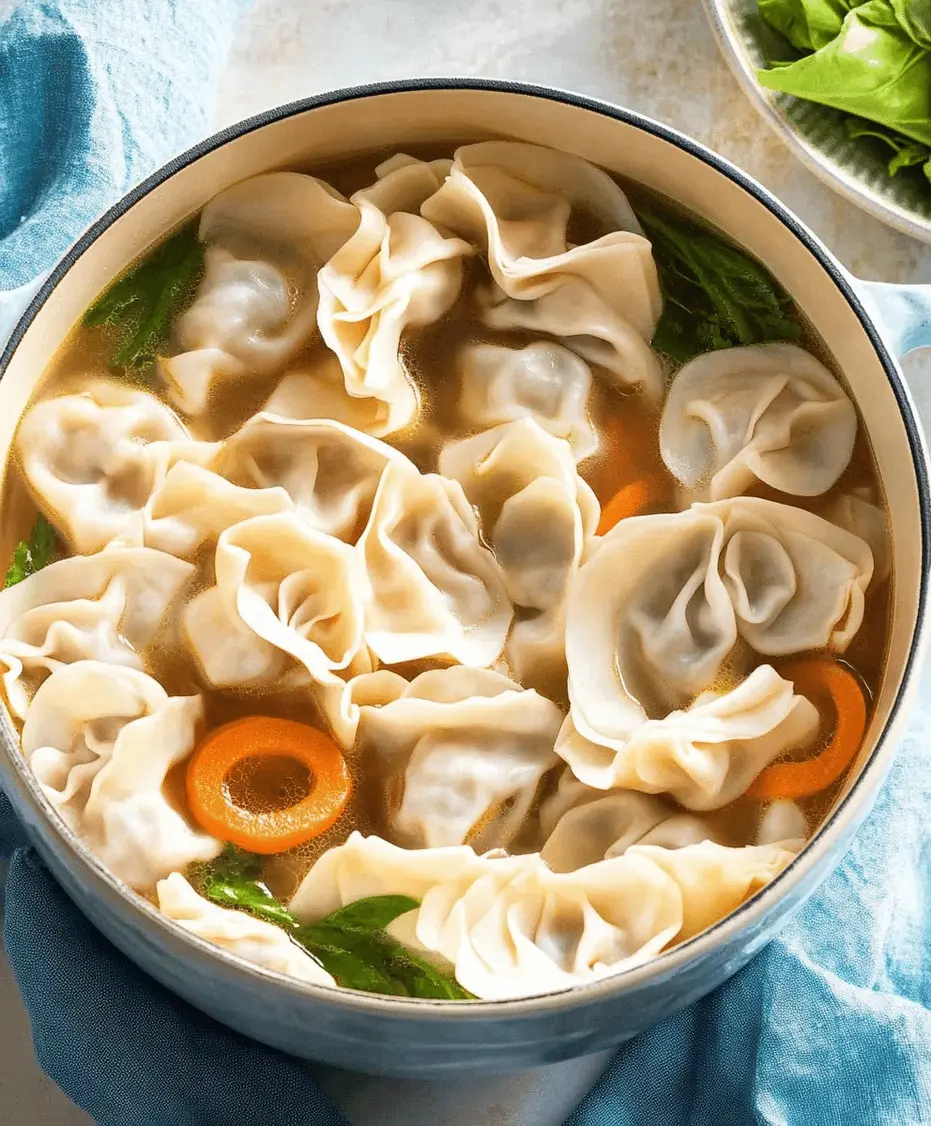
          Close-up of a bowl of homemade wonton soup with fresh garnishes

          Frequently Asked Questions

          What’s the difference between wontons and dumplings?

          While often used interchangeably, wontons typically have thinner wrappers and are often served in broth, like this soup. Dumplings can have thicker wrappers and are more commonly steamed or pan-fried. The fillings can also differ, though there’s a lot of overlap.

          Can I make the filling ahead of time?

          Yes, you can prepare the wonton filling up to a day in advance and store it in the refrigerator. Make sure it’s covered tightly.

          What kind of broth is best?

          A good quality chicken broth is traditional and provides a rich flavor. For a lighter option, a flavorful vegetable broth works wonderfully. You can also use a combination of both.

          My wontons are bursting! What am I doing wrong?

          This usually happens if you overstuff the wontons, don’t seal the edges properly, or let them cook for too long. Be sure to only use about a teaspoon of filling and ensure the edges are well-moistened and firmly pressed.

          Can I make this recipe vegan?

          Yes! Use vegetable broth, replace the pork with finely minced firm tofu or a mix of mushrooms and water chestnuts, omit the egg white (or use a vegan binder like a bit more cornstarch or psyllium husk), and ensure your wonton wrappers are egg-free.

          Your New Favorite Comfort Food

          There’s a unique satisfaction in creating something as delicious and comforting as homemade wonton soup from scratch. This recipe is a gateway to a world of flavor, offering a delightful balance of savory filling, tender wrappers, and aromatic broth. Whether you’re a seasoned cook or a curious beginner, the process is incredibly rewarding, and the end result is a dish that rivals any restaurant favorite. So, gather your ingredients, put on some music, and embark on this culinary adventure. We promise, your taste buds (and your soul) will thank you!

          Print
          clock clock iconcutlery cutlery iconflag flag iconfolder folder iconinstagram instagram iconpinterest pinterest iconfacebook facebook iconprint print iconsquares squares iconheart heart iconheart solid heart solid icon

          Homemade Wonton Soup Recipe


          • Author: Chef Emy

          Description

          This homemade wonton soup recipe is a delicious and comforting dish featuring delicate wontons filled with seasoned meat, simmered in a flavorful broth. With simple ingredients and easy steps, you can make this Chinese restaurant favorite right at home.


          Ingredients

          • For the Wontons:
          • For the Soup:

          Instructions

            Notes

            You can freeze extra wontons for later use.
            Adjust seasoning based on taste preference.
            Add mushrooms or other vegetables for extra flavor.

            Nutrition

            • Calories: 250
            • Sugar: 1g

            “`

            Easy Fried Cheese Bites Recipe

            “`html

            Easy Fried Cheese Bites Recipe

            Dish Up Delight: The Ultimate Easy Fried Cheese Bites

            Let’s talk about comfort food. We all have those go-to recipes that bring a smile to our faces, and these Easy Fried Cheese Bites are definitely on that list. Imagine this: a golden-brown, perfectly crispy exterior giving way to a molten, gooey cheese center that stretches with every bite. Sound irresistible? It is! These aren’t your average cheese sticks; they’re bite-sized explosions of cheesy goodness, incredibly easy to whip up with ingredients you likely already have in your pantry. Whether you’re hosting a party, looking for a game-day snack, or simply need a fantastic appetizer to impress your family, these fried cheese bites are a winner. They are wonderfully versatile, pairing beautifully with a classic marinara sauce for that Italian flair, or a tangy ranch dressing for a more casual, dipping delight. Ready to add this absolute gem to your recipe repertoire? Let’s dive in!

            Gather Your Cheesy Arsenal: The Ingredients

            The beauty of these fried cheese bites lies in their simplicity. You don’t need a pantry full of exotic spices or rare ingredients. Here’s what you’ll need to create these crispy, gooey delights:

            • Cheese: 8 ounces (about 225g) of firm, good melting cheese.
              • Sensory Description: Think of a cheese that can hold its shape when cold but melts into a luscious, stringy delight when heated.
              • Best Choices: Mozzarella (low-moisture, part-skim is great for this), Monterey Jack, mild or sharp Cheddar, or Colby Jack.
              • Pro Tip: For the best results and to ensure the cheese doesn’t completely ooze out, use cheeses that aren’t too soft or “fresh.” Low-moisture mozzarella is ideal.
              • Substitution: If you can’t find the specific cheeses, a blend of Gruyere and Provolone would also be delicious, offering a nuttier, slightly sharper profile.
            • All-Purpose Flour: 1/2 cup (about 60g).
              • Purpose: This is the first layer of our breading, providing a dry surface for the egg to adhere to.
            • Eggs: 2 large.
              • Purpose: The binder that helps the breadcrumbs stick to the cheese.
              • Pro Tip: Whisk them well with a tablespoon of water or milk for a smoother, more even coating.
            • Breadcrumbs: 1 cup (about 100g) of Panko breadcrumbs or regular breadcrumbs.
              • Sensory Description: Panko breadcrumbs are lighter, airier, and produce an extra-crispy texture. Regular breadcrumbs are finer and create a more traditional crunchy coating.
              • Substitution: For a gluten-free option, use gluten-free breadcrumbs or even finely ground almond flour mixed with herbs.
            • Seasonings (Optional but Recommended):
              • 1 teaspoon garlic powder
              • 1/2 teaspoon onion powder
              • 1/4 teaspoon smoked paprika (for a hint of smokiness and color)
              • Salt and freshly ground black pepper to taste
            • Frying Oil: About 3-4 cups of neutral oil with a high smoke point (e.g., vegetable oil, canola oil, peanut oil, or sunflower oil).
              • Purpose: Crucial for achieving that perfect golden-brown crispiness. The oil needs to be hot enough to fry quickly without making the cheese melt too soon.

            Timing is Everything: Prep, Cook, and Enjoy!

            Prep time: 15 minutes
            Cook time: 5-10 minutes
            Total time: 20-25 minutes

            Compared to similar fried appetizers, these cheese bites are incredibly quick to prepare. Many recipes involve more complex doughs or longer chilling times, but here, the simplicity of barding the cheese keeps the active prep time to a minimum. The frying itself is very rapid, ensuring you get that satisfying melt without a long wait.

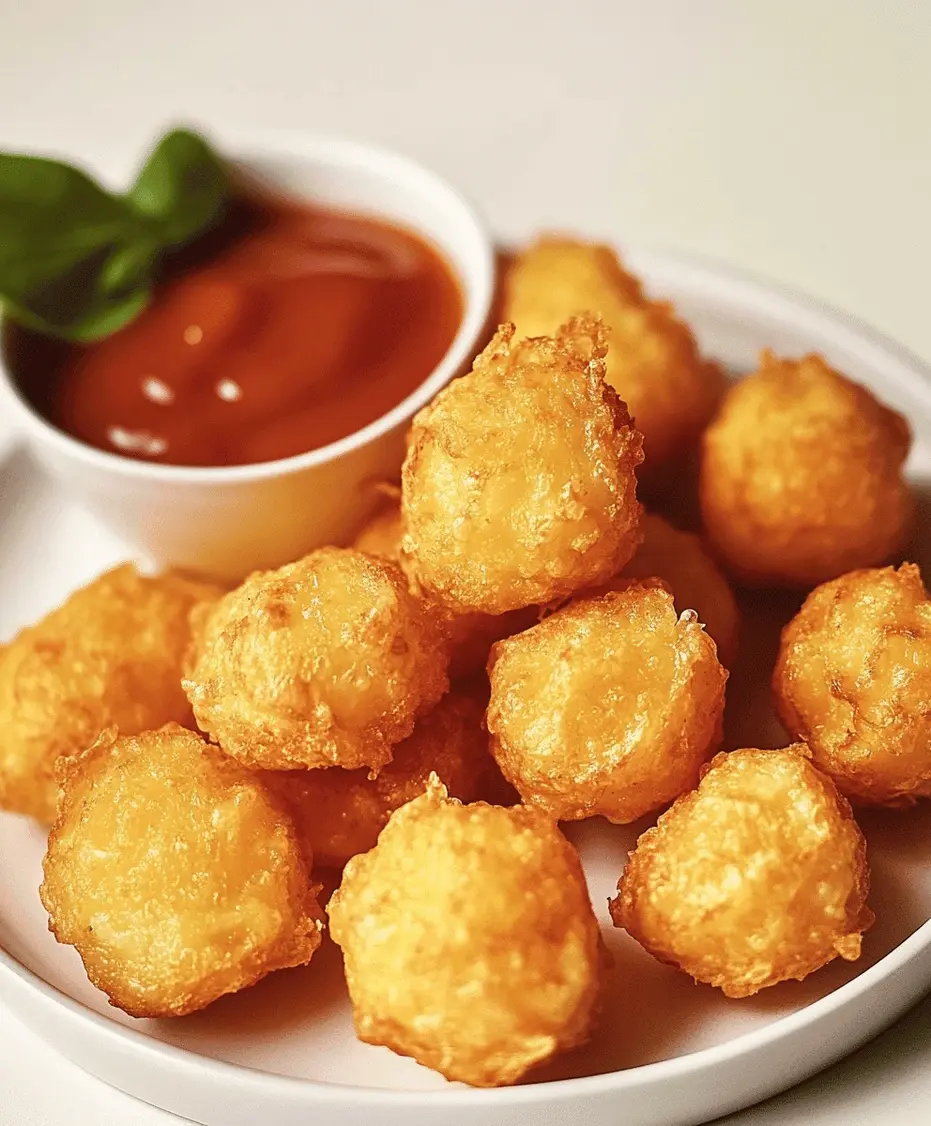
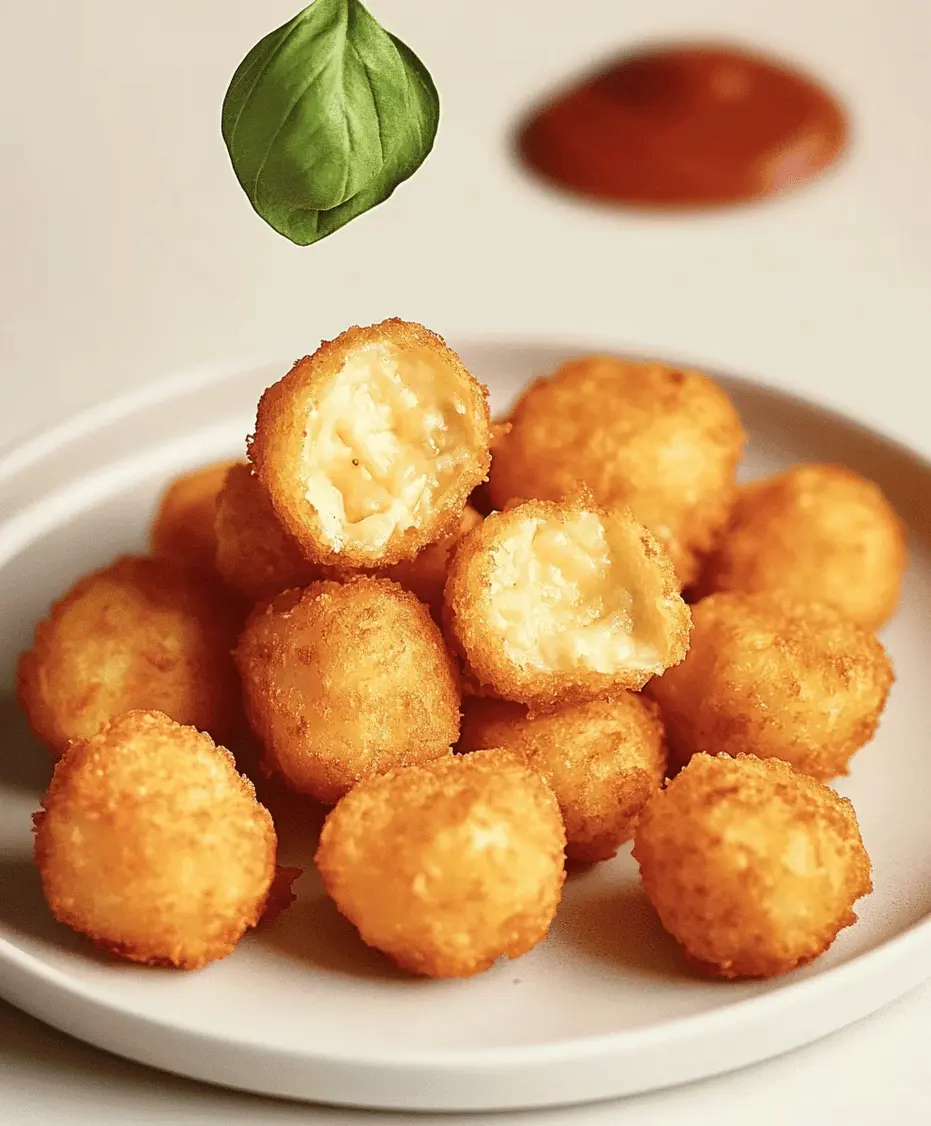
            Delicious golden brown fried cheese bites ready to be served

            Let’s Get Frying: Step-by-Step Guide

            Step 1: Prep the Cheese

            First, grab your block of cheese. For best results, it’s ideal if your cheese is chilled. Cut the cheese into roughly 1-inch cubes. If you’re using a larger block and want perfectly uniform shapes, you can experiment with cutting them into thick sticks, but cubes are generally easiest to manage and bread evenly. Make sure the cubes are firm and not soft. For an extra layer of security against meltdowns, some people like to freeze the cheese cubes for about 15-20 minutes before breading. This helps them hold their shape better during the frying process.

            Step 2: Set Up Breading Stations

            Now, let’s get your breading station ready. You’ll need three shallow dishes or bowls. In the first dish, place your all-purpose flour. In the second dish, whisk your eggs with a tablespoon of water or milk until they are well beaten and slightly frothy. In the third dish, combine your Panko breadcrumbs (or regular breadcrumbs) with your chosen seasonings – the garlic powder, onion powder, smoked paprika, salt, and pepper. Mix these seasonings thoroughly into the breadcrumbs so they’re evenly distributed. This ensures every bite gets a flavor boost!

            Step 3: Bread the Cheese

            This is where the magic happens! Take one cheese cube at a time and dredge it lightly in the flour, ensuring it’s coated all over. Shake off any excess flour. Next, dip the floured cheese cube into the whisked egg mixture, letting any excess drip off. Finally, roll the egg-coated cube in the seasoned breadcrumbs, pressing gently to make sure the crumbs adhere well. You want a nice, even coating. For an extra-crispy shell and to really seal in the cheese, you can repeat this process: dip the breaded cheese back into the egg, then back into the breadcrumbs. Place the fully breaded cheese bites on a clean plate or baking sheet. It’s a good idea to let them sit for a few minutes, or even pop them in the freezer for another 10-15 minutes after breading, to help the coating set.

            Step 4: Heat the Oil

            Pour your neutral frying oil into a heavy-bottomed pot or Dutch oven. You’ll need enough oil to allow the cheese bites to float freely, about 3-4 inches deep. Heat the oil over medium-high heat until it reaches about 350°F (175°C). A kitchen thermometer is your best friend here! If you don’t have one, you can test the oil by dropping a tiny bit of breadcrumb into it. It should sizzle actively and float to the top within a few seconds. If it browns too quickly, the oil is too hot; if it barely sizzles, it’s not hot enough. Maintaining the correct temperature is crucial for perfectly crispy, non-greasy results. If the oil is too cool, the cheese will melt out before the coating can crisp up. If it’s too hot, the coating will burn before the cheese inside has a chance to melt.

            Step 5: Fry the Cheese Bites

            Carefully, using a slotted spoon or spider strainer, lower a batch of about 4-6 breaded cheese bites into the hot oil. Don’t overcrowd the pot, as this will lower the oil temperature and result in soggy bites. Fry them for about 1-2 minutes, or until they turn a beautiful golden-brown and are floating. You’re looking for that perfect crispy exterior while the cheese inside just begins to melt. Keep an eye on them, as they cook very quickly!

            Step 6: Drain and Serve

            Once they’re gorgeously golden, use your slotted spoon or spider strainer to carefully lift the fried cheese bites out of the oil. Let any excess oil drip back into the pot for a moment, then transfer them to a plate lined with paper towels. This step is vital for absorbing any extra grease and ensuring maximum crispiness. Serve them immediately while they are hot and the cheese is wonderfully gooey and molten. The contrast between the hot, crispy exterior and the molten interior is what makes these so addictive!

            Nutritional Snapshot

            While these cheese bites are a treat, it’s good to have an idea of what you’re consuming. Please note that these values are approximate and can vary based on the type of cheese and exact oil absorption.

            • Calories: Approximately 120-150 per serving (2-3 bites).
            • Fat: 8-12g (primarily from cheese and frying oil).
            • Carbohydrates: 5-8g (from breadcrumbs and flour).
            • Protein: 6-9g (from the cheese).
            • Sodium: Varies depending on cheese and added salt.

            Lighter Bites: Healthier Swaps

            Craving that cheesy goodness but want a lighter option? Here are a few ways to make these bites a bit more health-conscious without sacrificing too much flavor:

            • Baking Instead of Frying: For a significantly reduced fat content, try baking these. Arrange breaded cheese bites on a parchment-lined baking sheet and bake at 400°F (200°C) for 10-15 minutes, flipping halfway, until golden brown. They won’t be as uniformly crispy as fried, but still delicious!
            • Air Frying: Similar to baking, air frying offers a crispy result with minimal oil. Lightly spray the breaded cheese bites with cooking spray and air fry at 375°F (190°C) for 6-8 minutes, shaking the basket halfway through.
            • Whole Wheat or Gluten-Free Breading: Swap the all-purpose flour for whole wheat flour and use whole wheat or gluten-free breadcrumbs for added fiber and nutrients.
            • Lower Fat Cheese: Opt for part-skim mozzarella or a reduced-fat cheddar. Be aware that some lower-fat cheeses may not melt as luxuriously.
            • Reduced Oil in Frying: If frying, ensure your oil is at the correct temperature to minimize oil absorption. Drain thoroughly on paper towels.
            Prep time: 15 minutes
            Cook time: 5-10 minutes (frying) / 10-15 minutes (baking/air frying)
            Total time: 20-25 minutes (frying) / 25-30 minutes (baking/air frying)

            Serving Suggestions: The Perfect Pairings

            These versatile bites are amazing on their own, but they truly shine when served with the right accompaniments. Here are some ideas:

            • Classic Marinara Sauce: A warm, slightly chunky marinara sauce is the quintessential pairing for fried cheese. The acidity cuts through the richness of the cheese beautifully.
            • Dill Ranch Dip: For a creamier, more herbaceous dip, a homemade or good-quality store-bought ranch dressing is a fantastic choice.
            • Honey Mustard: A sweet and tangy honey mustard dip offers a delightful contrast to the savory cheese.
            • Spicy Aioli: For those who like a kick, a sriracha or chipotle aioli adds a gourmet touch.
            • Garlic Butter Sauce: A drizzle of melted butter infused with garlic and herbs would be heavenly.
            • Garnish: A sprinkle of fresh parsley or chives can add a pop of color and freshness.

            Common Mistakes to Avoid

            Even with a simple recipe, a few missteps can turn perfect bites into a disappointment. Here’s how to avoid them:

            • Oil Temperature Too Low: This is the most common culprit for cheese oozing out. The coating won’t crisp up quickly enough, and the cheese inside will melt and escape before it’s sealed.
            • Overcrowding the Pot: Adding too many cheese bites at once drastically lowers the oil temperature, leading to greasy, sad results. Fry in small batches!
            • Not Double Breading (Optional but Recommended): While a single layer of breadcrumbs is okay, a double dip (flour, egg, breadcrumbs, egg, breadcrumbs) provides a thicker, more robust crust that can better contain the molten cheese.
            • Using Fresh or Extremely Soft Cheese: These cheeses have higher moisture content and will melt too readily, making them difficult to handle and prone to leakage.
            • Not Draining Properly: Skipping the paper towel step after frying leaves excess oil on the bites, making them greasy and less appealing.

            Storing Your Cheese Bites

            For the absolute best experience, these cheese bites are meant to be enjoyed fresh. The crispy exterior and molten center are at their peak right out of the fryer. However, if you have leftovers, here’s how to store them:

            • Refrigeration: Allow any leftover cheese bites to cool completely. Store them in an airtight container in the refrigerator for up to 2 days.
            • Reheating: To reheat, a conventional oven or toaster oven is best. Spread them in a single layer on a baking sheet and reheat at around 350°F (175°C) for 5-8 minutes, or until heated through and the exterior is re-crisped. Microwaving will make them soft and chewy, which isn’t ideal for this dish.
            • Freezing: You can freeze uncooked, breaded cheese bites by placing them in a single layer on a baking sheet until frozen solid, then transferring them to a freezer-safe bag. Fry from frozen (adding a minute or two to the cooking time) or bake/air fry as directed.
            Close up of fried cheese bites with marinara sauce for dipping

            Frequently Asked Questions

            What kind of cheese melts best for fried cheese bites?

            Low-moisture mozzarella, Monterey Jack, Cheddar, and Colby Jack are excellent choices. They melt well but still hold their shape somewhat when cold, making them easier to bread and fry.

            Why is my cheese melting out when I fry them?

            This usually happens if the oil isn’t hot enough, or if you’re using a very soft, high-moisture cheese. Ensure your oil is at 350°F (175°C) and consider chilling or even slightly freezing the cheese before breading.

            Can I make these ahead of time?

            You can prepare and bread them ahead of time and store them in the refrigerator for a few hours before frying. For longer storage, they freeze well before frying.

            How do I get them extra crispy?

            Use Panko breadcrumbs for a lighter, crispier coating. Double-breading (flour, egg, breadcrumbs, egg, breadcrumbs) also creates a thicker crust that gets very crispy. Ensuring your oil is at the correct temperature is also key.

            Can I use different breadcrumbs?

            Yes, you can use regular breadcrumbs or even seasoned breadcrumbs. For gluten-free options, use gluten-free breadcrumbs or almond flour.

            Conclusion

            There you have it – a simple, foolproof recipe for Easy Fried Cheese Bites that promises golden-crispy perfection with every single bite. These are more than just an appetizer; they’re a little parcel of joy, guaranteed to disappear quickly from any plate. Perfect for parties, game nights, or just a cozy evening in, they offer that irresistible combination of textures and flavors that everyone adores. So, gather your ingredients, get ready for some fun in the kitchen, and prepare to be amazed by how easy and rewarding it is to make these delightful cheese bites. Don’t wait – whip up a batch today and let the cheesy goodness begin!

            Print

            clock clock iconcutlery cutlery iconflag flag iconfolder folder iconinstagram instagram iconpinterest pinterest iconfacebook facebook iconprint print iconsquares squares iconheart heart iconheart solid heart solid icon

            Easy Fried Cheese Bites Recipe


            • Author: Chef Emy

            Description

            These easy fried cheese bites are crispy on the outside, gooey on the inside, and perfect for any occasion. Made with simple ingredients, they’re a crowd-pleasing snack or appetizer. Serve with marinara or ranch for extra flavor!


            Ingredients

            Scale
            • 8 ozmozzarella or cheddar cheese, cut into cubes
            • 1 cupall-purpose flour
            • 2eggs, beaten
            • 1 cupbreadcrumbs (panko or regular)
            • ½ tspgarlic powder
            • ½ tsppaprika
            • ¼ tspsalt
            • ¼ tspblack pepper
            • Oil for frying

            Instructions

              Notes

              Freezing the cheese helps prevent it from melting too quickly while frying.
              Double coating ensures a crispy outer layer.
              Serve immediately for the best texture.

              Nutrition

              • Calories: 320
              • Sugar: 1g

              “`

              Alabama Fire Crackers Recipe

              “`html

              Alabama Fire Crackers Recipe

              Introduction: Unlocking the Flavor of Alabama Fire Crackers

              Are you searching for a snack that’s incredibly easy to make, bursting with flavor, and guaranteed to disappear in minutes at your next gathering? Did you know that delicious, intensely flavorful appetizers can be made in under an hour with minimal effort? If you’ve ever craved a snack that offers a satisfying crunch followed by a symphony of savory, zesty, and spicy notes, then you’re in the right place. Alabama Fire Crackers are precisely that snack you’ve been dreaming of. Forget complicated baking processes or lengthy ingredient lists; this no-bake marvel transforms humble saltine crackers into an addictive treat. Perfect for game nights, holiday parties, or simply as an afternoon pick-me-up, these crackers pack a punch that will have everyone asking for the recipe. Let’s dive into how you can create this crowd-pleasing appetizer that’s as delightful to make as it is to devour.

              Ingredients: What You’ll Need for These Fiery Crackers

              The beauty of Alabama Fire Crackers lies in their simplicity, using pantry staples to create an explosion of flavor. Here’s what you’ll need:

              Saltine Crackers: The Crisp Canvas

              A standard 16-ounce box of saltine crackers forms the base of our recipe. Their neutral, slightly salty flavor is the perfect canvas for the bold seasonings to come. Look for fresh, crisp crackers; stale ones will result in a less satisfying crunch.

              Oil: For Richness and Flavor Infusion

              You’ll need 1 cup of a neutral-flavored oil, such as vegetable oil, canola oil, or even a light olive oil. This oil acts as the vehicle for our seasonings, allowing them to adhere to the crackers and infuse them with deep flavor. For a richer taste, some people opt for a blend of olive oil and a neutral oil.

              Ranch Seasoning: The Creamy Base

              One packet (about 1 ounce) of dry ranch seasoning mix is crucial. This provides the classic savory, tangy, and herbaceous flavor profile that makes ranch so universally loved. It also contributes a creamy undertone to the spice mixture. If you’re feeling adventurous, you can sprinkle in some extra dried dill or parsley for an enhanced ranch experience.

              Red Pepper Flakes: For That Signature Kick

              This is where the “fire” in Fire Crackers comes from! Start with 1 to 2 tablespoons of red pepper flakes. Adjust this amount based on your heat preference. For a milder kick, use less; for a fiery inferno, feel free to add more. The visual flecks of red also add an appealing aesthetic to the finished product.

              Garlic Powder: An Aromatic Enhancer

              1 tablespoon of garlic powder adds a pungent, aromatic depth that complements the other spices beautifully. Ensure it’s garlic powder, not granulated garlic, for a smoother blend.

              Onion Powder: A Sweet Allium Note

              Similar to garlic powder, 1 tablespoon of onion powder contributes a sweet, savory, and slightly pungent undertone that rounds out the flavor profile. It’s the perfect partner to garlic powder.

              Optional: Cayenne Pepper for Extra Heat

              If you love extra spice, consider adding 1/2 teaspoon to 1 teaspoon of cayenne pepper. This will dial up the heat significantly, creating a truly fiery experience. Use with caution!

              Timing: How Long Does It Take to Make Alabama Fire Crackers?

              One of the biggest draws of Alabama Fire Crackers is their incredible speed and ease of preparation. Let’s break down the time commitment:

              Prep Time: 10 minutes
              Marinating Time: 30 minutes (minimum) to 2 hours (or overnight)
              Bake Time: 10-15 minutes
              Total Time: Approximately 50 minutes (including minimum marinating) to 2 hours 35 minutes (for longer marination)

              Compared to many appetizer recipes that can take an hour or more just for prep, these fire crackers are significantly quicker. While some recipes call for baking for extended periods or complex marinades, this method balances flavor development with efficiency. The marinating time is flexible, allowing you to plan ahead.

              A bowl of Alabama Fire Crackers coated in seasoning mix.

              Step-by-Step Instructions: Crafting Your Fire Crackers

              Ready to create these addictive snacks? Follow these simple steps. It’s more of an assembly and marinating process than actual cooking!

              Step 1: Preheat and Prepare

              First things first, preheat your oven to 250°F (120°C). This low temperature is key to drying out the crackers without burning them, ensuring a perfectly crispy texture. Line a large baking sheet with parchment paper for easy cleanup. Arrange the saltine crackers in a single layer on the prepared baking sheet. You might need to use two baking sheets depending on the size of your crackers and your oven.

              Step 2: Whisk Up the Flavor Bomb

              In a medium bowl, whisk together the oil, dry ranch seasoning mix, red pepper flakes, garlic powder, onion powder, and cayenne pepper (if using). Make sure everything is thoroughly combined. You should have a vibrant, aromatic mixture with visible specks of red pepper and herbs.

              Step 3: Coat Those Crackers

              Now for the fun part! Carefully pour the seasoned oil mixture over the arranged saltine crackers. Your goal is to coat each cracker evenly. You can do this by gently tossing the crackers with your hands (wearing gloves is a good idea if you’re sensitive to spice!) or by using a spatula to carefully turn and coat them. Ensure every cracker gets a good dressing of the spicy, savory mixture. Don’t be afraid to get your hands a little messy – it’s part of the process!

              Step 4: The All-Important Marination Time

              This step is crucial for infusing maximum flavor. Once the crackers are coated, cover the baking sheet (or transfer them to an airtight container) and let them marinate. For a good flavor infusion, aim for at least 30 minutes at room temperature. For an even more intense, deep flavor, let them marinate for a few hours, or even overnight in the refrigerator. The longer they sit, the more the flavors penetrate the crackers.

              Step 5: Bake to Crispy Perfection

              Once the marinating time is up, spread the crackers back into a single layer on the parchment-lined baking sheet(s). Place them in the preheated oven. Bake for 10 to 15 minutes. Keep a close eye on them, as they can go from perfectly toasty to burnt quickly. You’re looking for the oil to be mostly absorbed and the crackers to feel slightly dry and crispy to the touch. They will continue to crisp up as they cool.

              Step 6: Cool and Enjoy

              Remove the baking sheet from the oven. Let the Alabama Fire Crackers cool completely on the baking sheet. As they cool, they will become wonderfully crisp and even more flavorful. Once cooled, they are ready to be devoured! Separate any crackers that may have stuck together.

              Nutritional Information: What You’re Getting

              While specific nutritional values can vary based on brands and exact measurements, a typical serving of Alabama Fire Crackers is generally high in calories and fat due to the oil, but also offers some carbohydrates. A rough estimate per serving (assuming 15-20 crackers per serving, depending on the total yield) would be:

              • Calories: 150-200 kcal
              • Fat: 12-16g
              • Carbohydrates: 8-10g
              • Sodium: Varies greatly depending on ranch seasoning and crackers, but often high.
              • Protein: 1-2g

              Please note: This is an approximation. For precise nutritional data, you would need to calculate based on the specific ingredients and quantities used.

              Healthier Alternatives: Enjoying Without the Guilt

              For those looking for a lighter version without sacrificing flavor, consider these swaps:

              • Reduced Fat Oil: Use half the amount of oil and supplement with a low-sodium vegetable broth or water to achieve a similar coating consistency. This will significantly reduce fat and calories.
              • Whole Wheat Crackers: Swap saltines for whole wheat crackers for added fiber and a slightly nuttier flavor.
              • Homemade Seasoning Blend: Control sodium and additives by making your own ranch seasoning using dried herbs, garlic powder, onion powder, and a touch of Greek yogurt powder (if available) or a small amount of nutritional yeast for cheesiness.
              • Air Fryer Method: Instead of baking, try air frying at a lower temperature (around 300°F or 150°C) for a shorter period, shaking the basket frequently, to achieve crispiness with less oil.

              Serving Suggestions: How to Best Enjoy Your Fire Crackers

              Alabama Fire Crackers are incredibly versatile. They make a fantastic standalone snack, but here are some ideas to elevate your experience:

              • Party Appetizer: Serve them in a bowl at parties and watch them disappear.
              • Game Day Snack: Perfect for munching on during sports events.
              • With Dips: While they have a strong flavor on their own, they can be surprisingly good dipped into a creamy avocado dip or a mild salsa.
              • Charcuterie Boards: Add a spicy crunch to your cheese and charcuterie spread.
              • Lunch Box Treat: Pack a small portion for a zesty addition to your lunch.

              Common Mistakes to Avoid

              To ensure your Alabama Fire Crackers turn out perfectly every time, steer clear of these common pitfalls:

              • Over-baking: The low temperature is crucial. Keep a watchful eye to prevent burning. They should be dry, not browned.
              • Uneven Coating: Ensure all crackers are thoroughly coated in the oil and seasoning mixture. This ensures consistent flavor in every bite.
              • Using Stale Crackers: Start with fresh, crisp crackers for the best texture.
              • Skipping Marination: While you *can* bake immediately, allowing them to marinate for at least 30 minutes significantly enhances the flavor penetration.
              • Not Letting Them Cool Completely: They continue to crisp up as they cool. Eating them while warm might leave them a bit chewy.

              Storing Tips: Keeping Them Fresh

              Once cooled, store your Alabama Fire Crackers in an airtight container at room temperature. They will stay wonderfully crisp and flavorful for up to a week. If they happen to lose some of their crispness after a few days, you can briefly (and carefully!) re-bake them on a low temperature for a few minutes to revive their crunch. However, they are so addictive, they’re unlikely to last that long!

              A close-up of Alabama Fire Crackers showing texture and red pepper flakes.

              Frequently Asked Questions About Alabama Fire Crackers

              ***Can I make these vegan?***

              Yes! The recipe as written is typically vegan, as saltine crackers, oil, and spices are plant-based. Just double-check your ranch seasoning packet to ensure it doesn’t contain any dairy or animal products, though most are vegan.

              ***How spicy are these crackers?***

              The spice level is adjustable. The base recipe with 1-2 tablespoons of red pepper flakes provides a noticeable kick. Adding cayenne pepper will significantly increase the heat. If you are sensitive to spice, start with only 1 teaspoon of red pepper flakes.

              ***Can I use different types of crackers?***

              While saltines are traditional, you could experiment with other neutral-flavored, thin crackers like oyster crackers or even certain water crackers. The texture and flavor might change slightly.

              ***Do I have to bake them?***

              Baking is recommended for achieving maximum crispiness and drying out the oil. However, some people have experimented with just letting them marinate for an extended period without baking, resulting in a less crispy but still flavorful cracker.

              ***My crackers seem oily after baking. What did I do wrong?***

              This can happen if the oven temperature is too high or if they are not baked long enough, not allowing the oil to fully absorb or evaporate. Ensure your oven is at 250°F (120°C) and bake until the crackers appear dry. They will continue to absorb oil as they cool.

              Conclusion: Your New Favorite Snack

              Alabama Fire Crackers are more than just a snack; they’re a testament to how simple ingredients can create extraordinary flavors. With minimal effort and just a few pantry staples, you can whip up a batch of these addictive, zesty, and perfectly spicy crackers. They are guaranteed to be a hit at any gathering or a delightful treat for yourself. So, gather your ingredients, follow these easy steps, and prepare to fall in love with this Southern staple. Get ready for the compliments – and maybe a few requests for the recipe!

              Print
              clock clock iconcutlery cutlery iconflag flag iconfolder folder iconinstagram instagram iconpinterest pinterest iconfacebook facebook iconprint print iconsquares squares iconheart heart iconheart solid heart solid icon

              Alabama Fire Crackers Recipe


              • Author: Chef Emy

              Description

              Alabama Fire Crackers are a zesty, spicy snack made with saltine crackers, ranch seasoning, and red pepper flakes. This no-bake recipe is simple yet packed with bold flavors, making it a perfect appetizer or snack for parties, game nights, or any occasion.


              Ingredients

              Scale
              • 1box (16 oz) saltine crackers
              • 1 cupcanola oil
              • 1packet (1 oz) ranch seasoning mix
              • 1 ½ tbspcrushed red pepper flakes
              • 1 tspgarlic powder
              • 1 tsponion powder
              • ½ tspblack pepper

              Instructions

                Notes

                For extra crispiness, bake the crackers at 250°F (120°C) for 15 minutes.
                Store in an airtight container for up to a week.
                Adjust red pepper flakes to control spiciness.

                Nutrition

                • Calories: 150
                • Sugar: 0g

                “`

                Italian Chop-chop Salad Recipe

                “`html

                Italian Chop-chop Salad Recipe

                Craving a Quick and Flavorful Italian Escape?

                Are you tired of spending hours in the kitchen only to end up with a bland, uninspiring meal? Did you know that incorporating more fresh, vibrant salads into your diet can actually boost your mood and energy levels? If you’re nodding along, then you’re in for a treat! This Italian Chop-chop Salad recipe is your answer to a delicious, satisfying, and incredibly quick meal solution. Forget those tired, wilted greens; we’re talking about a symphony of textures and bold, authentic Italian flavors that will transport your taste buds straight to the Mediterranean. This isn’t just a salad; it’s an experience, a vibrant explosion of freshness that’s perfect for a light lunch, a dazzling side dish, or even a crowd-pleasing potluck addition. Get ready to discover your new go-to salad that’s as easy to make as it is delightful to eat!

                The Heart of the Chop-Chop: Ingredients

                The beauty of this Italian Chop-chop Salad lies in its vibrant, fresh ingredients. Each component plays a crucial role in creating that signature tangy, savory, and crisp profile. Gather these treasures and let’s get chopping!

                • For the Salad Base:

                  • Crisp Romaine Lettuce: About 1 head, finely chopped. This provides a refreshing crunch and a sturdy foundation. Think of its cool, watery snap!
                  • Fresh Spinach: About 4 cups, roughly chopped. Adds a slightly earthy undertone and a boost of nutrients. Its delicate texture wilts beautifully.
                • The Savory Stars:

                  • Genoa Salami: About 4 oz, finely diced. This is where that classic Italian charcuterie flavor comes in. Its spicy, cured richness is essential. (Substitution: Pepperoni or Capicola for a similar spicy kick; Prosciutto for a saltier, more delicate flavor.)
                  • Mozzarella Cheese: About 4 oz, small diced (fresh or low-moisture). Melty, mild, and creamy, it’s the perfect counterpoint to the savory salami. (Substitution: Provolone for a slightly sharper bite; fresh burrata for an extra creamy indulgence.)
                  • Red Onion: About 1/4 cup, very thinly sliced or finely diced. Adds a sharp, pungent bite that wakes up the palate. The vibrant color is a bonus! (Substitution: Shallots for a milder, sweeter onion flavor.)
                • Fresh & Zesty Additions:

                  • Cherry Tomatoes: About 1 cup, halved or quartered. Bursting with sweet acidity, they add pops of juicy delight. Their bright color sings!
                  • Kalamata Olives: About 1/2 cup, pitted and halved. Their briny, fruity depth is quintessentially Mediterranean. The rich, dark hue is striking. (Substitution: Castelvetrano olives for a milder, buttery flavor; black olives in a pinch.)
                  • Fresh Parsley: About 1/4 cup, chopped. Its bright, peppery herbaceousness cuts through the richness and adds a final fresh lift.
                  • Optional: Artichoke Hearts: About 1/2 cup, quartered (canned or jarred, drained). Their tangy, slightly nutty flavor adds another layer of complexity.
                • For the Tangy Italian Dressing:

                  • Extra Virgin Olive Oil: 1/3 cup. The foundation of our dressing, providing a smooth, fruity base.
                  • Red Wine Vinegar: 3 tablespoons. Its sharp acidity is key to the tanginess. Feel its zesty bite! (Substitution: Apple Cider Vinegar for a slightly fruitier tang.)
                  • Dried Oregano: 1 teaspoon. The quintessential Italian herb, adding an aromatic, earthy note.
                  • Garlic: 1 clove, minced. For that essential pungent aroma and flavor.
                  • Dijon Mustard: 1 teaspoon. Helps emulsify the dressing and adds a subtle, sophisticated tang.
                  • Salt and Black Pepper: To taste. Essential for bringing all the flavors together.

                Speedy Prep, Maximum Flavor: Timing This Salad

                Prep Time:
                15 minutes
                Cook Time:
                0 minutes
                Total Time:
                15 minutes

                One of the biggest draws of this Italian Chop-chop Salad is its incredible speed. Unlike many elaborate recipes, this one comes together in just 15 minutes total, making it perfect for busy weeknights or when you need a quick, impressive dish. This is significantly faster than the average salad preparation time, which often involves more complex dressings or cooking components.

                A colorful chopped Italian salad in a bowl with dressing being poured over it.

                Let’s Get Chopping: Step-by-Step Instructions

                Step 1: Prep the Produce

                First things first, let’s get our greens ready. Take your head of romaine lettuce and give it a good rinse and dry. Using a sharp knife, chop it into bite-sized pieces. Don’t be shy with the knife – the “chop-chop” name really means business here! Transfer the chopped romaine to a large salad bowl. Next, give your fresh spinach a quick wash and rough chop, then add it to the bowl with the romaine. The combination of crisp romaine and tender spinach creates a delightful textural contrast.

                Step 2: Chop the Proteins and Cheese

                Now for the stars of our salad! Dice your Genoa salami into small, approximately 1/4-inch cubes. We want these little flavor bombs distributed evenly. Add the diced salami to the salad bowl. Next, if you’re using a block of mozzarella, dice it into similar-sized cubes. If you have fresh mozzarella pearls, you can use them as is or halve them. Add the cheese to the bowl. Thinly slice your red onion to ensure it doesn’t overpower the salad; finely dicing also works wonderfully. Toss the onion slices into the bowl with the other ingredients.

                Step 3: Assemble the Salad

                It’s time to bring in the supporting cast! Halve your cherry tomatoes and add them to the bowl. Pit and halve your Kalamata olives, then add them. If you’re using artichoke hearts, drain them well and quarter them before adding them to the mix. Finally, finely chop your fresh parsley and sprinkle it generously over everything. This aromatic herb adds a burst of freshness that ties all the flavors together beautifully.

                Step 4: Dress and Toss

                In a small bowl or jar, whisk together the extra virgin olive oil, red wine vinegar, dried oregano, minced garlic, and Dijon mustard. Season with salt and freshly ground black pepper to your liking. Whisk until the dressing is well emulsified. Pour about half of the dressing over the salad. Gently toss the salad to coat all the ingredients. Taste and add more dressing if needed, or reserve some for serving. The key here is to coat, not drown, the ingredients, allowing each bite to be perfectly balanced.

                Step 5: Serve and Enjoy

                Your delicious Italian Chop-chop Salad is ready! Serve immediately. This salad is fantastic on its own for a light and satisfying lunch, or as a vibrant side dish alongside grilled chicken, fish, or pasta. Enjoy the harmonious blend of crisp textures, savory meats, creamy cheese, and zesty dressing!

                Nutritional Snapshot

                While exact nutritional values can vary based on specific ingredient brands and quantities used, a typical serving of this Italian Chop-chop Salad offers a good balance of macronutrients. It’s rich in protein from the salami and mozzarella, healthy fats from the olive oil, and provides essential vitamins and minerals from the fresh vegetables. On average, a serving might contain:

                • Calories: Approximately 350-450 kcal
                • Protein: 15-20g
                • Fat: 25-35g (mostly healthy fats)
                • Carbohydrates: 10-15g
                • Fiber: 3-5g

                This makes it a satisfying and relatively low-carb option, perfect for those watching their intake.

                Healthier Twists on the Classic

                Looking to make this already vibrant salad even healthier without sacrificing flavor? Here are a few swaps you can consider:

                • Leaner Protein: Swap some or all of the salami for lean grilled chicken breast, turkey breast, or even canned tuna (packed in water).
                • Reduced Fat Cheese: Use part-skim mozzarella or opt for a sharp, flavorful cheese like Parmesan in moderation, as a little goes a long way.
                • “Lite” Dressing: Reduce the olive oil slightly and increase the vinegar and mustard in the dressing for a lower-fat, equally zesty option. You could also use avocado oil for its monounsaturated fats.
                • Boost Veggies: Add more non-starchy vegetables like bell peppers (any color!), cucumbers, broccoli florets, or shredded carrots for increased fiber and nutrients.

                How to Serve Your Masterpiece

                This Italian Chop-chop Salad is wonderfully versatile. Serve it as a light main course paired with crusty garlic bread, or alongside your favorite Italian main dishes like lasagna, spaghetti and meatballs, or chicken parmesan. It also makes a fantastic addition to any picnic or potluck spread. For a more substantial meal, consider topping it with grilled shrimp or a perfectly cooked salmon fillet.

                Common Mistakes to Avoid

                • Overdressing: Too much dressing can make the salad soggy and weigh down the flavors. Start with less and add more as needed.
                • Large Chunks: The “chop-chop” in the name means bite-sized! Ensure all your ingredients are chopped uniformly for easier eating and better flavor distribution.
                • Wilted Greens: Always wash and thoroughly dry your greens. Using a salad spinner is highly recommended to remove excess water, which can dilute the dressing.
                • Not Tasting and Adjusting: Always taste your dressing and the final salad. Adjust salt, pepper, or vinegar as needed to perfect the balance.

                Keeping It Fresh: Storing Leftovers

                This salad is best enjoyed fresh. However, if you have leftovers, store the undressed salad ingredients in an airtight container in the refrigerator for up to 2 days. The dressing should be stored separately in a sealed jar or container. When ready to serve, toss the salad with the dressing. This method helps prevent the greens from becoming wilted and the ingredients from becoming soggy.

                Close-up of chopped ingredients for an Italian salad in a bowl, ready to be mixed.

                Frequently Asked Questions

                What makes this an “Italian Chop-chop” salad?

                The “chop-chop” refers to the method of preparing the ingredients – they are all finely chopped into bite-sized pieces, making it quick and easy to eat. The “Italian” aspect comes from the classic Italian ingredients like salami, mozzarella, olives, and the tangy Italian dressing.

                Can I make this salad ahead of time?

                It’s best to assemble and dress the salad just before serving for maximum freshness and crispness. However, you can chop all your ingredients and prepare the dressing a day in advance and store them separately in the refrigerator. Then, simply toss everything together when you’re ready to eat.

                What other vegetables can I add?

                This salad is very adaptable! Feel free to add chopped bell peppers (red, yellow, or green), cucumber, celery, marinated hearts of palm, or even a sprinkle of chopped pepperoncini for extra tang and spice.

                Is this salad vegetarian?

                As written, it is not vegetarian due to the salami. To make it vegetarian, simply omit the salami. You could add more cheese, extra olives, or perhaps some chickpeas for added protein and texture.

                How do I get the best flavor from my dressing?

                For the most vibrant dressing flavor, let it sit for at least 10-15 minutes after whisking to allow the oregano and garlic to infuse into the oil and vinegar. Tasting and adjusting the salt and pepper just before dressing the salad is also key!

                Print
                clock clock iconcutlery cutlery iconflag flag iconfolder folder iconinstagram instagram iconpinterest pinterest iconfacebook facebook iconprint print iconsquares squares iconheart heart iconheart solid heart solid icon

                Italian Chop-chop Salad Recipe


                • Author: Chef Emy

                Description

                This Italian Chop-Chop Salad is a delicious mix of crisp lettuce, salami, mozzarella, and fresh vegetables, all tossed in a tangy Italian dressing. Perfect for a light meal or a side dish, this salad is full of bold flavors and textures.


                Ingredients

                • For the Dressing:

                Instructions

                  Notes

                  For extra crunch, add croutons or toasted pine nuts.
                  Swap salami for grilled chicken or chickpeas for a healthier option.
                  Let the salad sit for a few minutes to absorb the flavors before serving.

                  Nutrition

                  • Calories: 280
                  • Sugar: 3g

                  “`

                  Quick And Spicy Shrimp Soup Recipe

                  “`html

                  Quick And Spicy Shrimp Soup Recipe

                  A Flavorful Bowl of Fiery Comfort

                  This Quick and Spicy Shrimp Soup is more than just a meal; it’s an experience. Imagine tender shrimp swimming in a rich, aromatic broth, infused with a symphony of spices that awaken your senses. It’s the perfect remedy for a chilly evening or when you need a quick, yet deeply satisfying, culinary escape. We’re talking about a dish that’s ready in a flash, yet tastes like it simmered for hours. So, if you’re looking for a go-to recipe that delivers powerful umami notes and a pleasant kick of heat, you’ve found your match. Let’s dive into creating this delightful seafood soup!

                  Ingredients: The Heart of Your Spicy Soup

                  The magic of this soup lies in its carefully selected ingredients, each playing a vital role in creating a harmonious blend of flavors and textures. We’ve aimed for accessibility, but also included suggestions for those who like to experiment or need substitutions.

                  For the Soup Base:

                  • Olive Oil: 2 tablespoons (for sautéing). A good quality olive oil provides a subtle fruity base.
                    Substitution: Grapeseed oil or avocado oil for a neutral flavor.
                  • Aromatics:
                    • 1 medium Onion, finely chopped (adds sweetness and depth).
                      Substitution: Shallots for a milder, more refined onion flavor.
                    • 3-4 cloves Garlic, minced (essential for that pungent kick).
                      Substitution: Garlic powder (1 teaspoon) if fresh is unavailable, but fresh is highly recommended.
                    • 1-inch piece of fresh Ginger, grated or finely minced (adds warmth and a zingy spice).
                      Substitution: ½ teaspoon ground ginger, though fresh offers a brighter flavor.
                    • 1-2 Red Chilies (like Thai bird’s eye or Fresno), deseeded and finely chopped (adjust for heat preference). These are crucial for the “spicy” element.
                      Substitution: Red pepper flakes (½ – 1 teaspoon) or a dash of your favorite hot sauce.
                  • Spices:
                    • 1 teaspoon Cumin powder (earthy and warm).
                    • 1 teaspoon Coriander powder (citrusy and floral notes).
                    • ½ teaspoon Turmeric powder (for color and an earthy, slightly bitter undertone).
                    • ¼ teaspoon Cayenne Pepper (optional, for an extra layer of heat).
                  • Broth: 4 cups Vegetable or Chicken Broth (low sodium is preferred to control saltiness). This forms the liquid backbone of our soup.
                    Substitution: Fish stock for an even deeper seafood flavor, or water with a bouillon cube.
                  • 1 tablespoon Soy Sauce (or Tamari for gluten-free) (adds umami depth and saltiness).
                    Substitution: Coconut aminos for a slightly sweeter, soy-free option.
                  • 1 teaspoon Sesame Oil (adds a nutty, toasted aroma).

                  For the Shrimp and Garnish:

                  • 1 pound Shrimp, peeled and deveined (medium to large size works best). The star of our quick soup!
                    Substitution: Pre-cooked shrimp can be used, added at the very end just to warm through.
                  • ½ cup Cherry Tomatoes, halved (add a burst of freshness and acidity).
                    Substitution: Diced ripe tomatoes.
                  • 2 cups fresh spinach or other leafy greens (like bok choy or kale) (adds nutrients and wilts beautifully).
                  • Fresh Cilantro or Parsley, chopped (for garnish and a burst of freshness).
                    Substitution: Green onions (scallions), thinly sliced.
                  • Lime wedges, for serving (adds a bright, acidic counterpoint).

                  Timing is Everything: Fast Cooking, Big Flavor

                  One of the biggest selling points of this Quick and Spicy Shrimp Soup is its speed. It’s designed for those moments when hunger strikes and time is of the essence. Let’s break down the timing:

                  Prep time: 10 minutes
                  Cook time: 15-20 minutes
                  Total time: 25-30 minutes

                  Compared to many complex soups that can take hours to develop depth, this recipe is a champion of efficiency. The average simmering soup might require 45 minutes to an hour of cooking, not to mention the prep time. This shrimp soup cuts that time significantly, making it ideal for busy weeknights or when you’re craving something flavorful without the commitment of a long cooking process.

                  Bowl of spicy shrimp soup with fresh herbs and lime wedges

                  Step-by-Step Instructions

                  Let’s get cooking! Follow these simple steps to create your flavor-packed shrimp soup.

                  Step 1: Sauté Aromatics

                  In a large pot or Dutch oven, heat the olive oil over medium heat. Add the chopped onion and sauté for about 3-4 minutes until it begins to soften and turn translucent. Then, add the minced garlic, grated ginger, and chopped red chilies. Stir and cook for another minute until fragrant, being careful not to burn the garlic.

                  Step 2: Toast Spices

                  Add the cumin, coriander, turmeric, and cayenne pepper (if using) to the pot. Stir constantly for about 30 seconds to a minute. Toasting the spices like this unlocks their full aromatic potential and deeply infuses their flavor into the oil.

                  Step 3: Build the Broth

                  Pour in the vegetable or chicken broth and soy sauce. Bring the mixture to a gentle simmer, scraping up any browned bits from the bottom of the pot as it heats.

                  Step 4: Simmer and Season

                  Let the broth simmer for about 5-7 minutes to allow the flavors to meld. Taste and adjust seasoning. You might need more soy sauce for saltiness or a pinch of black pepper. Stir in the sesame oil.

                  Step 5: Add Shrimp

                  Add the peeled and deveined shrimp to the simmering broth. Cook for just 2-3 minutes, or until the shrimp turn pink and opaque. Be careful not to overcook the shrimp, as they can become rubbery.

                  Step 6: Finish and Serve

                  Stir in the halved cherry tomatoes and fresh spinach (or other greens). Cook for another minute, just until the spinach wilts. Ladle the hot soup into bowls. Garnish generously with fresh cilantro or parsley and serve immediately with lime wedges on the side for squeezing.

                  Nutritional Information (Approximate per serving)

                  While exact nutritional values can vary based on ingredients and portion sizes, a typical serving of this Quick and Spicy Shrimp Soup is:

                  • Calories: 250-300
                  • Protein: 20-25g
                  • Fat: 10-15g
                  • Carbohydrates: 10-15g
                  • Fiber: 2-4g

                  This soup is a fantastic source of lean protein from the shrimp and can be low in calories, making it a healthy choice for a light meal.

                  Healthier Alternatives & Flavor-Preserving Swaps

                  We love this soup as is, but here are some ways to make it even healthier without sacrificing deliciousness:

                  • Lower Sodium Broth: Always opt for low-sodium broth and control saltiness with soy sauce or salt to taste at the end.
                  • Leaner Protein: If you’re not a fan of shrimp, you could substitute with firm tofu cubes or even shredded chicken breast.
                  • Extra Veggies: Load up on more vegetables! Add chopped bell peppers, mushrooms, or snap peas along with the onions for added fiber and nutrients.
                  • Fat Reduction: Use a spray of oil or just 1 tablespoon of olive oil instead of 2. The flavor will still be robust.
                  • Spice Level Control: For less heat, remove the seeds and membranes from the chilies or use a milder pepper like jalapeño. Red pepper flakes can also be used in smaller quantities.

                  Serving Suggestions

                  This soup is a complete meal on its own, but here are some ideas to elevate your dining experience:

                  • Crusty Bread: Serve with a side of warm crusty bread for dipping into the flavorful broth.
                  • Side Salad: A light, crisp green salad with a simple vinaigrette makes for a balanced meal.
                  • Rice or Noodles: For a heartier meal, serve over a bed of jasmine rice or ramen noodles.
                  • AddITIONAL Garnishes: Consider a swirl of sriracha, a drizzle of chili oil, or a sprinkle of toasted sesame seeds for extra flavor and texture.

                  Common Mistakes to Avoid

                  To ensure your Quick and Spicy Shrimp Soup turns out perfectly every time, steer clear of these common pitfalls:

                  • Overcooking the Shrimp: Shrimp cook very quickly. Adding them too early or cooking them for too long will result in tough, rubbery shrimp.
                  • Burning the Garlic/Aromatics: Constantly stirring when sautéing garlic, ginger, and chilies prevents them from burning, which can make the soup taste bitter.
                  • Not Toasting the Spices: Rushing this step means you’re missing out on a significant depth of flavor. Toasting them briefly awakens their essential oils.
                  • Using Too Much Salt Upfront: Broth and soy sauce already contain sodium. It’s best to season at the end of the cooking process to perfectly balance the flavors.

                  Storing Your Soup

                  Leftovers can be stored in an airtight container in the refrigerator for up to 2-3 days. While reheating, be mindful not to overcook the shrimp. Gently heat the soup on the stovetop over low heat or in the microwave until warmed through. It’s often best to add the shrimp and spinach just before serving if you’re reheating a larger batch to maintain their texture.

                  Close-up of spicy shrimp soup ingredients being prepared

                  Frequently Asked Questions

                  ***Can I make this soup spicier?***

                  Absolutely! To increase the heat, add more fresh chilies (including the seeds and membranes), a pinch more cayenne pepper, or a dash of your favorite hot sauce or chili oil when serving.

                  ***Can I use frozen shrimp?***

                  Yes, frozen shrimp work perfectly. Ensure they are fully thawed before adding them to the soup, following the cooking instructions (about 2-3 minutes).

                  ***What kind of broth is best?***

                  Both vegetable and chicken broth work wonderfully. Using fish stock will give an even richer seafood flavor. Always opt for low-sodium to have better control over the final saltiness.

                  ***Can this soup be made vegetarian or vegan?***

                  Yes, to make it vegetarian, simply use vegetable broth and omit the shrimp. You could add firm tofu or more vegetables like mushrooms or bell peppers. For a vegan version, ensure it’s vegetable broth and use tofu or plant-based protein, and check that your soy sauce is vegan.

                  ***How do I prevent the shrimp from getting tough?***

                  The key is minimal cooking time. Shrimp cook very fast, usually in just 2-3 minutes. Add them towards the end of the cooking process, and cook only until they turn pink and opaque.

                  Enjoy Your Deliciously Quick and Spicy Soup!

                  There you have it – a vibrant, flavorful, and satisfying Quick and Spicy Shrimp Soup that’s on your table in under 30 minutes. It’s proof that you don’t need hours in the kitchen to create something truly delicious. This recipe is your ticket to a comforting, quick meal packed with aromatic spices and tender shrimp. Gather your ingredients, follow these simple steps, and prepare to wow your taste buds (and anyone you’re cooking for!). Happy cooking!

                  Print

                  clock clock iconcutlery cutlery iconflag flag iconfolder folder iconinstagram instagram iconpinterest pinterest iconfacebook facebook iconprint print iconsquares squares iconheart heart iconheart solid heart solid icon

                  Quick And Spicy Shrimp Soup Recipe


                  • Author: Chef Emy

                  Description

                  This Quick and Spicy Shrimp Soup is a flavorful, comforting dish made with shrimp, aromatic spices, and a rich broth. Perfect for a quick and satisfying meal, this soup is packed with heat and umami flavors, making it a go-to recipe for seafood lovers.


                  Ingredients

                  Scale
                  • 1lb shrimp, peeled and deveined
                  • 4 cupschicken or seafood broth
                  • 1can (14 oz) diced tomatoes
                  • 1small onion, chopped
                  • 2cloves garlic, minced
                  • 1 tbspolive oil
                  • 1 tspred pepper flakes
                  • 1 tspsmoked paprika
                  • 1 tbspsoy sauce
                  • 1 tspfish sauce (optional)
                  • 1 tsplime juice
                  • ½ tspblack pepper
                  • ½ tspsalt (adjust to taste)
                  • 2green onions, sliced
                  • ¼ cupfresh cilantro, chopped

                  Instructions

                    Notes

                    Adjust spice level by increasing or decreasing red pepper flakes.
                    Add vegetables like bell peppers or mushrooms for extra texture.
                    Serve with rice or noodles for a heartier meal.

                    Nutrition

                    • Calories: 180
                    • Sugar: 4g

                    “`

                    Greek Salad Recipe Fresh, Easy & Bursting with Flavor

                    “`html

                    Greek Salad Recipe: Fresh, Easy & Bursting with Flavor

                    Introduction: Craving a Taste of the Mediterranean?

                    Welcome, food enthusiasts! If you’re looking for a fresh, vibrant, and utterly delicious salad recipe, this Greek Salad Recipe is just for you. Packed with crisp vegetables, briny olives, and creamy feta cheese, it’s perfect as a side dish or a light main course. Whether you’re a fan of Mediterranean cuisine or simply want to try a new Greek-inspired recipe, this salad is sure to be a hit. Let’s dive into making this wonderful Greek Salad Recipe step-by-step!

                    Ingredients for the Ultimate Greek Salad

                    The beauty of a Greek salad lies in its simplicity and the quality of its fresh ingredients. Here’s what you’ll need:

                    • 1 English Cucumber: Crisp, refreshing, and adds a delightful crunch. (Substitution: Persian cucumbers for a thinner skin and fewer seeds).
                    • 2-3 Roma Tomatoes: Juicy and slightly sweet, they are the heart of the salad. (Substitution: Cherry tomatoes halved for an even sweeter burst).
                    • 1 Green Bell Pepper: Adds a mild bitterness and a vibrant green hue. (Substitution: Yellow or red bell pepper for a sweeter, more intense flavor).
                    • 1/2 Red Onion: Pungent and sharp, it balances the sweetness of the tomatoes. (Substitution: Shallots, thinly sliced, for a milder onion flavor).
                    • 1/2 cup Kalamata Olives: Briny, fruity, and a quintessential Greek flavor. (Substitution: Greek-style black olives or even green olives for a different tang).
                    • 4-6 oz Feta Cheese: Creamy, salty, and essential for that authentic Greek taste. (Substitution: Goat cheese for a tangier profile, or a dairy-free feta alternative).
                    • For the Dressing:
                      • 1/4 cup Extra Virgin Olive Oil: The smoothest, richest olive oil for a luxurious dressing.
                      • 2 Tablespoons Red Wine Vinegar: Tangy and bright, it cuts through the richness. (Substitution: White wine vinegar or apple cider vinegar).
                      • 1 teaspoon Dried Oregano: A classic Mediterranean herb that’s a must-have.
                      • 1/2 teaspoon Dried Mint (Optional): Adds a surprising, cooling freshness.
                      • Salt and freshly ground Black Pepper to taste: To enhance all the flavors.

                    Timing is Everything

                    Prep Time:
                    15 minutes
                    Cook Time:
                    0 minutes
                    Total Time:
                    15 minutes
                    Yields:
                    4 servings
                    A colorful and fresh Greek salad in a bowl

                    Step 1: Prep the Vegetables

                    Start by washing all your produce thoroughly. For the cucumber, you can peel it if you prefer, or leave the skin on for added texture and nutrients. Cut it into bite-sized pieces, about 1/2 inch thick. Halve or quarter the Roma tomatoes, depending on their size. Core and seed the green bell pepper, then chop it into similar bite-sized pieces. Thinly slice the red onion. If you find raw red onion too strong, you can soak the slices in cold water for about 10 minutes before draining them to mellow their bite.

                    Step 2: Prepare the Dressing

                    In a small bowl or a jar with a tight-fitting lid, combine the extra virgin olive oil, red wine vinegar, dried oregano, and optional dried mint. Season generously with salt and freshly ground black pepper. Whisk vigorously or shake the jar until the dressing is well emulsified. Taste and adjust seasonings as needed – you’re looking for a bright, tangy flavor that complements the salad ingredients.

                    Step 3: Combine and Toss

                    In a large salad bowl, add the chopped cucumber, tomatoes, bell pepper, and red onion. Scatter the Kalamata olives over the top. Crumble the feta cheese generously over the vegetables. Now, drizzle about half of the prepared dressing over the salad. Gently toss everything together, ensuring all the ingredients are lightly coated. You want to coat, not drown, the salad.

                    Step 4: Serve and Enjoy

                    Serve the Greek salad immediately to ensure the vegetables remain crisp. You can add more dressing if desired, or serve the remaining dressing on the side. This salad is best enjoyed fresh!

                    Nutritional Information for Greek Salad

                    While the exact nutritional values can vary based on ingredient brands and portion sizes, a typical serving of this Greek salad is:

                    • Calories: Approximately 200-250 per serving (without added proteins)
                    • Macronutrients: Rich in healthy fats from olive oil and olives, with a good amount of fiber from the fresh vegetables. Protein content comes primarily from the feta cheese.

                    (Note: This is an estimated value. For precise calculations, it’s recommended to use a nutritional calculator with your specific ingredients.)

                    Our Greek Salad vs. The Average

                    A traditional Greek salad is already quite healthy, but ours stands out by focusing on fresh, high-quality ingredients and a simple, light dressing that doesn’t overpower the natural flavors. Many store-bought or restaurant versions can be heavy on less healthy oils or include ingredients like lettuce, which isn’t authentic. Our recipe emphasizes the core flavors and textures that make a Greek salad so beloved.

                    Healthier Alternatives & Flavor Boosts

                    Want to lighten it up even further or add a new dimension of flavor? Consider these swaps and additions:

                    • Reduced Sodium Feta: If you’re watching your sodium intake, look for reduced-sodium feta cheese.
                    • Skip the Marinated Olives: Sometimes olives are packed in oil and brine. Opt for plain black or Kalamata olives.
                    • Add a Lean Protein: Grilled chicken breast, shrimp, or chickpeas can transform this salad into a complete meal.
                    • Fresh Herbs: While dried oregano is classic, a sprinkle of fresh parsley or dill can add a brighter, more intense herbaceous note.
                    • Lemon Zest: A little zest from a lemon can add a subtle, aromatic citrus punch to the dressing.

                    Serving Suggestions

                    This versatile Greek salad pairs wonderfully with a variety of dishes. It’s an ideal side dish for grilled meats, fish, or chicken. It also makes a fantastic light lunch on its own, perhaps with a side of crusty bread for dipping into any leftover dressing. For a more substantial meal, serve it alongside hummus and pita bread, or stuff it into warm pita pockets with a dollop of tzatziki sauce.

                    Common Mistakes to Avoid

                    To ensure your Greek salad is a masterpiece, steer clear of these common pitfalls:

                    • Over-dressing: Too much dressing can make the salad soggy and mask the fresh flavors. Start with less and add more if needed.
                    • Using Pre-shredded Feta: Pre-shredded cheese often contains anti-caking agents that affect its texture and meltability. Crumbled block feta is always superior.
                    • Chopping Ingredients Unevenly: Aim for consistent bite-sized pieces so you can get a good mix of flavors in every forkful.
                    • Soggy Vegetables: Don’t let the salad sit dressed for too long, especially if you’ve used very ripe tomatoes. Assemble and serve promptly.
                    • Not Seasoning the Dressing: A bland dressing will result in a bland salad. Don’t be shy with salt and pepper!

                    Storing Your Greek Salad

                    Greek salad is best enjoyed fresh, as the vegetables can become soggy if stored for too long. If you have leftovers, it’s recommended to store the undressed vegetables and dressing separately in airtight containers in the refrigerator. You can then combine and toss them just before serving again. Leftovers will typically last for 1-2 days.

                    Close-up of fresh Greek salad ingredients before tossing

                    Frequently Asked Questions About Greek Salad

                    ***What makes a Greek salad authentic?***

                    An authentic Greek salad (sometimes called Horiatiki) traditionally includes tomatoes, cucumbers, onions, Kalamata olives, feta cheese, oregano, and olive oil with red wine vinegar. It typically does not include lettuce or other leafy greens, and ingredients are usually chopped into larger chunks rather than finely diced.

                    ***Can I add lettuce to my Greek salad?***

                    While not traditionally part of an authentic Greek salad, many people enjoy adding lettuce for extra bulk and a different texture. If you choose to add lettuce, add it just before serving to prevent wilting.

                    ***What is the best type of feta cheese to use?***

                    For the most authentic flavor and texture, use a high-quality block feta made from sheep’s milk or a sheep and goat’s milk blend. It will be creamier and more flavorful than pre-crumbled feta. Look for it in brine for maximum freshness.

                    ***Can I make Greek salad ahead of time?***

                    You can prepare the components (chop vegetables, make dressing) ahead of time and store them separately. However, it’s best to toss the salad with the dressing just before serving to maintain the crispness of the vegetables.

                    ***What are Kalamata olives?***

                    Kalamata olives are a large, dark purple olive that originates from Kalamata, Greece. They have a deep, fruity, and slightly smoky flavor and are a staple in Greek cuisine.

                    Conclusion: Embrace the Freshness!

                    There you have it – a simple yet incredibly flavorful Greek Salad Recipe that’s perfect for any occasion. Its vibrant colors, fresh ingredients, and delightful tanginess make it a crowd-pleaser every time. So gather your ingredients, get chopping, and transport yourself to the Mediterranean with this easy and delicious salad. Don’t forget to share your creations with us!

                    Print
                    clock clock iconcutlery cutlery iconflag flag iconfolder folder iconinstagram instagram iconpinterest pinterest iconfacebook facebook iconprint print iconsquares squares iconheart heart iconheart solid heart solid icon

                    Greek Salad Recipe – Fresh, Easy, and Flavorful Mediterranean Dish


                    • Author: Chef Emy

                    Description

                    Welcome, food enthusiasts! If you’re looking for a fresh, vibrant, and utterly delicious salad recipe, thisGreek Salad Recipeis just for you. Packed with crisp vegetables, briny olives, and creamy feta cheese, it’s perfect as a side dish or a light main course. Whether you’re a fan of Mediterranean cuisine or simply want to try a newGreek-inspired recipe, this salad is sure to be a hit. Let’s dive into making this wonderfulGreek Salad Recipestep-by-step!


                    Ingredients

                    Scale
                    • 68cups chopped romaine lettuce(approx. 32 oz bag or1–2heads)
                    • 1/2 cupthinly sliced red onion
                    • 1/2 cupgrape or cherry tomatoes, halved
                    • 1/2 cupdiced cucumber
                    • 1/2 cupchopped green bell pepper
                    • 1/2 cuppitted Kalamata olives
                    • 1/2 cupcubed feta cheese
                    • 1/4 cupextra virgin olive oil
                    • 1/8 cupred wine vinegar
                    • 1 Tbsplemon juice
                    • 1 Tbsphoney
                    • 1 tspdried oregano
                    • 1 tspDijon mustard
                    • 1/4 tspkosher salt
                    • 1/4 tspblack pepper

                    Instructions

                    1. Prepare the Salad Base:Begin by placing the chopped romaine lettuce in a large mixing bowl. Add the thinly sliced red onions, halved tomatoes, diced cucumber, chopped bell pepper, pitted olives, and cubed feta cheese. Toss gently to combine the ingredients evenly.
                    2. Make the Dressing:In a separate small mixing bowl, whisk together the olive oil, red wine vinegar, lemon juice, honey, oregano, Dijon mustard, salt, and pepper until well combined. Alternatively, you can add the ingredients to a jar with a tight-fitting lid and shake vigorously until the dressing emulsifies.
                    3. Combine and Serve:Drizzle the dressing over the salad and toss to coat all ingredients thoroughly. For a more rustic presentation, serve the dressing on the side and let everyone add their desired amount.

                    Notes

                    Use Fresh Ingredients:Freshly chopped vegetables will provide the best texture and flavor.
                    Chill the Salad:Keep the salad in the fridge for about 15 minutes before serving for a crisper taste.
                    Customize the Dressing:Add a splash of balsamic vinegar for an extra tangy twist.

                    “`