Perfect Ham and Cheese Deviled Eggs – Easy Recipe

perfect-ham-cheese-deviled-eggs

Perfect Ham and Cheese Deviled Eggs – A Bite of Comfort

There’s something about deviled eggs that feels like a warm hug—a little bite of nostalgia that takes me straight back to family picnics and holiday gatherings. But sometimes, even the classics deserve a playful twist. That’s how these Ham and Cheese Deviled Eggs came to be in my kitchen. One lazy Sunday, with leftover Easter ham and a block of sharp cheddar staring at me from the fridge, inspiration struck. The result? A creamy, smoky, utterly irresistible upgrade to the traditional recipe. Whether you’re hosting a brunch or just treating yourself, these little bites are guaranteed to disappear fast!

Ingredients You’ll Need

  • 6 large eggs – The foundation of any good deviled egg! I like to use eggs that are a few days old—they peel easier.
  • ¼ cup mayonnaise – For that luscious, creamy texture. A good-quality mayo makes all the difference.
  • 1 teaspoon Dijon mustard – Just enough tang to balance the richness.
  • ½ cup finely diced ham – Leftover baked ham works beautifully here, but deli ham is just as tasty.
  • ¼ cup shredded sharp cheddar cheese – The sharper the better, in my opinion—it adds a lovely bite.
  • 1 tablespoon sweet pickle relish – A little sweetness to round out the flavors.
  • Pinch of smoked paprika – For garnish and a whisper of smokiness.
  • Salt and freshly ground black pepper – To taste, because seasoning is everything!

Step-by-Step: Let’s Make Magic

1. Perfect Hard-Boiled Eggs: Place your eggs in a single layer in a saucepan and cover with cold water by about an inch. Bring to a rolling boil, then immediately remove from heat, cover, and let sit for 10 minutes. Transfer to an ice bath to cool completely—this stops the cooking and makes peeling a breeze.

2. The Art of Peeling: Gently tap each egg on the counter and roll it between your palms to loosen the shell. Peel under cool running water—it helps lift those stubborn bits away.

3. Halve & Hollow: Slice each egg lengthwise and carefully pop out the yolks into a bowl. Arrange the whites on a serving platter—I like to use a deviled egg tray, but a simple plate works just fine!

4. Creamy Filling: Mash the yolks with a fork until fine, then stir in the mayo, Dijon, and relish until smooth. Fold in the ham and cheddar—don’t overmix; you want those little pockets of cheesy, meaty goodness.

5. Taste & Adjust: This is where I always sneak a spoonful (or two). Need more salt? A dash of pepper? Trust your taste buds!

Pro Tips for the Best Ham and Cheese Deviled Eggs

Want to take your deviled eggs to the next level? Here are a few tricks I’ve learned over the years:

  • Use room-temperature eggs. They’re much easier to peel without tearing the whites.
  • Pipe the filling for a polished look. A piping bag (or a zip-top bag with the corner snipped) makes them look bakery-perfect.
  • Let the flavors mingle. Chill the filling for 30 minutes before piping—it helps the flavors deepen.

Delicious Variations & Substitutions

This recipe is wonderfully adaptable! Try these twists:

  • Swap the ham: Crispy bacon or even diced prosciutto work beautifully.
  • Cheese lovers: Add a sprinkle of grated Parmesan to the filling or swap cheddar for Swiss.
  • Spice it up: A dash of hot sauce or smoked paprika adds a kick.
  • Herbaceous twist: Fresh chives or dill brighten up the flavor.

What to Serve With Ham and Cheese Deviled Eggs

These deviled eggs are a star at any gathering! Pair them with:

  • A crisp green salad with a tangy vinaigrette
  • Buttery crackers or toasted baguette slices
  • Fresh crudités for a lighter option
  • A charcuterie board for a full appetizer spread

Storage & Reheating Tips

Deviled eggs are best enjoyed fresh, but if you need to prep ahead:

  • Storage: Keep assembled eggs in an airtight container in the fridge for up to 2 days.
  • Make-ahead: Prep the filling and store separately for up to 24 hours. Pipe just before serving.
  • Freezing: Unfortunately, deviled eggs don’t freeze well—the texture suffers.

Frequently Asked Questions

Can I use pre-cooked eggs?
Absolutely! Store-bought hard-boiled eggs save time—just skip the boiling step.

How do I prevent my yolks from turning green?
Overcooking can cause that gray-green ring. Stick to 10–12 minutes of boiling and immediately cool in ice water.

Can I make these vegetarian?
Yes! Simply omit the ham and add extra cheese or finely diced bell peppers for texture.

Why are my deviled eggs watery?
If the filling is loose, you may have over-mixed or added too much mayo. A little extra mustard powder can help thicken it.

A Cozy Final Thought

There’s something so comforting about a platter of deviled eggs—nostalgic, satisfying, and always a crowd-pleaser. Whether you’re prepping for a holiday, potluck, or just a cozy night in, these ham and cheese deviled eggs bring a little extra joy to the table. I hope they become a staple in your recipe collection, just like they are in mine. Happy cooking, friends!

Print
clock clock iconcutlery cutlery iconflag flag iconfolder folder iconinstagram instagram iconpinterest pinterest iconfacebook facebook iconprint print iconsquares squares iconheart heart iconheart solid heart solid icon

Perfect Ham and Cheese Deviled Eggs


  • Author: Trusted Blog

Description

A delicious twist on classic deviled eggs, featuring savory ham and sharp cheddar cheese for extra flavor.


Ingredients

Scale

For the Crust:

  • 6 large eggs, hard-boiled and peeled
  • 2 tablespoons mayonnaise
  • 1 teaspoon Dijon mustard
  • 1/4 cup finely diced ham
  • 1/4 cup shredded sharp cheddar cheese
  • 1/2 teaspoon paprika
  • Salt and pepper to taste
  • Fresh chives for garnish (optional)

Instructions

1. Prepare the Crust:

  1. Slice the hard-boiled eggs in half lengthwise and carefully remove the yolks.
  2. In a bowl, mash the yolks with mayonnaise and Dijon mustard until smooth.
  3. Stir in the diced ham, shredded cheddar cheese, paprika, salt, and pepper.
  4. Spoon or pipe the yolk mixture back into the egg white halves.
  5. Garnish with fresh chives if desired and serve chilled.

Notes

You can customize the seasonings to taste.
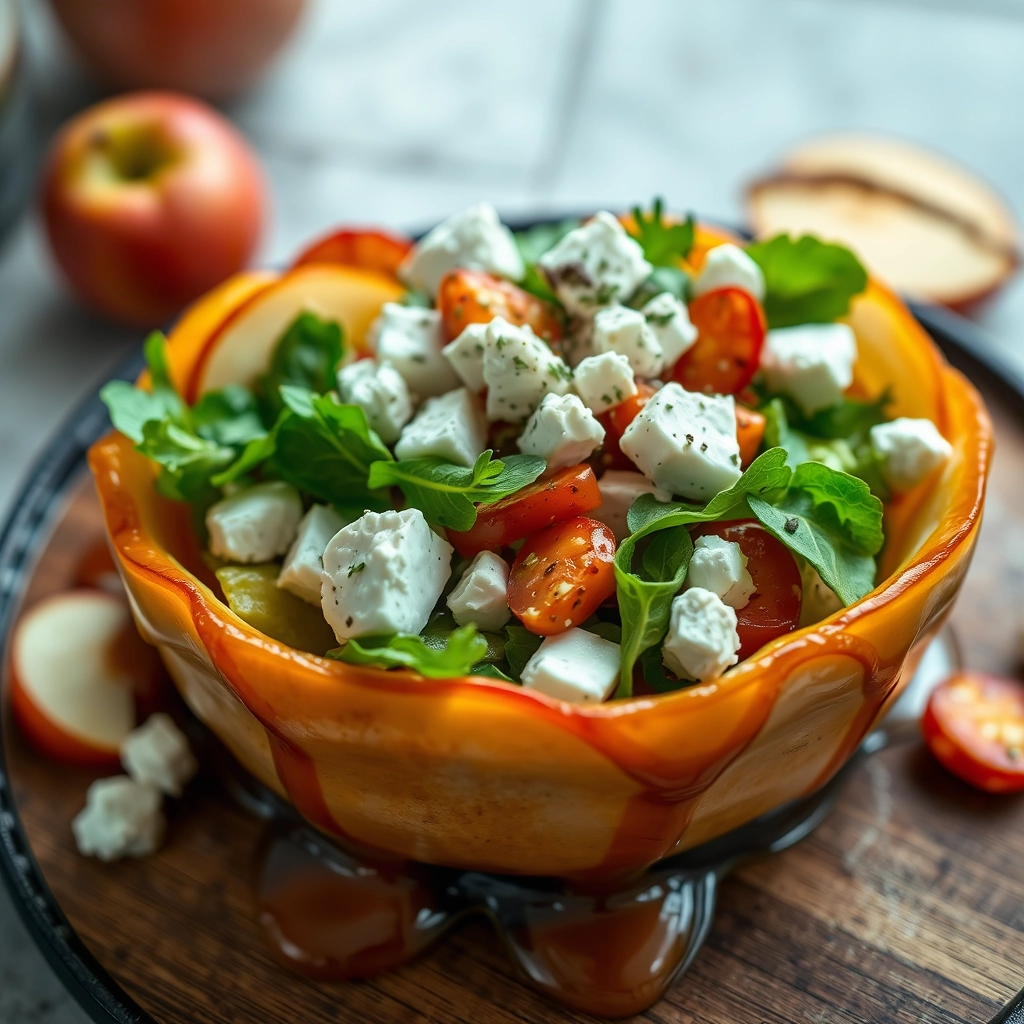
Best Honeycrisp Apple and Feta Salad Recipe

best-honeycrisp-apple-feta-salad

The Perfect Autumn Crunch: Honeycrisp Apple & Feta Salad

There’s something about the first crisp bite of a Honeycrisp apple that feels like autumn in a single moment. I remember picking them at a local orchard last year, the golden light filtering through the leaves as my basket grew heavier with each perfect, ruby-streaked fruit. That’s when I knew—this wasn’t just snack material. This was the star of a salad that would become my go-to for cozy gatherings and solo lunches alike. Sweet, tangy, and with just the right amount of crunch, this Honeycrisp Apple and Feta Salad is my love letter to the season.

Ingredients You’ll Need (and Why I Love Them)

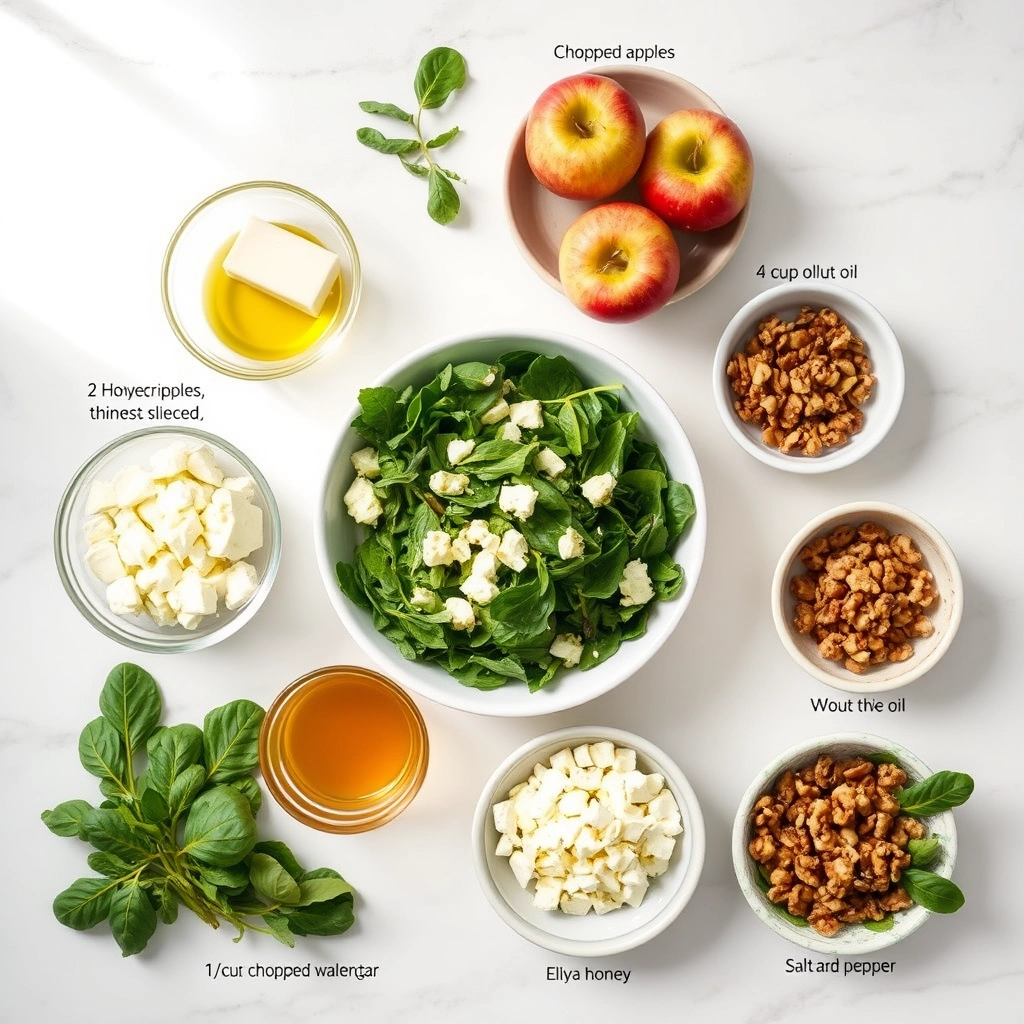
  • 2 large Honeycrisp apples – The star! Their crisp texture and honeyed sweetness balance the saltiness of the feta beautifully.
  • 1/2 cup crumbled feta cheese – Creamy, briny, and just crumbly enough to nestle into every bite.
  • 1/3 cup toasted walnuts – A toasty, nutty contrast that adds depth. (Pecans work too if you’re feeling fancy!)
  • 3 cups mixed greens – I like a blend of baby spinach and arugula for a peppery kick.
  • 1/4 red onion, thinly sliced – Soaked in ice water for 5 minutes to mellow the sharpness—trust me on this trick!
  • 2 tablespoons honey – For a drizzle that ties all the flavors together like a warm hug.
  • 1 tablespoon apple cider vinegar – Brightens everything up with its fruity tang.
  • 2 tablespoons extra virgin olive oil – The silky backbone of our simple dressing.
  • A pinch of flaky sea salt & cracked black pepper – Because even the simplest dishes deserve a little flourish.

Let’s Make Magic Together

Step 1: Start by toasting your walnuts. Heat a dry skillet over medium-low and toss them for 3-4 minutes until fragrant. (Watch closely—they go from golden to burnt in seconds!) Let them cool on a plate. This little step? It’s what takes your salad from “good” to “can I have the recipe?”

Step 2: Thinly slice your red onion and let it take a quick ice bath. This softens the bite while keeping that gorgeous purple hue. Drain and pat dry before adding to the bowl.

Step 3: Whisk together the honey, apple cider vinegar, olive oil, salt, and pepper in a small bowl. Taste and adjust—maybe a touch more honey if your apples are extra tart, or a squeeze of lemon if you love brightness.

Step 4: Core and slice your apples into thin wedges. (No need to peel—the skin adds color and nutrients!) To prevent browning, I sometimes give them a quick spritz of lemon juice, but honestly? This salad disappears too fast for it to matter.

There’s something magical about the way crisp Honeycrisp apples mingle with creamy feta in this salad. Every bite is a perfect balance of sweet, salty, and refreshing flavors. But let’s take this salad from great to extraordinary with some pro tips and creative variations!

Pro Tips for the Perfect Honeycrisp Apple & Feta Salad

  • Keep it crisp: Toss your apples in a teaspoon of lemon juice to prevent browning if preparing ahead
  • Texture matters: Toast your walnuts in a dry pan for 2-3 minutes to enhance their nutty flavor
  • Dressing wisdom: Whisk your vinaigrette in a jar for easy mixing and storage
  • Cheese choices: For a stronger flavor, try crumbled goat cheese instead of feta

Delicious Variations to Try

This salad is wonderfully adaptable to what you have on hand or your personal preferences:

  • Protein boost: Add grilled chicken, shrimp, or chickpeas to make it a complete meal
  • Nut alternatives: Swap walnuts for pecans, almonds, or pepitas
  • Greens galore: Try a mix of arugula and spinach for a peppery twist
  • Dried fruit: A handful of cranberries or chopped dates adds lovely sweetness

What to Serve With Your Apple Feta Salad

This versatile salad pairs beautifully with so many dishes:

  • Roasted chicken or turkey
  • Butternut squash soup
  • Grilled salmon or shrimp
  • Crusty bread with olive oil for dipping
  • As part of a holiday or potluck spread

Storage and Make-Ahead Tips

While this salad is best enjoyed fresh, you can prepare components ahead:

  • Store dressing separately for up to 5 days
  • Keep chopped apples in lemon water in the fridge for 1-2 days
  • Assembled salad (without dressing) keeps for about 4 hours
  • Leftovers will keep overnight but may get soggy – best eaten fresh!

Frequently Asked Questions

Can I use a different type of apple?

Absolutely! While Honeycrisp are our favorite for their perfect sweet-tart balance and crisp texture, Fuji, Pink Lady, or Jazz apples would also work beautifully.

Is there a vegan alternative to feta?

For a plant-based version, try cubed firm tofu marinated in lemon juice and salt, or a vegan feta alternative made from almonds or tofu.

Can I make this salad ahead for a party?

You can prepare all components separately up to a day ahead, then assemble just before serving to maintain the perfect crisp texture.

What if I don’t have walnuts?

Any nut or seed would be delicious – try pecans, almonds, sunflower seeds, or even pumpkin seeds for a different crunch.

A Salad to Remember

This Honeycrisp apple and feta salad is more than just a dish – it’s a celebration of textures and flavors that dance together in perfect harmony. Whether you’re serving it at a casual weeknight dinner or a special gathering, it’s sure to become one of those recipes you return to again and again. The crisp apples, creamy feta, and crunchy walnuts create a symphony of flavors that feels both comforting and exciting. I hope this salad brings as much joy to your table as it has to mine!

Print
clock clock iconcutlery cutlery iconflag flag iconfolder folder iconinstagram instagram iconpinterest pinterest iconfacebook facebook iconprint print iconsquares squares iconheart heart iconheart solid heart solid icon

Honeycrisp Apple and Feta Salad


  • Author: Trusted Blog

Description

A refreshing and crisp salad featuring sweet Honeycrisp apples, tangy feta cheese, and a light vinaigrette.


Ingredients

Scale

For the Crust:

  • 2 Honeycrisp apples, thinly sliced
  • 4 cups mixed greens
  • 1/2 cup crumbled feta cheese
  • 1/4 cup chopped walnuts
  • 2 tablespoons olive oil
  • 1 tablespoon apple cider vinegar
  • 1 teaspoon honey
  • Salt and pepper to taste

Instructions

1. Prepare the Crust:

  1. In a large bowl, combine the mixed greens, sliced apples, feta cheese, and walnuts.
  2. In a small bowl, whisk together the olive oil, apple cider vinegar, honey, salt, and pepper.
  3. Drizzle the dressing over the salad and toss gently to combine. Serve immediately.

Notes

You can customize the seasonings to taste.
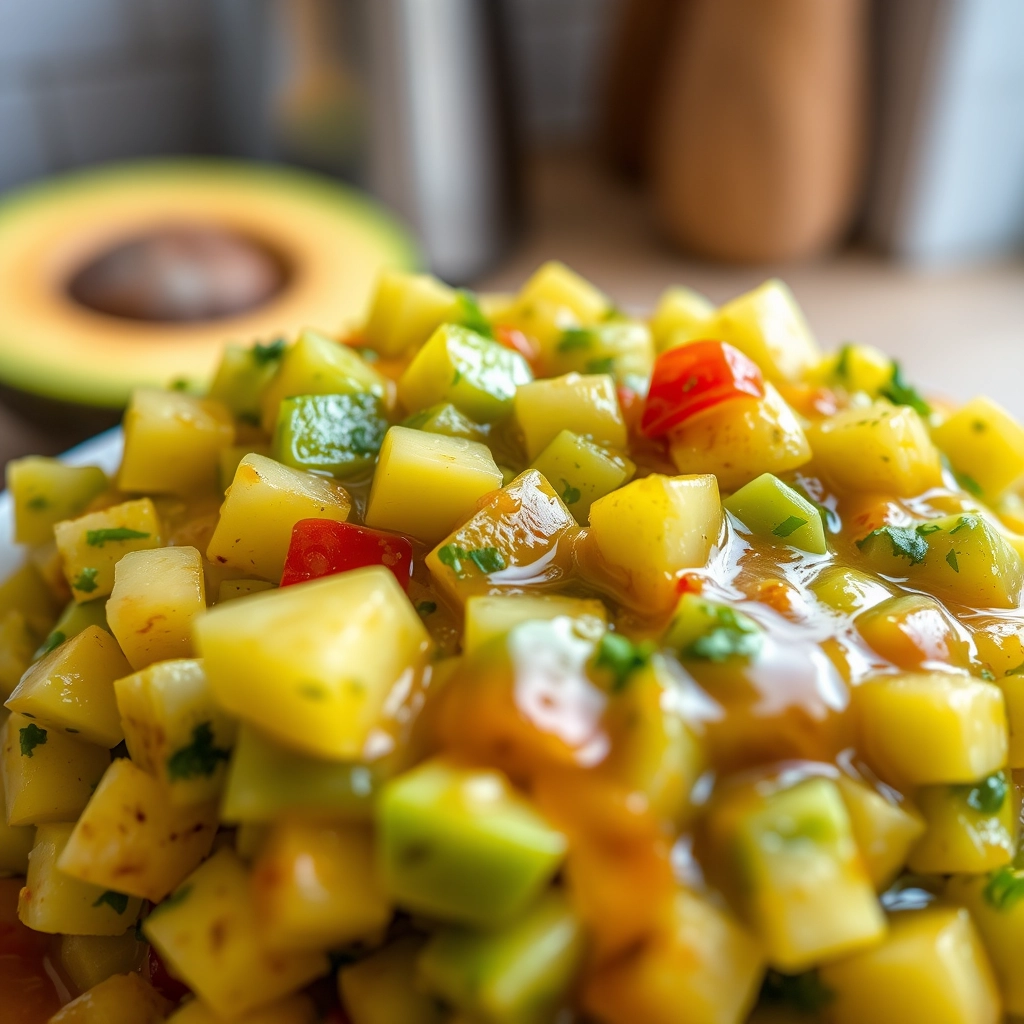
Best Pineapple Avocado Salsa – Fresh and Easy Recipe

best-pineapple-avocado-salsa

The Best Pineapple Avocado Salsa That Tastes Like Sunshine

There’s something magical about the way sweet pineapple and creamy avocado dance together in a bowl—bright, fresh, and utterly irresistible. I first fell in love with this salsa on a lazy summer afternoon when my neighbor, Maria, brought over a big bowl of it with a stack of warm tortilla chips. One bite and I was hooked. The tang of lime, the kick of jalapeño, and the juicy bursts of pineapple made it impossible to stop scooping. Now, it’s my go-to recipe for potlucks, taco nights, or just when I need a little tropical escape on a busy day.

Ingredients You’ll Need

This salsa is all about fresh, vibrant ingredients. Here’s what you’ll need to bring it to life:

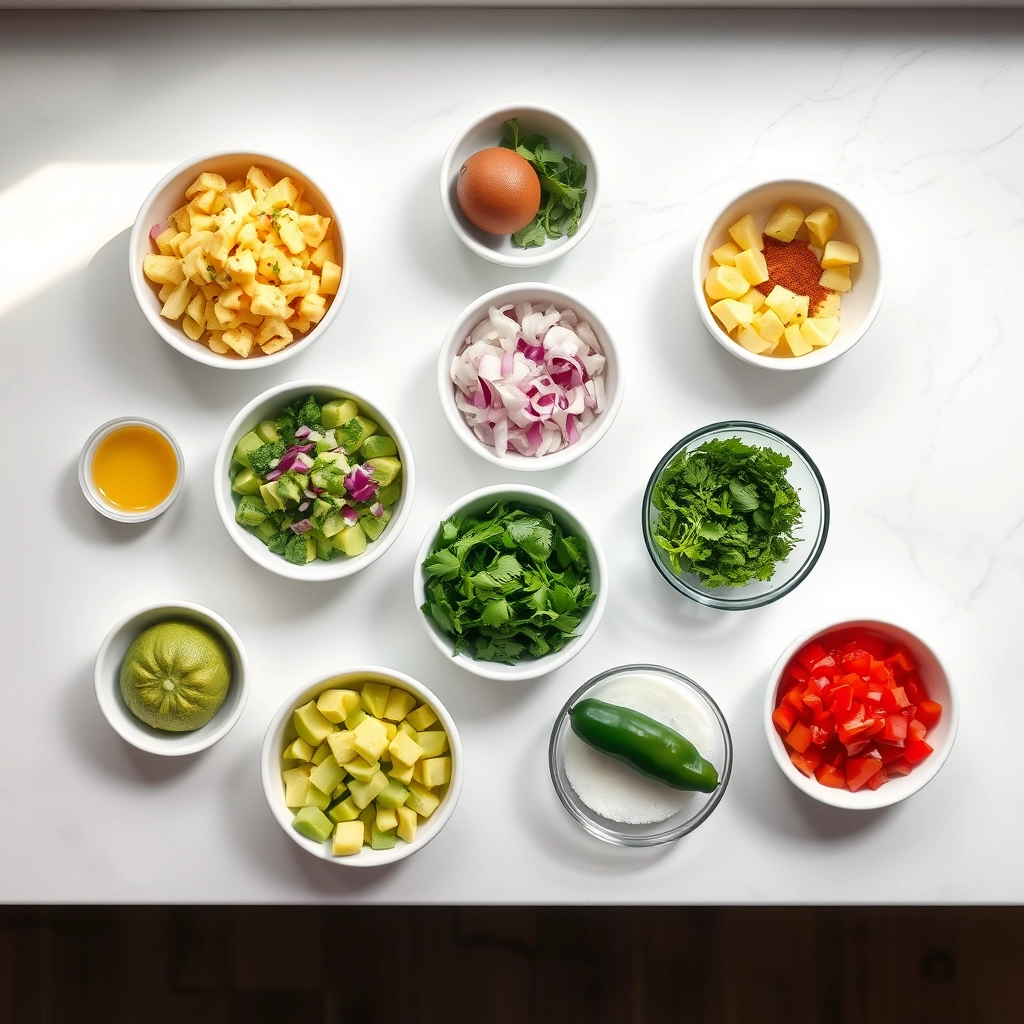
  • 1 cup fresh pineapple, diced – The star of the show! Look for a ripe pineapple with golden skin and a sweet aroma at the stem.
  • 1 large avocado, diced – Creamy and buttery, but make sure it’s just ripe enough—not too soft or it’ll turn mushy.
  • ½ red onion, finely chopped – Soaking it in cold water for 5 minutes tames the sharpness if you prefer a milder bite.
  • 1 jalapeño, seeded and minced – Adjust to your heat preference—leave a few seeds if you like it spicy!
  • ¼ cup fresh cilantro, chopped – If cilantro isn’t your thing, a little fresh mint or parsley works too.
  • Juice of 1 lime – Freshly squeezed is key—bottled lime juice just doesn’t have the same zing.
  • ½ teaspoon sea salt – Enhances all the flavors without overpowering.
  • A pinch of chili flakes (optional) – For an extra layer of warmth.

Let’s Make This Sunshine in a Bowl

This salsa comes together in minutes, but the flavors are anything but simple. Here’s how to make it:

  1. Prep your pineapple. Slice off the top and bottom, stand it upright, and carefully cut away the skin. Remove the core and dice the flesh into small, even pieces—about the size of corn kernels.
  2. Dice the avocado. Slice it in half, remove the pit, and use a spoon to scoop out the flesh. Gently dice it into similar-sized pieces as the pineapple (this keeps every bite balanced).
  3. Combine the base. In a large mixing bowl, gently toss together the pineapple, avocado, red onion, jalapeño, and cilantro. The key here is gentle—avocado can turn to mush if handled too roughly.
  4. Season and brighten. Drizzle the lime juice over the mixture and sprinkle with salt. Fold everything together until just combined. Taste and adjust—maybe a pinch more salt or an extra squeeze of lime?
  5. Let it rest (if you can wait). Cover and refrigerate for 10–15 minutes to let the flavors meld. Though, I won’t judge if you dive in immediately with a chip!

And just like that, you’ve got a bowl of pure happiness. The sweetness of pineapple, the richness of avocado, and that little kick of heat make this salsa unforgettable. Stay tuned for the second half of this post, where I’ll share serving ideas, storage tips, and why this salsa is secretly amazing on grilled fish!

Pro Tips, Variations, and Substitutions

This pineapple avocado salsa is wonderfully forgiving, so feel free to tweak it to your taste! Here are some ideas to make it your own:

  • Spice it up: Add a finely diced jalapeño or serrano pepper for extra heat. Remove the seeds if you prefer milder spice.
  • Herb swap: No cilantro? Try fresh mint or basil for a refreshing twist.
  • Fruit alternatives: Mango or peach makes a delicious substitute for pineapple when it’s not in season.
  • Extra crunch: Toss in some diced cucumber or jicama for added texture.
  • Make it creamy: Stir in a spoonful of Greek yogurt for a richer, dip-like consistency.

What to Serve With Pineapple Avocado Salsa

This vibrant salsa is incredibly versatile! Here are some of our favorite pairings:

  • Grilled fish or shrimp tacos
  • Chicken or pork tenderloin
  • As a topping for black bean burgers
  • With crispy tortilla chips for scooping
  • Over a bed of greens for a tropical salad
  • Alongside coconut rice for a Caribbean-inspired meal

Storage and Reheating Tips

While this salsa is best enjoyed fresh, here’s how to make it last:

  • Store in an airtight container in the refrigerator for up to 2 days.
  • The avocado may brown slightly – just give it a gentle stir before serving.
  • For longer storage (up to 4 days), omit the avocado and add it fresh when ready to serve.
  • This salsa doesn’t freeze or reheat well due to the fresh ingredients.
  • If making ahead, combine all ingredients except the avocado and lime juice, then add those just before serving.

Frequently Asked Questions

Can I use canned pineapple instead of fresh?

Absolutely! Just be sure to drain it well and pat dry with paper towels to prevent the salsa from becoming too watery.

How do I pick perfectly ripe avocados?

Gently press near the stem – it should yield slightly but not feel mushy. The skin should be dark (for Hass avocados) and bumpy.

Is there a way to prevent the avocado from browning?

The lime juice helps, but for extra protection, press plastic wrap directly onto the surface of the salsa before refrigerating.

Can I make this salsa milder for kids?

Yes! Simply omit the jalapeño or reduce the amount. You can always serve hot sauce on the side for adults.

A Taste of Sunshine in Every Bite

There’s something magical about the combination of sweet pineapple and creamy avocado that instantly transports you to warmer days. Whether you’re serving it at a summer barbecue, taco Tuesday, or just as a bright snack to lift your spirits, this salsa brings joy to every bite. The best part? It comes together in minutes but tastes like you spent all day in the kitchen. Whip up a batch today and let the tropical flavors dance on your tongue – your taste buds will thank you!

Print
clock clock iconcutlery cutlery iconflag flag iconfolder folder iconinstagram instagram iconpinterest pinterest iconfacebook facebook iconprint print iconsquares squares iconheart heart iconheart solid heart solid icon

Pineapple Avocado Salsa


  • Author: Trusted Blog

Description

A refreshing and tropical salsa combining sweet pineapple and creamy avocado with a hint of spice.


Ingredients

Scale

For the Crust:

  • 1 cup fresh pineapple, diced
  • 1 ripe avocado, diced
  • 1/4 cup red onion, finely chopped
  • 1/4 cup fresh cilantro, chopped
  • 1 jalapeño, seeded and minced
  • 1 lime, juiced
  • 1/2 teaspoon salt
  • 1/4 teaspoon black pepper

Instructions

1. Prepare the Crust:

  1. In a medium bowl, combine the diced pineapple, avocado, red onion, cilantro, and jalapeño.
  2. Drizzle the lime juice over the mixture and gently toss to combine.
  3. Season with salt and black pepper, adjusting to taste.
  4. Serve immediately or refrigerate for up to 1 hour before serving for best flavor.

Notes

You can customize the seasonings to taste.
Best Southwest Chicken Salad – Easy & Flavorful

best-southwest-chicken-salad

The Best Southwest Chicken Salad That Feels Like a Fiesta in Every Bite

There’s something magical about a salad that doesn’t feel like a salad at all—one that’s so packed with bold flavors and satisfying textures, you forget you’re eating something healthy. That’s exactly how I felt the first time I made this Southwest Chicken Salad. It was one of those sweltering summer evenings when turning on the oven felt like a crime, and I craved something fresh yet hearty. What emerged from my kitchen was a vibrant bowl of colors, smoky spices, and the kind of crunch that makes every forkful exciting. Now, it’s my go-to for potlucks, quick lunches, and those “I need something delicious but don’t want to fuss” nights.

Ingredients You’ll Need (and Why You’ll Love Them)

  • 2 cups cooked chicken, shredded or diced – Leftover rotisserie chicken works wonders here, but grilled chicken thighs add extra smokiness.
  • 1 can black beans, rinsed and drained – These little protein-packed gems add creaminess and heft.
  • 1 cup corn kernels – Fresh off the cob or charred in a pan takes it to the next level, but frozen (thawed) works in a pinch.
  • 1 red bell pepper, diced – For that sweet crunch and a pop of color.
  • 1/4 cup red onion, finely chopped – Soak in ice water for 5 minutes if you want to mellow the bite.
  • 1 avocado, cubed – Because everything’s better with avocado.
  • 1/3 cup cilantro, chopped – Don’t skip this! It’s the fresh herby kiss that ties everything together.
  • 1/2 cup cotija or feta cheese, crumbled – Salty, tangy, and utterly irresistible.
  • Tortilla strips or crushed chips – For that essential crunch factor (I’m team “extra crispy”).

The Dressing (Where the Magic Happens)

  • 1/3 cup lime juice – Freshly squeezed, please! Bottled just doesn’t sing the same way.
  • 2 tablespoons honey – A touch of sweetness to balance the spice.
  • 1 teaspoon cumin – Earthy, warm, and quintessentially Southwest.
  • 1/2 teaspoon smoked paprika – This is the secret weapon—it adds that campfire depth.
  • 1 clove garlic, minced – Because garlic makes everything better.
  • 1/3 cup olive oil – A good glug to bring it all together.
  • Salt and pepper to taste – Don’t be shy!

Let’s Make This Flavor Fiesta Happen

Step 1: Prep your protein. If you’re not using leftovers, season chicken breasts with salt, pepper, and a pinch of cumin, then grill or pan-sear until juicy. Let it rest before chopping—this keeps all those delicious juices locked in.

Step 2: Chop and assemble. In a large bowl, gently toss together the chicken, black beans, corn, bell pepper, red onion, and avocado. I like to add the avocado last to prevent mushiness. Pro tip: Squeeze a little extra lime over the avocado cubes to keep them vibrant.

Step 3: Whisk the dressing. In a small jar or bowl, combine lime juice, honey, cumin, smoked paprika, and garlic. Slowly drizzle in the olive oil while whisking until emulsified. Taste and adjust—sometimes I add an extra teaspoon of honey if my limes are extra tart.

Step 4: Bring it all together. Drizzle about half the dressing over the salad and toss lightly. The beauty of this recipe is that you can customize the sauciness to your liking. I always serve extra dressing on the side for those (like me) who love an extra tangy bite.

Pro Tips, Variations, and Substitutions

This Southwest Chicken Salad is wonderfully adaptable to your taste and pantry staples. Here are some ways to make it your own:

  • Protein Swap: Not a fan of chicken? Try grilled shrimp, steak strips, or even black beans for a vegetarian version.
  • Spice Level: Control the heat by adjusting the amount of chili powder or adding a diced jalapeño for extra kick.
  • Dressing Options: While the lime-cilantro dressing is perfect, ranch or avocado lime dressing work beautifully too.
  • Extra Crunch: Add toasted pepitas or crushed tortilla chips for more texture.

What to Serve With Your Southwest Chicken Salad

This vibrant salad is satisfying on its own, but pairs wonderfully with:

  • Warm flour tortillas or crispy tostadas
  • A side of Mexican rice or cilantro lime rice
  • Fresh avocado slices or guacamole
  • Chilled horchata or a crisp Mexican lager

Storage and Reheating Tips

This salad keeps beautifully for meal prep:

  • Storage: Keep in an airtight container for 3-4 days. Store dressing separately if possible.
  • Reviving Leftovers: If the salad seems dry, freshen it up with a squeeze of lime and a drizzle of olive oil.
  • Freezing: We don’t recommend freezing the assembled salad, but the cooked chicken freezes well for up to 3 months.

Frequently Asked Questions

Can I make this salad ahead of time?
Absolutely! Prep all ingredients separately and combine just before serving for the freshest texture.

What’s the best way to cook the chicken?
Grilling gives the best flavor, but pan-searing or baking works too. Just season well with Southwest spices.

Can I use bottled dressing?
While homemade is best, a good quality cilantro lime or Southwest-style bottled dressing can work in a pinch.

Is this salad gluten-free?
Yes! Just ensure your spices and dressing ingredients are gluten-free if that’s a concern.

A Salad That Feels Like a Fiesta

There’s something magical about how the smoky spices, fresh veggies, and zesty dressing come together in this Southwest Chicken Salad. It’s the kind of meal that makes weeknight dinners feel special and brings sunshine to even the cloudiest day. Whether you’re meal prepping for the week or serving it up for a casual gathering with friends, this salad always hits the spot. Here’s to delicious, fuss-free meals that nourish both body and soul!

Print
clock clock iconcutlery cutlery iconflag flag iconfolder folder iconinstagram instagram iconpinterest pinterest iconfacebook facebook iconprint print iconsquares squares iconheart heart iconheart solid heart solid icon

Southwest Chicken Salad


  • Author: Trusted Blog

Description

A flavorful and hearty salad with tender chicken, black beans, corn, and a zesty lime dressing.


Ingredients

Scale

For the Crust:

  • 2 boneless, skinless chicken breasts
  • 1 tbsp olive oil
  • 1 tsp chili powder
  • 1/2 tsp cumin
  • 1/2 tsp garlic powder
  • Salt and pepper to taste
  • 4 cups mixed greens
  • 1 cup black beans, rinsed and drained
  • 1 cup corn kernels (fresh or canned)
  • 1 avocado, diced
  • 1/4 cup red onion, finely chopped
  • 1/4 cup cilantro, chopped
  • 1/4 cup shredded cheddar cheese
  • 1/4 cup ranch dressing
  • 2 tbsp lime juice

Instructions

1. Prepare the Crust:

  1. Season chicken breasts with chili powder, cumin, garlic powder, salt, and pepper.
  2. Heat olive oil in a skillet over medium heat. Cook chicken for 6-7 minutes per side until fully cooked. Let rest, then slice.
  3. In a large bowl, combine mixed greens, black beans, corn, avocado, red onion, and cilantro.
  4. Top the salad with sliced chicken and shredded cheese.
  5. Whisk together ranch dressing and lime juice. Drizzle over the salad before serving.

Notes

You can customize the seasonings to taste.
Best Corn Salsa Recipe – Fresh and Flavorful

best-corn-salsa-recipe-fresh

The Best Corn Salsa Recipe – Fresh, Flavorful, and Full of Sunshine

There’s something about a bowl of fresh corn salsa that just feels like summer in a spoon. I remember the first time I tasted it at a backyard barbecue—charred sweet corn mingling with juicy tomatoes, crisp red onion, and a bright squeeze of lime. It was love at first bite. Since then, I’ve made it my mission to perfect this recipe, tweaking it over the years until it became the vibrant, crowd-pleasing dish I’m sharing with you today. Whether you’re scooping it up with tortilla chips, spooning it over grilled fish, or just eating it straight from the bowl (no judgment here!), this corn salsa is guaranteed to bring a little sunshine to your table.

Ingredients You’ll Need

Gather these fresh, simple ingredients—each one plays a starring role in creating that perfect balance of sweet, tangy, and spicy:

  • 3 cups fresh corn kernels – Nothing beats the sweetness of fresh-off-the-cob corn, but frozen (thawed) works in a pinch!
  • 1 medium red bell pepper – Diced small for a pop of color and crunch.
  • 1/2 red onion – Finely chopped. Soaking it in cold water for 5 minutes tames the sharpness if you prefer a milder bite.
  • 1 jalapeño – Seeded and minced. Leave the seeds in if you like a little extra heat!
  • 1/3 cup fresh cilantro – Chopped. If cilantro isn’t your thing, fresh parsley or a sprinkle of oregano works too.
  • Juice of 2 limes – About 1/4 cup. Freshly squeezed is key for that zesty brightness.
  • 1/2 tsp cumin – Just a whisper for warmth.
  • 1/2 tsp salt – Plus more to taste. Don’t be shy—it helps all the flavors sing.
  • 1 tbsp olive oil – A drizzle to bring everything together.

Let’s Make It Step by Step

This salsa comes together in minutes, but here’s how to make sure every bite is bursting with flavor:

  1. Prep the corn. If using fresh corn, shuck the ears and slice off the kernels. For extra depth, char them in a dry skillet over medium-high heat for 2–3 minutes until lightly golden. (This step is optional but oh-so-worth it!)
  2. Chop the veggies. Dice the bell pepper, red onion, and jalapeño into small, even pieces—this ensures every scoop has a little bit of everything.
  3. Mix it up. In a large bowl, combine the corn, bell pepper, onion, jalapeño, and cilantro. Gently toss to distribute the ingredients evenly.
  4. Dress it. Drizzle with lime juice, olive oil, cumin, and salt. Fold everything together with a spoon, then taste and adjust seasoning as needed. Sometimes I add an extra pinch of salt or squeeze of lime—trust your palate!

Now, here’s the hardest part: letting it sit for at least 15 minutes before serving. This gives the flavors time to mingle and deepen, transforming good salsa into unforgettable salsa. (But if you can’t wait, I won’t tell!)

Pro Tips for the Best Corn Salsa

After making this corn salsa dozens of times, I’ve picked up a few tricks to make it even better:

  • Char your corn – For deeper flavor, grill the corn or char it in a dry skillet before cutting off the kernels
  • Let it rest – The flavors meld beautifully if you let the salsa sit for 30 minutes before serving
  • Adjust to taste – Start with less lime/jalapeño and add more gradually until it’s perfect for you

Delicious Variations to Try

This recipe is wonderfully adaptable:

  • Fruit twist – Add diced mango or pineapple for sweetness
  • Creamy version – Stir in 1/4 cup crumbled cotija cheese or diced avocado
  • Winter hack – Use thawed frozen corn when fresh isn’t available
  • Protein boost – Mix in black beans for a heartier salsa

What to Serve With Corn Salsa

This vibrant salsa pairs beautifully with:

  • Tortilla chips (of course!)
  • Grilled chicken or fish tacos
  • As a topping for nachos or taco bowls
  • Alongside grilled meats at BBQs
  • Mixed into scrambled eggs for breakfast

Storage and Reheating Tips

This salsa keeps well for 3-4 days in the refrigerator in an airtight container. The flavors actually improve after the first day! For best results:

  • If it seems dry after storage, stir in a fresh squeeze of lime juice
  • Drain any excess liquid that accumulates before serving
  • I don’t recommend freezing as the texture changes
  • No reheating needed – serve chilled or at room temperature

Frequently Asked Questions

Can I use canned corn instead of fresh?

Absolutely! Drain and rinse one 15-oz can of corn. For better flavor, pat it dry and give it a quick sauté in a dry skillet before using.

How spicy is this salsa?

The heat level is easily adjustable. Start with half a jalapeño (seeds removed) for mild, or add more to taste. For no heat at all, use bell pepper instead.

Can I make this ahead for a party?

Yes! It actually tastes better made 4-6 hours ahead. Just wait to add fresh herbs until right before serving for maximum freshness.

Is this salsa gluten-free and vegan?

Yes to both! All the ingredients are naturally gluten-free and plant-based. Just check your chips if serving to guests with dietary restrictions.

A Summer Staple You’ll Make Again and Again

There’s something magical about how these simple ingredients come together to create a salsa that’s greater than the sum of its parts. Whether you’re hosting a backyard fiesta, packing a picnic, or just craving a fresh snack, this corn salsa never fails to delight. The bright flavors taste like sunshine in a bowl, and I love how versatile it is – equally at home on a chip or as a topping for grilled salmon. I hope this recipe becomes a regular in your kitchen like it has in mine. Happy dipping!

Print
clock clock iconcutlery cutlery iconflag flag iconfolder folder iconinstagram instagram iconpinterest pinterest iconfacebook facebook iconprint print iconsquares squares iconheart heart iconheart solid heart solid icon

Corn Salsa


  • Author: Trusted Blog

Description

A fresh and zesty corn salsa perfect for dipping or topping your favorite dishes.


Ingredients

Scale

For the Crust:

  • 2 cups fresh or frozen corn kernels
  • 1 medium red bell pepper, diced
  • 1/2 red onion, finely diced
  • 1 jalapeño, seeded and minced
  • 1/4 cup fresh cilantro, chopped
  • 2 tablespoons lime juice
  • 1 tablespoon olive oil
  • 1/2 teaspoon salt
  • 1/4 teaspoon black pepper

Instructions

1. Prepare the Crust:

  1. In a large bowl, combine corn, red bell pepper, red onion, jalapeño, and cilantro.
  2. In a small bowl, whisk together lime juice, olive oil, salt, and black pepper.
  3. Pour the dressing over the corn mixture and toss gently to combine.
  4. Cover and refrigerate for at least 30 minutes before serving to allow flavors to meld.

Notes

You can customize the seasonings to taste.
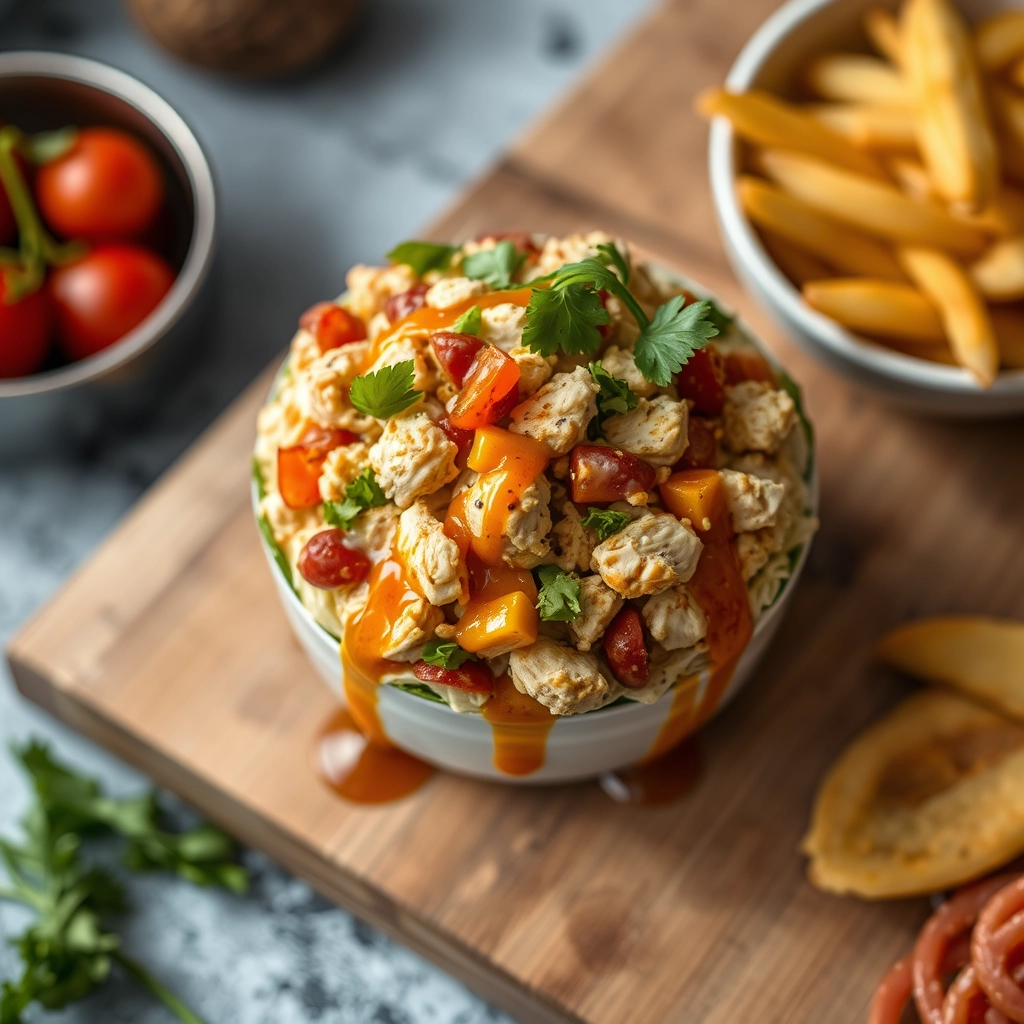
Best Air Fryer Zucchini Fries – Crispy & Easy Recipe

best-air-fryer-zucchini-fries

The Crispy Zucchini Fries That Stole My Heart (And My Air Fryer)

There’s something magical about that first bite of a perfectly crispy zucchini fry—the way the golden crust shatters to reveal the tender, almost buttery interior. I discovered this joy on a lazy Sunday afternoon when my garden was overflowing with zucchini and my cravings were leaning dangerously toward something fried. But with the summer heat making the thought of a bubbling pot of oil unbearable, my trusty air fryer came to the rescue. What unfolded was nothing short of a revelation: zucchini fries so crisp, so flavorful, and so downright addictive that my family nearly staged an intervention when I tried to save the last few for photos.

Ingredients You’ll Need for Air Fryer Zucchini Fries

  • 2 medium zucchinis – Look for firm, vibrant green ones without soft spots. Smaller zucchinis tend to be sweeter and less watery!
  • 1/2 cup panko breadcrumbs – The secret to an extra-crunchy crust. Regular breadcrumbs work, but panko is worth the pantry space.
  • 1/4 cup grated Parmesan cheese – The nutty, salty punch that makes these fries irresistible. Freshly grated melts into the crust beautifully.
  • 1 teaspoon garlic powder – Because everything is better with garlic. Promise.
  • 1 teaspoon Italian seasoning – A cozy blend of herbs that whispers “comfort food.”
  • 1/2 teaspoon smoked paprika – Just a hint for that smoky depth. (Swap with sweet paprika if that’s what you have!)
  • 2 large eggs – Our trusty binder to help everything stick.
  • 1 tablespoon water – A splash to loosen the egg wash for easy dipping.
  • Salt & freshly ground black pepper – To taste. Don’t be shy—seasoning is key!
  • Cooking spray or olive oil – A light spritz helps the fries crisp up golden brown.

Let’s Make Those Fries!

Step 1: Prep Your Zucchini
Slice your zucchinis into fry-shaped sticks—about 1/2-inch thick and 3 inches long. Too thin, and they’ll shrivel; too thick, and they might stay soggy inside. Pat them very dry with a kitchen towel (this is crucial for crispiness!).

Step 2: Create Your Crunchy Coating
In a shallow bowl, whisk together the panko, Parmesan, garlic powder, Italian seasoning, smoked paprika, and a pinch of salt and pepper. In another bowl, beat the eggs with water until smooth. This little duo is about to work magic.

Step 3: Dip & Coat Like a Pro
Working in batches, dip each zucchini stick into the egg wash, letting excess drip off, then roll it in the panko mixture. Press gently to help the crumbs adhere—this is where the crispy fairy does her work! Lay the coated fries on a plate in a single layer.

Step 4: Air Fry to Golden Perfection
Lightly spray your air fryer basket with oil (or brush with olive oil), then arrange the fries in a single layer without overcrowding. Spritz the tops lightly with oil—this is the cheat code for crunch. Air fry at 400°F for 8-10 minutes, flipping halfway, until they’re deeply golden and crisp. (Peek at the 8-minute mark—air fryers can vary!)

Pro Tip: If you’re doubling the batch, keep the cooked fries warm in a 200°F oven while you air fry the rest. Trust me, no one likes lukewarm fries!

Pro Tips, Variations, and Substitutions

Want to take your air fryer zucchini fries to the next level? Here are some expert tips and fun twists to try:

  • Extra crispy: For maximum crunch, pat your zucchini strips dry with paper towels before breading and let them sit for 5 minutes after coating to help the breading adhere.
  • Panko lovers: Swap regular breadcrumbs for panko for an even crispier texture.
  • Cheesy twist: Add 2 tablespoons of grated parmesan to your breadcrumb mixture for extra flavor.
  • Gluten-free option: Use almond flour or gluten-free breadcrumbs instead of regular breadcrumbs.
  • Spice it up: Add a pinch of cayenne pepper or smoked paprika to the breading for a kick of heat.

What to Serve with Air Fryer Zucchini Fries

These golden zucchini fries pair beautifully with so many dishes! Here are our favorite serving suggestions:

  • Classic marinara sauce for dipping
  • Creamy ranch or garlic aioli
  • As a side to juicy burgers or grilled chicken
  • Alongside a fresh garden salad for a light meal
  • With your favorite sandwich instead of potato chips

Storage and Reheating Tips

While these zucchini fries are best enjoyed fresh, here’s how to handle leftovers:

  • Storage: Keep in an airtight container in the fridge for up to 2 days.
  • Reheating: For best results, reheat in the air fryer at 375°F for 3-4 minutes to restore crispiness.
  • Freezing: We don’t recommend freezing as the texture becomes soggy when thawed.
  • Make-ahead tip: You can bread the zucchini strips and refrigerate them (unbaked) for up to 4 hours before air frying.

Frequently Asked Questions

Why are my zucchini fries soggy?

This usually happens if the zucchini wasn’t patted dry enough before breading or if the air fryer basket was overcrowded. Make sure to leave space between the fries for proper air circulation.

Can I use frozen zucchini?

We recommend fresh zucchini for this recipe. Frozen zucchini contains too much moisture and won’t crisp up properly in the air fryer.

Do I need to flip the fries during cooking?

Yes! Flipping halfway through ensures even browning on all sides. Use tongs for easy turning.

Can I make these in a conventional oven?

Absolutely! Bake at 425°F on a parchment-lined baking sheet for about 15-20 minutes, flipping halfway through.

Final Thoughts

There’s something so satisfying about biting into these crispy, golden zucchini fries knowing they’re actually good for you. Whether you’re serving them as an appetizer for game night, a fun side dish for family dinner, or just treating yourself to a healthier snack, these air fryer zucchini fries never disappoint. The best part? Even picky eaters who claim they don’t like vegetables often find themselves reaching for seconds. So grab that zucchini and your air fryer – your new favorite snack is just minutes away!

Print
clock clock iconcutlery cutlery iconflag flag iconfolder folder iconinstagram instagram iconpinterest pinterest iconfacebook facebook iconprint print iconsquares squares iconheart heart iconheart solid heart solid icon

Air Fryer Zucchini Fries


  • Author: Trusted Blog

Description

Crispy and delicious zucchini fries made in the air fryer for a healthier alternative to traditional fries.


Ingredients

Scale

For the Crust:

  • 2 medium zucchinis, cut into fries
  • 1/2 cup breadcrumbs
  • 1/4 cup grated Parmesan cheese
  • 1 tsp garlic powder
  • 1/2 tsp paprika
  • 1/2 tsp salt
  • 1/4 tsp black pepper
  • 2 eggs, beaten
  • Cooking spray

Instructions

1. Prepare the Crust:

  1. Preheat the air fryer to 400°F (200°C).
  2. In a shallow bowl, mix breadcrumbs, Parmesan cheese, garlic powder, paprika, salt, and pepper.
  3. Dip zucchini fries into beaten eggs, then coat with the breadcrumb mixture.
  4. Place the coated zucchini fries in the air fryer basket in a single layer, ensuring they don’t overlap. Lightly spray with cooking spray.
  5. Air fry for 10-12 minutes, flipping halfway through, until golden and crispy.
  6. Serve immediately with your favorite dipping sauce.

Notes

You can customize the seasonings to taste.

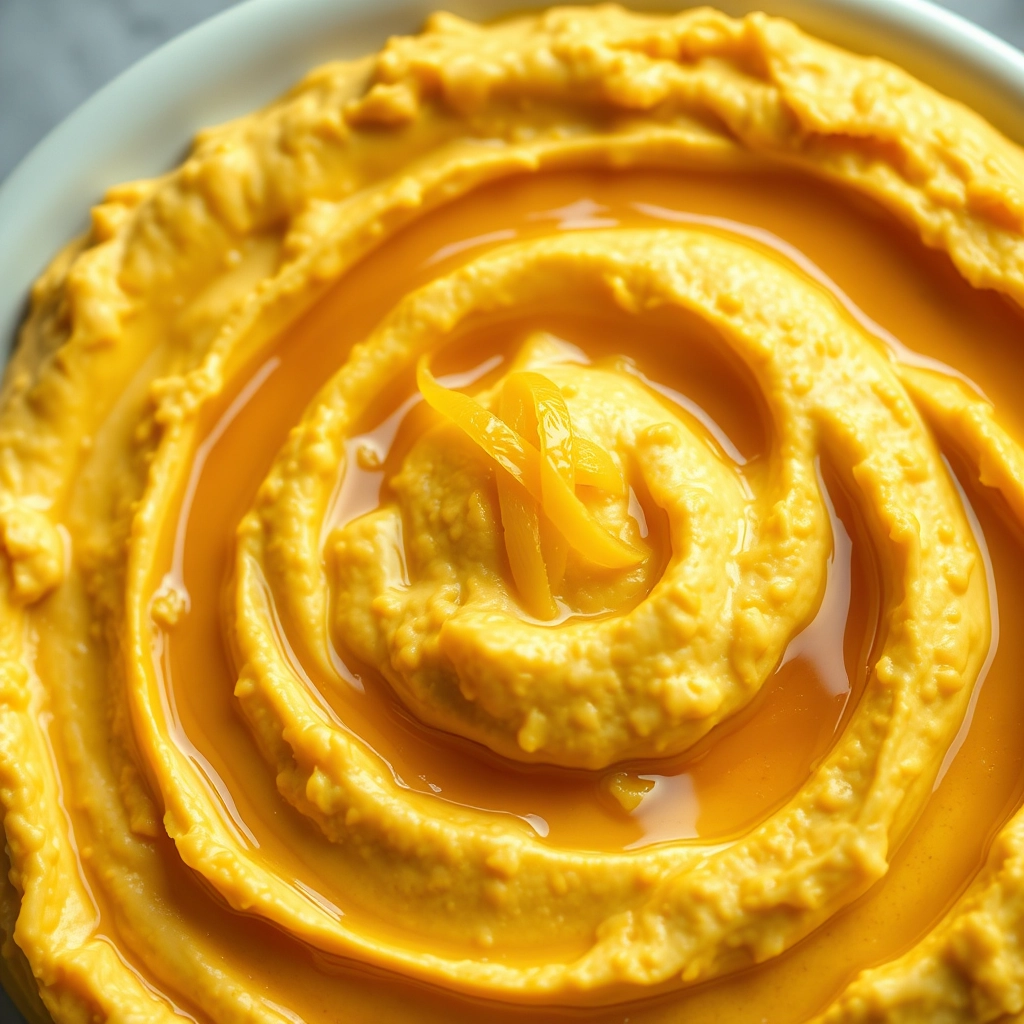
Best Lemon Hummus – Creamy and Zesty Recipe

best-lemon-hummus-creamy-zesty

The Best Lemon Hummus: A Little Sunshine in Every Bite

There’s something about lemons that instantly lifts my spirits. Maybe it’s their cheerful yellow hue or that first bright, tangy note that dances on your tongue. Whatever the magic, I found myself craving that very sunshine on a particularly gray afternoon last week. The kind of day where the sky couldn’t decide between drizzle and gloom, and my kitchen felt like the only cozy refuge. That’s when this lemon hummus was born – creamy, zesty, and bursting with the kind of flavor that makes you close your eyes and smile.

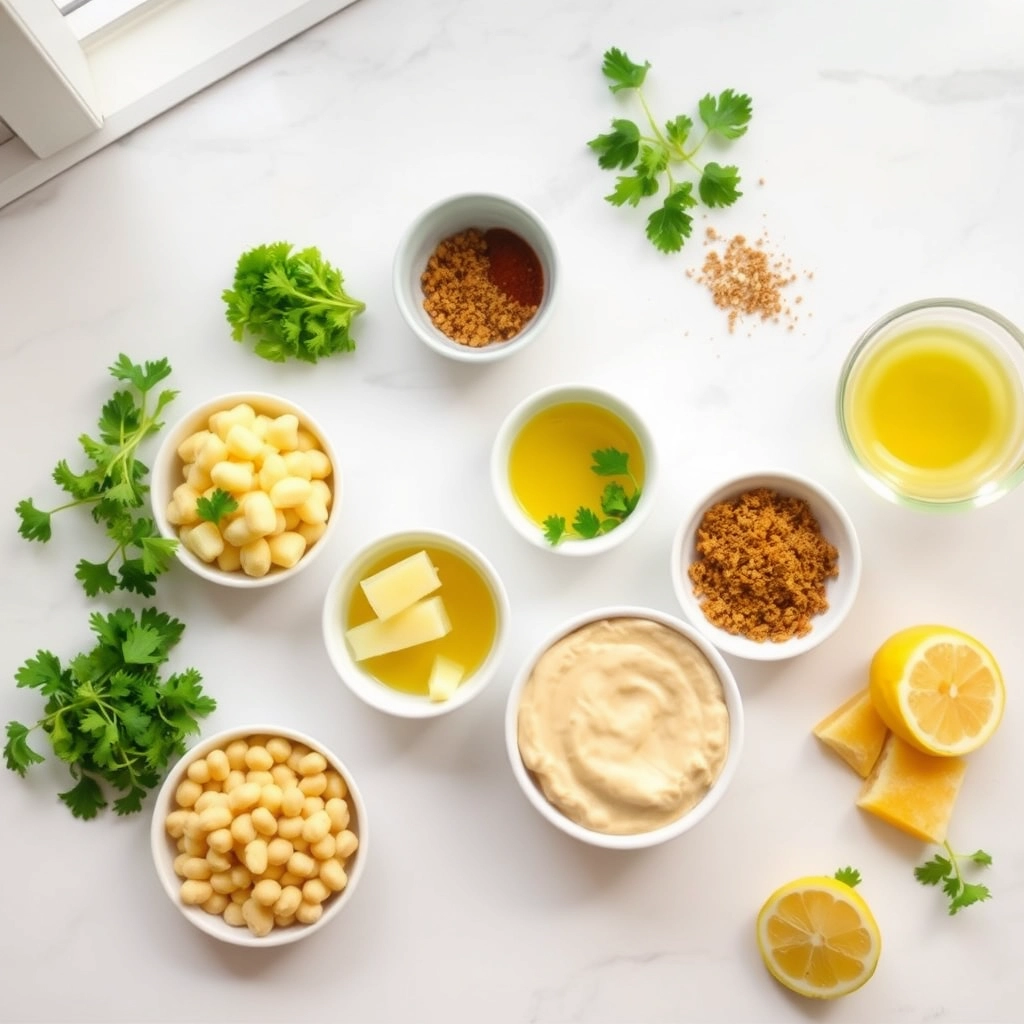
Ingredients You’ll Need

  • 2 cups cooked chickpeas – I adore using home-cooked ones for extra creaminess, but a good quality canned version works beautifully too (just rinse them well!)
  • 1/3 cup tahini – This sesame paste is hummus’ best friend. Look for one with a pourable consistency and rich, nutty aroma.
  • 2 lemons – We’re using both the zest and juice here for maximum citrusy joy. Meyer lemons would be divine if you can find them!
  • 2 garlic cloves – Fresh is best, minced finely so no one gets an unexpected pungent bite.
  • 1/2 teaspoon ground cumin – That warm, earthy note that makes hummus taste like home.
  • 1/4 cup ice water – The secret weapon for ultra-smooth texture!
  • 3 tablespoons extra virgin olive oil – Plus more for drizzling. Choose a fruity one you love the taste of.
  • Salt to taste – I start with 1/2 teaspoon and adjust from there.

Let’s Make Some Sunshine

First, let’s prep our lemons. Using a microplane or fine grater, zest both lemons before juicing them – you’ll want about 1/4 cup of fresh juice. That citrusy aroma already has me feeling brighter!

Now, into the food processor go the chickpeas, tahini, lemon zest, garlic, and cumin. Pulse a few times until the mixture starts breaking down. Here’s my favorite trick: with the processor running, slowly drizzle in the lemon juice through the feed tube. The acid helps soften the chickpeas for that dreamy smooth texture we all crave in hummus.

Next comes the ice water, added tablespoon by tablespoon while the processor runs. Watch the magic happen as your hummus transforms from thick paste to velvety clouds! I usually use about 3-4 tablespoons, but trust your instincts – you want it creamy but still able to hold its shape on a pita.

Now for the grand finale: with the processor still going, stream in that glorious olive oil. The hummus will become impossibly smooth and light. Taste (my favorite part!) and adjust salt as needed. Sometimes I add an extra pinch of cumin or squeeze of lemon at this stage – cooking should always be guided by your own palate.

Pro Tips, Variations, and Substitutions

Making the perfect lemon hummus is all about balancing flavors and textures. Here are some insider tips and creative twists to make it your own:

  • Extra Creamy: For ultra-smooth hummus, peel your chickpeas by rubbing them between paper towels. It takes a few extra minutes but makes a world of difference!
  • Lemon Variations: Try Meyer lemons for a sweeter citrus note, or add ½ teaspoon of lemon zest for extra brightness.
  • Tahini Swap: If you’re out of tahini, almond butter makes a surprisingly good substitute in a pinch.
  • Spice It Up: Add a pinch of cumin or smoked paprika for depth, or a dash of cayenne for heat.

What to Serve With Lemon Hummus

This zesty spread is incredibly versatile! Here are my favorite ways to enjoy it:

  • Classic pita wedges or warm naan bread
  • Crunchy vegetable crudités (carrots, cucumbers, bell peppers)
  • As a sandwich spread instead of mayo
  • With falafel or grilled chicken
  • Smeared on toast with avocado and chili flakes

Storage and Reheating Tips

To keep your lemon hummus fresh and delicious:

  • Store in an airtight container in the refrigerator for up to 5 days
  • If it thickens, stir in a teaspoon of water or lemon juice to revive the creamy texture
  • For best flavor, let it sit at room temperature for 15 minutes before serving
  • Freezing isn’t recommended as it can change the texture

Frequently Asked Questions

Can I use canned chickpeas?

Absolutely! Just be sure to rinse them well. Using canned chickpeas makes this recipe come together in minutes.

Why is my hummus grainy?

This usually happens if the chickpeas aren’t blended enough. Keep processing and add a bit more liquid (water or olive oil) until smooth.

How can I make it less lemony?

Start with half the lemon juice, taste, and add more gradually. You can also balance the acidity with a teaspoon of honey or maple syrup.

Is hummus healthy?

Yes! Chickpeas are packed with protein and fiber, and the olive oil provides healthy fats. It’s a nutritious snack when enjoyed in moderation.

A Final Zesty Note

There’s something magical about how the bright lemon transforms classic hummus into something extraordinary. Whether you’re serving it at a summer gathering or just treating yourself to an afternoon snack, this recipe never fails to delight. I love watching people’s faces light up after that first lemony bite! Wishing you many happy hummus-making moments ahead – may your dips always be creamy and your pita always warm.

Print
clock clock iconcutlery cutlery iconflag flag iconfolder folder iconinstagram instagram iconpinterest pinterest iconfacebook facebook iconprint print iconsquares squares iconheart heart iconheart solid heart solid icon

Lemon Hummus


  • Author: Trusted Blog

Description

A zesty and creamy hummus with a bright lemon flavor, perfect for dipping or spreading.


Ingredients

Scale

For the Crust:

  • 1 can (15 oz) chickpeas, drained and rinsed
  • 1/4 cup tahini
  • 1/4 cup fresh lemon juice
  • 2 cloves garlic, minced
  • 2 tbsp olive oil
  • 1/2 tsp ground cumin
  • 1/2 tsp salt
  • 23 tbsp water (as needed for consistency)
  • 1 tbsp fresh parsley, chopped (for garnish)

Instructions

1. Prepare the Crust:

  1. In a food processor, combine chickpeas, tahini, lemon juice, garlic, olive oil, cumin, and salt.
  2. Process until smooth, scraping down the sides as needed.
  3. Add water, one tablespoon at a time, until desired consistency is reached.
  4. Transfer to a serving bowl and garnish with chopped parsley and a drizzle of olive oil if desired.
  5. Serve with pita bread, vegetables, or crackers.

Notes

You can customize the seasonings to taste.
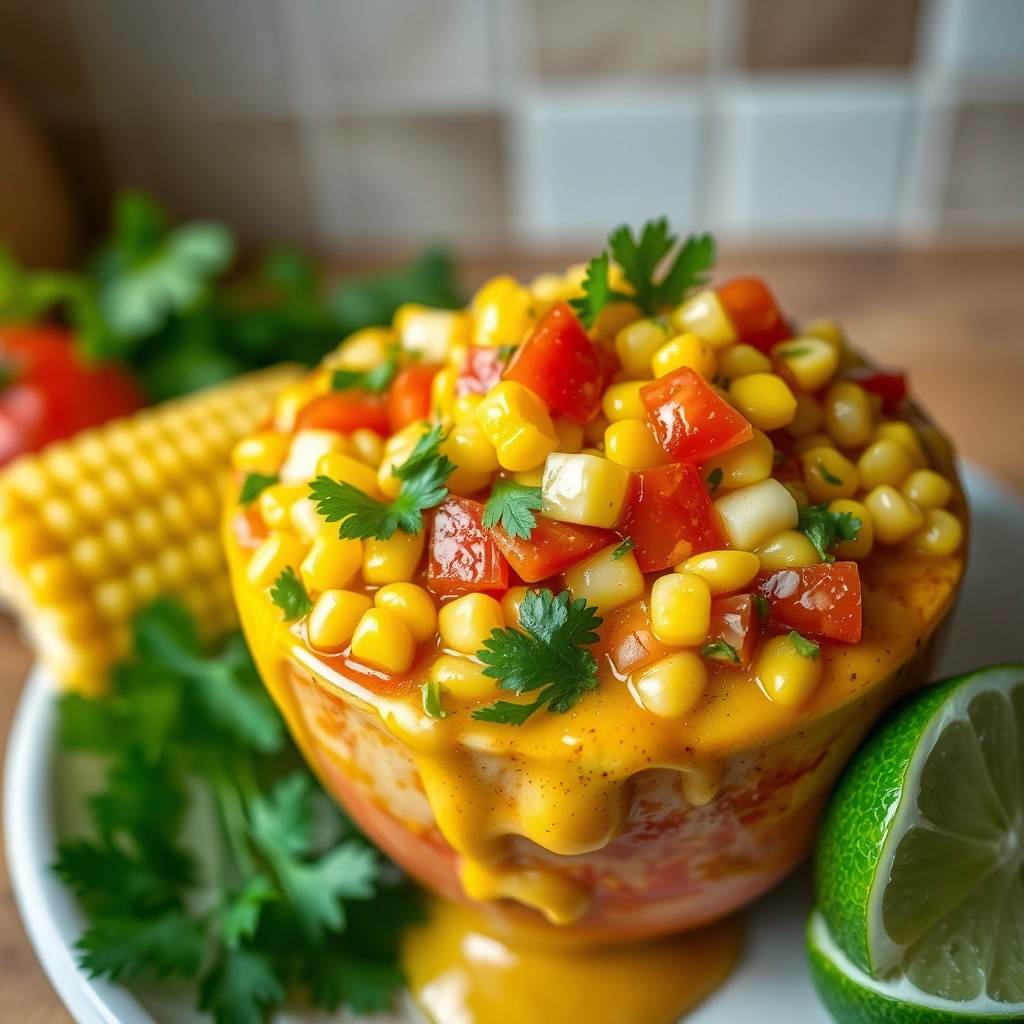
Best Easy Easter Dip – Quick and Creamy Recipe

best-easy-easter-dip

Best Easy Easter Dip – Quick and Creamy Recipe

There’s something about Easter that makes me crave bright, cheerful flavors—something creamy, tangy, and utterly irresistible to scoop onto a crisp carrot stick or a buttery cracker. Maybe it’s the pastel-colored table settings or the joyful chaos of family gatherings, but every year, I find myself whipping up this easy Easter dip. It’s the kind of recipe that disappears faster than the Easter eggs hidden in the garden, and trust me, that’s saying something!

I first made this dip on a whim when unexpected guests dropped by for an impromptu Easter brunch. With just a handful of ingredients from my fridge and pantry, I threw it together in minutes—and it was an instant hit. Now, it’s a non-negotiable part of our holiday spread. Whether you’re hosting a big feast or just need a quick snack to keep little hands busy while the ham finishes roasting, this creamy, dreamy dip is here to save the day.

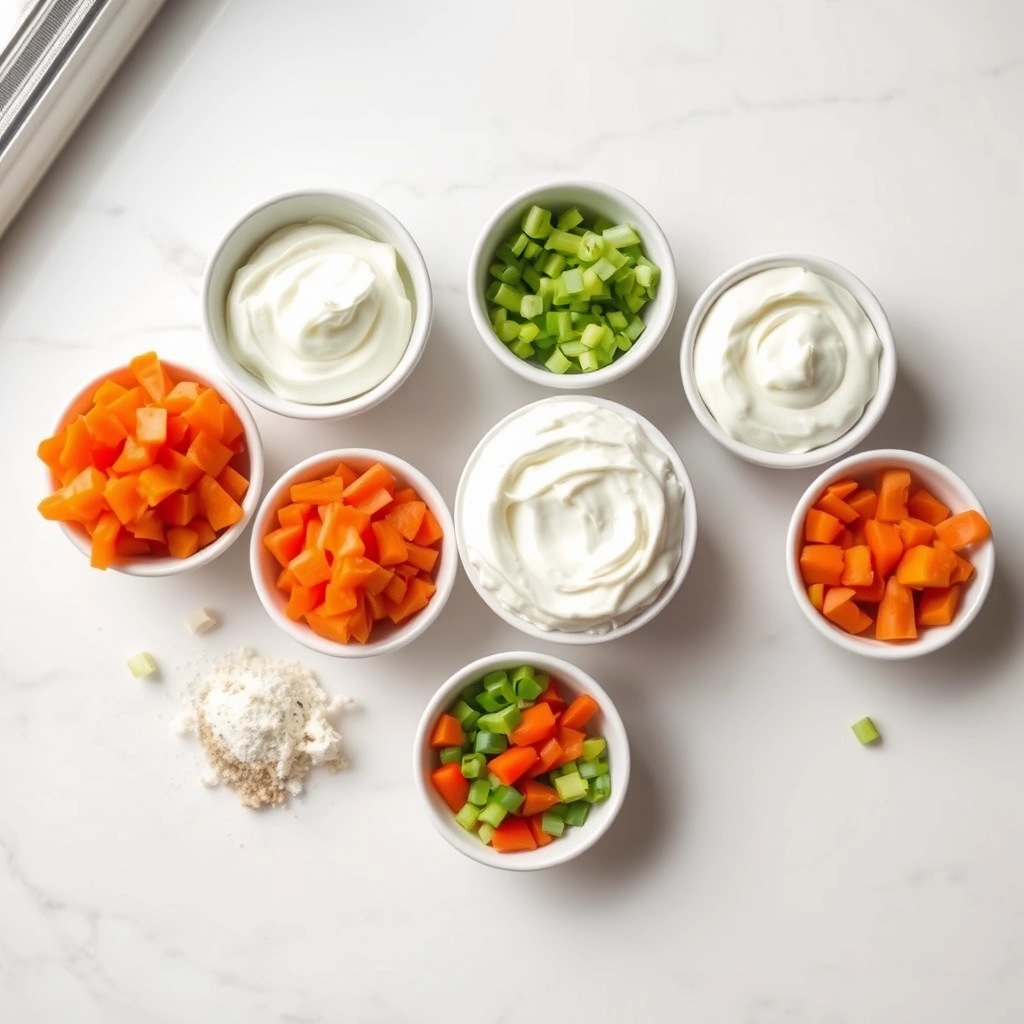
Ingredients You’ll Need

  • Cream Cheese (8 oz, softened) – The velvety base of our dip. Let it sit at room temperature for at least 30 minutes—it makes blending so much smoother (and saves your arm muscles!).
  • Sour Cream (½ cup) – Adds a lovely tang and keeps the dip luxuriously creamy. Full-fat is best here, but light works in a pinch.
  • Ranch Seasoning (1 packet or 2 tbsp homemade) – The secret flavor booster! I love the convenience of a packet, but if you’re out, a mix of dried dill, garlic powder, and onion powder works beautifully.
  • Shredded Cheddar Cheese (1 cup) – Sharp cheddar gives the best bite, but mild or even pepper jack would be delicious too.
  • Green Onions (3-4, finely chopped) – For a fresh, oniony crunch. Save a few slices for a pretty garnish!
  • Diced Ham (½ cup) – Leftover Easter ham is perfect here, but deli ham works just as well. For a vegetarian twist, skip it or add roasted red peppers instead.
  • Salt & Black Pepper (to taste) – A pinch of each to balance the flavors. Go easy—the ranch seasoning already has salt!

Let’s Make It!

  1. Prep your ingredients. Chop those green onions finely, dice the ham into small, bite-sized pieces, and measure everything out. Trust me, having it all ready makes this dip come together in a flash.
  2. Blend the creamy base. In a large bowl, beat the softened cream cheese with a hand mixer (or a sturdy spoon) until smooth. Add the sour cream and ranch seasoning, mixing until fully combined. If it feels too thick, a splash of milk will loosen it up.
  3. Fold in the good stuff. Gently stir in the shredded cheddar, ham, and most of the green onions (save some for garnish!). Taste and adjust with a pinch of salt or pepper if needed.
  4. Chill or serve immediately. This dip is delicious right away, but if you have time, let it rest in the fridge for 30 minutes—it gives the flavors a chance to mingle and makes it even more irresistible.

And just like that, you’ve got a crowd-pleasing Easter dip ready to go! But wait—there’s more. In the next part, I’ll share my favorite dippers (hint: think spring veggies and buttery crackers), plus a genius make-ahead tip to save you time on the big day.

Easter gatherings call for effortless recipes that wow your guests, and this creamy dip checks all the boxes. Whether you’re hosting a brunch or an afternoon egg hunt, this crowd-pleaser comes together in minutes with simple ingredients. Let’s dive into making it even more special with pro tips and serving ideas!

Pro Tips & Variations

This dip is wonderfully adaptable! Here’s how to customize it:

  • Herb Lover’s Twist: Fold in fresh chives, dill, or parsley for a garden-fresh flavor.
  • Spice It Up: Add a pinch of cayenne or smoked paprika for a subtle kick.
  • Lighter Option: Swap sour cream for Greek yogurt—still creamy but with a protein boost.
  • Cheesy Upgrade: Stir in crumbled feta or shredded cheddar for extra richness.

What to Serve With Your Easter Dip

This versatile dip pairs beautifully with:

  • Fresh veggies (carrot sticks, cucumber slices, bell peppers)
  • Crusty bread or toasted baguette rounds
  • Pretzel chips or pita crackers for crunch
  • As a spread on deviled eggs or sandwiches

Storage & Reheating Tips

Keep your dip tasting fresh:

  • Store in an airtight container in the fridge for up to 3 days.
  • Give it a quick stir before serving if separation occurs.
  • For best texture, avoid freezing—dairy-based dips can become grainy.

Frequently Asked Questions

Can I make this dip ahead of time?
Absolutely! Prepare it up to a day in advance—the flavors meld beautifully overnight.

What if my dip is too thick?
A splash of milk or lemon juice will thin it to your perfect consistency.

Can I use dried herbs instead of fresh?
Yes, but reduce the amount by half (dried herbs are more concentrated).

Is there a dairy-free version?
Try coconut cream or dairy-free cream cheese alternatives—just adjust seasoning to taste.

There’s something magical about a recipe that brings people together with minimal effort. As you set out this creamy dip amidst pastel-colored tableware and Easter laughter, know that the simplest touches often create the warmest memories. Wishing you a joyful, delicious celebration—may your bread always dip smoothly and your gatherings be full of love!

Print
clock clock iconcutlery cutlery iconflag flag iconfolder folder iconinstagram instagram iconpinterest pinterest iconfacebook facebook iconprint print iconsquares squares iconheart heart iconheart solid heart solid icon

Easy Easter Dip


  • Author: Trusted Blog

Description

A creamy, colorful dip perfect for Easter celebrations, made with simple ingredients.


Ingredients

Scale

For the Crust:

  • 1 cup sour cream
  • 1 cup mayonnaise
  • 1 packet ranch dressing mix
  • 1/2 cup finely chopped green onions
  • 1/2 cup finely chopped red bell pepper
  • 1/2 cup finely chopped carrots
  • 1/2 cup finely chopped celery

Instructions

1. Prepare the Crust:

  1. In a large bowl, combine sour cream, mayonnaise, and ranch dressing mix.
  2. Stir in the chopped green onions, red bell pepper, carrots, and celery.
  3. Cover and refrigerate for at least 1 hour before serving to allow flavors to blend.

Notes

You can customize the seasonings to taste.
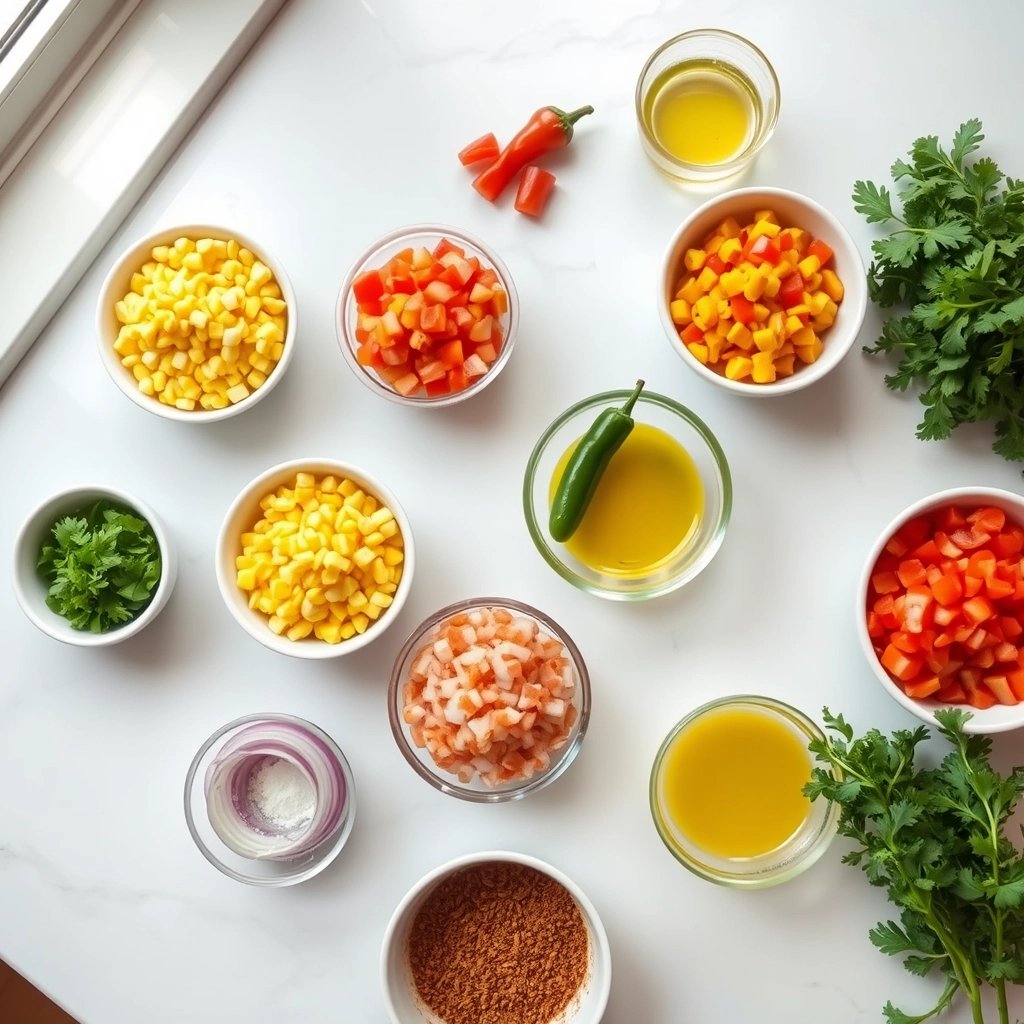
Best Potsticker Sauce – Easy Homemade Recipe

best-potsticker-sauce-recipe

The Secret to the Best Potsticker Sauce (and a Little Kitchen Confession)

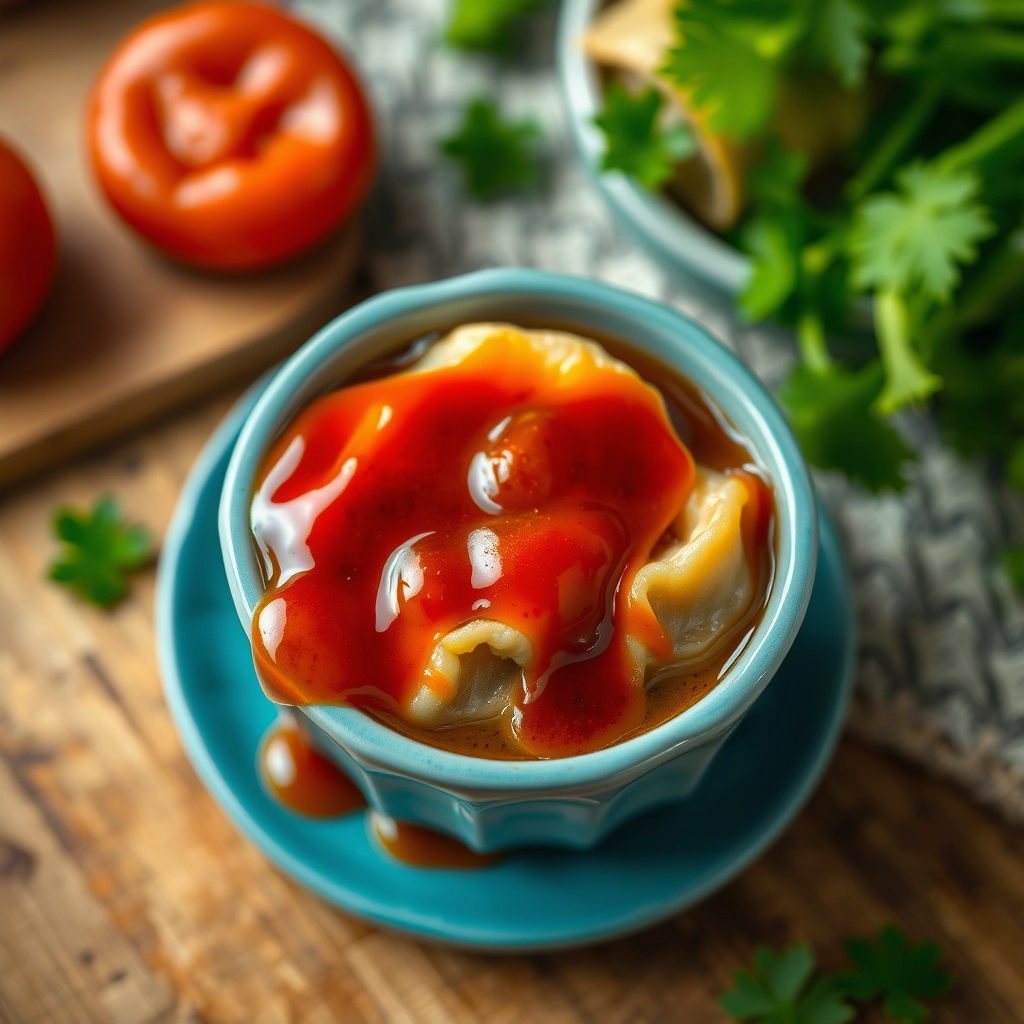
There’s something magical about the moment a crispy potsticker meets its perfect dipping companion—a sauce that’s tangy, savory, and just a little sweet. I’ll let you in on a secret: for years, I relied on store-bought sauces, convinced homemade versions were fussy or never quite “right.” That is, until one rainy afternoon when my favorite Asian market was closed, and I had a plate of freshly steamed dumplings staring at me, sauce-less and forlorn. What unfolded was a happy accident—a sauce so good, my family now refuses to eat potstickers without it. Today, I’m sharing that very recipe with you, because every dumpling deserves its perfect match.

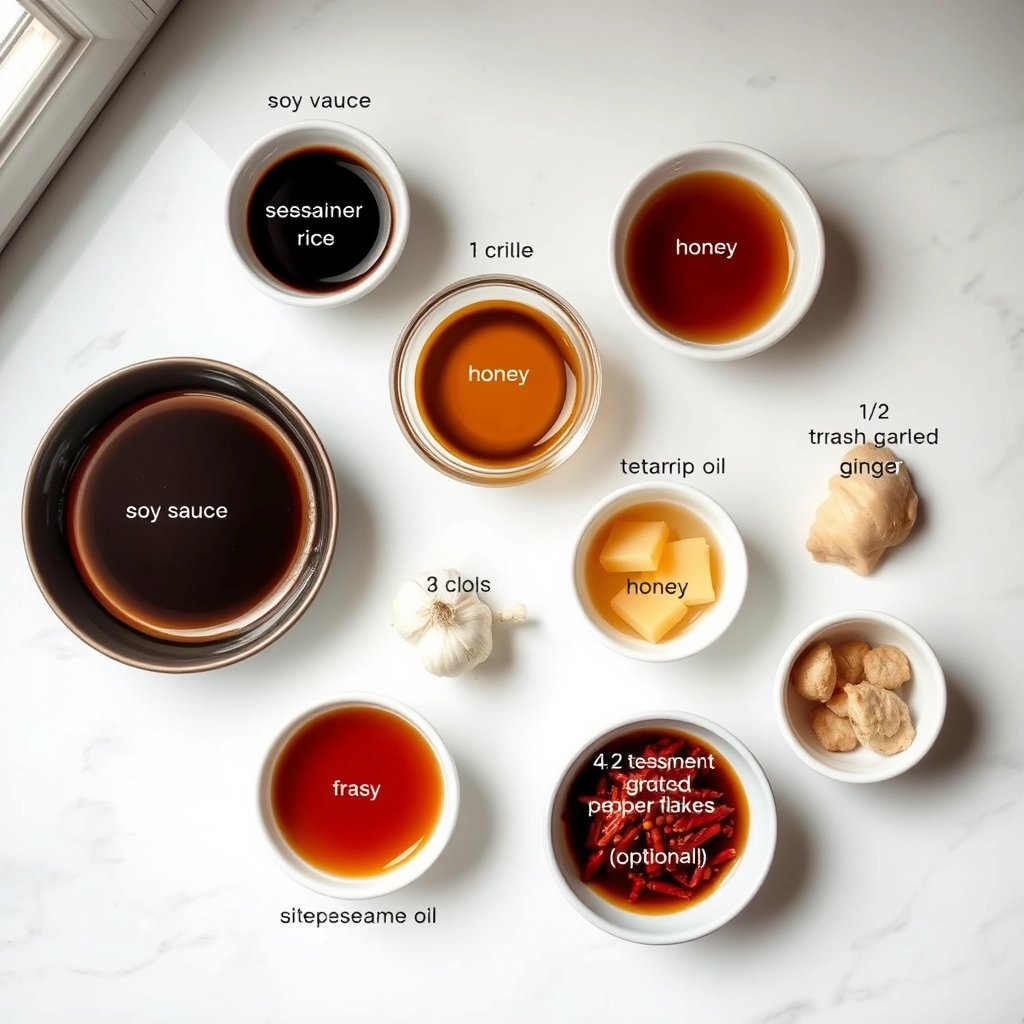
Ingredients You’ll Need (and Why They Matter)

  • Soy sauce (¼ cup): The salty backbone—opt for low-sodium if you’re watching salt levels, but full-flavored soy sauce adds depth.
  • Rice vinegar (2 tbsp): Bright and slightly sweet, it cuts through richness. Unseasoned is key here!
  • Toasted sesame oil (1 tsp): A drizzle of nutty warmth—don’t skip this, it’s the soul of the sauce.
  • Honey or maple syrup (1 tbsp): A touch of sweetness balances the tang. I love the floral note honey adds, but maple syrup works beautifully too.
  • Fresh garlic (1 clove, minced): Because everything’s better with garlic. Grate it for a smoother texture if preferred.
  • Ginger (½ tsp, grated): Fresh is ideal, but powdered ginger (¼ tsp) works in a pinch.
  • Chili flakes or sriracha (to taste): For those who like a gentle kick—my husband adds extra, I keep it subtle.
  • Green onions (1 tbsp, finely sliced): A pop of color and freshness. Scallion lovers, double this!

Let’s Make Magic: Step-by-Step

Step 1: The Foundation
In a small bowl, whisk together the soy sauce and rice vinegar. This duo is like the welcoming committee—they mingle first to set the tone. Tip: If your soy sauce is very thick, warm it for 10 seconds in the microwave to help it blend smoothly.

Step 2: The Aromatics
Add the minced garlic and grated ginger. Here’s where I lean in and take a deep breath—that spicy, pungent aroma is everything. If you’re prepping ahead, hold off on this step until serving to keep the flavors vibrant.

Step 3: Sweet & Smoky Notes
Drizzle in the honey (or maple syrup) and sesame oil. Whisk until the honey dissolves completely. Pro tip: If your honey is stubbornly thick, dip your measuring spoon in hot water first—it’ll slide right off.

Step 4: The Finishing Touches
Sprinkle in your chili flakes (start with ¼ tsp and adjust) and most of the green onions, reserving a few for garnish. Give it a taste—this is your moment to tweak! More vinegar for brightness? A drip of water to mellow the salt? Make it yours.

Now that you’ve got the basics of this delicious potsticker sauce down, let’s talk about how to make it truly your own. After all, the best recipes are the ones that adapt to your taste buds!

Pro Tips & Flavor Variations

This sauce is wonderfully versatile. Here are some ways to customize it:

  • Spice it up: Add 1/2 teaspoon of chili garlic paste or sriracha for a kick
  • Sweet tooth? Increase the honey to 2 tablespoons for a sweeter profile
  • Ginger lovers: Grate in 1 teaspoon of fresh ginger for extra zing
  • Vegan option: Substitute maple syrup for honey
  • Low-sodium: Use coconut aminos instead of soy sauce

Perfect Pairings

While this sauce was made for potstickers, don’t stop there! It’s fantastic with:

  • Steamed or pan-fried dumplings of any kind
  • Spring rolls (as a dipping sauce)
  • Stir-fried vegetables
  • Grilled chicken or tofu
  • As a marinade for proteins before cooking

Storage & Reheating

This sauce keeps beautifully, making meal prep a breeze:

  • Store in an airtight container in the refrigerator for up to 2 weeks
  • The flavors actually improve after 24 hours as they meld together
  • No need to reheat – it’s delicious cold or at room temperature
  • If separation occurs, just give it a good stir before serving

Frequently Asked Questions

Can I make this sauce ahead of time?

Absolutely! In fact, we recommend making it at least an hour before serving to allow the flavors to develop. It keeps well for up to 2 weeks in the fridge.

What can I use if I don’t have rice vinegar?

Apple cider vinegar makes a good substitute, though the flavor will be slightly fruitier. You could also use white wine vinegar in a pinch.

Is this sauce gluten-free?

It can be! Just use tamari or a gluten-free soy sauce alternative instead of regular soy sauce.

Why does my sauce taste too salty?

If your sauce tastes too salty, try adding a bit more honey or vinegar to balance it out. Different soy sauce brands vary in saltiness, so you may need to adjust to taste.

The Perfect Finish to Your Dumpling Feast

There’s something magical about homemade sauces that store-bought versions just can’t replicate. This potsticker sauce is more than just a condiment – it’s a flavor-packed companion that elevates every bite. Whether you’re hosting a dumpling party or just treating yourself to a cozy night in, this easy recipe is sure to become a staple in your kitchen. The best part? Each time you make it, you can tweak it to match your mood or the occasion. Happy dipping!

Print
clock clock iconcutlery cutlery iconflag flag iconfolder folder iconinstagram instagram iconpinterest pinterest iconfacebook facebook iconprint print iconsquares squares iconheart heart iconheart solid heart solid icon

Potsticker Sauce


  • Author: Trusted Blog

Description

A simple and flavorful dipping sauce perfect for potstickers, dumplings, or spring rolls.


Ingredients

Scale

For the Crust:

  • 1/4 cup soy sauce
  • 2 tablespoons rice vinegar
  • 1 tablespoon sesame oil
  • 1 teaspoon honey
  • 1 clove garlic, minced
  • 1/2 teaspoon grated ginger
  • 1/2 teaspoon red pepper flakes (optional)

Instructions

1. Prepare the Crust:

  1. In a small bowl, whisk together soy sauce and rice vinegar.
  2. Add sesame oil, honey, minced garlic, and grated ginger. Stir until well combined.
  3. Adjust seasoning with red pepper flakes if desired. Let sit for 10 minutes before serving to allow flavors to meld.

Notes

You can customize the seasonings to taste.
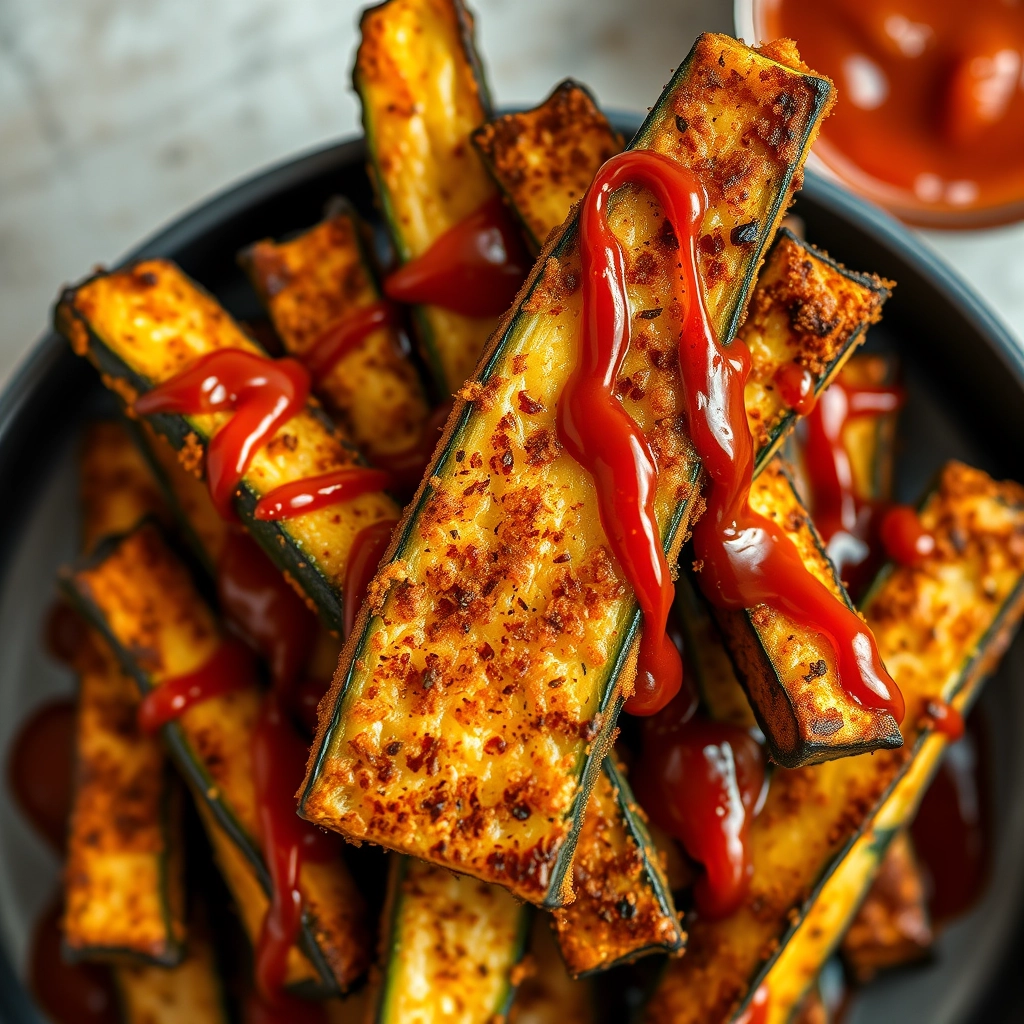
Easy Vegetable Stir Fry – Quick and Healthy Recipe

easy-vegetable-stir-fry-healthy

A Stir Fry That Feels Like a Hug

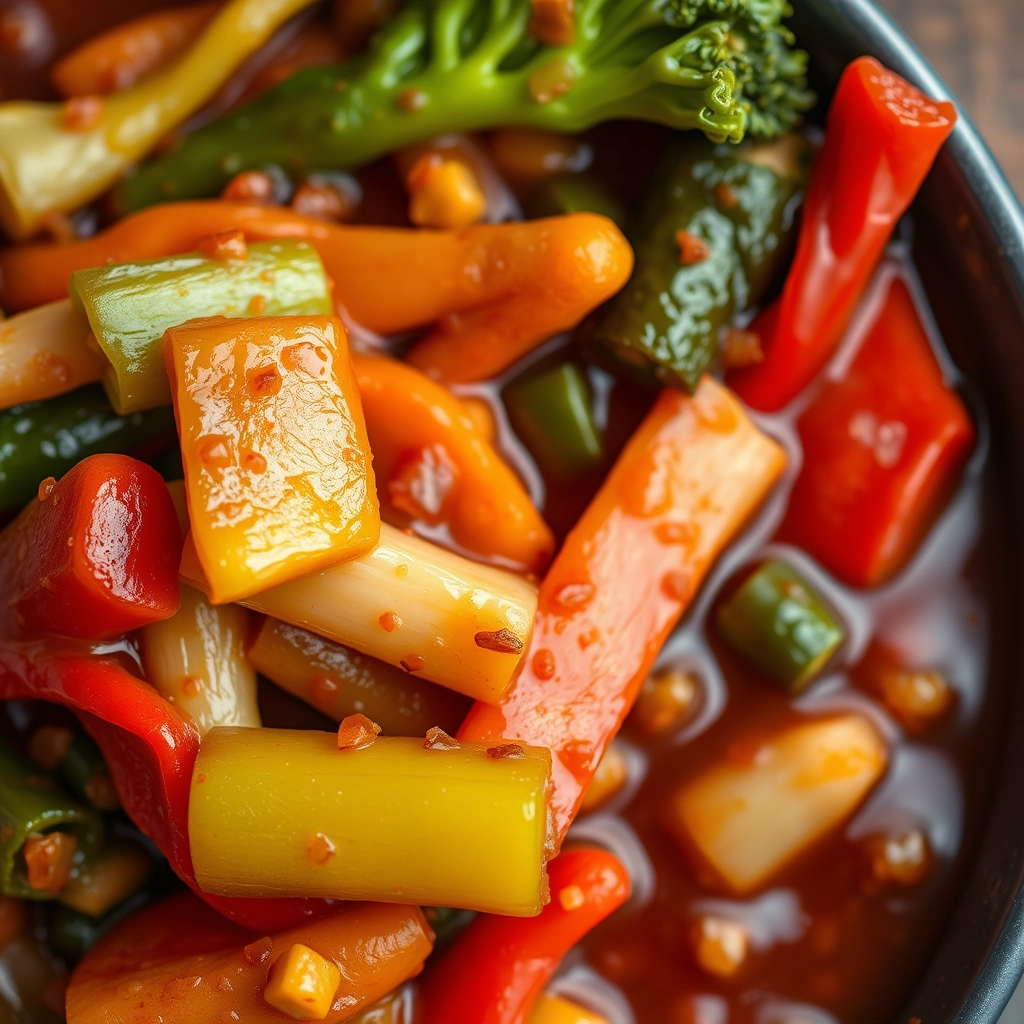
There are days when I crave something wholesome, colorful, and quick—something that feels like a warm hug after a long afternoon. That’s when I turn to this Easy Vegetable Stir Fry. It’s the kind of dish that comes together in minutes but still feels like a proper, nourishing meal. Whether you’re rushing between meetings or just need a little comfort without the fuss, this stir fry is my go-to. Plus, it’s endlessly adaptable—toss in whatever veggies you have, and dinner is served!

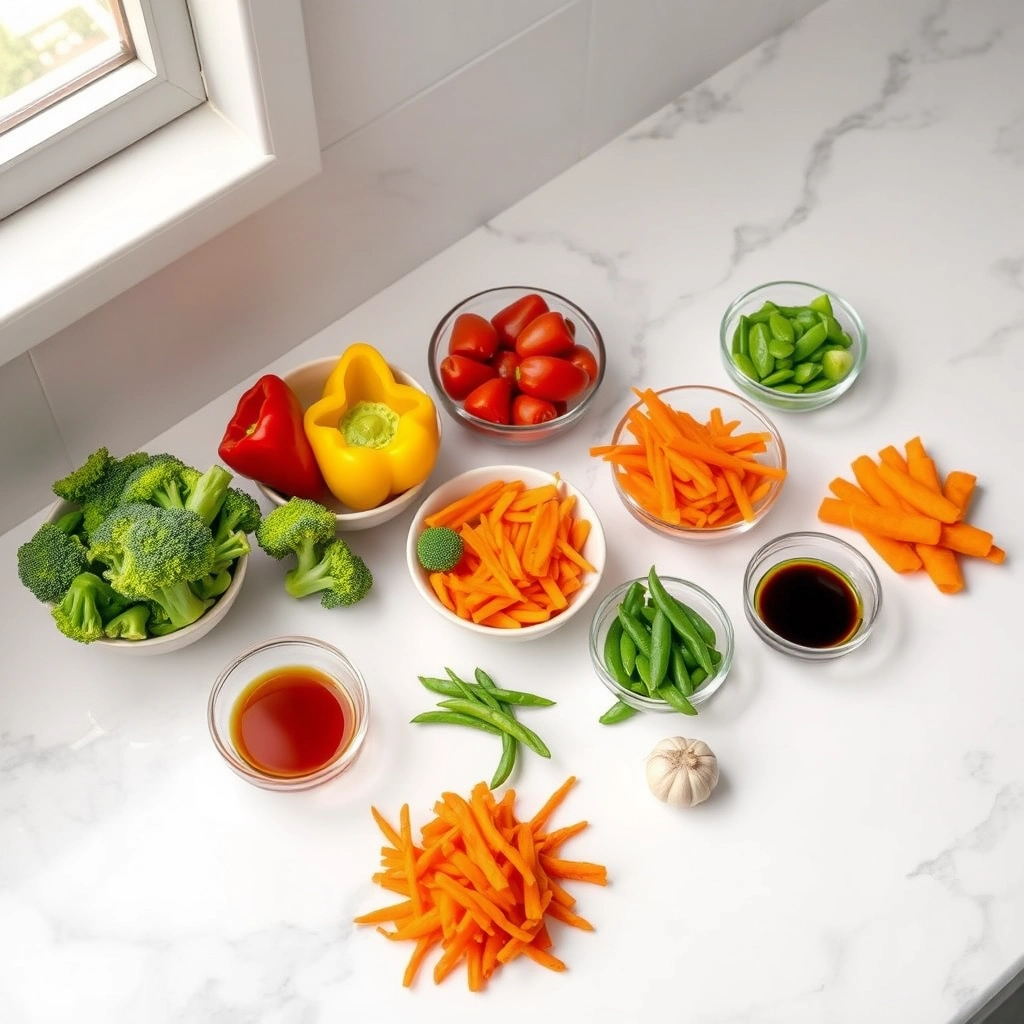
What You’ll Need

This recipe is all about simplicity, but the flavors are anything but boring. Here’s what I love to include:

  • 2 tbsp sesame oil – The nutty aroma is everything in a stir fry. If you don’t have it, olive oil works too, but sesame really makes it sing.
  • 3 cloves garlic, minced – Because what’s a stir fry without garlic? It adds that deep, savory base we all love.
  • 1 tbsp fresh ginger, grated – A little zing to brighten everything up. Pro tip: Keep ginger in the freezer—it grates like a dream!
  • 1 bell pepper, sliced – I love using red or yellow for sweetness, but any color works.
  • 1 carrot, julienned – Adds a lovely crunch and a pop of color.
  • 1 cup broccoli florets – Fresh or frozen, both work beautifully.
  • 1 cup snap peas – Crisp and sweet, they’re my favorite little stir fry gems.
  • 2 tbsp soy sauce – Or tamari for a gluten-free option.
  • 1 tbsp honey or maple syrup – Just a touch of sweetness to balance the savory.
  • 1 tsp chili flakes (optional) – If you like a little heat, don’t skip these!
  • Sesame seeds & green onions – For that perfect finishing touch.

Let’s Get Cooking

Now, the fun part—bringing it all together in a sizzling, fragrant pan. Here’s how I do it:

  1. Heat the oil in a large wok or skillet over medium-high heat. You want it nice and hot so the veggies get a little char without turning mushy.
  2. Sizzle the garlic and ginger for about 30 seconds—just until you catch that incredible smell. Be careful not to let them burn!
  3. Toss in the veggies starting with the ones that take longest to cook (hello, carrots and broccoli). Stir-fry for 2-3 minutes before adding the quicker-cooking veggies like bell peppers and snap peas.
  4. Drizzle in the soy sauce and honey, giving everything a good toss so every bite is coated in that glossy, savory-sweet goodness.

And just like that, you’re halfway to the most vibrant, satisfying meal. But wait—there’s more to come! In the next part, I’ll share my favorite ways to serve this stir fry (hint: it involves fluffy rice and a sprinkle of sesame seeds). Stay tuned!

Pro Tips, Variations, and Substitutions

Making a vegetable stir fry is all about flexibility and creativity! Here are some ways to customize your dish:

  • Protein boost: Add tofu, tempeh, chicken, shrimp, or thinly sliced beef for extra protein. Just cook it first before adding the veggies!
  • Sauce variations: Try swapping soy sauce for tamari (gluten-free option) or adding a splash of hoisin, oyster sauce, or chili garlic sauce for different flavor profiles.
  • Veggie swaps: No broccoli? Use green beans or snap peas. Bell peppers can be replaced with zucchini or eggplant. The possibilities are endless!
  • Crunch factor: Top with toasted sesame seeds, chopped peanuts, or cashews for extra texture.

What to Serve With Your Stir Fry

This versatile dish pairs beautifully with:

  • Steamed jasmine or brown rice
  • Quinoa for a protein-packed alternative
  • Rice noodles or soba noodles
  • A simple side of miso soup or egg drop soup

Storage and Reheating Tips

Leftovers? No problem! Here’s how to keep your stir fry tasting fresh:

  • Store in an airtight container in the refrigerator for up to 3 days
  • For best texture, reheat in a skillet over medium heat with a splash of water or broth
  • Microwave reheating works too – cover with a damp paper towel to prevent drying out
  • Not recommended for freezing as the veggies will lose their crisp texture

Frequently Asked Questions

Can I make this stir fry oil-free?

Absolutely! Use vegetable broth or water for sautéing instead of oil. Just add small amounts as needed to prevent sticking.

How can I make this stir fry spicier?

Add red pepper flakes, sriracha, or fresh chopped chili peppers to the sauce. Start with small amounts and adjust to your taste.

What’s the best way to cut vegetables for stir fry?

Cut them into uniform, bite-sized pieces so they cook evenly. Slice harder vegetables like carrots thinly, and keep softer veggies like mushrooms slightly larger.

Can I use frozen vegetables?

You can, but fresh vegetables will give you better texture. If using frozen, thaw and pat dry first to prevent excess water in your stir fry.

A Warm Final Thought

There’s something so comforting about a colorful bowl of vegetable stir fry – it’s like a warm hug in food form! Whether you’re cooking for one on a busy weeknight or serving a crowd, this recipe is sure to become a regular in your rotation. The best part? Every time you make it, you can create something slightly different based on what’s in your fridge or what flavors you’re craving. Happy stir-frying, friends – may your veggies always be crisp and your sauces always flavorful!

Print
clock clock iconcutlery cutlery iconflag flag iconfolder folder iconinstagram instagram iconpinterest pinterest iconfacebook facebook iconprint print iconsquares squares iconheart heart iconheart solid heart solid icon

Vegetable Stir Fry


  • Author: Trusted Blog

Description

A quick and healthy vegetable stir fry packed with colorful veggies and a savory sauce.


Ingredients

Scale

For the Crust:

  • 2 tablespoons vegetable oil
  • 1 red bell pepper, sliced
  • 1 yellow bell pepper, sliced
  • 1 cup broccoli florets
  • 1 carrot, julienned
  • 1 cup snap peas
  • 2 cloves garlic, minced
  • 1 tablespoon ginger, grated
  • 3 tablespoons soy sauce
  • 1 tablespoon honey
  • 1 teaspoon sesame oil
  • 1 tablespoon cornstarch
  • 2 tablespoons water

Instructions

1. Prepare the Crust:

  1. Heat vegetable oil in a large wok or skillet over medium-high heat.
  2. Add bell peppers, broccoli, carrot, and snap peas. Stir-fry for 5-6 minutes until vegetables are crisp-tender.
  3. Add garlic and ginger, stir-fry for another 1-2 minutes until fragrant.
  4. In a small bowl, whisk together soy sauce, honey, sesame oil, cornstarch, and water.
  5. Pour the sauce over the vegetables and stir well to coat. Cook for another 2-3 minutes until the sauce thickens.
  6. Serve hot over rice or noodles.

Notes

You can customize the seasonings to taste.