Take a break from your day and refuel with our delicious and satisfying lunch recipes! Whether you need a quick and easy meal, a light and healthy option, or something hearty to power you through the afternoon, we’ve got you covered.
From fresh salads and wholesome grain bowls to savory sandwiches, wraps, and comforting soups, our lunch ideas are perfect for busy weekdays, meal prep, and leisurely weekend meals.
Looking for something kid-friendly or on-the-go? Try our lunchbox-friendly meals, protein-packed bites, and make-ahead favorites that keep you full and energized all day. No more boring lunches—let’s make every midday meal exciting! 🥗🥪🍲
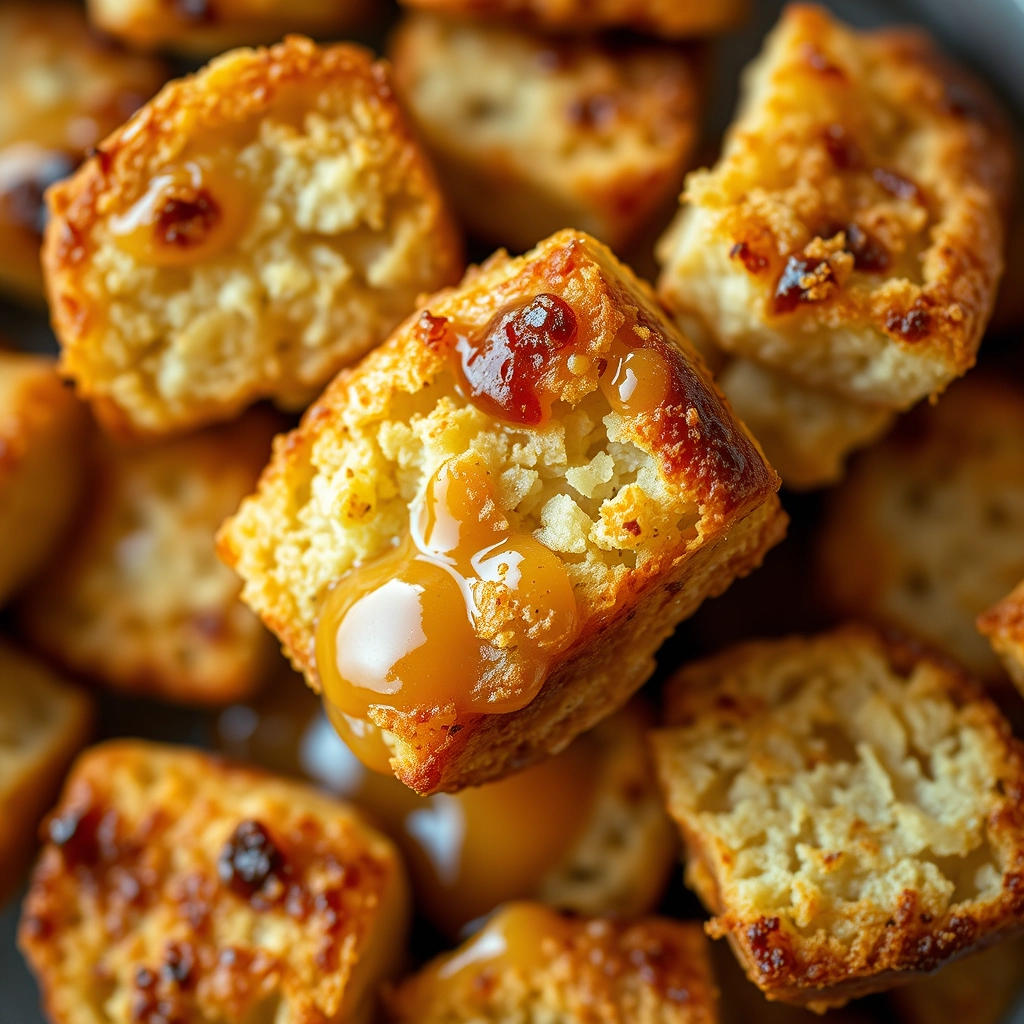
Best Homemade Croutons – Easy & Crispy Recipe
The Secret to the Best Homemade Croutons (And Why You’ll Never Buy Store-Bought Again)
There’s something deeply satisfying about turning stale bread into golden, crispy croutons—like giving new life to something forgotten. I remember the first time I made them at home, back when I was a college student with a half-loaf of day-old sourdough and a craving for a better salad. What came out of the oven that day was nothing short of magical: golden nuggets with a buttery crunch, far superior to the cardboard-like cubes from a plastic bag. Since then, I’ve never looked back. And trust me, once you try these, neither will you.
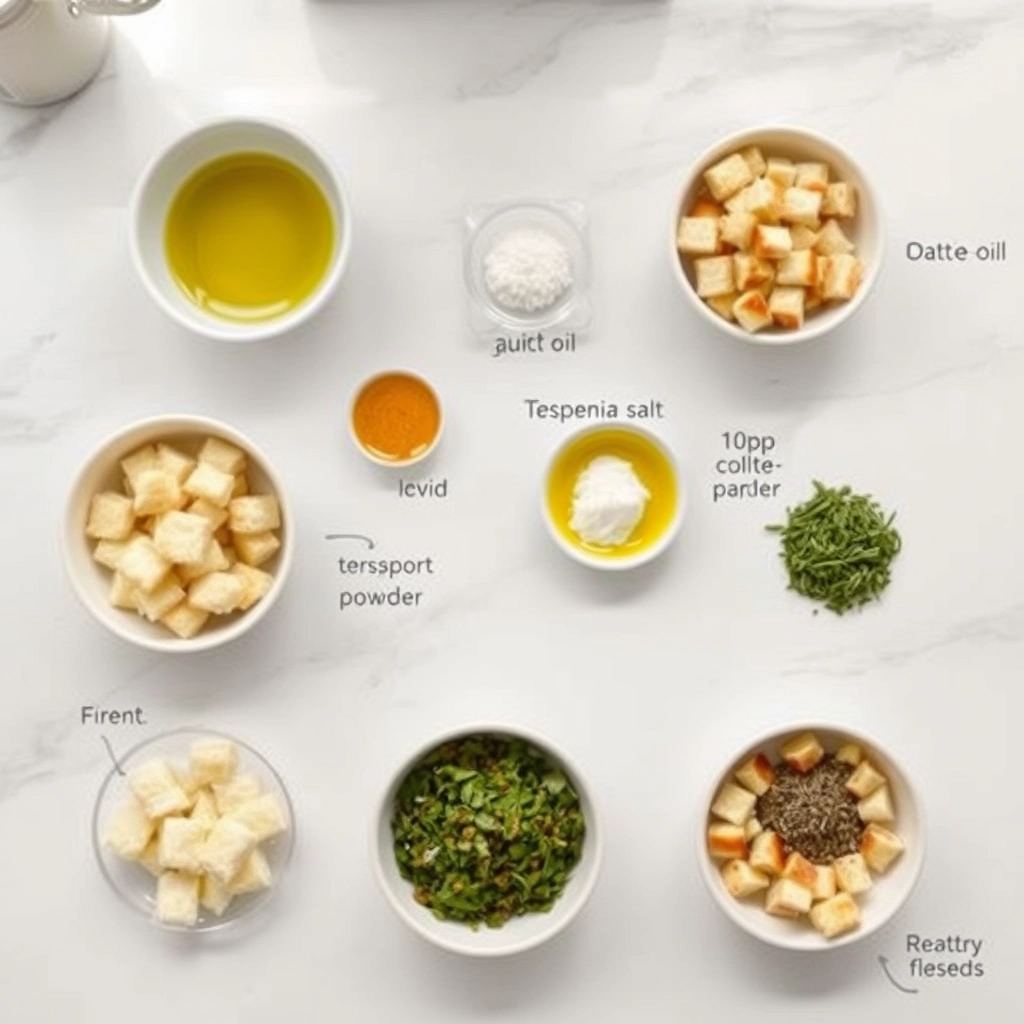
Ingredients You’ll Need
4 cups day-old bread – Stale bread is perfect here! I love using sourdough or a rustic country loaf, but even a simple baguette works wonders. Avoid very soft sandwich bread—it won’t crisp up as nicely.
3 tablespoons olive oil – Or melted butter for extra richness. If using butter, let it cool slightly so it doesn’t soak the bread.
1 teaspoon garlic powder – Fresh minced garlic can burn, so powder gives the best flavor without risk.
½ teaspoon dried herbs – Thyme, oregano, or rosemary add a lovely fragrance. Use what you have!
½ teaspoon salt – Flaky sea salt is my favorite, but any salt will do.
¼ teaspoon black pepper – Freshly cracked adds a little warmth.
Optional: a pinch of Parmesan cheese – For those who love a cheesy crunch (highly recommended).
Step-by-Step: How to Make Perfect Croutons
1. Preheat & Prep: Start by heating your oven to 375°F (190°C). While it warms up, cut your bread into bite-sized cubes—about ¾-inch thick. Don’t stress about perfection; rustic uneven pieces add charm!
2. Season Generously: In a large bowl, drizzle the bread cubes with olive oil. Toss gently with your hands, making sure each piece gets lightly coated. Sprinkle in the garlic powder, herbs, salt, and pepper. If you’re adding Parmesan, now’s the time! Toss again until everything is evenly distributed.
3. Spread & Bake: Lay the cubes in a single layer on a baking sheet. Crowding will steam them instead of crisping, so use two sheets if needed. Pop them into the oven and bake for 10 minutes, then give them a gentle stir for even browning.
4. The Golden Rule: Keep a close eye during the last few minutes—croutons go from golden to burnt in a flash! They’re ready when crisp and lightly browned, about 12-15 minutes total. Let them cool on the tray; they’ll crisp up even more as they sit.
Tip: For extra flavor, try adding a teaspoon of lemon zest or a dash of smoked paprika before baking. And if you’re feeling adventurous, a light drizzle of honey at the end makes them irresistible on soups!
Pro Tips, Variations, and Substitutions
Making homemade croutons is wonderfully forgiving, but a few little tricks can take them from good to extraordinary:
Bread Matters: Stale bread works best! Day-old French, sourdough, or even whole grain bread holds up beautifully. Avoid very soft sandwich bread—it can turn too crispy or burn easily.
Flavor Boosters: Toss your croutons with garlic powder, smoked paprika, or a pinch of Parmesan cheese before baking for extra depth.
Oil Swap: Olive oil is classic, but melted butter or even bacon fat adds richness. For a lighter touch, avocado oil works too.
Herb Love: Fresh rosemary or thyme sprinkled before baking infuses the croutons with aromatic warmth.
What to Serve With Homemade Croutons
These golden bites aren’t just for salads! Here are a few delicious ways to enjoy them:
Classic Caesar Salad: A must for that satisfying crunch.
Soups: Float them on tomato soup or butternut squash for texture.
Charcuterie Boards: Add a bowl for dipping in hummus or creamy cheese spreads.
Snack Time: Toss with a little extra seasoning and munch straight from the bowl.
Storage and Reheating Tips
Homemade croutons stay crisp for days if stored right:
Room Temp: Keep in an airtight container for up to 5 days.
Reviving Soft Croutons: Spread on a baking sheet and warm at 300°F for 5 minutes to crisp them back up.
Freezing: Yes, you can freeze them! Just thaw and re-crisp in the oven as needed.
Frequently Asked Questions
Can I make croutons gluten-free?
Absolutely! Use your favorite gluten-free bread—just adjust baking time slightly since it may crisp faster.
Why are my croutons soggy?
This usually happens if the bread was too fresh or the oil wasn’t evenly distributed. Patting bread dry before cubing helps!
Can I air-fry croutons?
Yes! Toss bread cubes with oil, then air-fry at 375°F for 5–7 minutes, shaking halfway.
What’s the best way to cut bread for croutons?
A serrated knife works best for clean cuts. Aim for ½-inch cubes so they toast evenly.
Final Thoughts
There’s something so comforting about the smell of toasty croutons filling the kitchen. Whether you’re topping a cozy soup or adding crunch to a summer salad, these little bites make every meal feel special. Once you try homemade, you’ll never go back to store-bought—promise! Now, go grab that leftover loaf and let the baking begin. Happy crunching!
Crispy, golden homemade croutons perfect for salads, soups, or snacking.
Ingredients
Scale
For the Crust:
4 cups cubed bread (French, sourdough, or Italian)
3 tablespoons olive oil
1 teaspoon garlic powder
1 teaspoon dried oregano
1/2 teaspoon salt
1/4 teaspoon black pepper
Instructions
1. Prepare the Crust:
Preheat oven to 375°F (190°C).
In a large bowl, toss bread cubes with olive oil, garlic powder, oregano, salt, and pepper until evenly coated.
Spread the bread cubes in a single layer on a baking sheet.
Bake for 15-20 minutes, stirring halfway, until golden and crispy.
Let cool completely before storing or using.
Notes
You can customize the seasonings to taste.
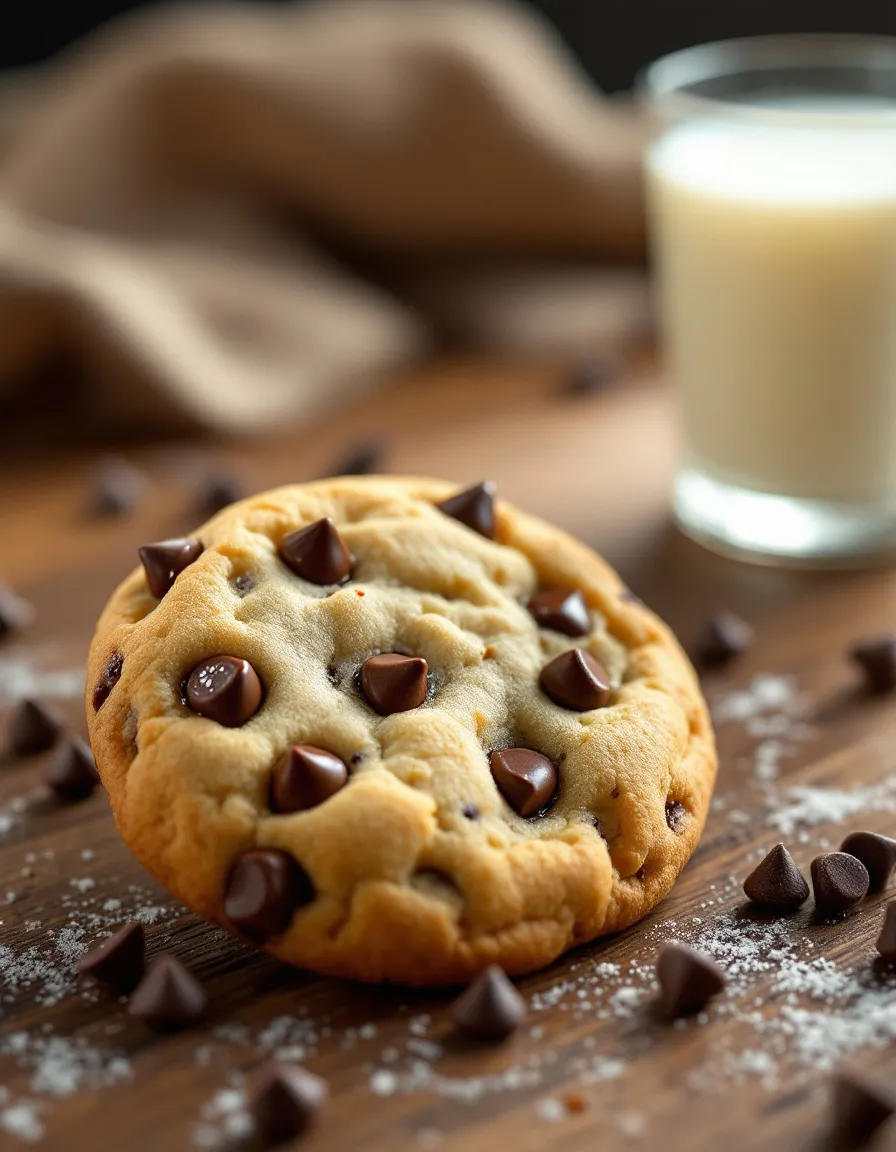
Best Chocolate Chip Cookies Recipe – Soft and Chewy
Chocolate Chip Cookies: The Ultimate Comfort Treat
⚖️
Difficulty
Easy
⏲️
Prep Time
15 mins
🕒
Cook Time
10 mins
⏱️
Total Time
25 mins
🍽️
Servings
24 cookies
Chocolate chip cookies are the quintessential treat that evokes warm memories and a sense of comforting nostalgia. With their golden edges and gooey, melted chocolate centers, these cookies bring joy to any gathering or personal snack time. The combination of sweet brown sugar and semi-sweet chocolate creates a delightful flavor profile that pleases the palate and warms the heart. Each bite is a heavenly embrace of buttery goodness, making it impossible to have just one.
Baking chocolate chip cookies is not only simple but also satisfying, as the aroma wafts through your kitchen, tantalizing those nearby. It’s a magical experience to see the dough transform in the oven, resulting in perfectly round, chewy cookies that invite you to indulge. Whether enjoyed fresh out of the oven or as a delectable addition to dessert platters, chocolate chip cookies remain a beloved choice for both kids and adults alike.
Quick Recipe Highlights
Flavor Profile: Rich and sweet with a perfect balance of buttery undertones and chocolatey bursts.
Texture: Soft and chewy on the inside with a slight crisp on the edges, creating a satisfying mouthfeel.
Aroma: A delightful blend of warm vanilla, melted chocolate, and a hint of caramelized sugar.
Visual Appeal: Golden-brown cookies studded with glossy chocolate chips offer an irresistible look.
Skill Level Needed: Accessible for novice bakers, requiring minimal techniques for delicious success.
Special Equipment: Standard kitchen tools are sufficient—mixing bowl, baking sheet, and measuring cups are all you’ll need.
Recipe Overview
Difficulty Level: This chocolate chip cookie recipe is classified as easy, making them perfect for beginner bakers who want instant gratification!
Category: Ideal as a dessert, snack, or sweet treat for any time of the day, versatile for various occasions.
Cuisine: Originating from American kitchens, these cookies reflect homemade comforts and the joy of baking with loved ones.
Cost: Budget-friendly, you can whip up a batch with ingredients that typically total under $10.
Season: Perfect year-round, but particularly popular during the holiday season when sharing is at its peak.
Occasion: Great for birthday celebrations, holidays, or simply to brighten up a regular day at home.
Why You’ll Love This Recipe
The marriage of rich flavors and delightful textures makes chocolate chip cookies an irresistible treat for many. Their sweetness is balanced perfectly by a hint of nostalgia, often reminding us of childhood cookie-baking sessions with family. The moment you pull a tray of fresh cookies from the oven, you’ll be enveloped in the comforting aroma that draws everyone in.
Convenience plays a key role in the appeal of this chocolate chip cookie recipe. With minimal prep time and straightforward steps, you’ll enjoy the process just as much as the end product. Whether you’re making cookies for guests or simply indulging for yourself, this quick recipe allows you to jump straight into deliciousness.
Furthermore, chocolate chip cookies can offer some surprising nutritional advantages. While they are undoubtedly a treat, using quality ingredients like dark chocolate chips can provide antioxidants. When made at home, you can control the sweetness and choose to incorporate healthier options, making them a more wholesome snack.
Socially, these cookies serve as a bridge, bringing together family and friends for shared experiences in the kitchen. Baking has a unique ability to evoke laughter and create memories, making the process of making chocolate chip cookies both fun and fulfilling.
Last but not least, the cost-effectiveness of this recipe cannot be overstated. With pantry staples and a few simple additions, you can create a large batch of delightful cookies without breaking the bank. Perfect for gatherings or gifts, this recipe ensures that the joy of baking is accessible to all.
Historical Background and Cultural Significance
The chocolate chip cookie has a delightful origin story that traces back to the 1930s, invented by Ruth Wakefield at the Toll House Inn in Massachusetts. Initially created as a twist on the classic butter drop cookie, Ruth’s addition of chopped chocolate bars led to the iconic cookie we know today. The dessert became so beloved that it prompted the creation of the famous Toll House cookie recipe and even a proprietary chocolate chip brand.
Culturally, chocolate chip cookies are synonymous with American home cooking. They signify warmth, family gatherings, and the joy of sharing. Their presence in households across the country illustrates the universal love for a sweet treat that feels like a hug in cookie form.
Over the years, the recipe has evolved, with countless variations emerging. Today, whether it’s a double chocolate chip, gluten-free, or stuffed version, these cookies have adapted to various taste preferences and dietary needs while maintaining their classic charm.
Regionally, chocolate chip cookies have seen adaptations worldwide, embracing local ingredients and flavors. From sea salt toppings to the incorporation of exotic spices, the versatility of this recipe celebrates cultural diversity within a beloved dessert.
Ingredient Deep Dive
Chocolate Chips
Chocolate chips are the star of this recipe, with a rich history dating back to their introduction in the 1930s. Today, their significance extends beyond flavor, representing culinary creativity in cookie making. Nutritionally, chocolate chips provide fiber and antioxidants, especially dark chocolate varieties, which offer heart health benefits. When selecting chocolate chips, opt for high-quality brands that melt easily. Store them in a cool, dry place to maintain freshness. If unavailable, substitute with chopped chocolate or carob chips for different flavors.
Flour
Flour is a foundational ingredient in baking, historically a staple in cuisines around the world, providing structure to baked goods. It’s vital for achieving the desired cookie texture—too much or too little can drastically affect the outcome. Whole wheat flour can add nutritional benefits like increased fiber. Be sure to store flour in an airtight container to prevent spoilage and consider using gluten-free alternatives like almond flour or oat flour for dietary needs.
Common Mistakes to Avoid
Overmixing the dough can lead to tough cookies. Mix only until just combined for a soft texture.
Using room temperature ingredients is essential; cold butter will not cream properly with sugar.
Not chilling the dough might result in spread-out, flat cookies. Chill for at least 30 minutes before baking.
Incorrect oven temperature can lead to over-baked or under-baked cookies; always preheat and check with an oven thermometer.
Not using parchment paper can lead to sticking; it helps with easy removal and cleanup.
Expecting cookies to look done right after baking; they will continue to cook while cooling.
Measuring flour incorrectly, packing it down, can result in dry cookies; always use a scoop and level method.
Ignoring the importance of salt, which enhances the cookie flavors, should never be omitted.
Not rotating the baking sheet halfway through can lead to uneven baking, especially in conventional ovens.
Underestimating the cooling time can cause chocolate chips to be too melty, lose shape, and not set properly.
Essential Techniques
Mixing
Achieving the perfect blend of wet and dry ingredients is crucial for the right texture and flavor. Start by creaming your butter and sugars to achieve a light and fluffy mix, which helps incorporate air into the cookies. Avoid overmixing once the flour is added; this helps maintain a tender crumb. Look for visual clues: the dough should be homogenous but not excessively beaten, retaining some texture from the chocolate chips.
Chilling the Dough
Chilling cookie dough is a vital step that should not be ignored. It solidifies the fat in the dough, allowing the cookies to retain their shape during baking. Master this technique by pouring the prepared dough onto parchment paper and rolling it into a log shape before chilling. Look for dough that is firm but manageable. Many bakers forget to chill, leading to flat cookies; make this a non-negotiable step for cookie perfection.
Pro Tips for Perfect Chocolate Chip Cookies
1. Use a mix of chocolate chips for a more complex flavor—half semi-sweet and half dark chocolate creates balance and depth.
2. Try adding a pinch of sea salt on top of the cookies just before baking for an additional flavor boost.
3. Experiment with different extracts, like almond or a hint of espresso, to enhance the chocolate flavor even further.
4. For a chewy cookie, slightly under-bake them; they will continue cooking as they cool on the tray.
5. Use a cookie scoop for even sizes, ensuring uniform baking times and visual appeal.
6. Allow your baked cookies to cool completely on a wire rack for the best texture and to allow flavors to develop fully.
7. Try adding nuts, like walnuts or pecans, for added crunch and a delightful flavor contrast.
8. If baking in batches, keep unbaked dough in the fridge between baking to maintain optimal shape and temperature.
Variations and Adaptations
Chocolate chip cookies can be tailored to fit various tastes and dietary needs. For a seasonal twist, consider adding pumpkin spice or swapping chocolate chips for seasonal treats like butterscotch or peppermint during the holidays. You can even make the recipe gluten-free by using almond flour or a gluten-free 1:1 baking blend.
Flavor adaptations are endless; adding spices like cinnamon or nutmeg can elevate the classic cookie taste. For a gooey and surprising twist, stuff the cookies with a piece of caramel candy before baking. Additionally, try chocolate-dipped variations for an indulgent treat.
Texture modifications can also be explored by using oats to create an oat-based chocolate chip cookie, offering a different mouthfeel and a chewy bite. Experimenting with presentation, such as serving cookies on a platter with fresh fruit or drizzling them with chocolate melts, adds a touch of elegance to your dessert.
Serving and Presentation Guide
Achieving an appealing presentation for your chocolate chip cookies is simple yet impactful. Use a beautiful serving platter and arrange cookies in different layers for an eye-catching display. Consider garnishing the cookies with a light dusting of powdered sugar or a sprinkle of sea salt to add visual intrigue.
Classic accompaniments such as a glass of cold milk, ice cream, or a warm cup of coffee can enhance the experience. When serving, warm the cookies slightly for that fresh-out-of-the-oven taste, drawing everyone to indulge. Don’t hesitate to provide some fun and quirky serving suggestions, like pairing them with desserts like brownies for a cookie bar setup.
Portion control is also an essential component of serving; consider using small cookie bags or boxes for events, allowing guests to take home a piece of your delicious creation.
Wine and Beverage Pairing
Finding the right beverage pairings can enhance your chocolate chip cookie experience. For a traditional choice, a cold glass of milk remains classic, beautifully complementing the sweet chocolate flavor.
If you would like to venture into the realm of adult beverages, consider pairing these cookies with a glass of dessert wine, such as a late-harvest Riesling. Its sweetness contrasts nicely with the richness of the cookies.
For non-alcoholic alternatives, rich hot cocoa or a flavored coffee, such as hazelnut or mocha, can create synergy that enhances the overall flavor. Keep in mind the serving temperature; cookies are best enjoyed slightly warm, allowing the chocolate to melt invitingly.
Storage and Shelf Life
Proper storage ensures your chocolate chip cookies stay fresh and delicious. Place them in an airtight container at room temperature for up to one week. For longer-lasting cookies, consider freezing them; simply freeze the dough in scoop-sized balls, then bake from frozen, adding a few minutes to the baking time.
When storing baked cookies, avoid stacking them too tightly to prevent them from becoming soft or losing shape. If you notice any changes in texture or smell, it’s time to discard them. To maintain cookie quality, be mindful of moisture and heat; store cookies in a cool, dry place away from direct sunlight.
Make Ahead Strategies
Preparing your chocolate chip cookies in advance can save time on busy days. You can create the dough and keep it in the fridge for up to 72 hours before baking, or freeze it for longer storage.
Consider portioning the dough into balls, which are easy to bake directly from the freezer. This allows for spontaneous cookie cravings without the lengthy prep time. When making ahead, assess the quality of ingredients, especially baking powder and chocolate chips, to ensure optimal freshness and flavor.
For quality maintenance, take note that chilling will give your cookies a better texture, so allow your dough equal time to rest and flavor before baking.
Scaling Instructions
Scaling your chocolate chip cookie recipe can easily adapt serving sizes for different occasions. To halve the recipe, simply divide the ingredients accordingly; this is straightforward and ensures consistency.
When doubling or tripling, consider using larger mixing bowls and possibly more than one baking sheet to keep your baking process efficient. Additionally, monitor oven temperatures; large batches can require slight adjustments in timing to ensure uniform baking.
If you’re making smaller or larger batches, remember to adjust your baking times. Smaller cookies will bake faster, while larger ones may take a tad longer. Always keep an eye on the baking process for perfect results.
Nutritional Deep Dive
A careful breakdown of the nutritional profile of chocolate chip cookies reveals essential macro and micronutrients. Each cookie offers small amounts of protein and dietary fiber from the flour and chocolate, contributing to a satisfying snack.
However, it’s important to consider the sugar content; enjoy these treats mindfully, especially if managing weight. Balance is key—pairing them with nutrient-rich foods can create a more wholesome snack experience.
When analyzing portion sizes, one cookie is approximately 100 calories, making them an easy choice for occasional indulgence. For those seeking to manage caloric intake, consider enjoying half a cookie alongside a piece of fruit for a fulfilling, smaller treat.
Dietary Adaptations
With dietary preferences on the rise, chocolate chip cookies can easily adapt to various needs. For a gluten-free variation, swap traditional flour for almond flour or a certified gluten-free flour blend, ensuring no cross-contamination during baking.
For dairy-free options, replace butter with coconut oil or vegan butter and choose dairy-free chocolate chips. If you want a plant-based alternative, replace the egg with a flax egg—simple to create yet effective in binding the ingredients.
Keto enthusiasts can modify the recipe further by using almond flour and erythritol instead of sugar, making them low-carb friendly. Additionally, paleo dieters often swap conventional sugar for honey or maple syrup while sticking to wholesome ingredients.
Troubleshooting Guide
Achieving cookie perfection can sometimes pose challenges. If your cookies lack the desired texture, the issue might lie in overmixing the dough or an incorrect flour ratio. Ensure you mix just until incorporated and measure carefully for the best results.
Flavor imbalances can arise from using too much flour or not enough sugar. Always taste the dough (before adding eggs) to adjust sweetness if needed. To combat any potential bitterness, a small pinch of salt can elevate overall flavor.
If your cookies are prone to burning, check your oven calibration and consider using parchment paper to help regulate heat. Pay close attention to visual cues: cookies should be just golden at the edges for an ideal texture without overcooking.
In case your cookies spread more than expected, chilling the dough is an essential step prior to baking. Lastly, for ingredient substitutions, research replacements beforehand, as certain changes (like using baking soda instead of baking powder) can drastically affect outcomes.
Recipe Success Stories
Community feedback is overwhelmingly positive regarding chocolate chip cookies. Many readers share their variations, expressing joy in customizing the flavors with ingredients like toffee bits or spices. Success stories often highlight baking experiences where family members, including kids, eagerly participate in the process, creating delightful memories.
Adaptation tales showcase individuals modifying the recipe to cater to dietary needs, successfully baking gluten-free varieties or managing sugar levels. Sharing these victories encourages others to experiment with their own baking efforts.
Some bakers report striking photography success, capturing the cookies in unique settings, showcasing the process from mixing to the final bite. This demonstrates the impact and joy that a simple recipe can have beyond mere consumption, forging connections through shared love for this timeless treat.
Frequently Asked Questions
Can I freeze cookie dough?
Yes, you can freeze chocolate chip cookie dough for up to three months. Portion it into balls and wrap them tightly in plastic wrap, then store in an airtight container. This allows you to bake fresh cookies whenever you have a craving.
How can I make chewier cookies?
To achieve a chewier texture, try using melted butter instead of softened, and chill the dough for at least 30 minutes before baking. Baking them for a slightly shorter time also helps retain moisture.
What chocolate is best for cookies?
For the best flavor, use semi-sweet chocolate chips. You can also mix in dark chocolate chips for added richness or milk chocolate for a sweeter cookie experience.
Why are my cookies flat?
Flat cookies can be a result of overly warm dough, not enough flour, or insufficient chilling time. Ensure your butter is at room temperature (not melted) and chill the dough before baking.
Can I use whole wheat flour?
Absolutely! Whole wheat flour can be substituted for all-purpose flour. However, it may produce denser cookies, so consider mixing half whole wheat and half all-purpose for balanced results.
What can I add for extra flavor?
Cinnamon, espresso powder, or almond extract are fantastic additions to enhance the flavor of your cookies. Just a teaspoon of any of these can elevate your cookies’ taste beautifully.
How do I store leftover cookies?
Place cooled cookies in an airtight container at room temperature for up to a week. Alternatively, you can freeze them for longer shelf life, ensuring they are wrapped well to prevent freezer burn.
Can I make these cookies vegan?
Yes, to make vegan chocolate chip cookies, simply replace the butter with a plant-based alternative and use a flax egg (1 tablespoon flaxseed meal mixed with 2.5 tablespoons water) instead of a regular egg.
What is the secret to soft cookies?
Using the right ratio of brown sugar to white sugar can help achieve softness, as brown sugar adds moisture. Also, avoid baking them longer than needed to maintain a chewy texture.
Why is my cookie dough crumbly?
A crumbly cookie dough can occur from too much flour or not enough wet ingredients. Balance is key—if you notice it’s too dry, add a splash of milk to bring it together.
What’s the best way to enjoy these cookies?
Enjoy your chocolate chip cookies warm with a glass of cold milk or a scoop of vanilla ice cream for an indulgent treat. They’re also delicious while still slightly warm, allowing the melted chocolate to envelop your senses.
Additional Resources
For those looking to expand their baking repertoire, consider trying related recipes like oatmeal raisin cookies or peanut butter cookies, both offering unique flavors that pair well with chocolate.
Explore technique guides for perfect cookie shaping or baking offers and tips for achieving the ultimate chewy texture. Investigate ingredient information for different types of chocolate chips and their respective melting points for best baking results.
Additionally, recommend essential equipment such as high-quality measuring cups and spoons, silicone baking mats, and sturdy mixing bowls to enhance the baking experience.
Join the Conversation
Engagement with the community can elevate both the recipe experience and shared joy of baking. Encourage followers to share their experiences on social media, showcasing the cookies they’ve made, or sharing personalized variations they’ve discovered.
Invite discussions on modifications made to the recipe, allowing readers to help inspire one another with innovative tips and tricks. Prompting photography sharing encourages budding bakers to capture their cookie-baking journey, creating a connected experience through delicious creations.
To create a vibrant conversation, consider a hashtag for the recipe, facilitating an enjoyable space for baking enthusiasts to share and inspire creativity while promoting a sense of community around this beloved comfort food.
The Recipe
Chocolate Chip Cookies
Serves: 24 cookies
Prep Time: 15 mins
Cook Time: 10 mins
Total Time: 25 mins
Kitchen Equipment Needed
Mixing bowls
Baking sheets
Parchment paper
Measuring cups and spoons
Cookie scoop or spoon
Spatula
Ingredients
1 cup unsalted butter, softened
3/4 cup brown sugar, packed
3/4 cup granulated sugar
1 teaspoon vanilla extract
2 large eggs
2 1/4 cups all-purpose flour
1 teaspoon baking soda
1/2 teaspoon salt
2 cups chocolate chips
Directions
Preheat your oven to 375°F (190°C) and line baking sheets with parchment paper.
In a large mixing bowl, cream together the softened butter, brown sugar, and granulated sugar until light and fluffy.
Add in the vanilla extract and eggs, mixing until fully combined.
In another bowl, whisk together the flour, baking soda, and salt.
Gradually add the dry mixture to the wet ingredients, stirring until just combined.
Fold in the chocolate chips until evenly distributed throughout.
Using a cookie scoop, drop rounded tablespoonfuls of dough onto the prepared baking sheets, spacing them about 2 inches apart.
Bake for 9-11 minutes, or until the edges are golden but the centers are still soft.
Remove from the oven and let the cookies cool on the baking sheets for 5 minutes before transferring to wire racks to cool completely.
Recipe Notes
Chill the dough for at least 30 minutes for thicker cookies.
Store leftover cookies in an airtight container for up to one week.
For variations, try adding nuts or different types of chocolate chips.
Classic Chocolate Chip Cookies – Chewy and Delicious
Classic Chocolate Chip Cookies: A Timeless Treat for Every Occasion
⚖️
Difficulty
Easy
⏲️
Prep Time
15 mins
🕒
Cook Time
10 mins
⏱️
Total Time
25 mins
🍽️
Servings
24 cookies
Chocolate chip cookies are a classic favorite that bring joy to every bite. This timeless recipe has been passed down through generations and is beloved for its rich flavors and comforting texture. The combination of butter, sugar, and chocolate creates a sweet, satisfying treat that evokes warmth and nostalgia. Whether you’re baking for family gatherings, celebrations, or a simple weeknight dessert, these classic chocolate chip cookies never disappoint.
As you bite into these cookies, you’ll be greeted with the perfect balance of sweetness and a gooey, melt-in-your-mouth chocolate experience. The enticing aroma of freshly baked cookies wafting through your kitchen creates an atmosphere of comfort that no one can resist. Just one bite of these delicious cookies will have you reminiscing about childhood memories or creating new ones with loved ones.
Quick Recipe Highlights
Flavor Profile: These cookies boast a sweet and buttery flavor with deep chocolate undertones.
Texture: Expect a slightly crisp exterior with a chewy and soft center that melts in your mouth.
Aroma: The smell of melted chocolate and baked dough will fill your kitchen, enticing everyone around.
Visual Appeal: Golden brown edges and melty chocolate chunks make these cookies visually irresistible.
Skill Level Needed: This recipe is beginner-friendly, requiring minimal baking skills.
Special Equipment: All you need is a mixing bowl, baking sheet, and an oven.
Recipe Overview
Difficulty Level: This classic chocolate chip cookie recipe is easy to follow, making it a great project for novice bakers.
Category: These cookies fall under desserts and are perfect for snacks or sweet treats at any time.
Cuisine: Chocolate chip cookies are an iconic American treat, celebrating homemade baked goods.
Cost: The ingredients are affordable, typically costing under $10 for a full batch.
Season: These cookies are loved year-round but are especially popular during the holiday season.
Occasion: Perfect for family gatherings, birthday parties, bake sales, or casual evenings at home.
Why You’ll Love This Recipe
Indulging in a classic chocolate chip cookie is an experience unlike any other. The combination of rich chocolate and buttery dough creates a delightful balance of flavors that will satisfy any sweet tooth. Each cookie offers a delicious contrast between soft and chewy, making it hard to stop at just one. Whether enjoyed warm from the oven or stored for later, the taste remains remarkable.
The convenience of this recipe is another reason to love it. With only a few simple steps, you can whip up a batch in no time. This recipe is forgiving, allowing for small variations in preparation without affecting the overall outcome. Additionally, the ability to freeze the cookie dough for future baking makes this recipe a favorite for busy families.
Beyond the flavors, these cookies provide nutritional benefits like your daily dose of carbohydrates, and they can offer a comforting treat for those moments when you need a break. Sharing freshly baked cookies not only spreads joy but also fosters friendships and connections, making each baking session a special occasion.
Affordability also plays a vital role in the appeal. Everything you need to create a batch can be found at your local grocery store without breaking the bank. Classic chocolate chip cookies are an accessible treat for everyone and fit any budget.
Finally, who can resist the universal appeal of cookies? They bring together people across different backgrounds and create shared moments of happiness. Whether you’re enjoying them alone or hosting a cookie swap with friends, this recipe embodies warmth and joy.
Historical Background and Cultural Significance
The origin of chocolate chip cookies is delightfully tied to a happy accident. In the 1930s, Ruth Wakefield, the owner of the Toll House Inn in Massachusetts, created the first chocolate chip cookie by combining dough with broken chocolate chunks. This innovative twist quickly captured the hearts and taste buds of many, leading to widespread popularity. Today, the Toll House brand remains synonymous with chocolate chip cookies.
These cookies are more than a dessert; they hold cultural importance in American kitchens, symbolizing warmth and hospitality. They are often baked for special occasions, shared among friends, and exchanged during holidays, cementing their status as a beloved treat. The chocolate chip cookie has become an enduring American icon, representing the essence of homemade goodness.
The recipe has evolved over the decades, with various adaptations appearing over time. From the original recipe, bakers have experimented with dark chocolate, nuts, and even alternative flours to suit different tastes and dietary restrictions. This adaptability has kept chocolate chip cookies relevant and cherished.
Regional variations have also emerged, with different areas of the United States adding their flair. For instance, some regions prefer softer cookies, while others may lean towards a firmer and crispier texture. This diversity showcases the cookie’s flexibility in accommodations, ensuring it is enjoyed by everyone, regardless of preference.
Ingredient Deep Dive
Flour is a foundational ingredient in chocolate chip cookies, creating the structure necessary for them to hold their shape. It has a deep-rooted history in baking, contributing to many beloved recipes. Selecting all-purpose flour offers the best result, while storing it in a cool, dry place will prolong its shelf life. There are alternatives for gluten-free baking; almond flour or oat flour can work well but may require adjustments to the overall recipe.
Sugars play a significant role, adding sweetness and influencing texture. Granulated sugar gives a crispness to the cookies, while brown sugar adds moisture and a hint of caramel flavor. This duality makes for a balanced sweet treat. When purchasing sugar, consider organic options for the best flavor. Store sugars in sealed containers to maintain freshness, and feel free to replace white sugar with coconut sugar for a healthier twist.
Butter adds richness and flavor, crucial for achieving that melt-in-your-mouth texture. Its history dates back centuries, with modern bakers opting for unsalted butter to have better control over sodium levels. Choose high-quality butter for the best flavor, and store it in the fridge for longer freshness. If you’re looking for substitutes, coconut oil or margarine can work, though they may slightly alter the taste.
Chocolate chips are the star of this cookie. Various types, such as dark, milk, or semi-sweet, can be used to create a customized flavor experience. They are essential for adding that irresistible chocolatey goodness that pairs beautifully with the cookie dough. Look for high-quality brands, and store in a cool place to avoid melting. If desired, you can also use chocolate chunks for a more rustic presentation.
Eggs serve as a binding agent, bringing together the ingredients and providing structure. Their historical use in baking is significant, offering versatility in recipes. Fresh, large eggs provide the best results, and they should be stored in the refrigerator for optimal freshness. For egg-free options, take a look at applesauce or flaxseed meal as potential alternatives.
Common Mistakes to Avoid
Using cold butter: Cold butter doesn’t cream well with sugars, leading to dense cookies instead of fluffy ones. Always use softened butter for optimal results.
Overmixing the dough: Overmixing can lead to tough cookies. Mix just until incorporated for the perfect chewy texture.
Incorrect oven temperature: An inaccurate temperature can yield underbaked or burnt cookies. Always preheat your oven and use an oven thermometer to ensure accuracy.
Skipping the chilling step: Chilling the dough enhances flavor and texture. Don’t skip this step if you want well-structured cookies.
Using expired or poor-quality ingredients: Ensure that all your ingredients are fresh for the best-tasting cookies.
Not measuring ingredients accurately: Baking is a science; using a scale or precise measuring tools can make a significant difference in your cookies.
Using too much flour: Flour should be spooned and leveled; scooping directly from the bag can lead to packing, resulting in dry cookies.
Ignoring the resting time: After baking, allow cookies to rest on the tray for a few minutes before transferring them to a wire rack. This helps them firm up.
Not tasting the dough: A taste test ensures the perfect balance of flavors. Adjust sweetness as needed.
Storing improperly: Store cookies in an air-tight container to maintain freshness and prevent them from becoming stale.
Essential Techniques
Creaming butter and sugar is crucial for creating air pockets in the dough, which leads to a lighter texture. Use room temperature butter to ensure it blends well with sugar, achieving a fluffy consistency. Avoid overmixing after adding flour to protect the cookie structure and prevent toughness.
Baking time and temperature should be closely monitored. The cookies will continue to cook slightly after they’re removed from the oven due to residual heat. Look for slightly golden edges while the centers remain soft for the best results.
Cooling cookies properly is vital to maintaining their texture. Let them rest on the baking tray for 5-10 minutes before transferring to a wire rack to ensure they set perfectly.
Pro Tips for Perfect Classic Chocolate Chip Cookies
1. Use high-quality chocolate chips for the best flavor, as the chocolate is a major contributor to the cookie’s deliciousness.
2. Experiment with different types of chocolate, including milk, dark, or even white chocolate, for a delightful twist.
3. Mix-in nuts, like walnuts or pecans, to add texture and enhance the cookie experience.
4. For a touch of sea salt atop the cookies before baking, to elevate the flavor profile considerably.
5. Add a splash of vanilla extract, even if the recipe doesn’t call for it, to amp up the flavor.
6. Try adding oats for a chewy variation that also enhances nutritional value.
7. Bake half the dough immediately and save the rest in the fridge or freezer for fresh cookies any time.
8. When storing, layer cookie sheets with parchment paper to prevent sticking.
Variations and Adaptations
There are countless delightful variations for classic chocolate chip cookies. For a seasonal twist, consider adding pumpkin spice in the fall or swapping out the chocolate for cranberry during winter holidays. Gluten-free options can be made using almond flour or a pre-made gluten-free blend without sacrificing any delicious flavor.
For an irresistibly chewy cookie, substituting half the butter with coconut oil can provide a soft texture. Vegan adaptations can utilize flax eggs and dairy-free chocolate chips, making these cookies accessible to a broader audience.
If you’re feeling adventurous, why not try different textures? Sea-salt chocolate chip cookies utilize coarse sea salt sprinkled on top for an extra crunch. You could also experiment with adding flavored extracts such as almond, mint, or hazelnut for unique twists on the classic recipe.
Presentation can also be adjusted; try serving mini cookies on a platter with fresh fruit for a gourmet touch, or create a cookie ice cream sandwich for a fun summer treat.
Serving and Presentation Guide
For an inviting presentation, stack warm cookies on a cake stand or arrange them on a colorful plate. Garnishing with fresh mint leaves adds a pop of color. Pairing the cookies with a glass of milk or a scoop of vanilla ice cream enhances the experience.
Consider using parchment paper to layer your cookies for gifting or presentation. Wrapping them in confectionery boxes or placing them in mason jars can create beautiful gifts for any occasion.
Set temperature considerations in mind; cookies are best served warm for maximum flavor and a gooey texture. If serving later, a quick warm-up in the microwave (5-10 seconds) can rejuvenate their delightful qualities. Be mindful of portion control; cookie sizes should be manageable for a satisfying experience without overwhelming indulgence.
Wine and Beverage Pairing
While chocolate chip cookies typically pair well with milk, wine enthusiasts can enjoy them alongside dessert wines like port or dessert-style Chardonnay. These choices complement the cookie’s sweetness and enhance the experience.
For a non-alcoholic option, a rich chai latte can provide warm spices that harmonize beautifully with the buttery cookies. Another excellent pairing is brewing a smooth cup of coffee; its bitterness balances the cookie’s sweetness perfectly.
If serving with tea, opt for a robust black tea or an aromatic herbal variety that can provide an intriguing contrast to the flavors of the cookies.
Storage and Shelf Life
To keep your chocolate chip cookies fresh, store them in an airtight container at room temperature. They’ll last up to a week, but be aware that exposure to air can cause them to dry out. If you want to prolong their life, consider freezing them.
When freezing, allow the cookies to cool completely before placing them in a single layer in a freezer-safe bag or container. They can last up to three months in the freezer. For best results, thaw them in the fridge or at room temperature.
For extra crunch, baked cookies can be reheated in a preheated oven for a few minutes. Make sure to monitor them closely to avoid burning.
Make Ahead Strategies
To prepare for future cravings, consider creating and freezing cookie dough. Roll the dough into logs, wrap tightly in plastic wrap, and store in the freezer. When you’re ready for freshly baked cookies, simply slice and bake with minimal effort.
An effective prep timeline includes mixing the dough in advance, chilling overnight, and baking when you’re ready for delicious treats. This way, you can enjoy the luxury of freshly baked cookies with a fraction of the effort.
As for quality, ensure to not skip the chilling step, even if it’s pre-prepared. Chilling enriches flavors while providing optimal baking results.
Note that any additional elements, like chocolate chunks, should be mixed in right before baking, ensuring they remain enticing and smooth.
Scaling Instructions
When it comes to scaling your classic chocolate chip cookies recipe, it’s fairly straightforward. To halve the recipe, divide all ingredients effectively and adjust baking times as necessary for smaller batches.
For doubling or tripling, ensure to use larger mixing bowls and trays. Be cautious of overbaking; larger batches might need slight adjustments in the baking duration.
For storage considerations, split your dough into manageable portions and store as mentioned for freshness. Remember, cookies baked in larger batches should be cooled completely before being layered in storage to prevent sticking.
Nutritional Deep Dive
A chocolate chip cookie’s macro breakdown includes carbohydrates primarily from flour and sugars, proteins from eggs, and fats from butter. For those looking to maintain balance, consider enjoying in moderation.
Micronutrient analysis shows cookies providing small amounts of valuable nutrients from quality chocolate and whole ingredients. However, as a treat, they ideally should support a well-rounded diet.
When enjoying these cookies, pay attention to portion control, as overeating can lead to consuming excessive sugars and fats. Practicing mindful indulging will enhance pleasure without derailing nutritional goals.
In terms of health benefits, opting for dark chocolate can provide heart-healthy antioxidants while making these cookies a more wholesome choice.
Dietary Adaptations
Gluten-free flour blends available can help create an equally delicious chocolate chip cookie that caters to gluten sensitivities. The same goes for a dairy-free option using plant-based butter and dairy-free chocolate chips.
For vegan adaptations, flax eggs can substitute traditional eggs effectively, and coconut oil could replace butter. Low-carb dieters can experiment with almond flour and sugar alternatives like erythritol or monk fruit to enjoy a keto-friendly version.
For those following a Paleo diet, utilizing almond flour and coconut sugar allows you to savor the cookies without compromising dietary preferences. Each alternative may require some adjustments in baking times; adding ingredients gradually is key for success.
Troubleshooting Guide
Texture issues may arise from too much flour or insufficient creaming. Adjusting by using spoons to measure flour accurately is crucial for optimal consistency.
Flavor balance can sometimes feel off; consider adding a pinch more salt to enhance sweetness levels when necessary.
If you encounter temperature problems, ensure that your oven is preheated before placing the cookies in to avoid undercooking.
Equipment challenges, such as inadequate mixers, can pose issues. Consider mixing by hand to control texture better if a mixer is unavailable.
Ingredient substitutions might not produce the same results. When making adaptations, consult trusted resources to guide ratios and alternatives effectively.
Timing concerns can affect the final product vastly. Keep a close eye on baking times, as different ovens and baking dishes can influence cooking duration.
Recipe Success Stories
Community feedback on this classic chocolate chip cookie recipe has been overwhelmingly positive, with many sharing joyful stories of family baking sessions and stunningly perfect results. Variations have flourished, showcasing the creativity of bakers around the world.
People have recounted adapting the recipe for gluten-free diets, with surprising success that preserves the cookie’s integrity. Reader suggestions, such as adding cinnamon or using brown butter, have proven to elevate the flavors even further, transforming the classic favorite into irresistible unique treats.
Photography tips suggest highlighting the melting chocolate or using creative backdrops that complement the warm hues of the cookies, effectively capturing the homey essence of the recipe.
Frequently Asked Questions
1. Can I freeze chocolate chip cookie dough?
Absolutely! You can freeze cookie dough for up to three months. Portion the dough into balls and freeze them on a tray before transferring to an airtight container. When you’re ready to bake, simply add a couple of minutes to the baking time.
2. What’s the best way to store baked cookies?
For fresh cookies, store them in an airtight container at room temperature for up to a week. To keep them longer, consider freezing them wrapped individually in plastic wrap.
3. Can I use margarine instead of butter?
While margarine can be used, it may slightly alter the flavor and texture of the cookies. For the best results, stick with unsalted butter.
4. How do I make my cookies chewy instead of crispy?
To achieve a chewy texture, use more brown sugar than granulated sugar and remove cookies from the oven when they’re still soft in the center.
5. Is it okay to use mini chocolate chips?
Yes! Mini chocolate chips offer a fun twist and distribute throughout the dough more evenly, enhancing that chocolatey goodness in every bite.
6. Can I omit the eggs in the recipe?
For egg-free cookies, you can substitute each egg with 1/4 cup of unsweetened applesauce or a flaxseed meal mixture (1 tablespoon flaxseed meal + 2.5 tablespoons water).
7. How do I avoid overbaking my cookies?
Keep a close eye on your cookies while baking and take them out when the edges look firm but the centers are still soft. They’ll continue to bake as they cool.
8. What can I do if my cookie dough is too sticky?
If the dough is too sticky, try chilling it in the refrigerator for about 30 minutes. This helps it firm up and makes it easier to scoop.
9. What size cookies should I make?
Standard-sized cookies are about 2 tablespoons of dough. However, you can make smaller or larger cookies based on your preference; just remember to adjust the baking time accordingly.
10. Can I use a different type of flour?
While all-purpose flour is recommended, you can experiment with whole wheat or gluten-free flour, but be aware that it may change the texture slightly. Adjustments may be needed when substituting.
Additional Resources
For those interested in expanding their baking repertoire, check out related recipes such as oatmeal chocolate chip cookies or double chocolate cookies.
For techniques, consider reading guides on how to properly mise en place for baking or expert tips on understanding baking temperatures.
Ingredient information can be found in many cookbooks that delve deeper into flour types and their specific properties. Furthermore, investing in quality kitchen equipment will make a significant difference in your baking journey.
Seasonal variations can yield delicious results, so remember to keep an eye on festive flavors that you can incorporate into classic baking recipes throughout the year.
Join the Conversation
We would love to see your baking creations! Share your chocolate chip cookie photos on social media using our designated hashtags for a chance to be featured. Engage with fellow bakers by sharing tips, experiences, and any remarkable adaptations you’ve made to the classic recipe.
Leave a comment below sharing your favorite variation or a memory connected to baking chocolate chip cookies. Your feedback helps us grow and create more delicious recipes for everyone to enjoy. Let’s keep the spirit of baking alive together!
The Recipe
Classic Chocolate Chip Cookies
Serves: 24 cookies
Prep Time: 15 mins
Cook Time: 10 mins
Total Time: 25 mins
Kitchen Equipment Needed
Mixing bowl
Measuring cups and spoons
Baking sheet
Spatula
Wire rack for cooling
Ingredients
2 1/4 cups all-purpose flour
1 teaspoon baking soda
1/2 teaspoon salt
1 cup unsalted butter, softened
3/4 cup granulated sugar
3/4 cup packed brown sugar
1 teaspoon vanilla extract
2 large eggs
2 cups semi-sweet chocolate chips
Directions
Preheat your oven to 375°F (190°C).
In a small bowl, combine flour, baking soda, and salt; set aside.
In a large mixing bowl, cream together the softened butter, granulated sugar, brown sugar, and vanilla extract until smooth.
Add the eggs one at a time, mixing well after each addition.
Gradually add the flour mixture, and beat until well blended.
Stir in the chocolate chips.
Drop rounded tablespoons of dough onto ungreased baking sheets.
Bake for 9 to 11 minutes or until golden brown.
Let the cookies cool on the baking sheet for 5 minutes before transferring them to a wire rack to cool completely.
Recipe Notes
You can customize the cookies by adding nuts or using different types of chocolate chips.
Chill the dough for extra flavor and a better consistency if desired.
For softer cookies, remove from the oven when they are still slightly underbaked.
Best Chocolate Chip Cookies – Soft, Chewy, and Easy
Chocolate Chip Cookies: The Ultimate Comfort Treat
⚖️
Difficulty
Easy
⏲️
Prep Time
15 mins
🕒
Cook Time
10 mins
⏱️
Total Time
25 mins
🍽️
Servings
24 cookies
There’s something undeniably comforting about warm, gooey chocolate chip cookies fresh from the oven. This classic recipe for chocolate chip cookies pairs the sweetness of brown sugar with the slightly salty taste of butter, creating a rich and indulgent treat that is hard to resist. Each bite offers a harmonious blend of flavors and textures—chewy, crispy edges combined with soft, melted chocolate that creates an irresistible indulgence.
Whether you’re baking for a special occasion or simply treating yourself, these chocolate chip cookies are perfect for sharing with family and friends. The aroma that fills your kitchen while they bake will evoke memories of childhood, warmth, and joy. This delightful recipe guarantees that your cookies come out perfect every time, ensuring the ultimate comfort food experience that everyone will love.
Quick Recipe Highlights
Flavor Profile: Rich, buttery flavor enhanced by sweet brown sugar and semi-sweet chocolate morsels.
Texture: Soft and chewy centers with crispy edges, creating a delightful mouthfeel.
Aroma: Enjoy the sweet, buttery scent as they bake, with hints of vanilla and chocolate.
Visual Appeal: Golden-brown cookies dotted with melted chocolate chips are a visual delight.
Skill Level Needed: Perfect for beginners; requires basic baking skills and a few common tools.
Special Equipment: Standard kitchen tools such as mixing bowls, a whisk, measuring cups, and a baking sheet.
Recipe Overview
Difficulty Level: This recipe is classified as easy, making it suitable for bakers of all levels. Basic measuring and mixing skills are all that are needed.
Category: Chocolate chip cookies belong to the dessert category, making them ideal for a sweet treat any time of day.
Cuisine: Originating from American baking traditions, these cookies are beloved by many and can be customized in multiple ways.
Cost: The ingredients for these cookies are relatively inexpensive, typically totaling around $5, making them accessible for everyone.
Season: Perfect for any season, but especially loved during holidays and family gatherings.
Occasion: These cookies are great for celebrations, snack time, or when you’re simply craving something sweet.
Why You’ll Love This Recipe
This classic chocolate chip cookie recipe delights with its rich taste and wonderful texture. The combination of creamy butter, sugar, and chocolate creates a symphony of flavors that dance on your taste buds. From the first bite, the softness envelops you while the crispy edges add an enjoyable contrast. This beloved treat is always a crowd-pleaser, making it perfect for gatherings or a quiet night in.
Another reason to love this cookie recipe is its convenience. With a mere 15 minutes of prep and simple steps, you can enjoy fresh-baked treats without spending hours in the kitchen. The ingredients are straightforward, ensuring that you can whip up your batch with ease, making it a great choice for novice bakers.
Nutritionally, chocolate chip cookies can bring joy without the guilt if you enjoy them in moderation. They are energy-boosting treats that can brighten your day. For those with kitchen skills, they can even be modified to include healthier ingredients like oats or nuts for added nutrition.
Sharing cookies can create memorable moments with loved ones. Baking together brings families closer and makes for fantastic opportunities to engage socially, as everyone loves to share their favorite cookie stories. These bite-sized morsels are also perfect for gifting; wrapping a batch in a lovely box can brighten anyone’s day!
In terms of cost, this recipe is budget-friendly, allowing for delightful treats without straining your wallet. These cookies are simple enough for weeknight baking, yet delicious enough to serve at parties or special events, showing that sweet indulgence doesn’t always have to be expensive or time-consuming.
Historical Background and Cultural Significance
Chocolate chip cookies have an iconic status rooted in American culture. The original recipe was created by Ruth Wakefield in the late 1930s at the Toll House Inn in Massachusetts. Wakefield’s introduction of chocolate bits into her cookie dough paved the way for what soon became a national favorite, making Toll House cookies a beloved household name.
As the cookies gained popularity, they became a symbol of American baking and home cooking. Their rise in the 1940s and ’50s coincided with an era that emphasized homemade desserts as part of family traditions. Over time, chocolate chip cookies have become more than just a treat; they symbolize comfort, nostalgia, and simple pleasures.
With each passing decade, variations of the chocolate chip cookie have emerged regional and international adaptations that each put their unique spin on the classic recipe. From chunkier bites packed with nuts to decadently gooey versions stuffed with peanut butter cups, the chocolate chip cookie continues to evolve while retaining its core identity.
Today, the chocolate chip cookie is not just a guilty pleasure; it’s a cultural icon, celebrated in family kitchens, bakeries, and cookie shops worldwide. They have found their way into dishes like milkshakes and dessert pizzas, showcasing their immense versatility.
Ingredient Deep Dive
All-Purpose Flour: Flour is the backbone of most baked goods, providing structure and texture. Using all-purpose flour ensures a balanced cookie that isn’t too dense or too light. When selecting flour, look for a high-quality brand that guarantees freshness. Store your flour in an airtight container to prolong its shelf life, and consider measuring it using the spoon and level method for accuracy. If you need alternatives, whole wheat or almond flour can work, though they will alter the final taste and texture.
Butter: Butter adds flavor and moisture, making cookies rich and soft. The choice between unsalted and salted butter can influence the overall taste; unsalted is typically preferred for controlled seasoning. To achieve the perfect cookie, ensure your butter is at room temperature for easier creaming with sugar. For storage, keep it in the refrigerator to prevent spoilage, and substitutions like margarine or coconut oil can be used with adjustments to flavor.
Granulated Sugar: This sugar sweetens and creates chewiness. It enhances the cookie’s texture, giving it a slight crispiness. When selecting granulated sugar, any brand will suffice, but consider organic options for a cleaner taste. Store sugar in a cool, dry place, and keep an eye out for clumping. Brown sugar can be used in place of granulated sugar for a richer flavor and added moisture.
Chocolate Chips: The star ingredient, chocolate chips bring sweetness and indulgence to the cookie. Semi-sweet chocolate is traditional, but feel free to experiment with dark, milk, or white chocolate chips for varied flavors. When shopping for chocolate chips, look for high-quality brands; they make a noticeable difference. Store any leftover chips in a cool, dry space. If you desire a healthier option, consider dark chocolate chips which offer improved nutritional benefits.
Common Mistakes to Avoid
Using cold butter: Ensure your butter is at room temperature to achieve the right texture by mixing it smoothly with the sugars.
Overmixing dough: Mixing the dough too vigorously can lead to dense cookies; instead, mix just until combined.
Incorrectly measuring flour: Use the spoon and level method to avoid tough cookies caused by excess flour.
Skimping on chilling time: Chilling the dough can help develop flavors and prevent spread while baking.
Underbaking cookies: Bake until the edges are golden brown to ensure the desired chewy texture throughout.
Using expired ingredients: Always check your baking soda and flour for freshness before starting.
Baking at the wrong temperature: Ensure your oven is properly calibrated to avoid burnt or undercooked cookies.
Not letting cookies cool: Allow cookies to cool on the baking sheet briefly to set before transferring them to a wire rack.
Essential Techniques
Creaming Butter and Sugar: This key technique aerates the butter, leading to a light and fluffy cookie texture. Start with room temperature butter and sugar; beat them together until the mixture is pale and fluffy. Common pitfalls include using cold butter or not mixing long enough. Look for a light, creamy consistency before adding other ingredients.
Measuring Ingredients Accurately: Accurate measurements are vital for great baking results. Use a kitchen scale for precision, especially with flour. Spoon flour into your measuring cup and level it off rather than scooping directly from the container, as this can pack down the flour, leading to drier cookies. Consistency in measurement is key for achieving cookie perfection.
Pro Tips for Perfect Chocolate Chip Cookies
1. Always start with room temperature ingredients for better incorporation and texture.
2. Chilling the dough for at least 30 minutes helps develop flavors and prevents the cookies from spreading too much.
3. Experiment with different types of chocolate chips—mix semi-sweet with dark or white chocolate for a variety of flavor.
4. For a hint of saltiness, sprinkle a little sea salt on cookies right before baking.
5. Line your baking sheets with parchment paper to prevent sticking and ensure even baking.
6. Keep an eye on cooking times; remove cookies while they’re slightly underbaked for the best chew.
7. Adjust baking times for different oven types, especially for convection ovens which may require shorter baking times.
8. Store cookie dough in the refrigerator for up to three days before baking for future convenience.
Variations and Adaptations
Chocolate chip cookies can be versatile, adapting to various regional flavors and dietary preferences. For example, to make a classic brookie, use half cookie and half brownie batter baked together. Seasonal variations might include pairing these cookies with pumpkin spice in the fall or candy canes for a festive twist during Christmas. Opting for dietary modifications such as gluten-free flour or adding oats can cater to those with specific dietary needs without compromising the original’s deliciousness. You can also try adding different nuts or dried fruits for texture and flavor modifications, making the recipe uniquely yours.
Serving and Presentation Guide
When serving chocolate chip cookies, consider using an elegant platter to display them attractively. Garnishing with a sprig of mint or serving with a scoop of vanilla ice cream creates a delightful dessert experience. For traditional accompaniments, pair with a tall glass of cold milk or a cup of coffee. Maintain cookies in an airtight container to stay fresh, and consider showcasing variations creatively for gatherings. For temperature, serve warm from the oven or at room temperature, depending on personal preference.
Wine and Beverage Pairing
For pairing, a rich Cabernet Sauvignon complements the sweetness of chocolate chip cookies beautifully, while a light Chardonnay can enhance the buttery notes. Non-alcoholic options like cold brew coffee or classic milk are always favorites. For a cozy vibe, consider crafting a mocha latte for a delightful contrast. Always serve beverages chilled or at the right temperature to maximize the flavor connection between the drink and cookies.
Storage and Shelf Life
Store your chocolate chip cookies in an airtight container at room temperature for up to a week. For longer shelf life, you can freeze them; they can last up to three months. Ensure to cool cookies completely before freezing. Reheat cookies in the oven for a couple of minutes if you’d like to enjoy them warm again. Signs of spoilage include an off smell or stale texture, indicating that fresh treats are needed.
Make Ahead Strategies
One effective way to prepare in advance is to make the cookie dough and store it in the refrigerator for up to 3 days before baking. You can also pre-scoop portions onto a baking sheet and freeze them individually. After freezing, transfer them to a zip-lock bag to make baking fresh cookies quick and easy whenever cravings hit. Consider keeping chocolate chips or nuts separate when preparing the dough and adding right before baking to maintain texture during storage.
Scaling Instructions
This chocolate chip cookie recipe is easily scalable! To scale down the recipe, simply halve measurements; cookies will still bake uniformly. For larger batches, doubling or tripling the recipe may require baking in batches to ensure proper cooking. Be aware that bake times may vary slightly, so always check your cookies’ doneness, adjusting oven space or temperature if needed.
Nutritional Deep Dive
Examining the nutritional profile of chocolate chip cookies reveals they are high in carbohydrates, mainly from sugars and flour. Each cookie generally contains around 9 grams of fat, offering energy while providing some essential fatty acids if made with quality butter. Micronutrients such as iron and calcium can be found in small amounts. Balancing your cookie intake with adequate nutrition and portion control is important for a healthy lifestyle, allowing indulgence without concern for excess.
Dietary Adaptations
Baking adaptations can cater to various dietary preferences and restrictions. For gluten-free options, substitute all-purpose flour with gluten-free blends designed for baking. To make them vegan, replace butter with coconut oil or margarine and use flax eggs. For low-carb diets, consider almond flour and sugar substitutes. Each adaptation may affect taste and texture, so minor experimentation is necessary to perfect each variation while keeping the essence of the classic recipe.
Troubleshooting Guide
If your cookies turn out too dry, this often indicates too much flour; always measure your ingredients accurately. For overly flat cookies, refrigerating the dough before baking can help enhance structure. If you find the flavors lacking, simply adjusting the amount of vanilla or adding a pinch of salt can elevate the taste significantly. Equipment challenges such as uneven baking can be mitigated by rotating your cookie sheets halfway through the baking process.
Recipe Success Stories
This chocolate chip cookie recipe has received enthusiastic responses from the community! Many bakers have reported perfect results on their first try, adapting the recipe to suit their personal tastes. Readers loved experimenting with mix-ins like nuts and dried fruits, sharing photos of their baking adventures. Contributing ideas for ingredient substitutions further enriched the recipe, showing the versatility that can be achieved with this beloved classic.
Frequently Asked Questions
What kind of chocolate chips should I use?
For traditional chocolate chip cookies, semi-sweet chips provide the classic taste, but feel free to experiment with dark, milk, or even white chocolate for diverse flavors.
Can I freeze cookie dough?
Yes! Cookie dough freezes perfectly. Portion it out on a baking sheet and freeze. Once solid, transfer portions to a zip-lock bag for easy baking later.
What’s the best way to store cookies?
Store cookies in an airtight container at room temperature for up to a week. For longer storage, freeze them for up to three months.
Why do my cookies spread too much?
This may be caused by warm dough or insufficient chilling time. Always chill your dough for at least 30 minutes before baking for better texture.
Can I use whole wheat flour instead of all-purpose flour?
Yes, whole wheat flour can be used, but it may alter the texture slightly; consider using a mix of both for a healthier yet familiar taste.
How do I know when my cookies are done?
Look for edges that are lightly golden while the centers look underbaked; they’ll continue to cook on the baking sheet after you remove them from the oven.
Can I add nuts to my chocolate chip cookies?
Absolutely! Walnuts or pecans make excellent additions, adding texture and flavor. Just fold them in during the mixing process.
What happens if I overmix the dough?
Overmixing can lead to denser cookies. Mix only until the flour is incorporated to maintain a light texture.
Can I replace eggs in the recipe?
Yes, you can use flaxseed meal or applesauce as egg substitutes. Use one tablespoon of flaxseed meal mixed with three tablespoons of water per egg.
What if my cookies are too chewy?
Too much moisture or butter can lead to chewier cookies. Adjust the amounts slightly and check your measurements for accuracy.
Additional Resources
Explore our related recipes for a variety of baking treats, from classic snickerdoodles to rich brownies. For those looking to dive deeper into baking techniques, check our guides on perfecting the creaming method or mastering ingredient substitutions. Interested in ingredient information? Find tips on selecting high-quality chocolate and flour. Plus, discover seasonal variations that offer exciting twists on your classic cookie recipes.
Join the Conversation
We invite you to share your baking experiences! Engage with us on social media by showcasing your delicious chocolate chip cookies. Share your variations or unique presentations, and connect with fellow cookie enthusiasts by exchanging photographs. Your feedback and suggestions not only enrich our baking community but inspire others to join the delicious journey of baking homemade cookies!
The Recipe
Chocolate Chip Cookies
Serves: 24 cookies
Prep Time: 15 mins
Cook Time: 10 mins
Total Time: 25 mins
Kitchen Equipment Needed
Baking sheets
Parchment paper
Mixing bowls
Whisk or electric mixer
Measuring cups and spoons
Spatula
Ingredients
2 1/4 cups all-purpose flour
1/2 teaspoon baking soda
1 cup unsalted butter, softened
3/4 cup granulated sugar
3/4 cup packed brown sugar
1 teaspoon salt
2 teaspoons pure vanilla extract
2 large eggs
2 cups semi-sweet chocolate chips
Directions
Preheat your oven to 350°F (175°C) and line baking sheets with parchment paper.
In a mixing bowl, whisk together flour and baking soda. Set aside.
In a large bowl, cream together butter, granulated sugar, brown sugar, and salt until smooth.
Add vanilla extract and eggs, beating until well combined.
Gradually mix in the flour mixture until just combined, then fold in chocolate chips.
Drop tablespoon-sized dough onto prepared baking sheets, spacing them about 2 inches apart.
Bake for 10-12 minutes or until edges are golden brown.
Remove from oven and allow cookies to cool on a baking sheet for 5 minutes before transferring to a wire rack to cool completely.
Recipe Notes
For softer cookies, remove from the oven when they appear slightly underbaked.
Chill cookie dough for 30 minutes for thicker cookies.
Store leftover cookies in an airtight container at room temperature.
Best Chocolate Chip Cookies – Soft, Chewy, and Easy
Delicious Chocolate Chip Cookies: A Classic Recipe for Every Occasion
⚖️
Difficulty
Easy
⏲️
Prep Time
15 mins
🕒
Cook Time
10 mins
⏱️
Total Time
25 mins
🍽️
Servings
24 cookies
Chocolate chip cookies are the quintessential treat that brings joy to both young and old. The aroma of freshly baked cookies wafting through your home is something truly special. With a perfect blend of rich chocolate, soft dough, and just a hint of vanilla, this recipe offers everything you crave in a sweet snack. Whether you are hosting friends, surprising your loved ones, or simply satisfying a late-night craving, these warm cookies guarantee happiness in every bite.
The beauty of chocolate chip cookies lies in their versatility; they can be enjoyed plain or dressed up with nuts or dried fruits. Each bite is a delightful balance of textures: the slightly crisp edges contrast beautifully with the soft, chewy center. As they cool, the chocolate chips become gooey, ensuring that every mouthful is both satisfying and indulgent. By making these cookies at home, you not only get to control the ingredients but also create a personal connection with a beloved classic that can be shared for generations.
Quick Recipe Highlights
Flavor Profile: The combination of sweet chocolate and buttery dough creates a delightful, melt-in-your-mouth experience that is both nostalgic and satisfying.
Texture: Expect a contrast of crispy edges and a chewy center, with pockets of gooey chocolate that enhance every bite.
Aroma: The sweet, buttery scent of cookies baking will fill your kitchen, evoking warmth and comfort.
Visual Appeal: Golden brown cookies speckled with dark chocolate chips are not only delicious but also visually enticing.
Skill Level Needed: This recipe is beginner-friendly, perfect for those who are new to baking or seeking a quick and easy treat.
Special Equipment: All you need are basic kitchen tools, including a mixing bowl, baking sheet, and an oven.
Recipe Overview
Difficulty Level: With just simple measurements and mixing required, this cookie recipe is perfect for novice bakers.
Category: Cookie recipes fall under desserts or snacks, making them a perfect fit for any occasion.
Cuisine: Chocolate chip cookies are an iconic American treat, originally crafted by Ruth Wakefield in the 1930s, reflecting the rich history of home baking.
Cost: The ingredients for this recipe are affordable and can be found in most pantry staples, making it cost-effective for families and individuals.
Season: Cookies can be enjoyed year-round, but they’re especially popular during holidays when baking and sharing treats is in full swing.
Occasion: Perfect for school lunches, birthday parties, or cozy family evenings, these cookies are versatile enough for any gathering.
Why You’ll Love This Recipe
The combination of rich chocolate and buttery dough in chocolate chip cookies creates an unforgettable taste experience that feels both indulgent and homely. The aroma that fills your kitchen will invite everyone in, transforming your home into a cozy haven. There’s nothing more satisfying than pulling a tray of warm cookies from the oven; the anticipation is part of the magic. These cookies, with their melt-in-your-mouth texture and delicious buttery flavor, deliver that classic comfort food satisfaction. Plus, the simple joy of biting into a warm chocolate chip cookie can evoke fond memories of childhood, family gatherings, and sweet moments shared with loved ones.
In terms of convenience, this recipe is straightforward and quick to prepare, making it ideal for busy individuals or families. The total time of just 25 minutes includes prep and baking, meaning you can enjoy a fresh batch of cookies with minimal effort. The ease of assembly allows you to whip up cookie dough even on a weeknight after dinner, allowing for spontaneous treats that brighten up your day. Simply mix the ingredients, scoop, and bake; the process is virtually foolproof, leaving no room for kitchen disasters.
Nutritionally, while chocolate chip cookies are a treat, they still can be enjoyed in moderation. Using high-quality chocolate chips can enhance the nutritional value, bringing antioxidants and flavor to your cookies. You can also incorporate whole grain flour or reduce sugar by experimenting with alternative sweeteners, making them a bit healthier while still satisfying your sweet tooth.
Socially, there’s something inherently joyful about sharing homemade cookies. Whether you’re hosting a gathering or just leaving a plate for neighbors or friends, there’s a sense of community built around these sweet treats. Baking becomes a way of showing love and care, and these cookies can be the star of any dessert spread. Everyone loves a classic chocolate chip cookie, making them perfect for all occasions.
Lastly, the cost-effectiveness of this recipe makes it accessible to everyone. With simple ingredients and minimal kitchen equipment required, you can bake a full batch of cookies without breaking the bank. The satisfaction of creating something delicious in your own kitchen also adds to the experience, offering both value and enjoyment.
Historical Background and Cultural Significance
The origin of chocolate chip cookies is a heartwarming tale of innovation courtesy of Ruth Wakefield in the 1930s. She created the first chocolate chip cookie at the Toll House Inn in Massachusetts. When she decided to add chopped-up bits of a Nestlé chocolate bar into her cookie dough, little did she know that she was about to spark a nationwide sensation that would change dessert history. The recipe was so well-loved that it was published in a Boston newspaper, leading to a rising trend in cookie baking.
Culturally, chocolate chip cookies have transcended generations, becoming a symbol of American home baking. They embody the spirit of warmth and hospitality that many find inherently inviting. This beloved treat often appears during celebrations and gatherings, symbolizing community and shared joy. They have since evolved into various flavors and adaptations, incorporating everything from nuts to different types of chocolate, thus enriching their significance in contemporary culture.
The evolution of the chocolate chip cookie has also led to countless variations that cater to diverse palates. From the introduction of gluten-free options to unique flavor profiles like salted caramel and matcha, these cookies continue to adapt to the culinary demands of society. Each version pays homage to the original recipe while inviting creativity and innovation.
Regional variations of the chocolate chip cookie—such as the addition of local flavors or ingredients—reflect the unique cultural nuances of different communities. For example, in some areas, bakers might incorporate nuts or various spices, resulting in delicious regional adaptations that still hold true to the foundational recipe while embracing local tastes.
Ingredient Deep Dive
Flour: Flour serves as the foundation for any cookie, as it provides structure and contributes to the texture. Generally, all-purpose flour is used in this recipe. When choosing flour, look for high-quality brands that are freshly milled for optimal taste and performance. Store in an airtight container in a cool, dry place to maintain freshness. For those avoiding gluten, substitutes like almond or oat flour can be used, but they may alter the cookie outcome slightly.
Butter: The use of butter in chocolate chip cookies contributes to the richness and flavor. It also impacts texture; room temperature butter allows for better creaming with sugar, creating a light and fluffy dough. When selecting butter, opt for unsalted to control the overall salt content. Proper storage in the refrigerator can keep butter fresh for a longer period, and freezing is an option for extended storage. For dairy-free alternatives, coconut oil or vegan butter can be suitable substitutes.
Sugar: Sugar not only sweetens but also aids in browning and creating the perfect chewy texture. A balance of granulated sugar and brown sugar often yields the best results. When choosing sugar, look for unrefined or organic varieties for additional flavor depth. Store sugar in a cool flour container away from moisture. If you wish to lower the sugar content, consider natural alternatives like honey or maple syrup, though baking times may need adjustments.
Chocolate Chips: The star ingredient of this recipe, chocolate chips, come in various types, including semi-sweet, dark, or even milk chocolate. When selecting chocolate, choose high-quality brands that contain cacao as the first ingredient for the best flavor. Proper storage of chocolate is crucial; keep it cool and dry to prevent melting and maintaining the best quality. For a twist, consider mixing in white chocolate or butterscotch chips for additional flavor profiles.
Common Mistakes to Avoid
Using cold butter: Cold butter doesn’t cream well, leading to dense cookies. Always use room-temperature butter for optimal fluffiness.
Overmixing the dough: Overmixing can lead to tough cookies. Mix just until the ingredients are combined to ensure a tender texture.
Skipping the chilling step: Chilling the dough solidifies the fat, preventing spreading, leading to thicker, chewier cookies.
Not measuring flour correctly: Flour should be spooned into the measuring cup and leveled off to prevent dense, dry cookies.
Underbaking: Cookies continue to cook once removed from the oven. Pull them out when the edges are golden but the centers look slightly underbaked.
Using expired ingredients: Always check the freshness of your baking powder, baking soda, and even the chocolate chips to ensure the best flavor.
Baking on ungreased sheets: Even if the pans are non-stick, greasing or using parchment paper prevents sticking and ensures even baking.
Ignoring oven temperature: An inaccurate oven can lead to over or undercooked cookies. Always preheat and consider using an oven thermometer for accuracy.
Not letting the cookies cool: Letting cookies cool on the baking sheet for a few minutes balances moisture and texture, ensuring they don’t break apart.
Forgetting to rotate baking sheets: Uneven heat can cause cookies to bake unevenly; rotating the sheets halfway ensures consistent results.
Essential Techniques
Measuring Ingredients: Accurate measuring of ingredients is vital for successful baking. For flour, use the spoon and level method, whereas for liquids, a clear measuring cup provides visual accuracy. Measuring accurately helps maintain the cookie’s intended texture and flavor, so invest time in this essential technique.
Creaming Butter and Sugar: This technique aerates the mixture, creating a light and fluffy base for your cookies. Beat the butter and sugar until pale and fluffy, using an electric mixer for efficiency. Watch for visual cues like a light color change and fluffiness. Proper creaming can be the difference between a dense and delightful cookie.
Chilling the Dough: Allowing the dough to chill is crucial for flavor development and texture. It solidifies the fat in the dough, preventing excessive spreading and resulting in thicker cookies. Chilling for at least 30 minutes ensures a more structured cookie with enhanced flavor.
Cookie Scooping Techniques: Using a cookie scoop for even portions ensures uniform baking and proper rising. Invest in different sizes of scoops to create cookies of various sizes. When placing dough on sheets, maintain distance to allow for spreading during baking.
Pro Tips for Perfect Chocolate Chip Cookies
1. Always use high-quality ingredients; they significantly affect taste and texture results. Opt for good butter and chocolate for the best outcome.
2. Experiment with adding a pinch of sea salt to enhance the chocolate flavor and add depth.
3. Try chilling the dough overnight; this allows for deeper flavor development and better texture.
4. For crispy cookies, bake slightly longer; for softer cookies, remove when they appear underbaked.
5. Always preheat your oven fully before baking; starting with a hot oven is key to achieving the right texture.
6. Rotate your baking sheets halfway through baking to ensure even baking.
7. When adding nuts or additional chocolate, ensure an even distribution within the dough for balanced bites.
8. Allow the cookies to cool fully on a wire rack to achieve the desired firmness without becoming soggy.
Variations and Adaptations
Incorporate ingredients like nuts, dried fruits, or various chocolates for added flavor and texture. Adding walnuts gives a nice crunch, while dried cranberries can provide a sweet-tart balance. For a seasonal twist, try adding pumpkin spice during the fall for a festive cookie alternative.
Seasonal adaptations can take advantage of winter flavors, such as peppermint chips around the holidays, while chocolate-orange combinations can refresh your summer baking. Opting for dairy-free versions is simple; substitute butter with coconut oil and use dairy-free chocolate chips for a delicious treat that accommodates dietary restrictions.
Flavor variations can range from espresso or peanut butter chips to coconut flakes, diversifying the cookie experience. If limb texture is desired, incorporating oats can provide a chewy element, adding to the cookie’s heartiness.
If presenting, consider forming the dough into bars or using mini muffin tins for a unique touch. Presentation can be elevated with a simple dusting of powdered sugar or a drizzle of chocolate on top before serving.
Serving and Presentation Guide
Plating chocolate chip cookies can be as simple as stacking them on a decorative plate or creating a cookie tower for gatherings. Garnish with sprigs of mint for a splash of color or sprinkle with flaky sea salt for added visual interest.
Consider serving warm cookies with a scoop of vanilla ice cream for an indulgent dessert. Alternatively, present them with a cup of freshly brewed coffee or tea for a cozy afternoon treat.
As for portion control, consider cutting cookies into smaller sizes for kid-friendly servings or serving alongside fruits for a balanced snack plate. Temperature-wise, cookies can be enjoyed warm right out of the oven or at room temperature, allowing for flexibility in serving.
Wine and Beverage Pairing
When pairing wine with chocolate chip cookies, a glass of dessert wine like Pedro Ximénez can enhance the sweetness of the cookie while complementing the rich chocolate. For a daring match, a stout beer can enrich the chocolate notes found within the cookie.
If you prefer non-alcoholic beverages, pair these cookies with milk or a creamy chai latte, ensuring a comforting complement to the sweetness. Also, pairing with coffee is a classic choice; the bitterness enhances the sweetness of the cookies, creating a satisfying flavor balance.
For tea lovers, a cup of black or herbal tea can be refreshing, offering a different kind of warmth last note with the sweetness of cookies.
Storage and Shelf Life
Proper storage is key to maintaining the freshness of your chocolate chip cookies. Store them in an airtight container at room temperature for up to one week. To maintain texture, consider placing a slice of bread in the container with the cookies to absorb moisture.
If freezing is necessary, allow the cookies to cool completely before placing them in a freezer-safe zipper bag. For best results, use parchment paper to separate layers of cookies to prevent sticking. The cookies can be frozen for up to three months, making them perfect for long-term storage.
For reheating, place frozen cookies in a preheated oven at 350°F for about 5-7 minutes until warm. This will revive the original texture and flavor profile of freshly baked cookies.
Make Ahead Strategies
To save time, consider preparing the cookie dough in advance. After mixing all the ingredients, scoop the dough into balls and freeze them individually on a baking sheet. Once frozen, transfer them to a freezer bag for easy access later on. This allows you to bake just the amount you need when the craving hits!
If you prefer a more structured approach, prepare the dough and refrigerate it. When ready to bake, simply scoop, shape, and bake directly from the fridge.
It’s important to note that chilling the dough also enhances the flavor and texture, so allowing the dough to sit overnight can have great benefits.
For added freshness, experiment with adding a touch of vanilla or almond extract just before baking if preparing ahead.
Scaling Instructions
Scaling your chocolate chip cookie recipe can be an easy way to cater to larger crowds or smaller gatherings. To halve the recipe, simply divide each ingredient by two, keeping the ratio intact for flavor. For doubling or tripling, ensure you have mixing bowls large enough to accommodate the larger quantities.
Adjust cooking times slightly when increasing the batch size, as larger quantities may require more time in the oven. Always check for doneness visually, looking for the classic golden edges.
When scaling, consider the baking sheets’ capacity. If you do not have a large enough space, bake multiple batches instead. You can store any excess dough in the refrigerator or freezer.
Nutritional Deep Dive
Each chocolate chip cookie contains a balance of macronutrients, with carbohydrates from the flour, fats from the butter, and proteins from the eggs. Understanding the macro breakdown can help track your dietary intake, particularly if you are conscious of portion sizes.
Micronutritionally, cookies provide minimal vitamins, but they can be enhanced with added ingredients like nuts, which supply healthy fats and additional fiber.
For those focused on health, incorporating whole grain flour or reducing sugar can make a significant difference in calorie count while still delivering delightful flavors.
Pay attention to portion sizes, as it’s easy to indulge in multiple cookies, leading to increased calorie consumption. Consider baking smaller, bite-sized cookies to make calorie management easier while still enjoying treats.
Dietary Adaptations
For gluten-free baking, substitute regular flour with a gluten-free flour blend, ensuring to check for a suitable consistency.
For those who are dairy-free, use plant-based butter and chocolate to maintain flavor without sacrificing texture. A vegan version can easily be made by switching out eggs for a flaxseed mixture or substituting with applesauce.
Low-carb or keto dieters can try almond flour replacements as a base, adjusting other ingredients accordingly for sweetness. This adaptation still allows for satisfying chocolate chip cookies without traditional carbs.
For low-FODMAP diets, also ensure the chocolate you choose is certified low-FODMAP and consider reducing the butter for better digestion.
Troubleshooting Guide
If you find your cookies are too flat, try chilling the dough longer or increasing the flour ratio slightly.
If cookies are tough, reduce the mixing time once wet and dry ingredients combine. You can also ensure you’re not overbaking; they should come out slightly soft in the middle to stay chewy.
Flavor balance can be adjusted by adding a pinch of salt, ensuring all sweet flavors stand out without being overwhelmingly sweet.
If using substitutions, maintain ratios where possible; too much variation can lead to altered texture and taste.
For burnt bottoms, consider using parchment paper or silicone baking mats to provide even heat distribution.
Watch for proper ingredient temperatures; these can greatly affect how the dough interacts and integrates during baking.
Recipe Success Stories
Feedback from the community continually highlights the delight that this chocolate chip cookie recipe brings to gatherings. Many have shared personal twists, such as adding sea salt flakes on top for enhanced flavor or incorporating family secret ingredients for a memorable touch.
Others have found success in adapting the recipe for special diets, documenting their journey of transforming the classic cookie into gluten-free or vegan versions while maintaining the intended essence of the treat.
When using this recipe for school bake sales or family events, it’s traveled well, often disappearing within minutes due to enthusiastic taste testers.
Story after story affirms the nostalgic connection these cookies bring, reminding many of their childhood baking experiences.
Photography enthusiasts frequently share beautiful shots of their cookies, encouraging others to share their achievements and present their interpretations of this timeless recipe.
Frequently Asked Questions
1. Can I freeze chocolate chip cookie dough? Yes, you can freeze the cookie dough for up to three months. Just scoop the dough onto a baking sheet, freeze until solid, then transfer to an airtight container or zipper bag. Bake directly from frozen state; just add a couple of minutes to the baking time.
2. What is the best way to store baked chocolate chip cookies? Keep your cookies in an airtight container at room temperature for up to a week. Adding a slice of bread can help retain moisture and prevent them from becoming too dry.
3. Why are my chocolate chip cookies flat? Flat cookies can result from using melted butter, not enough flour, or over-mixing the batter. Ensure your butter is softened and not melted, measure flour correctly, and mix the dough just until combined.
4. Can I use brown sugar instead of white sugar? Yes, brown sugar will make your cookies chewier and add a slight molasses flavor. Using a combination of both can provide the best taste and texture.
5. What can I substitute for eggs in this recipe? You can replace each egg with 1/4 cup of unsweetened applesauce, a mashed banana, or a flaxseed meal mixed with water (1 tablespoon flaxseed meal with 2.5 tablespoons water, let sit for 5 minutes).
6. Can I make these cookies without chocolate chips? Absolutely! Consider replacing chocolate chips with dried fruits, nuts, or coconut flakes for a different flavor profile.
7. How can I get thicker cookies? For thicker cookies, chill the dough for at least an hour before baking, and try using a higher proportion of brown sugar and including a bit more flour.
8. What’s the ideal baking temperature for chocolate chip cookies? The ideal temperature is usually around 350°F (175°C), providing even baking and optimal browning.
9. Are there vegan options for this recipe? Yes, substituting butter with vegan butter and using non-dairy chocolate chips will keep the flavor profile intact while accommodating a vegan lifestyle.
10. How do I prevent cookies from burning on the bottom? Use parchment paper or a silicone mat on your baking sheets for even baking and to prevent direct contact with the baking surface, which can get too hot.
11. Should I let my cookies cool before eating? Let cookies cool on the baking sheet for a few minutes to prevent them from breaking apart. They will firm up as they cool, providing the perfect texture.
12. Is it possible to make cookie bars instead of individual cookies? Yes, simply spread the dough into a greased baking pan and bake until golden brown. Once cooled, cut into squares for easy serving.
Additional Resources
For those wanting to explore more cookie recipes, consider trying oatmeal raisin cookies or peanut butter cookies for variety. Understanding the baking techniques, like proper ingredient measuring or dough chilling, can elevate your baking skill and deliciousness.
Explore ingredient information to learn more about substitutions, storage tips, or variations that lend their flair to traditional recipes. It’s helpful to follow guides on kitchen equipment, ensuring you have everything you need for successful baking.
Also, consider seasonal variations that incorporate festive flavors, such as pumpkin spice for autumn or peppermint for the winter holidays, to keep things exciting in the kitchen.
Join the Conversation
We invite you to share your baking experiences on social media with us! Share photos of your chocolate chip cookies and tag us to inspire others. Your feedback not only enriches the community but also celebrates the diversity of baking experiences.
Join recipe review sessions and provide tips based on your own trials and errors; this is where the cooking community thrives and learns together. Discussing your variations or secret ingredients can motivate others to experiment and innovate in their baking endeavors.
Invite friends and family to enjoy these cherished cookies together, creating vibrant memories around the kitchen, as shared cooking experiences have a unique ability to strengthen bonds.
The Recipe
Chocolate Chip Cookies
Serves: 24 cookies
Prep Time: 15 mins
Cook Time: 10 mins
Total Time: 25 mins
Kitchen Equipment Needed
Mixing bowl
Electric mixer (optional)
Baking sheet
Parchment paper or silicone mat (optional)
Measuring cups and spoons
Cookie scoop or spoon
Ingredients
1 cup unsalted butter, softened
3/4 cup granulated sugar
3/4 cup brown sugar, packed
1 teaspoon vanilla extract
2 large eggs
2 1/4 cups all-purpose flour
1 teaspoon baking soda
1/2 teaspoon salt
2 cups semi-sweet chocolate chips
Directions
Preheat your oven to 350°F (175°C).
In a mixing bowl, cream together the softened butter, granulated sugar, brown sugar, and vanilla extract until light and fluffy.
Add in the eggs one at a time, mixing well after each addition.
In a separate bowl, combine the flour, baking soda, and salt. Gradually add this dry mixture to the wet ingredients, mixing until just combined.
Fold in the chocolate chips until evenly distributed throughout the dough.
Using a cookie scoop or spoon, drop rounded tablespoonfuls of dough onto a baking sheet lined with parchment paper, spacing them about 2 inches apart.
Bake in the preheated oven for 9-11 minutes, or until the edges are golden and the centers look slightly underbaked.
Allow cookies to cool on the baking sheet for a few minutes before transferring them to a wire rack to cool completely.
Recipe Notes
For chewier cookies, chill the dough for at least 30 minutes before baking.
Feel free to add nuts, such as pecans or walnuts, for extra texture.
Store leftover cookies in an airtight container for up to a week.
Best Chocolate Chip Cookies – Soft, Chewy, and Easy
Delicious Chocolate Chip Cookies: A Classic Comfort Treat
⚖️
Difficulty
Easy
⏲️
Prep Time
15 mins
🕒
Cook Time
10 mins
⏱️
Total Time
25 mins
🍽️
Servings
24 cookies
When you think of classic baked goods, chocolate chip cookies often come to mind as a comforting favorite. These delightful morsels, speckled with rich, melty chocolate chips, evoke nostalgia and warmth, conjuring memories of family gatherings and cozy afternoons spent with loved ones. The simple act of biting into a perfectly baked chocolate chip cookie brings a satisfying crunch followed by a soft, chewy center that melts in your mouth.
There’s something irresistible about the balance of buttery dough and sweet chocolate, making them a staple dessert in countless households. Whether enjoyed warm out of the oven paired with a glass of cold milk or as an after-school treat, chocolate chip cookies are sure to brighten anyone’s day.
Quick Recipe Highlights
Flavor Profile: These chocolate chip cookies boast a buttery sweetness balanced with a rich chocolatey flavor that creates a mouthwatering experience.
Texture: Expect a delightful texture that combines crispy edges with a soft, gooey center, satisfying any cookie lover’s cravings.
Aroma: Freshly baked cookies fill the kitchen with an inviting aroma of melted chocolate and warm vanilla, stirring appetite and nostalgia alike.
Visual Appeal: Golden brown cookies with melty chocolate chips provide an enticing visual delight that’s hard to resist.
Skill Level Needed: This recipe is quite simple, making it perfect for novice bakers and seasoned pros alike.
Special Equipment: A mixing bowl, measuring cups, baking sheets, and parchment paper are all you need to create these tasty treats.
Recipe Overview
Difficulty Level: Baking chocolate chip cookies is easy and straightforward. Anyone can succeed with this beginner-friendly recipe.
Category: This recipe falls under desserts, easily satisfying sweet cravings with a beloved classic.
Cuisine: Chocolate chip cookies have American roots, having become a popular baked good internationally through their deliciousness.
Cost: Making chocolate chip cookies is budget-friendly. The ingredients are common and typically inexpensive.
Season: Chocolate chip cookies are perfect for any season, but they shine especially around holidays and festive occasions.
Occasion: Great for parties, gatherings, or simply enjoying at home, they make every moment a bit sweeter.
Why You’ll Love This Recipe
The rich taste and satisfying texture of these chocolate chip cookies will have you reaching for more. Each bite delivers a perfect combination of sweetness from the dough and decadence from the chocolate, creating a symphony of flavors. This balanced profile makes them a delightful treat anytime.
Convenience is key in this recipe, as it requires minimal ingredients and minimal time. With just a few simple steps, you can whip up a batch of cookies that will impress friends and family without spending all day in the kitchen.
Nutritionally, while cookies are typically indulgent, these can be part of a balanced diet when enjoyed in moderation. They can even be made with whole wheat flour or dark chocolate for a healthier twist.
Socially, baking these cookies can bring people together, whether it’s sharing them with family or gifting them to friends, enhancing every gathering’s warmth.
Lastly, the cost-effectiveness of chocolate chip cookies makes them accessible. Most ingredients are pantry staples, and baking them at home is far cheaper than buying ready-made cookies from the store.
Historical Background and Cultural Significance
The origin of chocolate chip cookies dates back to the 1930s when Ruth Wakefield invented them at the Toll House Inn in Massachusetts. The story goes that she originally intended to make chocolate cookies but discovered she didn’t have any baking chocolate. Instead, she chopped up a bar of Nestlé semi-sweet chocolate, which gave birth to the cookie we know and love today.
This recipe quickly gained popularity and soon became a staple in American households. Over the years, the chocolate chip cookie has evolved, inspiring numerous variations while maintaining its status as a beloved treat.
Culturally, these cookies symbolize comfort and home. They have been portrayed in media, films, and books as quintessentially American, reinforcing their significance in our food culture.
Regional variations exist, especially as various cultures put their own unique spins on this classic, incorporating different types of chocolate, nuts, or even spices to create regional favorites.
Ingredient Deep Dive
Flour: Flour is the base of any cookie dough, providing structure and holding everything together. All-purpose flour is commonly used, but specialty flours like whole wheat can add depth.
Butter: Essential for flavor, butter contributes to the richness of the cookies. It also affects texture, lending to that delightful chewiness. Always choose high-quality butter for the best results.
Granulated Sugar: This sweetens the cookies and helps to create a nice crisp texture. It’s important to measure correctly, as too much sugar can lead to overly sweet cookies.
Brown Sugar: Brown sugar adds moisture and a caramel-like flavor due to its molasses content. This ingredient is key to achieving that chewy texture in chocolate chip cookies.
Chocolate Chips: The star ingredient! Whether you opt for semi-sweet, dark, or milk chocolate, the type of chocolate chips you choose can change the overall flavor profile of your cookies.
Common Mistakes to Avoid
Overmixing the dough can lead to tough cookies. Mix just until combined to keep them tender.
Not chilling the dough can cause cookies to spread too much during baking, resulting in flat, crispy cookies.
Using expired ingredients, especially baking soda, can prevent cookies from rising and getting fluffy.
Forgetting to preheat the oven can result in uneven baking and undesirable textures.
Baking on ungreased or parchment-lined sheets can lead to sticking and difficult cookie removal.
Oversized cookie portions may result in uneven baking, so be sure to use consistent scoop sizes.
Choosing the wrong type of chocolate can affect taste; ensure you select chocolate you truly enjoy.
Not allowing cookies to cool on the baking sheet for a few minutes can cause them to break when moved to a cooling rack.
Essential Techniques
The creaming method is vital when making chocolate chip cookies. This technique involves mixing butter and sugar until light and fluffy, which incorporates air and creates a lighter texture. To master this, make sure your butter is at room temperature and beat until you achieve the right consistency.
Measuring ingredients accurately is crucial for success in this recipe. Using a kitchen scale can provide more precision, leading to consistent results. Always spoon flour into your measuring cup and level off with a knife instead of scooping directly from the bag.
Another important technique is properly folding in the chocolate chips. Use a spatula to gently incorporate them into the dough, being cautious not to overmix and deflate the dough.
Pro Tips for Perfect Chocolate Chip Cookies
To achieve perfectly uniform cookies, use an ice cream scoop to portion out the dough. This ensures each cookie is the same size, helping them bake evenly.
Make sure your baking sheets are cool before placing new dough on them. Baking on a hot sheet can lead to premature spreading, which affects cookie texture.
For an extra touch, sprinkle sea salt on top of the cookies just before baking. This enhances the sweetness of the chocolate and adds a delightful contrast.
Consider using a combination of chocolate chips for a more complex flavor; semi-sweet, dark, and white chocolate create an excellent mix.
Chilling the dough for at least 30 minutes prior to baking can enhance the flavor and texture, yielding thicker cookies.
Store your cookies in an airtight container to maintain freshness and prevent them from becoming stale too quickly.
For crispier cookies, flatten each dough ball slightly before baking. This can help them spread more evenly.
Finally, experiment with mix-ins like nuts or dried fruits for added texture and flavor.
Variations and Adaptations
Chocolate chip cookies lend themselves well to various adaptations. You can easily incorporate nuts, such as walnuts or pecans, for a delightful crunch.
Seasonal adaptations like adding crushed peppermint candies during the winter or incorporating pumpkin spice in the fall can add a festive twist.
For dietary modifications, gluten-free flour can be substituted for those with gluten sensitivities, while dairy-free chocolate chips can cater to lactose intolerance.
Flavor variations can also include using flavored extracts, like almond or coconut, to add depth to the cookie dough.
Presenting your cookies in creative ways, such as cookie stacks or towering delights, can enhance their visual appeal at gatherings.
When it comes to texture modifications, increasing the brown sugar content can yield an even chewier cookie, perfect for those who prefer softer textures.
Serving and Presentation Guide
For a stunning presentation, stack a few cookies on a decorative plate. You may also sprinkle a touch of sea salt on top for added flair.
Consider garnishing with fresh berries or a scoop of ice cream served alongside the cookies to elevate the dessert experience.
Serving chocolate chip cookies slightly warm from the oven enhances their flavor and aroma. Pair them with a chilled glass of milk for a classic combination.
For portion control, cut the cookies in half if they are particularly large, offering a smaller serving size while still enjoying the taste.
If presenting at an event, consider using tiered serving trays for an attractive display that invites guests to indulge.
Wine and Beverage Pairing
A classic pairing for chocolate chip cookies is a glass of milk, which complements the sweetness of the chocolate. Try almond milk for a nutty twist.
For wine lovers, consider a sweet red wine like a Zinfandel, which balances the richness of the cookies well.
Another delightful pairing would be a dessert wine, such as port, which enhances the cookie’s chocolate flavors.
If you’re looking for non-alcoholic options, a cup of rich coffee brewed with chocolate notes can create a wonderful tasting experience alongside your cookies.
When serving cookies with tea, opt for a black tea with chocolate or vanilla flavorings to create a harmonious pairing.
Storage and Shelf Life
To keep your cookies fresh, store them in an airtight container at room temperature. They will typically last up to a week under proper conditions.
If you want to adapt the shelf life further, consider refrigerating them, where they can last for up to two weeks.
For longer storage, homemade chocolate chip cookies can be frozen. Place them in an airtight container or freezer bag layered with parchment paper to prevent sticking.
Signs of spoilage include a change in texture or aroma, indicating it’s time to discard them.
When ready to enjoy frozen cookies, allow them to thaw at room temperature, or pop them in the microwave for a few seconds to bring back their freshly baked taste.
Make Ahead Strategies
Preparing cookie dough in advance allows for quick baking whenever the craving strikes. You can chill the prepared dough for up to 3 days in the refrigerator before baking.
Dough can also be rolled into balls and frozen, making future baking as easy as pulling cookies out and baking straight from the freezer. Just add a couple of extra minutes to the baking time.
Quality is maintained by ensuring dough is stored in a tightly sealed container or freezer bag to avoid freezer burn.
When storing between steps, divide the dough into portions and wrap them individually, allowing for quick access later.
Reheating cookies can be done in the oven for a few minutes or microwave to bring back that fresh-out-of-the-oven taste.
Fresh elements like nuts or chocolate chunks can be added just before baking for an even more delicious final product.
Scaling Instructions
If you need fewer cookies, simply halve the recipe and all corresponding ingredients. This is an easy way to enjoy these treats without excess.
For larger gatherings, you can double or triple the recipe, ensuring you have enough to share. Keep in mind that this may require baking in batches.
Adjust equipment as necessary; a larger bowl or multiple baking sheets may be needed to accommodate the increased volume of dough.
Timing modifications may be necessary; larger or denser cookies might take a bit longer to bake, so monitor closely while they bake.
Storage considerations should also be taken into account; ensure containers are large enough for larger batches, and don’t forget to label them.
Nutritional Deep Dive
Analyzing the macros of chocolate chip cookies reveals a balance of carbs, fats, and proteins, typically high in sugars due to the chocolate and sweeteners used.
Micronutrient analysis shows varying vitamins and minerals depending on ingredients; for example, using whole grains can enhance the nutritional profile.
Although treats like chocolate chip cookies should be enjoyed in moderation, they can contribute joy in a balanced diet, satisfying sweet cravings without overindulging.
Portion analysis is essential for those watching their intake; understanding serving sizes can help maintain moderation while enjoying these cookies.
Weight management tips can include pairing cookies with healthy snacks or balancing them with nutritious meals throughout the day to enjoy cookie treats without guilt.
Dietary Adaptations
For gluten-free adaptations, use a high-quality gluten-free flour blend, which provides similar results without the gluten.
Choosing dairy-free options, such as coconut oil and dairy-free chocolate chips, allows those with lactose intolerance or vegans to enjoy this treat.
A low-carb version can be achieved through almond or coconut flour and sugar alternatives, creating a cookie for those on keto diets.
Paleo-friendly adaptations would involve using natural sweeteners like honey or maple syrup and nut-based flours for a wholesome cookie.
For lactose-conscious individuals, substituting with dairy-free chocolate chips can still produce wonderfully sweet cookies.
Each modification allows everyone to enjoy chocolate chip cookies, proving their versatility in the kitchen.
Troubleshooting Guide
A common texture issue can arise if cookies end up too dry. This can often be remedied by adjusting the flour measurement or adding an extra egg yolk for moisture.
Flavor balance might be off if cookies taste too sweet; adding a pinch of salt can enhance flavors and balance the sweetness effectively.
Temperature problems can affect the outcome—ensure your oven is preheating properly, as incorrect temperatures can lead to underbaking or overbaking.
If you run into equipment challenges, using the wrong size baking sheets may affect the baking results, so always follow recommendations for best results.
Ingredient substitutions can lead to unexpected outcomes, especially in how ingredients react. Stick to the tried-and-true measurements or consult more experienced adjustments.
Timing concerns are also important; overbaking can lead to cookies that are hard instead of chewy. Watch closely during the last few minutes of baking.
Recipe Success Stories
Feedback from the community reveals some impressive results. People have shared stories about how their chocolate chip cookies became the star at gatherings, with requests for recipes from their friends and family.
Many bakers enjoy experimenting with variations. One reader adapted the recipe by adding nuts and received rave reviews, declaring them the best cookies ever made.
Photography tips shared by readers have enhanced their baking processes, encouraging them to capture mouthwatering moments, from mixing to the finished product, promoting their baking creations on social platforms.
Others have also provided delightful stories of hosting cookie decorating parties, bonding with children or friends over baking sessions that produced delicious memories.
The community consistently praises the ease and reliability of the recipe, making it a go-to for busy weeknights or spontaneous gatherings.
Frequently Asked Questions
Can I use different types of chocolate chips?
Yes! Feel free to mix and match different types of chocolate chips, such as semi-sweet, milk, or dark chocolate to suit your taste preferences.
How do I know when my cookies are done baking?
The cookies should be golden brown on the edges but still soft in the center. They will continue to cook slightly after being removed from the oven.
Can I freeze cookie dough?
Absolutely! You can freeze cookie dough by rolling it into balls and placing them in an airtight container. They can last in the freezer for up to 3 months.
Why are my cookies flat?
Cookies may turn out flat if the dough is too warm, or if there’s too much sugar or not enough flour. Ensure you’re measuring ingredients accurately.
Can I use brown sugar instead of granulated sugar?
Yes, you can substitute brown sugar for granulated sugar, but it may result in a chewier texture and a richer flavor.
What can I substitute for eggs?
You can use flaxseed meal mixed with water or applesauce as an egg substitute to make these cookies vegan.
How should I store leftover cookies?
Store leftover cookies in an airtight container at room temperature. They should stay fresh for about a week.
Can I double the recipe?
Definitely! You can easily double the recipe, but keep in mind you may need additional baking sheets or time depending on your oven’s capacity.
Should I chill my dough before baking?
Chilling the dough helps improve the flavor and prevents excessive spreading during baking. Aim to chill it for at least 30 minutes.
Can I add nuts to my cookies?
Yes! Adding nuts like walnuts or pecans can enhance the texture and flavor, making them even more delightful!
Additional Resources
If you’re looking to explore more delicious recipes, check out other baked goods like brownies or oatmeal cookies for variety. Also, discover technique guides that cover the nuances of baking to improve your skills further.
Adding ingredient information can help you choose the best options for your baking endeavors. Plus, considering seasonal variations can inspire you to adapt this recipe with seasonal flavors or ingredients.
Ensure that you have the right equipment recommended for baking, as it can greatly influence your experience and success in creating these delightful cookies.
Join the Conversation
We encourage you to share your chocolate chip cookie creations with us! Engage with us on social media by posting your cookie photos or stories, and don’t forget to tag us.
Your feedback and recipe reviews not only help us improve but also inspire fellow bakers. Tell us about your favorite variations or adaptations you’ve made to this classic recipe.
Connect with the baking community by exchanging tips and experiences. We love to hear about your culinary adventures in the kitchen and how these cookies have added sweetness to your life.
Embrace the joy of baking and the memories created through this simple yet beloved treat. Every batch tells a story, and we can’t wait to hear yours!
The Recipe
Chocolate Chip Cookies
Serves: 24 cookies
Prep Time: 15 mins
Cook Time: 10 mins
Total Time: 25 mins
Kitchen Equipment Needed
Mixing bowls
Measuring cups and spoons
Spatula
Baking sheets
Parchment paper
Ingredients
2 1/4 cups all-purpose flour
1/2 teaspoon baking soda
1 cup unsalted butter, softened
1 cup granulated sugar
1 cup packed brown sugar
1 teaspoon salt
2 teaspoons pure vanilla extract
2 large eggs
2 cups semi-sweet chocolate chips
Directions
Preheat your oven to 350°F (175°C) and line baking sheets with parchment paper.
In a small bowl, combine flour and baking soda; set aside.
In a large mixing bowl, cream together the softened butter, granulated sugar, brown sugar, and salt until light and fluffy.
Add the vanilla extract and eggs, one at a time, mixing well after each addition.
Gradually add the flour mixture to the wet ingredients, mixing just until combined.
Fold in the chocolate chips gently.
Scoop tablespoon-sized amounts of dough onto the prepared baking sheets, leaving space between each for spreading.
Bake in the preheated oven for 9-11 minutes, or until the edges are golden and the centers are slightly soft.
Remove from the oven and let cool on the baking sheets for a few minutes before transferring to a wire rack to cool completely.
Recipe Notes
For chewy cookies, don’t overbake them; remove when slightly underdone.
Feel free to customize with nuts, dried fruits, or different chocolate types.
Cookies can be stored in an airtight container for up to a week.
For even more flavor, try toasting the nuts before adding them to the cookie dough.
Best Crispy Garlic Butter Chicken Thighs (Quick & Easy)
Crispy Garlic Butter Chicken Thighs: A Flavorful Delight
⚖️
Difficulty
Medium
⏲️
Prep Time
10 mins
🕒
Cook Time
25 mins
⏱️
Total Time
35 mins
🍽️
Servings
4
Welcome to the world of Crispy Garlic Butter Chicken Thighs! If you’re looking for a dish that tantalizes your taste buds and fills your kitchen with mouthwatering aromas, then you’ve come to the right place. This recipe combines the rich flavor of garlic, the lusciousness of butter, and the crispy skin of chicken thighs, resulting in a dish that is both comforting and elegant. Perfect for weeknight dinners or special occasions, this chicken will surely impress your family and friends.
The delightful crunch of the skin meets the juicy, tender meat, creating a symphony of flavors and textures that dance in your mouth. Infused with aromatic garlic and enhanced by the richness of butter, every bite is a decadent experience. Serve it with your favorite sides, and you have a meal that looks as good as it tastes.
Quick Recipe Highlights
Flavor Profile: Savory garlic combines beautifully with buttery notes, complemented by a hint of freshness from herbs.
Texture: Enjoy a crispy outer layer while sinking into the juicy tenderness of the chicken thighs.
Aroma: The scent of garlic sizzling in butter fills your kitchen, creating an inviting atmosphere.
Visual Appeal: Golden brown chicken thighs are visually stunning, garnished with fresh herbs that pop against the rich color.
Skill Level Needed: This recipe requires medium cooking skills, suitable for home cooks looking to impress.
Special Equipment: A heavy skillet or cast-iron pan is recommended for achieving the best crispiness.
Recipe Overview
Difficulty Level: The medium difficulty stems from the frying technique and ensuring the chicken is cooked properly while maintaining crispiness.
Category: This dish falls under both poultry and main course categories, making it versatile for any meal.
Cuisine: While rooted in classic cooking methods, the garlic butter flavor profile gives it a universally appealing twist perfect for various cuisines.
Cost: The approximate cost for this recipe is budget-friendly, primarily featuring chicken and pantry staples.
Season: This dish shines in any season, but it’s particularly comforting during colder months.
Occasion: Ideal for casual dinners, family gatherings, or date nights.
Why You’ll Love This Recipe
This Crispy Garlic Butter Chicken Thighs recipe will captivate your taste buds with its delightful waves of flavor and pleasing textures. The robust seasoning enhances the natural flavor of the chicken, creating a dish that’s simply irresistible. The crispy skin adds a satisfying crunch, while the juicy meat offers a tender and fulfilling experience that brings comfort to the table.
In terms of convenience, this recipe is straightforward and doesn’t require any complicated techniques. It’s accessible for home cooks of all levels, making it a great choice for weeknight meals when you want something impressive yet easy to make. Prepare it in just 35 minutes, and you’ll have a delicious meal ready to share.
Nutritionally, chicken thighs are an excellent source of protein, and cooking them in garlic butter adds a flavorful richness without compromising on health. With careful portioning, this dish can fit into a balanced diet while still feeling indulgent.
On social occasions, nothing brings people together quite like a delicious meal. Crispy Garlic Butter Chicken Thighs serve as a crowd-pleaser, perfect for sharing with friends and family, igniting smiles and positive conversation around the dinner table.
Finally, the affordability of chicken thighs and basic ingredients means you can deliver a spectacular meal without breaking the bank. This recipe epitomizes the magic of simple cooking, turning everyday ingredients into a memorable dining experience.
Historical Background and Cultural Significance
Crispy Garlic Butter Chicken Thighs, while embodying familiarity, also tell a story of culinary evolution. Chicken has been a staple in various cultures for centuries, often favored for its versatility and nutritional benefits. Garlic, with its ancient roots in both cuisine and medicine, has been used historically to enhance flavor and promote health.
The cultural significance of this dish lies in its ability to bring families together. In many cultures, sharing a meal is an intimate act of love and connection. The method of frying chicken with flavorful seasonings has been celebrated globally, leading to myriad regional interpretations that showcase local ingredients and cooking styles.
As culinary practices evolved, methods like pan-frying emerged as accessible cooking techniques, allowing home cooks to explore flavor combinations that draw from traditional recipes. The marriage of garlic with rich butter exemplifies how simple ingredients can create profound flavors, making it a beloved choice in many households.
Finally, regional variations of garlic butter chicken exist in various forms across the globe, showcasing different spices, cooking methods, and cultural significance. Each interpretation offers a unique twist, adding to the rich tapestry of culinary history that this simple yet flavorful dish represents.
Ingredient Deep Dive
Chicken Thighs: A favored cut due to their richer flavor and juiciness compared to chicken breasts, chicken thighs offer versatility in cooking and are often more affordable. When selecting, look for thighs with even fat distribution; dark meat tends to hold moisture better during cooking. Store in the refrigerator for up to two days and freeze for longer preservation. For substitutions, boneless, skinless thighs can be used for a leaner option.
Garlic: One of the oldest cultivated plants, garlic is not only flavorful but also linked to several health benefits, including its natural antibiotic properties. Fresh garlic cloves are best for this recipe; look for ones that are firm and plump. Store in a cool, dark place. Dried garlic or garlic powder can serve as substitutes in a pinch, although the flavor may vary.
Butter: Enhancing the dish’s richness, butter adds flavor and aids in achieving that coveted crispy texture. European-style butter contains a higher butterfat content, which contributes to a creamier taste. Keep butter in the refrigerator and use within its expiration date. For a dairy-free alternative, consider ghee or plant-based butter.
Common Mistakes to Avoid
Not Patting the Chicken Dry: Ensuring the chicken is pat-dried helps achieve crispy skin when frying.
Overcrowding the Pan: Cooking too many pieces at once can lead to steaming rather than frying. Allow enough space for each piece to cook evenly.
Using Cold Ingredients: Bringing chicken and butter to room temperature before cooking promotes even cooking.
Failing to Preheat the Pan: A hot pan is crucial to developing that crispy texture needed for perfect chicken thighs.
Ignoring Internal Temperature: Cook chicken to an internal temperature of 165°F for safety and optimal texture.
Skimping on Seasoning: Ensure each piece is well-seasoned to avoid blandness; flavor boosts with garlic and herbs are essential.
Cooking on High Heat: While a searing temperature is necessary, too high can burn the outside before the inside cooks through.
Not Letting the Chicken Rest: Resting the chicken after cooking allows juices to redistribute, keeping it moist and flavorful.
Essential Techniques
Pan-Frying: This technique is crucial for achieving that crispy texture. Start with a preheated pan, allowing the fat to coat the bottom. Always place the chicken skin-side down for even rendering of fat. Look for a golden brown color as an indicator of doneness but be mindful not to flip too early.
Resting: Resting is an essential technique that allows the juices to settle in the chicken without escape. After cooking, let your chicken sit for at least 5 minutes. This ensures each bite is juicy and maximizes flavor.
Flavor Infusion: Sautéing garlic in butter not only flavors the chicken but also creates a delightful sauce. Monitor the garlic closely to prevent burning; it should turn golden and fragrant, not dark brown.
Pro Tips for Perfect Crispy Garlic Butter Chicken Thighs
For maximum crispiness, use a cast-iron pan; its heat retention is ideal for frying.
Marinate the chicken thighs in garlic and herbs for at least an hour to enhance flavor.
Experiment with different herbs like rosemary or thyme for added fragrance and taste.
Consider basting the chicken during cooking to keep it moist while adding extra flavor.
Use a meat thermometer to check for doneness, ensuring the meat reaches 165°F.
Pair with fresh lemon juice after cooking to enhance the richness and add a hint of acidity.
For leftovers, store chicken in an air-tight container to maintain crispness when reheating.
Try adding a splash of white wine to the pan after cooking to create a simple, delicious sauce.
Variations and Adaptations
Regional Variations: Explore Italian-inspired versions by adding basil and a splash of balsamic vinegar for an aromatic twist.
Seasonal Adaptations: For a fall twist, incorporate pumpkin puree and spices like nutmeg to create a seasonal dish.
Dietary Modifications: To make this dish gluten-free, ensure all seasonings are labeled gluten-free or opt for fresh herbs.
Flavor Variations: Spice lovers can introduce cayenne pepper or chili flakes for an exciting kick.
Texture Modifications: For added crunch, serve alongside freshly made coleslaw or crispy roasted vegetables.
Presentation Alternatives: Spoon the buttery sauce over the chicken before serving for a visually appealing finish.
Serving and Presentation Guide
When plating Crispy Garlic Butter Chicken Thighs, use a large, shallow bowl to showcase the golden chicken. Garnish with freshly chopped parsley or chives for a splash of color. Consider serving alongside roasted vegetables or a fresh salad for a balanced meal. A drizzle of the garlic butter sauce enhances both flavor and presentation when served warm over the chicken.
Temperature is crucial; chicken should be served hot, ensuring that the delicious flavors burst forth with each bite. For portion control, consider serving one thigh per person and complementing it with several side dishes for a fuller plate.
Wine and Beverage Pairing
For wine pairings, consider a crisp white wine like Sauvignon Blanc or a light Pinot Grigio, complementing the richness of the garlic butter beautifully. If you prefer red, a light-bodied Pinot Noir can provide an enjoyable contrast with its fruity notes.
For non-alcoholic alternatives, sparkling water with a slice of lemon or a refreshing iced tea can cleanse the palate. These drinks enhance the dining experience without overpowering the dish.
Storage and Shelf Life
To store leftover Crispy Garlic Butter Chicken Thighs, place them in an airtight container and refrigerate for up to 3 days. For longer shelf life, consider freezing the chicken, which can extend its freshness for up to 3 months. To reheat, use an oven to preserve crispiness or a microwave, although the latter may result in a softer texture.
Look for signs of spoilage like off odors or an unusual texture. Always make sure to thoroughly heat the chicken before serving, ensuring it reaches an internal temperature of 165°F.
Make Ahead Strategies
For a stress-free cooking experience, consider marinating the chicken thighs in the garlic butter mixture up to 24 hours in advance. This enhances flavor and minimizes prep time on the day of serving.
Store the marinated thighs in an airtight container in the refrigerator. Once ready to cook, the assembly process is simple. Any leftover garlic butter can be used as a drizzle during serving for added richness.
Scaling Instructions
If you plan to halve the recipe, simply adjust the ingredient measurements accordingly. Doubling or tripling the recipe is entirely possible; just ensure your cooking surface can accommodate the increased volume while maintaining spacing for effective frying.
Keep in mind that cooking times may be slightly affected when scaling the recipe, so monitor internal temperatures to ensure perfect doneness. For larger quantities, utilize multiple pans if necessary, and adjust storage containers for leftovers.
Nutritional Deep Dive
Exploring the macro breakdown, chicken thighs provide a substantial source of protein, while garlic contributes beneficial compounds such as allicin, known for its health properties. Fats from butter offer essential fatty acids, contributing to overall health when consumed in moderation.
While this dish is indulgent, mindful portioning allows it to fit into a balanced diet. Pairing with nutrient-rich sides can enhance the overall health benefits of the meal, providing fiber, vitamins, and minerals.
Dietary Adaptations
Gluten-Free: Use gluten-free sauces and check seasonings for gluten content to accommodate dietary needs.
Dairy-Free: Substitute the butter for plant-based butter alternatives to create a dairy-free version.
Vegan: Replace chicken with plant-based proteins like tofu or seitan, and use oil instead of butter for sautéing.
Low-Carb: Pair the chicken with non-starchy vegetables to keep carbohydrates low.
Keto: Emphasize high-fat elements, adjusting the butter quantity to suit a ketogenic diet.
Paleo: Focus on whole ingredients without dairy or refined sugars, resonating with Paleo principles.
Low-FODMAP: Limit garlic use or replace with garlic-infused oil to cater to sensitive digestion.
Troubleshooting Guide
If the chicken skin isn’t crispy, check if the oil was hot enough before adding the chicken; a properly heated pan is essential for achieving a crispy texture.
For flavor balance issues, consider adjusting seasoning during the cooking process, incorporating salt or herbs as needed.
If the chicken feels dry, ensure you’re monitoring cooking times closely; overcooking can lead to dryness in chicken thighs.
Encountering stickiness in the pan can indicate insufficient preheating; ensure your pan is hot before adding the chicken.
If your butter begins to burn, lower heat immediately, adding garlic later to preserve its flavor without bitterness.
When attempting substitutions, taste and adjust seasonings as alternative ingredients can alter flavor profiles significantly.
If the chicken is undercooked, return it to the heat and monitor closely until it reaches the safe cooking temperature of 165°F.
Recipe Success Stories
Our community of home cooks has celebrated this Crispy Garlic Butter Chicken Thighs recipe, sharing delightful variations and tips that have made it a household favorite. Readers enjoy experimenting with different herbs and spices, adding personal flair while maintaining the core flavors of the dish.
Some have cleverly incorporated seasonal ingredients, sharing their experiences and pictures on social platforms that showcase the dish’s visual appeal. Others have swapped out chicken thighs for alternatives, emphasizing how the underlying recipe remains robust and adaptable.
Frequently Asked Questions
1. Can I use chicken breasts instead of thighs? Yes, but cooking time may vary; chicken breasts require less time to cook than thighs.
2. Can I make this dish in advance? Yes, you can marinate the chicken beforehand and cook it fresh on serving day for optimal results.
3. What are the best sides to serve with this chicken? Roasted vegetables, mashed potatoes, or a simple salad complement this dish perfectly.
4. How do I store leftovers safely? Place cooled leftovers in an airtight container and refrigerate for up to three days.
5. Can I freeze the chicken? Yes, this dish can be frozen for up to three months. Make sure to seal it tightly before freezing.
6. How can I ensure my chicken stays juicy? Monitor cooking time carefully, and let the chicken rest after cooking to allow juices to redistribute.
7. What can I use instead of garlic? Consider garlic-infused oil, shallots, or leeks if you need a milder flavor or have sensitivities.
8. Can I make this dish spicy? Absolutely! Add crushed red pepper or cayenne to the garlic butter for some heat.
9. Is this recipe suitable for special diets? Yes, with modifications like dairy-free butter for lactose intolerance or low-FODMAP substitutions for sensitive diets.
10. What if my butter starts to burn? Lower the heat immediately. If it burns, discard it and start over to avoid bitterness in the dish.
Additional Resources
If you enjoyed this Crispy Garlic Butter Chicken Thighs recipe, check out related recipes for Garlic Butter Shrimp or Lemon Herb Roasted Chicken. Explore our technique guides for perfect frying and seasoning tips, or learn more about essential kitchen tools that make cooking delightful. Don’t forget to experiment with seasonal variations to keep your meals fresh and exciting throughout the year.
Join the Conversation
We’d love to hear about your experiences with this recipe! Share your photos and thoughts on social media, and leave reviews to inspire others. Explore the community by discussing variations and suggestions, fostering an enjoyable environment of culinary creativity. Together, we can learn and grow through the love of cooking!
The Recipe
Crispy Garlic Butter Chicken Thighs
Serves: 4
Prep Time: 10 mins
Cook Time: 25 mins
Total Time: 35 mins
Kitchen Equipment Needed
Cast-iron skillet or heavy frying pan
Meat thermometer
Cutting board
Knife
Tongs
Ingredients
4 bone-in, skin-on chicken thighs
4 tablespoons unsalted butter
6 cloves garlic, minced
Salt and pepper to taste
Fresh herbs (like parsley or thyme) for garnish
Directions
Pat chicken thighs dry with paper towels and season generously with salt and pepper.
In a cast-iron skillet, heat 2 tablespoons of butter over medium heat until melted and bubbling.
Place chicken thighs skin-side down in the skillet and cook for 12-15 minutes until the skin is golden brown and crispy.
Carefully flip the chicken and add the minced garlic and remaining butter to the pan.
Cook for another 10-12 minutes, basting with the melted butter and garlic until chicken reaches an internal temperature of 165°F.
Remove from heat and let rest for 5 minutes before serving. Garnish with fresh herbs.
Recipe Notes
Use fresh herbs to enhance flavor.
Adjust the cooking time based on the size and thickness of your chicken thighs.
For a spicy kick, add red pepper flakes to the butter and garlic mixture.
Easy Chicken Alfredo with Creamy Homemade Sauce
Delicious Chicken Alfredo: A Creamy Italian Classic
⚖️
Difficulty
Moderate
⏲️
Prep Time
10 mins
🕒
Cook Time
20 mins
⏱️
Total Time
30 mins
🍽️
Servings
4
Chicken Alfredo is a dish where comfort meets elegance, capturing the essence of classic Italian cuisine in every creamy bite. This irresistible recipe boasts tender pieces of chicken braised to perfection, enveloped in a rich and creamy Alfredo sauce that is an absolute delight. The taste of freshly grated Parmesan cheese melds beautifully with butter and heavy cream, creating a velvety smooth sauce that perfectly coats each strand of fettuccine. It’s a meal that warms the heart and satisfies the soul, making it a favorite for family dinners and special occasions.
What sets this Chicken Alfredo apart is the balance of flavors and textures. The sauce is luscious and creamy, while the well-seasoned chicken adds a satisfying depth to the dish. Served with a sprinkle of fresh parsley and extra Parmesan, the dish comes together visually as a masterpiece that looks as good as it tastes. Enjoying Chicken Alfredo is more than just a meal; it is a culinary experience that evokes feelings of bliss and contentment, making it a staple in many households.
Quick Recipe Highlights
Flavor Profile: This Chicken Alfredo offers a delightful combination of creamy, savory, and slightly nutty flavors from the Parmesan cheese, complemented by the savory goodness of perfectly cooked chicken.
Texture: The dish features a silky smooth sauce that clings to tender pasta, creating a mouthwatering contrast to the juicy chunks of chicken.
Aroma: The aroma is a mix of warm, cheesy notes with hints of garlic and freshly cracked black pepper, inviting you to indulge.
Visual Appeal: With its creamy white sauce, bright green parsley, and golden pieces of chicken, the dish is visually stunning and appetizing.
Skill Level Needed: The recipe requires basic cooking skills, making it accessible for home cooks who want to impress family or guests with restaurant-quality food.
Special Equipment: A large skillet and a pot for boiling pasta are essential, along with a good-quality knife for chopping chicken and herbs.
Recipe Overview
Difficulty Level: The Chicken Alfredo is categorized as moderate difficulty due to the need to cook the chicken perfectly while simultaneously preparing the sauce. However, with some practice, it becomes straightforward.
Category: This recipe fits perfectly within the categories of Italian cuisine and main courses. It brings together elements of traditional cooking with modern convenience.
Cuisine: Originating from Italy, Chicken Alfredo showcases the heart of Italian cooking focused on simple, high-quality ingredients. The dish has evolved globally, adapting to various preferences and ingredients.
Cost: The approximate cost of making Chicken Alfredo is quite reasonable, as ingredients like pasta, chicken breast, and cheese are typically affordable and widely available.
Season: Chicken Alfredo is a versatile dish that can be enjoyed year-round, but is particularly comforting during colder months.
Occasion: This dish is perfect for family gatherings, date nights, or festive occasions, as it exudes a sense of warmth and comfort.
Why You’ll Love This Recipe
The taste and texture appeal of Chicken Alfredo cannot be overstated; the creamy sauce glides over perfectly al dente fettuccine, creating a luxurious mouthfeel that is hard to resist. The slight saltiness of the freshly grated Parmesan cheese complements the richness of the cream, providing a flavor explosion in each bite. The addition of juicy, well-seasoned chicken takes this dish from simple to extraordinary, making it a favorite among both adults and children alike.
Convenience is another reason to love this Chicken Alfredo recipe. With just a few simple ingredients and quick cooking techniques, you can whip up a restaurant-quality meal in under an hour. It’s a fantastic option for busy weeknights or when entertaining guests. The method allows for multitasking, so you can prepare the sauce while the pasta cooks, ensuring everything is fresh and hot when served.
Nutritionally, Chicken Alfredo offers several benefits. The inclusion of chicken provides a good source of protein, while the pasta adds carbohydrates, making it a satisfying meal. By using whole grain pasta and controlling the amount of cream used, you can make this dish lighter without sacrificing flavor.
Socially, Chicken Alfredo is a dish that brings people together. Its comfort-food status makes it an excellent choice for gatherings, where everyone can enjoy a warm plate of creamy goodness. It easily sparks conversation and sharing among friends and family, enhancing the overall dining experience.
Lastly, the cost-effectiveness of this Chicken Alfredo recipe stands out. With a few pantry staples and some fresh ingredients, you can create a delicious, filling meal without breaking the bank. This dish promises tremendous value, both in flavor and satisfaction, making it a great addition to your culinary repertoire.
Historical Background and Cultural Significance
The origin of Chicken Alfredo is rooted in Italy, where it was originally known as “Fettuccine Alfredo.” The dish was created in the early 20th century by Alfredo di Lelio, a Roman restaurateur who prepared it for his wife. The recipe gained popularity among American tourists, eventually evolving into the creamy version we know today with the addition of chicken.
Culturally, Chicken Alfredo symbolizes the Italian tradition of simple cooking with fresh ingredients. It reflects the philosophy of using a few high-quality items to create something magnificent. Over the years, the dish has become a symbol of comfort food worldwide, loved for its richness and ease of preparation.
The recipe has seen numerous adaptations, especially in the United States, where creamy sauces became more prevalent in home cooking. Various interpretations have emerged, leading to a fusion of flavors and ingredients, influencing modern takes on the once-simple Italian classic.
Regional variations of Chicken Alfredo can be found globally, with each culture adding unique touches. From adding vegetables to experimenting with different proteins, the possibilities are endless. These adaptations showcase the dish’s versatility and its ability to transcend borders while still honoring its Italian roots.
Ingredient Deep Dive
Chicken
Chicken is the star of this recipe, providing a substantial protein source that is both versatile and beloved in many culinary traditions. Rich in essential nutrients like vitamin B6 and niacin, chicken supports metabolism and overall health. Selecting skinless chicken breasts ensures that the dish remains light and healthy while still packing a flavorful punch. Ideally, look for fresh, organic chicken, as this will enhance the dish’s flavor. Store your chicken in the fridge for up to two days or freeze it for longer storage, ensuring it remains safe to eat. If fresh is unavailable, consider using pre-cooked or rotisserie chicken as a convenient alternative.
Pasta
Fettuccine pasta is the ideal choice for Chicken Alfredo due to its flat, wide shape that beautifully holds the creamy sauce. This classic Italian pasta typically contains just flour and water, making it a hearty part of the meal. When selecting pasta, go for high-quality brands that offer a good bite and texture. Store dried pasta in a cool, dry place, while fresh pasta should be refrigerated. For a whole-grain or gluten-free option, various alternatives like zucchini noodles can also be used, adding a healthier twist to this classic comfort food.
Heavy Cream
The creamy element of this dish is created using heavy cream, which provides rich and luscious texture. It’s a dairy product that is high in fat, contributing to the velvety consistency of the sauce. Heavy cream can be found in most grocery stores; however, if a lighter option is preferred, half-and-half can work as a substitute, albeit resulting in a less rich sauce. Store heavy cream in the fridge and use it before the expiration date. For a dairy-free version, coconut cream offers a similar texture and flavor, making it a viable alternative.
Parmesan Cheese
Freshly grated Parmesan cheese is essential for imparting the distinct umami flavor to this dish. This hard cheese, typically made from cow’s milk, is rich in calcium, protein, and essential nutrients. Choosing authentic Parmigiano-Reggiano adds a touch of luxury to your Chicken Alfredo. When shopping for cheese, look for whole blocks and grate it yourself for the best flavor and texture. Store Parmesan in the refrigerator wrapped tightly to maintain its freshness. For vegan or dairy-free substitutions, nutritional yeast can provide a cheesy flavor without dairy.
Common Mistakes to Avoid
Overcooking the chicken: Cook chicken until golden brown and just cooked through; overcooking can lead to dry, tough meat.
Using pre-shredded cheese: Pre-shredded cheese contains anti-caking agents, which can affect the sauce’s smoothness. Always opt for fresh-grated cheese.
Cooking pasta too long: Aim for al dente texture for the best mouthfeel; over-boiled pasta will become mushy and watery in the sauce.
Adding cream too soon: Wait until the chicken has finished cooking to add heavy cream; this ensures the sauce thickens correctly without breaking.
Ignoring seasoning: Don’t forget to season each component, including the chicken and pasta water, for a well-rounded flavor.
Thickening sauce incorrectly: Avoid boiling the sauce after adding cream; instead, simmer gently to avoid curdling and maintain a creamy texture.
Neglecting to stir: Stirring regularly can prevent the sauce from sticking and ensure an even, creamy consistency throughout.
Serving immediately: Allow the dish to rest briefly before serving; this allows flavors to meld and enhances overall taste.
Essential Techniques
Cooking pasta al dente: Achieving the perfect pasta involves boiling in salted water until it offers a slight bite. This texture holds up during mixing and allows the sauce to cling beautifully.
Creating a creamy sauce: To create smooth sauce, scatter cheese gradually into the heat rather than adding it all at once. This method ensures a creamy finish without clumps.
Correctly searing chicken: Start with a hot skillet and allow the chicken to cook undisturbed until browned for a flavorful crust. Flip only once to retain juices and promote even cooking.
Combining the elements: Once the sauce has thickened, combine it with the pasta and chicken off the heat, allowing residual warmth to finish cooking while preventing overcooking.
Pro Tips for Perfect Chicken Alfredo
When preparing Chicken Alfredo, use freshly grated Parmesan cheese for the richest flavor and creaminess. This tip makes a noticeable difference in the final dish.
Always cook your pasta al dente, as it should have a slight bite that nicely complements the creamy sauce. This also prevents the pasta from becoming mushy when mixed.
For added depth of flavor, consider sautéing garlic in the butter before adding cream and cheese; this step infuses the sauce with a wonderful aroma and taste.
Don’t skip the seasoning in your pasta water. Salting your cooking water serves to flavor the pasta itself, enhancing the overall dish.
For a touch of freshness, finish your Chicken Alfredo with a squeeze of lemon juice. This brightens the flavors of the dish and cuts through the creaminess.
When reheating leftovers, add a splash of milk or cream to restore the sauce’s creamy consistency, ensuring it doesn’t dry out.
For a healthier twist, substitute regular fettuccine with whole grain or zucchini noodles for a low-carb version.
Finally, personalize your dish by adding vegetables like spinach or broccoli for added nutrition and flavor depth.
Variations and Adaptations
Regional variations: Think of adding sun-dried tomatoes, olives, or capers for a Mediterranean twist, or experimenting with Tuscan-inspired ingredients like artichokes and spinach for a flavorful, fresh take.
Seasonal adaptations: In spring, include asparagus or peas; during fall, consider roasted butternut squash for a seasonal flavor enhancement that complements the creamy sauce.
Dietary modifications: Chicken Alfredo can easily be made gluten-free with gluten-free pasta or even cauliflower rice for a low-carb option, ensuring that various dietary needs are met without sacrificing flavor.
Flavor variations: Adding different protein options like shrimp, scallops, or even mushrooms can elevate the dish. Each ingredient brings its unique flair that complements the Alfredo sauce beautifully.
Texture modifications: For a creamier sauce, add mascarpone cheese alongside the traditional ingredients. Alternatively, blend in blended or pureed vegetables for enhanced nutrition without compromising creaminess.
Presentation alternatives: Serve the Chicken Alfredo in individual bowls for a restaurant-style presentation, garnishing with fresh herbs and a sprinkle of extra cheese for a beautiful finish.
Serving and Presentation Guide
To plate Chicken Alfredo attractively, use a large bowl or plate to create a base of pasta and nestle the chicken pieces atop. The creamy sauce should drizzle gracefully over the pasta, enticing with its rich look. Garnish with fresh herbs such as parsley for a pop of color and a touch of freshness.
For garnishing, consider using freshly grated Parmesan cheese and a crack of black pepper. This embellishment adds visual appeal and enhances the dish’s overall flavor profile.
Traditional accompaniments include crusty garlic bread or a light salad, which balances the richness of the dish. For an updated twist, serve with a refreshing arugula salad tossed in balsamic vinaigrette.
When serving, ensure the Chicken Alfredo is hot, as the creamy texture can solidify when cooled. Plate the food just before serving to retain optimal warmth and creaminess.
Remember to consider portion control when serving. A generous amount of sauce should be reserved on the side or added to each serving to ensure every bite is delicious.
Wine and Beverage Pairing
Pairing wine with Chicken Alfredo can enhance the dining experience significantly. A classic choice is Chardonnay, particularly those that are oaked, as they complement the creaminess of the sauce beautifully.
For a red option, Pinot Noir works surprisingly well, too, thanks to its light body and fruit-forward profile that adds a layer of complexity.
If a non-alcoholic alternative is desired, consider sparkling water with a splash of lemon for freshness without overpowering the dish.
Coffee can also pair nicely; a light roast with hints of citrus can provide an interesting transition post-meal and cleanse the palate.
Ensure the wine is served chilled yet not too cold, allowing its nuances to emerge while accompanying the rich flavors of the Chicken Alfredo perfectly.
Storage and Shelf Life
To store leftover Chicken Alfredo, allow it to cool to room temperature before transferring it to an airtight container. Refrigerated, it lasts for 3-4 days, maintaining its flavor and texture.
For longer storage, consider freezing portions of the dish. However, be aware that the cream may separate upon freezing; therefore, it’s best to reheat gently and add a splash of cream or milk to restore creaminess.
When reheating, it is ideal to use a stovetop, as this prevents overcooking. Add a little milk or water to create moisture, stirring frequently until heated through.
Signs of spoilage include an off odor or visible mold, both of which indicate that the dish is no longer safe to consume. Always err on the side of caution when food safety is in question.
Make Ahead Strategies
For those who want to prepare Chicken Alfredo ahead of time, consider cooking the chicken and sauce, then storing them separately in airtight containers. This method helps maintain texture.
Pasta can be cooked and tossed in a little oil to prevent sticking, stored in a different container. This allows you to reheat each component when ready to serve.
Quality impact is crucial; ideally, assemble and mix the sauce with pasta just before serving to maintain the best flavor and texture. This prevents the pasta from absorbing too much sauce, which can lead to a dry dish.
During reheating, introduce fresh elements like parsley or extra cheese to enhance flavor and freshness, giving a sense of ‘just-cooked’ vibrancy to your dish.
Scaling Instructions
Halving the Chicken Alfredo recipe is straightforward, simply reduce all ingredients by half, ensuring the ratios remain appropriate.
For doubling or tripling, use larger pots and skillets as necessary to accommodate the increased volume, keeping the cooking times similar.
Timing modifications may not always be linear. Monitor the chicken’s doneness and the consistency of the sauce as larger quantities may require slight adjustments.
Storage considerations should include additional containers to ensure that leftovers are preserved properly, as batches tend to yield more than expected under this recipe.
Nutritional Deep Dive
The macro breakdown of Chicken Alfredo reveals a satisfying blend of macronutrients courtesy of its ingredients. Typically, each serving offers a significant amount of protein from chicken, complemented by carbohydrates from the pasta.
Micronutrient analysis shows the presence of calcium from cheese, iron from chicken, and vitamin B6, contributing to a well-rounded dish that supports overall health.
Additionally, Chicken Alfredo provides health benefits by incorporating lean proteins and essential vitamins, making it a considerable option for a hearty meal.
Dietary considerations include nutritional balancing by being mindful of portion sizes and pairing with vegetable sides to ensure a comprehensive nutrient intake.
For those managing weight, consider using whole grain pasta and reducing the cream quantity without sacrificing the core flavors for a friendlier option while still enjoying the classic taste.
Dietary Adaptations
For those following a gluten-free lifestyle, replace traditional pasta with gluten-free varieties made from rice or quinoa. This adaptation ensures that no one has to miss out on the creamy goodness of Chicken Alfredo.
If dairy-free is necessary, consider alternatives like coconut cream instead of heavy cream and nutritional yeast in place of cheese, achieving a similar texture and taste without using animal products.
Vegans can enjoy this dish by replacing the chicken with mushrooms or a plant-based protein and using vegan cheese to achieve the characteristic taste.
Low-carb and keto dieters can sub out the pasta for zucchini spirals or cauliflower rice, which keeps the dish lighter while still maintaining the flavors they love.
For those on a low-FODMAP diet, ensure the chosen cheese and cream alternatives fit within guidelines and opt for lactose-free versions to prevent digestive discomfort.
Troubleshooting Guide
Texture issues can arise if the sauce is cooked too long, leading to separation; keep cooking over low heat and add additional cream to salvage it.
Flavor balance may become skewed if too much salt is added; remedy this by incorporating a dash of lemon juice to cut through the saltiness and enhance flavors.
Temperature problems occur if the dish is too hot, potentially curdling the cream; to avoid, lower heat gradually while stirring gently as it cools.
Equipment challenges such as improper pans may cause sticking; opt for non-stick cookware for easier handling and cleaner results.
Ingredient substitutions can lead to unexpected flavors; always test a small batch when trying new ingredients to adjust effectively without losing the essence of Chicken Alfredo.
Timing concerns arise when reheating; monitor closely to prevent overcooking, using medium heat and stirring often for even warmth.
Recipe Success Stories
Community feedback on Chicken Alfredo typically highlights its comforting and satisfying nature, with many raving about its creamy texture that impresses every time.
Various readers share their personalized versions, adding unique elements like spices or different proteins that have elevated their experience, showcasing the recipe’s versatility.
Adaptation stories often mention first-time cooks sharing their success in making Chicken Alfredo, turning skeptics into believers in their culinary abilities.
Photography tips shared by our readers showcase how garnishing with fresh herbs adds a professional touch to their presentation, enticing others to try the recipe.
Feedback emphasizes the dish’s simple steps that lead to desirable outcomes, enabling novice cooks to gain confidence in the kitchen while encouraging experimentation.
Frequently Asked Questions
Can I make Chicken Alfredo ahead of time? Yes, you can prepare the chicken and sauce ahead of time, but it’s best to mix them with the pasta just before serving to maintain the creamy consistency.
What can I substitute for heavy cream? You can use half-and-half or even coconut cream for a dairy-free alternative. For a lighter option, consider evaporated milk.
How do I make my Chicken Alfredo healthier? Substitute whole grain pasta, reduce the amount of cream, or add steamed vegetables like broccoli for additional nutrients.
Can I use different types of pasta? Absolutely! While fettuccine is traditional, penne, rigatoni, or gluten-free options can be great substitutes.
What should I serve with Chicken Alfredo? Garlic bread, a light salad, or roasted vegetables pair excellently with the richness of this dish.
How do I thicken my Alfredo sauce? Simmering the sauce over low heat helps it reduce and thicken naturally. Adding more cheese also improves the thickness.
Can I use frozen chicken for this recipe? Yes, but ensure to thaw it before cooking for even cooking results.
What type of cheese is best for Alfredo? Parmesan is traditionally used, but Pecorino Romano can also be a flavorful substitute.
Is Chicken Alfredo suitable for meal prep? Yes, store components separately and reheat when ready to maintain the integrity of the flavors and sauce.
Can I freeze leftovers? Yes, but be aware that the texture of the cream sauce may change upon thawing. Add cream during reheating to restore creaminess.
Additional Resources
If you loved making Chicken Alfredo, consider trying similar recipes such as Shrimp Alfredo or Veggie Alfredo for additional twists on this classic.
For enhancing your culinary skills, check out technique guides on making homemade pasta or cheese sauces to elevate your cooking game even further.
Become familiar with ingredient information by exploring profiles on fresh herbs, various cheeses, and pasta types that will diversify your meals.
Equip your kitchen with recommended items that can aid preparation for Italian dishes, including pasta machines and quality sauté pans to make your cooking experience enjoyable.
Look for seasonal variations in produce to incorporate fresh ingredients that could spice up your Chicken Alfredo recipe with vibrant flavors and colors.
Join the Conversation
We encourage you to share your experience with making Chicken Alfredo on social media, tagging us with your creations and adaptations.
Photography tips can help you capture the best moments of your delightful dish, showcasing its rich texture and vibrant colors.
We love to hear about your recipe reviews and suggestions on how it turned out for you; sharing feedback helps foster a community of culinary enthusiasts eager to experiment.
Bring your creativity into play with possible variations. How have you made Chicken Alfredo your own? We’d love to hear your unique stories!
The Recipe
Chicken Alfredo
Serves: 4
Prep Time: 10 mins
Cook Time: 20 mins
Total Time: 30 mins
Kitchen Equipment Needed
Large skillet
Pot for boiling pasta
Cutting board
Knife
Measuring cups and spoons
Grater for cheese
Ingredients
8 oz fettuccine pasta
2 chicken breasts, diced
2 tablespoons olive oil
2 cups heavy cream
1 cup freshly grated Parmesan cheese
2 cloves garlic, minced
Salt and pepper to taste
Fresh parsley for garnish
Directions
Cook fettuccine according to package instructions until al dente. Drain and set aside.
In a large skillet, heat olive oil over medium heat. Add diced chicken and season with salt and pepper, cooking until browned and cooked through.
Add minced garlic to the skillet and sauté until fragrant, around 1 minute.
Pour in the heavy cream, stirring occasionally until it thickens slightly.
Lower the heat and gradually stir in the grated Parmesan cheese until melted and creamy.
Add the cooked fettuccine and mix well until all pasta is coated with the Alfredo sauce.
Serve immediately, garnished with fresh parsley and extra Parmesan if desired.
Recipe Notes
For a lighter version, substitute with half-and-half in place of heavy cream.
Add vegetables like broccoli or spinach for added nutrition.
Store leftovers in an airtight container in the refrigerator for up to 3 days.
Classic Spaghetti Carbonara – Creamy and Easy to Make
Spaghetti Carbonara: A Classic Italian Delight
⚖️
Difficulty
Medium
⏲️
Prep Time
15 mins
🕒
Cook Time
20 mins
⏱️
Total Time
35 mins
🍽️
Servings
4
Spaghetti Carbonara is a traditional Italian pasta dish that captivates with its rich flavors and comforting textures. The combination of al dente spaghetti, creamy sauce, and savory pancetta creates a symphony of taste that leaves food lovers wanting more. This recipe is not only simple to prepare but also offers an authentic taste of Italy that you can recreate in your kitchen. Ideal for both busy weeknights and leisurely weekends, this carbonara is sure to become a family favorite.
The beauty of this Spaghetti Carbonara lies in its minimal yet high-quality ingredients. As the pasta cooks, the heat transforms the eggs and cheese into a silky sauce that clings to each strand of spaghetti, creating a luscious mouthfeel that is irresistible. When you take a bite, you’ll not only taste the creamy richness but also the delightful crunch of pancetta, complementing the dish perfectly. It’s a meal where simple ingredients achieve splendid results!
Quick Recipe Highlights
Flavor Profile: The blend of salty pancetta and nutty Parmesan gives this carbonara its distinct taste, while the fresh black pepper adds a welcome kick.
Texture: Enjoy the creaminess of the sauce paired with the firm bite of the pasta, creating a dynamic yet satisfying texture.
Aroma: The buttery fragrance of sautéed pancetta combined with freshly cracked black pepper fills your kitchen with mouthwatering notes.
Visual Appeal: The dish presents beautifully with its golden hue, inviting parmesan, and black pepper accents, making it a feast for the eyes.
Skill Level Needed: With just a few straightforward steps, this dish is perfect for both novice and experienced cooks aiming to impress.
Special Equipment: A large pot for boiling pasta and a mixing bowl for the sauce are all you need to whip up this delight.
Recipe Overview
Difficulty Level: This dish is classified as medium difficulty due to the coordination required for timing and ingredient preparation, but with practice, it’s easy to master.
Category: Spaghetti Carbonara is a classic pasta dish often served as a main course, making it an excellent choice for both everyday dinners and special occasions.
Cuisine: Hailing from Rome, this traditional Italian recipe showcases the beauty of Italian culinary heritage using simple, quality ingredients.
Cost: The ingredients are relatively affordable, making this dish a cost-effective option for a delicious meal.
Season: While delicious year-round, many enjoy carbonara during colder months, as it warms the heart and soul.
Occasion: Perfect for family dinners, date nights, or even casual gatherings with friends, this dish is versatile for any occasion.
Why You’ll Love This Recipe
The Taste and Texture Appeal: The creamy sauce of Spaghetti Carbonara envelops each strand of pasta, offering a rich mouthfeel that balances perfectly with the crispy pancetta. When you bite into it, the combination of flavors – from the salty meat to the nutty cheese – creates an irresistible dish that tantalizes your taste buds.
Convenience and Preparation Benefits: Preparing Spaghetti Carbonara is quick and easy, taking only about 35 minutes from start to finish. With minimal prep and cooking time, it is perfect for busy nights when you want something delicious without spending hours in the kitchen.
Nutritional Advantages: While Spaghetti Carbonara is indulgent, it does offer nutritional benefits as well. The inclusion of eggs provides protein, while the spaghetti can be made with whole grains for added fiber, making it a well-rounded dish when served with a light salad.
Social and Entertaining Value: Carbonara is a crowd-pleaser! Its comforting familiarity makes it a fantastic choice for entertaining guests or family gatherings, where everyone can enjoy a hearty meal together while creating wonderful memories.
Cost-effectiveness and Accessibility: Most ingredients for this carbonara are easily available at your local grocery store, and the overall cost is budget-friendly. This dish allows you to enjoy a restaurant-quality pasta experience without breaking the bank.
Historical Background and Cultural Significance
Origin Story: Spaghetti Carbonara originated in the Lazio region of Italy, particularly Rome. It is rumored to have been created by Italian coal miners (“carbonari”) who needed a hearty meal to fuel their hard work. The dish has evolved over the years but remains a staple of Roman cuisine.
Cultural Importance: This iconic dish represents the culinary tradition of Italy, showcasing the use of local ingredients and simplicity. Carbonara is often referred to as a comfort meal for many Italians and is served in homes and trattorias alike.
Evolution of the Recipe: The original recipe is thought to have included only a few key ingredients: pasta, guanciale, eggs, and cheese. However, variations have emerged globally, sometimes substituting ingredients like bacon in place of guanciale, which has led to diverse interpretations of the classic dish.
Regional Variations: Across Italy, you may find different takes on carbonara, including variations that add ingredients such as peas or various herbs. However, the traditional Roman style emphasizes the purity and balance of its simple components, remaining a testament to Italian culinary philosophy.
Ingredient Deep Dive
Pasta: The star of Spaghetti Carbonara is undoubtedly the pasta. Traditionally, spaghetti or rigatoni is used for its ability to hold the sauce well. Whole grain or gluten-free varieties can be utilized to cater to various dietary preferences.
For the best results, choose high-quality durum wheat pasta, and cook until perfectly al dente for that perfect bite. Store any leftover pasta in an airtight container in the refrigerator, and try not to overcook it in the boiling water.
Pancetta: Pancetta is a cured pork belly that adds savory depth and richness to the dish. When cooked, it becomes wonderfully crispy, offering both texture and flavor that complements the creaminess of the sauce.
Select a high-quality pancetta, preferably unsmoked, and be sure to keep it in the fridge. For those who don’t consume pork, turkey bacon can serve as a suitable substitute, offering a lighter option while still delivering flavor.
Common Mistakes to Avoid
Overcooking the pasta: This leads to a mushy texture that won’t hold the sauce well. Always aim for al dente.
Using cold eggs: Ensure your eggs are at room temperature to help achieve a creamy consistency when whisked.
Adding cream: Traditional carbonara doesn’t include cream; instead, the sauce is made with eggs and cheese for a rich, creamy texture.
Cooking at too high a heat: Preparing carbonara requires gentle heat to avoid scrambling the eggs; keep the skillet over low heat.
Inadequate pasta water: Reserve enough pasta cooking water to achieve the desired sauce consistency; it helps emulsify the sauce.
Not tossing enough: Mixing the pasta with the sauce thoroughly is key; it ensures every strand is coated with sauce and flavor.
Incorrect cheese choices: Use authentic Pecorino Romano for an authentic flavor, avoiding pre-grated varieties that may contain anti-caking agents.
Skipping black pepper: Freshly cracked black pepper is an essential seasoning that elevates the dish’s flavor dramatically.
Letting it sit too long: Serve immediately for the best texture; carbonara can thicken as it cools.
Using too little salt: Pasta cooking water should be well-salted; this boosts flavor throughout the dish.
Essential Techniques
Tossing the Pasta and Sauce: Mastering the art of combining pasta with the sauce is crucial for achieving that legendary creamy texture in carbonara. Always reserve some pasta water; it acts as a emulsifier to bring everything together smoothly.
Common pitfalls include not tossing quickly enough or not using the reserved water to loosen the sauce, which can result in clumpy pasta. Keep an eye on visual cues: the sauce should cling gently to the noodles without being too thick.
Pro Tips for Perfect Spaghetti Carbonara
1. Use high-quality pasta for the best taste and texture; you’ll notice a significant difference compared to standard brands.
2. While the recipe calls for pancetta, guanciale is the traditional Roman option and offers a richer flavor profile.
3. Mix the egg and cheese mixture until combined before adding to the hot pasta; this step ensures even coating.
4. If you want extra creaminess, add a splash of well-stirred pasta water to the egg mixture before combining.
5. Always serve immediately; carbonara is at its best when fresh and hot straight from the stove.
6. Freshly cracked pepper is essential; it transforms the dish from mediocre to exceptional.
7. Don’t skimp on the cheese; authenticity and flavor shine through when using generous amounts of Pecorino Romano.
8. Experiment with flavors by incorporating fresh herbs like parsley or basil as a garnish for a burst of freshness.
Variations and Adaptations
Regional Variations: In some areas of Italy, you may come across carbonara featuring vegetables such as peas or mushrooms, adding a colorful twist while maintaining the dish’s creamy essence.
Seasonal Adaptations: You can swap out traditional ingredients based on the season; for a summer version, use zucchini or asparagus for a fresh touch.
Dietary Modifications: For a vegetarian take, consider using smoked tempeh for the pancetta and nutritional yeast to retain that cheesy flavor without dairy.
Flavor Variations: Enhance your carbonara with a hint of truffle oil or throw in some chili flakes if you desire a spicier kick.
Texture Modifications: To vary the texture, consider adding in a handful of fresh spinach or other tender greens during the last minute of cooking.
Presentation Alternatives: For an elegant touch, consider plating your carbonara in stylish pasta bowls and adding fresh herbs and a sprinkle of cheese for an upscale dining experience.
Serving and Presentation Guide
Plating techniques: Serve Spaghetti Carbonara in deep, wide bowls to create an inviting presentation. Use a fork or tongs to twirl the pasta into a nest for an appealing look.
Garnishing ideas: Finish your dish with freshly cracked black pepper and a generous shower of grated Pecorino Romano or a drizzle of high-quality olive oil for added flavor and richness.
Traditional accompaniments: Common Italian tradition pairs pasta with a fresh salad. A simple arugula salad with lemon vinaigrette complements this rich dish wonderfully.
Modern serving suggestions: For a contemporary twist, consider adding additional toppings such as a poached egg or sliced heirloom tomatoes for visual appeal and flavor diversity.
Temperature considerations: Serve carbonara hot, right off the stove, to maximize its creaminess and all of the vibrant flavors.
Portion control tips: When serving, a typical portion is around 3 to 4 ounces of cooked pasta per person, leaving room for a small side salad or appetizer.
Wine and Beverage Pairing
Wine Pairings: A classic match for Spaghetti Carbonara is a crisp white wine like Pinot Grigio or a light red like Chianti, which complements the dish beautifully without overpowering it.
Non-alcoholic alternatives: Sparkling water with a wedge of lemon or a refreshing non-alcoholic spritz can cleanse the palate and enhance your dining experience.
Coffee/Tea Pairings: Post-meal, espresso pairs wonderfully with carbonara, offering a rich, bold finish that contrasts the creamy pasta.
Temperature considerations: Ensure that white wines are served chilled, while red wines should be at room temperature for optimal flavor experience.
Serving suggestions: Serve wine chilled in elegant stemware to create a restaurant-like ambiance at home. Don’t forget to raise a toast to good food and good company!
Storage and Shelf Life
Storage methods: Store leftover Spaghetti Carbonara in an airtight container in the refrigerator to maintain freshness.
Temperature requirements: Keep the dish stored at refrigerator temperatures below 40°F (4°C) to prevent spoilage.
Container recommendations: For best quality, use glass containers or high-grade plastic that won’t retain lingering smells or stains.
Signs of spoilage: Smell your left-over carbonara; any off-odors or separation of sauce indicate it’s time to toss it.
Reheating instructions: When reheating, add a splash of reserved pasta water to revive the sauce’s original creaminess. Microwave in short intervals, stirring in between.
Freezing guidelines: While not ideal, you can freeze carbonara for up to a month. Note that the texture may change once thawed, so it is best enjoyed fresh.
Make Ahead Strategies
Prep timeline: For busy days, prepare the pancetta and sauce mixture ahead of time, allowing easy assembly when ready to serve.
Storage between steps: Keep the sauce refrigerated in an airtight container until you’re ready to combine it with freshly cooked pasta.
Quality impact assessment: While pasta is best when fresh, prepping the ingredients ahead of time can save you precious moments while still delivering great taste.
Assembly tips: Cook pasta separately just before you’re ready to serve, then combine with the prepped sauce to achieve that perfect freshly made texture.
Reheating guidelines: If reheating prepared pasta, use a non-stick pan and add a touch of water or olive oil to loosen the sauce while warming.
Fresh element additions: For the best taste, add any fresh herbs or greens just before serving to keep their vibrant color and flavor intact.
Scaling Instructions
Halving the recipe: To prepare a smaller batch of carbonara, simply divide the ingredient measurements by two while maintaining the cooking time.
Doubling or tripling: When scaling up, remember to use a larger pot for boiling pasta and ensure there’s ample space to mix the sauce evenly.
Equipment adjustments: Larger quantities may require additional mixing bowls or cooking utensils to keep work efficient and organized.
Timing modifications: Cooking slightly longer may be necessary to ensure all ingredients are mixed thoroughly and heat is evenly distributed, especially with larger batches.
Storage considerations: Adjust storage containers accordingly to accommodate larger batches and prevent spoilage due to reduced air exposure.
Nutritional Deep Dive
Macro breakdown: Each serving typically contains a balanced mix of carbohydrates from the pasta, healthy fats from the pancetta, and protein from the eggs and cheese, providing a satisfying meal.
Micronutrient analysis: You’ll find calcium from cheese, selenium from eggs, and iron from the pasta, contributing essential vitamins and minerals needed for overall health.
Health benefits: While rich, carbonara can be enjoyed in moderation as part of a balanced diet, offering energy and nourishment when combined with fresh sides.
Dietary considerations: Consider ingredient swaps if pursuing a specific dietary regimen; health-conscious versions can also be created with lower-fat cheeses and added vegetables.
Portion analysis: A reasonable serving allows for enjoyment of flavors while remaining mindful of calorie intake, especially when paired with a salad.
Weight management tips: Opt for whole grain pasta and incorporate vegetables to create a more balanced dish that maintains satisfying flavors without excess calories.
Dietary Adaptations
Gluten-free: Replace traditional pasta with gluten-free alternatives like zucchini noodles or chickpea pasta to accommodate gluten sensitivities while retaining taste.
Dairy-free: To create a dairy-free carbonara, use nut-based cheese alternatives and almond milk for creaminess without dairy products.
Vegan: For a vegan version, employ silken tofu or cashew cream as a substitute for the eggs and cheese, keeping the flavor authentic with the right spices.
Low-carb: Make a delightful low-carb version using spaghetti squash or other non-starchy vegetables in place of traditional pasta.
Keto: Stick to higher fat options by including more cheese and using a low-carb pasta alternative to remain within keto dietary restrictions.
Paleo: Emphasize natural ingredients, such as using guanciale and vegetables, while avoiding processed components.
Low-FODMAP: Swap ingredients to accommodate low-FODMAP diets, such as using garlic-infused oil for flavor without risking digestive issues.
Other specific diets: For those following any specific diet, consider re-evaluating ingredient portions and types to best fit dietary requirements while maximizing flavor.
Troubleshooting Guide
Texture issues: If your sauce separates, it could mean the heat was too high. Stir constantly, and add a touch of pasta water to re-emulsify.
Flavor balance: If the dish is too salty, serve with a side of fresh greens to counteract the saltiness. Adding more cheese can also help balance flavors.
Temperature problems: If the pasta cools too quickly, keep it warm in the pot before serving and mix the sauce gently when you’re ready.
Equipment challenges: If you don’t have a large enough pot, cook the pasta in batches to ensure everything cooks evenly.
Ingredient substitutions: Experiment confidently with substitutions, but remember that some elements like cheese and meat are integral to flavor; adjust accordingly.
Timing concerns: When cooking meat, ensure it’s crispy yet tender before mixing it with the pasta. It’s all about timing and watching that pancetta closely!
Recipe Success Stories
Community feedback: Our readers often share their tailored versions of Spaghetti Carbonara, praising how easily it adapts to various tastes and dietary needs.
Variation successes: Many have celebrated the addition of vegetables, discovering how it enhances nutritional value without sacrificing flavor.
Adaptation stories: Different regions have inspired unique adaptations of this classic dish, encouraging home cooks to put their spin on tradition.
Reader suggestions: Our community continually provides valuable tips for improving texture and flavor, showcasing the dish’s versatility.
Photography tips: Encourage readers to snap pictures and share their creations! Highlighting the dish’s aroma and appeal can lead to a delightful visual presentation.
Frequently Asked Questions
1. Can I add cream to my carbonara? While some modern recipes do, traditional carbonara is made without cream. The creaminess comes from the emulsion of eggs and cheese.
2. What type of cheese should I use? Pecorino Romano is the authentic choice for carbonara, lending that unique flavor. If unavailable, Parmesan can be used, but it will change the taste subtly.
3. Can I make it in advance? It’s best to enjoy carbonara immediately after cooking. If needed, store leftovers in the fridge, but the pasta may lose its texture when reheated.
4. Is there a vegetarian version? Yes! Substitute the pancetta with sautéed mushrooms or smoked tofu to maintain a similar depth of flavor.
5. What’s the best way to reheat leftovers? Gently reheat on the stove with a splash of pasta water to help restore the sauce’s creaminess.
6. Can I use other types of pasta? While traditionally made with spaghetti, you can use other pasta types like bucatini or fettuccine as well.
7. How can I get my pasta to become creamy? The creaminess comes from quickly tossing the pasta with the sauce off the heat and adding reserved pasta water as necessary.
8. Can I freeze Spaghetti Carbonara? It’s not advisable to freeze due to the texture changes, but if you must, store in airtight containers for up to a month.
9. How can I make it spicier? Adding crushed red pepper flakes or freshly ground black pepper enhances the dish’s spice factor without overwhelming the original flavors.
10. What’s a good side to serve with carbonara? A simple mixed green salad dressed with olive oil and lemon pairs nicely to cut through the rich flavors of the carbonara.
Additional Resources
Related recipes: Consider exploring other Italian classics, such as Fettuccine Alfredo or Lasagna, which also celebrate pasta’s wonderful versatility.
Technique guides: Check out our guides on making homemade pasta or mastering the art of emulsification to elevate your cooking skills.
Ingredient information: Dive into the world of Italian cheeses, learning about the differences between varieties and how to best utilize them in your dishes.
Equipment recommendations: For best results, invest in high-quality cookware, including non-stick pans and excellent knife sets to prepare your meals efficiently.
Seasonal variations: As seasons change, feel free to adapt your carbonara with different fresh vegetables to maintain a seasonal, fresh touch.
Join the Conversation
Social media sharing: We love seeing your carbonara creations! Tag us on social media and share your variations, allowing others to find inspiration.
Photography tips: Capturing the beauty of your dish can enhance your sharing experience; consider natural light and a clean background for that perfect shot.
Recipe reviews: After you try the recipe, please leave a review! Your feedback helps others learn and discover even more recipes.
Community engagement: Join our community by commenting on the posts or sharing your tips, as we continuously learn from each other to improve our culinary adventures.
The Recipe
Spaghetti Carbonara
Serves: 4
Prep Time: 15 mins
Cook Time: 20 mins
Total Time: 35 mins
Kitchen Equipment Needed
Large pot for boiling pasta
Skillet for cooking pancetta
Mixing bowl for egg and cheese
Whisk for blending
Tongs or fork for tossing
Ingredients
12 ounces spaghetti
4 ounces pancetta, diced
2 large eggs
1 cup grated Pecorino Romano cheese
Freshly cracked black pepper, to taste
Salt for pasta water
Directions
Bring a large pot of salted water to a boil. Cook the spaghetti according to package instructions until al dente. Reserve 1 cup of pasta water, then drain.
In a skillet over medium heat, cook the pancetta until crispy. Remove from heat and set aside.
In a mixing bowl, whisk together eggs and grated cheese, then season with generous black pepper.
Quickly combine the hot pasta with the pancetta in the skillet, then pour the egg mixture over the pasta. Toss vigorously to create a creamy sauce, adding reserved pasta water as needed to achieve your desired consistency.
Serve immediately with extra cheese and pepper sprinkled on top.
Recipe Notes
For a richer flavor, use guanciale in place of pancetta.
Adjust the amount of black pepper according to your spice preference.
The recipe is best enjoyed fresh and may not reheat well.
Add a green salad or steamed vegetables on the side for a complete meal.
Best Chocolate Chip Cookies Recipe – Soft and Chewy
Delicious Chocolate Chip Cookies: The Ultimate Indulgence
⚖️
Difficulty
Easy
⏲️
Prep Time
15 mins
🕒
Cook Time
10 mins
⏱️
Total Time
25 mins
🍽️
Servings
24 cookies
Indulge in the timeless delight of homemade chocolate chip cookies, a classic treat that captures the hearts of cookie lovers everywhere. These soft, chewy cookies are a perfect blend of sweet, buttery goodness with rich, melt-in-your-mouth chocolate chips. Ideal for all occasions, from family gatherings to quiet nights at home, this recipe will leave you with an irresistible craving for more. Imagine the heavenly aroma wafting through your kitchen as they bake – nothing beats the satisfaction of biting into a warm chocolate chip cookie fresh from the oven!
Not only do these cookies taste fantastic, but they also evoke nostalgia for simpler times. There’s something magical about measuring out ingredients, mixing them together, and watching them transform in the oven. Whether you’re making them for yourself or as a thoughtful gift, these chocolate chip cookies are sure to create joyous moments filled with laughter and love.
Quick Recipe Highlights
Flavor Profile: The sweet buttery flavor perfectly complements the rich chocolate, creating a balanced taste that’s simply irresistible.
Texture: Each cookie offers a delightful chewiness, with a crisp edge and a soft, gooey center.
Aroma: The warm blend of vanilla and baked brown sugar creates an inviting aroma that fills your kitchen.
Visual Appeal: These cookies boast a golden-brown hue with rich chocolate chunks peeking through, making them visually enticing.
Skill Level Needed: This recipe is easy to follow, making it suitable for beginners as well as seasoned bakers.
Special Equipment: Basic kitchen tools such as a mixing bowl, baking sheet, and spatula are all you need to create these cookies.
Recipe Overview
Difficulty Level: This easy recipe is perfect for beginner bakers. With straightforward steps, you’ll gain the confidence to create cookies everyone will love.
Category: These chocolate chip cookies fit perfectly into the dessert category, ideal for satisfying sweet cravings.
Cuisine: American in origin, chocolate chip cookies have become a beloved staple in many households worldwide.
Cost: The recipe is budget-friendly, with basic pantry ingredients that won’t break the bank.
Season: Chocolate chip cookies can be enjoyed year-round, making them a versatile treat for any season.
Occasion: Ideal for birthdays, holiday gatherings, or a casual snack, these cookies fit perfectly in any situation.
Why You’ll Love This Recipe
The taste and texture of these chocolate chip cookies make them an all-time favorite. Each bite offers a delightful combination of crunchy edges and soft centers, while the gooey chocolate melts beautifully in your mouth. Whether you enjoy them straight from the oven or with a glass of milk, they will become a staple in your recipe collection.
In terms of convenience, this recipe takes minimal time to prepare, allowing you to whip up a batch even on a busy day. The straightforward steps mean you won’t spend hours in the kitchen, making them an accessible treat for any occasion. You’ll be thankful to have such a quick and easy recipe in your arsenal.
Nutritionally, while cookies are a treat, they can also provide an opportunity to enjoy simple ingredients. With the balance of flour, sugar, and chocolate, they can offer energy and satisfaction. When enjoyed in moderation, these cookies can be a delightful part of a balanced diet.
Socially, chocolate chip cookies carry a certain nostalgia that brings people together. Baking and sharing these cookies can create treasured memories with family and friends, serving as the perfect excuse for gatherings. Who can resist a homemade cookie straight from the oven?
Financially, making chocolate chip cookies is an affordable option compared to store-bought versions. With minimal ingredients, you can create multiple servings at a fraction of the cost of purchasing cookies, ensuring everyone can enjoy this classic treat without the guilt of overspending.
Historical Background and Cultural Significance
Chocolate chip cookies originated in the United States, with Ruth Wakefield credited with creating the first batch in the 1930s. She added chunks of semi-sweet chocolate to her butter cookie recipe, expecting them to melt. Instead, the chocolate held its shape, leading to a delicious new innovation. Since then, chocolate chip cookies have become synonymous with American baking culture, often associated with comfort and nostalgia.
Over the years, chocolate chip cookies have evolved, influencing various baking traditions. The recipe has seen countless adaptations, from adding nuts to experimenting with different types of chocolate. This adaptability demonstrates the cookie’s popularity, showing how it has transcended generations and regions.
Different regions boast unique varieties of chocolate chip cookies, influenced by local ingredients and preferences. For example, some versions incorporate caramel, while others may include sprinkled sea salt to enhance flavor contrast. This widespread appeal has made chocolate chip cookies a beloved choice worldwide.
Culturally, chocolate chip cookies symbolize the warmth of home cooking and the joy of sharing. They are often associated with family gatherings, holiday celebrations, and simple get-togethers, highlighting their significance in reinforcing connections among loved ones.
Ingredient Deep Dive
Flour: Flour is the foundation of the cookie, providing structure while contributing to the cookie’s overall texture. Look for all-purpose flour to achieve the perfect balance between tenderness and sturdiness. Store it in a cool place to maintain freshness, and consider alternatives like whole wheat for different textures.
Butter: Butter adds richness and flavor, resulting in a tender cookie. Unsalted butter is preferred, as it allows for better control over the sodium content. Make sure to use room temperature butter for easier mixing, and store it in the fridge to extend its shelf life.
Brown Sugar: Brown sugar adds moisture and a rich flavor profile, contributing to the chewiness of cookies. Choose packed brown sugar for the best results and store it in an airtight container to prevent it from hardening. For alternative sweetness, consider coconut sugar.
Chocolate Chips: The star of the show, chocolate chips bring a delightful sweetness and chocolate flavor to each cookie. Use high-quality chocolate for the best taste, and explore options like dark or milk chocolate based on your preference. Store them in a cool, dry place to maintain freshness.
Eggs: Eggs bind the ingredients together while providing moisture and richness. Use large eggs for consistency, and remember to keep them refrigerated until ready to use. For egg substitutes, try unsweetened applesauce or flaxseed meal mixed with water.
Common Mistakes to Avoid
Using cold butter: Cold butter leads to dense cookies as it won’t cream properly. Always use room temperature butter for optimal dough texture.
Overmixing the dough: Too much mixing can develop gluten, causing tough cookies. Mix just until the ingredients are combined.
Baking at the wrong temperature: A too-hot oven can cause cookies to spread too quickly, resulting in thin, crispy cookies. Make sure to preheat your oven for even baking.
Not measuring ingredients accurately: Improper measuring can throw off the ratios. Use a kitchen scale for the best results.
Skipping the chilling step: Chilling the dough allows flavors to meld and prevents excessive spreading. For softer cookies, refrigerate the dough for at least 30 minutes.
Using expired baking soda: Old baking soda may not produce the desired rise. Always check the expiration date to ensure effective leavening.
Overbaking the cookies: Cookies should be slightly underbaked as they continue to cook on the pan. Keep a close eye on them during the last few minutes of baking.
Not allowing cooling time: Cookies need to cool on the baking sheet for a few minutes before transferring to a wire rack. This helps improve texture.
Not tasting the dough: A critical mistake! Always taste your cookie dough and adjust sweetness as needed.
Failing to line the baking sheet: Using unlined pans may lead to sticking. Always line with parchment paper for easy removal.
Essential Techniques
Creaming Butter and Sugar: This technique is vital for incorporating air into the dough, resulting in light and fluffy cookies. To master it, beat softened butter with sugar until the mixture is light and fluffy. Avoid overbeating, as it can lead to overly sweet or dry cookies. Look for a pale color and fluffy texture as visual cues for success.
Chilling the Dough: Chilling the cookie dough improves flavor and texture by allowing the ingredients to meld while preventing excessive spreading. To master this technique, wrap the dough in plastic wrap and refrigerate for at least 30 minutes. If the dough is too hard after chilling, let it sit at room temperature for a few minutes before scooping. Look for a firmer texture as a sign of success.
Proper Measuring: Accurate measurements are crucial for balanced cookie dough. To master this technique, use a scale for dry ingredients and measuring cups for liquids. Spoon flour into a cup without packing it down to avoid dense cookies. Visual cues include leveling the flour to ensure consistent results.
Testing for Doneness: Knowing when cookies are done can be tricky. The key is to look for slightly golden edges, with the centers appearing soft but set. For chewy cookies, remove them from the oven when they are just set but not browned. This ensures a perfect texture every time.
Pro Tips for Perfect Chocolate Chip Cookies
1. Use high-quality chocolate chips for richer flavor.
2. Experiment with different types of chocolate, such as dark, semi-sweet, or milk chocolate, for unique combinations.
3. Add a pinch of sea salt to enhance sweetness and balance flavors.
4. Consider browning the butter for a deeper flavor profile.
5. Use fresh ingredients for the best taste; check expiration dates for baking soda and flour.
6. Don’t skip the chilling step; it makes a big difference in texture and flavor.
7. Bake cookies in small batches to ensure freshness.
8. Always let cookies cool on the baking sheet briefly before transferring to a wire rack to maintain texture.
Variations and Adaptations
Regional variations of chocolate chip cookies abound, ranging from adding oatmeal for a chewy twist to incorporating nuts for crunch. Seasonal adaptations can include spices like cinnamon during the fall or peppermint flavoring for a festive touch at the holidays. Dietary modifications are also easy, with options for gluten-free or vegan cookies.
Flavor variations can elevate your cookies; try by adding a tablespoon of espresso powder for a coffee-flavored cookie or mixing in peanut butter chips for added richness. Texture modifications can also be made by adjusting baking time or incorporating shredded coconut for a tropical flair.
For presentation alternatives, consider shaping the cookies into fun designs or sandwiching them with frosting for a more elaborate treat. These adaptations allow you to get creative in the kitchen while enjoying this classic recipe.
Serving and Presentation Guide
When serving chocolate chip cookies, presentation is key. Aim for a rustic look by stacking them on a wooden board or a decorative plate. Enhance visual appeal by dusting powdered sugar on top or adding fresh mint leaves for a pop of color. Consider pairing with a glass of cold milk or hot chocolate for a comforting experience.
For garnishing, simply sprinkle a few chocolate chips on top before baking for a delicious finish. Traditional accompaniments can include ice cream, which is perfect for creating cookie sandwiches, or serve alongside a fruit salad for a refreshing contrast. Pay attention to temperature; serve cookies warm for the best taste experience.
Wine and Beverage Pairing
Pairing wine with chocolate chip cookies can enhance the tasting experience. A rich Cabernet Sauvignon complements the sweetness and chocolate flavors, while a dessert wine like Port balances the sugary notes beautifully. If you prefer a lighter option, a fruity sparkling wine like Prosecco can provide refreshing contrast.
For non-alcoholic alternatives, consider serving with freshly brewed coffee or a creamy chai latte that pairs wonderfully with the cookies’ sweetness. Cold beverages, such as iced tea, can also serve as a delightful refresher, especially in warm weather, ensuring your chocolate chip cookies are enjoyed in style!
Storage and Shelf Life
To store chocolate chip cookies, place them in an airtight container at room temperature for up to a week. To maintain freshness, include a slice of bread in the container, which will absorb moisture and keep the cookies soft. If you prefer, refrigerate the cookies for extending their shelf life; just ensure they’re sealed properly to avoid dryness.
For longer storage, freeze the cookies by placing them in a single layer on a baking sheet until solid, then transfer them to a freezer-safe bag or container. Frozen cookies can last up to three months. When reheating, simply place the cookies in a warm oven, or microwave for a few seconds to restore their original texture before serving.
Make Ahead Strategies
To make chocolate chip cookies ahead of time, prepare the dough and chill it in the fridge for up to 48 hours before baking. This allows the flavors to meld beautifully, enhancing taste. Alternatively, you can bake the cookies and freeze them, thawing as needed for a quick treat.
For ease, portion the dough into balls and freeze them, allowing you to bake fresh cookies on demand. When ready to bake, there’s no need to thaw; just add a couple of extra minutes to the baking time. This strategy helps maintain the cookies’ fresh taste and chewy texture.
Scaling Instructions
If you’re looking to half this recipe, simply divide each ingredient in half. For a larger batch, double or triple the ingredients accordingly. Consider using larger baking sheets or two pans if you increase the quantity significantly. You’ll also need to monitor the baking time, as larger cookie batches may take longer to cook through.
To store extra cookies, ensure that they are fully cooled before sealing them in an airtight container. This prevents condensation and potential sogginess. Cooking times may vary slightly based on the thickness of the cookies, so keep an eye on them while baking.
Nutritional Deep Dive
These chocolate chip cookies offer a delightful balance of carbohydrates and a small amount of protein from the eggs and flour. Each cookie has a moderate caloric profile, making them a sweet indulgence best enjoyed in moderation as part of a balanced diet.
Micronutrient analysis reveals that these cookies provide small amounts of essential vitamins and minerals, including B vitamins and calcium. Opting for whole-grain flour or adding nuts can enhance nutritional value without sacrificing flavor. When considering portion sizes, keep in mind personal health goals, and enjoy each cookie mindfully.
Dietary Adaptations
For gluten-free chocolate chip cookies, substitute all-purpose flour with a gluten-free blend or almond flour. For those with dairy allergies, use coconut oil or vegan butter as a dairy alternative. Enjoy the same delicious flavors while accommodating dietary preferences.
Vegans can replace eggs with flaxseed meal mixed with water, and use dairy-free chocolate chips to maintain the luscious flavor of traditional cookies. Low-carb and keto adaptations can involve almond flour and erythritol as sugar substitutes, ensuring everyone can enjoy a sweet treat.
Troubleshooting Guide
If your cookies turn out too flat, it might be due to warm dough or too much butter. Chill the dough before baking and ensure the butter is softened, not melted. If they are too dry, it may be a sign of overbaking or incorrect flour measurement; test for doneness a minute or two early.
For flavor balance, if the cookies taste bland, consider adjusting the amount of salt or adding a splash of vanilla extract. In situations where cookies spread too much, reduce baking soda slightly, and chilling the dough can help. Always monitor the dough closely during the preparation process.
Recipe Success Stories
Community feedback has shown that everyone has their special touch with chocolate chip cookies. Some fans have shared their favorite variations, adding dried fruits for a chewy finish or infusing the dough with spices. Their success stories inspire many, showcasing how simple the recipe can be adapted for unique flavors.
Readers have shared tips for making the cookies even better, such as browning the butter for that extra layer of flavor. From holiday gatherings to casual afternoons, the cookies have created lasting memories, further emphasizing the connection food has with our experiences.
Frequently Asked Questions
1. Can I freeze chocolate chip cookie dough?
Absolutely! Portion the dough into balls and freeze them for quick baking later. Just add a couple of extra minutes to the baking time if baking from frozen.
2. What type of chocolate is best for chocolate chip cookies?
Using high-quality semi-sweet chocolate chips is traditional, but feel free to experiment with dark or milk chocolate based on your preference.
3. How do I know when my cookies are done baking?
Look for slightly golden edges and set centers for a chewy texture. They may look a bit underdone, but they will continue to cook as they cool.
4. Can I make these cookies vegan?
Yes! Substitute eggs with flaxseed meal mixed with water and use dairy-free butter and chocolate chips for a scrumptious vegan option.
5. What can I do with leftover cookies?
Leftover cookies can be stored in an airtight container at room temperature for up to a week or frozen for longer preservation.
6. Can I add nuts to the cookie dough?
Certainly! Chopped nuts like walnuts or pecans make a lovely addition to add texture and flavor complexity to your cookies.
7. What’s the best way to store chocolate chip cookies?
Store baked cookies in an airtight container at room temperature for up to a week or refrigerate them for longer freshness.
8. How do I fix cookies that turned out too tough?
Tough cookies may be a result of overmixing or too much flour; next time, measure ingredients carefully and mix just until combined.
9. What’s the ideal way to scoop cookie dough?
Using a cookie scoop or ice cream scoop ensures consistent size throughout baking, leading to even cooking.
10. Can I use brown sugar instead of white sugar?
Yes, using brown sugar can add moisture and a richer flavor. You can also mix both for a more complex taste.
Additional Resources
For those looking to experiment further, consider trying related recipes like oatmeal raisin cookies or peanut butter cookies. Technique guides on whipping butter for baked goods and beginner baking tips can also enhance your skills. Learning about ingredient options can inspire variations and encourage creativity in your kitchen.
Join the Conversation
We love seeing your chocolate chip cookie creations! Share your photos and variations on social media, and don’t forget to leave a review of this recipe. Engage with other baking enthusiasts to share tips and tricks, and let’s celebrate cookie season together!
The Recipe
Chocolate Chip Cookies
Serves: 24 cookies
Prep Time: 15 mins
Cook Time: 10 mins
Total Time: 25 mins
Kitchen Equipment Needed
Mixing bowl
Baking sheet
Spatula
Measuring cups and spoons
Cookie scoop or spoon
Ingredients
2 1/4 cups all-purpose flour
1/2 teaspoon baking soda
1 cup (2 sticks) unsalted butter, softened
3/4 cup granulated sugar
3/4 cup packed brown sugar
1 teaspoon salt
2 teaspoons pure vanilla extract
2 large eggs
2 cups chocolate chips
Directions
Preheat oven to 350°F (180°C).
In a bowl, whisk flour and baking soda together; set aside.
In another large bowl, beat butter, granulated sugar, brown sugar, and salt until creamy.
Add vanilla and eggs; mix until well combined.
Gradually blend in flour mixture, and fold in chocolate chips.
Drop rounded tablespoons of dough onto a baking sheet, spaced about 2 inches apart.
Bake for 9-11 minutes or until golden brown around the edges.
Allow to cool on the baking sheet for 5 minutes before transferring to a wire rack.
Recipe Notes
For extra flavor, consider browning the butter before mixing.
Experiment with flavored chocolate chips like mint or caramel.
Store cookies in an airtight container for optimal freshness.
Hi I'm Emy
I’m passionate about sharing a diverse collection of sweet and savory recipes that I’ve meticulously tested and perfected in my own kitchen.