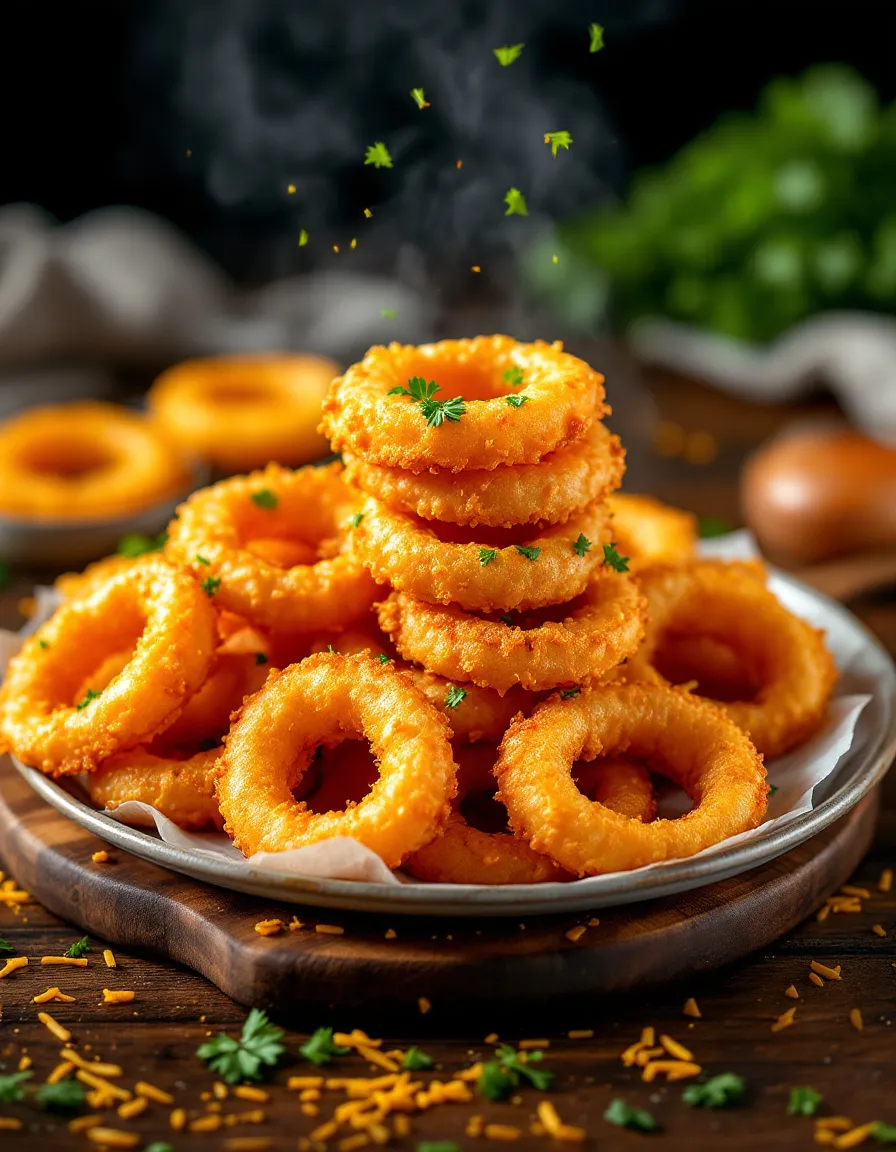
Best Cheddar Onion Ring Chips – Crispy and Cheesy Snack

Cheddar Onion Ring Chips: A Crunchy Delight for Snack Lovers

⚖️
Difficulty
Easy

⏲️
Prep Time
15 mins

🕒
Cook Time
25 mins

⏱️
Total Time
40 mins

🍽️
Servings
4 servings

Cheddar Onion Ring Chips are the perfect crunchy snack for any occasion. These delightful chips explode with flavor, combining the savory tang of cheddar cheese and the sweet, caramelized flavor of onions. Whether you’re hosting a game day gathering, a movie night, or just looking for a delicious way to satisfy your cravings, these chips will be the star of the show. The satisfying crunch of each bite, along with the rich and cheesy aftertaste, makes these onion ring chips an irresistible treat that everyone will love.

Making Cheddar Onion Ring Chips at home is simple and rewarding. The process involves slicing fresh onions and coating them in a seasoned batter before frying until golden brown. With just a few pantry staples and minimal preparation, you can produce this snack in your kitchen, filling the air with the mouthwatering aroma of fried onions and melted cheese. Perfect as a side dish or even as a standalone snack, these chips bring a richness that elevates any meal.

Quick Recipe Highlights

  • Flavor Profile: These Cheddar Onion Ring Chips are savory and cheesy, perfectly balanced by the mild sweetness of the onions.
  • Texture: Each chip offers a dual texture of crunchiness from the batter and a soft interior thanks to the fried onions.
  • Aroma: The key aromatic notes include the enticing smell of frying onions and warming cheese that beckon everyone to the kitchen.
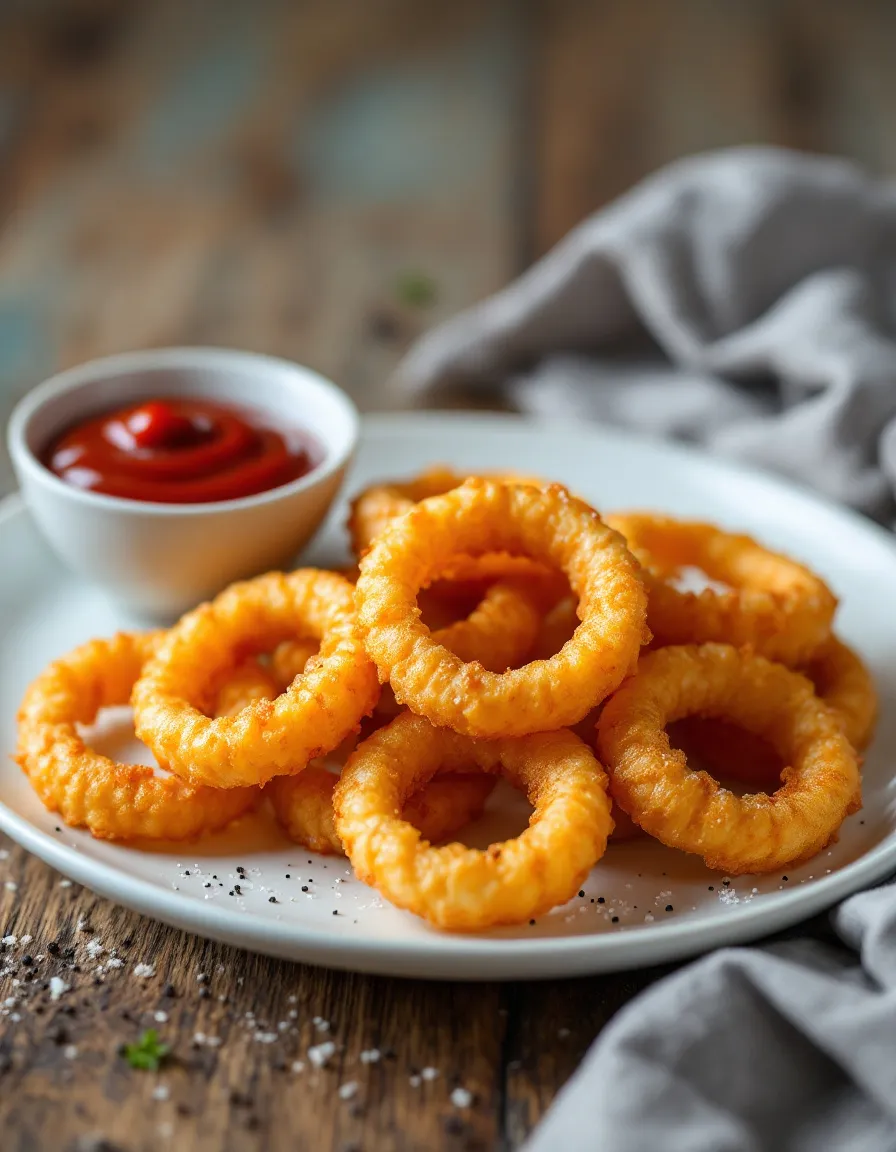
  • Visual Appeal: The golden-brown color of the chips, flecked with cheese, adds an inviting look that is sure to impress.
  • Skill Level Needed: An easy recipe suitable for beginners, it requires basic frying techniques but offers delicious results.
  • Special Equipment: Just a frying pan or a deep fryer is needed, along with basic kitchen utensils for preparation.

Recipe Overview

  • Difficulty Level: This recipe is easy to make, perfect for new cooks looking to try frying at home.
  • Category: These chips are a great appetizer or snack, perfect for sharing at gatherings.
  • Cuisine: While inspired by classic American flavors, these chips can add a twist to global cuisines when served alongside various dips.
  • Cost: Economically priced, with simple ingredients that won’t break the bank, making it accessible for everyone.
  • Season: Enjoyably year-round, but particularly great for summer barbecues or chilly autumn gatherings.
  • Occasion: Excellent for parties, game days, or simply as a tasty treat during a movie night at home.

Why You’ll Love This Recipe

The taste and texture of Cheddar Onion Ring Chips are truly irresistible. Each bite delivers a satisfying crunch followed by the warm, cheesy flavor that complements the sweet onion perfectly. These chips can stand alone or pair wonderfully with dips, creating a delightful experience for your palate. The crispy exterior and tender interior create a mouthfeel that keeps you coming back for just one more chip.

Convenience is another key benefit of this recipe. With just a handful of easily accessible ingredients and simple steps, you can whip up a batch in just under an hour. Perfect for spontaneous gatherings or when you need a quick snack! Moreover, the recipe allows for some flexibility with spices and herbs, letting you customize your flavor palette without any complicated processes.

Nutritionally, while these chips are indulgent, they can be made healthier by opting for lighter cheese or using an air fryer. Onions provide beneficial antioxidants and vitamins while adding a savory touch, making them a better choice compared to overly processed snacks.

Socially, these Cheddar Onion Ring Chips can be a hit at any gathering. Their crunchy texture and cheesy flavor make them a fun snack for sharing, encouraging a party atmosphere. They spark conversations and compliments, making gatherings more enjoyable.

Finally, the cost-effectiveness of this recipe makes it a great choice for any budget. With common ingredients, you can create a gourmet snack that rivals restaurant offerings without overspending. Plus, you can easily double or triple the batch for larger crowds without a hassle.

Historical Background and Cultural Significance

The origin of onion rings can be traced back to various cultures, with fried onions being a common element in many cuisines. The specific combination of cheddar and onion ring chips brings a classic American twist to this worldwide favorite, making it distinctly flavorful and appealing. People have enjoyed fried onion snacks for generations, with variations in the form of appetizers, sides, and even main dishes.

Culturally, onion rings have become staples at fairs, pubs, and bars across the United States. Their evolution from simple fried onions to gourmet versions topped with different cheeses, spices, or dips speaks to their adaptability and enduring popularity. Cheddar offers a rich flavor that contrasts beautifully with the sweetness of the onion, creating an unforgettable snacking experience.

The evolution of onion rings has been significant in the American culinary scene. While they were once served simply as fried onions, they have transformed into a snack that can stand on its own. With this recipe, we pay homage to the humble beginnings of this popular dish while elevating it to a new level of indulgence.

In various regions, onion rings have their unique twists. In the South, they are often seasoned with cajun spices, while in the Midwest, they are paired with barbecue flavors. This adaptability has allowed onion rings to transcend cultural boundaries and become a beloved favorite around the globe.

Ingredient Deep Dive

Onions are a crucial ingredient in Cheddar Onion Ring Chips. Historically, onions have been used for centuries in various cultures, valued not only for their flavor but also their health benefits. Rich in antioxidants, vitamins, and minerals, onions deliver a potent punch of nutrition. When selecting onions for this recipe, look for firm, medium to large-sized onions with shiny skin.

Cheddar cheese takes the dish to another level with its creamy texture and sharp flavor. Originating from England, cheddar cheese has become a staple in American households. It contains essential nutrients, including calcium and protein, which play a vital role in building strong bones. For the best flavor, choose aged cheddar, as it provides a distinct taste that complements the sweetness of the onions.

Flour is used to create the batter for the chips. A staple in kitchens worldwide, flour has been part of culinary traditions for generations. It acts as a binder that helps hold the coating together during frying. For best results, use all-purpose flour, which provides the right balance of texture and binding ability. To store flour, keep it in a cool, dry place to maintain its freshness for an extended period.

Bread crumbs add the final touch of crunch to the chips. Bread crumbs originated as a way to use leftover bread, making them an economical ingredient. They are essential for texture, creating an outer shell that crisps up during frying. Opt for fresh bread crumbs for a homemade touch that can elevate the chips further, providing a unique flavor. Store them in an airtight container to preserve their crunchiness.

Common Mistakes to Avoid

  • Overcrowding the frying pan: This can lead to uneven cooking and soggy chips. Fry in smaller batches for a perfect crisp.
  • Using too much batter: Excess batter can lead to mushy chips instead of crunchy ones. Ensure an even coating of batter.
  • Not heating the oil properly: If the oil isn’t hot enough, the chips will absorb excess oil, making them greasy. Use a food thermometer to check the oil temperature.
  • Not draining excess oil: Failing to drain the fried chips on paper towels can leave them soggy. This extra step is critical for crispiness.
  • Skipping the cooling step: Letting the chips cool slightly before serving helps them maintain their crunch.
  • Incorrect seasoning: Overseasoning or underseasoning can impact flavor. Taste the batter and adjust accordingly.
  • Using old or stale ingredients: Fresh ingredients yield the best flavor and texture. Check the expiration dates on cheese, flour, and breadcrumbs.
  • Frying at too high of a temperature: While a hot oil is essential, frying at too high can burn the exterior before the interior cooks fully. Monitor the heat closely.
  • Not preparing the onions properly: Failing to slice onions evenly can result in inconsistent cooking. Uniform slices ensure every chip cooks evenly.
  • Ignoring food safety: Ensure that the onion chips reach the proper temperature to maintain food safety standards when frying.

Essential Techniques

Frying is the core technique involved in making Cheddar Onion Ring Chips. It’s crucial to master your frying technique, as it impacts the final texture and flavor. Using the right oil and maintaining its temperature ensures that chips fry evenly. Test the temperature by dropping a small piece of batter into the oil; it should sizzle immediately.

Coating the onion slices properly is important as well. Dip each slice into the batter ensuring it’s coated evenly but not overloaded. Too much batter can cause sogginess instead of crunchiness. Additionally, using breadcrumbs will provide an extra layer of crunch that captivates the palate. Always ensure your surface is clean and organized for efficient coating.

Pro Tips for Perfect Cheddar Onion Ring Chips

Start by using chilled ingredients for the batter; this helps create a light texture. Additionally, rest the batter for 10-15 minutes before using it to enhance texture. For enhanced flavor, consider adding spices to your flour mixture to bring additional complexity to the dish.

When frying, maintain a consistent temperature around 350°F (175°C) to prevent sogginess. It also helps to have a frying thermometer to monitor heat accurately. Always test one chip before adding an entire batch, allowing you to adjust cooking times if needed.

Use fresh, high-quality cheddar cheese for the best flavor. Grating your cheese right before preparation will yield the best melting texture. For added depth, consider mixing cheese flavors, such as sharp cheddar with a hint of pepper jack.

For added crunch, double dip your onion rings. First, coat them in the batter, then in breadcrumbs, and dip them again in batter followed by breadcrumbs again. This will create a thicker coating that fries up beautifully crispy.

Finally, let the chips rest on a cooling rack instead of paper towels. This will keep them crispy by allowing air to circulate around all sides while cooling.

Variations and Adaptations

There are numerous ways to personalize your Cheddar Onion Ring Chips. For regional adaptations, consider spicing them up with southwestern flavors by adding chili powder or smoked paprika to the batter. Seasonal adaptations can include adding shredded zucchini during summer or using butternut squash during the autumn months to create a seasonal twist.

Dietary modifications are also possible. For gluten-free options, consider using almond flour or chickpea flour. In the case of lowering calories, consider baking or air frying instead of deep frying for a healthier option.

Flavor variations like incorporating garlic powder or herbs such as parsley, oregano, or thyme into your breadcrumbs can elevate the dish significantly. For a twist on texture, try using crushed cornflakes instead of breadcrumbs for a unique crunch.

Lastly, presenting the chips can be alluring by serving them in a cone-shaped holder lined with parchment paper or on a wooden serving board, creating a rustic and fun dining experience.

Serving and Presentation Guide

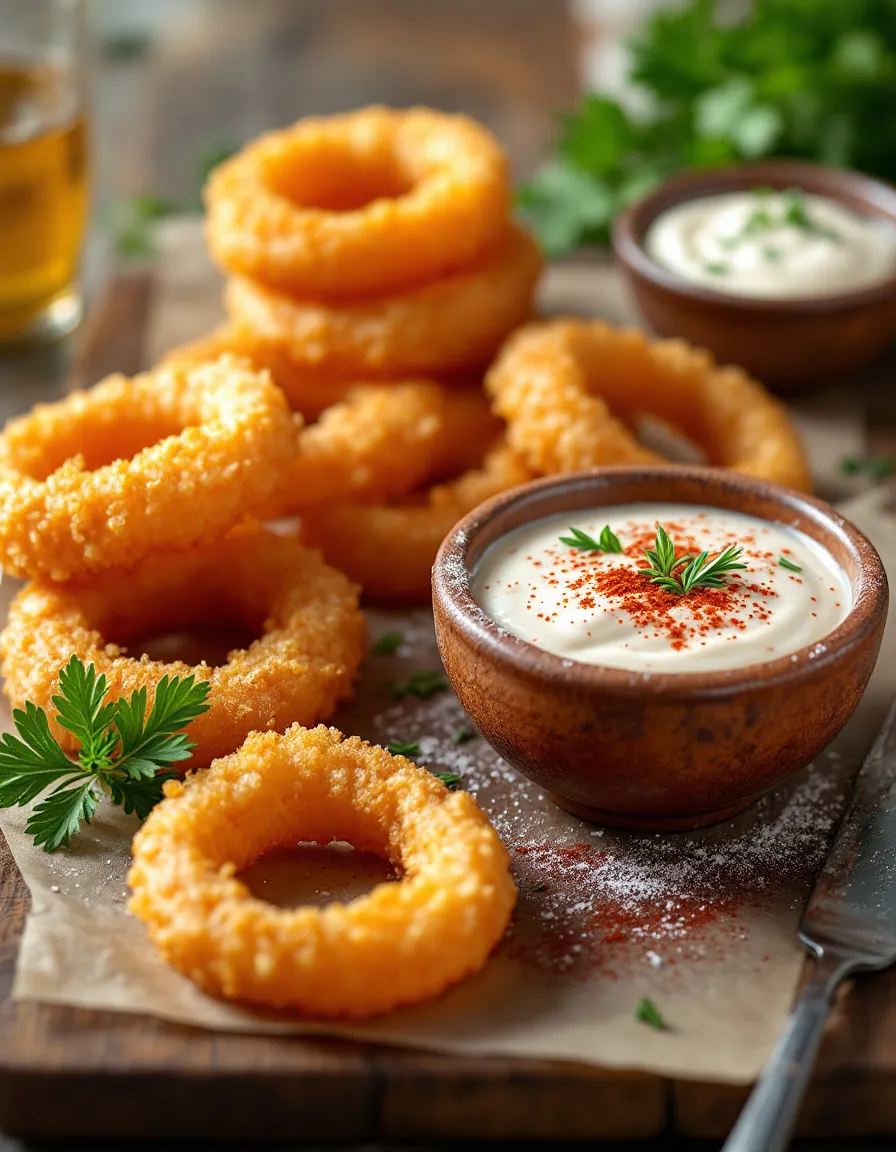
When serving your Cheddar Onion Ring Chips, presentation plays an essential role. A great way to serve is in a shallow bowl or on a platter lined with lettuce leaves for a fresh touch. For dipping sauces, small bowls filled with ranch, spicy mayo, or ketchup can offer delicious pairings.

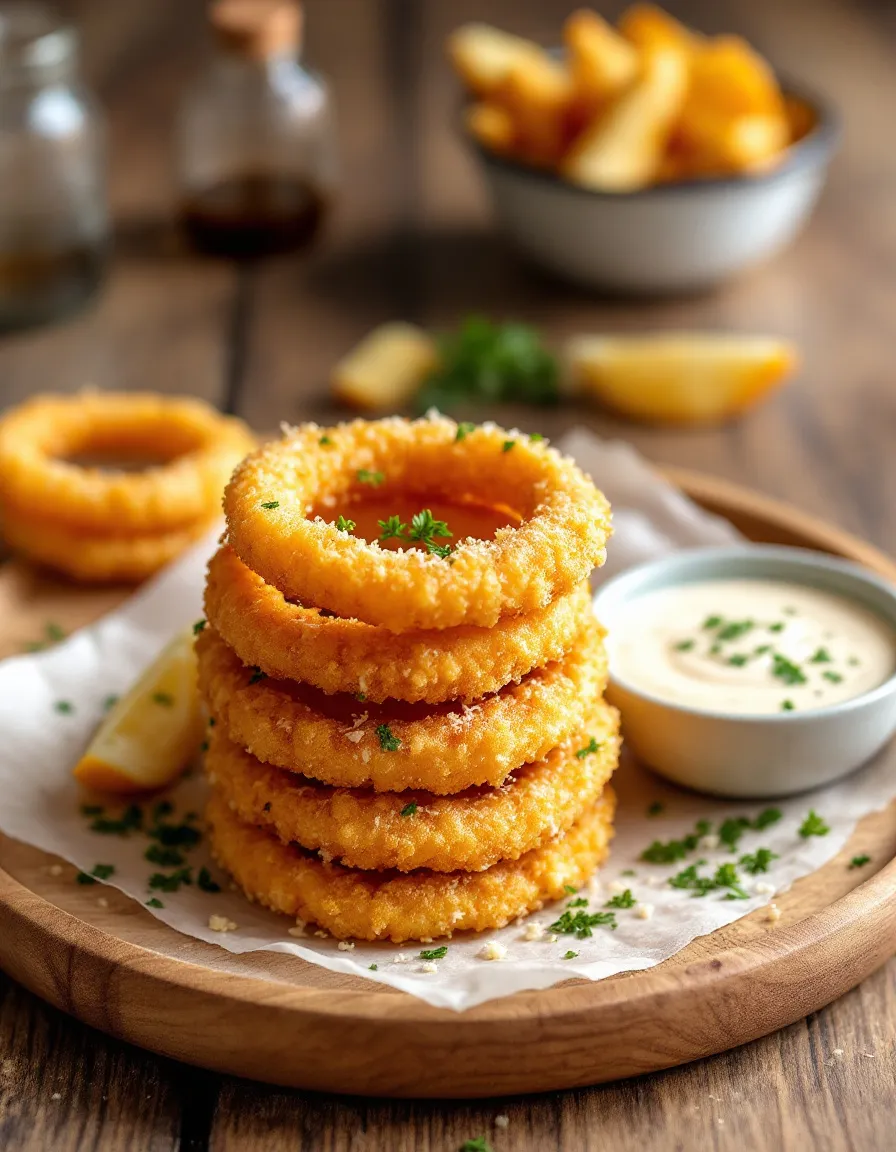
Another presentation idea includes stacking chips vertically for dramatic effect, making them appear more enticing. For garnishing, sprinkle some chopped herbs such as parsley or cilantro on top for a burst of color and freshness. Consider using vibrant serving dishes to enhance the attractiveness of your dish.

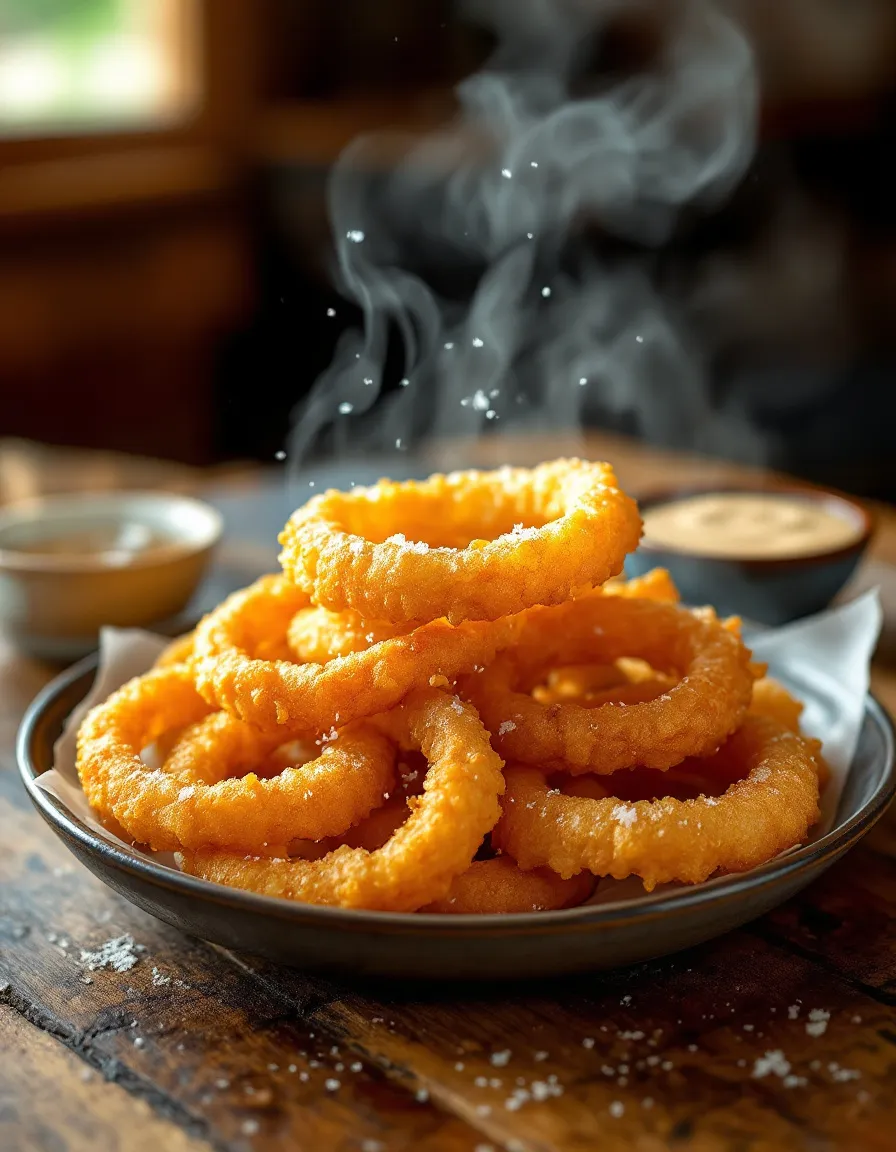
Temperature considerations are crucial too; serve the chips quickly after frying while they’re still warm to ensure maximum enjoyment. For portion control, consider serving in small personal-sized bowls to encourage sharing while not overwhelming guests.

Finally, for a modern twist, consider pairing your chips with craft beers or refreshing beverages to enhance the dining experience aesthetically and flavor-wise.

Wine and Beverage Pairing

When it comes to wine pairings for Cheddar Onion Ring Chips, a light white wine like Sauvignon Blanc or a crisp Pinot Grigio complements the rich flavors without being overpowering. These wines bring a refreshing acidity that contrasts beautifully with the heavy cheese and fried batter.

If you’re opting for a beer, a pale ale or lager works wonderfully, cutting through the richness of the cheese while providing a light refreshing element. For non-alcoholic options, consider sparkling water with a squeeze of lemon or a refreshing iced tea to balance the flavors.

If you want a warm drink, a mild chai tea can offer a delightful contrast for cooler days. Pairing with beverages that have contrasting flavors helps to elevate the enjoyment of your onion ring chips, allowing the flavors to shine beyond just the dish itself.

Storage and Shelf Life

To store your Cheddar Onion Ring Chips, ensure they are completely cool before placing them in an airtight container. If stored properly, they can last for up to 3 days at room temperature. To maintain crispness, consider placing a layer of paper towels inside the container to absorb moisture.

For longer storage, you can freeze the uncooked onion rings. Arrange them in a single layer on a baking sheet, freeze until solid, then transfer to a freezer-safe bag. They can be stored in the freezer for up to 2 months. To reheat, fry them directly from the freezer.

Signs of spoilage include a change in smell or visible moisture. To reheat, place the chips on a baking sheet and allow them to heat in a pre-heated oven at 375°F (190°C) for about 5-10 minutes, making them crispy again. Avoid the microwave, as it can make them soggy.

Make Ahead Strategies

To make Cheddar Onion Ring Chips in advance, start by prepping the onions. Slice them and coat in batter, then store them in the refrigerator. This pre-preparation allows flavors to meld and ensures a quicker frying process when ready to cook.

To optimize flavor while saving time, consider seasoning the batter the day before. Store it in an airtight container, allowing it to develop richer flavors. However, avoid coating the onion rings until you’re ready to fry, as the batter may lose its airiness through prolonged contact with the onions.

Additionally, you can set up your frying station ahead of time. Gather all utensils, pans, and ingredients to smooth the cooking process when you’re ready to serve.

For fresh element additions, serve with homemade dips like guacamole or salsa prepared ahead of time and stored in the fridge until serving.

Scaling Instructions

When scaling your recipe for Cheddar Onion Ring Chips, you can easily double or triple the ingredients based on your needs. Just ensure that your frying pan can accommodate the increased quantity. Frying in batches will help maintain consistent cooking temperatures.

For halving the recipe, adjust the ingredients carefully, ensuring you maintain the same proportion of batter to onions for consistent results. The cooking time may slightly vary based on the batch size, so keep an eye on the chips as they fry.

Timing modifications may be necessary when increasing the recipe, with larger batches requiring extra time to cook. Always check a couple of chips for doneness before removing them from the oil.

Regarding storage, make sure to have enough containers on hand for larger quantities, particularly if you intend to freeze them for later use. Prep ahead, so you have enough space in your freezer to accommodate expanded batches.

Nutritional Deep Dive

The macro breakdown of Cheddar Onion Ring Chips includes fats from the frying oil and cheese, carbohydrates from the breading and flour, and protein primarily from the cheese. This makes them a satisfying snack but also one that should be enjoyed in moderation.

Micronutrient analysis shows that onions provide vitamins C and B6, while cheddar cheese is rich in calcium and protein. To balance your intake, consider incorporating these chips into a broader meal involving fruits or vegetables.

Health benefits of onions include anti-inflammatory properties and heart health, most noted for their antioxidative effects. Cheese also provides a good source of energy, but too much can contribute to high saturated fat intake, so keep portion sizes in check.

For dietary considerations, those watching caloric intake should enjoy these chips alongside more nutrient-dense items. Portion analysis should include moderation, as chips are calorie-dense and may not always offer the best nutritional value.

Lastly, while Cheddar Onion Ring Chips are an indulgent option, they can fit into a balanced lifestyle when combined with fruits, vegetables, and whole grains in meals throughout the day.

Dietary Adaptations

For a gluten-free variation of Cheddar Onion Ring Chips, substitute regular flour with gluten-free all-purpose flour or almond flour. These alternatives yield a similar texture and will maintain the delicious flavor.

If a dairy-free version is desired, consider using nutritional yeast as a cheese substitute for flavor, combined with dairy-free bread crumbs for texture. Several plant-based cheeses are available that can mimic cheddar, enhancing its creamy texture.

For a vegan adaptation, skip eggs in the batter and use a vegan buttermilk made from non-dairy milk mixed with vinegar instead. This adds acidity that will still activate the rising agent, keeping everything light and fluffy.

For low-carb and keto-friendly adaptations, use a flour substitute like ground almonds or coconut flour for coating. These options create a low-carb alternative that still offers great taste.

Paleo options can be achieved by using almond flour as the base and leaving out any processed ingredients. Low-FODMAP options will require using specific onions that are less troublesome for those with digestive sensitivities, such as green onions.

Troubleshooting Guide

Common texture issues include soggy chips, which often result from overcrowding during frying. Ensure just enough space for chips to float freely in the oil to get that golden crispness. Excess moisture from onions can also lead to sogginess, so draining properly is important.

Flavor balance is crucial. If too salty, reduce the seasoning gradually, and begin tasting before adding any salt. Conversely, if bland, consider seasoning both the batter and the breadcrumbs liberally for better flavor integration.

If the chips are overcooked and burnt, try reducing frying time on the next batch. Maintain a proper frying temperature could also reduce the cooking time required. Color is your indicator, and even slightly lighter chips can yield a better flavor profile.

Equipment challenges may arise. If you’re using a non-stick pan, certain oils will be ineffective; a heavy-duty frying pan or deep fryer provides the best results for consistent frying and temperature maintenance.

Ingredient substitutions can be tricky; ensure your substitutes match the consistency and flavors aimed for in the recipe for success. If time is short, using frozen onion rings instead of fresh may serve as a quicker substitute, though freshness will always aid flavor.

Timing concerns may lead to cold chips at serving. For best results, consider warming them lightly in the oven just before serving to ensure they stay crispy and hot.

Recipe Success Stories

Community feedback reveals that Cheddar Onion Ring Chips are a hit among various groups, especially during gatherings where snacks are a centerpiece of enjoyment. Variations suggested by readers often include adding different types of cheese, showcasing a creativity that continues to impress.

Photographic success stories frequently highlight the golden-brown color of the chips, capturing the appetizing nature of this simple yet indulgent dish. Many have shared their adaptations, such as incorporating spices that reflect their regional tastes.

Readers also rave about the convenience factor, happily reporting that these chips have become go-to snacks for family game nights or casual gatherings. Suggestions for homemade dipping sauces have further added to the charm, showcasing unique flavors that now accompany the original recipe.

Lastly, feedback often highlights the aroma that fills the kitchen during preparation, turning cooking into an aromatic celebration that entices family and friends. The ease of preparation has transformed many into amateur fry cooks, leading to rave reviews at various social events.

Frequently Asked Questions

Can I make these chips ahead of time?

Yes, you can prepare the batter and slice the onions ahead of time. Store the batter in the fridge and avoid coating the onions until just before frying for the best texture.

Are these chips suitable for freezing?

Absolutely! You can freeze uncooked onion ring chips. Lay them out on a baking sheet to freeze individually before transferring them into a freezer-safe bag.

What can I use instead of cheddar cheese?

You can try mozzarella, pepper jack for a spicier kick, or any cheese that melts well. Nutritional yeast can also work for a dairy-free version.

Can I bake instead of fry these chips?

Yes, you can bake them at 400°F (200°C) for about 20-25 minutes. Spray them lightly with cooking oil for extra crispiness.

How do I ensure the chips stay crispy after frying?

Drain the chips on paper towels immediately after frying and avoid covering them, as steam can make them soggy.

What’s the best oil for frying these chips?

Vegetable oil, canola oil, or peanut oil are great choices because they have high smoke points, which are ideal for frying.

How do I store leftovers properly?

Store them in an airtight container at room temperature for up to three days. Place paper towels inside to absorb moisture.

Can I use whole wheat flour for a healthier option?

Yes, whole wheat flour can be used; it will provide a nuttier flavor and is a healthier alternative to all-purpose flour.

What if my batter is too thick?

If the batter is too thick, thin it out with a little water or milk until it reaches a consistency similar to pancake batter.

Do I have to peel the onions?

Peeling is preferred for the best flavor, but if you prefer a stronger onion taste, you can leave the skin on if desired.

Additional Resources

In addition to Cheddar Onion Ring Chips, consider exploring related recipes, such as crispy zucchini fries or loaded potato skins, for tasty alternatives. Technique guides for frying basics can help boost your skills in the kitchen, ensuring perfect chips every time.

For ingredient information, a guide on selecting the best types of cheese or onion varieties for frying can elevate your cooking. Equipment recommendations for frying setups, if you’re exploring deeper into frying culinary arts, will also be beneficial.

Lastly, seasonal variations can inspire new ways of enjoying these flavors throughout the year, integrating fresh seasonal herbs or vegetables to keep the recipe lively and exciting.

Join the Conversation

We’d love to hear your thoughts on this recipe; share your experiences with making Cheddar Onion Ring Chips! Post your results on social media using our hashtag or leave comments about your adaptations or specific tricks you’ve learned.

If you snap a photo of your creation, consider sharing it with fellow cooking enthusiasts to inspire and connect. Recipe reviews and suggestions from the community are always welcomed to enrich future versions and variations of Cheddar Onion Ring Chips.

Additionally, if you tried our recipe, let us know how it went! Your feedback helps improve our content and supports others looking to learn this delicious dish.

The Recipe

Cheddar Onion Ring Chips

Serves: 4 servings

Prep Time: 15 mins

Cook Time: 25 mins

Total Time: 40 mins

Kitchen Equipment Needed

  • Frying pan or deep fryer
  • Mixing bowls
  • Measuring cups and spoons
  • Slotted spoon or spider for lifting chips
  • Paper towels for drainage

Ingredients

  • 2 large onions, sliced
  • 1 cup all-purpose flour
  • 1 cup breadcrumbs
  • 1 cup shredded cheddar cheese
  • 2 large eggs
  • ½ teaspoon salt
  • ½ teaspoon garlic powder
  • ½ teaspoon black pepper
  • Oil for frying

Directions

  1. Start by slicing the onions into thick rings and setting them aside.
  2. In a bowl, mix flour, garlic powder, salt, and pepper.
  3. In another bowl, beat the eggs and mix in shredded cheddar cheese.
  4. In a third bowl, place breadcrumbs.
  5. Dip each onion ring first into the flour mixture, then the egg mixture, and finally coat in breadcrumbs.
  6. Heat oil in your frying pan over medium heat. Ensure it’s hot before adding the onion rings in batches.
  7. Fry each ring for around 3-5 minutes until golden brown.
  8. Remove and place on paper towels to drain excess oil.
  9. Serve warm and enjoy your Cheddar Onion Ring Chips!

Recipe Notes

  • Experiment with different cheeses for varied flavors!
  • For a healthier option, consider baking instead of frying.
  • For extra crunch, double dip in batter and breadcrumbs before frying.
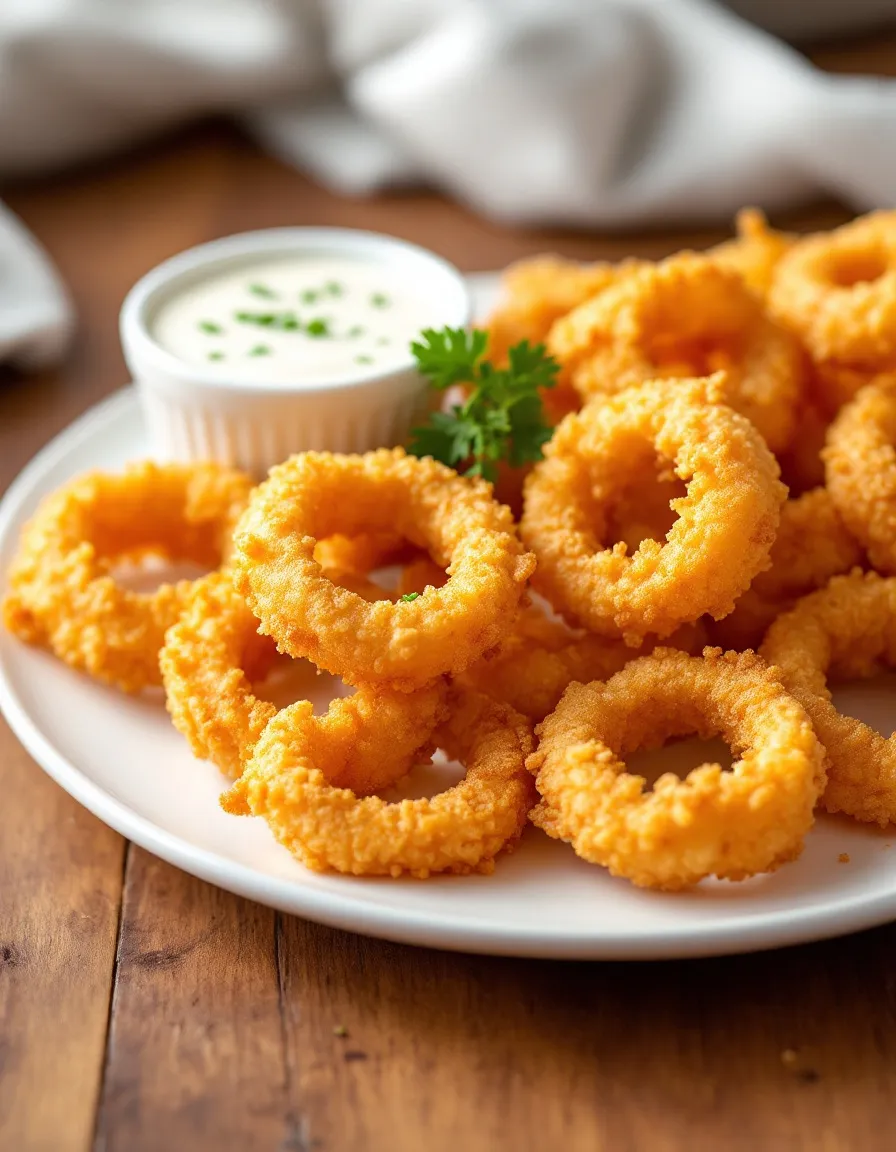
Crispy Air Fryer Onion Rings – Easy and Homemade

Deliciously Crispy Air Fryer Onion Rings: A Guilt-Free Treat

⚖️
Difficulty
Easy

⏲️
Prep Time
10 mins

🕒
Cook Time
15 mins

⏱️
Total Time
25 mins

🍽️
Servings
4

Onion rings are a classic snack that seems to have a special way of bringing joy to any gathering. Imagine a crispy, golden-brown exterior that gives way to a soft, flavorful onion inside, creating a mouthwatering contrast. With the Air Fryer, you can enjoy these delightful treats without the guilt of deep frying. This air fryer onion rings recipe not only maintains all the crunch and flavor but also significantly reduces the oil used, making it a healthier alternative to traditional recipes.

Preparing air fryer onion rings is simple and satisfying. The aroma of seasoned breadcrumbs wafting through the air as they cook is irresistible. It’s the perfect appetizer or side dish for family game nights, summer barbecues, or cozy movies at home. Plus, serving these delicious rings fresh from the air fryer ensures that they remain crispy for as long as you want them!

Quick Recipe Highlights

  • Flavor Profile: The onion rings are savory with a hint of sweetness from the onions, perfectly balanced by the aromatic spices.
  • Texture: Enjoy a crunchy outer layer with a soft and tender onion center that melts in your mouth.
  • Aroma: The enticing smell of frying onions combined with seasoned breadcrumbs fills your kitchen, creating an inviting atmosphere.
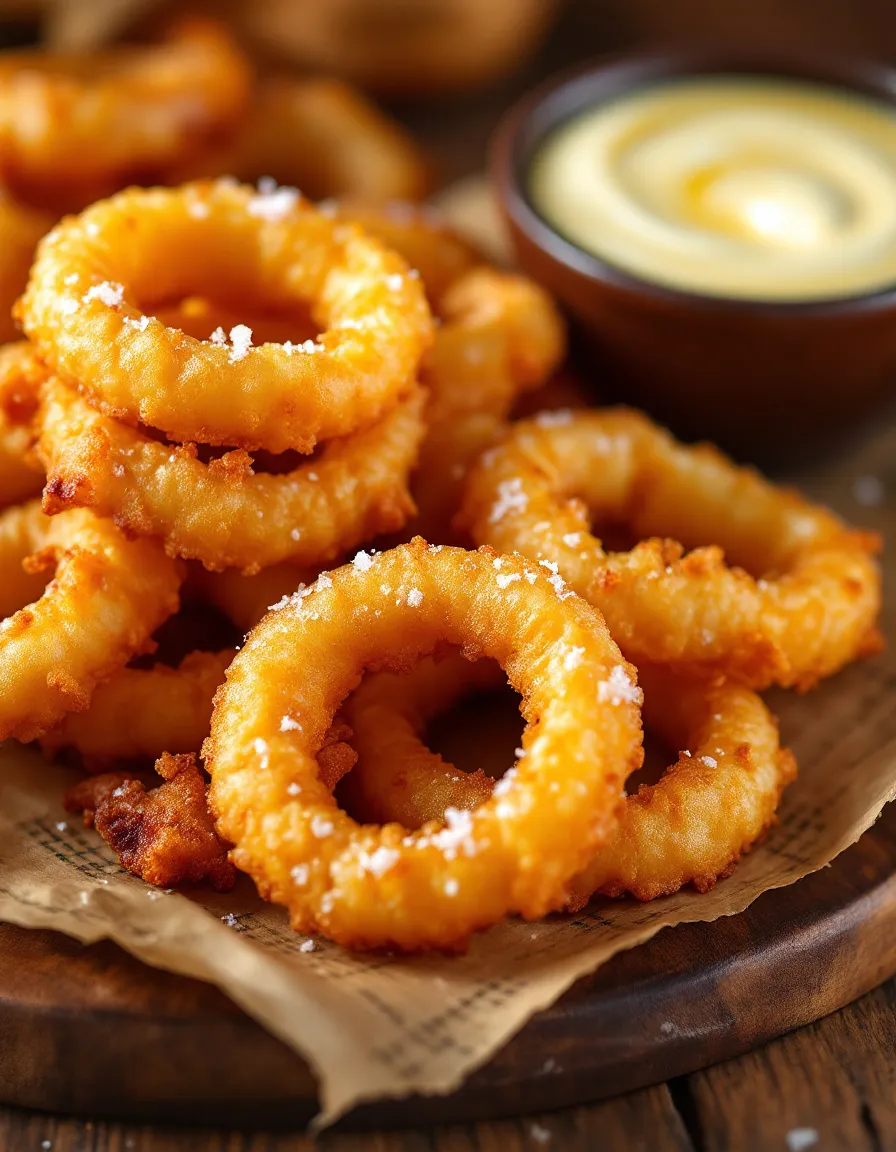
  • Visual Appeal: Golden brown rings look delightful on any plate, served warm and fresh.
  • Skill Level Needed: Perfect for beginners, this recipe requires minimal culinary skills and equipment.
  • Special Equipment: An air fryer is essential for making these crispy onion rings, allowing for even cooking without all the oil.

Recipe Overview

  • Difficulty Level: This air fryer onion rings recipe is easy enough for novice cooks, requiring no complicated techniques or hard-to-find ingredients.
  • Category: Perfect as a snack, side dish, or appetizer, these onion rings can complement various meals.
  • Cuisine: This dish draws inspiration from classic American cuisine, reflecting the love for fried snacks.
  • Cost: The ingredients are budget-friendly and readily available, making this recipe accessible for everyone.
  • Season: Onion rings are a great treat year-round, but they are especially enjoyable during the warmer months at picnics and parties.
  • Occasion: These onion rings are fantastic for casual gatherings, game day events, family dinners, or even movie nights.

Why You’ll Love This Recipe

Air fryer onion rings are not just irresistible; they’re a healthier twist on a beloved snack. The taste and texture are spot on with the satisfying crunch of the outer layer contrasting beautifully with the soft, succulent onions inside. The savory and slightly sweet flavor strikes the perfect balance, appealing to both kids and adults alike—a treat everyone can enjoy.

With the air fryer, convenience is key. You can whip these rings up in under 30 minutes, allowing for quick preparation whenever the craving strikes. The lack of excess oil means you can indulge without an overwhelming sense of guilt, making them an excellent choice for family-friendly meals. Plus, it’s easy to clean up afterward, which is a big win for busy kitchens!

Nutritionally, onion rings offer an opportunity to enjoy a classic crunch without the heavy calories associated with deep-fried versions. Onions are known for their potential health benefits, including antioxidants and vitamins. Frying them in the air fryer means you retain more of the nutritional value while still enjoying a crispy texture that satisfies your cravings.

These onion rings are an excellent addition to social gatherings, making them a hit at parties and BBQs. They serve as a great conversation starter and are easy to share, making them perfect for groups. Set out a variety of dipping sauces, and you’ve got a delightful, interactive appetizer for family and friends to enjoy!

Lastly, cost-effectiveness is key with this recipe. With minimal ingredients and preparation steps, you’re not only saving time but also money. Onion rings made at home often taste better than their restaurant counterparts, allowing you to enjoy a gourmet experience without breaking the bank—what’s not to love?

Historical Background and Cultural Significance

The origin of onion rings can be traced back to the United States, where they became popular as a classic fried snack. However, their roots may go deeper, as many cultures have enjoyed fried onion dishes for centuries. This beloved side dish represents a fusion of culinary traditions, highlighting the versatility of onions.

Culturally, onion rings enjoy significant popularity in American fast-food and diner cuisine. They’re often associated with comfort food, bringing nostalgia for many who enjoyed them on family outings or as part of their favorite meals. Their casual nature makes them a staple for gatherings, parties, and sporting events.

Over the years, the evolution of the onion ring recipe has led to diverse variations, with different cuisines putting their unique spin on this timeless treat. Whether breaded, battered, or spiced differently, the core appeal of crispy fried onions remains unchanged.

Regionally, onion rings vary in size, breading styles, and seasonings. While the classic versions remain popular, you’ll find unique adaptations in various parts of the country. Some may feature spicy or cheesy elements, showcasing the ingenuity and creativity of home cooks and chefs alike.

Ingredient Deep Dive

Onions are the star of the show in onion rings, and their history dates back thousands of years. This versatile vegetable has been a dietary staple across different cultures. Beyond their culinary appeal, onions are packed with vitamins and minerals. When selecting onions for onion rings, choose fresh, firm specimens, avoiding any that are soft or sprouting. Store them in a cool, dark place to maintain their freshness. For substitutions, shallots or sweet onions can offer unique flavors.

Breadcrumbs add that satisfying crunch to onion rings. Historically used as a method to stretch meals, breadcrumbs have evolved into essential ingredients for many dishes. They can also offer a range of textures and flavors, from traditional white breadcrumb styles to whole grain or panko. When choosing breadcrumbs, consider freshness and check for any signs of moisture. Store them in airtight containers and use them within a few months for best quality. For a gluten-free option, substitute with gluten-free breadcrumbs.

Seasoning is vital in elevating the flavor of onion rings. Spices like paprika, garlic powder, and pepper not only enhance the taste but also add aromatic depth to the dish. When selecting spices, opt for fresh, high-quality products, as their potency can diminish over time. Store spices in a cool, dark place to preserve their flavor. Feel free to get creative with your seasoning choices; adding herbs or unique spice blends can create a personalized version of onion rings.

Common Mistakes to Avoid

  • Using soggy or old onion slices: Always choose fresh onions for the best flavor and texture. Ensure they are cut evenly to promote uniform cooking.
  • Overcrowding the air fryer basket: Give onion rings space to circulate air for maximum crispiness. Cook them in batches if necessary.
  • Skipping seasoning: Don’t shy away from seasoning your onion rings; it enhances flavor tremendously. Taste your seasoning mix before rolling your rings.
  • Not preheating the air fryer: Preheating ensures even cooking and helps achieve that desired crispy texture.
  • Using too much oil: All you need to achieve a nice crunch is a light spray of oil. Overloading can lead to soggy rings.
  • Incorrect cooking time: Monitor your onion rings closely and adjust the cooking time based on your air fryer model and desired crispiness.
  • Failing to coat evenly: Make sure each onion ring is evenly coated in breadcrumbs for consistent crunch and flavor.
  • Using low-quality breadcrumbs: Choose fresh and crispy breadcrumbs for the best results; stale products will affect texture.
  • Not letting them cool: Allow onion rings to cool briefly before serving; this helps them set and maintain their crunch.
  • Ignoring dipping sauces: Elevate your onion rings by serving with a variety of dipping sauces that complement their flavor.

Essential Techniques

To master the perfect air fryer onion rings, even coating is key. This technique ensures that the breadcrumbs adhere adequately, resulting in a uniform texture. Using one hand for wet ingredients and the other for dry can help avoid clumping and keep your hands cleaner.

Another important technique is timing. Air fryers cook quickly, and knowing how to adjust the cooking time based on your model is vital. Check for visual cues, like golden brown color and a crispy appearance, to indicate perfect doneness.

Using the correct preheating method will aid in achieving variable textures as well. Preheating ensures the rings start cooking immediately, locking in moisture while delivering a crispy finish. Keep a lookout for how perfectly they bubble and brown during cooking to determine the right timing for your preferred crispiness.

Pro Tips for Perfect Air Fryer Onion Rings

Start by selecting the best onions for your rings—sweet onions or yellow onions work exceptionally well. Ensure they’re fresh, firm, and not sprouting.

Experiment with different breadcrumb types for diverse flavors and textures. Panko breadcrumbs yield the crunchiest onion rings due to their light and airy nature.

Don’t forget to let your onion rings cool slightly before serving; this will help them maintain their crispy texture longer.

Consider adding a pinch of cayenne pepper or paprika to your seasoning mix for a delightful kick of spice that complements the sweetness of the onions.

Try marinating your onion slices in buttermilk for an hour before breading. This extra step enhances flavor and allows for a softer interior.

Ensure each ring is fully coated in your breadcrumb mixture to maximize crunchiness; pat lightly to encourage adherence.

For a touch of indulgence, serve with gourmet dipping sauces like garlic aioli or spicy ranch to elevate the entire dining experience.

Variations and Adaptations

Onion rings can be adapted to feature seasonal flavors by incorporating herbs like rosemary or thyme during the breading process. This seasonal touch infuses your dish with fresh taste.

Consider a gluten-free option by using almond flour or gluten-free breadcrumbs if dietary restrictions are a concern, allowing everyone to enjoy this delightful snack.

For a cheesy twist, sprinkle Parmesan or cheddar cheese into your breadcrumb mixture for an extra layer of flavor and richness.

Try adding spices like smoked paprika or chili powder for a more robust taste that presents a different profile compared to traditional onion rings.

You can also create a spicy version by incorporating sliced jalapeños alongside your onion rings in the air fryer for an exciting flavor fusion.

For texture modifications, you can slice the onions into thick rings, achieving a heartier bite that holds up well during cooking.

Feel free to play around with different sauces for dipping, or pair them with innovative garnishes like homemade pickles or fresh herbs for an attractive presentation.

Serving and Presentation Guide

For an appealing plate presentation, arrange the onion rings in a circular fashion on a serving platter. This technique showcases their crispy texture while encouraging everyone to dig in.

Enhance the visual presentation by garnishing with fresh herbs like parsley or cilantro, adding a pop of color and fresh aroma that complements the fried rings.

Serve with an assortment of dipping sauces, such as barbecue sauce, ranch dressing, or homemade spicy mayo, to add excitement and variation to each bite.

Consider serving the onion rings on a cutting board lined with parchment paper for a rustic and homey vibe that looks great at any gathering.

Temperature is crucial when serving; enjoy them warm to maintain their crispy texture. Present them shortly after cooking to deliver the best experience.

For portion control, consider pre-dividing the onion rings into smaller bowls when serving, making it easier for guests to enjoy without overwhelming portions.

Wine and Beverage Pairing

These air fryer onion rings pair wonderfully with light, crisp white wines such as Sauvignon Blanc or a refreshing sparkling wine, which complements the flavors without overwhelming them.

For a non-alcoholic alternative, try freshly made lemonade or iced herbal tea, both of which provide a refreshing contrast to the savory goodness of the onion rings.

If you opt for beer, a light lager or wheat beer is an excellent choice, perfectly balancing the salty crunch of the rings with its carbonation and lightness.

When serving tea, a chilled green tea can add an unexpected yet delightful contrast, enhancing the flavor profile of this crispy snack.

Temperature matters in your beverage selection; serve wines chilled and non-alcoholic drinks cold to match the warm, crispy onion rings’ temperature presentation.

Storage and Shelf Life

Proper storage of leftover onion rings is crucial to maintaining their quality. Store them in an airtight container at room temperature for up to 2 days.

If you prefer longer storage, consider refrigerating them, where they can last 3-4 days. However, note that refrigeration can affect their crispiness.

When considering freezing, place cooled onion rings in an airtight container or freezer bag, where they can be stored for up to 3 months.

When reheating, try using the air fryer again. Preheat to 350°F and cook for about 4-6 minutes, checking often to achieve that familiar crispy texture.

Signs of spoilage include an off-putting odor or visible mold—always inspect your onion rings before consuming.

Avoid reheating multiple times, as each reheating session can compromise their quality and texture significantly.

Make Ahead Strategies

Preparing onion rings ahead of time is easy—pre-slice your onions and soak them in buttermilk for up to an hour before the party.

Breading the onion rings can also be done a few hours in advance. Simply refrigerate them between layers of parchment paper to keep them from sticking together.

If you’ve made a larger batch, store them unbreaded in the refrigerator and bread them just before cooking to enhance freshness.

Assess the quality after storing; onions might lose moisture, so emphasize drying them thoroughly before breading for optimal results.

For an added touch, consider prepping dips the night before and allowing them to chill; this can enhance flavors and make your gathering seamless.

When it comes time to cook, be sure to allow extra time for the air fryer to preheat while your ready ingredients wait on the counter.

Scaling Instructions

To halve the recipe, simply divide all ingredients in half, ensuring proportionate breading and seasoning for balance.

For doubling or tripling, keep in mind that you may need to cook in separate batches depending on your air fryer capacity—this ensures even cooking for all the onion rings.

When scaling up the recipe, adjustments in timing may be necessary; larger quantities can take slightly longer to cook.

Utilize a timer to keep track of each batch; maintaining flavor and texture consistency is crucial when enlarging the recipe.

For storage considerations, ensure that your containers can accommodate the increased batch sizes without compromising freshness.

Always check for doneness before serving larger amounts; visual cues will indicate if the batches have cooked evenly and adequately.

Nutritional Deep Dive

A macro breakdown of air fryer onion rings reveals a delightful balance of carbohydrates from the onions and breadcrumbs, combined with slight protein content.

The micronutrient analysis shows onions are a good source of vitamin C, B vitamins, and important minerals such as manganese and potassium, enhancing their nutritional profile.

Including onion rings in your meal ensures you’re not only enjoying a tasty snack but also benefiting from the good properties of onions, which may support heart health and digestion.

When considering portion analysis, one serving (approx. 4-5 rings) provides a satisfying crunch while maintaining a reasonable calorie count, making them an ideal choice for snackers.

For weight management, moderation is key; savor each ring and combine them with a salad or light dip to maintain balanced meals.

Onions’ natural sugars can lead to a delicious sweetness, making them a tasty addition that helps satisfy cravings without excessive calorie intake.

Dietary Adaptations

For those following a gluten-free diet, swapping regular breadcrumbs for gluten-free alternatives ensures everyone can enjoy a crunchy snack.

If you’re dairy-free, consider using non-dairy milk for soaking the onions, ensuring they’re still fully flavored and tender without compromising dietary needs.

Vegan adaptations are simple with minimal adjustments—just replace any egg wash used for breading with a mixture of flour and water for good adherence.

Low-carb dieters can utilize crushed pork rinds or almond flour instead of breadcrumbs, resulting in a keto-friendly twist on this classic recipe.

Paleo enthusiasts can use almond flour and ensure that all seasonings and ingredients align with their dietary practices for a healthy treat.

For those on a low-FODMAP diet, opting for shallots instead of onions can provide a similar flavorful experience without triggering sensitivities.

Troubleshooting Guide

For texture issues, consider adjusting the cook time; undercooked rings can turn out soft, while overcooked ones may become tough and chewy.

If the flavor balance is off, revisit your seasoning. Adding salt, pepper, or a bit of garlic powder can elevate the taste significantly.

Temperature problems might occur if the air fryer isn’t appropriately preheated. Always preheat for optimal cooking results that enhance texture and flavor.

Ingredient substitutions can lead to unexpected results; always choose high-quality, compatible alternatives to maintain the integrity of the dish.

Timing concerns arise when managing batches; overlapping cooking times can lead to inconsistencies in doneness, affecting overall flavor.

For the best results, always keep an eye on the visual cues while cooking, such as color and texture, ensuring the final product meets your expectations.

Recipe Success Stories

Community feedback around air fryer onion rings has been overwhelmingly positive, highlighting their crispiness and straightforward preparation as standout features.

Variations such as gluten-free and spicy versions have received praise, illustrating the flexibility of this recipe within various dietary preferences.

Readers enjoy sharing their own adaptation stories, often including unique seasoning mixes or homemade dipping sauces that add personal flair to this classic dish.

Photography tips include capturing the golden crispiness that air frying achieves. It’s crucial to highlight texture to entice viewers and encourage them to try the recipe.

Recipe reviews fill comment sections with rave endorsements surrounding the ease of preparation, quick cooking, and overwhelmingly positive flavor experiences shared by families and friends.

Frequently Asked Questions

Can I use different types of onions for this recipe?
Yes, while yellow onions are traditional, sweet onions like Vidalia or red onions can offer unique flavors and sweetness that add depth to your onion rings.

Can I bake onion rings instead of using an air fryer?
Absolutely! You can bake them in a preheated oven at 425°F for 20-25 minutes. Flip halfway through for even cooking.

How can I make the onion rings spicier?
Add cayenne pepper to your seasoning mix or use spicier varieties of onions, such as red onions. You can also serve with a spicy dipping sauce for an extra kick.

Is it necessary to soak the onions in buttermilk?
Soaking enhances flavor and tenderness but isn’t strictly necessary. You can also use plain milk or skip this step entirely if preferred.

Can I prep these in advance?
Yes! You can prepare the onion rings ahead by soaking and breading them, storing in the refrigerator until you’re ready to cook.

What dipping sauces go well with onion rings?
Classic choices include ketchup, ranch, and BBQ sauce. For something different, try garlic aioli or spicy mayo for a delicious contrast.

Can I freeze the cooked onion rings?
Yes, you can freeze cooled onion rings. Place them in an airtight container and reheat in the air fryer for best results.

How long will leftovers keep?
Leftover onion rings can be stored in an airtight container at room temperature for 2 days or in the refrigerator for 3-4 days.

What’s the best way to reheat onion rings?
The air fryer is the best option for reheating. Preheat, then cook for 4-6 minutes at 350°F for crispy results.

Can I use a different coating besides breadcrumbs?
Certainly! Alternatives like crushed cornflakes or panko breadcrumbs can add different textures and flavors to your onion rings.

Is there a way to make these onion rings healthier?
Reducing the amount of oil used for spraying and ensuring a light coating of breadcrumbs can contribute to a healthier dish.

Additional Resources

For those looking to explore more delicious snack ideas, our blog features related recipes like “Crispy Air Fryer Zucchini Fries” and “Baked Sweet Potato Wedges.”

You’ll also find technique guides illustrating the best methods for using your air fryer to its fullest potential, maximizing its capabilities for versatile meals.

Interested in learning more about specific ingredients used? Check out our ingredient information sections throughout the site discussing onions and other key components.

If you’re unsure about the best kitchen equipment for preparing snacks, we’ve recommended essential tools perfect for air frying and other cooking techniques.

Finally, keep an eye out for seasonal variations that highlight fresh and local ingredients each month, inviting you to try new flavors and combinations in every dish.

Join the Conversation

Connect with our community by sharing your take on this air fryer onion rings recipe! We love to see how you adapt it to your tastes.

Consider documenting your cooking process and sharing photos on social media for a chance to be featured in our next blog post!

We value recipe reviews and encourage you to leave comments and suggestions based on your experiences, building a wealth of knowledge for everyone to share.

Engagement is vital; your feedback informs our recipe evolution and fosters a collaborative cooking environment. Spread the word about your favorite adaptations, and let’s inspire others together!

Don’t forget to explore other delicious recipes and cooking techniques on our blog, helping to elevate your culinary skills.

The Recipe

Air Fryer Onion Rings

Serves: 4

Prep Time: 10 mins

Cook Time: 15 mins

Total Time: 25 mins

Kitchen Equipment Needed

  • Air fryer
  • Knife and cutting board
  • Mixing bowls
  • Measuring cups and spoons
  • Whisk

Ingredients

  • 1 medium onion, sliced into rings
  • 1 cup breadcrumbs
  • ½ cup all-purpose flour
  • 1 egg, beaten
  • 1 cup buttermilk (or regular milk)
  • 1 teaspoon garlic powder
  • 1 teaspoon paprika
  • Salt and pepper to taste
  • Cooking spray or oil for misting

Directions

  1. Soak onion rings in buttermilk for at least 30 minutes.
  2. In a shallow bowl, mix together breadcrumbs, garlic powder, paprika, salt, and pepper.
  3. In another bowl, place the flour. In a third bowl, whisk the beaten egg.
  4. Take each onion ring, dip in the flour, then into the egg, and finally coat with the breadcrumb mixture.
  5. Preheat the air fryer to 350°F (175°C).
  6. Arrange the coated onion rings in a single layer in the air fryer basket. Mist with cooking spray.
  7. Air fry for 10-15 minutes, flipping halfway through, until golden brown and crispy.
  8. Serve immediately with your favorite dipping sauces.

Recipe Notes

  • For extra crunch, you can double bread the onion rings by repeating the egg and breadcrumb steps.
  • Feel free to experiment with spices in the breadcrumb mixture for unique flavors.
  • Store leftovers in an airtight container; reheating in the air fryer can bring back their crunch.

Best Air Fryer Onion Rings – Extra Crispy and Golden

Air Fryer Onion Rings: Extra Crispy Delight

⚖️
Difficulty
Easy

⏲️
Prep Time
10 mins

🕒
Cook Time
15 mins

⏱️
Total Time
25 mins

🍽️
Servings
4 servings

When it comes to appetizers that can please a crowd, **Air Fryer Onion Rings** stand out as a delightful choice. These onion rings are not just crispy; they’re also a healthier alternative to traditional frying, ensuring you enjoy all the flavor with less guilt. Perfectly golden and extremely crunchy, every bite melts in your mouth while delivering an explosion of savory goodness. Whether you’re hosting a game night or simply craving a delicious snack, these onion rings will be a hit.

Using an air fryer elevates the classic fried onion ring experience, achieving an exceptional flavor while cutting back on grease. The aroma of fresh onions mingling with spices will draw family and friends into the kitchen, making them eager for a taste. Serve them with your favorite dips, and watch them disappear!

Quick Recipe Highlights

  • Flavor Profile: These onion rings have a savory, slightly sweet flavor complemented by a crispy coating that adds an irresistible crunch.
  • Texture: The contrast of the tender onion inside and the crunchy exterior creates a delightful texture that is sure to please.
  • Aroma: The enticing smell of frying onions mixed with spices fills the air, making it hard to resist these tasty treats.
  • Visual Appeal: Golden brown and perfectly uniform, these onion rings are a feast for the eyes that match their deliciousness.
  • Skill Level Needed: Even beginners can master this recipe with minimal effort and ingredients.
  • Special Equipment: An air fryer is essential for achieving that desired crispiness without excessive oil.

Recipe Overview

  • Difficulty Level: Air Fryer onion rings are easy to prepare, making this recipe suitable for cooks of all skill levels. With few ingredients and straightforward steps, it’s accessible for everyone.
  • Category: This recipe falls under appetizers, perfect for parties, snacks, or as a delicious side dish.
  • Cuisine: While onion rings are popular in American cuisine, they have gained global appreciation, with various countries offering their unique twists.
  • Cost: This recipe is cost-effective, utilizing simple ingredients that won’t break the bank.
  • Season: Ideal for year-round consumption, these onion rings are especially enjoyable during summer BBQs or winter gatherings.
  • Occasion: Whether it’s a casual family dinner or a lively party, these onion rings are an excellent choice for any occasion.

Why You’ll Love This Recipe

From the first crunch to the last bite, the taste and texture of air fryer onion rings are nothing short of extraordinary. The savory sweetness of the onions paired with the crispy exterior makes for a satisfying snack that satisfies cravings. Guests will rave about these golden delights when served at a gathering, making them a popular choice to impress your audience.

Not only are these onion rings extra crispy, but they are also quick and convenient to whip up. With just a few minutes of preparation and a fraction of the time needed for frying, you can enjoy these culinary bites much faster than traditional methods. Plus, you’ll feel good knowing they’re healthier due to reduced oil usage.

Nutritionally, opting for air-fried onion rings provides benefits such as reduced calories from less added fat. Onions are a good source of vitamins and minerals, making them a satisfying choice for a side dish or snack without compromising nutrition.

Social occasions become a hit with these crispy snacks. Their finger-food nature and appealing aesthetics ensure that they become the center of attention. You can effortlessly double or triple the recipe to accommodate more guests, ensuring there’s enough to go around.

With the accessibility of ingredients and the absence of intricate techniques, making air fryer onion rings is an economical choice that doesn’t sacrifice flavor. You can prepare this dish again and again without worrying about cost or complexity.

Historical Background and Cultural Significance

The origin of onion rings can be traced back to the United States in the early 20th century, where they became a staple in diner culture. As an affordable and comforting food, onion rings quickly became part of everyday American fare. They gained popularity owing to their unique flavor and versatility, easily fitting into any meal.

Onion rings have since evolved and spread to various cultures, each adding their unique approach. For instance, in the UK and Australia, similar fried onion dishes are commonly served, expanded upon with different spices and flavors. This evolution showcases the adaptability of the onion ring across global cuisines, leading to varied interpretations while maintaining the essence of crispy enjoyment.

Regional variations have appeared, such as different types of onion used or the addition of spices and seasonings to cater to local palates. From beer-battered versions to those infused with Parmesan, onion rings have spurred creativity among chefs and home cooks alike.

Throughout the years, they have been celebrated not just as a side dish but also at fairs and festivals where they are fried fresh to order, highlighting their cultural significance beyond the dinner table.

Ingredient Deep Dive

  • Onions: Onions are a classic staple with deep-rooted significance in various cultures. Rich in antioxidants, they offer numerous health benefits, including anti-inflammatory properties. When selecting onions, aim for firm bulbs without soft spots. Store them in a cool, dark place, and consider using sweet onions or yellow onions for a milder flavor that suits frying.
  • Flour: The flour forms the base for the crispy coating that envelops the rings. A versatile ingredient, it enhances the texture of the finished product. Store flour in an airtight container and use within a year for optimal freshness. For gluten-free alternatives, consider using almond flour or chickpea flour that works well in creating a crispy shell.
  • Common Mistakes to Avoid

    • Not soaking the onions: Soaking the onion rings in cold water for 30 minutes can help reduce harsh flavors and improve texture.
    • Overcrowding the air fryer: Ensuring enough airflow is critical for achieving crispiness, so arrange them in a single layer without overlapping.
    • Skipping the preheating step: Preheating the air fryer is essential for even cooking and perfect crispiness.
    • Using too much coating: Overcoating can lead to gummy texture; a light dusting is often more effective.
    • Not adjusting cooking time for thicker rings: Thicker rings take longer to cook; monitor closely to avoid undercooking.
    • Inadequate seasoning: Proper seasoning enhances flavor, so never skip on salt and spices in your coating mix.
    • Forgetting to flip halfway through: Flipping the onion rings halfway in the cooking process ensures even browning and crispness.
    • Ignoring the cooling time: Letting them rest briefly allows the steam to escape, further enhancing crispiness.

    Essential Techniques

    – Soaking and slicing: Proper slicing of onions into uniform rings ensures even cooking. Soaking them enhances flavor and reduces bitterness, resulting in a more enjoyable dish.
    – Preheating the air fryer: Always preheat your air fryer before adding the onion rings. This preliminary step guarantees that they cook evenly and attain crispiness faster.
    – Breading technique: Dredging the onion rings in flour, then egg, followed by breadcrumbs, creates a layered coating that holds up during cooking. Each step adds to the crunch factor.
    – Air frying: Knowing when to adjust cooking times based on onion thickness is crucial for achieving optimal texture and prevent burning.

    Pro Tips for Perfect Air Fryer Onion Rings

    – Experiment with different onions: Sweet onions and red onions offer various flavor experiences for your onion rings.
    – Add spices to the breadcrumbs: Mix in garlic powder, paprika, or cayenne for an added flavor boost that elevates the dish.
    – Try panko breadcrumbs: For an extra-crispy texture, panko breadcrumbs can provide a delightful contrast.
    – Ensure even coating: Dust off excess flour lightly before the egg wash to promote an even layer without clumping.
    – Air fry in batches: Avoid the temptation to overcrowd the air fryer by cooking in smaller batches to ensure even, crispy results.
    – Consider a double-bread method: For extra crunch, double dip your onion rings in the egg and breadcrumbs for a thicker crust.
    – Pair with homemade dips: Serve with ranch dressing, spicy mayo, or your favorite sauce to enhance the enjoyment.
    – Let them cool slightly before serving: Resisting the urge to dig in right away allows for the perfect balance of crunchiness and flavor.

    Variations and Adaptations

    – Regional variations: In the Southern United States, you may find onion rings cornmeal coated instead of traditional breadcrumbs.
    – Seasonal adaptations: Consider infusing seasonal flavors with pumpkin spice during fall or dipping them in mango salsa during summer for a tropical twist.
    – Dietary modifications: Opt for gluten-free breadcrumbs and follow a vegan approach with flax eggs for egg replacement, making them accessible to all.
    – Flavor variations: Spice things up by incorporating cheese into the breadcrumbs or adding herbs like oregano or thyme to the mix.
    – Texture modifications: If you prefer a softer onion ring, reduce the cooking time for a few minutes to achieve a creamier texture.
    – Presentation alternatives: Serve onion rings stacked high on a platter or drizzle them with sauces for an eye-catching appeal.

    Serving and Presentation Guide

    Stack the onion rings in a tower, showcasing their golden brown exterior, and serve on a vibrant platter for added visual appeal. To elevate the presentation, consider garnishing with freshly chopped parsley or chives. Pair them with dipping sauces in small bowls arranged around the platter for an interactive experience. Presenting them on raised wooden boards can also enhance the rustic charm of the dish. Ensure they are served warm for optimal taste and texture, and suggest to diners to savor them in individual portions for a delightful experience.

    Wine and Beverage Pairing

    Pair your crispy onion rings with light-bodied white wines such as Sauvignon Blanc or Pinot Grigio, which complement the savory flavors without overwhelming them. If you prefer non-alcoholic options, consider sparkling water with a splash of lemon or a refreshing iced tea for balance. For a cozy evening, a craft beer like a wheat ale or lager can enhance the flavors even more. Serving temperature for wine is best chilled, while onion rings should be served hot for the most enjoyment.

    Storage and Shelf Life

    To store leftover air fryer onion rings, place them in an airtight container at room temperature for up to 2 days. For prolonged freshness, consider refrigerating them, where they will last for about 3-4 days. Reheating in the air fryer will help regain their original crispiness; use a low temperature for a few minutes until heated through. If freezing, layer them in a container with parchment paper to avoid sticking. They can last up to 2 months in the freezer, though the best quality is within the first month.

    Make Ahead Strategies

    Prepare your onion rings in advance by slicing and soaking them. Once soaked, coat them with flour and breadcrumbs, then place them on a baking sheet and chill in the fridge for up to 2 hours before air frying. This method not only saves time but also enhances the flavor. You can also pre-make the dipping sauces ahead of time to serve alongside. If you wish to keep them crispy longer, reheat them right before serving for that fresh-out-of-the-fryer texture.

    Scaling Instructions

    If you want to halve the recipe, simply divide the ingredients accordingly, keeping in mind the cooking times will remain similar. For larger gatherings, you can double or triple the ingredients, but ensure not to overcrowd the air fryer. Adjust cooking time as needed and check for doneness each batch. Store extras in airtight containers to maintain freshness, and consider using multiple air fryers if available for efficiency.

    Nutritional Deep Dive

    Air fryer onion rings offer a delightful balance of macros, primarily comprising carbohydrates from the onions and flour. A serving typically contains low to moderate fat levels due to the air frying method, which cuts down on excess oil. Onion rings also provide dietary fiber that supports digestive health. For those monitoring their diets, controlling portion sizes is essential to enjoying this snack without compromising health goals while still providing satiety.

    Dietary Adaptations

    Adaptations for onion rings allow for inclusivity across various dietary preferences. For gluten-free diets, utilize gluten-free flour and breadcrumbs to enjoy crunchy onion rings without worry. Dairy-free individuals can simply omit cheese products from the recipe, and for vegans, substituting eggs with flaxseed meal mixed with water offers a perfect binding agent. Low-carb dieters can experiment with alternatives like almond flour, while paleo enthusiasts can leverage coconut flour for a different taste.

    Troubleshooting Guide

    Texture issues can arise if onion rings are too thinly sliced or if they’re overcooked, leading to a soggy product. Ensure uniformity in thickness for even cooking. Flavor balance can be adjusted through proper seasoning; don’t be afraid to season generously. If your onion rings aren’t as crispy as desired, check the moisture level of your onions before breading. For equipment challenges, ensure your air fryer is preheated correctly before cooking, as this influences the overall crispiness.

    Recipe Success Stories

    Community feedback reflects a high satisfaction level regarding the air fryer onion rings. Many home cooks share their triumphs in achieving irresistibly crisp results, crediting the technique to their newfound love for air frying. Readers frequently experiment with their flavor variations, offering suggestions on unique spice blends and custom dips that have led to rave reviews at family gatherings. Cooking success is not just about taste; it’s also about elevating the experience with great presentation and fun stories around the dish.

    Frequently Asked Questions

    Q: Can I use frozen onion rings in an air fryer?

    A: Yes, you can use frozen onion rings in an air fryer; however, cooking time may vary. Start with 10-12 minutes at 400°F and adjust based on crispness preference.

    Q: How do I make onion rings spicy?

    A: To achieve spicy onion rings, mix cayenne pepper or chili powder into your breadcrumb coating for an added kick.

    Q: Are air fryer onion rings healthier?

    A: Yes, air fryer onion rings are generally healthier because they require significantly less oil than traditional fried versions, reducing overall fat and calories.

    Q: Can I use a different type of onion?

    A: Absolutely! While yellow onions are commonly used, feel free to experiment with sweet onions or red onions for a different flavor profile.

    Q: How can I store leftover onion rings?

    A: Store leftover onion rings in an airtight container at room temperature for up to two days or refrigerate for 3-4 days, reheating in the air fryer before serving.

    Q: Can I make these onion rings vegan?

    A: Yes! Substitute eggs with a mixture of flaxseed meal and water to create a vegan-friendly binder for your breadcrumbs.

    Q: What sauces go well with onion rings?

    A: Onion rings pair well with a variety of dips, including ranch dressing, ketchup, honey mustard, and spicy aioli.

    Q: Can I prepare the onion rings in advance?

    A: Definitely! You can coat the rings and store them in the fridge for a couple of hours before air frying.

    Q: What seasoning can I use for more flavor?

    A: Experiment with garlic powder, onion powder, paprika, or Italian seasoning mixed into your flour or breadcrumbs for varied flavor profiles.

    Q: How do I make onion rings crispy in the air fryer?

    A: Ensure that you don’t overcrowd the air fryer and preheat it to the correct temperature for optimal crispiness.

    Additional Resources

    Explore related recipes that embrace the air frying technique for healthier alternatives, such as sweet potato fries or zucchini fritters. Check out ingredient guides that provide insights into onion varieties and their best uses in cooking. Additionally, consider equipment recommendations tailored for the best air fryer experience, including tools for perfecting breading techniques. Seasonal variations can inspire innovative dishes that make use of fresh ingredients, elevating your cooking repertoire to new heights.

    Join the Conversation

    Engage with fellow cooking enthusiasts and share your experiences. Use social media platforms to post photos of your air fryer onion rings and variations, encouraging others to join in. Participating in recipe reviews allows for community feedback, creating an interactive cooking environment. Explore different ingredient swaps and taste tests, and inspire creativity within your cooking circle by documenting your delicious variations.

    The Recipe

    Air Fryer Onion Rings

    Serves: 4 servings

    Prep Time: 10 mins

    Cook Time: 15 mins

    Total Time: 25 mins

    Kitchen Equipment Needed

    • Air fryer
    • Mixing bowls
    • Whisk
    • Measuring cups
    • Cutting board
    • Chef’s knife

    Ingredients

    • 2 large onions
    • 1 cup all-purpose flour
    • 2 large eggs
    • 2 cups breadcrumbs (Panko preferred)
    • 1 teaspoon garlic powder
    • 1 teaspoon paprika
    • Salt and pepper to taste
    • Cooking spray

    Directions

    1. Slice onions into ½-inch thick rings and soak in cold water for 30 minutes.
    2. Preheat air fryer to 400°F (200°C).
    3. In a bowl, combine flour with salt, pepper, garlic powder, and paprika.
    4. In a separate bowl, whisk the eggs until smooth.
    5. In a third bowl, place breadcrumbs.
    6. Remove onion rings from water and pat dry.
    7. Dredge each onion ring first in the flour mixture, then dip it in the eggs, and finally coat with breadcrumbs.
    8. Arrange coated rings in the air fryer basket in a single layer and spray lightly with cooking spray.
    9. Cook for 10-15 minutes, flipping halfway through, until golden brown and crispy.
    10. Remove and serve hot with your favorite dipping sauce.

    Recipe Notes

    • For extra crunch, consider double-breading the onion rings.
    • Feel free to experiment with different seasonings based on your preference.
    • Store leftovers properly to enjoy within a few days for the best texture.

    Best Sautéed Caramelized Air Fryer Onions – Easy & Flavorful

    Best Sautéed Caramelized Air Fryer Onions: Elevate Your Dishes!

    ⚖️
    Difficulty
    Easy

    ⏲️
    Prep Time
    10 mins

    🕒
    Cook Time
    20 mins

    ⏱️
    Total Time
    30 mins

    🍽️
    Servings
    4 servings

    Get ready to transform your meals with the delightful flavors of the Best Sautéed Caramelized Air Fryer Onions. These onions bring out a sweet depth that complements a wide array of dishes, from sandwiches to gourmet burgers and beyond. Harnessing the power of the air fryer not only saves you time but also provides a healthier approach to caramelizing onions. Discover how easy it is to achieve that perfect golden hue and luscious texture that will enhance any meal.

    With each bite, you will experience a balance of sweet and savory, presenting a rich flavor that makes these caramelized onions a quintessential addition to your cooking repertoire. The aroma alone will draw family and friends into the kitchen, eager to find out what deliciousness is in the air. Let’s embark on this culinary journey and unveil the secret to creating the best sautéed caramelized air fryer onions!

    Quick Recipe Highlights

    • Flavor Profile: The combination of sweet, gently charred onions exudes warmth and comfort, making it universally appealing.
    • Texture: The softness of the caramelized onions beautifully balances with their slight crunch, delivering a delightful mouthfeel.
    • Aroma: The sweet caramel notes fill your kitchen, promising a taste experience that’s both inviting and satisfying.
    • Visual Appeal: The vibrant golden-brown color is not only appetizing but also visually enhances your plated dishes.
    • Skill Level Needed: This recipe is perfect for all skill levels, making it a great kitchen project for beginners.
    • Special Equipment: All you need is a reliable air fryer to get that perfectly sautéed effect with minimal fuss.

    Recipe Overview

    • Difficulty Level: This dish is deemed easy, requiring basic chopping and monitoring during the cooking process.
    • Category: These caramelized onions are a versatile condiment, perfect for side dishes, toppings, or enhancing entrees.
    • Cuisine: The practice of caramelizing onions is rooted in various culinary traditions, celebrated across many cultures for its rich flavors.
    • Cost: Ingredients are affordable, primarily calling for high-quality onions and a few staples you likely already have.
    • Season: Ideal year-round, though particularly enjoyed in cooler months when their warming flavors are most comforting.
    • Occasion: Perfect for casual dinners, festive gatherings, or any other occasion where delicious food takes center stage.

    Why You’ll Love This Recipe

    The harmonious blend of taste and texture in sautéed caramelized onions creates a rich experience for your palate. This recipe highlights the natural sweetness of onions, achieved through the air fryer’s efficient cooking method, ensuring they turn soft and richly caramelized without any extra oil. Using the air fryer means you can enjoy this delicious topping without the guilt that often accompanies fried options.

    Convenience is a highlight here as well; with just a few ingredients and minimal prep work, you can whip these onions up in no time. The hands-off air frying technique allows you to multitask in the kitchen, making meal preparation stress-free. Plus, their nutritional benefits, derived from the high fiber content of onions, make them a smart addition to your dieta.

    Perfect for entertaining, these caramelized onions can elevate any dish—from gourmet burgers to sophisticated charcuterie boards. The subtle sweetness and rich flavor make them an ideal condiment for impressing guests, creating memorable dining moments that everyone will rave about!

    In terms of cost-effectiveness, this recipe is a winner! A small investment in onions can yield a generous batch of caramelized goodness, proving that delicious flavor doesn’t have to break the bank. With just a little time and effort, you can create this delicacy, accessible for all home cooks.

    Lastly, the versatility of these sautéed caramelized onions is unmatched. Use them as a flavorful topping for pizzas, sprinkle them in salads, or mix them into dips. They can be the secret ingredient that transforms the ordinary into the extraordinary!

    Historical Background and Cultural Significance

    The origins of sautéed onions can be traced back to ancient culinary practices, where onions were cherished not just for their flavor but also for their numerous health benefits. Historically, these humble vegetables have been revered in many cultures, often considered a staple in kitchens around the world.

    In various cultures, onions symbolize prosperity and good health. In cooking traditions, the method of caramelization combines both technique and artistry, showing how heat can transform basic ingredients into something special. The evolution of caramelizing onions has adapted to modern cooking innovations, including air frying.

    This recipe also reflects regional variations, as different cultures incorporate caramelized onions into local dishes, showcasing versatile flavors that resonate globally. From French onion soup to Middle Eastern mezze, the rich, sweet flavor of caramelized onions plays a crucial role in many beloved dishes.

    As food continues to evolve, the classic technique of making sautéed caramelized onions remains a beloved skill passed down through generations, enhancing recipes with its timeless taste appeal.

    Ingredient Deep Dive

    Onions

    Onions hold great cultural significance around the world, often considered a fountain of flavor in numerous cuisines. Rich in history, they have been cultivated for thousands of years and were even valued in ancient Egypt for their health properties. Nutritionally, onions are low in calories but high in flavor, containing vitamin C, B vitamins, and essential antioxidants that promote overall health.

    When selecting onions, opt for firm, glossy bulbs without any soft spots. Store them in a cool, dark place with good air circulation to maintain freshness. For those looking to switch things up, consider using shallots for a milder taste or red onions for a colorful presentation.

    Common Mistakes to Avoid

    • Not Preheating the Air Fryer: Ensure your air fryer is adequately preheated to achieve an even caramelization.
    • Using the Wrong Onion: Sweet onions such as Vidalia or yellow onions caramelize best; avoid using strong varieties like red onions.
    • Overcrowding the Basket: Cook in batches rather than piling onions high to ensure even cooking.
    • Cooking at Too High a Temperature: Maintain a moderate temperature to avoid burning and ensure even caramelization.
    • Neglecting to Stir: Stir the onions at intervals to prevent sticking and ensure uniform cooking.
    • Skipping the Oil: Although less is more, a touch of oil can help enhance flavor and caramelization.
    • Rushing the Cooking Time: Patience is key; allow sufficient time for that rich caramel color to develop.
    • Ignoring Aroma Cues: Trust your senses; the incredible smell is an indicator of your onions nearing perfection.

    Essential Techniques

    One fundamental technique that ensures correctly caramelized onions is maintaining the right temperature. When sautéing at a moderate heat, the natural sugars in the onions can caramelize beautifully, turning golden brown without burning. Master this by allowing your air fryer to reach the proper setup before adding the onions.

    Monitoring for color change is also vital for success; as the onions cook, you should notice a gradual deepening in color and a sweet aroma filling the kitchen. If you’re ever unsure, grab a quick taste test! Knowing these visual cues will help you master the art of caramelizing onions.

    Pro Tips for Perfect Best Sautéed Caramelized Air Fryer Onions

    1. Always slice onions evenly so they cook uniformly, ensuring a consistent texture.

    2. Use high-quality olive oil or butter for enhanced flavor; they make a significant difference.

    3. Don’t rush the process; caramelization takes patience—the longer you allow them to cook, the sweeter they will become.

    4. Experiment with adding a pinch of sugar to boost sweetness if desired, especially with milder onions.

    5. De-glazing the basket with a splash of broth at the end can help lift the flavorful bits and create a rich finish.

    6. For added complexity, consider sprinkling a hint of balsamic vinegar towards the end of the cooking time for a tangy contrast.

    7. Store any leftovers in the refrigerator, as they can enhance countless recipes throughout the week.

    8. Feel free to mix in other vegetables like bell peppers to add variety to your dish.

    Variations and Adaptations

    Explore regional variations of caramelized onions, such as French-style using red wine or adding thyme for an herby flair. Seasonal adaptations could include pumpkin or apple during autumn, providing a unique twist to the classic recipe that celebrates harvest flavors. For dietary modifications, you could use oil variations; olive oil works beautifully for those avoiding butter.

    Experimenting with flavor variations can be exciting too—try incorporating garlic or adding spices like smoked paprika for a distinct taste. If you’re looking for texture modifications, consider finishing your caramelized onions in a cast iron skillet for an added sear. Presentation alternatives like serving them on a rustic wooden board or garnishing with fresh herbs can elevate any dining experience.

    Serving and Presentation Guide

    When plating your sautéed caramelized onions, opt for a rustic presentation that highlights the dish’s vibrant colors and rich textures. A simple, white serving dish can shine a light on the beautiful golden-brown hue of the onions, drawing the eye in.

    Add garnishing ideas such as freshly chopped chives or parsley sprinkled on top to provide a pop of color and freshness. Serve alongside artisanal bread or as a topping over gourmet burgers, ensuring to create a visually appealing and inviting atmosphere at the table that beckons diners to indulge.

    Wine and Beverage Pairing

    Pair your sautéed caramelized onions with a glass of lightly chilled white wine, such as Sauvignon Blanc or Pinot Grigio, which complements their sweetness. If you prefer red, a light-bodied Pinot Noir can enhance the flavor profile beautifully. For non-alcoholic alternatives, consider a crisp apple cider or a refreshing sparkling water infused with lemon for a delightful accompaniment.

    Temperature considerations are crucial; serve your sautéed caramelized onions warm to fully appreciate their rich flavors. Whether you’re savoring them alone or as a complement to another dish, this pairing will enhance your overall dining experience.

    Storage and Shelf Life

    Storage methods for sautéed caramelized onions are straightforward; simply transfer them to an airtight container for optimal freshness. Keep them refrigerated to extend their shelf life, typically lasting up to a week. For longer storage, consider freezing the onions in portions for easy use in future meals.

    When checking for signs of spoilage, ensure there is no off-smell or unusual texture. To reheat, gently warm them on the stovetop or in the microwave, making sure they reach a consistent temperature for the best flavors.

    Make Ahead Strategies

    When planning ahead, consider prepping your onions the night before to save time during busy cooking times. Store uncooked, sliced onions in the fridge, and when ready, toss them into the air fryer.

    For optimal quality, assemble your dish close to serving time, ensuring that fresh components remain crisp. Reheating caramelized onions takes only a few minutes; add them just before serving to retain their rich flavor and warm aroma, enticing your guests with delightful scents as the meal concludes!

    Scaling Instructions

    When halving this recipe, simply slice your onions accordingly and adjust the cooking time slightly. For those looking to double or triple the quantities, ensure your air fryer can accommodate the increased volume without overcrowding; consider cooking in batches instead.

    Equipment adjustments may be necessary if working with larger quantities, such as using larger baking trays or setting your air fryer to a slightly longer cooking time while keeping an eye on the caramelization process. Storage considerations should be made to avoid overloading your refrigerator, ensuring quality is maintained across portions.

    Nutritional Deep Dive

    The macro breakdown reflects the simplicity of the dish, featuring primarily carbohydrates from the onions while being low in fat, especially when kept healthy and light. Onions are a significant source of vitamins C and B6, along with minerals like potassium and manganese.

    The health benefits are profound; the antioxidants present in onions support immune function, while the fiber content aids digestion. Dietary considerations highlight the dish’s versatility, making it suitable for various dietary regimes, from vegan to paleo-friendly.

    Dietary Adaptations

    For those following specific dietary needs, this recipe can easily be transformed to be gluten-free by ensuring all ingredients are naturally free from gluten. Those who are dairy-free can opt for olive oil or coconut oil instead of butter while still achieving delicious caramelization.

    If you adhere to a low-carb or keto diet, simply use fewer onions or substitute with other low-carb vegetables like mushrooms. Adapting this recipe for vegan diets is seamless, as the primary ingredient—onions—is naturally plant-based, catering to all dietary preferences while remaining delectable.

    Troubleshooting Guide

    Texture issues can arise if onions are cut unevenly; ensure uniform slicing for a consistent mouthfeel. If you encounter flavor balance problems, consider adjusting the seasoning or adding a pinch of sugar to enhance sweetness without overwhelming the palate.

    Should temperature problems arise, reevaluate your air fryer settings; reducing temperature but increasing cook time can lead to better results. If substitutes are necessary due to availability, scaling recipes carefully regarding cooking times and yields is crucial for maintaining quality.

    Recipe Success Stories

    Community feedback has shown that these sautéed caramelized onions can successfully transform even the simplest of dishes into gourmet experiences, suggesting their appeal across diverse cooking styles. Many readers have shared stories of adapting the recipe, using it in everything from lasagna to omelets, demonstrating its versatility.

    Photography tips are useful for capturing the rich colors and texture of the caramelized onions. Plating carefully and utilizing natural light can help showcase the beauty of this dish, making it just as enticing visually as it is when served.

    Frequently Asked Questions

    Can I use different types of onions?

    Absolutely! While yellow onions are ideal for caramelizing due to their natural sweetness, you can also experiment with sweet onions like Vidalia or even red onions for a bit more bite.

    How do I know when the onions are done?

    Your onions are done when they reach a beautiful golden brown color and have a sweet aroma. Keep tasting and checking their texture to ensure they’re soft and delicious!

    Can I make these ahead of time?

    Yes! You can prepare them ahead and store them in the fridge for up to a week or freeze them for longer freshness. Just reheat before serving!

    What can I use sautéed caramelized onions with?

    These onions are versatile; use them as toppings for burgers, sandwiches, pizzas, or even in dips and salads for added flavor!

    Is this recipe suitable for vegans?

    Yes! The recipe is naturally vegan-friendly as it primarily involves onions; just choose a plant-based oil for cooking.

    Can I add other ingredients during cooking?

    Definitely! Feel free to add garlic, herbs, or spices to elevate the flavor profile while caramelizing your onions.

    How long should I cook the onions?

    The total cooking time should be about 20 minutes, but this can vary based on your air fryer model and the thickness of onion slices.

    Are there any substitute options?

    You can use shallots instead of onions for a milder flavor, or experiment with other vegetables if you’re looking for a twist on the original recipe!

    What’s the best way to store leftovers?

    Store your sautéed caramelized onions in an airtight container in the refrigerator and enjoy them within a week.

    Can I caramelize other vegetables using this method?

    Yes! Other vegetables like bell peppers and mushrooms can also be caramelized in a similar fashion for added flavor and texture!

    Additional Resources

    Explore more related recipes that incorporate caramelized onions, such as French onion soup or onion tart. Supplement your culinary knowledge with technique guides on sautéing and air frying for mastering both methods effectively. Learn about onion varieties to enhance your shopping experience and elevate your future dishes.

    Join the Conversation

    We encourage readers to share their cooking adventures with sautéed caramelized onions! Whether you’ve made adjustments, added your twist, or created something entirely new, we’d love to hear about it. Upload your photos and your feedback on social media using our hashtag, and let’s build a vibrant community around flavorful cooking!

    The Recipe

    Best Sautéed Caramelized Air Fryer Onions

    Serves: 4 servings

    Prep Time: 10 mins

    Cook Time: 20 mins

    Total Time: 30 mins

    Kitchen Equipment Needed

    • Air fryer
    • Cutting board
    • Knife
    • Mixing bowl

    Ingredients

    • 4 large onions, thinly sliced
    • 2 tablespoons olive oil
    • Salt, to taste
    • Black pepper, to taste

    Directions

    1. Preheat the air fryer to 300°F (150°C).
    2. In a mixing bowl, toss the sliced onions with olive oil, salt, and pepper until evenly coated.
    3. Place the onions in the air fryer basket, spreading them out evenly.
    4. Cook for 15 minutes, stirring halfway through to ensure even cooking.
    5. After 15 minutes, cook for an additional 5 minutes or until the onions are golden brown and caramelized.
    6. Remove from the air fryer and let cool slightly before serving.

    Recipe Notes

    • Adjust seasoning according to preference.
    • Feel free to add garlic or herbs for additional flavor.
    • These onions can be refrigerated for up to a week in an airtight container.

    Best Crispy Air Fried Onion Rings – Light and Crunchy

    Crispy Air Fried Onion Rings: A Delightful Treat

    ⚖️
    Difficulty
    Easy

    ⏲️
    Prep Time
    15 mins

    🕒
    Cook Time
    10 mins

    ⏱️
    Total Time
    25 mins

    🍽️
    Servings
    4

    Welcome to the ultimate crunchy indulgence that promises to elevate your snacking game: Crispy Air Fried Onion Rings. These delicious onion rings are not only crispy on the outside but also tender on the inside, making each bite a savory delight. Whether you enjoy them as a side dish, a party snack, or a guilty pleasure while watching your favorite show, air-fried onion rings pair perfectly with an array of dips and sauces. The beauty of air frying not only maintains their distinct flavor but also makes them a healthier version compared to traditional frying methods.

    With their beautifully golden-brown color and irresistible aroma, you won’t be able to resist reaching for just one more. The sweetness of the onions caramelizes as they cook, providing a delightful contrast to the crunchy, seasoned coating. Plus, whipping up a batch of these crispy delights takes only a few simple steps and minimal ingredients. Let’s dive into this exciting recipe that will make your taste buds sing and your guests rave!

    Quick Recipe Highlights

    • Flavor Profile: A perfect blend of sweet and savory, enhanced by your favorite seasonings.
    • Texture: Crispy outer crust with a soft, tender onion center that melts in your mouth.
    • Aroma: Irresistibly inviting, with hints of fried goodness that will make your kitchen feel warm and welcoming.
    • Visual Appeal: Golden-brown rings that are not only appetizing but also perfect for sharing.
    • Skill Level Needed: This recipe is easy to follow, making it perfect for beginner cooks.
    • Special Equipment: An air fryer is essential for achieving that perfect crunch without the excess oil!

    Recipe Overview

    • Difficulty Level: Easy, ideal for cooks of all skill levels wanting to impress with minimal effort.
    • Category: Perfect for appetizers, side dishes, or game day snacks.
    • Cuisine: A popular treat that has roots in American cuisine, evolving into a staple at fairs and restaurants.
    • Cost: Economical; you can make a large batch with just a few affordable ingredients.
    • Season: Enjoy these onion rings year-round, with each season providing a different backdrop for serving them.
    • Occasion: Great for casual gatherings, barbecues, or as a fun family dinner addition.

    Why You’ll Love This Recipe

    Taste and texture are at the forefront of these crispy air-fried onion rings. The balance between the crunchy exterior and the soft, juicy onion creates a mouthful that is simply delightful. Each bite releases a burst of sweet onion flavor, perfectly complemented by the spices of your choice, making them addictive!

    Convenience is another standout aspect of this recipe. With minimal prep work and short cooking time, it’s a hassle-free option for any occasion. The air fryer simplifies the cooking process, allowing you to enjoy crispy onion rings without the fuss of deep frying.

    Nutritional advantages make these onion rings even more appealing. Air frying reduces the oil content significantly, allowing you to indulge guilt-free while still enjoying the same great taste and texture you love.

    The social aspect of serving crispy onion rings cannot be overlooked. These treats are perfect for sharing at parties, game nights, or casual family dinners, sparking conversations and creating memorable moments.

    Lastly, the cost-effectiveness of this recipe makes it accessible to everyone. With just a few affordable ingredients, you can whip up a batch of crispy onion rings that will impress your guests without breaking the bank.

    Historical Background and Cultural Significance

    The origin of onion rings can be traced back to variations of fried onion dishes that date as far back as the 1800s. They became popular in the United States in the 1930s when they made a significant appearance on menus across diners and fast-food establishments. The humble onion was transformed into a delightful delicacy that became a favorite comfort food.

    Culturally, onion rings have established themselves as an American classic. They evoke nostalgia, often reminding people of summer fairs, movie nights, and late-night snack sessions. Their versatility allows them to transition seamlessly from restaurant tables to home kitchens, where families recreate the experience.

    Over the years, the recipe has evolved with various adaptations and has gained global popularity. Many regions have added their unique spin to this dish, incorporating distinctive seasonings or dipping sauces, keeping the essence of crispy onion rings alive while infusing local flavors.

    Regional variations abound, with some areas favoring thicker cut styles or spicy batters, while others prefer lighter, more delicate coatings. Regardless of the style, crispy onion rings remain a beloved snack that appeals to all ages.

    Ingredient Deep Dive

    Onions are the star ingredient in this recipe, known for their pungent flavor and versatility. With origins dating back thousands of years, onions are a staple in kitchens worldwide. Rich in vitamins and minerals, they also offer numerous health benefits, including potential heart health benefits and anti-inflammatory properties.

    When selecting onions, look for firm, unblemished bulbs that feel heavy for their size. Store them in a cool, dry place away from light to prolong their shelf life. For substitution options, other types of onions, such as sweet onions or shallots, can offer a unique flavor profile in this recipe.

    The coating for onion rings typically consists of flour, breadcrumbs, and spices. Flour provides structure, while breadcrumbs create that signature crunch. When choosing your flour, consider using whole wheat flour for a healthier alternative. The spices can be customized to your taste, ranging from paprika to garlic powder, adding depth to the flavors.

    In terms of storage, keep the coating separate from the onions until cooking to maintain that crispy texture. Prepared onion rings are best when enjoyed fresh, but they can be stored in an airtight container in the refrigerator for short-term use.

    Common Mistakes to Avoid

    • Using the Wrong Onion: Sweet or yellow onions work best. Red onions can be too sharp for this recipe.
    • Too Much Wetness: Ensure that the onions are not too soggy after soaking. Pat them dry to maintain crispiness.
    • Skipping the Coating: A proper coating is essential for that signature crunch. Don’t skip this vital step!
    • Not Preheating the Air Fryer: Preheating ensures that the onion rings cook evenly and get crispy faster.
    • Overcrowding the Basket: Cooking in batches allows for better air circulation and ensures even cooking.
    • Improper Seasoning: Make sure to season the coating well for flavorful results. Taste as you go!
    • Inaccurate Time: Keep an eye on the cooking time to avoid burning the onion rings. They can go from golden to burnt quickly.
    • Using Too Much Oil: While air frying requires minimal oil, using excess can lead to soggy results instead of crispy textures.
    • Cutting Onions Too Thick: Aim for uniformity in thickness for even cooking. Thin slices become crunchier!
    • Ignoring Leftovers: Store leftover onion rings properly for later enjoyment, or reheat them correctly to maintain crispness.

    Essential Techniques

    One technique crucial for achieving perfectly crispy onion rings is the setting up of a proper breading station. This involves preparing your flour, egg wash, and breadcrumb mixture in separate bowls. This organization allows for quicker assembly and helps achieve an even coating on each ring, promoting that delightful crunch we all crave.

    Another important technique is mastering the air frying process. Knowing how to preheat your air fryer and how to space your onion rings correctly ensures they cook evenly and get that golden-brown exterior. Remember, visually inspecting the rings as they cook will help you gauge when they’ve reached perfection.

    Pro Tips for Perfect Crispy Air Fried Onion Rings

    1. Soak your onion rings in cold water or buttermilk for at least 30 minutes before coating. This helps soften the onion for a tender bite and enhances the onions’ sweetness.
    2. Use a mix of Panko breadcrumbs for extra crunch. They create a light and crispy texture that traditional breadcrumbs may not.
    3. Experiment with spices in your breadcrumb mixture. Consider adding cayenne pepper or smoked paprika for an extra flavor kick.
    4. Don’t rush the frying process. Giving each batch enough room in the fryer allows proper circulation for the perfect crisp.
    5. Always keep a close eye on your onion rings as they cook. They can change from perfect to overly done in just a minute!
    6. Serve them immediately after frying for maximum crunch; store leftovers properly to eat later.
    7. For a more exotic twist, try dipping them in a spiced yogurt or infused dip – it elevates the taste experience!
    8. Feel free to make the coating gluten-free by using a gluten-free flour and breadcrumbs for those with dietary restrictions.

    Variations and Adaptations

    When it comes to variations, regional styles can play an interesting role. Consider adding local specialties such as Cajun seasoning for a Southern kick or chili powder for a Mexican twist. Seasonal adaptations could include coating the onion rings in crushed herbs and spices during specific holidays to enhance the festive spirit.

    For dietary modifications, you can substitute the traditional breadcrumbs with almond flour or crushed nuts for a low-carb option. For a vegan version, replace the egg wash with a plant-based milk alternative, and ensure your breadcrumbs do not contain animal products.

    Flavor variations can also be explored; consider dipping the rings in various sauces like spicy aioli, ranch dressing, or classic ketchup, letting everyone personalize their experience. Texture modifications can also be implemented using thicker onion slices or adding whole grains to the batter for a chewy crunch.

    To present these onion rings differently, consider serving them stacked in a tall dish, allowing guests to see the beautifully cooked rings and enticing them to indulge. Garnish with fresh herbs or spices to elevate the visual appeal.

    Serving and Presentation Guide

    For plating techniques, consider using a large platter lined with parchment paper to catch any crumbs, which adds to the rustic charm. Include small bowls for different dipping sauces to encourage sharing and personalization.

    Garnishing can also enhance the overall presentation; sprinkle chopped parsley or even a dusting of paprika on the rings for a pop of color. Traditional accompaniments include classic ketchup or ranch dressing as dipping sauces, but an array of sauces can bring a creative flair.

    Modern serving suggestions can involve placing crisp onion rings in cones for a fun, street-food vibe or on skewers alongside other fried treats. Temperature considerations are key; serve immediately for the best crunch, but if reheating is needed, use an oven for a few minutes until they regain their crispy texture.

    Lastly, for portion control, serve in smaller dishes to allow guests to take as many as they wish without overdoing it, making it easy for them to enjoy the flavor without the mess!

    Wine and Beverage Pairing

    When it comes to pairing beverages, a light and crisp white wine, such as a Sauvignon Blanc, complements the savory and sweet elements of onion rings beautifully. The wine’s acidity balances the richness of the fried coating, making each sip refreshing.

    For a non-alcoholic alternative, consider an ice-cold sparkling water with a splash of lemon. The effervescence will cleanse your palate and enhance the overall dining experience.

    If you prefer coffee or tea pairings, choose a nice chai tea with its spiced notes, which harmonize well with the flavors of the onion rings. Temperature is important; serve your beverages chilled for the best contrast against the warm onion rings.

    Storage and Shelf Life

    To properly store your leftover crispy onion rings, allow them to cool completely before placing them in an airtight container. This prevents moisture buildup, which can lead to sogginess.

    For temperature requirements, keep them in the refrigerator for up to 3 days; however, note that the crispness may diminish over time. Container recommendations include using glass or silicone containers to preserve freshness.

    Keep an eye out for signs of spoilage; any signs of unusual odors or discoloration indicate that it’s time to discard the leftovers. When reheating, utilize an oven or air fryer to restore that delightful crunch rather than using the microwave, which may make them rubbery.

    For longer storage options, consider freezing the onion rings before cooking. Flash freeze them on a baking sheet, then transfer to a freezer bag. They can be cooked directly from frozen, making them a convenient snack for any time!

    Make Ahead Strategies

    Creating a prep timeline can save you time when making crispy onion rings. You can slice your onions the night before and soak them in cold water to enhance flavor and reduce prep time on the day of cooking.

    Storage between steps is crucial; keep your onion rings in the fridge if breading before you are ready to air fry. This will keep them fresh and crispier during cooking.

    When it comes to quality impact, onion rings are best cooked fresh, but if you must make them ahead, serve them immediately out of the fryer for the best taste and texture.

    For assembly tips, you can prepare the breading mixture in advance, storing it in an airtight container until needed. This provides convenience and speed during busy cooking sessions.

    Lastly, if you desire to add fresh elements after reheating, consider garnishing with fresh herbs or squeezing lemon to revitalize flavors that may have dulled during storage.

    Scaling Instructions

    If you decide to halve the recipe, be mindful of the cooking time, as smaller batches may cook quicker than larger ones. Adjust the timing accordingly and keep a watchful eye to prevent overcooking.

    For those wanting to double or triple, ensure that your air fryer has enough capacity. You may need to cook in batches to maintain the quality of each onion ring and to prevent overcrowding.

    Equipment adjustments may include using larger mixing bowls or more baking sheets for breading if scaling up significantly.

    Timing modifications are essential; keep a close check on the golden-brown color that indicates doneness, as larger batches may require longer cooking times.

    Lastly, for storage considerations, consider how much to prepare depending on leftovers; you don’t want to waste food, but cooking based on your audience size can help minimize waste while enjoying the crispy onion rings!

    Nutritional Deep Dive

    A macro breakdown reveals that these crispy air-fried onion rings, while tasty, can still fit into a balanced diet. The primary calories come from the flour and breadcrumbs used in the coating, contributing to carbohydrate content, while the onions offer fiber.

    Micronutrient analysis shows that onions are rich in vitamins C and B6, along with antioxidants that help promote good immunity and health. Incorporating healthy oils and whole grains as substitutes can improve the overall nutritional profile.

    Health benefits of this recipe include the use of air frying, which significantly lowers fat content compared to traditional frying methods. This makes crispy onion rings an interesting alternative for those wanting to indulge without the extra calories.

    Dietary considerations should be taken into account when assessing the inclusion of onion rings in various meal plans. They can serve as a delightful side that satisfies cravings for savory snacks without overloading on calories.

    For weight management tips, consider portion control when serving; although they may be lighter than traditional fried versions, enjoying a reasonable quantity allows enjoyment while adhering to dietary goals.

    Dietary Adaptations

    For a gluten-free version of crispy air-fried onion rings, substitute regular flour and breadcrumbs with a gluten-free flour blend and gluten-free breadcrumbs. This allows those with gluten sensitivities to enjoy the crispy treat without worry.

    A dairy-free adaptation can be easily achieved by using almond milk instead of traditional milk in the breading process. This ensures everyone can enjoy the snack!

    For a vegan approach, follow the same steps as the dairy-free version, and ensure that the breadcrumbs do not contain any dairy products.

    For those following low-carb or keto diets, consider using almond flour or coconut flour instead of traditional flour, and adjust the breading ratio accordingly for a healthier dish.

    Lastly, paleo dieters can adapt this recipe by utilizing a combination of almond flour or coconut flour, maintaining the crispy texture while aligning it with paleo principles.

    Troubleshooting Guide

    If you encounter texture issues, such as soggy onion rings, double-check that you’ve adequately dried the onions after soaking. If they seem too wet, they won’t crisp properly.

    For flavor balance, ensure you’ve adequately seasoned both the flour and breadcrumb mixture. Under-seasoning can lead to bland results. Be sure to taste and adjust your spices!

    If temperature problems arise, remember that air fryers can vary in temperature settings. It may be necessary to adjust your cooking time or temperature slightly for your equipment.

    Equipment challenges can be resolved by making sure you’re familiar with your air fryer settings. Reviewing the manual can provide insights into optimal cooking times and temperatures.

    Ingredient substitutions should be well thought out; using the right alternatives will ensure that the taste and texture remain intact with any modifications you make.

    Timing concerns are common; if your onion rings are browning too quickly on the outside but still raw inside, lower the temperature and extend the cooking time for balance.

    Recipe Success Stories

    Community feedback has been overwhelmingly positive, with many trying out variations by experimenting with different spices and flavor profiles. A reader shared their successful attempt by incorporating a bit of parmesan into the breadcrumbs for an extra cheesy bite!

    Variation successes are equally noteworthy; one reader mentioned enjoying a unique take by using sweet potato slices, which also air fried beautifully, letting them join the onion rings in joyous harmony.

    Adaptation stories inspire others—someone shared how they made a large batch for a game night, and the rings disappeared almost instantly, leaving their friends asking for the recipe.

    Photography tips from community members suggest capturing the golden-brown color popping against a vibrant dipping sauce, emphasizing the crunchiness that everyone loves about air-fried onion rings.

    Engaging with readers also leads to exciting new ideas. Some have gone on to suggest lightened-up dipping sauces that pair wonderfully with crispy onion rings, enhancing the social aspect of enjoying this treat.

    Frequently Asked Questions

    Can I make these onion rings in advance?
    Yes, you can prepare the onion rings and store them before cooking. You can soak the onions overnight and bread them right before cooking to maintain freshness.

    What is the best way to reheat leftovers?
    Reheating is best done in an air fryer or oven, which will help restore their crunchiness. Sprinkle a little oil before reheating for better results.

    Are onion rings gluten-free?
    They can be made gluten-free by using gluten-free flour and breadcrumbs, but be sure to check ingredients thoroughly to ensure they meet your dietary needs.

    Can I use different types of onions?
    Yes! While yellow onions are traditional, you can experiment with sweet or red onions for unique flavors in your air-fried onion rings.

    How do I store leftover onion rings?
    Store them in an airtight container in the refrigerator for up to three days. Reheat in an air fryer to regain crispiness.

    What dipping sauces go well with onion rings?
    Classic options are ketchup, ranch dressing, or even spicy mayo. Feel free to get creative with your favorite sauces!

    Is it necessary to soak the onions?
    Soaking helps to enhance flavor and texture; it’s a key step not to be skipped for the best results in making crispy onion rings.

    Can I freeze uncooked onion rings?
    Yes! You can flash freeze them before cooking so they can be cooked directly from frozen later, ensuring minimal waste.

    What should I do if my onion rings aren’t crispy?
    Ensure they are adequately dried after soaking and that you don’t overcrowd the air fryer. This will help achieve that desired crispiness.

    Are these onion rings healthy?
    Compared to traditional frying methods, air frying promotes a healthier version with lower fat content, but portion control is still essential.

    Additional Resources

    If you loved making crispy air-fried onion rings, you might also enjoy exploring related recipes such as air-fried zucchini fries or cauliflower bites, which utilize similar cooking techniques.

    For those looking to enhance their cooking skills, technique guides about breading or air frying can offer valuable insights to achieve the perfect crunch in various dishes.

    Ingredient information can provide an understanding of purchasing or substituting components if you seek healthier or unique options.

    Consider investing in equipment such as a quality air fryer, which can open up a world of healthier meal possibilities beyond just onion rings.

    Seasonal variations can encourage creativity, inviting you to try these onion rings with summertime onions or fall ingredients to keep your palate excited throughout the year.

    Join the Conversation

    We encourage you to share your crispy air-fried onion ring experiences with us on social media! Snap a picture of your delicious creations, tag us, and join our growing community of food lovers.

    Photography tips for showcasing your onion rings can help inspire others to try the recipe. A well-lit photo can highlight their golden-brown allure and tasty dipping sauces.

    Don’t hesitate to leave your recipe reviews or share variations that you’ve tried and loved. Community engagement can lead to even more fun variations and tips for the next cook.

    Feel free to ask questions or share suggestions in the comments section below—your experiences may guide others on their culinary journey to creating the perfect crispy onion rings.

    The Recipe

    Crispy Air Fried Onion Rings

    Serves: 4

    Prep Time: 15 mins

    Cook Time: 10 mins

    Total Time: 25 mins

    Kitchen Equipment Needed

    • Air Fryer
    • Mixing bowls
    • Whisk
    • Knife
    • Cutting board
    • Baking sheet

    Ingredients

    • 2 large onions, sliced into rings
    • 1 cup all-purpose flour
    • 1 cup breadcrumbs (preferably Panko)
    • 1/2 cup milk or buttermilk
    • 1 egg (or egg substitute)
    • Salt and pepper to taste
    • Optional spices (like paprika, garlic powder, or cayenne pepper)

    Directions

    1. Soak onion rings in cold water for at least 30 minutes. Drain and pat dry.
    2. In one bowl, combine flour with a pinch of salt and pepper.
    3. In a second bowl, whisk together the milk and egg.
    4. In a third bowl, combine breadcrumbs with any desired spices.
    5. Dip each onion ring into the flour, then the egg mixture, and finally the breadcrumbs, ensuring they’re well coated.
    6. Preheat your air fryer to 400°F (200°C).
    7. Arrange the coated onion rings in a single layer in the air fryer basket.
    8. Cook for 8-10 minutes or until they are golden brown and crispy, flipping halfway.
    9. Remove from the air fryer and serve immediately with your favorite dipping sauce.

    Recipe Notes

    • Feel free to experiment with different spices in the breadcrumb mixture.
    • For extra crunch, consider double-dipping your onion rings.
    • Leftovers can be stored in the refrigerator for up to three days.
    • Frozen onion rings are also an option; flash freeze before cooking.

    Crispy Homemade Onion Rings – Easy and Perfect Every Time

    Homemade Onion Rings: Crispy, Crunchy, and Delicious

    ⚖️
    Difficulty
    Easy

    ⏲️
    Prep Time
    15 mins

    🕒
    Cook Time
    10 mins

    ⏱️
    Total Time
    25 mins

    🍽️
    Servings
    4 servings

    Homemade onion rings are a delightful snack that everyone loves, offering a perfect blend of crispiness, flavor, and warmth. These fried golden discs create a satisfying crunch with each bite, elevating any meal or gathering. Whether served as an appetizer at a party, a side dish with your favorite burger, or simply enjoyed as a snack, homemade onion rings are sure to please even the pickiest eaters. The irresistible aroma of sizzling onions bathed in a crispy batter fills your kitchen, making it a delight to share this dish with friends and family.

    Making homemade onion rings is not just about the taste; it’s an experience. As you slice the onions, each layer reveals itself, promising a sweet yet savory treat. The magic truly happens when the rings are coated in a seasoned batter that crisps up beautifully once fried. This fantastic combination of texture and flavor creates a nostalgic comfort food that reminds many of their childhood or fond visits to the local diner.

    Quick Recipe Highlights

    • Flavor Profile: These onion rings are sweet from the onions, complemented by a slight tang from the buttermilk batter and a savory crunch from the breadcrumbs.
    • Texture: Expect a crisp outer layer that shatters upon biting, encasing a tender, juicy onion inside.
    • Aroma: The heavenly scent of frying onions greets you while they cook, a quintessential signal of comfort and home cooking.
    • Visual Appeal: Golden-brown and perfectly shaped, these onion rings are a feast for the eyes and tempt even the most restrained eaters.
    • Skill Level Needed: Despite their gourmet appeal, these onion rings are easy to prepare, making them perfect for beginner cooks.
    • Special Equipment: You will need basic frying equipment, such as a thermometer and a heavy-bottomed pot, for perfect frying.

    Recipe Overview

    • Difficulty Level: This homemade onion rings recipe is classified as easy, making it accessible for cooks of all skill levels. The frying technique may require a bit of practice, but with simple ingredients and clear steps, anyone can achieve delicious results.
    • Category: Ideal for appetizers, side dishes, or snacks, this recipe fits well in party menus or casual meals at home.
    • Cuisine: Influenced by American cuisine, onion rings often appear in burger joints and diners, celebrating classic comfort food traditions.
    • Cost: These homemade onion rings are budget-friendly, using basic pantry ingredients like onions, flour, and breadcrumbs—costing less than what you would spend on takeout.
    • Season: Perfect for year-round enjoyment, onion rings can complement summer barbecues or cozy winter gatherings.
    • Occasion: Acidic and rich, these rings are suitable for casual get-togethers, game day feasts, or as crowd-pleasing party snacks.

    Why You’ll Love This Recipe

    Homemade onion rings are a tantalizing treat that satisfies cravings for crunchy snacks. Imagine biting into a perfect ring that delivers a satisfying crunch, followed by the sweetness of the onion—it’s a combination that brings joy to your taste buds. The contrast in textures, with a crispy exterior hugging a soft, juicy center, makes them irresistible.

    Another great aspect of making these onion rings at home is convenience. They require minimal prep time and can be quick to whip up, especially if you’re entertaining guests. Having this recipe in your back pocket means you can effortlessly create a delightful snack at a moment’s notice, impressing anyone who joins you at the table.

    Nutritionally, onion rings can be a source of fresh vegetables when you choose to use natural ingredients. Onions are known for their beneficial properties, including high antioxidants that promote good health. Paired with moderate frying, these homemade versions can serve as an occasional indulgence.

    Socially, homemade onion rings are perfect for gatherings. They invite sharing and complement a wide range of dishes, making them ideal for dipping into sauces or enjoying with various meals. Their casual nature creates an inviting atmosphere, making them a staple in friendly get-togethers.

    Lastly, the cost-effectiveness of preparing homemade onion rings reigns supreme. By utilizing basic, inexpensive ingredients, you can create a dish that rivals restaurant versions without breaking the bank. This affordability encourages experimentation with flavors and techniques, allowing anyone to impress with their culinary skills.

    Historical Background and Cultural Significance

    The onion ring’s origin tells a story of culinary innovation. Believed to have roots dating back to ancient times, variations of fried onions have been cherished across various cultures. However, the modern onion ring, as we know it, likely gained popularity in the United States during the mid-20th century, particularly in diners and fast-food establishments.

    Culturally, onion rings represent a sense of comfort and casual dining, commonly associated with American cuisine. These crispy rings have become iconic, often found on menus alongside burgers, hot dogs, and sandwiches. Their popularity reflects the nostalgia of simpler times, evoking memories of family outings and spontaneous meals shared with friends.

    As the recipe evolved, regional variations began to emerge, reflecting local tastes and preferences. From spicy southern versions to gourmet adaptations topped with unique seasonings, onion rings continue to intrigue chefs and home cooks alike, inspiring creativity and experimentation in the kitchen.

    The popularity of onion rings led to the creation of special events and competitions to showcase the best versions across the country. Food festivals celebrating comfort food often feature deep-fried delights, including the beloved onion ring, further solidifying its place within American food culture.

    Ingredient Deep Dive

    – Onions: Onions are not just a fundamental ingredient; they’re a flavor powerhouse. Historically, they’ve been utilized in numerous cuisines, praised for their health benefits, including anti-inflammatory properties and essential vitamins. When selecting onions, choose firm, unblemished specimens. Store them in a cool, dark place to ensure longevity. Substitution options include shallots for a milder taste or red onions for a slightly sweeter flavor.

    – Flour: The backbone of our batter, flour is essential for creating that iconic crunch. Known for its versatility, flour forms the base of countless recipes worldwide. When choosing flour, all-purpose flour works best, but whole wheat or gluten-free varieties can be good alternatives. Keep it stored in a cool, dry place to maintain freshness.

    – Breadcrumbs: These bring the ultimate crunch and flavor to onion rings. Widely used in various cuisines, breadcrumbs offer a satisfying texture. When looking for breadcrumbs, consider panko for extra crispiness. Storage should be in an airtight container away from moisture. You can substitute with crushed crackers or cornmeal for alternative textures.

    – Buttermilk: A key ingredient for moisture and flavor, buttermilk adds a lovely tang to the batter. Made through fermentation, it is somewhat thinner than regular milk and provides a tenderizing effect on fried foods. To make a quick substitute, mix milk with a squeeze of lemon juice. Store buttermilk in the refrigerator and aim to use it within a week for the best flavor.

    Common Mistakes to Avoid

    • Using cold ingredients: Cold buttermilk can prevent the batter from adhering properly. Always ensure your ingredients are at room temperature for optimal results.
    • Overcrowding the frying pan: Adding too many onion rings at once can lower the oil temperature, resulting in soggy, greasy rings. Fry in small batches for the best crispiness.
    • Not preheating the oil: Ensuring the oil is at the correct temperature before frying is crucial. If it’s too hot, the rings might burn; if too cool, they will absorb more oil.
    • Skipping seasoning: While the batter can be flavorful, neglecting to season it can lead to bland onion rings. Make sure to add salt and spices for an enhanced taste.
    • Not using a deep-fry thermometer: Without proper monitoring, you risk burning or undercooking your onion rings. Using a thermometer guarantees consistency and safety while frying.
    • Using the wrong type of onion: While any onion can work, yellow onions are the best choice for balance of sweetness and flavor. Avoid using overly pungent varieties that may overpower the dish.
    • Frying at the wrong temperature: Slightly above or below the recommended oil temperature can drastically affect cooking time and texture.
    • Not allowing the fried onion rings to drain: Placing them directly on paper towels allows excess oil to escape. Failing to do so can lead to grease-saturated rings.
    • Rushing the cooling process: Allow the onion rings to cool for a few minutes after frying; this gives the batter time to settle and enhances crunch.

    Essential Techniques

    Proper frying technique is vital to achieve perfectly crispy homemade onion rings. Start by ensuring the oil reaches an appropriate temperature, typically around 350°F. This temperature is crucial as it prevents the batter from absorbing too much oil, leading to a soggy texture.

    Mastering the batter coating is equally important. Dip each onion ring in the buttermilk mixture first, allowing the batter to stick effectively. Shake off excess batter before coating in breadcrumbs to achieve that ideal crunchy exterior. Visual cues for success include a light golden-brown color upon frying and a sound of bubbling indicating that moisture is escaping rapidly.

    Pro Tips for Perfect Homemade Onion Rings

    1. Experiment with spices in your flour mixture to customize your flavor profile. Paprika, garlic powder, or cayenne can add exciting notes.
    2. For extra crunch, double-dip your onion rings. Dip in the buttermilk, coat in flour, return to the buttermilk, and finish with breadcrumb coating.
    3. Try making a beer batter instead of buttermilk; the carbonation will lead to an even lighter and crispier coating.
    4. Keep your frying oil at a consistent temperature—if it fluctuates significantly, your onion rings may suffer in flavor and texture.
    5. For added flavor, consider adding Parmesan cheese to your breadcrumb coating for a cheesy depth of flavor.
    6. Allow fried onion rings to rest on a wire rack instead of paper towels. This prevents moisture from accumulating underneath, keeping the crunch intact.
    7. Experiment with dipping sauces such as spicy ranch, honey mustard, or garlic aioli for added flavors.
    8. For a healthier approach, try baking the onion rings instead of frying. While they won’t have the same crunch, they can be deliciously comforting.

    Variations and Adaptations

    Regional variations of onion rings can include different types of seasoning and coatings. For instance, in the Southwest, you might find spicy jalapeño seasonings added for a kick. Seasonal adaptations include using locally available produce, like zucchini, in the same batter for alternative flavors.

    For dietary modifications, gluten-free breading can be achieved by substituting regular flour with a blend of almond flour and cornstarch. Those looking for a lower-carb option can utilize crushed pork rinds as a zero-carb coating. Additionally, to tweak the flavor, consider adding different cheeses or herbs to your breadcrumb mix.

    Finally, the presentation can be varied by serving the onion rings in creative plating styles—consider a rustic wooden board with dipping sauces in small bowls for an appealing display.

    Serving and Presentation Guide

    Presentation plays a crucial role in the dining experience. To plate your homemade onion rings beautifully, consider stacking them in a small tower to create height. Use parchment paper or small plates to keep the theme rustic and inviting. Garnishing with fresh herbs like parsley or chives will add a pop of color.

    Pairing your onion rings with classic accompaniments like ketchup, ranch dressing, or homemade aioli offers a delightful touch. Consider arranging the sauces in small bowls around the rings for easy access. Being mindful of serving temperatures is important; hot and crispy is always best.

    When it comes to portion control, remember these onion rings are a rich treat, so provide smaller servings on individual plates rather than a large shared bowl; it ensures everyone gets to enjoy them without overindulging.

    Wine and Beverage Pairing

    Pairing beverages with homemade onion rings can elevate your dining experience. For a classic approach, consider a crisp, refreshing lager or a pale ale, as these allow the flavors of the onion rings to shine while providing a nice counterbalance to the grease.

    Non-alcoholic alternatives like homemade lemonade or iced tea make great companions as they cut through the richness of the fried snack. If you’re in the mood for something warming, a light-bodied white wine with fruity notes can complement the sweetness of the onions beautifully.

    If you’re inclined towards coffee or tea pairings, consider serving a light herbal tea for a refreshing palate cleanser after indulging in onion rings.

    Storage and Shelf Life

    Storing homemade onion rings properly can help maintain their quality. Allow them to cool completely before storing them in an airtight container to prevent moisture. They can last in the fridge for up to 3 days, but frying them again briefly will help restore their original crispiness.

    For longer storage, consider freezing the cooked onion rings. Lay them flat on a baking sheet in a single layer before freezing to prevent sticking. Once frozen solid, transfer them to a freezer-safe bag. They can last in the freezer for up to two months.

    To reheat, preheat your oven to 375°F and bake for about 15 minutes or until crispy again. Avoid using the microwave, as this will result in soggy onion rings.

    Make Ahead Strategies

    Preparing elements of your homemade onion rings ahead of time can save you valuable minutes during mealtime preparations. Consider slicing your onions and soaking them in the buttermilk mixture up to several hours before frying; this enhances the flavor while freeing up time when guests arrive.

    You can also prepare the flour and breadcrumb coatings ahead of time. Simply mix together and store in separate airtight bags until you’re ready to use. When it’s frying time, all you need to do is coat your onions and get to cooking.

    If you’re assembling ahead of time, fry the onion rings just before serving for the best texture. Allowing them to cool while prepping your dips will keep the fried elements nice and temping.

    Scaling Instructions

    Adjusting the recipe to fit your needs is simple. To halve the recipe, just cut all ingredients, including flour and buttermilk, by half. For doubling or tripling, consider the size of your frying vessel; ensure you have ample oil to accommodate the extra onion rings.

    For timing modifications, while the cooking time per batch remains constant, be mindful that the temperature of the oil may fluctuate if you’re frying in larger batches. This may require a brief adjustment in cooking time to allow the oil to regain the right temperature.

    When scaling, also think about storage considerations for leftover batter. If you plan on making more later, it’s best to work in manageable small batches for optimal freshness.

    Nutritional Deep Dive

    Homemade onion rings offer a satisfying crunch but come with a few nutritional considerations. While they provide some dietary fiber and essential vitamins thanks to the onions, they are also high in calories and fat due to frying. Keeping portions moderate can help balance enjoyment with health.

    Analyzing micronutrients reveals beneficial compounds in onions, including quercetin, which has antioxidant properties. Though fried, the combination of onions and the batter can offer antioxidants that enhance nutritional value.

    For conscious consumers, it’s vital to pay attention to serving sizes. A standard serving at around three onion rings can satisfy cravings without overloading on fats and calories. This approach plays well into weight management strategies.

    Dietary Adaptations

    For those with dietary restrictions, homemade onion rings can easily adapt to fit different needs. Gluten-free versions can be made by opting for gluten-free flours and breadcrumbs. This adjustment maintains flavor while allowing gluten-sensitive individuals to enjoy the dish.

    Dairy-free individuals can replace buttermilk with unsweetened almond or soy milk mixed with lemon juice to create a similar effect. For a vegan option, substitute breadcrumbs with crushed cornflakes or potato chips for a unique twist.

    Low-carb dieters may use almond flour in place of regular flour, while keto enthusiasts can achieve an excellent alternative using crushed pork rinds as a coating. Each adaptation still craves that same satisfying crunch without compromising dietary choices.

    Troubleshooting Guide

    Often, texture issues arise when homemade onion rings do not achieve that signature crunch. Ensure that the oil is hot enough before frying; a drop of batter should sizzle upon contact. If your onion rings are too greasy, they were likely cooked at too low a temperature.

    Adjusting flavor balance can be tricky. If your rings taste bland, consider amplifying seasoning in your flour mix next time. On the contrary, if they are too salty, balance can be restored by adding a bit of sugar into the mix.

    For temperature problems, if your rings burn quickly and remain raw inside, your oil is too hot. Conversely, if they are cooked too slowly and become soggy, increase the temperature and monitor carefully.

    In cases of equipment challenges, such as using lighter pans that don’t maintain oil temperature, switching to a heavier stockpot can retain heat better.

    Recipe Success Stories

    Community feedback on homemade onion rings highlights their popularity across family gatherings and friendly parties. Readers have reported that making them together has turned into a fun family activity, fostering bonding over food.

    Modification success stories abound; many have experimented with adding unique seasonings or using different types of onions, discovering favorite variations that sparked conversation and heartfelt recommendations.

    Offer photography tips; capturing the ideal moment when your onion rings are golden-brown and perfectly plated brings pride to the chef. Sharing these images inspires others to try your version and adds to the success story of the recipe.

    Readers share their adaptations that perfectly complement these onion rings; many have suggested combining them with homemade dips to elevate the experience, making the recipe versatile and engaging.

    Frequently Asked Questions

    What type of onion is best for onion rings?

    Yellow onions are the most commonly used for their sweet flavor and balanced taste. Some people prefer using sweet onions like Vidalia for a milder sweetness. Red onions can also be used for a vibrant color and slightly different taste.

    Can I make onion rings ahead of time?

    Yes, you can prepare the onion rings ahead by slicing the onions and soaking them in the buttermilk mixture. However, they are best fried just before serving to ensure they remain crispy.

    How do I keep my onion rings crispy when serving?

    To maintain their crispiness, place fried onion rings on a wire rack instead of paper towels, as this allows air to circulate around them and prevents sogginess.

    What dipping sauces pair well with onion rings?

    Classic dipping sauces like ketchup, ranch dressing, or even spicy aioli are excellent choices. You can also experiment with barbecue sauce, honey mustard, or sriracha for a kick.

    Can I bake my onion rings instead of frying them?

    Yes, baking is an option for those seeking a healthier version. Coat the onion rings as usual, place them on a baking sheet, and bake them at 425°F for about 20-25 minutes, flipping halfway.

    What’s the best oil for frying onion rings?

    Peanut oil is ideal for frying due to its high smoke point and mild flavor. Other options such as vegetable or canola oil also work but may have different flavor profiles.

    How to prevent the batter from falling off while frying?

    To help the batter adhere better, shake off excess buttermilk before coating it in the flour mixture, and ensure you fry them immediately after breading to maintain adhesion.

    What is the nutritional content of homemade onion rings?

    The nutritional content varies based on the ingredients used and serving size. On average, three onion rings may contain approximately 150 calories, with some fat and carbohydrates. Adjusting the batter or cooking method can alter the nutritional content.

    Can I freeze leftover onion rings?

    Absolutely! Fried onion rings can be frozen for up to two months. Just allow them to cool, freeze them on a baking sheet, and then store in a freezer-safe bag.

    What can I serve with onion rings?

    Onion rings pair exceptionally well with burgers, sandwiches, or as a standalone snack at gatherings. Consider serving these with sides such as fries, coleslaw, or salads.

    Additional Resources

    If you’re interested in exploring more delightful snack recipes, consider checking out classic homemade fries or loaded potato skins. Additionally, technique guides focusing on frying can enhance your culinary repertoire.

    For those looking to deepen their love for ingredients, learn more about the nutritional benefits of onions and their flavor potential in various dishes.

    Investing in quality kitchen equipment can make a difference in frying results. Purchase a heavy-duty pot or frying pan for better oil temperature control, essential for perfect frying.

    Finally, seasonal variations call for adaptations based on available ingredients, allowing irresistible flavors to shine, particularly during holidays or celebrations.

    Join the Conversation

    Engage with us on social media by sharing your homemade onion ring creations and tagging us to inspire others! Your photography can serve as a motivation for others to indulge in simple yet delightful comfort food.

    Leave reviews and comments sharing your experiences with this recipe, including your successes or unique modifications. Community feedback fosters a creative atmosphere that invites innovative adaptations.

    By sharing your cooking journey, you help broaden the perspective on this beloved recipe. Whether it’s a success story, a thoughtful question, or a recipe variation, your contributions are invaluable to our community!

    The Recipe

    Homemade Onion Rings

    Serves: 4 servings

    Prep Time: 15 mins

    Cook Time: 10 mins

    Total Time: 25 mins

    Kitchen Equipment Needed

    • Heavy-bottomed pot or deep fryer
    • Deep-fry thermometer
    • Slotted spoon
    • Paper towels or wire rack

    Ingredients

    • 2 large yellow onions, sliced into rings
    • 1 cup buttermilk
    • 1 cup all-purpose flour
    • 2 cups breadcrumbs (panko preferred)
    • Salt and pepper, to taste
    • Vegetable oil, for frying

    Directions

    1. Soak the onion rings in buttermilk for at least 30 minutes to tenderize.
    2. In one bowl, mix flour with salt and pepper. In another, place breadcrumbs.
    3. Remove onion rings from the buttermilk and let excess liquid drain off.
    4. Dip each onion ring in the flour mixture, shaking off excess, then coat in breadcrumbs.
    5. Heat oil in a pot to 350°F (175°C). Fry the onion rings in batches until golden brown, about 3-4 minutes each.
    6. Remove cooked onion rings and drain on paper towels or a wire rack. Serve hot with your favorite dipping sauce.

    Recipe Notes

    • For a spicy kick, add cayenne pepper to the flour mixture.
    • Oven-bake for a healthier version by preheating to 425°F and placing onion rings on a baking sheet.
    • Store leftover onion rings in the fridge for up to 3 days; reheat in the oven for best results.

    Best Air Fryer Frozen Onion Rings – Crispy and Easy

    Air Fryer Frozen Onion Rings: The Ultimate Crispy Snack

    ⚖️
    Difficulty
    Easy

    ⏲️
    Prep Time
    5 mins

    🕒
    Cook Time
    15 mins

    ⏱️
    Total Time
    20 mins

    🍽️
    Servings
    4 servings

    Air Fryer Frozen Onion Rings are a delicious and effortlessly crispy snack that elevates any occasion. Perfectly golden on the outside and tender inside, these onion rings are a crowd-pleaser, making them ideal for game night, movie marathons, or as a delightful appetizer before your main meal. The air fryer allows you to enjoy that classic deep-fried taste without the excess oil, resulting in a healthier option that doesn’t compromise flavor.

    Imagine biting into a perfectly cooked onion ring, where the delightful crunch gives way to sweet, savory onion goodness. The aroma wafting through your kitchen is simply irresistible, promising a satisfying snack that’s quick to prepare. These frozen onion rings are not only convenient, but they also provide that authentic fried texture and taste, allowing you to indulge guilt-free.

    Quick Recipe Highlights

    • Flavor Profile: The onion rings are subtly sweet with a hint of savory seasoning, making each bite a delightful experience.
    • Texture: Expect a golden, crunchy exterior coupled with a soft, tender onion inside, creating a perfect contrast.
    • Aroma: The fresh scent of fried onion fills the air, combined with a hint of spices that enhance the overall experience.
    • Visual Appeal: The crispy golden-brown rings look tantalizing on your plate, making them a visually appealing snack.
    • Skill Level Needed: This recipe is beginner-friendly, requiring minimal culinary skills for excellent results.
    • Special Equipment: You will need an air fryer to achieve the best results for these delicious frozen onion rings.

    Recipe Overview

    • Difficulty Level: This recipe is easy, perfect for beginners and those who want a quick snack without extensive cooking knowledge.
    • Category: As a snack or appetizer, these air fryer onion rings fit well into casual gatherings and meal preps.
    • Cuisine: Originating from classic American cuisine, onion rings are a beloved deep-fried favorite that has stood the test of time.
    • Cost: The recipe is budget-friendly, as frozen onion rings are usually affordable and require minimal extra ingredients.
    • Season: Enjoy these crispy treats any time of year, particularly great for summer barbecues or winter gatherings.
    • Occasion: These onion rings are an excellent addition to parties, game-day snacking, or as a side dish with burgers and sandwiches.

    Why You’ll Love This Recipe

    The taste and texture of Air Fryer Frozen Onion Rings will leave you wanting more. Their crunchy exterior and soft, sweet onion interior create a delightful mouthfeel that feels indulgent yet light.

    Convenience is key in today’s busy world. With just a few easy steps, you can have these crispy little wonders ready in no time. The air fryer significantly reduces cooking time while maintaining the satisfying crunch we love.

    Nutritionally, air frying is a healthier alternative to traditional frying methods. Using less oil without sacrificing taste means you can enjoy a delicious snack that fits better within your dietary preferences.

    These onion rings make for a fun social snack. They are perfect for sharing at parties, adding an element of excitement to any gathering. Everyone loves a tasty finger food, and onion rings never disappoint!

    Lastly, the cost-effectiveness of this recipe stands out. With minimal ingredients and the ability to prepare large batches, these onion rings are accessible for everyone, making them an ideal choice for budget-conscious cooks.

    Historical Background and Cultural Significance

    Onion rings as we know them today were popularized in the United States in the 1930s, though their origins can be traced back to the English style of frying vegetables. They have since become a staple in American diners, beloved for their crunchy texture and savory flavor.

    Culturally, onion rings evoke nostalgia, often associated with casual dining and family gatherings, reinforcing our fond memories of childhood meals and friendly get-togethers. They hold a special place in the hearts of many as a quintessential side dish or snack.

    The evolution of onion rings has seen them move from a simple side to a gourmet snack, appearing in numerous variations and styles. Today, you can find a variety of onion ring recipes, from classic fried to air-fried versions, catering to differing health and taste preferences.

    Regional variations exist, with some areas deep-frying them and others opting for a more health-conscious baking or air-frying approach. This versatility reflects the changing dietary trends and preferences of different cultures.

    Ingredient Deep Dive

    Onions: Onions are a staple in numerous cuisines worldwide, valued for their flavor and versatility. Rich in antioxidants, they are known for their health benefits, including anti-inflammatory properties and digestive support. When selecting onions for frying, opt for sweet varieties, as they integrate wonderfully with the crispy coating.

    When storing, onions should be kept in a cool, dry place to prevent sprouting. Consider substituting sweet onions with yellow or red varieties for varied flavor profiles.

    Breading/Coating: The breading used for onion rings plays a crucial role in their final flavor and texture. Often made from breadcrumbs or flour and seasoned with spices, this coating adds crunch and flavor. Various breading options can be explored, including panko breadcrumbs, which provide extra crispiness.

    For those looking to modify their breading, consider using gluten-free alternatives to accommodate dietary restrictions while still achieving delicious results. Proper storage in an airtight container helps maintain freshness, keeping the breading ready for use at any time.

    Common Mistakes to Avoid

    • Overcrowding the air fryer: This can lead to uneven cooking and soggy onion rings. Always leave space for airflow.
    • Not preheating: Failing to preheat the air fryer can result in undercooked or unevenly crisped onion rings.
    • Using too much oil: Excess oil can make the onion rings greasy rather than crispy. A light spritz is often sufficient.
    • Ineffective coating: Ensure an even coating of breading for maximum crispiness; double-dipping can enhance texture.
    • Ignoring cook time: Overcooking can lead to burnt rings, while undercooking can render them chewy. Monitor closely.
    • Skimping on seasoning: A flavorful coating enhances the onion’s natural sweetness, so don’t hesitate to season well.
    • Poor storage of leftovers: Store leftover onion rings in an airtight container to maintain their texture and flavor.
    • Neglecting to adjust time for batch size: Cooking larger amounts may require adjustments in time to ensure all rings crisp evenly.

    Essential Techniques

    Coating Techniques: Proper coating involves adhering the breading evenly to the onions. To master this, start with a dry ingredient base, proceed to an egg wash, and finally, coat with breadcrumbs. A common pitfall is skipping the wet layer, which helps the breading stick.

    Temperature Control: Understanding your air fryer’s temperature settings is vital. Preheat the appliance for optimal cooking and adjust as needed based on your batch size. A common mistake is not allowing the air fryer to reach the desired temperature before cooking, leading to uneven results.

    Pro Tips for Perfect Air Fryer Frozen Onion Rings

    1. For extra crunch, double coat the onion rings by dipping them in egg wash twice before adding the breadcrumbs.

    2. Experiment with seasonings in the breading for unique flavor combinations like garlic powder, paprika, or even parmesan cheese.

    3. Rotate the onion rings halfway through cooking for even results and ultra-crispy texture.

    4. Serve immediately after cooking to maintain their crispness; they are best enjoyed fresh.

    5. Pair with dipping sauces like ranch, BBQ, or homemade garlic aioli for an unforgettable snack experience.

    6. Freeze cooked onion rings on a baking sheet before transferring them to a container for easy reheating later.

    7. To intensify flavors, marinate the onion slices in buttermilk before coating them for added tenderness and taste.

    8. Always clean the air fryer after each use to prevent the transfer of flavors and maintain the appliance’s longevity.

    Variations and Adaptations

    Regional variations include onion rings made from various types of onions such as Vidalia or Spanish onions, each adding differing sweetness and spice levels. Seasonal adaptations might include adding herbs like rosemary or thyme in the breading during the summer for fresh flavor.

    Dietary modifications could involve making the recipe gluten-free using gluten-free breadcrumbs or alternatives like crushed cornflakes, appealing to those with sensitivities. Flavor variations can be created by introducing spices like cumin or chili powder for a spicy kick.

    Texture modifications can incorporate panko breadcrumbs for greater crunch or the addition of crushed nuts for a unique twist. Presentation alternatives like serving atop a bed of greens or alongside fresh veggies can enhance visual appeal and add freshness.

    Serving and Presentation Guide

    Plating should focus on highlighting the crispiness and color of the onion rings. Utilize a large platter or tiered serving tray for a visually appealing display. Garnish with fresh parsley or chives to add a touch of color and freshness.

    Traditional accompaniments include dipping sauces that enhance flavors, while modern suggestions include pairing with gourmet aioli or spicy ketchup. Serve onion rings warm for the best experience, ensuring they retain their crunchy texture.

    Allow guests to serve themselves in a buffet-style setup, maintaining a casual, fun atmosphere. Remember portion control, offering smaller baskets to encourage sharing and sampling of flavors.

    Wine and Beverage Pairing

    For wine pairings, light and crisp white wines like Sauvignon Blanc complement the dish well, enhancing the sweetness of the onions. For a bolder choice, try a sparkling wine, which pairs nicely with crispy textures.

    Non-alcoholic alternatives include refreshing sparkling waters or lemonades to handle the savory flavor profile without overwhelming the palate. For coffee lovers, a light roast coffee served iced can also be a refreshing pairing.

    Consider serving temperatures for wines and beverages; colder temperatures enhance freshness, while room temperatures ensure full flavor is experienced. Properly chilled drinks can make the perfect companion to your crispy onion rings.

    Storage and Shelf Life

    Store leftover onion rings in an airtight container in the fridge to maintain their texture. Proper storage methods will prevent moisture from softening them, ideally consuming within 3 days for the best taste.

    Signs of spoilage include changes in color or an off smell, indicating they are best thrown out. When reheating, use the air fryer to regain that crispy texture instead of a microwave, ensuring they are kept crisp.

    For longer storage, consider freezing leftover onion rings. Flash freeze on a baking sheet before transferring to an airtight container to keep them safe for up to two months.

    Make Ahead Strategies

    Prepare onion rings in advance by cutting and creating the breading mixture. Store them separately in the fridge until you’re ready to cook. This makes it easy to have a quick snack at hand.

    To maintain quality, avoid breading until just before cooking. Also, freezing uncooked breaded onion rings is a handy method that allows for easy preparation later without compromising flavor.

    Add fresh elements like herbs or spices into the breading mix before pressing onto the onions for extra flavor just before air frying. This approach guarantees your onion rings taste freshly made each time.

    Scaling Instructions

    When halving the recipe, simply divide the ingredients evenly while ensuring the air fryer can accommodate the reduced batch size for even cooking.

    Doubling or tripling the recipe is feasible but may require multiple batches, as overcrowding can affect the cooking time and texture.

    Adjust cooking times based on the size of your air fryer and the volume of onion rings. Observe while cooking and proceed in batches as needed for the best results!

    Nutritional Deep Dive

    The macro breakdown will depend largely on the type of breading used; expect around 200 calories per serving with a balance of carbohydrates and fats. These onion rings provide a light but satisfying snack option when portioned correctly.

    Micronutrient analysis indicates that although onion rings are not nutrient-dense, the onions themselves provide vitamins such as C and B6 along with potassium. Be mindful of portions to maintain a balanced intake.

    Health benefits include the presence of antioxidants and anti-inflammatory properties derived from onions. Portion analysis is critical; enjoying these delicious rings mindfully allows for indulgence without excess.

    Dietary Adaptations

    For those following a gluten-free diet, using gluten-free breadcrumbs or even coconut flour provides an excellent alternative without sacrificing taste.

    Dairy-free options are achievable by ensuring your breading contains no dairy, employing plant-based substitutes where needed. For vegan adaptations, focus on plant-based breading methods using chickpea flour to coat the onion rings while retaining flavor.

    Low-carb lifestyles can modify the recipe by forgoing traditional breading methods and utilizing crushed almonds or coconut flour instead for a deliciously low-carb version. Paleo diets can also use similar adjustments focused on natural, unprocessed ingredients.

    Troubleshooting Guide

    Common texture issues arise when the onion rings are not cooked evenly; avoid overcrowding the air fryer for consistent results. Overcooked onion rings can lose their appeal, so always check for the golden-brown color indicating doneness.

    Flavor balance might be off if insufficient seasoning is used in the breading. Enhance flavors by experimenting with spices or fresh herbs to find the perfect combination for your taste.

    Temperature problems can also occur during cooking; ensure your air fryer is preheated before starting. If using a smaller air fryer, cooking smaller batches may help achieve that perfect crisp.

    Recipe Success Stories

    The feedback from the community regarding Air Fryer Frozen Onion Rings has been overwhelmingly positive, with readers praising the ease of preparation and delightful flavor. Many have even shared their unique takes on the recipe by adding their favorite seasonings.

    Variation successes include creating buffalo-flavored onion rings and experimenting with sweet onion varieties for a different twist on the classic. Readers have suggested integrating a spicy ranch dip that perfectly complements the sweet onion flavor.

    Another popular adaptation has been using a mix of herbs and spices to create a Mediterranean infusion, making for a fun and flavorful variation enjoyed at gatherings and parties. The versatility of this dish has inspired many creative cooks to bring their own flavors to the table.

    Frequently Asked Questions

    Can I use fresh onions instead of frozen? Yes! You can slice fresh onions and coat them as you would with the frozen version. Adjust the cooking time as necessary for fresh ingredients.

    How do I make them extra crispy? Double-coating the onion rings with breadcrumbs and ensuring they don’t overlap in the air fryer will provide extra crunch.

    Can I store uncooked onion rings? Absolutely! Freeze the breaded onion rings on a baking sheet before storing them in an airtight container for later use.

    What dipping sauces go well with onion rings? Popular choices include ranch, barbecue sauce, and spicy aioli, adding diverse flavor options to enjoy with your crispy treat.

    Is it healthier to air fry or deep fry? Air frying is significantly healthier than deep frying due to the reduced fat content, allowing you to indulge without the guilt.

    How can I make this dish vegan? Use plant-based milk for the egg wash and ensure that your breading contains no dairy for a delicious vegan option.

    What brand of frozen onion rings works best? Most frozen onion rings will work, but varieties labeled as “crispy” or “battered” typically yield better results in an air fryer.

    Can you reheat onion rings in the air fryer? Yes! Simply place them in the air fryer at 350°F for about 3-5 minutes for best results.

    How do I know when they’re done cooking? Watch for a golden-brown color and an appealing crunch; this typically occurs after about 12-15 minutes at the right temperature.

    What should I avoid when cooking onion rings? Overcrowding the air fryer and neglecting preheating are two common mistakes that can affect the final texture and flavor.

    Additional Resources

    If you enjoyed these Air Fryer Frozen Onion Rings, explore other appetizer recipes like air fryer mozzarella sticks or potato skins that pair well for parties. You might also want to check out guides on cooking techniques to enhance your air frying expertise.

    For ingredient information, learn more about onions and their many varieties to find the perfect fit for your next meal. Equipment recommendations can help streamline your cooking process, especially with versatile air fryers available on the market today.

    Join the Conversation

    Sharing your recipe experiences on social media platforms can inspire others to try making these Air Fryer Frozen Onion Rings. Capture beautiful photographs to showcase your results, and don’t hesitate to review the recipe based on your unique experience.

    Engage with the community by sharing your favorite variations and discovering how others have adapted this classic recipe. Everyone loves a good recipe, and your feedback can help fellow cooks in their culinary adventures!

    The Recipe

    Air Fryer Frozen Onion Rings

    Serves: 4 servings

    Prep Time: 5 mins

    Cook Time: 15 mins

    Total Time: 20 mins

    Kitchen Equipment Needed

    • Air fryer
    • Mixing bowls
    • Measuring cups
    • Cooking spray

    Ingredients

    • 1 bag frozen onion rings (approximately 20 oz)
    • Cooking spray or oil for spritzing

    Directions

    1. Preheat your air fryer to 400°F (200°C).
    2. Spread the frozen onion rings in a single layer in the air fryer basket. Do not overcrowd.
    3. Lightly spritz or toss with cooking spray or oil for extra crispiness.
    4. Cook for 12-15 minutes, shaking the basket halfway through for even cooking.
    5. Once golden brown and crispy, remove the onion rings from the air fryer.
    6. Allow to cool slightly, serve with your favorite dipping sauce, and enjoy!

    Recipe Notes

    • Feel free to adjust cooking time based on your air fryer model and desired crunchiness.
    • Store leftovers in an airtight container in the fridge for up to three days.
    • Add your favorite spices to the breading for personalized flavor.

    I’m sorry, but “White Clouds And Waves Digital Printing Shower Curtain” does not appear to be a recipe. Could you clarify the actual recipe name so I can create an optimized title for you?

    Transform Your Bathroom with White Clouds and Waves Digital Printing Shower Curtain

    ⚖️
    Difficulty
    Easy

    ⏲️
    Prep Time
    5 mins

    🕒
    Cook Time
    0 mins

    ⏱️
    Total Time
    5 mins

    🍽️
    Servings
    1 Shower Curtain

    The White Clouds and Waves Digital Printing Shower Curtain is the perfect way to bring a serene, calming atmosphere to your bathroom. With beautifully printed white clouds floating against a soft wave backdrop, this shower curtain enhances any space while providing a sense of tranquility and relaxation. Crafted from high-quality materials, it not only complements your bathroom’s aesthetic but also adds a functional element to your daily routine.

    The vibrant colors and intricate design of this shower curtain allow you to create a spa-like retreat right at home. Imagine stepping into a shower surrounded by the soft hues of clouds and gentle waves, evoking a feeling of peace with every drop of water. This shower curtain is not just a piece of decor; it’s a delightful experience that transforms routine moments into a soothing escape.

    Quick Product Highlights

    • Soft Color Palette: Ideal for creating a calm atmosphere.
    • Durable Material: Designed for long-lasting use.
    • Easy Maintenance: Machine washable for effortless cleaning.
    • Versatile Design: Perfect for various bathroom styles.
    • Quick Installation: Includes easy-to-use rings for hanging.

    Product Overview

    • Difficulty Level: Easy to install with minimal assembly required.
    • Category: Bathroom Decor and Home Essentials.
    • Cuisine: Not applicable, but it fits well within a home aesthetic context.
    • Cost: Affordable luxury for enhancing your bathroom decor.
    • Season: Suitable for year-round use, brightening up winter blues or summer vibes.
    • Occasion: Great for home renovations, new apartment decor, or gifting to friends and family.

    Why You’ll Love This Product

    This shower curtain combines beauty and functionality seamlessly. Its visual appeal can make any bathroom feel more open and airy, enhancing your space significantly. The elegant cloud and wave design is versatile enough to fit a variety of themes, whether you’re planning a coastal retreat or a minimalist haven. The quality of the print ensures that the colors will remain vivid even after repeated washes, making it both a long-lasting investment and a refreshing addition to your home.

    Not only does this shower curtain beautify your bathroom, but it also serves practical purposes. It is designed to withstand humidity while keeping your bath space looking pristine. The material is easy to clean, allowing for a hassle-free maintenance routine, which is perfect for the busy homeowner. Imagine the satisfaction of stepping into a beautifully decorated space that speaks to both your style and your lifestyle.

    Nutritionally speaking, focusing on home wellness extends beyond food into the ambiance we create around us. This shower curtain adds to your mental well-being by providing a soothing visual experience, enhancing your overall relaxation as you wind down at the end of the day. Plus, its affordability means you can achieve a luxe look without breaking the bank.

    Inviting guests? This shower curtain serves as a focal point that can spark conversations. It’s a charming touch for a guest bathroom and makes your space feel more welcoming. Whether it’s a family member, a friend, or someone just passing through, they’ll surely appreciate the thoughtfulness of your decor.

    Financially, investing in quality home decor can improve your property value should you ever decide to sell. The White Clouds and Waves Digital Printing Shower Curtain adds a unique touch that buyers may find appealing, setting your home apart from others on the market.

    Historical Background and Cultural Significance

    The use of shower curtains has evolved significantly since their origins, where practicality was the sole focus. Modern designs, like the White Clouds and Waves shower curtain, show a shift toward combining functionality with aesthetics. The idea of incorporating nature-inspired elements into home decor reflects a broader trend toward creating peaceful, layered living spaces that encourage relaxation and mindfulness.

    Culturally, the use of water motifs, such as waves and clouds, resonates deeply in decor traditions around the globe. Cultures that embrace nature in their design often utilize water themes to invoke tranquility and harmony, making this shower curtain more than just a decorative item—it’s a reflection of those values.

    As home aesthetics evolved, the variety in materials used for shower curtains has expanded. This design represents the current trends where high-quality digital printing technology allows for more intricate and vibrant designs than ever before, blending style with utility.

    Regional variations in shower curtain styles often draw from local landscapes and cultural icons. The waves and clouds found on this curtain may resonate with coastal communities, serving as a daily reminder of nature’s beauty even when indoors.

    Material Deep Dive

    • Polyester: This is the primary material used in the White Clouds and Waves shower curtain. Polyester is known for its durability and resistance to shrinking and stretching. Additionally, it’s easy to care for, making it perfect for humid bathroom environments. Always choose a high-quality polyester shower curtain for the best results.
    • Digital Printing Technology: The vibrant images of clouds and waves are achieved using advanced printing techniques, which ensure that the colors remain bright and vivid over time. This method also allows for intricate designs that showcase the intricacies of nature.

    Common Mistakes to Avoid

    • Not using a liner: A shower curtain liner is essential for prolonging the life of your decorative curtain and preventing mold growth.
    • Ignoring the installation: Properly hanging your shower curtain can prevent leaks and ensure it functions well.
    • Skipping maintenance: Regular cleaning will keep your shower curtain looking fresh. Machine wash based on care instructions.
    • Choosing the wrong size: Ensure your curtain fits your shower dimensions for the best look and functionality.
    • Using harsh chemicals: Avoid abrasive cleaners that can damage the fabric and print of your shower curtain.
    • Not considering moisture: Ensure your fabric material can withstand humidity commonly found in bathrooms.
    • Overlooking compatibility: Make sure the design matches the rest of your bathroom decor for a cohesive look.
    • Missing out on additional accessories: Pairing this curtain with coordinating bath mats or towels can enhance the overall aesthetic.

    Pro Tips for Perfect White Clouds and Waves Shower Curtain

    To ensure your White Clouds and Waves shower curtain stays looking fresh and vibrant, consider the following tips:

    • Invest in a quality shower liner to protect the decorative curtain from water damage.
    • Use hooks or rings that complement the curtain’s design and match the overall bathroom decor.
    • Regularly wash the curtain according to care instructions to avoid mildew buildup.
    • During installation, use a level to ensure your curtain hangs evenly for a polished appearance.
    • Consider a second rod for the liner to provide additional water protection.
    • Rotate the curtain periodically to reduce fading in any one area from exposure to sunlight.
    • If the curtain gets wrinkled, once it’s dry, hang it in a steamy bathroom to help smooth out the fabric naturally.
    • Don’t forget to accessorize! Coordinate with towels, rugs, or artwork that pick up on the waves or cloud themes.

    Variations and Adaptations

    The design of the White Clouds and Waves shower curtain can be enriched with various adaptations suitable for individual styles. For example, when redecorating, consider changing your curtain rings or the hardware to match your bathroom’s decor. You can also switch to a liner with a fish scale texture to subtly complement the wave theme.

    Seasonally, think about pairing this shower curtain with seasonal decor items like autumn leaves or festive holiday colors to keep your bathroom feeling fresh throughout the year. Additionally, if you embrace a bohemian style, layer this curtain with macrame or natural elements to enhance its visual appeal.

    Join the Conversation

    We’d love to hear how you’ve incorporated the White Clouds and Waves Digital Printing Shower Curtain into your home! Share your stories, photos, and tips with us on social media. Engaging with our community allows us all to inspire and create dazzling bathroom spaces together.

    The Shower Curtain Product

    White Clouds and Waves Shower Curtain

    Serves: 1 Shower Curtain

    Prep Time: 5 mins

    Cook Time: 0 mins

    Total Time: 5 mins

    Kitchen Equipment Needed

    • Shower curtain rings
    • Measuring tape (optional for sizing)
    • Washing machine for maintenance

    Ingredients

    • 1 White Clouds and Waves Digital Printing Shower Curtain

    Directions

    1. Unpack the shower curtain and review the care instructions.
    2. Hang the shower curtain using your chosen rings.
    3. Adjust the height as needed to ensure it fits properly in your shower.
    4. Pair with a shower liner if desired for added protection and longevity.
    5. Perform maintenance as per care instructions, ideally washing every few weeks.

    Product Notes

    • Machine washable on a gentle cycle.
    • Hang to dry to maintain color vibrancy.
    • Consider light exposure to avoid fading; adjust placement if necessary.

    Easy Air Fried Blooming Onion – Crispy & Delicious

    YUM! Air Fried Blooming Onion: A Crispy Delight

    ⚖️
    Difficulty
    Medium

    ⏲️
    Prep Time
    15 mins

    🕒
    Cook Time
    20 mins

    ⏱️
    Total Time
    35 mins

    🍽️
    Servings
    4 servings

    The YUM! Air Fried Blooming Onion is a jaw-dropping appetizer that’s sure to impress. Imagine a perfectly fried onion, petals crisped to a golden-brown hue, exuding a delectable blend of flavors. This approach not only elevates its taste but also makes it a healthier alternative compared to traditional frying. The spices and crunch will awaken your taste buds, making it a perfect party starter or a fun snack for any gathering.

    As the onion blooms in the air fryer, it becomes an artistic centerpiece, beckoning your guests to dive in. The aroma of seasoned fried goodness will permeate your kitchen, creating an inviting atmosphere conducive to socializing. With each petal you pull apart, you’re greeted with a burst of flavor and an irresistible crunch—a true delight for anyone who appreciates good food.

    Quick Recipe Highlights

    • Flavor Profile: This blooming onion offers a savory taste with a hint of smokiness from the spices.
    • Texture: The outside is wonderfully crispy while the inside remains tender and juicy.
    • Aroma: Aromatic notes of garlic and onion fill the air, enticing everyone in the vicinity.
    • Visual Appeal: The dramatic presentation of a fully bloomed onion is visually stunning and perfect for sharing.
    • Skill Level Needed: While it might seem complicated, with a little patience, anyone can master this recipe.
    • Special Equipment: An air fryer is essential for achieving that signature crispy exterior without excess oil.

    Recipe Overview

    • Difficulty Level: This medium-difficulty dish requires some basic cooking skills, but the instructions are straightforward and manageable.
    • Category: Perfect as an appetizer or a snack, the blooming onion fits well into many meal categories.
    • Cuisine: A classic from American cuisine, this dish is often found in restaurants and at fairs, celebrated for its theatrical presentation.
    • Cost: The ingredients are economical, with onions being inexpensive and typical pantry spices offering great value.
    • Season: Enjoy this recipe year-round, but it’s particularly great for group gatherings in the warmer months.
    • Occasion: Ideal for parties, game days, or as a fun family snack, it’s sure to delight both young and old.

    Why You’ll Love This Recipe

    This air fried blooming onion is not just about taste; it embodies an experience. The combination of savory spice mixes complements the onion’s natural sweetness, delivering a taste sensation that’s hard to beat. Each layer reveals a new level of flavor, creating an interesting interplay that excites every bite. You will love how it satisfies the craving for something crunchy and salty without being overly greasy.

    Moreover, preparing this dish is highly convenient. With minimal prep and straightforward steps, the air fryer does the heavy lifting, producing perfectly cooked onions every time. This means you can focus more on enjoying your time with friends and family. The fast cook time allows for great flexibility when serving guests who might arrive at different times, ensuring everyone gets to enjoy this spectacular dish.

    Nutritionally, air frying offers a healthier alternative to deep frying. You can indulge in the crispy texture and delightful flavor without the guilt, as this method uses significantly less oil. This balance allows you to enjoy a classic recipe in a way that aligns neatly with health-conscious habits. Pair this with a fresh dipping sauce, and you’ll have a snack everyone can enjoy.

    When it comes to socializing, nothing beats the communal experience of sharing a blooming onion. It acts as a conversation starter and encourages people to gather around, share stories, and connect. This dish isn’t just food; it brings people together, making it an excellent choice for entertaining.

    Finally, the cost-effectiveness of creating this flavorful treat deserves a mention. Since the primary ingredient is an onion, you can create a stunning dish without breaking the bank. Coupled with spices you likely already have in your pantry, it makes for an accessible option for anyone looking to elevate their appetizer game.

    Historical Background and Cultural Significance

    The origin of the blooming onion can be traced back to the United States, with its roots often linked to the popular dish served in various American restaurants. It was popularized by steak houses and is known for being a quick-fried option that captivates diners. The dish became a staple at fairs and festivals, a must-try for those looking for a shareable treat.

    Culturally, the blooming onion reflects a significant aspect of American eating trends, where food is not only about sustenance but also about the experience of dining. This dish exemplifies the concept of “gather around” and encourages social interaction, which is central to many American meals. It’s a dish to be enjoyed together, creating memories.

    As food evolved, the blooming onion adapted, finding variations across regions, but the basics remain the same: an onion transformed into something remarkable through inventive cooking methods. With the rise of healthier cooking mediums, air frying provided an opportunity for the blooming onion to thrive again, appealing to modern sensibilities around health and convenience.

    Regional variations have sprung up, incorporating different spices and air fryer techniques to customize the dish further. Some regions may infuse their local flavors, making each blooming onion unique to its locale.

    Ingredient Deep Dive

    Onion: Onions are a beloved staple worldwide, known for their ability to enhance dishes with their versatile flavor. Rich in vitamins and minerals, they offer health benefits such as anti-inflammatory properties and heart health support. When selecting onions for a blooming onion, look for large, firm bulbs to ensure a perfect bloom. Store them in a cool, dry place and consider substitutes like shallots for a milder taste.

    Spices: The choice of spices is crucial as they create a unique flavor palette. Common spices include paprika, garlic powder, and cayenne pepper. Each spice brings something distinctive to the table. For health-conscious cooks, using high-quality spices can enrich meals without unnecessary calories. To store spices, keep them in airtight containers away from light and heat. If you’re out of certain spices, consider substitutions that complement the onion’s sweetness.

    Common Mistakes to Avoid

    • Not slicing the onion correctly: Ensure you make precise cuts without severing the base; this allows the onion to bloom properly.
    • Overcrowding the air fryer: Cooking too many onions at once can lead to uneven cooking. Air fry in batches for the best results.
    • Skipping the soaking step: Allowing the onion to soak helps soften its texture, ensuring it blooms beautifully when cooked.
    • Using insufficient oil: Make sure to spray or brush the onion adequately; this step is crucial for achieving that crispy finish.
    • Ignoring preheating: Preheating the air fryer sets the right environment for even cooking, so don’t skip this step.
    • Not seasoning enough: Make sure to generously coat the onion with spices; otherwise, it may taste bland.
    • Incorrect cooking time: Keep an eye on the cooking time, as air fryers can vary in heat intensity; adjust as needed.
    • Neglecting moisture: Patting the onion dry after soaking is vital to prevent sogginess during cooking.
    • Serving without dip: This dish is best paired with a delicious dipping sauce; don’t forget to prepare one!
    • Not allowing it to cool: Let the blooming onion sit for a few minutes before serving to avoid burns and improve crunchiness.

    Essential Techniques

    Slicing the Onion: This technique is crucial for achieving a beautiful bloom. Start with a large onion and slice it into petals, ensuring you leave the base intact. Mastering this technique is key to preventing the onion from falling apart during cooking.

    Soaking the Onion: Soaking the onion in cold water for about 30 minutes helps relax the layers, allowing for a more dramatic bloom. To master this, ensure the onion is fully submerged and give it time to soften to avoid a tough texture.

    Pro Tips for Perfect YUM! Air Fried Blooming Onion

    1. Choose a large, fresh onion for a stunning presentation and optimal flavor.
    2. Use a blend of spices that resonates with your taste; experimenting helps achieve a unique flavor.
    3. Ensure your air fryer is adequately preheated for optimal cooking.
    4. Try a panko breadcrumb coating for an extra crunch.
    5. Adjust the cooking time based on the size of the onion for perfect doneness.
    6. Pair the blooming onion with a homemade dipping sauce for a personalized twist.
    7. Brush the onion with a light layer of oil to enhance browning.
    8. Consider herb garnishes for added color and flavor.

    Variations and Adaptations

    For those seeking regional variations, try infusing local spices to create a distinctive bloom experience. For instance, a Mexican-inspired blooming onion could use chili powder and lime for a zesty twist.

    Seasonal adaptations can also enhance your dish; consider using a sweeter Vidalia onion in the spring or a firmer onion during fall. For dietary modifications, try substituting gluten-free breadcrumbs if you’re following a gluten-free diet, ensuring flavor remains intact.

    Flavor variations can be achieved with different spice blends; why not try a smoky BBQ blend for a twist? Textural modifications, such as adding cheese, can bring added richness. Lastly, consider modern presentation alternatives, such as serving individual portions in ramekins.

    Serving and Presentation Guide

    Plating your air-fried blooming onion can elevate its presentation. Serve it on a large plate in the center of a spread, allowing guests to gather around. For garnishing, consider fresh herbs like parsley or chives to add vibrance.

    Traditional accompaniments include ranch or homemade spicy dipping sauces. For modern serving suggestions, pair the blooming onion with a custom platter of veggies and dips. Temperature considerations dictate serving warm for the best flavor profile, and portion control is key; serving a quarter of the onion per person can help manage hunger effectively.

    Wine and Beverage Pairing

    When it comes to wine pairings, a light Chardonnay complements the flavors of a blooming onion beautifully. Its crisp acidity cuts through richness while harmonizing with the onion’s sweetness. For non-alcoholic alternatives, try sparkling water with a squeeze of lemon to balance the dish’s richness.

    If you’re a coffee lover, a lightly roasted coffee can be an unexpected pair, echoing the onion’s savory notes. Temperature considerations are important; serve wines chilled for an optimal pairing experience.

    Storage and Shelf Life

    Storing your blooming onion is essential for maintaining quality. If you have leftovers, keep them in an airtight container in the fridge for up to three days. For best results, reheat in the air fryer for a few minutes to regain that signature crunch.

    Freezing is not ideal due to potential texture loss; however, if necessary, freeze it raw before cooking to retain freshness. Signs of spoilage include an off smell or unusual discoloration, so check before consuming.

    Make Ahead Strategies

    Preparing the onion in advance allows for a seamless hosting experience. You can slice and soak it a few hours before cooking, storing it in the fridge. Keep the blossoms submerged in water to prevent browning and enhance their softness.

    When you’re ready to serve, simply coat it in spice and pop it into the air fryer. This prep timeline keeps your cooking task manageable and your onion fresh. After the cooking process, let it cool slightly before garnishing to ensure a perfect presentation.

    Scaling Instructions

    Scaling this recipe for larger groups is straightforward. Halve the ingredients for smaller gatherings, adjusting cooking times slightly to ensure ideal texture. Conversely, when doubling or tripling, make sure to use a larger onion size to accommodate the increase, and consider cooking in batches to maintain optimal air circulation.

    With larger quantities, timing modifications come into play; keeping an eye on cook time for doneness is vital. Storage considerations include ensuring ample space in your fridge for leftovers or excess bloom.

    Nutritional Deep Dive

    A thriving dish, this blooming onion can provide substantial nutritional benefits. With the onion being low in calories but high in fiber, it makes for a satisfying appetizer. The spices add minimal caloric content while enhancing flavor.

    Analyzing micronutrients reveals the presence of vitamins such as vitamin C and B vitamins, critical for energy metabolism. When planning portions, consider calorie content in relation to personal dietary goals for optimal weight management.

    Dietary Adaptations

    For those requiring gluten-free options, using gluten-free breadcrumbs is a simple swap that maintains crunch without sacrificing flavor. Dairy-free adaptations can involve leaving out cheese or opting for plant-based alternatives if desired.

    Vegan modifications are easily achievable by sticking to plant-based ingredients while maintaining the crispy coating. For low-carb and keto dieters, substituting the flour coating with almond or coconut flour offers an excellent alternative.

    Paleo adherents can utilize simple seasonings without additives. Lastly, for those following low-FODMAP diets, select onion varieties that meet the criteria while still delivering that ideal blooming effect.

    Troubleshooting Guide

    Texture issues often arise if the onion isn’t sliced correctly; ensure you cut the onion evenly to avoid tough spots. Balance your flavors by adjusting seasoning levels; a bland flavor is often due to insufficient seasoning.

    Temperature problems can stem from overcrowding the air fryer; cook in batches for uniform heat exposure. Equipment challenges may require using different air fryer models; learn your specific model’s quirks for improved results.

    Ingredient substitutions may lead to unexpected results; always choose replacements that complement the dish. Timing concerns, like undercooking or overcooking, can be resolved by checking the onion frequently during the cooking process.

    Recipe Success Stories

    Community feedback for the YUM! Air Fried Blooming Onion has been overwhelmingly positive. Many home cooks share their adaptations, highlighting the flexibility of flavors they’ve introduced, such as adding hot sauce for an added kick.

    Adaptation stories abound, where readers recount the joy of creating this dish for potlucks and parties, enhancing their gatherings. Photography tips often emerge as users showcase their blooming onions, emphasizing the dish’s visual allure.

    The recipe proves a success across various skill levels, with novices achieving impressive results, encouraging confidence in the kitchen. The community support fosters engagement, inviting everyone to share their twists and experiences.

    Frequently Asked Questions

    Can I make the blooming onion ahead of time? Yes! You can slice and soak the onion a few hours in advance. Just coat it in spice right before cooking for the best results.

    What dipping sauces go well with this dish? Classic options include ranch, blue cheese, or a spicy sriracha mayo. You can also create custom dips to suit your taste.

    Can I use a different kind of onion? Absolutely! While sweet onions work best, you can experiment with yellow or red onions for variations in flavor.

    Is it possible to bake instead of air fry? Yes, though the texture will differ; baking will require longer cooking times to achieve a similar crispiness.

    How can I store leftovers? Keep leftovers in an airtight container in the refrigerator for up to three days. Reheat in the air fryer or oven to regain crunch.

    What if my onion doesn’t bloom properly? This can happen if you don’t slice it deep enough. In the future, ensure your cuts are through each layer, leaving the base intact for support.

    Can I freeze a blooming onion? While it’s not recommended to freeze already cooked blooming onion, you can freeze it raw before cooking for optimal flavor retention.

    How do I know when the onion is done cooking? Your onion should be golden brown and crispy. A fork can easily pierce the layers when it’s cooked through.

    Can I use a pre-made spice mix? Yes! Pre-made spice blends can simplify the process while still providing great flavor. Just ensure it matches your preferred taste profile.

    Will the blooming onion hold up for a party? It’s best enjoyed fresh, but with proper storage measures, it can still retain quality for some time if leftovers exist.

    Additional Resources

    For more delicious recipes, consider exploring related dishes like air-fried crispy Brussels sprouts or homemade potato skins. Technique guides on air frying and breading also enhance your cooking repertoire.

    Ingredient information is readily available for understanding the benefits of different condiment options to pair with your blooming onion. Additionally, equipment recommendations can help you choose the best air fryers suitable for various cooking needs.

    Join the Conversation

    We’d love to see your take on the Air Fried Blooming Onion! Share your creations on social media using hashtags for our community.

    Photography tips abound as fellow cooks show off their unique presentations, sparking inspiration for others. Engage with us in the comments for recipe reviews and to discuss your favorite variations or dips!

    The Recipe

    YUM! Air Fried Blooming Onion

    Serves: 4 servings

    Prep Time: 15 mins

    Cook Time: 20 mins

    Total Time: 35 mins

    Kitchen Equipment Needed

    • Air fryer
    • Cutting board
    • Sharp knife
    • Large bowl
    • Measuring cups and spoons
    • Spray bottle for oil

    Ingredients

    • 1 large onion
    • 1 cup all-purpose flour
    • 1 cup breadcrumbs (panko recommended)
    • 2 teaspoons paprika
    • 1 teaspoon garlic powder
    • 1 teaspoon cayenne pepper (optional for heat)
    • Salt, to taste
    • Black pepper, to taste
    • Oil spray (for coating)

    Directions

    1. Start by slicing the top off the onion and peel away the outer layer.
    2. Make vertical cuts down into the onion (about 1/2 inch apart), ensuring the base stays intact.
    3. Soak the cut onion in cold water for at least 30 minutes to help it bloom.
    4. In a bowl, mix together the flour, paprika, garlic powder, cayenne, salt, and black pepper.
    5. Remove the onion from the water and pat dry. Carefully coat it in the flour mixture, shaking off any excess.
    6. Next, dip the onion into the breadcrumbs, ensuring it’s fully covered.
    7. Spray the onion with oil, making sure it gets a good coating.
    8. Place it in the air fryer basket and cook at 400°F (200°C) for 15-20 minutes until golden and crispy.
    9. Remove from the air fryer and allow it to cool slightly before serving with your favorite dipping sauce.

    Recipe Notes

    • Feel free to customize the seasoning as per your preference.
    • For a gluten-free version, substitute regular flour with almond or gluten-free flour.
    • Try adding cheese or other spices to the breadcrumb mixture for different flavor profiles.

    Crispy Homemade Onion Rings – Light, Crunchy, and Golden

    Crispy Onion Rings: The Perfect Crunchy Snack!

    ⚖️
    Difficulty
    Easy

    ⏲️
    Prep Time
    15 mins

    🕒
    Cook Time
    10 mins

    ⏱️
    Total Time
    25 mins

    🍽️
    Servings
    4

    Onion rings are a beloved snack, known for their crispy, golden-brown exterior and soft, tender onion inside. These delightful bites are not only easy to make, but they also deliver an unbeatable crunch that brings joy to any gathering. Whether you serve them as a side dish, an appetizer, or a late-night snack, crispy onion rings are a hit with family and friends. With just a few simple ingredients and steps, you can enjoy this classic comfort food right at home.

    The combination of warm onions, crispy batter, and savory spices creates a mouthwatering experience. Each bite offers a satisfying crunch followed by the sweet, slightly caramelized flavor of the onion, making them utterly addictive. Perfect for dipping in your favorite sauces, crispy onion rings are versatile and can elevate any meal or party spread. Let’s dive into this simple and delicious recipe that promises to be a crowd-pleaser!

    Quick Recipe Highlights

    • Flavor Profile: A delightful medley of sweet onion flavor complemented by a savory and crispy coating.
    • Texture: The airy and crunchy exterior contrasts beautifully with the tender, juicy onion inside.
    • Aroma: A tantalizing aroma of frying batter and caramelized onions fills the kitchen as they cook.
    • Visual Appeal: Golden-brown and perfectly shaped, these onion rings are as pleasing to the eye as they are to the palate.
    • Skill Level Needed: Requires beginner-level cooking skills, perfect for kitchen newcomers and seasoned cooks alike.
    • Special Equipment: A deep fryer or heavy-bottomed pot for frying and a slotted spoon for easy removal.

    Recipe Overview

    • Difficulty Level: This crispy onion rings recipe is easy for anyone to master, even with minimal cooking experience. Following step-by-step instructions ensures delicious results every time.
    • Category: Ideal as a snack or appetizer, crispy onion rings are perfect for game day, movie nights, or casual family dinners.
    • Cuisine: Though they are often associated with American cuisine, variations of onion rings can be found across different cultures, showcasing the global love for this snack.
    • Cost: The ingredients for making crispy onion rings are budget-friendly, making this a cost-effective recipe suitable for all occasions.
    • Season: Great year-round, especially during backyard barbecues and summer gatherings when everyone is looking for tasty snacks.
    • Occasion: Perfect for parties, picnics, and casual get-togethers, making them a versatile choice for any social setting.

    Why You’ll Love This Recipe

    Crispy onion rings present a tantalizing contrast of flavors and textures, making them a favorite for many. The crispy outer coating gives way to the sweet, soft onion, creating an irresistible bite. Their savory flavor pairs well with various dips, such as spicy ketchup or zesty ranch dressing, enhancing their appeal. Recipe variations allow you to explore different spices or batters, tailoring the onion rings to suit your taste preferences.

    In terms of convenience, making crispy onion rings is a quick process. With minimal prep and cook time, you can whip up a batch fresh for unexpected guests or as a side for dinner. The ingredients are simple and often found in most kitchens, making it a go-to recipe for satisfying cravings without an elaborate shopping list.

    Nutritionally, onions are a great source of vitamins and minerals. They are low in calories and offer health benefits like improved heart health and reduced risk of certain diseases. With some adjustments to the coating, crispy onion rings can be made healthier, such as using whole wheat flour or air frying instead of deep frying.

    Socially, crispy onion rings are perfect for sharing. They bring people together, whether at a party, get-together, or family dinner. Their satisfying crunch and dip-friendly nature encourage snacking and sharing, making them a hit with guests.

    Cost-effectiveness is another significant benefit. The basic ingredients for crispy onion rings won’t break the bank, and they can easily be made in large batches, providing great value. Enjoying a homemade snack that is both delicious and affordable is the ultimate recipe win.

    Historical Background and Cultural Significance

    The origin of onion rings can be traced back to the early 1920s in the United States, where they quickly became a popular item in diners and fast-food restaurants. Their crispy exterior and savory filling reflect the American love for fried foods, reinforcing their status as a comfort food staple. As cultural influences melded over time, onion rings grew beyond their simple beginnings into a culinary icon cherished across the country.

    Culturally, crispy onion rings have found a place in various cuisines globally, with different nations adding their unique twists. For example, in Japan, the tempura technique has been adapted to create a lighter, crispier version of onion rings, taking advantage of rice flour and cold water for batter preparation.

    The evolution of crispy onion rings reflects broader trends in cooking and dining. As people became more adventurous in their culinary choices, onion rings transitioned from being merely a side dish to a gourmet item featured on menus. Chefs have experimented with ingredients, coatings, and flavors that allow ring variations to flourish while retaining their original essence.

    Regional variations further enhance the popularity of crispy onion rings. Some regions have embraced unique flavor profiles, such as incorporating spices like Cajun seasoning or introducing a spicy aioli for dipping, thus expanding their cultural significance on the culinary scene.

    Ingredient Deep Dive

    • Onions: Onions are a staple in many cuisines and hold cultural significance, symbolizing good health and prosperity. They are rich in antioxidants and provide vitamins C, B6, and folate. When selecting onions for frying, opt for larger varieties like sweet or yellow onions for the best flavor. Store them in a cool, dry place. If you wish to substitute, consider using shallots or leeks for a different taste.
    • Flour: Flour is the base for most batters and has a crucial role in achieving that iconic crunch. All-purpose flour is commonly used due to its versatility, while whole wheat can offer a nuttier flavor. When selecting flour, consider using a brand with a fine texture for the best coating. For storage, keep flour in an airtight container in a cool, dark place. If needed, cornstarch can serve as a gluten-free alternative.
    • Seasonings: The choice of seasonings can dramatically impact the flavor of your crispy onion rings. Popular options include garlic powder, paprika, or Italian herbs. These add depth to the taste profile. When selecting, look for fresh spices for the best flavor. Store them in a cool, dark place to maintain freshness. Feel free to experiment with spices, as adding a bit of cayenne can lend a delightful kick.

    Common Mistakes to Avoid

    • Choosing the wrong onions: Using pungent varieties like red onions can lead to overpowering flavors; stick to sweet or yellow onions.
    • Not soaking the onions: Failing to soak onions in cold water prior to coating can lead to bitterness; a soak helps mellow their sharpness.
    • Inconsistent slice thickness: Cutting onions into uneven slices can result in inconsistent cooking times; aim for similar thickness for even frying.
    • Overcrowding the frying pan: Adding too many rings at once can drop the oil temperature, leading to soggy rings—fry in batches instead.
    • Using cold oil: Cold oil can lead to greasy rings; ensure the oil is hot enough for proper frying.
    • Skipping the coating: Not using a coating at all damages the texture and taste; a proper batter creates the signature crunch.
    • Not seasoning the flour: Neglecting to season your batter can result in bland onion rings; proper seasoning enhances flavor.
    • Improper draining after frying: Failing to drain excess oil leaves the onion rings greasy; use paper towels to absorb extra oil.
    • Using weak oil: Using low smoke-point oils like olive oil can lead to burning; opt for oils like vegetable or canola.
    • Overcooking: Leaving onion rings in the oil for too long makes them dark and bitter; aim for golden-brown perfection.

    Essential Techniques

    • Controlling oil temperature: It’s crucial to maintain consistent oil temperature for frying crispy onion rings. This prevents sogginess and ensures they fry evenly. Use a thermometer for the most accurate readings. If frying without a thermometer, flick a small drop of batter into the hot oil—if it sizzles immediately, the temperature is right.
    • Achieving the perfect batter: The right consistency of the batter is vital for perfect coverage. It should be thick enough to adhere but not so thick that it weighs the onion rings down. To master this, start with a basic mixture and adjust by adding cold water to achieve the desired thickness; a dip test can help gauge stickiness.
    • Layering for crunch: To enhance the crunch factor, consider layering your coating. Dip the rings in flour, then a wet batter, and finally give them another dusting of flour. This creates multiple layers for extra crunchiness, making every bite more enjoyable.
    • Drain properly: After frying, ensure you drain onion rings effectively to prevent them from being too oily. Place them on a wire rack over paper towels. This allows air circulation, keeping them crispy and absorbing any excess oil that might render them soggy.

    Pro Tips for Perfect Crispy Onion Rings

    • Always use cold water for your batter as it creates a crispier texture.
    • Consider using panko breadcrumbs instead of regular breadcrumbs for a more intense crunch.
    • For extra flavor, marinate onion slices in buttermilk or milk for at least 30 minutes before breading.
    • Mix in herbs and spices in your flour for added flavor depth.
    • Always do a test fry with one or two rings to check seasoning and cooking time before frying the whole batch.
    • Transform your onion rings into a meal by adding cheese or spices to the batter.
    • Use a deep fryer for more consistent results if available.
    • Experiment with different dips to find your perfect pairing, from spicy sauces to tangy dressings.

    Variations and Adaptations

    Some popular regional variations include Cajun onion rings, which add a spicy twist with Cajun seasoning, and beer-battered onion rings offering a unique flavor with a crispy texture. Seasonal adaptations could see the inclusion of herbs like rosemary or garlic when fresh during the summer months for a delightful aromatics boost. If you’re looking for dietary modifications, gluten-free flour can be used successfully, and for a healthier twist, try baking or air frying instead of deep frying.

    Experimenting with flavors can lead to unexpected delights. Try adding smoked paprika for a hint of smokiness or chili powder for a touch of heat that takes them to another level. For texture modifications, finely crushed potato chips can replace breadcrumbs in the coating, adding crunch while amplifying flavor. Presentation alternatives, such as serving in mini cones or stacked builds layered with various sauces, can elevate the dining experience significantly.

    Serving and Presentation Guide

    Crispy onion rings can be served in a variety of ways that enhance their appeal. For plating, consider stacking them to create height or using wide, shallow bowls for visual sophistication. Garnishing with fresh herbs like parsley or chives adds a pop of color and freshness. Traditional accompaniments include classic ketchup or aioli, while modern suggestions might feature gourmet dipping options such as sriracha mayo or avocado cream.

    When serving, temperatures matter; keep onion rings warm in a low oven until ready to serve to ensure they remain crispy. Portion control can be adjusted based on occasion—from large platters for gatherings to individual servings for personal enjoyment.

    Wine and Beverage Pairing

    Crispy onion rings pair nicely with light, refreshing wines such as Sauvignon Blanc or a chilled lager, as these beverages complement the savory flavors. For non-alcoholic alternatives, sparkling water with a splash of citrus can cleanse the palate and highlight the food flavors. If desired, an iced tea garnished with lemon can create a refreshing experience. When serving wines, ensure they are chilled to enhance the crunchy texture and sweet onion flavors.

    Storage and Shelf Life

    The best way to store crispy onion rings is in an airtight container in the refrigerator, where they can last for up to 3 days. For optimal freshness, allow them to cool completely before transferring. Reheating in an oven is ideal; preheat to 350°F (175°C) and bake until warmed through, approximately 10 minutes. Signs of spoilage include off odors or changes in texture. If any ring appears soggy or has absorbed moisture, it’s best to discard them.

    For longer-term storage, consider freezing cooked onion rings. Place them in a single layer on a baking sheet to freeze individually before transferring them to a freezer bag. This method preserves texture against freezer burn, allowing for up to 2 months of deliciousness waiting to be reheated.

    Make Ahead Strategies

    You can prep crispy onion rings ahead of time by slicing onions and soaking them in buttermilk. Store in an airtight container in the fridge up to 12 hours before frying, enhancing flavor and batter adherence. When you’re ready to fry, mix the batter fresh for optimal crispness.

    An efficient timeline would involve preparing the onions a few hours before cooking, allowing for maximum flavor absorption. For better quality, avoid assembling until the frying process. However, if preparing the batter ahead, ensure to keep it covered to maintain freshness.

    Scaling Instructions

    When scaling this crispy onion rings recipe, consider how to properly adjust ingredient measurements while maintaining the same texture and flavor. Halving the recipe works elegantly, keeping the frying time consistent since oil temperature and frying method remain the same.

    Doubling or tripling the onion rings means ensuring adequate frying space. If you’re using a home frying method, it’s best to batch fry to prevent overcrowding, which affects crispness. Be aware of the need for further adjustments with timing since larger batches may take longer to cook thoroughly.

    When scaling up, investing in larger pots or multiple frying pans aids in timely preparation. There is no need to alter the ingredients substantially; simply increase equipment or choose to work in batches for results that remain consistent.

    Nutritional Deep Dive

    Fried foods, like crispy onion rings, can have a higher calorie count due to the frying process. A standard serving often contains around 250-300 calories, depending on the batter and frying method. This includes reasonable macros, primarily carbohydrates from the flour with a modest amount of fats from the frying oil.

    Onions provide vitamins C, B6, and essential minerals, aiding overall nutrition despite frying processes. For individuals focusing on dietary considerations, consider using healthier oils or oven-frying options that can greatly decrease oil absorption. Portion analysis helps maintain moderation, providing an enjoyable yet mindful experience.

    Incorporating more whole grains into the batter or using healthier oils can also improve the overall nutritional profile of your onion rings, making them better for individuals conscious of their dietary intake. Balancing these indulgent bites with nutritious sides ensures a gratifying meal filled with taste and health.

    Dietary Adaptations

    For gluten-free versions, swap all-purpose flour with almond flour, chickpea flour, or gluten-free blend flours. You can also create a fantastic pancake-style batter using chickpea flour that holds the onion’s sweetness and crispness well.

    A dairy-free adaptation might lean towards using plant-based milk for soaking onions prior to breading, ensuring the same benefits as traditional buttermilk. For a vegan take, replace egg in the batter with a mix of ground flaxseed and water, creating an egg substitute that binds well without losing texture.

    When following low-carb or keto diets, consider using crushed pork rinds or nut flour for a crispy batter without excess carbs. Air-frying crispy onion rings is another method that lessens calorie intake while maintaining crunch without sacrificing flavor.

    For low-FODMAP diets, use a single serving of onion rings instead of large quantities, indicating a way to enjoy flavors while monitoring digestion sensitivity. Adapting recipes to accommodate dietary restrictions ensures everyone can enjoy this beloved snack without guilt.

    Troubleshooting Guide

    If your crispy onion rings are failing to achieve the desired crunch, ensure the oil is at the correct temperature before introducing the rings. If they are soggy, it could also be due to overcrowding—the rings need space for best results. On the other hand, if burning occurs, reducing the cooking time or lowering the oil’s heat will help maintain proper cooking balance.

    Flavor issues may arise if seasoning is missed in either the batter or the breading; double-check both areas for adequate flavoring. If the batter doesn’t stick properly, ensure the onions are dry post-soak and dip, allowing for maximum adherence.

    Inconsistent cooking can stem from varying sizes of onion slices; aim for uniform cuts to ensure equal frying. Misjudges on time can also spoil the delicate texture; test-frying one or two can help set expectations for larger batches.

    Recipe Success Stories

    Home cooks share their successful takes on crispy onion rings, often experimenting with unique spices and dipping sauces that led to rave reviews from family and friends. Some adapted the recipe by introducing cheese into the batter, fundamentally modifying flavors while preserving the beloved crunch.

    Many readers also express satisfaction in their results after following straightforward steps, highlighting the ease and adaptability of the recipe. Others have provided feedback on texture especially when using alternative flours, proving that experimentation can produce delightful variations.

    Photography and presentation tips from the community showcase visually appealing takes, enhancing reader engagement and interest in recreating the recipe at home. These real-life applications illustrate how a simple recipe can resonate widely, fueling creativity and future culinary ventures.

    Frequently Asked Questions

    1. Can I bake onion rings instead of frying?

    Absolutely! To bake, preheat your oven to 425°F (220°C), and place the onion rings on a baking sheet lined with parchment paper. Bake for about 20-25 minutes, flipping halfway through for even crisping. They may not achieve the same depth of flavor as frying but provide a healthier alternative.

    2. How do I keep leftovers crispy?

    To maintain crispiness, store leftover onion rings in a single layer in an airtight container in the fridge. Reheat in the oven at 350°F (175°C) for about 10 minutes to revitalize their crunch before serving.

    3. Can I freeze uncooked onion rings?

    Yes! Arrange uncooked onion rings on a parchment-lined baking sheet and freeze them until solid. Once frozen, transfer them to a freezer bag, allowing for easy frying whenever you crave them.

    4. What are some alternative dips I can use?

    Crispy onion rings are versatile enough to pair with various dips, such as ranch, chipotle mayo, or even garlic aioli. These options provide exciting flavor contrasts and presentations during gatherings.

    5. Can I use different types of onions?

    While yellow and sweet onions are preferred, feel free to experiment with red or purple onions for a bolder flavor and vibrant color. Each type offers unique taste profiles that can enhance your crispy onion rings in different ways.

    6. How do I make onion rings spicier?

    For heat, include cayenne pepper or hot sauce in your batter, or incorporate spices like chipotle in the flour coating. Adjust according to taste preferences for an exciting kick!

    7. What’s the best type of oil to use?

    Using oils with high smoke points, like vegetable oil or peanut oil, is ideal for frying crispy onion rings. These oils can withstand the high temperatures required for frying without burning, ensuring perfectly cooked rings.

    8. Can crispy onion rings be made without gluten?

    Yes! Substitute all-purpose flour with gluten-free flour blends or almond flour for a delicious gluten-free version of crispy onion rings that mимics the same texture and flavor.

    9. Can crispy onion rings be made ahead of time?

    Prepared onion rings can be refrigerated before frying and stored for up to 12 hours. Alternatively, consider frying and then freezing for future use, allowing for quick reheating.

    10. What if my onion rings are too oily?

    If onion rings turn out oily, ensure the oil is at the right temperature before frying. Blot excess oil with paper towels post-frying to absorb any leftover grease, keeping them crispy.

    11. How do I achieve a better batter coating?

    Ensure the batter consistency is thick enough to coat the onions adequately. Consider double-coating by dipping first in flour, then in batter, and then back into flour for extra crispiness.

    12. Can I use an air fryer for onion rings?

    Using an air fryer can provide a much healthier cooking method while still producing crispy results. Lightly spray the onion rings with oil before cooking to enhance crispiness.

    Additional Resources

    Explore similar recipes such as sweet potato fries or zucchini fritters for variations on crispy snacks. Technique guides on frying safely and ensuring the perfect oil temperature can significantly improve your frying skills. Make sure to check out ingredient information on the best types of onions or flours to enhance your cooking depth and versatility.

    Lastly, consider equipment recommendations and reviews, ensuring you have the right tools for delicious creations that will impress family and friends. Seasonal variations in recipes can also inspire delightful new dishes tailored to the freshest ingredients available.

    Join the Conversation

    Share your crispy onion rings creations on social media to inspire others! Engaging with the community through comments on tips or variations encourages creativity and adaptation of this beloved recipe. Request feedback to see how others have successfully modified their versions while showcasing unique plating and photography techniques.

    Participate in discussions about favorite dipping sauces or what shortcuts help streamline the cooking process. This interaction fosters excitement and makes cooking a shared passionate experience, as everyone loves discovering new ideas and inspirations in the realm of crispy treats.

    The Recipe

    Crispy Onion Rings

    Serves: 4

    Prep Time: 15 mins

    Cook Time: 10 mins

    Total Time: 25 mins

    Kitchen Equipment Needed

    • Deep fryer or heavy-bottomed pot
    • Slotted spoon
    • Thermometer (optional)
    • Mixing bowls
    • Cutting board
    • Knife

    Ingredients

    • 2 large sweet onions, sliced into ¼ inch rings
    • 1 cup all-purpose flour
    • 1 cup buttermilk
    • 1 cup breadcrumbs (or panko)
    • 1 teaspoon garlic powder
    • 1 teaspoon paprika
    • Salt and pepper to taste
    • Vegetable oil for frying

    Directions

    1. Slice onions into rings, and soak in buttermilk for at least 30 minutes.
    2. In a separate bowl, mix flour, garlic powder, paprika, salt, and pepper.
    3. Remove onion rings from buttermilk and dredge in the flour mixture, then dip back into the buttermilk, followed by breadcrumbs.
    4. Heat oil in a deep fryer or pot to 375°F (190°C).
    5. Fry onion rings in batches until golden brown, about 2-3 minutes each side.
    6. Drain on paper towels and serve warm with dipping sauce.

    Recipe Notes

    • For extra crunch, double coat the onion rings.
    • These onion rings can also be made in an air fryer—reduce cooking temperature slightly and check doneness frequently.
    • Feel free to adjust seasoning in the flour mixture to suit your taste.