Best Lemon Garlic Roasted Chicken – Juicy and Flavorful

Lemon Garlic Roasted Chicken: A Flavorful Treat for Any Occasion

⚖️
Difficulty
Easy

⏲️
Prep Time
15 mins

🕒
Cook Time
1 hour

⏱️
Total Time
1 hour 15 mins

🍽️
Servings
4

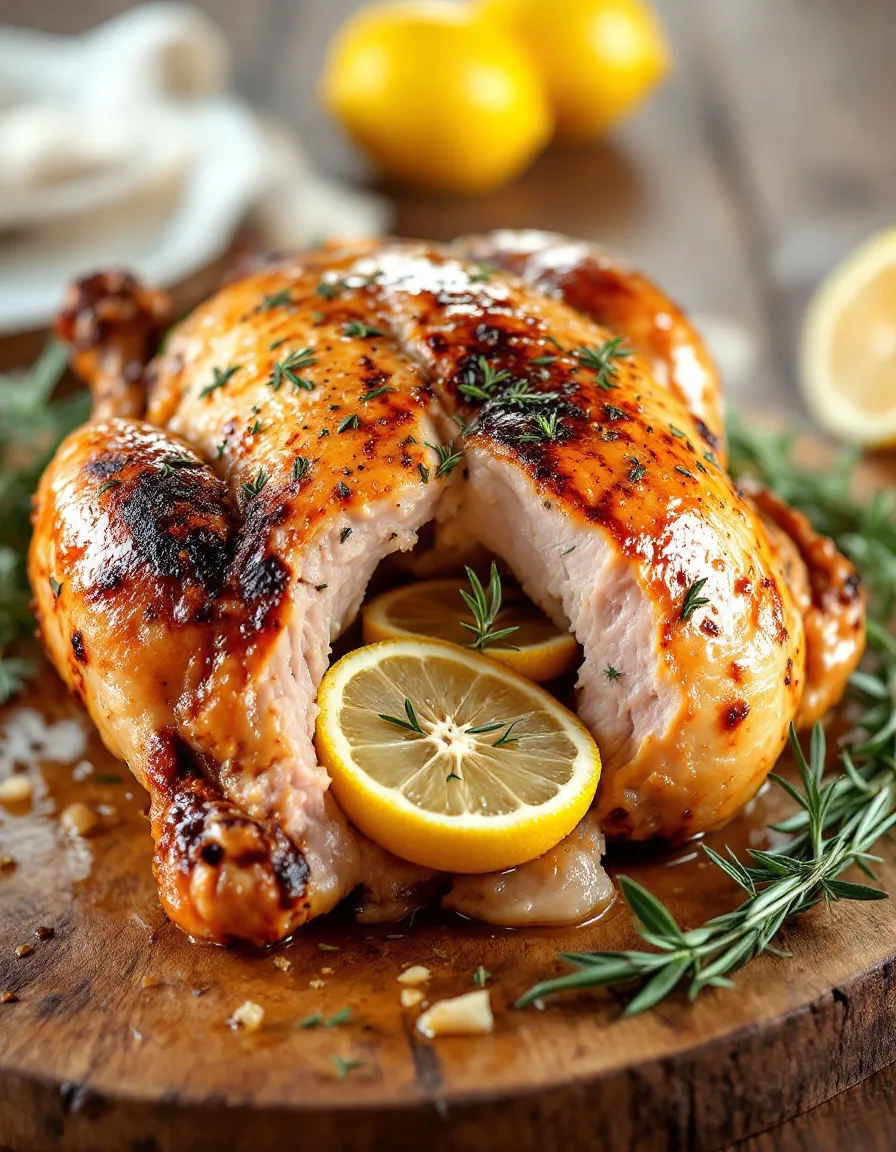
The Lemon Garlic Roasted Chicken is a luscious delight that merges the zesty brightness of lemon with the savory depth of garlic. This mouthwatering dish is perfect whether you’re cooking for a cozy family dinner or hosting a festive gathering. Imagine the aroma filling your home as the chicken roasts, enveloping it in a tangy, garlicky glaze that promises a succulent, juicy outcome. The golden-brown skin, crisp and inviting, gives way to tender meat infused with the vibrant flavors of fresh herbs and spices.

What sets this dish apart is not just its taste, but also its versatility. You can easily customize it to suit various taste preferences or occasions. Serve it alongside roasted vegetables, mashed potatoes, or a fresh salad for a well-rounded meal that is not only delicious but also visually appealing. Each bite is a comforting reminder of home-cooked goodness, making it a go-to recipe that will surely impress family and friends.

Quick Recipe Highlights

  • Flavor Profile: The combination of zesty lemon, robust garlic, and fragrant herbs creates a delightful balance of acidity and richness.
  • Texture: Roasting achieves a crispy exterior that contrasts beautifully with the moist and tender meat inside.
  • Aroma: The smell of garlic roasting in the oven, paired with the citrus notes of lemon, will have everyone eagerly awaiting dinner.
  • Visual Appeal: Golden-brown chicken adorned with vibrant herbs looks as good as it tastes, making it the star of your table.
  • Skill Level Needed: This recipe is considered easy, making it perfect for both beginner cooks and seasoned chefs looking for a quick meal option.
  • Special Equipment: You will need a roasting pan or baking dish, a sharp knife, and a meat thermometer for best results.

Recipe Overview

  • Difficulty Level: This Lemon Garlic Roasted Chicken is straightforward and manageable for anyone to prepare, with minimal steps required for delicious results.
  • Category: It fits perfectly into dinner recipes, especially for gatherings and family meals, ensuring everyone leaves satisfied.
  • Cuisine: This dish draws inspiration from Mediterranean cooking, where lemon and garlic are staple ingredients that add depth and brightness to meals.
  • Cost: The ingredients are affordable, typically costing around $15-20 for a serving of four, making it a budget-friendly choice.
  • Season: While ideal year-round, it’s particularly great for spring and summer gatherings and holiday festivities.
  • Occasion: Perfect for weekday meals, special occasions, or family gatherings, it suits any event that calls for a hearty main dish.

Why You’ll Love This Recipe

The taste and texture of Lemon Garlic Roasted Chicken are truly divine. The interplay of zesty and savory flavors captivates the palate, with each bite bursting with freshness and aroma. The tender chicken absorbs the bright notes of lemon and rich garlic, delivering a satisfying and flavorful experience that leaves you craving more.

One of the standout features of this dish is its convenience and ease of preparation. With just a few minutes of prep time, you can set the chicken in the oven and let it roast while you attend to other tasks or prepare side dishes. This recipe is a lifesaver for busy evenings when you want a nutritious, homemade meal without spending hours in the kitchen.

Nutritionally, roasted chicken is an excellent protein source, while the addition of lemon juice and garlic brings in vitamins and beneficial compounds. Garlic is known for its immune-boosting properties, and lemon adds vitamin C, making this dish not only tasty but also healthy.

Socially, this recipe shines when entertaining guests. The delightful aroma wafting through the air creates an inviting atmosphere, and the beautiful presentation of the dish encourages conversation and enjoyment among diners. It is an impressive centerpiece that showcases your culinary skills while being approachable for any host.

Cost-effectiveness is another compelling reason to embrace this Lemon Garlic Roasted Chicken in your meal planning. The simplicity of ingredients allows for an affordable yet gourmet meal that doesn’t break the bank. It’s a versatile recipe that can easily be scaled up for larger gatherings or adjusted for smaller households.

Historical Background and Cultural Significance

The origin of roasted chicken dates back to ancient times when newly domesticated birds made their way onto plates during feasts and family gatherings. Different cultures adopted their unique spin on this beloved dish, often infusing local flavors, such as those used in Mediterranean cuisines which prominently feature lemon and garlic.

Culturally, roasting a whole chicken has been a significant ritual around the world, symbolizing abundance, family togetherness, and celebration. In many households, serving roasted chicken for Sunday dinner or holiday events signifies love and care, making it a meaningful culinary tradition.

As time progressed, the recipe for Lemon Garlic Roasted Chicken evolved, incorporating various cooking techniques and flavor pairings. The adaptability of this dish has allowed it to thrive in numerous cuisines worldwide, whether it’s marinated in Mediterranean herbs or spiced with Latin influences.

Regional variations have developed, showcasing the beauty of this dish no matter where you find yourself. From savory lemon herb chicken in the Mediterranean to roasted garlic chicken in Latin American fare, these adaptations highlight local ingredients and palates while keeping the essence of roasted chicken at its core.

Ingredient Deep Dive

Chicken: The star of this dish, chicken has been a staple protein source for centuries. Its versatility allows for countless preparation methods and flavor combinations. It’s important to select fresh chicken with minimal blemishes for the best flavor. Proper storage includes keeping it refrigerated and using it within a few days of purchase. If needed, frozen chicken can be a great substitute, though ensuring it is thawed correctly before cooking will yield the best results.

Lemon: A vibrant addition that enhances the dish’s flavor profile, lemons have been cherished in cooking for their bright acidity. The vitamin C found in lemons supports immune function and adds refreshing zest. Optimal lemon selection includes choosing ones that are firm and heavy for their size. Store lemons in the refrigerator for prolonged freshness. If lemon is unavailable, lime or vinegar can serve as excellent substitutes in various culinary contexts.

Garlic: Known for its pungent flavor and health benefits, garlic has been valued both as a seasoning and for medicinal properties. Derived from ancient civilizations, garlic aids in flavor enhancement while promoting heart health. Fresh garlic is best and should be stored in a cool, dry place. It can easily be swapped out for garlic powder in a pinch, though fresh garlic will yield a more robust flavor.

Olive Oil: Integral to many Mediterranean dishes, high-quality olive oil enriches flavor and delivers healthy fats. Olive oil can enhance chicken’s taste and help achieve crispy skin. When choosing olive oil, go for extra virgin for the best flavor. It should be stored in a dark bottle to preserve its lovely flavor. If you’re out of olive oil, avocado or canola oil can be good alternatives, though they may slightly alter the taste.

Herbs: Fresh herbs like rosemary and thyme complement the chicken beautifully, offering an aromatic quality that elevates the dish. The culinary use of herbs dates back centuries, with various cultures attributing health benefits to many varieties. When selecting herbs, choose vibrant, fragrant bunches. Fresh herbs should be refrigerated while dried herbs require a cool, dark place. In the absence of fresh herbs, dried variants can be used, but should be adjusted according to taste for optimal results.

Common Mistakes to Avoid

  • Skipping rest time: Not allowing your chicken to rest post-roasting leads to loss of juices. Let the chicken sit before carving for a more tender result.
  • Incorrect oven temperature: Ensure that your oven is properly preheated, as too low temperatures can yield undercooked chicken and a lack of crispy skin.
  • Not seasoning adequately: Failing to season your chicken properly will result in bland flavor. Be generous with salt, pepper, and herbs for depth.
  • Overcrowding the pan: Crowding the chicken in the pan can prevent even cooking. Use a pan that gives chicken room to brown properly.
  • Failing to check doneness: Always use a meat thermometer to verify that the internal temperature reaches 165°F to ensure safe consumption.
  • Overcooking: Leaving chicken in the oven for too long leads to dry meat. Keep an eye on the time and check periodically.
  • Using old ingredients: Freshness matters in flavor. Quality herbs, garlic, and chicken make a critical difference in the dish.
  • Ignoring the marinade time: For an even deeper flavor, allow the chicken to marinate longer before roasting; overnight is best.
  • Not pairing sides thoughtfully: Serving this dish without complementary sides can miss enhancing its delightful flavors.
  • Avoiding brining: A simple brine can add moisture and flavor; skipping this can result in drier chicken than desired.

Essential Techniques

Brining: Brining helps to infuse moisture and flavor into the chicken. To master this technique, simply dissolve salt and sugar in water, then soak the chicken for several hours. Avoid over-brining, as this can result in excessively salty meat. A good cue is to taste the brine before using it.

Roasting: Roasting is significant as it caramelizes the chicken’s surface, creating a desirable flavor and texture. Preheat the oven to the appropriate temperature, and use a roast pan for even cooking. Check regularly, especially towards the end, as timing can vary based on the bird’s size.

Resting: Resting allows juices to redistribute within the meat, leading to a more flavorful chicken. After removing the chicken from the oven, cover it loosely with foil and wait for about 10-15 minutes before carving. Look for juices running clear when checking doneness to ensure proper resting time.

Marinating: Marinating adds flavor and tenderness to the chicken by allowing it to soak in spices and citrus. You’ll want to marinate for at least 30 minutes or up to 24 hours. Always refrigerate chicken during marination to prevent bacterial growth.

Pro Tips for Perfect Lemon Garlic Roasted Chicken

1. Use room temperature chicken: Letting your chicken sit out for about 30 minutes before cooking ensures even roasting.
2. Enhance flavor with a paste: Create a paste from garlic, olive oil, and lemon zest to rub under the chicken skin for added flavor infusion.
3. Opt for a thermometer: Investing in a good meat thermometer guarantees chicken is cooked thoroughly without being overdone.
4. High heat finish: For extra crispy skin, switch to broil in the last few minutes of cooking and watch closely to avoid burning.
5. Use fresh herbs: Fresh herbs not only look picturesque but also enhance flavor significantly over dried versions.
6. Utilize leftover juices: Save the drippings from the pan to create a delightful sauce that complements the chicken perfectly.
7. Pair wisely: Serve lemon garlic roasted chicken with light sides like salads or roasted vegetables to balance the meal.
8. Experiment with citrus: While lemon shines, experimenting with orange or lime can offer refreshing twists in flavor.

Variations and Adaptations

If you wish to explore regional variations, consider adding spices like cumin or coriander for a Middle Eastern twist. Seasonal adaptations might include fresh herbs tied to the local growing season, such as springtime basil or summertime oregano. For dietary modifications, feel free to make this dish gluten-free by ensuring all spices and sauces used are compliant.

Flavor variations can arise by experimenting with citrus combinations, such as a mix of lemon and grapefruit for a more complex taste. Texture modifications include grilling or even slow-cooking the chicken for different experiences. Presentation can be altered through garnishing with colorful vegetable sides or serving in a striking platter to inspire creativity in serving.

Serving and Presentation Guide

Plating techniques play an essential role in presenting Lemon Garlic Roasted Chicken beautifully. Arrange slices of chicken alongside colorful seasonal vegetables, placing the visual focal point on the golden-brown skin. Garnishing ideas like fresh herbs or lemon wedges not only enhance aesthetics but also reinforce the flavor profile.

Traditional accompaniments for this dish include mashed potatoes or a fragrant pilaf, which soak up the juices splendidly. Modern serving suggestions could involve a refreshing lemon-cilantro quinoa salad that complements the flavors without overshadowing them.

Temperature considerations are crucial; ensure the chicken remains warm but never beyond the safe temperature after removing it from the oven. For portion control, cutting the chicken thoughtfully into pieces ensures guests receive a generous yet controlled serving.

Wine and Beverage Pairing

For wine pairings, consider a crisp Chardonnay or a light Sauvignon Blanc, as the acidity complements the lemony flavors wonderfully. If opting for a red, a Pinot Noir can also work well with roasted chicken dishes. Non-alcoholic alternatives such as sparkling water with a splash of lemon will refresh the palate without overshadowing the main attraction.

Coffee or tea pairings might include a refreshing herbal tea like chamomile or a fragrant citrus-infused green tea, providing a contrasting yet harmonious taste experience. Temperature considerations are essential; serve white wine chilled and ensure beverages are refreshing for ensemble enjoyment.

Storage and Shelf Life

For effective storage methods, allow the chicken to cool completely before refrigerating it in an airtight container. The ideal temperature lies below 40°F, keeping leftovers safe for up to 3-4 days. When reheating, ensure the internal temperature reaches at least 165°F to retain safety and palatability.

In terms of signs of spoilage, watch for off-smells, discoloration, or sliminess; these may indicate your leftovers have surpassed their shelf life. If you prefer longer-term solutions, freezing is an option; use freezer-friendly containers and ensure it’s consumed within 2-3 months for best results.

Make Ahead Strategies

Prep your lemon garlic roasted chicken by marinating it up to a day in advance. Store it in the refrigerator for optimum flavor absorption. In terms of assembling and cooking, vegetables can be chopped beforehand. On cooking day, simply season and roast for a seamless experience.

Also, separate the chicken components, such as breast, thigh, or legs, if producing varied dishes, ensuring quality remains intact. Reheating is easily completed in an oven or microwave, ensuring to add moisture so the chicken does not dry out. Quality impact can be maximized when fresh ingredients are added right before serving for elevating flavors.

Scaling Instructions

Halving this recipe can produce about two servings, suitable for a small meal. When doubling or tripling, ensure you have adequate space on your roasting pan and adjusted cooking time to account for increased volume. Equipment adjustments might include using two pans when cooking larger quantities.

Timing modifications are necessary as larger chicken masses require longer roasting periods. Always check internal temperature to confirm complete cooking regardless of batch sizes, to maintain safety. Storage considerations for leftovers involve the same practices regardless of the initial recipe size.

Nutritional Deep Dive

Examining the macro breakdown, a serving of lemon garlic roasted chicken offers a well-rounded profile worth noting—high in protein yet moderate in fats, primarily from the olive oil. It’s an excellent choice for those seeking to meet daily protein intake without excessive calorie consumption.

Micronutrient analysis reveals essential vitamins and minerals due to the mix of lemon and herbs; vitamin C from the lemon and beneficial compounds found in garlic. Health benefits extend beyond taste therapy, supporting the immune system and promoting overall wellbeing.

For dietary considerations, those mindful of weight management can find this dish suitable, given its balance and nutrient density. Portion analysis helps maintain healthy habits; aim for one serving alongside fresh vegetables and grains for optimal dietary results.

Dietary Adaptations

For gluten-free adaptations, ensure all auxiliary ingredients, such as sauces or seasonings, are devoid of gluten. Dairy-free adjustments require no special action, as this dish is naturally dairy-free, making it ideal for those with lactose intolerances.

Vegan adaptations exist by replacing chicken with plant-based protein alternatives, using roasted tofu or seitan for a similar texture. Low-carb versions can be achieved by serving it with cauliflower rice or zucchini noodles.

Keto adaptability embraces healthy fats, focusing on the use of olive oil, and pairing with low-carb vegetables while avoiding high-carb side dishes. Paleo options allow for the same core recipe but incorporating more natural and less processed ingredients as desired.

Troubleshooting Guide

For texture issues, if the chicken turns out dry, keep an eye on cooking time and temperature next time, ensuring it reaches but doesn’t exceed 165°F. Flavor balance problems can arise from inadequate seasoning; always taste test prior to cooking to make adjustments accordingly.

Handling temperature problems requires careful monitoring of the oven settings; using an oven thermometer can help confirm accuracy. In cases of ingredient substitutions, remain cautious; not all can be swapped directly without altering flavor and texture, so do thorough research if making changes.

Timing concerns often surface when unexpectedly extending cooking times. Always check for doneness in thick areas, reintroducing the chicken to the oven as necessary without losing too much heat.

Recipe Success Stories

Community feedback on this Lemon Garlic Roasted Chicken has been overwhelmingly positive, with cooks praising its uncomplicated nature yet remarkable flavor. Many have shared variations that incorporate their favorite spices and herbs, enriching the experience while maintaining the core elements of the recipe.

Variation successes have also been highlighted; several readers note that introducing smoky paprika or other seasonal spices resulted in exciting new depths in flavor that delighted their families. Adaptation stories abound as skilled home cooks take inspiration from the original recipe to create unique dishes celebrating their culinary heritages.

Many have embraced the guidance around presentation, reporting that simple garnishes elevate the perceived complexity of the dish significantly—making a simple meal feel restaurant-quality. Photography contributions have made this recipe even more appealing, inspiring others to capture their versions in stunning detail as well.

Frequently Asked Questions

Can I use skinless chicken? Yes, skinless chicken can be used, but it may not achieve the same level of crispiness. To compensate, consider basting the meat with olive oil during cooking to retain moisture.

How can I tell if chicken is done? Use a meat thermometer to check; chicken is fully cooked when it reaches an internal temperature of 165°F. Alternatively, check the juices running clear when the meat is pierced near the bone.

Can I roast chicken from frozen? It’s best to avoid roasting from frozen as it will result in uneven cooking. Always thaw the chicken in the fridge beforehand for an even and safe cooking process.

What’s the best way to reheat leftovers? Reheat chicken leftovers in a 350°F oven to retain moisture. Cover with foil or place in a dish with a splash of broth to prevent drying out.

Can I use other herbs? Absolutely! While rosemary and thyme are excellent choices, feel free to substitute with your favorites like oregano, basil, or sage based on personal preference.

How long does it last in the fridge? Cooked chicken will remain safe to eat for 3-4 days when stored properly in an airtight container in the refrigerator.

What’s the best side dish to serve with this chicken? Roasted vegetables, mashed potatoes, or a light salad pair beautifully. Create a balanced meal by including both carbohydrates and greens.

Can I make this recipe in advance? Yes! You can prepare the marinade and even the chicken a day ahead, then simply roast it ahead of serving for minimal last-minute effort.

Does this recipe freeze well? Yes, lemon garlic roasted chicken can be frozen. Ensure it’s cooled before placing in a freezer-safe container, and it can last for 2-3 months.

Can I adjust the cooking time for different chicken cuts? Yes, varying cooking times should be expected. Bone-in pieces usually take longer than boneless cuts due to size differences.

Additional Resources

Explore related recipes for more ideas surrounding chicken, such as Honey Garlic Chicken or Rosemary Lemon Grilled Chicken, which complement this dish wonderfully. For technique guides, investigate how to perfectly roast vegetables to accompany your chicken, enhancing your dinner table.

Consider diving into ingredient books that dig deeper into the use of lemon and garlic in various culinary traditions. Equipment recommendations would suggest investing in a good roasting pan and meat thermometer to bring this recipe to its best potential. Seasonal variations can include utilizing different seasonal vegetables to complement your roasted chicken throughout the year.

Join the Conversation

We’re eager to hear from readers who have tried making this Lemon Garlic Roasted Chicken! Share your experiences on social media, and don’t forget to tag us in your delightful photos. Engage in recipe reviews, share your tips, and ask questions to connect with a community that shares your love for cooking.

Feel free to experiment with variations, whether it’s altering the ingredient list or presentation styles, and let us know what worked and what didn’t. Together, we can inspire others and make weeknight dinners extraordinary.

The Recipe

Lemon Garlic Roasted Chicken

Serves: 4

Prep Time: 15 mins

Cook Time: 1 hour

Total Time: 1 hour 15 mins

Kitchen Equipment Needed

  • Roasting pan
  • Sharp knife
  • Meat thermometer

Ingredients

  • 1 whole chicken (about 4-5 lbs)
  • 4 cloves garlic, minced
  • 2 lemons, juiced and zested
  • 1/4 cup olive oil
  • 2 tsp salt
  • 1 tsp black pepper
  • 1 tbsp fresh rosemary, chopped
  • 1 tbsp fresh thyme, chopped

Directions

  1. Preheat your oven to 425°F (220°C).
  2. In a bowl, mix garlic, lemon juice, lemon zest, olive oil, salt, pepper, rosemary, and thyme together.
  3. Pat the chicken dry and place it on the roasting pan.
  4. Rub the marinade mixture all over the chicken, including under the skin where possible.
  5. Roast in the preheated oven for about 1 hour, or until the internal temperature reaches 165°F.
  6. Let the chicken rest for at least 10 minutes before carving to allow juices to redistribute.
  7. Serve with selected side dishes and enjoy!

Recipe Notes

  • For an extra burst of flavor, try adding more herbs or spices to the marinade.
  • Consider using a mixture of different citrus fruits for depth.
  • Leftovers can be stored in an airtight container for up to 4 days.

Best Chocolate Chip Cookies – Soft, Chewy, and Easy

Deliciously Chewy Chocolate Chip Cookies: A Classic Comfort Treat

⚖️
Difficulty
Easy

⏲️
Prep Time
15 mins

🕒
Cook Time
10 mins

⏱️
Total Time
25 mins

🍽️
Servings
24 Cookies

Who doesn’t love a warm, gooey chocolate chip cookie? With their irresistible aroma wafting through the kitchen, chocolate chip cookies have secured their place as a beloved classic. These delightful treats combine the rich taste of velvety chocolate chips with a buttery dough, creating a flavor experience that is both simple and extraordinary. Perfect for any occasion, they offer a sense of nostalgia that transports you right back to your childhood, making them synonymous with comfort and joy.

As you bite into these cookies, you’re greeted by a soft, chewy texture highlighted by the slight crunch of the crispy edges. The more chocolate, the better! These cookies can easily be customized, satisfying individual cravings and making them ideal for sharing. Whether you’re seeking a late-night treat or a delightful addition to any gathering, these chocolate chip cookies promise to deliver satisfaction with every bite.

Quick Recipe Highlights

  • Flavor Profile: The balance between sweet and salty with a rich chocolate kick makes these cookies truly delicious.
  • Texture: Expect a perfect blend of chewy interiors and crisp edges, providing a wonderful mouthfeel.
  • Aroma: A heavenly scent of baked dough and melting chocolate creates an inviting atmosphere.
  • Visual Appeal: Golden-brown cookies dotted with semi-sweet chocolate chips look as tempting as they taste.
  • Skill Level Needed: This easy recipe is great for bakers of all experiences—perfect for beginners looking to hone their skills.
  • Special Equipment: Basic baking tools such as mixing bowls, a baking sheet, and a whisk are all that’s needed.

Recipe Overview

  • Difficulty Level: These chocolate chip cookies are designed for simplicity, making them accessible even for novice bakers.
  • Category: Ideal for desserts, snacks, or even midday indulgence, chocolate chip cookies cross multiple meal categories.
  • Cuisine: While they originate from American cuisine, chocolate chip cookies have gained international appeal, inspiring diverse variations.
  • Cost: With affordable ingredients like flour, sugar, and chocolate, this recipe remains budget-friendly for all.
  • Season: Wonderful year-round, these cookies are especially enjoyable during the festive season, making them a favorite at holiday gatherings.
  • Occasion: Perfect for birthdays, holidays, or cozy nights in, they complement any social event beautifully.

Why You’ll Love This Recipe

These chocolate chip cookies boast an addictively delicious taste that showcases the perfect amount of sweetness balanced with a hint of vanilla. Each bite reveals the warmth of freshly baked dough mingling with creamy chocolate, creating a mouthwatering experience that you won’t easily forget. The texture—crispy around the edges and delightfully chewy in the center—invites you to reach for another cookie, making them a cherished indulgence.

One of the best aspects of this recipe is its convenience. With a prep time of just 15 minutes and a quick bake time, you can have a batch of delightful cookies ready in no time. This makes it an excellent choice for impromptu gatherings or satisfying sudden sweet cravings. The straightforward steps ensure that even the busiest cooks can find joy in making these cookies.

The nutritional benefits of making your own cookies shouldn’t be overlooked either. By controlling the ingredients, you can create a healthier cookie, ensuring quality chocolate, whole grain flours, or reducing sugar as desired. Baking cookies at home also allows for the inclusion of optional add-ins like nuts or oats, enhancing the nutritional profile further.

Socially, sharing a batch of freshly baked chocolate chip cookies is a wonderful way to connect with friends and family. They make guests feel welcomed, and people often share their fond memories associated with these comforting treats. Whether enjoyed at a picnic, a birthday party, or during cozy movie nights, they bring people together for a shared moment of happiness.

Finally, the cost-effectiveness of this recipe makes it appealing. Using simple pantry staples, you can whip up a dozen cookies for just a few dollars, significantly cheaper than store-bought alternatives—not to mention you get them fresh and warm out of the oven!

Historical Background and Cultural Significance

The origin of chocolate chip cookies dates back to the 1930s when Ruth Wakefield created the first batch at her Toll House Inn in Massachusetts. The combination of semi-sweet chocolate and cookies quickly gained popularity, leading to the famous “Toll House Chocolate Chip Cookies” recipe. Over time, this sweet invention became a staple in American households, embedding itself in the country’s cultural fabric.

Culturally, chocolate chip cookies signify warmth and hospitality. They are often made and shared during family gatherings, holidays, and celebrations, solidifying their position as a symbol of nurturing and love. Their appeal stretches beyond American borders, finding variations and adaptations worldwide, from the American classic to European adaptations using different types of chocolate.

The evolution of the chocolate chip cookie has seen countless iterations; from classic recipes to gourmet takes featuring exotic flavors like sea salt caramel and peanut butter additions. These innovations reflect the cookie’s versatility and relevance in contemporary baking, inspiring ever-creative recipes embraced by bakers today.

Regional variations have emerged as well, with each culture adding its twist. Australian “ANZAC biscuits” and Mexican “biscochos” are just a few examples where chocolate and cookies have melded to create unique treats yet still paying homage to the original chocolate chip cookie.

Ingredient Deep Dive

Flour: Flour is the foundation of any cookie. High-quality all-purpose flour provides structure while allowing the cookies to rise. Look for flour with a protein content of around 10-12%. Store it in a cool, dry place, and consider refrigerating for longer shelf life. Whole wheat or gluten-free options can be suitable alternatives.

Sugar: Sugar is key to the cookie’s sweetness and texture. Using brown sugar alongside granulated sugar introduces moisture and a deeper flavor. Store sugar in an airtight container to maintain freshness. If you want to reduce sugar, consider substitutes like honey or maple syrup.

Chocolate Chips: Chocolate chips are undoubtedly the star ingredient. Semi-sweet chocolate is most common, but feel free to experiment with dark, milk, or even white chocolate! Choose high-quality chocolate for the best flavor. Store chips in a cool, dark place; they can be frozen for later use.

Butter: Butter adds richness and flavor while enhancing texture. Unsalted butter is ideal since it allows you to control the salt in your recipe. Keep butter wrapped and refrigerated; it can be frozen for longer storage. For dairy-free options, you can use coconut oil or margarine.

Common Mistakes to Avoid

  • Using cold butter instead of softened butter can lead to dense cookies; always make sure your butter is at room temperature for optimal mixing.
  • Overmixing your cookie dough can result in tough cookies. Mix until ingredients are just combined to maintain a tender texture.
  • Using too much flour leads to dry cookies. It’s important to measure flour accurately, preferably using a kitchen scale for best results.
  • Baking cookies on a warm baking sheet can cause them to spread too much. Always allow sheets to cool before adding more dough.
  • Neglecting to chill the dough can affect texture. For thicker cookies, chill the dough for at least 30 minutes before baking.
  • Not allowing cookies to cool on the baking sheet before transferring can result in crumbling; let them set for a few minutes first.
  • Underbaking cookies can lead to a doughy center. For a perfectly cooked cookie, they should look slightly golden around the edges and soft in the center.
  • Baking at the wrong temperature results in unevenly baked cookies. Always preheat your oven thoroughly before baking.
  • Ignoring recipe instructions, such as resting the dough or variations in cooking times can lead to unsatisfactory results.
  • Not checking expiration dates on your ingredients can affect taste and quality, especially with baking soda and flour.

Essential Techniques

Measuring Ingredients: Accurate measuring is vital for successful baking. Use proper measuring cups for dry ingredients and liquid measuring cups for wet ingredients. Spoon flour into the cup without packing it down, then level off with a knife to achieve accuracy. This prevents your cookies from being too dry or too dense.

Chilling the Dough: Chilling your cookie dough is an important step for thickening the dough and enhancing flavors. When chilled, the butter solidifies, leading to less spreading during baking. To chill, wrap the dough in plastic wrap and place it in the fridge for at least 30 minutes, ideally longer.

Oven Temperature: Baking cookies at the right temperature ensures they cook evenly. Always use an oven thermometer to verify that your oven temperature is accurate. For extra precision, consider rotating the baking sheet halfway through baking for evenly browned cookies.

Testing for Doneness: Knowing when your cookies are done is crucial. Remove them from the oven when the edges are golden brown and the centers look slightly underbaked. They will continue to cook as they cool on the baking sheet, delivering the perfect chewy texture.

Pro Tips for Perfect Chocolate Chip Cookies

Use a mix of chocolate types (dark, milk, and white) for a unique flavor experience.

Add a pinch of sea salt on top before baking for an enhanced chocolate flavor.

Regularly rotate your baking sheets to ensure even baking if your oven has hot spots.

Incorporate chopped nuts like walnuts or pecans for added crunch and flavor depth.

Incorporate a bit of cornstarch in your dough for a softer, chewy texture.

For more complex flavors, try adding a splash of vanilla extract or a hint of espresso powder.

Experiment with mix-ins like dried fruits or different flavored chocolate chips to suit your palate.

Store leftover cookies in an airtight container with a slice of bread to maintain freshness.

Variations and Adaptations

Try adding spices like cinnamon or nutmeg for a seasonal twist; these spices complement the sweetness beautifully. Swap out chocolate chips for caramel pieces or mint-flavored chips for a unique flavor profile. For a healthier version, consider using oat flour or reducing sugar by incorporating applesauce or mashed bananas. If lactose intolerance is a concern, experiment with vegan butter and dairy-free chocolate options to create delightful vegan chocolate chip cookies. Modify the texture by chilling the dough longer for thicker cookies or by leaving it at room temperature for flat and chewy versions.

Serving and Presentation Guide

When serving your chocolate chip cookies, use a simple presentation on a rustic wooden board or a classic melamine plate to highlight their homemade charm. Garnish with fresh mint leaves or a sprinkle of powdered sugar for a touch of elegance. Pair them with a glass of cold milk or a warm cup of coffee for a classic touch. For special occasions, create cookie sandwiches by adding a scoop of ice cream between two cookies, transforming them into an unforgettable dessert. Pay attention to portion control, presenting cookies in petite stacks or rows of two or three for easy sharing.

Wine and Beverage Pairing

Pair rich chocolate chip cookies with a robust dessert wine, such as Port or a full-bodied red, which will complement the sweetness and enhance the chocolate flavor. If you prefer non-alcoholic alternatives, serve with creamy almond milk or a homemade vanilla milkshake for an indulgent experience. For coffee lovers, a fresh brewed espresso or a spiced chai tea harmonizes beautifully, balancing the sweetness of the cookies with a bold beverage. Temperature considerations are crucial; serving the cookies warm with the milk or espresso slightly chilled creates a delightful balance.

Storage and Shelf Life

Store your chocolate chip cookies in an airtight container at room temperature for optimal freshness. They can last up to a week this way, but freezing cookies is a fantastic option to extend shelf life. Place them in a freezer-safe container with parchment paper between layers to prevent sticking, and they will keep well for up to three months. For reheating, pop frozen cookies in a preheated oven at 350°F for about 5-10 minutes or until warmed through. Be sure to watch for signs of spoilage, like a stale smell or mold, before consumption.

Make Ahead Strategies

To make your chocolate chip cookies ahead of time, consider preparing the dough and freezing it for later use. Shape the dough into balls, place them on a baking sheet, and freeze until solid. Once frozen, transfer to a zip-top bag for storage. You can bake straight from frozen, simply adding a minute or two to the baking time. Another strategy is to prepare the cookie dough up to 24 hours in advance, storing it in the fridge. This not only saves time but also enhances the flavors, allowing the ingredients to meld.

Scaling Instructions

If you want to halve the recipe, simply divide all ingredients by two, ensuring to keep the ratios consistent. Doubling or tripling the quantities is also easy; just ensure you have sufficient baking trays and prepare in batches if you lack space. Remember to monitor baking time as larger quantities may require adjustment—check the cookies a few minutes earlier than the standard bake time. Lastly, when storing, ensure that each layered cookie is separated by parchment or wax paper to avoid sticking.

Nutritional Deep Dive

The nutritional makeup of chocolate chip cookies can vary significantly based on the ingredients you utilize. On average, a standard cookie contains around 150 calories, with a balanced amount of fat, carbohydrates, and moderate protein. Opting for whole-wheat flour or adding oats can increase fiber content, beneficial for digestion. Additionally, using dark chocolate chips not only enhances the taste but provides antioxidants, promoting heart health. Paying attention to portion sizes is key, allowing you to enjoy indulgence while maintaining a balanced diet.

Dietary Adaptations

For those following a gluten-free diet, substituting all-purpose flour for a gluten-free flour blend is easy and effective. Ensure the flour blend contains xanthan gum or baking powder to aid in binding. Lactose intolerant individuals can use dairy-free butter and chocolate alternatives for a delicious dairy-free chocolate chip cookie experience. For a vegan option, swap butter for coconut oil or vegan margarine and consider using flaxseed meal mixed with water as an egg replacement. Keto dieters can utilize almond flour and sugar replacements to maintain their dietary principles while savoring chocolate chip cookies.

Troubleshooting Guide

If your cookies come out too crumbly, it may indicate a lack of moisture. Try adding a tablespoon of milk to your dough next time. If they spread too much during baking, your butter may have been too warm; use room temperature instead. For overly dry cookies, adding extra butter or incorporating an additional egg yolk can help achieve a softer texture. Monitor baking times closely; if you find your cookies are brown before completing the indicated time, consider adjusting the oven temperature accordingly.

Recipe Success Stories

Many bakers have joyfully shared their experiences with this chocolate chip cookie recipe. From modified ingredients yielding new flavor profiles, like using mint chocolate chips during the holidays, to feedback praising the simplicity and nostalgic flavors, these stories unite the community of cookie lovers. One reader shared how they successfully adjusted the recipe to include healthier options, much to the delight of their family and friends. These communal experiences highlight the recipe’s adaptability while celebrating the joy of baking together.

Frequently Asked Questions

1. Can I freeze chocolate chip cookie dough?
Yes! Freezing the dough is an excellent way to prepare ahead. Shape the dough into balls and freeze them on a baking sheet. Once solid, transfer to a zip-top bag. They can be baked straight from the freezer!

2. How do I prevent my cookies from spreading too much?
Chilling the dough and using room temperature butter can help prevent excessive spreading. Additionally, ensure proper measurement of flour to maintain the right consistency.

3. Can I use different types of chocolate chips?
Absolutely! You can mix and match chocolate types. White chocolate, dark chocolate, or even butterscotch chips can provide exciting variations.

4. How do I store cookies to keep them fresh?
Store the cookies in an airtight container at room temperature for up to a week. Adding a slice of bread to the container can help keep them moist.

5. What is the best way to reheat cookies?
To reheat cookies, place them in a preheated oven at 350°F for about 5 minutes. Alternatively, use a microwave for 15-20 seconds for a quick warm-up.

6. How can I make my cookies healthier?
Consider using whole-wheat flour, adding oats, or reducing sugar. Alternatively, use alternatives like applesauce or honey to sweeten and maintain moisture.

7. What baking sheet should I use?
Using ungreased, heavy-duty baking sheets ensures even baking. If you prefer, line them with parchment paper for easy cleanup.

8. Can I add nuts to my cookies?
Definitely! Chopped nuts like walnuts or pecans can add a delicious crunch. Mix them in along with the chocolate chips.

9. How do I know when my cookies are done baking?
Remove the cookies from the oven when the edges are golden brown but the center still appears soft. They continue to bake while cooling.

10. What adjustments should I make for high altitude baking?
At higher altitudes, you may need to reduce sugar slightly, add a bit more flour, and increase baking times. Adjusting oven temperatures can also help.

Additional Resources

Explore more related recipes that put a spin on classic cookies, such as oatmeal raisin and peanut butter cookies. Benefit from tips and guidelines on essential baking techniques, which can elevate your cookie-making game. Familiarize yourself with various baking ingredients, their properties, and best uses. For those interested in specialized baking tools, recommendations can enhance your efficiency and success while baking. Finally, seasonal variations and festive recipes can add a special touch to your celebrations.

Join the Conversation

We love connecting with fellow bakers! Feel free to share your photos and experiences with these chocolate chip cookies on social media. Tagging us in your creations allows us to see your twists on this classic recipe. Contribute to our community by sharing your tips, variations, and favorite ways to enjoy cookies. Join in discussions about baking adventures, and let’s inspire each other with creative ideas in the kitchen. The joy of baking is best when shared!

The Recipe

Chocolate Chip Cookies

Serves: 24 Cookies

Prep Time: 15 mins

Cook Time: 10 mins

Total Time: 25 mins

Kitchen Equipment Needed

  • Baking sheet
  • Mixing bowls
  • Measuring cups and spoons
  • Whisk or electric mixer
  • Spatula
  • Parchment paper (optional)

Ingredients

  • 2 1/4 cups all-purpose flour
  • 1/2 teaspoon baking soda
  • 1 cup unsalted butter, softened
  • 1/2 cup granulated sugar
  • 1 cup packed brown sugar
  • 1 teaspoon salt
  • 2 teaspoons vanilla extract
  • 2 large eggs
  • 2 cups semi-sweet chocolate chips

Directions

  1. Preheat your oven to 350°F (175°C) and line baking sheets with parchment paper.
  2. In a bowl, whisk together the flour and baking soda; set aside.
  3. Using an electric mixer, cream the butter, granulated sugar, brown sugar, and salt until light and fluffy.
  4. Add the vanilla and eggs, mixing until well combined.
  5. Gradually blend in the flour mixture until just combined. Do not overmix.
  6. Fold in the chocolate chips using a spatula until evenly distributed.
  7. Drop rounded tablespoons of dough onto the prepared baking sheets, spacing them about 2 inches apart.
  8. Bake in the preheated oven for 10-12 minutes or until the edges are golden brown.
  9. Allow cookies to cool on the baking sheet for a few minutes before transferring to wire racks to cool completely.

Recipe Notes

  • Feel free to substitute chocolate chips with your favorite mix-ins such as nuts or dried fruit.
  • For thicker cookies, chill the dough for at least 30 minutes before baking.
  • Store leftovers in an airtight container for up to 1 week.

Best Chocolate Chip Cookies – Soft, Chewy, and Easy

Classic Chocolate Chip Cookies: The Ultimate Comfort Treat

⚖️
Difficulty
Easy

⏲️
Prep Time
15 mins

🕒
Cook Time
10 mins

⏱️
Total Time
25 mins

🍽️
Servings
24 cookies

Indulging in freshly baked chocolate chip cookies is a universal pleasure that transcends generations. The moment those warm cookies emerge from the oven, with their delightful golden edges and soft, gooey centers, you experience pure joy. The rich aroma of melting chocolate mingling with buttery sweetness wafts through your kitchen, creating an inviting atmosphere. Each bite reveals a perfectly balanced flavor profile that captivates the senses—sweet yet slightly salty, chewy yet crisp, an irresistible combination that keeps you coming back for more.

This classic chocolate chip cookie recipe is straightforward, making it an excellent choice for bakers of all skill levels. Whether you’re a seasoned baker or a beginner, these cookies are sure to impress. The nostalgic experience of enjoying cookies fresh from the oven is a memory that many cherish, and each homemade batch invites you to create new ones. The simplicity of the ingredients, combined with the satisfying process of baking, makes it an activity perfect for families or solo bakers alike.

Quick Recipe Highlights

  • Flavor Profile: Rich butter and vanilla combined with semi-sweet chocolate create a comforting sweetness balanced by a slight saltiness.
  • Texture: Crispy edges with a soft, chewy center provide a delightful contrast with each bite.
  • Aroma: The inviting scent of toasted cookie dough mingles with melted chocolate, enticing anyone nearby to indulge.
  • Visual Appeal: Golden-brown cookies speckled with dark chocolate chips make for a visually stunning treat.
  • Skill Level Needed: This beginner-friendly recipe requires minimal baking skills, making it accessible for all levels.
  • Special Equipment: All you need is a mixing bowl, baking sheet, and an oven to bake these delicious treats.

Recipe Overview

  • Difficulty Level: The easy nature of this delicious cookie recipe makes it ideal for anyone looking to bake their first batch of cookies or for experienced bakers who want a quick treat.
  • Category: These cookies fall under the dessert category and are perfect for afternoon snacks, potlucks, or holiday gatherings.
  • Cuisine: Chocolate chip cookies have American origins and embody comfort food across various culinary traditions.
  • Cost: The ingredients for this recipe are affordable and easy to find, making these cookies a cost-effective option for satisfying your sweet tooth.
  • Season: Enjoy these cookies year-round; however, they are particularly delightful during the fall and winter months when warm treats bring comfort.
  • Occasion: Perfect for casual family nights, festive gatherings, or as a delightful surprise for guests.

Why You’ll Love This Recipe

Each bite of these classic chocolate chip cookies offers a perfect blend of taste and texture, making them an irresistible snack. The balance of sweet and salty is nothing short of delightful—the semi-sweet chocolate chips bring a luxurious richness that compliments the buttery dough. The slight chewiness of the interior, coupled with a nicely crisp edge, ensures that every mouthful is satisfying. This beloved flavor combination has stood the test of time, making these cookies a perennial favorite.

Beyond their mouthwatering appeal, these cookies offer convenience and quick prep. With a simple list of ingredients and only a short time commitment of about 25 minutes, you can create a batch of comfort that can be shared with loved ones. Perfect for busy evenings or spontaneous cravings, they provide instant satisfaction without fuss. Additionally, they are an excellent recipe for introducing kids to the joys of baking, allowing family bonding time that results in delicious treats that everyone can savor.

Nutritionally, while these cookies are undeniably a treat, they can also provide a bit of energy thanks to their carbohydrate content from sugars and flour. Enjoying them in moderation can be part of a balanced lifestyle, especially when paired with other healthy snacks. The cookies can also serve as a sweet reward after a long day or an enjoyable dessert to celebrate various milestones, each cookie evoking a sense of happiness and nostalgia.

Socially, these chocolate chip cookies bring people together. Sharing a warm cookie with friends or family can spark joy and create memories, whether you’re gathered around the dining table or enjoying an outdoor picnic. They are also great conversation starters, and baking together can strengthen relationships and enhance social interactions. A plate of freshly baked cookies is a warm invitation for friends and family to gather, making these cookies perfect for any casual occasion.

Lastly, with their accessible ingredients and straightforward method, this recipe is cost-effective. It allows you to create a beloved treat without breaking the bank. The simplicity and affordability make it easy to whip up for any occasion, whether as a sweet personal indulgence or a delicious gift for someone special. These classic chocolate chip cookies are truly a staple in any home kitchen.

Historical Background and Cultural Significance

The chocolate chip cookie as we know it stems from the ingenious creation of Ruth Wakefield in the 1930s. While running the Toll House Inn in Massachusetts, she inadvertently developed this delectable dessert by adding chopped chocolate to her butter cookie recipe. The idea quickly gained popularity, leading to the cookie’s incorporation into American culture. This cookie not only delighted taste buds but also established itself as a modern icon of American baking.

Culturally, chocolate chip cookies symbolize comfort and homeliness. They evoke feelings of nostalgia and warmth, making them a frequent choice for family gatherings, holidays, and celebration events. The cookie’s presence in pop culture has cemented its status—appearing in movies, television shows, and literature—often representing childhood and carefree moments. They are beloved across multiple generations, transcending age and demographics.

Over the years, the chocolate chip cookie has evolved but remains true to its original charm. The introduction of various chocolate types, such as dark, white, and even flavored varieties, has allowed bakers to experiment with this classic. Moreover, the demand for more health-conscious alternatives has led to gluten-free and vegan adaptations, showcasing the versatility of this iconic dessert while maintaining its legacy.

Regionally, different adaptations of the chocolate chip cookie can be found, reflecting local tastes and ingredient availability. From double chocolate variations to those enriched with nuts, different regions have tailored the basic recipe to create their unique spins. This adaptability underlines the cookie’s place in American homes, as families tend to create their cherished versions passed down through generations, solidifying its significance in culinary history.

Ingredient Deep Dive

All-Purpose Flour
All-purpose flour serves as the foundation of countless baked goods, including chocolate chip cookies. Historically, it was developed to provide versatility for various recipes, allowing bakers to use one flour type for all their needs. Nutritionally, it contains carbohydrates that are essential for energy, though it lacks some nutrients found in whole grains. When selecting flour, look for unbleached versions for better flavor. Store flour in a cool, dry place to maintain freshness, and consider alternatives like whole wheat flour for added nutrition.

Granulated Sugar
Granulated sugar is essential for sweetening cookies and providing structure. Used for centuries, it adds a flavorful sweetness and aids in browning during baking. Nutritionally, while sugar provides energy, its excessive consumption can lead to health problems like obesity. When selecting sugar, opt for organic if possible for a purer product. Store sugar in a dry location, ideally in an airtight container to keep it dry and flowing. For healthier versions, consider using coconut sugar or honey in moderation.

Brown Sugar
Brown sugar adds moisture and a rich caramel flavor to cookies. The history of brown sugar dates back to ancient times, particularly in sugar-producing regions like India. Its nutritional profile includes minerals like calcium and potassium, along with its high sugar content. Look for moist brown sugar, as it indicates freshness. Store it tightly sealed, and if it hardens, revive it by placing a slice of bread in the container. For intensity, you can substitute light brown sugar with dark brown sugar for a deeper flavor.

Butter
Butter is a classic cookie ingredient that contributes to the rich flavor and tender texture of chocolate chip cookies. Its use dates back centuries, making it a staple in kitchens worldwide. Nutritionally, butter contains fat-soluble vitamins and healthy fats in moderation. When purchasing, choose unsalted butter for better control of added salt. Store butter in the refrigerator or freezer to extend its shelf life. If you’re looking for healthier options, consider substituting half the butter with applesauce to reduce calories.

Chocolate Chips
Chocolate chips are the star ingredient in chocolate chip cookies, delivering rich flavor and a delightful chewy texture. The popularity of chocolate in baked goods surged in the early 20th century, particularly in America. Rich in antioxidants, chocolate also provides small amounts of iron and magnesium. When buying chocolate chips, look for high-quality brands that contain real cocoa butter. Store them in a cool, dry place or refrigerate for longer freshness. You can experiment with different types—dark, milk, or white chocolate—based on your preference.

Common Mistakes to Avoid

  • Not measuring ingredients accurately can lead to dense or dry cookies. Use a kitchen scale for precision.
  • Using cold butter instead of softened butter can affect the blending process, resulting in less flavorful cookies.
  • Baking cookies on an ungreased sheet can cause them to stick or burn; always use parchment paper.
  • Overmixing the dough can lead to tough cookies. Until the flour is just incorporated is the key to tenderness.
  • Not chilling the dough results in spreading excessively; always chill for at least 30 minutes if your dough seems soft.
  • Skipping the use of room temperature eggs affects the dough’s consistency, so use eggs that are at room temperature.
  • Baking cookies at too high a temperature causes them to brown too quickly, so be sure to follow the recipe closely.
  • Opening the oven door too often can cause temperature fluctuations, impacting cookie baking time – resist the urge to peek too frequently!
  • Using expired baking soda or powder leads to flat cookies, so always check the dates for freshness.
  • Not allowing cookies to cool on the baking sheet before transferring can break them. Let them rest for a few minutes for best results.

Essential Techniques

Mixing Dry and Wet Ingredients
Properly combining dry and wet ingredients ensures a uniform cookie dough, leading to even texture and taste in your cookies. Start by whisking together dry ingredients like flour, baking soda, and salt in one bowl, while creaming butter and sugar in another. Slowly add the dry mix to the wet blend, maintaining a gentle hand to avoid overmixing. Look for a smooth dough without lumps for perfect cookies.

Chilling the Dough
Chilling cookie dough prevents excessive spreading during baking. It solidifies the fat, allowing the cookies to hold their shape while in the oven. Simply place your mixed dough in the refrigerator for at least 30 minutes before scooping. This technique not only enhances texture but also allows flavors to meld beautifully, contributing to an improved overall flavor. Cookies should be firm to the touch before they go in the oven for optimal results.

Pro Tips for Perfect Chocolate Chip Cookies

– Always graze on a little piece of your chocolate dough to test and adjust sweetness before baking—it’s a baker’s secret!
– For extra flavor, add a teaspoon of vanilla extract into the wet ingredients for delightful depth.
– Toasting your flour at 350°F for about 10 minutes enhances nuttiness and flavor; cool it before using.
– For a more appealing presentation, sprinkle a little sea salt on top before baking to enhance the chocolate flavor.
– Rotate your baking sheets halfway through baking for even cooking and browning on all cookies.
– Invest in an oven thermometer to ensure the correct baking temperature; ovens often vary.
– Use a cookie scoop to ensure uniform size, leading to even baking and a consistent texture in each cookie.
– Prioritize using high-quality chocolate, which can make a massive difference in flavor.

Variations and Adaptations

Chocolate chip cookie variations abound! For those who appreciate a fun twist, consider adding nuts such as pecans or walnuts for crunch, or dried fruits like cranberries for a chewy touch. Seasonal adaptations can involve adding pumpkin spice in the fall or peppermint extract around the holidays to create festive flavors. For dietary modifications, gluten-free flour can be used as a substitute for all-purpose flour, and using coconut or almond flour can accommodate nut allergies. To alter flavor profiles, experiment with flavored extracts—like almond or citrus—for a refreshing kick.

Texture modifications can also be fun; implement rolled oats for a chewier bite or use a mix of semi-sweet and dark chocolate for an intense flavor experience. Finally, for presentation, consider shaping them into fun décor like cookie bars or using themed cookie cutters during holidays.

Serving and Presentation Guide

Achieve a visually appealing presentation for your cookies by stacking them neatly on a rustic wooden board or placing them in a decorative tin. When working with multiple cookie types, consider color coordinating or theming decorations. Simple garnishes, like a sprinkle of sea salt or drizzling melted chocolate over the top, can elevate the look and flavor. Ensure that warm cookies are served on a plate with napkins or paper coconuts for a cozy yet elegant touch.

When serving warm, cookies are best enjoyed with a glass of cold milk or a hot beverage. For portion control, go by the size of a golf ball when shaping your cookies; this ensures even cooking and a cookie size that pleases all ages. Remember to keep your cookies in a soft, warm place until ready to serve to maintain their delectable texture.

Wine and Beverage Pairing

Pairing cookies with the right beverages can enhance their flavors significantly. A dessert wine, such as a late harvest Riesling, highlights the sweetness of chocolate without overshadowing it. Alternatively, a rich stout or porter can bring additional chocolate notes that complement the cookies beautifully.

If you prefer non-alcoholic options, a classic pairing is cold milk; the creaminess balances the cookie’s sweetness wonderfully. For coffee lovers, a smooth espresso or mocha can elevate the chocolate experience, creating a satisfying finish. Serve at room temperature for the best mingling of flavors, creating an enticing combination.

Storage and Shelf Life

To keep your chocolate chip cookies fresh, store them in an airtight container at room temperature for up to a week. Ensure the cookies are completely cooled before sealing them to prevent moisture buildup. For longer storage, consider freezing your cookies; they can last up to three months. Place them in a single layer within a zippered freezer bag, adding parchment in between layers to keep from sticking.

Signs of spoilage include a hard texture or off smell; if these occur, it’s better to discard them. For reheating, simply pop them in the oven at 350°F for a couple of minutes to restore their delightful softness. Avoid using microwaves for reheating, which can sometimes lead to a chewy texture or rubbery feel.

Make Ahead Strategies

One of the best features of chocolate chip cookies is their make-ahead capability. You can prepare the dough in advance and freeze it for quick baking gratification later. Roll the cookie dough into balls and freeze them on a baking sheet before transferring to a ziplock for maximum freshness.

To bake from frozen, no need to thaw; instead, increase your baking time slightly. Additionally, consider mixing the dry ingredients ahead and storing them in a jar, making it easy to whip up a batch whenever the craving strikes. This approach helps you enjoy fresh cookies with minimum effort on busy days.

Scaling Instructions

Scaling your chocolate chip cookie recipe is simple and practical! To halve the recipe, just divide each ingredient by two; this works well with most ingredients. If doubling or tripling the recipe, ensure you have adequate mixing space and larger baking sheets; you might have to bake in batches if your oven capacity is limited.

Be mindful that when scaling up, cooking times may vary slightly; keep an eye on the cookies to avoid over-baking. If you choose to make a larger quantity, consider utilizing multiple racks and rotating them heartily in your oven for even baking. Leftover dough can also be stored easily for later use, making recipe adjustments manageable and accommodating.

Nutritional Deep Dive

In a standard chocolate chip cookie, the macro breakdown typically consists of carbohydrates, fats, and proteins. Each cookie can range around 5 grams of protein, 10 grams of fat, and 17 grams of carbohydrates, varying based on the specific ingredients used.

Micronutrient analysis reveals that chocolate chip cookies provide a bit of calcium from butter and some antioxidants from chocolate. If you’re considering health factors, remember to enjoy sweets like these in moderation—they can fit into an overall healthy diet without guilt. When planning portion sizes, consider the cookie’s weight; around 15-20 grams works well for an indulgent treat without overdoing it.

Dietary Adaptations

For those needing dietary adaptations, chocolate chip cookies can easily be modified. For gluten-free options, substitute all-purpose flour with almond or coconut flour, which work well with additional egg whites for binding. Likewise, vegan chocolate chip cookies can be prepared using flaxseed meal as an egg substitute and dairy-free chocolate chips.

For a low-carb approach, almond flour can replace traditional flour, while sugar alternatives like erythritol or monk fruit sweetener help maintain sweetness without the carbs. Ensuring your modifications align with dietary preferences enables you to enjoy cookies blissfully, catering to varied nutritional needs without sacrificing flavor.

Troubleshooting Guide

If your cookies turn out too dense, it could result from compacting the flour; always fluff before measuring. In contrast, if they spread too much, consider chilling the dough longer or reducing the butter slightly in your next batch.

A lack of flavor can stem from using low-quality chocolate or insufficient salt; always opt for quality chocolate and a pinch of salt to enhance sweetness. If your cookies turn out hard, review the baking time; under-baking often causes chewy interiors while over-baking leads to dryness. Address these easy fixes, and you’ll be left with delicious results!

Recipe Success Stories

The story of chocolate chip cookies resonates deeply within the community, with countless testimonials of triumph. Home bakers often share their proud moments of perfecting this classic recipe, having tried multiple variations until achieving that coveted chewy center.

From variations with nuts to different types of chocolate, many have explored adaptations with thrilling success. Reader contributions abound, celebrating successful gluten-free adaptations and delightful mix-ins, showcasing that experimentation is welcomed in the kitchen. For those new to baking, numerous social media posts inspire confidence, letting aspiring bakers know they can master this cherished treat.

Frequently Asked Questions

Q: Can I freeze cookie dough?
Yes! Cookie dough can be frozen for up to three months. Simply scoop and place it in an airtight container or freezer bag, ensuring no air is trapped inside. When you’re ready to bake, you can bake from frozen—just add a few extra minutes to the baking time.

Q: Why do my cookies spread too much?
Excessive spreading can result from using melted butter, too warm dough, or not chilling it long enough. To remedy this, ensure your butter is soft but not melted and chill your dough before baking.

Q: How can I make my cookies chewier?
For chewier cookies, use more brown sugar than granulated sugar and chill the dough before baking. Substituting half the butter with additional eggs can also help in achieving that desired chewiness.

Q: What’s the best way to store baked cookies?
Store baked cookies in an airtight container at room temperature for up to a week. For longer storage, consider freezing them. Make sure they are completely cooled before sealing.

Q: Are chocolate chip cookies gluten-free?
Traditional chocolate chip cookies are made with all-purpose flour, which contains gluten. However, you can easily make gluten-free chocolate chip cookies by using gluten-free flour blends to maintain similar texture and flavor.

Q: Can I use dark chocolate chips instead of semi-sweet?
Absolutely! Using dark chocolate chips is an excellent way to elevate the flavor profile of your cookies for a richer taste. Just adjust sweetness if needed.

Q: How can I make my cookies last longer?
To extend freshness, store cookies in a sealed container with a slice of bread, which helps retain moisture. For longer-lasting options, freezing cookies is fantastic!

Q: Can I add nuts to my cookies?
Definitely! Adding nuts like walnuts or pecans can introduce a delightful crunch and complexity to your chocolate chip cookies. Just make sure to adjust the proportions accordingly.

Q: Are chocolate chip cookies best baked fresh?
While they are certainly best enjoyed fresh, cooled cookies can still taste amazing! Heating them up for a few minutes in the oven restores some of their original gooeyness.

Q: How many calories are in a chocolate chip cookie?
On average, a homemade chocolate chip cookie contains around 150 calories. This can vary significantly depending on the specific ingredients used and portion sizes.

Additional Resources

For more delicious cookie recipes, be sure to explore our blog! You’ll find various techniques for achieving the perfect cookie, along with guides on selecting the right ingredients and equipment. Should you wish to expand your dessert repertoire, check our seasonal recipes for stunning cookies that fit any holiday or celebration!

Additionally, don’t miss the insightful articles filled with baking tips tailored for beginners and veteran bakers alike alike. Choosing the right pan, knowing when to double recipes, and learning how to achieve the texture you want can enhance your experience throughout your baking journey.

Join the Conversation

We’d love to hear from you! Share your personalized chocolate chip cookie experiences with us on social media, or leave a review about your baking journey. Post pictures of your creations and let your fellow bakers contribute their suggestions.

Engaging with our community not only fosters a great exchange of ideas but also enhances the joy of baking through shared experiences. Feel free to bring in your variations and adaptations! Join our thriving conversation about food creation and innovations for delicious homemade chocolates.

The Recipe

Classic Chocolate Chip Cookies

Serves: 24 cookies

Prep Time: 15 mins

Cook Time: 10 mins

Total Time: 25 mins

Kitchen Equipment Needed

  • Mixing bowl
  • Baking sheet
  • Parchment paper
  • Measuring cups and spoons
  • Cookie scoop

Ingredients

  • 2 1/4 cups all-purpose flour
  • 1/2 teaspoon baking soda
  • 1 cup unsalted butter, softened
  • 3/4 cup granulated sugar
  • 3/4 cup packed brown sugar
  • 1 teaspoon salt
  • 2 teaspoons vanilla extract
  • 2 large eggs
  • 2 cups semisweet chocolate chips

Directions

  1. Preheat your oven to 350°F (175°C).
  2. In a small bowl, whisk together flour and baking soda; set aside.
  3. In a large bowl, cream together the butter, granulated sugar, brown sugar, and salt until smooth.
  4. Add the eggs one at a time, mixing well after each addition and then stir in the vanilla extract.
  5. Gradually mix in the flour mixture until just blended.
  6. Fold in chocolate chips.
  7. Drop by rounded tablespoon onto ungreased baking sheets.
  8. Bake for 9 to 11 minutes, or until golden brown.
  9. Let cool on baking sheets for a few minutes before transferring to wire racks to cool completely.

Recipe Notes

  • For added texture, consider mixing in nuts or different types of chocolate chips.
  • For an extra touch, sprinkle sea salt on top before baking.
  • Cookies can be stored in an airtight container for up to one week.
  • Allow for longer cooling time if making larger cookie sizes.

Best Chocolate Chip Cookies Recipe – Soft and Chewy

Chocolate Chip Cookies: The Ultimate Comfort Treat

⚖️
Difficulty
Easy

⏲️
Prep Time
15 mins

🕒
Cook Time
12 mins

⏱️
Total Time
27 mins

🍽️
Servings
24 cookies

Chocolate chip cookies are a beloved classic that evokes feelings of nostalgia and happiness with each bite. There’s something magical about the combination of warm, gooey chocolate contrasted with the crispy edges of a freshly baked cookie. This recipe for chocolate chip cookies promises a perfect balance of flavors, making it an ideal treat for any occasion—be it a simple snack, a dessert to share, or a comforting indulgence just for you.

As you prepare these chocolate chip cookies, the alluring aroma of butter and vanilla will fill your kitchen, inviting family and friends to gather around. Watching the dough transform into golden-brown delights in the oven makes this recipe not only delicious but also a delight to prepare. The experience of baking these cookies, from mixing the ingredients to enjoying the final product, is an adventure filled with rich flavors and joyous moments.

Quick Recipe Highlights

  • Flavor Profile: These cookies burst with the rich flavor of semi-sweet chocolate, complemented by a hint of vanilla and a touch of salt.
  • Texture: Experience the satisfying crunch on the outside while the center remains perfectly chewy, creating a delightful mouthfeel.
  • Aroma: The warm notes of melted butter and brown sugar create an irresistible scent that fills the air as they bake.
  • Visual Appeal: Golden edges surround a soft, doughy center studded with luscious chocolate chips, making these cookies incredibly inviting.
  • Skill Level Needed: This recipe is beginner-friendly, requiring basic baking skills that anyone can master with ease.
  • Special Equipment: You’ll need standard kitchen tools like a mixing bowl, baking sheet, and an oven to whip up these delicious cookies.

Recipe Overview

  • Difficulty Level: Baking chocolate chip cookies is a straightforward process, ideal for both novice bakers and seasoned ones looking for a quick treat.
  • Category: Perfect for dessert, snacking, or even as a lunchbox addition, these cookies fit well into multiple meal categories.
  • Cuisine: Originating from American cuisine, chocolate chip cookies have become a staple in countless households, representing comfort food at its finest.
  • Cost: This recipe is budget-friendly, with common pantry ingredients ensuring that you can make a delightful treat without breaking the bank.
  • Season: While delicious year-round, these cookies can be particularly comforting during the fall and winter months, perfect for holiday gatherings.
  • Occasion: Chocolate chip cookies are perfect for birthdays, holiday parties, or simply a cozy evening at home.

Why You’ll Love This Recipe

The allure of chocolate chip cookies lies not only in their incredible taste and texture but also in the emotions they evoke. Each bite delivers a satisfying crunch followed by a melt-in-your-mouth experience of gooey chocolate bliss. The delicate balance of sweetness and slight saltiness enhances the overall flavor, making these cookies a definitive crowd-pleaser. No matter where you serve them, they are sure to bring smiles and satisfaction to everyone.

In today’s fast-paced world, this cookie recipe offers convenience without straying from quality. It requires minimal prep time and is incredibly easy to throw together, making it a go-to recipe whenever a sweet craving strikes. You can mix the dough in under 15 minutes, and within half an hour, you could be enjoying fresh cookies right out of the oven.

Nutritionally, while they are certainly a treat, chocolate chip cookies can provide energy and comfort when enjoyed responsibly. They contain fat and carbohydrates, offering a quick energy boost. Additionally, adding nuts or oatmeal variation can enhance the nutritional profile, adding fiber and healthy fats.

Sharing homemade cookies fosters connection and joy, making them ideal for entertaining. Bringing a batch of chocolate chip cookies to a gathering is a surefire way to make friends and family feel appreciated. This tradition of sharing baked goods continues to be a beloved part of many social occasions, proving that food can create lasting memories.

Lastly, the affordability of these cookies makes them accessible to everyone. With just a few essential ingredients that you likely already have in your pantry, anyone can indulge in making this favorite treat. This recipe for chocolate chip cookies supports a welcoming atmosphere, ensuring enjoyment for all.

Historical Background and Cultural Significance

The chocolate chip cookie has a charming and unique origin story that dates back to the 1930s in Massachusetts. Ruth Wakefield, the inventor, blended her cookie recipe with chunks of chocolate bars, leading to what we now know and love as chocolate chip cookies. Initially, these cookies gained popularity through Wakefield’s Toll House Inn, eventually becoming a staple across America.

Over the decades, chocolate chip cookies have played a significant role in American culture. They symbolize comfort, nostalgia, and the joy of family gatherings. They have become more than just a dessert; they signify love and effort in homemade treats shared among loved ones.

The evolution of the chocolate chip cookie has led to numerous adaptations, showcasing the versatility of the basic recipe. From variations like double chocolate to oatmeal chocolate chip cookies, this treat has influenced how we perceive cookie baking. The invention of pre-made dough in the late 20th century allowed for easier baking options, revolutionizing how we enjoy cookies today.

Regional variations have also emerged, showcasing local ingredients or flavors. For example, some regions incorporate spices like cinnamon or add unique toppings to give the cookie their signature twist, reflecting individual tastes and traditions.

Ingredient Deep Dive

– **Flour:** All-purpose flour serves as the base for cookies. A crucial ingredient, its gluten content affects the dough structure. For a chewy texture, it’s important to use the right flour type and measure accurately. Store it in a cool, dark place to maintain its freshness, and choose whole wheat for added fiber.

– **Sugar:** Granulated and brown sugars contribute sweetness and moisture to cookies. Brown sugar provides a richer flavor due to its molasses content. It’s essential to store sugar in an airtight container to prevent clumping and can be substituted with coconut sugar or honey for different flavor profiles.

– **Butter:** Using unsalted butter allows for better control over the salt content in your recipe. The quality of butter impacts taste, so using high-fat percentage butter can enhance flavor. Room temperature butter helps achieve a better creaming process. Store it in the refrigerator and freeze it if not used quickly.

– **Chocolate Chips:** These are the star of the show! Semi-sweet chocolate is most commonly used for its balanced sweetness. Always look for high-quality chocolate chips; they significantly affect the overall flavor of cookies. Keep them in a cool location to prevent melting before baking.

– **Eggs:** Eggs serve as a binding agent in cookies while adding moisture. Its fat and protein content contribute to the cookie’s structure, making it essential. Always choose fresh, organic eggs when possible for the best taste, and store them in their carton in the refrigerator.

– **Leavening Agents:** Baking soda helps cookies rise and provides a light, airy texture. Make sure these agents are fresh, as they lose potency over time. They should be stored in a cool, dry place for maximum effectiveness.

– **Vanilla Extract:** Vanilla extract brings warmth and complexity to the dough. Its aromatic notes enhance the overall flavor profile. Be sure to use pure vanilla extract for the best results, and keep it in a cool, dark place to maintain freshness.

Common Mistakes to Avoid

  • Over-measuring flour. This can lead to a dry cookie. Always spoon flour into your measuring cup and level it off for accuracy.
  • Not using room temperature ingredients. Cold butter or eggs can create a lumpy dough and affect texture.
  • Skipping the chilling process. Allowing the dough to chill helps in developing flavors and achieving the perfect shape during baking.
  • Baking on ungreased or improperly prepared baking sheets, which can lead to sticking or burnt bottoms.
  • Not spacing cookies properly on the baking sheet. This can cause cookies to spread into one another, resulting in a giant cookie.
  • Overmixing the dough after adding flour can lead to tough, chewy cookies instead of a softer texture.
  • Occasionally checking them too early can lead to under- or overbaking. Always follow the recommended baking time.
  • Substituting ingredients without understanding their role can lead to unpredictable results. Research or follow trusted guidelines.

Essential Techniques

– **Creaming Butter and Sugar:** This crucial step is important for creating a light, airy texture in your cookies. Beat butter and sugars together until light and fluffy, which can take about 2-3 minutes. Watch for a pale color, indicating the right consistency. Be careful not to overwhip, as this can lead to a too fluffy texture.

– **Measuring Ingredients Accurately:** Precision matters in baking! Use measuring cups and spoons designed for dry and liquid ingredients, respectively. For flour, sift it before measuring for optimal results. A kitchen scale can enhance accuracy, especially in complex recipes.

– **Chilling the Dough:** This step helps solidify the fats and prevent excessive spreading during baking. Chilling for at least 30 minutes improves flavor and texture. If time allows, overnight chilling can yield even better results.

– **Baking in Batches:** To ensure that each batch bakes evenly, rotate the baking sheet halfway through the baking time. Oven hot spots can lead certain cookies to bake faster or burn, so this is essential for uniform results.

Pro Tips for Perfect Chocolate Chip Cookies

– Always use a combination of brown and white sugars for the perfect sweetness balance and chewy texture.
– For richer flavor, consider browning the butter before mixing it into the dough—this adds a lovely nutty flavor.
– Don’t skip the salt, even if you’re using salted butter. It enhances the cookie’s flavor significantly.
– Use high-quality chocolate chips for the best flavor—you can use chunks or a combination of types for added complexity.
– Experiment with mix-ins like nuts, dried fruit, or even spices like sea salt or espresso powder for added depth.
– If you’re craving cookies with a softer profile, slightly underbake them and let them sit on the pan once removed from the oven.
– Allow cooling on the baking sheet for a few minutes before transferring to a wire rack to maintain shape.
– Store leftover cookies in an airtight container to keep them soft and delicious for longer.

Variations and Adaptations

– **Regional Variations:** In some areas, chocolate chip cookies are made with peanut butter added to the dough, creating a delightful flavor contrast.
– **Seasonal Adaptations:** During the winter holidays, consider incorporating spices like cinnamon or nutmeg for a festive touch.
– **Dietary Modifications:** For those with dietary restrictions, gluten-free flour blends work excellently as a substitute for all-purpose flour.
– **Flavor Variations:** Swap the chocolate chips with butterscotch or white chocolate chips for unique flavor experiences.
– **Texture Modifications:** Add oats for a heartier texture and extra chewiness.
– **Presentation Alternatives:** Consider drizzling melted chocolate over cooled cookies for a visually stunning treat or dusting with powdered sugar for a different look.

Serving and Presentation Guide

Present your chocolate chip cookies on a decorative platter, giving them the star treatment they deserve. Enhance their visual appeal by adding garnishes like a sprinkle of sea salt or drizzling melted chocolate on top. Pair them with ice cream for an indulgent treat or serve alongside a glass of milk for a nostalgic experience. For optimal enjoyment, serve them warm, as the melted chocolate provides a delightful texture.

Keeping portion control in mind ensures that everyone gets to indulge without overdoing it. Consider wrapping individual cookies in parchment paper for a charming gift idea or party favor, making them perfect for any gathering or occasion.

Wine and Beverage Pairing

Chocolate chip cookies pair beautifully with various beverages. For an elegant treat, try serving with a medium-bodied red wine like Merlot, which complements the richness of the chocolate. White wine lovers might enjoy a sweet Riesling that balances the sweetness of the cookie nicely.

For non-alcoholic alternatives, a tall glass of cold milk is a classic option; the creaminess enhances the cookie’s texture. Alternatively, a robust cup of coffee or espresso can provide a titillating balance to the cookie’s sweetness, making for a delightful afternoon treat.

Storage and Shelf Life

To preserve the freshness of your chocolate chip cookies, store them in an airtight container at room temperature. They will generally last up to one week. For longer storage, cookies can be frozen for up to three months. Place them in a single layer in an airtight container or freezer bag, considering separating layers with parchment paper to prevent sticking.

Be sure to check for signs of spoilage, such as a change in texture or an off smell. If reheating frozen cookies, allow them to come to room temperature first, and then warm them in the oven at low heat for 5-10 minutes for optimal freshness.

Make Ahead Strategies

To simplify your baking process, consider preparing the cookie dough ahead of time and refrigerating it for up to one week. This allows for quick baking on demand. Alternatively, freeze the dough in individual cookie portions, so you can bake just as many as you want at any time without the hassle of starting from scratch.

If making ahead, remember to let the dough thaw fully and come to room temperature before baking to ensure the cookies spread and bake evenly. You can also prepare the dry ingredients in advance and store them in a sealed container for quicker access.

Scaling Instructions

When scaling your cookie recipe, keep in mind that doubling or halving ingredient measurements should be straightforward, but you may need to adjust baking time. For smaller batches, consider using a kitchen scale for precision, especially with flour and sugar.

Be sure to monitor cookies closely, as they may bake faster or slower based on oven capacity and batch size. For an optimal texture across varying quantities, consider making test batches of incremental sizes to perfect your timing.

Nutritional Deep Dive

Each cookie typically contains a mix of macronutrients, including carbohydrates, fats, and protein. The main contributors to calorie content are sugars and fats, which shelter energy for quick boosts. Notably, using dark or semi-sweet chocolate increases antioxidant content, adding some nutritional benefits.

When assessing the micronutrient profile, consider the vitamins and minerals from the ingredients like eggs and nuts, if added. If you are mindful of dietary expectations, it can be beneficial to track portion sizes to maintain balance while enjoying these treats.

Dietary Adaptations

For those following specific diets, chocolate chip cookies can be adapted to meet diverse needs. Gluten-free options include substituting all-purpose flour with almond flour or a gluten-free blend.

Dairy-free alternatives can easily be introduced by using coconut oil instead of butter and dairy-free chocolate chips. For a vegan version, replace eggs with flaxseed meal or applesauce, while also checking labels to ensure chocolate chips are dairy-free.

Keto enthusiasts might enjoy low-carb flour alternatives, with granular erythritol and sugar substitutes bringing sweetness without the carbs. Each dietary modification can help you create a delicious treat that meets your needs without compromising flavor.

Troubleshooting Guide

Should you encounter texture issues, know that underbake or overbake can impact the final result. To address underbaking, bake the cookies longer on subsequent batches to achieve your desired firmness. Adjusting oven temperature by increments can also rectify issues if consistently faced.

Should flavors be imbalanced, consider adding vanilla or a pinch of salt to enhance sweetness. Likewise, if too salty, balance with a touch of sugar.

For common equipment challenges, preheating the oven helps eliminate temperature discrepancies; don’t skip this step! If ingredients seem clumpy, sift them before combining for an even texture.

Ingredient substitutions can vary in effectiveness, so aim for recommendations directed toward similar structural roles—such as substituting applesauce for eggs or using coconut flour with necessary adjustments.

Recipe Success Stories

Our readers often share their delightful experiences and adaptations of the chocolate chip cookie recipe. One reader noted how they swapped the semi-sweet chocolate for dark chocolate, making the cookies slightly more decadent and rich. Feedback from families reveals how baking together creates unforgettable memories each holiday season, fostering a strong sense of connection.

Photography enthusiasts enjoy capturing the gooey moment when cookies are pulled apart, showcasing their delicious interior. These success stories highlight the creativity and personalization that can occur with a simple recipe, affirming its broad appeal and adaptability.

Frequently Asked Questions

Can I use margarine instead of butter? Yes, but using butter is preferred for better flavor and texture. Margarine can alter the final outcome.

How can I make my cookies chewier? Increase the ratio of brown sugar to white sugar and underbake slightly for a softer cookie.

Why are my cookies spreading too much? Too much butter or not enough flour can cause cookies to spread. Chill the dough if this happens.

What’s the best way to store cookies? Store them in an airtight container at room temperature for up to a week. Freeze for longer storage.

Can I freeze cookie dough? Definitely! You can freeze the dough for up to three months. Just thaw before baking.

Are chocolate chip cookies healthier if I add nuts? Yes, nuts provide healthy fats and protein, contributing to a more balanced treat.

How do I make these cookies vegan? Substitute eggs with flaxseed meal and butter with coconut oil for a delicious vegan version.

What can I do if I don’t have an oven? You can try making no-bake chocolate chip cookie recipes that use oats and nut butter instead.

Can I add oatmeal to this cookie recipe? Yes, adding oats creates a chewy texture, turning your cookies into oatmeal chocolate chip cookies.

How long should I bake them for? Typically, 10-12 minutes at 350°F (175°C) works best. Check them after 10 minutes.

Additional Resources

For more delicious baking ideas, explore our related recipes such as oatmeal cookies, peanut butter cookies, and festive holiday cookies. To master your baking skills further, check out our technique guides on measuring accurately, perfecting the creaming method, and understanding ingredient roles. Explore equipment recommendations that can elevate your baking experience, including high-quality baking sheets and mixing bowls. Looking for seasonal variations? We provide insights into creating holiday-themed cookie recipes for festive delights!

Join the Conversation

Engage with us on social media and share your own chocolate chip cookie creations! Whether it’s a traditional version or your unique twist, we love to see how our recipe inspires your baking adventures. Share your photographs, tips, and stories in the comments and connect with other home bakers. Together, let’s create a community of passionate bakers who embrace the joy of cookie-making!

The Recipe

Chocolate Chip Cookies

Serves: 24 cookies

Prep Time: 15 mins

Cook Time: 12 mins

Total Time: 27 mins

Kitchen Equipment Needed

  • Mixing bowl
  • Baking sheet
  • Measuring cups and spoons
  • Electric mixer or whisk
  • Rubber spatula

Ingredients

  • 2 1/4 cups all-purpose flour
  • 1/2 teaspoon baking soda
  • 1 cup unsalted butter, softened
  • 3/4 cup granulated sugar
  • 3/4 cup brown sugar, packed
  • 1 teaspoon salt
  • 2 teaspoons vanilla extract
  • 2 large eggs
  • 2 cups semi-sweet chocolate chips

Directions

  1. Preheat oven to 350°F (175°C).
  2. In a medium mixing bowl, whisk together flour and baking soda. Set aside.
  3. In a large bowl, cream together butter, granulated sugar, brown sugar, and salt until light and fluffy.
  4. Add vanilla and eggs, mixing well until incorporated.
  5. Gradually mix in dry ingredients until just combined.
  6. Fold in chocolate chips gently.
  7. Drop rounded tablespoons of dough onto greased baking sheets, spacing them apart.
  8. Bake for 10-12 minutes or until golden around the edges.
  9. Let cool on the baking sheets for 5 minutes before transferring to wire racks to cool completely.

Recipe Notes

  • For extra flavor, consider adding nuts or substituting some chocolate chips with butterscotch chips.
  • Cookies can be stored in an airtight container for up to a week or frozen for longer enjoyment.
  • Adjust baking time if making a smaller batch, and always monitor closely.

Best Chocolate Chip Cookies – Soft, Chewy, and Easy

Deliciously Classic Chocolate Chip Cookies: A Sweet Treat for Every Occasion

⚖️
Difficulty
Easy

⏲️
Prep Time
15 mins

🕒
Cook Time
10 mins

⏱️
Total Time
25 mins

🍽️
Servings
24 cookies

Chocolate chip cookies are the iconic dessert that warms hearts and fills homes with an irresistible aroma. Their delightful combination of rich chocolate, soft dough, and a hint of vanilla elevates any occasion, making them the perfect treat for any time of year. Whether paired with a glass of milk or enjoyed on their own, these cookies evoke a sense of nostalgia and indulgence that everyone loves.

Imagine yourself biting into a freshly baked chocolate chip cookie, the warm chocolate melting in your mouth. The balance of sweetness and a subtle hint of salt creates a flavor profile unlike any other. Each cookie offers a delightful experience that transports you back to childhood memories of baking with family, laughter, and joy.

Quick Recipe Highlights

  • Flavor Profile: Features rich chocolate balanced with a hint of sea salt, enhancing the sweet experience of each bite.
  • Texture: A perfect chewiness that contrasts with crisp edges to offer an enjoyable mouthfeel that is both soft and crunchy.
  • Aroma: The buttery warmth of freshly baked dough mingled with rich chocolate notes fills your kitchen with a heavenly scent.
  • Visual Appeal: Golden-brown cookies dotted with glossy chocolate chips create an inviting and delectable presentation.
  • Skill Level Needed: This easy recipe requires minimal baking experience, making it perfect for beginners and seasoned bakers alike.
  • Special Equipment: All you need is a mixing bowl, a baking sheet, and a wooden spoon or hand mixer for easy preparation.

Recipe Overview

  • Difficulty Level: With simple steps and readily available ingredients, this recipe is suitable for every skill level, from kitchen novices to experienced bakers.
  • Category: Ideal as a snack, dessert, or treat for gatherings, these chocolate chip cookies fit perfectly in various meal categories.
  • Cuisine: Originating from American kitchens, these cookies have become a universal favorite with global interpretations.
  • Cost: This recipe is budget-friendly, with accessible ingredients that won’t break the bank, costing around $5 to make two dozen cookies.
  • Season: Perfect year-round, these cookies are especially popular during holidays when baking traditions shine.
  • Occasion: Great for parties, school lunches, or cozy evenings at home, these cookies suit any celebration.

Why You’ll Love This Recipe

The taste and texture of these chocolate chip cookies are truly unparalleled. The subtle sweetness of the dough combined with rich, melted chocolate creates a symphony of flavors that lingers on the palate. Each cookie’s texture perfectly balances a crispy exterior with a chewy center, providing a satisfying bite every time.

Not only do these cookies taste incredible, but they are also remarkably convenient to prepare. With just a few pantry staples, you can whip up a batch in no time, making them a go-to recipe for unexpected guests or a sweet snack attack. Their straightforward method requires minimal hands-on time, allowing you to easily fit baking into a busy day.

Additionally, chocolate chip cookies are often seen as comfort food that brings us together. Baking and sharing these treats evoke warm feelings of nostalgia and community, whether enjoyed at family gatherings, bake sales, or just as a reward after a long day.

This recipe is also cost-effective and accessible. Using basic ingredients like flour, sugar, butter, and chocolate chips mean anyone can create delicious cookies without requiring expensive items. With just a few dollars, you can create a batch that will impress friends and family alike.

Finally, the versatility of chocolate chip cookies is remarkable. While the classic version is always a crowd-pleaser, this recipe is the perfect base for creativity. You can easily modify it with nuts, dried fruits, or flavored chocolate to suit your personal taste or dietary preferences.

Historical Background and Cultural Significance

Chocolate chip cookies have an interesting origin story that dates back to the 1930s. Ruth Wakefield, the inventor of the chocolate chip cookie, created the recipe in her Toll House Inn in Massachusetts, unknowingly launching a dessert trend that would sweep the nation. By combining a classic butter cookie recipe with broken pieces of chocolate bars, she gave birth to what would become a staple in American households.

Culturally, chocolate chip cookies hold a special place in the hearts of many. They symbolize warmth, love, and nostalgia, often associated with family gatherings and childhood memories. This beloved treat represents American culinary tradition and remains popular across generations, serving as a comforting reminder of home.

Over the years, the chocolate chip cookie recipe has evolved significantly. While the classic version is cherished, adaptations tailored to individual tastes and dietary needs have emerged. This evolution can be seen in gluten-free, vegan, and low-sugar variations, highlighting the cookie’s adaptability and enduring appeal.

Regionally, chocolate chip cookies vary in style and preparation methods. For instance, some areas favor thicker, chewy cookies, while others enjoy crisp, thin varieties. This diversity in preparation showcases how this simple cookie can be transformed into numerous delicious iterations, reflecting the regional preferences of its fans.

Ingredient Deep Dive

Flour is the foundation of the chocolate chip cookie. Often all-purpose flour is used, giving structure and support. It provides a source of carbohydrates, essential for energy. You can opt for whole wheat flour as a healthier alternative, which adds a nutty flavor and increases fiber content. When selecting flour, look for finely milled options and store it in a cool, dry place to extend its shelf life.

Sugar is crucial for sweetness and texture. Granulated sugar creates a crisp exterior while brown sugar contributes to moisture and chewiness due to its molasses content. Selecting the right sugar can significantly alter the final product; for example, using all brown sugar results in a denser and chewier cookie. Always store sugar in an airtight container to maintain freshness.

Butter, a key ingredient, adds richness and flavor. It also aids in achieving the desired texture, offering a melt-in-your-mouth experience. Using unsalted butter allows you to control the saltiness of the final product. When baking, ensure butter is at room temperature for optimal blending with other ingredients; this allows for a smoother dough consistency and better texture.

Chocolate chips are the star of the show, providing bursts of rich flavor. You can choose semi-sweet, dark, or even white chocolate chips, depending on your taste preference. High-quality chocolate enhances the overall experience, so select quality brands. For a creative twist, consider using flavored chips such as peanut butter or butterscotch. When storing chocolate chips, keep them in a cool, dark place.


Common Mistakes to Avoid

  • Using cold butter: This can lead to dense cookies. Always use room temperature butter for better incorporation.
  • Overmixing the dough: Mix until just combined to avoid tough cookies. Dough should be slightly lumpy.
  • Not chilling the dough: Allowing the dough to chill enhances flavor and prevents excessive spreading during baking.
  • Not measuring flour correctly: Use the spoon-and-level method to avoid too much flour, which leads to dry cookies.
  • Baking on a hot pan: Ensure your baking sheets are cool before placing dough to maintain cookie shape.
  • Skipping parchment paper: This ensures easy cookie removal and prevents sticking; do not skip this step.
  • Underbaking: Bake until golden brown edges appear for a chewy center; underbaked cookies can be doughy.
  • Improper cooling: Allow cookies to set on the baking sheet before transferring to wire racks to prevent crumbling.
  • Not adding salt: Salt brings out the flavors; always include a pinch in your cookie dough.
  • Using old ingredients: Check expiration dates on baking powder, baking soda, and flour to ensure freshness.

Essential Techniques

Mixing methods are crucial for achieving the perfect chocolate chip cookie. Creaming butter and sugar together creates air pockets that contribute to the cookie’s rise and texture. Beat until light and fluffy, allowing the mixture to incorporate enough air for a great structure. Avoid overmixing after adding dry ingredients to maintain a tender crumb.

Baking temperature plays a significant role in the final outcome. Preheat your oven thoroughly to ensure even baking. Use an oven thermometer to check accuracy, as this can vary greatly between appliances. Starting with the right temperature is essential for achieving crispy edges and chewy centers.

Proper cookie placement on the baking sheet is critical for even baking. Space cookie dough balls sufficiently apart to allow for spreading. Use a standard size, ensuring uniformity for consistent baking. For optimal results, rotate the baking sheet halfway through baking for even color and texture, preventing any hot spots from burning.

Resting your dough is an integral part of cookie making that improves flavor and texture. Allow the cookie dough to rest for at least 30 minutes in the fridge before baking. This step helps develop the flavors and can also alter the texture to achieve that perfect soft and chewy consistency.

Pro Tips for Perfect Chocolate Chip Cookies

1. Experiment with different types of chocolate chips to discover your favorite combination; nuts or dried fruits can also elevate your cookies.
2. Use a cookie scoop for uniform shapes and consistent baking; this helps all cookies bake evenly.
3. Bake a test cookie to check the dough’s sweetness and texture before making a full batch.
4. Let cookie dough rest overnight in the refrigerator for enhanced flavors and chewier texture.
5. Consider adding a pinch of sea salt on top just before baking for an extra flavor dimension that contrasts the sweetness.
6. For crispy cookies, bake them longer; for softer, chewy cookies, take them out just before they turn golden brown.
7. If you prefer a thicker cookie, increase the flour by a few tablespoons for minor adjustments to the texture.
8. Use both granulated and brown sugars for optimal flavor and texture; this combination achieves the perfect chewiness.

Variations and Adaptations

For those looking to switch it up, consider making healthier versions of chocolate chip cookies by substituting white flour for whole wheat or almond flour, which adds nutritional benefits. For a seasonal twist, try adding pumpkin puree and spices for a fall-inspired cookie.

Vegan adaptations can be easily made by substituting butter with coconut oil or vegan butter and replacing eggs with flaxseed meal or applesauce. Each variation allows you to cater to specific dietary needs while enjoying delicious chocolate chip cookies.

For those who enjoy bold flavors, incorporate ingredients like espresso powder to enhance chocolate richness or citrus zest for a refreshing twist. Don’t hesitate to experiment with flavored extracts such as almond or coconut for a unique surprise.

Texture modifications can be achieved by adjusting baking times or using a combination of white and brown sugars for that cherished chewy quality. You can also add oatmeal for a heartier experience and a chewy texture, making every bite more fulfilling.

Seasonal adaptations can include adding crushed peppermint candy for a festive touch during the holidays. You might also consider using seasonal fruits like cranberries for a splash of color and flavor during winter celebrations.

Serving and Presentation Guide

Plating techniques can enhance the visual appeal of your chocolate chip cookies. Consider stacking a few on a decorative plate with a napkin underneath for a casual presentation, or arrange cookies in a clear jar for a rustic look.

Garnishing ideas, such as a dusting of powdered sugar or a drizzle of chocolate over the top, can elevate appearance and taste. Common accompaniments include a scoop of vanilla ice cream for serving warm cookies, or fresh berries to add a bright color contrast.

Modern serving suggestions might involve pairing cookies with coffee or espresso for an adult twist. Temperature considerations play a role; serve cookies warm for that gooey chocolate experience, or allow them to cool for a more traditional approach.

Portion control tips include cutting larger cookies in half for easier sharing or pre-scooping dough balls to control serving sizes. This can help keep portions manageable while still enjoying the delightful taste of chocolate chip cookies.

Wine and Beverage Pairing

When thinking about wine pairings for chocolate chip cookies, an off-dry wine like Riesling or a fruity Zinfandel complements the sweetness beautifully. The acidity in these wines balances the richness of the cookies without overpowering their delicate flavors.

For non-alcoholic alternatives, chilled milk or a rich hot chocolate are classic pairings that enhance the cookie-eating experience. If opting for coffee, a smooth, medium roast or a mocha can highlight the chocolate notes of the cookies.

When considering temperature for serving, warm cookies pair excellently with a chilled beverage, providing a delightful contrast. Alternatively, freshly brewed coffee served hot with a cookie creates a comforting atmosphere.

For more sophisticated gatherings, consider creating a cookie and wine pairing event. Encourage guests to discover their favorite combinations alongside different chocolate chip variations for a fun and interactive experience.

Storage and Shelf Life

To ensure the longevity of your chocolate chip cookies, store them in an airtight container at room temperature for up to a week. Adding a slice of bread to the container can help keep cookies soft and moist for longer, absorbing excess moisture.

For extended shelf life, freezing cookies is a great option. Place baked cookies in a freezer-safe container, separating layers with wax paper, and they can last for up to three months. When ready to enjoy, gently reheat them in an oven for a few minutes.

Signs of spoilage include discoloration, unusual odors, or a change in texture. If cookies appear dry or too hard, they may not be as enjoyable, and it’s best to discard them.

Reheating instructions are simple: for soft cookies, microwave for a few seconds until warm. For crisps, briefly bake at a lower temperature to restore crunch before serving.

When considering freezing cookie dough, you can scoop individual portions and freeze them. This method allows for fresh-baked cookies whenever you desire, ensuring maximum flexibility and taste.

Make Ahead Strategies

Planning ahead for your chocolate chip cookies can save you time. Prepare the dough a day prior and store it in the refrigerator. Chilling enhances the flavor and allows for easy baking without any last-minute fuss.

For storage between steps, portion out dough if making larger batches, wrapping it in plastic wrap or placing it in airtight bags for easier access later. This method also helps with portion control, ensuring you bake just what you need.

Consider the quality impact when making cookies ahead of time. Some recipes may benefit from resting overnight, leading to improved texture and flavor, while others should be baked fresh to maintain a soft consistency.

Assembly tips include preparing dry ingredients in advance. By measuring out flour, baking soda, and salt beforehand, the process becomes quicker when you’re ready to mix everything together.

Reheating guidelines suggest to warm cookie dough before baking, allowing for easier handling and better spreading. Remember to add fresh elements such as chocolate chips or nuts just before baking for optimal freshness.

Scaling Instructions

Scaling a chocolate chip cookie recipe can be an effective way to cater to larger gatherings. When halving the recipe, ensure each ingredient is divided accurately to maintain proportions and texture.

If doubling or tripling the recipe, keep in mind that baking times may need adjustment. Batch baking in smaller portions often leads to better texture and even baking.

Equipment adjustments are vital when scaling; larger mixing bowls may be necessary for combining ingredients efficiently without overfilling. Additionally, consider using multiple baking sheets to streamline the process.

Timing modifications are crucial for ensuring all cookies are evenly baked. Rotate baking sheets or use multiple racks in the oven if you are baking large quantities for consistent results.

Finally, while storing considerations may depend on batch size, ensure that all cookies are properly cooled before airtight storage to avoid moisture loss and spoilage.

Nutritional Deep Dive

In terms of macro breakdown, chocolate chip cookies primarily consist of carbohydrates from sugars and flour. Additionally, fats from butter contribute to a richer flavor profile, while proteins from eggs enhance structure and texture.

Analyzing micronutrient contents, these cookies are generally low in vitamins and minerals but can provide small amounts of calcium, iron, and essential fats. Opting for whole grain flour can increase fiber content while maintaining similar flavor profiles.

Health benefits of homemade cookies include the ability to control sugar and fat levels. By using alternative sweeteners or healthy fats like coconut oil, you can create a more nutritious version without sacrificing flavor.

Dietary considerations might suggest moderation in consumption, focusing on portion sizing. As part of a balanced diet, enjoying cookies in moderation can satisfy sweet cravings without deviating from health goals.

For weight management tips, consider how portion control and ingredient substitutions can assist in reducing caloric intake. Utilizing small cookie scoops can help maintain moderation while still indulging in a delicious treat.

Dietary Adaptations

For a gluten-free option, substitute all-purpose flour with a gluten-free flour blend or almond flour, ensuring each ingredient is certified gluten-free to avoid cross-contamination. These options can yield equally delightful cookies with a slightly different texture.

Dairy-free adaptations can be easily achieved by using vegan butter or coconut oil in place of traditional butter. Replacing eggs with alternatives like flaxseed meal or unsweetened applesauce keeps the cookies moist without any dairy.

For vegan chocolate chip cookies, choose dairy-free chocolate chips and follow existing substitution options for perfect results. These adjustments maintain flavor while catering to plant-based diets.

Low-carb cookie recipes can utilize almond flour and erythritol or other sugar substitutes, ensuring you enjoy delicious cookies without the carbs that traditional recipes offer.

Keto adaptations may also explore using sugar-free chocolate chips or swap granulated sugar for monk fruit sweetener while following standard methods; this transformation offers a health-conscious twist on the classic.

Paleo cookies can be created using coconut flour and minimal natural sweeteners, focusing on whole food ingredients without grain or processed sugars, adhering to the principles of the paleo lifestyle.

For low-FODMAP options, ensure that the ingredients are compliant, including certified gluten-free options, and aim for a low-sugar profile to suit gut health needs.

Troubleshooting Guide

If your cookies are too thin, consider adding a bit more flour next time. This can help create a thicker texture for your cookies, which is especially important if they spread too much on the baking sheet.

Flavor balance can sometimes be off if the cookies taste too sweet; adjusting the ratios of brown sugar and granulated sugar can help you find the perfect flavor balance while emphasizing the rich chocolate flavor.

For temperature problems, using an oven thermometer can ensure that your oven heat is accurate. If cookies are burning on the bottom, consider either lowering the temperature or using a baking sheet with a thicker bottom.

Equipment challenges can arise if your mixer is too powerful; mixing too quickly can incorporate too much air. Mixing at a low speed can yield better results and preserve texture.

When faced with ingredient substitutions, be mindful that certain swaps can drastically change the texture. Each alternative may require a slight adjustment in overall measurements or baking time.

Timing concerns can lead to underbaked or overbaked cookies. Keep a close watch on cookies as they bake to ensure appropriate timing and adjust as needed based on your specific oven characteristics.

Recipe Success Stories

Community feedback highlights how beloved chocolate chip cookies can unite people. Readers often share personal stories about family traditions, where baking cookies becomes a cherished ritual that generations pass down.

Variation successes are common, with many trying nutty additions or experimenting with different types of chocolate; these adaptations bring a new life to the classic cookie recipe while preserving its core integrity.

Adaptation stories frequently showcase how people tailor the recipe to fit dietary restrictions without losing flavor or enjoyment. This demonstrates the cookie’s versatility and universality across various preferences.

Reader suggestions often include ideas for holiday twists or themed cookie events, illustrating the creativity and excitement that baking can inspire. These innovative practices further the cookie’s presence across social gatherings.

Photography tips flourish among our baking communities, encouraging sharing images of perfectly baked cookies. These visuals inspire others to recreate and try the recipe, fostering community engagement and shared experiences.

Frequently Asked Questions

Can I freeze chocolate chip cookie dough?
Yes, chocolate chip cookie dough can be frozen for up to three months. Portion it into balls and freeze them on a baking sheet before transferring to a freezer-safe container for easy baking later.

What is the best way to store chocolate chip cookies?
Store chocolate chip cookies in an airtight container at room temperature for up to a week. For longer storage, consider freezing them.

Can I substitute butter with another fat?
Absolutely! You can use coconut oil, vegan butter, or even apple sauce in place of butter, keeping in mind this may slightly change the flavor and texture.

What if my cookies come out hard?
If cookies are too hard, it could be due to overbaking or too much flour. Adjust baking time and flour measurement for next time to achieve soft, chewy cookies.

How can I make my cookies chewier?
For chewier cookies, consider using more brown sugar than granulated sugar, and bake them for a bit less time to maintain moisture.

Can I add nuts or dried fruit?
Yes! Adding nuts like walnuts or pecans, or dried fruits like cranberries can enhance flavor and texture, making your cookies even more delightful.

Why did my cookies spread too much?
Over-creaming butter or insufficiently chilling your dough can lead to excess spreading. It’s important to properly measure ingredients and chill the dough for best results.

Can I halve this recipe?
Definitely! For smaller batches, simply divide each ingredient list by half, ensuring your cookies don’t lose their classic taste.

What type of chocolate is best for cookies?
Semi-sweet chocolate chips are traditionally used for a balanced flavor. However, you can also experiment with dark or milk chocolate for different tastes.

How long do baked cookies last?
Baked chocolate chip cookies can last in an airtight container for about a week at room temperature, or much longer if frozen.

Additional Resources

For those craving more home-baking inspiration, explore related recipes that incorporate chocolate chip cookies into desserts like cookie ice cream sandwiches or bars.

Technique guides offer detailed information on how to perfect cookie dough consistency and troubleshooting common issues while baking, ensuring a successful baking experience every time.

Ingredient information helps you understand the differences between various sugars, flours, and chocolate types, empowering you to make informed decisions while selecting quality ingredients.

Equipment recommendations provide insight into the best mixing bowls, cookie sheets, and measuring tools to enhance your baking experience.

Lastly, seasonal variations can make chocolate chip cookies more exciting – adding spices in the winter or using fresh fruits in summer provides delicious alternatives throughout the year.

Join the Conversation

We invite you to share your chocolate chip cookie baking experiences on social media! Share photos of your delicious creations and tag us to connect with fellow cookie lovers.

Photography tips can also be shared, showcasing your artistic skills behind the camera and highlighting unique baking methods or ingredients you’ve incorporated.

Recipe reviews and feedback are welcomed, as community engagement enriches our baking experience. Your suggestions and adaptations help inspire others while fostering a supportive cooking environment.

We encourage you to share personal variations to the recipe, whether it’s a family secret or a creative addition that elevates the traditional chocolate chip cookie. Join the discussion surrounding your most cherished baking memories and find inspiration in our shared passion for cookies.

The Recipe

Chocolate Chip Cookies

Serves: 24 cookies

Prep Time: 15 mins

Cook Time: 10 mins

Total Time: 25 mins

Kitchen Equipment Needed

  • Mixing bowl
  • Measuring cups
  • Measuring spoons
  • Cookie sheet
  • Parchment paper
  • Cooling rack

Ingredients

  • 1 cup unsalted butter, softened
  • 3/4 cup granulated sugar
  • 3/4 cup brown sugar, packed
  • 1 teaspoon vanilla extract
  • 2 large eggs
  • 2 1/4 cups all-purpose flour
  • 1 teaspoon baking soda
  • 1/2 teaspoon salt
  • 2 cups chocolate chips

Directions

  1. Preheat your oven to 375°F (190°C) and line a cookie sheet with parchment paper.
  2. In a large mixing bowl, cream together the softened butter, granulated sugar, brown sugar, and vanilla until smooth and creamy.
  3. Add the eggs, one at a time, mixing well after each addition.
  4. In a separate bowl, combine the flour, baking soda, and salt. Gradually add this dry mixture to the wet ingredients, mixing until just combined.
  5. Fold in the chocolate chips until evenly distributed throughout the dough.
  6. Drop rounded tablespoons of dough onto the prepared cookie sheet, spacing them about 2 inches apart.
  7. Bake for 9-11 minutes, or until the edges are golden brown but the centers are still soft.
  8. Remove from the oven and allow the cookies to cool on the sheet for 5 minutes before transferring them to a cooling rack.

Recipe Notes

  • For chewier cookies, chill the dough for 30 minutes before baking.
  • Experiment with different types of chocolate for a variety of flavors.
  • You can add nuts or dried fruit for additional texture and flavor.
  • Store in an airtight container for up to a week, or freeze for later enjoyment.

Easy Air Fryer Recipe Everyone Loves and Keeps Making

Air Fryer Chicken Wings: The Crispy Delight Everyone Is Raving About!

⚖️
Difficulty
Easy

⏲️
Prep Time
15 mins

🕒
Cook Time
25 mins

⏱️
Total Time
40 mins

🍽️
Servings
4

Air fryer chicken wings are taking social media by storm, and for good reason! This recipe is not only incredibly easy to follow, but it also delivers wings that are crispy on the outside and juicy on the inside. With just a handful of ingredients, you can whip up a batch of these irresistible wings for game night, family gatherings, or just a cozy night in. The air fryer cooks them to perfection, giving you that deep-fried taste without the guilt of excess oil.

What makes these air fryer chicken wings a must-try is their flavor. The simple yet delicious seasoning blend enhances the natural taste of the chicken, making them a crowd-pleaser. With options to customize the flavors—from zesty buffalo to mouthwatering garlic parmesan—you can cater to any palate. Serve them with your favorite dipping sauces, and you’ll see why everyone is in love with these crispy delights!

Quick Recipe Highlights

  • Flavor Profile: Expect a burst of savory goodness with a hint of spice that perfectly complements the rich chicken flavor.
  • Texture: These wings boast a crunchy exterior with succulently tender meat on the inside, creating a satisfying mouthfeel.
  • Aroma: The aroma of seasoned wings cooking wafts through the kitchen, enticing anyone nearby.
  • Visual Appeal: Golden brown and deliciously crispy, these wings are an eye-catching addition to any plate.
  • Skill Level Needed: Simple enough for beginners, this recipe requires just basic cooking skills.
  • Special Equipment: You’ll need an air fryer for that perfectly cooked texture.

Recipe Overview

  • Difficulty Level: With a straightforward process, this recipe is ranked easy, making it accessible for cooks of all levels.
  • Category: These wings make for an excellent appetizer, party snack, or even a main dish when paired with sides.
  • Cuisine: Drawing from American culinary traditions, particularly popular in bar food, these wings have variations around the globe.
  • Cost: An affordable option, you can expect to spend around $10-$15 for a batch, depending on chicken prices.
  • Season: Great year-round, but particularly popular during sports seasons and summer barbecues.
  • Occasion: Perfect for gatherings, game days, or a fun family dinner.

Why You’ll Love This Recipe

A delicious crunch and tender meat go hand in hand in this air fryer chicken wings recipe. The joy of biting into a perfectly cooked wing is unmatched, as the flavorful seasoning coats the juicy chicken to enhance every bite. With a variety of potential flavor variations, you can customize these wings to fit your cravings, whether you prefer spicy, savory, or even sweet wings. Pair them with fresh vegetables and your choice of dip for a satisfying and balanced snack.

Preparing these wings is super convenient, especially since air frying eliminates the need for oil-soaked frying pans. You’ll spend less time slaving over the stove and can enjoy more time with family and friends, making them ideal for entertaining. Plus, the cleanup is a breeze—just a quick wash of the air fryer basket, and you’re done!

Beyond taste and convenience, these wings offer some nutritional advantages too. Chicken is a great source of protein, and air frying significantly reduces fat content compared to traditional frying methods. This means you can indulge guilt-free, making it easier to stick to your health goals while enjoying delicious food.

If you’re considering making these wings for a gathering, you’ll appreciate the social element they bring. Good food sparks good conversation, and serving these air fryer wings will surely be a hit among your guests. You can even create a fun wing tasting challenge with different sauces and toppings for an exciting twist.

Lastly, they are budget-friendly. With minimal ingredients needed, you can create a large batch without breaking the bank. This recipe allows you to enjoy restaurant-quality wings at home, making it an excellent choice for anyone looking to save money while enjoying delicious food.

Historical Background and Cultural Significance

Chicken wings have become a staple of American cuisine, particularly in sports culture. Originating in Buffalo, New York, in the 1960s, the dish quickly became a symbol of classic bar food. The original Buffalo wing was deep-fried and tossed in a spicy sauce, which led to a plethora of variations across the nation. The air fryer offers a modern take on this beloved dish, providing a healthier option while maintaining the same beloved flavors.

In American food culture, chicken wings signify camaraderie and celebration, often accompanying sporting events, parties, and get-togethers. Their versatility allows for personalization, with flavors ranging from sweet and tangy to fiery hot, making them suitable for various palates and occasions.

Over the years, the evolution of chicken wings has resulted in creative adaptations and recipes. From traditional buffalo wings to honey BBQ and even lemon pepper, each region has put their own spin on the classic dish, showcasing local flavors and preferences.

Today, wings are not just limited to bars and restaurants; home cooks are embracing this dish, especially with the rise of air fryers. This revolution in cooking methods brings a healthier twist and newfound accessibility, allowing anyone to recreate a beloved pub favorite at home.

Ingredient Deep Dive

Chicken Wings: The star ingredient of this recipe, chicken wings are rich in protein and an excellent choice for parties and gatherings. They have a rich history in American cuisine, particularly as bar food. When selecting wings, look for plump, meaty options. The typical serving size of wings is about four to five pieces per person. Store them in the refrigerator for a few days or freeze them for long-term use. If you’re concerned about calories, opt for baking powder to enhance crispiness instead of oil.

Seasoning: Seasoning can make or break your wings. A standard spice mix might include paprika, garlic powder, and pepper. These spices not only enhance the flavor but also offer health benefits, such as anti-inflammatory properties. When selecting spices, opt for fresh, high-quality options for the best flavor. Store spices in a cool, dark place to prolong their shelf life. You can easily substitute your preferred seasonings to cater to your taste.

Common Mistakes to Avoid

  • Overcrowding the Air Fryer: Avoid overcrowding the basket, as this will prevent even cooking and crispiness. Always ensure there’s enough space for air to circulate.
  • Not Preheating: Preheating your air fryer is essential for achieving that perfect crispy texture. Skipping this step can lead to unevenly cooked wings.
  • Neglecting to Dry the Wings: Patting your wings dry before seasoning helps them crisp up nicely, as excess moisture can lead to soggy wings.
  • Using Too Much Sauce: While flavor is key, too much sauce can lead to sogginess. Toss wings in sauce lightly after cooking for the best results.
  • Not Using a Meat Thermometer: Ensure that your wings reach an internal temperature of 165°F (75°C) for safe consumption. A meat thermometer is your best friend here!
  • Skipping Marinades: While you can certainly cook wings without marinating, allowing them to soak in flavor for at least 30 minutes (or overnight) makes all the difference in taste.
  • Ignoring Seasoning Variations: Stick to basic seasonings and fail to experiment with flavors like lemon pepper or chili-lime, which can elevate your wings.
  • Failing to Rotate: For even cooking, remember to shake or flip your wings halfway through the cooking process to ensure they cook evenly.

Essential Techniques

Air Frying: The key technique for this recipe is air frying, which circulates hot air to cook the wings evenly. This method allows you to achieve a crisp exterior without deep frying. To master this technique, ensure that your wings are arranged in a single layer without overlap. This encourages proper air circulation, leading to evenly cooked and crispy wings. Look for a golden brown color as a visual cue for doneness.

Seasoning: Properly seasoning your wings is crucial for flavor enhancement. Start with a simple base of salt and pepper, then layer in additional spices based on your preferences. Use a generous amount to coat the wings evenly, ensuring they soak in the flavors. The aroma of the spices cooking will guide you to know when they’re ready. Adjust the spice levels according to your taste to enjoy the perfect balance.

Pro Tips for Perfect Air Fryer Chicken Wings

1. Always season your wings right before cooking for penetrative flavor. Avoid marinating them in sauces that can make them soggy.

2. Experiment with sauces after cooking; toss cooked wings in your favorite sauce to retain the crispiness.

3. For added crunch, spray a light mist of oil on the wings before air frying. This helps achieve that golden color.

4. Use a sturdy bowl with a lid to simple shake your spices onto the wings for an even coating.

5. If thawing frozen wings, do it in the fridge overnight to maintain quality and prevent bacteria growth.

6. Consider adding a baking powder in your spice mix for an even crispier texture; it helps absorb moisture.

7. For flavor innovation, try mixing different seasonings—like a hint of honey with sriracha—for a sweet-sour kick.

8. Reserve some seasoning to sprinkle over the wings just before serving for an extra kick of flavor.

Variations and Adaptations

For a spicy kick, try Asian-inspired wings by adding soy sauce, ginger, and sesame oil. For a tangy twist, consider lemon pepper or lime zest in your seasoning mix. On the sweeter side, honey BBQ wings can appeal to those who like a glaze on their wings. If you’re in the mood for something exotic, explore Caribbean jerk seasoning for a flavorful adventure. You can also play with dipping sauces such as blue cheese or ranch to cater to different tastes.

Serving and Presentation Guide

Elevate your serving game by plating wings on a large platter with fresh parsley or cilantro for a pop of color. Consider adding celery and carrot sticks as a crunchy side and pair with your favorite dipping sauces. For a gourmet touch, you could arrange the wings in a staggered pattern, showcasing the golden brown color. Serve them hot straight from the air fryer, allowing guests to enjoy them at the height of crispiness. Opt for small bowls for sauces for easy access and keep portion control in mind for guests to maintain balance.

Wine and Beverage Pairing

For wine lovers, consider a light, crisp Sauvignon Blanc or a cold lager, which can complement the rich flavors of the wings perfectly. If you prefer non-alcoholic options, sparkling water with a slice of lemon or a sweet tea can pair wonderfully. For those who love coffee, a rich brew could match well with spicier wings. Serving temperatures should be kept in mind; ensure that beverages are cold enough to soothe any heat from the wings, enhancing the overall dining experience.

Storage and Shelf Life

Store leftover wings in an airtight container in the fridge, where they can last for up to three days. To maximize freshness, consider wrapping each piece in aluminum foil before placing them inside the container. If freezing, they can last for up to three months; just ensure they’re cooled first to retain their texture. When reheating, use the air fryer to regain some of that original crispiness, as microwaving can often lead to sogginess. Heat them at 350°F (175°C) for about 10 minutes for best results.

Make Ahead Strategies

Wings can be prepped in advance by seasoning them the night before and storing them in the refrigerator for optimized flavor infusion. If you’re expecting guests, consider cooking them up to a couple of hours ahead of time and simply warming them up in the air fryer before serving. Just make sure to monitor the time closely. Also, leave out sauces until just before serving for the freshest taste experience and to maintain their crispy texture.

Scaling Instructions

Whenever you want to adjust the quantity, remember that air fryers have limits. For a small gathering, simply halve the recipe, while doubling for larger gatherings is easy. Pay attention to the cooking time; if you double the wings, you may need to cook them in batches to ensure even cooking. Keep an eye on the internal temperature to maintain safety and quality, adjusting time as needed. Don’t forget to store any unneeded ingredients properly to avoid waste!

Nutritional Deep Dive

Macro-wise, chicken wings offer a great balance of protein and fats. One serving (about four wings) typically provides around 20 grams of protein, making them an excellent choice for muscle maintenance and recovery. The micronutrient profile includes essential vitamins such as B6 and B12, which are crucial for energy metabolism. Make sure to watch your portion sizes if you’re keeping an eye on calorie intake, and consider air frying to keep fat content to a minimum.

Dietary Adaptations

For gluten-free wings, be sure to check the sauces, as many may contain gluten. Opt for gluten-free alternatives when marinades are called for. For a dairy-free option, you can use olive oil or other non-dairy substitutes. If you’re vegan, consider substituting chicken wings with plant-based alternatives like cauliflower wings, following the same air fryer technique. Those on a low-carb diet can enjoy wings without sauces or opt for low-carb options like dry rubs. Adjust the recipe according to any specific dietary needs while ensuring delicious results!

Troubleshooting Guide

Struggling with undercooked wings? Always ensure they’re placed in a single layer in the air fryer for even cooking. If they’re lacking flavor, consider revisiting your seasoning levels; it might be time to add more or marinate longer. If wings come out soggy, reduce excess moisture before cooking and allow them to cool slightly before serving. Equipment issues can arise; regular maintenance of your air fryer will also aid in proper cooking. Keep an eye on timing, adjusting as needed based on the quantity of wings being cooked.

Recipe Success Stories

Community feedback on these air fryer chicken wings has been overwhelmingly positive, with many home cooks sharing their adaptations and flavors. From classic buffalo to sweet honey BBQ, stories of flavorful variations enhance the enjoyment of this recipe. Readers have loved the ease of preparation, noting that it allows for spontaneous gatherings without the stress of complicated cooking. Many also share tips for getting the wings extra crispy, further demonstrating the flexibility and appeal of this beloved dish.

Frequently Asked Questions

Can I use frozen chicken wings?
Yes, you can use frozen wings—just add a few extra minutes to the cooking time to ensure they’re fully cooked.

How do I know when the wings are done?
The wings should be golden brown and have an internal temperature of 165°F (75°C). Use a meat thermometer for accuracy.

Can I make these wings in the oven instead?
Absolutely! Bake them at 400°F (200°C) for a similar time, flipping halfway through for even cooking.

What’s the best way to reheat leftover wings?
The air fryer is the best method for reheating to keep the wings crispy. Just warm them at 350°F (175°C) for about 10 minutes.

Can I make these wings spicier?
Definitely! Adjust your spice levels by adding cayenne pepper or using hotter sauces in your seasoning mix.

How should I serve these wings?
Present them on a platter with dipping sauces, celery sticks, and garnishes for a visually appealing dish.

What are some great dipping sauces?
Common options include ranch dressing, blue cheese dressing, or a simple garlic sauce.

Can I store leftover wings?
Yes, store them in an airtight container in the refrigerator for up to three days.

Is it okay to marinate wings overnight?
Absolutely! Marinating overnight can enhance the flavors; just remember to dry them before cooking.

What substitutions can I make for the seasoning?
You can easily swap spices based on your preference—experiment with your favorite seasonings!

Additional Resources

For more deliciously crispy recipes, check out our collection of air fryer appetizers. We also provide technique guides for mastering the air fryer, so you can become a pro in no time! Explore additional ingredient information, especially for sources of spices, as well as equipment recommendations to outfit your kitchen.

Join the Conversation

We love hearing from you! Share your air fryer chicken wings on social media and tag us for a chance to be featured. Don’t forget to leave your feedback or suggest your favorite variations in the comments. Engage with our community by sharing your cooking photos and any tips you adapt while trying this recipe!

The Recipe

Air Fryer Chicken Wings

Serves: 4

Prep Time: 15 mins

Cook Time: 25 mins

Total Time: 40 mins

Kitchen Equipment Needed

  • Air fryer
  • Bowl for mixing
  • Meat thermometer
  • Tongs for flipping

Ingredients

  • 2 lbs chicken wings
  • 1 tbsp olive oil
  • 1 tsp garlic powder
  • 1 tsp paprika
  • 1 tsp salt
  • 1/2 tsp pepper
  • 1/2 tsp cayenne pepper (optional)

Directions

  1. Preheat the air fryer to 400°F (200°C).
  2. Pat chicken wings dry with paper towels and place them in a bowl.
  3. Add olive oil and seasonings, mixing thoroughly to coat wings.
  4. Lightly spray the air fryer basket with cooking spray.
  5. Place wings in a single layer in the basket, making sure not to overcrowd.
  6. Air fry for 25-30 minutes, shaking or flipping halfway through for even cooking.
  7. Once golden brown and crispy, check internal temperature before serving.

Recipe Notes

  • For extra crispy wings, consider sprinkling baking powder with the seasoning.
  • If you prefer saucy wings, toss them in your desired sauce immediately after air frying.
  • Experiment with different spices for various flavor profiles!

Best Air Fryer Heaven Recipe – Crispy and Delicious

AIR FRYER HEAVEN: The Ultimate Crispy Delight

⚖️
Difficulty
Easy

⏲️
Prep Time
15 mins

🕒
Cook Time
20 mins

⏱️
Total Time
35 mins

🍽️
Servings
4

Air Fryer Heaven is the pinnacle of culinary delight, offering a crisp texture while infusing flavors that tantalize the palate. Imagine biting into golden, crispy bites that are light yet satisfying, every mouthful promising a blend of savory crunch and aromatic depth. This recipe not only saves you time but also indulges your cravings without the guilt of excessive oil. With the air fryer at the helm, you will create ideal snacks or sides that your family will crave.

This recipe embraces simplicity while delivering an impressive culinary experience that is sure to dazzle your dinner guests. The combination of varied spices and the enhanced crunch through air frying transforms ordinary ingredients into an extraordinary dish. It’s a celebration of flavors—bold, subtle, and everything in between—aiming to satisfy even the pickiest eaters. Gone are the days of greasy, heavy snacks, replaced by the lighter, healthier options that the air fryer graciously provides.

Quick Recipe Highlights

  • Flavor Profile: This dish boasts a delightful combination of savory spices that awaken the senses, enhanced by a hint of sweetness.
  • Texture: Achieving the perfect crunch on the outside while keeping the inside tender, this recipe elevates your snacking experience.
  • Aroma: The aromatic blend of herbs and spices will fill your kitchen with mouthwatering scents, enticing everyone in the house.
  • Visual Appeal: Beautifully golden brown with dainty crispiness, this dish is a feast for the eyes as well as the taste buds.
  • Skill Level Needed: Perfect for beginners and home cooks alike, this recipe requires minimal skill but delivers maximum satisfaction.
  • Special Equipment: You will only need a reliable air fryer to achieve heavenly results in half the time.

Recipe Overview

  • Difficulty Level: This easy recipe is perfect for anyone, even if you have never used an air fryer before. With straightforward steps and minimal prep time, it’s accessible to all.
  • Category: This dish is a versatile option for appetizers, snacks, or as a side dish alongside your main courses.
  • Cuisine: Infused with global flavors, this recipe draws inspiration from classic snack traditions allowing for various adaptions.
  • Cost: The ingredients are generally low-cost and widely available, making this recipe budget-friendly.
  • Season: Perfect for all seasons, these crispy delights can shine during family gatherings, barbecues, or cozy nights in.
  • Occasion: Ideal for social gatherings, game days, or simply a quick and easy family meal, Air Fryer Heaven fits any occasion perfectly.

Why You’ll Love This Recipe

Delight in the rich taste and texture of Air Fryer Heaven, where every bite offers an irresistible crunch balanced with soft, flavorful components. The unique air frying method ensures that you can enjoy all the flavors without the heavy oil found in traditional frying methods. This recipe keeps the essence of each ingredient intact, highlighting their natural flavors while adding a new dimension of crunch.

In addition to its delectable flavor, this recipe is a breeze to prepare, saving you time in the kitchen. With minimal ingredients and straightforward steps, it’s perfect for those hectic weeknights or casual get-togethers. Air frying is not only efficient but also requires less monitoring, allowing you to multitask or spend quality time with loved ones while your dish cooks to perfection.

Nutritionally, Air Fryer Heaven stands out. You can indulge in a guilt-free snack that is significantly lower in fat compared to traditional fried foods. The air frying process preserves essential nutrients while locking in delicious flavors, which means you can enjoy satisfying bites without compromising health.

Social gatherings become a delight with this recipe; it’s a crowd-pleaser that complements various gatherings, from game day to holiday parties. Friends and family will appreciate the incredible taste, leading to memories and laughter shared over fantastic food, making it a conversation starter at any event.

Finally, Air Fryer Heaven is accessible and cost-effective. The basic ingredients are often pantry staples that won’t break the bank, enabling anyone to create something incredible without the fuss. It’s a simple joy to prepare and share, bringing everyone together over a deliciously crafted dish that embraces flavors.

Historical Background and Cultural Significance

Air Fryer Heaven showcases the modern culinary trend of air frying, a cooking method that has rapidly gained popularity in recent years. Originating from traditional frying methods that have spanned centuries, air frying provides a healthier alternative, allowing people to enjoy their favorite crispy foods without the guilt. This technique has transformed how we perceive fried foods and has introduced a new dimension to classic dishes.

Culturally, this recipe highlights the desire for healthier options without sacrificing taste. Many households are now seeking to balance indulgent meals with nutrition, and air frying has adapted classic recipes to fit this need. The preparation of crispy snacks across different cultures has morphed to incorporate this modern twist, affirming the air fryer’s place in contemporary kitchens.

The evolution of Air Fryer Heaven can be traced back to traditional snack foods that were often deep-fried, such as potato chips, chicken wings, and various breaded morsels. Today, these beloved snacks are reimagined to fit into a healthier lifestyle. As more households embrace health-conscious choices, this recipe represents a significant step towards modern dietary preferences.

Regional variations can stem from the myriad of spices and ingredients available worldwide. Each culture might adapt the basic premise of this crispy delight by incorporating local flavors or traditions, showcasing its versatility. From spicy seasonings of the south to herb-infused versions of the Mediterranean, Air Fryer Heaven has the potential to reflect a variety of culinary influences.

Ingredient Deep Dive

For Air Fryer Heaven, the main ingredients typically include vegetables, proteins, and seasoning elements. Each component plays a crucial role in creating a delightful dish.

Vegetables often serve as the foundation of Air Fryer Heaven. Common choices include potatoes, zucchini, and bell peppers, each representing unique aspects of their cultural significance.
– Potatoes have been a staple in various cuisines and provide essential carbohydrates alongside numerous vitamins and minerals.
– Zucchini is low-calorie while high in vitamins, making it a nutritious addition that absorbs flavors beautifully.
– Bell peppers contribute a pop of color, offering various antioxidants while adding sweetness to balance savory elements.

Seasonings, which play a vital role in flavor, can include garlic, paprika, and Italian herbs, each adding depth and cultural relevance. Garlic is an enduring symbol in many cuisines; it elevates flavors and provides health benefits. Paprika introduces earthiness and, depending on the variety, varying levels of heat. Italian herbs not only enhance taste but also represent the rich history of flavor in Italian cuisine.

Common Mistakes to Avoid

  • Overcrowding the air fryer basket can prevent proper air circulation, leading to uneven cooking and a lack of crispiness. Always ensure items have enough space to breathe and crisp up.
  • Neglecting to preheat the air fryer can affect cooking times and the final texture. Heating the appliance beforehand helps achieve the desired crunch.
  • Using too much oil may lead to soggy results instead of the crisp finish sought after in air frying. Lightly spritzing the ingredients is usually sufficient.
  • Not shaking the basket halfway through cooking may result in unevenly cooked food. Gently tossing the ingredients ensures they brown evenly.
  • Ignoring the recipe suggestions for cooking times can lead to either undercooked or burnt food. Always refer to timing guidelines to achieve optimal results.
  • Failing to pat dry ingredients beforehand can introduce unwanted moisture and hinder the crisping process. Search for the best texture by ensuring they are dry before seasoning.
  • Using frozen ingredients without adjusting the cooking time is a common misstep. Frozen items typically require longer cooking times compared to fresh ingredients.
  • Assuming that all air fryers operate the same may lead to mishaps. Familiarize yourself with the specifics of your air fryer model for the best outcome.
  • Rushing through the cooling step can result in losing the crispness. Allowing food to rest for a few moments enhances the final texture.
  • Not experimenting with different spices can yield a repetitive flavor profile. Embrace the variety by mixing and matching spices to suit personal tastes.

Essential Techniques

Air frying is a game-changer when it comes to achieving that coveted crisp. The process involves circulating hot air evenly around the food, allowing it to cook thoroughly without the need for oil to seep through. Mastering this technique is vital for the best results; familiarize yourself with your air fryer’s settings and cooking times to avoid unexpected surprises.

Another key technique is seasoning. Properly coating ingredients with the right blend of spices not only enhances flavor but also contributes to the crunchy texture. Mix spices thoroughly to ensure even coverage; incorporate dry rubs or marinades to elevate taste complexity. The right seasoning transforms simple ingredients into a dish bursting with flavor, setting up the perfect balance for Air Fryer Heaven.

Pro Tips for Perfect Air Fryer Heaven

Use a meat thermometer to gauge the doneness—ensuring everything cooks thoroughly while remaining juicy.
Experiment with different types of coating, such as breadcrumbs, panko, or crushed nuts, to enhance delightfully crispy results.
Don’t be afraid to adjust cooking temperatures based on the ingredients; delicate items may require lower temperatures to avoid burning.
Make use of small batches for the best result, as it allows each piece the space it requires for optimal cooking.
Always monitor the cooking progress and be ready to shake the basket if necessary for even crisping.
Embrace fresh herbs post-cooking for added flavor; sprinkle some on right before serving to inject a brightness and freshness.

Variations and Adaptations

Regional variations can take Air Fryer Heaven to new heights, inviting global flavors into your kitchen. Explore classic variations by applying spice blends, such as Cajun or Asian-inspired mixes.
Seasonal adaptations are also an excellent idea; consider swapping in seasonal vegetables like asparagus in spring or sweet potatoes in fall for a delightful twist.
Vegetarian and keto perspectives can thrive here too; skip the meat for veggie variations or use almond flour as a low-carb coating option.
Experiment with texture modifications by adjusting cooking times or applying different cooking techniques; try blanching or steaming before air frying to solidify results.
Lastly, for presentation alternatives, serve with colorful garnishes or dipping sauces to elevate visual appeal and enjoyment.

Serving and Presentation Guide

Engaging plating techniques can turn a delightful dish into an unforgettable presentation. Stack pieces in a slightly haphazard manner on a platter to create visual interest.
Enhance with garnishing ideas such as chopped fresh herbs, or hold true to classic accompaniment themes such as tangy sauces.
For traditional accompaniments, consider pairing with dips like tangy ranch or a spicy salsa, both of which elevate the dish’s appeal.
Adopt modern serving suggestions by utilizing mason jars or small bowls for a trendy, rustic appeal that welcomes sharing.
Temperature considerations are important; serve while hot for ideal texture, but consider offering cooled options for long gatherings.
Finally, be mindful of portion control; present bite-sized servings that allow guests to sample without overindulging.

Wine and Beverage Pairing

Appropriate wine pairings for Air Fryer Heaven can include crisp whites like Sauvignon Blanc or light reds such as Pinot Noir. Both complement the flavors without overwhelming them.
Non-alcoholic alternatives like sparkling water infused with citrus are refreshing options, enhancing the dish’s clean flavors alongside Air Fryer Heaven.
If serving coffee or tea, consider a light herbal tea that complements the dish, providing a soothing finish.
When serving wine, pay attention to temperature; whites should be chilled while reds can benefit from slightly cooler than room temperatures.
Consider offering a variety of drinks for social gatherings to cater to diverse preferences and elevate the overall dining experience.

Storage and Shelf Life

Air Fryer Heaven can be stored in airtight containers, prolonging freshness and crispness for up to three days.
Maintain temperature requirements by refrigerating promptly after cooling to ensure optimal safety and shelf life.
When selecting containers, consider factors like size and material; glass or BPA-free plastic containers are excellent choices.
Take note of signs of spoilage such as off smells or unusual textures before consuming leftovers.
When reheating, utilize the air fryer for just a few minutes to regain that signature crunch.
For longer storage, freezing is an option; wrap tightly in foil and store in freezer-safe bags for up to two months.

Make Ahead Strategies

Preparing components ahead of time can ease the cooking process. Chop vegetables in advance and store them in the fridge to shorten your overall cooking timeline.
Consider pre-seasoning your ingredients the night before to let flavors meld and deepen.
Quality impact assessments suggest that while certain components, such as raw vegetables, are best fresh, cooked items can be stored for reheating.
When assembling, prep in stages; prepare dipping sauces or dips to accompany Air Fryer Heaven ahead of time.
For reheating, always use the air fryer to restore that delightful crunch while reheating evenly, ensuring optimal satisfaction.
Never forget to add fresh elements such as herbs just before serving to heighten flavor and freshness.

Scaling Instructions

Whatever your needs, scaling the recipe can be seamless.
To halve the recipe, adapt cooking times accordingly as smaller batches may cook more quickly; always check for doneness.
If doubling or tripling, keep in mind that cooking time may increase slightly, and always batch cook to maintain air circulation.
Be considerate of equipment adjustments; larger portion sizes may need to be spread out over additional cooking cycles.
Timing modifications are important—consider rotating batches or preheating in multiple sections for efficient use of your time.
Finally, observe storage considerations as increased quantities may require more space and greater foresight in planning.

Nutritional Deep Dive

Exploring the macros of Air Fryer Heaven reveals its lighter profile—with a focus on low-fat ingredients that embrace whole food options.
In terms of micronutrients, the dish boasts an array of beneficial vitamins, including Vitamin A from colorful vegetables and Vitamin C from seasonal spices.
Health benefits are prominent, saving on calories typically found in fried options, presenting a nutrient-rich alternative to satisfy cravings without compromise.
Consider dietary requirements as this dish can easily adapt to vegetarian, low-carb, or gluten-free variations, increasing its appeal and versatility.
Portion analysis indicates that with appropriate serving sizes, this dish can align well with weight management routines, encouraging mindful eating practices.

Dietary Adaptations

For those seeking gluten-free options, substituting traditional coatings with almond flour or gluten-free breadcrumbs keeps the crunch intact.
Dairy-free individuals can easily modify any creamy dips or sauces, replacing them with avocado or tahini-based options without sacrificing flavor.
Vegans can embrace plant-based proteins as substitutes, ensuring that every bite reflects their dietary values without losing taste appeal.
Low-carb enthusiasts may replace starchy vegetables with cauliflower or green beans, maintaining the delightful essence of the dish.
Keto followers can rejoice with variations incorporating cheese or nut-based coatings, staying true to their meal plans while enjoying this crispy delight.
Paleo dieters can adapt by selecting whole, unprocessed ingredients while avoiding grains and sugars for a wholesome experience.
For those following low-FODMAP diets, choose suitable ingredients while monitoring individual tolerances and adjustments.

Troubleshooting Guide

When encountering texture issues, consider adjusting cook time or shaking the basket for a more even cook.
If flavor balance seems off, experiment with seasoning levels or add contrasting elements like zesty citrus to brighten the dish.
Temperature problems may arise if you aren’t familiar with cooking times; always check that internal temperatures align with appropriate doneness standards.
If your air fryer struggles with even cooking, check that airflow isn’t obstructed by overcrowding, needing to batch-cook in smaller portions.
Ingredient substitutions may lead to new challenges, particularly with moisture levels; pay attention to recommended adjustments for a successful swap.
Lastly, if your cook time feels off, always trust your air fryer and monitor doneness periodically for confidence in your results.

Recipe Success Stories

Community feedback has revealed that Air Fryer Heaven has quickly become a favorite among many households.
Throughout variations, countless success stories highlight adjustments made for various dietary needs, all while maintaining fantastic flavors.
Readers have shared innovative adaptations, emphasizing how these enhancements have fostered delight in their kitchens.
Additional photography tips have emerged from those who documented their experiences, showcasing the eye-catching results that can be achieved with proper styling and presentation.

Frequently Asked Questions

1. Can I use frozen vegetables in Air Fryer Heaven?
Yes, frozen vegetables can be used, but they typically require extended cooking times. Ensure to adjust cooking times and temperatures for optimal results.

2. What air fryer do you recommend for beginners?
Beginners might find basket-style air fryers easier to manage; look for models with programmable settings for ease of use.

3. How do I know when my food is done cooking?
Utilizing a meat thermometer can help. For crispy items, look for a golden-brown color and check for tenderness at the center.

4. Is air frying healthier than traditional frying?
Air frying typically uses very little oil, drastically reducing fat content compared to traditional frying methods, making it a healthier option.

5. What can I pair with Air Fryer Heaven for a complete meal?
Pair Air Fryer Heaven with salads, dips, or lean proteins, creating a balanced meal that’s nutritious and satisfying.

6. How can I prevent sticking in the air fryer?
Always preheat the air fryer, and consider lightly spraying the basket with oil or using parchment paper to minimize sticking.

7. Can I use oil sprays in my air fryer?
Yes, using oil sprays is perfect for ensuring a crispy finish, but remember to choose oils with high smoke points for best results.

8. How long will leftovers last?
Properly stored in an airtight container, leftovers should be enjoyed within 3 days for optimal flavor and freshness.

9. Can I reheat Air Fryer Heaven leftovers?
Reheating in the air fryer is ideal; it helps maintain the crispy texture while warming up the dish evenly.

10. How can I customize the flavors?
Feel free to experiment with various spice blends, marinades, or dipping sauces to tailor Air Fryer Heaven to your taste preferences.

11. What should I do if my air fryer is smoking?
If your air fryer smokes, it may be due to oil residue or overuse of oil. Regular cleaning and proper oil use can prevent this issue.

12. Can Air Fryer Heaven be made ahead of time?
While some elements can be prepared in advance, it’s best to enjoy it soon after cooking to retain optimal texture and flavor.

Additional Resources

Explore other related recipes that complement Air Fryer Heaven, including dips and refreshing salads.
Get familiar with technique guides that enhance your air-frying skills to take your cooking to the next level.
Additionally, learn more about ingredient information to deepen your understanding of flavors and health benefits.
Explore equipment recommendations to find the best air fryer options that fit your lifestyle and budget.
Keep seasonal variations in mind as you prepare future meals, ensuring variety and freshness in every bite.

Join the Conversation

Engage with others passionate about cooking through social media sharing; post your Air Fryer Heaven creations to inspire others.
Share photography tips to highlight your culinary successes and entice others with your plating techniques.
Encourage recipe reviews and community engagement by reviewing flavors, textures, and any tweaks you’ve made to the original recipe.
Lastly, embrace the possibility of recipe variations by discussing ideas and suggestions with fellow food lovers.

The Recipe

Air Fryer Heaven

Serves: 4

Prep Time: 15 mins

Cook Time: 20 mins

Total Time: 35 mins

Kitchen Equipment Needed

  • Air Fryer
  • Mixing Bowls
  • Cutting Board
  • Knife
  • Measuring Cups
  • Spatula

Ingredients

  • 2 cups of vegetables (potatoes, zucchini, bell peppers)
  • 2 tablespoons of olive oil
  • 1 teaspoon of garlic powder
  • 1 teaspoon of paprika
  • Salt and pepper to taste
  • Optional: Fresh herbs for garnish

Directions

  1. Preheat your air fryer to 400°F (200°C).
  2. Chop the vegetables into bite-sized pieces and place them in a mixing bowl.
  3. Drizzle the olive oil over the vegetables and add garlic powder, paprika, salt, and pepper. Toss well to ensure even coating.
  4. Arrange the vegetables in the air fryer basket, ensuring they aren’t overcrowded.
  5. Cook for 15-20 minutes, shaking the basket halfway through for even cooking.
  6. Once golden brown and crispy, remove from the air fryer and garnish with fresh herbs if desired.
  7. Serve hot and enjoy your delicious Air Fryer Heaven!

Recipe Notes

  • Feel free to experiment with different vegetables according to your preference or seasonal availability.
  • Adjust the spice levels to suit your taste by adding chili powder or other spice blends.
  • For added crunch, coat the vegetables with breadcrumbs or panko before air frying.

Best Amish Potluck Fellas Recipe – A Crowd Favorite

Delicious Amish Potato Salad: A Crowd-Pleasing Favorite

⚖️
Difficulty
Easy

⏲️
Prep Time
20 mins

🕒
Cook Time
30 mins

⏱️
Total Time
50 mins

🍽️
Servings
8 servings

Potato salad is a beloved classic that graces many family gatherings and potlucks, and this Amish-style potato salad recipe stands out among the rest. My Amish buddy brought this dish to our last potluck, and let me tell you, it was an instant hit! The combination of hearty potatoes, creamy dressing, and the crunch of celery keeps every bite exciting and satisfying. With its rich flavors and wholesome ingredients, this potato salad is more than just a side dish—it’s a comforting staple that evokes feelings of nostalgia and togetherness.

Easy to prepare and full of flavor, this Amish potato salad is sure to impress. Each spoonful brings a smile, combining the creaminess of mayonnaise with a hint of tang and a sprinkle of seasoning. Perfect for any occasion, from summer picnics to holiday feasts, this dish not only fills the tummy but also warms the heart. Discover the joy of sharing this delicious potato salad at your next gathering and watch as it becomes a fast favorite among family and friends.

Quick Recipe Highlights

  • Flavor Profile: This potato salad features a blend of creamy, tangy, and savory elements that come together beautifully, creating a refreshing contrast with the hearty potatoes.
  • Texture: The soft, creamy potatoes are complemented by crunchy vegetables like celery and onion, offering a delightful mouthfeel in every bite.
  • Aroma: The aromatic notes of mustard and vinegar enhance the overall sensory experience, evoking a sense of homemade goodness.
  • Visual Appeal: This salad is visually stunning, with vibrant yellow mustards mingling with the white of the potatoes and the green crunch of celery, making it a feast for the eyes.
  • Skill Level Needed: This recipe is beginner-friendly, making it accessible for cooks of all skill levels. With straightforward steps, you’ll have it ready in no time.
  • Special Equipment: All you need are basic kitchen tools like a pot for boiling, a sharp knife, and a mixing bowl to create this delightful dish.

Recipe Overview

  • Difficulty Level: With easy-to-follow instructions, this recipe is perfect for beginners looking to create a comforting classic without much hassle.
  • Category: This potato salad fits into the category of side dishes, ideal for barbecues, family gatherings, and potlucks.
  • Cuisine: Rooted in traditional Amish cooking, this recipe reflects the simple yet flavorful ingredients celebrated in their culinary practices.
  • Cost: The ingredients for this recipe are quite affordable, with potatoes, mayonnaise, and celery being common pantry staples, making it budget-friendly.
  • Season: Perfect for spring and summer gatherings, this dish shines during warmer months, complementing grilled meats and fresh veggies.
  • Occasion: This potato salad is versatile enough for casual picnics as well as more formal gatherings, ensuring it fits in at any event.

Why You’ll Love This Recipe

This Amish potato salad is a delightful combination of taste and texture that will have your taste buds dancing. The creamy dressing clings perfectly to each potato, creating a comforting dish that is always a welcome addition to any table. The crunch from the celery adds a refreshing contrast, while the subtle tanginess from the mustard gives it a unique twist that sets it apart from traditional recipes.

The convenience of this recipe cannot be overstated. It comes together in less than an hour and can be made ahead of time, making it a perfect choice for busy days when you want to impress your guests with minimal effort. Simply allow the flavors to meld overnight for an even more delicious experience.

Nutritionally, this dish offers a balance of carbohydrates from the potatoes, fiber from the celery, and protein from the eggs, making it a satisfying side that’s more than just empty calories. This potato salad embodies comfort food while also providing a nourishing component to your meal.

The social aspect of sharing a homemade potato salad cannot be overlooked. This dish fosters a sense of community and connection as it is often shared among family and friends during gatherings, evoking conversations and memories around the dining table.

Finally, with a low cost and simple ingredients, this Amish potato salad is accessible to everyone. You don’t need rare items or expensive tools, making it a dish anyone can make whether you’re a novice cook or a kitchen pro.

Historical Background and Cultural Significance

This Amish potato salad has its roots in the tradition of simple, hearty foods that the Amish community values. Originating from the Pennsylvania Dutch, it has been a staple at potlucks and gatherings for generations. The Amish had a profound appreciation for wholesome, home-cooked meals made from ingredients sourced from their gardens and farms, and this recipe reflects that commitment to quality.

Culturally, potato salad is more than just a dish; it represents a gathering of family and friends. The Amish lifestyle emphasizes community and togetherness, and meals often serve as a means of building those connections. Sharing this potato salad at gatherings is a way of expressing love and hospitality, hallmarks of Amish culture.

Over the years, this recipe has evolved, incorporating local flavors and ingredients while maintaining its foundational elements. While many variations exist, the core idea remains consistent: a creamy, comforting salad that brings people together.

Regional variations highlight the adaptability of potato salad across different cultures. While the Amish version tends to be creamy and straightforward, variations can include different dressings, spices, or additional vegetables, reflecting local tastes and preferences.

Ingredient Deep Dive

**Potatoes**
Potatoes are often hailed as one of the world’s most versatile ingredients, with a rich history dating back thousands of years. They offer a high carbohydrate content, making them an excellent source of energy. When selecting potatoes for salad, choose waxy types like Red Bliss or Yukon Gold, as they hold their shape well when boiled.

Storage is essential; keep potatoes in a cool, dark place, and avoid refrigeration as it can alter their flavor. If you’re running low on time, substitute with new potatoes or even pre-cut varieties to simplify the cooking process.

**Mayonnaise**
Mayonnaise serves as the creamy binder in potato salad. Originating from the French, it is made primarily from oil, egg yolks, and vinegar, providing a luscious texture and tangy taste. Nutritionally, mayonnaise offers a dose of healthy fats, but moderation is key due to its calorie content.

When selecting mayonnaise, you might find options that are made with different oils, or even vegan alternatives made from aquafaba. For those who prefer a lighter option, feeding your guests with Greek yogurt mixed with mustard can serve as a tasty substitution without sacrificing creaminess.

**Celery**
Celery brings necessary crunch to this potato salad. Traditionally used for centuries, it is a wonderful source of fiber, vitamins, and minerals. Choosing bright green stalks with firm texture is crucial for optimal freshness.

Store celery in the refrigerator wrapped in a damp cloth or submerged in a container of water. If you have a bunch of celery that’s wilting, don’t discard it! You can use it in soups or stocks.

Common Mistakes to Avoid

  • Not Salting the Water: Failing to salt the boiling water can result in bland potatoes. Make sure to add a generous pinch of salt to enhance the natural flavors of the potatoes.
  • Overcooking the Potatoes: Boiling potatoes for too long can lead to mushiness. Cook until fork-tender but still firm enough to hold a shape.
  • Skipping the Cooling Step: If you mix warm potatoes with the dressing, it may become greasy. Allow potatoes to cool for the best texture.
  • Not Letting it Rest: Serve your potato salad immediately for the best flavor but expect an improvement when it’s left in the fridge for a few hours as the flavors meld.
  • Forgetting About the Add-ins: Some forget to include mix-ins like celery or onion. Don’t skip these; they add essential texture.
  • Using Low-Quality Ingredients: High-quality mayonnaise and fresh ingredients significantly impact the outcome of the salad. Opt for the best you can find.
  • Mismeasuring Ingredients: Following the ingredient proportions is crucial. Adjusting too much of one element can throw off the flavor balance.
  • Skipping the Tasting: Always taste your potato salad before serving. Frequently, a slight adjustment can make a world of difference!
  • Being Inflexible: Don’t feel tied to the recipe. Feel free to adapt based on preferences or allergies!
  • Not Chilling the Bowl: Using a warm bowl can affect the salad’s temperature. For an ultimate refreshing effect, chill your bowl before mixing.

Essential Techniques

Boiling Potatoes: Boiling potatoes is crucial for achieving the right texture. Start with cold water, ensuring even cooking, and avoid overcrowding the pot for uniform heating. A fork should easily pierce the potato when done, signaling it’s cooked without being mushy.

Mixing Ingredients: Gently folding the potatoes into the dressing is key. This technique preserves their shape while ensuring they are coated evenly. Be cautious to avoid mashing the potatoes for a perfect salad consistency with defined chunks.

Pro Tips for Perfect Amish Potato Salad

Begin with selecting the right potatoes; waxy types work best for maintaining their shape. When boiling, always start in cold salted water for even cooking. Remember to cool the potatoes completely before mixing with the dressing for a creamy outcome.

For added flavor, let the salad rest in the refrigerator for at least an hour, allowing the spices to penetrate each bite. If you want a bit of sweetness, consider adding finely diced pickles or sweet relish to the mix.

For a vibrant touch, garnish the salad with fresh herbs like parsley or dill before serving. This not only enhances the dish’s presentation but also adds a fresh taste.

When making ahead, consider storing the dressing separately until ready to serve, ensuring the salad remains fresh and perfect. If you’re scaling up the recipe, be sure to mix in a large bowl to accommodate all ingredients without splashing.

Finally, don’t hesitate to experiment with add-ins such as diced bell peppers or a sprinkle of paprika for an exciting twist!

Variations and Adaptations

Regional variations of Amish potato salad can introduce some unexpected but delightful flavors. In the Midwest, you might find versions that incorporate bacon, offering a smoky depth that pairs beautifully with the creamy dressing.

For seasonal adaptations, consider incorporating fresh herbs like dill in spring or roasting vegetables to add a rustic touch in fall. As for dietary modifications, replacing mayonnaise with an avocado-based dressing can create a wholesome and creamy vegan option.

Flavor variations can include adding a hint of curry powder for an exotic spin or incorporating mustard for a unique tangy flavor. If texture is your concern, experiment with sliced olives or chopped nuts for an added crunch.

To present this dish in a captivating manner, try serving it on a bed of leafy greens, garnished with sliced radishes for a beautiful color contrast.

Serving and Presentation Guide

To plate your Amish potato salad beautifully, layer it on a colorful serving platter for an eye-catching display. Consider garnishing with fresh herbs like chives or parsley for a pop of green. Serving it cold from the refrigerator enhances its refreshing qualities, making it perfect for warm gatherings.

For additional flavor and color, accompany the salad with cherry tomatoes or cucumber slices on the side. These provide not just texture but also bright visuals. When considering portion control, serving in smaller bowls may help to manage servings while creating enticing plates.

Experiment with different serving styles, such as individual glass cups for a more modern approach, allowing guests to enjoy their portions while maintaining an elegant table.

Wine and Beverage Pairing

For a delightful pairing, consider serving this Amish potato salad with a chilled white wine, such as Sauvignon Blanc, which complements the creamy dressing beautifully. Its crisp acidity balances the richness of the salad, enhancing the meal’s overall enjoyment.

If you prefer non-alcoholic alternatives, a sparkling lemonade or iced herbal tea makes for a refreshing choice that complements the flavors without overpowering them. For something heartier, a light lager beer can pair well, providing a refreshing contrast to the rich salad.

When serving coffee or tea, opt for light, aromatic varieties that won’t clash with the salad’s flavors, such as a mild chamomile or a smooth blonde roast coffee.

Storage and Shelf Life

To maximize the freshness of your Amish potato salad, store it in an airtight container in the refrigerator. The salad will typically keep well for about 3 to 5 days. It’s essential to check for any signs of spoilage, including off odors or changes in texture.

For optimal taste, avoid freezing, as mayonnaise-based dressings can separate and change in texture when thawed. If you must freeze it, consider omitting the dressing beforehand and keep the potatoes separate. Reheating should be avoided altogether; instead, serve the salad cold for the best experience.

Should you need to store leftover dressing, keep it in a sealed jar in the fridge, where it can usually last up to a week. When preparing to reheat any leftovers, be sure to do so gently in the microwave, ensuring even heating without becoming too mushy.

Make Ahead Strategies

Preparing your Amish potato salad a day in advance enhances its flavor as the ingredients meld overnight. Begin by prepping the potatoes and other ingredients, but keep the dressing separate until the day of serving for the freshest taste.

If you find yourself short on time, you can boil the potatoes and chop the veggies ahead of time, storing them in separate containers in the fridge. This reduces prep time significantly on the day of serving and keeps flavors fresh.

During assembly, combine everything in a large bowl but consider folding in mandatory last-minute elements, like fresh herbs, for a burst of freshness right before serving.

If you want to add freshness to the salad at the last moment, consider adding fresh vegetables or crispy toppings just before serving to maintain that desired crunch.

Scaling Instructions

Scaling up this Amish potato salad recipe is simple. For larger gatherings, you can double or triple the ingredients while keeping the proportions consistent. Just ensure you mix in a sufficiently large bowl to accommodate all ingredients.

When halving the recipe, it’s still essential to keep the flavors balanced, so reduce the notable ingredients without making drastic changes to the dressing ratios. If cooking in larger quantities, adjust the boiling time for the potatoes to ensure even cooking across the batch.

Also, consider equipment adjustments; larger pot capacities may be necessary for boiling a larger amount of potatoes effectively without overcrowding. For storage, larger containers or dividing into smaller portions makes for easier arrangement in the refrigerator.

Nutritional Deep Dive

Analyzing the macro breakdown of this Amish potato salad reveals a balance of carbohydrates from the potatoes, fats from the mayonnaise, and protein from eggs if included. Each serving provides a hearty, filling side perfect for meals, particularly during social occasions.

Micronutrient analysis indicates the benefits of vitamins C and K found in potatoes and celery. The combination provides antioxidants that support overall health, making this dish not only delicious but beneficial when enjoyed in moderation.

Health benefits also emphasize the potential high fiber content, especially if using skin-on potatoes, promoting digestive health and satiety. Be mindful with portions to prevent excessive caloric intake, especially since mayonnaise can be calorie-dense.

For weight management, consider pairing this potato salad with grilled proteins or fresh greens, creating a balanced plate that satisfies hunger without heavy caloric loads.

Dietary Adaptations

For those needing gluten-free options, this Amish potato salad is naturally gluten-free, ensuring everyone can enjoy it without worry. To cater to dairy-free diets, simply replace mayonnaise with avocado or a vegan mayo alternative, maintaining that creamy texture.

Vegan adaptations can be achieved by omitting egg and focusing on plant-based ingredients. Similarly, a low-carb adaptation could involve substituting traditional potatoes with cauliflower, creating a lighter version while replicating the beloved flavors.

Keto alternatives focus on minimizing carbohydrates further, using cream-based dressings instead of mayonnaise, while still providing a tantalizing salad. Paleo enthusiasts can substitute with a homemade dressing using whole food ingredients.

Low-FODMAP dieters may choose to omit onions and garlic from the recipe, while adding herbs to enhance flavors without the potential digestive stress.

Troubleshooting Guide

For texture issues, if your potatoes become too soft, ensure they are boiled just until fork-tender. A quick rinse under cold water will halt the cooking process.

If the flavor feels off-balance, adding a splash of vinegar or a pinch of salt can often remedy the blandness. Never hesitate to adjust your dressings based on taste preference.

When facing temperature problems, remember that chilling contributes to flavor development. If it’s too cold when serving, let it sit at room temperature for a short duration for the best taste.

For any equipment challenges, ensure you use non-stick pots for boiling to minimize sticking and maximize even cooking.

Ingredient substitutions may alter taste and texture, so always adjust with caution and start slow when introducing alternatives in the recipe for the best results.

Timing concerns come down to allowing enough time for the salad to chill and flavors to merge, so plan adequately if serving for occasions.

Recipe Success Stories

Many readers have shared how this Amish potato salad has become a sought-after dish during their family gatherings. Its rich flavor and satisfying texture resonates, leading to requests for the recipe from friends and family alike.

Variations inspired by this recipe have also emerged, with readers adding in their personal touches, such as hard-boiled eggs or pickled veggies, showcasing the flexibility of this beloved dish.

Adaptation stories abound as many adjust ingredients based on dietary needs, demonstrating the recipe’s versatility across different preferences and cultural influences.

Photography tips for this potato salad often include emphasizing its creamy textures and vibrant colors, ensuring that dish captures the attention and entices everyone present.

Frequently Asked Questions

Can I make this potato salad vegan?
Yes! You can easily substitute the mayonnaise with a vegan alternative or mashed avocado to keep it creamy without using animal products.
How long can I store leftovers?
Typically, Amish potato salad can be stored in the refrigerator for about 3 to 5 days when placed in an airtight container.
Can I freeze Amish potato salad?
It’s not recommended to freeze potato salad containing mayonnaise, as it tends to separate when thawed.
How can I spice up the flavor?
You can add a tablespoon of Dijon mustard to the dressing for an added tang, or incorporate fresh herbs for more flavor depth.
What are some great add-ins?
Consider adding diced pickles, sweet relish, or even bacon for a smoky flavor that complements the creamy potatoes perfectly.
How do I keep the potatoes from browning?
To prevent browning, add a little lemon juice to the cooked potatoes immediately after draining as it will help preserve their color.
Can I use other potatoes?
Although Yukon Gold and Red Bliss are best, you can use any waxy or all-purpose potatoes as they hold up well in salads.
Is this recipe gluten-free?
Absolutely! This Amish potato salad is naturally gluten-free, making it suitable for those with gluten sensitivities.
What’s the best way to reheat potato salad?
We recommend serving it cold rather than reheating. However, if you must, warm it gently while avoiding overcooking.
Can I make this salad the night before?
Yes! Making it the night before allows flavors to meld beautifully and enhances the overall taste when served chilled the next day.

Additional Resources

If you loved this Amish potato salad, you might want to explore related recipes like creamy coleslaw or macaroni salad, which are also irresistible potluck staples.

For more in-depth technique guides, check on our resources about efficient potato preparation or mastering mayonnaise from scratch that will help elevate your culinary skills.

Ingredient information can be beneficial for selecting the freshest produce, so consider local farmers’ markets, where seasonal variations enhance the overall flavors.

If kitchen equipment is a concern, seek recommendations for non-stick pots or quality mixing bowls that can simplify the cooking process and improve outcomes each time.

Join the Conversation

Sharing your experience with this Amish potato salad on social media not only spreads joy but also inspires others to try it out and share their variations. We encourage you to upload pictures alongside your own tweaks, further enriching the community’s love for food.

Are you proud of your culinary skills? Share your reviews and modifications, enriching discussions on how to enhance this comforting dish. Finally, engage in our community by suggesting your favorites; let’s connect over the love of great cuisine!

The Recipe

Amish Potato Salad

Serves: 8 servings

Prep Time: 20 mins

Cook Time: 30 mins

Total Time: 50 mins

Kitchen Equipment Needed

  • Large pot
  • Colander
  • Mixing bowl
  • Knife
  • Cutting board
  • Spoon for mixing

Ingredients

  • 2 lbs potatoes, peeled and diced
  • 1 cup mayonnaise
  • 2 tablespoons mustard
  • 1 cup chopped celery
  • 1/2 cup chopped onion
  • Salt and pepper to taste
  • 2 hard-boiled eggs, chopped (optional)

Directions

  1. In a large pot, bring salted water to a boil.
  2. Add the diced potatoes and cook until fork-tender, approximately 15-20 minutes.
  3. Drain the potatoes and allow them to cool in a colander.
  4. In a mixing bowl, combine mayonnaise, mustard, salt, and pepper.
  5. Once the potatoes are cool, add them to the dressing mixture along with chopped celery, onion, and hard-boiled eggs if desired.
  6. Gently mix until well combined ensuring the potato pieces are preserved.
  7. Refrigerate for at least one hour before serving for best flavor.

Recipe Notes

  • Feel free to adjust the spices according to taste.
  • If desired, incorporate additional vegetables like chopped pickles for added flavor.
  • This salad tastes best when made ahead of time and allowed to chill in the fridge.

Easy Mini Bloomin Onions with Crispy Batter

Mini Bloomin’ Onions: A Delightful Appetizer Experience

⚖️
Difficulty
Medium

⏲️
Prep Time
30 mins

🕒
Cook Time
15 mins

⏱️
Total Time
45 mins

🍽️
Servings
4 servings

Mini Bloomin’ Onions are an irresistible treat that transform the humble onion into a gourmet delicacy. When fried to a crispy perfection, these bite-sized marvels unfold in a delightful manner that not only pleases the palate but also the eyes. Plunge into a mouthwatering experience where each onion petal is coated in a savory batter, then deep-fried to golden brown bliss, creating a delicious crunch on the outside while remaining soft and flavorful on the inside.

These Mini Bloomin’ Onions are ideal for parties, game nights, or simply to enjoy as a comforting snack at home. The lusciousness of the onions pairs perfectly with a zesty dipping sauce, making every bite tantalizing. Whether you are watching the big game or hosting a barbecue, these appetizers will surely be the hit of the gathering, leaving everyone wanting more.

Quick Recipe Highlights

  • Flavor Profile: Mini Bloomin’ Onions offer a perfect balance of sweet onion flavor and savory batter, enhanced by spicy dipping sauce.
  • Texture: Each piece provides a satisfying crunch with a tender onion inside, creating a delightful contrast that enhances the eating experience.
  • Aroma: The aroma of freshly fried onions is simply intoxicating, mingling with the scent of spices from the batter.
  • Visual Appeal: Served as a bouquet of golden petals, these appetizers boast an enticing look that beckons guests to dig in.
  • Skill Level Needed: This recipe is approachable for amateur cooks, yet it provides enough challenges to make it an exciting culinary project.
  • Special Equipment: A deep fryer or heavy pot is necessary for frying, ensuring even cooking and crisp results.

Recipe Overview

  • Difficulty Level: This recipe is categorized as medium difficulty due to the need for frying and creating a complex batter.
  • Category: Perfect for appetizers, snacks, or party food that will undeniably impress guests.
  • Cuisine: This dish draws inspiration from classic American fare, echoing flavors often found in Southern cooking.
  • Cost: Ingredients are generally affordable, making this a budget-friendly option for a crowd-pleasing dish.
  • Season: Great for any season but shines particularly in summer for outdoor gatherings.
  • Occasion: Ideal for celebrations, game days, or casual get-togethers with family and friends.

Why You’ll Love This Recipe

Mini Bloomin’ Onions offer a rich taste and enticing texture that will make them a favorite among your guests. The crispy batter provides an engaging crunch, while the sweet onion flavor emerges with every bite, offering a satisfying contrast that is hard to resist. Not only are they delicious, but these onions also bring a visual element that elevates any meal or party spread.

In addition to their taste, Mini Bloomin’ Onions are highly convenient to prepare. The ingredients are straightforward, and the cooking process is relatively quick, making them a go-to recipe when you’re short on time but still want to impress. You can easily prepare the batter in advance, allowing for a smoother cooking experience when guests arrive.

Beyond flavor and convenience, this recipe possesses nutritional advantages. Onions are packed with vitamins and minerals that offer health benefits while being low in calories. Additionally, frying these onions can be done using healthier oils or cooking methods like air frying, allowing for a more nutritious take on this indulgent treat.

The social and entertaining value of Mini Bloomin’ Onions is immense. They spark conversation and invite guests to gather around as they pull apart the crispy petals. As a shared dish, they foster a sense of community and enjoyment during any occasion. Paired with a festive dipping sauce, these appetizers are sure to become a focal point of your gathering.

Cost-effectiveness adds an advantageous layer to this dish. Using only a few ingredients, Mini Bloomin’ Onions can cater to many without stressing your budget. This affordability coupled with their impressive presentation makes them a pragmatic choice for gatherings, ensuring that everyone leaves satisfied and delighted.

Historical Background and Cultural Significance

The Mini Bloomin’ Onion’s origin can be traced back to the popular onion blossom appetizer, which gained fame in the United States during the late 1980s. Its unique presentation and the spectacle of “bloomin'” onions quickly captivated the hearts and palates of diners across the country, particularly in the Southern states.

Culturally, this dish embodies the spirit of American casual dining, where food is meant to be shared and enjoyed with friends and family. The dish represents the rich culinary tradition of using readily available ingredients to create something extraordinary. It showcases the creativity found in American cuisine, often aiming to enhance simple ingredients through innovative cooking techniques.

As the recipe has evolved, variations have emerged, with some adapting different seasonings and dipping sauces to suit personal preferences. The evolution from large blooms to mini versions highlights the desire for bite-sized portions in contemporary dining. Furthermore, this transformation has made the appetizer more accessible for gatherings and parties.

Regional variations also exist. Some places have introduced creative spins, like incorporating spicy seasonings or unique dipping sauces, reflecting local flavors and preferences. Such adaptations indicate how the Mini Bloomin’ Onion continues to inspire creativity, encouraging cooks to experiment while retaining the essence of comfort food.

Ingredient Deep Dive

Onions are the star of this Mini Bloomin’ Onion recipe. They are not only a staple in kitchens worldwide but carry significant cultural meaning, often representing unity and community in various cuisines. Nutritionally, onions are beneficial, rich in antioxidants, and have anti-inflammatory properties. When selecting onions, look for firm, unblemished ones, and store them in a cool, dry place to maintain freshness. In the absence of onions, leeks or shallots could serve as tasty alternatives.

Flour is the binding agent in the batter. Whole wheat flour provides a nuttier flavor and additional nutrients compared to all-purpose flour. Experimenting with different types of flour can yield varying textures and tastes in the final product. Make sure to store unused flour in a cool environment to maintain its shelf life. If you need a gluten-free option, almond flour or a gluten-free flour blend can work well.

Spices such as paprika, garlic powder, and cayenne pepper are crucial for flavoring the batter. They not only enhance the taste but also give the dish its unique character. Herbs and spices have been used in diverse cultures for centuries, serving both culinary and medicinal purposes. When selecting spices, ensure they are fresh and aromatic. Storage should be in airtight containers away from direct sunlight to retain their potency.

Common Mistakes to Avoid

  • Not Using the Right Onion: Ensure you use a firm onion such as a Vidalia or a Texas sweet onion for the best results.
  • Overcrowding the Fryer: Fry only a few at a time to avoid temperature drops, which can lead to soggy batter.
  • Incorrect Oil Temperature: Ensure the oil is heated to the right temperature (around 350°F) to achieve a crispy exterior.
  • Underseasoning the Batter: Don’t skimp on spices; they are essential for flavor and elevating the overall taste.
  • Cutting the Onion Incorrectly: Make sure to make deep cuts without slicing through the root to keep petals attached.
  • Not Letting the Batter Rest: Allowing the batter to sit helps improve texture and adhesion to the onion.
  • Skimping on Dipping Sauce: A flavorful sauce enhances the experience, so don’t forget to create one that complements the dish.
  • Not Draining Excess Oil: Place fried onions on a paper towel to remove unnecessary grease for a better texture.
  • Serving Cold: These are best enjoyed fresh and hot from the fryer for maximum crunchiness.
  • Not Pairing with the Right Drinks: Pairing with beverages can enhance flavors; consider light beers or fruity cocktails.

Essential Techniques

Frying is a key technique for creating delectable Mini Bloomin’ Onions. Proper frying is important to achieve that desired crunch. Make sure to use a thermometer to monitor the oil’s temperature to avoid soggy results. Opt for a heavy pot or deep fryer to ensure even cooking, and remember to let the oil return to temperature between batches for consistency.

Batter-making involves blending dry and wet ingredients until smooth. This step is crucial as a well-mixed batter ensures even coating and flavor throughout the onion. Be cautious not to overmix, as this can lead to a dense texture instead of the crispy finish we desire. A light, airy batter is essential for that perfect bite.

Pro Tips for Perfect Mini Bloomin’ Onions

1. Choose the Right Onions: Vidalia or sweet onions work best for a lovely, mild flavor that pairs well with the crispy batter.

2. Let the Batter Rest: Allow your batter to sit for about 15 minutes before use. This helps create a lighter texture and better adherence to the onions.

3. Maintain Oil Temperature: Use a deep-frying thermometer to keep track of the oil temperature to ensure perfect frying without burning.

4. Cut Evenly for Uniform Cooking: When slicing your onions, ensure your cuts are even to promote consistent cooking times across all petals.

5. Experiment with Dipping Sauces: Pair your Mini Bloomin’ Onions with various dipping sauces, like ranch or spicy mayo, to enhance flavor combinations.

6. Drain on Paper Towels: After frying, place your onions on paper towels to absorb excess oil, ensuring they remain crispy.

7. Add Herbs for Extra Flavor: Incorporate fresh or dried herbs into your batter for a unique twist on flavor profiles.

8. Serve Immediately: For the best experience, serve your Mini Bloomin’ Onions right after frying for maximum crispness and warmth.

Variations and Adaptations

Regional variations of Mini Bloomin’ Onions include incorporating local spices or aromatics tailored to specific culinary traditions. For example, adding Cajun spices can amplify layers of flavor while giving a Southern twist.

Seasonal adaptations might include garnishing with fresh herbs or toppings reflective of current produce, such as chives or spring onions in the spring season. Similarly, a BBQ sauce dip in summer can add a unique twist, complementing the outdoor grilling ambiance.

Dietary modifications are also possible. For those needing gluten-free options, substituting regular flour with rice flour or a gluten-free blend can yield tasty results. Create a vegan version by using a plant-based coating or batter while ensuring sauces maintain a dairy-free profile.

Flavor variations, such as adding cheese into the batter or topping them with a sprinkle of Parmesan post-frying, can cater to different cuisines and cravings. These small tweaks can transform the fundamental dish into something personalized.

Presentation alternatives can range from serving on a rustic wooden platter to garnishing with vibrant greens, appealing to the eye while making it a stunning centerpiece at any gathering.

Serving and Presentation Guide

Plating Mini Bloomin’ Onions with care enhances their visual appeal. Consider using a multi-tiered serving tray to give a beautiful height to the presentation. Surround the onions with dipping sauces in small bowls or ramekins for added aesthetic flair.

Garnishing ideas include fresh herbs like parsley or chives to create vibrant color contrast against the golden hue of the onions. A squeeze of lemon or lime adds brightness while enhancing the overall experience.

Traditional accompaniments might involve classic dipping sauces such as ranch or spicy ketchup to elevate flavors. For modern suggestions, think about pairing them with avocado dip or homemade aioli to keep things fresh and interesting.

Temperature considerations are crucial: serve them piping hot for the best crunch. If serving at an event, use warming trays to keep the onions warm without overcooking or drying them out.

When it comes to portion control, serve smaller batches to avoid waste and keep guests returning for more, enticing them back for another delicious bite.

Wine and Beverage Pairing

When it comes to wine pairings, consider a crisp white wine like Sauvignon Blanc or a light-bodied Chardonnay, which can complement the onion’s sweetness while refreshing the palate. For red wine lovers, a light Pinot Noir can provide a nice contrast without overpowering the flavors.

Non-alcoholic alternatives such as sparkling water with a slice of citrus or a refreshing iced tea can elevate the dining experience, particularly during summer gatherings. These options cleanse the palate and add a touch of sophistication to the table.

For coffee lovers, a lightly roasted coffee can enhance the meal’s engaging flavors without overwhelming the taste buds. Consider making an espresso-based drink for a delightful finish to complement the meal.

Temperature considerations also apply when serving beverages. Chilling whites and sparkling beverages beforehand ensures they maintain their refreshing qualities, while serving reds slightly below room temperature can keep the experience balanced.

Storage and Shelf Life

Storing Mini Bloomin’ Onions requires careful attention to maintain their freshness. The best method is to keep them in an airtight container in the refrigerator for up to 2 days after frying. However, take caution as they tend to lose crispness over time.

For freezing, ensure the fried onions cool completely before placing them in a freezer-safe bag. They can be frozen for up to 2 months. When ready to eat, bake them from frozen at a high temperature to restore some of their original crispiness.

Signs of spoilage include an off-smell, changes in texture, or discoloration. It’s essential to discard any that exhibit these qualities to ensure food safety.

To reheat, place the onions in a preheated oven (about 375°F) for about 10-15 minutes until heated through. This method retains texture far better than microwaving, which can leave them soggy.

Make Ahead Strategies

Creating a timeline when planning to make Mini Bloomin’ Onions can be incredibly beneficial. Chop onions and prepare the batter up to a day in advance. Store the sliced onions submerged in water with a splash of lemon juice to prevent them from browning.

After preparing the batter, store it in the refrigerator, allowing the flavors to meld and improving the dish’s depth of taste. However, remember to re-mix to ensure optimal consistency before use.

When assessing quality impact, consider keeping the batter covered until ready to fry to prevent it from thickening. This approach ensures that the batter maintains the right lightness when coating the onions.

For assembly tips, you can coat the onions just before frying to retain their crispness. Any leftover batter can be stored and used for other fried foods, reducing waste and enhancing your cooking repertoire.

If you envision a last-minute gathering, having pre-prepared elements makes the execution smooth. Fresh components like herbs or dips can be added just before serving to enhance the flavor profile further.

Scaling Instructions

If you need to halve the recipe, simply reduce the amount of onions and adjust the batter and spices accordingly. This scaling maintains the overall balance of flavors and textures, ensuring a consistent product.

Doubling or tripling the recipe means preparing larger batches, so consider using a deep fryer for efficient frying. Timing modifications may be necessary; frying may take slightly longer, so ensure each batch is checked for doneness adequately.

Equipment adjustments might include using a larger pot or frying vessel to accommodate increased yolk size. Ensure the oil quantity is sufficient for proper frying without overcrowding.

Storage considerations become paramount when scaling, so portion out leftovers into smaller airtight containers. This approach ensures that leftovers maintain quality, making them easy to reheat on subsequent days.

Nutritional Deep Dive

These Mini Bloomin’ Onions offer a satisfying treat while permitting indulgence while still having some nutritional value. Each onion contributes a variety of vitamins, minerals, and dietary fiber, making them a delightful addition to your diet when enjoyed in moderation.

The macros are relatively straightforward, with the primary contributors being carbohydrates from the flour and natural sugars from the onions. When fried, the fat content increases, so being mindful of portion sizes can help maintain a balanced approach to indulgence.

Micronutrient analysis reveals essential vitamins such as vitamin C, which bolsters the immune system while contributing to overall well-being. Each serving provides a wholesome option that can fit comfortably into most diets.

Health benefits associated with onions, such as their anti-inflammatory properties, support digestive health and have linked positive effects on heart health. Enjoying them in this fried format encourages a balance of indulgence and health-conscious eating habits.

Weight management tips center around enjoying Mini Bloomin’ Onions in moderation and as part of a broader, balanced meal plan. Emphasizing sharing at gatherings can reduce the temptation to overindulge while still indulging in delicious flavors.

Dietary Adaptations

Adapting Mini Bloomin’ Onions to cater to gluten-sensitive individuals can be accomplished by substituting all-purpose flour with gluten-free options such as almond flour or a certified gluten-free flour blend, ensuring all ingredients reflect this requirement.

For dairy-free adaptations, use non-dairy milk alternatives when creating the batter. This adjustment ensures that those with lactose intolerance can still enjoy these delectable treats without missing out on flavors.

Vegans can follow suit by using plant-based ingredients, including replacing eggs in the batter with flaxseed or other egg substitutes, allowing this recipe to be enjoyed by a broader audience.

Low-carb dieters can get creative by using finely crushed pork rinds as a coating instead of traditional flour, maintaining the crunch without the carbs. This option minimizes the carbohydrate content while still delivering a satisfying crunch.

For those following keto or paleo diets, focusing on vegetable-friendly coatings and oils can promote flavor while ensuring dietary preferences are honored. The versatility of onion makes this dish a great fit across various dietary needs.

Troubleshooting Guide

Texture issues arise when the batter is either too thick or too thin. If the batter doesn’t adhere well, consider adjusting flour and liquid ratios to create a better consistency for the coating. Remember, a thicker batter often leads to a crispier outcome.

Flavor balance can sometimes be off if the batter lacks seasoning. Taste the batter before coating the onion and make adjustments accordingly. Adding spices incrementally ensures the right level of flavor without overpowering the sweet onion taste.

Temperature problems often result in either undercooked centers or soggy exteriors. Utilize a cooking thermometer to maintain oil temperature within the 350°F range for the desired interaction between heat and the surface of the mini onion.

Equipment challenges can occur if your fryer is not functioning properly. Regularly check the settings and ensure the oil is heated evenly to avoid temperature fluctuations that can lead to inconsistent cooking quality.

Ingredient substitutions may create flavor shifts; it’s critical to understand how each component interacts. Substituting spice blends or types of flour can alter results, so weigh alternatives thoughtfully.

Timing concerns come into play if preparation steps take longer than expected; managing your cooking timeline effectively and prepping in advance can help this issue significantly. Planning allows for a smoother cooking process during busy gatherings.

Recipe Success Stories

Community feedback often emphasizes the crowd-pleasing nature of Mini Bloomin’ Onions. Many readers share successful stories from their gatherings where these appetizers stole the show and delighted guests, leading to recipe requests.

Through adaptations, readers have experimented with incorporating personal flavors into the recipe, such as adding barbecue seasoning or spicy elements. These variations have generated excitement and exploration of the dish, enhancing its appeal.

Photography tips abound as many home cooks have shared images of their beautiful presentations on social media platforms, showcasing the visual splendor of the fried onions. These stories often inspire others to attempt the recipe themselves.

Suggestions from readers frequently include alternative dipping sauces or side dishes that complement these onions beautifully, proving that variety is the spice of culinary life. Feedback on which dips excel with the bloomin’ onions can provide inspiration in enriching the overall meal experience.

The vast range of adaptations and variations has allowed readers to customize the dish to fit their specific tastes. Many have showcased how these fried treats continue to evolve, highlighting each cook’s creativity and ability to make cooking a fun family activity.

Frequently Asked Questions

Can I bake Mini Bloomin’ Onions instead of frying them?

While frying gives the best texture and flavor, you can bake them by placing the battered onions on a baking sheet and spraying them lightly with oil. Bake at 425°F for about 20-25 minutes or until golden and crispy.

What type of onions is best for this recipe?

Sweet onions like Vidalia or Texas sweet onions are recommended for their mild flavor and sweetness, lending an excellent balance to the crispy batter.

Can I use a different flour for the batter?

Yes! Whole wheat flour or gluten-free flour blends can be utilized if necessary. Just be sure to adjust the liquid ratios to achieve the right batter consistency.

How can I make the batter more flavorful?

Add additional spices or herbs to the batter, such as garlic powder, cayenne pepper, or fresh herbs, to enhance flavor complexity.

Can these bloomin’ onions be made ahead of time?

Yes, you can prepare the onions and batter in advance, and store them in the refrigerator until you are ready to fry them. Just make sure to coat them just before cooking.

What is the best way to store leftovers?

Store leftover Mini Bloomin’ Onions in an airtight container in the refrigerator for up to 2 days. Note that they may lose some crispness.

Can I freeze Mini Bloomin’ Onions?

Yes, you can freeze them after frying. Lay them on a baking sheet to freeze individually, then transfer to a freezer-safe container. They can be reheated in the oven directly from frozen.

Is there a vegetarian dipping sauce you recommend?

A classic ranch dressing or a spicy mayo works well as a vegetarian option that complements the flavors of the bloomin’ onions perfectly.

How do I get a perfect bloom when cutting the onion?

Ensure to make deep cuts while leaving a small section of the root intact. This keeps the onion petals connected while allowing them to “bloom” during cooking.

Can I change the heat level of the spices in the batter?

Absolutely! Adjust the amount of cayenne or introduce other spices according to your heat preference. Taste the batter as you mix to achieve a personalized flavor.

Are there any health benefits to onions?

Yes! Onions are high in antioxidants, vitamins, and minerals, contributing to heart health and providing anti-inflammatory benefits.

Additional Resources

For those eager to expand their culinary repertoire, consider exploring related recipes such as Onion Rings, Fried Jalapeño Poppers, or Vegetable Tempura, which also employ battering and frying techniques.

Look for technique guides on frying methods to perfect your skills, learn about various cutting techniques for vegetables, or delve into seasoning blends that can elevate your dishes.

Ingredient information is also crucial; familiarize yourself with onion varieties for optimal flavor and nutrition profiles for your mini-blooming onions.

Equipment recommendations can enhance your cooking experience. Investing in a deep fryer or a heavy, cast-iron pot can significantly improve frying results and even cooking.

Seasonal variations can be phenomenal—experiment with locally available vegetables that can be prepared similarly, providing delightful alternatives throughout the year.

Join the Conversation

We’d love to hear your experiences with Mini Bloomin’ Onions! Join the conversation by sharing your photos and tips on social media using our dedicated recipe hashtag. Connect with others who enjoy cooking and exchange variations that make this dish unique to your culinary style.

Reader reviews are invaluable. Leave feedback about your culinary journey with this recipe to encourage others. Did you try a new dipping sauce or ingredient? Share your success stories and inspire fellow cooks!

We invite community engagement in discussing favorite dip pairings, presentation ideas, and adaptations to accommodate dietary preferences. Each cooking experience brings a new story, so let’s celebrate the creativity in cooking together!

Engage in recipes that spark conversation and ignite joy as you share your love for food with loved ones. Together, we can keep the spirit of culinary exploration alive and well!

The Recipe

Mini Bloomin’ Onions

Serves: 4

Prep Time: 30 mins

Cook Time: 15 mins

Total Time: 45 mins

Kitchen Equipment Needed

  • Deep fryer or heavy pot
  • Cooking thermometer
  • Mixing bowl
  • Sharp knife
  • Paper towels

Ingredients

  • 2 large sweet onions
  • 1 cup all-purpose flour
  • 1 teaspoon paprika
  • 1 teaspoon garlic powder
  • ½ teaspoon cayenne pepper (optional)
  • 1 cup buttermilk
  • Salt and pepper to taste
  • Vegetable oil for frying

Directions

  1. Peel and slice the onions to create deep cuts resembling a flower, leaving the root intact.
  2. In a large bowl, combine flour, paprika, garlic powder, cayenne, salt, and pepper.
  3. In another bowl, whisk the buttermilk until smooth.
  4. Dip each onion into the buttermilk and then into the flour mixture, coating evenly.
  5. Heat oil in a deep fryer to 350°F.
  6. Fry each onion for about 5-7 minutes or until golden brown and crispy.
  7. Remove and drain on paper towels and serve hot with dipping sauce of choice.

Recipe Notes

  • Feel free to experiment with spices and dipping sauces to personalize your dish.
  • For a healthier variation, consider air frying instead of deep frying.
  • Store any leftovers in an airtight container in the refrigerator for up to 2 days.

Crispy Homemade Onion Rings Recipe – Light & Crunchy

Crispy Onion Rings: A Perfect Crunchy Delight

⚖️
Difficulty
Easy

⏲️
Prep Time
15 mins

🕒
Cook Time
10 mins

⏱️
Total Time
25 mins

🍽️
Servings
4 servings

Crispy onion rings are the ultimate indulgence for snack lovers and partygoers alike. With their golden-brown exterior and sweet, tender onion inside, these crunchy delights are sure to please everyone. Whether served as a side with a juicy burger or enjoyed on their own with a zesty dipping sauce, crispy onion rings combine the perfect balance of flavors and textures. The satisfying crunch followed by the soft bite of onion creates an irresistible taste experience that leaves everyone wanting more.

Making crispy onion rings at home is simpler than you might think! With just a few ingredients, you can bring this classic appetizer from your favorite restaurant into your kitchen. This recipe will guide you step-by-step in creating perfectly crispy onion rings that are not only delicious but also easy to prepare. So grab your apron, and let’s get started on this crunchy culinary adventure!

Quick Recipe Highlights

  • Flavor Profile: These onion rings are seasoned to perfection, with a savory crunch that complements the sweetness of the onions, creating a harmonious balance of taste.
  • Texture: Expect a satisfying crunch when you bite into these onion rings, followed by the soft, juicy texture of the onions inside.
  • Aroma: The delightful aroma of fried onions wafts through the kitchen, making it hard to resist tasting these crispy treats right away.
  • Visual Appeal: Golden, crispy, and alluringly tempting, these onion rings are not only delicious but stunning to present.
  • Skill Level Needed: This dish is easy enough for beginners to master, requiring basic frying techniques.
  • Special Equipment: All you need is a deep frying pan, a slotted spoon, and a cutting board for preparing this classic dish.

Recipe Overview

  • Difficulty Level: Making crispy onion rings is straightforward and accessible to cooks of all levels. With simple preparation and frying, you can achieve spectacular results with minimal effort.
  • Category: Perfect as an appetizer, side dish, or snack, crispy onion rings can fit into many meal categories and are ideal for any occasion.
  • Cuisine: Rooted in American cuisine, onion rings have become a beloved staple in diners and fast-food establishments across the globe, a must-try for fried food enthusiasts.
  • Cost: This recipe is budget-friendly, as the primary ingredients—onions, flour, and oil—are inexpensive and widely available.
  • Season: Crispy onion rings are versatile and can be enjoyed year-round, making them suitable for summer barbecues, winter warmth, or any gathering.
  • Occasion: Ideal for parties, game days, or casual family dinners, crispy onion rings are perfect for sharing and celebrating!

Why You’ll Love This Recipe

Crispy onion rings appeal to both taste and texture lovers. The harmonious blend of savory crunch on the outside and sweet, juicy onion on the inside creates a delectable flavor profile that tantalizes the palate. Each bite offers a satisfying crunch, making them an addictive snack for everyone.

The convenience of this recipe is another reason it stands out. With only a handful of ingredients and minimal prep time, you can whip up these delightful onion rings in under 30 minutes. This makes them perfect for unexpected guests or as a quick addition to any meal. Plus, they pair fabulously with an array of sauces, allowing for endless customization.

Not only do these crispy delights taste amazing, but they also offer nutritional benefits. Onions are rich in essential vitamins and antioxidants that support overall health. Coupled with a moderate portion size, these onion rings can fit into a balanced lifestyle when enjoyed in moderation.

Social gatherings become more fun with crispy onion rings! They serve as a fantastic finger food that everyone can enjoy. In gatherings, sharing a basket of crispy onion rings encourages conversation and bonding over a shared love of delicious food, enhancing the overall experience.

Lastly, this recipe is cost-effective, allowing you to enjoy restaurant-quality onion rings at home without breaking the bank. With simple, affordable ingredients, making crispy onion rings can easily become a regular part of your meal rotation without straining your budget.

Historical Background and Cultural Significance

The origin of onion rings traces back to early American cuisine, where onions were plentiful and a popular vegetable. Various versions of deep-fried onions appeared in recipes from the 1930s, with differing methods and seasonings, showcasing regional twists on the classic idea of battered and fried vegetables.

Culturally, onion rings gained significance as a popular side dish in diners and fast-food restaurants, symbolizing comfort food. They evoke nostalgia and warmth, reminding many of lazy afternoons spent enjoying casual meals with family and friends.

Over the decades, the recipe for crispy onion rings has evolved. From simple battered rings to gourmet versions served in upscale restaurants, the versatility of this dish has kept it a staple in the culinary world, adaptable for various tastes and occasions.

Regionally, variations of onion rings exist, incorporating local ingredients or unique cooking methods. For instance, some regions prefer a thicker batter, while others may season their onion rings with spicy elements, showcasing the diversity and creativity that this beloved dish inspires among cooks.

Ingredient Deep Dive

Onions

Onions hold profound cultural significance across various cuisines, often used to build flavor bases in many dishes. This pungent vegetable has been cultivated for millennia, symbolizing sustenance and tradition.

Rich in vitamins and beneficial compounds, onions offer numerous nutritional benefits, including antioxidants known to combat inflammation and reduce the risk of chronic diseases. When selecting onions for your rings, look for firm bulbs without soft spots. For storage, keep them in a cool, dry place to prolong their freshness.

Flour

Flour serves as the backbone for the batter in crispy onion rings. It not only provides structure but also contributes to the delightful crunch. In many cultures, flour has been an essential pantry item, necessary for baking and cooking.

Nutritionally, flour is a source of carbohydrates and can be fortified with additional nutrients. To select the best flour, choose all-purpose or high-protein options for optimal crispiness. Keep flour stored in an airtight container in a cool, dry place to maintain its quality.

Oil

Oil is crucial for frying, providing the heat that transforms the batter into a crispy layer. Different oil types can influence the flavor and health aspect of your fried goodies.

When choosing oil for frying, go for oils with high smoke points, such as vegetable or canola oil, to prevent burning. Store cooking oil tightly sealed in a cool, dark place, and check for rancidity before use.

Common Mistakes to Avoid

  • Overcrowding the frying pan: When you add too many onion rings at once, the temperature of the oil drops, resulting in soggy instead of crispy rings. Work in batches for the best results.
  • Failing to heat the oil properly: If the oil is not hot enough, the onion rings will absorb grease and become oily. Use a thermometer to ensure the ideal frying temperature is around 350°F (175°C).
  • Using old or soft onions: Fresh, firm onions provide the best texture and flavor. Make sure to choose onions that are crisp and free of spots.
  • Inconsistent sizes: Cut the onion rings to uniform thickness to ensure even cooking. Thicker rings take longer to fry, while thinner ones may burn.
  • Inadequate batter: Ensure the onion rings are fully coated in the batter before frying. Insufficient batter leads to inconsistent texture and flavor.
  • Skipping the resting phase: After battering, allow the onion rings to rest for a few minutes to help the coating adhere during frying.
  • Not draining excess oil: Placing fried onion rings on paper towels helps absorb any excess oil, keeping them crispy. Don’t skip this crucial step!
  • Ignoring seasoning: Season the batter before coating the rings for an extra flavor punch. Adding spices boosts the overall taste.

Essential Techniques

Frying: Frying is the key technique for achieving crispy onion rings. Ensure the oil is at the right temperature for a perfectly golden exterior. Monitor the oil closely, and adjust the heat as needed to maintain a consistent frying environment. Use a thermometer for precision.

Battering: Properly coating the onion rings in batter is vital for achieving a crispy texture. Ensure an even layer without excess drips, and allow them to rest for a bit before frying. Feel free to experiment with different seasonings for added flavor.

Pro Tips for Perfect Crispy Onion Rings

1. **Use chilled ingredients**: For extra crunch, use chilled water or buttermilk in the batter. This helps create a crispier coating.
2. **Double dip for extra crispy**: For an even thicker crust, dip the onion rings in the batter, let them rest, and then dip them again before frying.
3. **Season generously**: Season your flour with spices like paprika, garlic powder, and pepper to elevate the flavor of your onion rings.
4. **Test oil readiness**: Before frying, drop a small piece of onion into the oil. If it sizzles and quickly floats to the top, the oil is ready.
5. **Maintain oil temperature**: Adjust the heat as you fry to keep the oil temperature consistent, ensuring even cooking and reducing sogginess.
6. **Serve immediately**: Enjoy your crispy onion rings right away for the best taste and texture. They are best served fresh out of the fryer!
7. **Experiment with flavors**: Customize your onion rings by adding herbs and spices to the batter to match your taste preferences.
8. **Try different onions**: While yellow onions are classic, experimenting with sweet onions or red onions can result in unique flavor profiles.

Variations and Adaptations

Crispy onion rings can be adapted to suit different regional tastes by using various types of flour; for example, using cornmeal for a Southern twist can enhance texture.

Seasonal adaptations, such as incorporating pumpkin spice seasoning in fall, can change the flavor profile to match the season. For those on special diets, gluten-free flour can be substituted to create a crispy treat that everyone can enjoy.

For an exciting flavor variation, try adding cheese powder to the batter for an extra cheesy punch. Texture modifications, such as selecting thicker cut onions or tossing the fried rings in a spicy seasoning blend, can vary the final result.

Presentation alternatives, like stacking the onion rings in a stylish way or serving them in a cone with a variety of dipping sauces, can elevate the dining experience.

Serving and Presentation Guide

Plating crispy onion rings can enhance their appeal. A simple yet effective technique is to stack them in a pyramid shape on a clean, colorful plate. Garnish with a sprinkle of parsley or chili flakes for color and a dash of flavor.

For an inviting serving suggestion, consider placing a small bowl of dipping sauce at the center of the onion ring display. Common accompaniments include ranch dressing, spicy mayo, or ketchup—each provides a different flavor experience.

Temperature considerations are important; serve onion rings hot to retain their crunchiness. Portion control is also crucial; aim for 5-6 onion rings per person as a side or appetizer, adjusting based on the overall meal size.

Wine and Beverage Pairing

When pairing beverages with crispy onion rings, consider light-bodied wines like Sauvignon Blanc or Pinot Grigio, which complement the savory flavors without overpowering them. Their acidity can balance the fried richness, making for a delightful experience.

For those preferring non-alcoholic options, craft beers, especially pale ales with a hoppy finish, work well with onion rings. Alternatively, consider a refreshing lemonade or iced tea, both of which provide a zesty contrast to the crispy texture.

If coffee or tea is more your style, a cold brew coffee can enhance the experience with its rich undertones, while a chai tea offers a spiced warmth that pairs beautifully with the flavor of fried onions.

Storage and Shelf Life

To store leftover crispy onion rings, let them cool completely, then place them in an airtight container. Storing in the refrigerator can extend their freshness for up to 2 days.

For reheating, avoid microwaving, which can make them soggy. Instead, reheat in the oven at 375°F (190°C) for about 10-15 minutes until warmed through and crispy again.

If you plan to freeze, place fried onion rings on a baking sheet to freeze individually before transferring them to a freezer-safe container. When ready to eat, reheat directly from the freezer in the oven for best results, maintaining their crunch.

Make Ahead Strategies

To streamline your cooking process, you can prepare the batter and slice the onions ahead of time. Store the sliced rings submerged in cold water to prevent browning before frying.

For maximum freshness, it’s best to fry the onion rings the same day they are prepared. However, if you want to make them in advance, fry them lightly and finish cooking when you’re ready to serve.

Assembly tips include laying out your frying station so everything is within reach. This will help you quickly coat and fry the onion rings without pausing mid-process.

Adding fresh elements, such as garnishing with herbs or serving with a new dip, can enhance the freshness when serving previously fried onion rings.

Scaling Instructions

If you want to adjust the quantity of your crispy onion rings, you can easily halve or double the recipe. Halving the ingredients maintains the same frying time, while doubling may require additional batches due to frying space.

When scaling up, ensure your frying pan can accommodate the increased volume; larger pots or deep fryers might be necessary for optimal frying conditions.

Timing adjustments are crucial as well; while the cooking time per batch should remain consistent, be prepared for a slightly longer overall time when frying multiple batches.

For storage considerations, larger quantities may require multiple containers once cooled, ensuring even distribution of air flow to keep them crisp.

Nutritional Deep Dive

The macro breakdown of crispy onion rings typically includes carbohydrates from the flour, fats from the frying oil, and minimal protein. Understanding these components can help you enjoy them as a treat in moderation while balancing your meals.

Micronutrient analysis shows that while onion rings are generally low in vitamins, the onions themselves contribute some beneficial nutrients such as vitamin C and B vitamins. Understanding these can allow for better dietary considerations when enjoying fried foods.

Health benefits of onions, when not over-fried, include antioxidants and anti-inflammatory properties. Moderation is key; pairing onion rings with a side salad or healthy options can create a more balanced meal.

Dietary considerations are important for those managing caloric intake. Portion analysis suggests enjoying a few rings alongside a protein-rich meal will contribute to a satisfying yet balanced plate.

If weight management is a goal, look for ways to enjoy this recipe baked rather than fried without sacrificing the taste, allowing for a healthier alternative.

Dietary Adaptations

For those following a gluten-free diet, substituting the flour with a gluten-free blend can create a comparable batter effect that still yields crispy onion rings.

For a dairy-free option, simply use water or an alternative milk for the batter. Many people following vegan diets can also enjoy onion rings using these adaptations.

Low-carb enthusiasts can experiment with almond flour or crushed pork rinds to achieve a crispy coating without the carbs associated with traditional flour.

Keto and paleo followers can further enjoy this dish by focusing on high-fat frying oils and exploring creative dips that align with their dietary guidelines.

For those needing low-FODMAP options, choosing the type of onion carefully, like using green onions, can create a satisfying dish without triggering digestive sensitivities.

Troubleshooting Guide

If your onion rings appear soggy, this often indicates that they were not fried in hot enough oil. Ensure the temperature reaches 350°F (175°C) for crispy results.

For flavor balance, if your onion rings taste bland, it may be time to re-evaluate your seasoning. Enhance the batter with spices to elevate curb appeal and taste vibrancy.

Temperature problems during frying can lead to uneven cooking. If your oil is too hot, the outside will brown while the inside remains raw; regulated heat is essential for optimal frying.

Equipment challenges, like using unsuitable pots for frying, can affect outcomes. Utilize a heavy-bottomed pot for better heat retention, ensuring even cooking.

If you find that substituting ingredients leads to undesired results, it’s important to maintain the proper ratios for optimal texture and flavor balance in your onion rings.

If timing concerns arise, especially when hosting events, prepare ingredients in advance. Keeping batter ready before frying allows for faster completion, making your event seamless.

Recipe Success Stories

Community feedback on crispy onion rings has highlighted their popularity; many readers note that this simple recipe transforms their gatherings into delightful culinary experiences.

Variations success stories speak to the adaptability of the recipe; one reader mentioned how adding a spicy twist turned a classic dish into a family favorite.

Adaptation stories reveal that some readers prefer to bake their onion rings. Inspired to create a healthier version, many found they still enjoyed satisfying crunchiness and taste.

Photography tips from community members emphasize focusing on natural lighting when snapping pics of golden onion rings, drawing attention to their appealing crunch and inviting color.

Sharing suggestions inspired several other cooks to experiment with their own twist on onion rings; feedback showcases how discussing food in a community enhances creativity and experience.

Frequently Asked Questions

Can I make crispy onion rings in advance?

While it’s best to enjoy onion rings fresh, you can prepare the batter and cut the onions in advance. Fry them right before serving for the best texture.

What type of onions work best?

Yellow onions are a classic choice for onion rings due to their sweetness and firmness. However, red onions or sweet onions can also be delightful alternatives.

Can I freeze crispy onion rings?

Yes, you can freeze cooked onion rings. Allow them to cool, freeze individually on a baking sheet, and then transfer to an airtight container for storage.

How can I reheat leftover onion rings?

Reheat in an oven set to 375°F (190°C) for about 10-15 minutes. This keeps them crispy without making them soggy.

What are some good dipping sauces for onion rings?

Popular dipping sauces include ranch dressing, BBQ sauce, and spicy mayo. Feel free to get creative with your own flavors!

Can I bake onion rings instead of frying?

Yes, baking is a healthier option. Simply coat your rings in the batter, place them on a baking sheet, and bake at 425°F (220°C) until crisp.

What are some common mistakes people make?

Common mistakes include overcrowding the frying pan, not using sufficiently hot oil, and neglecting to season the batter.

How do I make onion rings spicy?

Incorporate spices like cayenne pepper or chili powder into your batter for a spicy kick that complements the sweetness of the onions.

Can I make the batter vegan?

Yes, you can use plant-based milk and egg substitutes like flaxseed meal or applesauce to create a vegan batter without compromising on flavor.

How long will leftovers stay fresh?

Leftover onion rings can be stored in an airtight container in the fridge for about 2 days, but they are best enjoyed fresh!

Additional Resources

Explore related recipes like fried zucchini or tempura vegetables to broaden your fried food adventures. Alongside, check out technique guides for frying and batter-making to enhance your cooking skills.

Ingredient information can help you select the best produce to use not only for onion rings but for other dishes as well. Also, consider investing in quality frying equipment that will improve results and ease the cooking process.

Don’t forget to explore seasonal variations and adapt your crispy onion rings with fresh produce to elevate your meals throughout the year.

Join the Conversation

Share your experiences making crispy onion rings on social media to inspire others! Consider sharing your photography of the finished dish, along with variations you’ve tried, to engage with fellow food enthusiasts.

Encourage recipe reviews by inviting others to comment on their experiences and adaptations. Community engagement enhances the joy of cooking, bringing together diverse experiences and encouraging creativity in the kitchen.

Don’t hesitate to explore variations of this recipe, discussing tips and tricks with others who share a love for cooking crispy treats. Your experiences can contribute to a richer culinary community, allowing for shared learning and growth.

The Recipe

Crispy Onion Rings

Serves: 4 servings

Prep Time: 15 mins

Cook Time: 10 mins

Total Time: 25 mins

Kitchen Equipment Needed

  • Deep frying pan or pot
  • Slotted spoon
  • Cutting board
  • Thermometer (optional)
  • Baking sheet (for draining)

Ingredients

  • 2 large onions, sliced into rings
  • 1 cup all-purpose flour
  • 1 cup cold water or buttermilk
  • Salt and pepper to taste
  • Oil for frying

Directions

  1. Heat the oil in a deep frying pan to 350°F (175°C).
  2. In a bowl, mix flour, salt, and pepper.
  3. Dip each onion ring into the flour mixture, then into the cold water or buttermilk, and coat again in the flour mixture.
  4. Carefully place the coated rings into the hot oil, frying in batches until golden brown.
  5. Remove with a slotted spoon and drain on paper towels. Serve hot.

Recipe Notes

  • Feel free to season your oil with spices for added flavor.
  • For extra crunch, double dip your onion rings before frying.
  • Store leftovers in an airtight container for up to 2 days.