Take a break from your day and refuel with our delicious and satisfying lunch recipes! Whether you need a quick and easy meal, a light and healthy option, or something hearty to power you through the afternoon, we’ve got you covered.
From fresh salads and wholesome grain bowls to savory sandwiches, wraps, and comforting soups, our lunch ideas are perfect for busy weekdays, meal prep, and leisurely weekend meals.
Looking for something kid-friendly or on-the-go? Try our lunchbox-friendly meals, protein-packed bites, and make-ahead favorites that keep you full and energized all day. No more boring lunches—let’s make every midday meal exciting! 🥗🥪🍲
Rotel Sausage Dip
Table of Contents
Rotel Sausage Dip Spicy Creamy Twist – A Quick and Melty Delight
⚖️
Difficulty
Easy
⏲️
Prep Time
5 mins
🕒
Cook Time
15 mins
⏱️
Total Time
20 mins
🍽️
Servings
5
When I walked into the bustling farmers market in Brooklyn on a crisp Sunday morning, the aroma of fresh sausage wafting from a local stand immediately reminded me of the sizzling tagine nights in my mother’s kitchen back in Rabat. That scent, mixed with the sunny day and the sound of horns from the nearby train, inspired me to create a dish that captures the heart of Moroccan warmth while arriving at the pot in less than 20 minutes—a true Rotel Sausage Dip Spicy Creamy Twist that I’m excited to share.
The golden crust of the browned sausage gives a satisfying bite, while the succulent cream cheeses melt into a velvety base that swallows the tangy diced tomatoes with green chilies. Each spoonful of this hearty, savory sausage dip offers a relaxed crunch of fresh tomato, the heat of chili pepper, and the comfort of melted cheese—an explosion of textures that dances between smooth and crispy, delivering a festive flavor with the bright undertones of cumin that nod toward my Moroccan roots.
What sets this version apart is my custom touch: I fold in a touch of Kabyle spice seasoning right before microwaving, lending a subtle earthy perfume that is almost nostalgic. I also keep the paprika simmering on medium for just a minute to avoid burning the cheese. A common mistake is overcooking the bite, turning the cheese into an over-nihilized goo, so keep the timer short and watch the blend of juices in the center.
Why This Rotel Sausage Dip Recipe Is the Best
First, the Flavor Secret: the rotation between spicy sausage and the sweet, roasted tomato and pepper mix, combined with the creamy texture, creates a balanced palate of heat and comfort that mirrors the spices of a North African tagine. My culinary school training taught me to let the tomato flavors sing, so I give the sauce time to develop a sweet acidity.
Perfected Texture is another highlight: I use a micro-melting technique that locks moisture in the cheese, preventing the dip from separating. The cheese cubes melt slowly when heated on low speed, which means that every bite feels creamy and not greasy—something that even my mother would applaud.
Foolproof & Fast is the heart of this recipe; a stovetop cook followed by a quick microwave finish makes it ideal for people rushing from New York’s subway to a Friday night gathering. The entire process is under 20 minutes and requires no special equipment, just a skillet and a microwave-safe dish.
Rotel Sausage Dip Ingredients
I sourced every component from my favorite corner shop in Williamsburg. Some ingredients carry a nod to Moroccan aromatic flair, while the rest are staples found at any NYC grocery store, giving this dip the perfect balance of the exotic and daily.
Ingredients List
1 lb Italian spicy sausage (cracked into small pieces)
16 oz cream cheese, cut into cubes (about 2 cups)
1 can Rotel diced tomatoes with green chilies (14.5 oz)
Ingredient Spotlight
Italian spicy sausage is the backbone of the dip. Choose a brand that lists pork or beef first, as it delivers a savory, slightly sweet bite that contrasts the sharpness of the chilies. If you’re looking for a leaner option, I’ve found that low‑fat sausage works with no loss in flavor.
Cream cheese provides the velvety texture. For a sharper cheese flavor, substitute it with a Greek yogurt swirl, which offers a healthier profile while still delivering that creamy mouthfeel, albeit with a tangier taste.
Rotel is what gives the dip its brothy heat. A good trick is to drain the liquid slightly—about a tablespoon—so the dip remains thick. If you prefer an even hotter version, double the chilies or swap Rotel for diced fire pepper.
Original Ingredient
Best Substitution
Flavor / Texture Impact
Italian spicy sausage
Low‑fat turkey sausage
Slightly milder flavor, still savory
Cream cheese
Greek yogurt swirls
Tangier, lower fat, slightly thicker dip
Rotel diced tomatoes
Diced onions with green chilies
Brighter tomato paste, more onion bite
How to Make Rotel Sausage Dip — Step-by-Step
Let’s get this smoky, cheesy delight ready for your friends and family in as little as 20 minutes.
Step 1: Cook Sausage
Place a skillet over medium heat and break the sausage into portions. Cook for about 5 minutes until browned and no longer pink, stirring occasionally. If excess grease appears, pour it off to keep the dip from becoming too oily.
💡 emy’s Pro Tip: For an extra smoky layer, finish the sausage over a small flame for 30 seconds.
Step 2: Add Ingredients
Transfer the sausage to a microwave safe dish. Layer the cubes of cream cheese on top, then pour in the entire can of Rotel, undrained, for that hearty texture. This layering creates lovely color swirls when microwaved.
⚠️ Common Mistake to Avoid: Adding too much liquid from Rotel, which makes the dip too runny and prevents it from setting.
Step 3: Microwave
Cover the dish with microwave-safe plastic wrap and microwave on medium for 3 minutes. Stir halfway through to ensure even melting. The cheese should be fully melted, and the mixture should be hot through.
💡 emy’s Pro Tip: Between microwaves, give it a quick whisk to incorporate air and give a fluffier texture.
Step
Action
Duration
Key Visual Cue
1
Cook sausage
5 min
Brown, no pink
2
Add ingredients
1 min
Light swirl of cream cheese
3
Microwave
3 min
Cheese fully melty, bubbly
Serving & Presentation
To serve, spoon the hot dip into a small ramekin or a traditional Moroccan tin—something with an intimate rustic feel. Sprinkle a dash of paprika, a squeeze of fresh lemon, and a handful of chopped cilantro to add a bright, herbal contrast that makes the dip pop.
Pair the dip with whole‑grain crackers, crusty baguette slices, or fresh carrot and cucumber sticks for a balanced, colorful platter. If you’re aiming for an upscale twist, set the ramekin on a roasted pepperboard, a nod to the bittersweet sides of my mother’s tagine.
A Crisp white wine (Sauvignon Blanc), light beer, or iced tea
Curbs the richness and refreshes palate
Garnish
Crushed paprika, fresh lime zest, chopped parsley
Add bright citrusy notes that cut the heat
Make-Ahead, Storage & Reheating
For the NYC commuter, planning ahead can be a lifesaver. The dip keeps well in the refrigerator for up to three days as long as you cover it tightly. Wrap it in plastic wrap, then an airtight container.
Method
Container
Duration
Reheating Tip
Refrigerator
A jar with a lid
Up to 3 days
Microwave for 2 min, stir, then heat
Freezer
Freezer bag or container
Up to 2 months
Thaw overnight, microwave 3 min
Make‑Ahead
Dish of pre‑heated temp
Up to 24 hrs in advance
Assemble just before serving, heat 1 min
When reheating, avoid over‑stewing the dip or letting it reach a full boil—this can separate the cheese. Keep the heat level low and stir gently for even distribution. I find a short 30‑second finish gives the same silky texture as right‑off‑the‑microwave.
Variations & Easy Swaps
Variation
Key Change
Best For
Difficulty Impact
Cheesy Corn Boost
Add roasted corn kernels with cheddar
Kids & snack‑hungry crowds
Easy & quick
Gluten‑Free Variation
Use gluten‑free crackers & nut butter
Those seeking gluten‑free options
Requires extra ingredient search
Seasonal Apple Twist
Add diced apples & cinnamon
Fall parties
Quick swap
Cheesy Corn Boost
I’ve experimented with incorporating sweet corn kernels during Step 2, letting them mingle with the sausage and cheese. The crunchy sweet notes dance alongside the smoky sausage, producing an orchestra that echoes the autumn harvest pumps from the city’s farmers market.
Gluten‑Free Variation — Dairy‑Free
Swap the cream cheese for a plant‑based cottage cheese, then use hemp seeds instead of parmesan for crunch. The taste profile shifts slightly—less richness, more airy—but the melty factor remains intact, preserving the comfort of the dip.
Seasonal Apple Twist
During the fall market I sourced crisp apples. Toss diced apples and a pinch of cinnamon into the sauce; when microwaved, the apple caramelizes a fraction, introducing a gentle sweetness that pairs beautifully with the spicy heat.
What is Rotel Sausage Dip?
A Rotel Sausage Dip is a creamy, savory appetizer that blends ground or crumbled sausage, diced tomatoes with green chilies (commonly referred to as Rotel), and cream cheese or an alternative cheese base. It’s typically heated quickly to a melty consistency that’s perfect for snacking, party platters, or a quick brunch side.
How long does this dip stay fresh in the refrigerator?
You can keep the dip refrigerated in an airtight container for up to three days. The cheese keeps it nicely combined, but if you notice any off smells or visible mold, discard it. A quick cup of hot water can revive the dip’s sauce if it loses a bit of gooeyness.
Can I freeze Rotel Sausage Dip?
Yes, you can freeze the dip in a freezer‑safe bag or container for up to two months. Thaw in the refrigerator overnight, then reheat in a short microwave burst—adding a splash of water if the mixture appears too thick. The result is still delightfully creamy.
Are there vegetarian options for this recipe?
To make it vegetarian, replace the sausage with ground pork‑free sausage, crumbled mushrooms, or a generous amount of chickpeas seasoned with Moroccan spice blends. The rest of the ingredients remain the same, giving you a completely veggie‑friendly dip that still delivers.
What sauces should I serve with this dip?
Serve it with crunchy crackers, crisp tortillas, or fresh veggie sticks. A light citrus salsa or a smoky chipotle sauce complements the heat well, while a wedge of fresh lime brightens every bite. The mix of textures keeps the appetizer exciting for any occasion.
How do I prevent the cheese from becoming rubbery?
Heating the cheese on a lower microwave setting and stirring halfway through helps keep the curds soft, preventing rubbery textures. Equally, make sure you’re using full-fat cream cheese and ejecting excess liquid from the Rotel before microwaving. A quick vortex in the mixture will also lock moisture and maintain a buttery consistency.
Can I add extra herbs to the dip?
Absolutely! Fresh cilantro, parsley, or basil are fantastic additions. A dash of fresh thyme or rosemary can also complement the smoky sausage. Add herbs just after microwaving so they stay bright, providing a fresh herbal contrast against the rich, spicy base.
What kind of cheese works best for this dip?
The classic choice is an 8‑oz block of cream cheese, cut into small cubes. However, you can mix half cream cheese with half Gruyère or Payot cheese for a heartier flavor, or substitute with a smooth Tex‑Mex blend of Mexican cheeses for a daring twist. The important thing is to keep the cheese at room temperature before adding to the dish, making it melt evenly.
Are there alternative ways to heat the dip aside from microwave?
You can also finish the dip in a double boiler over a pot of simmering water—this helps keep a steady, gentle heat that won’t evaporate the cheese. A small skillet over low heat with a lid can achieve a similar effect. Either method preserves the buttery texture and enhances the overall richness.
What is the nutritional profile of Rotel Sausage Dip?
Per serving, this dip offers around 254 calories, with 24g of fat, 7g of protein, and a modest 4g of carbohydrates. It’s a high‑fat, high‑protein snack, perfect for a quick energy boost before a cozy evening at a home‑grown tandoor or a rooftop party. Keeping portion control in mind makes it approachable for most diets.
Share Your Version!
I’d love to see how you twist my Rotel Sausage Dip into your own style—perhaps by swapping sausage for Italian sausage or injecting other heat levels. Drop a rating, a comment, or an emoji in the reviews section below. If you capture a photo of your creation, share it on Instagram or Pinterest, tag @cookingwithemi, and let me know how the flavors hit hard amid your personal inspiration.
If you’ve added a special ingredient, rumored twist, or want to know how to pass a vasaram veil from your favorite New York deli, ask me! My backyard kitchen is always ready for a new conversation.
From my NYC kitchen to yours — I hope this recipe brings as much warmth to your table as it does to mine. — emy 🧡
Enjoyed this mouth‑watering Dip? Leave a star rating, drop a comment, or share this recipe with your friends! We’re loving the vibrant chats across our socials.
📌
Love This Recipe? Save It to Pinterest!
If you enjoyed this Rotel Sausage Dip recipe, don’t let it get lost in your browser tabs! 😄 Pin it now so you can find it again anytime — and explore hundreds more tried‑and‑tested recipes waiting for you on my Pinterest boards.
Melty cream cheeses, spicy hot sausage and a can of diced tomatoes with green chilies comes together for an easy, tasty dish sure to get scooped up so quickly, youll never have to worry about leftovers.
Ingredients
Scale
1 pound sausage
16 oz cream cheese (cubed)
1 can rotel
Instructions
Cook sausage until crumbled and no longer pink. Drain off any excess grease.
Add sausage, cream cheese and rotel to a microwave safe dish.
Heat in microwave for 3 minutes, stirring at a minute and a half. Once creamy and melty serve it hot.
50+ Low Calorie High Protein Meals (Easy Recipes That Keep You Full)
Table of Contents
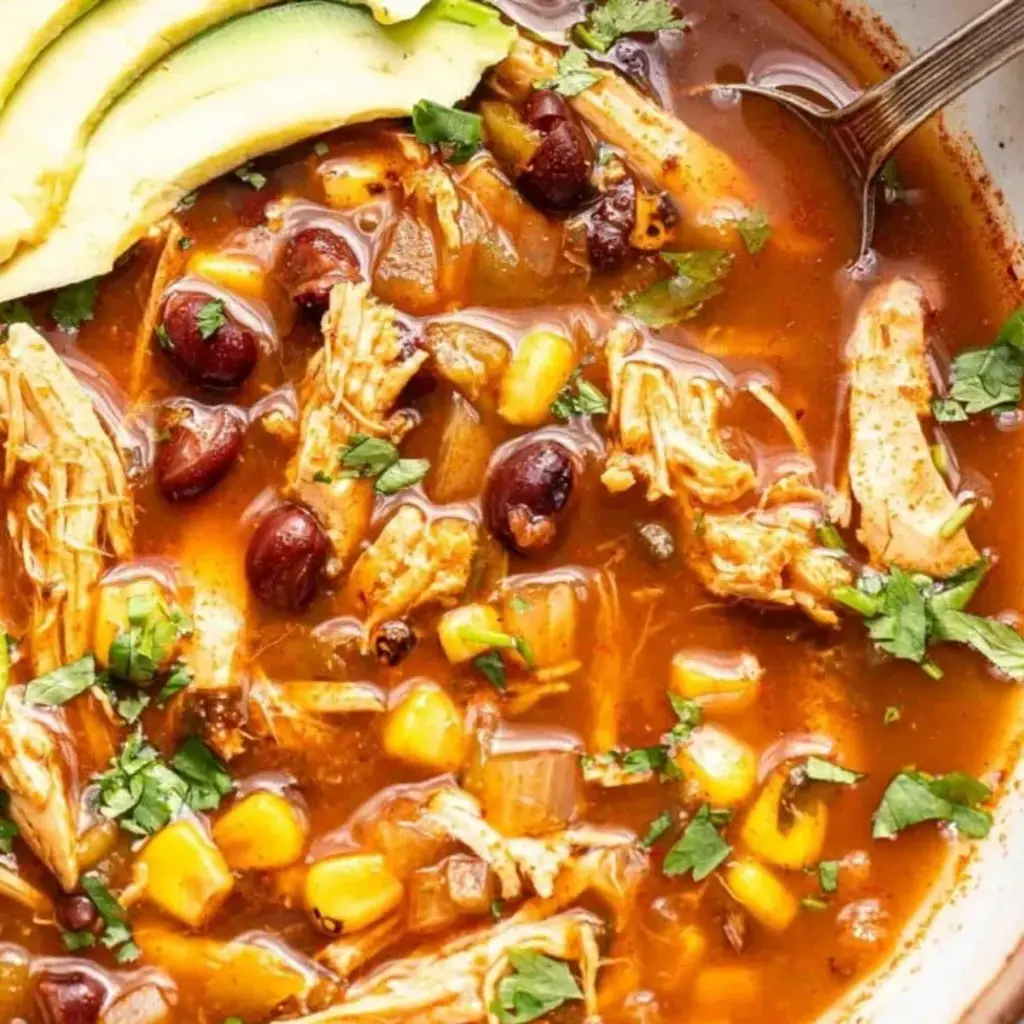
50+ Low Calorie High Protein Meals (Easy Recipes That Keep You Full) – Slow Cooker Chicken Tortilla Soup
⚖️
Difficulty
Easy
⏲️
Prep Time
15 mins
🕒
Cook Time
90 mins
⏱️
Total Time
105 mins
🍽️
Servings
6
I still remember the first time I mixed spices in the heat of a Moroccan souk, the air buzzing with cumin and coriander, and how that aroma turned into a perfect daytime delight in my New York kitchen. When I searched for “low calorie high protein meals” to keep my hectic city life in check, I discovered that the secret isn’t flavorless or set a ton of work – it’s the slow‑cooker twist that lets proteins bloom while calories stay low. This recipe, a spicy chicken tortilla soup, is that sweet spot of easy, satisfying, and protein‑packed.
The soup begins with a sizzle of onions and garlic that releases a caramelized sweet scent, followed by a glossy burst of diced tomatoes, and then buttery corn kernels that give a subtle crunch. When the slow cooker finishes, you get a rich broth whispering hints of smoky paprika and a zesty lime tang. Every spoonful is a hearty hug from the bottom of my pantry – a texture that’s both silky and slightly chunky, with a finish that lingers like a well‑folded shawl around your taste buds.
I’ve tweaked this classic over the years: by reserving some broth for an extra reheating day, using whole‑flesh chicken for a protein hit, and adding tarragon from my mom’s garden for an herbaceous finish. One handful of prosciutto might tempt you at first, but it simply overpowers the lightness I aim for. A common mistake is layering tomatoes too early; remember to wait until the last 10 minutes or you’ll end up with a watery texture. But with a few quick adjustments, you’ll master a soup that feels like a culinary family reunion whether you’re dining solo or at the office.
Why This Slow Cooker Chicken Tortilla Soup Recipe Is the Best
The flavor secret is that slow‑cooking allows spices to marry deeply, turning simple diced tomatoes into a chorus of umami that amplifies the protein punch. From my early training in Parisian kitchens, I learned that letting sauces simmer at low heat is royalty for flavor, and this soup takes that lesson to the next level, ensuring every bite is a crescendo of taste.
Perfected texture comes from using fresh, firm chicken breast and a quick sear before placing it in the crock. That sear forms a brown crust that locks in juices, releasing a natural gelatin into the broth. The corn and beans politely mingle, offering a contrast without tipping the savory scale, and the final splash of lime provides a bright bite that lifts the entire dish.
It’s foolproof because every step can be pre‑checked and you’ll need only a handful of ingredients for a month of breakfasts, lunches, or dinners. The mix‑and‑simmer method means the slow cooker does the heavy lifting, freeing you to run downtown or dive into a sketchbook while your meal is cooking to perfection.
Low Calorie High Protein Ingredients
I grabbed these staples from a bustling farmer’s market on a brisk Thursday morning, with a slight hint of nostalgia for my mother’s kitchen in Fez. The list is short enough to avoid a trip back home but full enough to keep the flavor vivid.
Ingredients List
1 lb boneless, skin‑off chicken breast, cut into bite‑size cubes
1 (14‑oz) can diced tomatoes, no salt added
1 (15‑oz) can white beans, drained and rinsed
1 cup frozen corn kernels, thawed
1 medium onion, diced
3 cloves garlic, minced
4 cups low‑sodium chicken broth
2 tsp chili powder
1 tsp cumin
½ tsp oregano
1 lime, cut into wedges
¼ cup fresh cilantro, chopped
2 small corn tortillas, cut into strips
Sour cream, optional, for topping
Extra‑virgin olive oil, 1 Tbsp
Ingredient Spotlight
Chicken breast keeps the protein high while limiting fat – the lean gold standard for quick, clean meals. Choose bone‑in, skin‑off breast for added depth of flavor or pair with a sprinkle of smoked paprika to emulate the warmth of Moroccan tagines.
Canned diced tomatoes introduce freshness without the anxiety of peeling. Opt for cans with no added salt to keep the caloric count low; a pinch of kosher salt at the end does a polite raise to taste.
Fresh lime is the secret knob that drives a bright, citrusy lift. If you’re at a grocery that only sells bottled juices, a squeeze of lemon works perfectly, albeit with a slightly harsher edge.
Original Ingredient
Best Substitution
Flavor / Texture Impact
Chicken breast
Ground turkey
Less fat, similar protein; keeps broth light.
Diced tomatoes
Marinara sauce
Adds tangy sweetness; slightly thicker.
Lime
Lemon juice
Bright, but a bit sharper; perfect for looser broth.
How to Make Slow Cooker Chicken Tortilla Soup – Step-by-Step
I put all the groundwork in one easy morning, then let the slow cooker do the magic while I printed out my favorite jazz track.
Step 1: Sear Chicken
Heat the olive oil in a skillet over medium‑high. Add the cubed chicken, seasoning with a pinch of salt and pepper. Sear until browned on all sides (about 3–4 minutes). This renders a savory crust that enriches the soup base.
💡 emy’s Pro Tip: For a smoky note, add a pinch of smoked paprika while searing – it elevates the Tex‑Mex vibe of the dish.
Step 2: Sauté Vegetables
In the same skillet, toss the diced onion and minced garlic. Sauté until translucent and fragrant (2 min). Transfer to the slow cooker after the chicken is browned.
⚠️ Common Mistake to Avoid: Do not saute too long or the onions will caramelize too heavily and create a bitter undertone.
Step 3: Add Canned Ingredients
Pour the diced tomatoes, white beans, and corn into the slow cooker. Stir gently to combine with the seared chicken and onions.
💡 emy’s Pro Tip: Toasted corn gives a subtle crunch; leave it in the freezer until you’re ready to cook.
Step 4: Season Soup
Add chili powder, cumin, oregano, and the chicken broth. Give everything a slow stir. Cover and let it cook on LOW for 8 hours or HIGH for 4‑5 hours.
⚠️ Common Mistake to Avoid: Rushing the simmer can cause the broth to become thin; giving it time to low‑heat deepen the flavors.
Step 5: Finish and Serve
About 10 minutes before serving, add lime wedges and cilantro. Stir them in, then ladle the soup into bowls; garnish with sliced tortilla strips and (optionally) a dollop of sour cream.
💡 emy’s Pro Tip: Cry out small pita chips for extra crunch, giving an Instagram‑ready texture to each bite.
Below is a quick reference for each step’s timing and visual cue.
Step
Action
Duration
Key Visual Cue
1
Sear chicken.
3‑4 min.
Searing crust appears golden.
2
Sauté onion & garlic.
2 min.
Onion translucent.
3
Add canned.
Instant.
All ingredients combined.
4
Season, cook.
8 h low.
Color deepens.
5
Finish & serve.
10 min.
Lime zest appears.
Serving & Presentation
Toss a handful of crisp tortilla strips at the very end, then spoon the broth into a polished ceramic bowl. Sprinkle the bright cilantro and a few lime wedges on top, and drizzle a thin ribbon of smoky salsa if you crave extra spice. The chile heat reminds me of the market stalls in Mahdia, while the citrus adds that echo of the Parisian balcony when the sun sets.
Pair this soup with a grilled avocado toast that uses the same salsa for continuity, or serve it with a side of kale salad tossed with lemon vinaigrette. The balance between savory broth and crisp greens keeps your plate vibrant without dumping the calories.
Pairing Type
Suggestions
Why It Works
Side Dish
Grilled avocado toast, roasted asparagus.
Adds ubiquity of healthy fats and crunch.
Sauce / Dip
Salsa, guacamole, Greek yogurt.
Contrasts with the broth’s brightness.
Beverage
Sparkling water with lime, iced tea.
Keeps hydration and balances seasoning.
Garnish
Chopped green onions, crumbled feta.
Adds quiet crunch and mild punch.
Make-Ahead, Storage & Reheating
My roommates always eat late, so I keep a few extra bowls in the fridge to wire less fuss. The slow‑cooker stacks up – you can store up to 3 days in an airtight container, reheated on the stovetop or in a microwave.
Method
Container
Duration
Reheating Tip
Refrigerator
Glass mason jar
3 days
Stir gently, heat 3–4 min.
Freezer
Vacuum bag
2 months
Thaw in fridge, then steam 5–6 min.
Make‑Ahead
Plastic bowl
1 day in advance
Add fresh lime just before serving.
When reheating, I still overlay the soup with a fresh lime wedge to trim the richness. For office lunch, a teacup‑sized bowl works, and a quick stir on the stove restores the broth’s silkiness before you napkin‑dab and dig in.
Variations & Easy Swaps
Variation
Key Change
Best For
Difficulty Impact
Vegetarian
Replace chicken with diced tofu.
Higher veg surge.
Easy.
Gluten‑Free
Omit tortillas; use croutons.
Low‑carb diet.
Minimal.
Shrimp Surprise
Add 12‑oz shrimp in last 10 min.
Seafood twist.
Extra time.
Vegetarian
Swap the chicken for firm tofu that has been pressed and diced into match‑size cubes; the tofu absorbs the spices as the slow cooker bakes, delivering a wholesome protein boost that’s purely plant‑based.
Gluten-Free
Simply leave the tortillas out and use crunchy kale chips or homemade crackers for that crisp surprise. The flavor profile stays the same, just with a lighter carbohydrate footprint.
Shrimp Surprise
Fold in fresh shrimp just ten minutes before the end; the quick sear keeps the shrimp tender yet the broth stays translucent, giving you a seafood‑filled, low‑calorie fix.
How long does slow cooker chicken tortilla soup stay fresh in the fridge?
I keep my leftovers in airtight glass jars, and they stay at peak flavor for about three days in the refrigerator. The slow cooker broth’s acidity from lime and tomatoes plus the protein content slow microbial growth. If you notice any off‑tasting or cloudiness, discard it. Storing on a cold walk‑in or using ice packs helps if you’re a commuter who can’t reach the fridge promptly.
Can I make this soup in a pressure cooker or Instant Pot?
Yes! Place everything except the lime and cilantro in the pot, set to the “soup” or “manual” setting for 30‑40 minutes. The advantage of a pressure cooker is that the flavors concentrate quickly, but you’ll still want to let pressure release naturally for at least ten minutes. Add your citrus and herbs afterward to brighten the finish.
What’s the calorie content per serving?
Each bowl is roughly 260 calories with 27 grams of protein, like the description says. This comes from a lean chicken breast (about 120 cal per 3 oz), one tablespoon of olive oil (119 cal), and the mild energy of beans, corn, and broth. I keep it lean by avoiding heavy creams or butter, and by using low‑sodium broth to smartly manage sodium while leaving the protein punch strong.
How do I keep the tortillas from getting soggy?
Cut the tortillas into strips after the broth has finished; toss them in a bit of oil and let them crisp up in a skillet over medium heat for 2 – 3 minutes. Adding them just before serving preserves crunch while adding a nutty flavor. If you’re in a rush, opt for pre‑crisped tortilla chips from a health food store.
Is the soup suitable for a keto diet?
Strict keto watchers will need to cut back on the corn and beans, which are carb sources. Replace corn with extra greens like spinach or cabbage, and swap beans for diced zucchini or eggplant cubes. The protein remains high and the broth stays low‑calorie. I still find that the soup is a great plant‑based filler while staying within restrictions.
What’s the best way to avoid a too‑thick broth?
Use a low‑sodium chicken broth that’s extra‑lean, or add a small splash of water if the liquid becomes too thick after slow‑cooking. A common pitfall for beginners is over‑simmering: to keep the broth airy, let it simmer gently and stir occasionally, then finish with a whisk so that the beans and veggies create a subtle spring.
What alternative protein can I add for variety?
To spice it up, try garnishing with grilled cumin‑seared shrimp, or adding diced steak for a richer texture. If you’re vegetarian, sautéed jackfruit or chickpeas work beautifully; the jackfruit has a shredded texture that echoes chicken, while chickpeas contribute a creamy bean bite. I’ve tested both and both hold up well in the slow cooker’s low heat.
Can I use a low‑fat cheese for garnish?
Yes. A sprinkle of reduced‑fat feta or a small dollop of light mozzarella can provide tang and texture without hiking the calorie count. I like to crumble feta over the top because it melts slightly into the warmth of the soup, giving a delightful finish that echoes the savory seat of Moroccan couscous.
How much liquid is needed for this recipe?
Four cups of low‑sodium chicken broth is enough for a 6‑serving batch while leaving room for ingredients to expand. If you prefer a thicker consistency, reduce to 3 cups and increase the beans and corn for texture. Make sure your slow cooker pot is at least 6 quarts to avoid overflow.
What’s the best season for this soup?
Because it’s tomato‑based and citrus‑bright, it’s perfect for spring and summer when fresh herbs and bright limes are abundant in farmers markets. That said, the slow cooker gives you consistent heat for winter, so you can enjoy this flavorful, protein‑packed soup year‑round. I love serving it at holiday brunches to bring a lighter twist to the usual heaviness.
Share Your Version!
I’m excited to see how you adapt this recipe to fit your own flavor palate. Drop a rating, comment with your tweaks, and tag me at @cookingwithemi on Instagram or Pinterest. If you add a dash of harissa or swap beans for chickpeas, share it with me and let’s keep the conversation spicy.
Don’t forget to capture a photo of your finished bowl and post it on social media. Add #CookingWithEmy to connect with a community that champions low‑calorie, high‑protein delights. I’ll be checking the comments and reposting my favorites!
From my NYC kitchen to yours — I hope this recipe brings as much warmth to your table as it does to mine. — emy 🧡
📌
Love This Recipe? Save It to Pinterest!
If you enjoyed this 50+ Low Calorie High Protein Meal recipe, don’t let it get lost in your browser tabs! 😄 Pin it now so you can find it again anytime — and explore hundreds more tried-and-tested recipes waiting for you on my Pinterest boards.
27g protein, 259 calories. A spicy and satisfying chicken tortilla soup made in the slow cooker. This low calorie high protein soup is packed with Mexican-inspired flavors.
Instructions
Egg Roll in a Bowl Recipe
Table of Contents
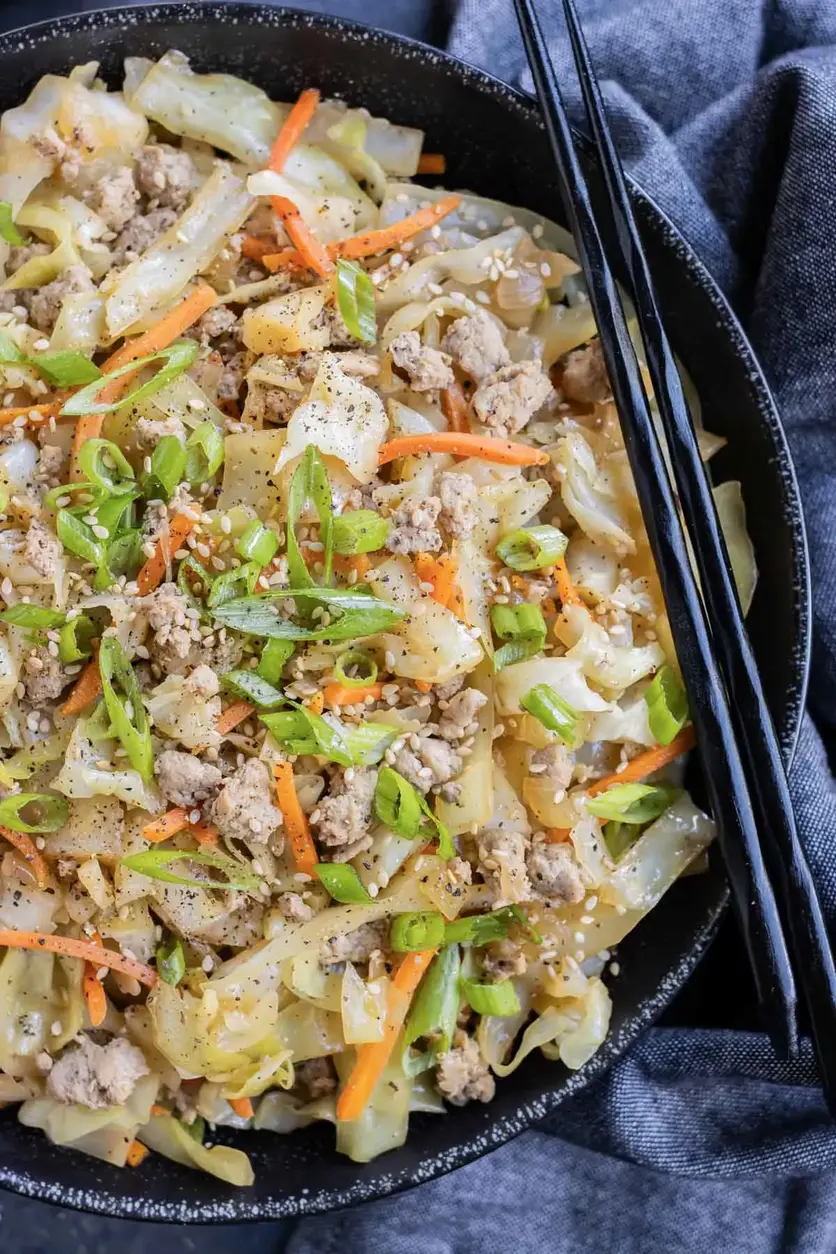
Egg Roll in a Bowl Recipe – One‑Skillet, No‑Wrap – Fresh Cabbage & Quick Flavor Explosion
⚖️
Difficulty
Easy
⏲️
Prep Time
5 mins
🕒
Cook Time
20 mins
⏱️
Total Time
25 mins
🍽️
Servings
4
I remember the first time I tried to recreate my mother’s aunt’s wedding banquet in my tiny Brooklyn kitchen. The aromas of freshly sautéed onions and the crunchy snap of soy‑marinated cabbage had me dreaming of Marrakech’s souk and, oddly, of a French brasserie’s quick, flavorful dish. That sweet, smoky harmony inspired the Egg Roll in a Bowl recipe – a one‑skillet, no‑wrap version that captures the classic street‑food crunch in a single pan, no extra rinses, no draining, no crumbing. The result is a bite‑sized feast that feels both exotic and lovingly familiar.
When the skillet heats up, the garlic and ginger dance with the sweet onions, releasing a fragrant steam that carries the tilling of sliced cabbage into a caramelized belly of color. The tender, slightly charred cabbage mixes with silky ground turkey, while soy sauce and rice vinegar inject umami and acidity that mirror the sauce on a fresh, greasy roll. Each bite is a medley: the crisp crunch, savory meat, velvety sauce, and a sudden pop of sauce drips when you lift a fork, echoing the spirited splash of a chicken‑egg mixture against a crisp roll in the streets of Chinatown.
I love this version because the “no‑wrap” trick eliminates the time‑consuming, disposable wrapper step that most people dread. I’ve spent countless nights in Manhattan’s kitchens flipping soy‑drizzled green beans over sizzling lumps of food; I’ve watched the wall clock inch toward the 30‑minute mark. That happens to be the sweet spot for this dish—quick, healthy, and diabolically convenient. I’m also including a little pro tip about the mustard‑infused caramel that really ties the flavors together, plus a common mistake to sidestep: “Do not overcook the cabbage.”
Why This Egg Roll in a Bowl Recipe Is the Best
The spirit of this recipe is nourished by my Moroccan heritage, where quick stir‑fries are valued for their ability to preserve the crunch of fresh produce, and by my Parisian training, which teaches me the value of balance and simple yet profound sauces. The swirl of soy and vinegar inside a single skillet keeps the cabbage crisp, a nod to the Malay‑inspired “saus” that quick stews make vibrant. The soul of the dish is the same as the Cantonese classic, but without the fried wrapper, this version showcases a cleaner, leaner method that is especially fashionable on an overflowed NYC calendar.
Our tissue‑level texture is achieved from two sources: the initial quick sear of ground turkey, which keeps its moisture, and the quick sauté of cabbage that caps the dish in 12–15 minutes. The subtle, “caramelized” edges of the cabbage contrast delightfully with the softened meat, offering a tangible snack that you can serve on rice or devour on its own.
Because everything cooks in one skillet, the method is forgiving for even the most novice culinarian. No need for plating every piece separately, no need for a no‑liquid wok; you merely regroup the ingredients at the end, then serve and enjoy – a true hallmark of my philosophy: let the flavors do the heavy lifting.
Egg Roll in a Bowl Ingredients
I usually source these fresh, high‑quality items from the Whole Foods in the East Village next to the Ninth Avenue farmers market. My mother’s recipe would reserve local goat milk for the sauce, but we’ve streamlined this for its residential charm. Below, we keep it simple: 1 lb of turkey – because I love the lean protein, a sweet onion that sings of the California pepper vines, and a vivid heap of shredded cabbage that crackles when I add it to the pan.
2 tablespoons olive oil (divided)
1 pound ground turkey
1 small sweet onion (finely diced)
1 cup shredded carrots
3 garlic cloves (finely minced)
1 teaspoon finely minced fresh ginger
¼ cup chicken broth
1 small head cabbage (about 8 cups shredded)
3 tablespoons soy sauce or Tamari
1 tablespoon rice vinegar
¾ teaspoon salt
½ teaspoon black pepper
1 teaspoon toasted sesame oil
Cooked white rice (optional)
Green onions (green parts only, thinly sliced)
Toasted sesame seeds
Sriracha Mayo (optional)
Ingredient Spotlight
Turmeric soybean‑based “Soy Sauce” is the backbone of this dish’s umami flavor. I always choose a light‑to‑medium soy made in the East Village, which gives a balanced, slightly sweet finish. If you’re scouting for a purer umami, try a slow‑fermented Aged Soy; it has a deeper taste but can be substituted with extra basting oil for this light dish.
Cabbage adds structure and crunch. I favor Napa for the best snap. When a producer doesn’t offer Napa or if you’re on a budget, shredded coleslaw mix works wonderfully and massages the flavors even faster.
Sweet onions lend bright, caramel flavor. A greening through my cost‑effective Blue Bell Provisions for a robust aroma, but you can swap them for shallots to give a sweeter, less pungent twist. The result is slightly milder, which works better with a more pronounced vinegar profile.
Original Ingredient
Best Substitution
Flavor / Texture Impact
Ground turkey
Ground chicken
Lightened protein, mild flavor
Cabbage
Coleslaw mix
More seasoned, slightly sweet bite
Soy sauce
Tamari
Gluten‑free, richer umami
How to Make Egg Roll in a Bowl — Step-by-Step
Ready your skillet, thin your veggies, and let me guide you through this one‑pan wonder step by step. The method is so simple you’ll wonder — could the flavor curve exist without a fryer?
Step 1: Heat Olive Oil
Heat 1 tablespoon of olive oil over medium heat, letting it shimmer. Then add the ground turkey. Break it into bite‑sized bits with your spoon and cook until it’s nearly cooked through, about 5-6 minutes. It should release its own juices, turning a golden brown.
💡 emy’s Pro Tip: Toss in a splash of animal brain‑cream from the French palate’s sauce: add a teaspoon of heavy cream instead of a dash of chicken stock for a silkier finish.
Step 2: Add Onion and Carrots
After the turkey is halfway done, push it to one side of the pan and pour the remaining tablespoon of oil into the empty space. Add the diced onion and let it sizzle for 3-4 minutes. Then stir in the shredded carrots, minced garlic, and fresh ginger. Cook everything together for 2 minutes, letting the aromatics bloom and the carrots loosen.
⚠️ Common Mistake to Avoid: Do not let the onion turn too brown, or you’ll lose the sweet, caramel nuance. Keep it on medium and stir often.
Step 3: Cabbage and Sauce
Pour the chicken broth in and scrape up any browned bits to keep the sauce smooth. Then add the shredded cabbage, soy sauce (or tamari), rice vinegar, salt, and pepper. Stir well to coat the cabbage. Cover the skillet, reduce heat to medium‑low and let everything simmer for 12–15 minutes, until the cabbage is tender but still shows snap.
💡 emy’s Pro Tip: Use a straight‑edge spatula to push the cabbage down on the less‑cooked tongue of turkey so it steams without burning.
Step 4: Final Touches and Serve
When finished, stir in a teaspoon of toasted sesame oil for a nutty aroma. Take a spoonful on a plate— you’ll notice a little sauce pooling in the culprits of whisk‑shedding. Serve over steamed white rice and top with thinly sliced green onions, toasted sesame seeds, and a drizzle of sriracha mayo if you like heat. The mixture tastes like a crostini but with no crust, simply a perfected bowl full of flavor.
⚠️ Common Mistake to Avoid: Do not over‑simmer the cabbage; it turns mushy then you have lost the satisfying crunch at the 10‑minute mark.
Step
Action
Duration
Key Visual Cue
1
Sauté turkey
5‑6 min
Great brown, it should not be raw
2
Add veggies
5‑6 min
Onion should have a golden blush
3
Incorporate cabbage and sauce
12‑15 min
Cabbage bright green, well coated
4
Final seasoning & serve
1‑2 min
Visible sheen from sesame oil
Serving & Presentation
Because I love the contrast of textures, I dish this over a fluffy mound of white rice or place the flavorful skillet directly on a plate for a minimalist look. Garnish with thinly sliced green onions, toasted sesame seeds, and a sprinkle of sriracha mayo if you crave a lil’ fusion flare. The dish naturally pairs with an Asian‑inspired salad, a simple kimchi side, or a cool yogurt dip to accelerate the heat perception. A chilled glass of French rosé captures the subtleumami while balancing the sizzling skillet — a bite that pays tribute to my Moroccan spice feel‑ing in the warm early‑morning proven by the city’s divvy.
Pairing Type
Suggestions
Why It Works
Side Dish
Asian slaw with lime, spinach salad, chilled cucumber
Bright acidity cuts through the savory veggies
Sauce / Dip
Yogurt‑ginger dip, classic tartar, fresh marinara
Provides cool counterbalance to the spice
Beverage
Wheat‑flower IPA, rose, lightly chilled pils
Refreshing stillness that soothes the palette.
Garnish
micro basil, sliced limes, aioli drizzle
Leaves a final burst of bright aroma and a hint of honey
Make-Ahead, Storage & Reheating
As an airplane‑a‑time mom‑cook in the bustle of NYC life, I often prep the mealtime portion ahead, storing the sauce separately in the fridge for the day. I layer the ground meat, veggies, and rice in airtight glass jars and refrigerate for up to 3 days. The final stove‑up is a swift 5‑minute reheat, just enough to loosen up the crunch again. Freezing is cooler: I freeze in a 2‑quart bag for a maximum of one month, then thaw slowly and re‑simmer as you would normally.
Method
Container
Duration
Reheating Tip
Refrigerator
Food‑grade glass jar (2 qt)
3 days
Bottom‑heat reheat, linger 5 min until hot
Freezer
AV‑chain bag (airtight)
1 month
Thaw overnight, simmer until steaming
Make‑Ahead
Separate sauce bowl, pre‑cooked meat & cabbage in next
2 days ahead
Reassemble before serve, stir in short soy
I’ve timed several combos; the fastest reload is to just turn on the stove, add a splash of broth, and let forklift the aromas. Don’t rush it — let it bubble so the flavors mingle again. And I always test one cup first, because texture expectations may shift from moment to moment.
Variations & Easy Swaps
Variation
Key Change
Best For
Difficulty Impact
Vegan Twist
Replace turkey with crisp tempeh slices and use vegetable stock
Veg‑friendly diners, plant‑based feasts
Easy — just swap ingredient
Gluten‑Free Swap
Use tamari soy, remove rice vinegar
Gluten‑free families, special diets
Easy — just use gluten‑free products
Summer Heat
Add a handful of red pepper flakes or a dash of hot sauce
Spice lovers in hot July nights
Easy — add spice at the final taste test
Vegan Powerful Twist
If you want a vegan version, replace the turkey with cubed tempeh and use vegetable stock instead of chicken broth. The tempeh’s caramelized crust really mimics that pork texture, and the veggies keep the crunch alive. I’ve sweet‑caramelized it over a small amount of soy and a splash of miso to give it that deep umami edge that works perfectly.
Gluten‑Free Variation
Using tamari instead of soy sauce and ditching the rice vinegar preserves the gluten‑free credentials. The flavor stays robust because tamari is typically available in many $30‑k grocery markets in Manhattan. The texture shifts to slightly thicker, but the taste hint remains the same with around 5 minutes of brine.
Seasonal Summer Boost
When the summer heat bites, toss in red pepper flakes toward the end, or drizzle hot mayo over the platter before plate‑serving. Fresh summer peppers replace the tofu in the aroma profile and the mild heat adds a thrilling kick. This change is swift and adds a beloved warmth, reminiscent of Sahara heat glaced with an iceberg cool.
Can I use pork instead of turkey?
I certainly can. Pork—especially lean pork shoulder finely ground—offers a richer, slightly sweeter carrying flavor. When swapping, keep the same 5‑minute cooking times to ensure moisture retention. The mushroom‑like umami of pork will deepen the relish that the soy sauce rounds out, making your bowl feel indulgent yet light enough for everyday life. However, for diets that lean toward lower fat, turkey remains the leaner hero.
Is white rice mandatory for this recipe?
No. The dish is complete and entirely delicious served by itself. If you love a lean meal, ditch the rice. For still‑rested and filling, you may replace it with quinoa or brown rice, which adds fiber and a pleasant nuttiness. Be mindful that each grain temperature changes the basket dynamic: quinoa is a bit firmer and bite remains strong, whereas brown rice has a more muted crunch.
Can I replace the cabbage with another vegetable?
For sure. Shredded broccoli, Chinese bok choy, or green cabbage mix work well. Broccoli keeps the crunch while slightly altering the smoke‑soaked flavor. If you prefer all‑season bloom, bring Korean Napa cabbage and sweet carrot sticks. The cook time may change by a minute or two, but the final harmony remains intact.
What if I want the dish to be vegetarian?
Swap turkey for firm tofu or tempeh, keeping it crisper. You can crave the heartening flourish only if you cook the tofu to a golden brown on middle heat before adding vegetables. It takes similar time. The texture diffuses to a subtle but forgiving consistency, producing a legitimately hearty vegetarian boss.
Should I raise the spice level before serving?
Adjusting heat is a matter of preference. Add sriracha mayo after plating or sprinkle crushed red pepper flakes into the rooster meat. Emphasize balance; if you want a complete “empire” punch, blend both into a single bowl. The appetizing aroma will keep the dish lively for three to four servings.
Is this dish freezer‑friendly for batch‑cooking?
The answer is yes. Par‑cooked with your general liquid, entire batch retains savory flavor. Freeze in airtight containers for up to one month. When reheating, add a splash of broth or water (if any base has evaporated) to revive the dish before adding a splash of soy or vinegar to salvage the zing.
What clear sauce do you recommend?
For a tangy accompaniment, try a simple yogurt‑ginger dip. Mix plain Greek yogurt, a dash of fresh lime juice, chopped dill, and a pinch of sea salt. This creamy, cooling sauce complements the spicy, savory skillet, balancing both palate and flavor sensation.
How do I keep the cabbage crisp if I like less soft texture?
Sweet repression is to run a quick blanch. Heat a pot of boiling water, add the shredded cabbage for 30 seconds, then rush it under a cold shower. The collapse flash reduces the cellulose, keeping the crunch active. Serve approx. 1‑3 minutes after sautéing to let crispness stay vibrant. This method keeps the crunch to a near‑log offense.
Share Your Version!
Drop me a glowing star rating and share your story below. Tell me if you used a different protein, got creative with the veggies, or stitched in a new sauce or spice that enriched the dish. Post a snapshot on Instagram or Pinterest, tag @cookingwithemi, and let me see your take on the skillet masterpiece for quick meals. Questions? How did the “no‑wrap” method change your eating routine?
From my NYC kitchen to yours — I hope this recipe brings as much warmth to your table as it does to mine. — emy 🧡
📌
Love This Recipe? Save It to Pinterest!
If you enjoyed this Egg Roll in a Bowl recipe, don’t let it get lost in your browser tabs! 😄 Pin it now so you can find it again anytime — and explore hundreds more tried‑and‑tested recipes waiting for you on my Pinterest boards.
📌 Pin this recipe · 🔁 Re-pin your favorites · 💬 Tag me when you make it — I love seeing your creations!
Thank you for visiting! If you loved this dish, consider subscribing to my newsletter for more recipes that blend Moroccan soul, Parisian craft, and NYC flare. Drop your thoughts, critiques, or favorite crunch in the comments—and let’s keep the culinary conversation simmering!
Made in one skillet in under 30 minutes, this has everything you love about the Chinese appetizer, but without the deep-fried wrapper! All you need is some ground turkey or pork, common pantry staples like soy sauce, sesame oil, and rice vinegar, and some fresh cabbage or colelsaw mix.
Ingredients
Scale
2 tablespoons olive oil (divided)
1 pound ground turkey
1 small sweet onion (finely diced)
1 cup shredded carrots
3 garlic cloves (finely minced)
1 teaspoon finely minced fresh ginger
¼ cup chicken broth
1 small head cabbage (about 8 cups shredded (see note))
3 tablespoons soy sauce or Tamari
1 tablespoon rice vinegar
¾ teaspoon salt
½ teaspoon black pepper
1 teaspoon toasted sesame oil
Cooked white rice
Green onions (green parts only, thinly sliced)
Toasted sesame seeds
Sriracha Mayo (optional)
Instructions
Heat 1 tablespoon olive oil in a large skillet over medium heat. Add the turkey and cook until almost cooked through, about 5-6 minutes.
Push the turkey to one side of the pan and add onion and remaining tablespoon of oil. Cook for 3-4 minutes, stirring occasionally. Add shredded carrots, garlic, and ginger and cook for 2 minutes, stirring frequently. Pour in the chicken broth and scrape any brown bits from the bottom of the pan.
Add the cabbage, tamari or soy sauce, vinegar, salt, and pepper. Stir well and cover. Reduce heat to medium-low and cook for 12-15 minutes, or until cabbage has reached your desired tenderness. Remove from the heat and add toasted sesame oil.
Serve egg roll in a bowl over white rice, if using, and top with green onions, toasted sesame seeds, and sriracha mayo, if desired.
Growing up in the bustling souk of Marrakech, I learned early that a ripe banana could turn into a dessert miracle. Now, in my tiny New York kitchen, I bring that same spirit to the modern air fryer, crafting Banana Donut Holes that capture the sweet, comforting aroma of Moroccan street pastries in under 15 minutes.
Imagine biting into a pillowy, caramel‑golden sphere, its exterior lightly dusted with cinnamon sugar, and the interior releasing a burst of banana‑butter that lingers like a summer breeze in the heart of Manhattan. The gentle heat from the air fryer gives a crisp edge, while a subtle hint of coconut oil keeps the texture silky—an irresistible marriage of North African spice and French pastry technique.
I’ve tweaked this classic to keep it fuss‑free yet unforgettable. The secret? Using self‑rising flour to lock in air, and a quick coat of coconut oil that doubles as a glaze and a flavor enhancer. A common mistake I’ve seen is over‑kneading the dough, which makes them tough—so I recommend a gentle hand and a splash of oil. With this method, you’ll get bite‑sized delights that stay moist and melt in your mouth.
Why This Banana Donut Holes Recipe Is the Best
The flavor secret lies in the synergy between ripe banana, self‑rising flour, and a whisper of cinnamon—an homage to the Moroccan briouats I grew up making, yet refined with a French flair that turns simple ingredients into gourmet treats.
Perfected texture comes from my Parisian pastry background: the dough is kneaded just enough to trap air, then lightly brushed with melted coconut oil before air frying, giving a golden crust that still cradles a moist interior.
Foolproof and fast, this recipe eliminates the need for a deep fryer or a dozen ingredients, making it an ideal go‑to for busy NYC nights or weekend brunches that crave something sweet without the wait.
Banana Donut Holes Ingredients
I always grab the freshest bananas from the farmer’s market on 8th Avenue, pairing them with organic self‑rising flour from a local artisanal mill—both staples that give these donuts their authentic flavor.
Bananas: The fresher, the sweeter. Look for bananas with a few brown spots; they’re ripe enough for natural sweetness and perfect for mash. A substitution would be applesauce—about ¼ cup for each banana—though the flavor will lean sweeter and less distinct.
Self‑rising Flour: Provides lift without the need for baking powder. If you don’t have it, combine 1 cup all‑purpose flour with 1½ teaspoons baking powder and a pinch of salt. The texture will be slightly denser.
Coconut Oil: Adds subtle tropical notes and keeps the dough moist. If you prefer a different oil, walnut or almond oil works; just expect a slightly different flavor profile.
Original Ingredient
Best Substitution
Flavor / Texture Impact
Banana
Applesauce
Slightly sweeter, less banana flavor
Self‑Rising Flour
All‑Purpose + Baking Powder
Denser texture
Coconut Oil
Olive Oil
Less tropical flavor, slightly savory note
How to Make Banana Donut Holes — Step-by-Step
Let’s get those donut holes going—quick, airy, and bursting with banana.
Step 1: Mash the Banana
Using a fork or a blender, mash the banana until it’s smooth, ensuring you reach about ½ cup in volume. This consistency is key so the batter can bind with the flour without becoming too wet.
💡 emy’s Pro Tip: If your banana is very sweet, add a pinch of salt to balance the flavors.
Step 2: Add the Flour and Knead
Fold in the self‑rising flour and stir with a rubber spatula until lumps form. Then, oil your hands with a splash of coconut oil, lightly knead the dough, and shape it into a smooth ball. Keep it moist—over‑kneading will dry it out.
⚠️ Common Mistake to Avoid: Adding too much flour at once, which makes the dough bready.
Step 3: Shape the Dough Balls
Divide the dough into tablespoon‑sized portions. Roll each into a ball and place them on parchment‑lined parchment paper. Spray a light layer of avocado oil over the tops to prevent sticking.
💡 emy’s Pro Tip: Use a small cookie scoop for uniform size.
Step 4: Arrange in Air Fryer
Spray the air fryer basket with oil, then line up the donut holes with about an inch between each. This spacing lets them expand without merging.
⚠️ Common Mistake to Avoid: Overcrowding the basket, which can cause uneven cooking.
Step 5: Air Fry to Golden
Air fry at 350°F (180°C) for 6–7 minutes until they puff up and turn a golden brown. They’ll be slightly crunchy on the outside while remaining tender inside.
💡 emy’s Pro Tip: Check them halfway through to ensure even browning.
Step 6: Brush with Coconut Oil & Dust
While still warm, brush each donut hole with melted coconut oil, then roll them in a mixture of cinnamon sugar for an extra sweet crunch.
⚠️ Common Mistake to Avoid: Letting the sugar dry on the dough, which can make them hard.
Step 7: Serve Warm
Serve immediately while still hot—these little treats melt in your mouth. Keep extras in an airtight container for a quick snack later.
💡 emy’s Pro Tip: Add a splash of vanilla extract to the batter for a subtle, aromatic twist.
Step
Action
Duration
Key Visual Cue
1
Mash banana
Smooth, ½ cup
Smooth puree
2
Add flour & knead
3‑5 min
Moist dough ball
3
Shape balls
5 min
Even spheres
4
Arrange in basket
2 min
Spacing visible
5
Air fry
6‑7 min
Golden surface
6
Brush & dust
2 min
Glassy glaze
7
Serve warm
Instantly
Soft, aromatic aroma
Serving & Presentation
Plate the donut holes on a white ceramic dish to let the colors pop. A sprinkle of powdered sugar or a dusting of ground cardamom gives a subtle Moroccan flair, while a drizzle of honey creates a glossy finish reminiscent of a French patisserie.
Pair them with a small cup of strong espresso or a chilled glass of almond milk. A side of fresh berries or a spoonful of Greek yogurt adds a creamy contrast that echoes the textures of a Moroccan tagine.
For a brunch vibe, arrange them on a platter with fresh citrus slices, and let guests grab a piece while chatting over the aroma of fresh mint tea.
Pairing Type
Suggestions
Why It Works
Side Dish
Roasted carrots, quinoa salad, or a fresh green salad.
Adds crunch and balances sweetness.
Sauce / Dip
Cinnamon honey glaze, vanilla yogurt, or chocolate drizzle.
Enhances flavor and adds moisture.
Beverage
Espresso, iced tea, almond milk latte, or a glass of chilled white wine.
Cools palate and complements sweetness.
Garnish
Fresh mint leaves, edible flowers, or a dusting of cocoa powder.
Adds aroma, color, and a hint of bitterness.
Make-Ahead, Storage & Reheating
I often batch‑cook these donut holes on Sunday evenings, storing them for the week’s breakfasts or quick dessert fixes. Their airy texture stays intact when reheated gently.
Method
Container
Duration
Reheating Tip
Refrigerator
Air‑tight zip‑lock bag
3 days
Reheat 30 seconds in microwave.
Freezer
Heavy‑duty freezer bag
2 months
Air‑fry 4 min at 350°F.
Make‑Ahead
Paper cup or small container
1 day in advance
Add a light coat of oil before storing.
When reheating from frozen, I find a quick air‑fry at 350°F for 4 minutes restores the original crunch without drying out the center. If you prefer the microwave, wrap a few donut holes in a damp paper towel and heat for 15‑20 seconds.
Variations & Easy Swaps
Variation
Key Change
Best For
Difficulty Impact
Moroccan‑Spiced Cinnamon
Add ¼ tsp ground ginger, a pinch of cumin.
Spicy breakfast.
Same.
Gluten‑Free & Dairy‑Free
Use gluten‑free self‑rising blend and coconut yogurt.
Allergies.
Easy.
Summer Berry Burst
Fold in ¼ cup crushed blueberries, drizzle with lemon zest.
Satisfying summer snack.
Easy.
Moroccan‑Spiced Cinnamon
Blend a pinch of ground ginger and a touch of cumin with the cinnamon; the warmth of these spices brings my mother’s tagine flavors into the dough, giving a subtle depth that pairs beautifully with the sweet banana.
Gluten‑Free & Dairy‑Free
Replace self‑rising flour with a gluten‑free blend and use coconut yogurt instead of sugar for a tangy note. The texture stays airy, and the final flavor is just as sweet but lighter, proving the recipe’s versatility.
Summer Berry Burst
Incorporate fresh blueberries and a splash of lemon zest into the batter for a juicy, tart twist that complements the banana’s mellow sweetness—perfect for a sunny brunch in the Lower East Side.
Share Your Version!
If you love these bite‑sized donuts, drop a star rating, leave a comment, and tell me how you tweaked the recipe—perhaps adding a dash of cardamom or swapping the coconut oil for avocado.
Share a photo on Instagram or Pinterest and tag @cookingwithemi—I’d love to see your colorful creations! If you’re experimenting with the Moroccan‑spiced version, let me know how the ginger and cumin worked for you.
From my NYC kitchen to yours — I hope this recipe brings as much warmth to your table as it does to mine. — emy 🧡
📌
Love This Recipe? Save It to Pinterest!
If you enjoyed this Banana Donut Holes recipe, don’t let it get lost in your browser tabs! 😄 Pin it now so you can find it again anytime — and explore hundreds more tried‑and‑tested recipes waiting for you on my Pinterest boards.
📌 Pin this recipe · 🔁 Re-pin your favorites · 💬 Tag me when you make it — I love seeing your creations!
Got a quick question or need a cooking hack? Drop me a note— I’m always here to help you turn everyday ingredients into culinary adventures.
How long do Banana Donut Holes stay fresh?
These airy donut holes are best eaten within 24 hours of baking for peak freshness. If you need to keep them longer, store them in an airtight container in the refrigerator for up to 3 days or freeze them for up to 2 months. When you’re ready to enjoy, reheat them in a preheated oven at 350°F for 5 minutes or in an air fryer for 2–3 minutes.
Can I use ripe plantains instead of bananas?
Absolutely! Plantains bring a richer, sweeter flavor and a slightly firmer texture. Use an equal volume (½ cup) of mashed ripe plantain and follow the same steps. The result will be a deeper caramel taste that pairs wonderfully with cinnamon.
What’s a good alternative to coconut oil?
You can replace coconut oil with extra‑virgin olive oil, avocado oil, or melted butter, depending on the flavor profile you desire. Olive oil gives a mild, fruity note, while butter adds richness. Keep in mind that the oil also affects the moisture, so use a similar fat amount.
Do these donut holes need to be fried?
If you prefer a lighter version, you can bake them in a preheated oven at 350°F for 12–15 minutes, spacing them 1 inch apart on a parchment sheet. They’ll be a bit less crisp but still deliciously soft and sweet.
How can I add a chocolate twist?
Stir in 1 tablespoon of cocoa powder into the batter before shaping the dough. Alternatively, after air frying, dip the donut holes in melted dark chocolate, then let them set. The chocolate adds richness without overpowering the banana’s natural sweetness.
Can I use almond flour instead of wheat flour?
Yes, almond flour works for a gluten‑free version. Replace the self‑rising wheat flour with ¾ cup of almond flour and add ¼ teaspoon baking powder and a pinch of salt. The texture will be denser and nutty, but the flavor will complement the banana nicely.
Is it okay to store them at room temperature?
At room temperature, these donuts will stay moist for about 12 hours. Beyond that, they tend to dry out. For longer storage, refrigerate or freeze. Always reheat slightly before serving to revive their moisture.
What’s the best way to dust them with sugar?
Combine ¼ cup of cane sugar with ½ teaspoon ground cinnamon in a shallow dish. Lightly coat each warm donut hole, shaking off excess. The sugar melts slightly on the warm surface, creating a sweet, fragrant glaze that’s perfect for a quick snack.
Can I use this recipe for a vegan diet?
Absolutely! Use vegan butter or extra‑virgin olive oil instead of coconut oil, and substitute cane sugar with a vegan-friendly alternative like date sugar or maple syrup. The texture remains airy, and the flavor stays bright.
How many donut holes do I get from the recipe?
With the given measurements, you’ll make about 12 donut holes. The exact number can vary slightly depending on how tightly you portion the dough, but expect roughly a dozen small, bite‑size treats.
These air fryer banana bread donut holes are easy 2-ingredient donut holes perfect for fixing your banana bread craving in less than 15 minutes.
Ingredients
Scale
1/2 cup Banana (1 large banana)
3/4 cup Self-Rising Flour ((note 1))
1/2 teaspoon Cinnamon
1/4 cup Unrefined Cane Sugar ((note 2))
2 tablespoons Coconut Oil (melted, or melted vegan butter)
2–3 teaspoon Melted Coconut Oil
Instructions
Mash the banana into a smooth puree, make sure you get 1/2 cup or the donut batter won't come together with the same ratio of flour.
Add in the flour and stir with a rubber spatula at first, until it starts to form lumps. Now, oil your hands and knead with your slightly oiled hands to form a dough ball. The dough is sticky and moist, but that's normal don't over-add flour! If it sticks to the finger, keep kneading, using a bit of oil to smooth the dough and form a ball. Eventually, if it's really too moist add up to a max of 2-3 tablespoons of flour, not more, or the dough turns bready. You should work this dough like foccacia, using oil to avoid sticking to fingers and shape, but the dough should stay moist and elastic, not saturated by flour.
Grease your hand with melted coconut oil, grab about a tablespoon of dough, roll it into a ball, and place it on a plate covered with parchment paper. Repeat until all the dough has been turned into balls. Spray avocado oil on top of the balls.
Spray oil in the air fryer basket and place the oiled donut holes in the basket, leaving 1 inch (3 cm) apart as they expand.
Air fry at 350°F (180°C) for 6-7 minutes or until puffy and golden brown. They will have a rocky shape and be dry outside, and some will not be as round as balls; that's normal.
To make these banana bread balls taste like donuts, brush each warm ball with melted coconut oil using a pastry brush. Then, roll the warm, oiled balls into cinnamon sugar to coat evenly.
Serve warm immediately.
Creamy Pasta Salad
Table of Contents
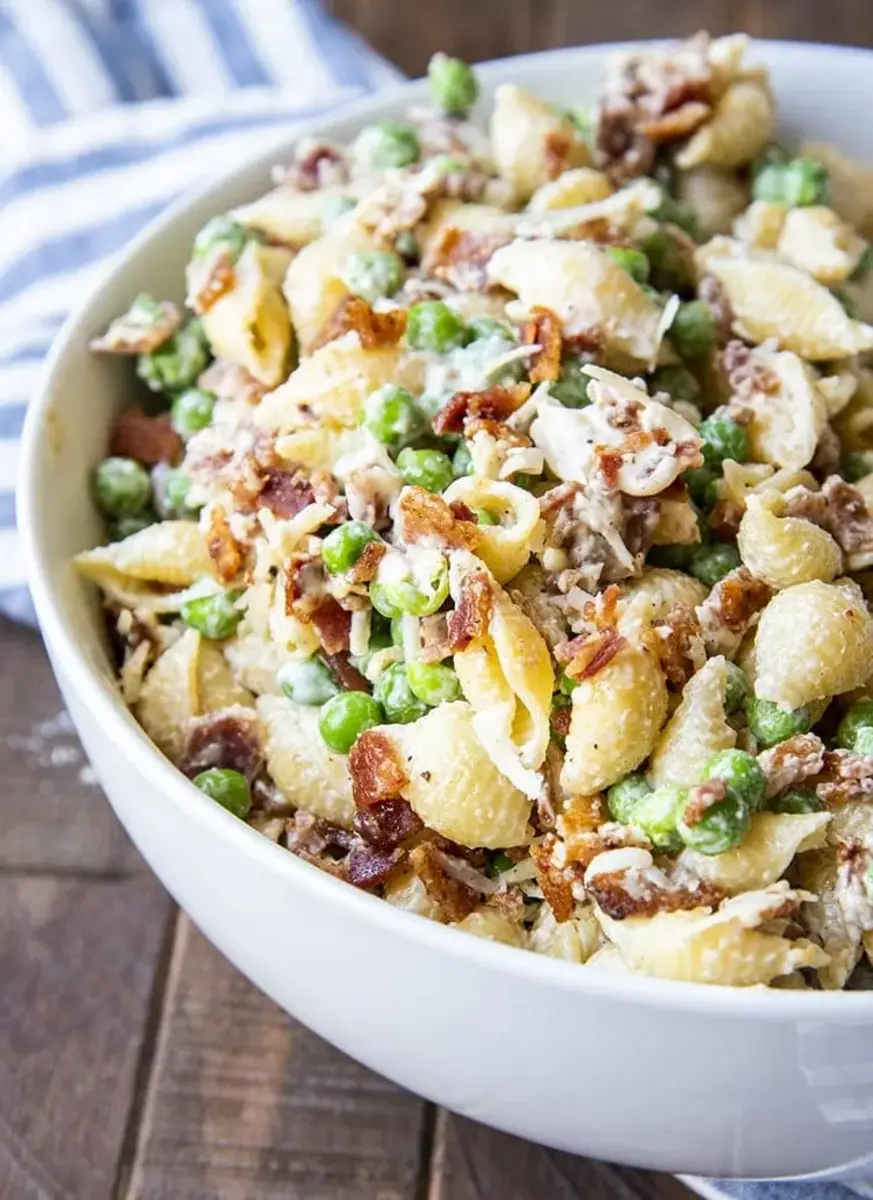
Creamy Pasta Salad with a Creamy Dressing – A Perfect Side Dish
⚖️
Difficulty
Easy
⏲️
Prep Time
10 mins
🕒
Cook Time
10 mins
⏱️
Total Time
20 mins
🍽️
Servings
8
This creamy pasta salad is the side dish that always steals the show, and I should know—I’ve been making versions of it since my days at culinary school in Paris. Back then, we focused on perfecting classic French dressings, but it wasn’t until I moved to New York and started cooking for friends at backyard barbecues that I truly understood the power of a simple, creamy pasta salad. It’s loaded with sweet peas, salty, crispy bacon, and tender noodles, all coated in a rich, creamy dressing that is anything but boring.
The creaminess here isn’t just from mayonnaise—I’ve added a touch of apple cider vinegar for brightness, a whisper of sugar for balance, and a generous handful of freshly grated Parmesan that melts into the dressing. The texture is everything: the pasta stays perfectly al dente, the peas pop with sweetness, and the bacon gives that irresistible crunch. It’s the kind of cold pasta salad that looks beautiful on a picnic table—creamy, colorful, and completely satisfying.
What makes my creamy pasta salad different from the rest? I trained in Paris, but I learned my love for creating bold, comforting flavors in my mother’s kitchen in Morocco. That dual background means I know how to build a dressing that’s both refined and deeply satisfying. In this recipe, I share a pro tip for avoiding a soggy salad, plus a common mistake that can make your pasta gluey. By the end, you’ll have a foolproof creamy pasta salad that will be the first bowl emptied at every potluck.
Why This Creamy Pasta Salad Recipe Is the Best
The flavor secret? It’s all in the balance of this creamy dressing. In my Paris training, I learned to layer flavors—not just dump them together. So I start with a good-quality mayonnaise, then brighten it with apple cider vinegar, a pinch of sugar, and a kiss of olive oil. Those tiny touches lift the entire creamy pasta salad from good to unforgettable. Every ingredient has a purpose, and the result is a cold pasta salad that’s tangy, savory, and just sweet enough.
Perfected texture is what separates home cooks from pros. I cook the pasta just to al dente, then rinse it in cold water to stop the cooking instantly. That step, plus chilling the assembled salad for an hour, lets the dressing meld with the noodles without making them mushy. The peas stay bright and the bacon stays crunchy. From my NYC kitchen to yours, this technique ensures your creamy pasta salad has the ideal bite every single time.
This recipe is foolproof and fast. With just 20 minutes of active time and a handful of everyday ingredients from any US grocery store, you can make a creamy pasta salad that serves a crowd. It’s forgiving—you can swap the bacon for chicken, use gluten-free pasta, or add diced veggies. I’ve tested it all, and it always comes out perfectly. That’s why it’s my go-to for summer cookouts and weeknight dinners alike.
Creamy Pasta Salad Ingredients
I love that this creamy pasta salad uses ingredients I can pick up at my local farmers market in Brooklyn or any supermarket in the US. The combination reminds me of the fresh, vibrant salads my mother made in Morocco, though she would never have used bacon! Each item here plays a critical role in building that creamy, tangy, and savory profile that makes this dish unforgettable.
Ingredients List
12 oz small pasta noodles (like elbow macaroni, fusilli, or shells)
2 cup frozen peas (thawed)
12 oz thick cut bacon (cooked and chopped)
1/2 cup freshly grated parmesan cheese
3/4 cup mayonnaise
2 TBS olive oil
1 TBS apple cider vinegar
1 tsp granulated sugar (to taste)
1 tsp salt (to taste)
1/2 tsp garlic powder (to taste)
1/2 tsp onion powder (to taste)
1/4 tsp black pepper (to taste)
Ingredient Spotlight
Let me walk you through the key players in this creamy pasta salad. First, the pasta: I recommend a sturdy shape like fusilli or shells because they catch the dressing in their curves. Second, the bacon—thick-cut is non-negotiable for that meaty bite. Finally, the Parmesan: always grate it yourself, as the pre-shredded stuff won’t melt smoothly into the creamy dressing.
Original Ingredient
Best Substitution
Flavor / Texture Impact
12 oz small pasta noodles
Gluten-free pasta (any shape)
Slightly less firm; cook 1-2 mins less than package directs
12 oz thick cut bacon
Turkey bacon or chopped ham
Less smoky flavor; still adds savory depth
3/4 cup mayonnaise
Greek yogurt or sour cream
Tangier and lighter; less creamy but still delicious
1/2 cup parmesan cheese
Pecorino Romano or Asiago
Saltier and sharper; use slightly less
How to Make Creamy Pasta Salad — Step-by-Step
Making this creamy pasta salad is easier than you think. Just follow these steps, and you’ll have a crowd-pleasing side dish in no time.
Step 1: Cook the Pasta
Bring a large pot of salted water to a rolling boil. Add your 12 oz of small pasta noodles and cook according to package directions until al dente—usually 7 to 9 minutes. Drain the water out, then rinse the noodles immediately under cold running water to stop the cooking process and cool them down. Let them drain well so the dressing isn’t watered down.
💡 emy’s Pro Tip: After rinsing, toss the drained pasta with 1 tablespoon of olive oil. This prevents sticking and gives the creamy dressing a velvety start.
Step 2: Prepare the Mix-Ins
While the pasta cooks, make sure your 2 cups of frozen peas are thawed. I usually just run them under warm water for a minute or leave them on the counter. Cook your 12 oz of thick-cut bacon until crispy—this takes about 8 to 10 minutes in a skillet over medium heat. Let it cool, then chop it into small pieces. Grate your Parmesan cheese fresh from the block for the best melt and flavor.
⚠️ Common Mistake to Avoid: Don’t use pre-grated Parmesan—it contains anti-caking agents that prevent it from dissolving smoothly into the dressing. You’ll end up with a grainy texture instead of a creamy one.
Step 3: Make the Creamy Dressing
In a small bowl, whisk together 3/4 cup mayonnaise, 2 tablespoons olive oil, 1 tablespoon apple cider vinegar, 1 teaspoon sugar, 1 teaspoon salt, 1/2 teaspoon garlic powder, 1/2 teaspoon onion powder, and 1/4 teaspoon black pepper. Whisk until the mixture is smooth and homogenous. Taste and adjust the sugar or salt to your preference—this creamy dressing should be tangy with a hint of sweetness.
💡 emy’s Pro Tip: Let this dressing sit for 5 minutes before pouring it over the salad. The garlic and onion powder will bloom and create a deeper flavor that makes the whole creamy pasta salad shine.
Step 4: Assemble the Salad
Add the cooled pasta, thawed peas, crispy bacon, and Parmesan to a large mixing bowl. Pour the creamy dressing over the top. Use a large spoon or spatula to stir everything together until every noodle, pea, and bacon piece is evenly coated. Make sure the dressing gets into all the crevices of the pasta shapes.
⚠️ Common Mistake to Avoid: Don’t overdress the salad at this stage. The dressing will absorb into the pasta as it chills. If you add too much now, it could become watery later. If it looks dry after chilling, you can always add a tiny splash of milk or extra mayo.
Step 5: Chill and Serve
Cover the bowl with a lid or plastic wrap and place it in the fridge to chill for 1 to 2 hours. This resting time lets the flavors meld beautifully. You can serve it immediately after assembling if you’re in a rush, but the cold creamy pasta salad truly peaks after an hour in the fridge. Give it a quick stir before serving and adjust seasoning if needed.
💡 emy’s Pro Tip: If you’re serving this at a picnic or potluck, keep the bowl chilled in a cooler or place it on ice. This creamy pasta salad is meant to be cold, and the cold temperature enhances the creamy dressing’s texture and flavor.
Step
Action
Duration
Key Visual Cue
1
Cook pasta
7-9 mins
Tender but firm to the bite
2
Prepare mix-ins
10 mins
Bacon browned and crispy
3
Make dressing
2 mins
Smooth and creamy consistency
4
Assemble
3 mins
All ingredients evenly coated
5
Chill
1-2 hours
Salad is cold and flavors have melded
Serving & Presentation
This creamy pasta salad is perfect for so many occasions. I love serving it in a large, colorful bowl that lets the green peas, golden bacon, and creamy white dressing shine. For a classic summer barbecue, pair it with grilled burgers, hot dogs, or smoky ribs. It also works beautifully alongside grilled chicken or fish for a lighter weeknight dinner. The creaminess is so satisfying that it can even stand as a main course for a quick lunch.
To present it like a pro, garnish the top with an extra sprinkle of crispy bacon bits and a dusting of fresh parsley. The contrast of green and brown against the creamy background is stunning. Sometimes I add a few fresh pea shoots for a pop of color—it’s a trick I picked up from a farmers market in Union Square. This salad is best served cold, straight from the fridge, on a warm day.
Pairing Type
Suggestions
Why It Works
Side Dish
Grilled burgers, hot dogs, ribs
Creaminess balances smoky, charred flavors
Sauce / Dip
Extra ranch dressing, hot sauce
Adds a tangy or spicy kick
Beverage
Iced tea, lemonade, crisp white wine
Refreshing and cuts through the richness
Garnish
Fresh parsley, extra bacon bits, chives
Adds color, texture, and freshness
Make-Ahead, Storage & Reheating
This creamy pasta salad is a dream for meal prep. In my busy New York City schedule, I often make it the night before a big gathering. The flavors actually deepen and meld beautifully after a full night in the fridge. Just be sure to keep it covered tightly so the pasta doesn’t dry out.
Method
Container
Duration
Reheating Tip
Refrigerator
Airtight container
3-4 days
Serve cold; no reheating needed
Grilled Zucchini Salad
Table of Contents
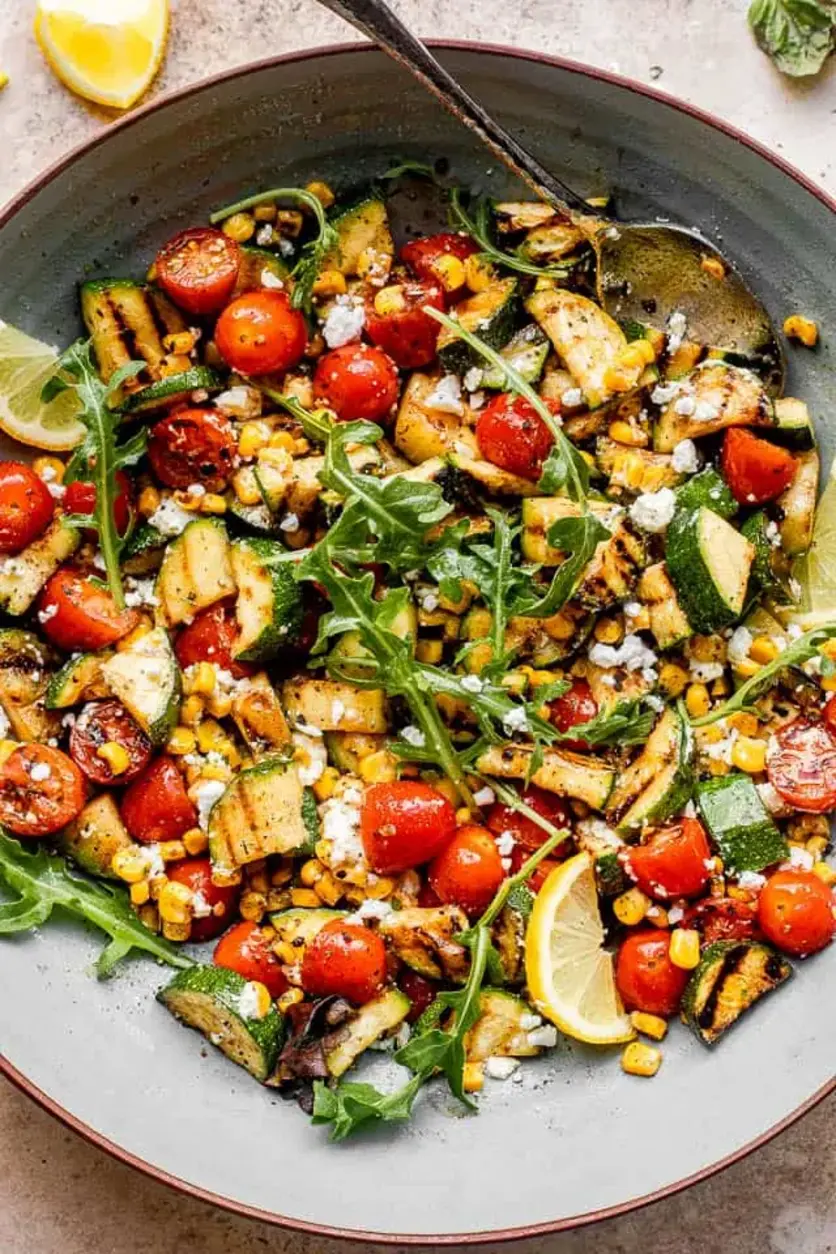
Grilled Zucchini Salad with Lemon Dressing – A Summer Bowl of Smoky Goodness
⚖️
Difficulty
Easy
⏲️
Prep Time
15 mins
🕒
Cook Time
10 mins
⏱️
Total Time
25 mins
🍽️
Servings
4 servings
I still remember the first time I made this grilled zucchini salad. It was a sweltering August afternoon in New York City, and I had just come back from the Union Square Greenmarket with armfuls of summer squash, the sweetest cherry tomatoes I could find, and ears of corn so fresh their silks were still damp. I stood in my tiny kitchen, the smell of charcoal drifting in from a neighbor’s rooftop grill, and I knew exactly what I wanted: a salad that celebrated every bit of that summer abundance. This grilled zucchini salad with corn and tomatoes, tossed in a bright lemon dressing, is that dish. It’s the recipe I turn to when I want something light yet satisfying, smoky yet fresh — and it never fails to transport me back to those lazy, sun-drenched afternoons.
There’s something magical about grilling zucchini. The high heat caramelizes its natural sugars, turning the once-crisp vegetable into a tender, almost buttery bite with beautiful char marks that add a subtle smokiness. Pair that with charred corn kernels that pop with sweetness and tomatoes that blister and release their juices, and you’ve got a salad that’s practically singing with summer flavors. The lemon dressing, with its bright acidity and a hint of garlic and oregano, ties everything together, cutting through the richness of the grilled vegetables and the creamy goat cheese that tops it all off. Every forkful is a balance of textures — tender, juicy, crisp, and creamy — that will have you reaching for seconds before you’ve finished your first plate.
What I love most about this recipe is how it combines my French culinary training with the bold, seasonal ingredients I fell in love with in New York. In Paris, I learned the art of making a perfect vinaigrette — a simple emulsion of oil and acid that should enhance, not overpower. That same principle guides this lemon dressing. But the grilling technique? That’s pure Americana, inspired by countless backyard barbecues I’ve been lucky enough to attend here in the city. My version is foolproof: you grill the zucchini directly on the grates for those perfect marks, while the tomatoes and corn cook together in a grill pan so nothing falls through. It’s fast, it’s efficient, and most importantly, it delivers incredible flavor every single time. 💡 emy’s Pro Tip: don’t overcrowd the grill — leaving space between the zucchini slices ensures they get those beautiful, caramelized grill marks instead of steaming.
Why This Grilled Zucchini Salad Recipe Is the Best
The Flavor Secret. The key to this grilled zucchini salad’s incredible taste lies in the dual grilling method. By grilling the zucchini directly on the grates and the corn and tomatoes in a pan, each component gets exactly the right amount of char. The zucchini develops deep, smoky notes without turning mushy, the corn kernels get those delightful blackened spots that amp up their sweetness, and the tomatoes blister just enough to concentrate their flavor. My French training taught me that each ingredient deserves its own cooking approach, and this technique ensures every element shines.
Perfected Texture. Texture is everything in a salad, and this one delivers in spades. The grilled zucchini is tender but still holds its shape, the corn provides a satisfying pop, the cherry tomatoes burst with juiciness, and the arugula adds a fresh, peppery crunch. Topping it all with creamy goat cheese adds a luxurious finish that balances the charred, smoky flavors. I learned in Paris that contrasting textures keep a dish exciting, and here, every bite offers something different.
Foolproof & Fast. This recipe is designed for everyone, from grilling novices to seasoned pros. With just 10 minutes of cook time and a handful of simple steps, you can have a stunning summer salad on the table in under half an hour. The ingredients are flexible — you can use whatever summer vegetables you have on hand — and the dressing comes together in seconds with a whisk. I’ve tested this countless times, and it’s nearly impossible to mess up. Even if you’ve never grilled zucchini before, you’ll nail it on your first try.
Grilled Zucchini Salad Ingredients
Whenever I make this grilled zucchini salad, I start by visiting the farmers market near my apartment in the West Village. The zucchini there are always firm and glossy, the corn is so sweet it could be dessert, and the cherry tomatoes come in every color of the rainbow. I pick up a bag of arugula and a round of creamy goat cheese from the cheese monger, and I’m set for the most glorious summer meal. The ingredients list is simple, but each one plays a crucial role in creating that perfect balance of smoky, tangy, and fresh.
Ingredients List
2 medium-sized zucchini (cut into ½-inch thick half-moons)
2 cups cherry tomatoes (halved)
2½ cups corn kernels (fresh or frozen, thawed)
2 tablespoons olive oil (divided)
Salt and freshly ground black pepper (to taste)
3 tablespoons olive oil (for dressing)
2 tablespoons lemon juice (freshly squeezed)
1 clove garlic (minced)
1 teaspoon dried oregano (or any other dried herbs)
Salt and freshly ground black pepper (to taste)
2 cups arugula
½ cup crumbled goat cheese (you could also use bleu cheese or feta cheese)
Ingredient Spotlight
Zucchini is the star of the show. Look for medium-sized zucchini that are firm and glossy, about 6 to 8 inches long. Larger zucchini can be watery and have tougher seeds, so stick with medium ones. You can substitute yellow summer squash for a slightly sweeter flavor, or use a mix of both for a beautiful color contrast. The texture will be very similar, though yellow squash tends to be a bit more tender.
Cherry tomatoes provide bursts of sweetness and acidity. Choose tomatoes that are bright, firm, and heavy for their size. If cherry tomatoes aren’t available, you can use grape tomatoes — they’re slightly less sweet but work perfectly. For a more robust flavor, roast halved Roma tomatoes in the oven at 400°F for 15 minutes, though you’ll miss the smoky char from the grill.
Corn adds that irresistible pop of sweetness and a satisfying crunch. Fresh corn on the cob, cut off the kernels, is ideal. If fresh corn isn’t in season, frozen corn kernels work wonderfully — just thaw them and pat dry before grilling. Canned corn is less recommended as it can be mushy; if you must use it, drain and pat dry thoroughly.
Goat cheese brings a creamy, tangy finish that complements the smoky vegetables perfectly. You can substitute bleu cheese for a stronger, funkier flavor, or feta for a saltier, brinier kick. For a dairy-free version, try crumbled vegan feta or omit the cheese altogether and add a handful of toasted pine nuts for crunch.
Arugula adds a peppery bite that cuts through the richness of the grilled vegetables and cheese. If arugula is too bitter for your taste, you can use baby spinach for a milder flavor, or mixed spring greens for a more delicate texture. Watercress would also be a lovely substitute, with its own peppery kick.
Original Ingredient
Best Substitution
Flavor / Texture Impact
Zucchini
Yellow summer squash
Slightly sweeter, just as tender
Cherry tomatoes
Grape tomatoes or roasted Roma
Less sweet; less smoky if roasted
Fresh corn
Frozen corn (thawed and patted dry)
Slightly less sweet, but still great
Goat cheese
Feta cheese or bleu cheese
Feta: saltier; bleu: funkier and creamier
Arugula
Baby spinach or mixed greens
Milder flavor, less peppery
How to Make Grilled Zucchini Salad — Step-by-Step
Trust me when I say this is one of the easiest, most rewarding salads you’ll ever make. The grill does most of the work, and the whole process takes less than 30 minutes. Here’s how I do it every single time.
Step 1: Prep the Grill
Preheat your outdoor grill to medium-high heat, about 425°F. While it’s heating up, brush the grill grates with a bit of oil using a long-handled brush. This prevents the zucchini from sticking and ensures those beautiful grill marks. If you’re using a gas grill, give it a good 10 to 15 minutes to get nice and hot. 💡 emy’s Pro Tip: To test if the grill is hot enough, hold your hand about 5 inches above the grates. If you can only keep it there for 2 to 3 seconds, it’s ready.
Step 2: Grill the Zucchini
Place the zucchini half-moons in a bowl and drizzle them with 1 tablespoon of olive oil. Season generously with salt and pepper, then toss gently to coat. Arrange the zucchini slices in a single layer on the hot grill grates, making sure they’re not touching. Grill for 2 to 3 minutes per side, or until tender and marked with distinct grill lines. They should be easily pierced with a fork but still hold their shape. ⚠️ Common Mistake to Avoid: Don’t move the zucchini around once you place it on the grill. Let it sit undisturbed for the full 2 to 3 minutes to develop those beautiful char marks. If you try to flip it too early, it will stick and tear.
Step 3: Grill the Tomatoes and Corn
While the zucchini is grilling, grab a grill pan (or a disposable aluminum pan with holes poked in the bottom). Combine the halved cherry tomatoes and corn kernels in the pan, drizzle with the remaining 1 tablespoon of olive oil, and season with salt and pepper. Place the grill pan on the grill alongside the zucchini and cook, stirring frequently, for about 2 to 3 minutes. You want the tomatoes to blister and the corn to develop some charred spots. 💡 emy’s Pro Tip: Don’t have a grill pan? No problem. You can thread the tomatoes and corn onto skewers or simply grill the corn directly on the grates (let it char on all sides, then cut the kernels off the cob). For the tomatoes, you can also toss them directly on the grates for the last minute, but watch them carefully so they don’t fall through.
Step 4: Make the Dressing
Meanwhile, in a large salad bowl, whisk together 3 tablespoons of olive oil, 2 tablespoons of fresh lemon juice, the minced garlic, dried oregano, and a generous pinch of salt and pepper. Whisk until it’s well combined and slightly emulsified. The aroma alone will make your mouth water. ⚠️ Common Mistake to Avoid: Don’t skip the fresh lemon juice! Bottled lemon juice lacks the bright, zesty flavor that makes this dressing sing. Squeeze it fresh right before you make the dressing for the best results.
Step 5: Finish and Serve
To the bowl with the dressing, add the grilled zucchini, charred tomatoes and corn, and the arugula. Toss everything gently with tongs until the vegetables are well coated in the dressing. The arugula will wilt slightly from the warmth of the grilled vegetables, which is exactly what you want. Transfer the salad to a serving platter or individual plates, and top generously with crumbled goat cheese. Serve immediately while the vegetables are still warm. 💡 emy’s Pro Tip: For the prettiest presentation, arrange the grilled zucchini in a fan pattern on the platter, then pile the rest of the salad on top. Sprinkle the goat cheese over everything right before serving so it stays creamy and doesn’t melt too much.
Step
Action
Duration
Key Visual Cue
1
Preheat grill and brush grates
10–15 mins
Grill is hot; oil on grates shimmers
2
Grill zucchini
4–6 mins total
Grill marks appear; zucchini is tender
3
Grill tomatoes and corn in pan
2–3 mins
Tomatoes blister; corn has charred spots
4
Make dressing
1–2 mins
Dressing is emulsified and aromatic
5
Toss and serve
2 mins
Arugula slightly wilted; cheese crumbled on top
Serving & Presentation
I love serving this grilled zucchini salad as a main dish for a light summer lunch or as a show-stopping side at a backyard barbecue. When I’m plating it for guests, I like to take a little extra care — it’s such a colorful dish, and it deserves a beautiful presentation. I arrange the grilled zucchini slices in a slight fan on one side of a large wooden board or platter, then pile the arugula, charred tomatoes, and corn in the center. The crumbled goat cheese goes on top, and I finish with a few extra grinds of black pepper and a light drizzle of olive oil. Sometimes I add a handful of fresh basil leaves or a sprinkle of toasted pine nuts for extra texture and flavor.
This salad pairs beautifully with grilled chicken or fish — I often serve it alongside a simple lemon-herb chicken breast or some grilled salmon. For a completely plant-based meal, I’ll add some crusty bread and a side of hummus or tzatziki. The smoky, tangy flavors also work wonderfully with a chilled glass of Sauvignon Blanc or a light, crisp rosé. If you’re having a Moroccan-inspired meal (my childhood favorite), serve this alongside slow-cooked lamb or chicken tagine — the freshness of the salad cuts through the richness of the stew beautifully.
Pairing Type
Suggestions
Why It Works
Side Dish
Grilled chicken, salmon, or lamb chops
Bright, acidic salad balances rich proteins
Sauce / Dip
Zucchini Garlic Bites
Table of Contents
Zucchini Garlic Bites with Italian Flair – Crispy, Cheesy, & Perfect for Snacking
⚖️
Difficulty
Easy
⏲️
Prep Time
10 mins
🕒
Cook Time
18 mins
⏱️
Total Time
28 mins
🍽️
Servings
16 bites (4 servings)
I still remember the first time I made these zucchini garlic bites in my tiny Parisian apartment kitchen—the smell of garlic and fresh herbs filling the air reminded me of my mother’s garden in Morocco, where she’d grow the most fragrant basil and oregano. This zucchini garlic bites recipe has become a staple in my NYC home ever since, and it’s the kind of snack that disappears within minutes at any gathering. The secret is in the balance: shredded zucchini that’s been properly wrung dry, a touch of fine-grated garlic, and a generous handful of Parmigiano-Reggiano that gives each bite a nutty, salty crunch.
Imagine biting into a warm, golden-brown ball that’s delicately crispy on the outside, yet tender and flavorful on the inside. The zucchini melts into the background, while the garlic and fresh herbs—chives, parsley, basil, oregano—sing in harmony. A hint of Parmesan adds depth, and the marinara dipping sauce ties everything together with its bright acidity. My culinary training in France taught me how to layer flavors so even simple ingredients shine, and this recipe is a perfect example: no fuss, just pure, honest taste.
I’ve tested this recipe dozens of times—first for my own lunches, then for dinner parties, and now it’s one of the most requested bites in my NYC circle. What makes my version different? I insist on grating the zucchini into a clean towel and twisting it tightly to remove as much moisture as possible. 💡 emy’s Pro Tip: If you skip this step, your bites will turn out soggy instead of crisp. Also, don’t overmix the batter—just combine until everything comes together. A common mistake home cooks make is using frozen zucchini or not salting it first, which leads to a watery texture. Follow my method, and you’ll get perfect zucchini garlic bites every time.
Why This Zucchini Garlic Bites Recipe Is the Best
The Flavor Secret: I bring a bit of my North African kitchen into this Italian-inspired dish by using a mix of fresh herbs—chives, parsley, basil, and oregano—that I grow on my NYC windowsill. The garlic is grated on a Microplane so it melts into the batter, avoiding sharp raw bites. The Parmigiano-Reggiano adds a salty, umami punch that makes these bites utterly addictive, while a pinch of salt and pepper ties it all together. This isn’t just a zucchini snack; it’s a flavor experience that bridges my Moroccan roots and French training.
Perfected Texture: The key to achieving that perfectly crispy exterior and tender interior is in the wringing technique. After grating the zucchini, I place it in a clean kitchen towel, roll it up, and twist as hard as I can to release the water. This step, learned from a Parisian chef who taught me the importance of moisture control, ensures every bite is firm, not mushy. The breadcrumbs and egg bind the mixture without making it heavy, so you get a light, crisp texture that holds together beautifully.
Foolproof & Fast: With just 10 minutes of prep and 18 minutes of baking, these zucchini garlic bites are perfect for busy weeknights, last-minute appetizers, or even a healthy snack for kids. The ingredient list is simple—you probably have most items in your pantry—and the method is straightforward enough for beginners. Plus, I’ve included tested substitutions in the ingredient spotlight so you can adapt to what you have on hand.
Zucchini Garlic Bites Ingredients
When I shop for these ingredients at the Union Square Greenmarket in NYC, I look for firm, medium-sized zucchini with shiny skin—they have the best texture and moisture content. The fresh herbs I snip from my own pots, but dried work beautifully too. Here’s everything you need, measured the American way.
Zucchini: The star of the show. Choose small to medium zucchini (about 6–8 inches long) for less bitterness and fewer seeds. In a pinch, yellow squash works, though it’s slightly more watery. Always wring it well—this is non-negotiable.
Garlic: I grate it on a Microplane or the fine side of a box grater so it incorporates smoothly. One clove is enough for a mellow garlic flavor that doesn’t overpower. If you like it stronger, add another half clove, but I find the fresh herbs provide plenty of depth.
Parmigiano-Reggiano: The real deal is worth it—pre-grated stuff often has anti-caking agents that affect texture. If you’re dairy-free, use a good vegan Parmesan or nutritional yeast for a similar umami hit, though the texture will be slightly crumblier.
Breadcrumbs: Plain or panko work equally well. Panko gives a lighter, crispier outcome, while regular breadcrumbs make a denser bite. For a gluten-free version, use gluten-free breadcrumbs or almond flour—the latter will make them more tender and slightly nuttier.
Original Ingredient
Best Substitution
Flavor / Texture Impact
Zucchini
Yellow squash
Slightly more moisture, similar flavor
Parmigiano-Reggiano
Vegan Parmesan or nutritional yeast
Less creamy, more crumbly, still savory
Breadcrumbs
Almond flour or gluten-free breadcrumbs
Nuttier, more tender; may require binding adjustment
Fresh herbs (mixed)
1 tsp dried Italian seasoning
More concentrated flavor; use half the amount
How to Make Zucchini Garlic Bites — Step-by-Step
Don’t let the simple ingredient list fool you—these zucchini garlic bites are packed with technique. I’ll walk you through each step so you get perfectly golden, crispy bites every time.
Step 1: Preheat and Prepare
Preheat your oven to 400°F (200°C). Lightly coat a baking sheet with olive oil or non-stick spray—this prevents the bites from sticking and helps them crisp up. I like to line mine with parchment paper for even easier cleanup.
⚠️ Common Mistake to Avoid: Don’t use a dark baking sheet—it can cause the bottoms to burn before the tops are golden. A light-colored, heavy-duty sheet gives even heat distribution.
Step 2: Grate and Wring the Zucchini
Use a box grater to shred the zucchini directly into a clean kitchen towel. Roll up the towel tightly and twist it over the sink to wring out as much moisture as possible. You’ll be surprised how much water comes out—this step is crucial for crispy bites.
💡 emy’s Pro Tip: If you have time, let the grated zucchini sit in a colander with a pinch of salt for 10 minutes before wringing. This draws out even more moisture, giving you an even firmer texture.
Step 3: Grate the Garlic
Grate the garlic clove using the small holes on the box grater or a Microplane. This fine grate ensures the garlic blends evenly into the mixture without leaving harsh chunks. Set it aside with the zucchini.
⚠️ Common Mistake to Avoid: Don’t use a garlic press—it can produce a watery, harsh paste that throws off the moisture balance. Stick to a fine grater for best results.
Step 4: Mix the Batter
In a medium bowl, combine the wrung-out zucchini, grated garlic, egg, breadcrumbs, Parmigiano-Reggiano, chives, parsley, basil, oregano, salt, and pepper. Stir with a fork or spatula until just combined—don’t overmix, or the bites may become tough.
💡 emy’s Pro Tip: If the mixture seems too wet, add another tablespoon of breadcrumbs. If too dry, a tiny splash of water or milk works wonders. The perfect texture should hold together when gently pressed.
Step 5: Shape and Arrange
Scoop about a tablespoon of the mixture and roll it into a small ball using your hands. Place each ball on the prepared baking sheet, spacing them about 1 inch apart. Pat them gently into a slight disc shape for even cooking.
⚠️ Common Mistake to Avoid: Don’t overcrowd the baking sheet—cramped bites will steam instead of baking, resulting in a soggy texture. Use two sheets if needed.
Step 6: Bake and Serve
Bake in the preheated oven for 15–18 minutes, or until the bites are golden brown and firm to the touch. Let them cool on the baking sheet for 2 minutes, then transfer to a serving plate. Serve warm with your favorite marinara sauce for dipping.
💡 emy’s Pro Tip: For extra crispiness, flip the bites halfway through baking and brush lightly with olive oil. This gives them a golden crust on both sides.
Step
Action
Duration
Key Visual Cue
1
Preheat oven & prep sheet
5 mins
Oven reaches 400°F
2
Grate & wring zucchini
5 mins
No water drips from towel
3
Grate garlic
1 min
Fine, even paste
4
Mix batter
3 mins
Uniformly combined, holds shape
5
Shape & arrange bites
5 mins
16 uniform balls on sheet
6
Bake
15–18 mins
Golden brown, firm edges
Serving & Presentation
These zucchini garlic bites are incredibly versatile—I’ve served them as appetizers at dinner parties, as a side dish alongside grilled chicken, and even as a fun snack for my niece and nephew. The way I love to plate them is on a rustic wooden board, piled high with a small bowl of warm marinara sauce in the center. A sprinkle of fresh parsley or basil on top adds a pop of color, and a light dusting of extra Parmesan makes them look straight off a restaurant menu.
Inspired by my time in Paris, I often pair them with a crisp white wine like Sauvignon Blanc or a light Italian Pinot Grigio—the acidity cuts through the richness of the cheese and complements the garlic beautifully. For a non-alcoholic option, a sparkling water with a squeeze of lemon is just as refreshing. If you’re serving them as a main dish (though they’re petite), pair them with a simple arugula salad dressed with lemon vinaigrette for a complete meal.
Growing up in Morocco, my mother would serve similar fritters with a tangy yogurt sauce. While marinara is my go-to dip for this Italian-inspired version, you can also try a herbed Greek yogurt dip or a spicy harissa aioli for a fusion twist that nods to my roots. The key is to keep the dip simple so the zucchini garlic bites remain the star.
Pairing Type
Suggestions
Why It Works
Side Dish
Grilled chicken, roasted salmon, or a simple pasta
Adds texture and flavor variety; light enough not to overwhelm
Sauce / Dip
Marinara, herbed yogurt, or harissa aioli
Acidity or creaminess balances the savory, garlicky bites
Beverage
Sauvignon Blanc, Pinot Grigio, or lemon sparkling water
Crisp, acidic drinks cut through richness and refresh the palate
Garnish
Fresh parsley, basil leaves, extra Parmesan shavings
This tasty zucchini garlic bites recipe combines shredded zucchini with garlic, Parmesan cheese, fresh herbs, and is served with a marinara dipping sauce for an Italian inspired twist.
Preheat oven to 400F. Lightly coat a baking sheet with olive oil or non-stick spray. Set aside.
Use a box grater to grate the zucchini into a clean towel. Roll up the towel and twist to wring out the moisture.
Grate the garlic using the small holes on the box grater.
Add the shredded zucchini, garlic, egg, breadcrumbs, parmesan, chives, parsley, basil, oregano, salt and pepper to a medium bowl. Mix well to combine.
Shape a tablespoon of the mixture into your hands, pat into small balls, and place on the baking sheet.
Bake for 15-18 minutes in the preheated oven until golden. Serve warm with marinara sauce. Recipe makes about 16 bites.
Air Fryer 2 Ingredient Parmesan Zucchini Crisps
Table of Contents
Air Fryer 2 Ingredient Parmesan Zucchini Crisps – The Crunchiest 2-Ingredient Snack
⚖️
Difficulty
Easy
⏲️
Prep Time
5 mins
🕒
Cook Time
12 mins
⏱️
Total Time
17 mins
🍽️
Servings
2 servings
Let me tell you a little secret from my NYC kitchen: sometimes the most brilliant recipes come from the most minimal ingredients. Growing up in Morocco, my mother would make crispy zucchini fritters called beghrir, but they were a production — hours of grating, seasoning, and frying. Now, as a busy food blogger in New York, I crave that same golden crunch without the fuss. That’s how these Air Fryer 2 Ingredient Parmesan Zucchini Crisps were born. Two ingredients, a hot air fryer, and a trick I learned at culinary school in Paris to get that perfect, savory crust. This is my ultimate snack when I need something fast, healthy, and deeply satisfying.
Imagine this: tender, barely-sweet zucchini rounds, each one perfectly seared and topped with a blanket of nutty, melted Parmesan that transforms into a wafer-thin, crunchy shell. The cheese darkens to a gorgeous golden brown, with crispy, lacy edges that shatter when you bite in. The inside stays just slightly tender, offering a beautiful contrast in texture. The aroma? It’s pure umami heaven — like the best part of a French cheese soufflé, but in snack form. I love serving these straight from the air fryer basket while they’re still piping hot and crackling.
My version of these Air Fryer 2 Ingredient Parmesan Zucchini Crisps isn’t just about convenience. It’s a chef’s trick — using freshly grated Parmesan instead of the pre-shredded stuff ensures it melts smoothly and crisps perfectly without clumping. I’ve tested this technique in my tiny NYC apartment kitchen with a dozen different zucchini sizes and cheese brands. The result is always a crispy, golden success. 💡 emy’s Pro Tip hidden inside: letting them cool for just a few minutes before eating is the key to that glass-like crunch. Also, watch out for a common mistake — don’t overcrowd the basket or the zucchini will steam instead of crisp!
Why This Air Fryer 2 Ingredient Parmesan Zucchini Crisps Recipe Is the Best
The Flavor Secret: The magic of these Air Fryer 2 Ingredient Parmesan Zucchini Crisps comes from using freshly grated Parmesan. The flavor is sharp, salty, and nutty without being greasy. Growing up in Morocco, we always grated our own cheese for salads and pastries — it was a sign of a careful cook. That French culinary training taught me that pre-grated cheese often contains anti-caking agents that stop it from melting into a cohesive, crunchy crust. This simple swap transforms the entire dish.
Perfected Texture: The genius of this air fryer trick is the direct contact between the cheese and the hot metal basket. When the Parmesan melts and hits the hot surface, it sizzles immediately, creating a thin, lacy crisp that acts like a golden shield on top of the tender zucchini. It’s the same technique we used for tuiles in Paris — a thin, crisp cheese disc that’s incredibly addictive.
Foolproof & Fast: This recipe is a go-to for anyone who thinks they can’t cook. It’s literally two ingredients, and the air fryer does all the work. You just slice, cheese, and air fry. My busy NYC friends, from lawyers to artists, make these all the time because they’re faster than ordering takeout and healthier than chips. If I can make these while waiting for a kettle to boil in my Manhattan kitchen, you can too!
Parmesan Zucchini Crisps Ingredients
The beauty of this recipe is its simplicity. Whenever I walk through the Union Square farmers market in NYC, I always grab a few medium zucchinis from the late-summer harvest. For the cheese, I head to Murray’s Cheese in Greenwich Village to pick up a block of real Parmigiano-Reggiano. If I’m in a pinch, a good domestic parmesan from the grocery store works wonders too. Here’s what you need.
Ingredients List
1 medium zucchini (sliced into ¼ inch thick rounds)
½ cup grated parmesan cheese (freshly grated)
Ingredient Spotlight
Zucchini: The star vegetable. Look for medium-sized zucchinis (6–8 inches long). They have fewer seeds and a firmer texture than giant ones. At the market, I press my thumb against the skin — it should feel firm, not soft. The skin is edible and holds the cheese well, so don’t peel it. Best substitution: Yellow squash works perfectly; it’s slightly sweeter. Flavor/Texture impact: Yellow squash is a bit more tender and has a higher moisture content, so it may crisp slightly less, but the flavor is lovely.
Parmesan Cheese: The crunchy crown. I cannot stress this enough — grate your own from a block of Parmigiano-Reggiano or a good-quality domestic parmesan. Pre-shredded cheese contains cellulose (wood pulp) to prevent clumping, which stops it from melting into a cohesive crisp. The freshly grated cheese melts into a golden lace. Best substitution: Pecorino Romano is saltier and sharper; Asiago is milder and creamier. Flavor/Texture impact: Pecorino will have a more intense, salty tang; Asiago might not get quite as crunchy but will be deliciously nutty.
Salt and Pepper (optional): You might not even need it! The Parmesan is already salty enough for most palates. However, if you’re a salt lover like me, a tiny pinch of flaky sea salt at the end is divine. Black pepper adds a gentle heat.
Original Ingredient
Best Substitution
Flavor / Texture Impact
Medium zucchini
Yellow squash
Slightly sweeter and more tender, may crisp a bit less.
Grated Parmesan (fresh)
Pecorino Romano
More intense, salty, tangy flavor.
Grated Parmesan (fresh)
Asiago (mild)
Milder, creamier, less crunchy but still delicious.
Freshly grated cheese
Pre-shredded cheese (avoid)
Likely to clump and not melt evenly; texture will be gummy.
How to Make Air Fryer 2 Ingredient Parmesan Zucchini Crisps — Step-by-Step
Making these Air Fryer 2 Ingredient Parmesan Zucchini Crisps is almost too easy. Follow these steps exactly, and you’ll have a perfect, crispy snack every single time.
Step 1: Slice the Zucchini
Wash the zucchini and trim off both ends. Using a sharp knife or a mandoline slicer, cut the zucchini into ¼-inch thick rounds. Try to keep them as uniform as possible for even cooking. Pat the slices dry with a paper towel to remove excess moisture — this helps the cheese stick better and encourages faster crisping.
💡 emy’s Pro Tip: If your zucchini slices are very wet, let them sit on a paper towel for 5 minutes, then blot again. Excess moisture is the #1 enemy of crispiness.
Step 2: Season and Top with Cheese
Place the zucchini rounds into your air fryer basket in a single layer. It’s important not to overlap them — if your air fryer is small, you may need to work in batches. If your air fryer basket is nonstick, you don’t need to grease it; it’s already ready to go. If it is not nonstick, give it a light spray with cooking oil spray. Now, add a thin, even layer of freshly grated Parmesan cheese over each round, covering the entire surface. Don’t pile it on — a light, even coating is all you need.
⚠️ Common Mistake to Avoid: Using too much cheese! A thick layer will take too long to crisp and may burn before the zucchini is cooked. Think of it as a fine dusting, not a heavy blanket.
Step 3: Air Fry to Perfection
Set your air fryer to 370°F (no need to preheat). Cook the rounds for about 12 minutes, or until the cheese is dark golden brown and the edges are just starting to darken. The cheese should look like it’s bubbling and setting into a lacy, crisp shell. Every air fryer runs a little differently, so check after 10 minutes. Once done, remove the basket and let the rounds cool for a few minutes directly on the basket or on a wire rack.
💡 emy’s Pro Tip: The cooling step is crucial! As the crisps cool, the cheese hardens into a glass-like, snappy crust. If you try to eat them immediately, they’ll be soft and bendable. Patience pays off here. About 3-5 minutes is perfect.
Step
Action
Duration
Key Visual Cue
1
Slice and pat zucchini dry
5 mins (prep)
Slices are ¼-inch thick, no visible water droplets
2
Place rounds in single layer, top with cheese
2 mins
Cheese covers surface thinly and evenly
3
Air fry at 370°F
12 mins
Cheese is dark golden brown, edges are lacy and crisp
4
Cool in basket on wire rack
3-5 mins
Cheese shell hardens and becomes firm to the touch
Serving & Presentation
These Air Fryer 2 Ingredient Parmesan Zucchini Crisps are seriously versatile. I love serving them as a pre-dinner snack straight from the air fryer basket, still warm and crunchy. They can be piled on a platter lined with a napkin, like the best kind of bar snack. For a more elegant look, arrange them on a wooden board with a small bowl of dipping sauce in the center. The cheese side up is the star — it’s golden, lacy, and perfectly rustic.
When I think of these crisps, it reminds me of the crispy, salty snacks my mother would prepare for Friday nights in Morocco, often with a fresh yogurt dip. In Paris, we’d pair similar cheese crisps with a glass of chilled white wine after a long shift. Here in NYC, I often serve them alongside a simple salad of greens and lemon vinaigrette, or as a crunchy topping on a bowl of tomato soup.
Pairing Type
Suggestions
Why It Works
Side Dish
Simple green salad, tomato soup, grilled chicken, or a burger
Adds crunch and salty umami to lighter dishes.
Sauce / Dip
Marinara, garlic aioli, ranch dressing, labneh, or balsamic glaze
The rich, sharp cheese pairs beautifully with bright, tangy dips.
Beverage
Chilled Sauvignon Blanc, dry rosé, or a light, crisp lager
High acidity cuts through the richness of the cheese and zucchini.
Garnish
Fresh basil ribbons, a sprinkle of red pepper flakes, lemon zest
Adds color, freshness, and a pop of flavor that lifts the dish.
Make-Ahead, Storage & Reheating
In my busy NYC life, I’ve learned that some things are best fresh, and these crisps are definitely on that list. Because of the moisture in the zucchini, the crispy top will soften when fully cooled and stored. But don’t worry — I have the perfect trick to bring them back to life. If you’re planning to make a larger batch for a party, follow the steps below.
Method
Container
Duration
Reheating Tip
Refrigerator
Paper towel-lined airtight container
Up to 2 days
Re-crisp in the air fryer at 370°F for 3-4 minutes.
Freezer
Freezer-safe bag (flash freeze on a tray first)
Up to 1 month
Grilled Vegetables Marinade
Table of Contents
Grilled Vegetables Marinade with Honey-Dijon Twist – The Best Healthy Summer Side
⚖️
Difficulty
Easy
⏲️
Prep Time
15 mins
🕒
Cook Time
12 mins
⏱️
Total Time
57 mins
🍽️
Servings
6 servings
Every summer, I think back to my mother’s kitchen in Morocco, where she would brush fresh vegetables with a simple blend of olive oil and spices before grilling them over hot coals. That memory, combined with my training in Paris—where I learned how a perfect vinaigrette can transform any dish—inspired this Grilled Vegetables Marinade. The honey-Dijon twist is the secret that elevates this from a simple side to a standout dish. The sweetness of the honey caramelizes on the grill, while the tangy Dijon and balsamic vinegar create a beautiful glaze, all enhanced by thyme and garlic.
Imagine biting into a charred, slightly smoky carrot with a sweet and tangy crust, or a tender zucchini strip that’s been infused with garlic and herbs. The aroma as these vegetables hit the grill is pure summer magic—a blend of balsamic, honey, and thyme mingling with the scent of open flame. Each vegetable takes on a unique texture; the asparagus gets crisp-tender, the peppers soften with a hint of sweetness, and the squash develops golden grill marks that lock in moisture. It’s a dish that tastes as vibrant as it looks.
What sets this Grilled Vegetables Marinade apart is its balance. It’s a recipe I developed while cooking at a food stall in Brooklyn, aiming to create a versatile, foolproof marinade that works on any vegetable. The key is the emulsification of the mustard and olive oil, which clings to every nook and cranny. 💡 emy’s Pro Tip: Let the vegetables marinate for at least 30 minutes—but no more than 2 hours—so the flavors penetrate without making the veggies soggy. ⚠️ Common Mistake to Avoid: Don’t overcrowd the grill, or the vegetables will steam instead of getting those beautiful charred edges.
Why This Grilled Vegetables Marinade Recipe Is the Best
The flavor secret is in the emulsification of the honey-Dijon base. I learned in Paris that a proper vinaigrette needs a strong emulsifier, and the Dijon mustard does exactly that. It binds the olive oil and balsamic vinegar into a creamy, clingy marinade that coats every piece of vegetable evenly. This means every bite is perfectly seasoned, from the first charred edge to the last tender slice.
Texture is everything when grilling vegetables. The technique I use—cutting everything into long strips, not rounds—ensures the vegetables stay intact on the grill and cook evenly. The carrots and asparagus are sliced lengthwise so they don’t fall through the grates, and the squash and zucchini are cut into sixths for substantial pieces that char beautifully without becoming mushy. This method was a game-changer in my NYC kitchen, where every grill minute counts.
This recipe is foolproof and fast, even for beginners. The marinade comes together in minutes with pantry staples, and the hands-on cooking time is just 12 minutes. The key is to preheat the grill thoroughly and use a timer. You’ll have a stunning, healthy side dish that looks like you spent hours on it. I’ve tested this for years—it works every single time.
Grilled Vegetables Marinade Ingredients
I buy my produce from the Union Square Greenmarket every Saturday. The bright orange carrots, fresh asparagus, and firm squash remind me of the market stalls in Marrakech. This Grilled Vegetables Marinade uses simple, fresh ingredients that are easy to find at any US grocery store.
Ingredients List
1/3 cup olive oil
¼ cup balsamic vinegar
3 tablespoons dijon mustard
3 tablespoons honey
1 ½ teaspoon dried thyme
1 teaspoon garlic powder
1 teaspoon salt
½ teaspoon ground black pepper
1 pound carrots (halved or quartered)
1 pound asparagus (trimmed)
2 zucchini (cut into sixths)
2 yellow squash (cut into sixths)
1 large red bell pepper (cut into ½ inch strips)
Ingredient Spotlight
The Dijon mustard is the backbone of this marinade. It’s not just for flavor—it’s an emulsifier that keeps the oil and vinegar from separating. I recommend Maille or Grey Poupon for a smooth, balanced taste. You can substitute whole-grain mustard for a chunkier texture, though the marinade will be slightly less smooth.
The honey adds a delicate sweetness that caramelizes on the grill. I use local wildflower honey from a farm in upstate New York. Maple syrup is a great substitute, though it will add a slightly deeper, woodsy flavor. For a vegan option, use agave nectar—it caramelizes similarly but is a bit thinner.
The balsamic vinegar provides the tangy acidity that brightens the entire dish. Look for a moderately priced bottle—the really expensive aged balsamics are wasted here. Apple cider vinegar is a fine substitute, but it will give a sharper, more fruity note. Red wine vinegar works too in a pinch, though the flavor will be more tart.
The dried thyme is a classic herb that pairs beautifully with grilled vegetables. It’s subtle but aromatic. If you have fresh thyme, use 1 tablespoon of fresh leaves (about 4–5 sprigs) instead of the dried. Rosemary is a good alternative, but use it sparingly—it can overpower the other flavors.
Original Ingredient
Best Substitution
Flavor / Texture Impact
Dijon Mustard
Whole-grain mustard
Adds texture; slightly less smooth
Honey
Maple syrup or agave
Deeper flavor with maple; vegan with agave
Balsamic Vinegar
Apple cider vinegar
Sharper, fruitier acidity
Dried Thyme
Fresh thyme or dried rosemary
Brighther with fresh; rosemary is more intense
Olive Oil
Avocado oil
Neutral flavor; higher smoke point
How to Make Grilled Vegetables Marinade — Step-by-Step
Making this Grilled Vegetables Marinade is simpler than you think. Follow these steps, and you’ll have perfect charred veggies every time.
Step 1: Whisk the Marinade
Set out a 1-2 cup measuring pitcher. Measure all the marinade ingredients—olive oil, balsamic vinegar, Dijon mustard, honey, dried thyme, garlic powder, salt, and black pepper—into the pitcher. Whisk vigorously until smooth and emulsified. The mixture should look creamy and slightly thickened. You can use it immediately or cover and refrigerate it for up to 3 days.
💡 emy’s Pro Tip: For the best emulsification, add the olive oil in a slow, steady stream while whisking. This creates a stable emulsion that won’t separate on the vegetables.
Step 2: Prep the Vegetables
Trim and slice all the vegetables into long, even strips. For carrots, halve or quarter them lengthwise. Trim the tough ends from asparagus. Cut zucchini and yellow squash into sixths lengthwise. Slice the red bell pepper into ½-inch strips. This shape is key—long strips are less likely to fall through the grill grates and they cook more evenly.
⚠️ Common Mistake to Avoid: Don’t cut the vegetables into rounds or small pieces. They’ll fall through the grates and burn. Long strips are your friend here.
Step 3: Marinate the Veggies
Place the prepared vegetables on a large rimmed baking sheet. Pour the marinade over the vegetables, then gently toss with your hands or tongs to coat every piece evenly. Spread them in a single layer and allow them to marinate for at least 30 minutes. For deeper flavor, you can marinate them for up to several hours in the refrigerator. If marinating longer, cover the baking sheet with plastic wrap.
💡 emy’s Pro Tip: To ensure even coating, use your hands to massage the marinade into the vegetables. The slight warmth from your hands helps the flavors penetrate better.
Step 4: Grill to Perfection
Preheat your grill to medium heat, about 350 degrees F. Once the grill is hot, place the carrots on first, laying them perpendicular across the grates so they don’t fall through. Let them grill for 3-4 minutes, then flip them over. Now lay the rest of the vegetables—asparagus, zucchini, yellow squash, and bell pepper—on the grill. Grill another 8-10 minutes, flipping once halfway through. The vegetables should have nice char marks and be tender but still with a bite. Remove with tongs.
⚠️ Common Mistake to Avoid: Don’t use too high heat or the honey in the marinade will burn before the vegetables are cooked. Medium heat is the sweet spot for caramelization without scorching.
Step
Action
Duration
Key Visual Cue
1
Whisk marinade
2 minutes
Smooth, creamy, no separation
2
Prep vegetables
10 minutes
Uniform long strips
3
Marinate veggies
30+ minutes
Glossy coating, fragrant
4
Grill carrots first
3-4 minutes per side
Char marks, slight softening
5
Grill all veggies
8-10 minutes total
Tender with char, slight blistering
Serving & Presentation
These grilled vegetables are a stunning side dish. I like to arrange them on a large wooden board or a white platter, grouping the different vegetables by color—the bright orange carrots next to the green asparagus, with golden zucchini and squash, and the red bell pepper strips as a striking accent. A final scatter of fresh thyme leaves and a pinch of flaky sea salt (like Maldon) adds a professional finish.
In my NYC kitchen, I often serve these vegetables alongside grilled chicken, lamb chops, or a simple piece of fish. They also make a fantastic warm salad when tossed with a handful of arugula and some crumbled feta. A drizzle of extra marinade (reserved just for serving) or a squeeze of fresh lemon juice brightens everything up. This dish is my go-to for summer barbecues and weeknight dinners alike.
Pairing Type
Suggestions
Why It Works
Side Dish
Grilled chicken skewers, lamb chops, salmon
The tangy-sweet veggies complement rich proteins perfectly
Sauce / Dip
Tzatziki, hummus, or a lemon-herb yogurt sauce
Creamy dips balance the char and vinegar notes
Beverage
Dry rosé, chilled Sauvignon Blanc, or a light lager
Acidic or crisp drinks cut the sweetness and richness
Garnish
Fresh thyme, flaky sea salt, toasted pine nuts
Adds textural contrast and aromatic finish
Make-Ahead, Storage & Reheating
In my busy NYC life, meal prep is a lifesaver. This Grilled Vegetables Marinade is perfect for making ahead. I often prep the vegetables and marinade the night before, then grill them just before dinner. Leftovers are fantastic cold in a salad or gently reheated.
Air Fryer Zucchini Fries
Table of Contents
Air Fryer Zucchini Fries with Parmesan Crust – Crispy & Healthy!
⚖️
Difficulty
Easy
⏲️
Prep Time
15 mins
🕒
Cook Time
12 mins
⏱️
Total Time
27 mins
🍽️
Servings
4 servings
I still remember the first time I bit into a perfectly crispy zucchini fry as a little girl in my mother’s kitchen in Marrakech. She would pan-fry them in olive oil until golden, dust them with cumin and salt, and serve them with a tangy yogurt dip. Those crunchy, golden sticks were pure magic. Now, as a trained Parisian chef and home cook living in New York City, I’ve reimagined that memory with a healthier twist. These Air Fryer Zucchini Fries are just as crispy and satisfying, but without the deep frying. The secret lies in the Parmesan crust — it adds a savory, nutty crunch that makes these fries truly unforgettable.
What I love most about this recipe is that simple, humble zucchini transforms into something so utterly delicious. When you air fry these fries, the exterior becomes crackly and golden brown, thanks to the Panko breadcrumbs and Parmesan cheese. Inside, the zucchini remains tender and juicy, with a slight sweetness that pairs beautifully with the savory, herby coating. The aroma that fills your kitchen as they cook is pure comfort — a blend of Italian seasoning, garlic, and warm Parmesan. And when you dip them into a bowl of marinara or aioli? Absolute perfection.
Let me tell you, this isn’t just another zucchini fry recipe. I’ve spent years perfecting the technique to ensure you get the crispiest results every time. My version uses a three-step breading station — flour, egg, then the Panko-Parmesan mixture — for maximum crunch. And because I know how frustrating soggy fries can be, I’m sharing a pro tip that makes all the difference. Plus, I’ll warn you about the most common mistake people make when air frying vegetables. Trust me, after you try these, you’ll never look at zucchini the same way again.
Why This Air Fryer Zucchini Fries Recipe Is the Best
The Flavor Secret: My French culinary training taught me the importance of layering flavors. That’s why I use a combination of freshly grated Parmesan, Italian seasoning, and garlic powder. But here’s my secret — I add a pinch of smoked paprika from the spice market in Marrakech. It adds a subtle warmth that elevates the entire dish without overpowering it. The result is a savory, aromatic crust that makes every bite crave-worthy.
Perfected Texture: Achieving that perfect crispiness with an air fryer can be tricky, but I’ve mastered it. The key is in the breading process. After years of testing, I’ve found that using Panko breadcrumbs (not regular ones) and a light coating of olive oil spray creates a texture that rivals deep frying. Plus, you never have to flip the fries — which saves you time and keeps the crust intact. This technique is foolproof, even for beginners.
Foolproof & Fast: As a busy NYC food blogger, I’m all about recipes that deliver big flavor without a huge time commitment. These air fryer zucchini fries are ready in under 30 minutes from start to finish. The air fryer does all the heavy lifting, giving you perfectly cooked fries with hardly any effort. Even if you’ve never used an air fryer before, this recipe will make you look like a pro. My step-by-step instructions guide you through every single detail.
Air Fryer Zucchini Fries Ingredients
Walking through the Union Square Greenmarket in NYC, I’m always drawn to the zucchini. My mother would buy them from the local souk in Morocco, always choosing the firmest ones with bright green skin. For this recipe, quality ingredients make a difference, but they’re all pantry-friendly. Let me walk you through what you’ll need.
Ingredients List
2 medium zucchini (about 8–10 ounces each)
½ cup all-purpose flour
2 large eggs
1 cup Panko breadcrumbs
½ cup grated Parmesan cheese (freshly grated is best)
1 tablespoon Italian seasoning
2 teaspoons garlic powder
½ teaspoon salt
¼ teaspoon black pepper
Olive oil spray (or other oil spray such as canola or coconut oil)
Ingredient Spotlight
Zucchini: The star of the show. Look for medium-sized zucchini that are firm and have shiny, unblemished skin. Overly large zucchini tend to be watery and seedy, which can make your fries soggy. I prefer organic zucchini from the farmers’ market because they have a denser texture and a more concentrated flavor. If you can only find large ones, just cut them into smaller fries and you’ll be fine.
Parmesan Cheese: This is the secret to that incredible crust. I highly recommend using a block of Parmesan and grating it yourself. Pre-shredded Parmesan has anti-caking agents that prevent it from melting and adhering properly to the breading. The freshly grated cheese melts into the Panko, creating a golden, nutty coating that is pure heaven.
Panko Breadcrumbs: Unlike regular breadcrumbs, Panko has a larger, flakier texture that creates a far crispier crust. They absorb less oil, making them perfect for the air fryer. I always use plain Panko, but you can also find seasoned varieties. Just adjust the salt in the recipe if you use a seasoned version.
Original Ingredient
Best Substitution
Flavor / Texture Impact
All-purpose flour
Gluten-free all-purpose blend or almond flour
GF flour works well; almond flour adds a nutty flavor and is grain-free
Panko breadcrumbs
Crushed pork rinds (for keto) or gluten-free Panko
Pork rinds create a very crispy, low-carb crust; GF Panko is a 1:1 swap
Parmesan cheese
Pecorino Romano (saltier) or nutritional yeast (vegan)
Pecorino adds a sharper, saltier flavor; nutritional yeast gives a cheesy, umami flavor without dairy
Italian seasoning
Dried oregano, basil, and thyme mixed together
Similar herbaceous flavor; adjust proportions to taste
How to Make Air Fryer Zucchini Fries — Step-by-Step
Making these crispy zucchini fries is incredibly straightforward. Just follow these simple steps, and you’ll have a batch of perfectly crunchy fries ready in no time. I’m sharing my best tips to ensure your fries come out perfect every single time.
Step 1: Prepare the Zucchini
Start by trimming off the ends of the zucchini. You don’t need to peel them — the skin helps the fries hold their shape. Cut each zucchini in half crosswise, then slice them into ½-inch thick sticks. Try to make them uniform in size so they cook evenly. I usually aim for fry-shaped pieces that are about 3–4 inches long.
⚠️ Common Mistake to Avoid: Cutting the zucchini too thin. If you cut them thinner than ½-inch, they can become mushy and fall apart in the air fryer. Stick to that ½-inch thickness for the best texture.
Step 2: Set Up the Breading Station
You’ll need three wide, shallow bowls. In the first bowl, place the all-purpose flour. In the second, lightly beat the eggs until they’re combined. In the third bowl, stir together the Panko breadcrumbs, freshly grated Parmesan cheese, Italian seasoning, garlic powder, salt, and pepper. This three-step coating (flour, egg, then breadcrumb mixture) ensures the crust adheres perfectly and becomes super crispy.
💡 emy’s Pro Tip: For an even crispier crust, let the breaded fries rest on a wire rack for 5 minutes before air frying. This helps the breading set and prevents it from sliding off during cooking.
Step 3: Bread the Zucchini Fries
Work with a few zucchini fries at a time. First, coat each piece in the flour, gently tap off any excess. Then, dip it into the beaten egg, making sure it’s fully coated on all sides. Finally, place it into the breadcrumb mixture and press gently so the crumbs adhere evenly. Don’t overcrowd — do this in batches so each fry gets a nice, even crust.
⚠️ Common Mistake to Avoid: Skipping the flour step. The flour acts as a glue that helps the egg stick to the zucchini. Without it, the egg and breading can slide right off.
Step 4: Arrange and Spray
Arrange the breaded zucchini fries in a single layer in the air fryer basket. It’s important to leave a little space between each fry so the hot air can circulate properly. Don’t pile them on top of each other. Cook in batches if needed. Before air frying, spray the tops of the fries generously with olive oil spray. This is what gives them that golden-brown color and crispy texture.
💡 emy’s Pro Tip: Don’t skip the oil spray! Even though we’re using an air fryer, a light coating of oil is essential for browning. Without it, the fries will be pale and not as crispy. I love using a good quality olive oil spray from a can.
Step 5: Air Fry to Perfection
Set your air fryer to 400°F and cook the zucchini fries for 10–12 minutes. You do not need to flip them halfway through. When they’re done, the outsides will be beautifully browned and crispy, and the insides will be tender when pierced with a fork. Serve immediately while they’re hot and crunchy. I like to sprinkle a little extra salt or fresh herbs right before serving.
⚠️ Common Mistake to Avoid: Overcrowding the air fryer basket. If you put too many fries in at once, they’ll steam instead of crisp. Work in batches to ensure each fry gets that perfect crunch.
Step
Action
Duration
Key Visual Cue
1
Cut zucchini into ½-inch fries
5 minutes
Uniform, stick-shaped pieces
2
Set up breading station
2 minutes
Three shallow bowls ready
3
Bread each fry (flour – egg – crumbs)
5–7 minutes
Fully coated, golden brown exterior
4
Arrange in basket and spray with oil
2 minutes
Single layer with space between fries
5
Air fry at 400°F
10–12 minutes
Golden brown, crispy exterior, tender inside
Serving & Presentation
These air fryer zucchini fries are incredibly versatile. I love serving them as an appetizer with a trio of dipping sauces — warm marinara, creamy ranch, and a garlic aioli. For a more substantial meal, pile them on a plate with a side of grilled chicken or a fresh salad. They’re also fantastic as a snack on game day or as a healthier alternative to regular fries alongside a burger.
For presentation, I like to arrange the fries on a wooden board or a white platter for contrast. Garnish with fresh parsley or a sprinkle of red pepper flakes for a pop of color and heat. If you’re feeling fancy, a squeeze of lemon juice right before serving brightens up the whole dish. This is a dish that tastes as good as it looks!
Pairing Type
Suggestions
Why It Works
Side Dish
Grilled salmon, roasted chicken, steak
Crisp texture contrasts with protein; light and healthy
Sauce / Dip
Marinara, ranch, chipotle aioli, lemon tahini
Adds moisture and flavor; each sauce offers a different profile
Beverage
Crisp white wine (Sauvignon Blanc), light beer, iced tea
Refreshing and light; cuts through the richness of the crust
Garnish
Fresh parsley, red pepper flakes, lemon wedges
Adds freshness, heat, and acidity to balance the dish
Make-Ahead, Storage & Reheating
As a busy NYC food blogger, I’m all about meal prepping. These air fryer zucchini fries are best enjoyed fresh, but you can still make them ahead with a few tricks. I often prep a double batch on Sunday to have on hand for quick lunches or snacks throughout the week. Here’s how to store and reheat them to keep that crunch.
Hi I'm Emy
I’m passionate about sharing a diverse collection of sweet and savory recipes that I’ve meticulously tested and perfected in my own kitchen.