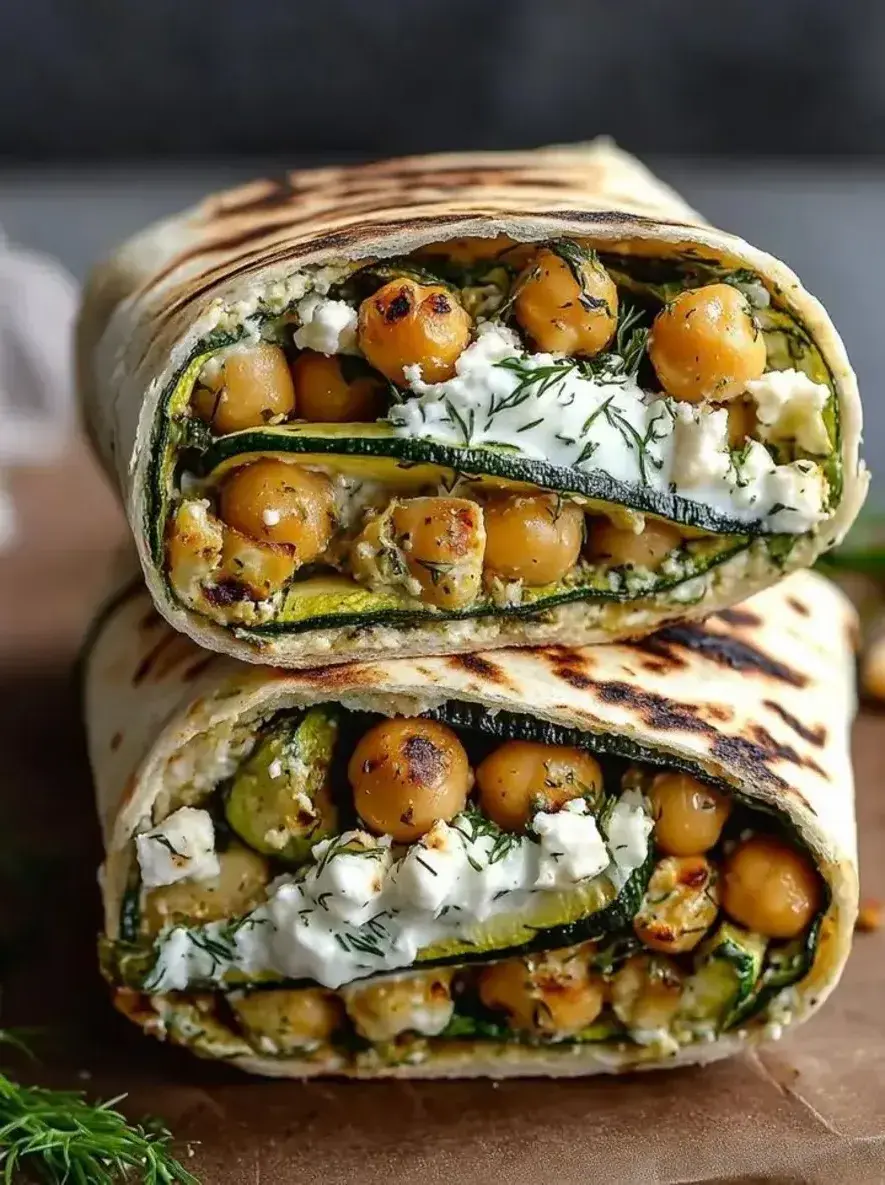
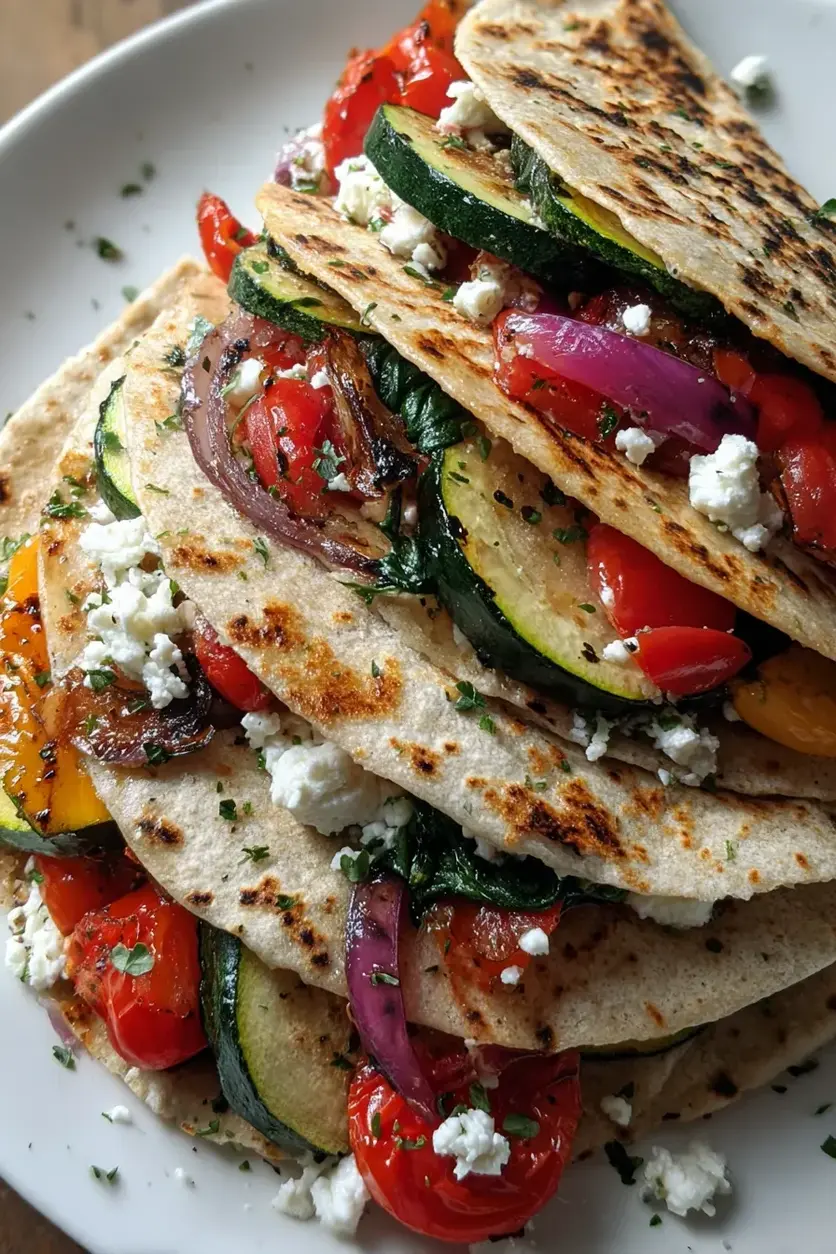
Take a break from your day and refuel with our delicious and satisfying lunch recipes! Whether you need a quick and easy meal, a light and healthy option, or something hearty to power you through the afternoon, we’ve got you covered.
From fresh salads and wholesome grain bowls to savory sandwiches, wraps, and comforting soups, our lunch ideas are perfect for busy weekdays, meal prep, and leisurely weekend meals.
Looking for something kid-friendly or on-the-go? Try our lunchbox-friendly meals, protein-packed bites, and make-ahead favorites that keep you full and energized all day. No more boring lunches—let’s make every midday meal exciting! 🥗🥪🍲
French Onion Soup
Table of Contents
French Onion Soup: The Classic with Perfectly Caramelized Onions and Melted Gruyere
⚖️
Difficulty
Medium
⏲️
Prep Time
20 mins
🕒
Cook Time
155 mins
⏱️
Total Time
175 mins
🍽️
Servings
6
I still remember the first time I tasted real French Onion Soup. It was in a tiny bistro tucked away on a cobblestone street in Paris, during my years at culinary school. I was a young cook from Morocco, trained in my mother’s kitchen where onions were sautéed with cumin and cinnamon, not slowly caramelized for hours. That first spoonful — rich, deeply savory broth, jammy sweet onions, and that blanket of bubbling Gruyere — it stopped me mid-conversation. This is the classic French Onion Soup I learned to perfect in Paris, and now I make it in my NYC kitchen for every chilly evening. The secrets are patience with the caramelization and using high-quality beef broth. This is the version you want to master.
Picture this: a pool of dark, silky broth that tastes like it simmered all day — because it has. Long strands of sweet, almost marmalade-like onions, softened into submission, each strand carrying a whisper of thyme and bay. A thick, crusty baguette slice floats on top, soaked at the edges but still holding its shape, crowned with a golden, blistered cap of nutty Gruyere. When you break through that cheesy crust with your spoon, the aroma — beefy, herbal, faintly wine-kissed — rises up like a warm hug. It’s the kind of soup that demands you sit down, take your time, and savor every single bite.
I’ve made French Onion Soup more times than I can count — for my family back in Morocco, for my Parisian chef instructors, and now for my friends in New York City. What sets my approach apart is a technique I picked up in a Paris kitchen: deglazing the pot with a splash of dry white wine every time a brown fond forms. It layers flavor without bitterness. And I always, always use a mix of yellow and sweet Vidalia onions for depth. While the slow caramelization takes up to two hours, the active work is minimal. 💡 emy’s Pro Tip: Don’t rush the onions — low and slow is the only way to get that deep, sweet flavor.
Why This French Onion Soup Recipe Is the Best
The Flavor Secret: This recipe uses a blend of yellow and sweet onions, which gives you both robust savory notes and natural sweetness. The slow caramelization draws out their sugars, and deglazing with wine builds layers of flavor that no shortcut can match. I learned this patience in Paris, but the love for sweet cooked onions? That’s straight from my mother’s Moroccan kitchen.
Perfected Texture: The key is not rushing the onions. You want them tender but not mushy, with a silky, almost jammy consistency. I slice them to exactly ¼-inch — any thinner and they become stringy as they cook down. The bread is toasted separately, so it stays sturdy enough to hold the cheese without turning into a soggy mess, yet soft enough to soak up every drop of broth.
Foolproof & Fast: Don’t be intimidated by the two-hour cook time. The onions do most of the work by themselves — you just stir every 10-15 minutes. The recipe is forgiving, especially if you use high-quality beef broth. Even for beginner cooks, this soup is a showstopper with minimal hands-on effort. ⚠️ Common Mistake to Avoid: Skipping the deglazing step. The browned bits on the bottom of the pot are pure flavor — don’t let them burn! Use a splash of wine and a spatula to lift them up.
French Onion Soup Ingredients
When I make French Onion Soup in my NYC apartment, I head to the Union Square Greenmarket for the sweetest Vidalia onions in season, or to my local Whole Foods for reliable yellow onions. The quality of your beef broth is everything — I swear by Better Than Bouillon for a rich, deep base without homemade stock. Let me walk you through the full list, with a few tips I’ve picked up from years of making this soup.
Ingredients List
4 large yellow onions (about 2 lbs total)
2 large sweet onions (Vidalia, about 1 lb)
6 tablespoons butter
2 sprigs fresh thyme
2 Bay leaves
¾ cup dry white wine (Chardonnay or Pinot Grigio)
3 tablespoons flour (optional — for thickening)
4 cups beef broth (high quality is key)
1 beef bouillon cube (or 1 tsp Better Than Bouillon)
1.5 cups chicken broth
1 teaspoon Worcestershire sauce
Salt and pepper, to taste
1 baguette
3 tablespoons olive oil (optional — for brushing bread)
6 slices Gruyere cheese
Ingredient Spotlight
Onions are the heart of this soup. I use a mix of yellow onions for a sharp, savory base and sweet Vidalias for natural sweetness. When you caramelize them low and slow, they melt into a jammy, golden pool. For the cheese, Gruyere is non-negotiable — it melts like a dream and has a nutty, slightly salty flavor that complements the broth perfectly. If you can’t find Gruyere, a good Swiss or Comté is a solid backup, but the flavor will be milder. And the broth? That’s where I get picky. A high-quality beef broth, like Pacific Foods or homemade, makes all the difference. I add a dash of Worcestershire for umami depth.
Original Ingredient
Best Substitution
Flavor / Texture Impact
Gruyere cheese
Swiss cheese or Comté
Still melts well, but is milder and less nutty
Dry white wine
Dry sherry or extra broth + 1 tsp vinegar
Sherry adds nuttiness; vinegar gives acidity
Beef broth
Vegetable broth (for a lighter version)
Less rich, but still savory with Worcestershire
Baguette
Sourdough or ciabatta
More tangy or chewy texture, still works great
How to Make French Onion Soup — Step-by-Step
Don’t let the long cook time scare you — this recipe is incredibly rewarding and mostly hands-off. The slow caramelization fills your kitchen with a deeply comforting aroma, and the final result is pure magic. Let’s get started.
Step 1: Slice the Onions
Slice 4 large yellow onions and 2 sweet Vidalia onions into ¼-inch thick rings. This thickness is key — if you slice them too thin, they’ll break down into stringy strands. A mandoline slicer makes this job much faster and more consistent.
💡 emy’s Pro Tip: Wear goggles if you’re sensitive to onion fumes! I learned this the hard way in Paris — a quick chill in the freezer for 10 minutes before slicing also helps reduce tears.
Step 2: Melt the Butter
Melt 6 tablespoons of butter in a large soup pot or Dutch oven over medium-low heat. Wait until it begins to foam — this lets the water evaporate out, leaving the butter more clarified and smooth.
⚠️ Common Mistake to Avoid: Don’t use high heat to melt the butter faster. It will burn and give a bitter taste to your soup. Keep it low and patient.
Step 3: Start Caramelizing
Add the sliced onions and toss them with tongs to coat evenly in butter. Cook uncovered over medium-low heat, stirring every 10-15 minutes. The onions will gradually soften and shrink. This process takes about 1.5 to 2 hours. Be patient — this is where all the sweetness develops.
💡 emy’s Pro Tip: When you see brown bits forming on the bottom of the pot, pour in a splash of dry white wine and use a silicone spatula to “clean” the pot. This deglazing step builds incredible depth.
Step 4: Add the Flour
When the onions are deeply brown and sweet, sprinkle 3 tablespoons of flour over them (if using) and cook for 2 minutes, stirring constantly. This helps thicken the broth slightly. Then add any remaining wine and increase heat to medium-high, tossing for another minute.
⚠️ Common Mistake to Avoid: Don’t skip the flour if you want a thicker soup. It gives the broth a silky, velvety body that clings to the bread and cheese.
Step 5: Simmer the Broth
Add 4 cups beef broth, 1 beef bouillon cube or 1 teaspoon Better Than Bouillon, 1.5 cups chicken broth, 1 teaspoon Worcestershire sauce, 2 bay leaves, and 2 sprigs fresh thyme. Stir everything together, bring to a gentle simmer, then cook over medium heat for 45 minutes with the lid cracked to let it reduce slightly.
💡 emy’s Pro Tip: Crack the lid just a finger’s width — this lets steam escape and concentrates the flavors without reducing the liquid too much.
Step 6: Toast the Bread
While the soup simmers, preheat your oven to 350°F. Slice the baguette into ½-inch thick pieces. Brush the tops lightly with olive oil, place them on a baking sheet, and toast for about 5 minutes until golden but not hard.
⚠️ Common Mistake to Avoid: Don’t over-toast the bread — it should be crisp on the outside but still soft inside. Over-toasted bread becomes too hard to soak up the broth.
Step 7: Melt the Cheese
Increase oven temperature to 450°F. Place a slice of Gruyere on each toasted baguette piece, then return to the oven for 3-5 minutes until the cheese melts and starts to bubble and brown slightly. Keep an eye on it — you want it golden, not burnt.
Step 8: Season and Serve
Remove the bay leaves and thyme stems from the broth. Season with salt and pepper to your taste. Ladle the hot soup into oven-safe bowls, float the cheese-topped baguette on each, and serve immediately. Enjoy every spoonful.
Step
Action
Duration
Key Visual Cue
1
Slice onions
10 mins
Uniform ¼-inch rings
2
Melt butter
3-5 mins
Butter foams gently
3
Caramelize onions
1.5-2 hours
Deep golden brown, sweet smell
4
Add flour & wine
3 mins
Flour disappears, wine sizzles
5
Simmer broth
45 mins
Gentle bubbles, rich aroma
6
Toast baguette
5 mins
Lightly golden edges
7
Melt cheese
3-5 mins
Bubbling, browned top
8
Season & serve
5 mins
Hot, fragrant soup
Serving & Presentation
French Onion Soup is a meal in itself, but I love to serve it with a simple green salad dressed with a sharp vinaigrette to cut through the richness. In my NYC apartment, I often pair it with a crusty baguette (yes, more bread!) and a glass of the same dry white wine I used in the soup — a crisp Chardonnay or Pinot Grigio feels just right. For gatherings, I set out small bowls of extra grated Gruyere and fresh thyme for guests to garnish their own servings.
Garnish each bowl with a sprinkle of fresh chopped parsley or chives for a pop of color. If I’m feeling nostalgic for my Moroccan roots, I’ll add a tiny pinch of smoked paprika on top — it’s not traditional, but it adds a warm, smoky note that honors both my heritage and the soup. Serve immediately while the cheese is still bubbling.
This traditional French Onion Soup has warm baguettes topped with hot, melted Gruyere cheese. High quality beef broth, a splash of wine, and perfectly caramelized onions are the secrets to this classic recipe.
Ingredients
Scale
4 large yellow onions, (see notes for pound conversion)
2 large sweet onions (Vidalia)
6 Tablespoons butter
2 sprigs fresh thyme
2 Bay leaves
¾ cup dry white wine (Chardonnay or Pinot Grigio)
3 tablespoons flour (optional)
4 cups beef broth (high quality is key)
1 beef bouillon cube (or 1 tsp Better Than Bouillon)
1.5 cups chicken broth
1 teaspoon Worcestershire sauce
Salt/Pepper (to taste)
1 baguette
3 Tablespoons olive oil (optional)
6 slices Gruyere cheese
Instructions
Slice the onions into ¼-inch slices, (no thinner). They'll reduce in size quite a bit and you dont want them to be too stringy. (Using a mandoline slicer makes this much easier).
Melt the butter in a large soup pot or dutch oven over medium-low heat. Wait until it begins to foam, this allows water to evaporate out, leaving the butter more clarified and smooth.
Add the onions and use tongs to toss and coat them in the butter. Leave them uncovered as they cook.
The onions will caramelize slowly, up to 2 hours or longer. Stir them every 10-15 minutes. As the onions caramelize, they may leave some brown residue at the bottom of the pot. Add a splash of wine and use a silicone spatula to 'clean' the bottom of the pot. Repeat as needed throughout the cooking process
When the onions are nearly done, sprinkle flour over them and cook for 2 minutes. Add any remaining wine and increase the heat to medium-high. Toss the onions more frequently. They are done when they are richly brown and sweet.
Add the beef broth, beef bouillon, chicken broth, Worcestershire sauce, bay leaves and thyme. Simmer over medium heat for 45 minutes with the lid cracked.
While the soup simmers, preheat the oven to 350° F.
Slice the baguette into ½ inch thick slices. Brush the tops with olive oil and bake for about 5 minutes.
Increase the oven temperature to 450° F. Top each baguette with cheese and bake in the oven until the cheese melts and begins to bubble and brown.
Remove the bay leaves and thyme stems. Season to taste with salt and pepper.
Ladle the warm soup into each bowl and top each of them with the warm baguettes. Serve!
French Onion Soup from Famous and Barr
Table of Contents
French Onion Soup from Famous and Barr – A St. Louis Icon Made Simple
⚖️
Difficulty
Medium
⏲️
Prep Time
20 mins
🕒
Cook Time
4 hrs
⏱️
Total Time
4 hrs 20 mins (+ overnight)
🍽️
Servings
8
There are recipes that feel like a hug in a bowl, and then there is this one—a bowl that wraps around you with warmth, depth, and the kind of patience that only time can bring. When I first moved to New York City from Paris, I was hunting for a soup that reminded me of the slow-cooked magic I grew up with in Morocco and perfected in French kitchens. I found it in an unexpected place: a vintage recipe card from Famous and Barr, the beloved St. Louis department store that closed its doors decades ago. This French Onion Soup from Famous and Barr is richer, silkier, and more deeply caramelized than any bistro version I’ve tried—thanks to a secret dusting of paprika and an overnight rest that I’ll show you below. It’s a piece of Americana with a French soul, and once you taste it, you’ll understand why I’ve been making it for my family every winter since.
Imagine a pot of onions that melt into the butter for nearly two hours, turning from crisp white slices into a soft, golden mass that smells like caramel and earth. The broth is built with nearly a gallon of beef stock, a splash of white wine, and a whisper of bay leaf, but it’s the paprika and pepper that give this soup its signature warmth—a nod to the North African spices my mother used in her tagines. When you ladle it into ovenproof bowls, top it with crusty French bread toasted with Parmesan, and blanket it with melted Gruyère (or Swiss, which I often use), the cheese pulls into glossy strands as it bubbles under the broiler. It’s a symphony of textures: crisp edges, silky broth, and that irresistible pull of stretchy cheese.
What makes my version of this French Onion Soup stand out isn’t just the ingredient list—it’s the technique. I’ve trained in Paris and cooked in NYC, and I learned that the best soups aren’t rushed. The key is the overnight refrigeration step: it allows the flavors to marry deeply and the flour to fully thicken without a pasty taste. After years of testing, I’ve also discovered a foolproof way to toast your bread without burning it under the broiler, and I’ll share a common mistake that even experienced home cooks make when adding the flour. Whether you’re serving it for a cozy Sunday dinner or impressing guests at a holiday gathering, this recipe will deliver restaurant-quality results from your own kitchen. From my NYC kitchen to yours—I promise this bowl of comfort will become a family favorite.
Why This French Onion Soup Recipe Is the Best
The Flavor Secret: Most French Onion Soup recipes stop at salt and pepper, but this one adds two tablespoons of paprika—a trick I picked up from a Moroccan spice seller in the medina. It doesn’t make the soup spicy; it adds a subtle warmth and a deep reddish hue that the broth absorbs beautifully. Combined with the slow-sautéed onions, the result is a flavor that lingers on your tongue, complex and comforting like a well-worn blanket.
Perfected Texture: The overnight rest is non-negotiable. When you let the soup sit in the fridge for at least 12 hours, the flour fully hydrates and the starch molecules relax, creating a velvety texture that coats the back of a spoon. Without this step, the broth can be thin or slightly grainy. It’s a technique I learned at culinary school in Paris, and it makes all the difference between a good soup and an extraordinary one.
Foolproof & Fast: Despite the long simmer, the active work is minimal. You spend about 20 minutes slicing onions, then let them do their thing over low heat. The recipe is forgiving: you can use Swiss cheese instead of Gruyère, substitute a dry sherry for white wine, or even skip the wine altogether. I’ve taught this to beginner cooks in my NYC cooking classes, and they always nail it on the first try.
French Onion Soup Ingredients
Every time I make this soup, I think of the Union Square Greenmarket in Manhattan, where I buy my onions in the fall—huge, sweet white onions that smell like the earth after rain. In Paris, I used to get them from the outdoor market on Rue Mouffetard, but here in NYC, I’ve learned that any white onion works as long as it’s fresh and firm. For the cheese, I often pick up Gruyère from Murray’s Cheese shop in the West Village, but when I’m in a pinch, Swiss from the local grocery store gives you that same stretchy, nutty finish without the splurge.
Ingredients List
5 pounds white onions (medium size)
1/2 cup butter
1 1/2 teaspoon pepper
2 tablespoons paprika
1-2 bay leaves
3/4 cup flour
96 ounces beef broth (3-32 oz containers)
1 cup white wine
Salt to season
1 loaf French baguette (sliced)
3 tablespoons olive oil
1/4 cup Parmesan cheese (grated)
16 ounces Gruyère cheese (can substitute Swiss which I often do)
Ingredient Spotlight
White Onions: The star of the show. Five pounds may seem like a lot, but they shrink dramatically as they cook. Look for onions that are heavy for their size with tight, papery skins. If you can only find yellow onions, they’ll work fine, but white onions give a cleaner, sweeter flavor. Substitution: Sweet onions like Vidalia can be used, but they’ll make the soup slightly sweeter—still delicious.
Paprika: This is the secret weapon. Use sweet paprika (not smoked or hot) for the authentic Famous and Barr flavor. I buy mine from a spice shop in NYC’s Chelsea Market, but any grocery store brand works. It adds a subtle warmth and a beautiful color to the broth. Substitution: Smoked paprika will change the flavor profile entirely—it’s good in its own way, but not traditional.
Gruyère Cheese: The traditional choice for its nutty, earthy flavor and excellent melting properties. I often substitute Swiss cheese (Emmental) because it’s more affordable and melts just as well, though it’s slightly milder. Substitution: Provolone or even mozzarella can work in a pinch, but the flavor won’t be as complex.
Beef Broth: Use a good-quality low-sodium broth so you can control the salt. I prefer the boxed varieties from brands like Swanson or Imagine. Homemade beef stock is ideal, but store-bought works perfectly. Substitution: Chicken broth can be used for a lighter version, but it won’t have the same depth.
Original Ingredient
Best Substitution
Flavor / Texture Impact
White Onions
Yellow or Sweet Onions
Slightly sweeter, still excellent
Gruyère Cheese
Swiss or Provolone
Milder flavor but same melt
Beef Broth
Chicken Broth
Lighter, less rich broth
White Wine
Dry Sherry or Vermouth
Similar acidity and complexity
How to Make French Onion Soup — Step-by-Step
Don’t let the long ingredient list scare you—this recipe is all about letting time do the hard work. Follow these steps, and you’ll have a soup that tastes like it simmered in a French bistro all day.
Step 1: Slice and Sauté the Onions
Slice the onions 1/8 inch thick—a mandoline makes this quick, but a sharp knife works too. Melt the butter in a large pot (at least 6 quarts) over low heat, then add the sliced onions. Sauté them slowly for 1 1/2 to 2 hours, stirring every 10-15 minutes, until they’re soft, translucent, and golden. Don’t rush this step; low heat prevents burning and builds deep flavor.
💡 emy’s Pro Tip: If your onions start to brown too quickly, add a splash of water or broth to deglaze the pan. This stops browning and keeps them moist.
Step 2: Add the Seasonings
Once the onions are soft, add 1 1/2 teaspoons pepper, 2 tablespoons paprika, and 1-2 bay leaves. Mix well and sauté for 2-3 minutes over low heat, stirring frequently, until the spices are fragrant. The paprika will turn the onions a warm reddish color.
⚠️ Common Mistake to Avoid: Don’t add the paprika on high heat or it will burn and turn bitter. Keep the flame low and stir constantly.
Step 3: Make the Broth
Add 2/3 of your beef broth (about 64 ounces) to the pot and stir well. In a separate bowl, whisk the flour into the remaining 1/3 of the broth (about 32 ounces) until completely smooth—no lumps. Pour this slurry into the pot, stirring constantly. Add 1 cup of white wine. Bring to a gentle simmer, then cook for 2 hours, stirring occasionally. This is where the soup thickens and deepens.
💡 emy’s Pro Tip: Whisking the flour into cold broth before adding it to the pot prevents lumps and ensures a silky texture. I learned this trick in a Paris patisserie class—it works for sauces too.
Step 4: Refrigerate Overnight
Let the soup cool to room temperature, then transfer it to the refrigerator. Let it rest overnight (at least 12 hours). This step is crucial: it allows the flavors to meld and the flour to fully thicken. The soup will be velvety and rich the next day.
⚠️ Common Mistake to Avoid: Don’t skip the overnight rest. If you rush and serve it immediately, the broth will be thin and the flavors flat. Patience is the secret ingredient here.
Step 5: Toast the Bread
The next day, preheat your oven to broil. Slice the French baguette into 1/2-inch thick rounds. Brush each slice with olive oil and sprinkle with grated Parmesan cheese. Place them on a baking sheet and broil for 1-2 minutes, watching carefully so they don’t burn. You want them golden and crisp, not dark.
💡 emy’s Pro Tip: Position the oven rack in the middle position, not too close to the broiler. This gives you more control and prevents the cheese from burning before the soup is hot.
Step 6: Heat the Soup
Reheat the soup on your stove top over medium heat until it’s steaming hot but not boiling. Ladle it into ovenproof bowls (8-ounce to 12-ounce size works best), filling them about 3/4 full.
⚠️ Common Mistake to Avoid: Don’t boil the soup after the overnight rest—it can break the flour-thickened texture. Gentle heating is all you need.
Step 7: Layer and Broil
Place one or two toasted bread slices on top of the soup in each bowl. Generously cover with shredded Gruyère (or Swiss) cheese. Broil for 3-5 minutes, watching carefully until the cheese melts, bubbles, and turns golden brown in spots. Let the bowls cool for a couple of minutes before serving—the soup inside is lava-hot.
💡 emy’s Pro Tip: For the perfect cheese pull, use a mix of Gruyère and a little mozzarella. The mozzarella adds extra stretch, while the Gruyère brings the flavor.
Step
Action
Duration
Key Visual Cue
1
Sauté onions
1.5 – 2 hours
Golden, translucent, soft
2
Add seasonings
2-3 minutes
Fragrant, reddish tint
3
Simmer broth
2 hours
Thickened, deep brown
4
Refrigerate overnight
12+ hours
Gel-like, velvety texture
5
Toast bread
1-2 minutes
Golden, crisp edges
6
Heat soup
5-10 minutes
Steaming, not boiling
7
Layer and broil
3-5 minutes
Melted, bubbly, golden
Serving & Presentation
This soup is a statement. Serve it in individual ovenproof bowls set on a small plate to catch any drips. For a beautiful presentation, I like to place a sprig of fresh thyme on top of the melted cheese right before serving—it adds a pop of green and a subtle herbal note. Pair it with a simple green salad dressed with a sharp vinaigrette to cut through the richness, or a crusty baguette on the side for extra dipping.
Growing up in Morocco, my mother would serve a similar onion-based soup called “chorba” with fresh bread and a side of olives. In NYC, I’ve adapted that tradition by serving this French Onion Soup with a bowl of mixed olives and a glass of dry white wine like a Sauvignon Blanc or a crisp Chardonnay. If you’re serving it as a main course, a French 75 cocktail adds a festive touch. For a cozy weeknight, just a glass of cold water and good company is all you need.
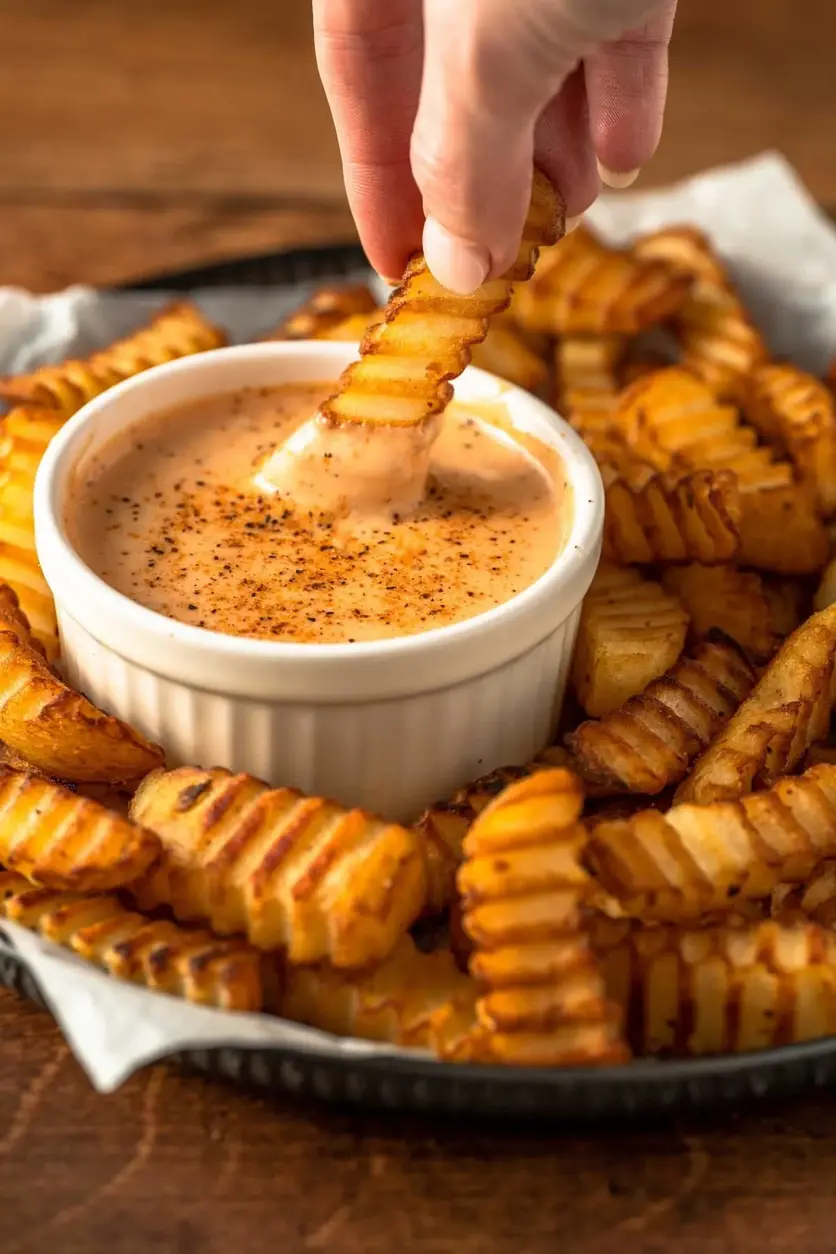
You know that jar of comeback sauce you grab at the store? The one that somehow makes everything from chicken tenders to fries taste infinitely better? I’ve always loved it, but after training in Paris and spending years in my mother’s Moroccan kitchen where we blended, whisked, and layered flavors by instinct, I knew I could make a version that felt more personal, more vibrant. This Classic Southern Comeback Sauce is my take on that beloved Southern staple — and my secret twist is a bold dose of Cajun seasoning inspired by the lively spice markets of North Africa. Within the first 100 words I’ll tell you: this isn’t just a sauce, it’s a one-bowl, five minute wonder that will transform your snack game.
Picture this: a luscious, creamy base that’s tangy from the ketchup and a little sweet from honey, then — bam — a slow-building heat from the hot sauce and the fragrant, earthy kick of Cajun seasoning. It’s the kind of sauce that coats each fry or tender perfectly, not too thick, not too runny. The aroma alone brings back memories of Saturday afternoons in my mother’s kitchen, where every spice was measured with love. In Paris, I learned that the best sauces balance acidity, fat, and heat. This comeback sauce nails that. The paprika and cayenne in the Cajun blend add a deep, almost smoky warmth that lingers just long enough.
I’m sharing my tested version — it uses common pantry staples, requires zero cooking, and delivers a depth of flavor that will have you asking, “Why didn’t I make this sooner?” My twist is in the Cajun seasoning; I’m partial to Slap Ya Mama for its perfect salt-to-heat ratio. 💡 emy’s Pro Tip: Let the sauce rest in the fridge for at least 30 minutes before serving — the flavors really meld. And a common mistake? Adding too much hot sauce right away. Start with one tablespoon, taste, and then go from there. This sauce is your blank canvas for heat.
Why This Classic Southern Comeback Sauce Recipe Is the Best
The Flavor Secret. My unique angle is the fusion of classic Southern comfort with a whisper of Moroccan spice. The honey provides a floral sweetness that tames the heat from the hot sauce, while the Worcestershire adds an umami depth that you often find in French sauces. My culinary training taught me to layer flavors rather than dump them in. The Cajun seasoning acts as a bridge between the sweet and the spicy, making every dip interesting.
Perfected Texture. From a chef’s perspective, the biggest challenge with a no-cook sauce is avoiding a split or watery result. The trick is to use full-fat mayonnaise at room temperature. Cold mayo can seize up when you add other cold ingredients, creating a grainy texture. Let your mayo come to room temp for 15 minutes before mixing. I whisk by hand to incorporate air, which gives the sauce a lighter, fluffier body that clings beautifully to crunchy foods.
Foolproof & Fast. This is the perfect starter recipe for anyone nervous about making sauces from scratch. There’s no stove, no chopping, no complicated techniques. If you can measure and stir, you can make this. It’s also incredibly forgiving — if you make it too spicy, add more honey; too thick, a teaspoon of water or lemon juice thins it. It’s my go-to for game day, quick snacks, and even as a salad dressing when thinned with a little olive oil.
Comeback Sauce Ingredients
I love how accessible these ingredients are at any NYC grocery store — from the bodega on the corner to the Whole Foods in Union Square. The honey reminds me of the jars my mother would keep in the pantry in Morocco, while the hot sauce and Worcestershire are staples in any American kitchen. This is where my worlds collide.
Ingredients List
1 cup mayonnaise
2 tbsp ketchup
1 tbsp honey
1 tbsp hot sauce (add more or less depending on preference)
2 tsp Cajun Seasoning (we love using Slap Ya Mama)
1 1/2 tsp Worcestershire sauce
Ingredient Spotlight
Mayonnaise: This is the foundation, providing the creamy richness. Look for a full-fat brand like Hellmann’s or Duke’s for the best texture. Duke’s has a slightly tangier profile, which works beautifully here. If you need a substitute, a high-quality olive oil mayo will work, but the flavor will be more pronounced. Avoid low-fat or vegan mayo, as they can break or taste artificial.
Cajun Seasoning: The heart of my twist. I always reach for Slap Ya Mama because it has a balanced blend of paprika, garlic powder, cayenne, and salt. You can find it in the spice aisle of most US supermarkets. For a homemade substitute, mix 1 tsp paprika, 1/2 tsp garlic powder, 1/2 tsp onion powder, 1/4 tsp cayenne, and a pinch of dried thyme. Use less salt if your Cajun seasoning is already salty.
Hot Sauce: This provides the heat. I use Frank’s RedHot for a classic tangy kick, but any Louisiana-style sauce works. Tabasco is vinegary and sharp, so use slightly less. For a smoky heat, try chipotle hot sauce. Always start with 1 tablespoon and taste — you can always add more, but you can’t take heat out.
Honey: Balances the acidity and heat with natural sweetness. Use a mild honey like clover or orange blossom. If you’re out of honey, maple syrup or agave nectar works, but they will alter the flavor profile slightly. I love local honey from the farmers market in NYC — it adds a floral note that’s beautiful.
Worcestershire Sauce: This is the umami bomb. It adds depth and a hint of tang. Lea & Perrins is the gold standard. One and a half teaspoons is perfect; too much and it can overpower. For a vegetarian version, use a vegan Worcestershire or a splash of soy sauce plus a dash of balsamic vinegar for depth.
Original Ingredient
Best Substitution
Flavor / Texture Impact
Mayonnaise
Olive oil mayo or yogurt (if looser)
Slightly tangier or thinner, less rich
Cajun Seasoning
Homemade blend (paprika, garlic, cayenne)
Milder or more controlled heat
Hot Sauce
Chipotle hot sauce or sriracha
Smokier or sweeter heat profile
Honey
Maple syrup or agave
Thinner, different sweet notes
How to Make Classic Southern Comeback Sauce — Step-by-Step
Making this sauce is almost too easy, but that simplicity is what makes it so brilliant. Follow these steps and you’ll have a dip worthy of any party.
Step 1: Combine Ingredients
In a medium-sized mixing bowl, add 1 cup mayonnaise, 2 tablespoons ketchup, 1 tablespoon honey, 1 tablespoon hot sauce, 2 teaspoons Cajun seasoning, and 1 1/2 teaspoons Worcestershire sauce. Make sure your mayonnaise is at room temperature for the smoothest mix. Use a whisk for best results — it incorporates air and creates a lighter texture than a spoon.
💡 emy’s Pro Tip: Whisk in one direction (clockwise) consistently. This helps emulsify the ingredients better, giving you a silkier finish. If you’re not sure about the heat level, start with just 1/2 tablespoon of hot sauce and add more after tasting.
Step 2: Whisk Until Smooth
Whisk vigorously for about 30 to 45 seconds, until the sauce is uniformly pinkish-orange and completely smooth. Scrape the sides and bottom of the bowl with a spatula to ensure nothing is left unmixed. You should see a glossy sheen on top. The texture should be thick but pourable, like a thick milkshake.
⚠️ Common Mistake to Avoid: Don’t over-whisk! If you go at it for too long, you can incorporate too much air and the sauce can become slightly grainy. Stop as soon as it’s smooth and uniform.
Step 3: Taste and Adjust
This is the most important step. Dip a clean spoon into the bowl and taste. Is it spicy enough for you? Is it too tangy? Add a pinch more honey if it’s too sharp, or a dash more hot sauce if you want more heat. Remember that the flavors will deepen after resting in the fridge. I always trust my palate — this is where you make the recipe your own.
💡 emy’s Pro Tip: If your sauce tastes flat, a tiny pinch of salt can elevate all the flavors. Also, a squeeze of fresh lemon juice can brighten it up if it feels too heavy.
Step 4: Store and Chill
Transfer the sauce to an airtight container (a glass jar with a tight-fitting lid is ideal). Refrigerate for at least 30 minutes before serving. This resting period allows the spice from the Cajun seasoning and hot sauce to meld with the creamy base, creating a more cohesive and flavorful sauce. You can use it immediately, but the flavor will be much better after a chill.
⚠️ Common Mistake to Avoid: Don’t skip the chill time if you want the full flavor experience. Also, never freeze this sauce — the mayonnaise will separate and become watery when thawed.
Step 5: Serve and Enjoy
Give the sauce a quick stir before serving, as some separation can occur in the fridge (this is normal). Serve it in a small bowl alongside your favorite finger foods. It’s incredible with warm, crispy chicken tenders, fries, onion rings, or even as a spread on a sandwich. Enjoy the burst of flavor!
Step
Action
Duration
Key Visual Cue
1
Combine all ingredients
2 minutes
All ingredients in one bowl
2
Whisk until smooth
30–45 seconds
Uniform, glossy, pinkish-orange
3
Taste and adjust
1 minute
Balanced flavor to your preference
4
Store and chill
30 mins minimum
Thickened, flavors melded
Serving & Presentation
This sauce shines brightest as a dip for anything crispy. I love serving it in a small, colorful bowl — maybe one I picked up from a vendor at the Union Square Greenmarket. A sprinkle of extra Cajun seasoning or fresh chopped chives on top adds a beautiful pop of green and reinforces the flavor. For a party, double the recipe and serve it in a bread bowl (a hollowed-out sourdough round) for a rustic, impressive presentation that always gets compliments.
Beyond chicken tenders, think of this sauce as your new condiment hero. Use it as a spread on burgers, a dressing for crunchy coleslaw, or a dip for roasted sweet potato wedges. In my NYC apartment, I even use it as a quick sauce for grilled shrimp tacos. It brings back that feeling of summer barbecues in the South, but with a sophisticated edge from the honey and spices.
Pairing Type
Suggestions
Why It Works
Side Dish
Crunchy coleslaw, baked beans, corn on the cob
Creaminess cuts through the acidity of coleslaw; spice complements sweet beans and corn.
Sweet drinks balance the spicy kick; beer cuts through the richness.
Garnish
Fresh chives, extra Cajun seasoning, lemon wedge
Adds freshness, color, and visual appeal; lemon brightens flavors.
Make-Ahead, Storage & Reheating
This comeback sauce is a meal-prep champion, perfect for my busy NYC lifestyle. I make a batch on Sunday and use it all week long. The key is proper storage and knowing how long it stays fresh.
Method
Container
Duration
Reheating Tip
Tartar Sauce Recipe
Table of Contents
Tartar Sauce Recipe – Simple and Creamy in 5 Minutes
⚖️
Difficulty
Easy
⏲️
Prep Time
5 mins
🕒
Cook Time
0 mins
⏱️
Total Time
5 mins
🍽️
Servings
12 servings (1.5 cups)
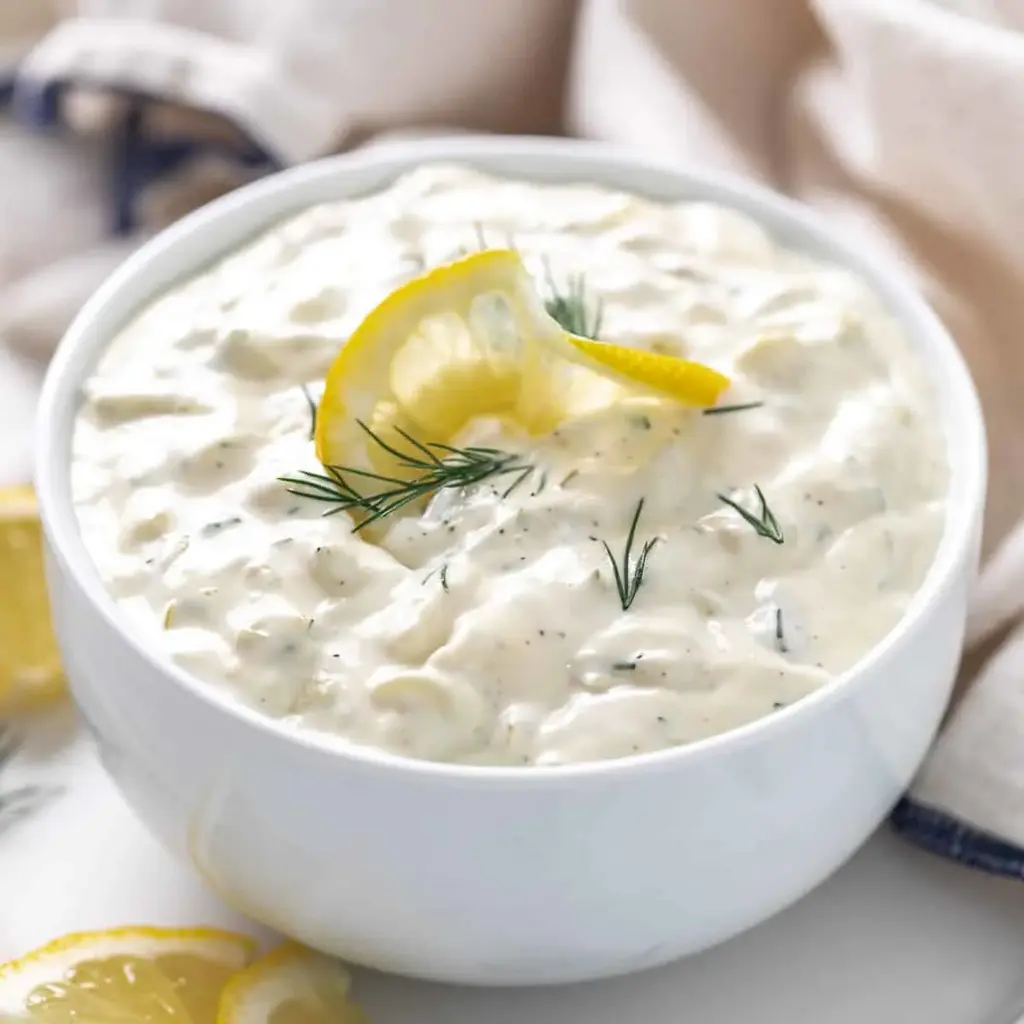
This homemade Tartar Sauce is one of my favorite condiments to make at home, and it’s a staple in my NYC kitchen. Ready in 5 minutes, it has all the classic flavors of store-bought or restaurant tartar sauce using just 7 simple ingredients. I make this tartar sauce recipe every week, especially during summer when we’re grilling fish or frying up some crispy shrimp. It’s so much better than anything you can buy — fresher, brighter, and completely customizable to your taste.
When I was training in Paris, I learned that great sauces are all about balance. The tang of the dill relish against the creaminess of the mayonnaise, the subtle heat of the horseradish, and the pop of fresh lemon juice — every spoonful is a little symphony. My mother, back in our home kitchen in Morocco, made a similar sauce for her fried fish, and she always added a pinch of sugar to soften the edges. That sweet-savory balance is what makes this tartar sauce so addictive. The texture is perfect too: not too thin, not too thick, with little bursts of pickle in every bite.
I’ve refined this recipe over the years, testing it with different combinations of mayonnaise, pickles, and seasonings. This version is my gold standard — the one I serve to friends and family, the one that disappears fastest at parties. What I love most is how foolproof it is. Even if you’ve never made a sauce from scratch, you can whip this up in minutes. 💡 emy’s Pro Tip: Always use full-fat mayo for the creamiest, most luxurious texture. Light mayo can make the sauce taste watery and thin.
Why This Tartar Sauce Recipe Is the Best
The Flavor Secret: My unique angle here is the combination of fresh dill and a touch of horseradish. Most recipes rely on dried herbs or skip the horseradish altogether, but that little bit of heat and earthiness makes all the difference. It’s a trick I picked up in Paris — a whisper of heat wakes up creamy sauces without overpowering them. I also use a smidge of sugar to balance the acidity, a nod to my Moroccan roots where sweet and savory are always in perfect harmony.
Perfected Texture: The key to a restaurant-quality tartar sauce is the chopping. Since I use dill relish, the pickles are already cut small and evenly, which means every bite has consistent flavor and crunch. I also fold everything gently — over-mixing can break the mayonnaise emulsion and make the sauce loose. From my culinary school days, I remember the rule: a good sauce holds together, it doesn’t separate. This one stays silky and thick, perfect for coating fish or spreading on a bun.
Foolproof & Fast: This recipe is practically impossible to mess up. With just 7 ingredients and one bowl, you’re done in 5 minutes flat. No cooking, no complicated techniques. I’ve taught this to absolute beginners, and they’re always amazed at what they can create. It’s the perfect gateway recipe for anyone wanting to make their own condiments at home. Plus, it keeps beautifully in the fridge for up to a week, so you can make a big batch and have it ready for busy weeknights.
Tartar Sauce Recipe Ingredients
I pick up my ingredients from my local market in Brooklyn — I love the bright, fresh dill they get from the farmers market. It reminds me of the herbs my mother would chop fresh every morning. For the mayonnaise, I always go with a good-quality full-fat brand like Hellmann’s or Duke’s. Don’t skimp here — it’s the foundation of the whole sauce.
Ingredients List
1 cup mayonnaise (not Miracle Whip)
½ cup dill relish
1 tablespoon freshly chopped dill
1 tablespoon freshly squeezed lemon juice
1 teaspoon horseradish (or stone ground mustard)
1 teaspoon granulated sugar (or more to taste)
¼ teaspoon black pepper
Ingredient Spotlight
Mayonnaise: This is the backbone of your tartar sauce. Use full-fat mayo for the richest, creamiest result. If you try to substitute with a low-fat version, the sauce will be thinner and might separate. I’ve tested Miracle Whip, and it’s too sweet and tangy for this classic flavor profile — stick with real mayonnaise.
Dill Relish: Dill relish is the heart of the sauce, providing both flavor and texture. I love using a sweet dill relish like Vlasic or Heinz, but you can use a dill pickle that you chop yourself if you prefer a chunkier texture. The relish is already seasoned, so it adds just the right amount of tang.
Horseradish: A little horseradish goes a long way. It adds a gentle heat that cuts through the richness of the mayo. If you don’t have horseradish on hand, stone ground mustard is an excellent substitute with a similar sharp, earthy flavor.
Original Ingredient
Best Substitution
Flavor / Texture Impact
Mayonnaise
Vegan mayonnaise (e.g., Just Mayo)
Slightly tangier, slightly thinner texture; still creamy.
Dill relish
Finely chopped dill pickles
Chunkier texture, more pronounced pickle flavor.
Horseradish
Stone ground mustard
Milder heat, adds a mustardy tang.
Fresh dill
Dried dill (use 1 teaspoon)
Less vibrant, slightly earthier flavor.
Lemon juice
White wine vinegar
Brighter acidity, less fruity lemon note.
How to Make Tartar Sauce — Step-by-Step
Making this homemade tartar sauce is ridiculously easy. Follow these simple steps and you’ll have a kitchen staple that’s way better than anything from a jar.
Step 1: Combine Ingredients
In a medium mixing bowl, add 1 cup mayonnaise, ½ cup dill relish, 1 tablespoon freshly chopped dill, 1 tablespoon lemon juice, 1 teaspoon horseradish, 1 teaspoon sugar, and ¼ teaspoon black pepper. Use a rubber spatula or a wooden spoon to gently fold everything together until it’s evenly combined. Don’t whip or beat — you want to keep the mayonnaise emulsion intact.
💡 emy’s Pro Tip: Taste the sauce after mixing. If you prefer a sweeter tartar sauce, add another ½ teaspoon of sugar. If you want more tang, add a splash of extra lemon juice or pickle juice from the relish jar.
Step 2: Stir and Adjust
Give the sauce one final gentle stir to make sure everything is incorporated. If it seems too thick, you can thin it with a teaspoon of water or extra lemon juice. If it’s too thin, let it sit in the fridge for 30 minutes — the flavors will meld and the texture will thicken slightly. Serve immediately or refrigerate in an airtight container.
⚠️ Common Mistake to Avoid: Don’t over-mix! Vigorously stirring or whisking can break the mayonnaise emulsion, making the sauce turn watery and separate. Use a gentle folding motion instead.
Step
Action
Duration
Key Visual Cue
1
Combine all ingredients in a bowl
2–3 minutes
Sauce should be uniform in color with visible specks of dill and pickle
2
Taste and adjust seasonings
1 minute
Adjust sugar, lemon, or pepper to taste
3
Refrigerate (optional)
30 minutes
Sauce thickens slightly, flavors meld
Serving & Presentation
This homemade tartar sauce is incredibly versatile. I love serving it alongside crispy fish and chips — the creamy, tangy sauce is the perfect counterpoint to the salty, crunchy batter. It’s also fantastic on fried shrimp, crab cakes, clam strips, or even as a spread on a fish sandwich. In my NYC kitchen, I often spoon it into a small bowl and garnish with a sprig of fresh dill and a lemon wedge for a beautiful, restaurant-style presentation.
Growing up in Morocco, we’d serve a similar sauce with fried fish for Friday lunches. My mother always placed the bowl in the center of the table so everyone could help themselves. It’s that communal, sharing energy that I love about this sauce — it brings people together. For a party, I sometimes add a pinch of smoked paprika or a drizzle of hot sauce on top for color and a little kick. I also love it as a dip for raw vegetables like cucumber sticks, bell peppers, and cherry tomatoes — a healthier way to enjoy it!
Pairing Type
Suggestions
Why It Works
Main Dish
Fish and chips, fried shrimp, crab cakes
Creamy tang cuts through rich, crispy textures
Sandwich Spread
Fish sandwiches, crab rolls, chicken wraps
Adds moisture and bright flavor to buns and breads
Dip
Raw vegetables, french fries, onion rings
Elevates simple snacks with bold, tangy flavor
Garnish
Fresh dill sprig, lemon wedge, paprika dust
Enhances visual appeal and adds fresh flavor
Make-Ahead, Storage & Reheating
One of the best things about this tartar sauce is how well it keeps. I always make a double batch on Sunday so I have it ready for the week ahead. It’s perfect for meal prep — just scoop it into a jar and you’ve got a quick condiment for lunches, dinners, or snacks. For my busy NYC lifestyle, this is a game-changer.
Method
Container
Duration
Reheating Tip
Refrigerator
Airtight glass jar or container
Up to 1 week
Use as is — no reheating needed
Freezer
Freezer-safe container (leave headspace)
Up to 3 months
Thaw overnight in the fridge, then stir well before serving
Make-Ahead
Airtight container
Up to 5 days in advance
Chill thoroughly; flavors develop more depth overnight
For best results, always store your tartar sauce in a clean, airtight container. I love using glass jars with tight-fitting lids — they keep the sauce fresh and don’t absorb odors. If the sauce separates slightly after chilling (a little liquid on top is normal), just give it a good stir before using. It will come right back together. And remember, this is a no-cook condiment, so you never need to reheat it — just spoon it out straight from the fridge.
Variations & Easy Swaps
One of the things I love most about this tartar sauce recipe is how easy it is to customize. Here are a few of my favorite variations that keep the sauce exciting every time I make it.
This homemade Tartar Sauce is one of my favorite condiments to make at home. Its ready in 5 minutes and has all of the classic flavors of store-bought or restaurant tartar sauce using just 7 ingredients!
Ingredients
Scale
1 cup mayonnaise (not Miracle Whip)
½ cup dill relish
1 tablespoon freshly chopped dill
1 tablespoon freshly squeezed lemon juice
1 teaspoon horseradish (or stone ground mustard)
1 teaspoon granulated sugar (or more to taste)
¼ teaspoon black pepper
Instructions
Combine all the ingredients in a bowl until well mixed. Serve immediately or refrigerate.
Scroll up and see the post for tips, FAQs, and storage options.
Simple Lemon Caper Sauce
Table of Contents
Simple Lemon Caper Sauce – A Zesty, Parisian-Inspired Sauce
⚖️
Difficulty
Easy
⏲️
Prep Time
5 mins
🕒
Cook Time
10 mins
⏱️
Total Time
15 mins
🍽️
Servings
4
Every time I make this simple lemon caper sauce, I’m transported back to my training at Le Cordon Bleu in Paris, where we spent entire afternoons perfecting emulsified sauces. But this one? It’s the sauce that reminds me that the best things in cooking are often the simplest. Growing up in Morocco, my mother always taught me that a single squeeze of lemon, a handful of capers, and a good knob of butter could elevate any dish. This simple lemon caper sauce is exactly that — a Parisian technique meets North African brightness. It’s my go-to for weeknight dinners when I need something elegant but fast, a sauce that tastes like you’ve been slaving for hours when you’ve actually only spent fifteen minutes at the stove.
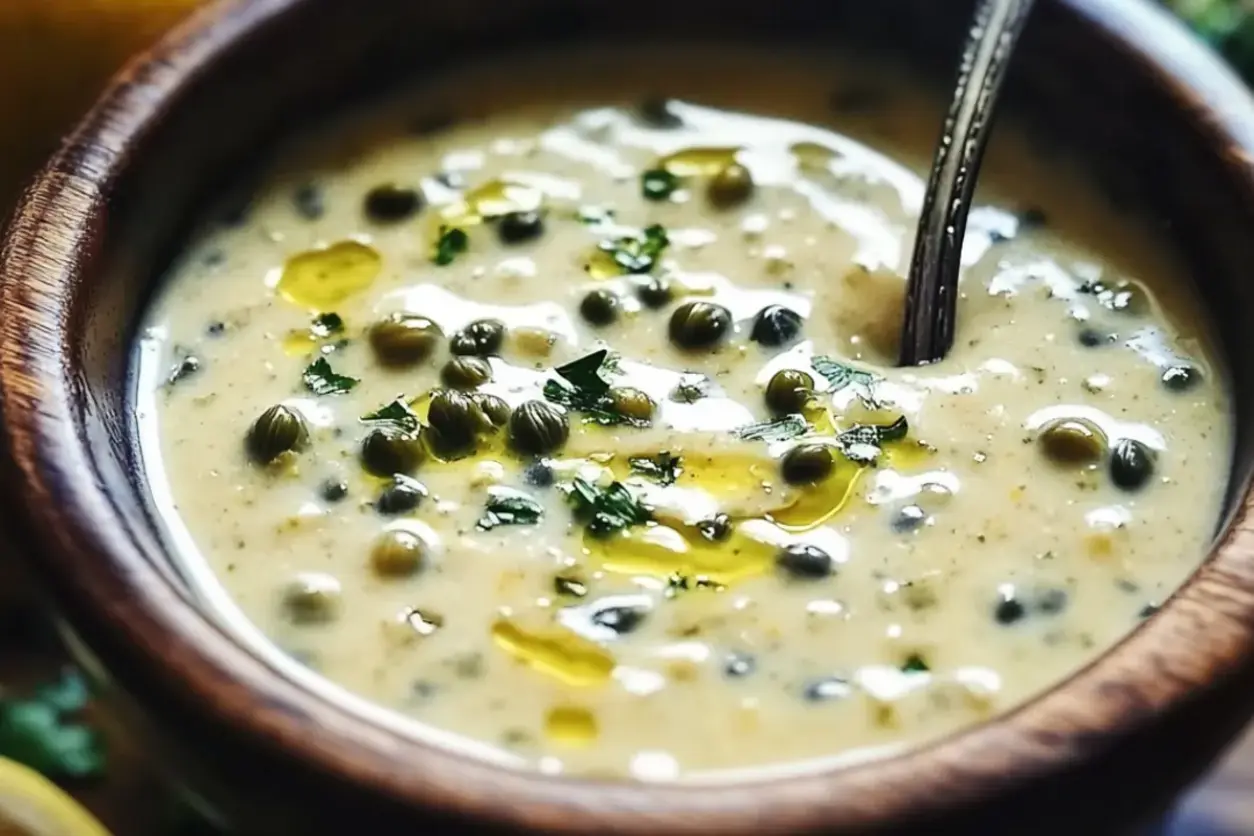
The magic of this simple lemon caper sauce is in its balance. The sharp burst of fresh lemon juice cuts through the richness of the butter and olive oil, while the briny capers add a savory depth that makes your taste buds sit up and pay attention. I add a whisper of garlic, just enough to scent the sauce, and a splash of dry white wine to tie everything together. The finished sauce is glossy, golden, and speckled with green capers and fresh parsley — it clings beautifully to pan-seared fish or tender chicken thighs, and it even makes a bowl of simple pasta feel like a celebration. This is the sauce I make when I want to impress without stress.
What makes my version of this classic French sauce different? I don’t drown it in heavy cream or flour. Instead, I rely on a simple beurre monté technique — whisking cold butter into the warm liquid — which gives the sauce a velvety texture without weighing it down. It’s foolproof, even for beginners. My biggest pro tip? Don’t let the garlic burn — that one mistake can turn a bright sauce bitter. And if you want to up the ante, add a teaspoon of preserved lemon (I always have a jar in my NYC fridge, a habit from Morocco). This simple lemon caper sauce is destined to become a staple in your kitchen, just as it is in mine. Let me show you exactly how to make it.
Why This Simple Lemon Caper Sauce Recipe Is the Best
The flavor secret here is the capers. Many recipes treat capers as an afterthought, but I brine mine briefly before adding to the pan — it softens their sharpness and lets their floral, earthy notes shine. This is a trick I learned from my mother, who would soak capers in warm water for five minutes before adding them to her tagines. The result is a sauce that’s briny but never harsh, and it pairs beautifully with any protein. This simple lemon caper sauce has a depth that store-bought sauces simply can’t match.
The texture is where my Paris training comes in. Instead of using a roux (which can make the sauce heavy and pasty), I use the beurre monté method. This French technique involves slowly whisking cold butter into a warm liquid, creating a silky, emulsified sauce that coats the back of a spoon. The butter adds a luxurious gloss and a delicate richness that clings to every bite of fish or chicken. It’s the same technique used for classic French sauces like beurre blanc, but here it’s streamlined for home cooks.
This recipe is also foolproof and fast — from start to finish, it’s just 15 minutes. The ingredient list is short, and the steps are simple. No chopping marathon, no complicated emulsification. Even if you’ve never made a pan sauce before, the visual cues I’ve included will guide you to success. And because it’s so versatile, you can serve it over salmon, roast chicken, or even a simple bowl of roasted vegetables. It’s the kind of recipe that makes you feel like a gourmet chef without any of the fuss. This simple lemon caper sauce is literally the best version of itself.
Simple Lemon Caper Sauce Ingredients
When I make this sauce in my NYC kitchen, I always pick up my produce at the Union Square Greenmarket — the lemons are so fragrant, and the parsley is incredibly fresh. The capers? I source them from a little Italian deli in the East Village that imports the best salt-packed capers from Sicily. But you can absolutely use standard jarred capers from your grocery store — just rinse them first. Here’s exactly what you’ll need for this simple lemon caper sauce.
Ingredients List
2 tablespoons unsalted butter
2 tablespoons olive oil
2 garlic cloves, minced
1/4 cup dry white wine or chicken broth
2 tablespoons fresh lemon juice (about 1/2 a lemon)
2 tablespoons capers, rinsed and drained
1 teaspoon lemon zest
Salt and black pepper, to taste
1 tablespoon fresh parsley, chopped (optional, for garnish)
Ingredient Spotlight
Unsalted butter is my choice here because it lets me control the salt level — capers are already salty, and I don’t want to overdo it. Use a good-quality butter for the best flavor; European-style butter has a higher fat content and creates a glossier sauce. For olive oil, pick a mild, fruity extra virgin olive oil, not a peppery one that will overpower the sauce. The garlic must be fresh — pre-minced garlic in a jar will taste dull and slightly acidic. Use a Microplane to zest your lemon before juicing, and make sure to wash the lemon thoroughly. The capers should be rinsed and drained to remove excess brine, which can make the sauce too salty. If you want a more intense caper flavor, you can skip the rinsing, but taste as you go.
Original Ingredient
Best Substitution
Flavor / Texture Impact
Unsalted butter
Salted butter (skip added salt)
Slightly saltier; reduce salt to taste
Dry white wine
Chicken or vegetable broth
Milder, non-alcoholic; richer savory notes
Capers
Green olives, chopped (brine-cured)
More savory, less briny; chunkier texture
How to Make Simple Lemon Caper Sauce — Step-by-Step
Making this simple lemon caper sauce is as easy as it gets. Follow these steps, and you’ll have a restaurant-quality sauce in under 15 minutes.
Step 1: Melt the Butter and Oil
In a medium skillet, heat the butter and olive oil over medium heat until the butter melts and starts to bubble. Swirl the pan gently to combine them. This creates a rich base for the sauce.
💡 emy’s Pro Tip: Use a light-colored skillet so you can see when the butter starts to foam. That’s your signal to add the garlic — don’t wait until it browns!
Step 2: Sauté the Garlic
Add the minced garlic and sauté for 1 to 2 minutes, until fragrant but not browned. You should smell the garlic immediately, but it should remain pale. If it starts to turn golden, reduce the heat.
⚠️ Common Mistake to Avoid: Burning the garlic. Brown garlic tastes bitter and will ruin the delicate flavor of the sauce. Cook it just until fragrant, then move quickly to the next step.
Step 3: Add the Wine
Pour in the white wine or chicken broth. Stir and simmer for 2 to 3 minutes to let the alcohol cook off or the broth reduce slightly. You should see the liquid reduce by about half — this concentrates the flavor.
💡 emy’s Pro Tip: Use a dry wine like Sauvignon Blanc or Pinot Grigio. If you only have a sweet wine, it can make the sauce too sugary. Stick with dry for the best balance.
Step 4: Stir in Lemon and Capers
Stir in the lemon juice, capers, and lemon zest. Season with salt and black pepper to taste. Cook for another 1 to 2 minutes, just until everything is heated through and well combined. The sauce will look glossy and fragrant.
⚠️ Common Mistake to Avoid: Adding too much salt before tasting. Capers are salty, so always taste the sauce first, then add salt sparingly. You can always add more, but you can’t take it out.
Step 5: Finish with Parsley
Remove from heat and stir in the chopped parsley, if desired. The residual heat will wilt the parsley slightly, adding a fresh, herbal finish. This step is optional but highly recommended for color and flavor.
💡 emy’s Pro Tip: If you want an even silkier sauce, turn off the heat and whisk in 1 additional tablespoon of cold butter, cut into small cubes. This is the classic beurre monté technique — it makes the sauce incredibly velvety.
Step 6: Serve Immediately
Drizzle the sauce over your favorite fish, chicken, pasta, or veggies while still warm. This sauce is best enjoyed fresh, as the flavors will be at their brightest and most vibrant.
⚠️ Common Mistake to Avoid: Letting the sauce sit too long before serving. It can separate as it cools. If it does, whisk in a teaspoon of warm water or broth to bring it back together.
Step
Action
Duration
Key Visual Cue
1
Melt butter and oil
1–2 mins
Butter starts to foam
2
Sauté garlic
1–2 mins
Garlic is fragrant but pale
3
Simmer wine or broth
2–3 mins
Liquid reduces by half
4
Add lemon, capers, zest
1–2 mins
Sauce is glossy and fragrant
5
Stir in parsley
30 secs
Parsley brightens sauce
6
Serve immediately
—
Sauce coats a spoon
Serving & Presentation
This simple lemon caper sauce is incredibly versatile. I love serving it over pan-seared salmon filets — the crispy skin and bright sauce are a match made in heaven. For chicken, spoon it over roasted breasts or thighs. For a vegetarian option, toss it with linguine or fettuccine and a handful of fresh arugula. The sauce also works beautifully drizzled over roasted vegetables like asparagus, broccoli, or cauliflower. When I serve this at dinner parties, I plate the protein first, then spoon the sauce over the top, and finish with a sprinkle of fresh parsley and a few extra capers for visual appeal.
Inspired by my Moroccan roots, I sometimes add a pinch of smoked paprika and a dash of harissa paste to the sauce for a North African twist. It transforms the bright, classic French flavor into something warm and spicy. And if I’m in a rush, I simply pour the sauce right from the skillet over a bowl of steamed white rice — the rice soaks up all that delicious lemon-caper goodness. For a complete meal, I pair this sauce with a simple side salad of arugula, shaved Parmesan, and a lemon vinaigrette. It’s a meal that feels both elegant and comforting.
Pairing Type
Suggestions
Why It Works
Side Dish
Roasted asparagus, steamed green beans, sautéed spinach
The bright sauce cuts through earthy greens
Sauce / Dip
Over grilled fish, roasted chicken, or pasta
Adds a burst of flavor without overpowering
Beverage
Crisp Sauvignon Blanc, dry rosé, sparkling water with lemon
Acidic wines echo the lemon notes
Garnish
Chopped parsley, extra capers, lemon wedges, shaved Parmesan
Adds freshness and visual contrast
Make-Ahead, Storage & Reheating
I know life in NYC gets busy, so I always recommend making a double batch of this simple lemon caper sauce to have on hand for quick meals. It stores beautifully, and with a few simple tricks, you can reheat it without losing its silky texture. Here’s how I manage it in my own busy kitchen.
Method
Two Ingredient Sweet Potato Tortillas
Table of Contents
Two Ingredient Sweet Potato Tortillas – The Softest, Pliable Paleo Tortillas
⚖️
Difficulty
Easy
⏲️
Prep Time
15 mins
🕒
Cook Time
20 mins
⏱️
Total Time
35 mins
🍽️
Servings
8 tortillas
There are some recipes that feel like pure magic — and these two ingredient sweet potato tortillas are exactly that. I first stumbled upon this idea while experimenting in my tiny NYC apartment kitchen, missing the warm, tender flatbreads my mother used to make in Morocco. She would spend hours kneading dough, and while I loved those moments, I knew there had to be a simpler way to get that same comforting texture without the gluten. That’s when I discovered the genius of combining sweet potato and cassava flour. The result? A soft, pliable, naturally paleo tortilla that bends without breaking — perfect for wrapping your favorite fillings. This recipe is a game-changer for anyone following a gluten-free or paleo diet, and it all starts with just two simple ingredients.
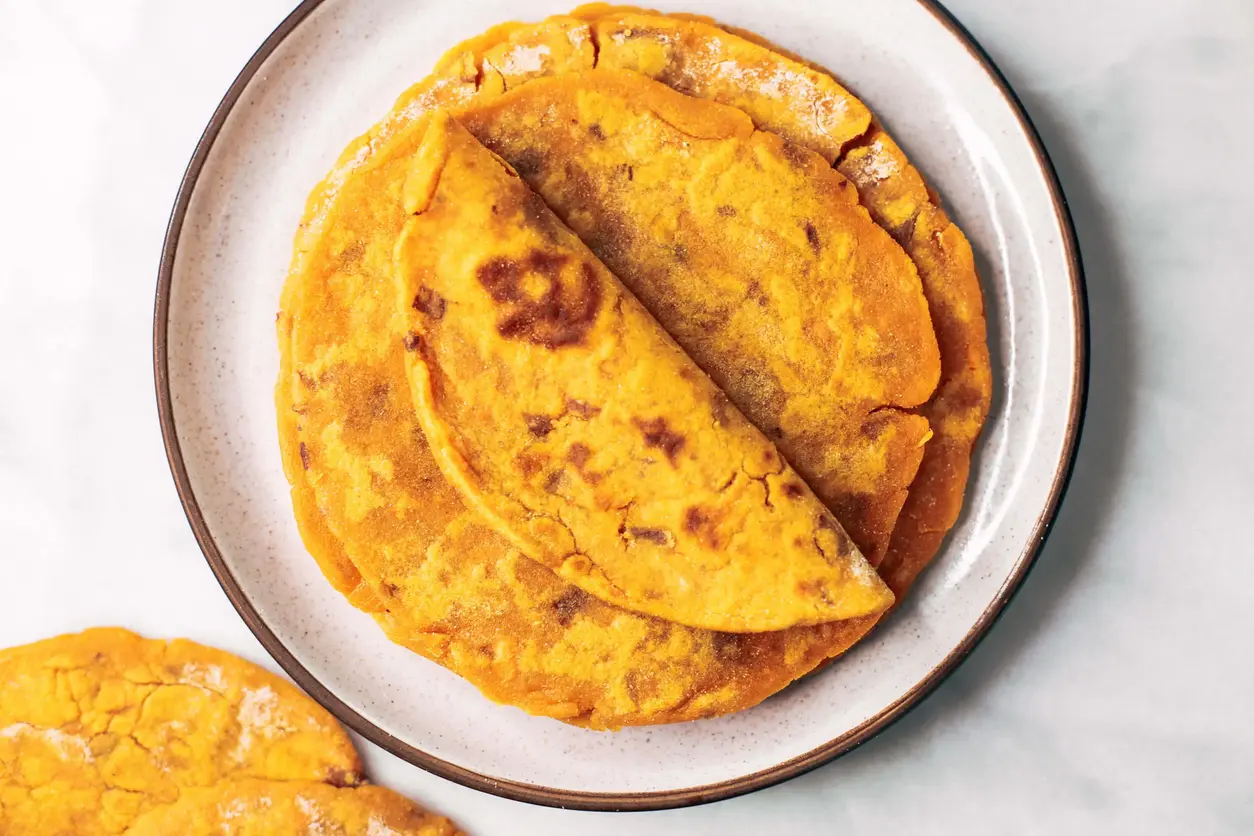
The first time I made these, the aroma of sweet potato hitting a hot skillet brought me right back to my mother’s kitchen in Marrakech. The tortillas develop a beautiful golden-brown speckled surface, with a tender, slightly chewy interior that’s nothing like the brittle grain-free tortillas you’ve had before. There’s a subtle natural sweetness from the potato, balanced by the neutral, earthy cassava flour. When you fold one around grilled chicken or roasted vegetables, it holds everything together like a warm hug. I love serving them alongside a smoky harissa dip — a little taste of my North African roots right here in my New York City home.
What sets my version apart is the technique I picked up during my pastry training in Paris — letting the dough rest just long enough for the cassava flour to fully hydrate. Many recipes skip this step, leading to dry, crumbly tortillas. But I’ll share my pro tip for getting them perfectly pliable every time. Plus, I’ll walk you through the one mistake I see home cooks make that turns these tortillas into sad little crackers. Whether you’re new to paleo cooking or a seasoned pro, this recipe is designed to be foolproof. Trust me, once you make these, you’ll never buy store-bought tortillas again.
Why This Two Ingredient Sweet Potato Tortillas Recipe Is the Best
The Flavor Secret: The magic here is the sweet potato. It’s not just a binder — it brings a natural sweetness and moisture that makes these tortillas taste almost buttery, without any dairy. Growing up in Morocco, we used sweet potatoes in both savory and sweet dishes, and this recipe honors that tradition. The cassava flour is the perfect partner because it has a very mild flavor and a fine texture that mimics wheat flour better than almond or coconut flour. Together, they create a tortilla that tastes wholesome and satisfying, not like a compromise.
Perfected Texture: From my time in Paris, I learned that the key to any good dough is hydration. If you overwork it, you get toughness. If you under-hydrate, you get cracks. With cassava flour, the trick is to let it sit after mixing so the flour can absorb all the moisture from the sweet potato. This creates a smooth, pliable dough that rolls out like a dream. The result is a tortilla that’s soft and flexible when warm, and still pleasant when cooled — not dry or crumbly.
Foolproof & Fast: I’ve tested this recipe with dozens of home cooks, and it works every single time. No special equipment, no complicated steps. You just mash, mix, roll, and cook. The recipe is naturally paleo, gluten-free, and vegan, making it a winner for almost any dietary need. Plus, it comes together in under 35 minutes — perfect for busy weeknights when you need a quick, healthy wrap solution.
Two Ingredient Sweet Potato Tortillas Ingredients
I source my sweet potatoes from the Union Square Greenmarket in Manhattan, where the orange-fleshed varieties are incredibly sweet and creamy. For cassava flour, I always reach for the brand I trust most — it’s now widely available at Whole Foods and online. When I was training in Paris, we learned the importance of ingredient quality, and it makes a real difference here.
Ingredients List
2 cups sweet potato (mashed, from about 1 large or 2 medium sweet potatoes)
1 cup cassava flour
1/4 teaspoon sea salt (optional, but I recommend it)
Ingredient Spotlight
Sweet Potato: This is the star of the show. Choose sweet potatoes that are firm, heavy for their size, and free of soft spots. The orange-fleshed variety (often labeled as “garnet” or “jewel”) works best because it’s naturally sweeter and more moist. If you only have white sweet potatoes, the tortillas will be slightly less sweet and a bit drier — you might need an extra tablespoon of water. But I always stick with orange for the best flavor.
Cassava Flour: Don’t confuse this with cassava starch or tapioca flour. Cassava flour is made from the whole root and has a much finer, more absorbent texture. It’s the secret to making these tortillas pliable. I’ve tested this with almond flour, and the results were a crumbly mess. For a substitute, try a blend of 1/2 cup coconut flour and 1/4 cup tapioca starch, but note that the texture will be slightly different and may require an extra egg (if not vegan).
Sea Salt (Optional): A pinch of salt enhances the natural sweetness of the potato and balances the flavor. It’s not strictly necessary, but I never skip it. If you’re watching your sodium, you can leave it out or use a salt substitute.
Original Ingredient
Best Substitution
Flavor / Texture Impact
Sweet Potato (mashed)
Butternut squash (mashed)
Slightly less sweet, same moisture — works well.
Cassava Flour
Coconut flour + tapioca starch blend
Drier dough, may need extra liquid; less pliable.
Sea Salt
Himalayan pink salt or omit
Flavor will be slightly flat without salt.
How to Make Two Ingredient Sweet Potato Tortillas — Step-by-Step
Making these tortillas is so straightforward that you’ll wonder why you ever bought them from the store. Follow these steps, and you’ll have a stack of beautiful, golden tortillas in no time.
Step 1: Prepare the Sweet Potato
Peel and cube your sweet potato into 1-inch pieces. Place them in a saucepan with about 1 inch of water. Cover and steam over medium heat for 12–15 minutes, until the cubes are fork-tender. Drain well — this is crucial! Excess water will make your dough sticky. Let the potatoes cool for a few minutes, then mash them thoroughly with a fork or potato masher until completely smooth. You should have exactly 2 cups of mashed sweet potato.
💡 emy’s Pro Tip: For the smoothest mash, use a ricer or a food mill. This eliminates any lumps that can create weak spots in your tortillas. I learned this trick during my pastry training in Paris — a smooth purée is the foundation of any good dough.
Step 2: Mix the Dough
In a large bowl, combine the warm mashed sweet potato with the cassava flour and optional sea salt. Stir with a spatula until a shaggy dough forms. Use your hands to bring it together into a ball. The dough should be smooth and slightly tacky but not sticky. If it feels too dry, add 1 tablespoon of water at a time until it comes together. If it’s too sticky, add a little more cassava flour. Cover the dough with a clean kitchen towel and let it rest for 5 minutes — this allows the cassava flour to fully hydrate.
⚠️ Common Mistake to Avoid: Don’t skip the rest time! If you roll the dough immediately, the cassava flour hasn’t absorbed enough moisture, and your tortillas will crack and break apart when cooked.
Step 3: Divide and Shape
Divide the dough into 8 equal pieces (about 2.5 ounces each). Dust your work surface lightly with cassava flour. Take one piece and press it into a disc, then use a rolling pin to roll it out into a circle about 1/4-inch thick. Don’t worry if they aren’t perfectly round — rustic tortillas have character! Repeat with the remaining pieces, dusting with flour as needed to prevent sticking.
💡 emy’s Pro Tip: To get even thickness, place two wooden skewers or chopsticks on either side of the dough before rolling. This creates a natural guide, so you don’t press too thin. The tortillas should be thick enough to hold their shape but thin enough to fold.
Step 4: Cook the Tortillas
Heat a large non-stick skillet or cast-iron pan over medium heat. Add a light drizzle of olive oil (about 1/2 teaspoon per tortilla). Carefully transfer one rolled tortilla to the hot pan. Cook for 1–2 minutes on the first side, until golden brown spots appear and the edges start to lift. Flip and cook for another 1–2 minutes on the second side. Adjust the heat as needed — if the tortillas are browning too fast, lower the heat slightly. Transfer to a plate and cover with a clean kitchen towel to keep warm. Repeat with the remaining tortillas.
⚠️ Common Mistake to Avoid: Don’t overcrowd the pan. Cook one tortilla at a time to ensure even heat distribution. Also, don’t press down on the tortilla with a spatula — let it cook undisturbed for the best texture.
Step
Action
Duration
Key Visual Cue
1
Steam & mash sweet potato
15 mins
Fork-tender cubes, smooth purée
2
Mix dough & rest
5 mins
Smooth, tacky dough ball
3
Divide & roll out
10 mins
1/4-inch thick circles
4
Cook on skillet
2–4 mins per tortilla
Golden brown spots on both sides
Serving & Presentation
These tortillas are incredibly versatile. I love serving them warm with a dollop of smoky harissa yogurt (a nod to my Moroccan roots) or alongside a fresh salsa verde. They’re perfect for wrapping grilled chicken, sautéed mushrooms, or even just a simple mix of avocado and black beans. For a NYC-inspired twist, fill them with pulled pork and pickled red onions for a delicious taco night.
When it comes to presentation, I like to stack the tortillas on a wooden board, slightly overlapping, with a bowl of dip in the center. Sprinkle a little fresh cilantro or a pinch of smoked paprika over the top for color. If you’re serving them as a side, arrange them in a napkin-lined basket — they’ll stay warm and look inviting.
My favorite way to enjoy them? Straight from the skillet with a generous smear of butter (or vegan butter) and a sprinkle of sea salt. It’s a simple pleasure that reminds me of the bread my mother would pull from the oven when I was a child.
Pairing Type
Suggestions
Why It Works
Side Dish
Grilled chicken, black bean salad, roasted veggies
The tortillas are sturdy enough to hold hearty fillings.
Sauce / Dip
Harissa yogurt, avocado crema, salsa verde
The mild sweetness balances spicy, tangy sauces.
Beverage
Iced tea with mint, lime sparkling water
Refreshing drinks complement the warm, earthy tortillas.
Garnish
Fresh cilantro, pickled onions, smoked paprika
Adds color, crunch, and a flavor boost.
Make-Ahead, Storage & Reheating
I always double this recipe so I have tortillas ready for quick lunches throughout the week. Living in NYC, I need meals that come together fast, and these are a lifesaver. Here’s how I store and reheat them.
Method
Container
Duration
Reheating Tip
Refrigerator
Airtight container or zip-top bag
Up to 5 days
Warm in a dry skillet for 30 seconds per side
Freezer
Layered with parchment in a freezer bag
Up to 3 months
Thaw overnight in the fridge, then reheat on skillet
Make-Ahead
Raw dough discs between parchment
Up to 2 days in the fridge
Crunchy Detox Salad
Table of Contents
Crunchy Detox Salad Recipe with Lemon Ginger Vinaigrette – A Crisp, Nourishing Bowl of Goodness
⚖️
Difficulty
Easy
⏲️
Prep Time
20 mins
🕒
Cook Time
0 mins
⏱️
Total Time
20 mins
🍽️
Servings
6 servings
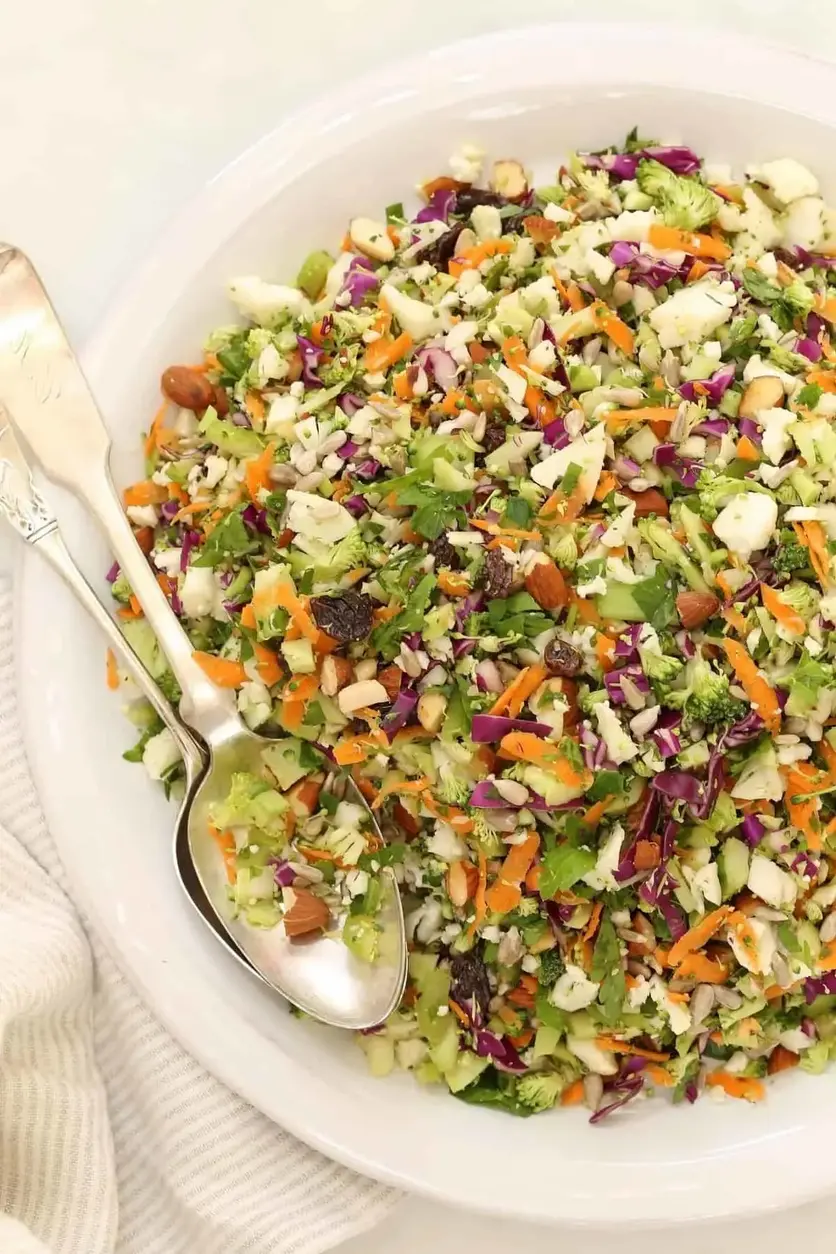
Ready for some salad love? This Crunchy Detox Salad recipe is loaded with chopped vegetables, almonds and raisins all tossed in a delicious lemon ginger vinaigrette. It’s one of my favorite detox salad recipes and it’s a salad that you’ll want to add to your daily wellness plan. I remember my mother in Morocco making a similar chopped salad with fresh herbs and a simple lemon dressing — it was her way of resetting after a big family feast. Now, living in New York City, I’ve given that memory a crunchy, nutrient-packed upgrade with broccoli, cauliflower, and a zingy ginger kick that feels both familiar and refreshingly new.
The first time you take a bite, you’ll notice the symphony of textures: the firm crunch of raw broccoli and cauliflower, the tender chew of raisins, and the satisfying pop of sunflower seeds. The lemon ginger vinaigrette ties everything together with a bright, slightly spicy warmth that wakes up your palate. I love how the fresh parsley adds an earthy, grassy note that balances the sweetness of the honey and the tang of the lemon. It’s a salad that tastes like energy in a bowl — light, vibrant, and deeply satisfying.
This Crunchy Detox Salad is my go-to for busy weeks when I want something that’s both nourishing and delicious. I learned the importance of finely chopping vegetables during my training in Paris — it releases more flavor and makes every forkful a perfect bite. 💡 emy’s Pro Tip: Chopping everything to a similar size ensures the vinaigrette coats every piece evenly. A common mistake is leaving the veggies too chunky — you’ll miss that beautiful, uniform crunch. This recipe is foolproof and comes together in just 20 minutes, making it perfect for meal prep or a quick lunch.
Why This Crunchy Detox Salad Recipe Is the Best
The Flavor Secret — My Moroccan roots taught me that balance is everything. This detox salad isn’t just about being healthy; it’s about being delicious. The combination of tart lemon, warm ginger, and sweet honey creates a vinaigrette that dances on your tongue. The raisins add just enough natural sweetness to counter the sharpness of the raw vegetables, while the parsley brings a fresh, herbaceous finish that reminds me of the herb salads my mother would make for our evening meals in Marrakech.
Perfected Texture — From my French culinary training, I learned that texture is what elevates a simple salad to something memorable. By pulsing the vegetables in a food processor (or chopping them by hand with a sharp knife), you get a fine, even consistency that allows the vinaigrette to cling to every nook and cranny. The almonds and sunflower seeds provide a double crunch that keeps each bite interesting. It’s a textural experience that makes you want to keep eating.
Foolproof & Fast — This is a no-cook recipe that anyone can master. There’s no wilting, no blanching, no complicated techniques. Just chop, toss, and dress. Even if you’re a beginner, you’ll feel like a pro. The ingredients are forgiving — you can swap in whatever crunchy vegetables you have on hand. And because it’s served cold or at room temperature, it’s perfect for picnics, potlucks, or make-ahead lunches. I’ve tested this recipe dozens of times, and it always delivers.
Crunchy Detox Salad Ingredients
I find the freshest ingredients for this Crunchy Detox Salad at the Union Square Greenmarket here in NYC. The farmers there know me by name, and they always save me the crunchiest heads of broccoli and the most vibrant bunches of parsley. It reminds me of the souks in Morocco, where every stall overflows with color and life. For the ginger, I look for firm, smooth roots with a strong fragrance — it makes all the difference in the vinaigrette.
Ingredients List
2 cups cauliflower, chopped
2 cups broccoli, chopped
1 cup red cabbage, chopped
1 cup carrots, chopped
1-1/2 cups fresh parsley, chopped
2 celery stalks, chopped
1/2 cup raw almonds, chopped
1/2 cup raw sunflower seeds
1/3 cup organic raisins
3 Tbsp olive oil
1/2 cup lemon juice
1 tablespoon fresh ginger, peeled and grated
2 tablespoons clover honey
1/2 teaspoon sea salt
Ingredient Spotlight
Fresh Ginger — The star of the vinaigrette. Ginger adds a warm, slightly spicy kick that aids digestion and gives the salad its detoxifying edge. When shopping, look for ginger that is firm, smooth-skinned, and free of wrinkles. A good test is to smell it — it should have a sharp, citrusy aroma. If you can’t find fresh ginger, you can substitute 1/2 teaspoon of ground ginger, but the fresh root truly makes the vinaigrette sing. I always grate it on a microplane for the finest texture.
Raw Almonds — These provide the hearty crunch that makes this salad so satisfying. I use raw almonds because they have a milder, creamier flavor than roasted ones, which can overpower the other ingredients. You can also use walnuts or pecans for a different texture. If you’re nut-free, pumpkin seeds are an excellent substitute. I like to chop them by hand to get a mix of sizes — some fine, some chunky — for a more interesting mouthfeel.
Fresh Parsley — Don’t skip this! Parsley is not just a garnish here; it’s a core ingredient. It adds a fresh, slightly peppery note that lightens the salad and complements the lemon vinaigrette perfectly. I use flat-leaf (Italian) parsley because it has more flavor than curly parsley. One bunch usually yields about 1-1/2 cups when chopped. If you’re not a parsley fan, you can substitute fresh cilantro or a mix of mint and basil for a different herbaceous profile.
Clover Honey — The natural sweetness in the vinaigrette. Honey balances the acidity of the lemon and the sharpness of the ginger. I prefer clover honey for its mild, floral sweetness, but any liquid honey will work. For a vegan version, use maple syrup or agave nectar. The key is to use a sweetener that’s liquid enough to blend easily into the vinaigrette without crystallizing.
Original Ingredient
Best Substitution
Flavor / Texture Impact
Fresh Ginger (1 Tbsp)
Ground Ginger (1/2 tsp)
Less sharp, more earthy; vinaigrette loses some kick
Raw Almonds (1/2 cup)
Pumpkin Seeds (1/2 cup)
Similar crunch, nut-free option; slightly earthier
Fresh Parsley (1-1/2 cups)
Fresh Cilantro (1-1/2 cups)
Brighter, more citrusy; changes the herb profile
Clover Honey (2 Tbsp)
Maple Syrup (2 Tbsp)
Thinner vinaigrette, adds subtle maple note
How to Make Crunchy Detox Salad — Step-by-Step
Making this Crunchy Detox Salad is as simple as chop, toss, and dress. Let me guide you through each step so you get that perfect, uniform crunch every time.
Step 1: Chop the Vegetables
Either chop the ingredients using a good sharp knife, or toss them individually in a food processor and pulse a few times so they are finely chopped. I prefer the food processor method for speed — it gives you a consistent texture in seconds. If chopping by hand, aim for pieces about the size of a pea. This ensures every bite has a mix of all the vegetables.
💡 emy’s Pro Tip: Work in batches when using a food processor. Overfilling can lead to uneven chopping. Pulse 4-5 times per batch, then check the texture. You want small, uniform pieces, not a puree.
Step 2: Combine the Salad Ingredients
Add all of the salad ingredients to a large bowl. This includes the chopped cauliflower, broccoli, red cabbage, carrots, parsley, celery, almonds, sunflower seeds, and raisins. Give everything a good stir with a large spoon or your hands to distribute the ingredients evenly.
⚠️ Common Mistake to Avoid: Don’t add the vinaigrette yet! Tossing the dry ingredients first helps distribute the nuts and seeds evenly. If you add the dressing too early, the nuts can clump together.
Step 3: Make the Vinaigrette
For the vinaigrette, place the olive oil, lemon juice, grated fresh ginger, clover honey, and sea salt in a mason jar. Seal the lid and shake well until the honey is fully dissolved and the dressing is emulsified. You can also place the ingredients in a small bowl and whisk to blend. For the best flavor, refrigerate the vinaigrette for up to an hour before use — this allows the ginger to infuse the dressing.
💡 emy’s Pro Tip: If you’re short on time, use a microplane to grate the ginger directly into the jar. This releases more juice and flavor than chopping it. Also, taste the vinaigrette before using — you may want to add a pinch more honey or salt depending on your preference.
Step 4: Toss and Serve
Pour the vinaigrette over the salad mixture and toss well to coat. Use two large spoons or your hands to ensure every piece is dressed. Let the salad sit for 5-10 minutes before serving — this allows the vegetables to absorb the flavors and soften slightly. Serve chilled or at room temperature.
⚠️ Common Mistake to Avoid: Don’t overdress the salad. Start with half the vinaigrette, toss, and then add more if needed. You can always add more dressing, but you can’t take it away. The salad should be lightly coated, not swimming in liquid.
Step
Action
Duration
Key Visual Cue
1
Chop vegetables
10 mins
Pea-sized, uniform pieces
2
Combine dry ingredients
2 mins
Evenly distributed in bowl
3
Make vinaigrette
5 mins
Honey fully dissolved, emulsified
4
Toss and serve
3 mins
Lightly coated, glossy
Serving & Presentation
This Crunchy Detox Salad is incredibly versatile. I love serving it as a light lunch on its own, or as a vibrant side dish alongside grilled chicken or fish. For a heartier meal, top it with some crumbled feta cheese or a sliced avocado. The creaminess of the avocado pairs beautifully with the crunchy vegetables and the zesty vinaigrette. In the summer, I’ll add some grilled corn kernels for a pop of sweetness and color.
When it comes to presentation, I like to serve this salad in a large, shallow bowl so the colors really shine. Garnish with a sprinkle of extra chopped parsley and a few whole almonds on top for visual appeal. It’s a dish that looks as good as it tastes — a true crowd-pleaser at any gathering. My New York friends always ask for the recipe after I bring it to a potluck, and I love sharing the Moroccan-French twist that makes it so special.
For a complete meal, pair it with a warm bowl of Moroccan lentil soup or a simple roasted vegetable platter. The bright, fresh flavors of the salad complement heartier dishes perfectly. If you’re serving it as a main, add some chickpeas or grilled tofu for extra protein. It’s a salad that adapts to any occasion.
Pairing Type
Suggestions
Why It Works
Side Dish
Grilled chicken, roasted salmon, lamb chops
Bright acidity cuts through rich proteins
Sauce / Dip
Tahini dressing, yogurt dip, hummus
Creamy textures balance the crunch
Beverage
Sparkling water with lemon, green tea, dry white wine
Clean, refreshing flavors complement the salad
Garnish
Extra parsley, whole almonds, pomegranate seeds
Adds color, texture, and a pop of flavor
Make-Ahead, Storage & Reheating
This Crunchy Detox Salad is a meal-prep superstar. I often make a big batch on Sunday evenings to have ready for busy weekdays in my NYC kitchen. The key is to store the salad and vinaigrette separately until you’re ready to serve. This keeps the vegetables crisp and prevents them from getting soggy. I keep the chopped vegetables in an airtight container and the dressing in a mason jar in the fridge.
Method
Container
Grilled Zucchini Feta Chickpea Wrap with Herbed Yogurt
Table of Contents
Grilled Zucchini Feta Chickpea Wrap with Herbed Yogurt – A Fresh, Herb‑Laced Wrap
⚖️
Difficulty
Easy
⏲️
Prep Time
10 mins
🕒
Cook Time
10 mins
⏱️
Total Time
20 mins
🍽️
Servings
4
Growing up in a bustling Moroccan market, I learned that a simple vegetable can become a star when it meets the right herbs. When I moved to New York, I carried that lesson to my kitchen, pairing the humble zucchini with a vibrant, herbed yogurt sauce that captures the Mediterranean soul in a quick daytime bite. My latest creation— the Grilled Zucchini Feta Chickpea Wrap with Herbed Yogurt— blends fresh, smoky veggies, protein‑rich chickpeas, and a creamy sauce that lingers on the palate. This version adds a Moroccan‑inspired herb mix, giving the wrap a fragrant, aromatic lift that’s both wholesome and indulgent.
Imagine the tender, charred zucchini sliding into the plate, its slices kissed with olive oil and a dusting of sea salt, creating a subtle smokiness that mirrors the ticks of a Parisian grill and the heat of a Moroccan tagine. A spoonful of feta splinters into creamy bursts, while the chickpeas provide hearty texture. The herbed yogurt, a weaving of dill and mint, adds a bright, cooling counterpoint that brightens each bite. This harmony of warm, smoky, and cool produces a moisture balance that feels both comforting and refreshing, suitable for a hot summer lunch or an energizing pre‑workout meal.
I’ve spent years refining this wrap from my kitchen in Manhattan, borrowing techniques from French culinary training and the herb‑richness of my Moroccan grandmother’s kitchen. The key secret? Grilling the zucchini until it’s just slightly charred so it holds its shape without becoming mushy, and timing the addition of feta so it minimally melts into the sauce—this keeps the layers crisp. I’ve tested various herb blends; the dill‑mint combination yields the best flavor contrast. A common mistake is over‑cooking the zucchini—just guard it with a quick flip to keep that tender crunch. Enjoy the results of my signature herb twist and a few simple shortcuts that keep you on track even on a workday.
Why This Grilled Zucchini Feta Chickpea Wrap Is the Best
The flavor secret starts with the herb‑laced yogurt that has a fresh burst of dill and mint, a flavor profile I perfected during a culinary internship in Paris. By blending these North African and European greens, I give the wrap a bright, herbaceous aroma that feels like a sunny day in the medina of Marrakech. It pairs jasmine‑scented feta with grilled zucchini for a symphony of textures that gives the wrap a satisfying crunch and creamy richness.
Perfected texture takes advantage of a glass‑grill technique—heating the grill pan to medium-high so the zucchini slices develop that sweet char without wilting, while the feta remains clearly defined. I gently fold the feta after the grilling so that it starts to soften just enough to meld into the yogurt sauce without sinking and losing its shape. The result is an elegant contrast, much like layered Moroccan pastries, where each component maintains its identity.
Foolproof & Fast—this wrap can be assembled in under 20 minutes, so it’s ideal for a busy New Yorker who wants a protein‑rich meal on the go. The 15‑minute grill step means you can have a wholesome, protein‑dense meal before your evening commute or evening workout class. Instructions are simple, with no special equipment beyond a grill pan, and you’ll seldom miss a step, keeping the challenge low even for kitchen novices.
Grilled Zucchini Feta Chickpea Wrap Ingredients
During a late‑night trip to the Union Square farmers market, I found the freshest zucchinis, ripe blueberries of feta, and a perfect jar of chickpeas. Few places in NYC offer produce that sings with flavor, but the city’s spring bounty makes any recipe this vibrant a sure hit. Bring a pinch of sea salt, a handful of fresh dill and mint, and you’ll capture a taste that’s unmistakably Mine.
Ingredients List
2 medium zucchinis, sliced into 1/4‑inch rounds
100 g feta cheese, crumbled
1 can (15 oz) chickpeas, drained and rinsed
1 cup Greek yogurt
2 tablespoons fresh dill and mint, chopped
1 tablespoon olive oil
Salt and pepper, to taste
4 whole‑wheat wraps (size 12 in)
Ingredient Spotlight
Grilled Zucchini: Choose firm, dark‑green zucchinis for optimal flavor. A thicker slice holds its shape and develops a pleasant char. If you’re pressed for time, use a pre‑cut variety—just get rid of the stems and pat dry. Substitution: Replace with grilled yellow squash for a sweeter, mellow finish.
Feta Cheese: Look for ivory‑whisked blue‑core feta with a tangy sharpness that melts just slightly when warmed. Avoid over‑aged variations that turn brittle. Substitution: Use crumbled goat cheese to add tang and a slightly less salty taste.
Greek Yogurt: Choose plain full‑fat version for a silky currying consistency. A thinner yogurt expands when mixed with herbs; you’ll want a tighter sauce. Substitution: Swap for sour cream for a milder tang, but keep heart‑healthy nutrients higher with yogurt.
Original Ingredient
Best Substitution
Flavor / Texture Impact
Zucchini
Yellow Squash
Softer, sweeter bite
Feta Cheese
Goat Cheese
Tangier, less salty
Greek Yogurt
Sour Cream
Milder, creamier
How to Make Grilled Zucchini Feta Chickpea Wrap — Step-by-Step
Let’s crank up the heat and assemble a wrap that’s bursting with color, flavor, and Mediterranean sunshine. The process is simple and will have you done in 20 minutes.
Step 1: Preheat the Grill
Heat a cast‑iron or stainless‑steel grill pan over medium‑high until a light sheen of oil appears. A hot surface gives the zucchinis immediate sear without creating a soggy texture.
💡 emy’s Pro Tip: If you’re using a charcoal grill, add a splash of water to the coals to keep the garpla at a consistent temperature.
Step 2: Brush the Zucchini
Brush each zucchini slice with olive oil, then sprinkle with salt and pepper. The oil ensures a nice caramelized edge while the seasonings lock in flavor.
⚠️ Common Mistake to Avoid: Leave the zucchini uncovered during grilling can cause uneven roasting; keep a single thin layer so heat surrounds each slice.
Step 3: Grill the Zucchini
Place the slices on the grill, turning once after 3‑4 minutes until the edges get soft‑brown char marks. Remove from heat and let cool slightly.
💡 emy’s Pro Tip: If the edges scorch, lower the heat a touch or lift the skillet slightly to let excess smoke rise.
Step 4: Make the Herbed Yogurt Sauce
In a bowl, whisk the Greek yogurt with diced dill and mint. Add a pinch of salt, a little pepper, and a splash of lemon juice for brightness.
⚠️ Common Mistake to Avoid: Mixing yogurt at high speed can cause separation; whisk gently until smooth.
Step 5: Combine the Ingredients
In another bowl, toss the grilled zucchini, crumbled feta, and chickpeas. The chickpeas soak up the herb scent, while the feta adds creamy bursts.
💡 emy’s Pro Tip: Give the mixture a quick stir with your hands to allow the feta to gleam slightly without breaking its pieces.
Step 6: Lay the Wraps
Warm the wraps in a dry skillet for 10‑20 seconds to increase pliability. Then spread a generous layer of yogurt sauce over each with a spoon.
⚠️ Common Mistake to Avoid: Using too much sauce can make the wrap soggy. Keep it thin and even.
Step 7: Roll Up the Wraps
Drop the zucchini‑feta mixture down the center of each wrap. Fold the sides in, then roll tightly from one end to the other.
💡 emy’s Pro Tip: Tie each wrap with a toothpick if you need extra hold during transportation.
Step 8: Serve The Wraps
Slice the wraps in half if you like, then plate with a drizzle of lemon‑honey vinaigrette. Serve immediately for optimal texture.
⚠️ Common Mistake to Avoid: Letting the wrapped assembly stay at room temperature too long can cause the feta to lose firmness; serve right away.
Step
Action
Duration
Key Visual Cue
1
Preheat Grill
3‑4 min
Pan sparkles
2
Brush Zucchini
1 min
Oil sheen
3
Grill Zucchini
3‑4 min/side
Char marks
4
Make Sauce
2 min
Smooth swirl
5
Combine
1 min
Even coat
6
Lay Wraps
30 sec
Even layers
7
Roll Wraps
30 sec
Tightly packed
8
Serve
Instant
Golden crust
Serving & Presentation
Slice the wrap diagonally to reveal a vibrant cross‑section of grilled zucchini, feta melt, bright herbs, and fluffy chickpeas. Place the halves on a white slate plate to capture the natural colors—a nod to the bright mosaics of Moroccan tiles.
A final drizzle of lemon‑honey vinaigrette or a dusting of za’atar adds an extra layer of Mediterranean flair. Carrots or cucumber slaw on the side hark back to the crispness of a Parisian market basket, creating a contrast that satisfies both the palette and Instagram aesthetics.
Pair this wrap with a chilled glass of rosé or sparkling water flavored with lime to echo the herb aromas, and you have a meal that feels as if it traveled from Marrakech to Midtown in one bite.
Pairing Type
Suggestions
Why It Works
Side Dish
Greek salad
Fresh contrast
Sauce / Dip
Tzatziki, hummus
Creamy accompaniment
Beverage
White wine, rosé, sparkling water
Refreshes palate
Garnish
Microgreens, lemon zest, fresh mint
Adds aroma and color
Make-Ahead, Storage & Reheating
When the city’s hustle demands meal prep, this wrap is remarkably adaptable. I routinely cook the zucchini and garlic platter this morning and refrigerate the assembly for up to 3 days.
Method
Container
Duration
Reheating Tip
Refrigerator
Air‑tight zip‑lock bag
3 days
Microwave 1 min, 50% power
Freezer
Freezer bag
1 month
Thaw, stir quickly, oven 300 °F 10 min
Make‑Ahead
Wrap separately, sauce in small container
2 days in advance
Assemble fresh just before serving
A lingering tip from my prep routine: keep the sauce chilled until the last minute—this preserves the yogurt’s creamy integrity and prevents the feta from dissolving. Reheat with a splash of water or a damp paper towel to maintain moisture.
Variations & Easy Swaps
Variation
Key Change
Best For
Difficulty Impact
Whole‑Wheat Wrap Swap
Swap for spinach tortilla
Vegan
Low
Double Protein
Add grilled chicken or tofu
High protein
Medium
Summer Twist
Swap feta for crumbled goat cheese and add diced mango
Seasonal
Low
Whole‑Wheat Wrap Swap
Use a spinach tortilla for a subtly earthy base that accentuates the herb ashes. It’s a curious switch from the standard wheat wrap, popular in New York’s vegan cafés.
Double Protein — Grilled Chicken or Tofu
Add per‑cut grilled chicken or marinated tofu slices to double the protein punch. The chicken brings a smoky tang; tofu adds a neutral, absorbent flesh that keeps the wrap’s moisture stable. Test this during a busy brunch shift— it levels up the meal without over‑complicating the prep.
Summer Twist — Mango & Goat Cheese
Replacing feta with goat cheese and adding diced mango introduces sweet acidity that highlights the summer in Brooklyn’s farmer’s market. A handful of chopped fresh basil gives a final European touch that rounds off the dish beautifully.
How do I keep the feta from turning mushy in the wrap?
I keep the feta shredded and add it after the zucchini has cooled slightly. A quick stir before distributing the mix over the wraps ensures the feta retains its bite. If you feel the feta beginning to soften, wrap the assembly in foil and warm it for 30 seconds at 300 °F to firm the cheese again. This method, a small trick I learned in a Paris pastry class, balances the feta’s creaminess without losing its distinct flavor.
Can I use a different type of wrap if I’m gluten free?
Absolutely! Swap the whole‑wheat wrap for a gluten‑free tortilla—be it corn or almond‑based. Make sure the wrap’s thickness is similar so the wrap holds the filling. The flavor stays consistent, and the wrap still keeps the presented char of the zucchini. This variation is popular in many New York instant‑vote cafés, and it’s a breeze to try.
What can I use instead of Greek yogurt for the sauce?
You can substitute plain sour cream or even plain mayonnaise for a richer, less tangy sauce. If staying light, low‑fat yogurt is another option, but the flavor is milder. For a vegan twist, blend cashew or oat yogurt with the herbs and a squeeze of lemon. The key is to whisk until silky, so the sauce coats the zucchini evenly.
How can I add more protein to this wrap?
Simply fold in grilled chicken, shrimp, or tempeh. Add an extra egg, or sprinkle hemp seeds for an additional protein boost. A 1‑cup protein range works nicely: chicken slices (2 ounces) or shrimp (1/2 cup) maintain a balanced taste without overpowering the fresh herbs and chickpeas. This tweak aligns with the versatile, haute‑cuisine approach I love sharing.
Can I make this as a full meal by adding side dishes?
Definitely! Pair the wrap with a rustic couscous salad or a light tomato‑olive yogurt dip, echoing the flavors of Marrakech. Serve with a side of quinoa or a small bowl of lentil soup, and you have a complete Mediterranean feast. The wrap keeps the proteins high, while the sides add texture and extra greens, providing the fullness needed for a satisfying lunch or dinner.
What happens if I refrigerate the sauce for too long?
The yogurt can thin and separate if left long enough. To prevent this, keep the sauce chilled until the moment you distribute it over the wraps. Once warmed, whisk again. Keeping the sauce in a cold, dry container means it stays vibrant for a few hours, ensuring each bite remains moist and flavorful.
Is chickpeas necessary, or can I omit them?
For a lighter take, you may omit the chickpeas. The wrap will still carry zesty Greek yogurt and a crunchy zucchini. However, the chickpeas supply a substantial protein source and a bean echo of the North African menu. They’re optional, but highly recommended for lengthening the meal and adding a robust texture.
How do I keep the wrap from sliding when I eat it?
The key lies in slight over‑filling the wrap with sauce. This holds the filling in and creates a cohesive bite. Also, roll the wrap with a snug but gentle press; too tight will tear the tortilla, too loose will cause the filling to slip. If you’re transporting the wrap, secure it with a toothpick or wrap it in parchment paper.
Share Your Version!
I’d love to hear what tweaks you’ve made to this wrap! Drop a rating and share your comments below. If you snap a photo, post it on Instagram or Twitter and tag @cookingwithemi. Tell me: which herb blend did you find most striking, and why?
From my NYC kitchen to yours — I hope this recipe brings as much warmth to your table as it does to mine. — emy 🧡
📌
Love This Recipe? Save It to Pinterest!
If you enjoyed this Grilled Zucchini Feta Chickpea Wrap recipe, don’t let it get lost in your browser tabs! 😄 Pin it now so you can find it again anytime — and explore hundreds more tried-and-tested recipes waiting for you on my Pinterest boards.
Growing up in Casablanca, I learned that a great dish starts with the right char – the subtle, sweet smoke that turns plain veggies into a festival of flavor. That same instinct brought me to Paris in 2014, where I was taught to let the grill do its magic while keeping herbs fragrant. Today, in my New York City kitchen, I bring all these experiences together to create the Grilled Mediterranean Veggie Quesadillas with Smoky Veggie Twist, a dish that feels like a warm Moroccan market and a chic Parisian bistro rolled into one.
Picture it: crisp, charred zucchini and bell pepper, a smoky caramel of red onion, and a burst of fresh spinach that folds into the glossy mozzarella. The feta slices crumble, salt dancing across the surface while oregano and basil perfume the air. Each bite hits with a subtle nuttiness from the toasted tortilla, a hint of garlic, followed by a creamy, tangy finish that lingers like the last note of a well‑played French accordion. The contrast of textures – soft cheese, crunchy veggies, buttery tortilla – makes every mouthful an adventure.
I’ve refined this recipe to be truly foolproof. I always grill the veggies first on a preheated grill to achieve that smoky char, then assemble the quesadillas right before finishing them on the grill. My pro tip: keep the tortillas warm in a low‑heat oven while you grill, so they never tear. A common mistake is squeezing the spinach too early – let it cook just enough to wilt, then fold it in as the final touch to keep that bright green pop. With this method, even a beginner can master a gourmet‑level quesadilla.
Why This Grilled Mediterranean Veggie Quesadillas Recipe Is the Best
The smoking technique is my secret sauce. Grilling the veggies not only deepens the flavor profile but also delivers a charred, slightly sweet undertone that mimics the street‑food stalls of Marrakesh. It’s a quick way to add depth without extra seasonings.
Texture perfection comes from a double‑grill trick: after folding, the quesadilla is flipped again to crisp the outer tortilla while the mozzarella oozes just enough to bind the fillings. The result? A golden, flaky crust that gives way to a melty interior, every bite satisfying both mouth and eye.
Fast for my NYC 9‑to‑5 schedule, yet elegant enough for dinner parties, this version works for anyone. The assembly is simple, the cooking time is minimal, and the flavor is bold. I’ve tried thousands of variations, and these two steps—grill before assemble and finish on the grill—are the only tricks you need to make the dish shine.
I usually grab the veggies at the Union Square Farmers Market for that burst of freshness, then stop by Whole Foods for the cheeses. The combination of farm‑to‑table produce and high‑quality dairy makes this recipe a little luxury you can afford on a Tuesday night.
Ingredients List
4 large whole wheat tortillas
1 zucchini, sliced
1 red bell pepper, sliced
1 red onion, sliced
8 oz fresh spinach
1 cup cherry tomatoes, halved
1 cup crumbled feta cheese
1 cup shredded mozzarella cheese
2 Tbsp olive oil
1 tsp dried oregano
1 tsp dried basil
Salt and pepper to taste
2 cloves garlic, minced
Ingredient Spotlight
Fresh spinach: Provides a subtle earthiness and a pop of green that balances the roasted veggies. Pick crisp, dark‑green leaves from a local farmer’s market. If you’re in a winter market, baby spinach works fine. Substitute with kale for a peppery hit, but remember kale will keep a crunchy bite longer.
Feta cheese: The salty crumb brings a Mediterranean punch. Look for feta that’s still slightly moist; it dissolves better over warm cheese. A good swap is goat cheese for a tangier, milder flavor that still keeps the profile.
Whole wheat tortillas: They give a nutty undertone and hold up against the fillings. If you’re avoiding wheat, tortilla flour tortillas or corn tortillas are works‑for‑work, though the bite changes.
Original Ingredient
Best Substitution
Flavor / Texture Impact
Whole wheat tortilla
Flour tortilla
Soft, milder flavor, slightly sweeter
Feta cheese
Goat cheese
Tender, lighter tang, lower sodium
Spinach
Kale
Earthier bite, firmer texture when cooked
How to Make Grilled Mediterranean Veggie Quesadillas — Step-by-Step
Start by preparing all your ingredients; the process is quick, and every step builds toward that smoky, melt‑in‑your-mouth finale.
Step 1: Preheat Grill
Heat the grill to medium (about 375°F). Let it go for 5 minutes until it’s ready to char those veggies.
💡 emy’s Pro Tip: Keep a firewood or a bit of charcoal in a small basket for that authentic wood‑smoked flavor.
Step 2: Season Vegetables
In a bowl, toss zucchini, red pepper, and red onion with 1 Tbsp olive oil, oregano, basil, salt, and pepper. Make sure every slice is coated for even grill marks.
⚠️ Common Mistake to Avoid: Over‑crowding the grill, causing steam and preventing crisp edges.
Step 3: Grill Vegetables
Place veggies on the grill, turning once. Cook 5–7 minutes until tender with nice char lines. Remove and set aside.
💡 emy’s Pro Tip: Use a grill basket so you can lift the veggies in one go, preserving their shape.
Step 4: Saute Garlic & Spinach
Warmed a small pan, add a splash of olive oil, add minced garlic, saute 30 seconds, then add spinach. Cook until wilted (about 2 minutes). Remove from heat.
⚠️ Common Mistake to Avoid: Overcooking zucchini before finishing; they should be tender but still hold their shape.
Step 5: Assemble Quesadillas
Lay tortillas on a flat surface. On half of each, layer grilled veggies, spinach, cherry tomatoes, feta, and mozzarella. Fold the tortillas over the filling.
💡 emy’s Pro Tip: Press the edges together to keep the filling inside; this also creates a nice seal while grilling.
Step 6: Grill Quesadillas
Return quesadillas to grill. Cook 3–4 minutes on each side or until the tortillas are golden and the cheese is molten.
⚠️ Common Mistake to Avoid: Grilling too high can burn the tortilla before cheese melts.
Step 7: Decorate and Serve
Let cool slightly, cut into wedges, and plate on a warm dish. Optional garnish: a drizzle of olive oil, a sprinkle of chopped parsley, or a few fresh basil leaves for that bright aroma.
💡 emy’s Pro Tip: Use a small dish of tzatziki or a yogurt‑based dip for a cool contrast.
Step
Action
Duration
Key Visual Cue
1
Preheat grill
5 min
Grill lights up, smoke begins
2
Season veggies
2 min
Veggies shiny with oil
3
Grill veggies
5–7 min
Char marks visible
4
Saute garlic & spinach
3 min
Spinach wilted, aromatic
5
Assemble quesadillas
4 min
Cheese visible under tortilla
6
Grill quesadillas
6-8 min
Golden crust, melted cheese
7
Cool & plate
2 min
Cheese still molten, tortilla warm
Serving & Presentation
Slide the quesadillas on a hot platter and add a small bowl of tzatziki or a lemon‑yogurt dip. Sprinkle fresh parsley or mint for visual pop and a burst of herbaceous aroma. The golden crust on the tortilla gives an impressive silhouette reminiscent of a Moroccan tagine from the side.
Pair this with a crisp Sauvignon Blanc or a light-bodied rosé to accent the Mediterranean herbs, or go local with a chilled New York hard cider for a refreshing contrast. For a simple side, toss a handful of mixed greens and a drizzle of vinaigrette – the acidity brightens the creamy cheese.
A touch of smoked paprika on the tortillas before grilling gives a subtle “North African kiss” that enhances that smoky theme, while a wedge of lemon adds a citrus pop that lifts the dish, a favorite in my parents’ Moroccan kitchen.
Pairing Type
Suggestions
Why It Works
Side Dish
Mixed green salad with lemon vinaigrette, Roasted chickpeas
Acidic brightness cuts fat, crunch balances melt
Sauce / Dip
Tzatziki, Lemon‑yogurt dip, Salsa verde
Cooling, herby contrast to smoky cheese
Beverage
Sauvignon Blanc, Prosecco, Sparkling cucumber water
Light, effervescent, complements herbs
Garnish
Fresh basil, chopped parsley, toasted pine nuts
Texture and aroma enhance the dish’s Mediterranean feel
Make-Ahead, Storage & Reheating
I love prepping ahead in my New York apartment for my hectic weekday. I assemble individual quesadillas and store them in airtight bags. Because the filling is already cooked, they’re great for a quick lunch.
Method
Container
Duration
Reheating Tip
Refrigerator
Zip‑top bag
3 days
Reheat in a skillet for 2 minutes per side
Freezer
Freezer bag
2 months
Thaw overnight; quick grill or skillet finish
Make‑Ahead
Refrigerated plastic container
24 hrs in advance
Assemble then grill when ready; no extra prep
When reheating, never use high heat; a gentle stovetop or low‑heat grill brings the cheese back to gooey perfection without burning the tortilla. For a quick snack, let a frozen slice thaw on a pan‑free griddle until it smiles back.
Variations & Easy Swaps
Variation
Key Change
Best For
Difficulty Impact
Seasonal Variation
Add grilled eggplant or fresh basil leaves
Summer veggies, fresh herb lovers
Easy
Gluten‑Free / Dairy‑Free
Use corn tortilla, lactose‑free cheese, or vegan feta
Diet‑specific
Easy
Spiced Variation
Replace oregano/ basil with smoked paprika and cayenne
Spice lovers, autumn
Easy
Seasonal Variation
Swap the zucchini for locally grown summer squash or fold in slices of roasted eggplant for a deeper, earthy flavor. Add a handful of fresh basil right before plating for a fragrant finish that whispers of my childhood kitchen in Rabat.
Gluten‑Free / Dairy‑Free
The same recipe works wonderfully with a corn tortilla and a lactose‑free mozzarella or a coconut‑based cheese. Texture remains similar, though the flavor shifts to a lighter, subtler profile that’s still comforting.
Spiced Variation
Replace oregano and basil with a sprinkle of smoked paprika and a pinch of cayenne pepper to give the quesadillas a bold, smoky kick. The heat pairs beautifully with the feta’s tang and is reminiscent of the spice markets on the banks of the Nile.
How long does it take to cook grilled quesadillas?
It generally takes about 15 minutes total on the grill—from the moment you place the filled tortillas in the heat until they’re golden brown and the cheese has melted. In addition, prep time of around 10 minutes is required to chop, season, and grill the veggies. So the whole process is roughly 25 minutes.
Can I use frozen veggies in these quesadillas?
Yes, frozen sliced veggies can be used if fresh is not available, but you’ll need to thaw them slightly and pat them dry. This extra step helps maintain the proper texture and ensures they get the golden char you’re aiming for. A 5‑minute quick rinse also prevents excess moisture.
What type of cheese works best with grilled veg quesadillas?
Cheese that melts well is ideal—mozzarella gives a classic melt, while provolone or a mild cheddar pair nicely with the smoky vegetables. If you want a briny contrast, feta is wonderful; crumble it on top for a tangy accent. The key is to keep a mixture of a melty cheese and a crumble for texture.
How can I keep the tortilla from tearing?
Rolling the tortilla slightly before filling, warming it in a low oven or on a hot pan without food, and pressing the edges firmly together lock the filling inside. Adding a thin layer of olive oil around the edges also helps create a seal that reduces tearing during grilling.
Is it possible to make these quesadillas in a skillet?
Definitely! Use a stainless‑steel pizza pan at medium–high heat. Sear the filled tortilla for 3–4 minutes per side. The result will mimic the grill’s sear, though you’ll miss the smoky flavor. For a more authentic taste, add a single drop of liquid smoke before finishing.
What’s a good dipping sauce for grilled veggie quesadillas?
Tzatziki, salsa verde, or a creamy avocado‑based dip work wonders. For a quick Mediterranean touch, whisk together Greek yogurt, lemon juice, chopped parsley, and minced garlic. The cool, tangy finish balances the heat and the smoky cheese.
How can I store leftovers without losing flavor?
Store assembled quesadillas sealed in airtight bags in the fridge for up to 3 days. Reheat them in a hot skillet for 2 minutes per side to return the cheese to melt. If you prefer a crisp exterior, briefly toast them in a pre‑heated pan after reheating.
Can I substitute the whole wheat tortilla?
Yes — if you have a wheat allergy, look for certified gluten‑free tortillas made from corn or rice. For a lighter version, use a thin corn tortilla; for a more indulgent bite, a thicker flour tortilla will work. Ensure the substitute can handle the heat without splitting.
Do I need to precook the spinach?
It’s best to sauté the spinach briefly to wilt it and remove excess moisture before adding it to the quesadilla. Cook only 2‑3 minutes until dark green; this step keeps the texture fresh and prevents soggy tortillas.
What’s the secret to perfectly melted cheese?
Use a cheese that has a high moisture content, like mozzarella or goat cheese. Sprinkle a bit of flour or corn starch on the tortilla to catch the melted cheese and reduce excess grease. Maintaining a moderate heat lets the cheese loosen without scorching.
Share Your Version!
I’d love to see how you tweak this recipe to suit your taste. Drop a star rating, leave a comment below, and let me know whether you lean toward a smoky, spicy version or prefer a dairy‑free twist. If you capture a photo of your finished quesadillas, share it on Instagram or Pinterest, tag @cookingwithemi, and tell me how the dish made it onto your table.
From my NYC kitchen to yours — I hope this recipe brings as much warmth to your table as it does to mine. — emy 🧡
📌
Love This Recipe? Save It to Pinterest!
If you enjoyed this Grilled Mediterranean Veggie Quesadillas recipe, don’t let it get lost in your browser tabs! 😄 Pin it now so you can find it again anytime — and explore hundreds more tried-and-tested recipes waiting for you on my Pinterest boards.
With grilled veggies, gooey cheese, and fragrant herbs, these quesadillas make for a tasty meal perfect for any time of the day. Theyre easy to make and bursting with flavor!
Ingredients
Scale
4 large whole wheat tortillas
1 zucchini, sliced
1 red bell pepper, sliced
1 red onion, sliced
8 ounces of fresh spinach
1 cup cherry tomatoes, halved
1 cup crumbled feta cheese
1 cup shredded mozzarella cheese
2 tablespoons olive oil
1 teaspoon dried oregano
1 teaspoon dried basil
Salt and pepper to taste
2 cloves garlic, minced
Instructions
Preheat the grill to medium heat.
In a large bowl, combine the zucchini, red bell pepper, and red onion. Drizzle with olive oil and season with salt, pepper, oregano, and basil. Toss to coat the vegetables evenly.
Place the seasoned vegetables on the preheated grill. Grill for about 5-7 minutes or until they are tender and have nice grill marks. Remove the vegetables from the grill and set aside.
In a large skillet, add a little olive oil and sauté the garlic over medium heat until fragrant. Add the spinach and cook until wilted. Remove from heat.
Lay out the tortillas on a flat surface. On half of each tortilla, layer some grilled vegetables, spinach, cherry tomatoes, feta cheese, and mozzarella cheese. Fold the tortillas in half to enclose the filling.
Return the quesadillas to the grill and cook for about 3-4 minutes on each side or until the tortillas are golden brown and the cheese is melted.
Remove from the grill and let cool slightly before cutting into wedges. Serve warm.
Growing up in a Moroccan kitchen, I learned that the best foods celebrate bright, simple flavors. When I moved to Paris, I refined my technique around delicate grains and sauces, and now in New York I love simply searing fresh produce to amplify its edges. That’s why I created this Grilled Zucchini Wrap with a herbed yogurt twist – it’s a street‑style snack that marries the warmth of a North African cumin laugh with the coolness of Greek yogurt.
Imagine the sun‑kissed green of zucchini sliced thin, sliced again into half‑moons that grill to a subtle smoky char while the feta shatters into pockets of briny softness. The chickpeas bring earthiness, and the yogurt, infused with fresh dill, mint, and a squeeze of lemon, lifts everything with a tangy, creamy note. The visual pops of green against golden‑brown grill marks and a touch of flaky feta give the wrap a playground of textures that dance on your tongue.
This version is my signature because it cradles the vegetables in a quick grill, and the herbed yogurt acts as a flavor booster that eliminates the need for extra oil or sauces. A pro tip is to lightly brush the zucchini with olive oil and a dusting of smoked paprika before grilling; it brings out a smoky depth without overwhelming the fresh herbs. A common mistake is to overmix the yogurt—you want a silky, but not overly runny, sauce that coats each bite.
Why This Grilled Zucchini Wrap Recipe Is the Best
The Grilled Zucchini Wrap is the pinnacle of flavor synergy. The smoky grill marks break the zucchini’s quiet sweetness, while the feta’s saltiness cuts through the brassiness of the chickpeas. My culinary training in Paris taught me to balance textures, so I kept the chickpeas whole for bite and added a hint of cumin from my Moroccan mother’s pantry.
When I first tried this in my Queens apartment, I seasoned the zucchini with fresh coriander and a dash of black pepper before searing. The result was a vibrant chromatic crunch that contrasted the silkiness of the herb‑yogurt spread—an unexpected twist made the wrap unforgettable.
Because the entire recipe takes less than ten minutes, it’s perfect for busy New Yorkers who crave a healthy power lunch. Its simple ingredients, no-cook steps, and robust flavors make it a fast, foolproof recipe anyone can master.
Grilled Zucchini Wrap Ingredients
I built this list using fresh produce from the Midtown Farmers Market and a selection of ingredients from Colombo’s and L’Atelier Market. Every component is a celebration of flavor and texture.
Ingredients List
1 medium zucchini, sliced into 1/4-inch thick half‑moon strips
1 cup canned chickpeas, drained and rinsed
2 oz crumbled feta cheese
1/4 cup plain Greek yogurt
1 Tbsp chopped fresh dill
1 Tbsp chopped fresh mint
1 tsp lemon zest
1 tsp lemon juice
1 tsp olive oil
1/2 tsp smoked paprika
1/4 tsp sea salt
8 oz flour tortillas or low‑fat whole‑wheat wraps
Ingredient Spotlight
Zucchini; Choose a firm, green‑green zucchini for optimal crunch and a flavor that pairs wonderfully with the herbed yogurt. A regular ‘butter’ zucchini tends to be gelatinous and will fall apart on the grill. If you’re craving a milder, sweeter alternative, try summer squash—you’ll notice a sweeter bite.
Feta; Look for a reasonable salt level, about 20% salt in the weight, to avoid overtly salty tasting wraps. If you don’t have feta, a sprinkle of crumbled goat cheese will bring a pleasantly tangy flavor with a cleaner carb profile.
Greek yogurt; Select a thick, 6‑% fat yogurt for creaminess. Don’t skimp on probability: a watery Yo‑Gurt will thin the sauce. A keen alternative is a plant‑based Greek‑style yogurt, though the taste profile may shift slightly.
Original Ingredient
Best Substitution
Flavor / Texture Impact
Zucchini
Summer squash
Slightly sweeter, less fibrous.
Feta cheese
Goat cheese
Tart, lower salt, lighter bite.
Greek yogurt
Plant‑based Greek‑style yogurt
Creaminess retained, vegan.
How to Make Grilled Zucchini Wrap — Step-by-Step
Here’s the secret sauce: quick grill and an instant yogurt blend.
Step 1: Prepare Ingredients
Wash and slice the zucchini into 1/4‑inch half‑moon strips, then pat dry. Combine chickpeas with feta in a bowl, season with a pinch of sea salt and pepper.
💡 emy’s Pro Tip: Keep the chickpeas whole; they add a satisfying bite without disintegrating the wrap.
Step 2: Make Herbed Yogurt
Blend Greek yogurt with dill, mint, lemon zest, juice, and a splash of oil for silky texture. Season lightly with salt.
⚠️ Common Mistake to Avoid: Compartmentalizing the yogurt—dilute it with too much oil or juice, it loses body.
Step 3: Grill Zucchini
Preheat a cast‑iron skillet over medium‑high heat. Brush zucchini with olive oil and sprinkle smoked paprika. Grill each side 2 min until charred.
💡 emy’s Pro Tip: Grill support for a near‑sizzling effect, then move to a cooler side to keep fibers firm.
Step 4: Assemble Wrap
Spread a generous layer of herbed yogurt on the warm tortilla. Layer grilled zucchini, chickpeas, feta, then roll tightly. Slice diagonally for a classic presentation.
⚠️ Common Mistake to Avoid: Adding too many fillings at once; let the wrap cool slightly to prevent melting.
Step 5: Serve & Enjoy
Serve immediately with a side of sliced cucumber or baby carrots. A cold glass of sparkling water with a splash of lemon makes it a refreshing brunch or lunch.
💡 emy’s Pro Tip: Wash the wrap with a damp paper towel before cutting; it keeps the edges neat.
Step
Action
Duration
Key Visual Cue
1
Prepare
5 min
Bright green strips.
2
Herb‑Yogurt
2 min
Silky swirl.
3
Grill
2 min per side
Smoky black lines.
4
Assemble
3 min
Golden swirl visible.
5
Serve
immediate
Clear bite.
Serving & Presentation
Plate the wrap on a warm stone platter. Slice into 6–8 segments and arrange with a side of fresh cherry tomatoes, sliced cucumber, or a whisper of fresh mint leaves. The hot grill marks introduce a caramelized note that resonates with the cool, spicy yogurt.
If you crave a savory finish, drizzle a small amount of harissa vinaigrette. The north‑african heat, reminiscent of the souks of Fez, balances the yogurt’s cooling effect. Pair it with a crisp white wine, like a chilled Sauvignon Blanc, to add a citrusy lift that harmonizes with the lemon in the sauce.
Pairing Type
Suggestions
Why It Works
Side Dish
Tabbouleh, romaine salad, roasted carrot sticks
Complementary crunch and brightness.
Sauce / Dip
Tzatziki, hummus, tahini drizzle
Adds creaminess and depth.
Beverage
Sparkling water, white wine, iced mint tea
Refreshes palate and cools heat.
Garnish
Fresh mint sprigs, microgreens, toasted pepitas
Adds color, texture, and subtle flavor.
Make-Ahead, Storage & Reheating
I often pre‑cook gravitated ingredients on Sunday mornings to ease my mid‑week schedule. Grilling the zucchini ahead allows me to store the vegetables and sauces separately to keep their crisp.
Method
Container
Duration
Reheating Tip
Refrigerator
Zip‑lock bag
3 days
Warm wrap in microwave 30 sec then grill 1 min.
Freezer
Vacuum bag
2 months
Defrost overnight, then grill 2 min.
Make‑Ahead
Notebook
1 day in advance
Assemble at night, keep in fridge, reheat gently.
Cold wraps hold better when assembled in a sealed wrap, but they lose the crispness of the grill. My trick is to grill again briefly on a hot pan just before serving; that restores the smoky aroma.
When reheat, I avoid high heat that can melt the feta. A 320°F oven, 5 min on a sheet pan, or a covered skillet keeps the heart of the wrap slightly warm while preserving texture.
Variations & Easy Swaps
Variation
Key Change
Best For
Difficulty Impact
Hearty Protein Boost
Add grilled chicken or tofu
Lunch
Easy
Gluten‑Free
Use corn tortillas
Gluten‑sensitive
Easy
Summer Twist
Add diced mango or pineapple
Summer plate
Easy
Hearty Protein Boost
Grilled chicken or tofu adds a robust protein punch, letting the wrap become a satisfying main dish. Slice the protein thin, grill to a savory sear, then fold into the wrap for a Mediterranean‑inspired salad‑meat combo.
Gluten‑Free
Swap a flour tortilla for a corn or spinach‑flavored wrap. The colors stay vibrant, and the breathable texture keeps the fillings from mashing. The result is a low‑carb alternative that still feels festive.
Summer Twist
Infuse diced mango or chunks of fresh pineapple into the chickpea mixture for a tropical zing that mirrors the flavors of my family’s piña colada. The sweetness plays nicely against the tangy yogurt and grilled veggies.
How long does it take to grill zucchini for a wrap?
Grilling zucchini for a wrap is a quick process that typically takes 4‑6 minutes total. Each half‑moon slice needs about 2 minutes per side on a hot, lightly oiled skillet or grill pan. The key is to see smoky char lines and a tender crumb without overcooking, which would result in mushy slices that collapse the wrap. In our recipe, we reserve just enough time to preserve a crisp bite while still softening the natural sugars for a subtle caramelization.
Can I use a different yogurt base if I’m lactose intolerant?
Yes, you can swap the Greek yogurt for a non‑dairy, plant‑based yogurt that has a similar thick, creamy texture. Look for brands that are specifically labeled “Greek‑style” or “Greek‑Yogurt‑like” to keep the consistency. Coconut‑based yogurts add a subtle tropical note; almond milk yogurt offers a mild nutty flavor. Use the same portion size (¼ cup) and blend with herbs and lemon just as in the original. If the non‑dairy yogurt feels too silky, whisk in a tablespoon of cashew milk to help it hold its form when the wrap is assembled.
What kind of tortillas work best for this wrap?
The best tortilla choices for this recipe are warm, pliable wraps that don’t split when folded. Whole‑wheat tortillas with a slight stretch give a hearty bite, while low‑fat or spinach‑infused wraps keep the wrap lighter. If you prefer gluten‑free, corn tortillas or quinoa‑based wraps maintain structural integrity. Warm the tortilla in a dry skillet for 10‑15 seconds on each side before filling; this reduces the likelihood of tearing and ensures a smooth seal around the fillings.
Can I prepare the herbed yogurt ahead of time?
Herbed yogurt can be elevated to a mini‑dairy storage room by sealing it in an airtight container and refrigerating for up to 24 hours. Fresh herbs, especially mint, can wilt, but a handful of extra leaves added just before serving will rescue the aroma. If you want the yogurt to remain silky, stir in a teaspoon of canola or grapeseed oil before packaging; this prevents it from drying out and keeps the texture soft when the wrap is assembled the next day.
What storage method works best for the full assembled wrap?
Assembling a ready‑to‑eat wrap then storing it in a refrigerator will quickly lead to sogginess if the contents remain wet. Keep the assembled wrap wrapped loosely in parchment paper, then place it in a zip‑lock bag. This approach traps moisture but also protects the tortilla from crushing. For longer storage, decide to assemble only the ingredients separately—grilled zucchini, chickpeas, feta, and yogurt—and then combine just before eating. This prevents the tortilla from drying out while still allowing you to enjoy a quick, fresh wrap throughout the week.
Can I change the spices in the “herbed yogurt” sauce?
Absolutely! The herbed yogurt is a flexible base that can accommodate many flavor profiles. Replace dill with parsley or cilantro for a fresh, citrus vibe; swap mint for oregano or thyme for a Mediterranean note. For a punchier bite, add a pinch of cumin, coriander, or a light airflow of harissa paste. Adjust salt and lemon to taste, remembering that the feta provides its own brine, so a subtle seasoning adjustment is enough to keep the sauce from becoming too overtly salty or tart.
What is the best way to assemble the wrap to keep it from falling apart?
Begin by laying the warm tortilla flat, then spread the herbed yogurt as the base. Layer the grilled zucchini, sprigged chickpeas, and a scattering of crumbled feta. Before wrapping, sprinkle a pinch of fine black pepper or pepper flakes to add a subtle heat that keeps the ingredients
tightly bound. Fold the sides inwards, then roll tightly from the bottom to the top, pressing gently to compact the wrap. Once completed, place the wrap on a clean cutting board, slice diagonally, and arrange on a plate. If leftovers are necessary, keep the wrap loosely wrapped with parchment paper to prevent it from re‑mushing.
Can I use a different grain for the wrap to adjust texture?
Substituting a tortilla with a grain‑based flatbread or pita can change the mouthfeel. Whole‑wheat puffed ribbons or an almond‑flour flatbread bring a denser, chewier backbone that holds up better against moist fillings like the herbed yogurt. Similarly, a lightly toasted pita adds a slight crunch on the inside, balancing the tenderness of the zucchini. Be sure to warm the alternative wrap to soften it, preventing it from tearing when filled.
What additional side dishes complement this wrap?
Crispy tabbouleh with fresh parsley, chopped parsley‑lime dressing, or a simple cucumber‑tahini drizzle are excellent companions. A rainbow of carrot ribbons or roasted beet cubes adds color, fiber, and smooth sweetness. For an elegant palette, finish with a spoonful of roasted red pepper aioli or a crafted lemon‑horseradish spread that slices through the creaminess of the yogurt with a bright bite, providing an elevated, wholesome side for a balanced plate.
Is it suitable for a vegetarian or vegan menu?
Yes, the core of the recipe is vegetarian, and a vegan version is easy to prepare. Swap the feta for a dairy‑free crumble such as nutritional yeast or vegan cheese. Use a plant‑based yogurt for the sauce and replace chickpeas with seasoned quinoa or lentils to maintain the protein. Layer the grilled veggies and vegan proteins in the tortilla to keep the wrap light, yet satisfying for plant‑based diners.Anyum gets a versatile, flavor‑rich dish that works well for any dining style.
Share Your Version!
I’d love to hear how you make this wrap your own—perhaps a dash of harissa or a bag of toasted pepitas is your secret. Drop a rating and comment below, or capture a photo and tag me on Instagram or Pinterest!
If you’re curious about how altering the paprika to smoked salt changes the flavor profile, let me know—your input will help me refine the recipe further!
From my NYC kitchen to yours — I hope this recipe brings as much warmth to your table as it does to mine. — emy 🧡
📌
Love This Recipe? Save It to Pinterest!
If you enjoyed this Grilled Zucchini Wrap recipe, don’t let it get lost in your browser tabs! 😄 Pin it now so you can find it again anytime — and explore hundreds more tried-and-tested recipes waiting for you on my Pinterest boards.