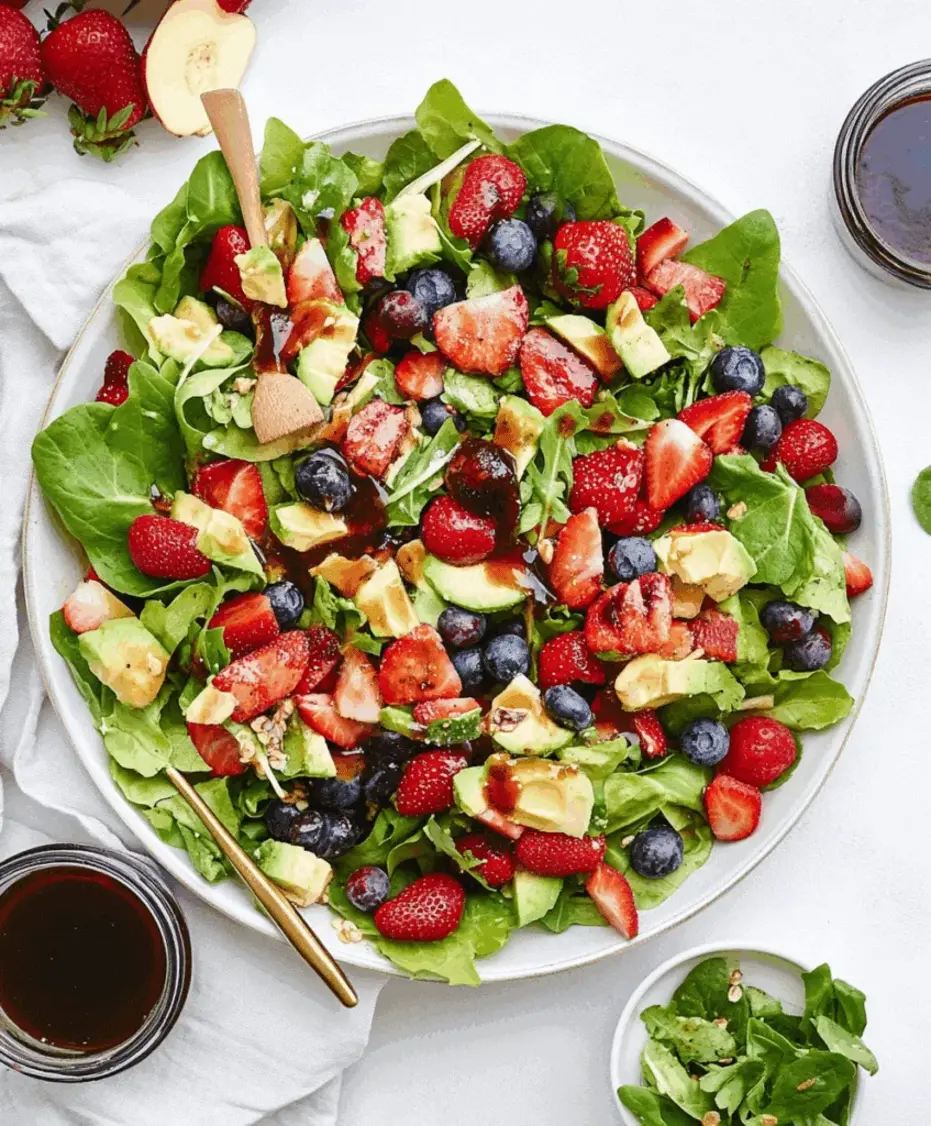
Summer Peach Spinach Salad Recipe

“`html

Summer Peach Spinach Salad Recipe

Introduction

Did you know that a single serving of spinach provides over 50% of your daily vitamin A needs? This nutritional powerhouse is the star of our Summer Peach Spinach Salad, a dish that perfectly captures the essence of the season. As temperatures rise, our bodies crave meals that are both hydrating and nutrient-dense, making this salad the ideal choice. The combination of sweet, juicy peaches with earthy spinach creates a flavor profile that’s not only delicious but also packed with antioxidants, fiber, and essential vitamins. This salad is more than just a side dish—it’s a vibrant, satisfying meal that celebrates peak summer produce. Whether you’re hosting a backyard barbecue, packing a picnic, or looking for a quick and healthy lunch, this recipe delivers on every front. The creamy avocado, tangy goat cheese, and crunchy almonds add layers of texture and flavor that will make this salad a regular in your summer rotation.

Ingredients List

For the Salad:

  • 6 cups fresh baby spinach (about 5 oz): Look for vibrant, dark green leaves with no signs of wilting or yellowing. The spinach should have a crisp, clean scent. Substitution: Arugula or mixed spring greens for a peppery twist.
  • 2 large ripe peaches: Choose peaches that yield slightly to gentle pressure near the stem and have a fragrant, sweet aroma. Substitution: Nectarines or mangoes if peaches are out of season.
  • 1 ripe avocado: It should be slightly soft when pressed, with a dark, pebbly skin. Substitution: A handful of creamy burrata cheese for extra decadence.
  • 1/2 cup crumbled goat cheese (about 2 oz): Use a high-quality, creamy goat cheese that crumbles easily. Substitution: Feta cheese for a saltier profile or vegan cashew cheese.
  • 1/3 cup sliced almonds: Toast them lightly for a deeper, nuttier aroma and golden-brown color. Substitution: Pecans, walnuts, or pumpkin seeds.
  • 1/4 cup thinly sliced red onion: Soak in ice water for 10 minutes to mellow the sharp bite if desired.

For the Balsamic Vinaigrette:

  • 1/4 cup extra virgin olive oil: Use a fruity, high-quality oil for the best flavor.
  • 2 tbsp balsamic vinegar: Aged balsamic will be sweeter and more complex. Substitution: Red wine vinegar or a squeeze of fresh lemon juice.
  • 1 tsp Dijon mustard: Adds emulsification and a subtle tang.
  • 1 tsp honey or maple syrup: Balances the acidity with a touch of sweetness.
  • 1 small garlic clove, minced: Fresh is best for a pungent kick.
  • Salt and freshly ground black pepper to taste.

Timing

Prep Time: 15 minutes
Cook Time: 0 minutes
Total Time: 15 minutes

Compared to the average salad recipe that requires 20-25 minutes of prep, this Summer Peach Spinach Salad is remarkably quick. The 15-minute total time is a game-changer for busy weeknights or last-minute entertaining. There’s no cooking involved, which not only saves time but also preserves the maximum nutritional value and fresh, crisp texture of every ingredient. This efficiency makes it possible to whip up a gourmet-quality, healthy meal in less time than it takes to order takeout.
Fresh ingredients for Summer Peach Spinach Salad laid out on a wooden table

Step-by-Step Instructions

Step 1: Prepare the Dressing

In a small bowl or jar, combine the olive oil, balsamic vinegar, Dijon mustard, honey (or maple syrup), and minced garlic. Season generously with a pinch of salt and a few cracks of black pepper. Whisk vigorously until the mixture is fully emulsified and slightly thickened. Alternatively, you can screw the lid on the jar and shake it for about 30 seconds. I always taste it at this point and adjust the seasoning—sometimes an extra drop of honey is needed if your peaches aren’t super sweet. Set the dressing aside to allow the flavors to meld while you prepare the salad components.

Step 2: Prepare the Fresh Produce

Gently wash the spinach in a colander under cold running water. I recommend using a salad spinner to dry it thoroughly; wet spinach will dilute your dressing and make the salad soggy. Place the dry spinach in a large, wide salad bowl. Next, wash the peaches. To slice them, I find it easiest to cut around the pit, twist the halves apart, remove the pit, and then slice each half into thin, elegant wedges. For the avocado, cut it in half, remove the pit, and slice it while still in the skin before scooping it out with a spoon to keep the pieces intact. If using, soak the thinly sliced red onion in a bowl of ice water for about 10 minutes to crisp it up and reduce its pungency, then drain and pat dry.

Step 3: Assemble the Salad

Add the peach wedges and avocado slices to the bowl with the spinach. Scatter the drained red onion over the top. At this stage, the colors should be stunning—deep green, vibrant orange, creamy pale green, and a hint of purple. I like to arrange some of the peach and avocado slices artfully on top of the spinach bed for visual appeal before tossing.

Step 4: Add Crunch and Creaminess

In a small, dry skillet over medium heat, toast the sliced almonds for 3-4 minutes, stirring frequently, until they are fragrant and lightly golden. Let them cool for a minute. Sprinkle the toasted almonds and crumbled goat cheese evenly over the salad. The warmth of the almonds will slightly wilt the spinach in the most delightful way when tossed. The goat cheese should be in small, crumbly pieces that will distribute throughout the salad, offering little pockets of tangy creaminess in every bite.

Step 5: Toss and Serve

Just before serving, give the dressing another quick whisk or shake. Drizzle about two-thirds of it over the salad. Using clean hands or two large salad spoons, gently toss the salad to coat all the ingredients lightly. Be gentle to avoid mashing the avocado and peaches. Taste a leaf and add more dressing, salt, or pepper as needed. I prefer to serve it immediately on individual plates or in a large, beautiful serving bowl.

Nutritional Information

(Per serving, based on 4 servings)

  • Calories: ~320 kcal
  • Total Fat: 26g (Saturated: 5g)
  • Cholesterol: 10mg
  • Sodium: 180mg
  • Total Carbohydrates: 18g (Dietary Fiber: 6g, Sugars: 10g)
  • Protein: 8g
  • Key Vitamins & Minerals: Excellent source of Vitamin A (over 100% DV), Vitamin C, Vitamin K, Folate, and Manganese.

Healthier Alternatives

You can easily tailor this salad to fit various dietary needs without sacrificing flavor:

  • Lower Fat/Oil-Free Dressing: Substitute the olive oil with 3 tablespoons of plain Greek yogurt or silken tofu blended with the vinegar and seasonings. It creates a creamy, protein-rich dressing with significantly fewer calories.
  • Nut-Free: Replace almonds with toasted sunflower seeds or pepitas (pumpkin seeds) for a similar crunch that’s safe for allergies.
  • Vegan/Dairy-Free: Omit the goat cheese or use a vegan alternative. For creaminess, add a handful of creamy white beans (like cannellini) or cubed, marinated tofu.
  • Lower Sugar: Omit the honey/maple syrup from the dressing. The natural sweetness from the ripe peaches is often sufficient.
  • Added Protein: Top the salad with grilled chicken breast, shrimp, chickpeas, or flaked salmon to transform it into a complete, muscle-building meal.

Serving Suggestions

This salad is incredibly versatile. For a light summer lunch, serve it as-is with a slice of crusty whole-grain bread. To make it the centerpiece of a dinner, pair it with simply grilled proteins like lemon-herb chicken, cedar-plank salmon, or garlic shrimp. It’s also the perfect companion to summery soups like a chilled gazpacho or a creamy zucchini soup. For entertaining, present it on a large platter and let guests serve themselves—it’s always a showstopper at potlucks and barbecues.

Common Mistakes

  • Using Overripe or Underripe Peaches: Underripe peaches are hard and lack sweetness; overripe ones are mushy. Perfectly ripe peaches are non-negotiable for the best flavor and texture.
  • Not Drying the Spinach: Water clinging to the leaves will prevent the dressing from adhering and create a watery pool at the bottom of your bowl.
  • Adding Dressing Too Early: Dressing the salad more than 5-10 minutes before serving will cause the delicate spinach to wilt and become soggy.
  • Skipping the Toasting Step for Nuts: Toasting almonds unlocks their essential oils, dramatically enhancing their flavor and crunch. Raw almonds can taste bland in comparison.
  • Over-Tossing: Being too vigorous when mixing can bruise the spinach and crush the soft peaches and avocado. Toss gently and with care.

Storing Tips

This salad is best enjoyed immediately. However, you can prep components ahead of time. Store the washed and dried spinach, sliced peaches (sprinkled with a little lemon juice to prevent browning), sliced avocado (kept with the pit and wrapped tightly), dressing, and toasted almonds separately in airtight containers in the refrigerator for up to 24 hours. Assemble just before serving. Any leftover assembled salad will keep for a few hours but will lose its optimal texture. The dressing can be stored in the fridge for up to a week.
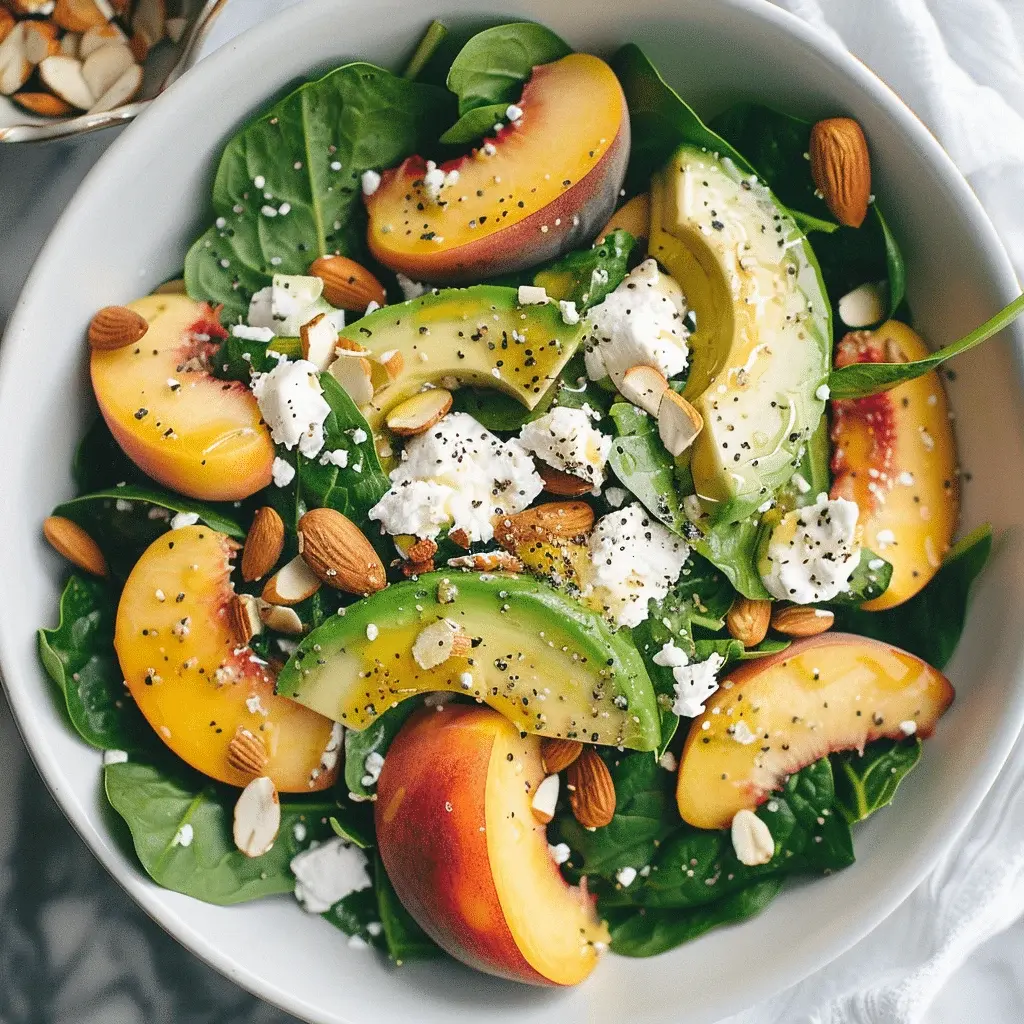
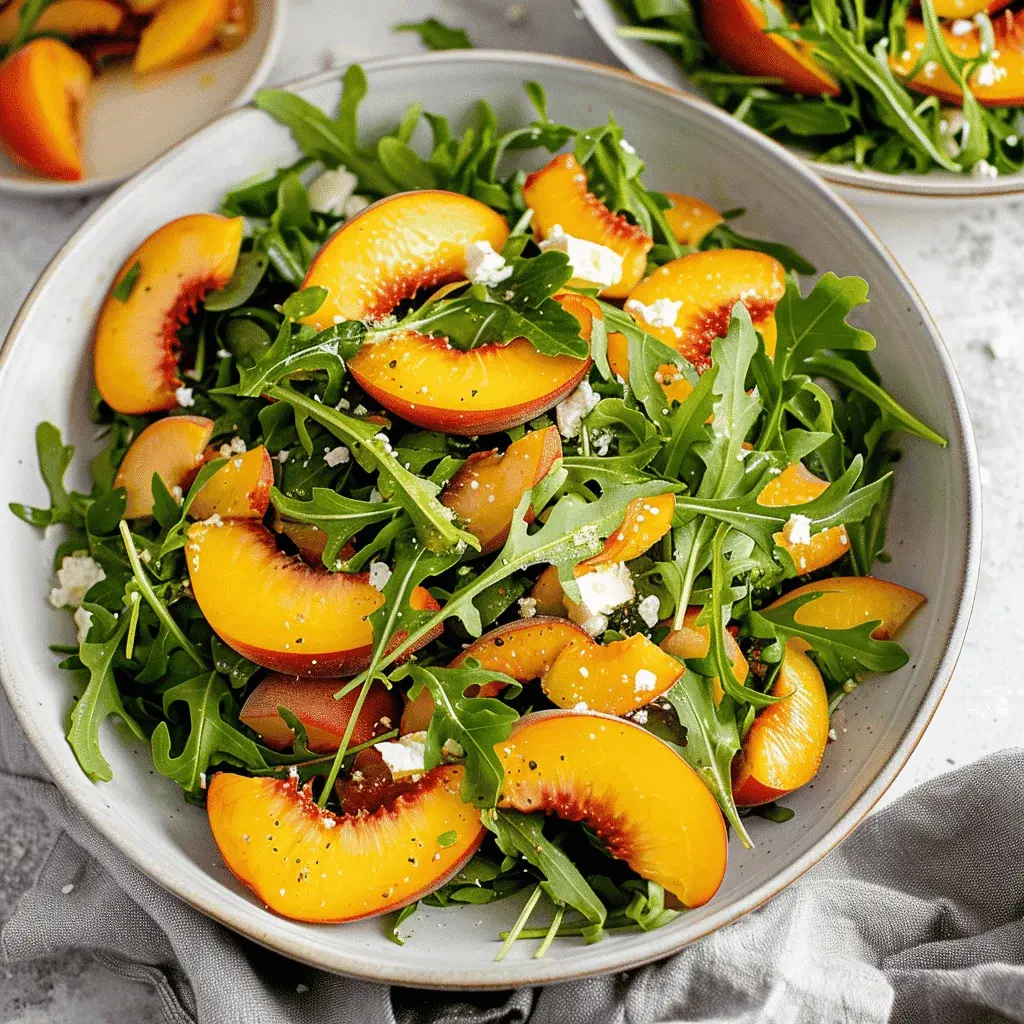
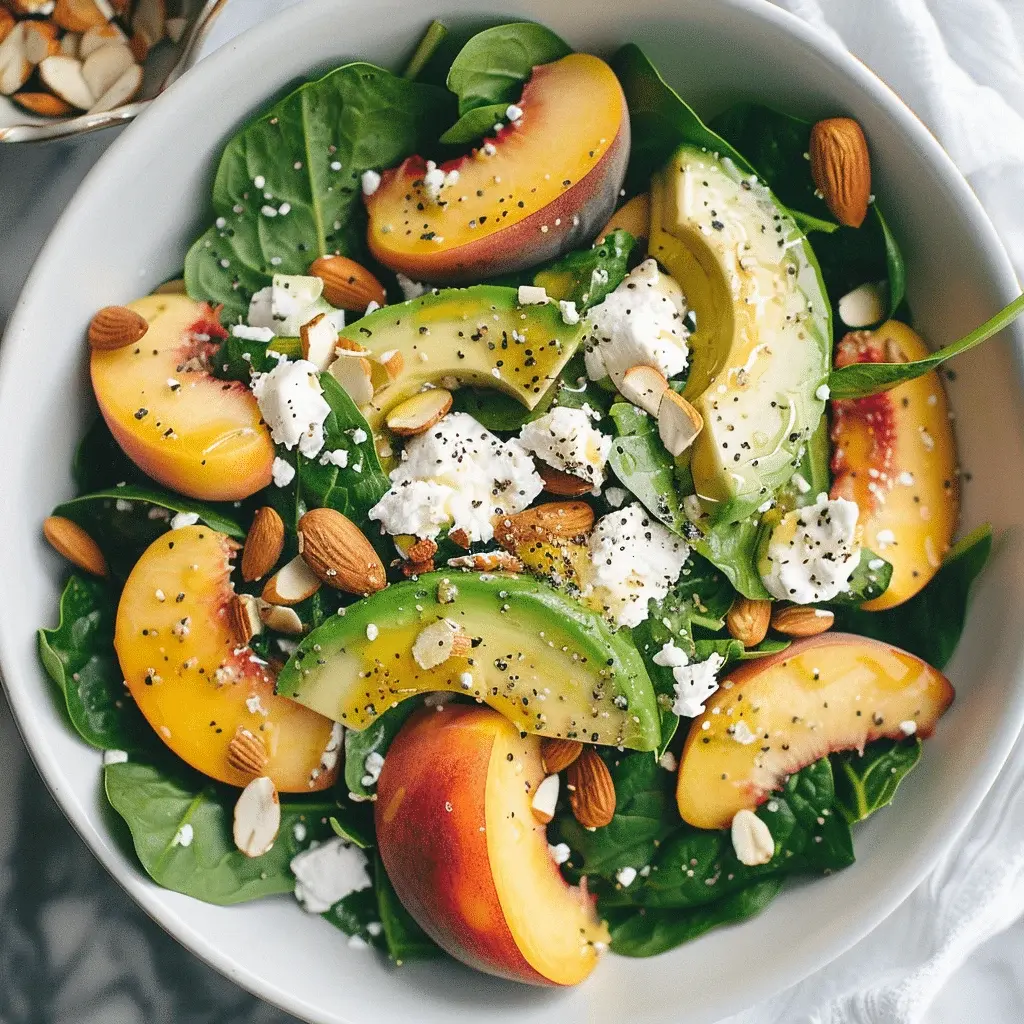
Beautifully plated Summer Peach Spinach Salad in a white bowl, ready to eat

Conclusion

This Summer Peach Spinach Salad is more than just a recipe; it’s a celebration of seasonal abundance. It proves that healthy eating can be effortless, beautiful, and incredibly satisfying. With its perfect balance of sweet, tangy, creamy, and crunchy elements, it’s a dish that will impress your family and guests alike. I encourage
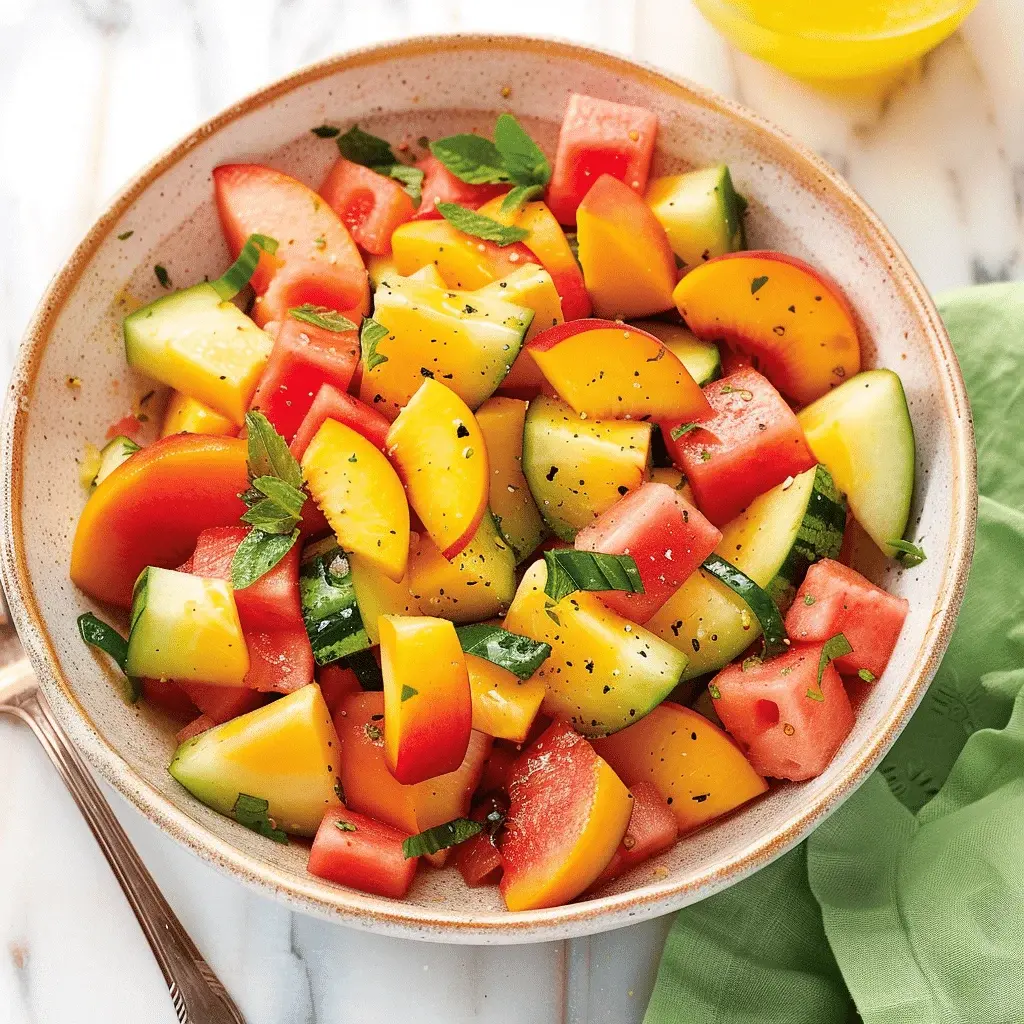
Peach Watermelon Salad Recipe

“`html

Peach Watermelon Salad Recipe

Did you know that a study published in the journal Appetite found that colorful, visually appealing meals can increase perceived flavor and satisfaction by up to 20%? This is the secret power behind our stunning Peach Watermelon Salad, a dish that’s as much a feast for the eyes as it is a refreshing, healthy delight for your palate. In a world where we often reach for heavy, processed snacks, why not embrace a recipe that harnesses the pure, vibrant energy of summer’s best produce? This isn’t just another fruit salad; it’s a carefully balanced symphony of sweet, juicy peaches, crisp watermelon, aromatic herbs, and a zesty lime dressing that will transform your perception of what a salad can be. Perfect for picnics, BBQs, or a light lunch, this Peach Watermelon Salad is your ticket to a healthier, more delicious summer.

Introduction

Summer eating should be effortless, refreshing, and bursting with flavor. This Peach Watermelon Salad delivers on all fronts. It’s the culinary equivalent of a cool breeze on a hot day—light, invigorating, and utterly satisfying. The combination of ripe, fuzzy peaches and hydrating, ruby-red watermelon creates a juicy base that’s both sweet and subtly complex. When you add the bright, peppery notes of fresh basil and the cool, clean finish of mint, each bite becomes a multi-layered experience. A simple dressing of lime juice, honey, and a pinch of salt doesn’t just add moisture; it amplifies the natural sugars in the fruit and ties all the elements together in a harmonious blend. This recipe is more than a side dish; it’s a centerpiece for casual gatherings, a healthy dessert alternative, and a brilliant way to get your daily dose of vitamins and antioxidants. Let’s dive into how you can create this vibrant masterpiece in your own kitchen.

Ingredients List

Gathering high-quality, ripe ingredients is the first step to salad success. Here’s what you’ll need for about 4-6 servings:

  • For the Salad:
    • 1 medium seedless watermelon (about 4-5 lbs): Look for one that feels heavy for its size with a creamy yellow spot on one side—this indicates sun-ripening. You’ll need about 4 cups of cubed fruit. (Substitution: Can’t find seedless? Use a regular watermelon and take a few extra minutes to pick out the black seeds. Yellow watermelon also works beautifully for a color twist.)
    • 3-4 ripe peaches or nectarines: They should yield slightly to gentle pressure and smell fragrant at the stem. (Substitution: Nectarines are a perfect swap—same flavor profile, no fuzz. For an off-season option, use well-drained canned peaches in juice, but fresh is ideal for texture.)
    • 1/4 cup fresh basil leaves, thinly sliced (chiffonade): The aromatic, slightly sweet anise-like flavor is non-negotiable. (Substitution: In a pinch, 1 tsp of dried basil can be mixed into the dressing, but it lacks the vibrant freshness.)
    • 2 tbsp fresh mint leaves, chopped: Adds a cool, refreshing finish. (Substitution: Lemon balm offers a similar citrusy note.)
    • 1/4 cup crumbled feta cheese (optional, for a savory twist): Use a block of feta and crumble it yourself for better texture and less moisture. (Substitution: Goat cheese, ricotta salata, or for a vegan option, omit or use a sprinkle of nutritional yeast.)
  • For the Lime-Honey Dressing:
    • Juice of 1 large lime (about 3 tbsp): Freshly squeezed is key for that bright, tangy zing. (Substitution: Lemon juice works, but lime complements the fruit’s sweetness more uniquely.)
    • 1 tbsp honey or agave nectar: Just enough to round out the acidity without making it cloying. (Substitution: Maple syrup for a vegan version.)
    • 1 tbsp extra virgin olive oil: A high-quality oil adds a subtle richness and helps the dressing cling. (Substitution: Avocado oil or omit for a lower-fat version.)
    • A tiny pinch of flaky sea salt (like Maldon): This is the magic ingredient that makes the fruit flavors pop.

Timing

Prep Time
15 minutes
Cook Time
0 minutes
Total Time
15 minutes (plus optional chilling)

Compared to the average summer salad that might involve roasting vegetables or cooking grains, this Peach Watermelon Salad is remarkably swift. The entire active preparation time is under 15 minutes if your fruit is pre-washed. The “cook time” is zero, making it an incredibly energy-efficient dish for hot days. The most time-consuming part is carefully cubing the watermelon and slicing the peaches. Many complex salads can take 30-45 minutes from start to finish; this recipe gets you to the table in half that time, leaving you more moments to enjoy the sunshine.

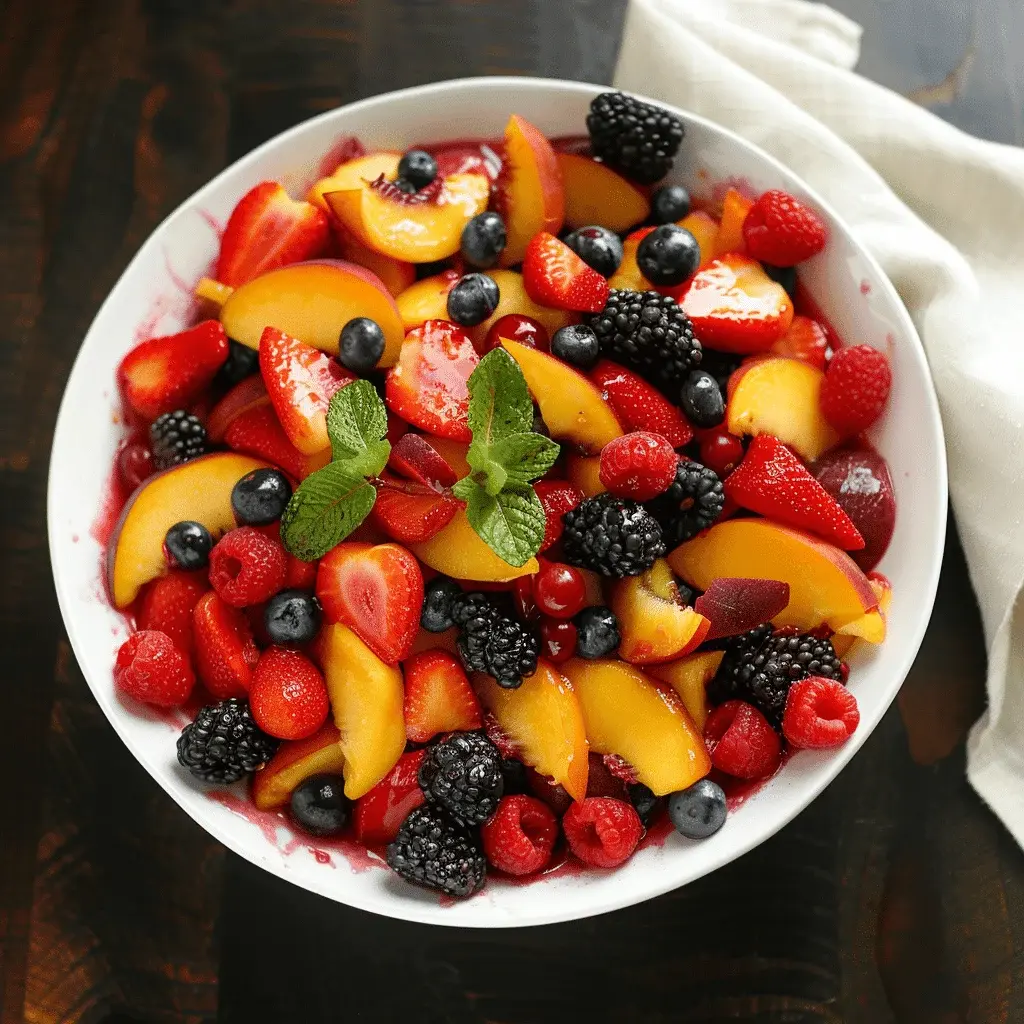
Vibrant Peach Watermelon Salad with fresh mint and basil in a white bowl, ready to serve.

Fresh, colorful, and ready in minutes—the perfect summer side dish.

Step-by-Step Instructions

Step 1: Prepare the Fruits

Start by giving your watermelon and peaches a good rinse under cool water to remove any surface dirt. Pat them dry. For the watermelon, slice it in half, then place the flat side down on your cutting board. Carefully slice off the rind in sections, working from top to bottom. Cut the large flesh into 1-inch thick slabs, then into long strips, and finally into bite-sized cubes. Aim for uniformity so every spoonful gets a perfect mix. For the peaches, slice them in half around the pit, twist to separate, and remove the pit. I like to cut each half into slices, then into chunks similar in size to the watermelon. Pro tip: If your peaches are very ripe and juicy, do this step over a bowl to catch any precious nectar that can be added to the dressing!

Step 2: Chop the Herbs

Wash your basil and mint leaves and gently pat them completely dry with a paper towel or clean kitchen cloth. Wet herbs will wilt quickly and dilute the salad. For the basil, stack 5-6 leaves on top of each other, roll them tightly into a cigar shape, and use a sharp knife to thinly slice across the roll—this technique, called chiffonade, creates beautiful ribbons. For the mint, simply give the leaves a rough chop. The different textures will distribute the herb flavor throughout the salad in delightful little bursts.

Step 3: Make the Dressing

In a small bowl or jar, combine the freshly squeezed lime juice, honey, and olive oil. Add that tiny, crucial pinch of flaky sea salt. Whisk vigorously with a fork or seal the jar and shake until the mixture is fully emulsified—you’ll see it turn slightly opaque and thicken. Taste it! It should be a perfect balance of tangy, sweet, and salty. Remember, the fruit is sweet, so the dressing should provide contrast. Adjust with a drop more honey or lime to suit your preference.

Step 4: Assemble the Salad

In your largest, most beautiful serving bowl, gently combine the cubed watermelon and peaches. You want to mix them without crushing the delicate fruit. Sprinkle about three-quarters of the sliced basil and chopped mint over the top. If you’re using feta cheese, now is the time to scatter it over the fruit. Drizzle about half of the dressing over the salad and give it one very gentle toss to coat. The goal is to distribute the flavors without breaking down the fruit’s structure.

Step 5: Chill and Serve

For the best flavor melding, cover the bowl loosely with plastic wrap or a lid and let the salad chill in the refrigerator for 15-30 minutes. This allows the fruits to macerate slightly in the dressing, creating a delicious natural syrup at the bottom of the bowl. Just before serving, give it another gentle toss, add the remaining fresh herbs as a garnish, and drizzle with the rest of the dressing if it looks like it needs it. Serve immediately for the ultimate crisp, refreshing experience.

Nutritional Information

(Per serving, based on 6 servings without optional feta cheese)

  • Calories: ~95 kcal
  • Total Fat: 1.5g
  • Saturated Fat: 0.2g
  • Carbohydrates: 22g
  • Fiber: 2g
  • Sugars: 18g (naturally occurring)
  • Protein: 1.5g
  • Vitamin C: 30% of the RDI
  • Vitamin A: 15% of the RDI
  • Potassium: 10% of the RDI

This salad is a hydration powerhouse thanks to the watermelon’s 92% water content and is packed with vitamins A & C from the peaches, which are essential for skin health and immunity.

Healthier Alternatives

Want to tweak this recipe for specific dietary goals? Here are easy swaps that preserve the fantastic flavor:

  • Lower Sugar: Reduce or omit the honey in the dressing. The ripe fruit provides ample sweetness. You can also increase the lime juice for more tang to balance it.
  • Vegan: Use agave nectar or maple syrup instead of honey. Skip the feta or use a plant-based alternative.
  • Lower Fat: Omit the olive oil from the dressing entirely. The lime juice and honey will still create a lovely glaze. The salad will be slightly less cohesive but just as tasty.
  • Added Protein & Fiber: Toss in 1/2 cup of cooked, chilled quinoa or a handful of toasted slivered almonds or pepitas (pumpkin seeds) for a more substantial meal.

Serving Suggestions

  • As a Side: This salad is the perfect companion to grilled proteins like lemon-herb chicken, shrimp skewers, or cedar-plank salmon. The freshness cuts through the smoky, rich flavors.
  • As a Main: For a light lunch, serve it over a bed of peppery arugula and top with grilled halloumi or chickpeas for staying power.
  • As a Dessert: Serve in smaller portions with a dollop of vanilla Greek yogurt or coconut whipped cream.
  • Party Style: Serve the salad in hollowed-out watermelon halves for a stunning, portable presentation at picnics or potlucks.

Common Mistakes

  • Using Underripe Fruit: This salad lives and dies by the quality of its stars. Hard, flavorless

Fresh Peach Salsa Recipe

“`html

Fresh Peach Salsa Recipe

Introduction

Did you know that a single cup of fresh peaches provides over 15% of your daily vitamin C needs? This vibrant peach salsa recipe is not just a flavor powerhouse; it’s a nutritional upgrade to your summer table. Imagine the sweet, sun-ripened juiciness of peaches meeting the bright acidity of tomatoes and the sharp kick of jalapeno—it’s a symphony of summer in a bowl. More than just a dip, this salsa is a versatile condiment that can transform simple grilled chicken, fish, or even a bowl of tortilla chips into a gourmet experience. With over 60% of home cooks looking for “no-cook summer sides,” this recipe answers the call with its effortless preparation and explosion of fresh, seasonal flavors. Let’s dive into how you can create this crowd-pleasing dish that’s as beautiful to look at as it is delicious to eat.

Ingredients List

Gathering the freshest ingredients is the secret to an unforgettable salsa. Here’s what you’ll need for about 3-4 cups of salsa:

  • 3 large ripe peaches (about 1.5 lbs): Look for peaches that yield slightly to gentle pressure and have a fragrant, sweet aroma. They should feel heavy for their size. Substitution: Nectarines or mangoes work beautifully for a similar texture and sweetness.
  • 2 medium ripe tomatoes (about 1 cup diced): Use Roma or vine-ripened tomatoes for the best flavor and less watery seeds. You want a firm, juicy bite. Substitution: Cherry tomatoes halved, or 1 cup of drained canned fire-roasted tomatoes in a pinch.
  • 1/2 medium red onion (about 3/4 cup finely diced): The purple hue adds visual pop, and its sharp, slightly sweet flavor is essential. Substitution: Sweet white onion or shallots for a milder taste.
  • 1-2 jalapeño peppers (seeds and ribs removed for less heat): This provides the crucial spicy counterpoint. Start with one and taste. Substitution: Serrano pepper for more heat, poblano for mild, or 1/4 tsp of crushed red pepper flakes.
  • 1/2 cup fresh cilantro, finely chopped: The herbaceous backbone. Don’t skip it! Substitution: Fresh parsley or basil for a different, but still delicious, herbal note.
  • Juice of 2 large limes (about 1/4 cup): Freshly squeezed is non-negotiable for the brightest zing. Substitution: Lemon juice in equal measure.
  • 1/2 teaspoon fine sea salt, plus more to taste: Enhances all the natural flavors.
  • 1/4 teaspoon freshly ground black pepper: Adds a subtle warmth.
  • Optional: 1 small clove of garlic, minced, or a pinch of cumin for extra depth.

Timing

Prep Time 20 minutes
Cook Time 0 minutes
Total Time 20 minutes (plus 30 min rest)

This fresh peach salsa is remarkably quick. With a total active time of just 20 minutes, it’s over 50% faster than the average cooked salsa or complex dip recipe. The “cook time” is effectively zero, making it a perfect last-minute addition to any meal. The only patience required is allowing the salsa to rest for at least 30 minutes in the refrigerator, which is crucial for the flavors to meld and deepen. Compared to recipes requiring roasting or simmering, this no-heat approach preserves the raw, vibrant crunch and nutrients of every ingredient, delivering maximum freshness with minimal effort.

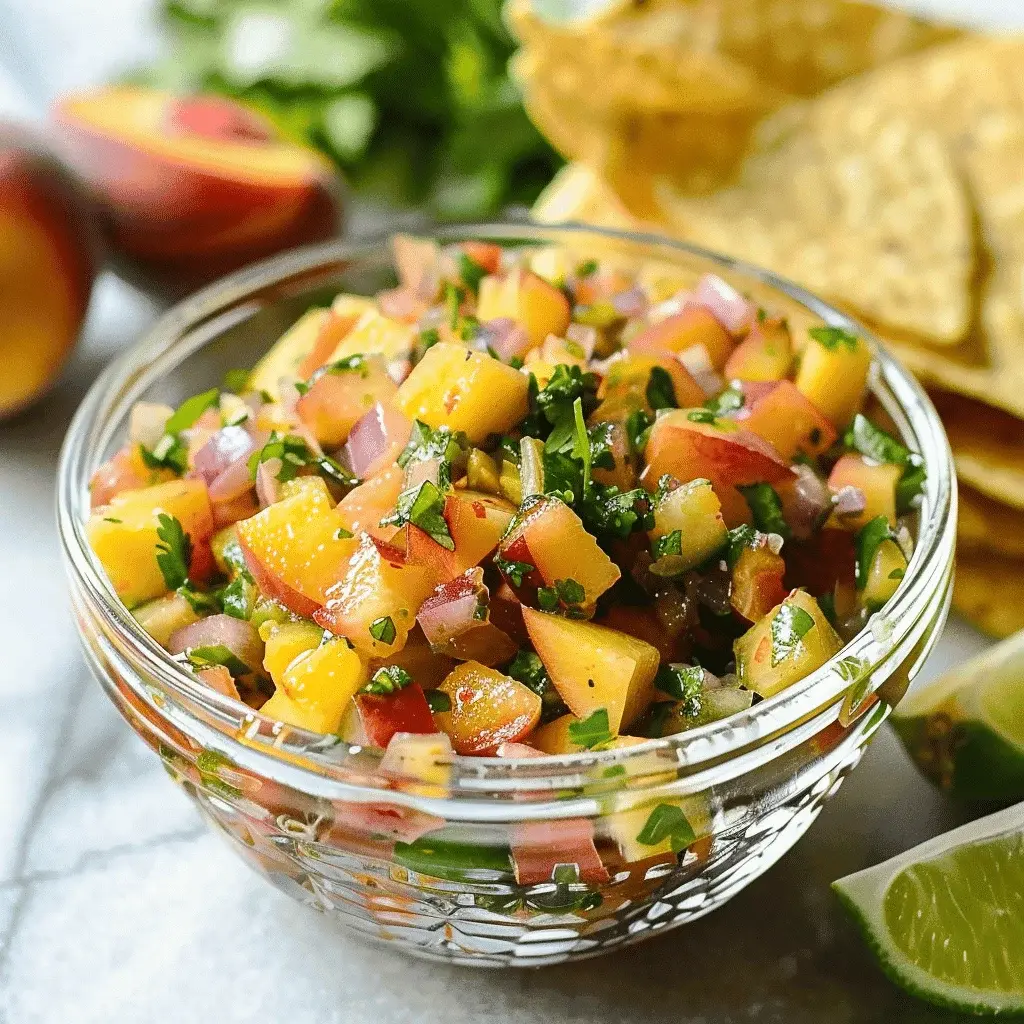
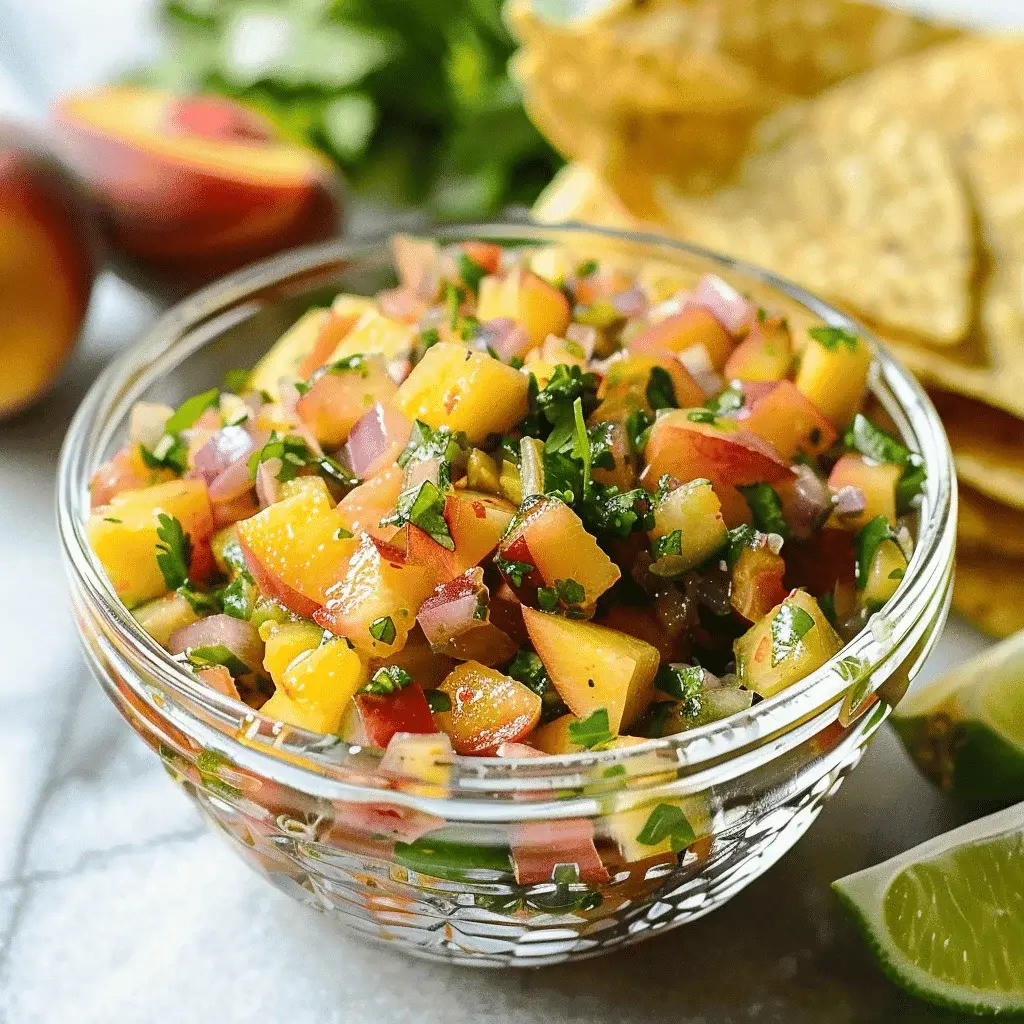
Fresh peach salsa in a white bowl with colorful ingredients like diced peaches, tomatoes, red onion, and cilantro visible

Step-by-Step Instructions

Step 1: Prepare Your Produce

Start by giving all your fruits and vegetables a good rinse under cool water. Pat them dry. This is your foundation—clean, fresh produce ensures the best flavor and food safety. Take your peaches and carefully slice them in half, twisting to separate the halves. Remove the pit. I like to dice the peaches into 1/4 to 1/2-inch cubes. The skin can be left on for added color, fiber, and texture, but you can peel them if you prefer a completely soft bite. For the tomatoes, slice them in half and use a small spoon to scoop out the watery seed pulp. This step is key to preventing a soggy salsa. Dice the remaining firm flesh to a similar size as the peaches.

Step 2: Chop and Combine

Finely dice the red onion. If you find raw onion too pungent, you can soak the diced pieces in a bowl of ice water for 10 minutes, then drain and pat dry—this mellows the flavor significantly. For the jalapeño, slice it in half lengthwise. Use the tip of your knife to scrape out the white ribs and seeds (wear gloves if you have sensitive skin!). The seeds hold most of the capsaicin, so removing them controls the heat level. Mince the jalapeño finely. Grab a large, non-reactive mixing bowl (glass, ceramic, or stainless steel) and add the diced peaches, tomatoes, onion, and jalapeño.

Step 3: Season and Marinate

Now, add the magic. Chop the fresh cilantro, stems discarded, and add it to the bowl. Roll your limes on the counter under your palm to loosen the juices, then cut and juice them directly over the bowl to catch every drop. Sprinkle in the salt and black pepper. If using, add the optional minced garlic or cumin. Using a large spoon or spatula, gently fold all the ingredients together. Be thorough but gentle to avoid crushing the delicate peach pieces. You want every component coated in that bright lime juice.

Step 4: Serve and Enjoy

This is the most important step for flavor development: let it rest. Cover the bowl with plastic wrap or a lid and refrigerate for at least 30 minutes, though 1-2 hours is ideal. This resting period allows the salt to draw out the natural juices, the acid to mellow the onions, and all the flavors to marry into a cohesive, incredible salsa. Before serving, give it one final stir, taste, and adjust seasoning with an extra pinch of salt or squeeze of lime if needed.

Nutritional Information

(Per 1/2 cup serving, approximate)

  • Calories: 45 kcal
  • Total Carbohydrates: 11 g
  • Dietary Fiber: 2 g
  • Sugars: 8 g (naturally occurring)
  • Protein: 1 g
  • Total Fat: 0.3 g
  • Vitamin C: 20% of Daily Value (DV)
  • Vitamin A: 15% of DV
  • Potassium: 8% of DV

This salsa is a low-calorie, fat-free, and nutrient-dense choice packed with vitamins, antioxidants from the colorful produce, and hydration.

Healthier Alternatives

Want to tweak this recipe for specific dietary needs without sacrificing taste? Here are some smart swaps:

  • Lower Sugar: Use firmer, slightly under-ripe peaches or increase the tomato-to-peach ratio. The tomatoes provide bulk with slightly less natural sugar.
  • Low-Sodium: Reduce salt to 1/4 tsp and amplify flavor with extra lime zest, a splash of orange juice, or fresh herbs like mint.
  • Extra Fiber & Antioxidants: Add 1/2 cup of finely diced cucumber or bell pepper (any color) for more crunch, volume, and nutrients without adding significant calories.
  • Spice Control: For sensitive palates, replace jalapeño with a few slices of pickled jalapeño (rinsed and minced) for tangy flavor with controlled heat, or use a pinch of smoked paprika.

Serving Suggestions

This salsa’s versatility is its superpower. Move beyond the tortilla chip!

  • Protein Topper: Spoon generously over grilled chicken breasts, salmon, shrimp, pork chops, or fish tacos. The acidity cuts through richness perfectly.
  • Salad Booster: Use it as a chunky, flavorful dressing for a bed of greens or as a relish on a black bean and corn salad.
  • Breakfast Upgrade: A refreshing topping for avocado toast, scrambled eggs, or breakfast burritos.
  • Cheese Pairing: Serve alongside a creamy goat cheese log or baked brie with crackers for an impressive appetizer.
  • In a Bowl: Add a scoop to grain bowls with quinoa or rice, black beans, and a protein for a complete meal.

Common Mistakes

  • Using Overripe/Mushy Peaches: They will turn to pulp when mixed. Slightly firm peaches hold their shape and provide satisfying texture.
  • Skipping the Tomato Seed Removal: The excess liquid will water down your salsa, diluting the flavors and creating a soupy consistency.
  • Not Letting it Rest: Serving immediately means the onion will be too sharp, and the flavors won’t have harmonized. Patience is key.
  • Over-stirring or Using a Food Processor: This is a chunky, rustic salsa, not a puree. Hand-chopping and gentle folding are essential for the right texture.
  • Using Bottled Lime Juice: The preservatives and lack of freshness will give your salsa a flat, artificial tang. Always use fresh citrus.

Storing Tips

Store your salsa in an airtight container in the refrigerator. It will be at its absolute peak within the first 24 hours. You can expect it to stay fresh for 2-3 days. The peaches and tomatoes will soften and release more liquid over time, so it’s best enjoyed relatively fresh. This salsa does not freeze well, as the texture of the fresh produce will be ruined upon thawing. If you need to make it ahead, you can pre-chop all the ingredients (except the peaches) and store them separately in the fridge, then combine and add the peaches and lime juice no more than a few hours before serving to maintain optimal texture.

Close-up of fresh peach salsa being scooped with a tortilla chip, highlighting the colorful mix of ingredients

Conclusion

This Fresh Peach Salsa is more than a recipe—it’s a celebration of summer’s bounty. With its perfect balance of sweet, spicy, tangy, and fresh flavors, it demonstrates how a few simple, quality ingredients can create something extraordinary. It’s

Avocado Peach Salsa Recipe

“`html

Avocado Peach Salsa Recipe

Introduction

Did you know that a study published in the Journal of Sensory Studies found that the combination of sweet and savory elements significantly increases a dish’s perceived complexity and overall enjoyment? This is the exact principle that makes our Avocado Peach Salsa such a showstopper. Forget the jarred stuff—this vibrant, homemade salsa is a masterclass in balancing textures and flavors. Imagine the juicy sweetness of ripe summer peaches, the cool creaminess of avocado, the satisfying pop of corn, and the gentle kick of jalapeño, all brought together with a bright splash of lime and fresh cilantro. It’s more than just a dip; it’s a versatile condiment that can transform grilled chicken, fish tacos, or a simple bowl of chips into a gourmet experience. Ready to make a salsa that will have everyone asking for the recipe? Let’s dive in.

Ingredients List

Gather these fresh, high-quality ingredients for the best flavor. The key is ripe, in-season produce.

  • 2 large ripe peaches (about 1 ½ cups diced): Look for peaches that yield slightly to gentle pressure and have a fragrant aroma. Substitution: Nectarines or mangoes work beautifully for a similar sweet-tart profile.
  • 1 large, ripe avocado (Hass preferred): It should be slightly soft but not mushy. Substitution: In a pinch, 1 cup of diced jicama adds crunch without the creaminess.
  • ½ cup fresh corn kernels (from 1 ear): The fresh, milky sweetness is irreplaceable. Substitution: Thawed frozen corn or fire-roasted canned corn (drained) can be used.
  • ¼ cup finely diced red onion: Soak in ice water for 10 minutes to mellow the sharp bite if desired.
  • 1 jalapeño pepper, seeds and ribs removed for mild heat, finely diced: For more heat, leave some seeds in. Substitution: Serrano pepper for more heat, or poblano for a smoky, mild flavor.
  • ⅓ cup finely chopped fresh cilantro: The fresh, citrusy herb is essential. Substitution: Fresh basil or mint for a completely different, but delicious, twist.
  • Juice of 1 large lime (about 3 tablespoons): Freshly squeezed is non-negotiable for maximum brightness.
  • 2 tablespoons extra virgin olive oil: Helps emulsify the dressing and carry flavors.
  • ½ teaspoon sea salt, plus more to taste
  • ¼ teaspoon freshly ground black pepper
  • Optional: 1 small clove garlic, minced, for an extra flavor layer.

Timing

Prep Time
15 minutes
Cook Time
0 minutes
Total Time
15 minutes

This Avocado Peach Salsa comes together in a lightning-fast 15 minutes with no cooking required. Compared to the average cooked salsa or pico de gallo, which can take 30+ minutes including chopping and simmering, this is a true “quick and fresh” winner. The majority of your time will be spent on the satisfying task of dicing beautiful, colorful produce. It’s the perfect last-minute appetizer or weeknight meal enhancer.

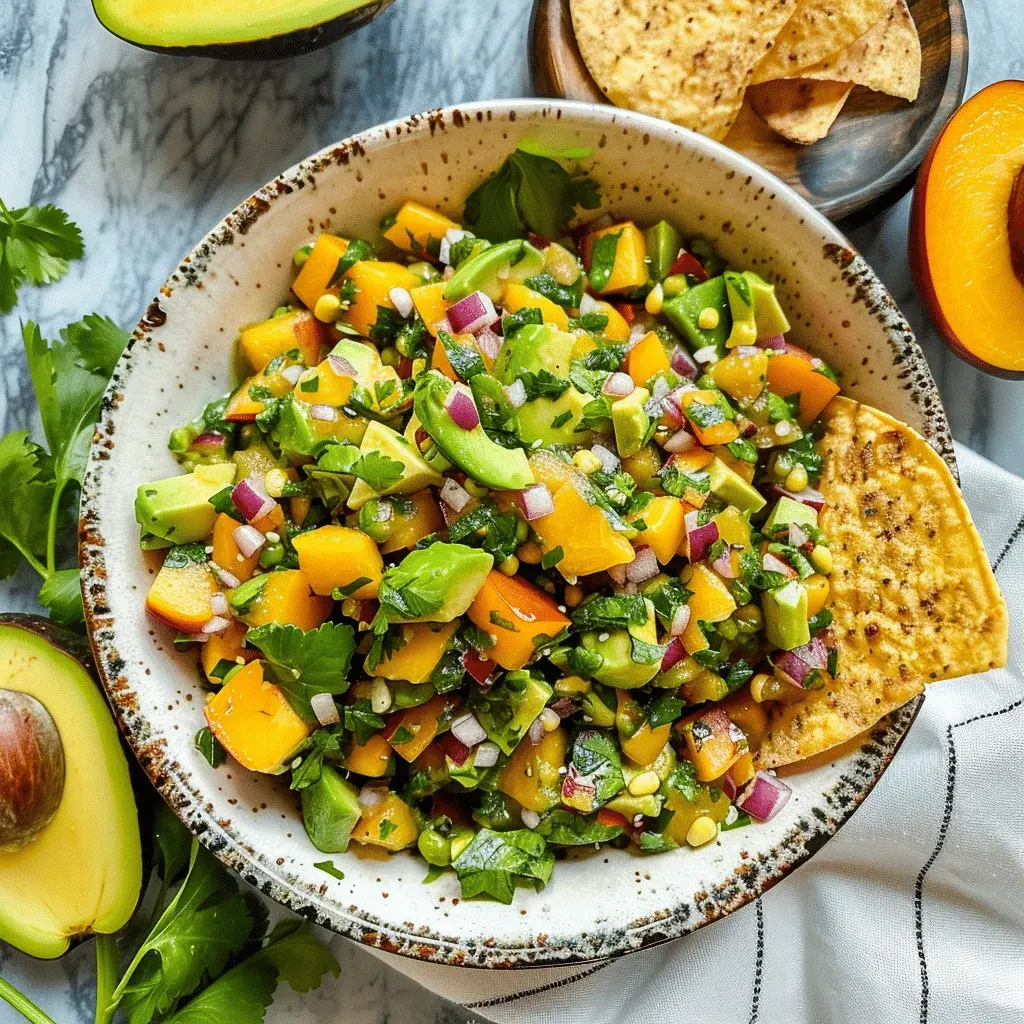
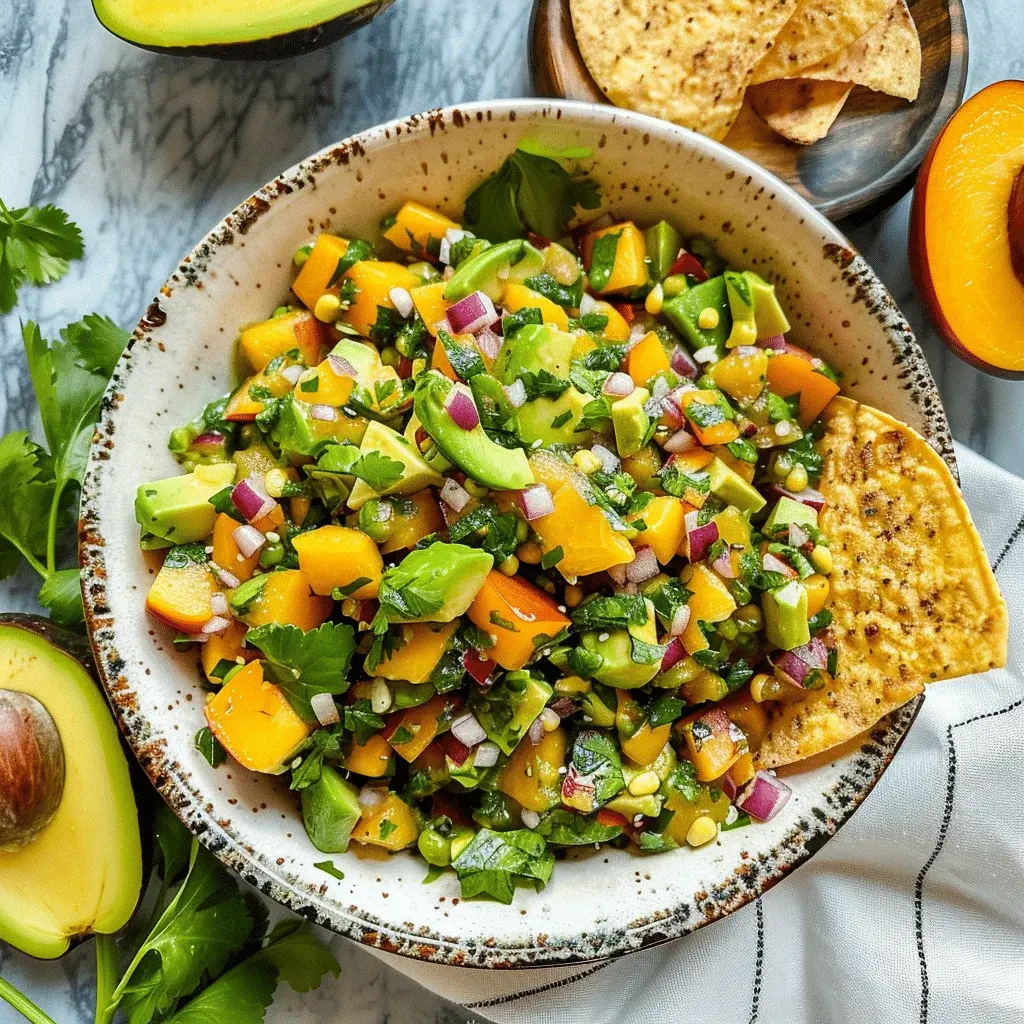
Freshly made Avocado Peach Salsa in a white bowl, showing vibrant colors of peaches, avocado, corn, and cilantro
The vibrant colors of this salsa are a feast for the eyes before it even hits your taste buds.

Step-by-Step Instructions

Step 1: Prepare Your Fresh Produce

Wash all your fruits and vegetables. Pit and dice the peaches into ½-inch cubes—you want them substantial enough to provide a juicy burst. Halve, pit, and dice the avocado into similar-sized pieces. If using fresh corn, slice the kernels off the cob. Finely dice the red onion and jalapeño. Give the cilantro a rough chop. Having everything prepped and in separate piles (mise en place) makes assembly effortless.

Step 2: Combine the Core Components

In a large mixing bowl, gently combine the diced peaches, avocado, corn, red onion, and jalapeño. I like to use a silicone spatula or a large spoon to prevent mashing the delicate avocado and peaches. The goal here is integration, not pulverization.

Step 3: Add the Flavor Finishers

In a small bowl or jar, whisk together the freshly squeezed lime juice, extra virgin olive oil, sea salt, and black pepper (and minced garlic, if using). This simple dressing will coat every ingredient and prevent the avocado from browning. Pour it over the peach and avocado mixture.

Step 4: Gently Fold and Rest

Add the chopped cilantro to the bowl. Now, with a gentle folding motion—like you’re turning the pages of a precious book—mix everything until the dressing is evenly distributed and the cilantro is incorporated. Taste and adjust seasoning, adding more salt, lime, or a pinch of sugar if your peaches aren’t super sweet. Let the salsa sit at room temperature for 10-15 minutes before serving. This brief rest allows the flavors to marry and intensify beautifully.

Nutritional Information

(Per approximately ½ cup serving)

  • Calories: ~110 kcal
  • Total Fat: 8g (Healthy monounsaturated fats from avocado and olive oil)
  • Saturated Fat: 1g
  • Carbohydrates: 10g
  • Fiber: 3g (Excellent source, aiding digestion)
  • Sugars: 6g (Naturally occurring from peaches and corn)
  • Protein: 1.5g
  • Vitamin C: 15% DV | Vitamin A: 8% DV | Potassium: 10% DV

Healthier Alternatives

Want to lighten it up further without sacrificing the signature sweet-creamy-spicy experience? Try these smart swaps:

  • Reduce Oil: Cut the olive oil to 1 tablespoon and add a tablespoon of orange juice or peach nectar for moisture and sweetness.
  • Boost Protein: Fold in ½ cup of rinsed black beans or chickpeas after mixing. They add heartiness and fiber.
  • Lower Sodium: Use a salt substitute like a dash of coconut aminos or simply rely more on the acidity of the lime and the natural flavors.
  • Grill for Smokiness: Lightly grill the peach halves and corn cob before dicing. This adds incredible depth without any extra fat.

Serving Suggestions

This salsa’s versatility is its superpower. Go beyond the tortilla chip!

  • The Classic: With sturdy, lightly salted tortilla chips or plantain chips.
  • On Protein: A generous spoonful over grilled salmon, shrimp, chicken breasts, or black bean burgers.
  • Taco Tuesday Upgrade: The ultimate topping for fish tacos (especially mahi-mahi or cod) or carnitas.
  • Salad Style: Serve on a bed of mixed greens as a vibrant, no-cook summer salad.
  • Breakfast Brilliance: Top scrambled eggs or avocado toast for a luxurious start to the day.

Common Mistakes

  • Using Under-ripe or Over-ripe Produce: Rock-hard peaches won’t sweeten, and mushy avocado will turn the salsa into a paste. Perfect ripeness is key.
  • Over-mixing: Aggressive stirring smashes the avocado and bruises the peaches, leading to a mushy texture. Fold gently.
  • Skipping the Rest Time: Serving immediately means the flavors haven’t melded. That 10-15 minute wait is a game-changer.
  • Bottled Lime Juice: It lacks the bright, fresh acidity and can have a metallic aftertaste. Always use fresh lime.

Storing Tips

This salsa is best enjoyed the day it’s made. However, you can maximize its life:

  • Short-term: Transfer to an airtight container, press plastic wrap directly onto the surface to limit air exposure, and refrigerate for up to 24 hours. The avocado will darken slightly but will still taste great.
  • Make-Ahead Prep: Prep and store all components (diced peaches, onion, jalapeño, corn, dressing) separately in the fridge. Combine with the avocado and cilantro just before serving.
  • Do Not Freeze: Freezing will destroy the texture of the avocado and peaches, creating a watery, unappetizing mess upon thawing.
Close-up of Avocado Peach Salsa being scooped with a tortilla chip, highlighting the chunky texture
The perfect scoop: chunky, colorful, and packed with fresh flavor.

Conclusion

This Avocado Peach Salsa is more than a recipe—it’s a celebration of summer produce and effortless entertaining. With its foolproof 15-minute assembly, stunning visual appeal, and symphony of sweet, creamy, tangy, and spicy flavors, it’s guaranteed to become a seasonal staple in your kitchen. It proves that the most impressive dishes are often the simplest, relying on the quality of ingredients and

Peaches And Cream Salad Recipe

“`html

Peaches And Cream Salad Recipe

Introduction

Did you know that over 80% of people crave a light, fruity dessert after a summer meal, yet struggle to find one that’s both satisfying and refreshing? This delightful Peaches and Cream Salad is the perfect answer to that seasonal craving. Combining the nostalgic comfort of vanilla pudding with the bright, juicy sweetness of fresh peaches, this dessert salad is a textural dream. It’s a versatile dish that blurs the line between a creamy dessert and a fruit salad, making it an ideal choice for potlucks, barbecues, or a simple family treat. The magic lies in the harmony of simple ingredients: instant vanilla pudding mix for structure, vanilla yogurt for tang, Cool Whip for cloud-like fluff, and ripe peaches for a burst of sunshine in every bite. Let’s dive into how you can create this crowd-pleaser in just minutes.

Ingredients List

  • 1 (3.4 oz) package Instant Vanilla Pudding Mix: The flavor backbone. It provides a sweet, custardy base that thickens the salad without cooking. Substitution: For a different flavor profile, try cheesecake or white chocolate pudding mix.
  • 1 cup Cold Milk (whole or 2% recommended): Activates the pudding. Using cold milk ensures a quicker, smoother set. The fat content adds richness.
  • 1 (5.3 oz) container Vanilla Yogurt: Introduces a delightful tang and creaminess, cutting through the sweetness. Substitution: Greek yogurt for extra protein and thickness, or sour cream for a richer, more pronounced tang.
  • 1 (8 oz) tub Cool Whip, thawed: The “cream” element, lending an airy, light texture. Substitution: An equal amount of homemade sweetened whipped cream (whipped to stiff peaks) for a fresher, less processed taste.
  • 4-5 medium Fresh, Ripe Peaches, peeled and diced (about 3-4 cups): The star! Look for peaches that are fragrant and yield slightly to gentle pressure. Their juicy, floral sweetness is irreplaceable. Substitution: In a pinch, 2 (15 oz) cans of peaches in light syrup, well-drained and diced, can be used. For a different twist, try nectarines or a mix of berries.
  • Optional Garnish: Fresh mint leaves, a sprinkle of cinnamon or nutmeg, or a handful of toasted sliced almonds for crunch.

Timing

Prep Time15 minutes
Chill Time1-2 hours
Total Time1 hour 15 minutes (active: 15 min)

Compared to many baked desserts that can take an hour or more of active preparation and baking, this Peaches and Cream Salad is remarkably quick. The 15-minute prep time is about 60% faster than the average fruit pie or cobbler. The majority of the time is hands-off chilling, allowing the flavors to meld beautifully. This efficiency makes it a last-minute lifesaver for unexpected guests or when you need a impressive dish without the fuss.

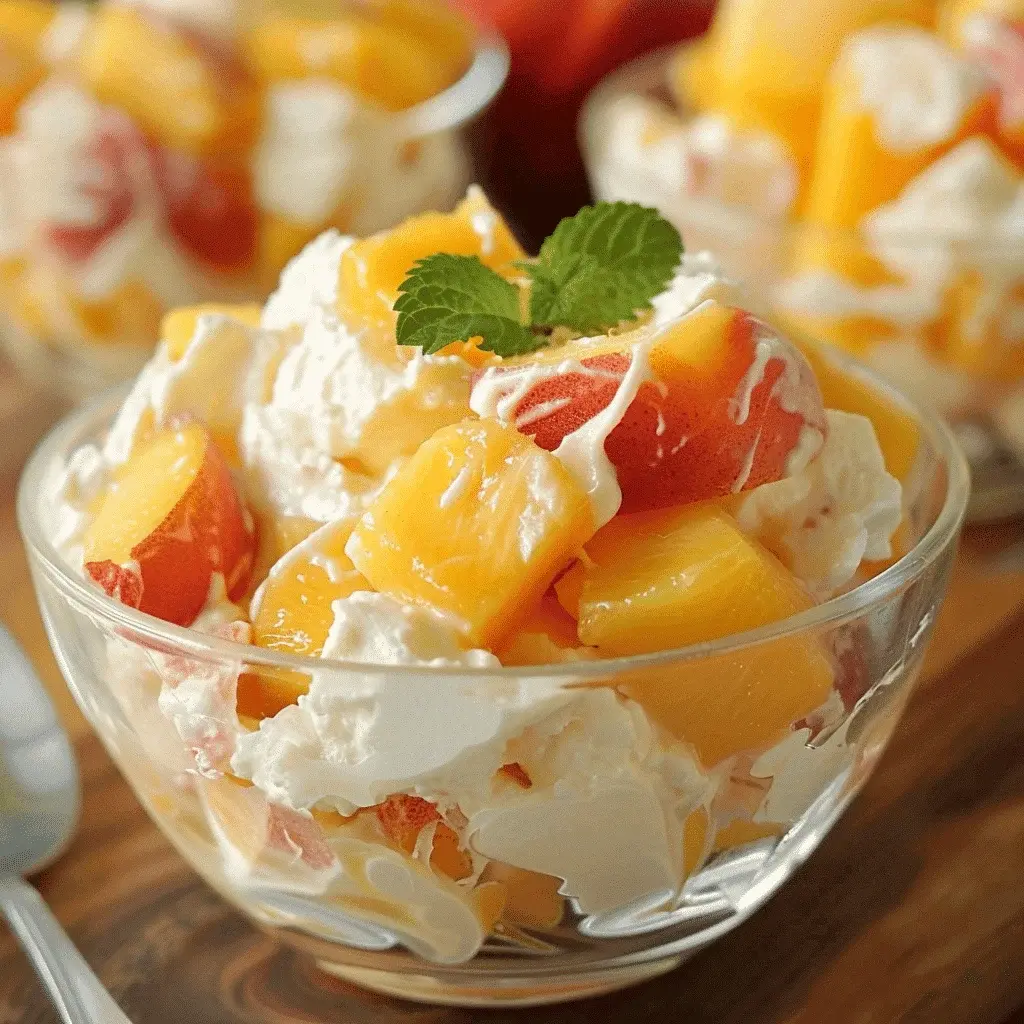
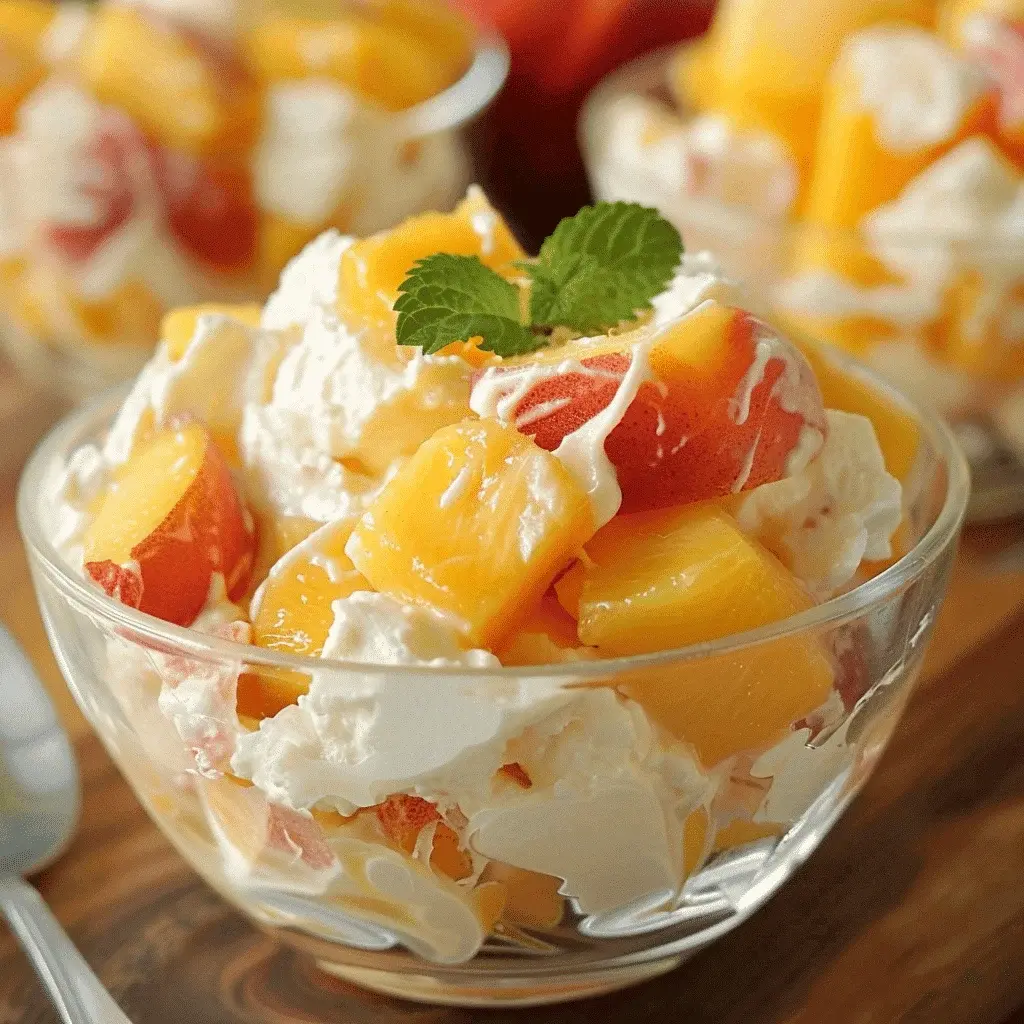
Close-up of creamy Peaches and Cream Salad in a glass bowl, showing juicy peach chunks mixed with fluffy vanilla cream.
The creamy, dreamy texture of this salad is half its appeal. See how the peaches are perfectly suspended in the fluffy vanilla base.

Step-by-Step Instructions

Step 1: Prepare the Pudding Base

In a large mixing bowl, whisk together the instant vanilla pudding mix and the cold milk. Whisk vigorously for a full two minutes. This isn’t just mixing; you’re activating the thickening agents in the pudding. You’ll see it transform from a liquid to a thick, smooth, spoonable consistency. Let this mixture sit for about 5 minutes to fully set. This base is crucial—it prevents the salad from becoming watery later.

Step 2: Fold in the Creaminess

Add the entire container of vanilla yogurt to the set pudding. Use a spatula to fold it in until just combined and no white streaks remain. Now, take your thawed Cool Whip. The key technique here is folding, not stirring. Gently add the Cool Whip to the bowl in two or three additions. Use the spatula to cut down through the center, sweep across the bottom, and fold the mixture over on top. Repeat until the mixture is uniformly creamy and light. Over-mixing will deflate the Cool Whip and make the salad dense.

Step 3: Gently Incorporate the Peaches

Ensure your diced peaches are well-drained if they’re extra juicy (pat them gently with a paper towel). Add about three-quarters of the diced peaches to the cream mixture. Again, fold gently until the peaches are evenly distributed. Reserve the remaining peaches for garnish on top before serving. This step adds beautiful pops of color and freshness throughout.

Step 4: Chill and Serve

Transfer the salad to a serving bowl, cover tightly with plastic wrap (press it directly onto the surface to prevent a skin from forming), and refrigerate for at least 1-2 hours. This chilling time is non-negotiable—it allows the pudding to fully hydrate and the flavors to marry, resulting in a cohesive, perfectly textured dessert. Before serving, garnish with the reserved peaches and any optional toppings like mint or nuts.

Nutritional Information

Estimated per serving (based on 8 servings):

  • Calories: ~180-220
  • Total Fat: 5-7g
  • Saturated Fat: 4-5g
  • Carbohydrates: 30-35g
  • Sugars: 25-28g (primarily from peaches, pudding, and yogurt)
  • Protein: 3-4g
  • Calcium: 10% DV (from milk and yogurt)

Note: Values are approximate and can vary based on specific brands and ingredient substitutions used.

Healthier Alternatives

You can easily adapt this recipe for dietary preferences without sacrificing the essential peaches and cream flavor:

  • Sugar-Free/Lower-Calorie: Use a sugar-free instant pudding mix, unsweetened almond milk, plain non-fat Greek yogurt, and light Cool Whip or a sugar-free whipped topping. The peaches provide natural sweetness.
  • Dairy-Free: Opt for a dairy-free vanilla pudding mix (check labels), use oat milk or coconut milk, a dairy-free vanilla yogurt, and a coconut milk-based whipped topping.
  • Higher-Protein: Swap the vanilla yogurt for a full container of vanilla Greek yogurt (increasing the protein significantly) and use whole milk. The texture will be thicker and even creamier.
  • Less Processed: Make a homemade pudding base with cornstarch, milk, and vanilla extract. Sweeten with honey or maple syrup, and always use freshly whipped cream instead of Cool Whip.

Serving Suggestions

  • As a Dessert: Serve in pretty parfait glasses, garnished with a peach slice and mint sprig. It pairs wonderfully with a crisp, buttery shortbread cookie.
  • As a Side Salad: This dish shines alongside grilled meats like pork chops, chicken, or barbecue ribs. Its cool creaminess balances smoky, savory flavors perfectly.
  • Brunch Star: Serve it as part of a brunch buffet next to quiche, pastries, and mimosas. It’s a refreshing alternative to heavy pastries.
  • In a Bowl: For a fun, casual presentation, serve it in a hollowed-out watermelon or pineapple half for a summer party.

Common Mistakes

  • Using Warm Milk: This can cause the pudding to set improperly or become grainy. Always use cold milk.
  • Stirring, Not Folding: Aggressive stirring after adding the Cool Whip will knock out the air and result in a heavy, dense salad instead of a light, fluffy one.
  • Skipping the Chill Time: Serving immediately means the salad will be runny and the flavors won’t have blended. Patience is key.
  • Using Overripe, Mushy Peaches: While ripe is good, peaches that are too soft will break down into mush when folded. Aim for firm-ripe peaches that hold their shape when diced.
  • Not Draining Canned Peaches: If using canned, thorough draining is essential to prevent a watery salad.

Storing Tips

  • Refrigeration: Store covered tightly in the refrigerator for up to 3 days. The salad is best consumed within 48 hours as the peaches may soften further and release more juice over time.
  • Freezing: Not recommended. The dairy and whipped topping can separate and become watery upon thawing, and the peach texture will be ruined.
  • Make-Ahead: This is an excellent make-ahead dish. Prepare it up to a day in advance, keeping it covered in the fridge. Add any crunchy garnishes (like nuts) right before serving to maintain their texture.
Peaches and Cream Salad served in individual mason jars with a spoon, ready for a summer picnic or party.
Portioning the salad into individual jars makes for a charming and convenient presentation for gatherings.

Conclusion

This Peaches and Cream Salad is more than just a recipe; it’s a taste of summer simplicity and joy. With its foolproof method, customizable ingredients, and universally appealing flavor, it’s destined to become a staple in your recipe collection. Whether you’re feeding a crowd or just treating your family, it delivers maximum flavor with minimal effort. So grab those ripe, fragrant peaches and whip up a batch of this creamy, dreamy salad. Don’t forget to share your creation with us! Tag @spicemingle on social media to show off your beautiful dessert.

Simple Peach Feta Salad Recipe

“`html

Simple Peach Feta Salad Recipe

Introduction

Did you know that a study published in the Journal of Sensory Studies found that the combination of sweet and salty flavors, like peaches and feta, significantly increases perceived flavor complexity and overall enjoyment? This is the secret science behind why this Simple Peach Feta Salad is so irresistibly good. It’s not just a salad; it’s a vibrant, textural symphony designed to delight your palate. Perfect for those sweltering summer days when you crave something light yet satisfying, this dish transforms simple, fresh ingredients into a show-stopping centerpiece. The juicy peaches burst with sunshine, the cherry tomatoes add a pop of acidity, the herbs bring a garden-fresh aroma, and the creamy, salty feta ties it all together with a tangy punch. It’s the ultimate answer to the question: how can I make a salad that everyone will actually be excited to eat?

Ingredients List

Gather the freshest ingredients you can find for the best flavor. Here’s what you’ll need for the salad and its simple dressing:

  • For the Salad:
    • 3 ripe peaches – Look for peaches that are fragrant and yield slightly to gentle pressure. They should have a vibrant, blushing skin. Substitution: Nectarines or ripe mangoes work beautifully.
    • 1 pint cherry or grape tomatoes – Halved. Their sweet-tart juice is essential. Substitution: Sun gold tomatoes or diced heirloom tomatoes.
    • 1/2 small red onion – Thinly sliced. Soak in ice water for 10 minutes to mellow the sharp bite if desired.
    • 1/2 cup fresh basil leaves – Torn, not chopped, to prevent bruising and release maximum aromatic oils.
    • 1/4 cup fresh mint leaves – Adds a cool, refreshing note that complements the peach perfectly.
    • 4 oz (about 1 cup) crumbled feta cheese – Use a block of feta in brine for superior creaminess and crumble it yourself. Substitution: Goat cheese (chèvre) or creamy burrata for a richer twist.
    • 1/3 cup toasted pecans or walnuts (optional) – For a delightful crunch and nutty depth.
  • For the Simple Dressing:
    • 3 tbsp extra virgin olive oil – Use a good, fruity variety.
    • 1 tbsp white balsamic vinegar or apple cider vinegar – White balsamic adds sweetness without darkening the salad. Substitution: Fresh lemon juice.
    • 1 tsp honey or maple syrup – Just a touch to harmonize the flavors.
    • 1 small clove garlic, minced or grated
    • Salt and freshly cracked black pepper to taste

Timing

Prep Time15 minutes
Cook Time0 minutes
Total Time15 minutes

This Peach Feta Salad comes together in a mere 15 minutes with no cooking required. Compared to the average salad recipe that might involve roasting vegetables or preparing complex proteins, this recipe is significantly faster, putting a gourmet-quality dish on your table in the time it takes to set it. The efficiency lies in the minimal prep—washing, slicing, and tossing. It’s the perfect “fast food” for health-conscious foodies.

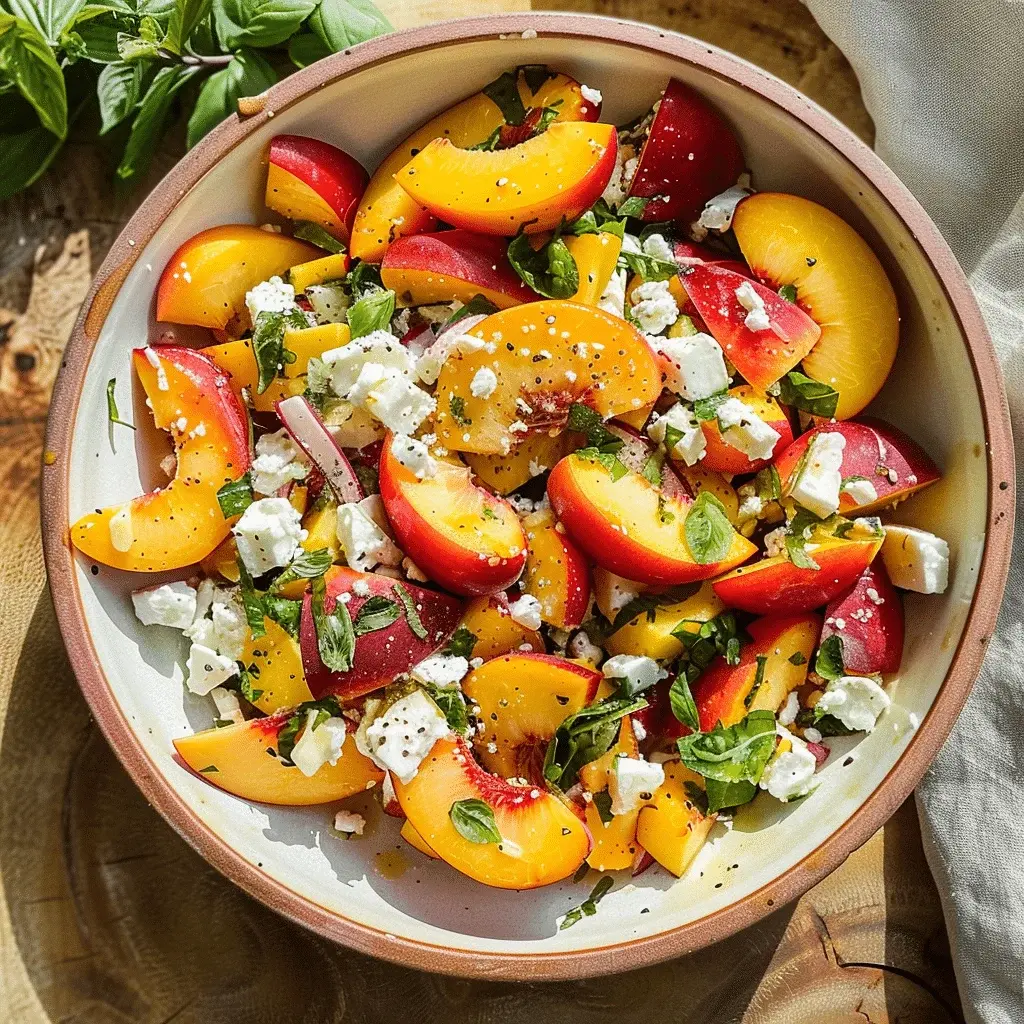
Fresh ingredients for Peach Feta Salad including peaches, tomatoes, basil, mint, and feta cheese arranged on a wooden table

Step-by-Step Instructions

Step 1: Prepare the Produce

First, give your peaches a good wash. I like to leave the skin on for color, fiber, and texture, but you can peel them if you prefer. Slice the peaches into ½-inch thick wedges or chunks—big enough to be substantial in a bite. Halve the cherry tomatoes. If using, thinly slice the red onion. For the herbs, gently tear the basil and mint leaves with your fingers. This method preserves more of their delicate flavor and essential oils than chopping with a knife. Place all these prepped ingredients in a large, wide salad bowl.

Step 2: Make the Dressing

In a small bowl or jar, combine the extra virgin olive oil, vinegar, honey (or maple syrup), and minced garlic. Add a generous pinch of salt and several grinds of black pepper. Whisk vigorously or shake the jar until the mixture is fully emulsified—you want it slightly thickened and unified, not separated. Taste it! The dressing should be a perfect balance of tangy, sweet, and savory. Adjust seasoning if needed. Remember, the feta will add saltiness later, so don’t over-salt the dressing.

Step 3: Assemble the Salad

To the bowl with your peaches and tomatoes, add the torn herbs and sliced red onion. Now, here’s a pro tip: add about two-thirds of the crumbled feta cheese to the bowl, reserving the rest for a beautiful garnish on top. If you’re using toasted nuts, add them now as well. Pour about half of the dressing over the salad ingredients.

Step 4: Toss and Serve

Using clean hands or two large spoons, gently toss the salad. I mean gently—you want to coat everything in dressing without crushing the juicy peaches or bruising the herbs. Once everything is lightly dressed, do a final taste test. Add more dressing if desired, but it’s better to start with less; you can always add more. Transfer the salad to a serving platter or individual plates. Garnish with the remaining crumbled feta cheese and an extra crack of black pepper. Serve immediately for the best texture and temperature contrast.

Nutritional Information

(Per serving, assuming salad serves 4 as a side dish)

  • Calories: ~220 kcal
  • Total Fat: 16g (Healthy fats from olive oil, nuts, and feta)
  • Saturated Fat: 4.5g
  • Carbohydrates: 17g
  • Fiber: 3g
  • Sugars: 13g (Naturally occurring from peaches and tomatoes)
  • Protein: 5g
  • Vitamin A: 25% DV | Vitamin C: 40% DV | Calcium: 15% DV

Healthier Alternatives

Want to lighten it up further without sacrificing flavor? Here are smart swaps:

  • Lower-Fat Feta: Opt for reduced-fat feta cheese. The flavor is still tangy and satisfying.
  • Dressing Base: Replace half the olive oil with plain Greek yogurt or buttermilk for a creamy, protein-rich dressing with fewer calories.
  • Sweetener: Use a drop of liquid stevia or monk fruit extract instead of honey to cut sugar content while maintaining the sweet balance.
  • Salt-Conscious: Rinse the feta in brine briefly under cold water to remove some surface salt before crumbling.
  • Nut-Free: Swap nuts for toasted sunflower or pumpkin seeds for a similar crunch with a different nutrient profile.

Serving Suggestions

This salad is incredibly versatile:

  • As a Side: The classic! Pair it with grilled chicken, salmon, shrimp, or a simple herb-marinated steak. It cuts through the richness of grilled meats perfectly.
  • As a Main: For a light lunch, add a can of drained and rinsed chickpeas, white beans, or a handful of quinoa to bulk it up with plant-based protein.
  • Brunch Star: Serve alongside quiche, frittata, or on top of avocado toast.
  • On Crostini: Spoon it onto toasted baguette slices for an elegant appetizer.
  • With Grains: Toss it with cooked farro, couscous, or orzo to create a hearty grain salad.

Common Mistakes

  • Using Unripe Peaches: This is the #1 mistake. Hard, flavorless peaches will ruin the salad. They must be ripe, juicy, and fragrant.
  • Over-Dressing: A soggy salad is a sad salad. Dress lightly just before serving; you can always add more.
  • Chopping Herbs with a Knife: This bruises them and causes them to blacken. Tearing is the way to go.
  • Pre-assembling Too Early: The salt in the dressing and feta will draw moisture from the peaches and tomatoes, creating a watery pool at the bottom of your bowl. Assemble within 30 minutes of serving.
  • Using Pre-Crumbled, Dry Feta: The anti-caking agents on pre-crumbled feta make it dry and less flavorful. Always buy a block and crumble it yourself.

Storing Tips

This salad is best enjoyed fresh. However, if you have leftovers:

  • Short-Term (Next Day): Store in an airtight container in the refrigerator for up to 24 hours. The peaches will soften and release more juice, and the herbs will wilt, but it will still taste delicious. The texture just won’t be as crisp.
  • Meal Prep Friendly: Prep components separately. Store chopped peaches with a squeeze of lemon juice to prevent browning. Keep dressing in a separate jar. Combine everything just before you’re ready to eat.
  • Do Not Freeze: Freezing will destroy the texture of all the fresh ingredients, turning them mushy upon thawing.

Easy Peach Arugula Salad Recipe

“`html

Easy Peach Arugula Salad Recipe

Introduction

Did you know that a study published in the Journal of Sensory Studies found that combining sweet and savory elements in a dish can increase perceived flavor complexity by up to 40%? This is the secret behind our stunning Easy Peach Arugula Salad. More than just a side dish, this recipe is a masterclass in balancing textures and tastes. The peppery bite of fresh arugula, the juicy sweetness of ripe peaches, the creamy tang of goat cheese, and the satisfying crunch of toasted pecans all come together under a simple, tangy balsamic glaze. It’s the perfect answer to the question: what can I make that’s impressive, healthy, and ready in under 15 minutes? Whether you’re looking for a light summer lunch, a vibrant side for your BBQ, or a quick, nutrient-packed meal, this salad delivers on every front.

Ingredients List

Gather these fresh, high-quality ingredients for the best flavor experience. Each component plays a crucial role in the salad’s harmony.

  • For the Salad:
    • 5 oz (about 5-6 cups) Fresh Arugula: Look for vibrant, dark green leaves with a pronounced peppery aroma. Avoid any wilted or yellowing bunches. Substitution: Baby spinach or mixed greens for a milder flavor.
    • 2 Large Ripe Peaches: They should yield slightly to gentle pressure and smell fragrant at the stem. Substitution: Nectarines, mango, or ripe pears when peaches are out of season.
    • 4 oz Goat Cheese (Chèvre), crumbled: The creamy, tangy profile is essential. Use a log for easy crumbling. Substitution: Feta cheese for a saltier punch, or burrata for ultimate creaminess.
    • 1/2 cup Pecans, raw: We’ll toast them to unlock a deep, buttery fragrance and crunch. Substitution: Walnuts, almonds, or pistachios.
    • Optional: Fresh mint or basil leaves, thinly sliced for an herbal lift.
  • For the Balsamic Dressing:
    • 1/4 cup Extra Virgin Olive Oil: Use a good-quality, fruity oil as it’s the base of the dressing.
    • 2 tbsp Balsamic Vinegar: Aged balsamic has a sweeter, more complex flavor. Substitution: Red wine vinegar or a squeeze of fresh lemon juice.
    • 1 tsp Dijon Mustard: Acts as an emulsifier and adds a subtle sharpness.
    • 1 tsp Honey or Maple Syrup: Balances the vinegar’s acidity. Adjust to taste.
    • 1 small Garlic Clove, minced: (optional) For a bit of bite.
    • Salt and Freshly Cracked Black Pepper to taste.

Timing

Prep Time 12 minutes
Cook Time 3 minutes
Total Time 15 minutes

At just 15 minutes total, this recipe is significantly faster than the average composed salad recipe, which often takes 20-25 minutes. The efficiency comes from minimal cooking (just toasting the nuts) and a dressing that whisks together in seconds. This makes it an ideal “emergency gourmet” dish for unexpected guests or last-minute meal decisions.

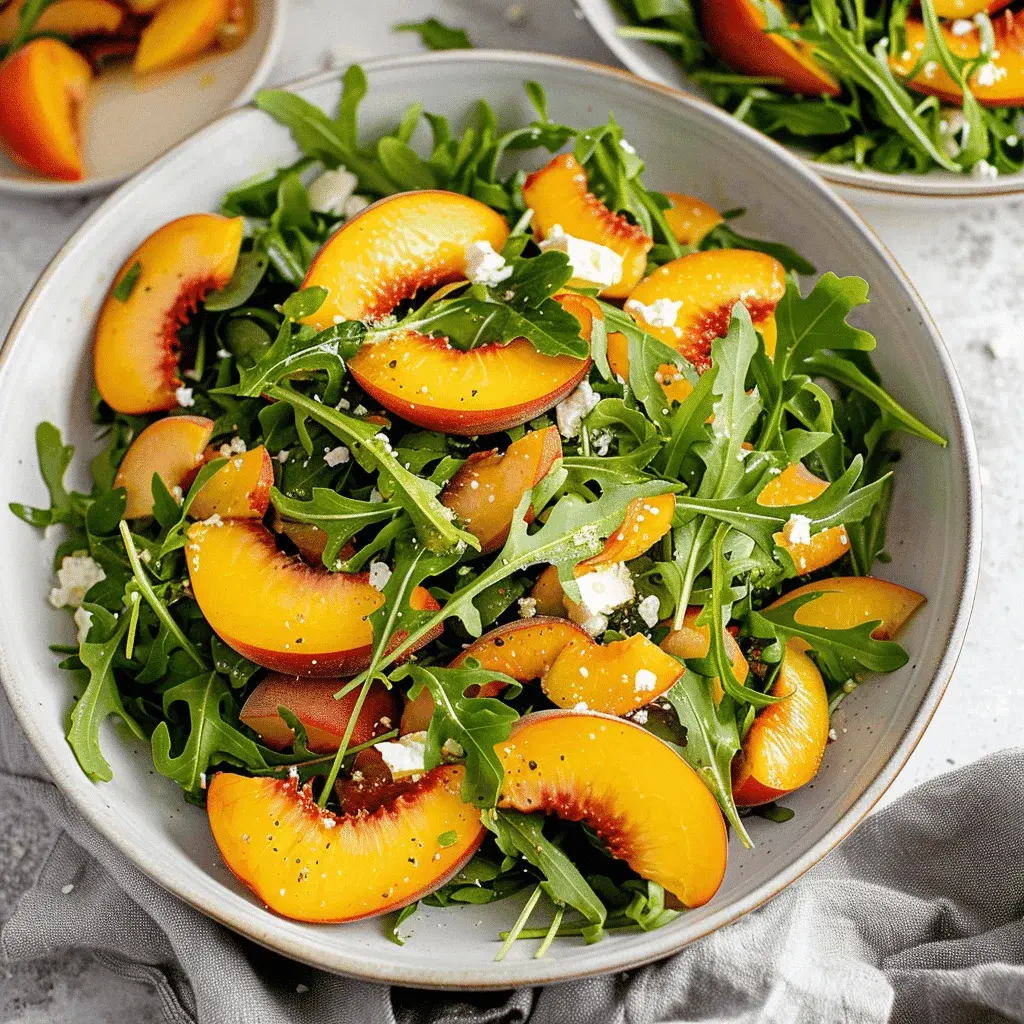
Close-up of a vibrant peach arugula salad in a white bowl, showing juicy peach slices, crumbled goat cheese, and toasted pecans on fresh green arugula.

Step-by-Step Instructions

Step 1: Prepare the Dressing

In a small bowl or a mason jar with a lid, combine the extra virgin olive oil, balsamic vinegar, Dijon mustard, and honey. If using, add the minced garlic. Season generously with a pinch of salt and a few cracks of black pepper. Whisk vigorously or shake the jar until the mixture is fully emulsified—you’ll see it turn from separated to a smooth, slightly thickened consistency. Give it a quick taste. I often find it needs another tiny pinch of salt to make all the flavors pop. Set this aside while you prepare the other components; letting it sit for a few minutes allows the flavors to meld.

Step 2: Toast the Nuts

Place the raw pecans in a dry skillet over medium-low heat. Toast them for 2-4 minutes, shaking the pan frequently, until they become fragrant and you see a slight golden color on the edges. Be vigilant! Nuts burn in an instant. The moment you smell that rich, buttery aroma, transfer them to a plate to stop the cooking process. Let them cool completely. Toasting is non-negotiable—it transforms the nuts from bland and soft to deeply flavorful and satisfyingly crunchy.

Step 3: Prepare the Peaches and Arugula

Wash the peaches and pat them dry. Slice them in half, remove the pit, and then cut them into 1/4-inch thick slices or bite-sized wedges. Pro tip: If your peaches are very ripe and juicy, slice them directly over your salad bowl to catch any dripping nectar. Give the arugula a good rinse in a colander and spin it dry in a salad spinner. This is crucial—water on the leaves will dilute your dressing and make the salad soggy. Place the dry arugula in your large serving bowl.

Step 4: Assemble the Salad

Now for the fun part! Drizzle about two-thirds of the dressing over the bed of arugula. Use clean hands or salad tongs to gently toss the greens, ensuring every leaf gets a light, glossy coating. Arrange the beautiful peach slices over the dressed arugula. Sprinkle the crumbled goat cheese and the cooled, toasted pecans evenly across the top. If using fresh herbs, scatter them over now. Drizzle the remaining dressing over the top for an extra flavor boost. Serve immediately to enjoy the perfect contrast of the cool, crisp greens with the warm, crunchy nuts.

Nutritional Information

(Per serving, assuming salad serves 4 as a side)

  • Calories: ~280 kcal
  • Total Fat: 22g (Healthy fats from olive oil and nuts)
  • Saturated Fat: 5g
  • Carbohydrates: 16g
  • Dietary Fiber: 3g
  • Sugars: 12g (Natural sugars from peaches)
  • Protein: 7g
  • Vitamin A: 45% DV | Vitamin C: 20% DV | Calcium: 10% DV

Healthier Alternatives

You can easily adapt this salad to fit various dietary needs without sacrificing the core flavor profile.

  • Dairy-Free/Vegan: Swap the goat cheese for a vegan feta alternative or a handful of creamy avocado slices. Use maple syrup instead of honey in the dressing.
  • Lower Fat: Reduce the olive oil to 2 tbsp and the nuts to 1/4 cup. The peaches and dressing provide plenty of flavor.
  • Nut-Free: Replace the pecans with roasted sunflower seeds or pumpkin seeds (pepitas) for a similar crunch.
  • Lower Sugar: Omit the honey/maple syrup from the dressing. The ripe peaches provide ample sweetness.

Serving Suggestions

  • As a Main Course: Add grilled chicken breast, shrimp, or flaked salmon on top for a complete, protein-packed meal.
  • Summer BBQ Side: This salad is the perfect bright, fresh counterpoint to rich grilled meats like steak, burgers, or ribs.
  • Elegant Starter: Serve smaller portions on individual plates as a refreshing first course for a dinner party.
  • With Bread: A slice of crusty sourdough or a warm baguette is perfect for soaking up the last bits of dressing.

Common Mistakes

  • Using Wet Greens: This is the #1 mistake. Soggy salad is a tragedy. Always dry your arugula thoroughly.
  • Over-dressing: Start with less dressing than you think you need. You can always add more, but you can’t take it away.
  • Using Unripe Peaches: Hard, flavorless peaches won’t provide the necessary sweetness. If your peaches aren’t ripe, let them sit on the counter for a day or two.
  • Adding Dressing Too Early: Assemble and dress the salad just before serving. Arugula is delicate and wilts quickly.

Storing Tips

This salad is best enjoyed immediately. However, you can prep components ahead:

  • Make-Ahead: Toast the nuts and prepare the dressing up to 3 days in advance. Store nuts in an airtight container at room temp and dressing in the fridge.
  • Leftovers: Store any leftover dressed salad in an airtight container in the fridge for up to 24 hours. The arugula will wilt, but it will still taste delicious. The peaches may brown slightly but are still safe to eat.
  • Pro Tip: For next-day lunches, pack the dry arugula, peach slices, cheese, and nuts separately. Carry the dressing in a small container and assemble just before eating.
Overhead shot of the finished peach arugula salad beautifully plated, ready to serve with a wooden fork and spoon.

Conclusion

This Easy Peach Arugula Salad is more than

Avocado, Mozzarella, and Tomato Grilled Cheese Recipe

“`html

Avocado, Mozzarella, and Tomato Grilled Cheese Recipe

Introduction

Did you know that the average American eats nearly 200 grilled cheese sandwiches per year? While that classic comfort food is undeniably delicious, it often lacks the nutritional punch many of us seek in our daily meals. What if you could elevate this beloved staple into a meal that’s not only irresistibly tasty but also packed with healthy fats, protein, and vitamins? This Avocado, Mozzarella, and Tomato Grilled Cheese recipe is the perfect answer, offering a gourmet, nutritious twist on a timeless favorite. By combining creamy avocado, fresh mozzarella, and juicy cherry tomatoes between slices of hearty multigrain bread, you create a symphony of flavors and textures that satisfies your cravings while fueling your body. It’s more than just a sandwich; it’s a quick, balanced meal that proves healthy eating doesn’t have to be boring or complicated.

Ingredients List

Gather these fresh, simple ingredients to create your gourmet grilled cheese. Each component plays a crucial role in building the perfect bite.

  • 4 slices of Multigrain Bread: The foundation. Look for a bread with visible seeds and grains for a nutty flavor and satisfying chew. Substitution: Sourdough, whole wheat, or ciabatta.
  • 1 ripe Avocado: Choose one that yields slightly to gentle pressure. Its buttery, creamy texture is the star. Substitution: Mashed white beans with a squeeze of lemon for a similar creaminess.
  • 4 oz Fresh Mozzarella Cheese: Opt for the ball packed in water, sliced. It melts into glorious, stretchy pools. Substitution: Burrata for ultimate luxury, or low-moisture part-skim mozzarella for a more traditional melt.
  • 1/2 cup Cherry Tomatoes Halved. They provide a juicy, sweet-tart burst that cuts through the richness. Substitution: Sun-dried tomatoes (packed in oil, patted dry) for a more intense, concentrated flavor.
  • 2 tbsp Butter, softened: For that iconic golden, crispy exterior. Substitution: Mayonnaise or olive oil for a different browning profile and flavor.
  • 1 clove Garlic, minced (optional): For a savory kick. Rub it on the toasted bread or mix into the avocado.
  • Fresh Basil Leaves: A few leaves add a fragrant, peppery aroma that ties everything together. Substitution: Fresh spinach or arugula.
  • Pinch of Salt and Black Pepper: Essential for enhancing all the natural flavors.

Timing

Prep Time10 minutes
Cook Time8-10 minutes
Total Time~20 minutes

This recipe clocks in at a swift 20 minutes from start to finish, making it an ideal choice for a quick lunch or a hassle-free dinner. Compared to the average grilled cheese, which might take 5-7 minutes, the extra few minutes here are dedicated to prepping the fresh ingredients—a worthwhile investment for a significantly more nutritious and flavorful result. The active cooking time remains blissfully short, ensuring you get a hot, melty sandwich without a long wait.

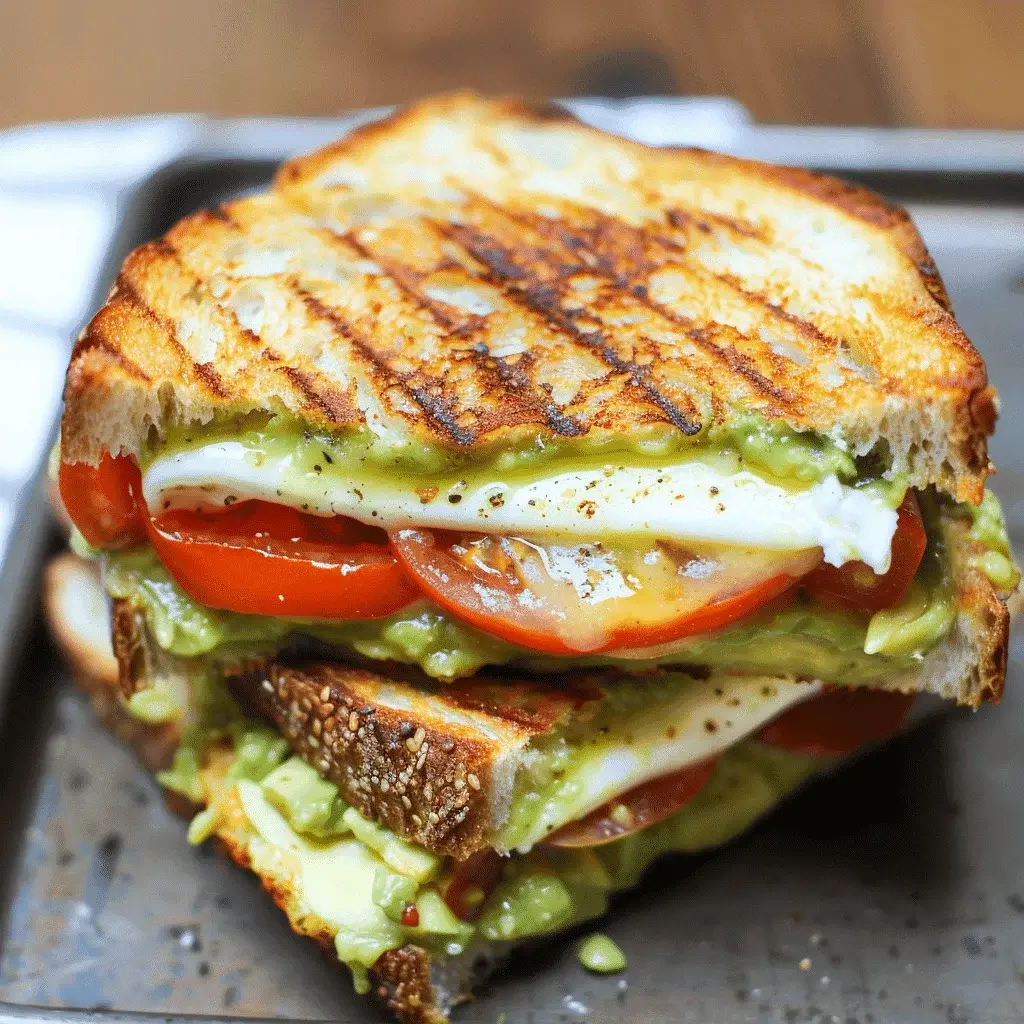
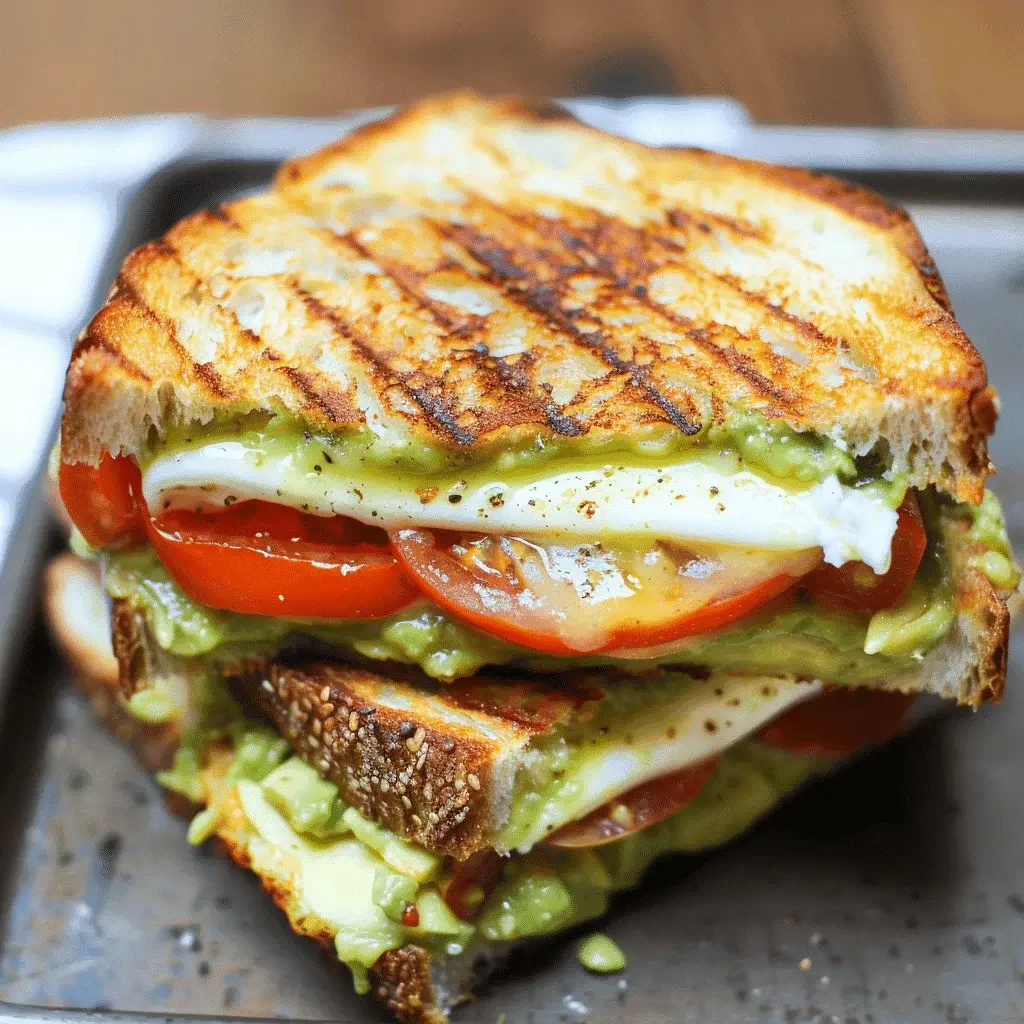
Close-up of an avocado, mozzarella, and tomato grilled cheese sandwich on a wooden board, showing the melted cheese and fresh ingredients

Step-by-Step Instructions

Step 1: Prepare Your Ingredients

Start by getting everything ready. This “mise en place” is the secret to a stress-free cooking experience. Slice your mozzarella into 1/4-inch thick pieces. Halve the cherry tomatoes. Pick the basil leaves. In a small bowl, mash the avocado with a fork until mostly smooth but with some chunks remaining for texture. Season it lightly with salt and pepper. If using, you can mix the minced garlic right into the avocado mash. Soften your butter so it spreads easily. Having everything within arm’s reach means you can assemble and cook without scrambling.

Step 2: Assemble the Sandwich

Lay out your four slices of multigrain bread. Spread the softened butter evenly on one side of each slice—this will be the glorious, crispy exterior. Flip two slices over so the unbuttered side is facing up. On these slices, spread a generous, even layer of the seasoned avocado mash. Next, layer on the slices of fresh mozzarella, followed by the halved cherry tomatoes (cut-side down so they don’t roll) and fresh basil leaves. Top with the remaining bread slices, buttered side facing out. Gently press down to secure the stack.

Step 3: Cook to Perfection

Heat a non-stick skillet or griddle over medium-low heat. Yes, medium-low! This is crucial. We want the bread to turn a deep golden brown and the cheese to melt completely without burning the outside. Place your assembled sandwiches in the preheated pan. Cook for 4-5 minutes per side, pressing down gently with a spatula occasionally. You’re looking for that perfect, even golden-brown crust and seeing the cheese start to ooze slightly from the edges. If the bread is browning too quickly, reduce the heat.

Step 4: Slice and Serve

Once both sides are beautifully golden and the cheese is visibly melted, transfer the sandwiches to a cutting board. Let them rest for just one minute—this allows the molten cheese to set slightly so it doesn’t all gush out when you cut it. Using a sharp serrated knife, slice each sandwich diagonally. This not only looks more appealing but also makes for easier eating. Serve immediately while the cheese is at its peak stretchiness and the bread is still crisp.

Nutritional Information

(Per serving, based on one full sandwich)

  • Calories: ~520 kcal
  • Protein: 22g
  • Carbohydrates: 45g
  • Dietary Fiber: 12g
  • Sugars: 8g
  • Total Fat: 32g
  • Saturated Fat: 12g
  • Vitamin C: 25% DV
  • Calcium: 40% DV

This sandwich is a fantastic source of heart-healthy monounsaturated fats from the avocado, high-quality protein and calcium from the mozzarella, and fiber from the multigrain bread and vegetables.

Healthier Alternatives

Want to lighten it up further without sacrificing flavor? Try these smart swaps:

  • Bread: Use 100% whole grain or sprouted grain bread for even more fiber and nutrients.
  • Cheese: Swap fresh mozzarella for part-skim mozzarella or a slice of reduced-fat provolone. The melt will be slightly different but still delicious.
  • Butter: Use a light brushing of olive oil or avocado oil spray on the bread instead of butter. You’ll still achieve a great crisp with less saturated fat.
  • Add Greens: Tuck in a handful of baby spinach or arugula for an extra vitamin boost and peppery bite.
  • Protein Boost: Add a few slices of lean turkey or a smear of hummus for added protein without overwhelming the delicate flavors.

Serving Suggestions

This grilled cheese is a complete meal on its own, but it pairs wonderfully with a variety of sides:

  • Classic Tomato Soup: The ultimate comfort duo. The acidity of the soup beautifully complements the richness of the sandwich.
  • Simple Side Salad: A light mix of greens with a lemony vinaigrette adds freshness and cuts through the decadence.
  • Sweet Potato Fries: Baked, not fried, for a satisfying, sweet-and-savory combination.
  • Pickles or Olives: A small bowl of cornichons or kalamata olives adds a tangy, briny counterpoint that wakes up the palate.

Common Mistakes

  • Heat Too High: This is the #1 mistake. High heat burns the bread before the cheese melts. Solution: Patience! Use medium-low heat.
  • Overstuffing: Piling on too many ingredients makes the sandwich impossible to cook evenly and difficult to eat. Solution: Use a single, even layer of each filling.
  • Using Cold Cheese: Cold cheese straight from the fridge takes longer to melt. Solution: Let your cheese slices sit at room temperature for 10-15 minutes before assembling.
  • Skipping the Rest: Cutting immediately sends molten cheese and fillings everywhere. Solution: Let the sandwich rest for 60 seconds on the cutting board.

Storing Tips

Grilled cheese is always best enjoyed fresh. However, if you have leftovers:

  • Refrigeration: Wrap tightly in foil or place in an airtight container. It will keep for 1 day. The avocado will oxidize and darken, and the bread will soften.
  • Reheating: To restore crispness, reheat in a toaster oven or air fryer at 350°F for 5-7 minutes. Avoid the microwave, as it will make the bread soggy.
  • Make-Ahead: You can prep the components ahead of time. Store mashed avocado with a squeeze of lemon juice to prevent browning, slice the cheese and tomatoes, and keep them separate. Assemble and cook just before serving.
A beautifully plated avocado, mozzarella, and tomato grilled cheese sandwich, sliced and served with a side salad

Conclusion

This Avocado, Mozzarella, and Tomato Grilled Cheese is a testament to how simple ingredients can be transformed into something extraordinary. It delivers on every front: incredible flavor, satisfying texture, and genuine nutritional value. It’s a recipe that adapts to your needs—whether you’re looking for a quick weeknight dinner, a impressive lunch for guests, or a way to make comfort food a bit better for you. The next time a grilled cheese craving hits, skip the basic version and treat yourself to this gourmet, nutrient-packed upgrade. Your taste buds and your body will thank you.

Frequently Asked Questions (FAQs)

Spring Mix Salad With Balsamic Honey Dressing Recipe

“`html

Spring Mix Salad With Balsamic Honey Dressing Recipe

Introduction

Did you know that incorporating just one cup of leafy greens into your daily diet can reduce the risk of cardiovascular disease by up to 15%? This fresh and vibrant Spring Mix Salad with Balsamic Honey Dressing is not just a feast for the eyes but a powerhouse of nutrients designed to support your wellness journey. Combining tender baby greens, juicy cherry tomatoes, crisp cucumbers, and sharp red onions, this salad is elevated by a homemade dressing that masterfully balances sweet honey with tangy balsamic vinegar. It’s the perfect answer for anyone seeking a healthy lunch or a stunning side dish that’s both easy to prepare and bursting with flavor. Whether you’re meal prepping for the week or entertaining guests, this recipe is your go-to for a delicious, nutrient-dense option.

Ingredients List

For the Salad:

  • 5 oz (about 6 cups) Spring Mix or Baby Greens: A colorful blend of tender lettuces like spinach, arugula, and frisée. Substitution: Use a blend of fresh spinach and romaine if needed.
  • 1 cup Cherry or Grape Tomatoes: Halved. Their bright, juicy pop adds essential sweetness and color. Substitution: Sun-dried tomatoes (chopped) for a more intense, chewy flavor.
  • 1 medium English Cucumber: Thinly sliced or diced. Provides a refreshing, crisp texture and high water content.
  • 1/4 medium Red Onion: Very thinly sliced. Offers a sharp, peppery bite that cuts through the sweetness. Soak in ice water for 10 minutes to mellow the flavor.
  • Optional Add-ins: 1/4 cup toasted pine nuts or slivered almonds (for crunch), 1/3 cup crumbled feta or goat cheese (for creaminess), or 1/2 cup sliced strawberries for a seasonal twist.

For the Balsamic Honey Dressing:

  • 1/4 cup Extra Virgin Olive Oil: The rich, fruity base of the dressing. Substitution: Avocado oil for a more neutral taste.
  • 3 tbsp Balsamic Vinegar: Look for a good-quality, aged variety for a deep, complex tang. Substitution: Red wine vinegar mixed with 1/2 tsp of sugar.
  • 1 1/2 tbsp Honey: Raw honey is ideal for its floral notes, creating the perfect sweet contrast. Substitution: Pure maple syrup or agave nectar for a vegan version.
  • 1 tsp Dijon Mustard: Acts as an emulsifier and adds a subtle, sharp depth.
  • 1 small Garlic Clove: Minced or pressed. Infuses a gentle, aromatic pungency.
  • 1/4 tsp Sea Salt & 1/8 tsp Black Pepper: To taste. Enhances and balances all the flavors.

Timing

Prep Time
15 minutes
Cook Time
0 minutes
Total Time
15 minutes

This Spring Mix Salad comes together in a mere 15 minutes from start to finish, with zero cooking required. Compared to the average salad recipe that might involve roasting vegetables or preparing complex proteins, this recipe is significantly faster, making it an unbeatable choice for busy weeknights or last-minute gatherings. The efficiency lies in the simplicity of the fresh ingredients and the quick-shake dressing method.

Fresh Spring Mix Salad ingredients arranged beautifully on a wooden table

Step-by-Step Instructions

Step 1: Prepare the Dressing

In a small bowl or a mason jar with a tight-fitting lid, combine the extra virgin olive oil, balsamic vinegar, honey, Dijon mustard, minced garlic, sea salt, and black pepper. If using a jar, seal it tightly and shake vigorously for about 30 seconds until the mixture is fully emulsified and slightly thickened. If whisking in a bowl, whisk constantly while slowly streaming in the oil to create a stable emulsion. Taste and adjust seasoning—you might want an extra pinch of salt or a drizzle more honey depending on the acidity of your vinegar. Set aside to allow the flavors to meld.

Step 2: Prepare the Vegetables

Wash the spring mix in a salad spinner and dry thoroughly—this is crucial to prevent a soggy salad. Halve the cherry tomatoes. For the cucumber, you can peel it in stripes for visual appeal or leave the skin on for extra nutrients, then slice into thin rounds or half-moons. Take your red onion slice and soak it in a bowl of ice water for 5-10 minutes; this simple trick tames its sharp bite and makes it pleasantly crisp. Drain and pat dry.

Step 3: Assemble the Salad

In a large, wide salad bowl, add the dried spring mix as your base. Artfully arrange the halved tomatoes, cucumber slices, and drained red onions over the top. If you’re using any optional add-ins like nuts, cheese, or fruit, scatter them over the vegetables now. I love creating little pockets of color and texture—it makes the salad look as incredible as it tastes.

Step 4: Toss and Serve

Just before serving, give your dressing a final shake or whisk. Drizzle about two-thirds of it over the salad. Using a pair of large salad tongs or two large spoons, gently toss the salad from the bottom up until every leaf is lightly and evenly coated. You can always add more dressing, but you can’t take it away, so start conservatively. Serve immediately on individual plates or bowls for the freshest, crispiest experience.

Nutritional Information

Per serving (Salad only, without optional add-ins, recipe serves 4):

  • Calories: ~120 kcal
  • Total Fat: 7g
  • Saturated Fat: 1g
  • Carbohydrates: 14g
  • Fiber: 2g
  • Sugars: 10g (primarily from natural honey and tomatoes)
  • Protein: 2g
  • Vitamin A: 90% DV | Vitamin C: 45% DV | Iron: 8% DV

Healthier Alternatives

You can easily tailor this Spring Mix Salad to fit specific dietary goals without sacrificing an ounce of flavor:

  • Lower Sugar: Replace the honey in the dressing with 1 tbsp of mashed ripe raspberries or a pinch of stevia. The fruit will provide natural sweetness with added fiber.
  • Reduced Fat: Substitute half the olive oil with vegetable broth or aquafaba (chickpea water) for a lighter, yet still emulsified, dressing.
  • Boost Protein: Add 3/4 cup of chickpeas (rinsed and drained) or 4 oz of grilled, sliced chicken breast to transform the salad into a complete, filling meal.
  • Nut-Free: Swap pine nuts for toasted sunflower seeds or pepitas to maintain that essential crunch.

Serving Suggestions

This salad’s versatility is one of its greatest strengths. Serve it as a light lunch on its own, or pair it with:

  • Grilled Proteins: Such as lemon herb chicken, garlic shrimp, or a simple seared salmon fillet. The dressing doubles as a fantastic marinade.
  • Heartier Meals: Alongside a bowl of creamy tomato soup, a slice of quiche, or a rustic tart for a balanced dinner.
  • For Entertaining: Present it in a large, clear glass bowl to showcase the colorful layers. Offer the extra dressing on the side in a small pitcher.

Common Mistakes

  • Not Drying Greens: Water clinging to the leaves will dilute your delicious dressing, leading to a watery, bland salad. Always use a salad spinner or pat dry with clean towels.
  • Over-dressing: Drowning the salad. Remember, you can add more, but you can’t remove it. Toss with a light hand.
  • Adding Dressing Too Early: Dressing the salad more than 5-10 minutes before serving will cause the delicate greens to wilt. Always dress at the last moment.
  • Using Low-Quality Vinegar: A harsh, cheap balsamic can overpower the salad. Investing in a moderately priced, aged balsamic makes a world of difference.

Storing Tips

  • Undressed Salad: Store washed and thoroughly dried greens and pre-cut vegetables in separate airtight containers lined with a paper towel in the fridge for up to 3 days.
  • Dressing: Store in a sealed jar in the refrigerator for up to 1 week. Let it sit at room temperature for 10 minutes and shake well before using, as the olive oil may solidify slightly when cold.
  • Leftovers: If you have dressed leftovers, they’re best consumed within 24 hours. The greens will be wilted but still tasty—consider repurposing them into a wrap or smoothie.
Close-up of a serving of Spring Mix Salad with Balsamic Honey Dressing in a white bowl

Conclusion

This Spring Mix Salad with Balsamic Honey Dressing is more than just a recipe—it’s a template for vibrant, healthy eating that fits seamlessly into any lifestyle. With its perfect balance of sweet and tangy flavors,