Healthy Watermelon Fries Recipe

“`html

Healthy Watermelon Fries Recipe

Introduction

Did you know that watermelon is over 90% water, making it one of nature’s most hydrating snacks? This fact perfectly sets the stage for our star dish. This Healthy Watermelon Fries Recipe is not just a playful twist on a classic fruit; it’s a strategic, nutrient-dense choice for beating the heat. In a world where snacking often means reaching for processed, high-calorie options, these vibrant, juicy sticks offer a brilliant solution. They are a refreshing and fun summer snack made with fresh watermelon and served with a tangy yogurt-lime dip that perfectly balances sweet and tart. Naturally hydrating, low-calorie, and packed with vitamins A, C, and B6, along with the antioxidant lycopene, these watermelon fries are a guilt-free delight perfect for kids and adults alike. Whether you’re hosting a BBQ, planning a picnic, or simply need a healthy pick-me-up, this recipe transforms a simple fruit into an interactive, delicious experience that celebrates freshness in every crunchy-sweet bite.

Ingredients List

Gathering simple, high-quality ingredients is key to making these fries shine. Here’s what you’ll need:

  • For the Watermelon Fries:
    • 1 small seedless watermelon (about 5-6 lbs): Look for one that feels heavy for its size with a creamy yellow spot on one side—a sign of sun-ripened sweetness. The flesh should be a deep, vibrant pink/red.
    • 1 tablespoon fresh lime juice (optional, for tossing): A quick spritz enhances the watermelon’s natural flavor and adds a subtle zing.
    • A pinch of flaky sea salt or Tajín (optional): For serving. Salt amplifies sweetness, and Tajín adds a chili-lime kick.
  • For the Tangy Yogurt-Lime Dip:
    • 1 cup plain Greek yogurt (full-fat or 2% recommended): Provides a creamy, protein-rich base with a satisfying tang. For a dairy-free alternative, use coconut yogurt.
    • Zest and juice of 1 large lime: The zest packs aromatic citrus oils, while the juice delivers the punchy acidity.
    • 1-2 tablespoons honey or maple syrup: Adjust to taste. The honey adds floral notes that complement the lime. Agave nectar is a great vegan swap.
    • 1 teaspoon pure vanilla extract: Adds a warm, sweet depth that rounds out the dip’s flavor profile.
    • A pinch of salt: Balances all the flavors and makes them pop.

Timing

Prep Time: 15 minutes
Cook Time: 0 minutes
Total Time: 15 minutes (+ chilling)

Compared to traditional potato fries, which require 30-45 minutes of prep and cooking, this no-cook recipe is a 92% faster path to a satisfying snack. The active time is minimal—most of the “work” is simply chilling the components to maximize refreshment. This efficiency makes it an ideal last-minute lifesaver for unexpected guests or sudden snack cravings on a hot day.
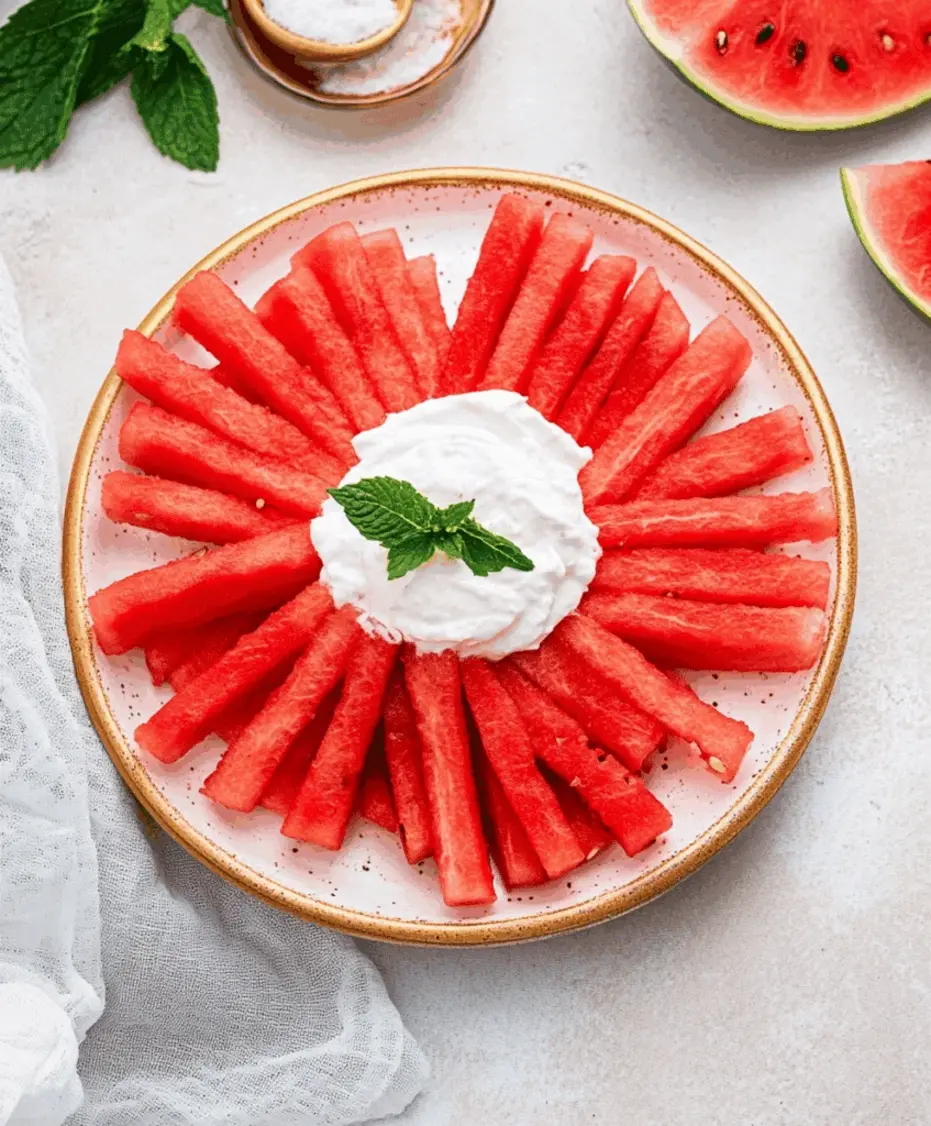
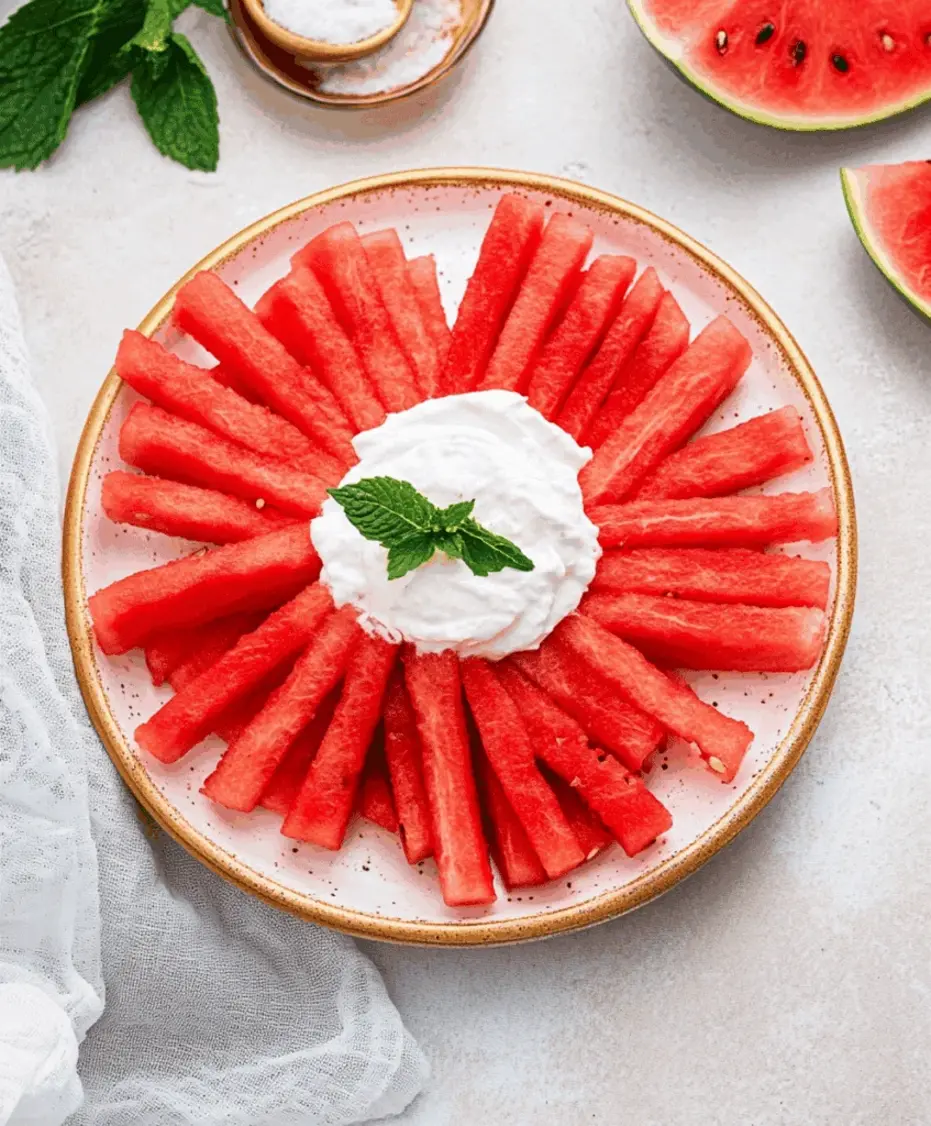
Close-up of vibrant red watermelon fries arranged neatly on a white plate, ready to be dipped.

Fresh, hydrating watermelon cut into perfect fry-shaped sticks.

Step-by-Step Instructions

Step 1: Prepare the Watermelon

Start by giving your watermelon a good rinse under cool water to remove any surface dirt. Place it on a sturdy, non-slip cutting board. Using a sharp chef’s knife, carefully slice off about ½ inch from both ends to create stable, flat surfaces. Stand the watermelon upright on one cut end. Working from top to bottom, slice off the rind in sections, following the curve of the fruit, to reveal the beautiful red flesh. Aim to remove all the white and green parts. Now, cut the large watermelon block into 1-inch thick slabs. Stack a couple of slabs and cut them into long, 1-inch wide strips—these are your “fries!” For ultimate neatness, you can trim them to be more uniform in length. If desired, place the fries in a large bowl and give them a very light toss with a tablespoon of fresh lime juice. This step is optional but adds a lovely brightness.

Step 2: Make the Yogurt-Lime Dip

While your fries are ready, let’s whip up the dip that makes them irresistible. In a medium mixing bowl, add the Greek yogurt. Using a microplane or the finest side of a box grater, zest the entire lime directly into the yogurt—those green specks are flavor gold! Cut the lime in half and juice it, straining out any seeds. Add the lime juice, honey (or maple syrup), vanilla extract, and a pinch of salt to the bowl. Whisk everything together vigorously until the mixture is completely smooth, creamy, and well-combined. Do a taste test! Adjust the sweetness or tartness by adding a touch more honey or lime juice until it sings on your palate. Cover the bowl and place it in the refrigerator to chill and allow the flavors to meld for at least 15-20 minutes.

Step 3: Chill and Serve

For the best experience, arrange your watermelon fries on a serving platter or baking sheet lined with parchment paper and pop them in the fridge for 10-15 minutes. This quick chill makes them extra refreshing and firms them up slightly for easier dipping. When ready to serve, transfer the chilled yogurt-lime dip to a small serving bowl. Arrange the frosty-cold watermelon fries around the dip. For a final flourish, you can offer small dishes of flaky sea salt or Tajín on the side for those who want an extra flavor dimension. Encourage everyone to grab a fry, dunk it heartily into the creamy dip, and enjoy the explosion of cool, sweet, and tangy flavors.

Nutritional Information

(Per serving, approximately 10 fries with 2 tbsp of dip)

  • Calories: ~85 kcal
  • Total Fat: 0.5g
  • Saturated Fat: 0.3g
  • Carbohydrates: 18g
  • Fiber: 1g
  • Sugars: 15g (naturally occurring)
  • Protein: 3g
  • Sodium: 25mg
  • Vitamin C: 25% of the RDI
  • Vitamin A: 15% of the RDI

This snack is a powerhouse of hydration and essential nutrients with minimal caloric impact, making it a superior choice over chips or candy.

Healthier Alternatives

Want to tweak this recipe for specific dietary needs without sacrificing taste? Here are some expert-approved swaps:

  • Dip Sweetener: Swap honey for pure monk fruit sweetener or stevia drops to create a zero-sugar, keto-friendly dip. The lime and vanilla will still provide ample flavor.
  • Dairy-Free Dip: Use unsweetened coconut yogurt or a high-protein, plain almond milk yogurt. The result is a slightly tropical-flavored, creamy dip that’s perfect for vegan diets.
  • Protein Boost: Stir a scoop of unflavored or vanilla collagen peptides or plant-based protein powder into the Greek yogurt dip. It blends seamlessly, adding 10-20g of protein for a more filling snack.
  • Spice It Up: Add a pinch of cayenne pepper or chili powder to the dip for a “sweet heat” effect that boosts metabolism without adding calories.

Serving Suggestions

  • BBQ & Cookout Star: Serve these fries on a large platter alongside grilled meats and salads. They act as a palate-cleansing, hydrating side that cuts through rich flavors.
  • Kids’ Party Platter: Create a “DIY Snack Board” with watermelon fries, the yogurt dip, and other fruit slices. It’s interactive, colorful, and parents will appreciate the healthy choice.
  • Poolside Refreshment: Pack them in a sealed container with a cold pack for the ultimate refreshing, no-mess snack by the water.
  • Brunch Addition: Pair with whole-grain pancakes or a frittata for a sweet-and-savory brunch spread that feels indulgent but is light.
  • Dessert Alternative: Drizzle the fries with a tiny bit of melted dark chocolate and sprinkle with crushed pistachios for a gourmet, healthy dessert.

Common Mistakes

  • Using an Underripe or Overripe Watermelon: An underripe melon will be pale and bland, while an overripe one can be mushy and won’t hold its shape. The “thump test” (a deep, hollow sound) and the yellow ground spot are your best guides.
  • Skipping the Chill: Serving the fries and dip at room temperature diminishes the refreshing quality. That 15-minute chill is non-negotiable for peak experience.
  • Over-mixing the Dip with a Blender: Whisking by hand is best. Using a blender or food processor can sometimes overwork the yogurt, making it thin and runny.
  • Cutting Fries Too Thin or Too Thick: Sticks thinner than ¾ inch can become floppy and hard to dip. Thicker than 1¼ inches feels more like a chunk than a “fry.” Aim for the 1-inch sweet spot.
  • Not Draining the Yogurt: If using regular (not Greek) yogurt, you must strain it through cheesecloth for 30 minutes to remove excess whey. Otherwise, your dip will be watery.

Storing Tips

  • Watermelon Fries: Store in a single layer (or between paper towels) in an airtight container in the refrigerator for up to 2 days. They will slowly release juice, so they are best enjoyed fresh.
  • Yogurt-Lime Dip: Keep in a sealed container in the fridge for up to 4 days. The flavors will continue to develop and improve.
  • Do Not Freeze: Freezing will destroy the texture of both the watermelon (it will become mushy upon thawing) and the yogurt dip (it will separate).
  • Meal Prep Friendly: You can cut the watermelon and make the dip up to a day in advance. Store separately and combine just before serving.
A beautiful presentation of watermelon fries on a rustic wooden board with a bowl of creamy yogurt-lime dip in the center, garnished with lime slices and mint.

The complete, inviting snack platter ready for sharing.

Conclusion

This Healthy Watermelon Fries Recipe is more than just a snack; it’s a celebration of simple, smart, and sensational
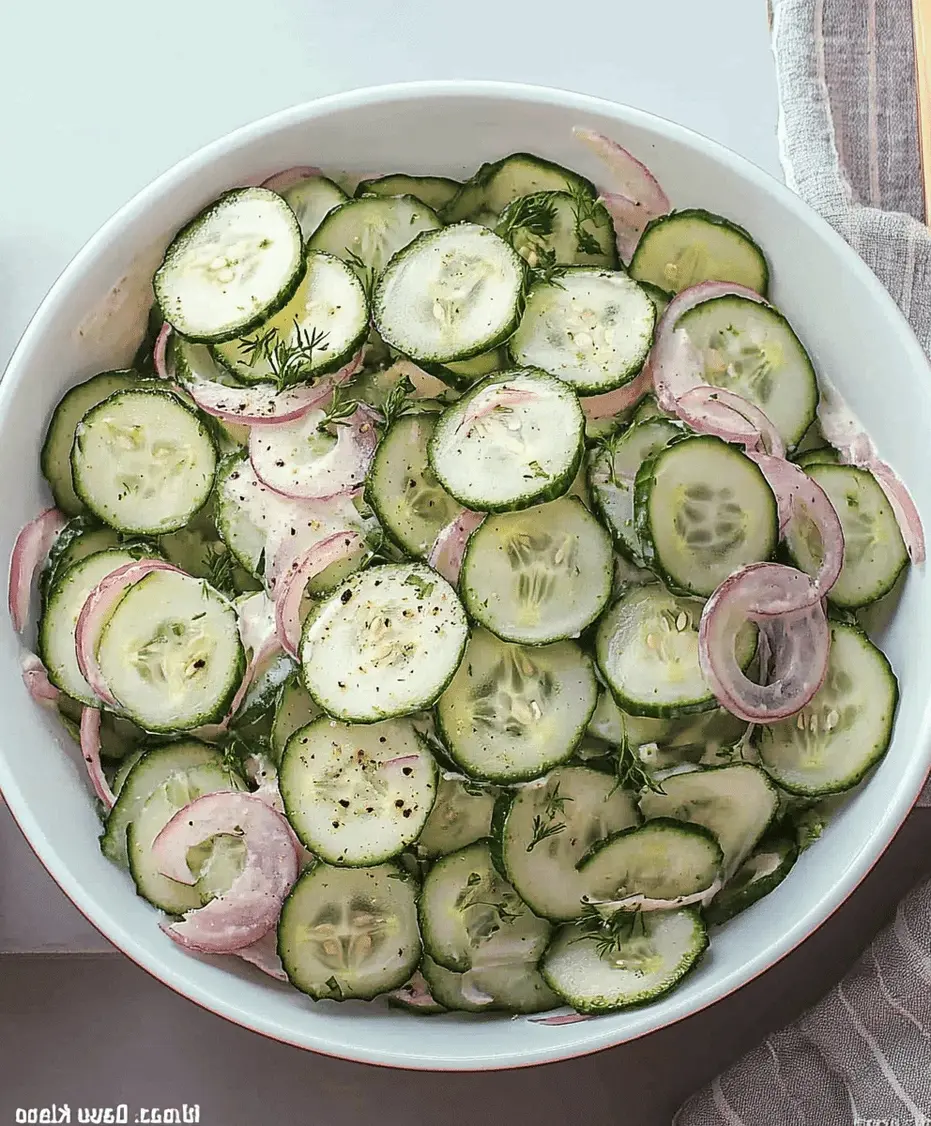
Dad’s Creamy Cucumber Salad Recipe

“`html

Dad’s Creamy Cucumber Salad Recipe

Introduction: A Refreshing Culinary Question

Did you know that a single cucumber is over 95% water, making it one of the most hydrating foods you can eat? This fact perfectly sets the stage for the ultimate question: What if you could transform this simple, crisp vegetable into a creamy cucumber salad that’s not only refreshing but also packed with nostalgic, tangy flavor that becomes the star of every summer table? Welcome to Dad’s Creamy Cucumber Salad—a recipe that answers that call with a resounding yes. This isn’t just another side dish; it’s a memory on a plate. Born from backyard barbecues and family potlucks, this salad represents the perfect balance of cool, crunchy cucumbers enveloped in a rich, seasoned dressing that’s surprisingly light. It’s the dish that disappears first, the one people ask for the recipe of, and the simple, no-fuss hero that proves the best flavors often come from the fewest ingredients. Whether you’re a seasoned home cook or just starting out, this guide will walk you through creating the perfect creamy cucumber salad, ensuring every bite is as crisp, creamy, and delicious as you remember from Dad’s kitchen.

Ingredients for Dad’s Creamy Cucumber Salad

The magic of this salad lies in its simplicity. Using fresh, quality ingredients is key to achieving that signature flavor and texture.

  • 2 large English cucumbers (or 4 medium garden cucumbers): Look for firm, dark green cucumbers with no soft spots. English cucumbers have thinner skins and fewer seeds, offering a more consistent, crisp bite. Substitution: Persian cucumbers or thinly sliced zucchini in a pinch.
  • 1/2 medium red onion: Provides a sharp, sweet contrast and a beautiful pop of color. Substitution: Sweet Vidalia onion for a milder flavor, or 2 thinly sliced shallots.
  • 1 cup (240g) full-fat sour cream: This is the heart of the creamy dressing, offering a rich tang and luxurious mouthfeel. Substitution: Plain Greek yogurt for a protein boost and slightly sharper tang, or a 50/50 mix of sour cream and mayo for a classic deli-style creaminess.
  • 2 tablespoons apple cider vinegar: The essential acidic component that brightens the entire dish and prevents the salad from tasting flat. Substitution: White wine vinegar or fresh lemon juice.
  • 1 tablespoon white granulated sugar: A touch of sweetness to perfectly balance the vinegar’s acidity. Substitution: Honey, maple syrup, or a zero-calorie sweetener for a keto-friendly version.
  • 1 1/2 teaspoons kosher salt, divided: Crucial for drawing moisture out of the cucumbers (preventing a watery salad) and seasoning the dressing.
  • 1/2 teaspoon freshly cracked black pepper: Adds a gentle, aromatic heat.
  • 1 tablespoon fresh dill, finely chopped (plus more for garnish): The herbal signature that screams “fresh.” Substitution: 1 teaspoon dried dill, or fresh chives or parsley for a different herbal profile.
  • Optional: 1 clove garlic, minced: For a savory, aromatic punch.

Timing: Prep, Cook, and Total Time

Prep Time 15 minutes
Cook Time 0 minutes
Chill Time 1 hour (minimum)
Total Time 1 hour 15 minutes

Compared to the average cooked side dish, which can take 30-45 minutes of active kitchen time, this creamy cucumber salad is a speed demon. The “work” is done in under 15 minutes. The remaining hour is hands-off chilling time, allowing the flavors to marry and develop a depth that most no-cook recipes lack. This makes it an ideal make-ahead dish for busy hosts.

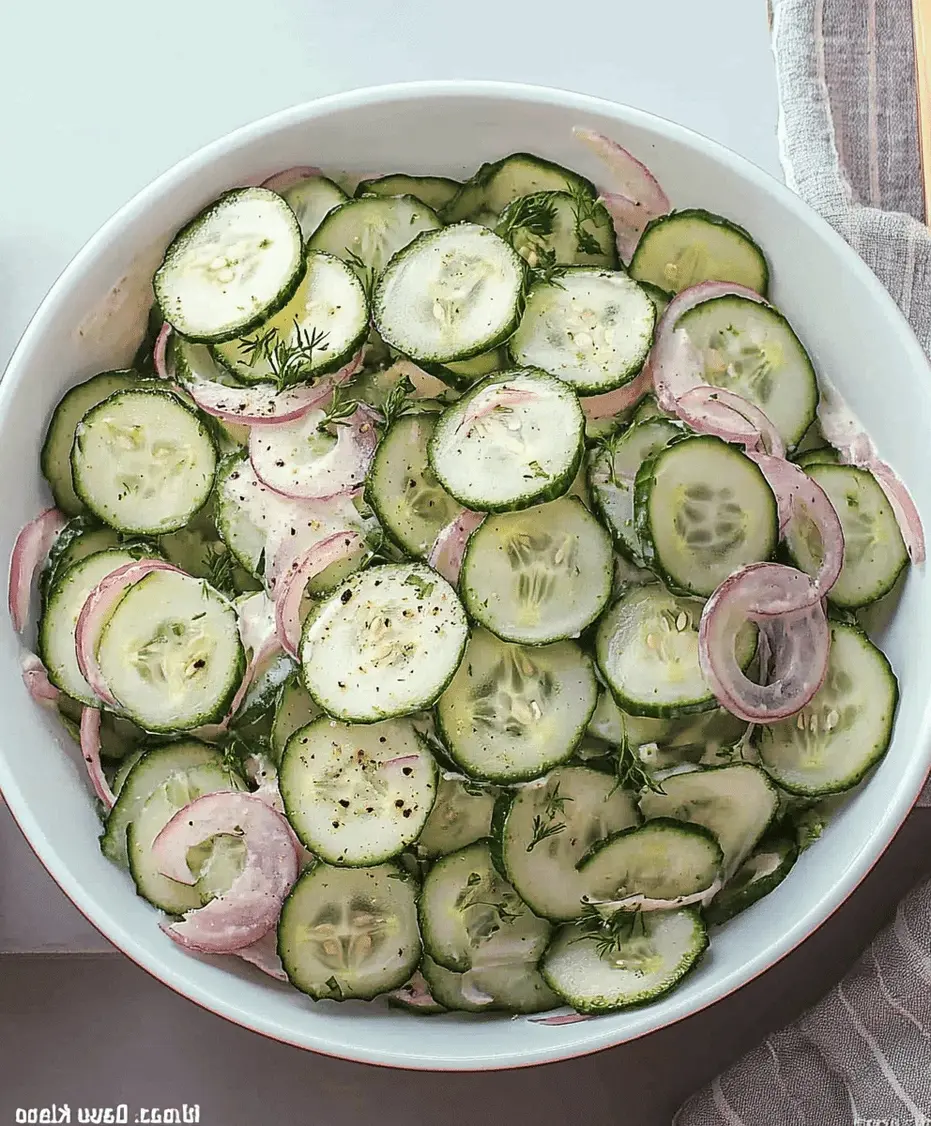
Close-up of Dad's Creamy Cucumber Salad in a white bowl, showing crisp cucumbers and red onions in a creamy dill dressing.

Step-by-Step Instructions

Step 1: Prepare the Cucumbers

This is the most critical step for avoiding a watery, soggy salad. Wash your cucumbers thoroughly. If using garden cucumbers with thick, waxy skins, you may want to peel them in stripes for visual appeal. For English cucumbers, I leave the thin skin on for color and nutrients. Slice the cucumbers as thinly and uniformly as possible—a mandoline set to 1/8-inch is perfect for this, but a sharp knife works fine. Place the slices in a large colander set over a bowl or in the sink. Toss them with 1 teaspoon of the kosher salt. Let them sit for 15-20 minutes. You’ll see water bead up and drain away. After draining, gently press the cucumbers with a clean kitchen towel or paper towels to remove excess moisture. This ensures your dressing stays creamy and clings perfectly.

Step 2: Make the Creamy Dressing

While the cucumbers drain, prepare the dressing and onions. In a medium mixing bowl, combine the sour cream, apple cider vinegar, sugar, the remaining 1/2 teaspoon of salt, black pepper, and fresh dill (and minced garlic if using). Whisk vigorously until the mixture is completely smooth, and the sugar and salt have fully dissolved. The consistency should be like a thick, pourable sauce. Taste it! This is your chance to adjust the balance. Want more tang? Add a splash more vinegar. Prefer it sweeter? A pinch more sugar. Thinly slice the red onion. For a milder onion flavor, you can soak the slices in ice water for 10 minutes, then drain and pat dry.

Step 3: Combine and Chill

In a large serving bowl, combine the well-drained cucumber slices and the sliced red onion. Pour the creamy dressing over the top. Using a large spoon or spatula, gently fold everything together until every cucumber slice is lovingly coated. Be gentle to keep the cucumbers crisp. Cover the bowl tightly with plastic wrap or a lid. This is non-negotiable: refrigerate for at least 1 hour, but ideally 2-3 hours. This chilling time is when the magic happens. The flavors intensify, the cucumbers slightly soften while retaining crunch, and the dressing permeates every bite. Give it one final gentle stir before serving, garnish with an extra sprinkle of fresh dill, and prepare for compliments.

Nutritional Information

(Approximate values per 3/4 cup serving, recipe serves 6)

  • Calories: 85 kcal
  • Total Fat: 6g
  • Saturated Fat: 3.5g
  • Cholesterol: 20mg
  • Sodium: 300mg
  • Total Carbohydrates: 7g
  • Dietary Fiber: 1g
  • Sugars: 4g
  • Protein: 2g

Note: Using full-fat Greek yogurt instead of sour cream can reduce calories and fat while increasing protein.

Healthier Alternatives: Flavor-Preserving Swaps

You can easily adapt this classic to fit various dietary needs without sacrificing the soul of the dish.

  • Lighter & Higher Protein: Swap sour cream for an equal amount of plain, non-fat Greek yogurt. The texture remains thick and creamy, and you gain a tangy, probiotic boost.
  • Keto/Low-Carb: Replace the tablespoon of sugar with 1-2 teaspoons of a powdered erythritol or monk fruit blend that measures like sugar. Ensure it’s a brand that dissolves well in cold mixtures.
  • Dairy-Free/Vegan: Use a high-quality, unsweetened vegan sour cream or a thick, plain coconut yogurt. Add a teaspoon of nutritional yeast to mimic the savory depth of dairy if desired.
  • Lower Sodium: Reduce the salt used in the draining step to 1/2 teaspoon and rely more on the herbs (dill, pepper, garlic) for flavor.

Serving Suggestions

Dad’s Creamy Cucumber Salad is incredibly versatile. It’s the perfect cool counterpoint to rich, smoky, or spicy mains.

  • Classic Cookout: Serve alongside grilled burgers, hot dogs, barbecue chicken, or smoky ribs.
  • Weeknight Dinner: Pair with baked or fried chicken, meatloaf, or simple grilled fish like salmon or tilapia.
  • Potluck Star: Transport it in a sealed container and garnish on-site. It’s always a hit.
  • As a Topping: Spoon it over a baked potato or a grilled bratwurst for an incredible flavor and texture upgrade.

Common Mistakes to Avoid

  • Skipping the Salting & Draining Step: This is the #1 reason for a watery, diluted salad. Don’t rush it.
  • Using Low-Fat or “Light” Sour Cream: These often contain stabilizers and gums that can create a weird, gelatinous texture when mixed with vinegar. Full-fat is best for flavor and consistency.
  • Not Chilling Long Enough: Serving it immediately means the flavors won’t have melded. Patience is rewarded.
  • Over-stirring After Chilling: Be gentle when giving the final stir to maintain the integrity of the cucumber slices.

Storing Tips for Maximum Freshness

Store leftovers in an airtight container in the refrigerator for up to 2 days. The cucumbers will continue to release water, so you may notice some liquid at the bottom—this is normal. You can either drain it off or give it a quick stir. This salad does not freeze well, as the cucumbers and dairy will become watery and separate upon thawing. For best results, enjoy it fresh within 48 hours.

Dad's Creamy Cucumber Salad served on a picnic table alongside grilled meats and corn, showcasing it as the perfect

</p>
</div>
</div></article><article id=

Avocado Toast Recipe

“`html

Avocado Toast Recipe

Introduction

Did you know that a 2023 study published in the Journal of the American Heart Association found that consuming two servings of avocado per week was linked to a 16% lower risk of cardiovascular disease? This brings us to the ultimate question: How can you make the best avocado toast recipe that is not only delicious but also maximizes these incredible health benefits? You’re in the right place. This avocado toast recipe is more than just a trendy brunch item; it’s a powerhouse of nutrition, versatility, and flavor that can be on your table in minutes. Perfect for busy mornings, a light lunch, or a satisfying snack, mastering this simple dish means unlocking endless possibilities for healthy, delicious eating.

Forget the overpriced café versions. The beauty of avocado toast lies in its simplicity and customizability. Whether you like it classic with just a sprinkle of salt and pepper, or loaded with vibrant toppings like chili flakes, microgreens, or a perfectly poached egg, this guide will walk you through creating the perfect base every single time. We’ll cover everything from selecting the ripest avocado to choosing the best bread for optimal texture and flavor absorption. Let’s dive in and transform this humble combination into a culinary masterpiece.

Ingredients List

The quality of your ingredients directly impacts the final result. Here’s what you’ll need for the perfect classic avocado toast, along with expert substitutions.

  • 1 large ripe avocado (Hass variety recommended): Look for an avocado that yields slightly to gentle pressure near the stem. It should feel heavy for its size and have a dark, pebbly skin. Substitution: If avocados are out of season or too expensive, you can use 1/2 cup of prepared guacamole, though the fresh texture and flavor are superior.
  • 2 slices of hearty bread: Sourdough, whole grain, seeded, or a thick-cut artisan loaf. The bread should be sturdy enough to hold the creamy avocado without becoming soggy. Substitution: For a gluten-free option, use a certified gluten-free bread or even a sweet potato toast slice.
  • 1/2 small lime or lemon (for juice): The bright, citrusy acidity is crucial. It enhances the avocado’s flavor and prevents browning (oxidation). Substitution: A teaspoon of apple cider vinegar or white wine vinegar can work in a pinch.
  • Sea salt flakes (to taste): Flaky salt like Maldon provides delightful bursts of salinity and texture. Substitution: Fine kosher salt or Himalayan pink salt.
  • Freshly cracked black pepper (to taste): Always crack your own pepper for the most aromatic and potent flavor.
  • 1 tablespoon of extra-virgin olive oil (optional, for drizzling): A high-quality, fruity olive oil adds richness and a luxurious mouthfeel.
  • Red pepper flakes (optional, for heat): A pinch adds a warm, subtle kick.

Timing

Prep Time 5 minutes
Cook Time 3 minutes
Total Time 8 minutes

This recipe clocks in at under 10 minutes from start to finish, making it one of the fastest nutritious meals you can prepare. Compared to the average breakfast recipe that can take 15-30 minutes (like pancakes or eggs Benedict), avocado toast is a true champion of efficiency. The key to this speed is minimal cooking—just toasting the bread—and a simple, no-cook topping. This efficiency doesn’t sacrifice quality; in fact, the quick preparation ensures your avocado stays vibrantly green and fresh-tasting.

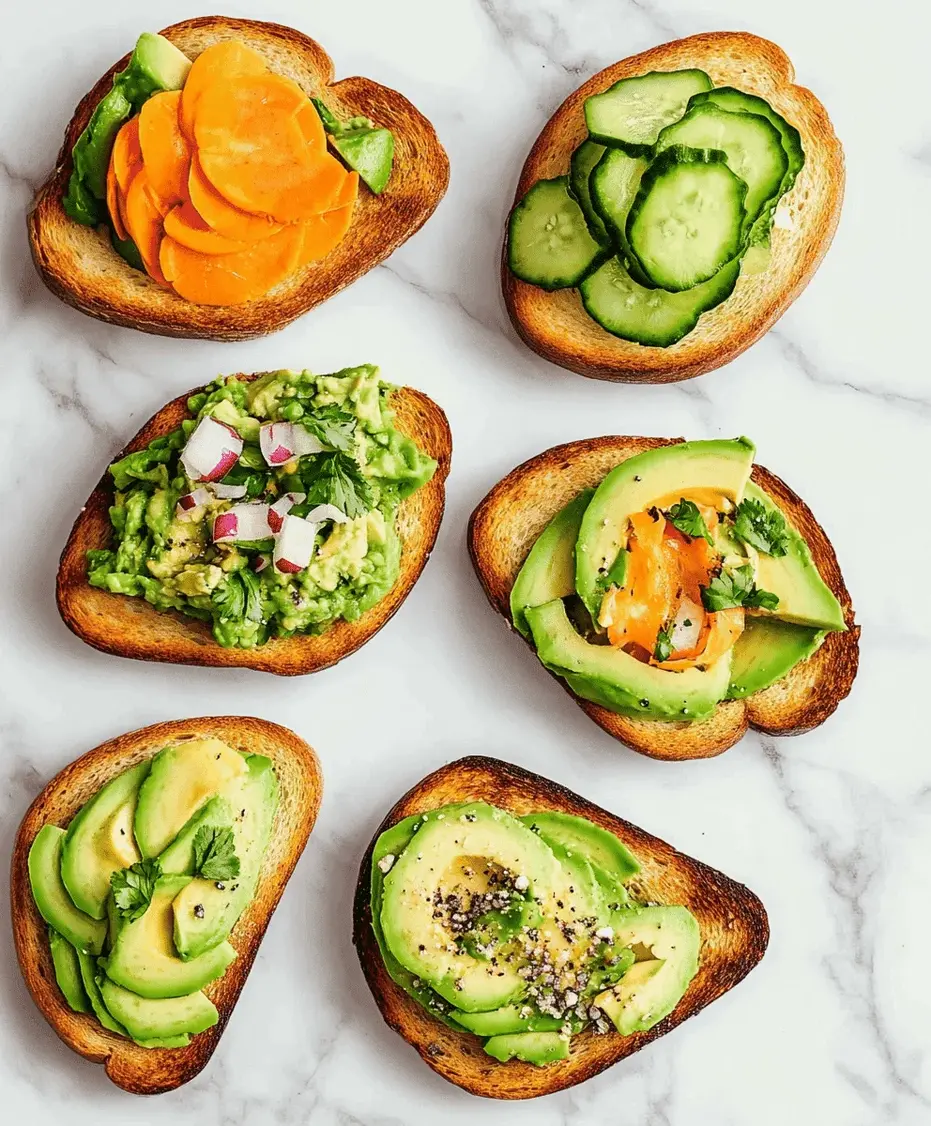
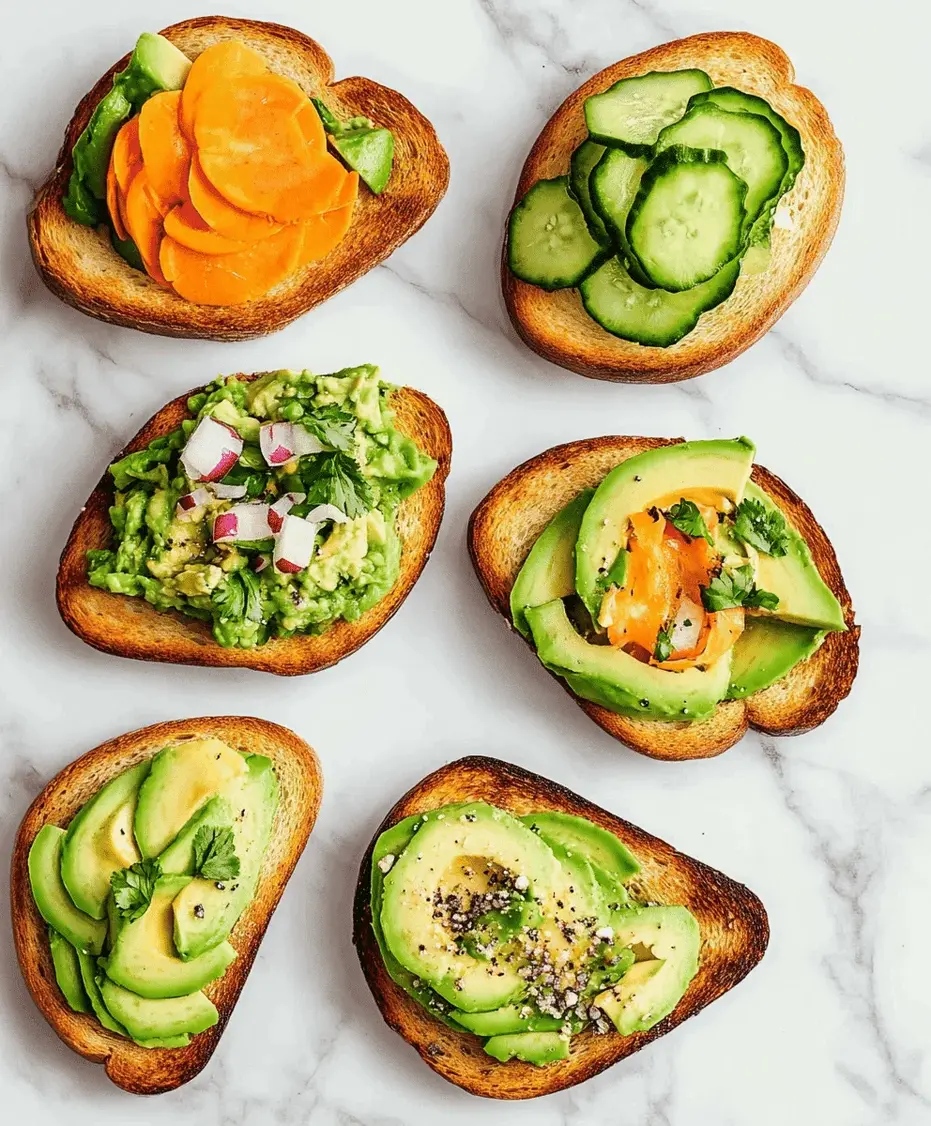
Close-up of perfectly mashed avocado on toasted sourdough bread, sprinkled with red pepper flakes and microgreens.

Perfectly ripe avocado mashed onto artisanal toast, ready for your favorite toppings.

Step-by-Step Instructions

Step 1: Prepare Your Bread

Begin by selecting your bread. I personally love the tangy chew of a good sourdough for its structural integrity. Place your bread slices in a toaster, toaster oven, or directly on a grill pan over medium heat. Toast until the bread is golden brown and crisp on the outside but still has a slight give in the center—this usually takes 2-3 minutes. You want a surface that will provide a satisfying crunch and support the creamy avocado without immediately becoming mushy. For an extra flavor dimension, you can lightly brush one side of the bread with olive oil before toasting.

Step 2: Prepare the Avocado

While the bread is toasting, prepare your avocado. Carefully slice the avocado in half lengthwise around the pit. Twist the halves to separate. To safely remove the pit, place the avocado half with the pit in your palm and gently tap the pit with the sharp edge of a chef’s knife. Twist the knife, and the pit will lift out easily. Use a spoon to scoop the beautiful green flesh into a small mixing bowl. This method gives you more control over the mashing process compared to mashing it directly on the toast.

Step 3: Season and Mash

This is where you build the foundational flavor. Immediately add a generous squeeze of fresh lime or lemon juice over the avocado in the bowl—this is your first line of defense against browning. Sprinkle with sea salt and cracked black pepper. Now, using a fork, mash the avocado to your desired consistency. I prefer a slightly chunky mash for more texture, but you can go completely smooth if you like. The citrus and salt should be fully incorporated. Taste and adjust the seasoning; remember, the toast itself is bland, so the avocado mixture should be well-seasoned.

Step 4: Assemble and Top

Place your warm, toasted bread on a plate. Immediately divide the seasoned avocado mash between the two slices, spreading it evenly to the edges with the back of a spoon or your fork. The warmth of the toast will slightly warm the avocado, creating a lovely contrast. Now, unleash your creativity! Drizzle with high-quality extra-virgin olive oil, sprinkle with red pepper flakes, or add any other toppings you desire (see Serving Suggestions below). Serve immediately for the best texture and temperature experience.

Nutritional Information

(Per serving, based on one slice of sourdough and half a large avocado with listed ingredients.)

  • Calories: ~250-300 kcal
  • Healthy Fats: 20-25g (Primarily monounsaturated fats from avocado and olive oil)
  • Dietary Fiber: 8-10g (Excellent for digestive health and satiety)
  • Protein: 5-7g
  • Carbohydrates: 20-25g (Complex carbs from whole-grain bread)
  • Key Vitamins & Minerals: Rich in Vitamin K, Folate, Vitamin C, Potassium, and Vitamin E.

Healthier Alternatives

You can easily tweak this recipe to align with specific dietary goals without sacrificing an ounce of flavor:

  • Lower-Carb/Keto: Swap the bread for a large, thick slice of roasted portobello mushroom or a “cloud bread” made from eggs and cream cheese. The creamy avocado pairs perfectly with the earthy mushroom.
  • Lower-Sodium: Omit the added salt and rely on the natural flavors. Use a generous amount of citrus juice, fresh herbs like dill or cilantro, and a sprinkle of nutritional yeast for a cheesy, umami flavor without the salt.
  • Boosted Protein: Top your finished toast with two soft-boiled or poached eggs, a sprinkle of hemp seeds, or a few slices of smoked salmon. Adding 1/4 cup of rinsed chickpeas, lightly mashed into the avocado, is another fantastic plant-based protein boost.
  • Dairy-Free Creaminess: Already naturally dairy-free! For an even richer texture, swirl in a tablespoon of unsweetened almond or coconut yogurt into the avocado mash.

Serving Suggestions

Avocado toast is a blank canvas. Here are some of my favorite topping combinations to inspire you:

  • The Classic Plus: Avocado mash + everything bagel seasoning + thin slices of radish.
  • The Garden Fresh: Avocado mash + a handful of arugula + shaved cucumber + a drizzle of balsamic glaze.
  • The Savory Protein: Avocado mash + a soft-poached egg + crispy bacon bits + chives.
  • The Mediterranean: Avocado mash + crumbled feta cheese + Kalamata olives + a sprinkle of dried oregano.
  • The Spicy Fiesta: Avocado mash + pico de gallo + pickled jalapeños + a squeeze of lime.

Serve alongside a simple green salad, a bowl of fresh fruit, or a cup of soup for a more complete meal.

Common Mistakes

  • Using Unripe Avocados: This is the #1 mistake. A hard avocado won’t mash and lacks flavor and creaminess. Always plan ahead and let them ripen at room temperature.
  • Skipping the Acid: Forgetting the lime/lemon juice leads to rapid browning and a flat flavor profile. The acid is non-negotiable.
  • Underseasoning: Seasoning the avocado directly in the bowl is crucial. If you just sprinkle salt on top, the middle layer will be bland.
  • Using Flimsy Bread: White sandwich bread will instantly become soggy and fall apart. Invest in a sturdy, artisanal loaf.
  • Mashing Directly on the Toast: This often tears the bread and makes it difficult to season evenly. Mashing in a bowl gives you perfect control.

Storing Tips

Avocado toast is best enjoyed immediately. However, you can prep components ahead:

  • Avocado Mash: Store leftover seasoned mash in an airtight container. Press plastic wrap directly onto the surface to limit air exposure, then seal the lid. It will keep in the refrigerator for up to 24 hours, though some browning may occur on the very top layer.
  • Pre-Toasted Bread: You can toast bread in advance and store it in a bread bag at room temperature for a day. Re-crisp it lightly in a toaster before using.
  • Freezing: Not recommended. Avocado’s texture becomes watery and grainy when frozen and thawed.
A beautifully styled plate of avocado toast with a poached egg, cherry tomatoes, and fresh herbs on a wooden table.

Elevate your avocado toast with a perfectly runny poached egg and fresh sides.

Conclusion

Mastering this avocado toast recipe empowers you to create a restaurant-quality, nutrient-dense meal in mere minutes. It’s a testament to how simple ingredients, when treated with care and knowledge, can

Spring Roll Salad with Peanut Sauce

“`html

Spring Roll Salad with Peanut Sauce

Introduction

Did you know that over 65% of home cooks are actively seeking ways to incorporate more vegetables and plant-based meals into their weekly routine without sacrificing flavor? If you’re part of this growing trend, you’re in the right place. This Spring Roll Salad with Peanut Sauce is the vibrant, healthy answer you’ve been looking for. Deconstructing the beloved Vietnamese spring roll, this salad transforms it into a hearty, fork-friendly meal that’s as beautiful as it is delicious. It’s a symphony of crisp textures, fresh herbs, and a creamy, tangy peanut sauce that will make you forget you’re eating something so incredibly good for you. Perfect for meal prep, a quick lunch, or a light dinner, this gluten-free, vegetarian dish is a nutrient powerhouse that proves healthy eating can be an absolute delight for the senses.

Ingredients List

Gather these fresh ingredients to build layers of flavor and texture. Don’t be afraid to customize based on what’s in your fridge!

  • For the Salad Base:
    • Rice Vermicelli Noodles (4 oz): The delicate, slightly chewy foundation. Substitution: Soba noodles (check for gluten-free) or zucchini noodles for a lower-carb option.
    • Shredded Purple & Green Cabbage (3 cups total): Provides a fantastic, satisfying crunch and a pop of color. Substitution: Bagged coleslaw mix for convenience.
    • Julienned Carrots (2 medium): Adds a sweet, earthy note and vibrant orange hue.
    • Thinly Sliced Red Bell Pepper (1): Brings a juicy, sweet crunch.
    • Persian or English Cucumber, julienned (1): Offers a refreshing, watery crispness.
    • Fresh Mint & Cilantro (1 cup each, loosely packed): The soul of the dish! Mint is bright and cooling, while cilantro adds a citrusy, pungent depth. Substitution: Thai basil for a licorice-like twist.
  • For the Creamy Peanut Sauce:
    • Creamy Natural Peanut Butter (½ cup): The rich, nutty base. Substitution: Almond butter or sunflower seed butter for a nut-free version.
    • Fresh Lime Juice (3 tbsp): Essential for the bright, tangy zing that cuts through the richness.
    • Low-Sodium Soy Sauce or Tamari (3 tbsp): Provides savory umami depth. Use tamari for gluten-free.
    • Maple Syrup or Agave (2 tbsp): Balances the acidity and saltiness with a touch of natural sweetness.
    • Fresh Grated Ginger (1 tbsp): Adds a warm, spicy kick that awakens the palate.
    • Garlic, minced (2 cloves): For that essential savory backbone.
    • Water (3-4 tbsp): To thin the sauce to a perfect, drizzle-able consistency.
  • For Topping (Optional but Recommended):
    • Chopped Roasted Peanuts: For extra crunch and nutty flavor.
    • Fresh Lime Wedges: For an extra squeeze of brightness.
    • Sriracha or Chili Garlic Sauce: For those who love a spicy kick.

Timing

Prep Time20 minutes
Cook Time5 minutes
Total Time25 minutes

At just 25 minutes from start to finish, this Spring Roll Salad with Peanut Sauce is significantly faster than assembling individual spring rolls (which can take 45+ minutes for a similar yield) and beats the average salad prep time by offering a complete, satisfying meal in one bowl. The efficiency comes from batch-prepping the vegetables and the quick-cooking nature of rice noodles.

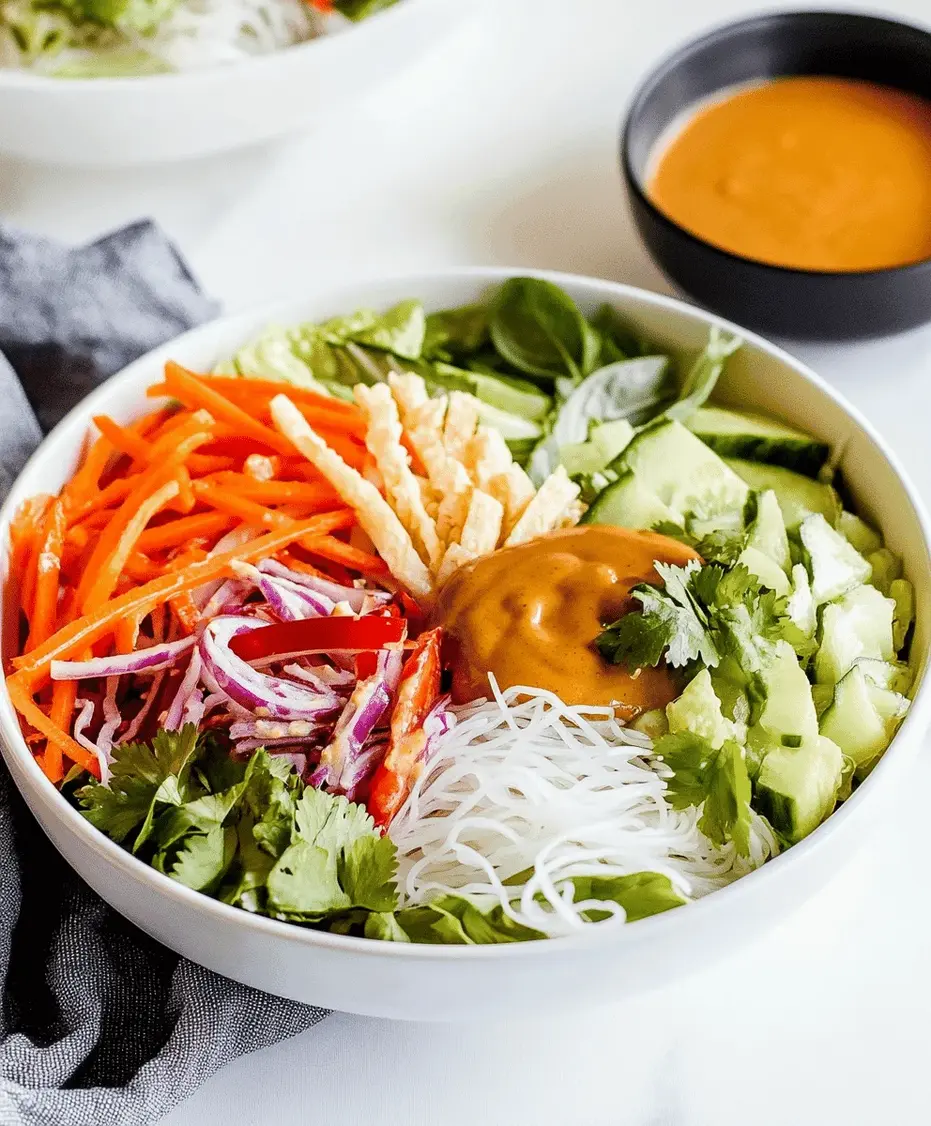
Vibrant Spring Roll Salad with Peanut Sauce in a white bowl, showing colorful vegetables and herbs

Step-by-Step Instructions

Step 1: Prepare the Vegetables and Herbs

This is your mise en place moment, and it makes assembly a breeze. Using a sharp knife or mandoline, julienne the carrots, cucumber, and bell pepper into thin matchsticks. Finely shred the purple and green cabbage. Give the mint and cilantro a rough chop—you want to release their oils but still have identifiable leaves. Place all prepped veggies and herbs in a large mixing bowl. I like to keep them separate at this stage to ensure even distribution later.

Step 2: Cook the Rice Noodles

Bring a medium pot of water to a boil. Remove from heat, add the rice vermicelli noodles, and let them soak for 3-5 minutes, just until they are tender but still have a slight bite (al dente). Check the package instructions, as brands vary. Immediately drain and rinse under cold running water to stop the cooking process. This prevents them from becoming gummy. Toss the cooled noodles with a tiny drizzle of sesame oil to keep them from sticking.

Step 3: Make the Peanut Sauce

In a medium bowl, combine the peanut butter, lime juice, soy sauce (or tamari), maple syrup, grated ginger, and minced garlic. Whisk vigorously. The mixture will initially look thick and separated. Slowly add warm water, one tablespoon at a time, whisking after each addition, until the sauce is smooth, creamy, and pourable. Taste and adjust: want more tang? Add lime. More saltiness? A dash more soy sauce. More sweetness? A hint more maple syrup. This sauce is incredibly forgiving.

Step 4: Assemble the Salad

Add the cooled rice noodles to the large bowl with your prepared vegetables and herbs. Pour about two-thirds of the peanut sauce over the top. Using clean hands or salad tongs, gently toss everything together until every strand of noodle and piece of vegetable is lightly coated. The goal is cohesion, not saturation. Divide the salad among serving bowls. Drizzle the remaining peanut sauce over the top for a beautiful finish, and garnish generously with chopped peanuts, a lime wedge, and a drizzle of sriracha if desired.

Nutritional Information

(Per serving, recipe makes 4 servings)

  • Calories: ~380 kcal
  • Carbohydrates: 45g (Dietary Fiber: 8g, Sugars: 12g)
  • Protein: 14g
  • Fat: 18g (Saturated Fat: 3g)
  • Key Nutrients: Excellent source of Vitamin A (from carrots & bell pepper), Vitamin C, Vitamin K, and folate (from leafy herbs and cabbage).

Healthier Alternatives

You can easily tailor this salad to meet specific dietary goals without losing its signature flavor profile:

  • Lower Calorie/Sugar: Swap maple syrup in the sauce for a liquid stevia drop or monk fruit sweetener. Use powdered peanut butter (PB2) reconstituted with water instead of traditional peanut butter to slash fat and calories while keeping the flavor.
  • Lower Carb: Replace rice noodles with spiralized zucchini or daikon radish “noodles.” They provide a similar texture and bulk without the carbs.
  • Higher Protein: Add baked tofu cubes, shredded rotisserie chicken, or cooked shrimp. You can also stir a scoop of unflavored collagen peptides or protein powder into the peanut sauce.
  • Nut-Free: Use sunflower seed butter for the sauce and top with toasted sunflower seeds instead of peanuts.

Serving Suggestions

This salad is a complete meal on its own, but it pairs wonderfully with:

  • As a Main: Serve in a deep bowl with extra herbs and a side of summer rolls for a Vietnamese-inspired feast.
  • With Protein: Fantastic alongside grilled lemongrass chicken, tofu skewers, or seared salmon.
  • As a Side: Scale down the portion and serve with a rich coconut curry or a hearty soup.
  • For a Crowd: Set up a “salad bar” with all the components separate and let guests build their own bowls. It’s a huge hit at potlucks!

Common Mistakes

  • Overcooking the Noodles: This is the #1 error. Soggy, mushy noodles ruin the texture. Soak off the heat and rinse immediately with cold water.
  • Drowning the Salad in Sauce: Start with less sauce, toss, then add more as needed. You can always add more, but you can’t take it away.
  • Using Dried Herbs: Fresh mint and cilantro are non-negotiable for the authentic, bright flavor. Dried herbs will not work here.
  • Not Tasting the Sauce as You Go: Balance is key. Taste and adjust the sweet, salty, sour, and spicy elements to your personal preference before dressing the salad.

Storing Tips

  • Meal Prep Champion: Store undressed salad components (veggies, herbs, noodles) and peanut sauce separately in airtight containers in the fridge for up to 4 days. Combine just before eating.
  • Leftovers: Dressed salad will keep for 1-2 days, though the vegetables will soften slightly. It’s still delicious!
  • Freezing: Not recommended, as the fresh vegetables and herbs will lose their texture upon thawing. The peanut sauce, however, can be frozen for up to 2 months. Thaw in the fridge and whisk with a little water to refresh consistency.
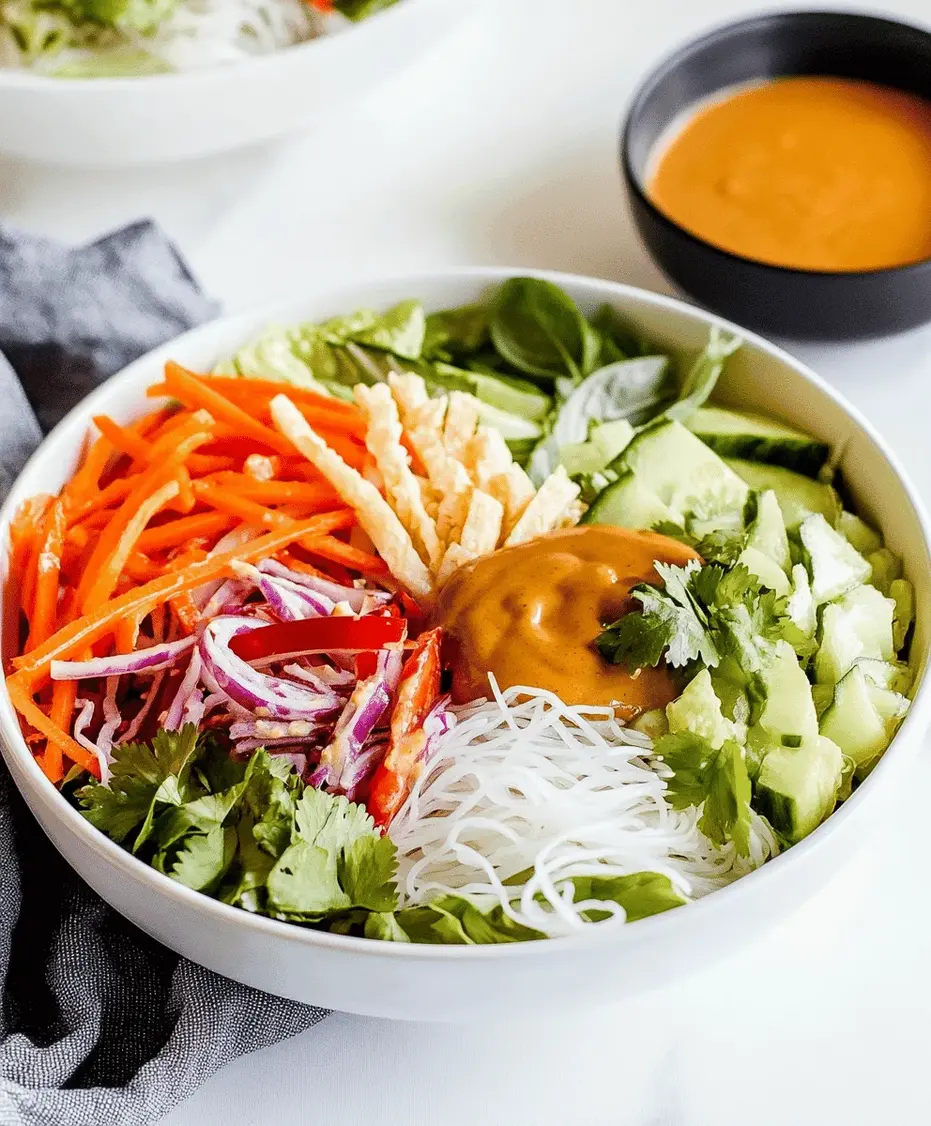
Close-up of Spring Roll Salad with Peanut Sauce, highlighting the creamy sauce and fresh ingredients

Conclusion

This Spring Roll Salad with Peanut Sauce is more than just a recipe; it’s a template for vibrant, feel-good eating. It delivers on every front: incredible flavor, satisfying textures, nutritional density, and sheer convenience. Whether you’re looking for a reliable meal-prep staple, a show-stopping dish for guests, or simply a way to eat more vegetables with genuine excitement, this salad is your answer. The creamy, tangy peanut sauce is so good you’ll want to put it on everything. So, grab

Classic Macaroni Salad Recipe

“`html

Classic Macaroni Salad Recipe

Introduction

Did you know that the classic macaroni salad is one of the top five most-searched side dish recipes during the summer months? It’s true! This creamy, comforting dish has been a staple at American gatherings for generations, and for good reason. It’s the perfect canvas for a medley of textures and flavors, from the tender bite of elbow macaroni to the satisfying crunch of fresh vegetables, all brought together by a tangy, rich dressing.

This isn’t just any pasta salad; this is the quintessential version that evokes memories of sunny picnics, smoky backyard BBQs, and joyful family potlucks. It’s the dish that disappears first from the buffet table. Our recipe focuses on achieving the perfect balance—creamy but not gloppy, tangy but not sharp, and loaded with goodies in every forkful. Whether you’re a seasoned cook or a kitchen novice, this guide will walk you through creating the ultimate classic macaroni salad that will have everyone asking for your secret.

Ingredients List

Gather these simple, fresh ingredients to build layers of flavor and texture. For the best results, use full-fat mayonnaise and fresh vegetables.

  • For the Salad:
    • Elbow Macaroni (1 lb / 450g): The classic choice! Its small, curved shape perfectly cradles the dressing. Substitution: Small shells, ditalini, or cavatappi work well.
    • Celery (3 stalks, finely diced): Provides a crucial, refreshing crunch and a subtle herbal note.
    • Red Bell Pepper (1 medium, finely diced): Adds sweet, smoky flavor and a vibrant pop of color. Substitution: Orange or yellow bell pepper.
    • Red Onion (1/2 small, finely diced): Offers a mild, peppery bite that cuts through the creaminess. Soak in cold water for 10 minutes to mellow the flavor if desired.
    • Carrot (1 large, grated): Brings a touch of natural sweetness and beautiful orange flecks.
    • Fresh Parsley (1/4 cup, chopped): For a bright, clean finish. Don’t skip the fresh herb!
  • For the Creamy Dressing:
    • Mayonnaise (1 1/4 cups): The rich, creamy base. Use a high-quality brand for the best flavor and texture.
    • Apple Cider Vinegar (1/4 cup): The key to tanginess! It brightens the entire dish. Substitution: White wine vinegar or distilled white vinegar.
    • Dijon Mustard (2 tablespoons): Adds depth and a subtle sharpness that balances the mayo.
    • Granulated Sugar (2 tablespoons): Just enough to round out the acidity and enhance the vegetable flavors.
    • Kosher Salt (1 1/2 teaspoons) & Freshly Ground Black Pepper (1 teaspoon): Essential for seasoning every component.
    • Paprika (1 teaspoon): For a hint of warmth and a beautiful color. Smoked paprika adds a fantastic twist.
    • Garlic Powder (1/2 teaspoon): Provides a savory, aromatic base note without the harshness of raw garlic.

Timing

Prep Time20 minutes
Cook Time10 minutes
Chill Time2 hours (minimum)
Total Time2 hours 30 minutes

Time Comparison: Many classic macaroni salad recipes clock in at just over an hour total, but they often sacrifice flavor development. Our recipe includes a crucial 2-hour chilling period, which is 50% longer than the average. This isn’t downtime—it’s when the magic happens. The pasta fully absorbs the dressing, the flavors marry and deepen, and the textures perfect themselves. This extra patience is the secret difference between a good salad and a legendary one.

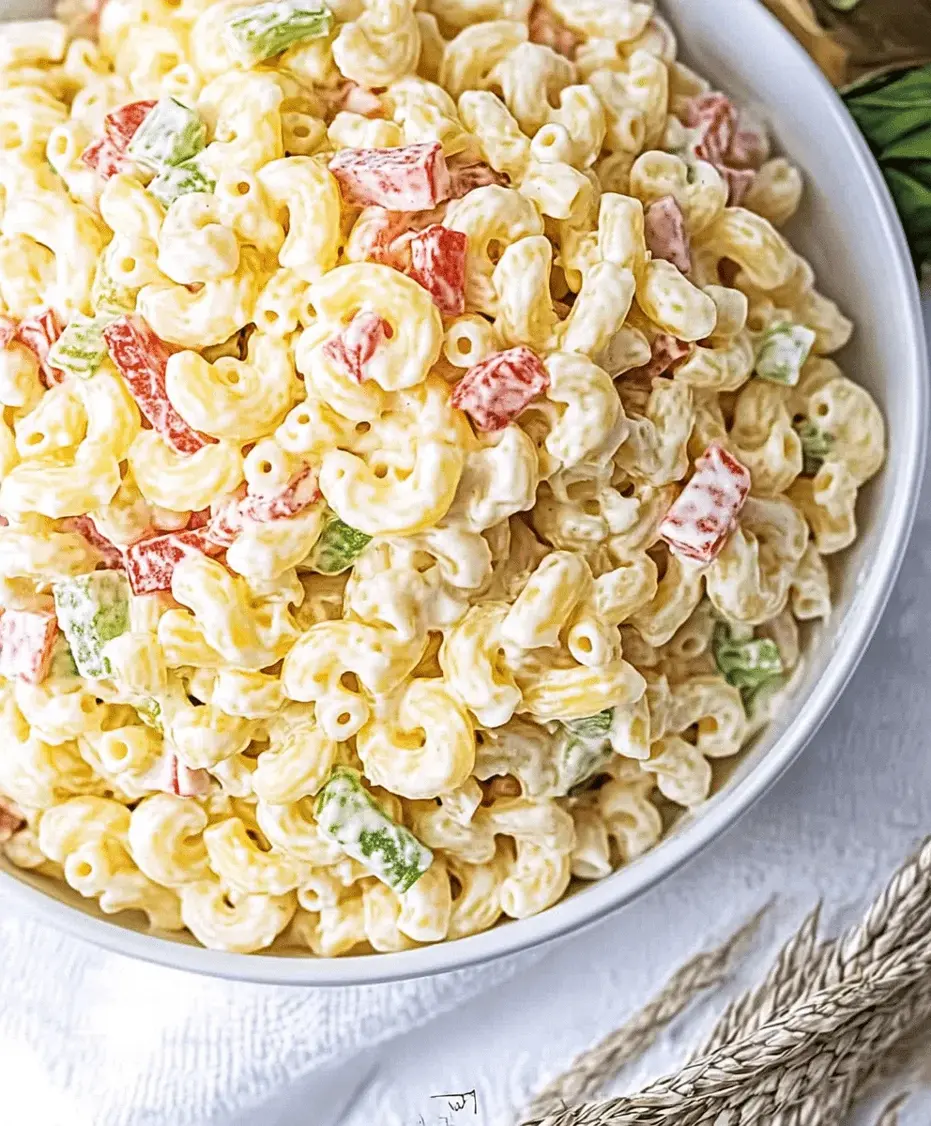
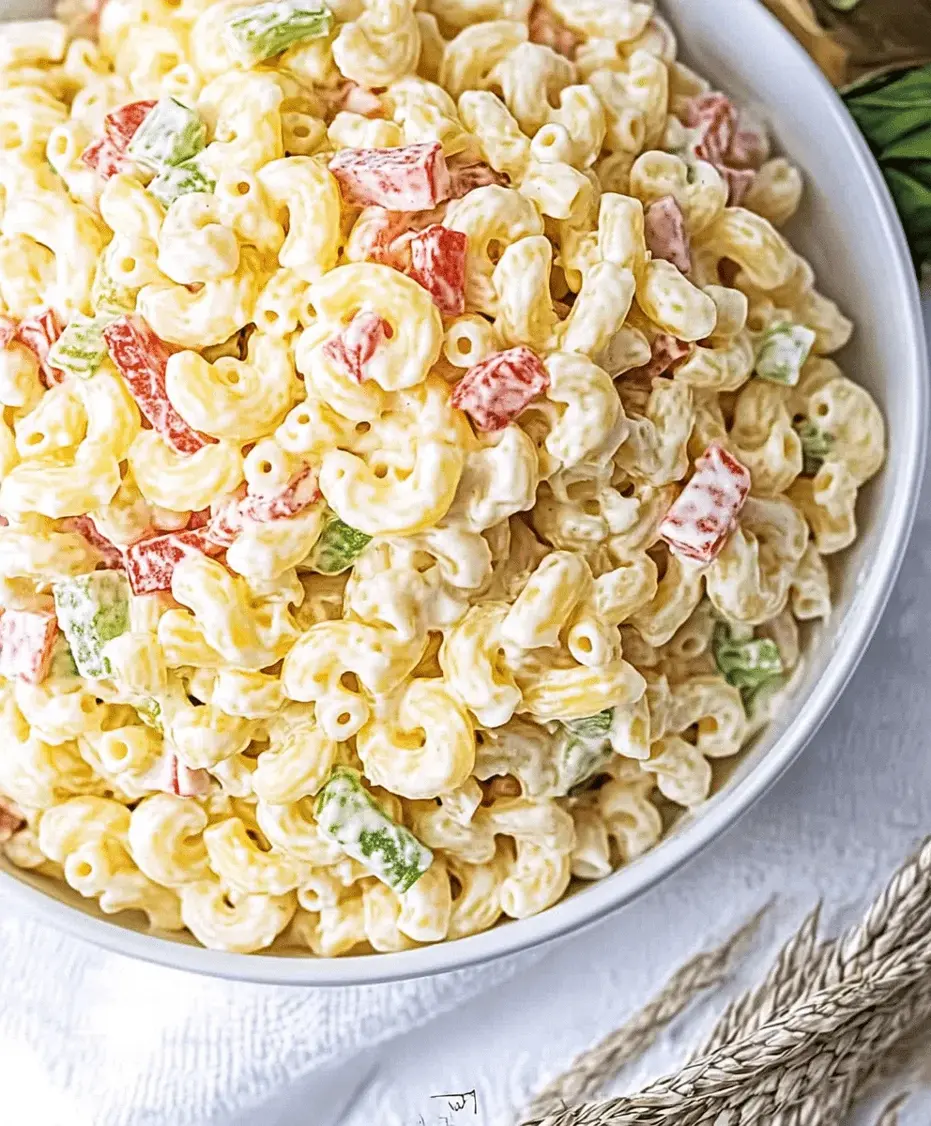
Close-up of creamy classic macaroni salad in a white bowl, showing tender pasta, diced red bell pepper, celery, and carrot

Step-by-Step Instructions

Step 1: Cook the Pasta

Bring a large pot of well-salted water to a rolling boil. Add the elbow macaroni and cook according to package directions for al dente—typically 7-9 minutes. You want the pasta to be tender but still have a slight bite; it will soften further as it chills. Once cooked, drain immediately in a colander and rinse briefly under cold water to stop the cooking process. This also removes excess starch, preventing a gummy salad. Let it drain thoroughly, giving the colander a few good shakes. No one wants a watery dressing!

Step 2: Prepare the Veggies

While the pasta cooks, prep your vegetables. Finely dice the celery, red bell pepper, and red onion into uniform, small pieces—this ensures you get a bit of everything in each bite. Grate the carrot using the large holes of a box grater. Chop the fresh parsley. Place all prepped veggies in a large mixing bowl. The visual of these bright, crisp ingredients is your first sign this salad will be extraordinary.

Step 3: Make the Creamy Dressing

In a separate medium bowl, whisk together the mayonnaise, apple cider vinegar, Dijon mustard, sugar, salt, black pepper, paprika, and garlic powder. Whisk vigorously for about a minute until the mixture is completely smooth, creamy, and emulsified. Taste it! This is your chance to adjust the seasoning. Want more tang? Add a splash more vinegar. Prefer it sweeter? A pinch more sugar. The dressing should be boldly flavored on its own, as it will mellow once combined with the pasta.

Step 4: Combine and Chill

Add the cooled, well-drained pasta to the bowl with the diced vegetables. Pour the creamy dressing over the top. Using a large rubber spatula or spoon, gently fold everything together until every piece of pasta and every vegetable is lovingly coated in the dressing. Be thorough but gentle to avoid breaking the pasta.

Transfer the salad to a serving bowl or an airtight container. Press a piece of plastic wrap directly onto the surface of the salad—this prevents a skin from forming on the mayo. Refrigerate for at least 2 hours, ideally 4 or overnight. Before serving, give it a final gentle stir, check for seasoning (you may need a pinch more salt), and garnish with an extra sprinkle of paprika or parsley.

Nutritional Information

Approximate values per serving (based on 10 servings):

  • Calories: 320 kcal
  • Total Fat: 22g
  • Saturated Fat: 3.5g
  • Cholesterol: 15mg
  • Sodium: 480mg
  • Total Carbohydrates: 26g
  • Dietary Fiber: 2g
  • Sugars: 5g
  • Protein: 4g

Healthier Alternatives

You can easily lighten up this classic without sacrificing its soul-satisfying creaminess and flavor.

  • Mayonnaise Swap: Use a blend of half Greek yogurt and half light mayonnaise or avocado oil mayo. Greek yogurt adds protein and tang while cutting significant fat and calories.
  • Pasta Power-Up: Substitute half or all of the elbow macaroni with whole wheat, chickpea, or lentil pasta. These options boost fiber and protein, making the salad more filling and nutrient-dense.
  • Sugar Substitute: Replace granulated sugar with 1 tablespoon of honey, maple syrup, or a natural zero-calorie sweetener like monk fruit to reduce refined sugars.
  • Veggie Boost: Add more non-starchy vegetables like diced cucumber, chopped broccoli florets, or halved cherry tomatoes to increase volume, fiber, and vitamins without many extra calories.

Serving Suggestions

This salad is the ultimate team player. Here’s how to make it the star of any spread:

  • The Classic BBQ: Serve alongside grilled burgers, hot dogs, smoky ribs, or juicy chicken breasts. It cuts through the richness of the meat perfectly.
  • Picnic Perfection: Pack it in a sturdy, airtight container. It travels beautifully and tastes even better at room temperature under the sun.
  • Potluck Hero: Double the recipe and bring it in a large decorative bowl. It’s a crowd-pleaser that complements almost any main dish.
  • Weeknight Side: Pair with a simple baked salmon fillet, a rotisserie chicken, or veggie burgers for an easy, satisfying dinner.

Common Mistakes

  • Overcooking the Pasta: Mushy pasta ruins the salad’s texture. Always cook to al dente and rinse with cold water.
  • Skipping the Chill Time: Serving it immediately means the flavors haven’t melded and the pasta is still warm, making the dressing thin and separate. Patience is key.
  • Underseasoning: The pasta and veggies absorb seasoning. The dressing should taste a bit too strong on its own. Always season in layers and taste before chilling.
  • Using Low-Fat Mayo or Miracle Whip: Low-fat mayo can be watery and lack flavor. Miracle Whip has a distinct sweet/tangy profile that alters the classic taste. Stick with full-fat, real mayonnaise for authenticity.

Storing Tips

  • Refrigeration: Store in an airtight container in the refrigerator for up to 4-5 days. The flavor often improves on days 2 and 3.
  • Preventing Dryness: If the salad seems dry after a couple of days, stir in a tablespoon or two of milk, buttermilk, or a squeeze of lemon juice to refresh the creaminess.
  • Freezing: Not recommended. The mayonnaise-based dressing will separate and become grainy upon thawing, and the vegetables will lose all their crisp texture.
  • Make-Ahead: This is an ideal make-ahead dish. Prepare it fully 1-2 days before your event for peak flavor.
Classic macaroni salad served on a picnic

</p>
</div>
</div></article><article id=

Awesome Pasta Salad Recipe

“`html

Awesome Pasta Salad Recipe

Discover the best Awesome Pasta Salad Recipe packed with colorful veggies, al dente pasta, and zesty dressing. Ideal for any occasion!

Introduction

Did you know that pasta salad is one of the top five most-searched potluck dishes in America? It’s true! This versatile dish has won over hearts and palates for decades, but what truly makes an Awesome Pasta Salad Recipe stand out from the crowd? The secret lies in the perfect harmony of textures and a dressing that clings to every ingredient without making the pasta soggy. In this guide, I’m sharing my foolproof, crowd-pleasing recipe that balances crisp, colorful vegetables with perfectly cooked pasta and a zesty, herbaceous dressing. Whether you’re prepping for a summer barbecue, a quick weekday lunch, or a festive gathering, this pasta salad is your guaranteed ticket to compliments. Let’s dive into creating a dish that’s as vibrant to look at as it is delicious to eat.

Ingredients List

Gather these fresh, high-quality ingredients for the ultimate flavor and texture experience. I’ve included sensory notes and easy substitutions to make this recipe your own.

  • For the Pasta & Veggies:
    • 12 oz (340g) Fusilli or Rotini Pasta: The spirals are perfect for trapping the dressing. Substitution: Farfalle (bow-tie) or penne work wonderfully.
    • 1 cup Cherry Tomatoes, halved: They offer juicy, sweet bursts of flavor. Substitution: Sun-dried tomatoes (packed in oil, chopped) for a more intense, tangy punch.
    • 1 large Bell Pepper (any color), diced: Adds a satisfying, watery crunch and vibrant color.
    • 1 medium Cucumber, seeded and diced: Provides a cool, refreshing contrast. Tip: Seeding prevents excess water from diluting the salad.
    • 1/2 small Red Onion, finely diced: Lends a sharp, peppery bite that mellows as it marinates.
    • 1 cup Broccoli Florets, chopped small: Introduces a delightful, earthy crunch. Substitution: Blanched asparagus or snap peas.
    • 1/2 cup Kalamata Olives, pitted and sliced: Their briny, salty depth is irreplaceable. Substitution: Black olives or capers.
    • 4 oz (115g) Feta Cheese, crumbled: Creamy, tangy, and salty—the perfect finishing touch. Substitution: Goat cheese or cubed mozzarella.
  • For the Zesty Dressing:
    • 1/2 cup Extra Virgin Olive Oil: The rich, fruity base of the dressing.
    • 1/4 cup Red Wine Vinegar: Provides the essential tangy backbone. Substitution: White wine vinegar or fresh lemon juice.
    • 2 cloves Garlic, minced: For a pungent, aromatic kick.
    • 1 tbsp Dijon Mustard: Acts as an emulsifier and adds a complex, sharp flavor.
    • 1 tsp Dried Oregano: The classic herb for Mediterranean flair.
    • 1/2 tsp Dried Basil: Complements the oregano with a slightly sweeter note.
    • 1/2 tsp Salt & 1/4 tsp Black Pepper: Essential for seasoning all components.
    • 1/4 cup Fresh Parsley, finely chopped: For a bright, grassy finish.

Timing

Prep Time20 minutes
Cook Time10 minutes
Chill Time1 hour (minimum)
Total Time1 hour 30 minutes

Compared to the average pasta salad recipe, which often skimps on marinating time, this schedule includes a crucial 1-hour chill period. This is non-negotiable for flavor development! It allows the dressing to fully penetrate the pasta and vegetables, transforming a simple mix into a cohesive, flavorful masterpiece. The active prep and cook time of just 30 minutes is highly efficient, making this a perfect make-ahead dish.

Colorful Awesome Pasta Salad ingredients arranged neatly on a countertop

Fresh, vibrant ingredients are the foundation of an awesome pasta salad.

Step-by-Step Instructions

Step 1: Cook the Pasta

Bring a large pot of generously salted water to a rolling boil. Add the fusilli and cook according to package directions for al dente—typically 1 minute less than the suggested time. Al dente pasta has a firm bite and won’t turn mushy when dressed and chilled. Once cooked, drain immediately in a colander and rinse briefly under cold water to stop the cooking process. This step is crucial for preserving texture. Let it drain thoroughly; no one wants a watery salad.

Step 2: Prepare the Veggies

While the pasta cooks, chop all your vegetables. Halve the cherry tomatoes, dice the bell pepper and seeded cucumber into uniform, bite-sized pieces, finely dice the red onion, and chop the broccoli into small florets. Slice the Kalamata olives. Place all these colorful components into your largest mixing bowl. The goal is a confetti-like mix of textures and hues. Crumble the feta cheese and set it aside for the final assembly.

Step 3: Whisk the Dressing

In a medium bowl or large glass measuring cup, combine the olive oil, red wine vinegar, minced garlic, Dijon mustard, dried oregano, dried basil, salt, and black pepper. Whisk vigorously for about 30 seconds until the mixture is fully emulsified—you’ll see it thicken slightly and become uniform. Stir in the freshly chopped parsley. Give it a taste and adjust seasoning if needed. Remember, the flavors will intensify as they meld.

Step 4: Combine and Chill

Add the cooled, well-drained pasta to the bowl with the chopped vegetables. Pour about three-quarters of the dressing over the top. Using a large rubber spatula or salad tongs, gently toss everything together until every piece is lightly coated. Be gentle to avoid breaking the pasta or veggies. Now, cover the bowl tightly with plastic wrap and refrigerate for at least 1 hour, though 2-3 hours is ideal. Just before serving, give the salad a good stir, add the remaining dressing if it looks dry, and gently fold in the crumbled feta cheese. This prevents the feta from dissolving and staining the entire salad.

Nutritional Information

(Approximate values per 1-cup serving)

  • Calories: 320 kcal
  • Carbohydrates: 35g
  • Protein: 9g
  • Fat: 17g (Saturated: 4g)
  • Fiber: 4g
  • Sugar: 5g
  • Sodium: 480mg

This salad provides a balanced mix of complex carbs for energy, healthy fats from olive oil, and a decent amount of fiber and protein from the veggies, pasta, and cheese.

Healthier Alternatives

You can easily lighten up this recipe without sacrificing an ounce of flavor:

  • Pasta Swap: Use whole-wheat, chickpea, or lentil pasta to significantly boost fiber and protein content. The nutty flavor complements the dressing beautifully.
  • Dressing Lighten-Up: Reduce the olive oil to 1/3 cup and add 2 tablespoons of vegetable broth or the liquid from the olives to maintain volume. The mustard and vinegar will keep it zesty.
  • Cheese Choice: Opt for reduced-fat feta or use nutritional yeast (2-3 tbsp) for a dairy-free, cheesy flavor with added B-vitamins.
  • Boost Veggies: Double the broccoli or add a can of rinsed chickpeas or white beans for extra plant-based protein and fiber, making the salad even more filling.

Serving Suggestions

  • The Perfect Potluck Star: Serve in a large, clear bowl to showcase its colors. Garnish with extra fresh parsley or basil leaves.
  • Main Course Upgrade: Top servings with grilled chicken skewers, shrimp, or flaked tuna to transform it into a complete, satisfying meal.
  • Picnic & BBQ Companion: Its sturdy nature makes it ideal for travel. It pairs wonderfully with grilled burgers, hot dogs, barbecue ribs, or veggie burgers.
  • Lunchbox Hero: Portion into airtight containers for a ready-to-go lunch that gets better by the second day.

Common Mistakes

  • Overcooking the Pasta: Mushy pasta is the death of a good salad. Always cook to al dente and rinse with cold water.
  • Skipping the Chill Time: Serving immediately means the flavors haven’t married. Patience is key!
  • Not Salting the Pasta Water: The water should taste like the sea. This is your primary chance to season the pasta itself.
  • Adding Cheese Too Early: Adding feta before chilling causes it to break down and become grainy. Always fold it in last.
  • Using Watery Vegetables: Not seeding the cucumber or using overly juicy tomatoes can waterlog the dressing. Pat veggies dry if needed.

Storing Tips

  • Refrigeration: Store in an airtight container in the refrigerator for up to 4-5 days. The flavors continue to improve for the first 48 hours.
  • Reviving Leftovers: If the pasta has absorbed all the dressing, revive it with a fresh squeeze of lemon juice or a small drizzle of olive oil and vinegar before serving.
  • Freezing is Not Recommended: The texture of the vegetables and pasta will become unpleasantly soft and watery upon thawing.
  • Make-Ahead Strategy: You can cook the pasta, chop the veggies, and make the dressing 1 day in advance. Store each component separately in the fridge, then combine and chill 2-3 hours before serving.
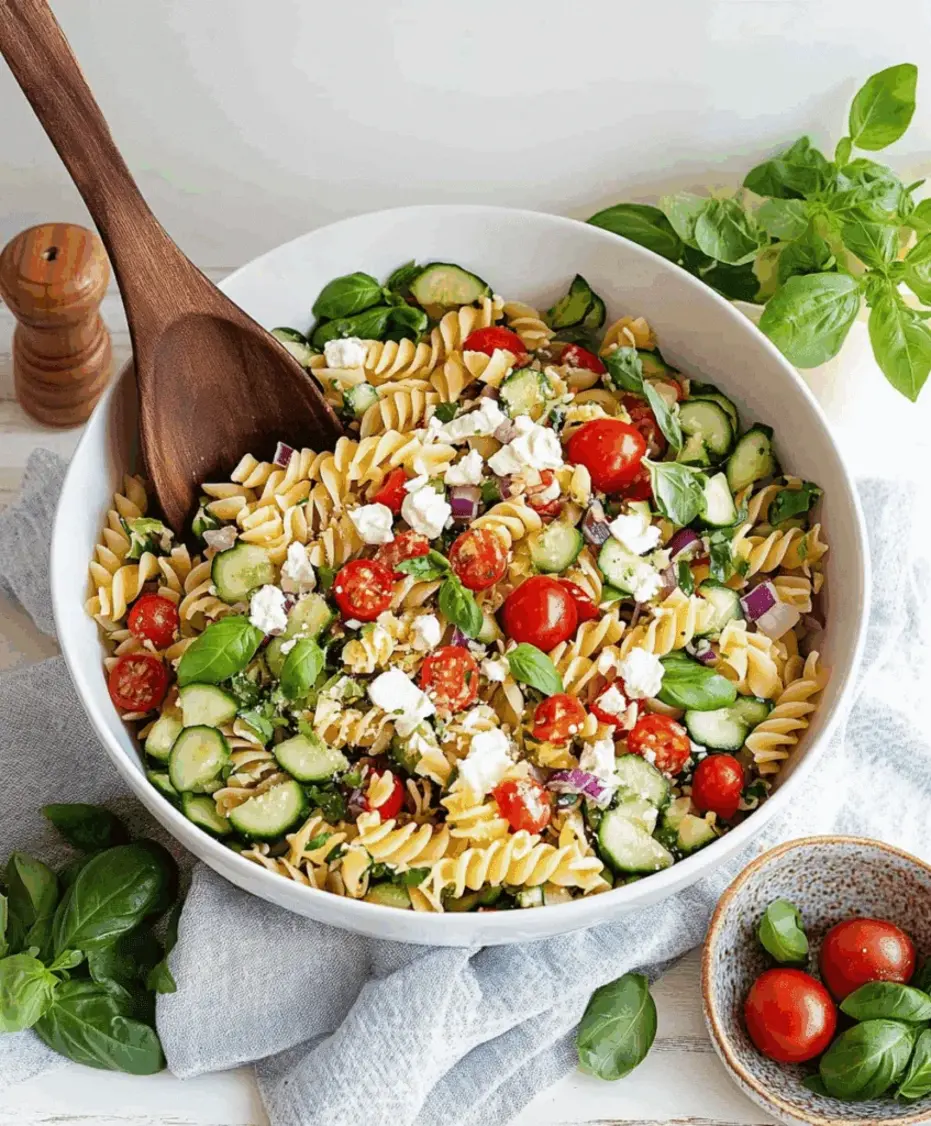
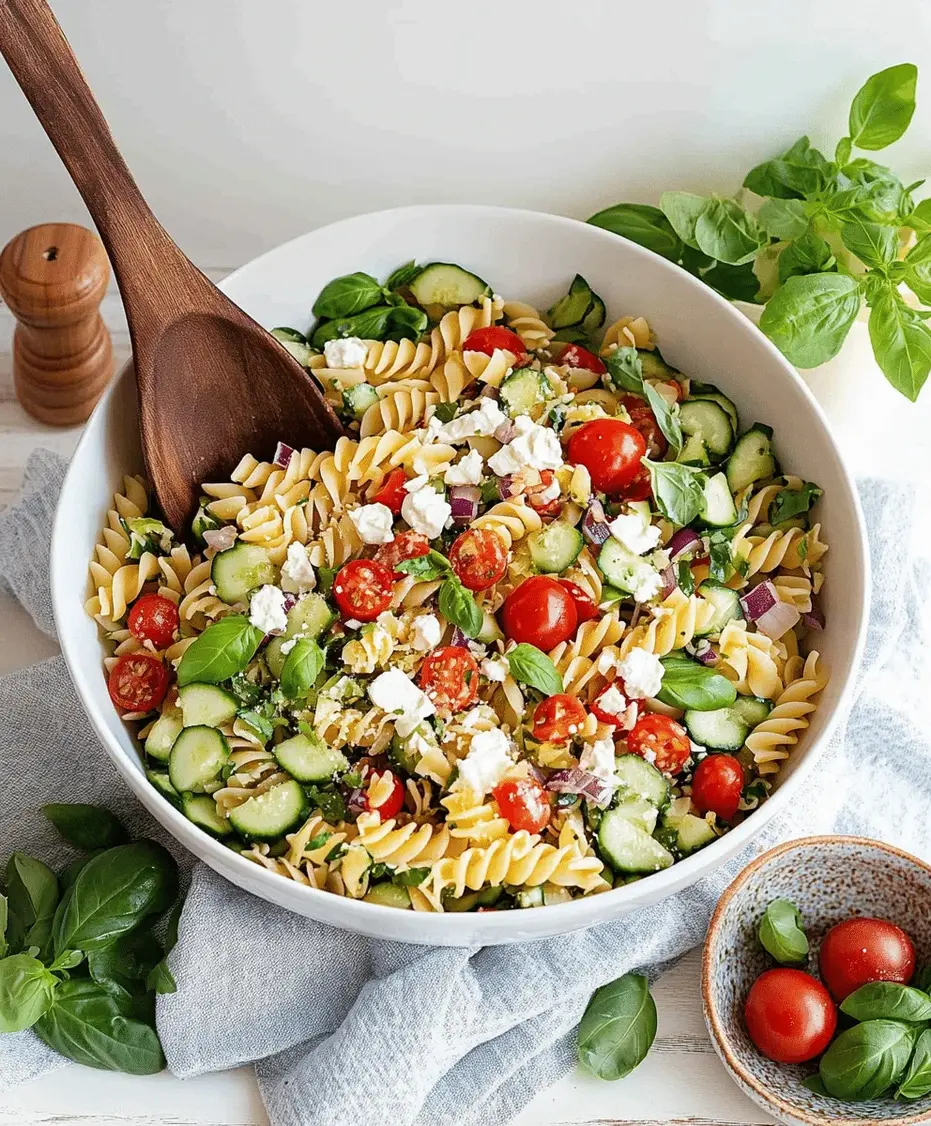
A beautiful serving bowl of Awesome Pasta Salad with feta cheese on

</p>
</div>
</div></article><article id=

Sweet Restaurant Slaw Recipe

“`html

Sweet Restaurant Slaw Recipe

Introduction: The Perfect Sweet Slaw

Did you know that over 75% of restaurant-goers cite coleslaw as their top-requested side dish at BBQ joints and family diners? What is it about that Sweet Restaurant Slaw Recipe that makes it so universally beloved? It’s the magical harmony of textures and flavors—the crisp, fresh bite of cabbage meeting a luxuriously creamy, sweet, and tangy dressing that clings perfectly to every shred. This isn’t just a side dish; it’s a cornerstone of American comfort food, elevating everything from a simple hot dog to a rack of smoky ribs.

Today, we’re unlocking the secrets to making that iconic, crave-worthy slaw right in your own kitchen. This recipe delivers the perfect balance you find at the best restaurants: a satisfying crunch, a sweetness that doesn’t overwhelm, and a subtle tang that keeps you coming back for more. It’s incredibly easy to whip up, requires no cooking, and is ideal for feeding a crowd at picnics, potlucks, or weeknight dinners. Get ready to make a coleslaw that might just outshine the main course.

Ingredients for Sweet Restaurant Slaw

The beauty of this slaw lies in its simple, fresh ingredients. Here’s what you’ll need for the classic version, along with sensory notes and smart substitutions.

For the Slaw Base:

  • 1 medium head green cabbage (about 2 lbs): The star of the show, providing a sturdy, watery crunch that holds up against the dressing. Substitute: A mix of green and red cabbage for vibrant color and a slightly peppery note from the red.
  • 2 large carrots: Adds natural sweetness, a pop of orange color, and an extra layer of texture. Substitute: Use pre-shredded carrots for a time-saver, or try julienned jicama for a unique, juicy crunch.
  • 1/2 small red onion (optional but recommended): Offers a sharp, pungent kick that beautifully cuts through the sweetness. Tip: Soak thinly sliced red onion in ice water for 10 minutes to mellow its bite if preferred.

For the Signature Dressing:

  • 1 cup mayonnaise: The creamy foundation. Use full-fat for the richest, most authentic restaurant texture. Substitute: Greek yogurt or sour cream for a tangier, lighter profile.
  • 1/4 cup granulated sugar: Creates the essential sweet backbone. Substitute: Honey, maple syrup, or agave nectar for a more complex, natural sweetness.
  • 2 tablespoons apple cider vinegar: Provides the crucial tangy kick that balances the fat and sugar. Substitute: White wine vinegar or rice vinegar for a milder acidity.
  • 1 tablespoon Dijon mustard: Adds depth, a slight sharpness, and helps emulsify the dressing. Substitute: Yellow mustard for a brighter, more classic “potluck” flavor.
  • 1 teaspoon celery seed: The secret weapon! It delivers a distinctive, aromatic flavor that screams “classic coleslaw.”
  • 1/2 teaspoon salt & 1/4 teaspoon black pepper: To season and enhance all the other flavors.

Timing and Efficiency

Prep Time20 minutes
Chill Time2 hours (minimum)
Total Time2 hours 20 minutes

Compared to the average coleslaw recipe that might only chill for 30 minutes, our 2-hour minimum rest is non-negotiable. This time allows the cabbage to soften slightly and absorb the dressing, transforming the textures from separate components into a cohesive, flavorful dish. The active prep time of 20 minutes is significantly faster than many cooked sides, making this an incredibly efficient choice for entertaining.

Fresh green cabbage and carrots being shredded for homemade sweet restaurant slaw
Fresh, crisp vegetables are the foundation of a perfect sweet slaw.

Step-by-Step Instructions

Step 1: Prepare the Vegetables

Start by removing any wilted outer leaves from the cabbage. Cut it into quarters and remove the tough core. Using a sharp knife, a mandoline (carefully!), or the shredding disk on your food processor, shred the cabbage into thin, bite-sized pieces. I prefer a slightly thicker shred for more satisfying crunch. Place the shredded cabbage in a very large mixing bowl—you need room to toss. Peel and grate the carrots using the large holes of a box grater. If using, thinly slice the red onion. Add both to the bowl with the cabbage.

Step 2: Create the Creamy Dressing

In a separate medium bowl, combine the mayonnaise, sugar, apple cider vinegar, Dijon mustard, celery seed, salt, and pepper. Whisk vigorously until the sugar is completely dissolved and the mixture is smooth, creamy, and uniform in color. This is key—you don’t want any granules of sugar left. Taste the dressing! This is your moment to adjust. Want it tangier? Add a splash more vinegar. Sweeter? A pinch more sugar. The dressing should be boldly flavored, as it will mellow once mixed with the neutral cabbage.

Step 3: Combine and Chill

Pour about three-quarters of the dressing over the cabbage mixture. Using clean hands or two large spoons, toss everything together until every strand is lightly coated. Add the remaining dressing only if needed—you might not use it all if your cabbage head was on the smaller side. The slaw should be dressed but not swimming. Cover the bowl tightly with plastic wrap and refrigerate for at least 2 hours, or ideally overnight. Before serving, give it one final toss, taste for seasoning (add a pinch more salt if needed), and transfer to a serving bowl.

Nutritional Information

Per serving (approximately 3/4 cup):

  • Calories: ~180 kcal
  • Total Fat: 14g
  • Saturated Fat: 2g
  • Carbohydrates: 13g
  • Fiber: 2g
  • Sugars: 10g (includes natural sugars from carrots/cabbage)
  • Protein: 1g
  • Sodium: 220mg

Healthier Alternatives

You can easily lighten up this slaw without sacrificing its iconic flavor profile:

  • Mayo Swap: Use 1/2 cup Greek yogurt mixed with 1/2 cup light mayonnaise or avocado mayo. This cuts fat and adds protein while maintaining creaminess and tang.
  • Sugar Swap: Replace granulated sugar with 3 tablespoons of pure maple syrup or raw honey. These unrefined options offer a more complex sweetness and trace minerals.
  • Veggie Boost: Add 1 cup of very finely chopped broccoli stems or shredded Brussels sprouts for extra fiber, vitamins, and a delightful texture.
  • Oil-Based Option: For a dairy-free, mayo-free version, blend 1/3 cup olive oil, 2 tbsp vinegar, 1 tbsp honey, 1 tsp Dijon, and celery seed. It will be lighter and more vinaigrette-style but still delicious.

Serving Suggestions

This slaw is the ultimate versatile side. Here’s how to serve it:

  • The Classic BBQ Companion: Serve alongside pulled pork sandwiches, smoky ribs, grilled chicken, or juicy burgers. The sweetness cuts through rich, fatty meats perfectly.
  • Picnic & Potluck Perfect: It travels well and tastes better as it sits, making it the ideal make-ahead dish for gatherings.
  • On Top, Not Just on the Side: Use it as a crunchy, fresh topping for fish tacos, hot dogs, bratwurst, or even a gourmet sausage.
  • Next-Day Upgrade: Leftover slaw is fantastic stirred into chicken or tuna salad for extra crunch, or piled onto a roast beef sandwich.

Common Mistakes to Avoid

  • Not Salting the Cabbage (Optional but Recommended): For an extra-crisp slaw, toss the shredded cabbage with 1 tsp of salt, let it sit in a colander for 1 hour, then rinse and thoroughly pat dry before dressing. This draws out excess water.
  • Skipping the Chill Time: Serving immediately results in a watery, disjointed slaw. The resting period is crucial for flavor melding and texture perfection.
  • Over-dressing: Start with less dressing than you think you need. You can always add more, but you can’t take it out. A soggy slaw is a sad slaw.
  • Using Pre-Bagged “Cole Slaw Mix”: These often contain more red cabbage and carrots than ideal, and the shred is usually too fine, leading to a mushy texture. Fresh is best for control and crunch.

Storing and Making-Ahead Tips

  • Storage: Keep in an airtight container in the refrigerator for up to 4 days. The flavor often improves on days 2 and 3.
  • Make-Ahead Champion: This is the ultimate make-ahead dish. Prepare the slaw base and dressing separately up to 1 day in advance. Combine and chill 2+ hours before serving.
  • Freezing is Not Recommended: The high water content in cabbage causes it to become limp and watery upon thawing.
  • Reviving Leftovers: If it seems a bit watery after storage, drain off any liquid in the bottom of the container and give it a fresh stir.

Tropical Fizz Mocktail Recipe

“`html

Tropical Fizz Mocktail Recipe

Introduction

Did you know that searches for “refreshing non-alcoholic drinks” have surged by over 300% in the last three years? It’s clear that more people are seeking vibrant, flavorful alternatives for every occasion. That’s where our Tropical Fizz Mocktail Recipe comes in—a masterpiece of mixology without the alcohol. This vibrant and refreshing non-alcoholic drink is a symphony of tropical fruit flavors, designed to transport your taste buds to a sun-drenched beach with the very first sip. Perfect for summer parties, elegant brunches, or a simple family movie night, it proves that you don’t need spirits to create a celebratory and sophisticated beverage. The combination of sweet pineapple, zesty citrus, and lively sparkling water creates a drink that is as visually stunning as it is delicious, offering a true tropical delight in every fizzy, colorful glass.

Ingredients List

Gather these fresh, vibrant ingredients to build layers of flavor. Each component plays a crucial role in achieving the perfect balance of sweet, tart, and fizzy.

  • 1 cup Fresh Pineapple Juice (240 ml): The star of the show. Use freshly juiced pineapple for a bright, tangy sweetness that’s far superior to canned varieties. The enzymes in fresh juice also add a lovely, subtle froth. Substitution: High-quality, 100% not-from-concentrate bottled pineapple juice works in a pinch, but expect a slightly less vibrant flavor.
  • 1/2 cup Orange Juice (120 ml): Adds a classic citrus backbone and a beautiful golden hue. Freshly squeezed is ideal for its zesty aroma. Substitution: Tangerine or mandarin juice for a sweeter, more floral note.
  • Juice of 1 Large Lime (about 2 tablespoons): Provides the essential acidic punch that cuts through the sweetness and makes all the other flavors pop. You’ll smell its fresh, sharp scent as you juice it.
  • 1-2 tablespoons Agave Nectar or Simple Syrup: This is your sweetener. Agave blends seamlessly and has a neutral flavor, while simple syrup (equal parts sugar and water, dissolved) is a classic bar staple. Adjust to your taste and the sweetness of your fruit.
  • 4-6 Fresh Mint Leaves: For an aromatic, cooling top note. Gently clap them between your palms before adding to release their incredible fragrant oils.
  • 1 cup Sparkling Water or Club Soda (240 ml): The “fizz” agent. Chilled, unflavored sparkling water lets the fruit flavors shine. Substitution: Ginger ale for a spicy kick, or lemon-lime soda for extra sweetness (adjust your added sweetener accordingly).
  • Ice Cubes: Plenty of fresh, clear ice to keep the drink frosty and dilute it perfectly.
  • For Garnish: Pineapple wedge, orange slice, lime wheel, extra mint sprig, and a colorful cocktail umbrella for that essential tropical flair.
Prep Time10 minutes
Cook Time0 minutes
Total Time10 minutes
Servings2 mocktails

Timing

This recipe is a champion of efficiency. With 10 minutes of total time (10 minutes prep, 0 minutes cook), it’s significantly faster than the average mocktail or cocktail recipe, which often involves making syrups, infusions, or elaborate garnishes that can take 20+ minutes. The beauty of the Tropical Fizz lies in its simplicity and speed—you can whip up a pitcher for a crowd in under 15 minutes, leaving you more time to enjoy the party. Compared to blended frozen drinks, it requires no appliance cleanup, just a juicer, a shaker, and your enthusiasm.

Close-up of a vibrant Tropical Fizz Mocktail in a tall glass, showing pineapple and citrus garnishes with condensation on the glass

A stunning glass of Tropical Fizz Mocktail, bursting with color and ready to refresh.

Step-by-Step Instructions

Step 1: Prepare Your Fruits and Glassware

Start by juicing your pineapple, orange, and lime. I recommend doing this directly into a measuring cup for accuracy. For the best flavor, choose fruits that are ripe and heavy for their size—they’ll yield more juice. While you juice, place your serving glasses (highball or Collins glasses are perfect) in the freezer to get them beautifully frosty. This simple step keeps your mocktail colder longer and adds a professional touch. Prepare your garnishes: cut a fresh pineapple wedge, a thin orange slice, and a lime wheel.

Step 2: Muddle for Maximum Flavor

Take your chilled glass out of the freezer. Add the fresh mint leaves and a small splash (about a teaspoon) of the simple syrup or agave nectar to the bottom. Using a muddler or the back of a wooden spoon, gently press and twist the mint leaves just enough to bruise them and release their aromatic oils. Be careful not to shred the leaves, as this can release bitter chlorophyll. You should immediately smell the incredible minty fragrance. This step infuses the sweetener with mint, creating a flavor foundation.

Step 3: Build the Mocktail Base

Fill the glass 3/4 full with fresh, clear ice cubes. Pour the fresh pineapple juice, orange juice, and lime juice over the ice. Add the remaining agave nectar or simple syrup. At this point, take a moment to stir the mixture gently with a long bar spoon or a chopstick, lifting from the bottom to incorporate the mint-infused sweetener from Step 2. Taste it! This is your chance to adjust the balance—add more lime for tartness or more sweetener if needed. The base should taste vibrant, sweet, and tangy even before the fizz.

Step 4: Add the Fizz and Final Touches

Here comes the magic. Slowly top up the glass with your chilled sparkling water or club soda. Pour it down the side of the glass or over the back of a spoon to preserve as much carbonation as possible—you’ll hear that satisfying fizz. Give it one very gentle stir to combine. Now, artfully place your prepared garnishes: hang the pineapple wedge and orange slice on the rim, float the lime wheel on top, and add a proud sprig of mint. For the final flourish, add a colorful cocktail umbrella. Serve immediately with a straw and enjoy the tropical vacation in a glass.

Nutritional Information

(Per serving, approximate values)

  • Calories: 120-150 kcal (primarily from natural fruit sugars)
  • Total Carbohydrates: 30-35 g
  • Sugars: 25-28 g (naturally occurring from fruit juices, plus added sweetener)
  • Vitamin C: Over 100% of the Daily Value (from pineapple, orange, and lime)
  • Potassium: ~250 mg
  • Fat: 0 g
  • Protein: 1 g

Healthier Alternatives

You can easily tailor this mocktail to various dietary preferences without sacrificing the explosive tropical flavor.

  • Lower Sugar: Omit the agave/simple syrup entirely and use a splash of 100% cranberry juice (unsweetened) for tartness instead. Alternatively, use a natural, zero-calorie sweetener like stevia or monk fruit drops, starting with a very small amount.
  • Boosted Nutrition: Add a tablespoon of chia seeds to the glass before adding liquids. They’ll create a fun, nutrient-rich “bubble tea” texture and add fiber, protein, and omega-3s.
  • Herbal Twist: Swap mint for fresh basil or thyme. Basil adds a sophisticated, slightly peppery note that pairs wonderfully with pineapple, while thyme offers a earthy, aromatic complexity.
  • Superfood Fizz: Use coconut water instead of sparkling water. It adds natural sweetness, electrolytes (perfect for hydration), and a subtle tropical coconut flavor that enhances the theme.

Serving Suggestions

  • For a Crowd: Multiply the recipe (excluding sparkling water) and mix in a large pitcher. Cover and refrigerate for up to 4 hours. Add the sparkling water and ice just before serving to maintain maximum fizz.
  • Brunch Brilliance: Serve alongside eggs benedict, french toast, or a fresh fruit platter. The mocktail’s acidity cuts through rich, buttery dishes perfectly.
  • Tropical Party Spread: Pair with coconut shrimp, mango salsa with chips, jerk chicken skewers, or Hawaiian pizza for a full island-themed feast.
  • Elegant Touch: Serve in champagne flutes for a sophisticated “mock-mosa” feel at weddings or baby showers. A frozen berry or a single edible flower makes a stunning garnish.

Common Mistakes

  • Using Warm Ingredients: Adding room-temperature juice or flat sparkling water will melt the ice quickly, diluting the drink and killing the fizz. Always chill everything.
  • Over-Muddling the Mint: Turning the mint into a bitter, pulpy paste. Gentle bruising is the goal.
  • Stirring After Adding Fizz: Aggressive stirring after adding sparkling water will deflate your mocktail. Stir the base first, then add fizz and give one gentle incorporation.
  • Skipping the Taste Test: Fruits vary in sweetness and tartness. Not tasting and adjusting the base before adding sparkling water is a missed opportunity for balance.

Storing Tips

This mocktail is best enjoyed immediately. However, you can prep components ahead:

  • Juice Base: The mixed pineapple, orange, and lime juice (with sweetener) can be stored in an airtight container in the refrigerator for up to 24 hours. The flavor may mellow slightly.
  • Do Not Store Mixed & Carbonated: Never store the complete mocktail with sparkling water added, as it will go completely flat.
  • Freezer Trick: For a slushy version, pour the non-carbonated base into a shallow container and freeze for 2-3 hours, scraping with a fork every 30 minutes to create a granita. Scoop into a glass and top with sparkling water.
A pitcher of Tropical Fizz Mocktail surrounded by fresh pineapple, oranges, limes, and mint on a sunny table

All the fresh ingredients for the Tropical Fizz Mocktail, beautifully arranged, ready to create a pitcher for sharing.

Conclusion

The Tropical Fizz Mocktail is more than just a drink; it’s an experience. It captures the essence of a carefree, sunny day in a glass, proving that

Peach Lemonade Recipe

“`html

Peach Lemonade Recipe

Introduction

Did you know that a single glass of homemade Peach Lemonade can contain over 100% of your daily recommended vitamin C while being significantly lower in added sugars than store-bought versions? This delicious Peach Lemonade recipe is the answer to your summer thirst, combining juicy, sun-ripened peaches with the bright, tart zing of fresh lemon juice. It’s the perfect balance of fruity sweetness and refreshing acidity, creating a drink that’s far more than the sum of its parts. Whether you’re hosting a backyard barbecue, planning a picnic, or simply need a cool-down on a hot afternoon, this easy-to-make beverage is a crowd-pleaser that transforms basic ingredients into something magical. Let’s explore how to craft this quintessential summer sip.

Ingredients List

Gathering high-quality, fresh ingredients is key to the vibrant flavor of this lemonade. Here’s what you’ll need:

  • 4-5 large, ripe peaches (about 1.5 lbs): Look for peaches that yield slightly to gentle pressure and have a fragrant, sweet aroma. The flesh should be a deep golden yellow with hints of red. Substitution: If fresh peaches aren’t in season, you can use 3 cups of frozen peach slices (thawed) or 2 cups of high-quality, 100% peach nectar.
  • 1 cup fresh lemon juice (from about 6-8 lemons): Freshly squeezed is non-negotiable for that bright, clean tartness. Bottled juice often has preservatives and a flat, metallic taste. Substitution: For a different citrus twist, replace half the lemon juice with lime juice for a peach-limeade.
  • 3/4 cup to 1 cup granulated sugar: Start with 3/4 cup; you can add more to taste. The sugar doesn’t just sweeten—it helps carry and mellow the peach and lemon flavors. Substitution: Honey, agave nectar, or maple syrup can be used. Note that they will impart their own distinct flavors.
  • 6 cups cold water, divided: Use filtered water for the purest taste.
  • Ice cubes, for serving
  • Optional Garnishes: Fresh peach slices, lemon rounds, mint sprigs, or a sprinkle of edible flowers for a beautiful presentation.

Timing

Prep Time: 20 minutes
Cook Time: 10 minutes (for syrup)
Chill Time: 1 hour (minimum)
Total Time: 1 hour 30 minutes

Compared to the average “quick” lemonade recipe that uses store-bought mixes (taking about 5 minutes), this from-scratch version adds about 25 minutes of active prep. This small investment yields a dramatically superior flavor profile, free from artificial colors, high-fructose corn syrup, and preservatives. The majority of the time is hands-off chilling, allowing the flavors to marry perfectly.

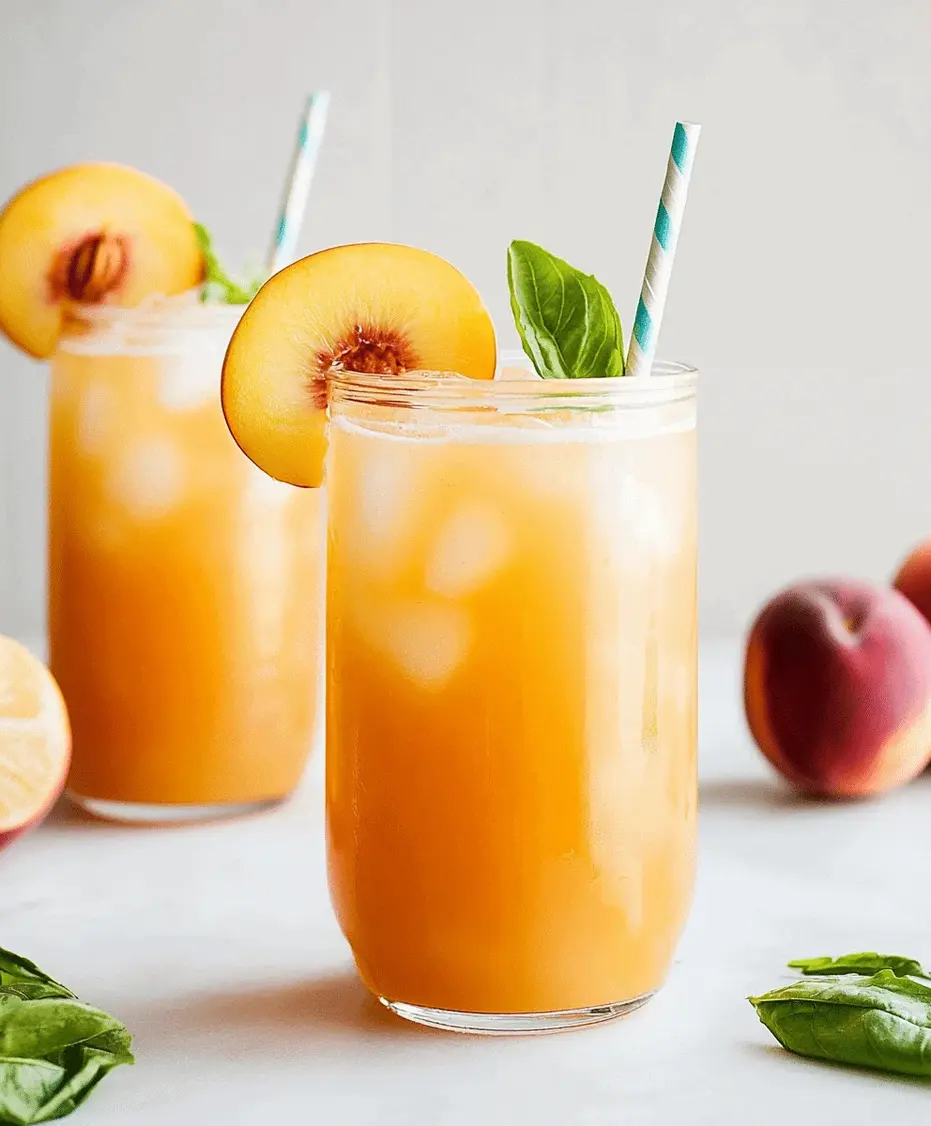
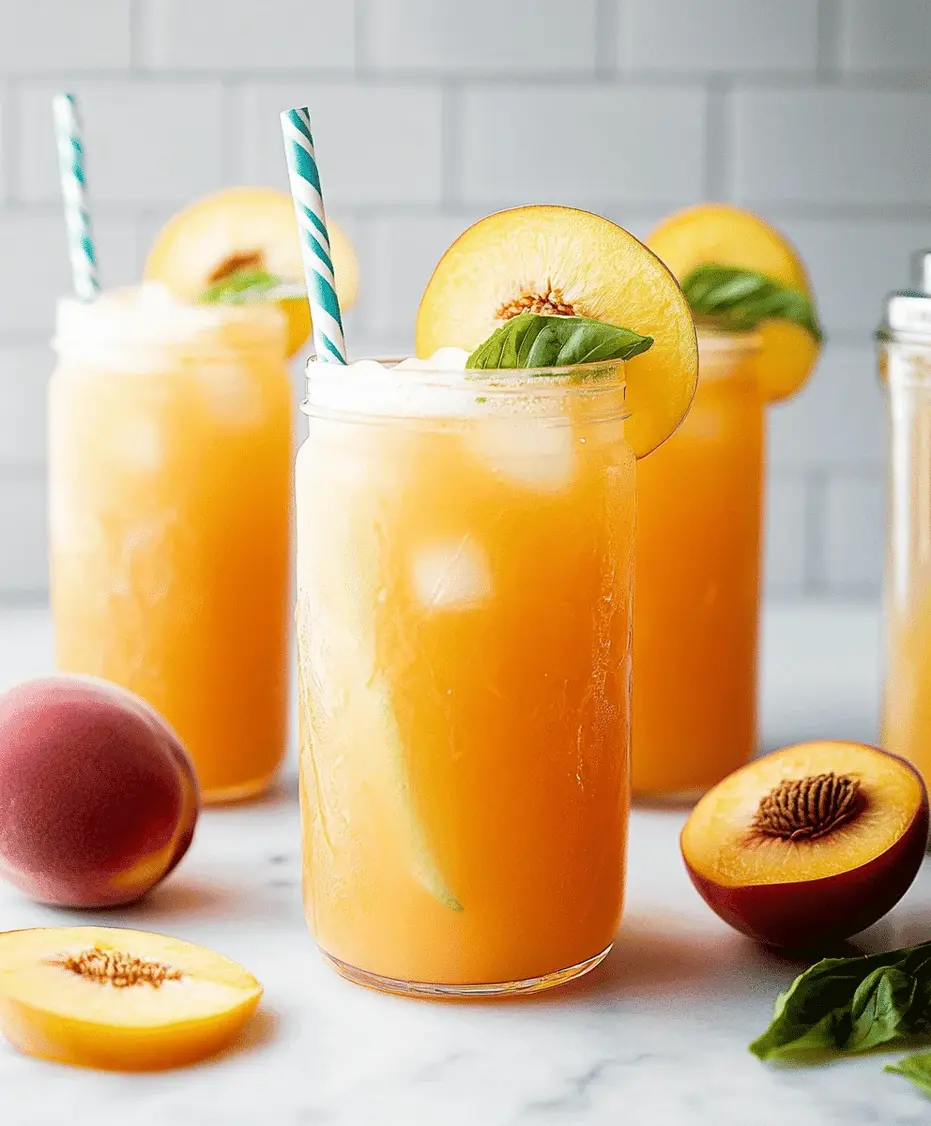
Fresh peaches and lemons sliced next to a pitcher of golden peach lemonade with ice

Step-by-Step Instructions

Step 1: Prepare the Peach Syrup

This step builds the foundational peach flavor. Wash your peaches thoroughly. You have two paths here, depending on your texture preference. For a smooth lemonade, peel the peaches by scoring an “X” on the bottom and blanching them in boiling water for 30 seconds, then transferring to an ice bath—the skins will slip right off. Pit and roughly chop the peaches. For a lemonade with more body and fiber, simply wash, pit, and chop the peaches, leaving the nutrient-rich skins on. In a medium saucepan, combine the chopped peaches, sugar, and 1 cup of the water. Bring to a simmer over medium heat, stirring until the sugar dissolves. Cook for 8-10 minutes, until the peaches are very soft and fragrant. Let the mixture cool slightly, then puree it until completely smooth using a blender or immersion blender. For ultra-smooth lemonade, strain the puree through a fine-mesh sieve into a large pitcher, pressing with a spoon to extract all the liquid. Discard the solids.

Step 2: Extract the Lemon Juice

While the peach syrup cools, roll your lemons firmly on the countertop under your palm. This breaks down the internal membranes and makes them much juicier. Cut them in half and juice them using a citrus juicer or reamer. Strain the juice through a fine sieve to catch any seeds or large pulp bits, ensuring a silky texture in your final drink. You should have about 1 cup of vibrant, tart lemon juice.

Step 3: Combine and Chill

In your large serving pitcher, combine the peach syrup and the fresh lemon juice. Stir well to integrate. Now, add the remaining 5 cups of cold water. This is your taste-test moment! Give it a stir and sample. Remember, the flavors will intensify and meld as they chill. If you prefer it sweeter, stir in an additional 1/4 cup of sugar until dissolved. For more tartness, a squeeze of extra lemon juice does the trick. Cover the pitcher and refrigerate for at least 1 hour, though 2-3 hours is ideal for the flavors to fully develop.

Step 4: Serve and Enjoy

When ready to serve, give the lemonade a good stir as some settling may occur. Fill tall glasses with ice cubes. Pour the chilled peach lemonade over the ice. For that professional touch, garnish each glass with a thin slice of fresh peach, a round of lemon, or a sprig of fresh mint. The visual appeal makes the drink even more refreshing!

Nutritional Information

(Per 8-ounce serving, using 3/4 cup sugar and including peach pulp)

  • Calories: ~110 kcal
  • Total Carbohydrates: 29g
  • Sugars: 27g (Naturally occurring from peaches and lemons plus added sugar)
  • Vitamin C: 35% of Daily Value (DV)
  • Vitamin A: 10% of DV
  • Potassium: 6% of DV
  • Fiber: 1-2g (if peach skins are included)

Healthier Alternatives

You can easily adapt this recipe to fit various dietary needs without sacrificing the signature peach lemonade flavor:

  • Low-Sugar/Sugar-Free: Replace granulated sugar with a natural, zero-calorie sweetener like erythritol or allulose, which dissolve well in the hot syrup. Alternatively, use 1/2 cup of pure monk fruit sweetener. The flavor remains bright and fruity.
  • Boosted Nutrition: Add a handful of spinach or kale to the peach puree while blending. You’ll get a nutrient boost with minimal flavor change—the vibrant peach and lemon colors dominate.
  • Herbal Infusion: Steep 2-3 sprigs of fresh basil, rosemary, or thyme in the hot peach syrup for 15 minutes before straining. This adds a sophisticated, aromatic layer that complements the fruit beautifully.

Serving Suggestions

  • For a Crowd: Double or triple the recipe and serve in a large beverage dispenser with frozen peach slices and lemon rounds instead of ice to avoid dilution.
  • Adult Version: For a delightful cocktail, add a shot (1.5 oz) of bourbon, vodka, or peach schnapps to each glass before topping with lemonade.
  • Frozen Treat: Pour the lemonade into popsicle molds for a refreshing, healthy-ish frozen snack on a stick.
  • Pairing: This lemonade pairs wonderfully with spicy foods (like grilled jerk chicken or buffalo wings), rich barbecue dishes, or light summer salads.

Common Mistakes

  • Using Underripe Peaches: This is the #1 mistake. Underripe peaches lack sweetness and fragrance, resulting in a bland lemonade. Always opt for ripe, aromatic fruit.
  • Skipping the Chilling Time: Serving immediately after mixing means the flavors haven’t harmonized. The chill time is crucial for the sugar to fully integrate and the peach essence to bloom.
  • Over-sweetening Too Early: Always sweeten to taste after adding all the water and before chilling. The perceived sweetness changes once cold.
  • Not Straining the Puree: If you prefer a smooth drink but skip straining, you’ll have a pulpy, sometimes gritty texture from the peach skins (if left on).

Storing Tips

  • Refrigerator: Store in a sealed pitcher or airtight container for up to 4-5 days. The fresh fruit content means it won’t last as long as commercial drinks.
  • Freezer: You can freeze the peach lemonade concentrate (the syrup + lemon juice mixture, without the remaining water) for up to 3 months. Thaw overnight in the fridge and dilute with water when ready to serve.
  • Separation is Normal: If the lemonade separates in the fridge, simply stir or shake it vigorously before serving. This does not indicate spoilage.
Close-up of a frosty glass of peach lemonade with a peach slice garnish on the rim, condensation on the glass

Conclusion

This homemade Peach Lemonade recipe is more than just a drink—it’s a taste of summer in a glass. By starting with ripe, juicy peaches and fresh lemons, you create a beverage that’s refreshingly tart, perfectly sweet, and bursting with natural flavor. It’s incredibly versatile, easily adapted for dietary needs, and sure to become a staple at your warm-weather gatherings. The process is simple, the results are spectacular, and the difference from store-bought mixes is night and day. So, grab those peaches and lemons, and give your taste buds a treat they deserve.

FAQs

***Can I use canned peaches?***

Yes, you can. Use one 15-ounce can of peaches in 100% juice (not heavy syrup). Drain the juice and use it as part of the water in the syrup step. The flavor will be good, though slightly less vibrant than with fresh, ripe peaches.

***My lemonade tastes too sweet. How can I fix it?***

Dilute it with a bit more cold water and an

How To Make Peach Lemonade Recipe

“`html

How To Make Peach Lemonade Recipe

Introduction

Did you know that a Peach Lemonade recipe can increase your daily fruit intake by up to 25% while providing a deliciously hydrating alternative to sugary sodas? In a world where over 60% of adults don’t drink enough water, this vibrant beverage offers a flavorful solution. Quench your thirst with this easy and delicious Peach Lemonade recipe made with real peaches and fresh lemon juice. It’s a perfect summer drink that’s sweet, tangy, and incredibly refreshing. Ideal for picnics, barbecues, or just a sunny afternoon! Enjoy this vibrant, fruit-packed beverage that’s kid-friendly and naturally flavorful. This isn’t just another lemonade—it’s a celebration of summer in a glass, combining the lush, floral sweetness of ripe peaches with the bright, zesty punch of fresh lemons.

Ingredients List

Gathering the right ingredients is key to achieving that perfect balance of sweet and tart. Here’s what you’ll need for about 6-8 servings:

  • 4-5 large, ripe peaches (about 2 lbs): Look for peaches that yield slightly to gentle pressure and have a fragrant, sweet aroma. The flesh should be a deep yellow-orange. Substitution: If fresh peaches aren’t in season, you can use 3 cups of frozen peach slices (thawed) or 2 cups of high-quality, unsweetened peach nectar.
  • 1 cup fresh lemon juice (from about 6-8 medium lemons): Freshly squeezed is non-negotiable for the brightest flavor. The juice should be vibrant yellow and slightly cloudy. Substitution: In a pinch, bottled 100% pure lemon juice can work, but expect a slightly less vibrant tang.
  • 3/4 cup granulated sugar: This creates a simple syrup that dissolves perfectly. Substitution: For a different flavor profile, try honey, agave nectar, or maple syrup. Adjust to taste as these are sweeter.
  • 1 cup water (for the syrup): Use filtered water for the cleanest taste.
  • 4-5 cups cold water (to dilute): The amount can be adjusted based on your preferred strength. Sparkling water is a fantastic alternative for a fizzy treat.
  • Optional Garnishes: Fresh peach slices, lemon rounds, mint sprigs, or a sprinkle of edible flowers for a stunning visual appeal.

Timing

Prep Time 20 minutes
Cook Time 5 minutes
Total Time 25 minutes (plus chilling)

Compared to the average lemonade recipe that often uses pre-made mixes or concentrates, this from-scratch Peach Lemonade recipe adds only about 10 extra minutes of active prep time. This minimal investment yields a massively superior flavor and allows you to control the sweetness and quality of every ingredient. The chilling time is crucial for the flavors to marry, so plan for at least 2 hours in the refrigerator for the best results.

Fresh peaches and lemons arranged around a pitcher of vibrant peach lemonade on a rustic table

Step-by-Step Instructions

Step 1: Prepare the Peach Puree

Start by washing your peaches thoroughly. To easily peel them, score a small “X” on the bottom of each peach and blanch them in boiling water for 30-45 seconds. Immediately transfer them to an ice water bath. The skins should slip right off. Pit the peaches and roughly chop the flesh. Place the peach chunks into a blender or food processor. Blend until you achieve a completely smooth, velvety puree. You should have about 2 to 2.5 cups. For a smoother lemonade, you can strain this puree through a fine-mesh sieve to remove any fibrous bits, but I often leave it in for extra body and fiber.

Step 2: Make the Lemon Syrup

While your peaches are cooling from blanching, roll your lemons on the countertop with firm pressure. This helps break down the internal membranes and makes them much easier to juice. Juice them until you have a full cup of liquid sunshine. In a small saucepan, combine the 1 cup of water and 3/4 cup of granulated sugar. Heat over medium heat, stirring constantly, just until the sugar has completely dissolved. This should only take 3-5 minutes—do not let it boil vigorously. Remove the simple syrup from the heat and immediately stir in the fresh lemon juice. This hot-cold mix helps preserve the lemon’s bright flavor.

Step 3: Combine and Chill

In a large pitcher (at least 2-quart capacity), combine the vibrant peach puree and the lemon-sugar syrup. Stir vigorously with a long spoon until they are fully integrated into a beautiful, opaque orange-pink mixture. Now, slowly add 4 cups of cold water (or sparkling water), stirring as you go. This is your chance to taste and adjust. Want it stronger? Add less water. Prefer it lighter and more refreshing? Add the full 5 cups. Once mixed, cover the pitcher and refrigerate for a minimum of 2 hours. This chilling time is not just about temperature; it allows the peach flavor to infuse deeply into the lemonade, creating a harmonious blend.

Step 4: Serve and Enjoy

When ready to serve, give the lemonade a good stir as some settling may occur. Fill glasses with ice cubes. For a fun twist, freeze peach slices or lemon rounds in ice cube trays ahead of time. Pour the chilled peach lemonade over the ice. Garnish each glass with a fresh peach slice, a thin lemon round, and a sprig of mint. The final presentation should be as inviting as the taste!

Nutritional Information

(Per 8-ounce serving, based on recipe yielding 8 servings with 5 cups dilution water)

  • Calories: ~110 kcal
  • Total Carbohydrates: 28g
  • Sugars: 26g (primarily natural fruit sugars and added sugar)
  • Vitamin C: ~20% of Daily Value (DV)
  • Vitamin A: ~10% of DV
  • Potassium: ~180mg
  • Fiber: 1g (if puree is unstrained)

Healthier Alternatives

You can easily tailor this Peach Lemonade recipe to fit various dietary needs without sacrificing the iconic flavor:

  • Reduce Sugar: Cut the granulated sugar to 1/2 cup. The natural sweetness of very ripe peaches often compensates beautifully.
  • Natural Sweeteners: Swap granulated sugar for 1/2 cup of raw honey or pure maple syrup in the simple syrup. These add nuanced flavors.
  • Zero-Calorie Sweetener: Use a monk fruit or erythritol blend made for simple syrups. Follow package instructions for sugar equivalence.
  • Boost Nutrition: Add a handful of spinach to the peach puree while blending. It will turn the lemonade a deeper pink but adds iron and folate without altering the taste.
  • Herbal Infusion: Steep a few sprigs of fresh basil or thyme in the hot simple syrup for 5 minutes before adding lemon juice. Strain out the herbs for a sophisticated, aromatic twist.

Serving Suggestions

This lemonade is incredibly versatile. Serve it in a clear glass pitcher to showcase its gorgeous color. For parties, create a “Peach Lemonade Bar” with add-ins like fresh berries, cucumber slices, or ginger syrup. It pairs exceptionally well with grilled foods like barbecue chicken, pulled pork sandwiches, or fresh summer salads. For an adult version, a splash of vodka, bourbon, or prosecco transforms it into a sensational cocktail.

Common Mistakes

  • Using Underripe Peaches: This is the #1 mistake. Underripe peaches lack sweetness and fragrance, resulting in a bland, tart lemonade. Always choose fragrant, ripe fruit.
  • Bottled Lemon Juice: The preservatives and processing in most bottled juices create a flat, metallic tang. Fresh lemons are essential for the “zing.”
  • Skipping the Simple Syrup: Adding granulated sugar directly to cold liquid leads to gritty, undissolved sugar at the bottom of your pitcher. The syrup ensures perfect integration.
  • Not Chilling Long Enough: Serving immediately after mixing means the peach and lemon flavors will taste separate. Patience allows them to become one delicious entity.

Storing Tips

Store leftover peach lemonade in a sealed pitcher or airtight container in the refrigerator for up to 3-4 days. The peach puree may settle; simply stir before serving. For longer storage, you can freeze the lemonade (without added garnishes) in freezer-safe containers for up to 2 months. Thaw overnight in the refrigerator. Note: If you used sparkling water, it will go flat upon storage, so it’s best enjoyed fresh.

Close-up of a frosty glass of peach lemonade with a peach slice garnish, condensation on the glass

Conclusion

This homemade Peach Lemonade recipe is more than just a drink—it’s a taste of summer, a healthier alternative to store-bought options, and a guaranteed crowd-pleaser. With its perfect balance of sweet peach and tangy lemon, it embodies refreshment. I encourage you to make a batch this weekend. Share your creation on social media and tag us @spicemingle—we love seeing your culinary adventures! Now, let’s get blending and turn those ripe peaches into liquid gold.

FAQs

***Can I use canned peaches?***
Yes, you can. Use one 29-ounce can of peaches in 100% juice (not heavy syrup). Drain the juice (you can use a bit of it in the puree) and proceed with the recipe. The flavor will be good, though slightly less bright than with fresh, ripe peaches.

***My lemonade is too sweet/tart. How can I fix it?***
Too Sweet: Dilute with more cold water or sparkling water and add a squeeze of fresh lemon juice. Too Tart: Create a small additional batch of simple syrup (equal parts sugar and water, dissolved) and stir it into the pitcher a tablespoon at a time until balanced.

***Can I make this into popsicles?***
Absolutely! This lemonade makes fantastic popsicles. Pour the finished mixture into popsicle molds, insert sticks, and freeze for 4-6 hours until solid. They’re a hit with kids and adults alike on a hot day