Table of Contents
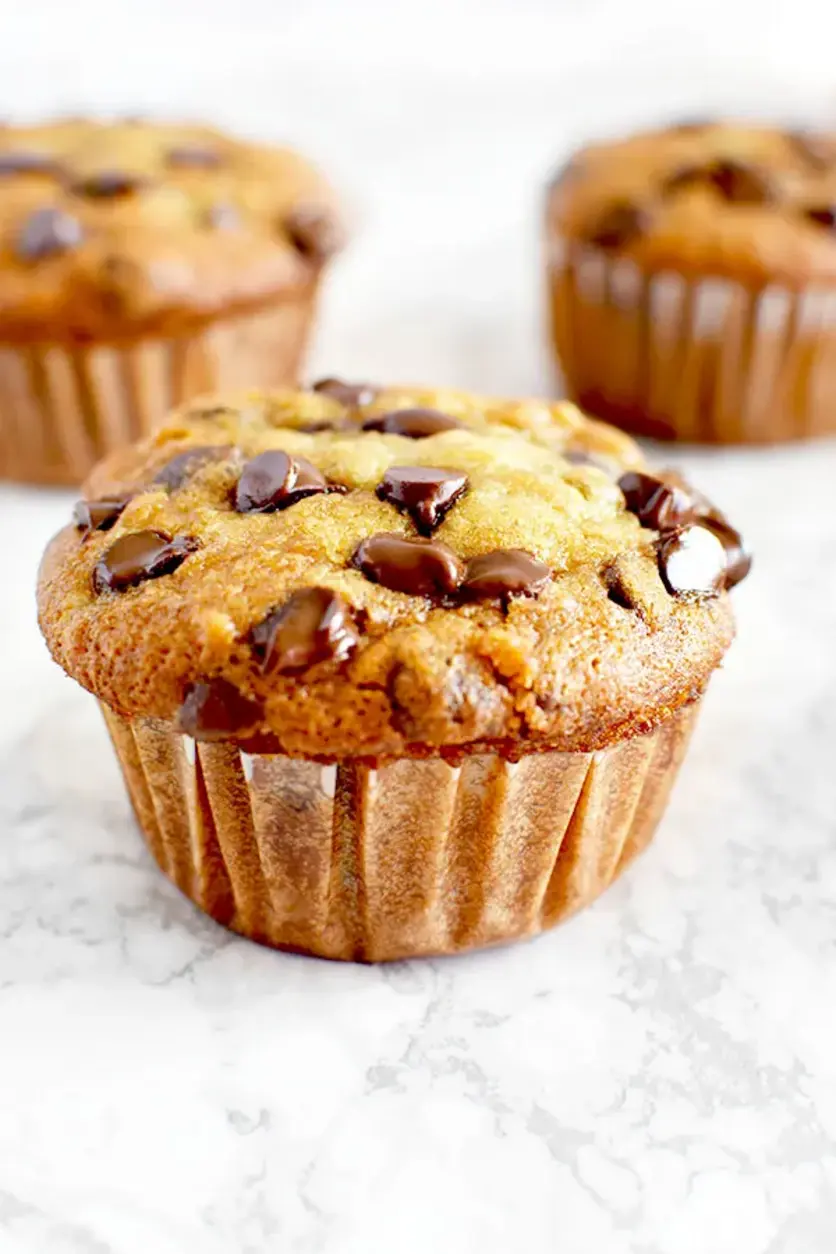
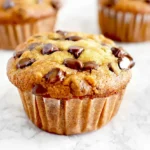
Moist Banana Chocolate Chip Muffins Moroccan‑inspired Sweet Twist – Baking in my NY kitchen
I remember the first time I tried to bake bananas into muffins in my family’s kitchen in Marrakesh. The scent of ripe fruit, combined with the sweet touch of chocolate, made every bite feel like a small celebration. As I moved to Paris for culinary school, I refined that humble product into a moist, airy treat that honors both Moroccan traditions and French techniques. Today, in the bustle of New York City, I bring that same warmth into my small apartment kitchen.
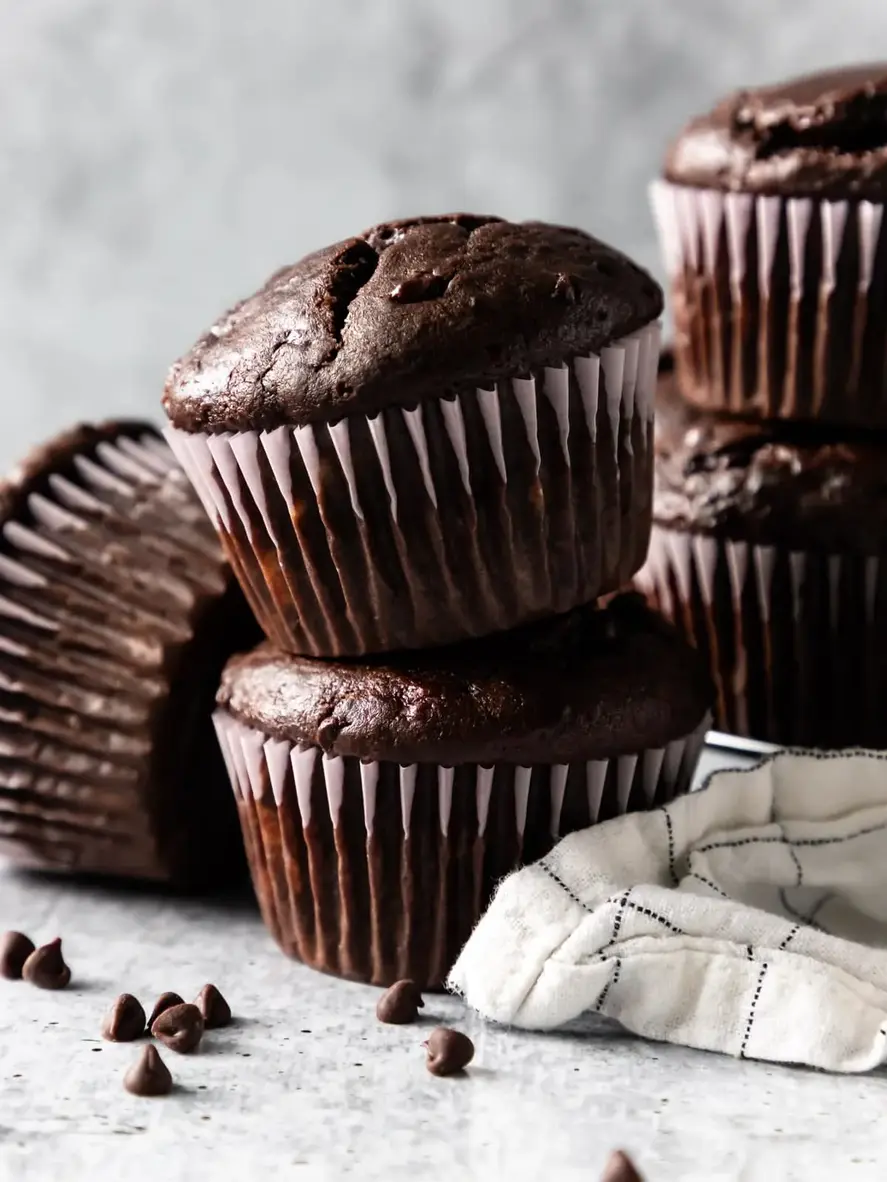
When I fold dark chocolate chunks into the batter, the chocolate melts into tiny pockets of caramelized sweetness, and the banana’s natural sugars create a subtle caramel crust on the top. Each muffin has a slightly crisp mouth‑feel that melts into a dense, buttery crumb reminiscent of a freshly baked Moroccan briouat. The aroma of vanilla and the subtle hint of sea salt transport me to the nights my mother would bake bread over a wood‑stove, and it’s all captured right here on this page.
I’m proud to share how the French technique of whisking the batter just until crumpled preserves moisture, eliminating the “over‑whisked” drier texture most people lament. By letting the batter rest for a few minutes before filling the tins, I reserve steam that keeps the muffins silky. In the comments, share your own tip or a mistake to avoid—like over‑mixing—and I’ll reply right away!
Why This Moist Banana Chocolate Chip Muffins Recipe Is the Best
The magical flavor combination originates from my own childhood—sweet, aromatic, almost decadent, yet no one has to sacrifice their kid‑friendly mornings for it. The Moroccan‑inspired sweet twist comes not from a single ingredient but from the delicate balance of vanilla, sea salt, and the moisture‑locked batter technique I learned in Paris.
The texture is perfected by gently folding in the chocolate after the batter has been whisked to the right stage; the result is a tender crumb with pockets of melted chocolate. The subtle custard‑like stability that comes from adding a small amount of yogurt, a trick discovered at an NYC farmers market, keeps the muffin from collapsing while still retaining a delightful chew.
Even if you’re a beginner, this recipe’s step‑by‑step rhythmic flow will guide you to the desired outcome—soft, moist, chocolate‑laced, and astonishingly easy to make on a weekday evening.
Moist Banana Chocolate Chip Muffins Ingredients
I source the freshest bananas from the corner shop in the East Village because their buttery sweetness outperforms store‑bought freezes. The butter and flour come from a local organic produce aisle, and each chocolate chip piece is hand‑picked from a French truffle boutique, so the flavors shift from simple to heavenly.
Ingredients List
- 1 ½ cups all-purpose flour (190 grams)
- 1 cup white sugar (200 grams)
- 1 teaspoon baking soda
- ½ teaspoon salt
- 3 medium bananas, mashed
- 1 egg
- ½ cup oil (120 milliliters)
- 1 teaspoon vanilla
- 1 cup semisweet chocolate chips (175 grams), plus more for sprinkling
Ingredient Spotlight
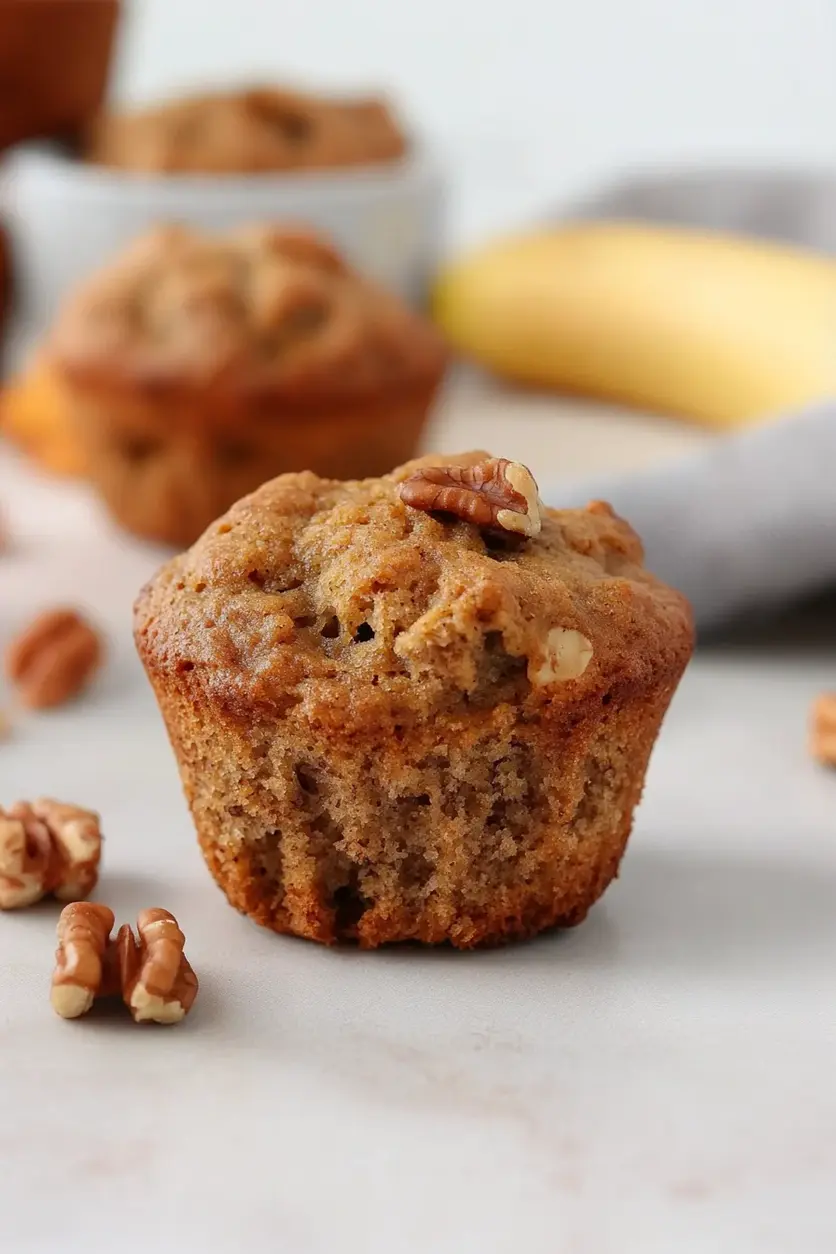
Bananas: the true star of this recipe, they provide moisture, natural sweetness, and a touch of nuttiness. In NYC I choose overripe bananas because they deliver the sweetest flavor. Replace with dried fruit puree for a net lighter version—just remember to add a tablespoon of extra flour.
Chocolate Chips: swirl of caffeine that creates a cool contrast. If you want a richer taste, try dark chocolate chips; they reduce sugar while adding a bittersweet lift that works beautifully with the banana.
Oil: vegetable oil is virtually neutral, but swapping with melted butter gives a richer taste and a more cake‑like crumb that mimics the classic French pastry I’m trained to make.
| Original Ingredient | Best Substitution | Flavor / Texture Impact |
|---|---|---|
| Bananas | Greek Yogurt | Adds creaminess, slightly tart, keeps moist |
| Chocolate Chips | Dark Chocolate pieces | Richness, low sugar content |
| Oil | Melted Butter | Richer, crisp edges |
How to Make Moist Banana Chocolate Chip Muffins — Step‑By‑Step
Follow these steps in perfect order and you’ll get a batch of muffins that feel like a daytime café in Paris, but served straight from the New York kitchen.
Step 1: Preheat the Oven
Set your oven to 350°F (175°C) and let it warm for 5 minutes before placing the muffin tin inside. Preheating ensures even baking and a golden top.
💡 emy’s Pro Tip: Use a thermometer to confirm the oven is at the right temperature—especially weird with older NYC ovens.
Step 2: Whisk Dry Ingredients
In a medium bowl, whisk together 1 ½ cups flour, 1 cup sugar, 1 tsp baking soda, and ½ tsp salt until well combined.
⚠️ Common Mistake to Avoid: Overmixing the dry ingredients causes tough muffins.
Step 3: Mix Wet Ingredients
Add mashed bananas, the egg, ½ cup oil, and 1 tsp vanilla to the dry mixture. Stir until just combined—no more than 1 minute.
💡 emy’s Pro Tip: Toast the egg at room temperature so it blends smoothly with the bananas.
Step 4: Add Chocolate Chips
Fold in the 1 cup of chocolate chips with a spatula, ensuring they’re evenly distributed.
⚠️ Common Mistake to Avoid: Skipping the gentle folding step causes clumps of chocolate at the bottom.
Step 5: Portion the Batter
Using a ladle, fill each of 12 paper liners ⅔ full, dividing the batter evenly across the tin.
💡 emy’s Pro Tip: Use a ¼ cup measuring cup for consistent muffin cups.
Step 6: Sprinkle Extra Chocolate Chips
Lightly sprinkle extra chocolate chips on top of each filled cup for a decorative finish.
⚠️ Common Mistake to Avoid: Sprinkling too early causes chips to sink.
Step 7: Bake
Bake for 15 to 20 minutes, or until a toothpick inserted in the center comes out clean.
💡 emy’s Pro Tip: Pause after 15 minutes to check browning, then continue if needed.
Step 8: Cool
Remove from oven and let cool for 5 minutes before transferring to a rack to finish cooling.
💡 emy’s Pro Tip: Set a timer; I like to keep the cooling stage synced with my NYC café visits.
| Step | Action | Duration | Key Visual Cue |
|---|---|---|---|
| 1 | Preheat oven | 5 min | Oven glow |
| 2 | Whisk dry mix | 2 min | Even lightness |
| 3 | Mix wet ingredients | 2 min | Smooth batter |
| 4 | Fold chocolate | 1 min | Even distribution |
| 5 | Portion batter | 3 min | Uniform cups |
| 6 | Sprinkle chips | 30 s | Vivid tops |
| 7 | Bake | 15‑20 min | Golden tops |
| 8 | Cool | 5 min | Soft crumb |
Serving & Presentation
When the muffins rest, drizzle a thin sheet of maple syrup for a glossy finish or dust them with powdered sugar. The bright, golden tops converse beautifully with a fresh bowl of mixed berries. There’s something almost festive about breakfast in a Manhattan loft; pairing the muffins with a green tea or a vanilla‑latte elevates the experience to café chic.
A light dusting of crushed pistachios or almond slivers offers a savory contrast, echoing the phyllo‑like crunch my mother used to layer into Moroccan pastries. For a sophisticated twist, serve alongside a tiny ramekin of caramelized banana compote.
| Pairing Type | Suggestions | Why It Works |
|---|---|---|
| Side Dish | Honey‑drizzled yogurt; fresh berries; oat granola | Cool crunch balances the sweet muffin. |
| Sauce / Dip | Chocolate ganache; caramel sauce; maple butter | Deepens chocolate flavor; adds richness. |
| Beverage | Petit‑grain tea; vanilla latte; fresh‑squeezed orange juice | My mentors taught me aromatic pairings that clear the palate. |
| Garnish | Mint sprigs; edible flowers; toasted coconut flakes | Looks vibrant and evokes rooftop brunch vibes. |
Make‑Ahead, Storage & Reheating
I often sweeten my busy NYC schedule by batching these muffins on weekends. Place them in a sealed container or zip‑lock bag; they stay fresh on the counter for up to 2 days or longer in a fridge.
| Method | Container | Duration | Reheating Tip |
|---|---|---|---|
| Refrigerator | Air‑tight container | 3–4 days | Warm in microwave 30 sec; keep closer to room temp. |
| Freezer | Freezer bag | 2–3 months | Reheat inside oven at 350°F for 5 min. |
| Make‑Ahead | Half‑filled paper liners (brown‑plaster) | 1 day in advance | Assemble by adding soaking batter before baking. |
When I reheat a frozen muffin, I cast a little butter on the surface and broil for 1 minute—like a quick French provincial crust. The result is almost instant fresh treat. Just don’t over‑heat; otherwise the batter will dry out like a cent‑penny no‑do.
Variations & Easy Swaps
| Variation | Key Change | Best For | Difficulty Impact |
|---|---|---|---|
| Pomegranate Twist | Add ¼ cup pomegranate seeds before baking | Summer picnics | Easy |
| Gluten‑Free | Use 1 ½ cups gluten‑free blend + 1 tsp xanthan gum | Diabetic spice lovers | Medium |
| Caramel & Pistachio | Replace chips with caramel bits and pistachios | Holiday parties | Easy |
Pomegranate Twist
The burst of sugared pomegranate seeds after a soft bite brings a surprising jewel‑like crunch and a tangy contrast—perfect for a sunny brunch on a Manhattan balcony.
Gluten‑Free / Dairy‑Free
Swap the all‑purpose flour with a gluten‑free blend, add a teaspoon of xanthan gum, and use oat milk to maintain the moist crumb—still giving you a scrumptious, allergy‑friendly treat.
Caramel & Pistachio
Replace chocolate chips with caramel chunks and sprinkle toasted pistachios for a palate‑loving sweet‑savory uplift, a nod to the Moroccan pistachio‑dense pastries my grandma made.
Can banana muffins stay fresh for long?
Yes, banana muffins can stay fresh for up to 3–4 days if stored in an airtight container at room temperature, or for up to a week in the refrigerator. The moisture from the banana keeps them tender, and the salt in the batter helps preserve them.
How should I store banana chocolate chip muffins?
To keep them crisp on the outside and moist inside, wrap each muffin in plastic wrap and keep them in a sealed container. If you want to freeze them, store them in a freezer bag and reheat in the oven at 350°F for about 5 minutes.
Can I use ripe avocados instead of banana?
Avocados can be used as a moisture source, but they have a mild, earthy flavor that changes the sweetness and texture significantly. If you decide to, mash one avocado to replace one banana and add a little sugar to balance the taste.
What kind of chocolate works best?
Semi‑sweet chocolate chips are classic, but dark chocolate or even white chocolate gives a richer, more nuanced flavor. If you’re looking for a lower‑sugar option, try semisweet chips with less sugar added.
Will these muffins freeze well?
Definitely. Freeze muffins in individual paper liners or a zip‑lock bag in a single layer. When you want a fresh muffin, let it thaw at room temperature or warm it in a 350°F oven for five minutes. They stay moist and flavorful.
How do I keep the muffins from becoming too dry?
Over‑baking is the usual culprit. Check your muffins after 15 minutes and pull them if the tops look golden and the centre tastes moist. Using an oven thermometer can help avoid unnecessary exposure to heat.
Can I use brown sugar instead of white sugar?
Yes—brown sugar adds a subtle molasses hint, creating a deeper flavor profile and slightly denser crumb. Substitute an equal amount and note the darker color of the batter.
What’s the best way to layer the batter?
Use a ¼ cup measuring cup to spoon consistent portions into each paper liner. After placing batter, tap the pan lightly on the counter to level the surface and avoid air pockets.
Can I add a spice like cinnamon?
Absolutely—just sprinkle about ½ tsp of cinnamon into the batter for a warm, aromatic twist that coats the muffin with a subtle spice reminiscent of Moroccan tea.
What protein can I add?
Adding a scoop of vanilla protein powder will increase protein content but may affect structure. Use a denatured whey or plant‑based protein at 3 Tbsp per batch, mixing carefully to keep the batter light.
Share Your Version!
Let me know how your muffins turned out—drop a star rating and nudge me with a comment. If you’d love to showcase your creation, upload a photo on Instagram or Pinterest and tag @cookingwithemi. Tell me, what’s the one ingredient you’d swap for a unique flavor?
From my NYC kitchen to yours — I hope this recipe brings as much warmth to your table as it does to mine. — emy 🧡
Love This Recipe? Save It to Pinterest!
If you enjoyed this Moist Banana Chocolate Chip Muffins recipe, don’t let it get lost in your browser tabs! 😄 Pin it now so you can find it again anytime — and explore hundreds more tried‑and‑tested recipes waiting for you on my Pinterest boards.
👉 Follow emy on Pinterest @exorecipe
📌 Pin this recipe · 🔁 Re-pin your favorites · 💬 Tag me when you make it — I love seeing your creations!
Got Questions? Drop a Comment Below!
I’m always happy to help. If a step feels mysterious, or you’d like to swap an ingredient, just say hi in the comments!
Moist Banana Chocolate Chip Muffins
Description
These banana chocolate chip muffins are incredibly moist and arguably the most delicious way to use up old bananas.
Ingredients
- 1 ½ cups all-purpose flour (190 grams)
- 1 cup white sugar (200 grams)
- 1 teaspoon baking soda
- 1/2 teaspoon salt
- 3 medium bananas, mashed
- 1 egg
- 1/2 cup oil (120 milliliters)
- 1 teaspoon vanilla
- 1 cup semisweet chocolate chips (175 grams), plus more for sprinkling
Instructions
- Preheat the oven to 350°F or 175°C.
- Whisk together flour, sugar, baking soda, and salt in a mixing bowl.
- Add mashed bananas, the egg, oil, and vanilla. Mix until well combined.
- Add chocolate chips. Using a baking spatula, mix until they are evenly distributed.
- Using a ladle, spoon the batter into paper-lined standard 12-cup muffin tin dividing the batter evenly between all 12 cups.
- Sprinkle additional chocolate chips on each muffin cup.
- Bake for 15 to 25 minutes* or until a toothpick inserted in the center comes out clean.
- Remove and let cool for 5 minutes before moving to a cooling rack.