End your day with a delicious, comforting, and satisfying dinner! Whether you’re looking for quick and easy weeknight meals, cozy comfort food, or elegant dishes for special occasions, we have the perfect recipes for you.
From hearty casseroles and one-pan wonders to savory pastas, juicy meats, and flavorful vegetarian options, our collection is designed to make dinnertime effortless and enjoyable.
Busy schedule? No problem! Try our slow cooker meals, sheet pan dinners, and 30-minute recipes to save time without sacrificing flavor. Whatever your craving, these recipes will bring warmth and joy to your table every night. 🍽️✨
Gordon Ramsay French Onion Soup Recipe
Table of Contents
Gordon Ramsay French Onion Soup Recipe – A Chef’s Homage
⚖️
Difficulty
Medium
⏲️
Prep Time
15 mins
🕒
Cook Time
70 mins
⏱️
Total Time
85 mins
🍽️
Servings
4
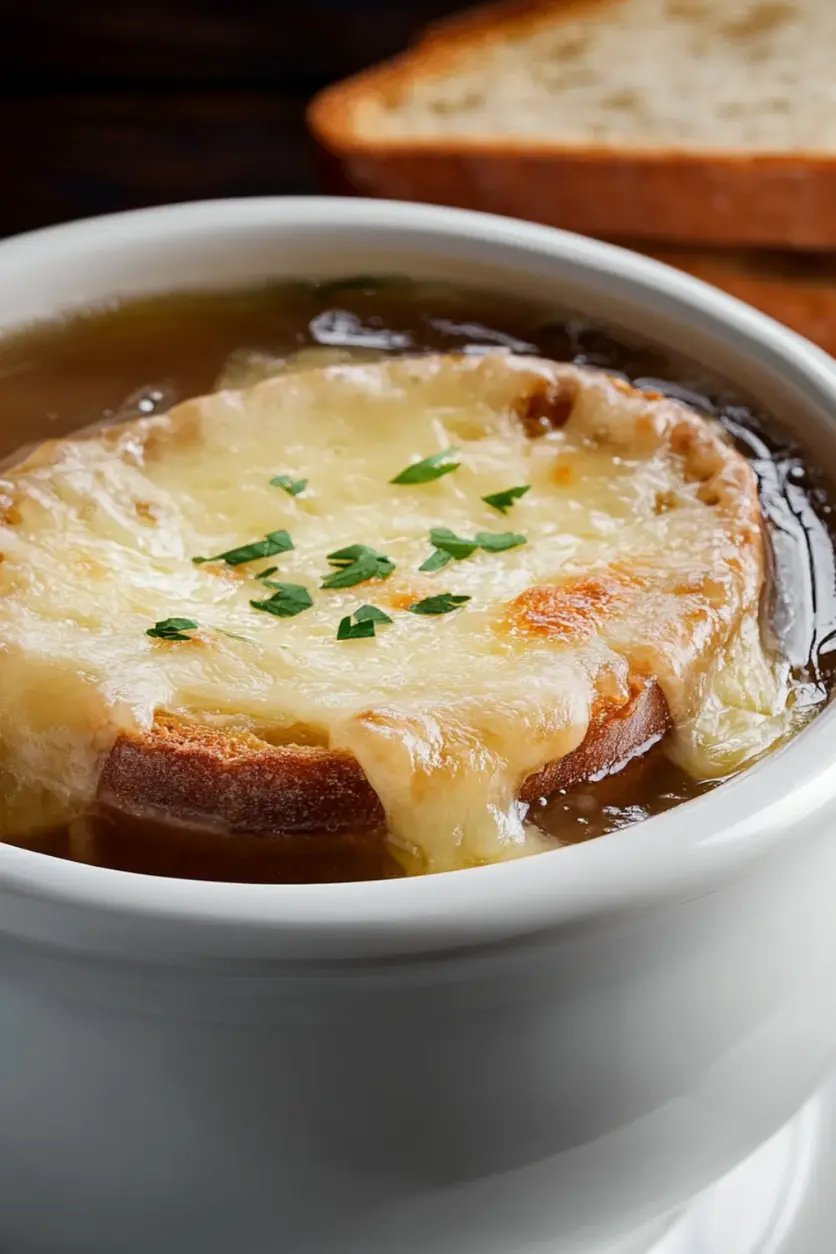
There are soups that warm you, and then there’s this Gordon Ramsay French onion soup recipe — the one that wraps you in a blanket of caramelized sweetness and savory depth. I first tasted a version of this classic in a tiny bistro near Les Halles in Paris during my culinary training. The chef there took thirty minutes just to caramelize the onions, stirring with a patience I didn’t yet have. Now, living in New York City, I find that same patience every time I stand over my own pot. This Gordon Ramsay French onion soup recipe is built on the same principle: deeply caramelized onions, a rich beef broth, and a golden Gruyère toast that crackles when you break through it. The unique angle here is the sugar trick — a small pinch added midway through caramelization that mimics a professional’s touch.
Imagine a bowl where the broth is almost mahogany, with threads of melted Gruyère stretching from your spoon to your lips. The onions are buttery soft, almost jammy, with a sweetness that never tips into cloying. A whisper of thyme and bay leaf lifts the whole thing, while a splash of dry white wine cuts through the richness. It smells like a Parisian kitchen on a rainy evening — warm, earthy, and impossibly comforting. The toasted baguette crouton, bubbling with cheese, becomes a little raft of joy. Every spoonful is a balance of savory broth, sweet onion, and nutty, browned cheese.
I’ve tweaked this Gordon Ramsay French onion soup recipe over the years, blending my French training with the ingredients I find at the Union Square Greenmarket. The biggest game-changer? Using a mix of butter and olive oil for caramelization — the butter gives flavor, the oil prevents burning. My pro tip is to deglaze with wine while the pan is still hot, scraping up all those browned bits from the bottom; that’s where the soul of the soup lives. A common mistake is rushing the onions — if they brown too fast, they turn bitter instead of sweet. Take your time, and this Gordon Ramsay French onion soup recipe will reward you with a bowl of pure comfort.
Why This Gordon Ramsay French Onion Soup Recipe Is the Best
The Flavor Secret: Most recipes stop when onions are just translucent. Not this one. I take them into deep mahogany territory, coaxing out natural sugars until they almost caramelize into a compote. Adding a teaspoon of sugar at the 10-minute mark accelerates this process without burning, a trick I learned from a pastry chef in Paris. The result is a broth so rich it tastes like it simmered all day, even though it only takes about an hour. My Moroccan grandmother’s tagines taught me the power of slow-cooking onions, and this Gordon Ramsay French onion soup recipe is my love letter to that lesson.
Perfected Texture: The onions should melt on your tongue, not be stringy or crunchy. That means slicing them thinly, about 1/8-inch thick, which ensures even cooking. I also use a wide, heavy-bottomed pot so the onions have room to breathe — crowding them traps steam and prevents proper browning. The broth is silky yet substantial, with just enough body from quality beef stock to feel satisfying without being heavy. A final touch: I simmer the soup uncovered for 30 minutes to concentrate the flavors, exactly as Gordon Ramsay demonstrates in his own kitchen.
Foolproof & Fast: While classic recipes call for hours of simmering, this Gordon Ramsay French onion soup recipe is designed for a weeknight dinner. The caramelization takes about 40 minutes (mostly hands-off after the first 10 minutes), and the broth simmers for just 30 minutes. That means from start to finish, you’re looking at about 85 minutes total — but most of that is passive cooking. Even a beginner can pull this off, as long as you resist the urge to crank the heat. Low and slow is the mantra here.
French Onion Soup Ingredients
Every time I make this Gordon Ramsay French onion soup recipe, I think of my first trip to the Union Square Greenmarket in NYC. I wandered past piles of Vidalia onions, their papery skins glowing in the morning light, and knew they’d be perfect for this soup. In Paris, my chef always insisted on using a mix of yellow and red onions for depth, but at home, I stick with yellow for their reliable sweetness. Here’s what you’ll need — all available at your local grocery store or farmers market.
120ml (½ cup) dry white wine (like Sauvignon Blanc or Pinot Grigio)
2 bay leaves
2 sprigs fresh thyme (or 1 teaspoon dried)
Salt and freshly ground black pepper, to taste
1 baguette, sliced into ½-inch rounds and toasted
170g (about 1½ cups) Gruyère cheese, grated
Fresh parsley, chopped (optional, for garnish)
Ingredient Spotlight
Onions: The heart of this Gordon Ramsay French onion soup recipe. Yellow onions are preferred for their balanced sweetness and mellow flavor. If you only have red or white onions, red will add a slightly sharper taste, while white onions are milder. Avoid sweet onions like Vidalias — they’re too high in moisture and can turn mushy. Look for firm, heavy onions with no soft spots.
Gruyère: This Swiss cheese is essential for that nutty, melty topping. It browns beautifully under the broiler and stretches into luscious strings. If you can’t find Gruyère, Emmental or Comté are excellent substitutes — both melt well and have a similar nuttiness. Avoid pre-shredded cheese; it contains anti-caking agents that prevent smooth melting.
Beef Stock: The backbone of the broth. Use a high-quality, low-sodium store-bought stock, or make your own for an even deeper flavor. I often use Better Than Bouillon beef base dissolved in water — it’s concentrated and delivers a robust, meaty flavor that mimics homemade. Avoid watery broths; they’ll leave your soup thin and unsatisfying.
Dry White Wine: A splash of acidity brightens the rich, savory broth. Use a wine you’d drink — avoid anything labeled “cooking wine,” which has added salt and preservatives. Sauvignon Blanc or an unoaked Chardonnay work well. If you don’t have wine, substitute with an extra splash of stock and a teaspoon of lemon juice or white wine vinegar.
Original Ingredient
Best Substitution
Flavor / Texture Impact
Yellow onions
Red onions
Slightly sharper, less sweet
Gruyère cheese
Emmental or Comté
Similar nuttiness, excellent melting
Beef stock
Chicken stock + 1 tbsp soy sauce
Lighter body, umami boost from soy
Dry white wine
Extra stock + 1 tsp lemon juice
Less depth, but still bright
Butter
Additional olive oil (3 tbsp total)
Less richness, slightly fruity note
How to Make Gordon Ramsay French Onion Soup — Step-by-Step
Don’t be intimidated by the caramelization time — this Gordon Ramsay French onion soup recipe is more about patience than skill. Follow these steps, and you’ll have a bowl that rivals any bistro in NYC.
Step 1: Caramelize the Onions
Heat butter and olive oil in a large, heavy-bottomed pot over medium-low heat. Add the thinly sliced onions and stir to coat. Cook for 30–40 minutes, stirring every 5 minutes, until the onions are deeply browned and jammy. After 10 minutes, sprinkle in the sugar to help caramelization. The key is low, steady heat — if you see any burning, reduce the temperature immediately.
💡 emy’s Pro Tip: Use a wooden spoon to stir. Metal can scrape the pot and release unwanted flavors. And don’t walk away too long — every 5 minutes of stirring prevents sticking.
Step 2: Add Garlic and Deglaze
Add the minced garlic and stir for 2 minutes until fragrant. Pour in the dry white wine, scraping the bottom of the pot with your spoon to release all those browned bits (called fond). Let the wine bubble for 1 minute, then add the beef stock, bay leaves, thyme, salt, and pepper.
⚠️ Common Mistake to Avoid: Adding the wine when the pot is too cool. The sizzle is crucial for deglazing — it lifts the fond into the broth, adding deep savory notes. If the pot isn’t hot enough, you’ll miss that flavor.
Step 3: Simmer the Broth
Bring the soup to a gentle simmer, then reduce heat to low and cook uncovered for 30 minutes. Stir occasionally. This allows the flavors to meld and the liquid to concentrate slightly. Taste and adjust seasoning — you may need more salt or pepper depending on your stock.
💡 emy’s Pro Tip: For an even deeper flavor, add a Parmesan rind to the pot while simmering. It adds a subtle nutty richness that complements the Gruyère beautifully.
Step 4: Assemble and Broil
Preheat your broiler. Ladle the soup into oven-safe bowls. Place a toasted baguette slice on top of each bowl, then pile on the grated Gruyère. Broil for 2–3 minutes until the cheese is melted, bubbly, and golden brown in spots. Watch closely — cheese can burn quickly under the broiler.
⚠️ Common Mistake to Avoid: Using cold bowls. Place your oven-safe bowls on a baking sheet and warm them in the oven for 5 minutes before adding the soup. This keeps the soup hot while the cheese melts.
Step 5: Serve and Garnish
Carefully remove the bowls from the oven (they’re very hot!). Let them cool for 2 minutes, then garnish with fresh parsley if desired. Serve immediately with a spoon and a warning that the bowl is hot. The cheese will stretch gloriously as you dig in.
Step
Action
Duration
Key Visual Cue
1
Caramelize onions
30–40 minutes
Deep golden brown, jammy texture
2
Add garlic and deglaze
3 minutes
Wine sizzles and steams, fond lifts
3
Simmer broth
30 minutes
Liquid reduces slightly, deep brown color
4
Assemble and broil
2–3 minutes
Cheese bubbles and turns golden
5
Serve and garnish
2 minutes
Parsley flecks, cheese strings stretch
Serving & Presentation
Presentation matters with this Gordon Ramsay French onion soup recipe. I always serve it in deep, oven-safe ceramic bowls — the kind you’d find at a cozy bistro in the West Village. Ladle the soup to about 1 inch from the rim, then float the baguette slice on top. Pile on the Gruyère generously, allowing some to drip over the edge for a rustic, irresistible look. A sprinkle of fresh parsley adds a pop of green against the deep brown broth and golden cheese.
Pair this soup with a crisp green salad dressed with a simple vinaigrette — the acidity cuts through the richness. For a heartier meal, serve it alongside a grilled steak or a roasted chicken. In my NYC kitchen, I love to open a bottle of the same wine I used in the soup — a crisp Sauvignon Blanc or a light Pinot Noir. The wine echoes the flavors in the broth, creating a beautiful harmony.
French Onion Soup
Table of Contents
French Onion Soup Recipe – Classic, Rich, and Cheesy
⚖️
Difficulty
Medium
⏲️
Prep Time
15 mins
🕒
Cook Time
70 mins
⏱️
Total Time
85 mins
🍽️
Servings
5
I still remember the first time I truly understood what a bowl of soup could be. I was in Paris, studying at culinary school, and a classmate took me to this tiny bistro in the 6th arrondissement. The waiter placed a bubbling crock in front of me, and when I broke through that golden cheese crust with my spoon, I nearly cried. That is the moment this French Onion Soup recipe was born in my heart. Growing up in Morocco, my mother made hearty broths with caramelized onions and warm spices, but this French version — with its deep, wine-kissed broth and three melted cheeses — was something else entirely. Now, living in New York City, I make this soup every winter, especially after a long day at the Union Square Greenmarket. It is the ultimate comfort food: rich, savory, and deeply satisfying. This homemade French Onion Soup recipe will knock your socks off! Made with the richest broth, perfect caramelized onions, and topped with three different types of melted cheese, it is a meal that feels like a warm hug.
The beauty of this French Onion Soup lies in the caramelization. Those five large yellow onions, sliced thin and cooked low and slow until they are almost syrupy, create a sweetness that balances the savory beef and chicken broths. The aroma that fills your kitchen — a mix of butter, thyme, and balsamic vinegar — is nothing short intoxicating. When you add the red wine and deglaze the pot, scraping up all those browned bits, you are building layers of flavor that simply cannot be rushed. And then, the finishing touch: a slice of crusty French bread, toasted golden, topped with Gruyère, mozzarella, and Parmesan, all broiled until bubbly and forming that iconic crusty seal. Every spoonful is a perfect balance of rich broth, sweet onions, and gooey cheese.
What sets my version apart is my professional chef’s approach to layering flavors. I trained in Paris, so I know the importance of technique — but I also learned from my mother in Morocco that the best food comes from patience and love. I use a combination of beef and chicken broth for a more complex base, a touch of Worcestershire sauce for umami depth, and balsamic vinegar right at the end to brighten everything up. My pro tip? Do not skimp on the stirring during caramelization. That thirty-five minutes is where the magic happens. A common mistake is rushing this step, ending up with burnt onions rather than sweet, jammy ones. Trust me, the wait is worth it. From my NYC kitchen, I promise this will become your go-to French Onion Soup recipe.
Why This French Onion Soup Recipe Is the Best
The flavor secret is in the dual-broth method. Most recipes use just beef broth, which can taste one-dimensional. My French Onion Soup combines low-sodium beef broth and chicken broth for a more rounded, savory foundation. The chicken broth adds a lightness that keeps the soup from being too heavy, while the beef provides the deep, meaty notes you crave. This is a technique I picked up in Paris — layering broths to create a richer, more elegant result. It is the same principle behind a great stock: balance is everything.
Perfected texture comes from my careful caramelization process. I start by sautéing the onions over medium-high heat for ten minutes to soften them, then I reduce the heat to medium and add salt and sugar. The sugar is key — a small amount helps the onions develop that deep, golden color and almost syrupy texture. I stir every five minutes for thirty-five minutes total. This patience ensures every strand of onion is evenly caramelized, not burnt or crunchy. My chef training taught me that proper caramelization is a controlled process, not a race. When you get it right, the onions melt into the broth, giving the soup a silky, luxurious body.
This recipe is foolproof and fast enough for a weeknight, even with the longer cook time. The active hands-on time is only about 15 minutes for the initial sauté, then mostly stirring and simmering. I have tested this recipe dozens of times in my NYC apartment, and it works beautifully for home cooks of all levels. The instructions are clear, with visual cues like “syrupy consistency” and “golden and bubbly cheese.” Whether you are making it for a cozy dinner or a dinner party, this French Onion Soup delivers restaurant-quality results without stress. Plus, it comes together with simple, everyday ingredients you can find at any US grocery store.
French Onion Soup Ingredients
I love shopping for these ingredients at the Fairway Market on the Upper West Side or the Union Square Greenmarket. The yellow onions from local farms are sweet and firm, perfect for caramelizing. The Gruyère Swiss cheese — I always look for a block that smells nutty and slightly fruity. It reminds me of the cheese shops in Paris, where I used to buy wedges wrapped in brown paper. If I cannot find Gruyère, I sometimes mix in a bit of Emmental, which melts just as beautifully. The key is to use room-temperature cheese for even melting.
Ingredients List
4 tablespoons unsalted butter
5 large yellow onions (thinly sliced)
1 teaspoon salt
1 teaspoon granulated sugar
2 cloves garlic (minced)
1/2 cup dry red wine (see note)
32 ounces low-sodium beef broth
24 ounces low-sodium chicken broth
1 tablespoon Worcestershire sauce
2 sprigs fresh thyme
1 bay leaf
1/2 tablespoon balsamic vinegar
pinch of salt and freshly ground black pepper (to taste)
Yellow onions are the heart of this soup. They have a perfect balance of sweetness and pungency, which breaks down into rich, jammy goodness. When I buy them, I look for firm, heavy onions with tight, papery skin. Avoid any with soft spots or green sprouts. If you only have white onions, they work too, though the flavor will be a bit sharper.
Gruyère Swiss cheese is my top choice for the topping. It melts smoothly, has a nutty flavor, and browns beautifully under the broiler. Look for a block of Gruyère and shred it yourself — pre-shredded cheese often has anti-caking agents that affect melting. If Gruyère is hard to find, a good-quality Swiss cheese like Emmental or Comté works wonderfully.
Dry red wine — I recommend a Pinot Noir or a Merlot. The wine deglazes the pot and adds depth to the broth. You want something dry, not sweet. If you do not cook with wine, you can substitute an equal amount of additional beef broth mixed with 1 tablespoon of red wine vinegar for acidity.
Balsamic vinegar is my secret finisher. A half-tablespoon stirred in at the end brightens the soup and balances the richness. I buy a mid-range balsamic for cooking — save the expensive aged stuff for salads. This small addition makes a huge difference in the final flavor profile.
Pairing Type
Suggestions
Why It Works
Side Dish
Mixed green salad with vinaigrette, roasted asparagus
Acidity and crunch balance the rich soup
Sauce / Dip
Dijon mustard, extra Gruyère for dipping bread
Adds tangy contrast and cheese indulgence
Beverage
Sauvignon Blanc, Pinot Noir, hard cider
Wine mirrors the wine in the soup; cider adds apple brightness
Original Ingredient
Best Substitution
Flavor / Texture Impact
Gruyère Swiss cheese
Emmental or Comté
Similar nutty, creamy melt; slightly milder with Comté
Dry red wine
Beef broth + 1 tbsp red wine vinegar
Less depth but still bright; acidic lift remains
French bread
Sourdough or ciabatta
Sourdough adds tangy note; ciabatta is softer
Low-sodium beef broth
Vegetable broth (for vegetarian version)
Lighter, less savory; add 1 tbsp soy sauce for umami
How to Make French Onion Soup — Step-by-Step
Trust me when I say this: making French Onion Soup at home is not hard, but it does require a bit of patience and love. Follow these steps, and you will be rewarded with the most incredible bowl of soup. I have broken it down into simple steps with clear visual cues.
Step 1: Sauté the Onions
In a large pot over medium-high heat, melt the 4 tablespoons of unsalted butter. Add the 5 thinly sliced yellow onions and sauté, stirring often, until they soften. This takes about 10 minutes. The onions will release moisture and shrink down significantly. Do not rush this initial softening — it sets the stage for perfect caramelization.
⚠️ Common Mistake to Avoid: Adding the onions to cold butter or oil. Always melt the butter first over medium-high heat. Cold butter will make the onions steam instead of sauté, delaying the process and preventing proper browning.
Step 2: Caramelize the Onions
Reduce heat to medium. Stir in 1 teaspoon of salt and 1 teaspoon of granulated sugar. Cook for another 35 minutes, stirring occasionally — every 5 minutes or so. The onions will turn a deep golden brown and become almost syrupy. This is the most important step. The sugar helps accelerate caramelization, but the salt also draws out moisture, creating a rich, complex flavor. Patience here is everything.
💡 emy’s Pro Tip: Do not walk away from the pot. Set a timer for every 5 minutes and give the onions a good stir. This prevents burning and ensures even caramelization. If you see any dark spots forming, reduce the heat slightly and scrape them up with your wooden spoon — those browned bits are flavor gold!
Step 3: Add Garlic and Deglaze
Add the minced garlic and cook until fragrant, about 20 seconds. Then pour in the 1/2 cup of dry red wine. Use a wooden spoon to scrape up all the brown bits on the bottom and sides of the pot — this is called deglazing. Those bits are packed with flavor, and the wine lifts them into the broth. Let the wine bubble for about 30 seconds to cook off the alcohol.
⚠️ Common Mistake to Avoid: Pouring the wine into a too-hot pot. Reduce the heat to medium before adding the wine to prevent it from splattering or burning off too quickly. The deglazing should be a gentle fizz, not a violent steam explosion.
Step 4: Simmer the Broth
Add the 32 ounces of low-sodium beef broth, 24 ounces of low-sodium chicken broth, 1 tablespoon of Worcestershire sauce, 2 sprigs of fresh thyme, and 1 bay leaf. Stir everything together. Bring the soup to a gentle simmer over medium/medium-low heat. Let it cook for about 20 minutes, stirring occasionally. Do not let it boil hard — a gentle simmer allows the flavors to meld without clouding the broth.
💡 emy’s Pro Tip: Taste the broth after 15 minutes of simmering. The flavors should be rich and savory. If it tastes flat, add another splash of Worcestershire sauce or a pinch of salt. Remember, you are building layers, so adjust as you go.
Step 5: Finish the Soup
Remove and discard the thyme sprigs and bay leaf. Stir in the 1/2 tablespoon of balsamic vinegar. Taste the soup again and season with a pinch of salt and freshly ground black pepper as needed. Reduce heat to low, cover the pot, and keep it hot while you prepare the bread and cheese. The balsamic vinegar adds a final touch of brightness that cuts through the richness.
⚠️ Common Mistake to Avoid: Adding the balsamic vinegar too early. It should be added only at the end, after the herbs are removed. Adding it during the simmer can make the flavor flat and dull. The vinegar needs to stay bright and vibrant.
Step 6: Toast the Bread
Preheat your oven broiler with the rack 6 inches from the heat source. Arrange the 5 slices of French bread on a baking sheet. Brush both sides with the 2 tablespoons of olive oil. Broil for 2-3 minutes total, flipping once, until the bread is well toasted on both sides. Keep a close eye on the bread — it can burn in seconds under a hot broiler. Every oven is different, so watch carefully. Remove from heat but leave the broiler on.
💡 emy’s Pro Tip: Do not skip toasting the bread. If you add untoasted bread to the soup, it will become soggy and fall apart before the cheese melts. Toasted bread holds its structure and creates a sturdy platform for the cheese. I like to toast it until just golden — it will continue to brown under the broiler with the cheese.
Step 7: Assemble and Broil
Arrange oven-safe bowls or crocks on a rimmed baking sheet. Fill each bowl 2/3 full with the hot soup. Top each bowl with one slice of toasted bread. Sprinkle evenly with the 1 & 1/2 cups shredded Gruyère, 1/4 cup shredded mozzarella, and 2 tablespoons grated Parmesan. Make sure the cheese covers the bread entirely and extends slightly over the edges of the bowl — this will create a wonderful crusty seal as it melts.
Broil the assembled bowls until the cheese is bubbly and golden brown. As it melts and softens, the cheese will fall over the sides of the crock, forming that irresistible crusty seal. This usually takes 2-4 minutes, but watch closely. Remove from the oven and let the bowls cool for 2-3 minutes before serving — the soup inside is extremely hot!
⚠️ Common Mistake to Avoid: Using cold cheese straight from the fridge. Always let the shredded cheese come to room temperature before assembling. Cold cheese takes longer to melt and can burn on top while remaining unmelted underneath. Take the cheese out 20 minutes before you need it.
This homemade French Onion Soup recipe will knock your socks off! Made with the richest broth, perfect caramelized onions, and topped with three different types of melted cheese!Step-by-step photos can be seen below the recipe card.
Ingredients
Scale
4 tablespoons unsalted butter
5 large yellow onions (thinly sliced)
1 teaspoon salt
1 teaspoon granulated sugar
2 cloves garlic (minced)
1/2 cup dry red wine ((see note))
32 ounces low-sodium beef broth
24 ounces low-sodium chicken broth
1 tablespoon Worcestershire sauce
2 sprigs fresh thyme
1 bay leaf
1/2 tablespoon balsamic vinegar
pinch of salt and freshly ground black pepper (to taste)
In a large pot over medium-high heat, melt the butter. Add in the onions and sauté, stirring often, until softened, about 10 minutes.
Reduce heat to medium, stir in the salt and sugar; cook for another 35 minutes, stirring occasionally (every 5 minutes or so), until onions are caramelized and almost syrupy.
Add in the garlic and cook until fragrant, about 20 seconds.
Pour in the red wine to deglaze the pot, scraping up any brown bits on the bottom and sides.
Add in the beef broth, chicken broth, Worcestershire sauce, thyme, and bay leaf.
Gently simmer over medium/medium-low heat for about 20 minutes, stirring occasionally.
Remove and discard the herbs.
Mix in balsamic vinegar and taste. Season with additional salt and pepper, if necessary.
Reduce heat to low, cover to keep hot while you prepare the bread.
Preheat oven broiler, with rack 6 inches from the heat source. Arrange bread slices on a baking sheet and brush both sides with the olive oil. Broil 2-3 minutes total, flipping once, until well toasted on both sides. (NOTE: keep an eye on the bread the entire time to ensure it doesn't burn. Every oven is different.) Remove from heat; leave broiler on.
Arrange oven safe bowls or crocks on a rimmed baking sheet. Fill each bowl 2/3 full with hot soup. Top each bowl with 1 slice toasted bread, and sprinkle with the Swiss, Mozzarella, and Parmesan cheeses.
Broil until bubbly and golden brown. As it softens, the cheese will fall over the sides of the crock and form a wonderful crusty seal.
Serve and enjoy!
Easy Homemade Hoisin Sauce Recipe
Table of Contents
Easy Homemade Hoisin Sauce Recipe – A Sweet, Salty, and Spicy Pantry Staple
⚖️
Difficulty
Easy
⏲️
Prep Time
5 mins
🕒
Cook Time
5 mins
⏱️
Total Time
10 mins
🍽️
Servings
About ¾ cup
My mom’s kitchen in Morocco always smelled like slow-cooked tagines and earthy spices, but when I moved to New York for culinary school, I fell hard for the bold, sticky-sweet sauces of Chinatown. This easy homemade hoisin sauce recipe is my love letter to that pantry staple. I wanted a version that I could whip up in minutes with ingredients I always have on hand—soy sauce, peanut butter, honey, and a splash of rice vinegar. The unique angle here is that I add a bit of Sriracha for heat, making it as spicy as you like. It’s sweet, salty, and infinitely customizable, just like the sauces I used to dream about during my pastry classes in Paris.
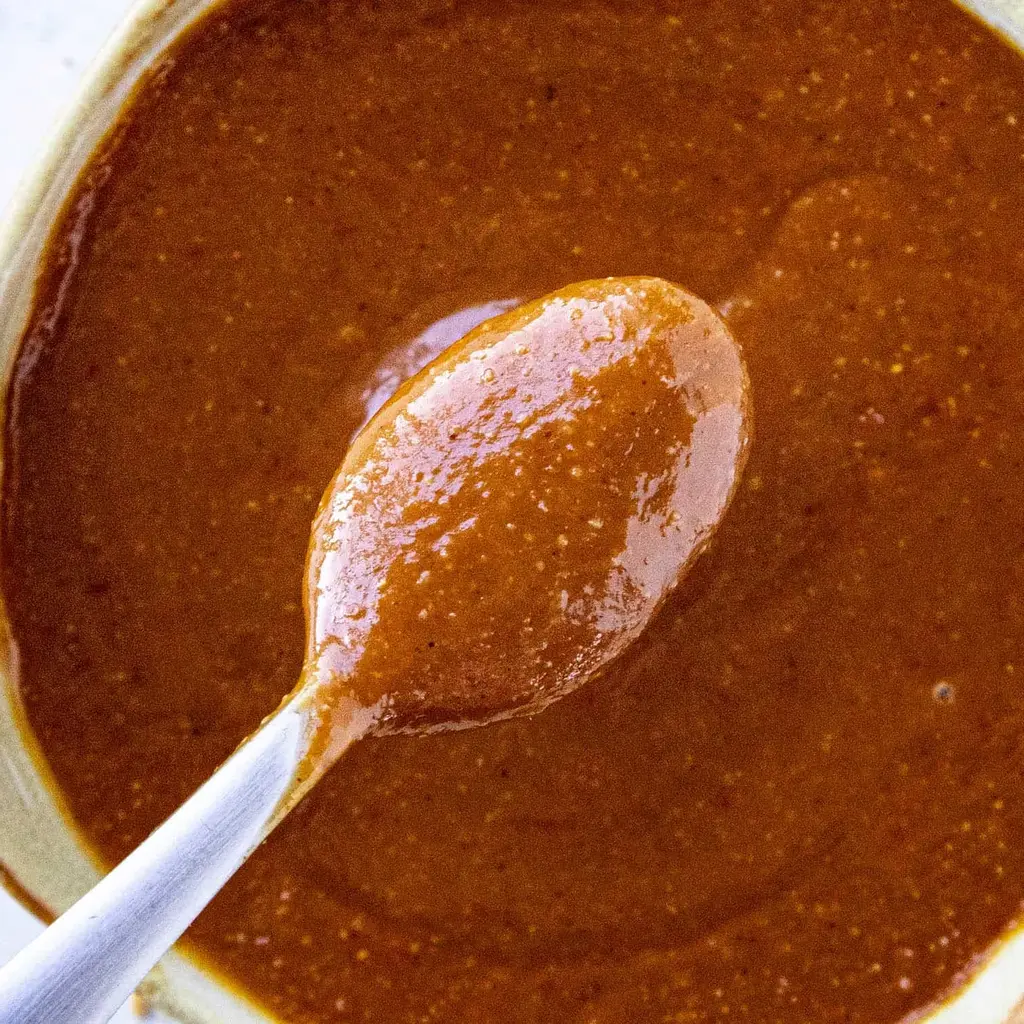
Imagine the deep, savory aroma of soy sauce mingling with the nutty richness of peanut butter, all balanced by the floral notes of Chinese five spice powder. A hint of garlic cuts through the sweetness of honey, while the rice vinegar adds a bright tang that wakes up your taste buds. The sauce is glossy and thick, perfect for glazing ribs, coating stir-fried noodles, or dipping spring rolls. I love how the Sriracha (or your favorite chili paste) gives it a slow-building warmth that makes you want to keep tasting. It’s a sauce that transforms simple dishes into something magical.
As a trained chef who has spent years perfecting sauce work in Paris and now cooks daily for my NYC family, I can tell you that this recipe is a game-changer. Most store-bought hoisin sauces are loaded with preservatives and high-fructose corn syrup—my version uses real ingredients and lets you control the spice level entirely. 💡 emy’s Pro Tip: The secret is to thicken the sauce with a cornstarch slurry, which gives it that perfect cling without being gluggy. Avoid the common mistake of simmering it too high and too fast—that will make the cornstarch clump. This recipe is foolproof and fast, ready in just 10 minutes.
Why This Homemade Hoisin Sauce Recipe Is the Best
The flavor secret is in the balance. Growing up in Morocco, I learned to layer spices with patience—a philosophy I brought to my Parisian training and now to my NYC kitchen. Here, the Chinese five spice powder (cinnamon, cloves, fennel, star anise, and Szechuan peppercorns) dances with the umami of soy sauce and the natural sweetness of honey. Peanut butter adds a creamy, nutty depth that traditional hoisin sauce gets from fermented soybean paste, but without needing hard-to-find ingredients. This unique twist makes it both accessible and unforgettable.
Perfected texture comes from a chef’s trick: the cornstarch slurry. I whisk a teaspoon of cornstarch with cold water and stir it into the warm sauce. This technique, which I learned in a Parisian pastry kitchen for thickening fruit coulis, creates a silky, glossy finish that clings beautifully to food. Unlike store-bought sauces that can be runny or pasty, this homemade version is just right—lush and pourable. It’s the same precision I use when making a classic French beurre blanc.
This recipe is foolproof and fast, making it ideal for busy weeknights. You don’t need to hunt for obscure ingredients or slave over a hot stove. With just 10 minutes and common pantry items (soy sauce, peanut butter, honey, garlic, rice vinegar, Chinese five spice, Sriracha, and cornstarch), you have a versatile sauce that beats any jarred version. It’s also naturally gluten-free if you use tamari, and easily vegan with maple syrup. Whether you’re a beginner or a seasoned cook, this is a recipe you’ll turn to again and again.
Homemade Hoisin Sauce Ingredients
I love shopping for these ingredients at the Union Square Greenmarket or my local Asian market in Chinatown. There’s something special about picking up fresh garlic and a good soy sauce—it reminds me of the spice markets in Marrakech where my mom would haggle for the best cinnamon. You don’t need anything fancy, just a well-stocked pantry.
Ingredients List
4 tablespoons soy sauce
2 tablespoons rice vinegar
2 tablespoons peanut butter (or try it with tahini or black bean sauce)
½ teaspoon Chinese five spice powder (use more as desired)
2 teaspoons Sriracha (or any Chinese hot sauce, chili paste, or your favorite hot sauce)
1 teaspoon cornstarch
Ingredient Spotlight
Soy Sauce: This provides the salty, umami backbone. I recommend using naturally brewed soy sauce like Kikkoman or San-J—avoid the cheap imitation stuff that’s just salt and color. For a gluten-free version, swap in tamari or coconut aminos. The flavor will be slightly milder but still delicious.
Peanut Butter: This is my favorite shortcut for richness. Using creamy peanut butter (not the chunky kind) gives the sauce a smooth, luscious texture. If you’re allergic to peanuts, try tahini (sesame paste) or Chinese black bean sauce. Tahini adds a nutty, slightly bitter note that works beautifully with the honey. Black bean sauce will make it saltier, so go easy on the soy sauce.
Chinese Five Spice Powder: This blend is the soul of the sauce. It combines star anise, cloves, cinnamon, Szechuan peppercorns, and fennel seeds. You can find it in any supermarket’s spice aisle, but for the freshest flavor, try a specialty spice shop in NYC like Kalustyan’s. Start with ½ teaspoon and adjust—too much can be overpowering.
Original Ingredient
Best Substitution
Flavor / Texture Impact
Soy Sauce
Tamari or coconut aminos
Less salty, slightly sweeter; gluten-free option
Peanut Butter
Tahini or black bean sauce
Tahini: nuttier, slightly bitter. Black bean sauce: saltier, fermented flavor
Honey
Brown sugar or maple syrup
Brown sugar: deeper molasses note. Maple syrup: thinner, woodsy sweetness
Sriracha
Chili garlic sauce, sambal oelek, or gochujang
Chili garlic sauce: more garlicky. Gochujang: sweeter, fermented heat
How to Make Homemade Hoisin Sauce — Step-by-Step
Making this sauce is so easy, you’ll wonder why you ever bought it from a jar. Just follow these simple steps, and you’ll have a thick, glossy, and deeply flavorful sauce in under 10 minutes.
Step 1: Combine the Base
Add all of the ingredients to a small pot, except for the cornstarch. That means the soy sauce, rice vinegar, peanut butter, minced garlic, honey, Chinese five spice powder, and Sriracha. Use a small whisk to stir everything together until the peanut butter is mostly incorporated. It’s okay if there are a few tiny lumps—they’ll melt as it heats.
💡 emy’s Pro Tip: For a deeper flavor, let the garlic sit in the soy sauce for a minute before heating—it will bloom the aroma.
Step 2: Warm It Up
Place the pot on the stove over medium heat. Warm the mixture, stirring constantly, until the peanut butter fully melts and the sauce comes together into a smooth, fragrant liquid. This should take about 2–3 minutes. Don’t let it boil—just a gentle simmer. Watch for small bubbles around the edges, which is your cue that it’s ready for the next step.
⚠️ Common Mistake to Avoid: If you heat the sauce too high, the honey can burn and the garlic can become bitter. Keep it at medium heat and stir frequently.
Step 3: Make the Cornstarch Slurry
In a small bowl, whisk the cornstarch with 2 tablespoons of cold water until the cornstarch completely dissolves. You’re looking for a milky, white liquid with no lumps. This slurry is what will give your hoisin sauce that gorgeous, glossy thickness.
💡 emy’s Pro Tip: Use cold water, not hot—hot water will cause the cornstarch to clump immediately. Whisk vigorously until it’s smooth like cream.
Step 4: Thicken the Sauce
Pour the cornstarch and water mixture into the hoisin sauce pot while whisking constantly. Keep whisking for about 30 seconds until the slurry is fully incorporated. You’ll see the sauce start to thicken and become more viscous almost immediately.
⚠️ Common Mistake to Avoid: Pouring the slurry in all at once without stirring can create lumps. Slowly stream it in while whisking to ensure a silky-smooth texture.
Step 5: Simmer and Serve
Heat the sauce for another 1–2 minutes, continuing to stir, until it reaches your desired thickness. The sauce should coat the back of a spoon—think thick maple syrup consistency. Remove it from the heat immediately to prevent over-thickening. Taste and adjust: add more Sriracha for heat, or a pinch of salt for saltiness. Serve warm or at room temperature.
💡 emy’s Pro Tip: The sauce will continue to thicken slightly as it cools. If it becomes too thick, whisk in a teaspoon of warm water to loosen it up.
Step
Action
Duration
Key Visual Cue
1
Combine all ingredients except cornstarch
1 min
Peanut butter partially mixed in; small lumps visible
2
Heat over medium, stirring
2–3 mins
Smooth, fragrant liquid with small bubbles at edges
3
Whisk cornstarch with cold water
30 secs
Milky white, lump-free slurry
4
Add slurry, whisk constantly
30 secs
Sauce begins to thicken visibly
5
Simmer until thickened
1–2 mins
Coats back of spoon; glossy, thick maple syrup consistency
Serving & Presentation
This homemade hoisin sauce is incredibly versatile. Brush it on grilled chicken thighs or pork ribs during the last few minutes of cooking for a sticky, caramelized glaze. I love drizzling it over a bowl of steaming ramen or soba noodles, topped with scallions and sesame seeds. It also makes a fantastic dipping sauce for spring rolls, dumplings, or roasted cauliflower. For a Moroccan twist, try it with lamb meatballs—the sweetness and spice pair beautifully with harissa.
When I’m hosting a dinner party in my NYC apartment, I serve this sauce in a small, rustic bowl alongside a platter of crispy tofu and vegetable skewers. The deep brown color and glossy sheen catch the light, and the aroma of Chinese five spice fills the room. I like to garnish with a sprinkle of sesame seeds and a few thin slices of red chili. It’s simple, elegant, and always gets compliments.
Pairing Type
Suggestions
Why It Works
Side Dish
Steamed jasmine rice, stir-fried bok choy, roasted broccoli
Absorbs sauce well; neutral base for bold flavors
Sauce / Dip
Spring rolls, dumplings, chicken skewers, egg rolls
Sticky, flavorful coating; a perfect balance of sweet and salty
Beverage
Crisp lager like Sapporo, dry Riesling, iced green tea
Cuts through richness; refreshes the palate between bites
Garnish
Toasted sesame seeds, finely sliced scallions, fresh cilantro, red chili flakes
Adds texture, freshness, and visual pop
Make-Ahead, Storage & Reheating
As a busy NYC professional cook, I often double this recipe on Sunday so I have hoisin sauce ready for the week. It stores beautifully and actually develops more depth of flavor overnight as the spices meld. It’s a total game-changer for meal-prepping everything from weekday stir-fries to last-minute glaze for salmon.
This homemade hoisin sauce recipe is easy to whip together with common pantry ingredients. It’s sweet and salty and you can make it as spicy as you want it.
Ingredients
Scale
4 tablespoons soy sauce
2 tablespoons rice vinegar
2 tablespoons peanut butter ((Or try it with tahini or black bean sauce – peanut butter is more readily available and easier))
3 cloves garlic (minced – 1 teaspoon garlic powder is good instead)
2 tablespoons honey ((you can use brown sugar instead))
1/2 teaspoon Chinese Five Spice Powder (use more as desired)
2 teaspoons Sriracha ((or use any Chinese hot sauce, red chili sauce, chili paste or try your favorite hot sauce))
1 teaspoon cornstarch
Instructions
Add all of the ingredients to a small pot, except for the cornstarch.
Heat to medium heat and warm through, stirring, until the ingredients combine.
In a small bowl, whisk the cornstarch with 2 tablespoons of cold water, until the cornstarch dissolves.
Pour the cornstarch and water mixture into the hoisin sauce pot and whisk until well combined.
Heat for another 1-2 minutes, until the hoisin sauce thickens.
Serve!
BEST Sweet and Sour Sauce
Table of Contents
BEST Sweet and Sour Sauce – Better Than Store-Bought in 10 Minutes
⚖️
Difficulty
Easy
⏲️
Prep Time
3 mins
🕒
Cook Time
7 mins
⏱️
Total Time
10 mins
🍽️
Servings
about 1.5 cups
I still remember the first time I made this BEST sweet and sour sauce from scratch. It was a rainy Tuesday in my tiny New York City apartment, and I was craving the tangy, glossy sauce from my favorite Chinese takeout spot. But as a trained pastry chef from Le Cordon Bleu in Paris, I knew I could make it better. So I rummaged through my pantry, grabbed some pineapple juice I had leftover from a Moroccan breakfast, and started experimenting. The result? A sauce so vibrant, so perfectly balanced, that my husband declared it “better than takeout.” This isn’t just any sweet and sour sauce—it’s the one that will make you never buy a bottle from the store again.
Close your eyes and imagine it: a brilliant, jewel-toned sauce that clings to crispy chicken or shrimp like a second skin. The first hit is pure pineapple sweetness, followed by a bright tang from rice vinegar that makes your mouth water. There’s a savory depth from soy sauce and a faint tomato note from ketchup that rounds everything out. It’s thick enough to coat a spoon but not syrupy—a velvety texture that I perfected by using a cornstarch slurry, a technique I learned from my French training. The aroma? Like a walk through the night market in Marrakech, where smoky and sweet meet in the most delicious way.
What makes my version truly the BEST is that it’s completely free of artificial colors, high-fructose corn syrup, and preservatives. I use real pineapple juice for authentic fruit flavor, and I’ll show you how to get that iconic restaurant color naturally. Plus, I’m sharing a 💡 emy’s Pro Tip for avoiding a common mistake that ruins many homemade sauces: a lumpy texture. One simple trick and you’ll have a silky, smooth sweet and sour sauce every single time. Ready to ditch the bottled stuff? Let’s get cooking.
Why This Sweet and Sour Sauce Recipe Is the Best
The Flavor Secret: The magic here lies in using canned pineapple juice as the base. It’s naturally sweeter and more acidic than fresh pineapple at most grocery stores, giving you a consistent result every time. Growing up in Morocco, we always had cans of pineapple in the pantry for a family treat. Now in my NYC kitchen, I combine that sweetness with light brown sugar and a splash of rice vinegar to create a sweet and sour sauce that’s complex, not cloying. This is the unique angle that sets my recipe apart.
Perfected Texture: A great sweet and sour sauce needs to be thick enough to coat, but not so thick it turns into jelly. The trick, which I learned in Paris, is to dissolve your cornstarch completely in cold water before adding it to the hot liquid. This “slurry” method prevents lumps and guarantees a glossy, smooth sauce that looks as good as it tastes. I’ll guide you through the exact moment to add it—right when the sauce reaches a boil—for perfect results.
Foolproof & Fast: With just three minutes of prep and seven minutes on the stove, this sweet and sour sauce is practically effortless. It’s a 10-minute recipe that even a beginner can master. No weird ingredients, no complicated techniques—just a saucepan, a whisk, and a few pantry staples. This is the kind of sauce that makes you feel like a chef, even on a busy weeknight.
Sweet and Sour Sauce Ingredients
I find all of these ingredients at my local New York City grocery store—no specialty Asian market needed (unless you want to explore!). The rice vinegar is usually in the international foods aisle, and the canned pineapple juice is next to the fruit juices. It reminds me of my mother’s kitchen in Morocco, where she’d always have a can of pineapple waiting for a special occasion. Here’s exactly what you need for this BEST sweet and sour sauce.
Ingredients List
1 cup canned pineapple juice (see note)
3/4 cup packed light brown sugar OR brown sugar alternative (for low sugar option)
1/3 cup rice vinegar (found in the Asian or general vinegar section of any grocery store, or you can substitute apple cider vinegar)
3 tablespoons ketchup
2 tablespoons soy sauce or tamari (GF)
For the Cornstarch Slurry: 1 1/2 tablespoons cornstarch dissolved in 2 tablespoons water
Optional: 2-3 drops natural red food coloring
Ingredient Spotlight
Pineapple Juice: This is the backbone of your sweet and sour sauce. Use canned, unsweetened pineapple juice for the most reliable flavor. Fresh pineapple juice can work, but it’s less consistent in sweetness. Look for a brand with no added sugar. For a tested substitution, you can use a 20-ounce can of crushed pineapple and strain out the juice, but you’ll get a slightly pulpy texture.
Rice Vinegar: This mild, slightly sweet vinegar is what gives the sauce its authentic tang. It’s milder than white vinegar, so the result is less harsh. Substitute with apple cider vinegar in a pinch—just use 1/4 cup plus 1 teaspoon, as it’s stronger. The flavor will be slightly fruitier, but still delicious.
Ketchup: Don’t skip this! It adds a subtle tomato flavor and helps develop that iconic red-orange color. Use a good quality brand like Heinz. For a cleaner option, use tomato paste (1 tablespoon) mixed with 2 teaspoons of honey and 1 teaspoon of vinegar.
Method
Container
Duration
Reheating Tip
Original Ingredient
Best Substitution
Flavor / Texture Impact
Canned pineapple juice
Fresh pineapple juice (strained, from about 1/2 pineapple)
More variable sweetness; slightly thinner
Light brown sugar
Coconut sugar or brown sugar alternative (like Swerve)
Deeper, more caramel-like flavor; slightly lower sweetness
Rice vinegar
Apple cider vinegar (use 1/4 cup + 1 tsp)
Fruitier, slightly sharper tang
Soy sauce
Coconut aminos (for soy-free)
Slightly sweeter, less salty; still savory
How to Make Sweet and Sour Sauce — Step-by-Step
Trust me, this is the easiest homemade sauce you’ll ever make. Just follow these simple steps and you’ll have a restaurant-quality sweet and sour sauce in minutes.
Step 1: Combine Base Ingredients
Place 1 cup of canned pineapple juice, 3/4 cup packed light brown sugar, 1/3 cup rice vinegar, 3 tablespoons ketchup, and 2 tablespoons soy sauce in a small saucepan. Whisk everything together until the sugar is mostly dissolved. Don’t worry if it looks a little cloudy—it will clear as it heats.
💡 emy’s Pro Tip: Use a small saucepan (about 2 quarts) so the liquid doesn’t spread too thin. This helps the sauce heat evenly and thicken faster.
Step 2: Bring to a Boil
Set the saucepan over medium-high heat and bring the mixture to a rolling boil. Stir occasionally to prevent the sugar from burning on the bottom. You’ll see large bubbles breaking the surface—that’s your cue to move to the next step. This takes about 4-5 minutes.
⚠️ Common Mistake to Avoid: Don’t walk away! Once it starts boiling, it can foam up quickly. Keep an eye on it to prevent a sticky mess on your stove.
Step 3: Add the Cornstarch Slurry
In a small bowl, whisk 1 1/2 tablespoons cornstarch with 2 tablespoons cold water until completely smooth. This is your slurry. With the boiling sauce still on the heat, pour the slurry in a steady stream while whisking constantly. The sauce will thicken almost immediately.
💡 emy’s Pro Tip: Make sure the slurry is smooth before adding it—any lumps of dry cornstarch will create lumpy sauce. I like to use a fork to whisk it thoroughly.
Step 4: Simmer and Finish
Reduce the heat to low and simmer the sweet and sour sauce for 1 minute, stirring constantly. You’ll see it go from a thin liquid to a glossy, thick sauce that coats the back of a spoon. If using natural red food coloring (like from beet juice), stir in 2-3 drops now. Remove from heat and let it cool completely.
⚠️ Common Mistake to Avoid: Don’t overcook after adding the slurry! Over-simmering can break down the cornstarch and make the sauce thin again. One minute is all you need.
Step
Action
Duration
Key Visual Cue
1
Whisk base ingredients in saucepan
1 min
Sugar mostly dissolved, liquid cloudy
2
Bring to a boil
4-5 min
Large, rolling bubbles cover the surface
3
Add cornstarch slurry while whisking
10 sec
Sauce thickens instantly
4
Simmer and finish
1 min
Glossy, coats the back of a spoon
Serving & Presentation
This BEST sweet and sour sauce is incredibly versatile. In my NYC kitchen, I love to pair it with crispy fried chicken or shrimp for a classic restaurant-style dish. Just toss the hot, crispy protein in the sauce right after frying, and watch the magic happen—the sauce clings beautifully. For a vegetarian option, try it with crispy tofu or tempura vegetables. The contrast of crunchy and sticky is absolutely addictive.
For a beautiful presentation, drizzle the sauce over your main dish with a spoon, then garnish with thinly sliced green onions and toasted sesame seeds. I like to serve it alongside steamed jasmine rice and a simple side of steamed broccoli or snow peas. The sauce also works as a dipping sauce for spring rolls, wontons, or even chicken nuggets. It brings back memories of my mother’s table in Morocco, where a sweet and tangy sauce was always the star of the meal.
Spring rolls, fried wontons, chicken nuggets, egg rolls
Crispy textures contrast with the glossy sauce
Beverage
Iced green tea, crisp lager, or a light Riesling
Refreshing drinks cut through the sweetness
Garnish
Green onions, toasted sesame seeds, fresh cilantro
Adds color, freshness, and crunch
Make-Ahead, Storage & Reheating
This sweet and sour sauce is a meal-prepper’s dream. In my busy NYC schedule, I always make a double batch on Sunday and keep it in the fridge for quick stir-fries and dipping sauces all week. Let the sauce cool completely before storing—this prevents condensation from diluting it. Here’s how to keep it fresh.
Method
Container
Duration
Reheating Tip
Refrigerator
Airtight glass jar or container
2-3 weeks
Reheat gently in a saucepan over low heat, whisking. Add 1-2 teaspoons of water if too thick.
Freezer
Freezer-safe jar or zip-top bag (leave 1/2 inch headroom)
Making your own sweet and sour sauce couldn’t be any easier! Plus it’s free of junk ingredients and tastes MUCH better than store-bought!
Ingredients
Scale
1 cup canned pineapple juice (, see note)
3/4 cup packed light brown sugar
OR brown sugar alternative ((for low sugar option))
1/3 cup rice vinegar (, found in the Asian or general vinegar section of any grocery store, or you can substitute apple cider vinegar)
3 tablespoons ketchup
2 tablespoons soy sauce or tamari (GF)
For the Cornstarch Slurry: 1 1/2 tablespoons cornstarch dissolved in 2 tablespoons water
Optional: 2-3 drops natural red food coloring
Instructions
Place all of the ingredients, except for the cornstarch slurry, in a small saucepan and bring to a boil. Stir in the cornstarch slurry and simmer for another minute until thickened, stirring constantly. If using red food coloring, stir it in.
Let the sauce cool completely and store in an airtight container in the refrigerator where it will keep for 2-3 weeks.
Garlic Sauce
Table of Contents
Garlic Sauce: The Creamy Dip That Goes with Everything — A Foolproof, 5-Minute Recipe
⚖️
Difficulty
Easy
⏲️
Prep Time
5 mins
🕒
Cook Time
0 mins
⏱️
Total Time
5 mins
🍽️
Servings
16
Let me tell you about the first time I truly understood garlic sauce. It was in my mother’s kitchen in Morocco—a tiny, sun-drenched room filled with the scent of cumin and fresh herbs. She was making a simple dip for warm, crusty bread, using garlic smashed with a mortar and pestle, a splash of lemon, and thick yogurt that came from a neighbor’s goat. That sauce was magic: creamy, pungent, and impossibly bright. Now, living in New York City and having trained at Le Cordon Bleu in Paris, I’ve taken that memory and turned it into this Garlic Sauce—a creamy, garlicky, sour cream-based sauce that I whip up in under five minutes. It’s the kind of versatile condiment that makes everything taste better, whether you’re dipping crispy french fries, slathering it on a grilled chicken wrap, or drizzling it over a slice of homemade pizza.
What makes this Garlic Sauce so special is the texture. It’s not thin or watery—it’s luscious and spoonable, with a velvety richness that clings to whatever you dip into it. The garlic is smashed, not minced, which releases the oils gently, ensuring a robust but not overwhelming heat. The sour cream and mayonnaise combine to create a tangy base that feels both indulgent and refreshing, while a hint of lemon juice brightens everything up. The first time I made this for friends here in NYC, they asked if I’d spent hours on it. I just laughed—it took me exactly the time it takes to toast a bagel. That’s the beauty of this recipe: it delivers restaurant-quality flavor with zero cooking and minimal effort.
As a professional cook and a busy mom, I’ve tested this sauce dozens of times to get it just right. The secret? A perfect balance of salt and lemon, and the simple trick of smashing the garlic instead of chopping it. In this post, I’ll show you how to nail it on your first try, share a pro tip for making the flavor even deeper, and caution you against a common mistake—using too much water, which can ruin the texture. Whether you’re new to cooking or a seasoned pro, this Garlic Sauce recipe will become a staple in your kitchen. Let’s get started!
Why This Garlic Sauce Recipe Is the Best
The flavor secret here lies in the technique: smashing the garlic. When you smash garlic cloves with the flat side of a knife (or use a mortar and pestle, like my mother did), you rupture the cells and release allicin—the compound that gives garlic its punch—without the bitterness that can come from slicing. This creates a mellow, aromatic foundation that infuses the sour cream beautifully. I learned this trick in Paris, where we’d smash garlic for sauces to keep them elegant and smooth. Combined with the natural tang of sour cream and the richness of mayonnaise, this Garlic Sauce has a depth that bottled versions simply can’t match. It’s the kind of creamy, garlicky sauce you’ll want to put on everything from roasted vegetables to a simple piece of grilled fish.
Perfected texture is what sets this sauce apart from others. The ratio of sour cream to mayonnaise is key: too much sour cream and it becomes too tangy and thin; too much mayo and it’s overly heavy and greasy. I’ve calibrated this recipe so that it’s thick enough to stay on a chip without dripping, yet spreadable enough to coat a slice of bread evenly. A single teaspoon of water is all you need to loosen the mixture to the ideal consistency—just enough to make it smooth without diluting the flavor. In my NYC kitchen, I often test it by dipping a cold carrot stick—if it clings without sliding off, it’s perfect. This foolproof method works every time, even if you’re making it for the first time.
And it’s foolproof and fast—truly. You don’t need a stove, a knife (well, just for smashing the garlic), or any special equipment. A bowl and a spoon are all you require. I’ve had neighbors in Brooklyn ask me for this recipe after a potluck, and they’re always shocked at how simple it is. There’s no cooking, no waiting, and the results are consistent, batch after batch. For beginners, this is the perfect gateway to making your own sauces. Once you taste how vibrant and customizable homemade garlic sauce is, you’ll never go back to store-bought.
Garlic Sauce Ingredients
One of the things I love most about this recipe is that you can find every ingredient in any regular American grocery store—and they’re all budget-friendly. On my shopping trips to the Union Square Greenmarket or the bodega around the corner, I always keep these staples on hand. The smell of fresh garlic reminds me of the spice souk in Marrakech, where vendors would pile heads of garlic like jewels. For the best results, choose ingredients that are fresh and high-quality, because this simple sauce lets every flavor shine.
Ingredients List
2 cloves garlic, peeled and smashed
1½ cups (345 g) sour cream
½ cup (116 g) mayonnaise
1 teaspoon water
1 teaspoon kosher salt
½ teaspoon black pepper
1 teaspoon lemon juice, freshly squeezed
Ingredient Spotlight
Garlic: This is the star of the sauce, so use fresh cloves, not pre-chopped jarred garlic. When you smash the clove, you get a mellow, slightly sweet flavor that melds into the sauce. At the store, choose plump, firm heads of garlic with no green sprouts. If you only have pre-minced garlic (from a jar), use about ½ teaspoon, but expect a sharper, more pungent taste—it’s okay for a quick fix, but not as nuanced. Also, for a roasted garlic variation, see the swaps section below!
Sour cream: This gives the sauce its tangy creaminess and helps balance the richness of the mayonnaise. I recommend full-fat sour cream for the best texture; low-fat or Greek yogurt can be substituted (see the substitutions table), but the sauce will be thinner and less luxurious. In a pinch, you can use crème fraîche, which adds a slightly nutty flavor.
Mayonnaise: This adds body and silkiness. Use a good-quality mayo like Hellmann’s or Duke’s; avoid light or fat-free versions, as they can make the sauce taste bland and watery. For a vegan option, see the variations section. The combination of sour cream and mayo is what gives this sauce its signature luscious mouthfeel.
Lemon juice: A small amount of fresh lemon juice brightens the sauce and cuts through the fat. Bottled lemon juice can be used, but fresh is much more vibrant. For a different tang, you could substitute with white wine vinegar, but it changes the flavor profile slightly—lemon is classic and works best.
Original Ingredient
Best Substitution
Flavor / Texture Impact
Sour cream
Greek yogurt (plain, full-fat)
More tangy, slightly thinner; still creamy
Mayonnaise
Vegan mayo (e.g., Just Mayo)
Slightly less rich; good for dairy-free diets
Kosher salt
Sea salt (use less—start with ½ teaspoon)
Same flavor, adjust to taste
Lemon juice
White wine vinegar (1 teaspoon)
Sharper acidity; less fruity
How to Make Garlic Sauce — Step-by-Step
This might just be the easiest sauce you’ll ever make. The whole process takes about five minutes from start to finish—no heat required, just a little elbow grease for smashing the garlic. I’ll walk you through each step so you feel confident and get a perfect result every time.
Step 1: Smash the Garlic
Peel two cloves of garlic and place them on a cutting board. Using the flat side of a chef’s knife (or a heavy skillet), press down firmly on each clove until it cracks open. You want it flattened, not completely pulverized—this releases the garlic oils without making a paste. Transfer the smashed cloves to a medium mixing bowl.
💡 emy’s Pro Tip: If you have a mortar and pestle, smash the garlic with a pinch of salt to create a smooth paste. This integrates the garlic even more fully into the sauce and gives a more intense, yet still smooth, flavor.
Step 2: Combine the Base Ingredients
Add the sour cream, mayonnaise, water, kosher salt, black pepper, and lemon juice to the bowl with the smashed garlic. Stir with a spoon or whisk until everything is well combined and creamy. Scrape the sides of the bowl to incorporate all ingredients evenly.
⚠️ Common Mistake to Avoid: Don’t over-stir! You want a smooth, homogenous sauce, but vigorous whisking can make the sauce too thin. Mix gently until just combined.
Step 3: Taste and Adjust
Take a small spoonful and taste the sauce. Adjust the seasoning: add more salt if needed, a pinch more pepper for heat, or an extra drop of lemon juice for brightness. Remember that the garlic flavor will intensify slightly after sitting for 10 minutes, so keep that in mind when tasting now.
💡 emy’s Pro Tip: For a more mellow, roasted garlic flavor, you can use roasted garlic cloves instead of fresh. The texture will be creamier, and the taste will be sweeter and more subtle—perfect for a gourmet twist.
Step 4: Refrigerate and Serve
Transfer the sauce to a serving bowl or a glass jar with a lid. Cover and refrigerate for at least 10 minutes before serving to allow the flavors to meld. This sauce tastes even better the next day. Store any leftovers in the refrigerator for up to a week.
⚠️ Common Mistake to Avoid: Never leave this sauce at room temperature for more than 2 hours. Because it contains dairy, it can spoil quickly. Always keep it chilled until ready to serve.
Step
Action
Duration
Key Visual Cue
1
Smash garlic
30 seconds
Cloves are flattened, not minced
2
Combine all ingredients
2 minutes
Smooth, creamy, no lumps
3
Taste and adjust
1 minute
Flavor balanced to your liking
4
Refrigerate and serve
10+ minutes
Chilled, thickened slightly
Serving & Presentation
This Garlic Sauce is a true chameleon in the kitchen. I love serving it as a dip for crispy potato wedges or fresh vegetable crudités—it’s a hit at every party I throw. Drizzle it over a warm piece of grilled chicken or use it as a spread for a turkey and avocado wrap; it adds a creamy, garlicky kick that elevates any meal. In my house, we even use it as a pizza sauce substitute for white pizza—just spread a thin layer over the dough before adding cheese and toppings. The tangy notes pair perfectly with earthy mushrooms and salty prosciutto.
For a beautiful presentation, transfer the sauce to a small bowl and garnish with a swirl of extra-virgin olive oil and a sprinkle of fresh chopped parsley or chives. A pinch of smoked paprika on top adds color and a subtle warmth. When I’m entertaining, I set out a platter of warm pita bread, grilled skewers, and seasonal veggies, with this sauce in the center—it always disappears first. The sauce looks lovely served in a rustic ceramic bowl, which reminds me of the tagine bowls my mother used in Morocco.
Iced tea with mint, light beer (e.g., pilsner), sparkling water with lemon
Cuts through the richness and refreshes the palate
Garnish
Fresh parsley, smoked paprika, drizzle of olive oil
Adds color, aroma, and a touch of elegance
Make-Ahead, Storage & Reheating
One of the best things about this Garlic Sauce is that it’s designed to be made ahead. I often prepare a double batch on Sunday and use it throughout the week for salads, sandwiches, and quick snacks. Since there’s no cooking involved, it’s the perfect meal-prep condiment—and it actually tastes better after the flavors have had time to meld overnight. I store mine in a glass jar with a tight-fitting lid, ready to grab from the fridge whenever I need it.
Garlic Sauce is a creamy, garlicky, sour cream-based sauce that can be used as a dipping sauce or as a flavorful kick that would be delicious on everything from bread to chicken to pizza!
Ingredients
Scale
2 cloves garlic, (peeled and smashed)
1½ cups (345 g) sour cream
½ cup (116 g) mayonnaise
1 teaspoon water
1 teaspoon kosher salt
½ teaspoon pepper
1 teaspoon lemon juice
Instructions
In a medium bowl, combine all the ingredients until creamy and smooth. Store in the refrigerator.
Dragon Sauce
Table of Contents
Dragon Sauce – The Perfect Balance of Sweet, Tangy & Spicy – A 5-Minute Pantry Staple
⚖️
Difficulty
Easy
⏲️
Prep Time
5 mins
🕒
Cook Time
3 mins
⏱️
Total Time
8 mins
🍽️
Servings
About ¾ cup
When I was growing up in Morocco, my mother had a way of transforming simple pantry ingredients into something magical. She’d whisk together a quick sauce for grilled meats or roasted vegetables, and the whole kitchen would fill with a scent that pulled everyone to the table. Years later, after training at Le Cordon Bleu in Paris and settling into my tiny but mighty NYC kitchen, I started experimenting with a sauce that could capture that same warmth and versatility. This Dragon Sauce is the result – a perfect balance of sweet, tangy, and spicy that comes together in just 5 minutes. I use it on everything from chicken wings to stir-fried greens, and it’s become my go-to dipping sauce for spring rolls and dumplings.
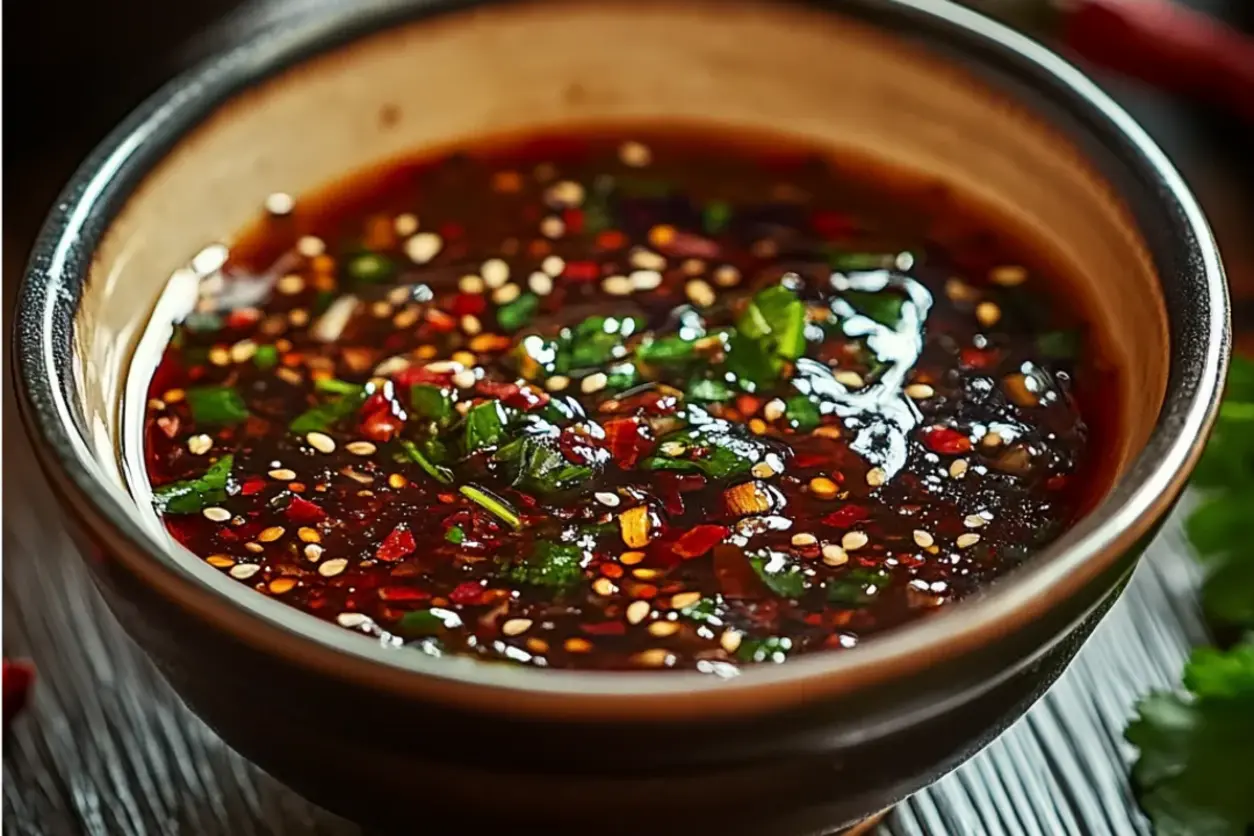
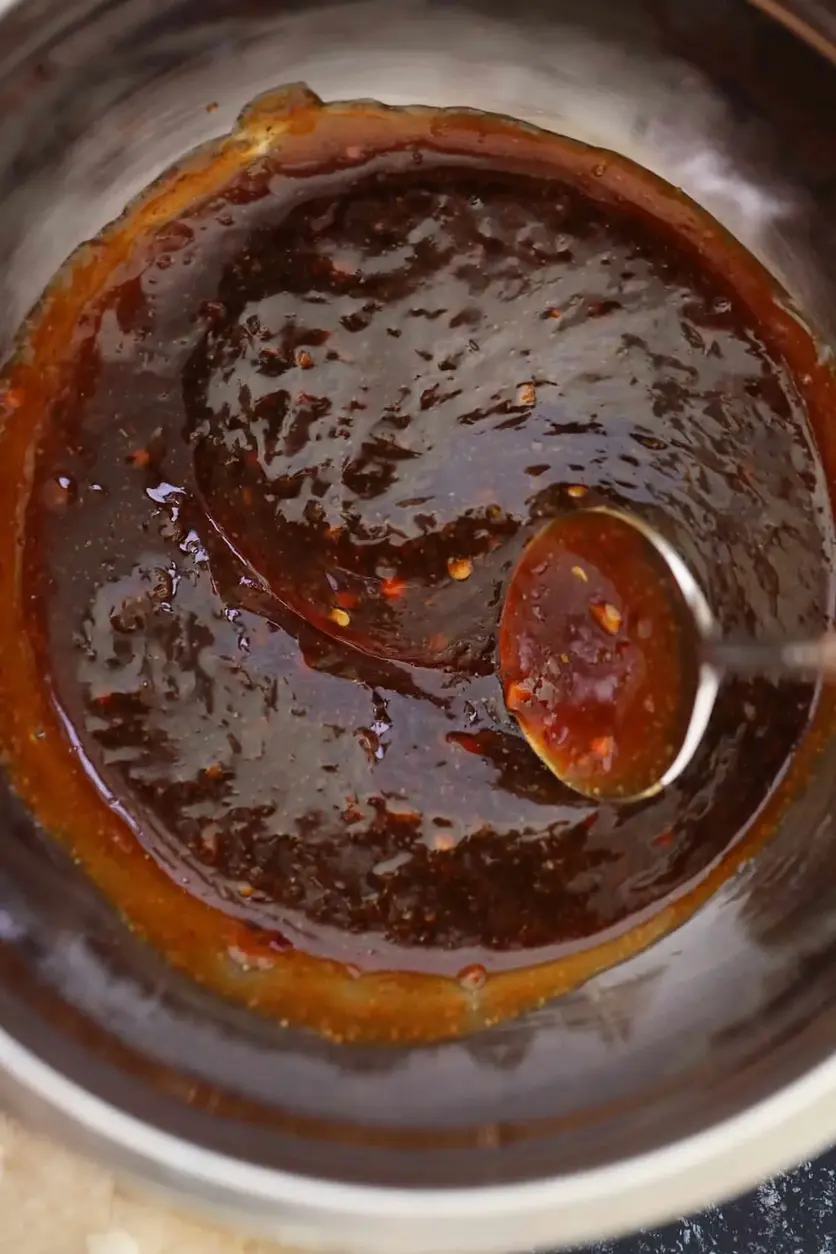
Let me describe what makes this Dragon Sauce so special. The first hit is pure honey sweetness – rich and floral, coating your tongue gently. Then comes the tangy brightness of rice vinegar, bright and clean like a splash of citrus. The heat sneaks in next, not a punch but a slow, warm build from the sriracha that lingers pleasantly. The soy sauce brings an umami depth, while fresh garlic and grated ginger add a fragrant, aromatic layer that makes your mouth water. The texture is smooth and glossy, thick enough to cling to a spoon but pourable enough to drizzle over a bowl of rice or noodles.
What sets my version apart is the technique I learned in Paris – a simple cornstarch slurry that gives the sauce a velvety, professional finish without any weird additives. It’s the same technique I use for French sauces, but here it makes the Dragon Sauce irresistibly smooth. 💡 I’ll share my pro tip for getting that perfect glossy consistency without clumps. And I’ll also warn you about a common mistake – rushing the thickening step – that can leave you with a watery sauce instead of this luxurious nectar. Trust me, once you make this, you’ll never buy bottled Asian-style sauce again.
Why This Dragon Sauce Recipe Is the Best
The flavor secret is in the balance. Growing up in Morocco, I learned that a great sauce is never about one dominant flavor – it’s about harmony. The honey and sriracha play together like old friends. The garlic and ginger add depth without overwhelming. My training in Paris taught me to let each ingredient shine, and that’s exactly what happens here. This isn’t just a spicy sauce – it’s a symphony of sweet, tangy, and heat that works beautifully on everything from grilled chicken to roasted vegetables.
The perfected texture comes from a classic French technique: the cornstarch slurry. Instead of cooking the cornstarch directly into the sauce (which can create lumps), I dissolve it in cold water first, then whisk it into the simmering liquid. This guarantees a silky, glossy finish every time. It’s the same method I use for my béchamel and velouté sauces – simple, reliable, and transformative. The result is a Dragon Sauce that clings to every bite without being gluey.
This recipe is foolproof and fast, making it perfect for busy weeknights. From start to finish, you’re looking at under 10 minutes. No hard-to-find ingredients, no special equipment – just a small saucepan and a whisk. As a busy NYC food blogger and mom, I rely on recipes that deliver big flavor with minimal effort. This Dragon Sauce is exactly that. Whether you’re a seasoned cook or a complete beginner, you’ll nail this on your first try.
Dragon Sauce Ingredients
I love how these ingredients are all pantry staples – things I always have in my NYC kitchen. Sometimes I grab fresh ginger from the Union Square Greenmarket, and the honey I use is from a local apiary upstate. But honestly, even shelf-stable versions work beautifully. This Dragon Sauce is forgiving and flexible.
Ingredients List
½ cup soy sauce
¼ cup honey
2 tbsp rice vinegar
2 cloves garlic, minced
1 tsp fresh ginger, grated
1 tbsp sriracha sauce (adjust to spice preference)
1 tbsp cornstarch
2 tbsp water
Ingredient Spotlight
Soy Sauce: This is the salty-umami backbone of the Dragon Sauce. I use a regular Japanese-style soy sauce (like Kikkoman) – not light or low-sodium, as we need the full flavor. Look for one with a deep, rich color and no added caramel coloring. If you’re gluten-free, swap with tamari or coconut aminos. Tamari gives a slightly thicker consistency, while coconut aminos will make the sauce a bit sweeter and less salty.
Honey: The sweet counterbalance to the heat and salt. I prefer a mild honey like clover or orange blossom – nothing too assertive, as we want the sweetness to support, not dominate. You can substitute with maple syrup or agave nectar. Maple syrup will add a slight woody note, which actually works beautifully in fall pairings with roasted root vegetables.
Sriracha: This is the heat source, but it’s also got a garlicky tang that deepens the sauce. The rooster-brand sriracha is classic and reliable. For a different flavor profile, try gochujang (Korean chili paste) – it’s thicker and has a fermented depth. Or use sambal oelek if you want pure heat without the garlic. Adjust the amount to your spice tolerance – start with 1 tbsp for a mild warmth, or go up to 2-3 tbsp for a serious kick.
Fresh Garlic & Ginger: These two are the aromatic heart of the sauce. Always use fresh – pre-minced garlic in a jar or powdered ginger won’t give the same bright, punchy flavor. I grate the ginger on a microplane for a fine paste that melts into the sauce. The garlic gets minced finely so it distributes evenly. If you’re in a real pinch, you can use ½ tsp garlic powder and ½ tsp ground ginger, but the fresh versions really elevate this Dragon Sauce to something special.
Method
Container
Duration
Reheating Tip
Refrigerator
Airtight glass jar or container
Up to 7 days
Stir before using—no reheating needed. Serve cold.
Freezer
Freezer-safe jar or zip-top bag (remove air)
Original Ingredient
Best Substitution
Flavor / Texture Impact
Soy Sauce
Tamari (gluten-free) or coconut aminos
Tamari is slightly thicker; coconut aminos are sweeter and less salty.
Honey
Maple syrup or agave nectar
Maple adds woody depth; agave is neutral and slightly thinner.
Sriracha
Gochujang or sambal oelek
Gochujang is thicker, fermented, sweeter; sambal oelek is pure heat.
Fresh garlic + ginger
½ tsp garlic powder + ½ tsp ground ginger (in a pinch)
Less aromatic, but still delivers a similar flavor profile.
How to Make Dragon Sauce — Step-by-Step
Making this Dragon Sauce is almost embarrassingly easy – but the results are anything but basic. Follow these steps, and you’ll have a restaurant-quality sauce in under 10 minutes.
Step 1: Mix the Slurry
In a small bowl, whisk together 1 tablespoon cornstarch and 2 tablespoons cold water until completely smooth. There should be no lumps at all. This is your thickening agent. Set it aside.
💡 emy’s Pro Tip: Use cold water – not warm or hot – to prevent the cornstarch from clumping. And whisk it just before you add it to the pan, since the starch settles quickly.
Step 2: Combine the Sauce Base
In a small saucepan, combine ½ cup soy sauce, ¼ cup honey, 2 tablespoons rice vinegar, 2 minced garlic cloves, 1 teaspoon grated fresh ginger, and 1 tablespoon sriracha. Whisk everything together to combine.
⚠️ Common Mistake to Avoid: Don’t add the cornstarch slurry yet. If you add it to the cold liquid, the starch will not dissolve properly and you’ll get lumps. The slurry always goes in when the sauce is simmering.
Step 3: Simmer
Place the saucepan over medium heat and bring the mixture to a gentle simmer. You’ll see small bubbles forming at the edges – this takes about 2 minutes. Stir occasionally to prevent the honey from sticking.
💡 emy’s Pro Tip: Don’t let it boil vigorously – a gentle simmer is key. A hard boil can make the honey caramelize too quickly and throw off the sweet-tangy balance.
Step 4: Thicken
Give your cornstarch slurry a quick whisk (it will have settled), then pour it into the simmering sauce while whisking constantly. Continue whisking for about 30-60 seconds. The sauce will transform from a thin liquid to a glossy, pourable consistency that coats the back of a spoon.
⚠️ Common Mistake to Avoid: Pouring the slurry in without whisking – you’ll get one big clump of cooked cornstarch. Whisk as you pour to ensure even distribution.
Step 5: Cool and Store
Remove the saucepan from the heat. Let the Dragon Sauce cool completely in the pan – it will thicken a bit more as it cools. Once at room temperature, transfer to a glass jar or airtight container. It will keep in the fridge for up to two weeks.
💡 emy’s Pro Tip: For an even smoother sauce, pour it through a fine-mesh strainer before storing. This catches any tiny bits of ginger or garlic that didn’t dissolve completely.
Step
Action
Duration
Key Visual Cue
1
Mix cornstarch + cold water
30 seconds
Smooth, white liquid with no lumps
2
Combine base ingredients
1 minute
Uniform dark brown liquid
3
Bring to a gentle simmer
2 minutes
Small bubbles at edges, steam rising
4
Whisk in slurry, cook until thickened
30-60 seconds
Glossy, coats spoon
5
Cool and store
15-20 minutes
Room temperature, thickened further
Serving & Presentation
This Dragon Sauce is incredibly versatile. I use it as a marinade for chicken thighs or salmon – just coat the protein and let it sit for 30 minutes before cooking. It’s also my go-to dipping sauce for spring rolls, dumplings, and crispy tofu. Drizzle it over a bowl of steamed rice with roasted broccoli and a fried egg for the easiest weeknight dinner. The sweet-tangy-spicy notes pair beautifully with grilled meats, stir-fried noodles, or even as a glaze for roasted vegetables like Brussels sprouts or carrots.
For presentation, I like to serve the Dragon Sauce in a small ceramic bowl with a drizzle of sesame oil on top and a sprinkle of toasted sesame seeds. It adds a beautiful contrast and a nutty aroma that complements the heat. Sometimes I add a few thin slices of red chili for an extra pop of color. This is a trick I picked up at a market in Marrakech – the visual appeal makes the sauce even more inviting.
When I’m cooking for friends in my NYC kitchen, I often set up a “sauce bar” with this Dragon Sauce alongside a cooling yogurt dip (like my Moroccan yogurt sauce with mint) and a simple soy-vinegar dip. It lets everyone choose their adventure – and the Dragon Sauce is always the first to disappear.
The sauce clings to these mild bases and adds a punch of flavor.
Sauce / Dip
Dumplings, spring rolls, chicken wings, crispy tofu
Thick enough to coat, tangy enough to cut through richness.
Beverage
Iced green tea, crisp lager, sparkling water with lime
Clean, refreshing drinks balance the bold, spicy sauce.
Garnish
Toasted sesame seeds, sliced green onions, fresh cilantro
Adds texture, color, and fresh herbal notes.
Make-Ahead, Storage & Reheating
This Dragon Sauce is a meal-prep dream. I often make a double batch on Sunday and store it in a squeeze bottle in the fridge – it makes weekday cooking so much faster. Being a busy mom and blogger in NYC, I rely on ready-to-go sauces to turn simple proteins and vegetables into exciting meals in minutes.
Growing up in my mother’s kitchen in Morocco, I learned that the best sauces are built on layers of flavor — not just heat or salt, but a harmony of sweet, savory, and spicy. This Szechuan sauce is a flavorful sweet and savory recipe with just the right amount of spice that I make in 15 minutes using soy sauce, fresh ginger, and chili garlic sauce. The secret to its balance comes from a technique I picked up in Paris: blooming the ginger and chili in hot liquid before adding the rest, which wakes up their essential oils without making the sauce harsh.
The first time I made this sauce for a stir-fry in my tiny NYC apartment, the smell filled every corner — ginger warming the air, vinegar cutting through with a bright tang, and a gentle heat that lingered on the tongue. It clings to noodles like a velvet glaze, with just enough body from cornstarch to coat a spoon but not weigh it down. The color is a deep amber brown, flecked with red chili flakes and tiny bits of fresh ginger.
This version is my riff on the classic Chinese-American Szechuan sauce you might get from takeout, but I’ve dialed up the ginger and added a touch of red wine vinegar for complexity. One thing I often see home cooks get wrong is adding the cornstarch slurry too early — it clumps and leaves a starchy taste. I’ll show you the exact moment to stir it in for a silky, glossy finish. 💡 emy’s Pro Tip: Always dissolve your cornstarch in cold broth first — room temperature liquid prevents lumps every time.
Why This Szechuan Sauce Recipe Is the Best
The flavor secret here is the combination of two vinegars — red wine vinegar and rice vinegar. The red wine vinegar adds a fruity depth that rice vinegar alone can’t give, while the rice vinegar keeps things light. This two-vinegar trick is something I learned from a saucier in Paris, and it makes the sauce sing without being sharp.
Texture-wise, the cornstarch slurry is the key. But instead of dumping it in all at once, I add it in a slow stream while whisking constantly. This technique ensures the sauce thickens evenly — no lumps, no gluey spots. You end up with a sauce that pours beautifully but clings to every bite.
This recipe is foolproof because it comes together in one saucepan and uses ingredients you probably already have in your pantry. It’s forgiving: if you like it spicier, add more chili garlic sauce; if you want it sweeter, bump up the brown sugar. Within 15 minutes, you’ll have a sauce that works for everything from rice bowls to chicken wings.
Szechuan Sauce Ingredients
I love buying my soy sauce and ginger from the Asian market near Union Square in NYC — the ginger is always fragrant and knobby, and the soy sauce has a cleaner taste than what I find in regular grocery stores. This recipe reminds me of the bustling spice markets in Marrakech where I’d pick up chili pastes as a child.
Ingredients List
1/4 cup low-sodium soy sauce
2 tablespoons red wine vinegar
1 tablespoon fresh ginger (minced)
2 tablespoons brown sugar
1 tablespoon Asian chili garlic sauce (or chili sauce)
1 tablespoon rice vinegar
1/2 teaspoon crushed red pepper flakes
1/2 teaspoon garlic powder
1/2 cup chicken broth (veggie broth for vegetarian) — cold
1 tablespoon cornstarch
Ingredient Spotlight
Soy Sauce: This provides the salty, umami backbone. Use low-sodium so you can control the salt level. I prefer Kikkoman or a Japanese-style soy sauce for its cleaner, less yeasty flavor. If you’re gluten-free, swap with tamari — it works beautifully and tastes almost identical.
Fresh Ginger: Do not substitute dried ginger! Fresh ginger gives a bright, peppery warmth that is essential. Look for ginger that feels heavy and has smooth skin. From my Paris training, I always peel it with a spoon — it’s easier than a knife and you waste less.
Chili Garlic Sauce: This is my shortcut to deep fermented heat. I use Huy Fong brand (the one with the rooster on the label). It’s not just spicy — it has garlic and vinegar notes that build complexity. You can substitute with sambal oelek for a purer chili flavor.
Original Ingredient
Best Substitution
Flavor / Texture Impact
Soy Sauce
Tamari (gluten-free)
Similar umami, slightly less salt; no difference in texture
Fresh Ginger
1/2 tsp dried ginger + 1 tsp fresh lemon juice
Less pungent, more muted heat; sauce will have less zing
Chili Garlic Sauce
Sambal Oelek
Pure chili heat, less garlic; sauce will be spicier with less depth
Chicken Broth
Vegetable Broth
Milder savory notes; identical texture and thickening
Brown Sugar
Coconut Sugar
Slightly less sweet, hint of caramel; texture unchanged
How to Make Szechuan Sauce — Step-by-Step
Trust me, this is the easiest sauce you’ll ever make. It all happens in one pan, and you’ll have dinner ready before you know it.
Step 1: Prep the Slurry
In a small bowl, combine 1/2 cup cold chicken broth and 1 tablespoon cornstarch. Stir with a fork until the cornstarch is fully dissolved and no white streaks remain. The broth must be cold — if it’s warm, the cornstarch will clump immediately and you’ll get a lumpy sauce.
💡 emy’s Pro Tip: Use a fork, not a whisk, for the slurry. A fork breaks up cornstarch clumps more efficiently and creates a smooth paste faster.
Step 2: Build the Flavor Base
In a medium saucepan over medium heat, add all remaining ingredients except the broth and cornstarch mix: soy sauce, red wine vinegar, minced ginger, brown sugar, chili garlic sauce, rice vinegar, red pepper flakes, and garlic powder. Stir gently with a wooden spoon. Bring the mixture to a light boil — you’ll see small bubbles forming around the edges. Do not let it boil vigorously or the vinegar can become harsh. This takes about 3 minutes.
⚠️ Common Mistake to Avoid: Boiling the sauce too hard before adding the slurry can reduce the liquid too much and concentrate the salt. Keep it at a gentle simmer — you want steam, not a rolling boil.
Step 3: Thicken & Finish
Give your cornstarch slurry a quick stir (it settles fast), then pour it into the simmering sauce in a slow, steady stream while whisking constantly with a wire whisk. Continue whisking for 3–5 minutes, until the sauce thickens to a glossy, syrupy consistency that coats the back of a spoon. You’ll see it go from watery to opaque and silky. Remove from heat immediately — it will continue to thicken slightly as it cools.
💡 emy’s Pro Tip: For the glossiest finish, whisk in one teaspoon of butter or sesame oil off the heat. It adds a restaurant-quality sheen and rounds out the flavors.
Step
Action
Duration
Key Visual Cue
1
Prep Slurry
1 minute
No lumps in the paste
2
Build Flavor Base
3 minutes
Small bubbles at edges; ginger is fragrant
3
Thicken & Finish
3–5 minutes
Glossy, coats spoon
Serving & Presentation
This Szechuan sauce is incredibly versatile. Use it as a glaze for stir-fried chicken or beef, a dipping sauce for spring rolls or dumplings, or drizzle it over steamed rice and vegetables for a quick weeknight dinner. I like to toss it with noodles and sesame seeds for an amazing 10-minute noodle bowl that reminds me of late-night noodle shops in NYC’s Chinatown.
For presentation, the sauce’s rich amber color looks gorgeous when drizzled over white rice or pale noodles. Garnish with a sprinkle of sliced green onions, a few sesame seeds, and a pinch of extra red pepper flakes for color. I sometimes add a twist of lime for brightness — a trick from my Moroccan kitchen that cuts through the richness perfectly.
Pairing Type
Suggestions
Why It Works
Side Dish
Steamed jasmine rice, lo mein noodles, roasted broccoli
The sauce clings to rice and noodles; roasted veg adds crunch
Sauce / Dip
Dumplings, spring rolls, chicken wings, tofu cubes
Balanced sweetness and heat enhance without overpowering
Beverage
Crisp lager, iced green tea, semi-dry Riesling
Cuts the spice; green tea refreshes the palate
Garnish
Green onions, sesame seeds, lime wedge, cilantro
Adds freshness, color, and visual contrast
Make-Ahead, Storage & Reheating
As a busy NYC mom and food blogger, I love making a double batch of this Szechuan sauce on Sundays. It saves me during the week when I need a quick dinner fix. Just pour it into a jar and you’ll have sauce ready for noodles, stir-fries, or a quick dip after 15 minutes.
Method
Container
Duration
Reheating Tip
Refrigerator
Airtight glass jar
Up to 2 weeks
Warm in saucepan over low heat, stirring; add splash of water to loosen
Freezer
Silicone ice cube tray, then zip-top bag
Up to 3 months
Defrost in fridge overnight; reheat in pan, whisking to re-emulsify
Make-Ahead
Airtight jar
Up to 5 days in advance
No need to reheat for cold dips; for hot uses, warm gently
When reheating from the fridge, I’ve found that the cornstarch can create a slight skin on top if left too long. Just whisk it back in over low heat — it will become silky again. If it’s too thick, add a tablespoon of water or broth. From my years in restaurant kitchens, I always warm sauces gently to avoid breaking the emulsion.
This Szechuan sauce is a flavorful sweet and savory recipe with just the right amount of spice. I make it in 15 minutes using soy sauce, fresh ginger, and chili garlic sauce. It works perfectly as a dip, marinade, or sauce for rice, noodles, and stir-fried meals.
Ingredients
Scale
1/4 cup low-sodium soy sauce
2 tablespoons red wine vinegar
1 tablespoon fresh ginger (minced)
2 tablespoons brown sugar
1 tablespoon Asian chili garlic sauce (or chili sauce)
1 tablespoon rice vinegar
1/2 teaspoon crushed red pepper flakes
1/2 teaspoon garlic powder
1/2 cup chicken broth (veggie broth for vegetarian)
1 tablespoon cornstarch
Instructions
Combine broth and cornstarch in a small bowl; stir until dissolved
In a saucepan over medium heat, add all ingredients except broth and cornstarch mix and bring to a light boil.
Stir the cornstarch mixture until it thickens, about 3-5 minutes. Remove from heat and let it cool.
I still remember the first time I made baked cilantro lime chicken in my tiny New York City kitchen. It was a humid August evening, and I was missing the bright, herbaceous flavors of the salads my mother used to toss together in our home in Morocco. She would pile cilantro and lime into everything — from tagines to simple grilled fish — and that combination of fresh, citrusy, and slightly peppery notes always felt like sunshine on a plate. This baked cilantro lime chicken is my grown-up, chef-trained take on that memory. It’s low-carb, keto-friendly, and easily adapted for paleo or Whole30 diets, which makes it a staple in my meal prep rotation. The marinade comes together in a blender in under five minutes, and the result is tender, juicy chicken that’s bursting with flavor. Trust me, once you try this, you’ll never go back to bland chicken again.
Imagine this: chicken thighs that come out of the oven with a beautifully caramelized, golden-brown surface, thanks to a quick sear before baking. The aroma alone — garlic, cumin, and fresh lime — will fill your entire apartment. When you cut into the meat, it’s impossibly juicy, infused with that vibrant cilantro-lime marinade that clings to every bite. There’s a subtle smokiness from the cumin, a bright pop from the lime, and a savory depth from the garlic that makes this dish feel both comforting and exciting. The best part? It’s naturally low in carbs, so it fits beautifully into a keto or paleo lifestyle without sacrificing an ounce of flavor. I like to serve it with a simple avocado salad or cauliflower rice on the side — the creamy avocado pairs perfectly with the tangy, herbaceous chicken.
What sets my version of cilantro lime chicken apart is the technique I learned at culinary school in Paris: balancing acidity with fat. The marinade here uses just the right amount of lime juice (not too much, or it can turn the chicken tough) along with olive oil to keep the meat tender and moist. I also add a generous handful of fresh cilantro leaves — measured before chopping — because I want that herb to be a star, not a background note. One common mistake I see home cooks make is skipping the marinating time, thinking they can just pour the sauce on and bake. Do yourself a favor and let the chicken sit in that marinade for at least 30 minutes — it makes all the difference. And if you’re using bone-in thighs (which I sometimes do for a richer flavor), you’ll need to adjust your baking time. But for a quick, foolproof weeknight dinner, boneless skinless thighs are your best friend. I’ll walk you through both methods in the steps below.
Why This Cilantro Lime Chicken Recipe Is the Best
The Flavor Secret — This isn’t just a marinade thrown together haphazardly. I blend the cilantro, lime zest, lime juice, garlic, cumin, salt, pepper, and olive oil until it’s a smooth, emulsified sauce. This technique, which I picked up in Paris, ensures the flavors are fully integrated and coat every nook and cranny of the chicken. The cumin adds a warm, earthy note that ties the bright citrus and fresh herbs together beautifully, a trick I inherited from my mother’s Moroccan kitchen.
Perfected Texture — Baking chicken can sometimes lead to dry, tough meat, but I’ve cracked the code. By searing the chicken first (even just for a few minutes on the stovetop or under the broiler), you lock in the juices and create a gorgeous crust. Then, baking at 375°F ensures the chicken cooks through gently, staying moist and tender. For boneless skinless thighs, that means about 25-30 minutes — just long enough to be safe and succulent.
Foolproof & Fast — I’ve designed this recipe to be as simple as possible without sacrificing taste. The marinade takes two minutes in a blender, and the active cooking time is minimal. It’s perfect for beginners because the oven does most of the work, and there’s no complicated basting or flipping required. Just marinate, sear (or not — you can bake directly!), and bake. I promise you’ll feel like a chef with barely any effort.
Cilantro Lime Chicken Ingredients
When I’m shopping for this at the Union Square Greenmarket in NYC, I always look for the freshest, most vibrant cilantro — it should smell fragrant and look perky, not wilted. The limes need to be heavy for their size, which means they’re juicy. And for the chicken, I prefer thighs because they stay moist and flavorful even with a quick bake. Here’s everything you’ll need.
Ingredients List
8 boneless skinless chicken thighs (about 2 lb)
1 cup cilantro leaves, packed (measure un-chopped leaves, about 1/2 bunch)
1 tsp lime zest
1/4 cup lime juice (about 3 limes)
3 cloves garlic (chopped)
1 tsp cumin
1 tsp salt
1 tsp black pepper
3 tbsp olive oil
Extra cilantro leaves, for garnish (optional)
Lime wedges, for serving (optional)
Ingredient Spotlight
Cilantro. This is the soul of the dish. Fresh cilantro adds a bright, citrusy, slightly peppery flavor that’s irreplaceable. When buying, look for bunches with deep green leaves and no yellowing. If you can’t find fresh cilantro, you could substitute fresh parsley (Italian flat-leaf is best) for a milder flavor, but you’ll lose that distinct zing. For a completely different twist, try fresh mint — it’s lovely but will change the dish dramatically.
Limes. Both the zest and juice are crucial. The zest gives you the concentrated, aromatic lime oil, while the juice provides the acidity that balances the richness of the chicken. Choose limes that are firm but give slightly when squeezed — they’re the juiciest. If you only have bottled lime juice, use about 3 tablespoons, but note that the flavor won’t be as bright. A splash of white wine vinegar can help mimic the acidity if you’re in a pinch.
Cumin. This warm, earthy spice is a cornerstone of my Moroccan heritage. It adds depth and a subtle smokiness that complements both the lime and the cilantro. Use ground cumin for this recipe; it blends easily into the marinade. If you don’t have cumin, you can try ground coriander for a lighter, floral note, or a pinch of smoked paprika for a different kind of warmth. But honestly, cumin is non-negotiable for the authentic flavor I’m aiming for.
Original Ingredient
Best Substitution
Flavor / Texture Impact
Cilantro
Fresh parsley (Italian flat-leaf)
Milder, more herbal; loses the signature cilantro zing
Fresh lime juice
Bottled lime juice + 1 tsp white wine vinegar
Slightly less bright; vinegar adds necessary acidity
Cumin
Ground coriander
Lighter, more floral; loses the earthy warmth
How to Make Cilantro Lime Chicken — Step-by-Step
Let me guide you through this — it’s easier than you think. I’ll break it down into simple steps, with my best tips to ensure perfect results every time.
Step 1: Prepare the Marinade
Add the packed cilantro leaves, lime zest, lime juice, chopped garlic, cumin, salt, pepper, and olive oil to a blender. Pulse until the mixture is completely smooth and vibrant green. You’re looking for a pourable, emulsified sauce. If you don’t have a blender, you can finely mince the cilantro and garlic and whisk everything together in a bowl — it just won’t be as smooth.
💡 emy’s Pro Tip: For the brightest flavor, let the marinade sit for 5 minutes after blending. This allows the garlic and cumin to bloom and meld with the lime juice.
Step 2: Marinate the Chicken
Place the boneless skinless chicken thighs in a large bowl or a zip-top bag. Pour the marinade over the chicken and toss or massage until every piece is evenly coated. Seal the bag or cover the bowl, then refrigerate for at least 30 minutes — up to 4 hours is ideal. Don’t exceed 4 hours, as the acidity from the lime can start to break down the protein too much and make the texture mushy.
⚠️ Common Mistake to Avoid: Skipping the marination time. Even 15 minutes makes a difference, but 30 minutes is the sweet spot for flavor penetration without compromising texture.
Step 3: Sear the Chicken (Optional but Recommended)
While the chicken is marinating, preheat your oven to 375°F. Heat a cast-iron skillet or grill pan over medium-high heat and brush with a little olive oil. Remove the chicken from the marinade (let excess drip off) and sear each piece for 2-3 minutes per side, until you get a nice golden-brown crust. This step builds deep, caramelized flavor that baking alone can’t achieve.
💡 emy’s Pro Tip: Don’t overcrowd the pan. Sear in batches if needed. Overcrowding steams the chicken instead of searing, and you’ll lose that gorgeous crust.
Step 4: Bake the Chicken
Transfer the seared chicken thighs to a baking dish (if not using the same oven-safe skillet). Bake for 25-30 minutes for boneless skinless thighs, or until the internal temperature reaches 165°F when checked with a digital meat thermometer. If using bone-in thighs, bake for about 45 minutes. The chicken should be golden brown and the juices should run clear.
⚠️ Common Mistake to Avoid: Not using a meat thermometer. Don’t guess — chicken can go from perfectly cooked to dry in minutes. A digital thermometer is your best friend for juicy results every time.
Step 5: Rest and Serve
Once the chicken is cooked, let it rest in the pan for 5 minutes. This allows the juices to redistribute, so every bite is moist and flavorful. Garnish with fresh cilantro leaves and a squeeze of lime juice before serving.
💡 emy’s Pro Tip: While the chicken rests, drizzle a little of the pan juices over the top for extra flavor. Those juices are liquid gold — don’t waste them!
Step
Action
Duration
Key Visual Cue
1
Blend marinade
2 minutes
Smooth, vibrant green sauce
2
Marinate chicken
30 mins – 4 hours
Chicken fully coated in green marinade
3
Sear chicken
2-3 mins per side
Golden-brown crust forms
4
Bake chicken
25-30 mins (boneless)
Internal temp 165°F
5
Rest and serve
5 minutes
Juices settle, chicken glistens
Serving & Presentation
I love serving this baked cilantro lime chicken with a generous spoonful of the pan juices drizzled over the top. The vibrant green of the marinade against the golden-brown chicken is beautiful on its own, but a few extra cilantro leaves and a lime wedge on the plate really make it pop. For a complete meal that’s still low-carb and paleo-friendly, I pair it with creamy avocado slices, a fresh tomato and cucumber salad, or a bowl of cilantro lime cauliflower rice. The cool, creamy avocado balances the tangy, spicy notes of the chicken perfectly.
When I’m feeling like I’m back in Morocco, I serve this with a side of warm flatbread (if not doing Whole30) and a dollop of harissa-spiked yogurt. For a NYC touch, I sometimes add a quick pickled red onion — the acidity cuts through the richness. No matter how you serve it, this chicken is the star of the show. It’s also fantastic sliced and tossed into a salad for lunch the next day.
Low-carb, fresh, and complements the citrus-herb flavors
Sauce / Dip
Avocado crema, tahini sauce, Greek yogurt with lime
Adds creaminess and extra tang
Beverage
Sparkling water with lime, crisp Sauvignon Blanc, iced green tea
Refreshing and cleanses the palate
Garnish
Fresh cilantro, lime wedges, sliced jalapeño
Enhances color, aroma, and bright flavor
Make-Ahead, Storage & Reheating
As a busy mom and food blogger in NYC, meal prep is my lifeline. This cilantro lime chicken is one of my go-to recipes for Sunday meal prep because it tastes even better the next day as the flavors meld. Here’s how to store it properly so you can enjoy it all week long.
Growing up in Morocco, I remember my mother layering warm spices with the patience of an artist, each dish telling a story of our North African roots. When I moved to New York City and trained at a French culinary school in Paris, I learned how to marry those bold, aromatic flavors with the precision of a chef’s technique. This Dairy Free Butter Chicken is that marriage in a bowl—rich, creamy, and deeply comforting, with coconut milk stepping in for heavy cream and yogurt, making it perfect for Paleo and Whole30 lifestyles. The magic here isn’t just the substitution; it’s the way the coconut milk soaks up the garam masala, turmeric, and ginger, creating a silky sauce that clings to every piece of chicken. I want you to feel the warmth of my mother’s kitchen and the confidence of a NYC cook all at once.
The first time I made this for a dinner party in my Brooklyn apartment, the aroma of fenugreek and coriander filled every corner, and my guests—a mix of foodies and skeptics—asked for seconds before I could sit down. The sauce is extra saucy, with a reddish-brown hue that comes from slow-simmering tomato paste and spices, and it’s finished with a final touch of coconut milk for that velvety smoothness. You’ll taste the sweet warmth of garam masala, the slight kick from fresh chili, and the tang from lemon juice, all balanced by the richness of full-fat coconut milk. It’s the kind of meal that feels like a hug on a chilly NYC evening, but light enough to enjoy any night of the week.
What sets my version apart is the double-coconut approach—first marinating the chicken in coconut milk and lemon juice, then adding more coconut milk at the end for extra creaminess. This technique comes from my French pastry training, where layering flavors is key. I also insist on blending the sauce until it’s silky smooth, a step many home cooks skip, but it makes a world of difference. 💡 emy’s Pro Tip: Don’t rush the marinade—let it sit for at least 30 minutes, or overnight, to let the flavors really sink into the chicken. One common mistake I see is overcrowding the pan when browning the chicken; do it in batches to get that beautiful golden crust. This Dairy Free Butter Chicken is more than a recipe—it’s a testament to how simple swaps can create something extraordinary.
Why This Dairy Free Butter Chicken Recipe Is the Best
The Flavor Secret: The unique angle here is using coconut milk in two stages—first as a marinade to tenderize and infuse the chicken, then as a finishing cream to create a sauce that’s rich and luxurious without any dairy. Growing up, my mother taught me that the best dishes come from patience, and this recipe rewards that with a depth of flavor that store-bought versions just can’t match.
Perfected Texture: From my Paris training, I learned that a smooth sauce is everything. By blending the cooked sauce until silky, you get that restaurant-quality finish that coats the chicken perfectly. The fenugreek adds a subtle, nutty note that’s hard to replicate, but it’s that final simmer that brings everything together into a cohesive, saucy dream.
Foolproof & Fast: Even with the marinade and blending, this dish comes together in just over an hour from start to finish. I’ve streamlined it so you can marinate overnight and have dinner on the table in 30 minutes the next day. The instructions are clear, with visual cues so you know exactly when each step is done—like when the onions turn translucent or the sauce thickens into a reddish-brown color.
Dairy Free Butter Chicken Ingredients
When I shop for these ingredients at my local NYC farmers market or Whole Foods, I always look for the freshest spices and full-fat coconut milk from a can—it’s non-negotiable for that creamy texture. My mother’s kitchen in Morocco used dried fenugreek leaves, which I now find at specialty spice shops in the city, and they add a flavor I can’t live without.
Ingredients List
½ cup full fat coconut milk, coconut cream or coconut yoghurt (114g) – see notes*
1 chili, stemmed, seeded and minced (see notes for type)
1 tbsp garam masala
1 tsp ground coriander
½ tsp ground cumin
½ tsp black pepper
1 ½ cups water (360ml)
½ cup tomato paste (64g)
1 tbsp sugar
1 tsp salt
½ tsp dried fenugreek or kasoori methi (see notes)
1 cup unsweetened full fat coconut milk or coconut cream from a can (228g)
Ingredient Spotlight
Coconut Milk: The star of this dish for its creamy, dairy-free richness. Use full-fat from a can for best results; light coconut milk won’t give you the same luxurious sauce. I always shake the can well before opening to combine the cream and liquid.
Garam Masala: This warming spice blend is the backbone of the recipe. You can find it in any US grocery store or make your own with cinnamon, cardamom, and cloves. Freshness matters—check the expiration date for that vibrant aroma.
Dried Fenugreek (Kasoori Methi): These aromatic dried leaves add a subtle, nutty flavor that’s irreplaceable in butter chicken. I buy mine at a local Indian market or online. A good substitute is a pinch of maple syrup for sweetness, but the fenugreek is truly unique.
Chicken Thighs vs. Breasts: I recommend thighs for juiciness, but breasts work too—just be careful not to overcook them. My NYC friends often use a mix, and it’s always a hit.
Original Ingredient
Best Substitution
Flavor / Texture Impact
Full-fat coconut milk
Coconut cream or coconut yoghurt
Slightly thicker sauce; similar richness
Dried fenugreek
1 tsp maple syrup + ½ tsp cumin
Adds sweetness and warmth; less nutty
Fresh chili
½ tsp red pepper flakes
Less fresh heat; more dried spice kick
Tomato paste
½ cup crushed tomatoes (reduce water by ¼ cup)
Lighter color; slightly sweeter sauce
How to Make Dairy Free Butter Chicken — Step-by-Step
This might look like a long list, but I promise each step is simple and rewarding. Let me walk you through it, just like I would in my own kitchen.
Step 1: Marinate the Chicken
In a large mixing bowl, mix together ½ cup coconut milk, lemon juice, 1 tbsp ginger, 1 ½ tbsp garlic, 2 tsp garam masala, ½ tsp black pepper, 1 tsp turmeric, and ½ tsp salt until well combined. Add the chicken pieces and toss to coat. Let it marinate for at least 30 minutes; I often do this the night before for deeper flavor.
💡 emy’s Pro Tip: Use a glass or ceramic bowl for marinating—metal bowls can react with the lemon juice and alter the taste.
Step 2: Brown the Chicken
Warm 2 tbsp coconut oil in a large pot or skillet over medium-high heat. Once hot, add the chicken pieces in 2-3 batches (don’t crowd the pan!). Cook for about 3 minutes per side until golden brown, then set aside.
⚠️ Common Mistake to Avoid: Overcrowding the pan causes the chicken to steam instead of brown. Work in batches for that perfect crust.
Step 3: Sauté the Aromatics
Add the remaining 2 tbsp coconut oil to the same pot. Cook the diced onion for 5-7 minutes over medium heat until translucent. Stir in 5 minced garlic cloves, 4 tsp fresh ginger, and the minced chili, cooking for 1 minute until fragrant.
💡 emy’s Pro Tip: Finely chop the chili to distribute its heat evenly. For a milder dish, use a seeded serrano or just half of it.
Step 4: Build the Sauce
Reduce heat to medium-low. Add ½ cup tomato paste, 1 tbsp garam masala, 1 tsp coriander, ½ tsp cumin, and ½ tsp black pepper. Cook for 2-3 seconds, stirring constantly. If the pan looks dry, add 1-2 tbsp water. Then pour in 1 ½ cups water, 1 tbsp sugar, and 1 tsp salt. Let it simmer for 15 minutes until the sauce thickens into a deep reddish-brown color.
⚠️ Common Mistake to Avoid: Burning the tomato paste and spices. Keep the heat low and stir continuously during this step.
Step 5: Blend the Sauce
Remove the pot from heat. Using a blender or immersion blender, purée the sauce until smooth. If using a blender, do this in batches to avoid overfilling. Return the sauce to the pot.
💡 emy’s Pro Tip: An immersion blender is my go-to for this—it saves time and cleanup. Blend in a heat-safe bowl to avoid splatters.
Step 6: Finish with Coconut Milk
Stir in the remaining 1 cup coconut milk until fully combined. Return the browned chicken to the pot, mixing it into the sauce. Simmer over medium-low heat for 10 minutes. Stir in ½ tsp dried fenugreek or kasoori methi if using.
⚠️ Common Mistake to Avoid: Adding the fenugreek too early can make it bitter. Stir it in at the very end for a gentle, earthy finish.
Step 7: Serve
Serve topped with fresh cilantro alongside rice or cauliflower rice. The sauce should be creamy, rich, and clinging to every piece of chicken. Enjoy immediately!
Step
Action
Duration
Key Visual Cue
1
Marinate chicken
30 mins
Chicken fully coated in golden marinade
2
Brown chicken
6 mins
Golden-brown crust on all sides
3
Sauté aromatics
6-8 mins
Onions translucent; garlic fragrant
4
Build sauce
15 mins
Deep reddish-brown, thickened
5
Blend sauce
2 mins
Silky smooth texture
6
Finish with coconut milk
10 mins
Sauce coats chicken; fragrant fenugreek
Serving & Presentation
When I serve this Dairy Free Butter Chicken at my NYC dinner parties, I love to plate it family-style in a large shallow bowl. The sauce is extra saucy, so I pour it generously over fluffy basmati rice or cauliflower rice for a Paleo option. Top with fresh cilantro and a squeeze of lemon for brightness—it’s how my mother always finished her dishes in Morocco.
For a complete meal, I pair it with a cooling cucumber and mint raita (made with coconut yogurt) and warm naan bread. The combination of spicy, creamy, and fresh is pure comfort. On busy weeknights, I’ll just serve it with a simple green salad dressed with lemon and olive oil—quick, fresh, and perfect for soaking up the sauce.
A final touch: sprinkle a few dried fenugreek leaves over the top before serving for an aromatic finish. This recipe is as much about presentation as it is about taste, and it’s always the first dish to disappear. From my Paris training, I learned that food is an experience, so take a moment to enjoy the colors and smells before diving in.
Cabbage Fritters | Crispy Fried or Oven Baked Patties
Table of Contents
Cabbage Fritters – Crispy Fried or Oven Baked Patties – The Secret to Perfectly Golden Veggie Patties
⚖️
Difficulty
Easy
⏲️
Prep Time
15 mins
🕒
Cook Time
12 mins
⏱️
Total Time
27 mins
🍽️
Servings
8-10 fritters
I still remember the first time I made these cabbage fritters. It was a chilly winter afternoon in my tiny NYC apartment, and I had a half-head of cabbage sitting in the fridge, looking at me with what felt like judgment. Back in Morocco, my mother would turn leftover vegetables into golden, crispy patties with a flick of her wrist and a pinch of cumin. That memory pushed me to experiment. The result? These crispy cabbage fritters that are now a staple in my home. The secret to cabbage fritters that are golden on the outside and tender on the inside lies in the technique — a gentle hand while mixing and the right pan temperature. Whether you pan-fry them for a crunchy crust or bake them for a lighter bite, these patties are pure comfort.
When these fritters hit the hot skillet, the sizzle is unmistakable — it’s the sound of cabbage transforming into something irresistible. The edges turn lacy and deep golden brown, while the interior stays moist and packed with shredded carrots and scallions. A whisper of smoked paprika and coriander adds warmth without overpowering the sweet, earthy flavor of the cabbage. The texture is the real star: crispy on the outside, almost creamy on the inside. I love how the scallions release their subtle onion perfume as they cook, mingling with the garlic and the nutty note of ghee. It’s a smell that takes me straight back to my mother’s kitchen — but with a Parisian finesse I picked up in culinary school.
What sets my version apart is the balance between simplicity and technique. I’ve tested this recipe dozens of times — through soggy fritters, burned fritters, and fritters that fell apart in the pan. After all that trial and error, I’ve cracked the code. The key is not squeezing the cabbage too hard — you want just enough egg and flour to bind, not drown. And the pan must be at the perfect medium-low heat. My biggest pro tip? Press the fritters thin — thinner than you think — so they cook all the way through without burning. The most common mistake? Crowding the pan. Give each fritter room to breathe. Trust me, this recipe is foolproof once you know these little tricks.
Why This Cabbage Fritters Recipe Is the Best
The flavor secret in these cabbage fritters is the combination of smoked paprika and a touch of coriander. Growing up in Morocco, I watched my mother add spices with confidence — never measuring, always tasting. The smoked paprika brings a subtle, earthy depth that makes the fritters taste almost meaty, while the coriander adds a gentle citrusy note that brightens the cabbage. This isn’t a bland veggie patty — it’s a patty with a backbone. The carrots add natural sweetness, and the scallions bring a gentle bite. Together, they create a fritter that’s complex enough for a dinner party but simple enough for a Tuesday lunch.
Perfected texture is where my Parisian training comes in. In culinary school, I learned that moisture management is everything when frying vegetables. The trick is to mix the shredded cabbage, carrots, and eggs with a light hand — overworking the mixture releases too much water from the cabbage, turning your fritters into sad, soggy discs. I also learned that a 10-inch ceramic non-stick skillet, preheated for a full three minutes on medium-low, creates the ideal surface for even browning. The fritters cook undisturbed for three minutes per side, developing a crust that shatters when you bite into it. Inside, the cabbage stays tender and juicy, never watery.
This recipe is foolproof and fast because it uses everyday ingredients you probably already have in your pantry. No exotic spices, no hard-to-find vegetables — just cabbage, carrots, eggs, flour, and a few spices. The preparation takes about 15 minutes, and the cooking time is just 12 minutes total. Even if you’ve never made a fritter before, my step-by-step instructions with visual cues will guide you to success. Plus, I’ve included both pan-fried and oven-baked options, so you can choose your preferred method. Whether you’re a busy parent, a college student, or a seasoned home cook, these cabbage fritters will become your go-to recipe for a quick, satisfying meal.
Cabbage Fritters Ingredients
I buy my cabbage from the Union Square Greenmarket when I can — the local varieties are incredibly sweet and crisp. But even the standard green cabbage from any grocery store works beautifully. In Morocco, my mother would use a firm, heavy white cabbage, which is similar to what we find here. The key is to choose a cabbage that feels dense and heavy for its size, with tightly packed leaves. For these fritters, the cabbage is the star, so quality matters. I also grab my carrots and scallions from the farmers market — they’re usually sweeter and more flavorful than supermarket options.
Ingredients List
16 oz shredded cabbage (about 7 packed cups or 1/3 of a medium head)
1/2 tsp coriander, ground (optional but recommended)
3-4 tbsp fat for frying (ghee, avocado oil, or grape-seed oil)
Ingredient Spotlight
Cabbage is the foundation of this dish. It provides the bulk and a subtle sweetness when cooked. Look for a head that feels heavy and has crisp, unblemished leaves. Green cabbage is classic, but savoy cabbage works well too — it’s a bit more tender. Avoid pre-shredded bagged cabbage if possible; it’s often too dry and won’t hold together as well.
Eggs are the binder that holds everything together. They provide structure and richness. Use large eggs — if you use extra-large, the mixture might be too wet; if you use medium, it might be too dry. At room temperature, eggs incorporate more evenly, but cold eggs work fine in a pinch.
Flour helps absorb excess moisture and gives the fritters a tender crumb. All-purpose flour is my go-to for the best texture. For a gluten-free version, use a 1:1 gluten-free baking blend that contains xanthan gum — this ensures the fritters hold together. Almond flour will work but will make the fritters denser and more delicate.
Smoked paprika is my secret weapon. It adds a deep, smoky flavor that elevates the fritters from simple to memorable. If you don’t have smoked paprika, regular sweet paprika works, but you’ll miss that subtle barbecue-like note. Coriander is optional but highly recommended — its citrusy, floral notes complement the cabbage beautifully.
Original Ingredient
Best Substitution
Flavor / Texture Impact
All-purpose flour
1:1 gluten-free flour blend
Slightly crumblier but still holds; add 1 extra tbsp if needed
Smoked paprika
Regular paprika + pinch of cumin
Less smoky but still warm and earthy
Ghee for frying
Avocado oil or grape-seed oil
Ghee adds nutty richness; oils give neutral flavor
Scallions
1 small yellow onion, finely diced
Slightly stronger onion flavor; sauté onion first if raw bothers you
How to Make Cabbage Fritters — Step-by-Step
Don’t worry — even if the mixture looks like a loose slaw at first, these fritters will hold together beautifully once they hit the heat. The key is to trust the process and not overwork the cabbage.
Step 1: Shred the Cabbage
Use a mandoline slicer for fine, uniform shreds. You’ll need 16 oz, which is about 7 packed cups, or roughly 1/3 of a medium head of cabbage. If you don’t have a mandoline, a sharp chef’s knife works — just cut the cabbage into very thin ribbons. Uniform shreds ensure even cooking.
💡 emy’s Pro Tip: Run the cabbage under cold water after shredding, then spin it dry in a salad spinner. This removes excess starch and helps the fritters stay crispy.
Step 2: Prep the Vegetables
Thinly slice 2-3 scallions, using both white and green parts. Grate the carrots using a box grater — the finer side works best. Mince the garlic cloves. If you prefer a milder garlic flavor, use the finer side of the box grater to create a paste. This distributes the garlic more evenly.
⚠️ Common Mistake to Avoid: Don’t use a food processor to shred the cabbage — it releases too much water and makes the fritters soggy. Always shred by hand or with a mandoline.
Step 3: Mix the Batter
In a large bowl, add the shredded cabbage, sliced scallions, grated carrots, minced garlic, eggs, flour, salt, pepper, paprika, and coriander. Use your hands to toss everything together gently. The mixture should be evenly coated with egg, but don’t squeeze or press — you don’t want to draw water out of the cabbage. It will look like a loose, wet slaw. That’s exactly right.
💡 emy’s Pro Tip: If the mixture looks too wet after sitting for a few minutes, add 1 more tablespoon of flour. If it looks too dry, add a splash of milk or water. The batter should hold together when pressed in your palm.
Step 4: Heat the Pan
Heat a non-stick skillet (I use a 10-inch ceramic-coated one) over medium-low heat for 3 minutes. My stove dial is at 3. This gentle preheat ensures even browning without burning. Add 3-4 tablespoons of your chosen fat — ghee, avocado oil, or grape-seed oil — and let it heat for another minute. The fat should shimmer but not smoke.
⚠️ Common Mistake to Avoid: Using high heat will burn the outside of the fritters while leaving the inside raw. Stick to medium-low and be patient — the fritters will still get beautifully crispy.
Step 5: Form and Fry
Form a ball of the mixture in your hands — about 1/3 cup each — and place it in the heated skillet. Press down firmly with a spatula or your fingers to flatten into a patty about 1/4-inch thick. The thinner the patty, the faster and more evenly it will cook. Fry for 3 minutes per side, or until the surface is deep golden brown and crispy. Repeat with the remaining mixture, adding more oil as needed between batches.
💡 emy’s Pro Tip: For extra crispy edges, don’t move the fritters for the first 2 minutes of cooking. Let the crust form undisturbed. When you flip, you’ll see a beautiful golden-brown surface.
Step
Action
Duration
Key Visual Cue
1
Shred cabbage
5 mins
Fine, uniform ribbons
2
Prep vegetables
5 mins
Grated carrots, sliced scallions
3
Mix batter
3 mins
Loose, wet slaw consistency
4
Heat pan
3 mins
Fat shimmers, not smoking
5
Form and fry
3 min per side
Deep golden brown edges
Serving & Presentation
I love serving these cabbage fritters as a snack with a dollop of cool Greek yogurt or labneh mixed with a pinch of za’atar — it’s a nod to my Moroccan roots. The creamy, tangy sauce balances the crispy, savory fritters perfectly. For a lighter option, serve them over a simple arugula salad with a lemon vinaigrette. In NYC, I often bring these to potlucks and they disappear within minutes. They’re also fantastic as a burger patty substitute — just add a slice of melty cheese and some pickled onions.
For presentation, I arrange the fritters on a rustic wooden board, sprinkled with fresh parsley and a pinch of flaky sea salt. A small bowl of garlic aioli or sriracha mayo on the side adds a modern twist. If I’m serving them for breakfast, I’ll add a fried egg on top and a dash of hot sauce. The versatility is endless. In the summer, I pair them with a cold cucumber and mint salad — it’s refreshing and cuts through the richness.
Hi I'm Emy
I’m passionate about sharing a diverse collection of sweet and savory recipes that I’ve meticulously tested and perfected in my own kitchen.
ABOUT me
Let's connect
Pairing Type
Suggestions
Why It Works
Side Dish
Arugula salad, roasted vegetables, or simple rice pilaf
Fresh greens balance the richness; rice adds substance
Sauce / Dip
Greek yogurt with za’atar, garlic aioli, sriracha mayo, or tahini sauce
Creamy dips complement the crispy exterior and add flavor
Beverage
Iced mint tea, crisp white wine (Sauvignon Blanc), or a light lager