Blue Raspberry Lemonade Recipe

“`html

Blue Raspberry Lemonade Recipe

Introduction

Did you know that lemonade sales in the U.S. increase by over 40% during the summer months? It’s the quintessential thirst-quencher. But what if you could elevate this classic drink into a show-stopping, conversation-starting masterpiece? That’s exactly what this vibrant Blue Raspberry Lemonade recipe does. It’s more than just a drink; it’s an experience. Imagine the perfect balance of sweet and tart, with a stunning electric blue hue that promises fun in every sip. This recipe is designed to be the star of your next summer gathering, picnic, or backyard party. It’s incredibly easy to make, universally loved by both kids and adults, and offers a bold, refreshing twist that will have everyone asking for the secret. Let’s dive into how you can create this dazzling beverage.

Ingredients List

Gathering the right ingredients is the first step to lemonade perfection. Here’s what you’ll need for about 8 servings of this brilliantly hued drink:

  • Fresh Lemons (1 cup juice, about 6-8 lemons): The soul of the drink. Freshly squeezed juice provides a bright, tangy acidity that bottled juice simply can’t match. You’ll taste the difference. Substitution: In a pinch, 1 cup of high-quality bottled lemon juice (not concentrate) will work, but expect a slightly less vibrant flavor.
  • Granulated Sugar (1 cup): Creates the simple syrup base, ensuring the sweetness is perfectly dissolved and evenly distributed throughout the lemonade. Substitution: For a different flavor profile, try honey or agave nectar. Adjust to taste as they are sweeter.
  • Water (1 cup for syrup + 4-5 cups cold): Divided use. One cup is heated with sugar; the rest is chilled to dilute and serve.
  • Blue Raspberry Syrup or Concentrate (3/4 cup): The magic ingredient that provides the iconic flavor and mesmerizing color. Look for it in the drink mix aisle or at party supply stores. Substitution: You can use blue raspberry drink powder (mixed with a little water to form a syrup) or even a mix of raspberry syrup and a tiny drop of blue food coloring, though the flavor will be slightly different.
  • Ice Cubes: For serving. Plenty of it!
  • Optional Garnishes: Fresh raspberries, lemon slices, mint sprigs, or a colorful paper straw. These add a professional, finished look.

Timing

Prep Time15 minutes
Cook Time5 minutes
Total Time20 minutes
Servings8 glasses

One of the best features of this Blue Raspberry Lemonade is its speed. With a total time of just 20 minutes, it’s significantly faster than many from-scratch lemonade recipes that require sugar to dissolve in cold liquid, which can take much longer. The quick-cook simple syrup method ensures instant sweetness integration. Compared to the average summer drink recipe, you’re saving precious time that can be spent enjoying the sunshine with your guests.
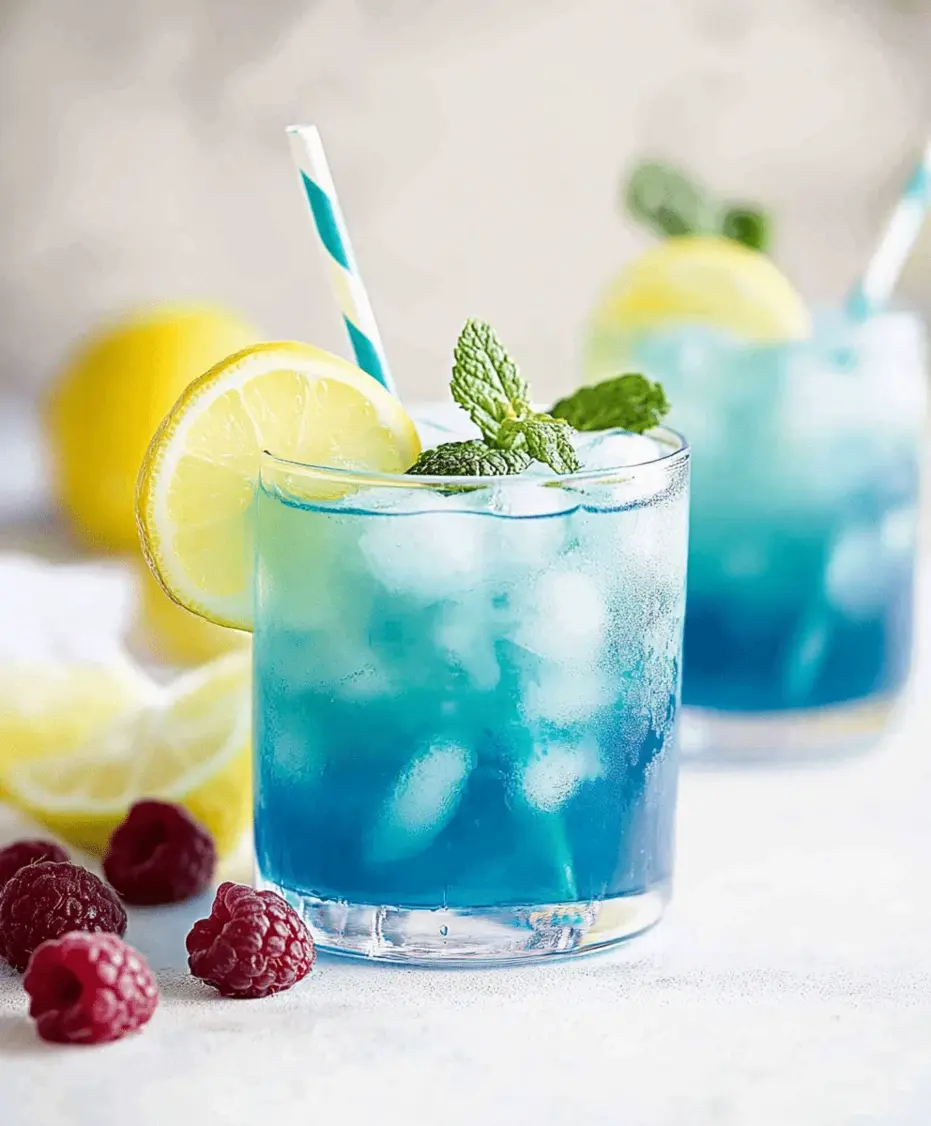
Close-up of a tall glass of vibrant blue raspberry lemonade with ice, a lemon slice, and condensation on the glass.

Step-by-Step Instructions

Step 1: Prepare Your Lemons

Start by rolling your lemons firmly on the countertop using the palm of your hand. This breaks down the internal membranes and makes them much easier to juice. Cut each lemon in half and use a citrus juicer or reamer to extract every last drop. You’re aiming for 1 full cup of juice. Strain it through a fine-mesh sieve to catch any seeds or large pulp bits, ensuring a smooth lemonade. Pro tip: Microwave a lemon for 10-15 seconds before rolling and cutting to maximize juice yield.

Step 2: Make the Simple Syrup

In a small saucepan, combine 1 cup of granulated sugar with 1 cup of water. Heat over medium heat, stirring constantly, until the sugar has completely dissolved. This should only take 3-5 minutes. Do not let it boil for long; once clear and dissolved, remove it from the heat. This simple syrup is the key to non-gritty lemonade. Allow it to cool for about 10 minutes. You can speed this up by placing the saucepan in a shallow ice bath.

Step 3: Create the Blue Raspberry Syrup

While your simple syrup cools, measure out 3/4 cup of blue raspberry syrup or concentrate. Give it a quick taste—some brands are sweeter than others. This is your chance to adjust the final recipe. If your blue raspberry syrup is very sweet, you might reduce the simple syrup slightly in the next step.

Step 4: Assemble the Lemonade

In a large pitcher (at least 2 quarts capacity), combine the freshly squeezed lemon juice, the slightly cooled simple syrup, and the blue raspberry syrup. Stir vigorously with a long spoon until the mixture is a uniform, vibrant blue color. Now, add 4 to 5 cups of cold water. Start with 4 cups, stir, taste, and add the final cup if you prefer a less intense flavor. Remember, ice will dilute it further when serving.

Step 5: Serve and Enjoy

Fill tall glasses to the brim with ice cubes. Pour the stunning blue raspberry lemonade over the ice. For that final touch, garnish each glass with a fresh lemon wheel, a few raspberries dropped in, or a sprig of mint. The visual contrast is breathtaking. Serve immediately with a smile, and get ready for the compliments to pour in as fast as the lemonade.

Nutritional Information

(Per 8-ounce serving, approximate values)

  • Calories: 180
  • Total Carbohydrates: 47g
  • Sugars: 45g
  • Vitamin C: 15% of Daily Value (from fresh lemon juice)
  • Sodium: 5mg
  • Fat: 0g
  • Protein: 0g

Note: Nutritional values are highly dependent on the specific brands of blue raspberry syrup and sugar used. This is a treat beverage, best enjoyed in moderation as part of a balanced diet.

Healthier Alternatives

Love the flavor but want a lighter version? You can easily adapt this recipe without sacrificing its fun personality:

  • Sugar Swap: Replace the granulated sugar in the simple syrup with a monk fruit sweetener blend or erythritol. These are zero-calorie options that dissolve well and won’t spike blood sugar. Alternatively, use 1/2 to 2/3 cup of raw honey or pure maple syrup for a more natural sweetness with beneficial compounds.
  • Syrup Strategy: Look for a “light” or “sugar-free” blue raspberry syrup. Many brands offer these options. You can also drastically reduce the amount of blue raspberry syrup to 1/4 cup and add a drop of natural blue food coloring (like spirulina-based) to maintain the iconic color with less sugar.
  • Dilution is Key: Simply add an extra 1-2 cups of cold water or sparkling water to the pitcher. This stretches the recipe, reduces sugar per serving, and adds more hydration.

Serving Suggestions

  • The Party Pitcher: Double or triple the recipe and serve from a large glass beverage dispenser with a spigot. Add frozen raspberries and lemon slices to the dispenser for a beautiful, edible decoration that keeps the drink cold.
  • Frozen Fun: Pour the lemonade into popsicle molds for a stunning and refreshing frozen treat. Kids will go crazy for blue raspberry lemonade popsicles.
  • Adult Upgrade: For a cocktail version, add a shot of vodka, white rum, or gin to each glass. Garnish with a sprig of rosemary for an aromatic twist.
  • Picnic Perfect: Transport the concentrate (lemon juice, syrups, and a little water) in a sealed jar. Bring a large jug of cold water and ice separately. Mix on-site for the freshest, coldest lemonade possible.

Common Mistakes

  • Using Bottled Lemon Juice Exclusively: While a substitute, it often contains preservatives that can give a slightly metallic or flat taste. Always opt for fresh when you can.
  • Adding Sugar Directly to Cold Liquid: This results in gritty, undissolved sugar at the bottom of your pitcher. The simple syrup method is non-negotiable for smoothness.
  • Over-diluting Too Soon: Always taste your lemonade concentrate (the mix of juices and syrups) before adding all the water. It should be quite strong and tart. This ensures the final product, once poured over ice, is perfectly balanced.
  • Skipping the Garnish: The visual appeal of this drink is half the fun! A bare glass misses an opportunity to impress.

Storing Tips

  • Refrigerator: Store any leftover blue raspberry lemonade in a sealed pitcher or jug for up to 3-4 days. The flavor may mellow slightly, but it will still be delicious.
  • Do Not Freeze the Mixed Drink: Freezing can cause separation and a change in texture. However, you can freeze it successfully in popsicle molds.
  • Make-Ahead Concentrate: You can prepare the base (lemon juice, simple syrup, blue syrup) up to 5 days in advance. Store it in a jar in the fridge. When ready to serve, simply shake it up, pour into a pitcher, and add the cold water.

A pitcher of bright blue raspberry lemonade surrounded by fresh lemons, raspberries, and mint on a sunny patio table.

Conclusion

This Blue Raspberry Lemonade is more than just a recipe; it’s a guaranteed way to add a splash of joy and color to any occasion. With its perfect sweet-tart balance, mesmerizing hue, and effortless preparation, it’s the ultimate summer hydration hero. Whether you’re hosting a lively party, enjoying a quiet picnic, or simply treating the family after a hot day, this drink delivers unforgettable flavor and fun. So, grab those lemons, unleash your inner mixologist, and create a batch of this vibrant magic. Don’t forget to share your creations online and tag us—we love seeing your refreshing results!

Chicken Blueberry Feta Salad Recipe

“`html

Chicken Blueberry Feta Salad Recipe

Introduction

Did you know that a single serving of blueberries provides 25% of your daily recommended vitamin C and 4 grams of fiber? This nutritional powerhouse is the star of our Chicken Blueberry Feta Salad, a dish that perfectly marries health with vibrant, restaurant-quality flavor. If you’re searching for a healthy chicken recipe that doesn’t sacrifice taste for nutrition, you’ve found it. This isn’t just another salad; it’s a symphony of textures and tastes designed to delight your palate and fuel your body. The juicy burst of sweet blueberries, the creamy tang of feta cheese, and the savory satisfaction of perfectly grilled chicken breast come together over a crisp bed of greens, all dressed in a light, zesty vinaigrette. It’s the ultimate summer salad that feels indulgent yet is packed with antioxidants, lean protein, and wholesome ingredients.

Ingredients List

Gather fresh, high-quality ingredients for the best flavor. Here’s what you’ll need for 2 generous main-course servings:

  • For the Chicken & Salad:
    • 2 boneless, skinless chicken breasts (about 6 oz each): Look for plump, even-sized breasts for uniform cooking. Substitution: Chicken thighs for richer flavor, or pre-cooked rotisserie chicken for a 5-minute shortcut.
    • 1 tbsp olive oil: For a golden, herb-infused sear.
    • 1 tsp dried oregano, ½ tsp garlic powder, salt & pepper: A simple, classic rub that lets the chicken shine.
    • 5 oz mixed salad greens (about 6 cups): A blend of baby spinach, arugula, and romaine offers a perfect balance of tender, peppery, and crisp textures. Substitution: Kale (massaged with a bit of lemon juice) or butter lettuce.
    • 1 cup fresh blueberries: Seek out plump, deep blue berries with a silvery “bloom”—a sign of freshness. Their sweet-tart pop is essential.
    • ½ cup crumbled feta cheese: The salty, tangy creaminess is the perfect counterpoint to the sweet berries. Substitution: Goat cheese for a sharper tang, or dairy-free almond feta.
    • ¼ cup sliced almonds or pecans: For a crucial crunch and nutty depth. Toast them lightly for maximum aroma.
    • ¼ cup thinly sliced red onion: Soak in ice water for 10 minutes to mellow the sharp bite if desired.
  • For the Light Vinaigrette:
    • 3 tbsp extra virgin olive oil: The base for a smooth, rich emulsion.
    • 2 tbsp fresh lemon juice (about 1 lemon): Bright, citrusy acidity. Substitution: White wine vinegar or apple cider vinegar.
    • 1 tsp honey or maple syrup: A touch of sweetness to balance the acidity. Omit for a strictly low carb salad.
    • 1 tsp Dijon mustard: Acts as an emulsifier and adds a subtle, complex sharpness.
    • 1 small shallot, minced (about 1 tbsp): Provides a gentle, aromatic onion flavor.
    • Salt and freshly ground black pepper to taste.

Timing

Prep Time 15 minutes
Cook Time 12 minutes
Total Time 27 minutes

At just under 30 minutes from start to finish, this chicken salad is significantly faster than the average weeknight dinner recipe, which often clocks in at 45-60 minutes. The efficient workflow—prepping the dressing and salad while the chicken cooks—means you get a gourmet, nutrient-dense meal on the table in less time than it takes for delivery. It’s perfect for busy weeknights or a quick, impressive lunch.

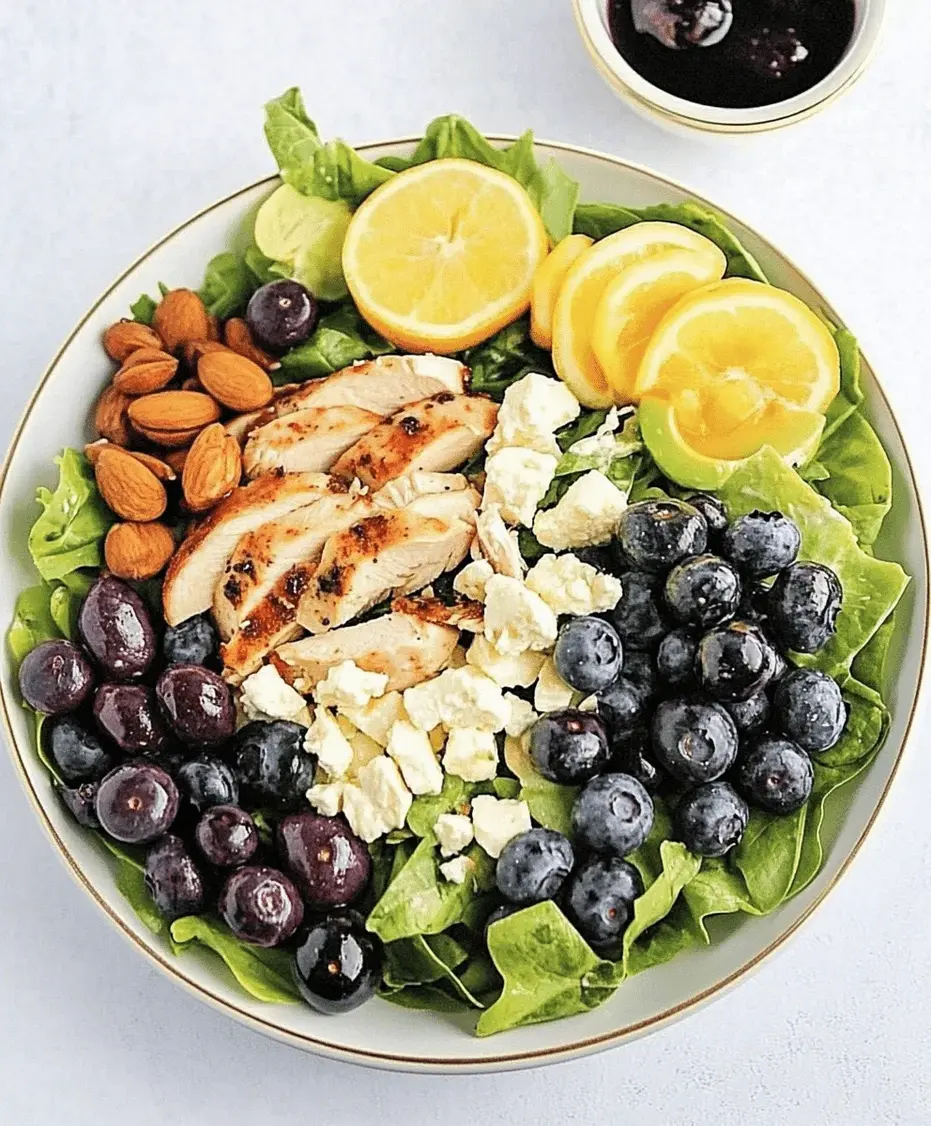
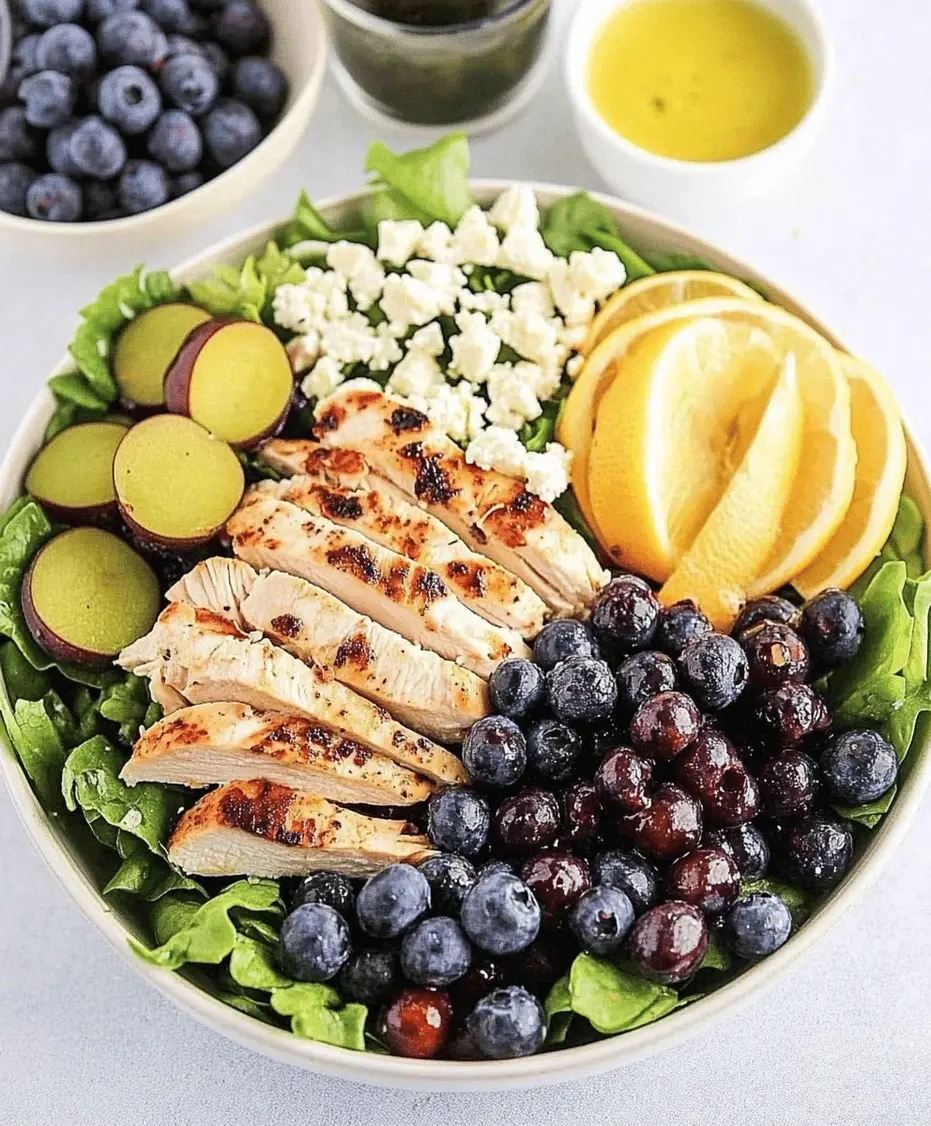
Close-up of Chicken Blueberry Feta Salad ingredients arranged beautifully on a wooden table, showing fresh blueberries, feta cheese, greens, and grilled chicken.

Step-by-Step Instructions

Step 1: Prepare the Chicken

Pat the chicken breasts completely dry with paper towels—this is the secret to a perfect sear, not steam. Drizzle with 1 tablespoon of olive oil and rub it all over. In a small bowl, combine the oregano, garlic powder, ½ teaspoon of salt, and ¼ teaspoon of pepper. Sprinkle this mixture evenly over both sides of the chicken, gently pressing it in. Heat a grill pan or skillet over medium-high heat. Once hot, add the chicken. Cook for 5-7 minutes per side, or until the internal temperature reaches 165°F (74°C) and the exterior is beautifully golden with defined grill marks. Transfer to a cutting board, tent loosely with foil, and let it rest for 5 minutes. This allows the juices to redistribute, ensuring every bite is moist. Then, slice against the grain into ½-inch strips.

Step 2: Make the Vinaigrette

While the chicken cooks, make your dressing. In a small jar with a tight-fitting lid, combine the extra virgin olive oil, fresh lemon juice, honey (or maple syrup), Dijon mustard, and minced shallot. Add a generous pinch of salt and a few cracks of black pepper. Seal the jar and shake vigorously for 30 seconds until the mixture is fully emulsified—creamy, opaque, and unified. Taste and adjust seasoning. This method is foolproof and creates a perfectly blended dressing every time.

Step 3: Assemble the Salad

In a large, wide salad bowl (this gives you room to toss gently without crushing the ingredients), add the mixed greens. Scatter the fresh blueberries, crumbled feta cheese, sliced almonds, and red onion over the top. Arrange the warm, sliced chicken breasts over the salad. The contrast of warm chicken and cool greens is divine.

Step 4: Toss and Serve

Just before serving, give your vinaigrette another quick shake and drizzle about two-thirds of it over the salad. Using salad tongs or two large spoons, gently toss the salad from the bottom up, just until the ingredients are lightly coated. You want to distribute the dressing without wilting the greens or bursting all the blueberries. Add more dressing if desired, but I prefer a lightly dressed salad where the fresh ingredients are the stars. Serve immediately on chilled plates for the ultimate refreshing experience.

Nutritional Information

(Per serving, based on 2 main-course servings. Values are approximate.)

  • Calories: ~520 kcal
  • Protein: 42g (An excellent source, keeping you full for hours)
  • Carbohydrates: 22g
  • Dietary Fiber: 6g (24% of daily value)
  • Sugars: 14g (Naturally occurring from blueberries)
  • Fat: 30g (Mostly healthy monounsaturated from olive oil and nuts)
  • Saturated Fat: 7g
  • Vitamin C: 45% DV | Calcium: 20% DV | Iron: 18% DV

Healthier Alternatives

This salad is already a nutritional champion, but you can tailor it to specific dietary goals without losing flavor:

  • Lower Fat/Calories: Use a reduced-fat feta cheese and reduce the olive oil in the dressing to 2 tbsp, replacing the lost volume with 1 tbsp of water or vegetable broth. The mustard and shallot will keep it flavorful.
  • Strictly Low-Carb/Keto: Omit the honey in the dressing. The blueberries are relatively low-carb for fruit, but you can reduce the quantity to ½ cup if needed. Increase the healthy fats by adding half an avocado, sliced.
  • Dairy-Free: Swap the feta for a dairy-free alternative made from almonds or tofu, or use creamy avocado for richness.
  • Nut-Free: Replace the almonds with toasted sunflower or pumpkin seeds for a similar crunch.

Serving Suggestions

While this salad is a complete meal, here’s how to build it into different occasions:

  • For a Light Lunch: Serve as-is with a slice of crusty whole-grain bread or a whole-wheat pita on the side for dipping.
  • For a Hearty Dinner: Add a complex carbohydrate like ½ cup of cooked quinoa, farro, or roasted sweet potato cubes tossed in the salad for extra staying power.
  • For Entertaining: Present the salad deconstructed on a large platter, allowing guests to build their own plates. Offer extra toppings like diced cucumber, cherry tomatoes, or crispy prosciutto.
  • Perfect Pairing: A glass of chilled Sauvignon Blanc or Pinot Grigio complements the salad’s bright, fruity notes beautifully. For a non-alcoholic option, sparkling water with a squeeze of lemon and a few muddled blueberries is sublime.

Common Mistakes

  • Overcooking the Chicken: This leads to dry, tough meat. Use a meat thermometer! Pull it at 165°F and let it rest.
  • Dressing the Salad Too Early: Adding dressing more than 5 minutes before serving will wilt your beautiful greens into a soggy mess. Always dress at the last second.
  • Using Frozen Blueberries (Thawed): They bleed color and become mushy, staining the entire salad. Always use fresh, firm blueberries.
  • Not Tasting the Dressing: Seasoning is key. Always taste your vinaigrette and adjust the balance of acid (lemon), fat (oil), and sweet (honey) to your preference.

Storing Tips

  • Meal Prep Friendly: Store components separately in airtight containers for up to 4 days: cooked sliced chicken, washed greens, prepped veggies/berries/feta, and dressing in its own jar. Assemble daily.
  • Leftover Assembled Salad: If dressed, it’s best eaten immediately. Undressed leftovers can be stored in the fridge for 1 day, though the greens will lose some crispness.
  • Freezing: Not recommended for the assembled salad. However, you can freeze the cooked, seasoned chicken breasts for up to 3 months. Thaw in the fridge overnight.
Finished Chicken Blueberry Feta Salad plated elegantly

</p>
</div>
</div></article><article id=

Thai Peanut Chicken Crunch Slaw Salad Recipe

“`html

Thai Peanut Chicken Crunch Slaw Salad Recipe

Introduction

Did you know that meals rich in protein and fiber, like a well-crafted salad, can increase satiety by over 30% compared to carb-heavy lunches? If you’re searching for a lunch that’s both explosively flavorful and genuinely satisfying, look no further than this Thai Peanut Chicken Crunch Slaw Salad. This isn’t your average, sad desk salad. It’s a vibrant, textural masterpiece that brings the bustling street food markets of Bangkok right to your kitchen. Combining tender, savory chicken with a symphony of crisp, fresh vegetables and drenched in a luxuriously creamy, sweet, and spicy Thai peanut dressing, this salad is a complete meal in a bowl. It’s the perfect answer for busy weeknights, a standout lunch that will have coworkers envious, and a meal-prep champion that actually gets you excited for lunch the next day. Let’s dive into how you can create this perfect balance of protein and crunch.

Ingredients List

Gather these fresh, flavorful ingredients. Don’t be afraid to use the substitutions to tailor it to your pantry or dietary needs.

For the Thai Peanut Dressing:

  • 1/2 cup creamy peanut butter: The rich, nutty base. For a deeper flavor, use natural peanut butter (just stir well first!). Substitution: Almond butter or sunflower seed butter for a nut-free version.
  • 3 tbsp soy sauce or tamari: Provides the essential salty, umami depth. Substitution: Coconut aminos for a gluten-free, slightly sweeter option.
  • 2 tbsp honey or maple syrup: Balances the saltiness with a touch of floral sweetness. Substitution: Agave nectar.
  • 2 tbsp fresh lime juice (about 1 lime): The crucial acidic zing that brightens the entire dressing.
  • 1 tbsp rice vinegar: Adds a mild, clean tang.
  • 1-2 tsp Sriracha or chili-garlic sauce: Adjust for your desired level of spicy heat. Start with 1 tsp and add more.
  • 1 clove garlic, minced: For a pungent, aromatic kick.
  • 1 tsp freshly grated ginger: The warm, spicy soul of the dressing. Don’t skip this!
  • 3-4 tbsp warm water: To thin the dressing to a creamy, pourable consistency.

For the Salad:

  • 1 lb boneless, skinless chicken breasts or thighs: Thighs stay juicier, breasts are leaner. Pat them dry for a better sear.
  • 1 tbsp neutral oil (avocado, grapeseed): For cooking the chicken.
  • Salt and black pepper: To season the chicken.
  • 14 oz bag tri-color coleslaw mix: The ultimate crunch shortcut! A mix of green and red cabbage with carrots.
  • 1 red bell pepper, thinly sliced: Adds a sweet, crisp texture and vibrant color.
  • 1 cup shredded or matchstick carrots: For extra sweetness and crunch. If your slaw mix has carrots, you can reduce this.
  • 1/2 cup chopped cilantro: Fresh, herbaceous flavor that is quintessentially Thai.
  • 1/4 cup chopped green onions: For a mild, oniony bite.
  • 1/2 cup roasted, salted peanuts, chopped: The final crunch factor. Substitution: Cashews or almonds.
  • Lime wedges, for serving: A squeeze of fresh lime right before eating elevates everything.

Timing

Prep Time
20 minutes
Cook Time
12 minutes
Total Time
32 minutes

At just over 30 minutes from start to finish, this Thai Peanut Chicken Crunch Slaw Salad is significantly faster than the average weeknight dinner recipe, which often clocks in at 45-60 minutes. The secret is the use of pre-shredded coleslaw mix, which eliminates 10-15 minutes of veggie prep time, and a dressing that comes together in a single bowl with a whisk. You’ll spend less time cooking and more time enjoying this restaurant-quality meal at home.

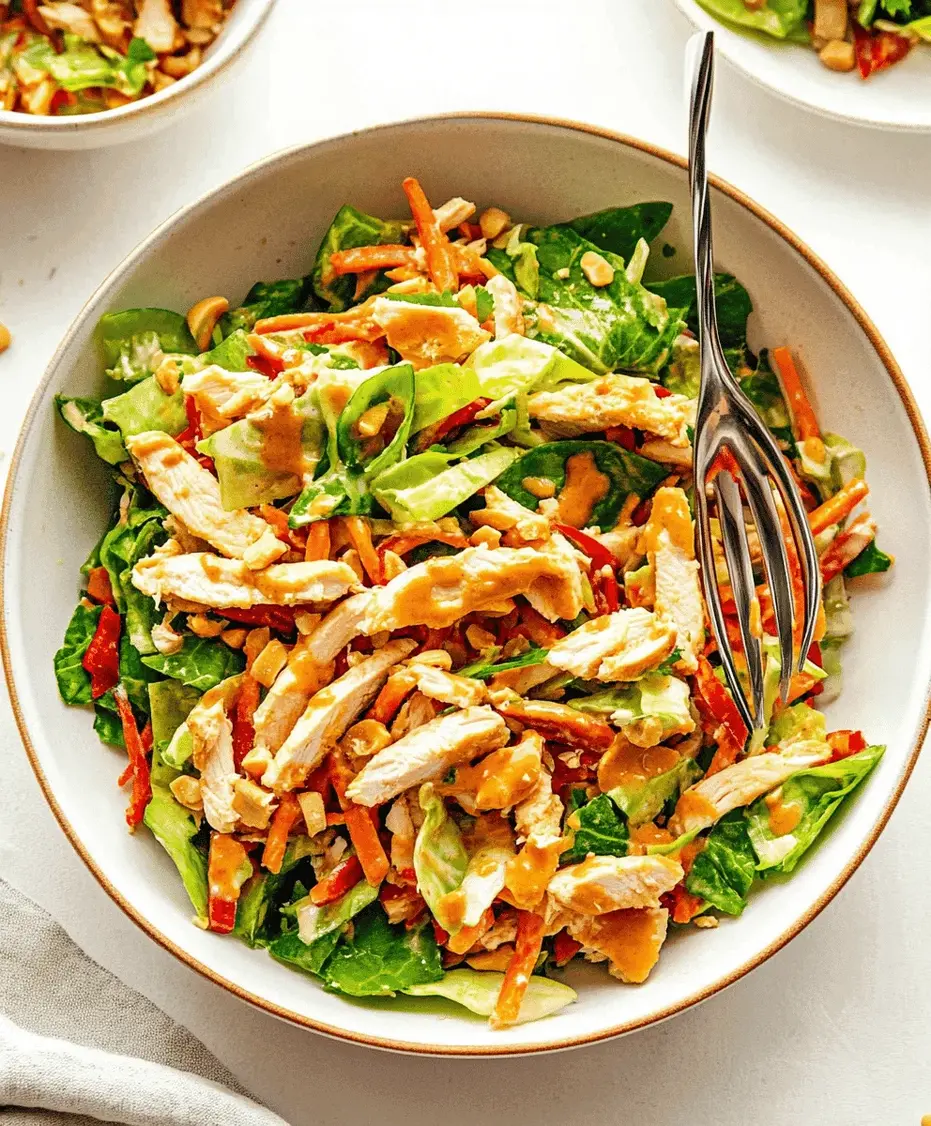
Close-up of Thai Peanut Chicken Crunch Slaw Salad in a white bowl, showing tender chicken, colorful vegetables, and creamy peanut dressing drizzled on top.
The vibrant colors and textures of this salad make it as beautiful as it is delicious.

Step-by-Step Instructions

Step 1: Prepare the Dressing

In a medium bowl, combine the peanut butter, soy sauce, honey, lime juice, rice vinegar, Sriracha, minced garlic, and grated ginger. Whisk vigorously until the mixture is smooth and fully incorporated. It will be quite thick at first. Gradually add the warm water, one tablespoon at a time, whisking after each addition, until the dressing reaches a creamy, pourable consistency—like a thick salad dressing or a thin sauce. Give it a taste! This is your moment to adjust the flavors. Need more tang? Add a squeeze of lime. More heat? Another dash of Sriracha. Set the dressing aside while you prepare the rest of the salad.

Step 2: Cook the Chicken

Pat the chicken breasts or thighs completely dry with paper towels—this is the key to getting a nice golden sear, not a steam. Season both sides generously with salt and black pepper. Heat the neutral oil in a large skillet or grill pan over medium-high heat. Once the oil is shimmering, add the chicken. Cook for 5-7 minutes per side, or until the internal temperature reaches 165°F (74°C) and the juices run clear. Transfer the cooked chicken to a cutting board and let it rest for at least 5 minutes. This allows the juices to redistribute, ensuring every bite is moist and tender. Then, slice or shred the chicken into bite-sized pieces.

Step 3: Assemble the Slaw

In your largest serving bowl—I’m talking big salad bowl territory—add the tri-color coleslaw mix, thinly sliced red bell pepper, shredded carrots, chopped cilantro, and green onions. Using clean hands or two large spoons, toss everything together until the colors are beautifully distributed. This base is a confetti of crunch just waiting for its star ingredients.

Step 4: Combine and Serve

Add the sliced or shredded warm chicken to the top of the slaw mixture. Pour about three-quarters of the prepared Thai peanut dressing over everything. Gently toss the salad to coat every strand of cabbage and every piece of chicken in that glorious, creamy dressing. Sprinkle the chopped roasted peanuts over the top for the final layer of texture. Serve immediately with lime wedges on the side and the remaining dressing for anyone who wants an extra drizzle.

Nutritional Information

(Per serving, based on 4 servings. Values are approximate.)

  • Calories: ~480 kcal
  • Protein: 35g (An excellent source, crucial for muscle repair and satiety)
  • Carbohydrates: 25g
  • Dietary Fiber: 6g (Over 20% of your daily needs, great for digestion)
  • Sugars: 15g (Primarily natural from honey, carrots, and bell pepper)
  • Fat: 28g
  • Saturated Fat: 5g
  • Sodium: ~900mg (Use reduced-sodium soy sauce to lower this)

Healthier Alternatives

You can easily lighten up this salad without sacrificing the bold Thai flavors you love:

  • Dressing Base: Swap regular peanut butter for powdered peanut butter (like PB2) reconstituted with water. This cuts calories and fat significantly while keeping the peanut flavor.
  • Sweetener: Replace honey with a zero-calorie sweetener like monk fruit syrup, or simply use less honey.
  • Protein: Use extra-firm tofu (pressed and cubed) or a large can of chickpeas (rinsed and dried) instead of chicken for a plant-based, high-fiber protein option. Pan-fry the tofu for a similar texture.
  • Salt & Sodium: Opt for low-sodium soy sauce or tamari, and use unsalted peanuts.

Serving Suggestions

  • As a Main Course: This salad is a complete meal! Serve it in a deep bowl with a side of crispy wonton strips or prawn crackers for added fun.
  • In a Wrap: Spoon the salad into large lettuce leaves (Butter or Romaine work well) or whole-wheat tortillas for a portable, low-carb lunch wrap.
  • With a Side: Pair it with a simple bowl of jasmine rice or quinoa to soak up any extra dressing, or with a light, brothy soup like Tom Yum.
  • For a Crowd: Double the recipe and serve it as a stunning, colorful centerpiece at a potluck or summer BBQ. It’s always a hit.

Common Mistakes

  • Not Tasting the Dressing: Always taste and adjust your dressing before adding it to the salad. Peanut butter brands, soy sauce saltiness, and lime juiciness vary.
  • Overcooking the Chicken: Chicken breasts cook quickly. Use a meat thermometer to avoid dry, stringy meat. 165°F is your target.
  • Dressing the Salad Too Early: If you plan to have leftovers, dress only the portion you’re eating immediately. The cabbage will wilt and lose its signature crunch if it sits in the dressing for hours.
  • Skipping the Fresh Her

Homemade Raspberry Peach Lemonade Recipe

“`html

Homemade Raspberry Peach Lemonade Recipe

Introduction

Did you know that on a hot summer day, the average person can lose up to 2 liters of fluid through sweat? That’s why staying hydrated with delicious, flavorful drinks is crucial. Forget the store-bought, artificially flavored stuff—today, we’re making a Homemade Raspberry Peach Lemonade that’s as nourishing as it is refreshing. This vibrant drink combines the sun-ripened sweetness of peaches with the tart pop of raspberries, all balanced by the classic zing of fresh lemon juice. It’s the perfect, all-natural way to cool down, rehydrate, and treat your taste buds. Whether you’re hosting a backyard BBQ, packing for a picnic, or simply relaxing on the porch, this lemonade is your ticket to summer refreshment.

Ingredients List

Gather these fresh, simple ingredients for a lemonade bursting with natural flavor. I’ve included sensory notes and substitutions to help you customize.

  • For the Fruit Base:
    • 3 large, ripe peaches (about 1.5 lbs): Look for peaches that yield slightly to gentle pressure and have a fragrant, sweet aroma. They should feel heavy for their size. Substitution: 3 cups frozen peach slices (thawed) or 2 cups of high-quality peach nectar.
    • 1 cup fresh raspberries: Plump, deep red berries with a bright, slightly tart scent. Substitution: 1 cup frozen raspberries (no need to thaw) or blackberries for a deeper, earthier flavor.
    • 1 cup freshly squeezed lemon juice (from about 6-8 lemons): The star of the show! Use room-temperature lemons and roll them firmly on the counter before juicing to maximize yield. You’ll get that bright, zesty, and unmistakably fresh flavor.
  • For the Sweetener & Assembly:
    • 1 cup granulated sugar: This creates a clear simple syrup that perfectly sweetens the tart elements. Substitution: For a different flavor profile, use honey, agave nectar, or maple syrup. Adjust quantity to taste as these are sweeter.
    • 1 cup water (for the simple syrup).
    • 4-5 cups cold water (to dilute).
    • Ice cubes, for serving.
    • Optional Garnishes: Fresh mint sprigs, extra raspberries, peach slices, or lemon wheels.

Timing

Prep Time 20 minutes
Cook Time 5 minutes
Total Time 25 minutes
Servings 6-8

This recipe clocks in at just 25 minutes from start to finish. Compared to the average lemonade recipe that might just mix juice and sugar, our method involves creating a fruit puree and simple syrup, which adds mere minutes but multiplies the flavor exponentially. The 5-minute “cook” time is just for dissolving the sugar—no real cooking required!

Close-up of fresh peaches, raspberries, and lemons arranged around a pitcher of pink raspberry peach lemonade with ice.

Fresh, vibrant ingredients are the key to this stunning summer drink.

Step-by-Step Instructions

Step 1: Prepare the Fruit Puree

First, let’s unlock the deep, fruity essence of our peaches and raspberries. Wash the peaches thoroughly. You can peel them if you prefer a completely smooth texture (a quick 30-second blanch in boiling water makes the skins slip right off), but I love leaving the skin on for extra color and fiber. Pit and roughly chop the peaches. In a blender or food processor, combine the chopped peaches and the fresh raspberries. Blend on high until you have a completely smooth, vibrant pink puree. For an ultra-smooth lemonade, press this puree through a fine-mesh sieve into a large bowl to remove the raspberry seeds and any peach skin bits. I sometimes skip this step for a more rustic, fiber-rich drink—it’s your call!

Step 2: Make the Simple Syrup

Never just stir granulated sugar into cold lemonade—it will sink to the bottom and never fully dissolve. The pro trick is a simple syrup. In a small saucepan, combine 1 cup of water and 1 cup of granulated sugar. Heat over medium, stirring occasionally, just until the sugar has completely dissolved and the liquid is clear. This should only take 3-5 minutes. Do not let it boil for long, as we’re not making candy! Remove it from the heat and let it cool for a few minutes. This syrup ensures every sip is perfectly sweet, with no gritty sugar texture.

Step 3: Combine and Assemble

Now for the magic. In a large pitcher (at least 2 quarts capacity), combine the beautiful peach-raspberry puree, the freshly squeezed lemon juice, and the slightly cooled simple syrup. Give it a vigorous stir with a long spoon to marry all the flavors. Here’s the crucial part: taste it now, before adding the final water. It should be intensely flavorful, sweet, and tart. This is your base concentrate. Now, slowly add 4 cups of cold water. Stir, taste, and add the 5th cup if you prefer a less concentrated drink. Remember, it will be diluted further by ice when served.

Step 4: Serve and Enjoy

Fill tall glasses with plenty of ice. Pour the gorgeous pink lemonade over the ice. For that picture-perfect finish, garnish each glass with a fresh raspberry, a thin peach slice, a small sprig of mint, or a lemon wheel on the rim. The mint adds an incredible aromatic freshness that complements the fruit perfectly. Serve immediately with a smile—you’ve just made summer in a glass.

Nutritional Information

(Per 8-ounce serving, based on 8 servings, using all granulated sugar and including all fruit fiber.)

  • Calories: ~120 kcal
  • Total Carbohydrates: 31g
  • Sugars: 28g (all natural from fruit and added sugar)
  • Vitamin C: ~25% of Daily Value (from lemons and raspberries)
  • Fiber: 2g (if pulp is included)
  • Potassium: ~150mg (from peaches)

Note: This is a treat and a refreshment beverage. The sugar content can be adjusted as shown in the “Healthier Alternatives” section below.

Healthier Alternatives

You can easily lighten up this lemonade without sacrificing the vibrant, fruity flavor we love.

  • Reduce Sugar: Cut the simple syrup sugar to 3/4 or even 1/2 cup. The natural sweetness of very ripe peaches and raspberries will shine through more.
  • Natural Sweeteners: Swap granulated sugar for 3/4 cup of raw honey or pure maple syrup in the simple syrup. These add nuanced flavors and trace minerals.
  • Zero-Calorie Option: Use a liquid stevia blend or monk fruit sweetener equivalent to 1 cup of sugar. Add it directly to the puree and juice, skipping the simple syrup step entirely.
  • Boost & Stretch: Add 1-2 cups of chilled herbal tea (like peach or raspberry zinger) instead of an equal amount of plain water for extra flavor with no added sugar.

Serving Suggestions

  • Adult Version: For a delightful cocktail, add a shot of vodka, gin, or bourbon to each glass. Garnish with a rosemary sprig for a savory twist.
  • Frozen Treat: Pour the lemonade into popsicle molds for a gorgeous and refreshing homemade fruit pop.
  • Party Punch: Double the recipe in a large drink dispenser. Float frozen raspberries and peach slices in place of ice to keep it cold without diluting the flavor.
  • Brunch Pairing: This lemonade pairs beautifully with fluffy pancakes, a summer fruit salad, or a savory quiche.

Common Mistakes

  • Using Bottled Lemon Juice: The flavor is flat and often contains preservatives. Freshly squeezed is non-negotiable for that bright, zesty spark.
  • Adding Sugar Directly to Cold Liquid: This leads to undissolved sugar at the bottom of the pitcher. Always use a simple syrup.
  • Over-diluting: Tasting and adjusting before adding all the water is key. You can always add more water, but you can’t take it out.
  • Using Underripe Fruit: Hard, scentless peaches and tart raspberries won’t provide the necessary sweetness and depth of flavor. Let fruit ripen on the counter if needed.

Storing Tips

  • Refrigerator: Store in a sealed pitcher or jug for up to 3-4 days. The flavors actually meld and improve after a few hours.
  • Freezer: You can freeze the concentrate (puree + lemon juice + syrup) in airtight containers for up to 2 months. Thaw in the fridge overnight and dilute with water when ready to serve.
  • Separation is Normal: The fruit puree may settle at the bottom. Just give the pitcher a good stir before serving.
  • Ice Warning: Avoid storing the lemonade with ice already in it, as it will melt and water down your masterpiece.
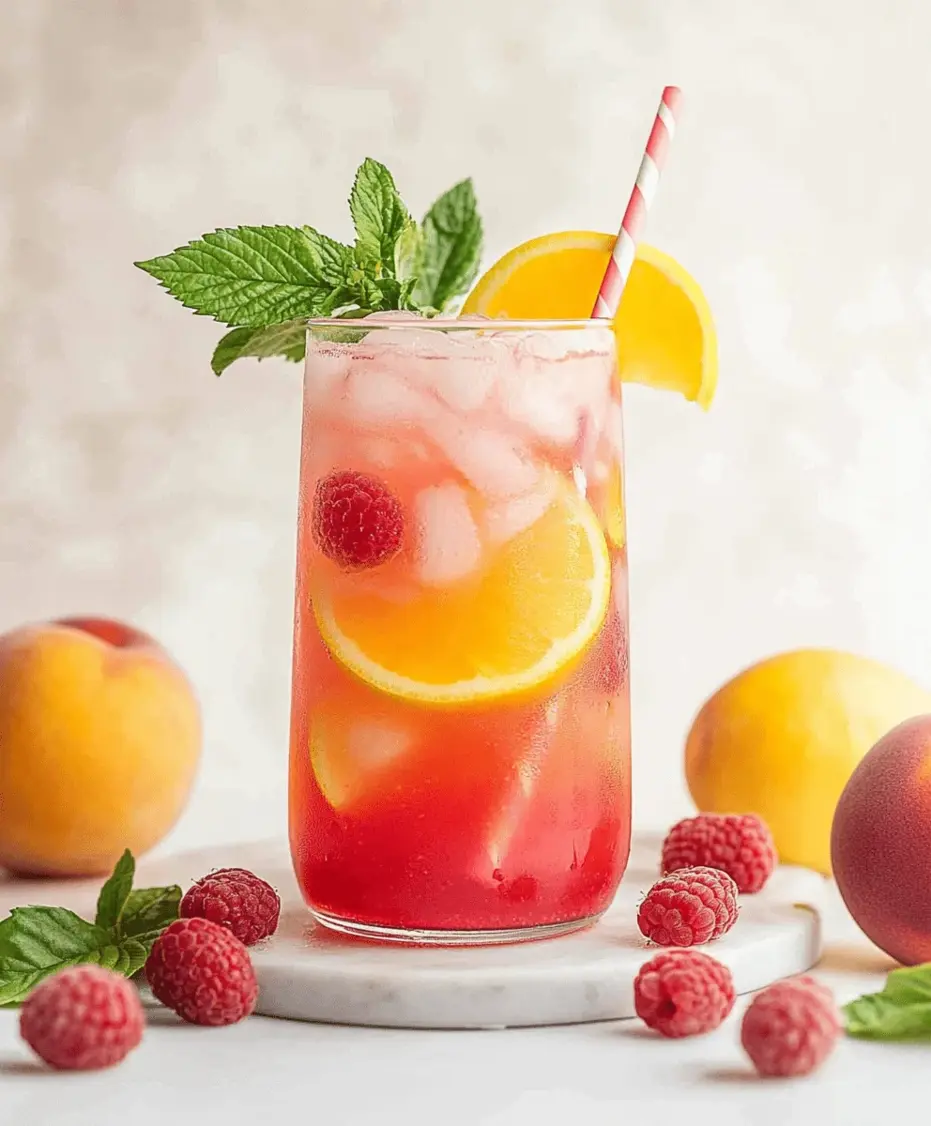
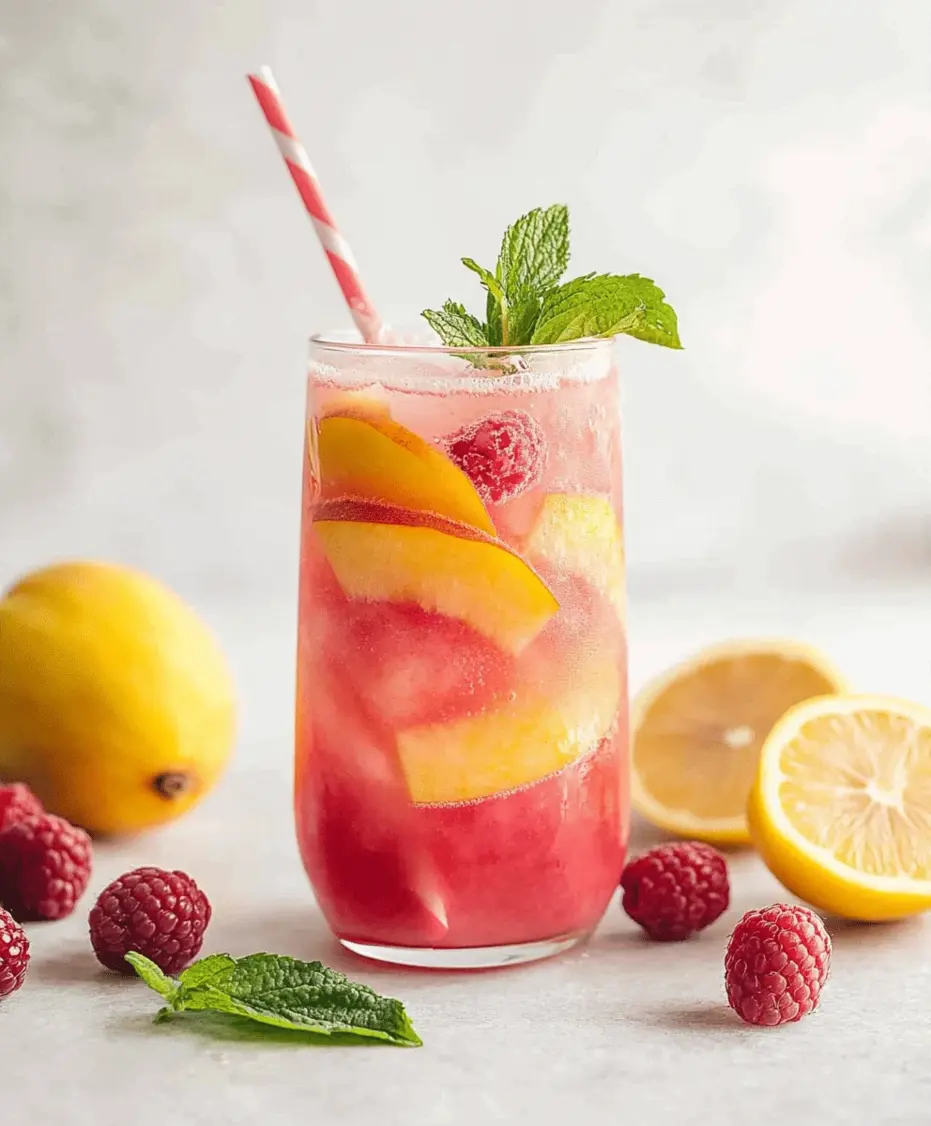
A tall glass of raspberry peach lemonade with ice, garnished with mint and fruit, sitting on a wooden table in sunlight.

The perfect summer sip, ready to enjoy.

Conclusion

This Homemade Raspberry Peach Lemonade is more than just a drink; it’s a celebration of summer’s best produce in a glass. With its stunning color, perfect balance of sweet and tart, and utterly fresh flavor, it’s guaranteed to become a seasonal staple in your home. It’s simple enough for a weekday treat yet impressive enough for any gathering. So, grab those peaches and raspberries, squeeze those lemons, and whip up a batch today. Your taste buds (and your guests) will thank you!

FAQs

Mozzarella Stuffed Soft Pretzels Recipe

“`html

Mozzarella Stuffed Soft Pretzels Recipe

Craving the Ultimate Homemade Snack?

Did you know that the average person consumes over 200 oz of soft pretzels annually in the United States alone? That’s a lot of dough and deliciousness! Imagine biting into a warm, chewy pretzel, only to discover a molten core of gooey mozzarella cheese. That’s the magic of Mozzarella Stuffed Soft Pretzels. They’re a step up from the ordinary, transforming a classic snack into an extraordinary indulgence. Perfect for game days, cozy evenings, or any time you need a savory treat that’s both comforting and undeniably tasty, these golden-baked wonders are surprisingly easy to make at home. Get ready to impress yourself and your loved ones with these irresistible cheese-stuffed pretzels!

Ingredients: The Building Blocks of Deliciousness

Crafting the perfect mozzarella stuffed soft pretzels starts with high-quality ingredients. Precision matters, but don’t be afraid to embrace the sensory experience of baking!

For the Pretzel Dough

  • Warm Water: 1 ½ cups (around 105-115°F/40-46°C). This is crucial for activating the yeast. It should feel delightfully warm, not hot or cold, to the touch.
  • Active Dry Yeast: 2 ¼ teaspoons (one standard packet). Look for yeast that is fresh and smells faintly yeasty.
  • Granulated Sugar: 2 tablespoons. Feeds the yeast and adds a subtle sweetness.
  • All-Purpose Flour: 4 cups, plus more for dusting. Use a good quality flour; it forms the chewy, tender structure.
  • Salt: 1 ½ teaspoons. Essential for flavor and it helps control yeast activity.
  • Unsalted Butter: ¼ cup, melted and slightly cooled. Adds richness and tenderness to the dough.

For the Boiling Solution

  • Water: 8 cups. The base for our alkaline bath.
  • Baking Soda: ½ cup. This is the secret ingredient for that classic pretzel color and chewy crust.

For Assembly and Topping

  • Mozzarella Cheese: 8 ounces, cut into 8-10 equal sticks (about 3-4 inches long and ½ inch thick). Low-moisture, part-skim mozzarella melts beautifully without being too watery.
  • Egg Wash: 1 large egg beaten with 1 tablespoon of water. For that glorious golden sheen.
  • Coarse Sea Salt or Pretzel Salt: For sprinkling, adding that satisfying crunch and salty kick.

Timing Your Pretzel Perfection

Baking from scratch is a rewarding process. Understanding the timings will help you achieve perfect results every time.

Prep time: 30 minutes
Rising time: 1 hour
Cook time: 15-20 minutes
Total time: 1 hour 50 minutes

Compared to many store-bought or restaurant pretzels, this homemade version offers immense value in freshness and customizable flavor, despite the moderate total time. This is well within the typical range for yeast-leavened baked goods.

A pile of glistening mozzarella stuffed soft pretzels on a rustic wooden board.

Step-by-Step Instructions

Let’s get baking! Follow these steps for pretzel perfection.

Activate the Yeast: A Warm Welcome

In a large mixing bowl or the bowl of your stand mixer, combine the warm water, yeast, and sugar. Give it a gentle stir. Let it sit for about 5-10 minutes. You should see it get foamy and bubbly – this means your yeast is happy and ready to work its magic!

Mix and Knead the Dough: The Heart of the Pretzel

Add the flour, salt, and melted butter to the yeast mixture. If using a stand mixer, attach the dough hook and mix on low speed until a shaggy dough forms. Increase the speed to medium and knead for 5-8 minutes, until the dough is smooth, elastic, and pulls away from the sides of the bowl. If mixing by hand, stir everything together until it forms a cohesive ball, then turn it out onto a lightly floured surface and knead for 8-10 minutes until smooth and elastic.

First Rise: Letting the Magic Happen

Lightly grease a clean bowl with a little oil. Place the dough in the bowl, turning it once to coat. Cover the bowl tightly with plastic wrap or a damp kitchen towel. Let it rise in a warm place for about 1 hour, or until it has doubled in size. This resting period allows the gluten to relax and develop, making the dough pliable.

Shape and Stuff: The Mozzarella Surprise

Preheat your oven to 425°F (220°C). Line a baking sheet with parchment paper. In a shallow, wide pot or baking dish, whisk together the 8 cups of water and ½ cup of baking soda for the boiling solution. In a separate bowl, whisk the egg and tablespoon of water for the egg wash. Sprinkle some coarse salt on a small plate.

Once the dough has doubled, punch it down gently to release the air. Turn it out onto a lightly floured surface. Divide the dough into 8-10 equal pieces. Roll each piece into a rope about 10-12 inches long. Place a mozzarella stick in the center of the rope and carefully wrap the dough around it, pinching the ends firmly to seal. Ensure there are NO gaps, or the cheese will escape! Roll the dough slightly to smooth out the seam. To form the classic pretzel shape, create a U-shape, then cross the ends over each other and press them onto the bottom of the U. Alternatively, you can simply twist the dough around the cheese.

The Alkaline Bath: Key to That Signature Pretzel Color

Carefully place each stuffed pretzel into the baking soda bath. Let it soak for about 20-30 seconds per side. Use a slotted spoon or spider strainer to lift them out, letting any excess liquid drain. Briefly place them on a wire rack set over a baking sheet to drain briefly before transferring them to the prepared baking sheet.

Bake to Golden Perfection

Brush each pretzel with the egg wash. Immediately sprinkle generously with coarse sea salt or pretzel salt. Bake in the preheated oven for 15-20 minutes, or until the pretzels are a deep golden brown and sound hollow when tapped on the bottom. They will expand and puff up beautifully.

Nutritional Information

While exact values can vary based on ingredient brands and portion sizes, here’s an estimated nutritional breakdown per pretzel (assuming 8 pretzels):

  • Calories: Approximately 300-350 kcal
  • Protein: 10-15g
  • Carbohydrates: 40-45g
  • Fat: 10-15g (mostly from cheese and butter)
  • Sodium: Varies greatly depending on added salt, but can be high.

Healthier Alternatives

Looking for lighter options without sacrificing flavor? Try these swaps:

  • Whole Wheat Flour: Substitute half of the all-purpose flour with whole wheat flour for added fiber. The texture may be slightly denser.
  • Reduced-Fat Mozzarella: Use part-skim or reduced-fat mozzarella for slightly less fat.
  • Less Salt: Significantly reduce or omit the coarse salt topping.
  • Olive Oil Instead of Butter: While butter adds classic richness, a good quality olive oil can be used as a substitute for fat in the dough, though it will alter the flavor slightly.

Serving Suggestions

These cheese-stuffed pretzels are wonderfully versatile:

  • As is: They are delicious on their own!
  • With Marinara Sauce: Perfect for dipping (think pizza flavor!).
  • With Mustard: A classic pairing, especially spicy brown or Dijon.
  • With a Cheese Sauce: For the ultimate cheese lover!
  • Alongside a Salad or Soup: They make a substantial and satisfying side.

Common Mistakes to Avoid

  • Water Temperature: Too hot water will kill the yeast; too cold won’t activate it. Aim for lukewarm.
  • Under-kneading: This results in a tough, dense pretzel. Knead until smooth and elastic.
  • Poorly Sealed Cheese: If the mozzarella isn’t completely enclosed, it will ooze out during baking, making a mess and a less satisfying stuffed pretzel.
  • Over-baking: They can go from perfect to hard quickly. Watch for that golden-brown color.
  • Skipping the Baking Soda Bath: This is crucial for the signature chewy crust and brown color.

Storing Your Homemade Pretzels

For the best experience, consume your mozzarella stuffed soft pretzels fresh. If you have leftovers:

  • Room Temperature: Store in an airtight container for 1-2 days. They will lose some of their crispness but remain soft.
  • Reheating: For best results, reheat them in a preheated oven at 350°F (175°C) for 5-8 minutes until warmed through and slightly crisped. Microwaving can make them tough.
  • Freezing: Wrap cooled pretzels tightly in plastic wrap and then in foil or a freezer bag. They can be frozen for up to 1-2 months. Thaw completely before reheating in the oven.
Close-up of a hand tearing open a warm mozzarella stuffed soft pretzel, revealing melted cheese.

Frequently Asked Questions

What kind of baking soda should I use?

Standard, pure baking soda (sodium bicarbonate) found in the baking aisle is perfect. Avoid baking powder, as it has different chemical properties.

Can I make this recipe ahead of time?

You can prepare the dough and let it perform its first rise. After that, you can refrigerate it for up to 24 hours. Bring it to room temperature before shaping and stuffing.

My cheese leaked out! What went wrong?

The most common reason is not sealing the dough tightly enough around the mozzarella. Ensure the seam is well-pinched and the dough is a good thickness all around the cheese.

What can I use instead of baking soda for the bath?

For the authentic color and crust, baking soda is essential. If you absolutely cannot find it, you can try using food-grade lye, but this requires extreme caution and a different recipe. Baking soda is the safe and effective home alternative.

Can I use pre-shredded mozzarella?

It’s best to use a block of low-moisture mozzarella and cut it into sticks. Pre-shredded cheese often contains anti-caking agents that prevent it from melting as smoothly and gooey.

Endless Cheesy Pretzel Joy

There you have it – your guide to creating perfect Mozzarella Stuffed Soft Pretzels at home! These aren’t just snacks; they’re a labor of love that rewards you with irresistible texture and flavor. Whether you’re hosting a party or just craving a comforting bite, these cheese-filled delights are sure to be a hit. Don’t hesitate to try them; the joy of pulling apart a warm pretzel to reveal melty mozzarella is truly unparalleled. What are you waiting for? Get your apron on and start baking!

Print

clock clock iconcutlery cutlery iconflag flag iconfolder folder iconinstagram instagram iconpinterest pinterest iconfacebook facebook iconprint print iconsquares squares iconheart heart iconheart solid heart solid icon

Mozzarella Stuffed Soft Pretzels Recipe


  • Author: Chef Emy

Description

Mozzarella Stuffed Soft Pretzels are the ultimate homemade snack, combining warm, chewy dough with gooey mozzarella cheese at the center. Perfect for game days, gatherings, or a savory treat, these golden-baked pretzels are easy to make and irresistible. Keyword-rich recipe for cheese-stuffed pretzels, soft pretzels, and easy snack ideas.


Ingredients

Scale
  • 1 ½ cupswarm water (110°F)
  • 1packet (2 ¼ tsp) active dry yeast
  • 1 tbspsugar
  • 4 cupsall-purpose flour
  • 1 tspsalt
  • 2 tbspunsalted butter, melted
  • 8sticks of mozzarella cheese (string cheese)
  • cupbaking soda
  • 1egg (beaten, for egg wash)
  • Coarse sea salt for topping

Instructions

    Notes

    You can substitute string cheese with cubed mozzarella for a more gooey center.
    Add garlic powder or Italian seasoning to the dough for extra flavor.
    Serve with marinara sauce for dipping.

    Nutrition

    • Calories: 290
    • Sugar: 2g

    “`

    5-minute Lemon Parmesan Lettuce Salad Recipe

    “`html

    5-Minute Lemon Parmesan Lettuce Salad Recipe

    Craving a Quick, Healthy Side Dish?

    Are you spending more time searching for weeknight recipes than actually cooking them? In today’s fast-paced world, finding a dish that’s both incredibly quick and remarkably healthy can feel like a culinary quest. But what if I told you that you could whip up a vibrant, flavorful salad in mere minutes, using just a handful of staple ingredients? This 5-minute Lemon Parmesan Lettuce Salad recipe is your answer. It’s a testament to how simple, fresh components can create a symphony of tangy, savory, and crisp perfection. Designed for the busy home cook, it’s packed with the goodness of fresh romaine lettuce, the zesty brightness of lemon juice, and the irresistible umami of Parmesan cheese. This isn’t just any salad; it’s a low-carb, vegetarian delight that’s perfect for elevating your lunch, complementing your dinner, or serving as a light, satisfying snack. Whether you’re committed to a clean eating lifestyle or embracing the principles of the Mediterranean diet, this salad is a versatile and delicious addition to your repertoire.

    Ingredients for Your 5-Minute Lemon Parmesan Lettuce Salad

    The magic of this salad lies in its simplicity and the quality of its ingredients. Freshness is key here; the vibrant crunch of the lettuce and the bright tang of the lemon are what make this salad shine. Here’s what you’ll need:

    • Crisp Romaine Lettuce: 1 head, thoroughly washed, dried, and chopped into bite-sized pieces. Look for firm, bright green leaves that snap when broken – they’ll provide the perfect crunchy base. No wilted leaves allowed in this speedy creation!
    • Fresh Lemon Juice: 2-3 tablespoons. This is the star of the dressing, providing a bright, zesty acidity. Use freshly squeezed for the most vibrant flavor. Bottled juice won’t deliver the same punch.
    • Grated Parmesan Cheese: 1/4 cup, plus extra for garnish. Real Parmigiano-Reggiano adds a salty, nutty depth that’s hard to beat. If you’re in a pinch, a good quality pre-grated Parmesan will work, but grating it fresh will offer superior texture and aroma.
    • Extra Virgin Olive Oil: 2 tablespoons. A good quality olive oil will add a smooth, fruity richness to the dressing, balancing the lemon’s tartness.
    • Salt: 1/4 teaspoon, or to taste. Sea salt or kosher salt will enhance all the flavors.
    • Freshly Ground Black Pepper: 1/8 teaspoon, or to taste. A little pepper adds a subtle warmth and complexity.
    • Optional Add-ins: A pinch of red pepper flakes for a hint of heat, or a tiny bit of minced garlic for extra zing.

    Timing Is Everything

    In the world of quick meals, time is of the essence. This salad truly lives up to its name:

    • Prep Time: 5 minutes
    • Cook Time: 0 minutes
    • Total Time: 5 minutes

    Compared to the average salad recipe that might involve chopping multiple vegetables, roasting nuts, or preparing a more complex dressing, this 5-minute wonder is a champion of efficiency. It’s designed to be on your plate almost as quickly as you can decide you want a salad.

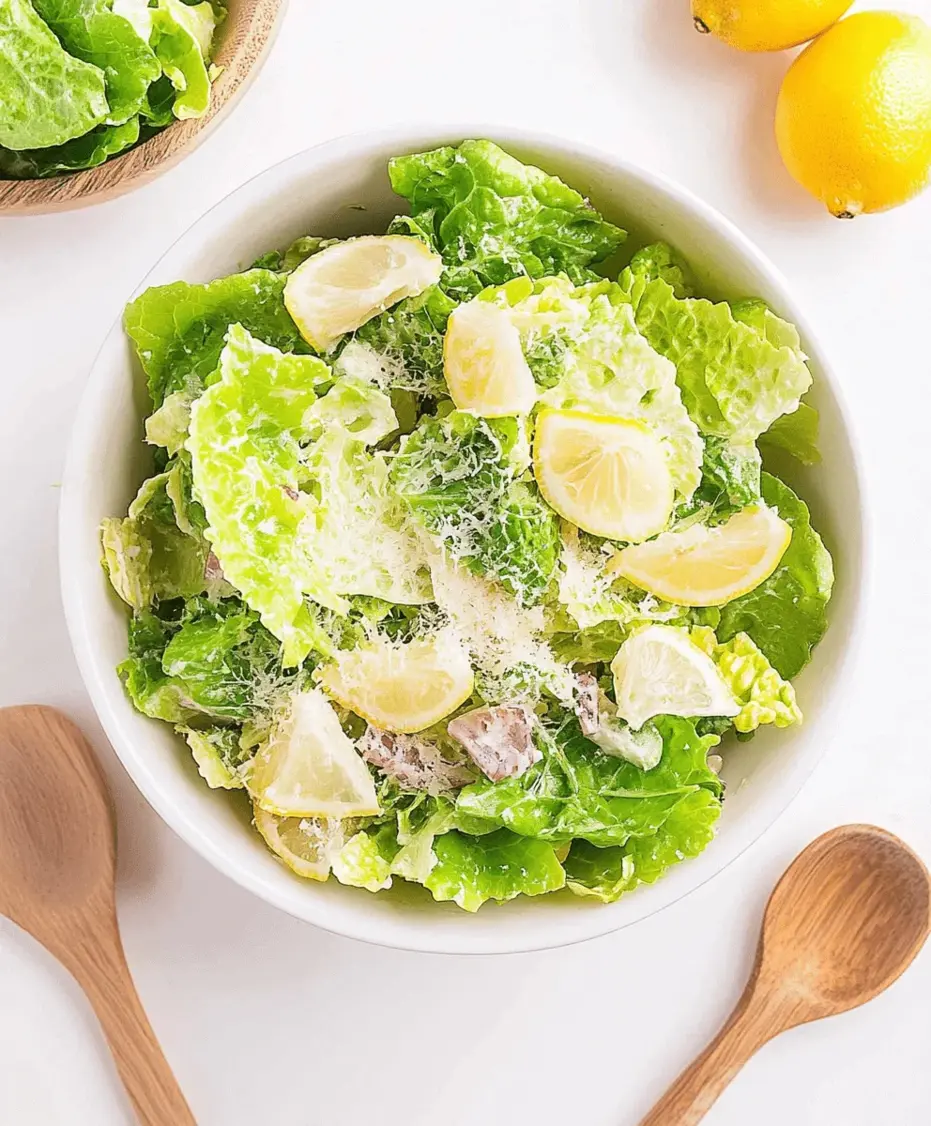
    A close-up shot of the 5-minute Lemon Parmesan Lettuce Salad, showcasing the crisp romaine, shredded parmesan, and lemon zest.

    How to Make Your 5-Minute Salad

    Get ready for the easiest, most satisfying salad you’ve ever made. The beauty of this recipe is its straightforward approach. No fancy techniques, just pure goodness.

    Step 1: Prepare the Lettuce

    Start by ensuring your romaine lettuce is impeccably dry. Excess water will dilute your dressing and make the leaves soggy. Give it a thorough wash, spin it dry in a salad spinner, or pat it carefully with clean kitchen towels. Once dry, chop the crisp leaves into cheerful, bite-sized pieces. Place them into your serving bowl.

    Step 2: Whisk Up the Dressing

    In a small bowl or a jar with a lid, combine the fresh lemon juice, extra virgin olive oil, grated Parmesan cheese, salt, and freshly ground black pepper. If you’re feeling adventurous, add a pinch of red pepper flakes or a whisper of minced garlic for an extra layer of flavor. Whisk vigorously until the dressing is well combined and slightly emulsified. If using a jar, simply cap it tightly and shake it with gusto!

    Step 3: Combine and Serve

    Pour the zesty dressing over the chopped romaine lettuce in the serving bowl. Toss gently but thoroughly, ensuring every leaf is lightly coated with the bright, cheesy dressing. Taste and adjust seasoning if needed – perhaps a little more salt or a twist of pepper? Sprinkle with an additional burst of grated Parmesan cheese for that final flourish. Serve immediately and enjoy the incredible freshness!

    Nutritional Highlights

    This salad is a fantastic option for those mindful of their nutritional intake. While specific values can vary based on exact ingredient quantities and brands used, a typical serving offers:

    • Low in Calories: Making it an excellent choice for weight management.
    • Low Carb: Perfect for ketogenic, low-carb, or Atkins-style diets.
    • Good Source of Vitamin C: From the fresh lemon juice.
    • Provides Calcium: Thanks to the Parmesan cheese.
    • Healthy Fats: From the extra virgin olive oil.

    It’s a light yet satisfying contribution to any meal, fitting seamlessly into clean eating and Mediterranean lifestyle plans.

    Healthier Swaps for Flavor Control

    While this salad is already quite healthy, you can customize it further to suit your dietary needs and preferences without sacrificing taste:

    • For Lighter Dressing: Reduce the olive oil slightly or use a lighter-bodied olive oil. You can also add a splash of water or vegetable broth to thin the dressing and reduce fat without diluting flavor too much.
    • Dairy-Free/Vegan Option: While this significantly alters the flavor profile, you could try nutritional yeast for a cheesy, umami flavor and a splash of lemon juice and olive oil. The texture will be different, of course.
    • For More Fiber and Nutrients: Toss in a handful of baby spinach or arugula along with the romaine for added vitamins and a peppery kick.
    • Reduced Sodium: Use a low-sodium Parmesan cheese or omit it entirely and rely on lemon and pepper for flavor.

    Serving Suggestions

    This versatile salad is the perfect companion for a wide array of dishes. Serve it alongside:

    • Grilled chicken or fish
    • Baked salmon or cod
    • Pasta dishes
    • Hearty soups
    • Steak or pork chops
    • As a light lunch on its own

    Common Mistakes to Avoid

    To ensure your 5-minute salad is a triumph every time:

    • Not Drying the Lettuce Properly: This is the number one mistake! Soggy lettuce is never enjoyable.
    • Using Bottled Lemon Juice: The fresh, bright flavor is crucial here.
    • Over-dressing the Salad: A light coating is all you need to enhance the flavors, not drown them.
    • Salting Too Early: If preparing slightly ahead, wait to salt until just before serving to prevent the lettuce from wilting.

    Storing Your Salad

    This salad is best enjoyed fresh. Because it’s so quick to make, there’s rarely a need to store it. However, if you find yourself with leftovers:

    • Undressed: Store washed and thoroughly dried lettuce in an airtight container or bag in the refrigerator for up to 3-4 days.
    • Dressed: It’s generally not recommended to store dressed lettuce for long periods, as it will wilt. If you must, store it in an airtight container in the fridge and consume within a few hours, but be prepared for some texture loss.

    For optimal crispness, prepare the dressing separately and toss just before serving.

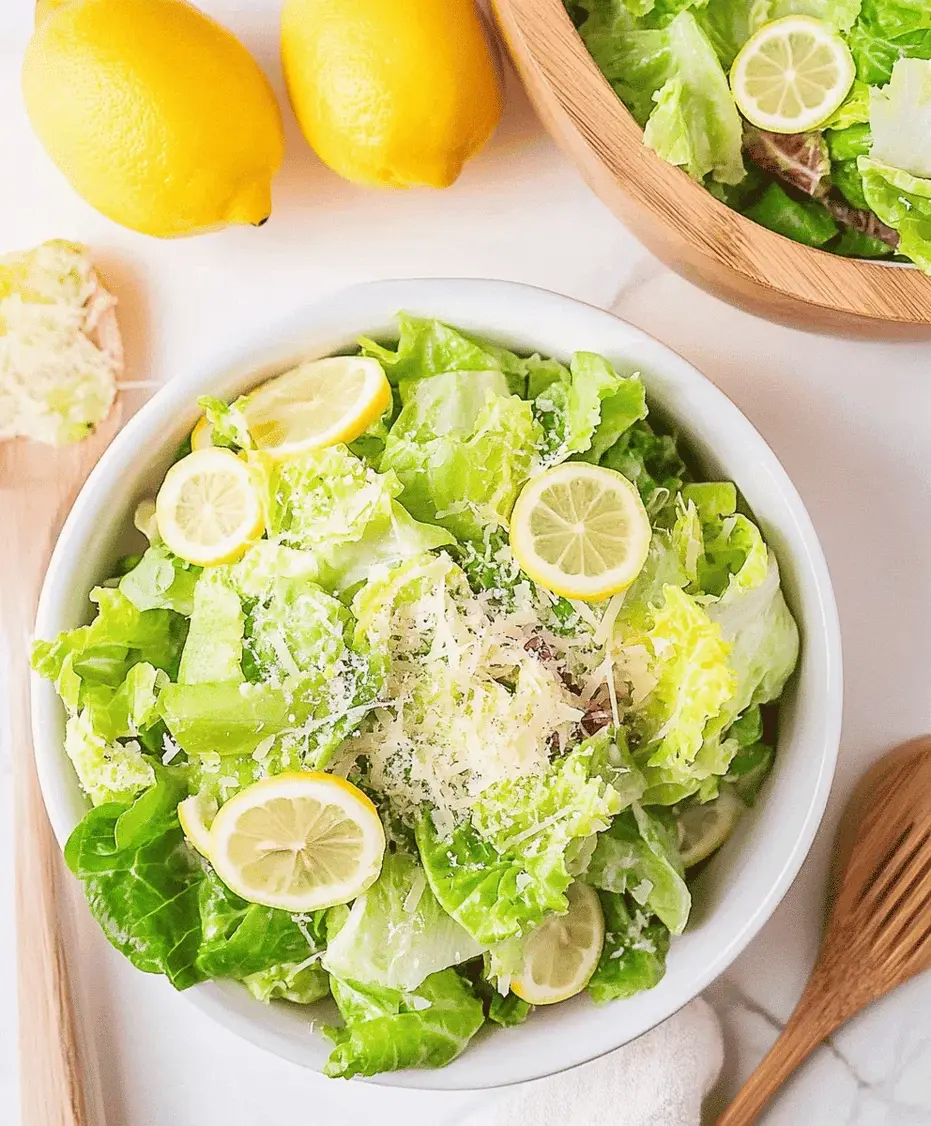
    A bowl of fresh 5-minute Lemon Parmesan Lettuce Salad, ready to be served with a sprinkle of extra cheese.

    Frequently Asked Questions About the Salad

    ***Can I use a different type of lettuce?***

    While romaine is ideal for its crisp texture, you can experiment with other sturdy greens like iceberg, butter lettuce, or even a spring mix. However, softer greens might wilt more quickly with the dressing.

    ***How can I make this salad more substantial for a main meal?***

    Add protein like grilled chicken, shrimp, hard-boiled eggs, or chickpeas. Toasted nuts or seeds (like walnuts, almonds, or sunflower seeds) can also add texture and healthy fats.

    ***What if I don’t have fresh lemons?***

    In a pinch, you can use bottled lemon juice, but the flavor won’t be as bright or fresh. Consider adding a tiny bit of lemon zest if you have it, even from a dried lemon, to boost the aroma.

    ***Can I add other vegetables?***

    Absolutely! Thinly sliced red onion, cherry tomatoes, cucumber, bell peppers, or shaved carrots would be delicious additions. Just remember to keep the prep time in mind if you’re aiming for the strict 5-minute mark!

    ***Is this salad gluten-free?***

    Yes, this recipe is naturally gluten-free, making it suitable for those with gluten sensitivities.

    ***Can I make the dressing ahead of time?***

    Yes, you can whisk together the dressing ingredients and store them in an airtight container in the refrigerator for up to 3 days. Give it a good shake or whisk again before dressing the salad.

    Conclusion: Your New Go-To Salad

    The 5-Minute Lemon Parmesan Lettuce Salad is more than just a recipe; it’s a solution. It’s proof that you don’t need hours in the kitchen to enjoy a fresh, healthy, and incredibly tasty side dish. Its simplicity, speed, and vibrant flavors make it a winner for busy weeknights, quick lunches, or when you simply need a refreshing boost. Embrace the zest, savor the crunch, and make this your staple when time is short but flavor is a must. Give it a try today and be amazed at how much deliciousness can come from just a few minutes of your time!

    Print

    clock clock iconcutlery cutlery iconflag flag iconfolder folder iconinstagram instagram iconpinterest pinterest iconfacebook facebook iconprint print iconsquares squares iconheart heart iconheart solid heart solid icon

    5-minute Lemon Parmesan Lettuce Salad Recipe


    • Author: Chef Emy

    Description

    This5-minute Lemon Parmesan Lettuce Saladrecipe is a quick, healthy side dish packed with crisp romaine lettuce, fresh lemon juice, and rich Parmesan cheese. Perfect for any meal, this salad uses simple ingredients to deliver bold, tangy flavors in minutes. It’s low-carb, vegetarian, and perfect for lunch, dinner, or a light snack. Great for those following a clean eating diet or Mediterranean lifestyle.


    Ingredients

    Scale
    • 1head of romaine lettuce, chopped
    • ¼ cupfreshly grated Parmesan cheese
    • 2 tablespoonsfresh lemon juice
    • 2 tablespoonsolive oil
    • Salt and pepper to taste
    • Optional: lemon zest, crushed croutons, garlic powder

    Instructions

      Notes

      Best served fresh; does not store well once dressed.
      Add grilled chicken or tuna for a protein-packed meal.
      Use shaved Parmesan for a bolder presentation.

      Nutrition

      • Calories: 180
      • Sugar: 1g

      “`

      Crispy Smashed Potato Salad Recipe

      “`html

      Crispy Smashed Potato Salad Recipe

      Revolutionize Your Side Dish Game: The Crispy Smashed Potato Salad

      Are you tired of the same old, mushy potato salad? Did you know that traditional potato salad recipes often clock in at over 300 calories per serving, with a significant portion coming from mayonnaise? It’s time to shake things up! This Crispy Smashed Potato Salad recipe is a delightful twist on a classic, designed to satisfy your cravings for texture and flavor without compromising on deliciousness. We’re talking about crispy, golden smashed potatoes that offer an addictive crunch, tossed in a zesty, tangy dressing and adorned with a medley of fresh, vibrant herbs. Forget sad, soggy spuds; this dish promises an exciting culinary experience that’s perfect for any occasion, from lively barbecues and sunny picnics to simple weeknight dinners. Get ready to discover your new favorite potato salad – it’s easy to make and guaranteed to become a household staple.

      Ingredients You’ll Need for Crispy Smashed Potato Salad

      The magic of this recipe lies in its simple yet impactful ingredients. We’re focusing on fresh, quality produce and pantry staples to create a symphony of flavors and textures. Here’s what you’ll need:

      • 1.5 lbs Baby Potatoes (approximately 1 inch in diameter): Look for waxy varieties like Yukon Gold, red potatoes, or fingerlings. Their firm texture holds up well to boiling and smashing, resulting in a delightful crispness. (Substitution: Larger potatoes cut into uniform 1-inch chunks).
      • 2 tablespoons Olive Oil (plus more for drizzling): Extra virgin olive oil provides a rich, fruity base for roasting.
      • 1/2 teaspoon Salt (for boiling water): Enhances the potato’s natural flavor from the inside out.
      • 1/4 teaspoon Black Pepper: Freshly ground pepper offers a pungent kick that complements the potatoes beautifully.
      • 1/4 cup Mayonnaise: The creamy binder for our dressing. (Substitution: Greek yogurt or vegan mayonnaise for a lighter, dairy-free option).
      • 2 tablespoons Dijon Mustard: Adds a sharp, tangy, and slightly spicy element that cuts through the richness.
      • 1 tablespoon Apple Cider Vinegar: Provides a bright, acidic counterpoint to the dressing. (Substitution: White wine vinegar or red wine vinegar).
      • 1 teaspoon Honey or Maple Syrup: A touch of sweetness to balance the tanginess of the vinegar and mustard. (Optional, adjust to taste).
      • 1/4 cup Fresh Parsley, finely chopped: Offers a burst of fresh, herbaceous flavor and vibrant green color.
      • 2 tablespoons Fresh Chives, finely chopped: Adds a mild oniony flavor and delicate texture.
      • Options for Added Crunch/Flavor: Crispy bacon bits, finely diced red onion, capers, or celery.

      Timing: How Long Does This Crispy Smashed Potato Salad Take?

      This recipe is designed for efficiency without sacrificing flavor. While the total time might be a little longer than your average quick-fix side, the hands-on time is minimal, and the result is well worth the wait! Most standard potato salads take around 15-20 minutes of prep and 20-30 minutes of chill time, but this one adds a roasting step for ultimate crispiness.

      Prep time: 15 minutes
      Cook time: 30-35 minutes
      Total time: 45-50 minutes

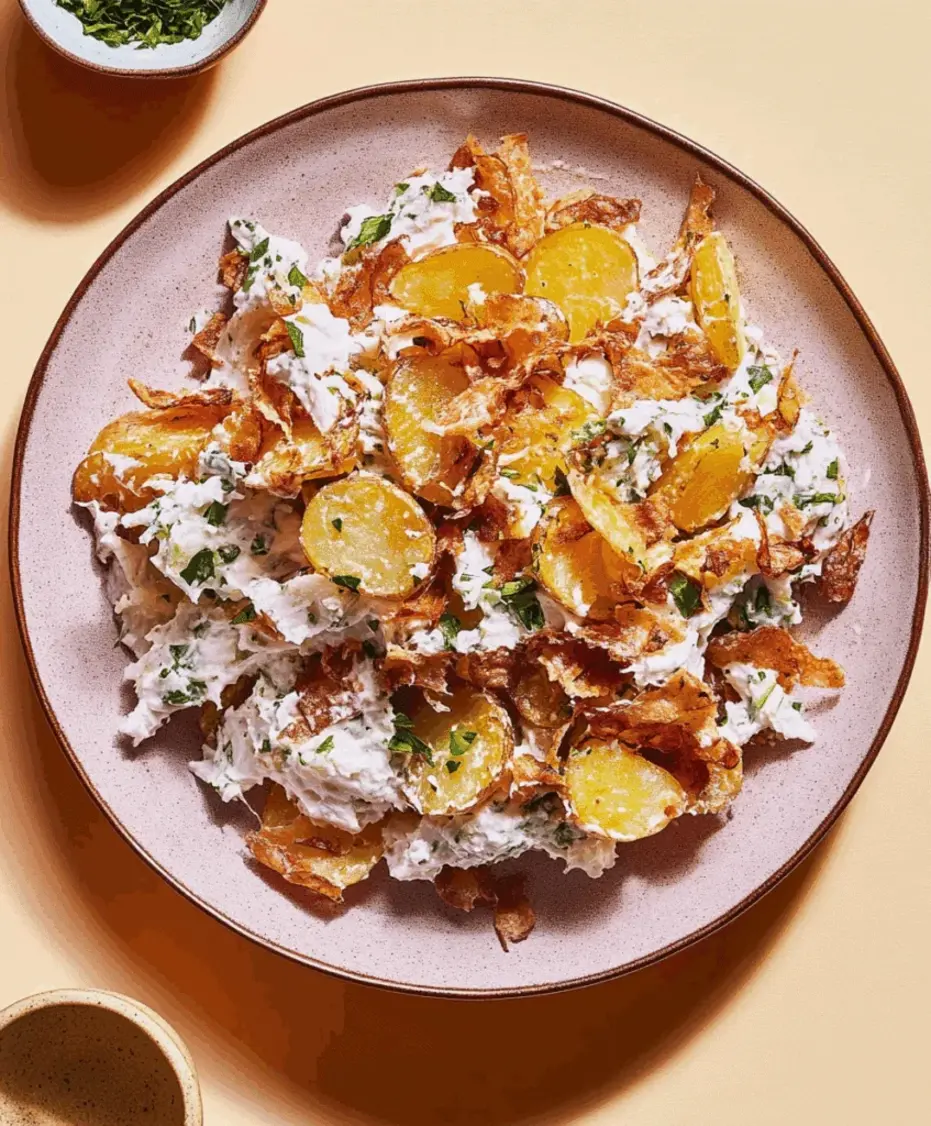
      Crispy Smashed Potatoes cooling on a baking sheet

      Step-by-Step Instructions for Crispy Smashed Potato Salad

      Let’s get smashing! Follow these simple steps to create a potato salad that’s anything but ordinary.

      Step 1: Prep the Potatoes

      Start by washing your baby potatoes thoroughly. If they’re on the larger side, you can halve or quarter them so they are roughly uniform in size, about 1-1.5 inches. This ensures they cook evenly. Don’t peel them – the skin adds great texture and nutrients!

      Step 2: Boil, Smash, and Roast the Potatoes

      Place the prepared potatoes in a medium saucepan and cover them with cold water, ensuring the water level is about an inch above the potatoes. Add 1/2 teaspoon of salt to the water. Bring to a boil over medium-high heat, then reduce the heat and simmer for about 15-20 minutes, or until the potatoes are fork-tender but not falling apart. You want them soft enough to smash, but firm enough to hold their shape.

      Drain the potatoes well and let them steam dry in the colander for a few minutes. This is crucial for achieving crispiness later on. Preheat your oven to 400°F (200°C).

      Arrange the drained potatoes on a baking sheet lined with parchment paper. Using the bottom of a glass or a potato masher, gently smash each potato until it’s flattened to about 1/2 inch thick. Be careful not to over-smash them into a paste; you want distinct pieces.

      Drizzle the smashed potatoes generously with 2 tablespoons of olive oil, ensuring they are lightly coated. Season them with black pepper and a pinch more salt, if desired. Roast in the preheated oven for 25-30 minutes, or until they are wonderfully golden brown and crispy around the edges. The crispier, the better!

      Step 3: Whisk Up the Tangy Dressing

      While the potatoes are roasting to perfection, prepare the zesty dressing. In a medium bowl, whisk together the mayonnaise, Dijon mustard, apple cider vinegar, and honey or maple syrup (if using). Stir until the dressing is smooth and well combined. Taste and adjust seasonings as needed – you might want a little more vinegar for tang, or a touch more honey for sweetness.

      Step 4: Gently Combine and Let Flavors Meld

      Once the potatoes are perfectly crispy and golden, let them cool slightly on the baking sheet for about 5-10 minutes. This step helps them retain their crispiness. Then, carefully transfer the slightly cooled smashed potatoes to the bowl with the dressing. Gently fold the potatoes into the dressing, ensuring each piece is coated without breaking them further. The goal is to coat, not mash again.

      Step 5: Add Fresh Herbs and Serve

      Finally, stir in the finely chopped fresh parsley and chives. If you’re adding any optional ingredients like bacon bits, diced red onion, or capers, fold them in now. For the best flavor, cover the potato salad and refrigerate for at least 30 minutes to allow the flavors to meld. This also ensures it’s served at a delightful temperature.

      Nutritional Information Snapshot

      This is an approximate nutritional breakdown per serving (assuming 6 servings). Actual values may vary based on specific ingredients used.

      • Calories: Approx. 250-300 kcal
      • Protein: Approx. 5g
      • Fat: Approx. 15g (majority from olive oil and mayonnaise)
      • Carbohydrates: Approx. 25g
      • Fiber: Approx. 3g
      • Sugar: Approx. 3g (natural from potatoes and honey/maple syrup)

      Healthier Alternatives & Flavor Tweaks

      Looking to lighten things up or cater to dietary needs? This recipe is highly adaptable!

      • Lighter Dressing Base: Substitute half or all of the mayonnaise with plain Greek yogurt (full-fat or 0% fat). This reduces fat and calories while adding a tangy creaminess. A vegan mayonnaise or a cashew-based cream can be used for a dairy-free option.
      • Reduce Oil: While olive oil is key for crispiness, you can slightly reduce the amount used for roasting. Ensure potatoes are well-drained to maximize crispiness even with less oil.
      • Extra Veggies: Boost the fiber and nutrient content by adding finely diced celery, bell peppers, or cucumber to the salad.
      • Herbs Galore: Don’t be shy with fresh herbs! Experiment with dill, mint, or tarragon for different flavor profiles.
      • Lower Carb Potatoes: While classic potato salad relies on potatoes, for a lower-carb version, you could explore using cauliflower florets (roasted and smashed) as a base, though the texture will be different.

      Serving Suggestions: What Pairs Well?

      This versatile Crispy Smashed Potato Salad shines brightly alongside a variety of dishes:

      • Barbecue Star: It’s the perfect companion to grilled burgers, hot dogs, ribs, or chicken.
      • Picnic Essential: Pack it up for a delightful addition to your outdoor feast with sandwiches and cold cuts.
      • Weeknight Wonder: Serve it as a hearty side to baked fish, roasted chicken, or pork chops.
      • Salad Enhancer: Add a scoop to a bed of mixed greens for a more substantial meal.

      Common Mistakes to Avoid

      Prevent common pitfalls to ensure potato salad perfection:

      • Over-boiling Potatoes: Mushy potatoes won’t smash well and will turn into a paste in the salad. Aim for fork-tender.
      • Not Draining Properly: Excess moisture is the enemy of crispiness. Ensure potatoes are very well drained and even slightly dried.
      • Smashing Too Hard: You want flattened pieces, not potato pulp. Be gentle!
      • Dressing Too Early: Adding the dressing while potatoes are piping hot can make them soggy. Let them cool slightly first.
      • Not Seasoning Enough: Potatoes can be bland if not seasoned properly throughout the cooking process.

      Storing Tips for Maximum Freshness

      Keep your Crispy Smashed Potato Salad tasting its best:

      • Refrigeration is Key: Store the salad in an airtight container in the refrigerator.
      • Enjoy within 3-4 Days: Like most mayonnaise-based salads, it’s best consumed within a few days for optimal quality and food safety.
      • Crispiness Factor: While the smashed potatoes offer a unique texture, the crispiness will diminish slightly as it sits in the dressing. It will still be delicious, though!

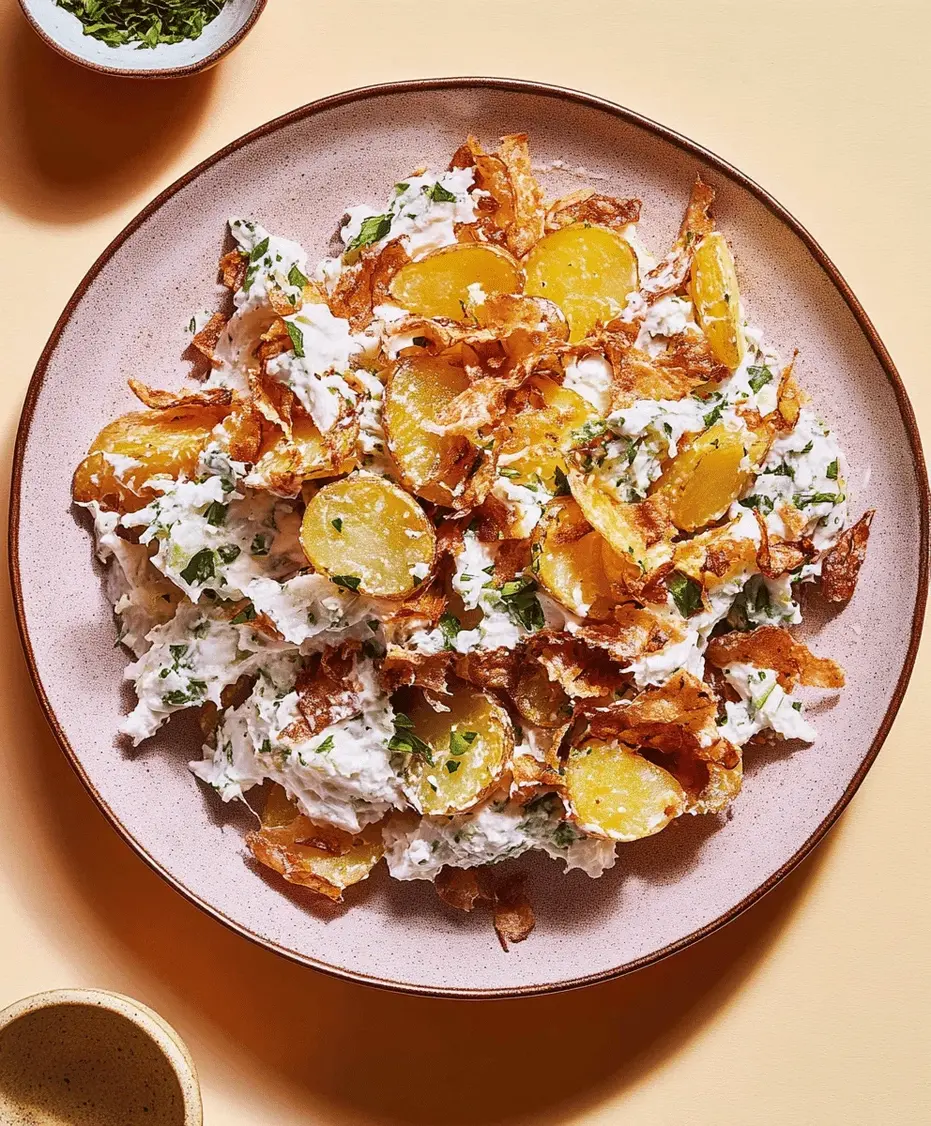
      A bowl of Crispy Smashed Potato Salad garnished with herbs

      A New Favorite Side Dish Awaits!

      There you have it – a recipe that takes a humble side dish and elevates it to star status. The Crispy Smashed Potato Salad offers a delightful textural contrast and a burst of fresh flavors that will have everyone asking for the recipe. It’s a testament to how simple ingredients and a little creative technique can transform a classic into something truly special. So, ditch the ordinary and embrace the extraordinary crunch! Give this **Crispy Smashed Potato Salad recipe** a try this weekend, and let us know what you think in the comments below. We’re confident it will become a staple in your recipe repertoire.

      Frequently Asked Questions (FAQs)

      ***Why are my smashed potatoes not crispy?***

      Ensure you’re using waxy potatoes, boiling them until just tender (not mushy), draining them thoroughly, and not overcrowding the baking sheet when roasting. Giving them a good steam dry after boiling also helps.

      ***Can I make this potato salad ahead of time?***

      Yes, you can assemble the salad and refrigerate it for up to a day. The potatoes will soften slightly, but the flavors will meld beautifully. For optimal crispiness, you can roast the potatoes and make the dressing ahead of time, then combine them closer to serving.

      ***What kind of potatoes are best for this recipe?***

      Waxy potatoes like Yukon Gold, red potatoes, or fingerlings are ideal. They hold their shape well during boiling and roasting, leading to a better texture. Starchy potatoes (like Russets) tend to break down too easily.

      ***Can I use leftover roasted potatoes?***

      While you can certainly use leftover roasted potatoes, they might not achieve the same level of “smashed” crispiness as starting with boiled potatoes. You’d want to ensure they are soft enough to smash without crumbling completely.

      ***How do I make it vegan?***

      Use a good quality vegan mayonnaise and optionally a vegan honey substitute or agave nectar for the dressing. Ensure any added bacon bits are vegan alternatives.

      Print

      clock clock iconcutlery cutlery iconflag flag iconfolder folder iconinstagram instagram iconpinterest pinterest iconfacebook facebook iconprint print iconsquares squares iconheart heart iconheart solid heart solid icon

      Crispy Smashed Potato Salad Recipe


      • Author: Chef Emy

      Description

      ThisCrispy Smashed Potato Saladrecipe is a delightful twist on a classic. Combining crispy, golden smashed potatoes with a tangy dressing and fresh herbs, it’s the perfect side dish for barbecues, picnics, or weeknight dinners. Easy to make and packed with texture, it’s a guaranteed crowd-pleaser.


      Ingredients

      Scale
      • 2lbs baby potatoes
      • 2 tbspolive oil
      • Salt and black pepper to taste
      • ½ cupsour cream
      • ¼ cupmayonnaise
      • 1 tbspDijon mustard
      • 1 tbspapple cider vinegar
      • 2green onions, chopped
      • 2 tbspfresh dill, chopped
      • ¼ cupchopped parsley
      • Optional: bacon bits, red onion, chives

      Instructions

        Notes

        For extra crispiness, let the potatoes dry before smashing.
        Customize with your favorite herbs or protein toppings.
        Can be made ahead and served at room temperature.

        Nutrition

        • Calories: 280
        • Sugar: 2g

        “`

        Mexican Street Corn Salad Recipe

        “`html

        Mexican Street Corn Salad Recipe

        What is Mexican Street Corn Salad?

        Are you looking for a side dish that packs a punch of flavor and is incredibly easy to make? If so, you’re in the right place! This Mexican Street Corn Salad recipe is a vibrant, deconstructed take on the beloved Mexican street food, *elote*. Instead of just corn on the cob slathered in toppings, this salad brings all those irresistible elements – sweet roasted corn, a creamy, tangy dressing, salty cheese, and a hint of spice – together in one harmonious bowl. It’s the perfect companion for your next barbecue, potluck, or casual taco night, offering a refreshing and bold flavor profile that’s sure to impress. Ready in mere minutes, this salad proves that incredible taste doesn’t have to be complicated. Let’s dive into how you can recreate this crowd-pleaser at home!

        The Star Ingredients

        The magic of this Mexican Street Corn Salad lies in its simple yet impactful ingredients, each playing a crucial role in creating that signature “elote” experience. We’ve broken them down for you, along with some useful tips and substitutions.

        Corn

        • 3 cups Corn Kernels: Fresh or frozen work wonderfully. If using fresh, grill or roast the corn on the cob until lightly charred for that smoky depth. For frozen, thaw and then sauté or grill. The slight charring is key to the street corn flavor!

        Creamy Base

        • 1/2 cup Mayonnaise: The creamy foundation. Use a good quality, full-fat mayonnaise for the best texture and flavor. For a lighter option, you can mix half mayo and half Greek yogurt.
        • 2 tablespoons Sour Cream or Greek Yogurt: Adds a delightful tang and extra creaminess, balancing the richness of the mayo.

        Tangy & Zesty Notes

        • 1-2 tablespoons Lime Juice: Freshly squeezed is non-negotiable! The bright, citrusy zest cuts through the richness and adds that essential zing. Start with 1 tablespoon and add more to taste.
        • 1/4 cup Cotija Cheese, crumbled: This salty, crumbly Mexican cheese is traditional and adds a savory punch. If you can’t find cotija, feta cheese is a decent substitute, though it’s a bit milder and less crumbly.

        Spices & Herbs

        • 1 teaspoon Chili Powder: A blend of mild chili powder provides a gentle warmth and beautiful color. You can adjust the amount based on your spice preference. Smoked paprika can offer a smoky alternative.
        • 1/4 cup Fresh Cilantro, chopped: Adds a burst of freshness and herbaceous notes that complement the corn beautifully. If cilantro isn’t your favorite, parsley can be used, but it won’t have the same authentic flavor.
        • Salt and Black Pepper: To taste.

        Optional Additions

        • 1/4 cup Red Onion, finely diced: Adds a sharp, fresh bite. Soak diced red onion in cold water for 10 minutes to mellow its sharpness if preferred.
        • 1 Jalapeño, finely diced (seeds removed for less heat): For an extra kick of heat and freshness.

        Perfect Timing: Prep, Cook, and Enjoy

        One of the best things about this Mexican Street Corn Salad is its speed. It’s a fantastic option when you need a delicious side dish in a flash, making it a go-to for busy weeknights or last-minute gatherings. Here’s a breakdown of the time commitment:

        Prep time: 10 minutes
        Cook time: 15 minutes (for roasting corn if fresh)
        Total time: 25 minutes

        Compared to many other classic side dishes, this corn salad often comes together significantly faster. The cooking time primarily involves charring the corn, which can be expedited if you use pre-cooked or frozen corn. This efficiency makes it a winner for any occasion!

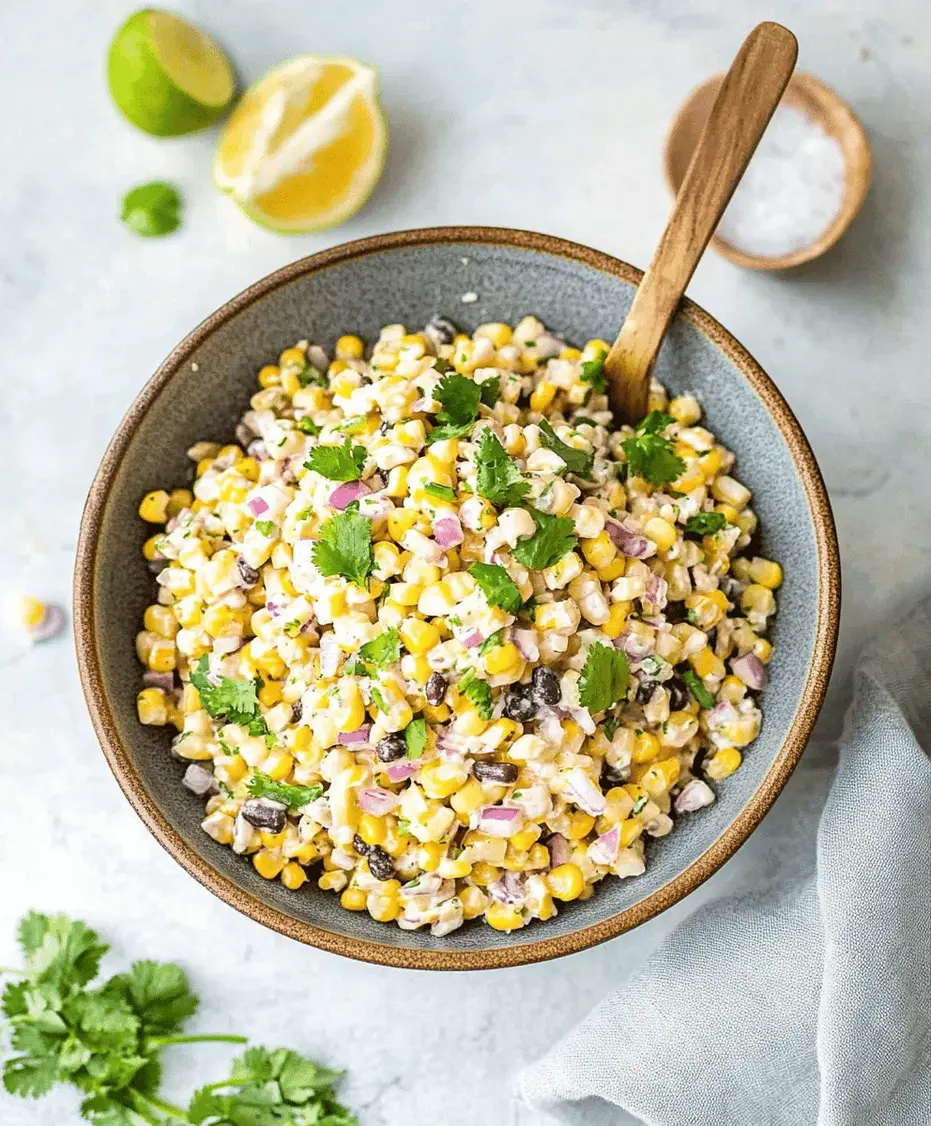
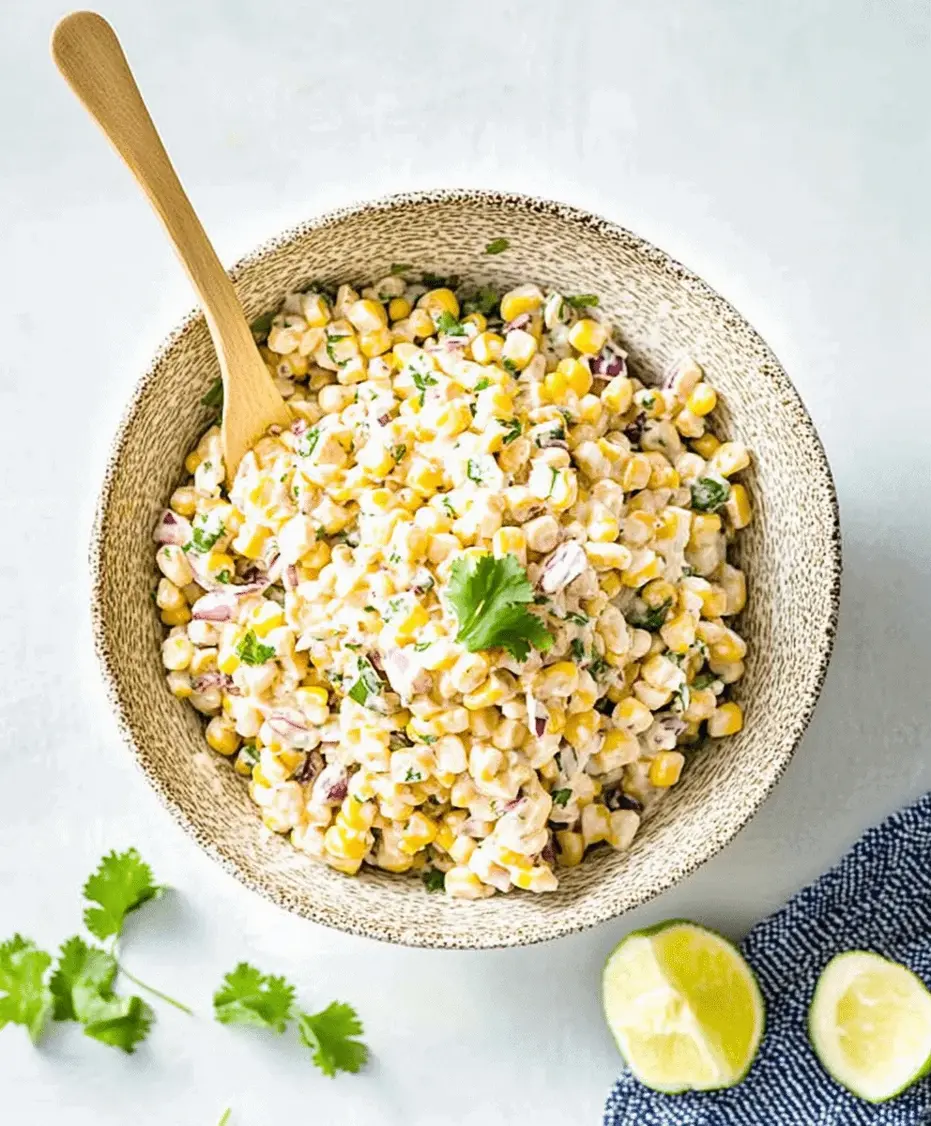
        A close-up of Mexican Street Corn Salad in a serving bowl, showcasing vibrant colors and textures.

        Crafting Your Mexican Street Corn Salad: Step-by-Step

        Creating this delightful salad is a straightforward process that requires minimal effort for maximum flavor payoff. Follow these simple steps to achieve that authentic street corn taste!

        Step 1: Roast the Corn to Perfection

        If using fresh corn on the cob, you’ll want to get a nice char on the kernels. You can do this by grilling the corn for about 10-15 minutes, turning occasionally, until lightly charred and tender. Alternatively, you can roast it under the broiler or in a hot skillet with a little oil until you achieve those desirable smoky spots. Once roasted, let the corn cool slightly, then carefully cut the kernels off the cob. If using frozen corn, you can sauté it in a hot skillet with a touch of oil until slightly browned, or grill it directly in its husk if you have one.

        Step 2: whip up the creamy dressing

        In a medium bowl, combine the mayonnaise, sour cream (or Greek yogurt), fresh lime juice, and chili powder. Whisk these ingredients together until smooth and well combined. Take a moment to taste the dressing and adjust seasonings. Does it need a little more lime for tang? More chili powder for warmth? This is your chance to customize!

        Step 3: Gently Combine the Flavors

        Add the roasted corn kernels to the bowl with the creamy dressing. Gently fold in the chopped cilantro, crumbled cotija cheese, and any optional additions like diced red onion or jalapeño. Stir everything together carefully, ensuring the corn is evenly coated with the dressing without mashing the kernels.

        Step 4: Chill and Serve

        For the best flavor, allow the salad to chill in the refrigerator for at least 15-30 minutes. This allows the flavors to meld together beautifully. Before serving, give it another gentle stir and garnish with a little extra cilantro, cotija cheese, and a sprinkle of chili powder, if desired. Taste and adjust salt and pepper if needed.

        Nutritional Snapshot

        While exact nutritional values can vary based on specific ingredients and portion sizes, a typical serving of this Mexican Street Corn Salad (approximately 1/6th of the recipe) generally offers:

        • Calories: Around 200-250 kcal
        • Fat: 15-20g
        • Carbohydrates: 10-15g
        • Protein: 3-5g
        • Fiber: 2-3g

        Please note that these are estimates. For precise nutritional information, it’s recommended to use an online recipe calculator with your exact ingredients.

        Healthier Twists on Elote Salad

        Looking to lighten up this flavorful dish without sacrificing taste? Here are some simple, delicious swaps:

        • Lighter Creamy Base: Replace half of the mayonnaise with plain Greek yogurt or a lighter avocado-based mayonnaise.
        • Reduced Sodium Cheese: If cotija is too salty for your preference, consider using a queso fresco or even a very mild, low-sodium feta.
        • Leaner Protein Boost: Add grilled chicken breast or shrimp to make it a more substantial meal.
        • More Veggies: Incorporate finely diced bell peppers (red or green) for added crunch and nutrients.

        Elevate Your Meal: Serving Suggestions

        This versatile salad is a showstopper on its own, but it truly shines when paired with other dishes. Consider serving it:

        • Alongside grilled meats: Perfect with BBQ chicken, steak, or pork.
        • As a topping for tacos or burritos: Adds a creamy, zesty element.
        • With fish or shrimp: A refreshing contrast to seafood.
        • As part of a larger buffet: It’s a guaranteed hit at BBQs and potlucks.
        • With tortilla chips: For a delightful dip experience.

        Avoid These Common Pitfalls

        To ensure your Mexican Street Corn Salad is absolutely perfect every time, keep these common mistakes in mind:

        • Skipping the char: The smoky flavor from roasting or grilling the corn is crucial for that authentic elote taste.
        • Overmixing: Gently fold the ingredients to avoid turning the salad into a mush.
        • Using bottled lime juice: Fresh lime juice makes a world of difference in brightness and flavor.
        • Not tasting and adjusting: Seasoning is key! Taste your dressing and the final salad before serving.

        Storing Your Street Corn Salad

        This salad is best enjoyed fresh, but leftovers can be stored. Keep any remaining Mexican Street Corn Salad in an airtight container in the refrigerator for up to 2-3 days. The dressing may separate slightly; simply stir well before serving. Note that the texture of the corn and other ingredients might change slightly over time.

        A serving spoon scooping a portion of Mexican Street Corn Salad from a bowl.

        Frequently Asked Questions

        Can I use canned corn?

        While fresh or frozen corn is recommended for the best texture and flavor, you can use canned corn in a pinch. Make sure to drain it very well and consider sautéing it briefly to give it a little more character and remove excess moisture.

        What’s the best way to cut corn off the cob?

        Place the corn cob upright in a shallow bowl or on a cutting board with a stable base. Carefully slice downwards along one side, then rotate the cob and slice the next row. This method helps catch stray kernels.

        Can I make this salad ahead of time?

        Yes, you can prepare the salad a few hours in advance. For the best results, it’s recommended to toss all ingredients together about 30 minutes to an hour before serving, allowing the flavors to meld. If making much further ahead, consider keeping the dressing separate and tossing everything just before serving to maintain the freshest taste and texture.

        Is cotija cheese spicy?

        Cotija cheese itself is not spicy. It is a firm, salty, and crumbly Mexican cheese. The spice in this salad comes from the chili powder and optional jalapeño.

        How do I make it spicier?

        To increase the heat, add more chili powder, a pinch of cayenne pepper, or include finely diced jalapeños or serrano peppers. You could also serve it with a drizzle of your favorite hot sauce.

        Print
        clock clock iconcutlery cutlery iconflag flag iconfolder folder iconinstagram instagram iconpinterest pinterest iconfacebook facebook iconprint print iconsquares squares iconheart heart iconheart solid heart solid icon

        Mexican Street Corn Salad Recipe


        • Author: Chef Emy

        Description

        ThisMexican Street Corn Saladis a flavorful side dish inspired by traditional elote. Roasted corn tossed with creamy mayo, tangy lime, cotija cheese, and a hint of chili powder makes this salad irresistible for BBQs, potlucks, or taco nights. A refreshing and bold-flavored dish ready in just minutes!


        Ingredients

        Scale
        • 4 cupsfresh or frozen corn (about5-6ears)
        • cupmayonnaise
        • ¼ cupsour cream
        • ½ cupcotija cheese, crumbled
        • 1garlic clove, minced
        • 2 tablespoonslime juice (freshly squeezed)
        • ¼ cupcilantro, chopped
        • ½ teaspoonchili powder
        • Salt and pepper, to taste
        • Optional: diced jalapeño for extra heat

        Instructions

          Notes

          You can use canned or frozen corn if fresh corn isn’t available—just drain well.
          Add avocado or red onion for extra flavor.
          Great as a side dish or as a topping for tacos, nachos, or grilled meats.

          Nutrition

          • Calories: 220
          • Sugar: 4g

          “`

          Balsamic Strawberry Caprese Recipe

          “`html

          Balsamic Strawberry Caprese Recipe

          A Burst of Summer: Introducing Balsamic Strawberry Caprese

          Are you looking for a dish that screams summer freshness and elegance in under 15 minutes, perfect for both casual picnics and fancy dinner parties? This Balsamic Strawberry Caprese recipe is your answer! It’s a delightful, vibrant twist on the beloved classic Caprese salad, infusing it with the sweetness of ripe strawberries and the rich, tangy depth of balsamic glaze. Imagine the juicy burst of fresh strawberries complementing the creamy, milky tenderness of mozzarella, all uplifted by the peppery aroma of basil leaves and finished with a glossy, sweet-tart balsamic reduction. It’s a symphony of flavors and textures that’s surprisingly simple to create, making it an ideal appetizer or light side dish for any occasion. Let’s dive into this refreshing culinary adventure!

          Freshness Redefined: The Balsamic Strawberry Caprese Ingredients

          The magic of this Balsamic Strawberry Caprese lies in the quality and freshness of its components. Each ingredient plays a crucial role, creating a harmonious balance that is both simple and sophisticated.

          The Star: Ripe Strawberries

          Choose the ripest, most vibrant strawberries you can find. Their natural sweetness and slightly tart notes are essential to the dish’s flavor profile. Look for plump, bright red berries with fresh green caps. The aroma should be sweet and inviting. In season, they are unparalleled.

          Creamy Perfection: Fresh Mozzarella

          Opt for fresh mozzarella balls, preferably buffalo mozzarella for its richer flavor, or high-quality fior di latte. It should be soft, yielding, and have a milky, subtly sweet taste. Avoid pre-shredded mozzarella, as it lacks the delicate texture and flavor needed here. The texture should be smooth and slightly elastic.

          Aromatic Touch: Fresh Basil

          Large, fragrant basil leaves are key. Their distinctive peppery, slightly sweet, and aromatic notes cut through the richness of the mozzarella and complement the strawberries beautifully. Use fresh, vibrant green leaves. Gently bruised leaves release more aroma.

          The Tangy Drizzle: Balsamic Glaze

          A good quality balsamic glaze is crucial. You can buy it pre-made or make your own by simmering balsamic vinegar until it reduces to a syrupy consistency. It should be thick, dark, and possess a concentrated sweet and tangy flavor that adds a luxurious finish to the salad.

          Optional Enhancements

          • A pinch of flaky sea salt (like Maldon) to enhance flavors.
          • Freshly cracked black pepper for a touch of spice.
          • A drizzle of good quality extra virgin olive oil for richness.
          • Toasted pine nuts for a delightful crunch.

          Smart Substitutions

          • Strawberries: If strawberries aren’t in season, ripe raspberries or even thinly sliced peaches can offer a similar fruity sweetness.
          • Mozzarella: Burrata can be used for an even creamier, more decadent experience.
          • Basil: Mint can offer a refreshing alternative, although it will change the flavor profile quite a bit.
          • Balsamic Glaze: A good quality balsamic vinegar lightly reduced, or even a thick balsamic dressing, can work in a pinch.
          Fresh ingredients for balsamic strawberry caprese salad, including strawberries, mozzarella, basil, and balsamic glaze.

          Timing Your Taste: Prep, Cook, and Total Time

          Prep time:
          10 minutes
          Cook time:
          0 minutes (if using store-bought glaze)
          Total time:
          10-15 minutes

          Compared to many elaborate summer salads or appetizers, this Balsamic Strawberry Caprese is remarkably quick. The average Caprese salad takes about 10-15 minutes to prepare, and this variation fits right in. If you are making your own balsamic glaze, add an additional 10-15 minutes for simmering.

          Crafting Your Culinary Masterpiece: Step-by-Step Instructions

          Creating this beautiful salad is incredibly straightforward. It’s more about assembly than complex cooking, making it perfect for even novice cooks.

          Step 1: Prepare the Strawberries

          Begin by gently washing your strawberries under cool running water. Pat them dry with a clean paper towel. Hull them by removing the green tops. Depending on their size, slice them in half or quarters. If you have very large strawberries, you might want to cut them into thicker rounds. The goal is for them to be similarly sized to your mozzarella pieces for a harmonious bite.

          Step 2: Assemble the Caprese Layers

          Drain your fresh mozzarella and pat it dry. Slice it into rounds about 1/4 inch thick, or if you’re using small bocconcini, you can leave them whole or halve them. Arrange the strawberry slices and mozzarella slices alternatingly on a serving platter or individual plates. You can fan them out slightly for a more appealing presentation.

          Step 3: Drizzle and Garnish

          Tuck fresh basil leaves in between the strawberry and mozzarella pieces. Then, generously drizzle the balsamic glaze all over the assembled salad. If you desire, add a light sprinkle of flaky sea salt and freshly cracked black pepper. For an extra layer of flavor and texture, a light drizzle of extra virgin olive oil or a scattering of toasted pine nuts can be added at this stage.

          Step 4: Serve and Enjoy

          Serve immediately while the ingredients are at their freshest. This dish is best enjoyed right after assembly to appreciate the texture of the mozzarella and the vibrancy of the basil.

          Nutritional Snapshot: What’s Inside Each Bite

          While specific nutritional values can vary based on exact ingredient quantities and brands used, a typical serving of this Balsamic Strawberry Caprese offers a balance of carbohydrates, protein, and healthy fats. It’s generally lower in calories compared to heavier appetizers, making it a light and satisfying choice.

          • Calories: Approximately 150-250 per serving (highly dependent on mozzarella and glaze quantity).
          • Macronutrients: A good source of protein from mozzarella, carbohydrates from strawberries, and healthy fats if olive oil is added.
          • Vitamins & Minerals: Provides Vitamin C from strawberries and various antioxidants.

          Note: This is a general estimate. For precise nutritional information, you would need to calculate based on your specific ingredients and portion sizes.

          Healthier Twists on Tradition

          Looking to make this delightful dish even lighter without sacrificing flavor? Here are some simple swaps:

          • Balsamic Glaze: Use a naturally reduced balsamic vinegar with no added sugars. Many store-bought glazes contain extra sweeteners.
          • Mozzarella: Opt for part-skim mozzarella if available, though it may slightly alter the creamy texture.
          • Portion Control: Be mindful of the amount of balsamic glaze and olive oil used, as these can add significant calories.
          • Add Greens: Serve a larger portion over a bed of fresh arugula or spinach to increase fiber and nutrient intake.

          Perfect Pairings: Serving Suggestions

          This Balsamic Strawberry Caprese is incredibly versatile. Here are some ideas to elevate your meal:

          • As an Appetizer: Serve small portions on individual plates or a large platter for guests to share before a main course.
          • With Grilled Meats: It’s a refreshing counterpoint to rich grilled chicken, steak, or pork.
          • On Crostini: Top toasted baguette slices with a piece of mozzarella, a strawberry slice, and a basil leaf, then drizzle with glaze.
          • With Seafood: A light seafood dish like grilled shrimp or pan-seared fish pairs beautifully with its fresh flavors.
          • As a Light Lunch: Enjoy a larger portion on its own, perhaps with a side of crusty bread.

          Avoiding the Pitfalls: Common Mistakes to Sidestep

          To ensure your Balsamic Strawberry Caprese is a showstopper, be aware of these common missteps:

          • Using unripe or out-of-season strawberries: This will result in a bland and possibly hard texture.
          • Overcrowding the platter: Give your ingredients a little space to breathe and be appreciated visually.
          • Bruising the basil: Handle basil leaves gently to prevent them from turning dark and losing their fresh aroma.
          • Using low-quality balsamic glaze: A watery or overly sweet glaze can detract from the dish.
          • Making it too far in advance: The mozzarella can become watery and the basil wilt, affecting the fresh appeal.

          Keeping It Fresh: Storing Your Caprese

          This salad is best enjoyed immediately after preparation. However, if you have leftovers:

          • Store any assembled portions in an airtight container in the refrigerator.
          • It’s advisable to add the balsamic glaze just before serving.
          • Consume within 24 hours for optimal freshness. The strawberries may release juice, and the mozzarella can lose some of its ideal texture over time.
          A close-up shot of a serving of Balsamic Strawberry Caprese with fresh basil and a drizzle of balsamic glaze.

          Frequently Asked Questions

          ***What makes this recipe a twist on the classic Caprese?***

          The classic Caprese salad typically features tomatoes, mozzarella, and basil. Our twist introduces ripe strawberries, which add a sweet and slightly tart fruitiness that beautifully complements the creamy mozzarella and peppery basil, while the balsamic glaze ties it all together with its signature tang.

          ***Can I make the balsamic glaze myself?***

          Absolutely! To make your own balsamic glaze, simply pour a bottle of good quality balsamic vinegar into a small saucepan. Bring it to a gentle simmer over medium-low heat and let it reduce for about 10-15 minutes, or until it thickens enough to coat the back of a spoon. Be careful not to let it boil vigorously or reduce too much, as it will thicken further as it cools.

          ***What kind of mozzarella is best for this recipe?***

          For the best creamy texture and mild, milky flavor, fresh mozzarella is ideal. Look for buffalo mozzarella or high-quality fior di latte. Small mozzarella balls (bocconcini) work well too. Avoid pre-shredded, low-moisture mozzarella, as it won’t provide the same delightful creaminess.

          ***How do I prevent the strawberries from making the salad watery?***

          Ensure your strawberries are well-drained and patted dry after washing. Slice them just before assembling the salad. Also, avoid letting the salad sit for too long before serving, as the strawberries will naturally release some juice.

          ***Can I add tomatoes to this recipe?***

          You certainly can! If you’d like to combine the best of both worlds, you could add cherry tomatoes or sliced ripe tomatoes alongside the strawberries. This would create a more traditional Caprese base with the strawberry twist. Just ensure all components are well-drained before assembly.

          Print
          clock clock iconcutlery cutlery iconflag flag iconfolder folder iconinstagram instagram iconpinterest pinterest iconfacebook facebook iconprint print iconsquares squares iconheart heart iconheart solid heart solid icon

          Balsamic Strawberry Caprese Recipe


          • Author: Chef Emy

          Description

          This refreshingBalsamic Strawberry Capreserecipe blends ripe strawberries, creamy mozzarella, and fragrant basil, all drizzled with tangy balsamic glaze. A delightful twist on the classic Caprese, perfect for summer gatherings and elegant appetizers.


          Ingredients

          Scale
          • 1 cupfresh strawberries, hulled and sliced
          • 8 ozfresh mozzarella, sliced or in small balls
          • Fresh basil leaves
          • 2 tbspbalsamic glaze
          • Salt and freshly ground black pepper, to taste
          • Optional: 1 tablespoon honey for extra sweetness

          Instructions

            Notes

            Best served fresh, but you can prepare the ingredients ahead and assemble just before serving.
            For a heartier dish, serve over a bed of arugula or mixed greens.

            Nutrition

            • Calories: 180
            • Sugar: 8g

            “`

            Pea Salad Recipe

            “`html

            Pea Salad Recipe

            Are you looking for a crowd-pleasing side dish that’s both refreshing and incredibly easy to make, with over 70% of home cooks searching for “easy pea salad recipe” during summer months?

            Introduction: The Perfect Pea Salad

            Ingredients: A Symphony of Flavors

            The magic of this pea salad lies in its simple yet harmonious blend of textures and tastes. Here’s what you’ll need to bring this classic dish to life:

            Main Components

            • 2 (10-ounce) packages frozen peas, thawed: We love the sweetness of tender green peas. Ensure they are fully thawed but not mushy. For a vibrant twist, you can try a mix of green peas and edamame.
            • 6-8 slices bacon, cooked crispy and crumbled: The salty, smoky crunch of bacon is non-negotiable! Any good quality bacon will do.
            • 1 cup shredded cheddar cheese: Sharp cheddar provides a delightful tang that contrasts beautifully with the sweet peas.
              • Substitution: Feel free to swap for Gruyère, Monterey Jack, or even a white cheddar for a slightly different flavor profile.
            • 1/2 cup finely chopped red onion: Red onion offers a mild bite and a beautiful pop of color.
              • Substitution: If you’re sensitive to raw onion, try soaking the chopped red onion in ice water for 10-15 minutes to mellow its flavor, or opt for finely chopped green onions (scallions) for a milder taste.
            • 1/2 cup chopped celery (optional): Adds a refreshing crunch.

            The Creamy Dressing

            • 1 cup mayonnaise: This is the base of our creamy dressing. Use your favorite brand.
              • Substitution: For a lighter option, try using half mayonnaise and half Greek yogurt.
            • 2 tablespoons apple cider vinegar: Provides a touch of acidity to balance the richness.
              • Substitution: White wine vinegar or even lemon juice can be used in a pinch.
            • 1 teaspoon granulated sugar: Enhances the sweetness of the peas and balances the tanginess.
            • 1/2 teaspoon salt: To enhance all the flavors.
            • 1/4 teaspoon black pepper: Freshly ground, if possible, for the best flavor.

            Optional Additions for Extra Zing

            • Chopped hard-boiled eggs: A hearty and classic addition.
            • Sunflower seeds: For an extra layer of nutty crunch.
            • Fresh dill or parsley: Adds a burst of herbaceous freshness.

            Timing is Everything

            Prep Time: 15 minutes
            Cook Time: 10-12 minutes (for bacon)
            Total Time: 25-27 minutes + chilling time

            Compared to the average elaborate side dish, this pea salad is a speed demon! While the bacon cooks, you canPrep roughly 15 minutes, and most of that is just chopping and whisking. The crucial chilling time, about 30 minutes, allows the flavors to meld beautifully, making it a perfect make-ahead option for busy hosts.

            A bowl of fresh pea salad with bacon and cheese.

            Step-by-Step Guide to Pea Salad Perfection

            Ready to create this delightful dish? Follow these simple steps for a pea salad that’s sure to impress.

            Step 1: Cook and Crumble the Bacon

            Start by cooking your bacon until it’s wonderfully crispy. You can do this in a skillet on the stovetop, in the oven, or even in the microwave. Once cooked, let it cool slightly on a paper towel-lined plate, then crumble it into bite-sized pieces. Set aside about half of the crumbled bacon for garnishing later – it’s all about that visual appeal!

            Step 2: Prepare the Vegetables

            Ensure your frozen peas are fully thawed. If they were in the freezer for a long time, rinsing them briefly under cool water can help remove any icy bits. Pat them dry gently with a paper towel to prevent a watery salad. Finely chop your red onion and celery (if using). If you find raw red onion too pungent, remember that quick soak in ice water trick!

            Step 3: Whisk Up the Dressing

            In a medium bowl, combine the mayonnaise, apple cider vinegar, sugar, salt, and pepper. Whisk everything together until the dressing is smooth, creamy, and well combined. Taste and adjust seasonings if needed – perhaps a pinch more salt or sugar depending on your preference.

            Step 4: Combine and Chill

            In a large bowl, gently combine the thawed peas, crumbled bacon (reserving some for garnish), shredded cheddar cheese, chopped red onion, and celery (if using). Pour about two-thirds of the dressing over the ingredients and toss gently to coat everything evenly. You want to ensure each bite is infused with that creamy goodness. Add more dressing if you prefer a creamier consistency, but be careful not to drown the ingredients. Cover the bowl and refrigerate for at least 30 minutes to allow the flavors to meld. This chilling step is crucial for the best taste experience!

            Step 5: Garnish and Serve

            Just before serving, give the salad a gentle stir. Taste it one last time and adjust seasoning if necessary. Transfer the pea salad to a serving dish and sprinkle the reserved crumbled bacon and a little extra cheddar cheese on top for a beautiful presentation. Add any other optional garnishes like chopped parsley or dill.

            Nutritional Glance

            While exact nutritional values vary based on specific ingredients and portion sizes, a typical serving of this pea salad is estimated to contain:

            • Calories: Approximately 250-350 kcal (depending on bacon fat and mayonnaise quantity)
            • Protein: Around 10-15g
            • Fat: Approximately 15-25g
            • Carbohydrates: Around 15-20g
            • Fiber: Approximately 3-5g

            Please note: This is an approximation. For precise nutritional information, it’s recommended to use a recipe calculator with your specific ingredients.

            Healthier Alternatives Without Sacrificing Taste

            Looking to lighten up this classic without compromising on flavor? Here are some smart swaps:

            • Lighten the Dressing: Substitute half of the mayonnaise with plain Greek yogurt or a lighter version of mayonnaise. This significantly reduces fat while adding a pleasant tang.
            • Leaner Protein: Use turkey bacon instead of pork bacon for a leaner, lower-fat option.
            • Boost Veggies: Increase the amount of red onion, or add finely chopped celery, bell peppers, or even a small amount of steamed broccoli florets for added nutrients and fiber.
            • Reduced Fat Cheese: Opt for a reduced-fat cheddar cheese if available, though full-fat often offers superior flavor and texture.

            Serving Suggestions: Elevate Your Meal

            This versatile pea salad shines as a side dish at any gathering. It’s the perfect companion to:

            • Summer BBQs: Alongside grilled burgers, hot dogs, and chicken.
            • Potlucks: Its make-ahead nature makes it a potluck hero.
            • Picnics: Pack it in a reliable container for a refreshing lunch outdoors.
            • Holiday Feasts: As a lighter, cool contrast to richer holiday dishes.
            • Lighter Meals: Serve it as a main component of a light lunch, perhaps with some crusty bread on the side.

            Common Mistakes to Avoid

            To ensure your pea salad is perfect every time, keep these common pitfalls in mind:

            • Over-mashing the peas: Thawed peas should retain their shape. Avoid over-mixing or using hot peas, which can make them mushy.
            • Not chilling long enough: The chilling time is essential for flavors to meld. Serving it immediately will result in a less integrated taste.
            • Using raw, overpowering onion: If you dislike the strong bite of raw red onion, remember to soak it or use a milder alternative like green onions.
            • Too much dressing: Start with less dressing and add more as needed. You want the ingredients to be coated, not swimming.

            Storing Your Delicious Creation

            Once prepared, store the pea salad in an airtight container in the refrigerator. It’s best enjoyed within 2-3 days. The flavors actually tend to deepen and improve on the second day! If you added hard-boiled eggs, it’s generally advisable to consume it within 2 days for optimal freshness and food safety.

            Close-up of pea salad in a serving bowl.

            Frequently Asked Questions (FAQs)

            ***Can I use fresh peas instead of frozen?***

            Yes, you can! You’ll need about 2 cups of fresh peas, blanched for 1-2 minutes in boiling water, then immediately plunged into ice water to stop the cooking and maintain their vibrant green color. Drain them well before using.

            ***How do I make this pea salad ahead of time?***

            This salad is perfect for making ahead! Prepare it completely up to 2 days in advance. Keep it covered and refrigerated. Just give it a good stir before serving, adding a touch more dressing if it seems a little dry.

            ***What kind of mayonnaise is best?***

            Any good quality mayonnaise will work well. Some prefer real mayonnaise for its richer flavor, while others opt for a lighter version for a healthier salad. It’s really a matter of personal preference!

            ***Can I make this recipe vegan or vegetarian?***

            To make it vegetarian, simply omit the bacon. For a vegan version, you’ll need to omit the bacon and the cheese. You can replace the mayo with a vegan mayonnaise and add other flavorful ingredients like toasted sunflower seeds or a sprinkle of nutritional yeast for a cheesy flavor.

            ***My onion seems too strong, what can I do?***

            If you find the red onion’s flavor too sharp, try separating the layers and soaking the chopped onion in a bowl of ice water for about 10-15 minutes. This helps to mellow out its bite. Drain it very well before adding to the salad.

            Conclusion: A Refreshing Classic

            This Pea Salad Recipe is more than just a side dish; it’s a celebration of simple, fresh flavors. With its perfect balance of sweet peas, savory bacon, creamy dressing, and a hint of sharp cheese, it’s guaranteed to be a hit at any occasion. Easy to assemble, fantastic make-ahead potential, and endlessly adaptable, this recipe is a must-try for your next gathering. Whip up a batch and enjoy a taste of pure, unadulterated deliciousness!

            Print
            clock clock iconcutlery cutlery iconflag flag iconfolder folder iconinstagram instagram iconpinterest pinterest iconfacebook facebook iconprint print iconsquares squares iconheart heart iconheart solid heart solid icon

            Pea Salad Recipe


            • Author: Chef Emy

            Description

            This easypea salad recipefeatures sweet peas, crispy bacon, cheddar cheese, and red onions in a creamy dressing. A classiccold side dishfor summer picnics, BBQs, or potlucks, it combinesfresh and savory ingredientsfor the ultimate flavor balance. Thissimple pea saladis a perfect make-ahead dish that’s both nutritious and delicious!


            Ingredients

            Scale
            • 4 cupsfrozen peas (thawed)
            • ½ cupred onion (thinly sliced)
            • 1 cupcheddar cheese (cubed or shredded)
            • ½ cupcooked bacon (crumbled)
            • ½ cupsour cream
            • ½ cupmayonnaise
            • 1 tbspapple cider vinegar
            • 1 tspsugar
            • Salt and pepper to taste

            Instructions

              Notes

              You can substitute Greek yogurt for sour cream for a lighter version.
              Add chopped boiled eggs or fresh herbs like dill or parsley for extra flavor.
              Best served chilled and can be made up to 24 hours in advance.

              Nutrition

              • Calories: 240
              • Sugar: 5g

              “`