Introduction
Hi there! I’m Emily, the heart and soul behind brekcakes.com. From my earliest memories, the kitchen has always been a place of warmth and creativity. It’s where I discovered the magic of turning simple ingredients into extraordinary meals and learned that the best dishes are often made with love as the main ingredient.
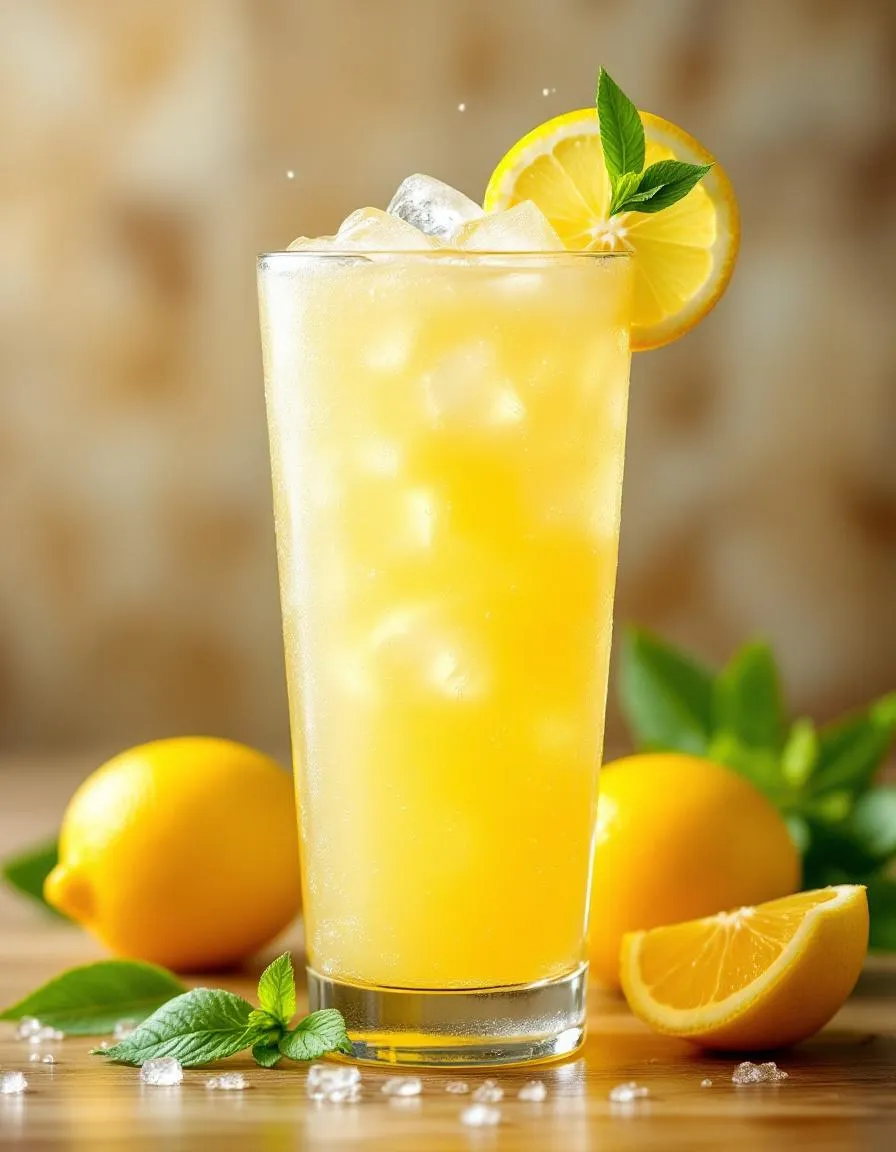
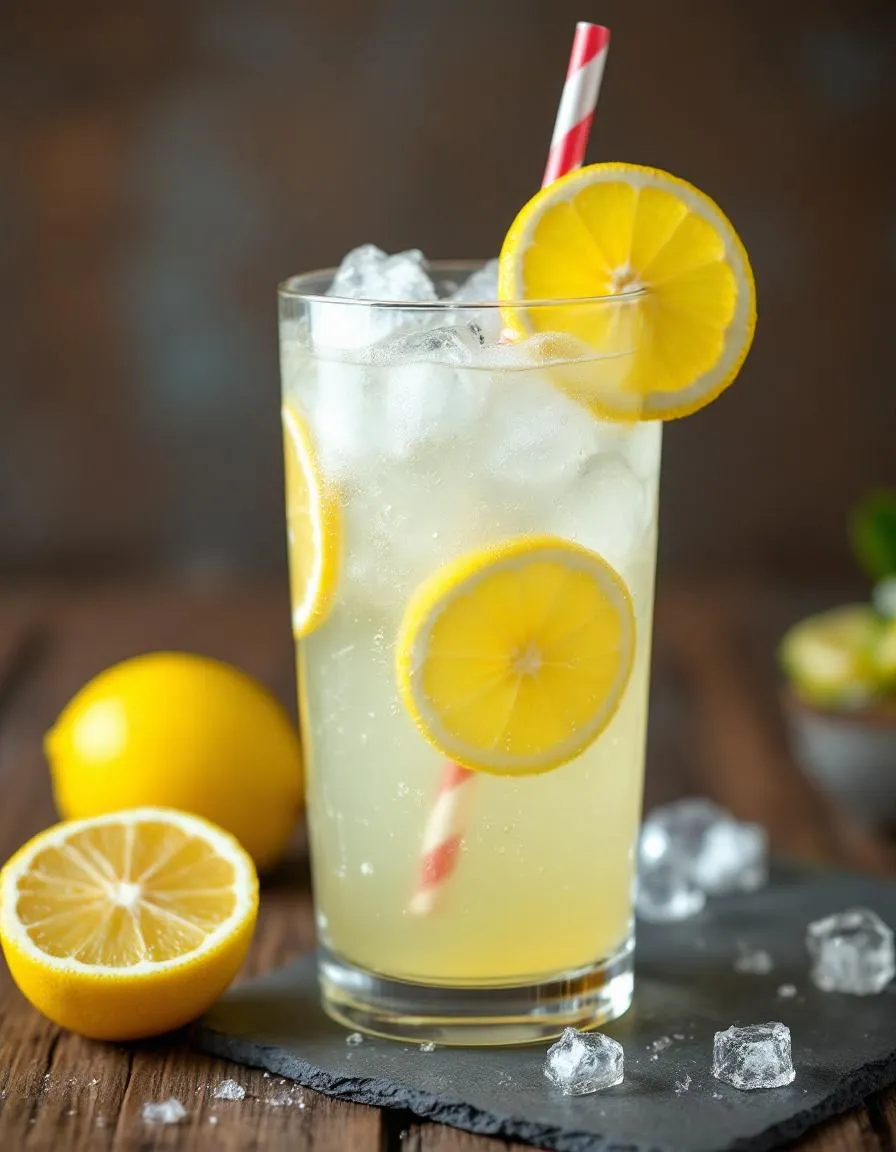
Nothing captures the joy of summer quite like a frosty glass of State Fair Lemonade. Whether you’re reminiscing about childhood trips to the fair or simply craving a refreshing sip of sunshine, this recipe delivers that perfect balance of tart and sweet. Moreover, it’s incredibly easy to whip up with just a handful of ingredients. After all, everyone deserves a taste of nostalgia—especially when it’s this delicious.
State Fair Lemonade isn’t just another drink; it’s a celebration of simple pleasures. Traditionally served at bustling fairgrounds, this iconic beverage combines freshly squeezed lemons, sugar, and ice-cold water for a thirst-quenching experience. What sets it apart is its vibrant, tangy flavor that instantly transports you to carefree summer days. For those who adore homemade treats, this recipe aligns perfectly with the brekcakes.com philosophy of creating crowd-pleasing favorites with a personal touch. If you’re looking for more refreshing ideas, check out our homemade iced tea or explore our guide to summer desserts for seasonal inspiration.
Why I Love This Recipe
State Fair Lemonade holds a special place in my heart because it reminds me of lazy afternoons spent with my grandmother. She always insisted on using real lemons, never bottled juice, and taught me that patience makes all the difference when dissolving the sugar. To this day, the first sip takes me back to her porch swing, where we’d clink glasses and watch the fireflies appear. It’s more than a drink—it’s a memory in every glass.
Health and Nutrition
Why it’s good for your body
State Fair Lemonade delivers a refreshing burst of hydration while packing a surprising nutritional punch. First, its natural lemon juice provides a hefty dose of vitamin C, which supports immune health and helps your body absorb iron more efficiently. Additionally, the citrusy tang comes from flavonoids, antioxidants that may reduce inflammation over time. Even better, State Fair Lemonade contains far less sugar than many store-bought alternatives, making it a smarter choice when you crave something sweet.
Beyond vitamins, this drink offers quick energy thanks to its balanced blend of natural sugars and electrolytes. For instance, a cold glass of State Fair Lemonade can replenish fluids after a workout or on a hot day. Meanwhile, the lemon’s acidity aids digestion by stimulating saliva and stomach acid production. Of course, moderation matters, but when you enjoy State Fair Lemonade as part of a varied diet, you get flavor and function in every sip.
Finally, the simple ingredients—like real lemons and minimal additives—mean fewer hidden chemicals. Unlike heavily processed beverages, State Fair Lemonade keeps things clean and recognizable. So whether you’re cooling off or just craving a bright pick-me-up, this drink brings both taste and tangible benefits.
How it fits in a healthy lifestyle
State Fair Lemonade fits seamlessly into balanced eating habits, especially when you prioritize whole foods. For a low-sugar twist, try diluting it with sparkling water or pairing it with a protein-rich snack like Greek yogurt. This way, you avoid blood sugar spikes while still enjoying that classic lemonade flavor. Plus, its gluten-free and vegan-friendly ingredients make it a versatile choice for nearly any diet.
If you’re watching your sugar intake, consider serving State Fair Lemonade alongside fiber-packed meals, like our quinoa salad, to slow digestion and keep cravings in check. Heart-healthy eaters will also appreciate that lemons contain potassium, which helps regulate blood pressure. And for active lifestyles, this drink works as a natural alternative to sugary sports drinks—just add a pinch of sea salt for extra electrolytes. Want more hydration tips? Check out our guide to refreshing summer sips for smarter ways to stay cool.
PrintState Fair Lemonade
Description
A refreshing and tangy lemonade inspired by the classic state fair treat.
Ingredients
For the Crust:
- 1 cup freshly squeezed lemon juice (about 6–8 lemons)
- 1 cup granulated sugar
- 4 cups cold water
- 1 cup ice cubes
- Lemon slices for garnish (optional)
Instructions
1. Prepare the Crust:
- In a small saucepan, combine sugar with 1 cup of water. Heat over medium heat, stirring until sugar is completely dissolved to make a simple syrup. Remove from heat and let cool.
- In a large pitcher, combine the cooled simple syrup, freshly squeezed lemon juice, and remaining 3 cups of cold water. Stir well.
- Add ice cubes to the pitcher or pour lemonade over ice in individual glasses. Garnish with lemon slices if desired.
Notes
You can customize the seasonings to taste.
“`html
How to Prepare This Dish
Steps and time-saving tips
Start by juicing fresh lemons to get that bright, tangy flavor for your State Fair Lemonade. Roll the lemons on the counter before cutting to maximize juice yield. Combine the lemon juice with cold water in a large pitcher, then whisk in granulated sugar until fully dissolved. For a smoother texture, dissolve the sugar in warm water first before adding it to the mix. Stir in a pinch of salt to balance the sweetness and enhance the citrus notes. Chill the lemonade for at least an hour to let the flavors meld. Meanwhile, slice a few extra lemons for garnish. When serving, fill glasses with ice, pour the State Fair Lemonade over it, and add a lemon slice for a refreshing touch. To save time, prep the lemonade a day ahead—it tastes even better when it sits overnight. If you prefer a fizzy twist, top it off with sparkling water right before serving.
Mistakes I’ve made and learned from
I once made State Fair Lemonade way too tart because I didn’t taste as I went. Now, I always adjust the sugar gradually until it hits the perfect balance. Another time, I used bottled lemon juice, and the flavor fell flat—fresh lemons make all the difference. If you’re short on time, check out my quick kitchen hacks for speeding up prep without sacrificing quality. Also, don’t skip the chilling step like I did once; serving it lukewarm just isn’t the same. For more tips on balancing flavors, my flavor pairing guide has saved me from many kitchen mishaps. Trust me, a little patience and tasting along the way will give you the best State Fair Lemonade every time.
“`
Cultural Connection and Variations
Where this recipe comes from
State Fair Lemonade carries the nostalgic charm of summer afternoons spent under striped tents, with the hum of carnival rides in the background. Originating from American state fairs in the late 19th century, this sweet-tart drink quickly became a staple. Vendors would hand-shake the lemonade with ice in large metal tins, creating a frothy, refreshing treat that cooled crowds under the summer sun. Today, families still associate State Fair Lemonade with memories of sticky fingers and shared laughter.
Around the world, lemonade takes on unique twists. In Italy, they spike it with sparkling water for a fizzy limonata, while in India, they infuse it with ginger and mint for a spicy kick. Even within the U.S., Southern versions might add a splash of peach syrup, and coastal regions often blend in fresh berries. Yet, State Fair Lemonade remains distinct—its perfect balance of sweetness and tang evokes a simpler time. Some home cooks even sneak in a hint of lavender or thyme for a modern twist, but the classic recipe still rules the fairgrounds.
How it fits in today’s cooking
State Fair Lemonade isn’t just a relic of the past. It’s a versatile star in today’s kitchens, especially during backyard barbecues and poolside gatherings. Many modern cooks lighten it up with honey or agave instead of sugar, or swap in frozen fruit for extra color and flavor. Whether you’re pairing it with summer BBQ dishes or serving it alongside picnic desserts, this drink bridges generations.
Beyond summer, State Fair Lemonade inspires year-round creativity. Winter versions might feature rosemary and cranberry, while spring calls for a floral touch of elderflower. No matter the season, its bright, crowd-pleasing flavor keeps it relevant. After all, some traditions—like the first sip of an ice-cold glass—never go out of style.
Taste and Texture
What makes it delicious
State Fair Lemonade bursts with bright, tangy sweetness that dances on your tongue. The first sip delivers a refreshing zing from freshly squeezed lemons, balanced by just the right amount of sugar for a smooth finish. Meanwhile, the subtle floral aroma of lemon zest lingers in every glass, making it irresistible. What truly sets State Fair Lemonade apart is its crisp, icy texture—perfect for sipping on a hot day. Whether you enjoy it straight or with a sprig of mint, each sip feels like a cool, citrusy hug.
Boosting the flavor
For a fun twist, muddle fresh berries like strawberries or raspberries into your State Fair Lemonade to add a juicy, fruity depth. Alternatively, a splash of sparkling water turns it into a fizzy delight. If you love herbal notes, try infusing the lemonade with basil or lavender for a fragrant upgrade. For more inspiration, check out our summer drink recipes or explore how to pair citrus flavors with other ingredients. Small tweaks can make this classic drink even more memorable.
Tips for Success
Best practices for results
Always use freshly squeezed lemons for the brightest flavor in your State Fair Lemonade. Meanwhile, chill your serving pitcher beforehand to keep the drink icy cold longer. For the perfect balance, dissolve the sugar completely in warm water before mixing it with the lemon juice. Additionally, taste as you go and adjust the sweetness or tartness to match your preference. Finally, garnish with thin lemon slices and fresh mint for that classic State Fair Lemonade appeal.
Mistakes to avoid
Avoid using bottled lemon juice, as it often lacks the vibrant taste of fresh lemons. Instead, learn how to select the ripest lemons for maximum flavor. Another common mistake is adding ice too early, which dilutes the lemonade. For the best results, chill the mixture first and add ice just before serving. Also, don’t skip straining the pulp unless you prefer a textured drink. If you’re serving a crowd, check out our guide to scaling recipes for parties to avoid last-minute shortages.
Serving and Pairing Suggestions
How to serve this dish
State Fair Lemonade shines when served ice-cold in tall, frosty glasses with plenty of crushed ice. For a festive touch, rim the glasses with sugar or add colorful paper straws. Meanwhile, garnish each serving with a lemon wheel and a sprig of fresh mint to elevate the presentation. This refreshing drink pairs perfectly with outdoor gatherings, picnics, or summer barbecues. Additionally, consider serving it in mason jars for a rustic charm that captures the essence of a state fair. Whether you’re hosting a brunch or a poolside party, State Fair Lemonade always steals the show.
What goes well with it
State Fair Lemonade pairs wonderfully with classic fair foods like crispy homemade funnel cakes, which balance the drink’s tangy sweetness with their light, airy texture. Alternatively, try it alongside savory options such as grilled corn on the cob or buttery pretzels for a satisfying contrast. For a heartier meal, serve it with Southern fried chicken, as the lemonade’s bright acidity cuts through the richness of the dish. Ultimately, these pairings make every sip and bite feel like a trip to the fair.

State Fair Lemonade stands out for its perfect balance of tartness and sweetness, often made with fresh-squeezed lemons and a hint of vanilla or other secret ingredients. Unlike store-bought lemonade, it’s typically prepared in large batches with a nostalgic, carnival-style flavor that keeps people coming back for more.
To recreate State Fair Lemonade, combine fresh lemon juice, sugar, water, and a touch of vanilla extract for that signature fairground taste. Chill thoroughly and serve over ice for the most authentic experience—just like you’d get at the fair!
State Fair Lemonade owes its popularity to its association with summer fun and childhood memories, plus its uniquely refreshing taste. The bright yellow color and the ritual of getting a cup at the fair make it more than just a drink—it’s part of the experience.
While some brands sell “fair-style” lemonade mixes, authentic State Fair Lemonade is usually made fresh on-site. However, you can find copycat recipes online or specialty mixes that aim to replicate that distinctive carnival flavor at home.