Table of Contents
Crockpot Sweet Potatoes with Marshmallows – Maple‑Sweetened, Gooey Marshmallow Topping
When I first crunched my way through a Moroccan market in Rabat, the sweet aroma of rosemary‑infused caramels and simmering couscous grounds my sense of home. Back in my New York apartment, I dreamt of that same comforting sweetness but with a twist that would shine at holiday gatherings: the silky melt of marshmallows atop silky sweet potatoes, all coaxed together in my trusty crockpot. The maply‐sweetened, gooey marshmallow topping turns this classic side into a holiday crescendo, and that’s the key twist I’ll show you here.
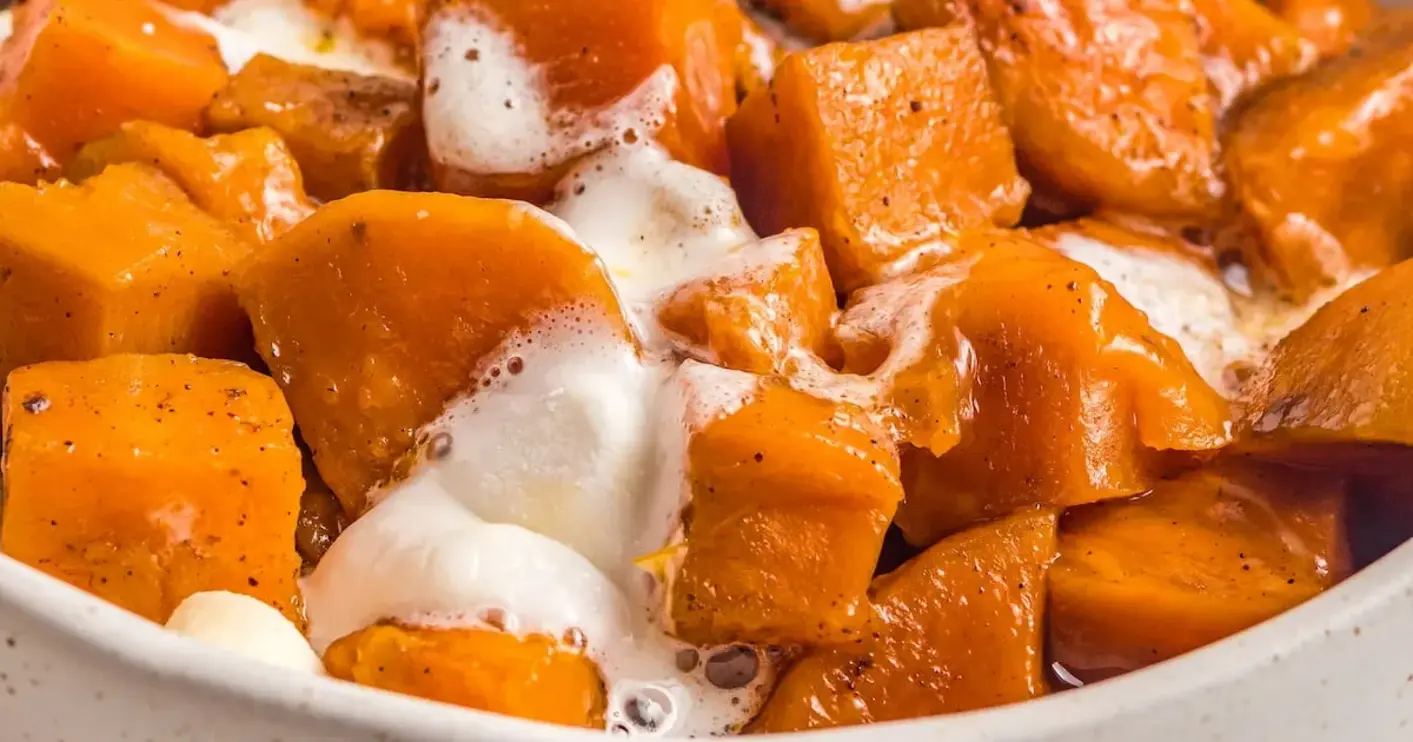
Imagine pulling the lid open to reveal vaults of tender, caramel‑coated sweet potato cubes, their skins softened into a buttery, maple glaze that melts into sugary ribbons. The marshmallows bounce like springy confetti, their amber hearts dripping into the heat‑sweetened sauce. The scent is a heady mix of butter, maple syrup and earthy sweet potato, boosted with cinnamon and nutmeg—a visual and olfactory festival that feels like a feast on a plate. It’s convenient, comforting, and full of Mediterranean warmth passed through American convenience.
My version diverges by pulling the maple syrup pour on the sweet potatoes’ skin—a trick I learned in a Paris culinary cohort where caramelizing a small amount brings depth. I add a gallery of spices that echo my mother’s tajine, and I finish with marshmallows to give that signature goo. A pro tip before you start: give the sweet potatoes a quick blanch in boiling water to soften the outside; this trims the overall cooking time and ensures a silky inside. The most common mistake? Forgetting to stir once the sweet potatoes settle, which can cause an uneven caramel sheet.
Why This Crockpot Sweet Potatoes with Marshmallows Recipe Is the Best
The flavor secret lies in the maple‑sweetened glaze that paints each cube, a nuance borrowed from my time in Lyon’s patisserie where the heart of sweetness is never overpowering. The butter’s golden richness balances the maple’s lightness, and the pumpkin pie spice brings a nostalgic scent, echoing return trips to both Paris and Morocco.
The perfected texture comes from a carefully timed simmer: high heat for four hours melts the fries into a glorious pourable sauce while the marshmallows sit like fresh snow, slowly soaking into the pockets. The result? A silky, buttery exterior that cracks like flaky pastry, and a soft inside that dissolves in your mouth.
It’s foolproof because every step uses what you probably already have: a slow cooker, a sprinkle of salt, a cup of maple syrup. You need no fancy equipment, no prep that takes hours. I’ve tested it on a busy New York morning, and it comes out ready to wow the family before long.
Crockpot Sweet Potatoes with Marshmallows Ingredients
I usually shop at the Union Square farmer’s market for my sweet potatoes—hand‑picked at crisp, medium‑dark skin that’s ideal for slow‑cooking. A quick trip to the Duff & Co. bake shop gives me high‑quality butter with a bright butter flavor. I sneak in a splash of maple syrup straight from a small Vermont dairy brand. The pantry stands ready once in a while for the pumpkin pie spice, a staple from my French culinary training.
Ingredients List
- 4 large sweet potatoes (about 2 lbs, peeled and diced into ½ inch cubes)
- ¾ cup packed brown sugar
- ¼ cup maple syrup
- ½ cup butter (sliced into pieces)
- 1 tablespoon pumpkin pie spice (or a blend of cinnamon and a pinch of nutmeg)
- 1 teaspoon salt
- 2 cups mini marshmallows
Ingredient Spotlight
Sweet potatoes are the backbone—look for medium‑rimed, dense, naturally sweet varieties. In the U.S., orange‑fleshed beets capture a deeper natural sugar that pairs beautifully with maple. A good cut into ½ inch cubes maximizes surface area for caramelization.
Butter adds a film of golden richness; choose a semi‑or fully‑butter brand with a high salt content to showcase the spice. If lactose‑intolerant, a small amount of clarified butter works culturally in French sauces and preserves the creamy texture.
Maple syrup is the honest sweetener that has a distinct mineral note. A 100% pure, grade A product gives a subtle caramel finish while brightening the color. Sweetener swaps include honey or pure maple for a richer, more robust flavor profile.
| Original Ingredient | Best Substitution | Flavor / Texture Impact |
|---|---|---|
| Brown Sugar | Stevia or Camel Honey | Slightly sweet, lower carbs, less caramel |
| Butter | Ghee or Coconut Oil | Rich, dry heat-friendly, slightly nutty |
| Maple Syrup | Honey | Brighter floral, more moisture |
How to Make Crockpot Sweet Potatoes with Marshmallows — Step-by-Step
Let’s get this sweet‑to‑savory symphony rolling in your crockpot—no beat, just quick three‑hour magic.
Step 1: Spray Non‑Stick
Spray an 8‑quart slow cooker with non‑stick spray to keep the mixture from sticking to the bottom. Press the lid down and set the pot on the back of a base that can rest on the stove, setting the alignment right.
💡 emy’s Pro Tip: Use a light coating of olive oil if you’re avoiding chemicals; it keeps the crocktop chewy and enhances the color.
Step 2: Stir Sweet Potatoes
Add the diced sweet potatoes to the pot, then pour in brown sugar, maple syrup, butter slices, pumpkin pie spice and a dash of salt. Give them a gentle toss so every cube is coated.
⚠️ Common Mistake to Avoid: Not stirring evenly—this causes uneven caramel ribbons and burnt bits at the bottom.
Step 3: Cook High
Place the lid on and cook on high for 4 hours or until sweet potatoes are fork‑tender. Keep an eye on the thickening sauce; if it becomes too thin after the final click, let it bubble slightly longer.
💡 emy’s Pro Tip: When the potatoes start to soften, you can stir once more to re‑coat them—you’ll notice the caramel jacket thicker.
Step 4: Melt Marshmallows
Five minutes before serving, lift the lid, pour in mini marshmallows, replace the lid, and let them melt for 3–5 minutes. Watch them puff up, turning gold and dripping into the buttery base.
⚠️ Common Mistake to Avoid: Rushing the marshmallow melt by removing the lid—it will not soften uniformly.
| Step | Action | Duration | Key Visual Cue |
|---|---|---|---|
| 1 | Spray Non‑Stick | Immediate | Even oiled base |
| 2 | Stir | 3 min | Perfect coat on each cube |
| 3 | Cook High | 240 min | Golden skins, thick sauce |
| 4 | Melt Marshmallows | 3–5 min | Marshmallows puff golden |
Serving & Presentation
While steaming, spoon the sauce on top of each sweet potato stack for a drizzle effect that kisses the skin. Sprinkle a handful of chopped pecans and a light dusting of pumpkin pie spice for a crunchy contrast. Plate them on a rustic slate for a Moroccan‑inspired aesthetic, and your dish feels like a holiday centerpiece.
Pair with a crisp white wine such as a lightly oaked Chardonnay, or a glass of sparkling wine for a festive drink. A side of stewed lentils will echo the hearty sweetness, and a dollop of Greek yogurt gives a tart, cooling counterpoint.
| Pairing Type | Suggestions | Why It Works |
|---|---|---|
| Side Dish | Stewed lentils, roasted Brussels sprouts | Earthy bitterness balances sweetness |
| Sauce / Dip | Honey‑mustard, plain yogurt | Creates creamy contrast |
| Beverage | Sparkling wine, crisp white | Foamy acidity cuts sugar |
| Garnish | Pecans, pumpkin pie spice, fresh lime zest | Texture and bright suds |
Make‑Ahead, Storage & Reheating
I crowdsource the secret to a busy New York schedule: you can prep the sweet potatoes a whole day earlier. Layer them, sealed in an airtight container, and store in the refrigerator. When ready to serve, simply re‑assemble in the slow cooker on high for 30–40 minutes, finish with marshmallows, and it’ll smell as fresh as if it were new.
| Method | Container | Duration | Reheating Tip |
|---|---|---|---|
| Refrigerator | Airtight jar | 3 days | Reheat + marshmallows in 20‑min high setting |
| Freezer | Glass freezer bag | 1 month | Thaw overnight, re‑cook hot until just hot |
| Make‑Ahead | Functinprising tin | 1 day in advance | When ready, add marshmallows, heat 30 min |
For reheating, I wipe the pot clean, lightly spray a fine mist of olive oil, top with the pre‑prepared batter, decide on the marshmallow finish, and let the stovetop magic happen. The result is as comforting as freshly prepped—perfect for holiday crowds.
Variations & Easy Swaps
| Variation | Key Change | Best For | Difficulty Impact |
|---|---|---|---|
| Spicy Cajun | Add cayenne pepper, smoked paprika | Glutton fans of heat | Easy |
| Almond‑Honey | Replace butter with almond butter, honey | Gluten‑free or dairy‑free | Medium |
| Pumpkin Spice | Add pumpkin puree, extra pumpkin pie spice | Seasonal fall menu | Easy |
Spicy Cajun Sweet Potato Marshmallows
Uplift the dish with a kick by ruffling in a teaspoon of cayenne and a pinch of smoked paprika while tumbling the sweet potatoes. The smoky earthy flavor echoes the bold, spicy marinades I learned in La Rochelle, offering a contrast to the sugary glaze.
Almond‑Honey Sweet Potato Marshmallows
Swap the butter for smooth almond butter and the maple for raw honey. The nutty undertone adds a deep, slight bitterness that balances the marshmallow’s sweetness, and the result stays silky with no dairy. I tested this at a vegan potluck and it won major applause.
Pumpkin Spice Sweet Potato Marshmallows
Incorporate pumpkin puree into the base and boost the pumpkin pie spice to 1½ tablespoons. The creamy pumpkin layers with the buttery maple, creating a fall‑season parfait that fits any Thanksgiving menu.
Can I make this recipe ahead of time?
Absolutely! I batch‑prep the sweet‑potato portion a day ahead in the fridge, storing it in an airtight jar. When you’re ready to serve, just re‑heat in the slow cooker on high for 30–40 minutes and toss in fresh marshmallows for 3–5 minutes. It keeps the sauce creamy, the potatoes moist, and the marshmallows perfectly warm, saving you time on busy evenings.
Is this recipe dairy free?
Yes, you can easily make it dairy‑free by substituting coconut oil or a plant‑based butter for the ½ cup of butter. In addition, choose non‑dairy mini marshmallows (often labeled “vegan”) and the dish will remain wonderfully sweet and creamy.
What type of sweet potato works best?
Choose medium‑to‑large orange‑fleshed varieties—they’re naturally sweet and their dense interior caramelizes well in a slow cooker. Avoid small, waxy sweet potatoes that may stay too firm. Slice into consistent ½‑inch cubes for a uniform cooking time.
How long does it take for the marshmallows to melt?
Melt your mini marshmallows for 3–5 minutes on high heat. They puff up like soft dough, turning honey‑golden before sliding into the thick, buttery sauce. A quick visual cue is when you see the tops turning slightly opaque; that’s when they’re ready.
Do I need a slow cooker, or can I use an oven?
You could bake these cubes in a 350°F oven for about 45–50 minutes, stirring at the mid‑point. However, the slow cooker produces a more caramelized sauce because the moisture stays trapped, and the marshmallows sit atop the gentle steam, producing a superior meld of textures.
Can I use regular potato instead of sweet potato?
Regular potatoes will be less sweet and will not develop the same rich, maple glaze. To mimic sweetness, add a tablespoon of brown sugar and a splash of maple syrup; but expect a firmer texture and a less pronounced caramel finish.
How much salt should I add?
A teaspoon of salt is enough to highlight the maple and caramel notes while taming any bitterness. If you’re watching sodium, decrease to ½ teaspoon; the sauce’s natural sweetness will still coat the potatoes beautifully.
What if I don’t have pumpkin pie spice?
Combine 1 teaspoon of cinnamon, ½ teaspoon of nutmeg, and a pinch of cloves to emulate pumpkin pie spice’s warm aroma. This homemade blend delivers the same comforting spice profile that enhances the maple‑sweet potato harmony.
Can I freeze the cooked mixture?
Yes—once you’ve cooked the sweet potatoes and the sauce, refrigerate the mixture, then transfer it to an airtight container and freeze for up to a month. Reheat from the refrigerator or directly from the freezer by covering and gently warming until the sauce is silky and the marshmallows’re ready.
What is the nutritional profile per serving?
Per serving, the dish offers about 316 kcal, 53 g carbs, 2 g protein, 12 g fat, 3 g fiber, 36 g sugar, 404 mg sodium, and 31 mg cholesterol—taking into account the marshmallows, maple syrup, and sweet potatoes. It’s a comforting holiday side that balances indulgence with wholesome ingredients.
Share Your Version!
Did you try a sprinkle of cardamom instead of the pumpkin spice, or maybe swapped in coconut oil for the butter? Drop a star rating, let me know in the comments, and tag me when you plate your version—I’d love to see how your spin turns the light maple and marshmallow classic into your own signature creation. Post a photo on Instagram or Pinterest and tag @cookingwithemi for a chance to be featured.
From my NYC kitchen to yours — I hope this recipe brings as much warmth to your table as it does to mine. — emy 🧡
Love This Recipe? Save It to Pinterest!
If you enjoyed this Crockpot Sweet Potatoes with Marshmallows recipe, don’t let it get lost in your browser tabs! 😄 Pin it now so you can find it again anytime — and explore hundreds more tried‑and‑tested recipes waiting for you on my Pinterest boards.
👉 Follow emy on Pinterest @chefrecipes2
📌 Pin this recipe · 🔁 Re-pin your favorites · 💬 Tag me when you make it — I love seeing your creations!
Got questions, tweaks, or a heart‑warming story about your holiday table? Drop me a line, and let’s keep the culinary conversation happily simmering in our kitchens together!

Crockpot Sweet Potatoes with Marshmallows
Description
Make this childhood favorite right in your crockpot! Crockpot Sweet Potatoes and Marshmallows is a holiday favorite featuring sweet potatoes, maple syrup, fall spices, and gooey marshmallows.
Ingredients
- 4 large sweet potatoes (about 2 lbs, peeled and diced into 1/2 inch cubes)
- 3/4 cup packed brown sugar
- 1/4 cup maple syrup
- 1/2 cup butter (sliced into pieces)
- 1 tablespoon pumpkin pie spice (or cinnamon and a pinch of nutmeg)
- 1 teaspoon salt
- 2 cups mini marshmallows
Instructions
- Spray an 8-quart slow cooker with non-stick spray.
- Place the sweet potatoes in the slow cooker. Add the brown sugar, maple syrup, butter, pumpkin pie spice, and salt and stir to combine.
- Place the lid on the slow cooker and set it on high for 4 hours, or until the sweet potatoes are fork tender. There will be extra sauce at the bottom when done cooking. You can pour it out if desired, or leave it to drizzle on top of the sweet potatoes when serving.
- Five minutes before serving, remove the lid and top with marshmallows. Place the lid back on the sweet potatoes and let the marshmallows melt for 3 to 5 minutes. Serve immediately!