Watermelon Smoothie Recipe

“`html

Watermelon Smoothie Recipe

Introduction: Stay Hydrated and Refreshed

Did you know that on average, most people don’t consume enough water to stay optimally hydrated, especially during warmer months? Staying hydrated is crucial for energy levels, skin health, and overall bodily function. If you’re looking for a delicious and incredibly effective way to boost your fluid intake, have you considered the humble yet mighty watermelon? This Watermelon Smoothie Recipe is your answer! It’s not just a thirst-quencher; it’s a vibrant, refreshing, and low-calorie powerhouse packed with antioxidants, vitamins, and electrolytes. Perfect for a light breakfast, a post-workout recovery drink, or a delightful midday treat, this smoothie is designed to cool you down, energize you, and make you feel fantastic. Let’s dive into how you can whip up this summery delight in just minutes!

Ingredients: A Breeze of Freshness

The beauty of this watermelon smoothie lies in its simplicity and the pure, unadulterated taste of fresh ingredients. We’re keeping it light, refreshing, and naturally sweet, allowing the watermelon to truly shine. Here’s what you’ll need:

  • 4 cups (about 650g) Seedless Watermelon, chilled and cubed: The star of our show! Look for a ripe, sweet watermelon – it should feel heavy for its size and have a deep, uniform color. Chilling it beforehand ensures a perfectly cool smoothie without needing excessive ice. Its natural sweetness will form the base of our drink.
  • 1 tablespoon Fresh Lime Juice: This is the secret weapon that elevates the watermelon’s flavor. Lime juice adds a zesty, bright counterpoint to the sweetness, creating a wonderfully balanced and invigorating taste. Freshly squeezed is always best!
    • Substitution: If limes aren’t available, fresh lemon juice can work, though it offers a slightly different tartness. You could also use a splash of orange juice for a sweeter citrus note.
  • 5-8 Fresh Mint Leaves: Mint brings an incredible wave of coolness and aroma, making each sip exceptionally refreshing. Don’t underestimate the power of these little green leaves!
    • Substitution: If mint isn’t your favorite, a small piece of fresh ginger can add a warming zing, or you can omit it entirely.
  • Optional: 1/2 cup Ice Cubes: Use if your watermelon isn’t as chilled as you’d like, or if you prefer a thicker, frostier consistency.
  • Optional: Sweetener to taste (honey, maple syrup, or stevia): Only if your watermelon isn’t sweet enough for your liking. It’s usually unnecessary for ripe watermelons!

Timing: Quick Refreshment, Ready in Minutes

Prep time:
5 minutes
Cook time:
0 minutes
Total time:
5 minutes

Compared to the average smoothie recipe which might involve more complex prep or chilling times, this watermelon smoothie is a true speed demon. You can typically expect to spend around 5 minutes from start to finish, making it ideal for those days when you need a refreshing drink in a hurry. It requires minimal preparation, focusing on simply cubing the fruit and blending.
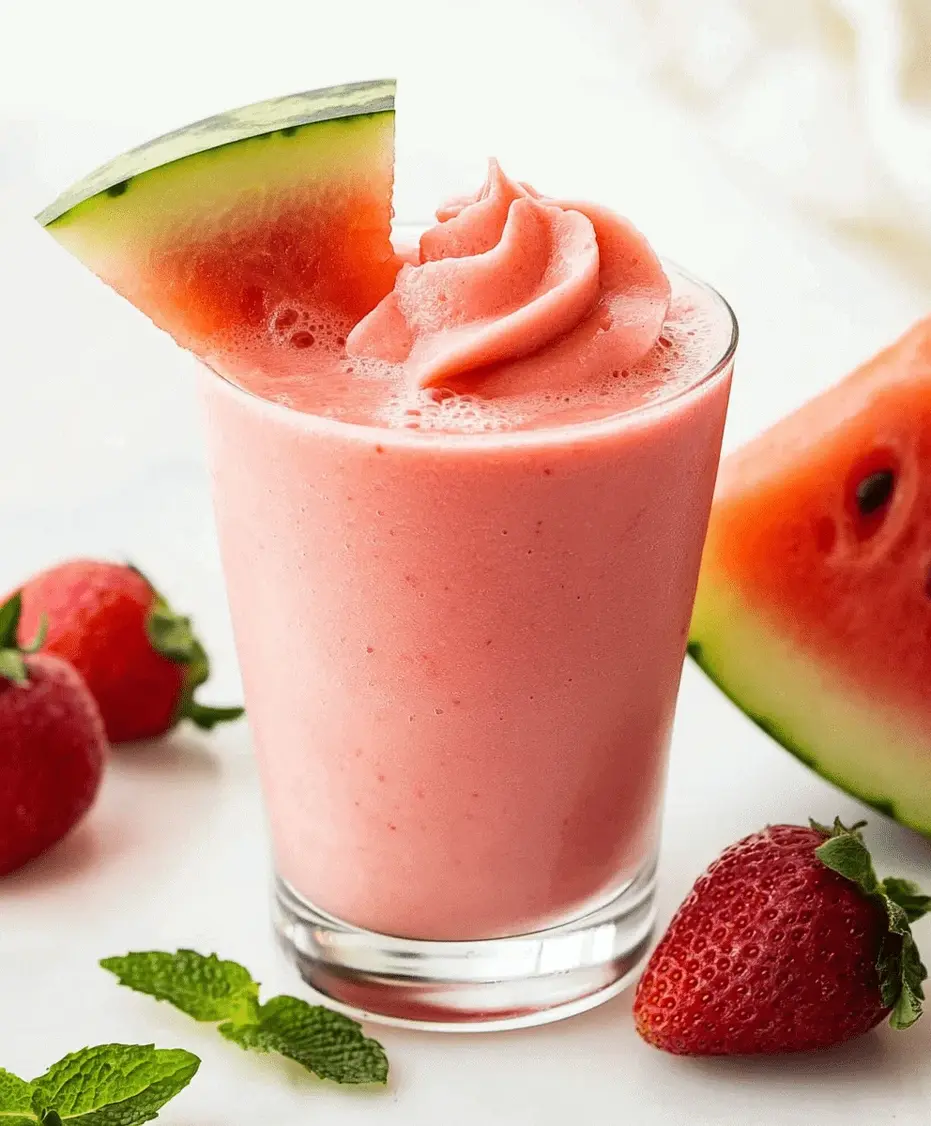
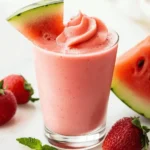
Close-up of refreshing watermelon smoothie in a glass with mint and lime

Step-by-Step Instructions: Crafting Your Perfect Smoothie

Whipping up this delightful watermelon smoothie is incredibly straightforward. Follow these simple steps for a perfect pour every time!

Step 1: Prepare Your Ingredients

Ensure your watermelon is chilled and cut into roughly 1-inch cubes. If your watermelon has seeds, now is the time to remove them. Wash your fresh mint leaves. Juice your lime. Having everything prepped and ready makes the blending process seamless.

Step 2: Blend to Perfection

Add the cubed watermelon, fresh lime juice, and mint leaves to your blender. If you’re using ice cubes or a sweetener, add them now. Secure the lid tightly and start blending on a low speed, gradually increasing to high. Blend until the mixture is completely smooth and has a consistent, creamy texture. This usually takes about 30-60 seconds, depending on your blender’s power.

Step 3: Taste and Adjust

Once blended, give your smoothie a quick taste. Is it sweet enough? Does it have enough zing? If you desire more sweetness, add your chosen sweetener and blend again briefly. If you want it tangier, add another squeeze of lime juice. For a thicker consistency, add a few more ice cubes and blend again.

Step 4: Serve and Enjoy

Pour the freshly blended watermelon smoothie immediately into chilled glasses. Garnish with a fresh mint sprig or a thin slice of lime for an extra touch of elegance. Serve and enjoy this incredibly refreshing drink right away!

Nutritional Highlights: A Guilt-Free Treat

This watermelon smoothie is a fantastic choice for those mindful of their calorie and sugar intake. It’s naturally low in calories and sugar, especially when no extra sweeteners are added. Watermelon itself is made up of about 92% water, making it incredibly hydrating. It’s also a good source of Vitamin C and contains antioxidants like lycopene, which contributes to its red hue and has numerous health benefits.

  • Low Calorie: Typically around 50-70 calories per serving (depending on watermelon sweetness and optional additions).
  • Hydrating: High water content for essential fluid intake.
  • Rich in Vitamins: Provides Vitamin C and some Vitamin A.
  • Antioxidant Power: Contains lycopene and other beneficial compounds.
  • Electrolytes: Contains potassium, which is important for fluid balance and muscle function.

Healthier Alternatives and Flavor Enhancers

While this recipe is already wonderfully healthy, you can customize it further to suit your taste and nutritional goals:

  • For Extra Protein: Add a scoop of unflavored or vanilla protein powder, or a tablespoon of chia seeds or hemp seeds before blending.
  • For Creaminess: A quarter of a frozen banana can add a creamy texture and natural sweetness without overpowering the watermelon flavor. Alternatively, a small amount of plain Greek yogurt works wonders.
  • Greens Boost: A small handful of spinach is almost undetectable in flavor but adds iron and other nutrients.
  • Spice it Up: A tiny pinch of cayenne pepper can add a surprising and delightful kick.
  • Other Fruits: A small amount of frozen berries (like strawberries or raspberries) can be added for a different flavor profile and extra antioxidants.

Serving Suggestions: Perfect for Any Occasion

This watermelon smoothie is versatile and can be enjoyed in various ways:

  • Breakfast Boost: Serve as a light and refreshing breakfast, especially on warm mornings.
  • Midday Refreshment: A perfect pick-me-up to combat afternoon fatigue and heat.
  • Post-Workout Refuel: Its hydrating properties and natural sugars make it great for replenishing fluids and energy after exercise.
  • Kids’ Treat: A healthy and fun alternative to sugary drinks for children.
  • Party Punch: Serve in small glasses as a refreshing welcome drink at summer gatherings.

Common Mistakes to Avoid

To ensure your watermelon smoothie is perfect every time, be aware of these common pitfalls:

  • Using Unripe Watermelon: This will result in a bland and watery smoothie. Always opt for a ripe, sweet watermelon.
  • Over-Blending Ice: If you add too much ice and over-blend, the smoothie can become slushy and lose its enjoyable texture. Add ice gradually if needed.
  • Skipping the Lime/Lemon: The citrus is crucial for balancing the sweetness and adding brightness. Don’t omit it!
  • Adding Too Much Sweetener: Taste the watermelon first! Most ripe watermelons are sweet enough on their own.

Storing Your Summery Smoothie

Watermelon smoothies are best enjoyed immediately after blending. However, if you have leftovers:

  • Pour any remaining smoothie into an airtight container or mason jar.
  • Fill the container as close to the top as possible to minimize air exposure, which can cause oxidation and separation.
  • Store in the refrigerator for up to 24 hours.
  • When ready to serve again, give it a good shake or re-blend for a few seconds to recombine. The texture might be slightly less vibrant after storage.
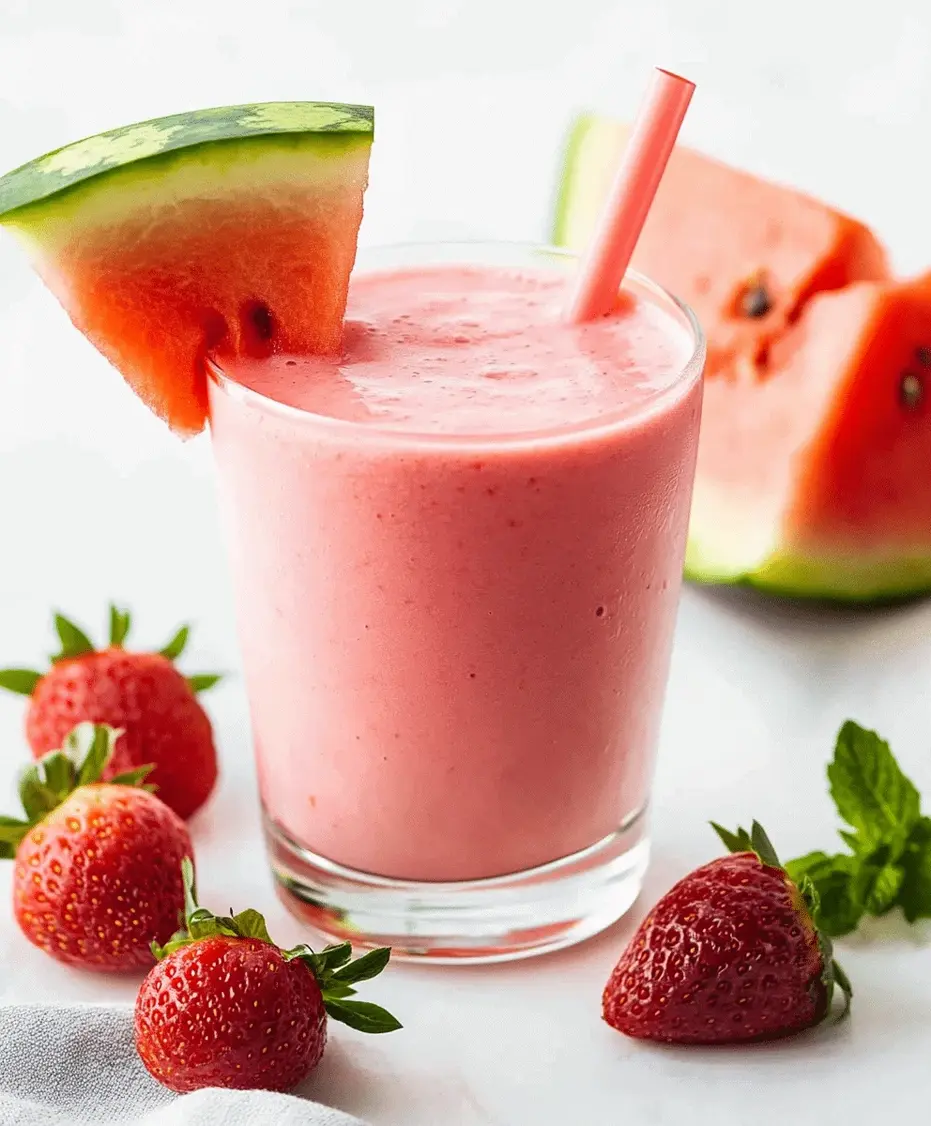
A glass of watermelon smoothie next to a bowl of fresh watermelon cubes and mint leaves

Frequently Asked Questions About Watermelon Smoothies

***Can I use frozen watermelon instead of fresh?***

Yes, absolutely! Frozen watermelon chunks will create a thicker, colder smoothie without the need for ice. It’s a great option if you want a frosty consistency.

***Why is my watermelon smoothie watery?***

This can happen if your watermelon is not very sweet or if you add too much liquid (like water or milk, which aren’t in this recipe). Ensure you use ripe, chilled watermelon and adjust ice to achieve your desired consistency. Blending for too long can also sometimes break down ingredients too much, leading to a thinner result.

***Can I make this smoothie without mint?***

Yes, you can omit the mint if you don’t have it or don’t prefer its flavor. The smoothie will still be delicious and refreshing, though the mint does add a lovely cooling sensation.

***Is this smoothie good for weight loss?***

This watermelon smoothie is an excellent choice for weight management due to its low calorie count and high water content, which can help you feel full. It’s a healthy alternative to high-calorie beverages and snacks.

***Can I add other fruits to this smoothie?***

Certainly! Other fruits like strawberries, raspberries, blueberries, or a small amount of banana can complement the watermelon nicely. Just be mindful that adding too many fruits, especially high-sugar ones, can increase the overall calorie and sugar content.

Conclusion: Your Ultimate Summer Sip

This Watermelon Smoothie Recipe is more than just a drink; it’s a revitalizing experience. It’s proof that healthy and delicious can go hand-in-hand, offering a simple, quick, and incredibly satisfying way to stay hydrated and nourished. With its vibrant flavor, minimal ingredients, and impressive health benefits, it’s set to become a staple in your summer routine. So, grab your blender, and let the wave of refreshing goodness wash over you!
Print

clock clock iconcutlery cutlery iconflag flag iconfolder folder iconinstagram instagram iconpinterest pinterest iconfacebook facebook iconprint print iconsquares squares iconheart heart iconheart solid heart solid icon

Watermelon Smoothie Recipe


  • Author: Chef Emy

Description

Cool down with this hydratingWatermelon Smoothie Recipe, made with fresh watermelon, lime juice, and a hint of mint. Perfect for summer, this smoothie is low-calorie, packed with antioxidants, and incredibly refreshing. Great for breakfast or a midday energy boost!


Ingredients

Scale
  • 3 cupsseedless watermelon (cubed and chilled or frozen)
  • ½ cupGreek yogurt (optional for creaminess)
  • Juice of1lime
  • 45fresh mint leaves (optional)
  • 1 tbsphoney or maple syrup (optional, adjust to taste)
  • ½ cupice cubes (optional for extra chill)

Instructions

    Notes

    For adairy-freeoption, omit yogurt or replace with coconut milk.
    Usefrozen watermeloncubes to skip ice and avoid watering it down.
    Adjust sweetener based on the natural sweetness of your watermelon.

    Nutrition

    • Calories: 90 (without yogurt) / ~140 (with yogurt)
    • Sugar: 17g

    “`
    Delicious Easy Baja Fish Tacos Recipe

    “`html

    Delicious Easy Baja Fish Tacos Recipe

    Introduction: Why You’ll Love These Fish Tacos

    Are you craving a burst of vibrant, coastal Mexican flavors that satisfy without keeping you in the kitchen all night? If the thought of perfectly crispy fish, a refreshing crunch of slaw, and a drizzle of zesty, creamy sauce sounds like your kind of weeknight dream, then you’re in the right place! These Delicious Easy Baja Fish Tacos deliver all that and more. We’re talking about a culinary escape to the shores of Baja California, right in your own home, in less time than you’d imagine. This recipe masterfully blends bold, authentic tastes with remarkable simplicity, making it an ideal choice for busy evenings or casual weekend get-togethers. Whether you’re a seasoned home cook or just starting, get ready to impress yourself and your loved ones with a dish that’s as fun to make as it is to devour.

    Ingredients for Crispy Baja Fish Tacos

    For the Fish

    • 1.5 lbs firm white fish fillets (like cod, tilapia, or mahi-mahi), cut into 1-inch strips or cubes – choose fish that cooks quickly and holds its shape.
    • 1 cup all-purpose flour
    • 1 teaspoon smoked paprika
    • ½ teaspoon garlic powder
    • ½ teaspoon onion powder
    • ¼ teaspoon cayenne pepper (optional, for a little heat)
    • Salt and freshly ground black pepper to taste – season generously for full flavor!
    • 1 cup beer (lager or pilsner works well) or club soda – the bubbles create a lighter batter!
    • Vegetable oil or canola oil, for frying

    For the Slaw

    • 4 cups shredded cabbage (a mix of green and red cabbage for color and crunch) – aim for thinly shredded pieces.
    • ½ cup finely chopped fresh cilantro – its bright, herbaceous notes are key.
    • ¼ cup finely diced red onion – for a sharp, sweet bite.
    • 1 jalapeño, seeded and minced (optional, for extra spice) – remove seeds and membranes for milder heat.
    • 2 tablespoons fresh lime juice – the essential tangy element.
    • 1 tablespoon olive oil
    • Salt and pepper to taste

    For the Creamy Cilantro Lime Sauce

    • ½ cup mayonnaise – the creamy base.
    • ¼ cup sour cream or Greek yogurt – adds tang and lightens the richness.
    • 2 tablespoons fresh lime juice – for that signature zesty punch.
    • 2 tablespoons chopped fresh cilantro – more of that vibrant flavor!
    • 1 clove garlic, minced or grated – for a subtle garlicky warmth.
    • Salt and pepper to taste

    For Serving

    • 8-10 corn or flour tortillas, warmed – consider homemade for an extra special touch.
    • Extra cilantro, lime wedges, hot sauce, and sliced avocado for garnish (optional, but highly recommended!)

    Timing is Everything: Let’s Get Cooking!

    Prep time: 25 minutes
    Cook time: 15 minutes
    Total time: 40 minutes

    Compared to the average recipe that might take upwards of an hour for similar complexities, these Baja Fish Tacos are a swift culinary victory. The 40-minute total time is achievable because the components can be prepared concurrently and the frying process is quick and efficient. This makes them perfect for a spontaneous dinner without the commitment of a lengthy cooking session.

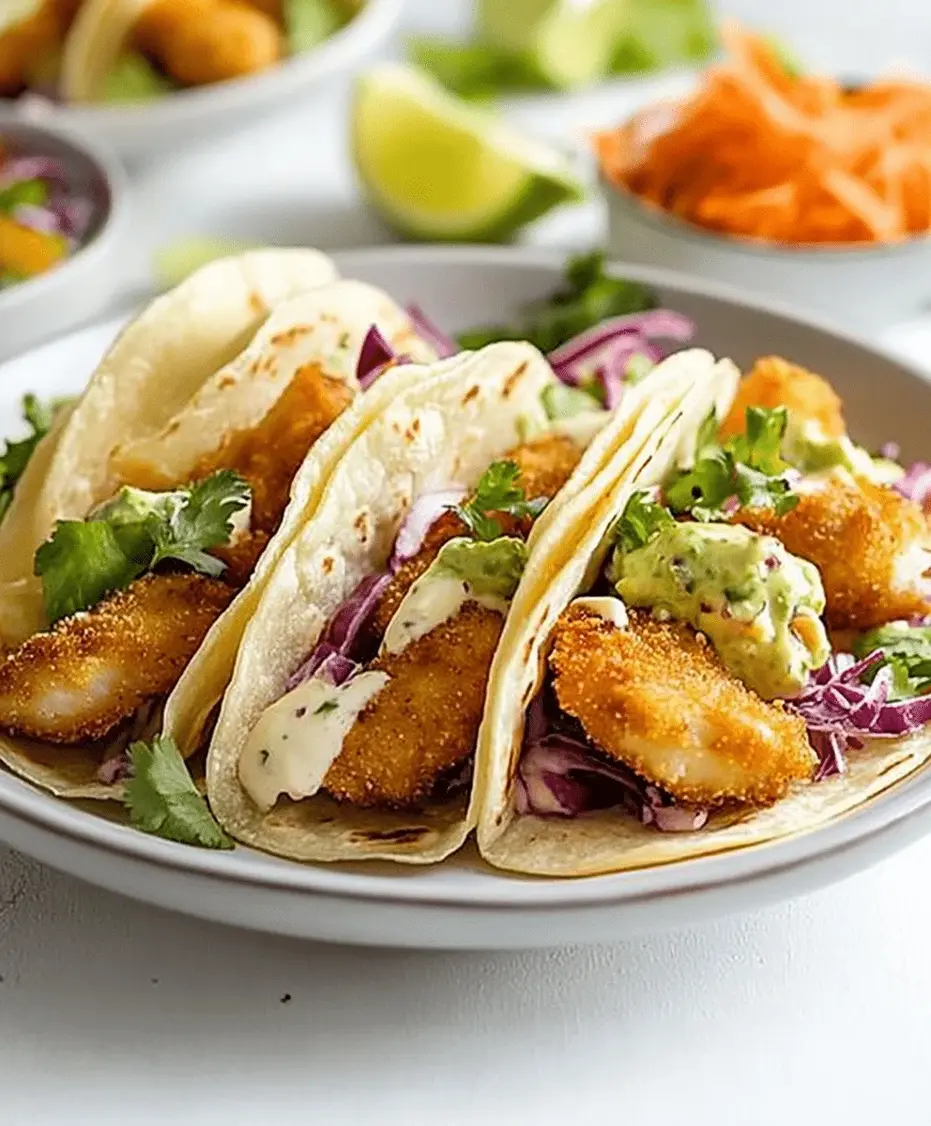
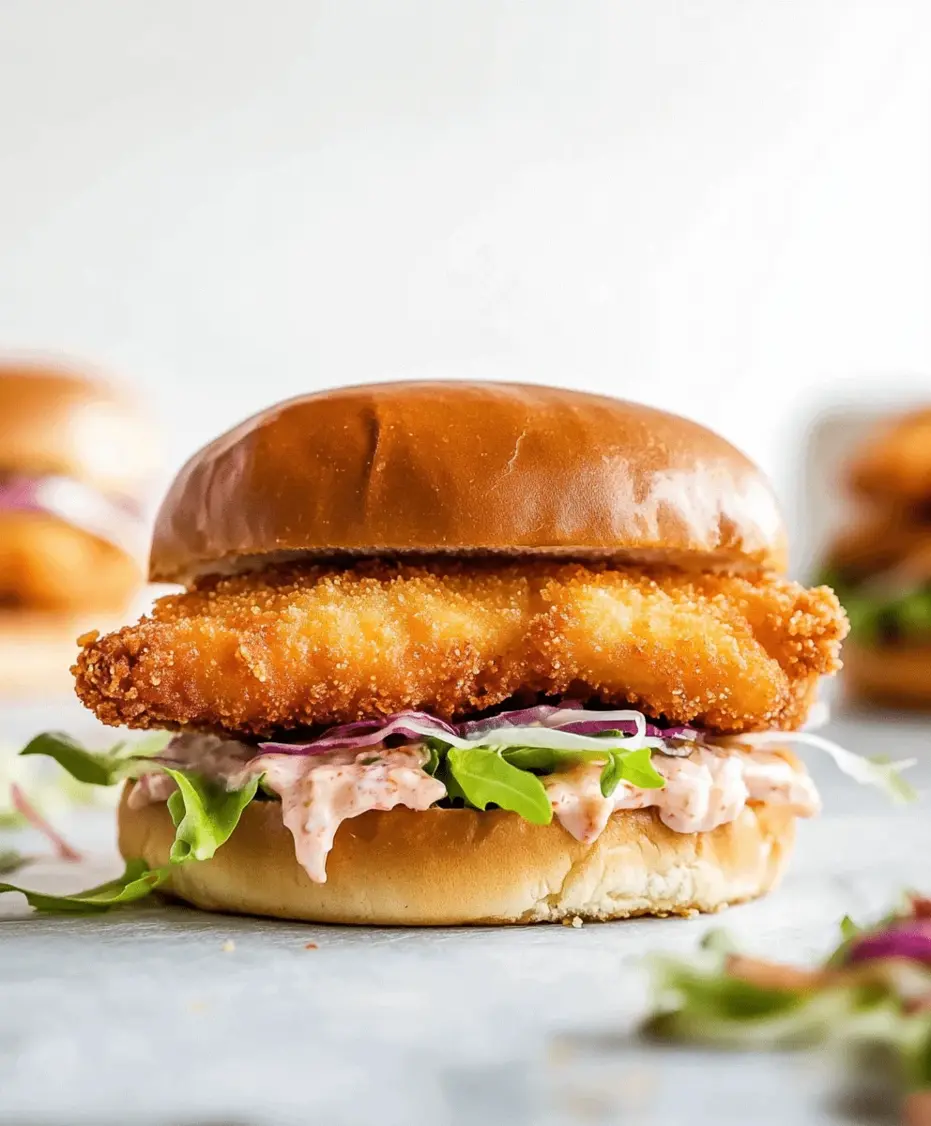
    Close-up of delicious Baja Fish Tacos on a plate, showcasing crispy fish, colorful slaw, and creamy sauce.

    Step-by-Step Instructions

    Prepare the Fish

    Begin by ensuring your fish fillets are patted thoroughly dry with paper towels. This is crucial for the batter to adhere properly and for achieving that desirable crispiness. Cut the fish into bite-sized pieces, about 1-inch strips or cubes. Season them generously with salt and pepper. Set aside while you prepare the other components.

    Make the Slaw

    In a medium bowl, combine the shredded cabbage, chopped cilantro, finely diced red onion, and minced jalapeño (if using). In a small separate bowl, whisk together the lime juice, olive oil, salt, and pepper. Pour the dressing over the cabbage mixture and toss gently until everything is well combined. Let it sit for at least 10-15 minutes to allow the flavors to meld and the cabbage to soften slightly. This allows for maximum crunch and flavor infusion.

    Whisk Up the Sauce

    In another small bowl, combine the mayonnaise, sour cream (or Greek yogurt), lime juice, chopped cilantro, minced garlic, salt, and pepper. Stir until smooth and creamy. Taste and adjust seasonings as needed. If you prefer a thinner sauce, you can add a tablespoon of water or milk. This sauce is incredibly versatile and can be used on many other dishes!

    Batter and Fry the Fish

    In a shallow dish or bowl, whisk together the flour, smoked paprika, garlic powder, onion powder, cayenne pepper (if using), salt, and pepper. Gradually pour in the beer or club soda, whisking until you have a smooth batter about the consistency of pancake batter. If it’s too thick, add a little more liquid; if too thin, a bit more flour.
    Heat about 2-3 inches of vegetable oil in a heavy-bottomed pot or Dutch oven over medium-high heat to around 350°F (175°C). Test the oil by dropping a tiny bit of batter; it should sizzle and float.
    Working in batches to avoid overcrowding the pan, dip each piece of seasoned fish into the batter, ensuring it’s fully coated. Carefully place the battered fish into the hot oil. Fry for 3-5 minutes per side, or until golden brown and cooked through. The internal temperature should reach 145°F (63°C). Use a slotted spoon to remove the fish from the oil and drain on a wire rack set over a baking sheet to keep them crispy. Sprinkle with a little salt immediately after frying.

    Assemble Your Masterpieces

    Warm your tortillas according to package directions (a quick saute in a dry skillet or a few seconds in the microwave works well). Place a generous portion of the crispy fish onto each warm tortilla. Top with a heap of the crunchy slaw and a generous drizzle of the creamy cilantro-lime sauce. Garnish with extra cilantro, a squeeze of fresh lime juice, and any other desired toppings like avocado slices or your favorite hot sauce. Serve immediately and savor every bite!

    Nutritional Information: A Taste of Well-being

    While precise nutritional values can vary based on the specific fish used and portion sizes, here’s an estimated breakdown per taco (assuming 8 tacos and average ingredient usage):

    • Calories: Approximately 350-450 kcal
    • Protein: 15-20g
    • Fat: 18-25g (includes healthy fats from avocado if used)
    • Carbohydrates: 25-30g (varies with tortilla type)
    • Fiber: 3-5g

    (Note: This is an estimation. For exact nutritional data, it’s recommended to use a recipe calculator with your specific ingredients.)

    Healthier Alternatives for Guilt-Free Pleasure

    Looking to make these tacos even lighter? Here are a few swaps:

    • Baking or Air-Frying the Fish: Instead of deep-frying, toss the battered fish pieces with a little cooking spray and bake at 400°F (200°C) for 12-15 minutes, flipping halfway, or air fry at 380°F (190°C) for 8-10 minutes, until golden and crisp.
    • Lighter Slaw Dressing: Use a dressing made with Greek yogurt, lime juice, and a touch of honey instead of mayonnaise.
    • Reduced-Fat Mayo: Substitute some or all of the mayonnaise in the sauce with reduced-fat or light mayonnaise.
    • Whole Wheat Tortillas: Opt for whole wheat tortillas for added fiber.

    Serving Suggestions: Elevate Your Taco Experience

    These fish tacos are a star on their own, but they also pair beautifully with:

    • Mexican Rice: A classic side that complements the flavors perfectly.
    • Black Beans or Refried Beans: Adds more protein and fiber to your meal.
    • Corn Salad (Esquites-style): A sweet and savory addition.
    • Chips and Salsa/Guacamole: For a casual, appetizer-style start or accompaniment.

    Common Mistakes to Avoid

    • Watery Fish: Not patting the fish dry enough before battering. This leads to a soggy crust and the batter sliding off.
    • Overcrowding the Pan: Frying too many fish pieces at once lowers the oil temperature, resulting in greasy, unevenly cooked tacos.
    • Undercooked Fish: Not cooking the fish long enough leads to a mushy texture. Ensure it’s flaky and opaque throughout.
    • Bland Slaw/Sauce: Not tasting and adjusting seasonings. Fresh lime juice and salt are your best friends here!

    Storing Tips: Enjoy Leftovers Wisely

    Cooked Fish: Leftover fried fish is best enjoyed fresh, as the batter loses its crispiness when refrigerated. However, you can store it in an airtight container in the refrigerator for up to 1-2 days. Reheat gently in an oven or air fryer to try and restore some crispness, but it won’t be the same as freshly fried.

    Slaw: The prepared slaw can be stored in an airtight container in the refrigerator for up to 3 days. The flavors will continue to meld, becoming even tastier. However, it will soften considerably.

    Sauce: The creamy cilantro-lime sauce will keep in an airtight container in the refrigerator for up to 5 days. Give it a good stir before using.

    Assembled Tacos: It’s highly recommended to assemble tacos just before serving to prevent soggy tortillas and preserve the texture of the fish and slaw.

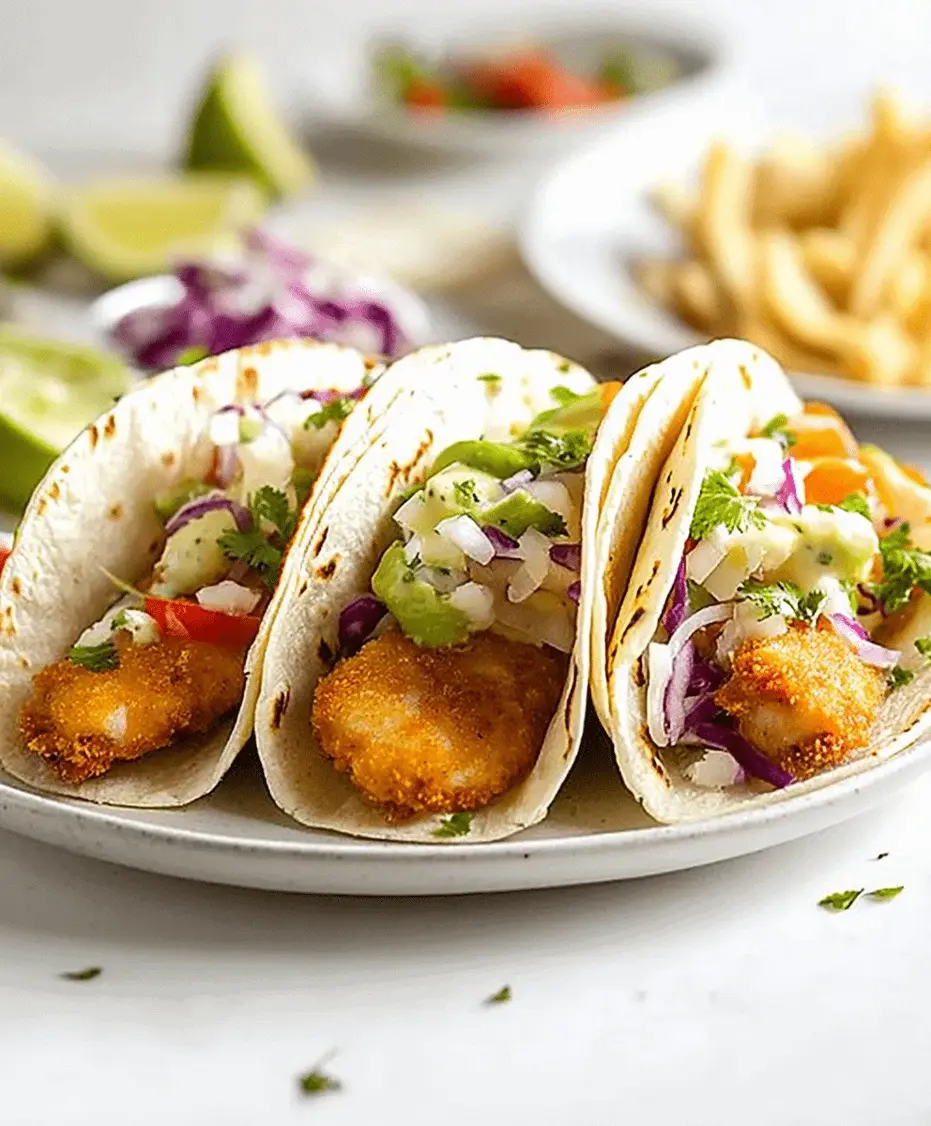
    A colorful spread of freshly made Baja Fish Tacos with all the fixings.

    Frequently Asked Questions

    ***What kind of fish is best for Baja fish tacos?***

    Firm white fish that is flaky and holds up well to frying is ideal. Popular choices include cod, tilapia, mahi-mahi, and haddock. Avoid delicate fish that might fall apart during cooking.

    ***Can I make the slaw and sauce ahead of time?***

    Yes! The slaw and sauce can and should be made ahead of time. Making them at least 30 minutes in advance allows the flavors to meld beautifully. They can be stored in the refrigerator for up to 3-5 days.

    ***How do I prevent the fish from being greasy?***

    Ensure your oil is at the correct temperature (350°F or 175°C). Avoid overcrowding the pan, as this causes the oil temperature to drop, leading to greasy fish. Draining the fried fish on a wire rack instead of paper towels also helps maintain crispiness and prevents sogginess.

    ***What can I use instead of beer in the batter?***

    Club soda is an excellent non-alcoholic alternative that provides the necessary carbonation for a light and crispy batter. You can also use water, but the texture might be slightly less airy.

    ***How spicy are these tacos?***

    The spice level is adjustable. The batter has optional cayenne pepper, and the slaw can include minced jalapeño. You can control the heat by adding more or less of these ingredients, or by adding your favorite hot sauce when serving.

    Conclusion: Happy Taco Making!

    There you have it – a recipe for Delicious Easy Baja Fish Tacos that brings the vibrant tastes of coastal Mexico right to your table with minimal fuss. These tacos are a beautiful balance of textures and flavors, from the satisfying crunch of the battered fish to the fresh zing of the slaw and the cooling creaminess of the sauce. They’re perfect for weeknight dinners, weekend gatherings, or whenever you’re craving a taste of sunshine. Give this recipe a try and get ready to be hooked by how simple and incredibly delicious homemade fish tacos can be!

    Print
    clock clock iconcutlery cutlery iconflag flag iconfolder folder iconinstagram instagram iconpinterest pinterest iconfacebook facebook iconprint print iconsquares squares iconheart heart iconheart solid heart solid icon

    Delicious Easy Baja Fish Tacos Recipe


    • Author: Chef Emy

    Description

    TheseDelicious Easy Baja Fish Tacosare packed with crispy battered fish, crunchy slaw, and a creamy, zesty sauce—all wrapped in warm tortillas. Perfect for a quick weeknight dinner or weekend gathering, this Baja-style taco recipe blends bold flavors with ease and speed. Great for anyone craving a taste of coastal Mexican cuisine.


    Ingredients

    Scale
    • 1lb white fish fillets (like cod or tilapia)
    • 1 cupall-purpose flour
    • 1 tspbaking powder
    • ½ tspsalt
    • 1 cupbeer (or sparkling water)
    • Oil for frying
    • 8small corn tortillas
    • 2 cupsshredded cabbage
    • ¼ cupchopped cilantro
    • ½ cupsour cream or Greek yogurt
    • 2 tbspmayonnaise
    • 1 tbsplime juice
    • 1 tsphot sauce (optional)
    • Salt and pepper to taste

    Instructions

      Notes

      Use gluten-free flour and corn tortillas for a gluten-free version.
      Substitute Greek yogurt for a healthier sauce alternative.
      Add avocado slices or pickled onions for extra flavor.

      Nutrition

      • Calories: 420
      • Sugar: 3g

      “`

      Pineapple Cucumber Salad Recipe

      “`html

      Pineapple Cucumber Salad Recipe

      Introduction

      Looking for a way to beat the heat and add a burst of vibrant flavor to your meals? Did you know that incorporating refreshing salads can significantly boost your daily intake of essential vitamins and hydration, with studies showing a direct correlation between salad consumption and improved nutrient profiles? Introducing the Pineapple Cucumber Salad – a dish that’s not just incredibly delicious but also a powerhouse of health benefits. This isn’t your average side dish; it’s a tropical escape in a bowl, combining the sweet, juicy burst of ripe pineapple with the crisp, cool crunch of fresh cucumbers. All of this is brought together with a zesty lime dressing that creates a tangy, invigorating flavor explosion. Perfect for sunny picnics, lively BBQs, or simply as a light and healthy accompaniment to any meal, this salad is a winner. It’s delightfully low in calories, generously packed with nutrients, and astonishingly easy to whip up in mere minutes. If you’re on the quest for a quick, clean-eating recipe that delights your taste buds and nourishes your body, you’ve found your match.

      Ingredients

      Crafting this vibrant salad is a breeze, thanks to its simple yet impactful ingredient list. Each component plays a crucial role in creating that perfect balance of sweet, tangy, and crisp. We’ve also included some helpful notes on substitutions to make this recipe your own!

      • 2 cups fresh pineapple, cubed (about 1 cm chunks): Look for a ripe pineapple that yields slightly to gentle pressure and has a sweet aroma. Its bright sweetness forms the tropical heart of the salad.
        • Substitution: Canned pineapple chunks (in juice, not syrup) can be used in a pinch, but fresh offers superior flavor and texture. Drain thoroughly.
      • 1 large cucumber, seeded and diced (about 1 cm chunks): English or Persian cucumbers are ideal as they have thinner skins and fewer seeds, offering a clean, crisp bite.
        • Substitution: Regular garden cucumbers can be used, but be sure to peel them and scoop out the seedy core for the best texture.
      • 1/4 cup red onion, finely chopped: Adds a sharp, pungent bite that beautifully contrasts the sweet pineapple and cool cucumber.
        • Substitution: Green onions or shallots can offer a milder onion flavor if red onion is too strong for your preference. Soak chopped red onion in cold water for 10 minutes to mellow its bite.
      • 1/4 cup fresh cilantro, chopped: Its bright, citrusy notes enhance the freshness and add another layer of complexity.
        • Substitution: Fresh mint or parsley can be used for a different herbaceous twist.
      • For the Dressing:
      • 3 tablespoons fresh lime juice (from about 1-2 limes): The key to the tangy zestiness that ties everything together. Make sure it’s freshly squeezed for the best flavor.
      • 1 tablespoon olive oil (extra virgin recommended): Provides a smooth base for the dressing and helps meld the flavors.
      • 1 teaspoon honey or maple syrup (optional): Adds a touch of sweetness to balance the tartness of the lime.
      • Salt and freshly ground black pepper to taste: Essential for enhancing all the other flavors.

      Timing

      Prep Time:
      15 minutes
      Cook Time:
      0 minutes
      Total Time:
      15 minutes

      Compared to many summer salads that require cooking or extended chilling, this Pineapple Cucumber Salad truly shines in its speed. The average complex salad might take 30-45 minutes from prep to serving, often including cooking pasta or grains. Our recipe, however, is ready in a mere 15 minutes, making it an excellent choice for a quick lunch, light dinner, or an spontaneous side dish. This efficiency is a game-changer for busy weeknights or when you need to whip up something refreshing in a flash.

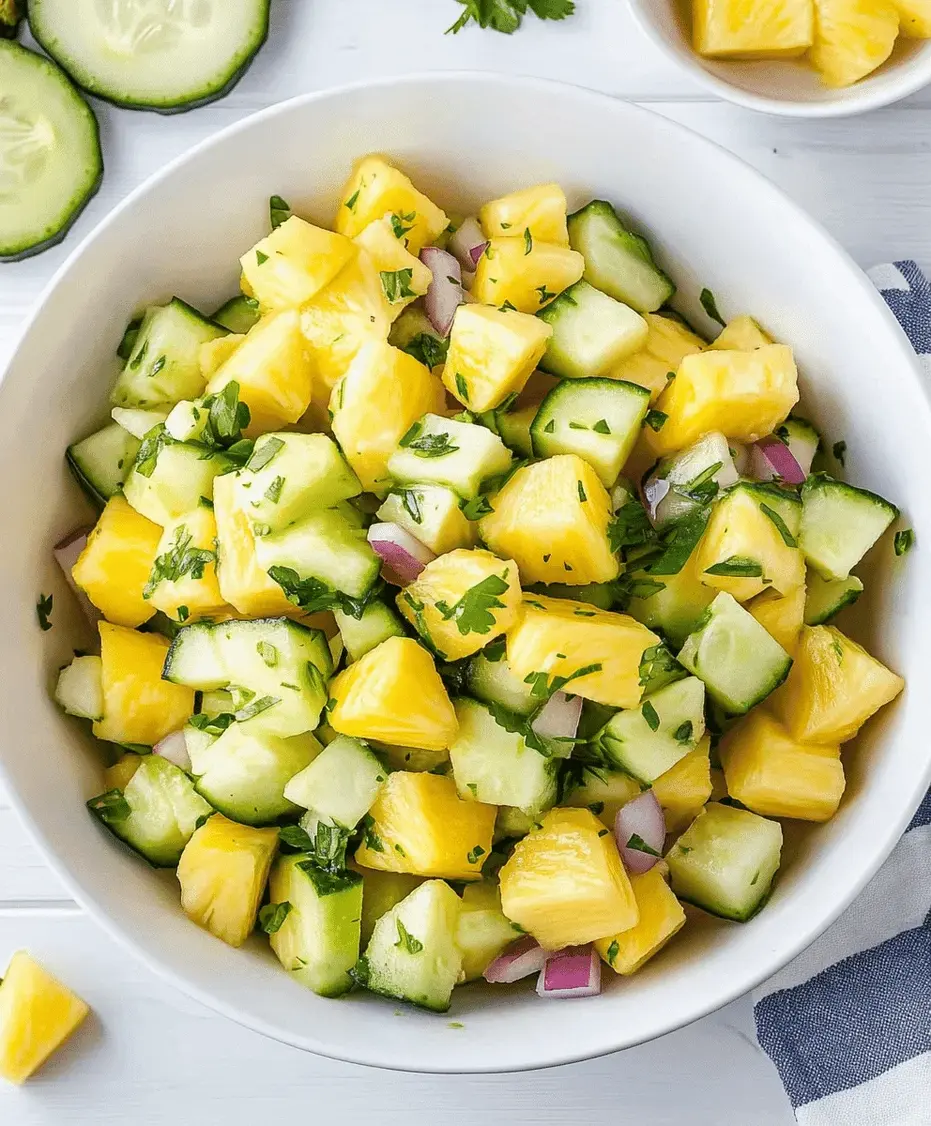
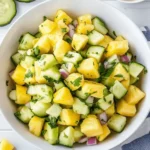
      A colorful Pineapple Cucumber Salad in a serving bowl, garnished with cilantro.

      Step-by-Step Instructions

      Step 1: Prep the Fruit

      Begin by preparing your pineapple. If using a whole fresh pineapple, carefully cut off the top and bottom, then stand it upright. Slice away the tough outer skin, following the curve of the fruit. Remove any remaining “eyes.” Cut the pineapple into quarters, remove the tough core from each quarter, and then dice the flesh into bite-sized chunks, aiming for pieces around 1 cm (or about half an inch).

      Step 2: Chop the Vegetables

      Next, prepare your cucumber. Wash it thoroughly. For best results with English or Persian cucumbers, you can leave the skin on. If using a standard garden cucumber, you might prefer to peel it first. Slice the cucumber in half lengthwise and use a spoon to gently scoop out the seedy core. Dice the cucumber flesh into pieces similar in size to your pineapple chunks. Finely chop your red onion – the smaller the dice, the better it will distribute its flavor without overpowering the salad. Lastly, finely chop the fresh cilantro.

      Step 3: Make the Dressing

      In a small bowl or a jar with a lid, whisk together the fresh lime juice and olive oil until they are well combined. If you prefer a slightly sweeter dressing, stir in the honey or maple syrup. Season generously with salt and freshly ground black pepper. Taste and adjust the seasoning as needed – you want a bright, tangy flavor that complements the fruits and vegetables.

      Step 4: Combine and Chill

      In a medium-sized mixing bowl, gently combine the prepared pineapple chunks, diced cucumber, finely chopped red onion, and chopped cilantro. Pour the prepared dressing over the salad. Toss everything together gently until all the ingredients are evenly coated with the dressing. For the best flavor, cover the bowl and refrigerate the salad for at least 15-30 minutes. This chilling time allows the flavors to meld together, creating a more cohesive and refreshing taste. Serve chilled.

      Nutritional Information

      This Pineapple Cucumber Salad is a light and healthy option. While exact nutritional values can vary based on ingredient size and specific brands used, a typical serving (approximately 1.5 cups) offers the following approximate breakdown:

      • Calories: 100-150 kcal
      • Carbohydrates: 20-30g (primarily from fruit sugars)
      • Fiber: 2-4g
      • Protein: 1-2g
      • Fat: 3-5g (mostly from olive oil)
      • Vitamins & Minerals: Excellent source of Vitamin C (from pineapple and lime), good source of potassium (from cucumber) and antioxidants.

      Healthier Alternatives

      Looking to boost the health factor even further or tailor it to specific dietary needs? Here are some simple swaps that maintain flavor while enhancing nutritional benefits:

      • For a lighter dressing: Reduce or omit the olive oil and increase the lime juice. You can also add a splash of water to thin it out.
      • For added protein and fiber: Toss in some cooked quinoa, black beans, or chickpeas. This transforms the salad into a more substantial meal.
      • For a spicy kick: Add a finely minced jalapeño or a pinch of red pepper flakes to the dressing.
      • For a creamier texture without added fat: Blend a small amount of avocado into the lime dressing.
      • Sweetener-free option: Omit the honey or maple syrup entirely if you prefer a purely savory and tart profile. The pineapple’s natural sweetness should be sufficient for many palates.

      Serving Suggestions

      This versatile salad is a fantastic accompaniment to a wide range of dishes. Here are some ideas:

      • BBQ Favorite: Serve alongside grilled chicken, fish, or burgers for a refreshing contrast to smoky flavors.
      • Picnic Perfect: It’s a delightful addition to any picnic spread, holding up well in a cooler.
      • Healthy Lunch: Enjoy it as a light, refreshing lunch on its own, especially when the weather is warm.
      • Side Dish Staple: Pairs wonderfully with tacos, enchiladas, or any Mexican-inspired cuisine.
      • Fruity Addition: Consider adding diced bell peppers (red or yellow for color) or even some berries like blueberries for an extra pop of flavor and antioxidants.

      Common Mistakes to Avoid

      While this salad is forgiving, a few common pitfalls can detract from its perfection:

      • Over-mixing: Be gentle when tossing the salad; vigorous mixing can bruise the ingredients and make the pineapple mushy.
      • Using unripe pineapple: It can be hard and tart, significantly impacting the salad’s sweetness and texture.
      • Not seeding the cucumber: Large seeds can add an unpleasant watery texture.
      • Dressing too early for storage: If you plan to store leftovers, it’s best to dress the salad just before serving to prevent the ingredients from becoming soggy.

      Storing Tips

      To keep your Pineapple Cucumber Salad fresh and delicious:

      • Best served fresh: This salad is at its peak when consumed within a few hours of preparation.
      • Refrigerate promptly: Store any leftovers in an airtight container in the refrigerator.
      • Duration: It will typically keep well for 1-2 days, though the cucumber might soften slightly over time.
      • Dressing separately for longer storage: If you know you’ll have leftovers, consider storing the salad ingredients and the dressing separately and combining them just before serving.
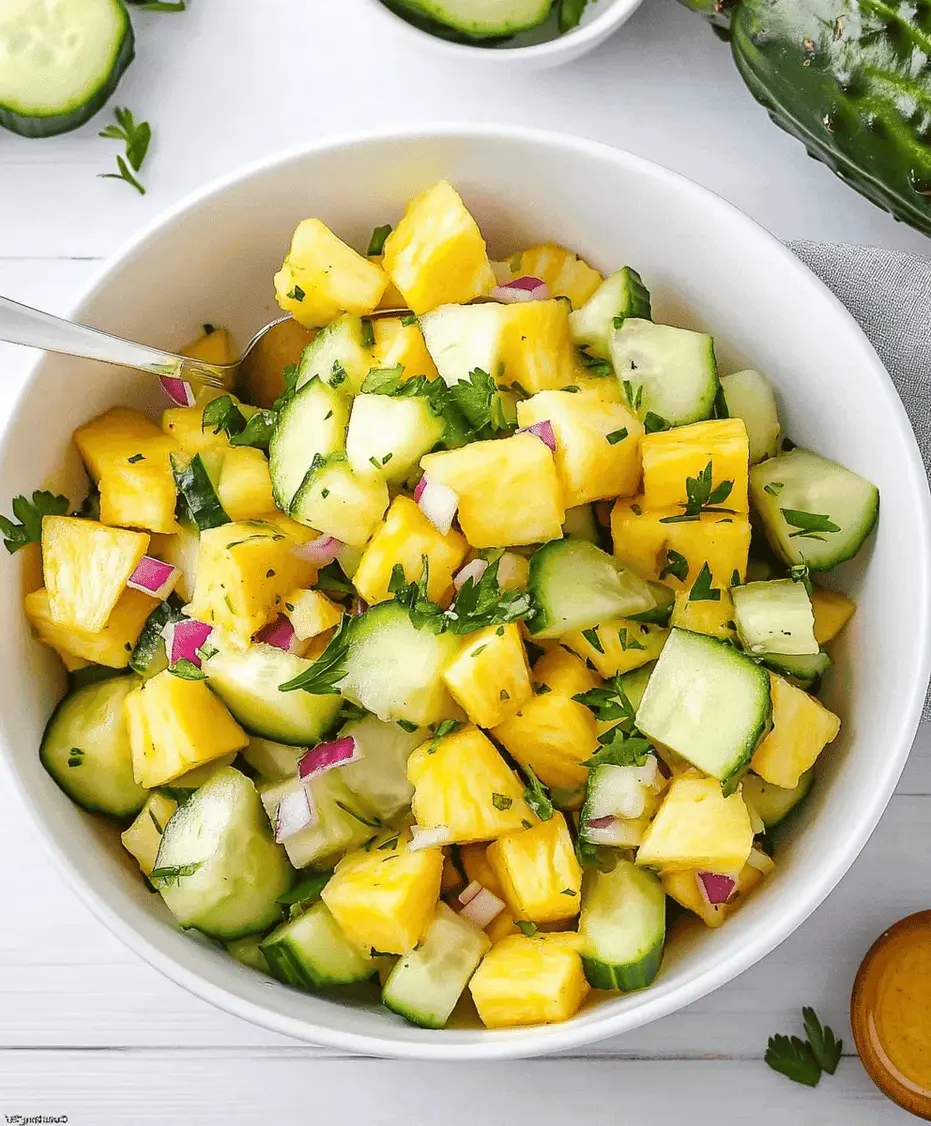
      Close-up of Pineapple Cucumber Salad ingredients being prepped, showing chopped pineapple, cucumber, and red onion.

      Conclusion

      The Pineapple Cucumber Salad is more than just a recipe; it’s a celebration of fresh, vibrant flavors and effortless healthy eating. Its tropical sweetness, combined with the refreshing crunch of cucumber and a zesty lime dressing, makes it an irresistible dish for any occasion. Whether you’re looking for a quick side to liven up your BBQ or a light, nutritious meal, this salad delivers every time. Its simplicity belies its incredible taste and health-boosting properties. Don’t wait – gather your ingredients and whip up this delightful salad today. Your taste buds (and your body) will thank you!

      Frequently Asked Questions

      ***Is it okay to use canned pineapple?***

      Yes, you can use canned pineapple chunks. However, make sure to drain them very well to avoid excess syrup, which can make the salad too sweet and watery. Fresh pineapple is always recommended for the best flavor and texture.

      ***Can I make this salad ahead of time?***

      This salad is best enjoyed fresh. While you can chop the ingredients ahead of time, it’s ideal to combine and dress them closer to serving. If storing leftovers, keep the dressing separate if possible to maintain crispness.

      ***What other herbs can I use besides cilantro?***

      Fresh mint or parsley are excellent substitutes for cilantro. Mint offers a cooling, refreshing contrast, while parsley provides a milder, peppery note.

      ***How can I make this salad more filling?***

      To make the salad more substantial, consider adding cooked quinoa, chickpeas, black beans, grilled chicken, or even some avocado.

      ***My lime juice is very tart. How can I balance it?***

      You can balance the tartness by adding a touch more sweetener (honey or maple syrup) or a tiny pinch of salt. A squeeze of orange juice can also add a hint of sweetness without being overpowering.

      Print

      clock clock iconcutlery cutlery iconflag flag iconfolder folder iconinstagram instagram iconpinterest pinterest iconfacebook facebook iconprint print iconsquares squares iconheart heart iconheart solid heart solid icon

      Pineapple Cucumber Salad Recipe


      • Author: Chef Emy

      Description

      This Pineapple Cucumber Salad is a vibrant, refreshing dish that combines juicy pineapple, crisp cucumbers, and zesty lime for a tropical, tangy flavor explosion. Perfect for picnics, BBQs, or as a healthy side dish, it’s low in calories, packed with nutrients, and easy to whip up in just minutes. Featuring fresh ingredients and a light dressing, this salad is ideal for those seeking a quick, clean-eating recipe.


      Ingredients

      Scale
      • 2 cupsfresh pineapple, diced
      • 1large cucumber, thinly sliced or diced
      • ¼red onion, thinly sliced (optional)
      • ¼ cupfresh cilantro, chopped
      • Juice of1lime
      • Salt and pepper to taste
      • Optional: 1 teaspoon chili flakes or chopped jalapeño for heat

      Instructions

        Notes

        You can substitute mint for cilantro for a different herbal flavor.
        Add avocado for a creamy texture.
        Best served fresh but can be stored in the fridge for up to 24 hours.

        Nutrition

        • Calories: 75
        • Sugar: 9g

        “`

        Creamy Cucumber Salad Recipe

        “`html

        Creamy Cucumber Salad Recipe

        Beat the Summer Heat with the Ultimate Creamy Cucumber Salad!

        Are you searching for that perfect side dish to cool you down on a sweltering summer day? Did you know that cucumber salads have been a popular choice for centuries due to their refreshing properties and versatility? This creamy cucumber salad recipe is your answer! It’s a stellar choice for BBQs, picnics, or even a quick weeknight dinner when you want something light yet satisfying. Packed with crisp cucumbers, aromatic fresh dill, and a luscious, tangy sour cream dressing, this classic comfort dish is the ideal companion to grilled meats, hearty mains, or as a standalone light meal. Prepare to impress your taste buds and your guests with this no-fuss, low-carb delight that comes together in a mere 10 minutes. Let’s dive into creating this refreshing masterpiece!

        Ingredients for Your Creamy Cucumber Salad

        The beauty of this creamy cucumber salad lies in its simplicity and the vibrant flavors of its fresh ingredients. Gather these for a salad that screams summer!

        • 2 large cucumbers: Choose firm, crisp cucumbers, preferably English or Persian varieties for fewer seeds and a delicate skin. Their cool, watery crunch is the foundation of this salad.
        • 1/4 cup sour cream: The creamy base of our dressing. It brings a lovely tang and richness. For a lighter version, Greek yogurt works wonderfully.
        • 2 tablespoons mayonnaise: Adds another layer of creaminess and a subtle richness. Feel free to adjust this ratio with the sour cream to your preference.
        • 1 tablespoon fresh dill, chopped: This herb is the quintessential partner for cucumbers. Its delicate, anise-like flavor is indispensable. If fresh isn’t available, 1 teaspoon of dried dill can be substituted, though the fresh aroma is unmatched.
        • 1 teaspoon fresh lemon juice: A touch of acidity to brighten all the flavors and cut through the richness of the dressing.
        • 1/2 teaspoon granulated sugar (optional): Balances the tanginess. A small pinch can elevate the overall taste.
        • Salt and freshly ground black pepper to taste: Essential for seasoning and enhancing every ingredient.
        • 1/4 cup red onion, thinly sliced (optional): Adds a zesty, sharp bite and a beautiful pop of color. Soak in cold water for 10 minutes to mellow its intensity if desired.

        Timing and Prep

        Prep time: 10 minutes
        Cook time: 0 minutes
        Total time: 10 minutes
        Yields: 4 servings

        This recipe is incredibly fast! Compared to many summer salads that might involve roasting or extensive chopping, this creamy cucumber salad is ready in just 10 minutes. The minimal prep time makes it a lifesaver on busy days or when you need a last-minute side dish. No cooking is required, meaning no extra heat in your kitchen!

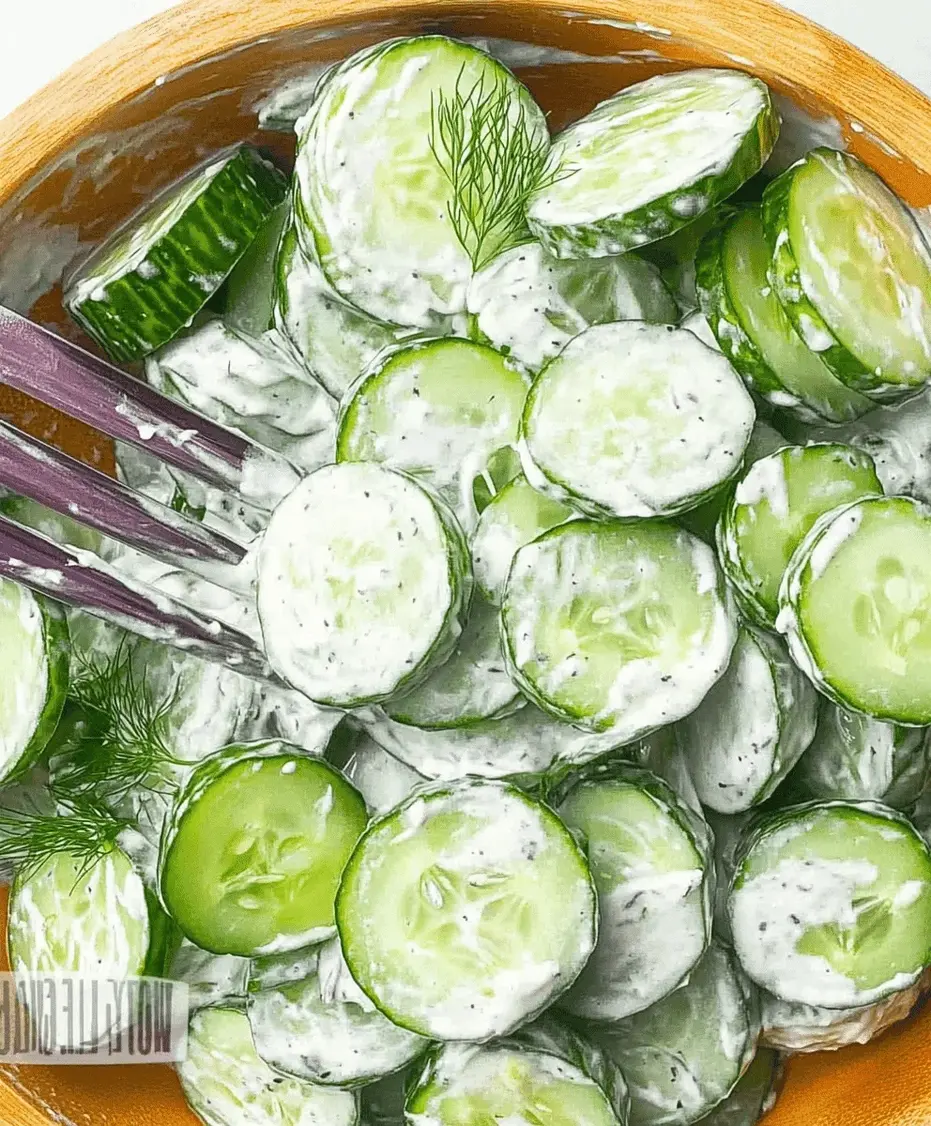
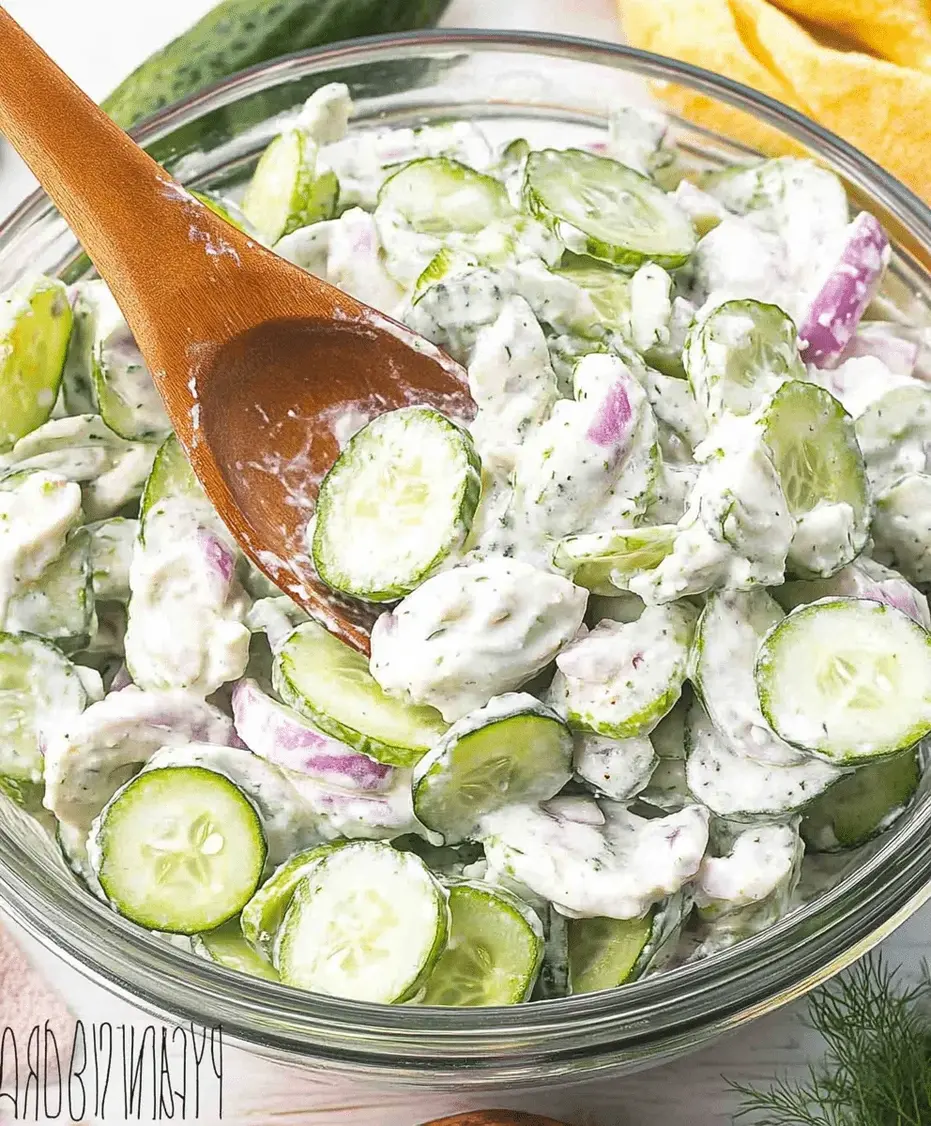
        Creamy cucumber salad in a bowl with dill and a spoon.

        Step-by-Step Instructions

        Step 1: Prep the Cucumbers

        Begin by thoroughly washing your cucumbers. You can peel them if you prefer, but leaving the skin on adds a lovely green hue and extra nutrients. Slice the cucumbers thinly. A mandoline slicer is perfect for achieving uniform thickness, but a sharp knife works just as well. Aim for slices about 1/8 inch thick. If your cucumbers have large seeds, you might want to scoop them out before slicing. Place the sliced cucumbers in a colander set over a bowl. Sprinkle them lightly with salt and let them sit for about 10-15 minutes. This step is crucial as it draws out excess moisture, preventing a watery salad and ensuring the cucumbers retain a pleasant crispness.

        Step 2: Make the Dressing

        While the cucumbers are draining, prepare your luscious dressing. In a medium bowl, whisk together the sour cream, mayonnaise, chopped fresh dill, and fresh lemon juice. Add the optional sugar if you like a hint of sweetness to balance the tang. Season generously with salt and freshly ground black pepper to your taste. Mix until smooth and well combined. Taste and adjust seasonings as needed – you might want a little more lemon juice for brightness or more salt to bring out the flavors.

        Step 3: Combine and Chill

        Once the cucumbers have finished draining, gently press them with a paper towel to remove any remaining surface moisture. Discard the accumulated liquid. Add the prepared cucumbers to the bowl with the dressing. If you’re using red onion, add it now. Gently toss everything together until the cucumber slices are evenly coated with the creamy dressing. For the best flavor and texture, cover the bowl and refrigerate for at least 15-30 minutes. This allows the flavors to meld beautifully and ensures the salad is refreshingly cold.

        Nutritional Information

        This creamy cucumber salad is a delight for both the palate and your health goals. While exact values can vary based on ingredient brands and portion sizes, here’s a general overview per serving (assuming 4 servings):

        • Calories: Approximately 150-180 kcal
        • Fat: 12-15g (mostly from sour cream and mayonnaise)
        • Carbohydrates: 5-7g
        • Protein: 2-3g
        • Fiber: 1-2g

        It’s low in carbohydrates, making it a great option for those following ketogenic or low-carb diets. The cucumbers themselves are virtually fat-free and rich in water and electrolytes.

        Healthier Alternatives and Flavor-Preserving Swaps

        Want to make this salad even lighter without sacrificing taste? Here are some fantastic swaps:

        • Greek Yogurt for Sour Cream/Mayonnaise: Substitute half or all of the sour cream and mayonnaise with plain Greek yogurt. It significantly cuts down on fat and calories while maintaining a rich, tangy profile. The protein boost is a bonus!
        • Reduced-Fat Dairy: If you prefer to stick with sour cream and mayo, opt for their light or reduced-fat versions.
        • Avocado Creaminess: For a dairy-free and heart-healthy option, blend half an avocado with a tablespoon of lemon juice and a pinch of garlic powder. Use this as a creamy binder instead of dairy.
        • Vinegar for Lemon Juice: White wine vinegar or apple cider vinegar can be used if lemon juice isn’t available, offering a slightly different but still delicious tang.
        • Herbs Galore: Don’t be afraid to add other fresh herbs like chives, parsley, or even a hint of mint for a unique twist.

        Serving Suggestions

        This creamy cucumber salad is incredibly versatile. It’s the perfect cool and refreshing side dish for:

        • Grilled Meats: Pairs beautifully with hamburgers, hot dogs, steaks, chicken, and ribs.
        • Picnic Fare: A staple for any picnic basket, alongside fried chicken, potato salad, and sandwiches.
        • Fish Dishes: Complements lighter fare like grilled salmon or pan-seared cod.
        • Vegetarian Mains: Delicious with veggie burgers, stuffed peppers, or quiches.
        • As a Light Lunch: Enjoy a larger portion on its own for a cool, low-carb meal.

        Common Mistakes to Avoid

        To ensure your creamy cucumber salad is always a hit:

        • Skipping the Salting Step: Forgetting to salt and drain the cucumbers can lead to a soggy, watery salad.
        • Using Old or Mealy Cucumbers: Always choose firm, fresh cucumbers for the best crisp texture.
        • Over-Mixing: Gentle tossing is key to avoid bruising the delicate cucumber slices.
        • Not Chilling Enough: Letting the salad chill allows the flavors to meld and the salad to become truly refreshing.
        • Using Dried Dill Incorrectly: If using dried dill, remember that it’s more potent than fresh. Use about 1/3 of the amount and be cautious not to overpower the salad.

        Storing Tips

        This salad is best enjoyed fresh, but leftovers can be stored in an airtight container in the refrigerator for 1-2 days. Be aware that the cucumbers will soften over time due to the dressing. For optimal freshness, you can store the dressing and drained cucumbers separately and combine them just before serving. If the salad becomes a bit watery upon reheating, gently drain off any excess liquid before serving.

        Close-up of creamy cucumber salad ingredients, showing sliced cucumbers and fresh dill.

        Frequently Asked Questions

        ***Can I make this salad ahead of time?***

        Yes, you can make it a few hours ahead, but it’s best to combine the dressing and cucumbers about 30 minutes to 2 hours before serving. The chilling time allows flavors to meld. If making further in advance, consider keeping the dressing and cucumbers separate and mixing just before serving to maintain optimal crispness.

        ***What kind of cucumbers are best?***

        English or Persian cucumbers are ideal because they have fewer seeds and thinner skins, requiring minimal or no peeling. They also tend to be less watery.

        ***Can I make this dairy-free?***

        Absolutely! Use a dairy-free yogurt (like coconut or almond-based) and a vegan mayonnaise. You can also experiment with a creamy dressing made from blended avocado for a rich, dairy-free alternative.

        ***Why is my cucumber salad watery?***

        This is usually because the cucumbers weren’t properly salted and drained beforehand. Salting draws out excess moisture, preventing a watery salad. Also, avoid over-mixing, which can break down the cucumber structure.

        ***Can I add other vegetables?***

        Certainly! Thinly sliced radishes for a peppery crunch, finely diced bell peppers for color and sweetness, or even some sweet corn kernels can be delicious additions.

        Print
        clock clock iconcutlery cutlery iconflag flag iconfolder folder iconinstagram instagram iconpinterest pinterest iconfacebook facebook iconprint print iconsquares squares iconheart heart iconheart solid heart solid icon

        Creamy Cucumber Salad Recipe


        • Author: Chef Emy

        Description

        This creamy cucumber salad recipe is a refreshing and easy summer side dish, made with crisp cucumbers, fresh dill, and a tangy sour cream dressing. Ideal for BBQs, picnics, or quick family dinners, it’s a classic comfort dish that complements grilled meats and hearty mains. Make this light, low-carb salad in just 10 minutes!


        Ingredients

        Scale
        • 2large cucumbers, thinly sliced
        • ½small red onion, thinly sliced
        • 1 cupsour cream
        • 2 tablespoonsfresh dill, chopped (or1 tablespoondried dill)
        • 1 tablespoonwhite vinegar or lemon juice
        • 1 teaspoonsugar
        • Salt and pepper, to taste

        Instructions

          Notes

          For a lighter version, replace sour cream with Greek yogurt.
          Use a mandoline for even, thin cucumber slices.
          Salting cucumbers beforehand helps reduce excess moisture.

          Nutrition

          • Calories: 110
          • Sugar: 3g

          “`

          Creamy Caprese Pasta Salad Recipe

          “`html

          Creamy Caprese Pasta Salad Recipe

          Summer’s Favorite Side Dish: Craving a Refreshing Pasta Salad?

          Are you looking for a dish that screams summer, bursting with vibrant flavors and refreshing textures, yet is incredibly easy to make? If you’ve ever stumbled upon a potluck or BBQ and thought, “What’s the perfect cool, satisfying side dish that everyone will love?”, then this Creamy Caprese Pasta Salad is your answer. This isn’t just any pasta salad; it’s a symphony of classic Italian flavors – juicy cherry tomatoes that pop with sweetness, creamy mozzarella balls that melt in your mouth, and fragrant fresh basil that awakens your senses. All of this is lovingly tossed in a rich, tangy dressing that perfectly complements every ingredient. It’s a weeknight lifesaver and a party showstopper, making it the ultimate summer side dish that comes together in a mere 30 minutes, using simple pantry staples. Get ready to elevate your simple pasta dish to a gourmet experience!

          Ingredients List: A Symphony of Freshness

          The beauty of this Creamy Caprese Pasta Salad lies in its simplicity and the quality of its fresh ingredients. Each component plays a crucial role in creating that beloved Caprese flavor profile. We’ve also included some wonderful substitution ideas to make this recipe work for you, no matter what you have on hand.

          • 8 ounces pasta: We love using farfalle (bow-tie pasta) or rotini because their shape holds onto the dressing beautifully. Any short pasta like penne or fusilli will also work wonderfully. For a gluten-free option, cook your favorite gluten-free pasta according to package directions.
            Sensory Note: Al dente pasta provides a delightful chewiness that contrasts with the softer ingredients.
          • 1 pint cherry tomatoes: Halved, these sweet bursts of flavor are essential. Look for ripe, vibrant red tomatoes for the best taste. Grape tomatoes work as a good substitute.
            Sensory Note: Juicy and slightly sweet, they add moisture and bright acidity.
          • 8 ounces fresh mozzarella balls (bocconcini or ciliegine): These small, pearl-like mozzarella balls are incredibly creamy and mild. If you can’t find them, you can cube a larger ball of fresh mozzarella. Make sure to drain them well.
            Sensory Note: Creamy, delicate, and slightly elastic, they add a luxurious texture.
          • 1/2 cup fresh basil leaves: Roughly chopped or torn, this is non-negotiable for that authentic Caprese aroma and flavor. If fresh basil is out of season, a smaller amount of dried basil can be used in a pinch, but the fresh is far superior.
            Sensory Note: Aromatic, peppery, and slightly sweet, it provides a fresh, herbaceous lift.
          • For the Creamy Balsamic Dressing:
            • 1/4 cup extra virgin olive oil: Good quality olive oil makes a difference in flavor.
              Sensory Note: Fruity, slightly peppery undertones that form the base of the dressing.
            • 3 tablespoons balsamic vinegar: A good quality balsamic vinegar will offer a rich, complex sweetness.
              Sensory Note: Tangy, slightly sweet, with notes of caramel and fruit.
            • 1 tablespoon mayonnaise (or Greek yogurt for a lighter option): This is the secret to creaminess!
              Sensory Note: Adds a smooth, rich texture and emulsifies the dressing beautifully.
            • 1 clove garlic, minced: For a pungent, savory kick.
              Sensory Note: Sharp, aromatic, and savory.
            • 1/2 teaspoon salt, or to taste: Enhances all the flavors.
              Sensory Note: Balances sweetness and acidity.
            • 1/4 teaspoon black pepper, or to taste:Adds a subtle warmth and spice.
              Sensory Note: Pungent and slightly spicy.

          Timing is Everything: Speedy Summer Success

          One of the best things about this Creamy Caprese Pasta Salad is how quickly it comes together. In just 30 minutes total, you can have a stunning and delicious dish ready to serve. This is significantly faster than many other pasta salads, which often require longer chilling times or more complex preparations.

          Prep Time: 15 Minutes
          Cook Time: 15 Minutes
          Total Time: 30 Minutes

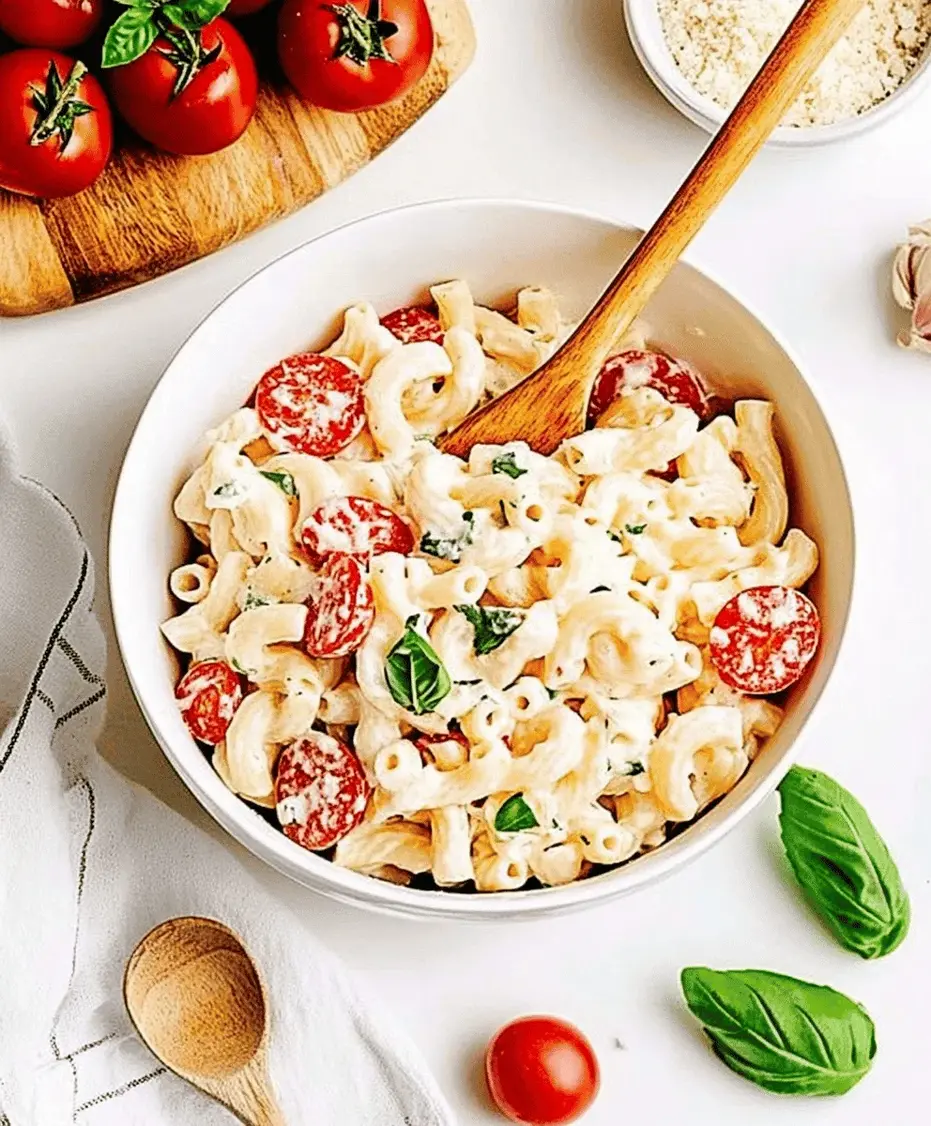
          Creamy Caprese Pasta Salad with cherry tomatoes and mozzarella

          Step-by-Step Instructions: From Pantry to Plate

          Follow these simple steps to create your delicious Creamy Caprese Pasta Salad:

          Cook the Pasta

          First things first, let’s get that pasta cooked. Bring a large pot of salted water to a rolling boil. Add your chosen pasta and cook according to the package directions until it’s perfectly al dente – that means it should still have a slight bite to it. Overcooked pasta can get mushy in a salad, so keep a close eye on it and give it a taste test a minute or two before the package suggests. Once it’s ready, drain the pasta thoroughly and rinse it with cold water. Rinsing stops the cooking process and prevents the pasta from clumping together, which is key for a good pasta salad.

          Prepare the Veggies and Cheese

          While the pasta is cooking, or as it’s draining, it’s time to prep your fresh ingredients. Take those beautiful cherry tomatoes and give them a good wash. Then, pat them dry and slice them in half. If you’re using larger grape tomatoes, you might want to quarter them. Next, grab your fresh mozzarella balls. If they are packed in liquid, drain them very well. If you’ve opted for a larger ball of mozzarella, drain it, pat it dry, and then dice it into bite-sized cubes. Finally, take your fresh basil leaves. Give them a gentle rinse and pat them dry. You can either stack the leaves and thinly slice them into a chiffonade or simply rough chop them. The goal is to release their wonderful aroma!

          Make the Dressing

          Now for the magic that ties it all together: the creamy balsamic dressing. In a small bowl or a jar with a tight-fitting lid, combine the extra virgin olive oil, balsamic vinegar, mayonnaise (or Greek yogurt), minced garlic, salt, and pepper. If you’re using a bowl, whisk everything together vigorously until the dressing is well emulsified and looks creamy. If you’re using a jar, simply screw on the lid tightly and shake it until everything is thoroughly combined. Taste the dressing and adjust the seasonings if needed. You might want a little more salt, pepper, or even a splash more vinegar for tanginess.

          Combine Everything

          In a large mixing bowl, add your cooled, drained pasta, the halved cherry tomatoes, and the well-drained mozzarella balls. Pour the creamy balsamic dressing over the ingredients. Gently toss everything together using large spoons or tongs, ensuring that every piece of pasta, every tomato, and every mozzarella ball is coated in the delicious dressing. Add the chopped fresh basil and toss a few more times to distribute it evenly throughout the salad. Be gentle to avoid mushing the tomatoes or mozzarella.

          Chill and Serve

          For the best flavor, it’s recommended to let the pasta salad chill for at least 15-30 minutes before serving. This allows the flavors to meld together beautifully. You can serve it directly from the refrigerator. If you’re making it ahead of time for a party, you can prepare it a few hours in advance. Just before serving, give it a quick stir, and if it seems a little dry, you can always add another drizzle of olive oil or a tiny splash of balsamic vinegar.

          Nutritional Information: A Guilt-Free Indulgence

          While this pasta salad is a treat, understanding its nutritional value can help you enjoy it even more. The figures below are approximate and can vary based on the specific ingredients and portion sizes used.

          • Calories: Approximately 350-450 per serving (depending on pasta type, oil, and mayonnaise used).
          • Protein: Good source from pasta and mozzarella.
          • Healthy Fats: From extra virgin olive oil and mozzarella.
          • Carbohydrates: Primarily from pasta.
          • Vitamins & Minerals: Rich in Vitamin C from tomatoes, and various nutrients from basil and olive oil.

          Note: These are estimates. For precise nutritional information, it’s recommended to use a recipe calculator with your specific ingredients.

          Healthier Alternatives: Lighten Up Without Sacrificing Flavor

          Looking to make this already delightful salad even lighter? You can easily swap out a few ingredients without compromising on that delicious Caprese taste:

          • For the creamy dressing: Substitute Greek yogurt (plain, non-fat or low-fat) for the mayonnaise. This significantly cuts down on fat and calories while still providing creaminess and a pleasant tang. You can also use silken tofu blended with a little lemon juice and olive oil for a vegan or dairy-free creamy base.
          • Pasta: Opt for whole wheat pasta for added fiber, or use legume-based pastas (like chickpea or lentil pasta) which offer more protein and fiber. Zucchini noodles (zoodles) can be used for a very low-carb, vegetable-heavy option, though they will have a different texture and won’t absorb the dressing quite the same way.
          • Cheese: While fresh mozzarella is classic, you could reduce the amount slightly or use a part-skim fresh mozzarella if available. For a dairy-free option, use small balls of marinated tofu or cubes of firm tofu tossed with nutritional yeast and herbs.
          • Add-ins: Boost nutrients and flavor with added vegetables like cucumber, bell peppers, or a handful of spinach.

          Serving Suggestions: Beyond the Side Dish

          This Creamy Caprese Pasta Salad is incredibly versatile:

          • Classic Side: It’s the perfect accompaniment to grilled chicken, fish, or steaks at any summer BBQ.
          • Potluck Perfection: Its refreshing taste and portability make it a guaranteed hit at any potluck or picnic.
          • Light Lunch: Enjoy a generous portion on its own for a satisfying and light lunch. Add a protein like grilled chicken or shrimp to make it a full meal.
          • Appetizer: Serve smaller portions in individual cups or bowls as a delightful appetizer.
          • With Bread: Delicious served alongside crusty bread for soaking up any extra dressing.

          Common Mistakes to Avoid

          To ensure your pasta salad is perfect every time, steer clear of these common pitfalls:

          • Overcooking the Pasta: This is the number one culprit for a mushy pasta salad. Ensure your pasta is al dente.
          • Not Draining Ingredients Well: Excess water from the pasta, mozzarella, or tomatoes will dilute your dressing and make the salad watery.
          • Adding Basil Too Early: Fresh basil can wilt and turn brown if mixed too far in advance and agitated. Add it just before serving for the freshest look and flavor.
          • Under-Seasoning: Pasta salads need to be well-seasoned, not just in the dressing but potentially a pinch of salt on the tomatoes or mozzarella too, to truly make the flavors pop.
          • Using Dry, Rubbery Mozzarella: Always opt for fresh mozzarella (especially bocconcini or ciliegine) for that signature creamy texture.

          Storing Tips: Keep it Fresh and Delicious

          This salad is best enjoyed fresh, but leftovers can be stored effectively:

          • Refrigeration: Store any leftover pasta salad in an airtight container in the refrigerator. It will keep well for 2-3 days.
          • Texture Changes: Keep in mind that the pasta may absorb more dressing and become softer over time. The tomatoes might also get a bit softer.
          • Reviving: If the salad seems a little dry after refrigeration, you can revive it with a small drizzle of olive oil and a splash of balsamic vinegar or lemon juice before serving. Stir gently.
          • Basil: For the best results, add fresh basil just before serving, whether it’s the first time or when reviving leftovers.
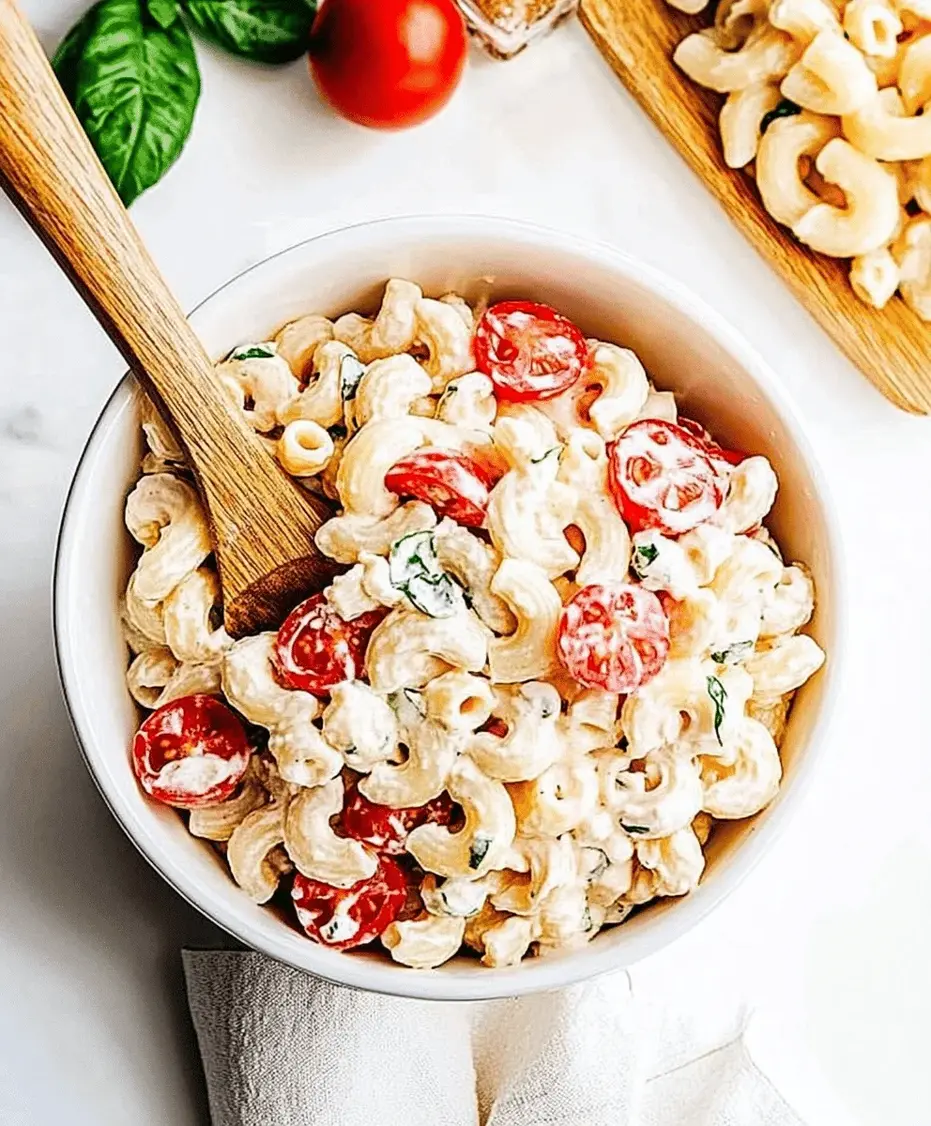
          Close-up of Creamy Caprese Pasta Salad ingredients

          Your New Go-To Summer Salad!

          There you have it – a Creamy Caprese Pasta Salad that’s bursting with fresh, vibrant flavors, incredibly easy to make, and ready in just 30 minutes. It’s the perfect blend of creamy, tangy, and fresh, making it an absolute winner for any occasion. Whether you’re hosting a backyard BBQ, heading to a potluck, or just looking for a quick and satisfying lunch, this pasta salad is sure to impress. Give it a try and let this simple yet spectacular dish become your new summer favorite!

          Frequently Asked Questions

          Will this pasta salad keep well at a party?

          Yes, it’s great for parties! Just keep it chilled until ready to serve. Avoid leaving it out at room temperature for extended periods to maintain freshness and food safety.

          Can I make this salad ahead of time?

          You can prepare this salad a few hours in advance. For best results regarding the basil’s freshness, consider adding it just before serving.

          What kind of pasta is best?

          Short pasta shapes like farfalle, rotini, penne, or fusilli are ideal as they hold the dressing well. Avoid long pasta like spaghetti.

          Can I add other vegetables?

          Absolutely! Diced red onion, cucumber, bell peppers, or even some grilled zucchini would be delicious additions.

          How do I make it more flavorful?

          Ensure all your ingredients are fresh. Seasoning is key – taste and adjust the dressing. A pinch of red pepper flakes can add a touch of heat if desired.

          Print
          clock clock iconcutlery cutlery iconflag flag iconfolder folder iconinstagram instagram iconpinterest pinterest iconfacebook facebook iconprint print iconsquares squares iconheart heart iconheart solid heart solid icon

          Creamy Caprese Pasta Salad Recipe


          • Author: Chef Emy

          Description

          ThisCreamy Caprese Pasta Saladis the ultimate summer side dish, combining juicy cherry tomatoes, creamy mozzarella balls, and fresh basil tossed in a rich, tangy dressing. Perfect for BBQs, potlucks, or a light lunch, this Italian-inspired pasta salad brings bold flavor with every bite. Made with pantry staples and ready in just 30 minutes!


          Ingredients

          Scale
          • 12 ozpasta (rotini or bowtie)
          • 1 cupcherry tomatoes, halved
          • 1 cupfresh mozzarella balls (bocconcini), halved
          • cupfresh basil, chopped
          • ½ cupmayonnaise
          • 2 tbspbalsamic vinegar
          • 1clove garlic, minced
          • Salt & pepper to taste

          Instructions

            Notes

            Substitute Greek yogurt for mayo for a lighter version.
            Add grilled chicken or salami for a heartier salad.
            Best enjoyed cold or at room temperature.

            Nutrition

            • Calories: 390
            • Sugar: 4g

            “`

            Broccoli And Mushroom Stir Fry Recipe

            “`html

            Broccoli And Mushroom Stir Fry Recipe

            Tired of Bland Weeknight Dinners? Discover the Quickest, Tastiest Broccoli and Mushroom Stir Fry!

            Are you looking for a meal that’s both incredibly delicious and packed with health benefits, yet can be on your table in under 30 minutes? You’re not alone! In today’s fast-paced world, finding dishes that satisfy cravings without sacrificing nutrition or time can feel like a culinary quest. Fortunately, this Broccoli and Mushroom Stir Fry is here to answer your call. Bursting with vibrant colors, satisfying textures, and a savory Asian-inspired sauce that’s completely vegan-friendly, this recipe is designed for busy bees and health enthusiasts alike. Imagine crisp, tender broccoli florets mingling with earthy, succulent mushrooms, all coated in a glossy, umami-rich sauce. It’s the perfect plant-based solution for a quick and wholesome meal, proving that healthy eating can be exciting and effortless. Ready to revolutionize your weeknights with this delightful broccoli stir fry and mushroom stir fry?

            Ingredients to Spark Your Senses

            Gather these fresh components to create your masterpiece. The key to a fantastic stir fry is the quality and freshness of your ingredients.

            • 1 lb Broccoli Florets: Look for bright green, firm florets. The slight bitterness of broccoli is beautifully balanced by the sauce.

              • Substitution: You can use pre-cut broccoli florets if short on time, or swap for broccolini for a slightly more delicate texture.
            • 8 oz Cremini Mushrooms (or Baby Bellas): Select firm, evenly colored mushrooms with a good earthy aroma.

              • Substitution: Shiitake mushrooms will add a deeper, more complex umami flavor. White button mushrooms are also a fine choice. Slice them about 1/4 inch thick for perfect browning.
            • 1 tbsp Sesame Oil: For that authentic nutty aroma crucial to Asian cooking.

              • Substitution: A neutral oil like avocado or grapeseed oil can be used, but add an extra pinch of toasted sesame seeds at the end for flavor.
            • 2 tbsp Soy Sauce (or Tamari for Gluten-Free): The salty, savory backbone of our sauce.

              • Substitution: Coconut aminos offer a slightly sweeter, soy-free alternative.
            • 1 tbsp Rice Vinegar: Adds a gentle tang to cut through richness.

              • Substitution: Apple cider vinegar or a squeeze of lime juice can provide acidity.
            • 1 tsp Maple Syrup (or Agave Nectar): A touch of sweetness to balance the savory and sour notes.

              • Substitution: Brown sugar or honey (if not strictly vegan) works well.
            • 1 clove Garlic, minced: Pungent and aromatic, a stir-fry essential.

              • Substitution: Garlic powder can be used in a pinch, but fresh is always best for that vibrant kick.
            • 1/2 tsp Grated Fresh Ginger: Adds a warming, zesty spice.

              • Substitution: Ginger powder can be used, but use sparingly as it’s more potent.
            • 1 tbsp Cooking Oil (e.g., avocado, grapeseed): For high-heat sautéing.

              • Substitution: Canola or vegetable oil are also suitable.
            • Optional Garnishes: Toasted sesame seeds, sliced green onions, red pepper flakes for a hint of heat.

            Timing and Yield: Speed Meets Satisfaction

            This vegan stir fry is designed for ultimate efficiency. In the time it takes to preheat your oven for most meals, you can have this flavorful dish ready to devour.

            Prep time: 10 minutes
            Cook time: 10 minutes
            Total time: 20 minutes
            Yield: 2-3 servings

            Compared to an average vegetable stir fry recipe which often clocks in around 40-45 minutes total, this 20-minute wonder is a weeknight superstar. The key is having everything prepped before you start cooking – stir-frying is a fast process!

            Broccoli and Mushroom Stir Fry ingredients prepped and ready to cook.

            Step-by-Step Instructions: Your Culinary Journey

            Follow these simple steps for a perfect stir fry every time. Remember, the faster you work, the better the texture of your vegetables!

            Step 1: Prep Your Veggies

            Wash and trim your broccoli into bite-sized florets. If using larger stalks, you can slice them thinly. Wash your mushrooms and slice them about 1/4 inch thick. Mince your garlic and grate your fresh ginger. Have all your ingredients ready to go near your stovetop – this is the most crucial step for a successful stir fry!

            Step 2: Heat the Wok or Pan

            Place a wok or a large, heavy-bottomed skillet over medium-high heat. Let it get nice and hot – a good sear is essential for achieving that characteristic stir-fry texture.

            Step 3: Sauté the Aromatics

            Add 1 tablespoon of your chosen cooking oil to the hot pan. Once shimmering, add the minced garlic and grated ginger. Stir-fry for about 30 seconds until fragrant, being careful not to burn them. This infuses the oil with incredible flavor.

            Step 4: Add the Broccoli

            Add the broccoli florets to the pan. Stir-fry for 2-3 minutes, tossing them frequently. You want them to start turning bright green and slightly tender-crisp. If the pan seems too dry, you can add a tablespoon of water to create steam, which helps cook the broccoli faster.

            Step 5: Add the Mushrooms

            Pour in the 1 tablespoon of sesame oil. Then, add the sliced mushrooms. Continue to stir-fry for another 3-4 minutes, or until the mushrooms have softened and started to brown slightly. They release moisture, which helps steam the broccoli further.

            Step 6: Add the Sauce

            In a small bowl, whisk together the soy sauce (or tamari), rice vinegar, and maple syrup. Pour this sauce mixture into the pan with the vegetables. Stir well to coat everything evenly.

            Step 7: Toss and Serve

            Let the sauce bubble and thicken for about 1-2 minutes, stirring constantly. The vegetables should be perfectly tender-crisp, coated in a glossy sauce. Remove from heat immediately to prevent overcooking.

            Nutritional Information

            This healthy Asian recipe is a powerhouse of nutrients. While exact values can vary based on specific ingredients and portion sizes, a typical serving (per person, assuming 3 servings) contains approximately:

            • Calories: 150-200 kcal
            • Protein: 5-7g
            • Fat: 8-12g (mostly healthy fats from oils)
            • Carbohydrates: 15-20g
            • Fiber: 5-7g

            It’s also rich in Vitamin C, Vitamin K, and various antioxidants thanks to the star ingredients.

            Healthier Alternatives and Flavor Boosts

            Looking to make this even healthier or boost its flavor profile? Here are some smart swaps and additions:

            • Lower Sodium: Use a low-sodium soy sauce or tamari.
            • Add More Veggies: Toss in bell peppers, snap peas, carrots, or baby corn for extra nutrients and color.
            • Spice it Up: Add sliced red chilies or a pinch of red pepper flakes with the garlic and ginger for a kick that can also boost metabolism.
            • Protein Power: For a non-vegan option, you could add pre-cooked chicken, shrimp, or tofu.
            • Thicken the Sauce: For a thicker sauce without extra calories, mix 1 teaspoon of cornstarch with 2 teaspoons of cold water and stir it into the pan during the last minute of cooking.

            Serving Suggestions

            This versatile Broccoli and Mushroom Stir Fry is wonderful on its own, but it truly shines when served with:

            • Steamed brown rice or white rice for a classic pairing.
            • Quinoa for a protein-rich, gluten-free base.
            • Cauliflower rice for a low-carb option.
            • As a side dish to grilled or baked tofu, tempeh, or your favorite lean protein.

            Common Mistakes to Avoid

            Avoid these pitfalls for the best stir-fry experience:

            • Overcrowding the Pan: Cooking too many vegetables at once will steam them instead of stir-frying, resulting in a soggy texture. Cook in batches if necessary.
            • Pan Not Hot Enough: A screaming hot pan is crucial for that signature crisp-tender texture.
            • Not Prepping Everything: Stir-frying happens fast! Have all your ingredients chopped, measured, and within reach before you turn on the heat.
            • Overcooking: Vegetables should maintain a slight bite. Remove from heat as soon as they reach your desired tenderness.

            Storing Tips

            Leftovers can be stored in an airtight container in the refrigerator for up to 3 days. Reheat gently on the stovetop or in the microwave. Note that the vegetables may lose some of their crispness upon reheating.

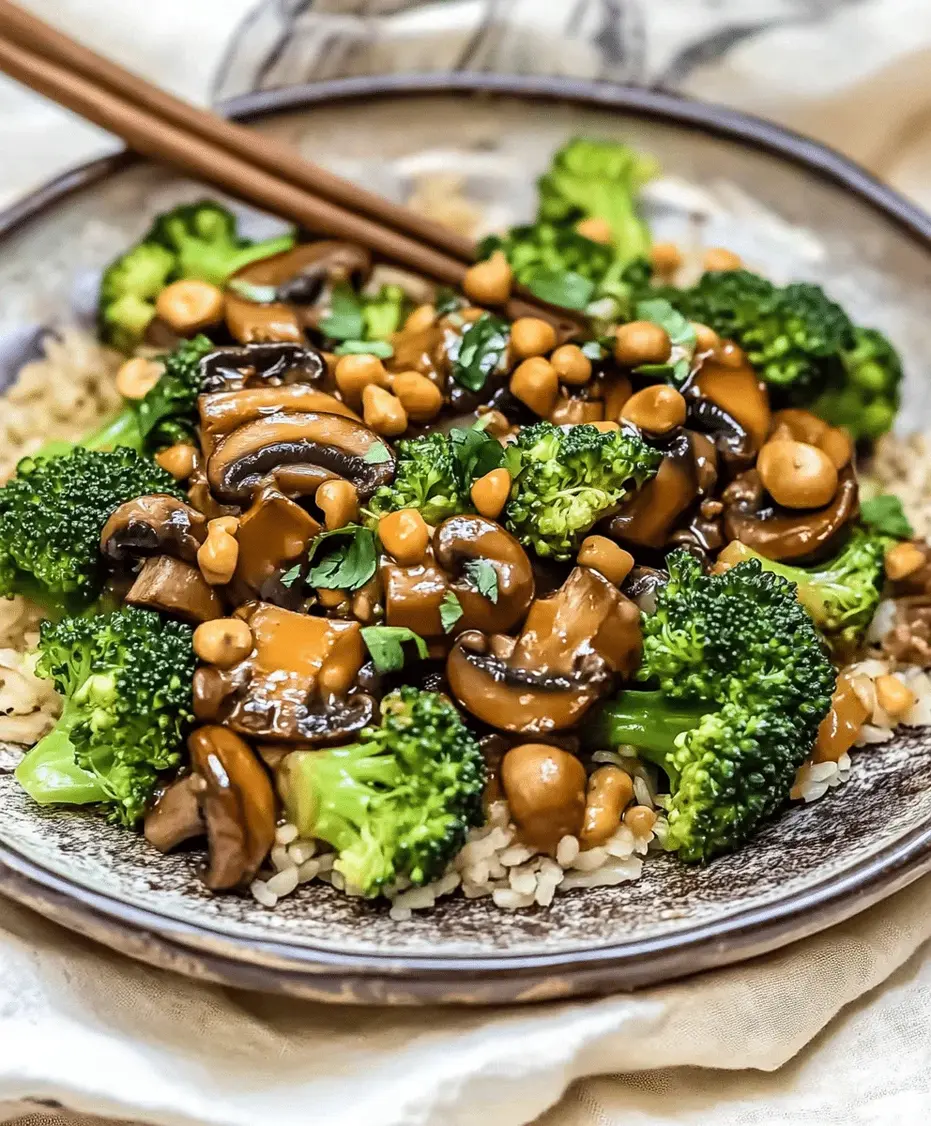
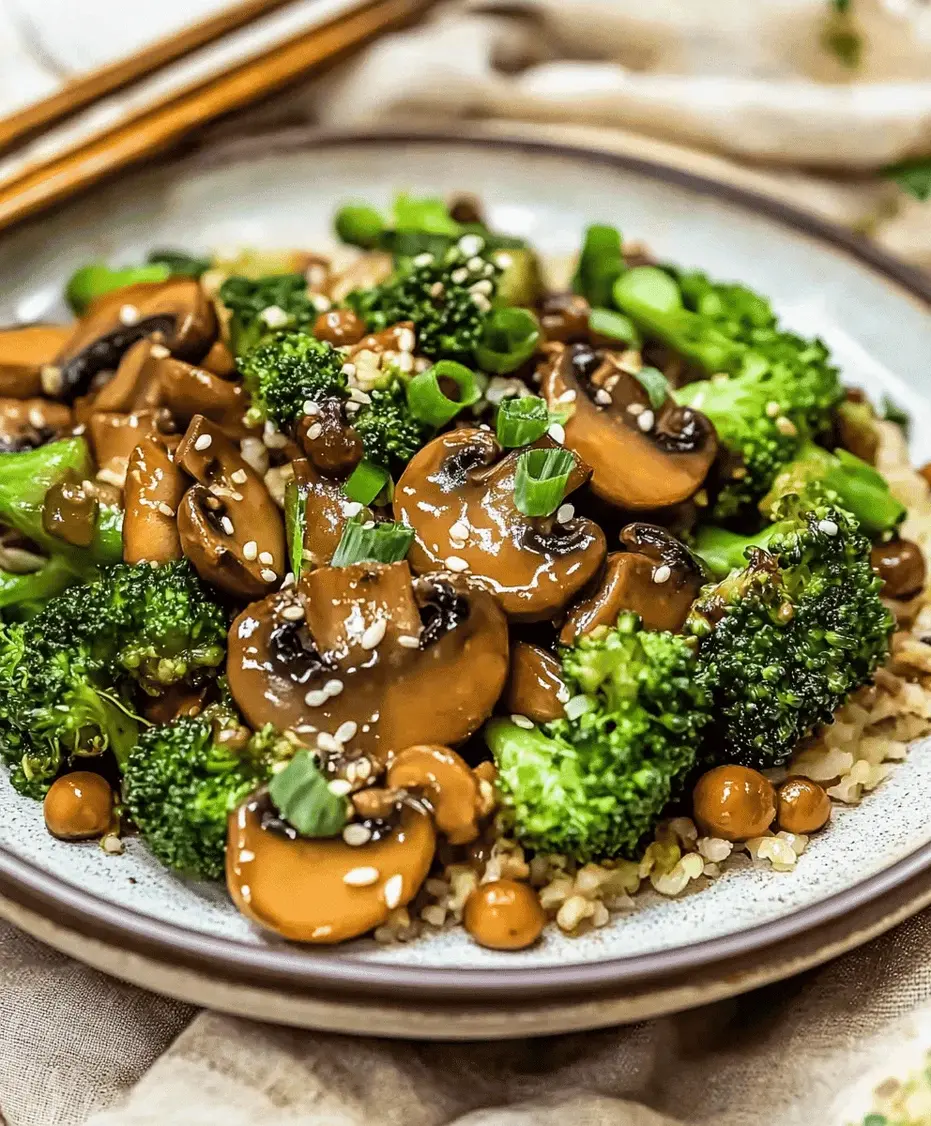
            A plate of delicious Broccoli and Mushroom Stir Fry, garnished with sesame seeds and green onions.

            Frequently Asked Questions

            What makes this a vegan stir fry?

            This recipe is naturally vegan as it uses plant-based ingredients like broccoli, mushrooms, and a sauce made with soy sauce, rice vinegar, and maple syrup. No animal products are involved.

            Can I use other vegetables?

            Absolutely! This recipe is very versatile. Feel free to add or substitute with bell peppers, snow peas, carrots, zucchini, or bok choy. Just ensure they’re cut to a similar size for even cooking.

            What can I do if my broccoli is too tough?

            If your broccoli seems tough, you can par-boil or steam it for 1-2 minutes before adding it to the stir fry. Alternatively, add a splash of water to the pan when you add the broccoli, cover it for a minute to create steam, then continue stir-frying.

            How can I make the sauce thicker?

            To thicken the sauce, you can create a cornstarch slurry. Mix 1 teaspoon of cornstarch with 2 teaspoons of cold water until smooth, then stir it into the pan during the last minute of cooking. Let it simmer until thickened.

            What kind of pan is best for stir-frying?

            A wok is ideal due to its shape, which allows for quick, even cooking and easy tossing. However, a large, heavy-bottomed skillet or sauté pan will also work effectively.

            Don’t Let Dinner Be a Chore

            This Broccoli and Mushroom Stir Fry recipe is proof that healthy, delicious, and satisfying meals don’t need to be complicated or time-consuming. It’s an easy vegetable stir fry that delivers incredible flavor with minimal effort, making it a go-to for busy individuals and families seeking wholesome, plant-based options. Whether you’re a seasoned vegan cook or just exploring healthier alternatives, this dish is sure to impress. So, the next time you’re wondering what to make for a quick weeknight dinner or a light, nutritious lunch, remember this vibrant and flavorful stir fry. Give it a try and taste the difference!

            Print
            clock clock iconcutlery cutlery iconflag flag iconfolder folder iconinstagram instagram iconpinterest pinterest iconfacebook facebook iconprint print iconsquares squares iconheart heart iconheart solid heart solid icon

            Broccoli And Mushroom Stir Fry Recipe


            • Author: Chef Emy

            Description

            Enjoy a delicious and quickBroccoli and Mushroom Stir Frythat’s bursting with flavor and nutrients. This vegan-friendly stir fry features crisp broccoli and tender mushrooms tossed in a savory Asian-style sauce. Perfect for a busy weeknight or a light lunch, it’s a wholesome, plant-based dish made in just 20 minutes. Keywords include: broccoli stir fry, mushroom stir fry, vegan stir fry, easy vegetable stir fry, healthy Asian recipes.


            Ingredients

            Scale
            • 2 cupsbroccoli florets
            • 1 cupmushrooms (button or cremini), sliced
            • 2 tbspsoy sauce
            • 1 tbspsesame oil
            • 2garlic cloves, minced
            • 1 tspginger, grated
            • 1 tspcornstarch mixed with 2 tablespoon water
            • 1 tbspvegetable oil
            • Optional: chili flakes, green onions, sesame seeds

            Instructions

              Notes

              For extra protein, add tofu or tempeh.
              Make it gluten-free by using tamari instead of soy sauce.
              Best served over rice or noodles.
              Add bell peppers or snap peas for more color and crunch.

              Nutrition

              • Calories: 180
              • Sugar: 4g

              “`

              Easy Keto Egg Salad Recipe

              “`html

              Easy Keto Egg Salad Recipe

              Tired of bland keto lunches? Discover the creamy, satisfying solution!

              Are you struggling to find quick, delicious, and truly satisfying meals that fit your keto lifestyle? Many of us face this challenge, especially when it comes to portable lunches or quick dinners. The good news is, you don’t need complex ingredients or hours in the kitchen to whip up something amazing. This **Easy Keto Egg Salad Recipe** is a game-changer for anyone on a low-carb journey. Forget boring salads; this recipe delivers a creamy, flavorful, and protein-packed punch that will have you looking forward to mealtime. Made with simple, wholesome ingredients, it’s incredibly versatile and perfect for meal prep. Whether you’re a seasoned keto enthusiast or just starting, this recipe is designed for simplicity and maximum taste.

              Your Creamy Keto Dream Team: Ingredients

              The beauty of this keto egg salad lies in its simplicity. We’re focusing on high-quality, low-carb ingredients that create a rich, satisfying texture and flavor.
              Ingredients for Keto Egg Salad
              • 6 Large Eggs: The star of our show! Opt for farm-fresh if possible for the richest yolks. Hard-boil them to perfection – not too soft, not too rubbery.
              • 1/4 cup Mayonnaise: Choose a good quality, full-fat mayonnaise. Avocado oil or olive oil-based mayo are excellent keto-friendly choices. This is what brings the creamy indulgence!

                • Substitution: For a slightly tangier flavor, you can use a mix of mayo and sour cream or Greek yogurt (ensure it’s full-fat and unsweetened for keto).
              • 1 teaspoon Dijon Mustard: Adds a subtle sharpness and depth of flavor that balances the richness of the eggs and mayo.

                • Substitution: Yellow mustard can be used in a pinch, but Dijon offers a more complex taste.
              • 1/2 teaspoon Apple Cider Vinegar: A little acidity brightens the flavors and cuts through the richness.

                • Substitution: White vinegar or lemon juice can be used.
              • Salt and Black Pepper to taste: Essential for bringing all the flavors together. Don’t be shy with the pepper – fresh cracked is best!
              • Optional Add-ins:

                • 1-2 tablespoons finely chopped fresh dill or chives: For a burst of fresh herbaceousness.
                • 1/4 teaspoon smoked paprika: For a hint of smoky sweetness and color.
                • 1 tablespoon finely chopped celery: For a satisfying crunch.

              Time Breakdown: Quick Prep, Lasting Flavor

              Prep Time:
              10 minutes
              Cook Time:
              12-15 minutes (for boiling eggs)
              Total Time:
              25 minutes
              Compared to many keto recipes that can take 30 minutes or more to prepare, this egg salad is incredibly speedy. The majority of the “cook time” is simply boiling the eggs, which can even be done in advance, making assembly a breeze on busy days.

              Crafting Your Perfect Keto Egg Salad: Step-by-Step

              Ready to create a keto lunch masterpiece? It’s simpler than you think! Follow these easy steps for a creamy, delicious egg salad that’s perfect every time.

              Step 1: Prepare the Eggs

              First things first, let’s get those eggs ready. Place your eggs in a saucepan and cover them with cold water by about an inch. Bring the water to a rolling boil over high heat. Once boiling, immediately remove the pan from the heat, cover it tightly with a lid, and let the eggs sit undisturbed in the hot water for 10-12 minutes. This method ensures perfectly hard-boiled eggs that are easy to peel.

              Step 2: Mash the Eggs

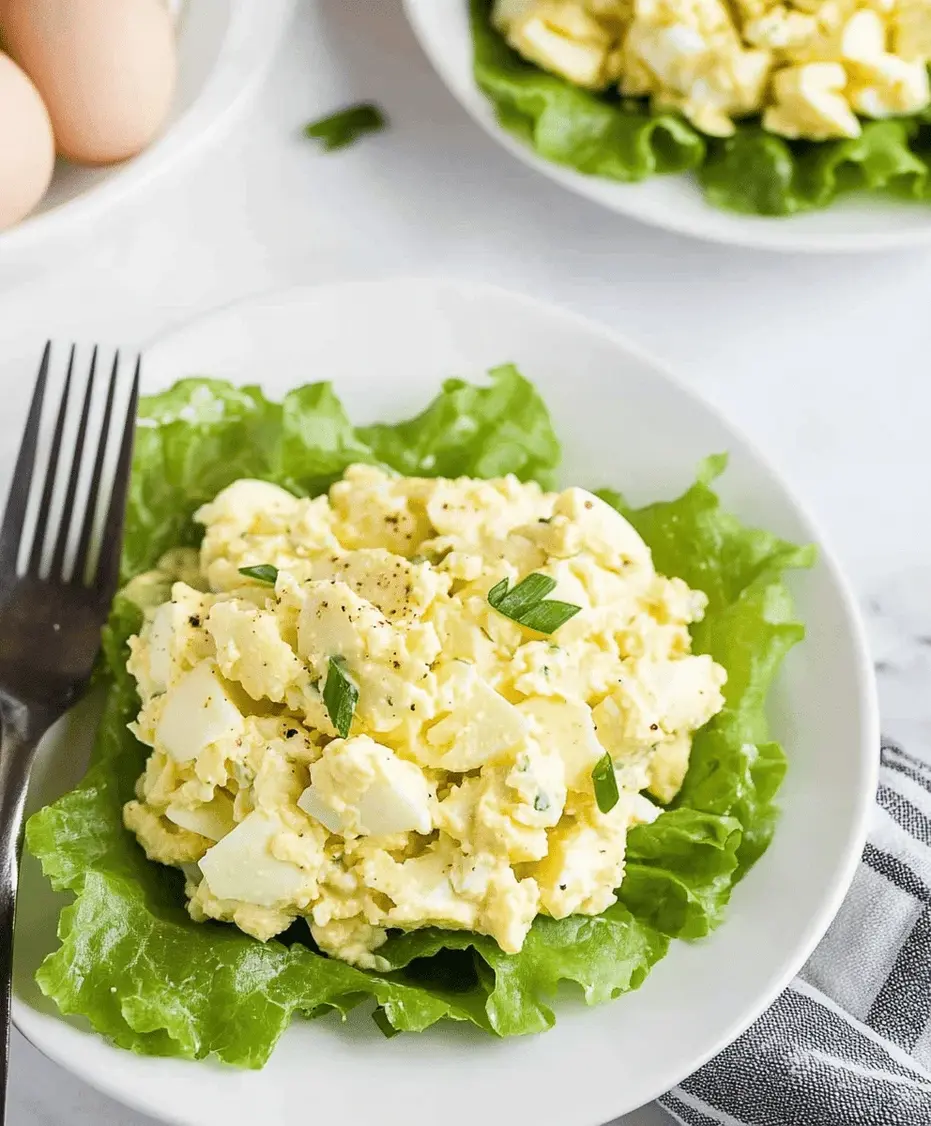
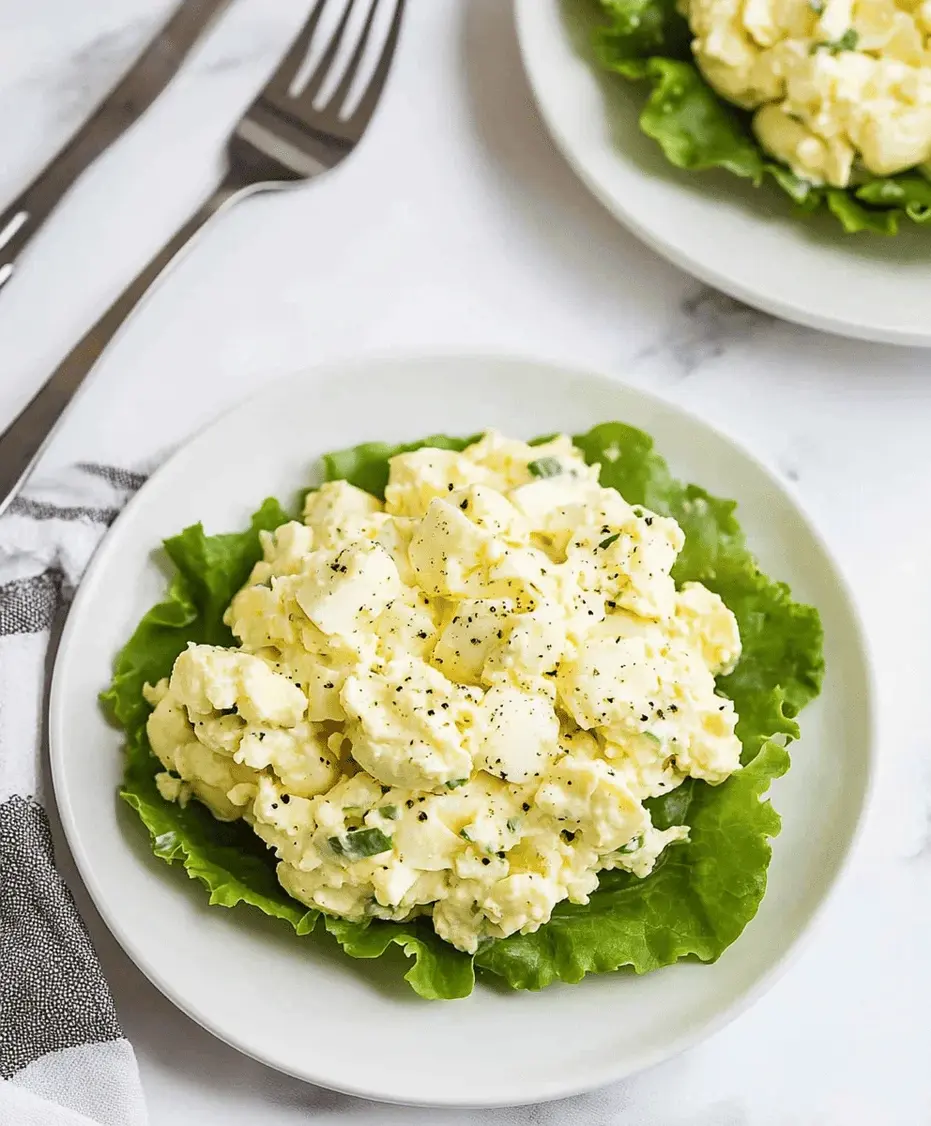
              Once the eggs have cooked, drain the hot water and immediately plunge them into an ice bath. This stops the cooking process and makes them easier to peel. Once cooled, peel the eggs carefully. Place the peeled eggs into a medium-sized mixing bowl. Using a fork or a potato masher, roughly chop and mash the eggs. I prefer a slightly chunky texture, so I don’t go overboard with the mashing – leave some beautiful egg whites and yolks visible!

              Step 3: Add the Creamy Goodness

              Now it’s time to add the elements that make this egg salad truly irresistible. Spoon in your mayonnaise. Remember, good quality, full-fat mayo is key for that luxurious keto texture. Next, add the Dijon mustard and the apple cider vinegar. These ingredients will start to bind everything together and add layers of flavor.

              Step 4: Season to Perfection

              Seasoning is where you can really tailor this recipe to your taste. Add salt and freshly cracked black pepper to your liking. Don’t forget to add any of your chosen optional ingredients at this stage – chopped dill, chives, smoked paprika for color, or finely chopped celery for a delightful crunch.

              Step 5: Mix and Chill

              Gently fold all the ingredients together until just combined. You want to coat the egg pieces evenly without overmixing, which can make the salad mushy. Taste and adjust the seasoning if necessary – perhaps a pinch more salt or pepper? For the best flavor, cover the bowl and refrigerate for at least 15-30 minutes. This allows the flavors to meld beautifully.
              Serving Keto Egg Salad with lettuce wraps

              Fuel Your Keto Journey: Nutritional Highlights

              This Easy Keto Egg Salad is a nutritional powerhouse, perfect for keeping you full and on track with your macros.
              • High in Protein: Eggs provide high-quality protein essential for muscle repair and satiety.
              • Rich in Healthy Fats: The mayonnaise and egg yolks contribute healthy fats, crucial for keto energy and hormone production.
              • Low in Carbohydrates: With minimal net carbs, it fits perfectly into a ketogenic diet.
              • Gluten-Free & Dairy-Free: Naturally free from gluten and dairy, making it suitable for those with sensitivities.
              *(Nutritional information is approximate per serving and can vary based on specific ingredients used, especially the brand of mayonnaise.)*

              Elevating Flavor, Naturally: Healthier Swaps

              While this recipe is already keto-friendly and fairly healthy, you might be looking for ways to tweak it further or cater to specific dietary needs. Here are some flavor-preserving alternatives:
              • Lower-Calorie Mayo: If you’re watching calories, you can use a light or calorie-reduced mayonnaise, but be mindful of added sugars and carbs. Avocado oil-based options are often a good compromise for flavor and health.
              • Plain Full-Fat Greek Yogurt or Sour Cream: As mentioned in the substitutions, these can replace some or all of the mayo for a tangier, slightly lighter (though still rich) profile. Ensure they are unsweetened.
              • Avocado: For an ultra-creamy and heart-healthy fat boost, mash in half a ripe avocado along with the eggs. This will change the color and flavor profile slightly but is a fantastic keto addition.
              • Nutritional Yeast: For a subtle cheesy, umami flavor without dairy, a tablespoon of nutritional yeast can be a surprising and delicious addition.

              Ideas to Delight Your Palate: Serving Suggestions

              This versatile keto egg salad isn’t just for eating with a spoon (though that’s perfectly fine!). Here are some fantastic ways to serve it:
              • Lettuce Wraps: The classic keto choice! Use large lettuce leaves like romaine, butter lettuce, or iceberg for a refreshing, crunchy wrap.
              • Keto Crackers or Buns: Serve with your favorite low-carb crackers or place into mini keto-friendly buns.
              • On a Bed of Greens: Spoon it over a fresh salad for a hearty and complete meal. Add some avocado slices and a sprinkle of seeds for extra texture.
              • Stuffed in Bell Peppers or Tomatoes: For an attractive and portable option, hollow out bell peppers or large tomatoes and fill them with the egg salad.
              • As a Dip: Serve alongside keto-friendly crudités like cucumber slices, bell pepper strips, or celery sticks.

              Don’t Let Your Egg Salad Go Wrong: Common Mistakes

              Even simple recipes can have pitfalls. Avoid these common mistakes to ensure your keto egg salad is always delicious:
              • Overcooking Eggs: This leads to a rubbery texture and often a greenish ring around the yolk, impacting both taste and texture.
              • Undermining Flavor: Not tasting and adjusting seasoning is a major miss. Salt, pepper, and the tang from mustard/vinegar are crucial.
              • Using Low-Fat Mayo: This is a keto recipe; embrace the healthy fats! Low-fat versions can contain more carbs and less satisfying flavor/texture.
              • Overmixing: Mashing too vigorously or stirring too much can turn your delicious egg salad into apaste-like consistency. A slightly chunky texture is usually preferred.
              • Skipping the Chill Time: While you can eat it immediately, refrigerating allows the flavors to meld, significantly improving the overall taste.

              Keep it Fresh: Storing Your Egg Salad

              Proper storage ensures your keto egg salad stays fresh and safe to eat, maintaining its deliciousness throughout the week.
              • Airtight Container: Store the egg salad in an airtight container in the refrigerator. Thisprevents it from absorbing other odors and keeps it fresh.
              • Shelf Life: Properly stored, this egg salad is best consumed within 3-4 days.
              • Avoid Freezing: Egg salad doesn’t freeze well. The texture can become watery and unappealing upon thawing.

              Frequently Asked Questions (FAQs)

              ***Q:*** ***Can I make this keto egg salad ahead of time for meal prep?***
              A: Absolutely! Egg salad is one of the best make-ahead keto meals. Prepare it as directed and store it in an airtight container in the refrigerator for up to 3-4 days. The flavors actually improve overnight!
              ***Q:*** ***What’s the best way to boil eggs for egg salad?***
              A: For easy peeling and perfect hard-boiled eggs, place eggs in a pot, cover with cold water, bring to a boil, then immediately remove from heat, cover, and let sit for 10-12 minutes. Then, shock them in an ice bath.
              ***Q:*** ***Can I add chopped onions or pickles to this keto egg salad?***
              A: While traditional egg salad often includes onion and pickles, these can add carbs. If you choose to add them, use them sparingly (e.g., a tablespoon of finely minced red onion or sugar-free dill pickle relish) and account for the carbs in your daily intake. Celery is a great crunchy, low-carb alternative.
              ***Q:*** ***Is this recipe suitable for dairy-free diets?***
              A: Yes, this recipe is naturally dairy-free, provided you use a dairy-free mayonnaise (most standard mayonnaises are dairy-free, but always check the label).
              Print
              clock clock iconcutlery cutlery iconflag flag iconfolder folder iconinstagram instagram iconpinterest pinterest iconfacebook facebook iconprint print iconsquares squares iconheart heart iconheart solid heart solid icon

              Easy Keto Egg Salad Recipe


              • Author: Chef Emy

              Description

              This Easy Keto Egg Salad is a creamy, delicious, and low-carb meal made with hard-boiled eggs, mayo, and spices. Perfect for keto diets, this quick salad is ideal for lunch, dinner, or meal prep. Packed with protein and healthy fats, it’s a satisfying, low-effort dish that’s also gluten-free and dairy-free. Serve it in lettuce wraps or eat it by the spoonful!


              Ingredients

              Scale
              • 6large hard-boiled eggs, peeled and chopped
              • ¼ cupmayonnaise
              • 1 tspyellow mustard
              • 1 tbspchopped dill pickles or relish
              • ¼ tspgarlic powder
              • ¼ tsponion powder
              • Salt and pepper to taste
              • Optional: fresh dill or chives for garnish

              Instructions

                Notes

                For extra flavor, use homemade keto mayo.
                Add avocado or bacon bits for variation.
                Keeps well in the fridge for up to 3 days in an airtight container.
                Great for keto meal prep or packed lunches.

                Nutrition

                • Calories: 280
                • Sugar: 1g

                “`

                Simple Cottage Cheese Egg Salad Recipe

                “`html

                Simple Cottage Cheese Egg Salad Recipe

                Revolutionize Your Lunch with This Simple Cottage Cheese Egg Salad

                Are you looking for a delicious, healthy, and protein-packed lunch option that’s quick to prepare? The average egg salad can be loaded with mayonnaise, making it a high-fat, calorie-dense meal. But what if you could enjoy the creamy, satisfying taste of egg salad with a significant nutritional upgrade? This Simple Cottage Cheese Egg Salad Recipe is the answer! By swapping traditional mayonnaise for creamy, protein-rich cottage cheese, we’ve created a lighter, lower-carb, and incredibly satisfying dish. It’s a fantastic choice for meal prep, a substantial snack, or a delightful spread on toast or in wraps. Get ready to discover your new favorite healthy lunch staple!

                Crafting the Perfect Cottage Cheese Egg Salad: A Symphony of Flavors and Textures

                The beauty of this cottage cheese egg salad lies in its simplicity and the quality of its core ingredients. We focus on fresh, vibrant components that come together to create a harmonious blend of creamy, tangy, and savory notes.

                • Hard-Boiled Eggs: The undisputed star! For the best texture, aim for eggs that are just cooked through – not rubbery. About 6-8 large eggs should provide a wonderfully hearty base.
                • Cottage Cheese: This is our secret weapon for creaminess and protein. Opt for a full-fat or 2% cottage cheese for the richest flavor and silkiest texture. Low-fat can sometimes be a bit watery, but it’s a viable option for a lighter version. We recommend about 1 cup.
                • Dijon Mustard: A crucial component for that signature tangy bite. A tablespoon of Dijon adds a sophisticated warmth that cuts through the richness.
                • Fresh Chives or Green Onions: For a subtle oniony kick and a beautiful pop of green. Finely chopped is key to distribute their flavor evenly. About 2 tablespoons should do.
                • Lemon Juice: Just a squeeze (about 1 teaspoon) brightens everything up and adds a lovely zesty note. Freshly squeezed is always best!
                • Salt and Black Pepper: To taste. Don’t be shy with the freshly cracked black pepper – it makes a big difference!

                Substitutions & Additions:

                • For a Creamier Base: If you find your cottage cheese a bit too chunky, a quick blitz in a food processor or blender can yield an exceptionally smooth texture, akin to traditional mayo.
                • Herbs: Feel free to experiment! Dill, parsley, or even a touch of tarragon can add unique aromatic dimensions.
                • Spice: A pinch of paprika or a dash of hot sauce can add a gentle warmth or a fiery kick, depending on your preference.
                • Texture Boost: For added crunch, consider finely diced celery or red onion.
                • Pickle Relish: For that classic sweet or dill tang, a tablespoon of finely chopped dill pickle or sweet pickle relish can be a great addition.

                Perfect Timing for Your Protein-Packed Meal

                Prep time:
                15 minutes
                Cook time:
                10-12 minutes (for eggs)
                Total time:
                25-27 minutes

                Compared to a traditional egg salad that often involves just chopping and mixing, the only significant “cook” time here is for boiling the eggs. Most recipes online focus on the mixing aspect, often having similar prep times, but this recipe’s total time advantage comes from our healthier base.

                Simple Cottage Cheese Egg Salad in a bowl with chives

                Step-by-Step: Crafting Your Delicious Cottage Cheese Egg Salad

                Let’s dive into creating this wonderfully simple yet incredibly flavorful egg salad! It’s a straightforward process that yields maximum taste with minimal fuss.

                Step 1: Achieve Perfect Hard-Boiled Eggs

                Place your eggs in a saucepan and cover them with cold water by about an inch. Bring the water to a rolling boil over high heat. Once boiling, immediately remove the pan from the heat, cover it tightly with a lid, and let the eggs sit for 10-12 minutes. This steaming method ensures perfectly cooked yolks without any gray ring. After the time is up, drain the hot water and plunge the eggs into an ice bath to stop the cooking process and make them easy to peel. Once cooled, peel your eggs. They should be firm and perfectly cooked.

                Step 2: Prepare the Eggs for Mixing

                There are a few ways to prepare your peeled hard-boiled eggs. For a chunkier texture, simply chop them with a knife into bite-sized pieces. If you prefer a finer consistency, you can use a potato masher or even grate them. For an ultra-smooth, creamy experience, pulse them gently in a food processor until they reach your desired consistency, being careful not to turn them into a paste.

                Step 3: Combine the Creamy Base

                In a medium mixing bowl, combine the cottage cheese, Dijon mustard, fresh lemon juice, and finely chopped chives or green onions. Stir these ingredients together until they are well incorporated and form a smooth, creamy mixture. Taste and adjust seasonings with salt and freshly cracked black pepper. This is your chance to perfect the tang and savory notes!

                Step 4: Gently Fold in the Eggs

                Add your prepared hard-boiled eggs to the bowl with the cottage cheese mixture. Using a spatula or spoon, gently fold the eggs into the creamy base. The goal is to coat the egg pieces evenly without over-mashing them. You want to retain some of the texture from the eggs, creating delightful pockets of flavor and substance within the creamy dressing.

                Step 5: Taste and Adjust

                Before serving, give your Simple Cottage Cheese Egg Salad a final taste. Does it need a pinch more salt? A bit more black pepper? Perhaps another squeeze of lemon juice for brightness? Adjust the seasonings as needed to achieve your perfect balance. This step is crucial for ensuring every bite is as flavorful as the last.

                Step 6: Chill and Serve

                For the best flavor, it’s recommended to let the egg salad chill in the refrigerator for at least 15-30 minutes. This allows the flavors to meld together beautifully. Once chilled, serve this delightful creation as you wish!

                Nutritional Snapshot: A Healthier Choice

                This cottage cheese egg salad is a nutritional powerhouse, packed with protein and flavor while being significantly lower in unhealthy fats compared to traditional versions. A typical serving (about 1/2 cup, using 2% cottage cheese) offers:

                • Calories: Approximately 180-220 kcal (varies with cottage cheese fat content)
                • Protein: Around 20-25g (excellent for satiety and muscle support)
                • Fat: Around 8-12g (mostly healthy fats from eggs and moderate from cottage cheese)
                • Carbohydrates: About 4-6g (low carb, making it great for keto or low-carb diets)
                • Fiber: Minimal (unless you add vegetables)

                This makes it an ideal choice for those looking to increase their protein intake, manage their weight, or follow a low-carb lifestyle.

                Elevating Your Egg Salad: Healthier Swaps and Flavor Boosters

                While cottage cheese is our star player for a healthier twist, we can further enhance this healthy lunch option:

                • Greek Yogurt: For an even tangier profile and similar protein content, consider using plain Greek yogurt (full-fat or 2%) as a partial or full substitute for cottage cheese.
                • Avocado: Mash in a quarter of an avocado for healthy monounsaturated fats and an incredibly creamy texture. This adds a subtle richness and boosts the healthy fat content.
                • Light Mayo / Miracle Whip: If you absolutely must have a hint of mayonnaise, use a light version sparingly. However, the cottage cheese base is so good, you might find you don’t miss it at all.
                • Vegetable Add-ins: Finely diced bell peppers, cucumber, or shredded carrots can add volume, color, and extra nutrients without significantly impacting macronutrients.

                Serving Inspiration: Where This Cottage Cheese Egg Salad Shines

                This versatile cottage cheese egg salad is a dream to serve. Here are some of our favorite ways to enjoy it:

                • On Whole-Wheat Toast: A classic for a reason. Pile it high on toasted whole-grain bread for a satisfying and balanced meal.
                • In Lettuce Wraps: For a super low-carb and refreshing option, serve scoops of the salad in crisp lettuce cups (romaine, butter, or iceberg work well).
                • As a Dip: Serve with your favorite raw vegetables like cucumber slices, bell pepper strips, carrot sticks, or celery.
                • In a Wrap or Pita: Fill a whole-wheat tortilla or pita pocket with the salad for a portable and delicious lunch.
                • On a Bed of Greens: Top a fresh salad with a generous scoop for an extra protein boost.
                • With Crackers: Choose whole-grain or seeded crackers for a simple snack.

                Common Pitfalls to Avoid

                Even with a simple recipe, a few common mistakes can detract from the final dish:

                • Over-boiling Eggs: This leads to rubbery whites and chalky yolks. Use the ice bath method to prevent this.
                • Mashing Too Aggressively: Over-mixing can result in a mushy, homogenous texture. Gentle folding is key.
                • Under-seasoning: Eggs and cottage cheese are mild. Don’t be afraid to season generously with salt, pepper, and Dijon mustard for full flavor.
                • Using Watery Cottage Cheese: If your cottage cheese is very watery, drain off some of the excess liquid before mixing, or consider blending it first for a smoother consistency.

                Savor It Later: Storing Your Cottage Cheese Egg Salad

                This healthy lunch is fantastic for meal prep. Store the prepared cottage cheese egg salad in an airtight container in the refrigerator. It will stay fresh and delicious for 3-4 days. The flavors tend to meld and improve over time, making it even tastier on the second or third day!

                Cottage cheese egg salad served on whole wheat toast with chives

                Frequently Asked Questions (FAQs)

                ***Can I use low-fat cottage cheese?***

                Yes, you can! Low-fat cottage cheese will work, but it might result in a slightly thinner or less creamy consistency. For the best texture and flavor, 2% or full-fat is recommended.

                ***How long does this egg salad last in the fridge?***

                Properly stored in an airtight container, this cottage cheese egg salad should last for about 3-4 days in the refrigerator.

                ***Can I make this egg salad ahead of time?***

                Absolutely! It’s an excellent candidate for meal prepping. Make a batch on Sunday, and you’ll have a healthy and satisfying lunch ready for several days.

                ***What if I don’t like cottage cheese?***

                If cottage cheese isn’t your favorite, you can try using plain Greek yogurt (as mentioned in healthier alternatives), or a combination of Greek yogurt and a small amount of avocado or light mayonnaise for creaminess.

                ***Can I add other vegetables?***

                Certainly! Finely diced celery, bell peppers, red onion, or even shredded carrots can add extra crunch, color, and nutrients. Just be sure to chop them very finely so they blend well.

                Your New Go-To Healthy Meal

                This Simple Cottage Cheese Egg Salad Recipe is more than just a substitute; it’s an upgrade. It delivers all the creamy, satisfying goodness you crave from a classic egg salad but with a powerful protein punch and a lighter profile. Perfect for busy weekdays, post-workout fuel, or simply enjoying a delicious and nutritious meal, it’s a recipe you’ll find yourself returning to again and again. Give it a try and experience the delicious difference!

                Print
                clock clock iconcutlery cutlery iconflag flag iconfolder folder iconinstagram instagram iconpinterest pinterest iconfacebook facebook iconprint print iconsquares squares iconheart heart iconheart solid heart solid icon

                Simple Cottage Cheese Egg Salad Recipe


                • Author: Chef Emy

                Description

                This Simple Cottage Cheese Egg Salad Recipe blends creamy cottage cheese with protein-rich hard-boiled eggs, making it a healthy, low-carb, and satisfying dish. Whether served on toast, in a wrap, or as-is, it’s perfect for lunch, meal prep, or a high-protein snack. Keywords: cottage cheese, egg salad, healthy lunch, high protein, low carb.


                Ingredients

                Scale
                • 4hard-boiled eggs, chopped
                • ½ cupcottage cheese (full fat or low fat)
                • 1 tspDijon mustard
                • Salt and black pepper, to taste
                • 1 tbspchopped green onions or chives (optional)
                • Paprika for garnish (optional)

                Instructions

                  Notes

                  For extra flavor, add a dash of hot sauce or a sprinkle of garlic powder.
                  Use a fork to mash the eggs more finely for a smoother texture.
                  Great on whole grain toast, lettuce wraps, or crackers.

                  Nutrition

                  • Calories: 180
                  • Sugar: 2g

                  “`

                  Old Fashioned Egg Salad Recipe

                  “`html

                  Old Fashioned Egg Salad Recipe

                  Craving Classic Comfort?

                  Are you searching for that quintessential, creamy, and utterly satisfying egg salad that transports you back to simpler times? For many of us, the nostalgic taste of old-fashioned egg salad is a culinary hug, a reliable favorite for lunches, picnics, and potlucks. But what makes a truly exceptional egg salad? It’s all about the perfect balance of creamy texture, tangy notes, and simple, wholesome ingredients. This Old Fashioned Egg Salad recipe hones in on precisely that classic flavor profile, delivering a timeless, creamy blend of hard-boiled eggs, rich mayonnaise, a hint of zesty mustard, and just the right seasonings. It’s remarkably easy to prepare, making it an ideal choice for busy weekdays or spontaneous gatherings. Whether you prefer it piled high on a soft bread sandwich, rolled up in a tortilla wrap, or nestled in crisp lettuce cups for a low-carb delight, this recipe is your gateway to unparalleled comfort food. With its short ingredient list and quick preparation time, it’s poised to become your go-to for any occasion.

                  The Heart of the Matter: Ingredients

                  The beauty of a truly old-fashioned egg salad lies in its simplicity. You likely have most of these staple ingredients already in your pantry. Here’s what you’ll need to create this comforting classic:

                  Fresh Eggs

                  Quantity: 6 large eggs.

                  Sensory Description: Fresh, firm eggs are the foundation. They should be room temperature for even cooking, though this is a minor point for most. Once boiled and cooled, their whites will be firm and slightly gelatinous, and the yolks will be a vibrant, deep yellow when perfectly cooked. The texture of the yolk is paramount – you want it tender, not chalky or dry.

                  Substitutions: While not ideal for an “old-fashioned” flavor, you could technically use pasteurized liquid egg whites and yolks if you have specific dietary needs, but the texture and flavor would be significantly different.

                  Mayonnaise

                  Quantity: 1/3 to 1/2 cup.

                  Sensory Description: Use a good quality, full-fat mayonnaise for that signature creamy richness. It should have a smooth, velvety consistency and a pleasant tang that complements the eggs without overpowering them. Choose one that you genuinely enjoy the taste of, as it’s the primary binder and flavor enhancer.

                  Substitutions: For a lighter version, you can use light mayonnaise or even a mix of mayonnaise and plain Greek yogurt (start with 1/4 cup mayo and 2 tablespoons yogurt). Avocado-based mayonnaise is also a good option for a subtle flavor change.

                  Mustard

                  Quantity: 1 to 2 teaspoons (preferably Dijon or yellow.

                  Sensory Description: A touch of mustard adds a bright, tangy counterpoint to the richness of the eggs and mayo. Dijon mustard offers a more complex, slightly spicy flavor, while classic yellow mustard provides a milder, familiar tang. The aroma should be pungent and inviting.

                  Substitutions: Use whole grain mustard for a bit of texture and a more rustic flavor. A tiny pinch of dry mustard powder whisked into the mayo can also work if you don’t have prepared mustard.

                  Seasonings

                  Quantity: 1/4 teaspoon salt, 1/8 teaspoon black pepper.

                  Sensory Description: Simple salt and freshly ground black pepper are key. Salt enhances all the flavors, making them pop, while black pepper adds a subtle warmth and complexity. The aroma of freshly cracked pepper is essential.

                  Substitutions: A tiny pinch of paprika can add a touch of color and a very mild, sweet peppery note. A whisper of garlic powder or onion powder can also be added for depth.

                  Optional Add-Ins

                  While the soul of old-fashioned egg salad is its simplicity, these additions can elevate it:

                  • 1 tablespoon finely chopped fresh chives or green onions (for a fresh, oniony bite)
                  • 1 tablespoon finely chopped dill pickle or sweet pickle relish (for tang and crunch)
                  • A dash of hot sauce (for a little heat)
                  • A pinch of celery seed (for a subtle earthy note)

                  Timing is Everything

                  Prep time:
                  10 minutes
                  Cook time:
                  10-12 minutes
                  Total time:
                  20-22 minutes (plus cooling time)

                  Compared to many complex recipes, this old-fashioned egg salad is a breeze. The active preparation time is minimal, focusing mainly on the boiling and chopping of eggs. The cooking time is precisely for achieving that perfect hard-boiled state. The total time excludes the crucial cooling period for the eggs, which is essential for easy peeling and safe handling. For many egg salad recipes, the preparation is similar, but achieving the ideal yolk texture without overcooking can sometimes add a mental “cook time” complexity. This recipe keeps it straightforward and delicious.

                  A bowl of creamy old-fashioned egg salad with chopped chives, ready to be served.

                  Crafting the Perfect Egg Salad

                  Let’s get down to the delicious business of making this timeless classic. Follow these simple steps for egg salad perfection:

                  Step 1: Perfectly Boil Your Eggs

                  Place your eggs in a single layer in a medium saucepan. Cover them with cold water by about an inch. Bring the water to a rolling boil over medium-high heat. Once boiling, immediately remove the pan from the heat, cover it tightly with a lid, and let the eggs sit in the hot water for 10-12 minutes. This method prevents the dreaded rubbery whites and ensures the yolks are perfectly cooked.

                  Step 2: Cool and Peel

                  While the eggs are steaming, prepare an ice bath: fill a bowl with cold water and plenty of ice. Once the 10-12 minutes are up, carefully transfer the eggs from the hot water into the ice bath using a slotted spoon. Let them cool completely for at least 10 minutes. This rapid cooling stops the cooking process and makes peeling much easier. To peel, gently tap the larger end of the egg on a hard surface, then roll it gently to crack the shell all over. Start peeling from the larger end, working your way around. If they’re stubborn, try peeling them under cool running water.

                  Step 3: Chop or Mash

                  Place the peeled, cooled eggs in a medium bowl. For a smoother egg salad, use a fork to mash them into small pieces. For a bit more texture, chop them into a dice of your preferred size (about 1/4 to 1/2 inch). Some people prefer a mix – mash some eggs completely and leave others slightly chunky.

                  Step 4: Mix the Magic

                  Add the mayonnaise (start with 1/3 cup), mustard, salt, and pepper to the bowl with the eggs. If you’re using any optional add-ins like chives or pickle relish, add them now. Gently fold and stir everything together until the eggs are well coated and combined. Be careful not to overmix, especially if you prefer some texture.

                  Step 5: Taste and Adjust

                  This is the most important step for personalized perfection! Taste the egg salad. Does it need more creaminess? Add another tablespoon of mayonnaise. More tang? A little more mustard. Not enough flavor? Add a pinch more salt or pepper. Adjust the seasonings and texture until it’s exactly to your liking. This is where you make it *your* signature egg salad.

                  Step 6: Chill and Serve

                  For the best flavor, cover the bowl and refrigerate the egg salad for at least 15-30 minutes. This allows the flavors to meld and meld together beautifully. Serve chilled on your favorite bread, in wraps, or with crackers.

                  Nutritional Snapshot

                  While exact nutritional values vary based on specific ingredient brands and quantities used (especially mayonnaise), a typical serving (about 1/2 cup) of this Old Fashioned Egg Salad is estimated to contain:

                  • Calories: Approximately 250-350 kcal
                  • Protein: Around 10-12 grams
                  • Fat: Approximately 20-30 grams (largely from mayonnaise)
                  • Carbohydrates: Around 2-4 grams
                  • Cholesterol: High (due to eggs)

                  Note: This is an estimation. For precise nutritional information, it’s recommended to use a nutritional calculator with your specific ingredients.

                  Healthier Twists on Tradition

                  Looking to lighten up this classic without sacrificing flavor? Here are some delicious substitutions:

                  • Lighter Base: Replace half or all of the mayonnaise with plain Greek yogurt. This adds protein and reduces fat significantly while providing a creamy texture and a pleasant tang.
                  • Avocado Creaminess: Mash in half an avocado instead of some of the mayonnaise. It adds healthy monounsaturated fats and a wonderfully smooth texture, though it will lend a slight green hue and a subtly different flavor.
                  • Boosted Veggies: Finely chop celery, bell peppers, or red onion and mix them in. These add volume, crunch, and nutrients without adding many calories.
                  • Herbal Freshness: Load up on fresh herbs like dill, parsley, chives, or cilantro. They add immense flavor and antioxidants.
                  • Low-Carb Serving: Skip the bread and serve your egg salad in crisp lettuce cups (butter lettuce or romaine work well), on cucumber slices, or as a dip for vegetable sticks.

                  Beyond the Sandwich: Serving Ideas

                  While classic sandwiches are a given, this versatile egg salad shines in many other ways:

                  • Sandwiches: On toasted sourdough, soft white bread, or hearty whole wheat. Add a leaf of crisp lettuce and a slice of tomato for extra freshness.
                  • Wraps: Spread it onto a tortilla or a large lettuce leaf, add some greens, and roll it up for a portable lunch.
                  • Salad Topper: Dollop a spoonful onto a bed of mixed greens or spinach for a protein-packed salad.
                  • Stuffed Avocados: Halve and pit an avocado, then spoon the egg salad into the cavities.
                  • Egg Boat: Halve hard-boiled eggs lengthwise and fill the centers with egg salad.
                  • Dip: Serve with crackers, pretzels, or a platter of fresh vegetables like carrots, celery, and bell peppers.
                  A close-up of old-fashioned egg salad in a sandwich with lettuce on toasted bread.

                  Avoiding Common Pitfalls

                  • Rubbery Eggs: Overcooking your hard-boiled eggs is the most common mistake. Using the steam-top method described above helps prevent this.
                  • Chalky Yolks: This is a direct result of overcooking. The greenish-gray ring around the yolk indicates it’s been heated too long.
                  • Too Much Mayo: While creaminess is key, drowning the eggs in mayonnaise can make the salad greasy and hide the egg flavor. Start with the recommended amount and add more only if necessary.
                  • Not Enough Seasoning: Bland egg salad is a true disappointment. Don’t be shy with salt and pepper. Taste and adjust!
                  • Over-Mashing: Unless you prefer a completely smooth paste, avoid over-mashing your eggs. Some texture makes egg salad much more interesting.

                  Keeping It Fresh

                  Proper storage is crucial for food safety and maintaining the best flavor and texture.

                  • Refrigeration: Store leftover egg salad in an airtight container in the refrigerator.
                  • Shelf Life: Homemade egg salad is best consumed within 3 to 4 days. The mayonnaise and eggs are perishable, so don’t let it sit out at room temperature for more than 2 hours (or 1 hour if the temperature is above 90°F/32°C).
                  • Freezeability: Egg salad does not freeze well. The mayonnaise can break and become oily and watery, and the texture of the eggs can become mealy.

                  Frequently Asked Questions

                  ***Can I make egg salad with cold eggs straight from the fridge?***

                  While you can, it’s generally recommended to start with room temperature eggs for more even cooking. If you must use cold eggs, you might add an extra minute or two to the boiling time, but be very careful not to overcook them. The ice bath after boiling is crucial regardless of the starting temperature.

                  ***How do I get perfectly cooked yolks for egg salad?***

                  The “steam-top” method described in Step 1 is excellent for this. Carefully bringing eggs to a boil, then removing from heat and letting them steam for 10-12 minutes, ensures the yolks are cooked through but not rubbery or chalky. A quick immersion in an ice bath immediately after stops the cooking process.

                  ***My egg salad is too dry. What can I do?***

                  If your egg salad is too dry, simply stir in another tablespoon or two of mayonnaise until you reach your desired creamy consistency. You can also add a splash of milk or even a bit of pickle juice for added moisture and flavor.

                  ***Can I add celery to my old-fashioned egg salad?***

                  Absolutely! Finely diced celery is a fantastic addition to old-fashioned egg salad. It adds a wonderful crisp texture and a fresh, slightly earthy flavor that complements the creamy richness beautifully. It’s a classic variation for a reason!

                  ***How long does homemade egg salad last?***

                  When stored properly in an airtight container in the refrigerator, homemade egg salad typically lasts for 3 to 4 days. Always use clean utensils and avoid leaving it at room temperature for extended periods.

                  Print

                  clock clock iconcutlery cutlery iconflag flag iconfolder folder iconinstagram instagram iconpinterest pinterest iconfacebook facebook iconprint print iconsquares squares iconheart heart iconheart solid heart solid icon

                  Old Fashioned Egg Salad Recipe


                  • Author: Chef Emy

                  Description

                  This Old Fashioned Egg Salad recipe is a timeless, creamy blend of hard-boiled eggs, mayo, mustard, and simple seasonings. Easy to prepare and ideal for sandwiches, wraps, or low-carb lettuce cups. Featuring a short ingredient list and quick prep, it’s a comfort food favorite perfect for lunch, picnics, or meal prep.


                  Ingredients

                  Scale
                  • 6hard-boiled eggs, peeled and chopped
                  • ¼ cupmayonnaise
                  • 1 tspyellow mustard
                  • 1 tbspfinely chopped onion or green onion (optional)
                  • Salt and pepper to taste
                  • Paprika for garnish (optional)

                  Instructions

                    Notes

                    For a healthier twist, substitute Greek yogurt for mayo.
                    Add chopped celery or pickles for extra crunch.
                    Best served chilled, and can be stored in the fridge for 3–4 days.

                    Nutrition

                    • Calories: 210
                    • Sugar: 1g

                    “`

                    Crispy Fried Cod Fish Sandwich Recipe

                    “`html

                    Crispy Fried Cod Fish Sandwich Recipe

                    Dive Into Deliciousness: The Ultimate Crispy Fried Cod Sandwich

                    Are you craving a seafood delight that’s both satisfying and surprisingly easy to make at home? On average, Americans consume over 14 pounds of seafood annually, and for good reason! It’s nutritious, delicious, and incredibly versatile. If you’re looking to elevate your lunch or dinner game, then this Crispy Fried Cod Fish Sandwich recipe is exactly what you need. Forget those soggy, bland fast-food versions; we’re talking about perfectly flaky cod, enveloped in a shatteringly crisp, golden-brown breading, nestled in a soft bun with all the fixings. Imagine the satisfying crunch followed by the tender, succulent fish – pure bliss! This recipe breaks down exactly how to achieve that perfect bite every single time, transforming simple ingredients into a restaurant-worthy masterpiece. Get ready to become the hero of your kitchen with this show-stopping seafood sandwich.

                    Gather Your Treasures: Ingredients for the Perfect Cod Sandwich

                    The magic of a great sandwich lies in its components. For our Crispy Fried Cod Fish Sandwich, we’re focusing on fresh, quality ingredients that work in harmony. Think of tender, flaky cod, a seasoned crunchy coating, and bright, fresh toppings. Here’s what you’ll need:

                    • For the Cod:
                      • 1.5 lbs Cod Fillets (about 4-6 fillets): Look for thick, firm fillets, preferably wild-caught for the best flavor. Halibut or haddock are excellent substitutes if cod is unavailable.
                      • 1 cup All-Purpose Flour: This is the base for our crispy coating.
                      • 1 tsp Salt: Essential for seasoning both the fish and the dredge.
                      • 1 tsp Black Pepper: Freshly ground is always best for a pungent kick.
                      • 1 tsp Paprika: Adds a touch of color and a mild, smoky sweetness.
                      • 1/2 tsp Garlic Powder: For an aromatic depth.
                      • 2 large Eggs: To bind the breading to the fish.
                      • 1/4 cup Milk (or buttermilk for extra tang): Helps create a smooth batter.
                      • 2 cups Panko Breadcrumbs: These Japanese breadcrumbs are key to achieving an extra-crispy crust. Regular breadcrumbs will work but won’t be as crunchy.
                      • Vegetable oil or Canola oil for frying (about 3-4 cups): A neutral oil with a high smoke point is crucial for successful deep-frying.
                    • For Serving:
                      • 4-6 Soft Burger Buns (Brioche, potato rolls, or Kaiser rolls): Choose a bun that holds up well to the fish and toppings. Toasting them is highly recommended!
                      • Tartar Sauce: Homemade or store-bought. (See healthier alternatives for a lighter version!)
                      • Shredded Lettuce: Crisp iceberg or romaine for that refreshing crunch.
                      • Thinly Sliced Tomatoes: Ripe and juicy.
                      • Pickle Slices: Dill pickles add a lovely briny tang.
                      • Lemon Wedges: For a squeeze of fresh citrus just before eating.

                    Time Flies When You’re Cooking Delicious Food!

                    This recipe is designed for efficiency without sacrificing quality. While the average fried fish recipe might take longer due to simpler breading or prep, this streamlined approach gets you to that perfect crunch in no time.

                    Prep Time: 20 minutes
                    Cook Time: 12-15 minutes
                    Total Time: 32-35 minutes

                    Compared to many other fried fish recipes that can take up to an hour including marinating or extensive prep, this recipe offers a delightful and quick solution for a weeknight dinner or a speedy weekend lunch.

                    Crispy fried cod fillets on a plate, ready for sandwiches

                    Crafting Your Masterpiece: Step-by-Step Instructions

                    Follow these simple steps to achieve perfectly crispy fried cod that will have everyone asking for seconds.

                    Step 1: Prepare the Cod

                    Begin by patting your cod fillets completely dry with paper towels. This is crucial for the breading to adhere properly and for achieving a truly crispy exterior. If your fillets are very large, you can cut them into sandwich-sized portions (about 4-5 ounces each). Season the cod lightly on both sides with a pinch of salt and pepper.

                    Step 2: Set Up the Breading Stations

                    Set up three shallow dishes or plates for your breading process.
                    In the first dish, combine the flour, salt, pepper, paprika, and garlic powder. Whisk it all together to ensure the seasonings are well distributed.
                    In the second dish, whisk the eggs and milk (or buttermilk) together until smooth. This creates your egg wash.
                    In the third dish, place the panko breadcrumbs. If you want to add extra flavor to your breadcrumbs, you can mix in a little more salt, pepper, or even some dried herbs like parsley or dill.

                    Step 3: Bread the Cod

                    Now, let’s get that beautiful crust on the cod. Take one cod fillet at a time and dredge it lightly in the seasoned flour, shaking off any excess. Then, dip it into the egg wash, ensuring it’s fully coated. Finally, press the fillet into the panko breadcrumbs, coating all sides generously. Gently press the breadcrumbs onto the fish to help them stick. Place the breaded fillets on a clean plate or wire rack and repeat with the remaining fillets. For an even crispier coating, you can refrigerate the breaded fillets for about 10-15 minutes before frying.

                    Step 4: Heat the Oil

                    Pour your chosen vegetable oil into a heavy-bottomed pot or Dutch oven to a depth of about 2-3 inches. Heat the oil over medium-high heat until it reaches approximately 350°F (175°C). Use a thermometer to ensure the oil is at the correct temperature. If the oil is not hot enough, the fish will absorb too much grease and become soggy. If it’s too hot, the breading will burn before the fish is cooked through.

                    Step 5: Fry the Cod

                    Carefully place 2-3 breaded cod fillets into the hot oil, making sure not to overcrowd the pot. Overcrowding will lower the oil temperature, resulting in greasy fish. Fry for about 4-5 minutes per side, or until the fish is golden brown, crispy, and cooked through. The internal temperature should reach 145°F (63°C). Use a slotted spoon or spider strainer to carefully remove the fried cod from the oil and place it on a wire rack set over a baking sheet to drain any excess oil. This allows air to circulate, keeping the crust extra crispy. Repeat with the remaining fillets, ensuring the oil returns to 350°F (175°C) between batches.

                    Step 6: Assemble the Sandwiches

                    While the fish is draining, lightly toast your burger buns. Spread a generous amount of tartar sauce on the bottom half of each bun. Place a piece of crispy fried cod on top of the tartar sauce. Add your desired toppings: shredded lettuce, tomato slices, and pickle slices. Top with the other half of the bun, add a lemon wedge to the side, and serve immediately!

                    Nutritional Snapshot

                    It’s always good to have an idea of what you’re consuming. While exact values can vary based on portion size and specific ingredients used, here’s an estimated nutritional breakdown per sandwich (serving size is 1 sandwich with cod, bun, tartar sauce, lettuce, tomato, and pickles):

                    • Calories: Approximately 500-650 kcal
                    • Protein: 30-40g
                    • Fat: 25-40g (depending on frying oil absorption)
                    • Carbohydrates: 35-50g
                    • Sodium: Varies greatly based on added salt and tartar sauce

                    Note: This is an estimate and can change based on ingredient brands and preparation methods.

                    Lighter Bites: Healthier Alternatives

                    Want to enjoy this delicious sandwich with a healthier twist? Here are some smart swaps:

                    • Baking or Air Frying: Instead of deep-frying, you can bake the breaded cod at 400°F (200°C) for about 15-20 minutes, flipping halfway, or air fry at 380°F (190°C) for 10-12 minutes. For an even crispier baked result, lightly spray the breaded fish with cooking spray before baking.
                    • Whole Wheat Buns: Opt for whole wheat buns for added fiber and nutrients.
                    • Homemade Lighter Tartar Sauce: Mix Greek yogurt or light mayonnaise with chopped pickles, capers, fresh dill, a squeeze of lemon juice, and a pinch of salt and pepper. This significantly reduces fat and calories while retaining that signature tang.
                    • More Veggies: Load up your sandwich with extra lettuce, tomato, onion, or even avocado slices for added nutrients and fiber.
                    • Gluten-Free Breading: Use a gluten-free flour blend and gluten-free breadcrumbs (like crushed rice crackers or almond flour) if you have gluten sensitivities.

                    Perfect Pairings: Serving Suggestions

                    This crispy fried cod sandwich is a star on its own, but it shines even brighter with the right companions. Consider serving it with:

                    • Classic Fries: Crispy oven-baked fries or sweet potato fries are always a winner.
                    • Coleslaw: A creamy or vinegar-based coleslaw offers a refreshing crunch and tang.
                    • Onion Rings: For an extra indulgence!
                    • Side Salad: A simple green salad with a light vinaigrette can balance out the richness of the fried fish.
                    • Corn on the Cob: Especially delightful during the summer months.

                    Common Mistakes to Avoid

                    To ensure your fried cod sandwich is absolutely perfect, steer clear of these common pitfalls:

                    • Not drying the fish: This prevents the breading from sticking and leads to a less crispy coating.
                    • Overcrowding the pan: This drops the oil temperature, resulting in greasy, soggy fish. Fry in batches!
                    • Incorrect oil temperature: Too low and the fish gets greasy; too high and it burns. Use a thermometer!
                    • Not draining properly: Draining on paper towels can trap steam. A wire rack allows air circulation for maximum crispiness.
                    • Using stale breadcrumbs: Panko breadcrumbs offer the best crunch; ensure they are fresh.

                    Keeping It Fresh: Storing Leftovers

                    Fried fish is best enjoyed fresh for optimal crispiness. However, if you do have leftovers:

                    • Refrigeration: Store cooked cod fillets in an airtight container in the refrigerator for up to 2 days. Store assembled sandwiches separately for best results, as the bun can become soggy.
                    • Reheating: To revive crispiness, reheat the cod in a 375°F (190°C) oven for about 8-10 minutes, or in an air fryer until heated through and crispy again. Avoid reheating in the microwave, as it will make the fish rubbery and soft.
                    A close-up of a delicious fried cod fish sandwich with all the fixings

                    Frequently Asked Questions

                    ***What kind of fish is best for a fried fish sandwich?***

                    While cod is excellent, other firm white fish like haddock, pollock, tilapia, or even catfish work wonderfully. The key is a flaky texture that cooks relatively quickly.

                    ***Can I make the tartar sauce ahead of time?***

                    Absolutely! Homemade tartar sauce can be stored in an airtight container in the refrigerator for up to a week. The flavors often meld and improve over time.

                    ***Why is my fried fish soggy?***

                    This is usually due to oil temperature being too low, overcrowding the pan, or not draining the fish properly on a wire rack. Ensuring proper heat and airflow is essential.

                    ***Can I use regular breadcrumbs instead of panko?***

                    Yes, you can, but panko offers a superior, lighter, and crispier crunch. If using regular breadcrumbs, you might want to add a tablespoon or two of cornmeal to the mix for extra crispiness.

                    ***How can I tell if the cod is cooked through?***

                    The fish should be opaque and flake easily with a fork. For accuracy, use an instant-read thermometer; the internal temperature should reach 145°F (63°C).

                    Print
                    clock clock iconcutlery cutlery iconflag flag iconfolder folder iconinstagram instagram iconpinterest pinterest iconfacebook facebook iconprint print iconsquares squares iconheart heart iconheart solid heart solid icon

                    Crispy Fried Cod Fish Sandwich Recipe


                    • Author: Chef Emy

                    Description

                    Make the ultimatecrispy fried cod fish sandwichat home! This easy seafood recipe features flaky cod fillets, crunchy golden breading, fresh slaw, and creamy tartar sauce, all stacked inside a soft bun. Perfect for lunch, dinner, or casual gatherings.


                    Ingredients

                    Scale
                    • 4cod fillets (about4-6oz each)
                    • 1 cupall-purpose flour
                    • 2eggs
                    • 1 cuppanko breadcrumbs
                    • 1 teaspoonpaprika
                    • 1 teaspoongarlic powder
                    • ½ teaspoonblack pepper
                    • ½ teaspoonsalt
                    • Vegetable oil for frying
                    • 4sandwich buns
                    • 1 cupshredded cabbage (for slaw)
                    • ¼ cupmayonnaise
                    • 1 tablespoonlemon juice
                    • 1 tablespoonpickle relish
                    • Optional: sliced pickles, tomato, or lettuce

                    Instructions

                      Notes

                      For extra flavor, marinate cod in buttermilk for 30 minutes before breading.
                      Use a thermometer to keep frying oil between 350°F–375°F.
                      Toast the buns for an even better sandwich experience.

                      Nutrition

                      • Calories: 580
                      • Sugar: 5g

                      “`