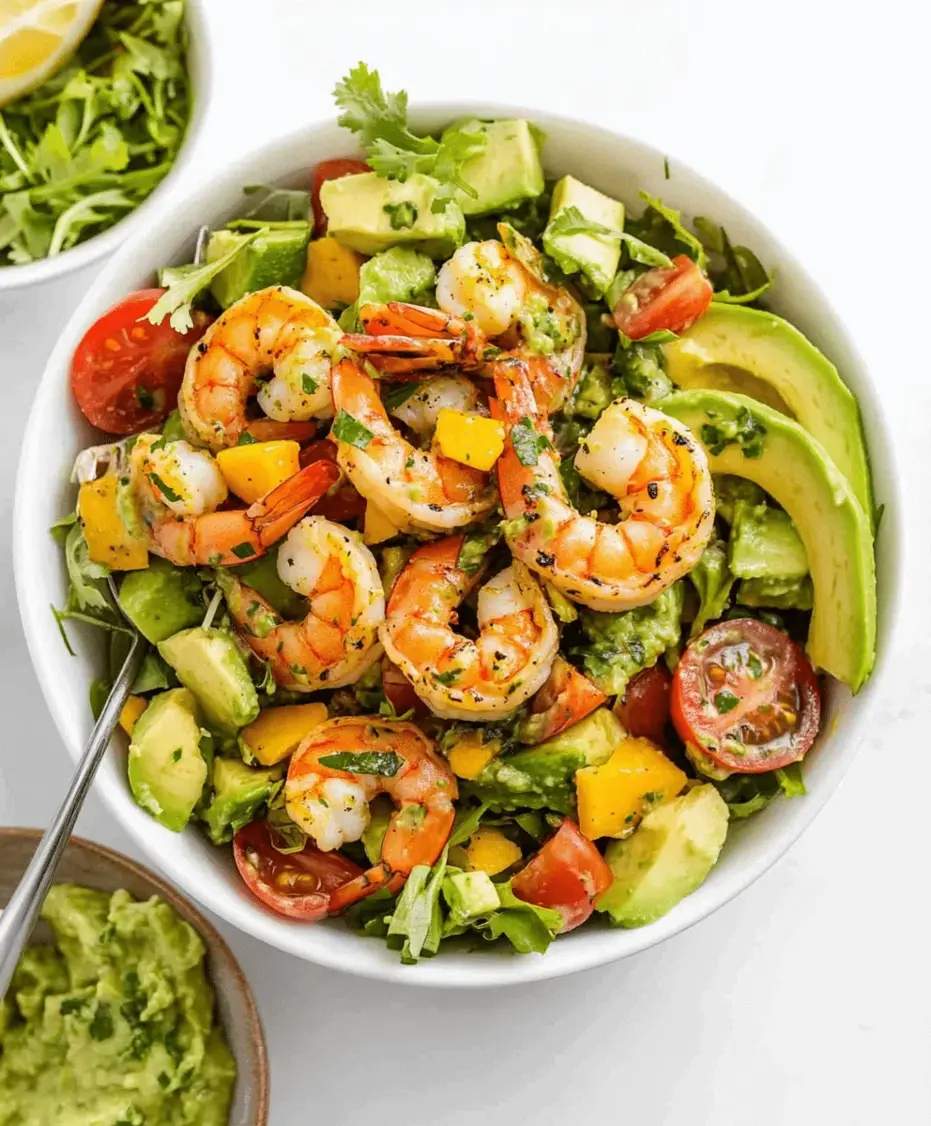
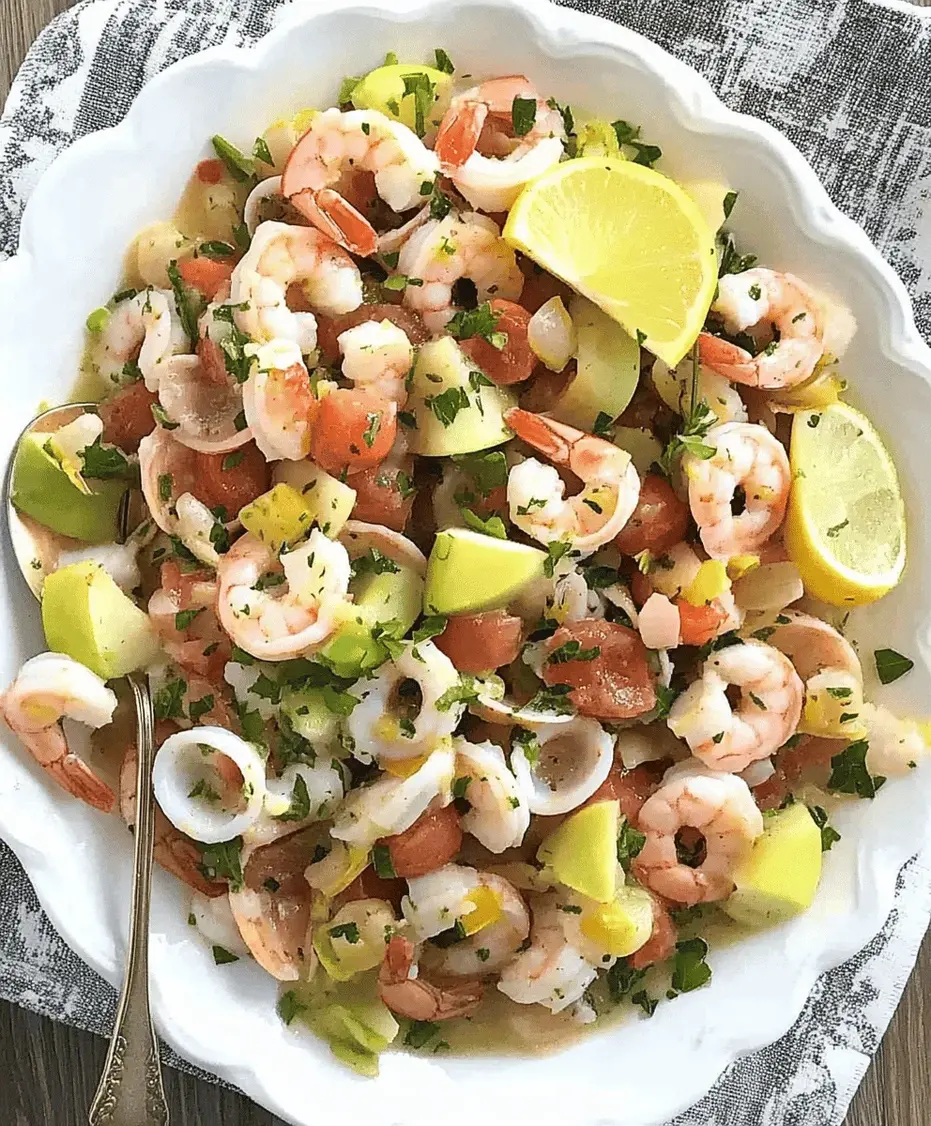
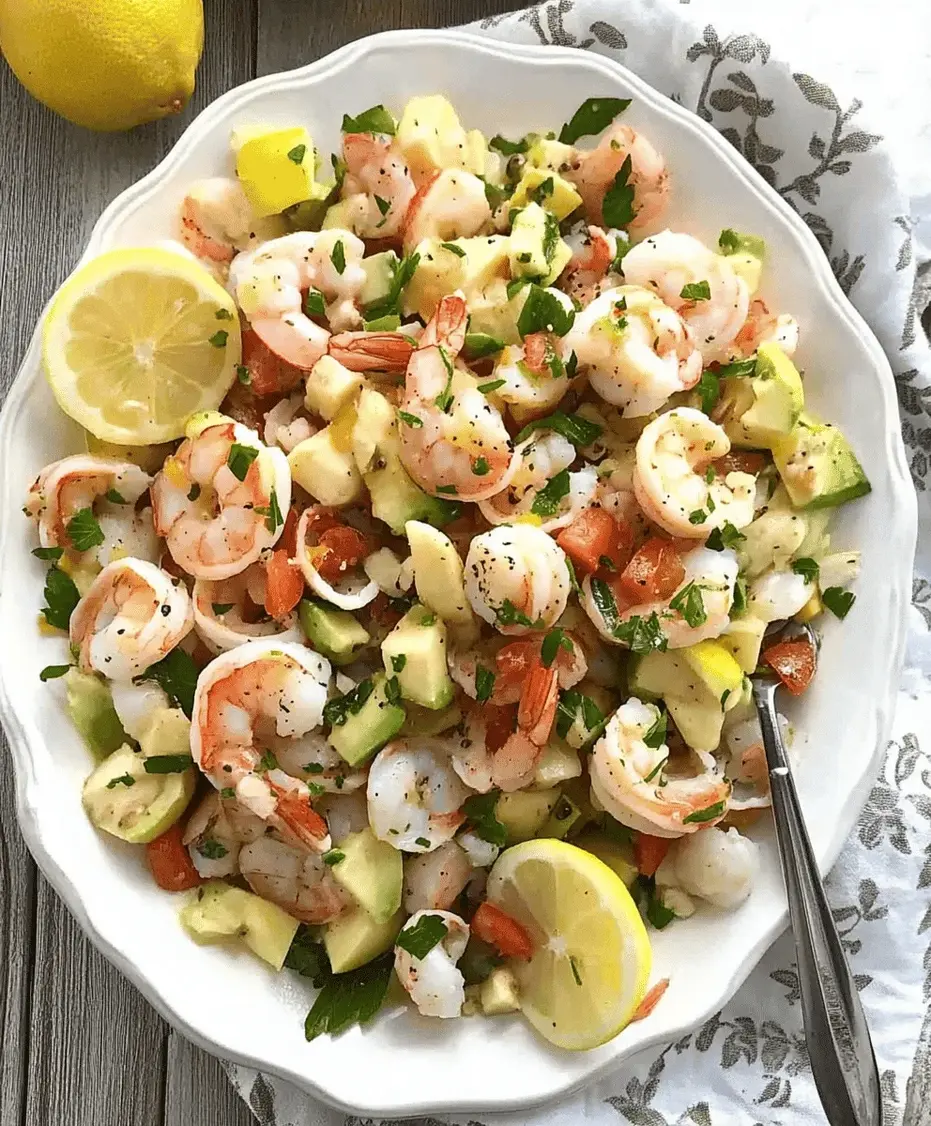
Green Goddess Salad Recipe

“`html

Green Goddess Salad Recipe

What is Green Goddess Salad?

The Green Goddess salad is a modern interpretation of a classic that has captivated taste buds for decades. While the original boasted a creamy, anchovy-laced dressing, today’s popular rendition focuses on fresh herbs, healthy fats, and a medley of vibrant greens and crisp vegetables. It’s the perfect dish to sneak in a serving of nutritious greens, offering a delightful crunch and a refreshing zest that makes healthy eating a joyous occasion. Think of it as your go-to for a light yet satisfying meal that won’t weigh you down, perfect for a quick lunch, a light dinner, or a stunning side dish.

Ingredients You’ll Need

Gathering your ingredients is the first step to culinary success. This salad is a celebration of freshness, so opt for the best quality produce you can find.

For the Salad Base:

  • Crisp Lettuce: A base of romaine lettuce, chopped into bite-sized pieces, provides that essential satisfying crunch. You can also mix in some tender butter lettuce for a softer texture.
  • Fresh Herbs: TONS of fresh herbs! This is where the “Goddess” truly shines. We’re talking about a generous mix of parsley (flat-leaf is great for flavor), chives (for a mild oniony bite), and tarragon (for a unique anise-like sweetness). Don’t be shy with these!
  • Cucumber: Half a seedless cucumber, thinly sliced or diced, adds a cool, watery crispness.
  • Avocado: One ripe avocado, diced, brings a creamy, luscious texture and healthy fats to the party. It also makes the salad incredibly satisfying.
  • Scallions (Green Onions): Thinly sliced scallions add a delicate onion flavor without being overpowering.
  • Optional Add-ins: Feel free to toss in some peas (fresh or frozen and thawed), edamame for protein, or even some chopped bell peppers for extra color and crunch.

For the Green Goddess Dressing:

  • Mayonnaise or Greek Yogurt: The creamy base. For a lighter version, Greek yogurt is a fantastic substitute for mayonnaise.
  • Fresh Herbs: More of that glorious herbaceous goodness! Parsley, chives, and tarragon are key.
  • Lemon Juice: Freshly squeezed lemon juice is essential for that bright, zesty flavor that cuts through the richness.
  • Garlic: One clove of garlic, minced or pressed, adds a pungent depth. Adjust to your taste.
  • Anchovy Paste (Optional but Recommended): A small amount of anchovy paste (or a finely minced anchovy fillet) provides an umami depth that is traditional and surprisingly doesn’t make the dressing taste fishy.
  • Salt and Black Pepper: To taste.
  • A splash of water or buttermilk: To thin the dressing to your desired consistency.

Timing is Everything

Prep Time:
15 Minutes
Cook Time:
0 Minutes
Total Time:
15 Minutes

Compared to many elaborate salad recipes, the Green Goddess Salad is a dream for busy weeknights or quick lunches. Most of the time is spent on chopping and prepping, with a minimal 15 minutes from start to finish. This is significantly faster than average layered salads or pasta salads that often require longer prep and cook times.
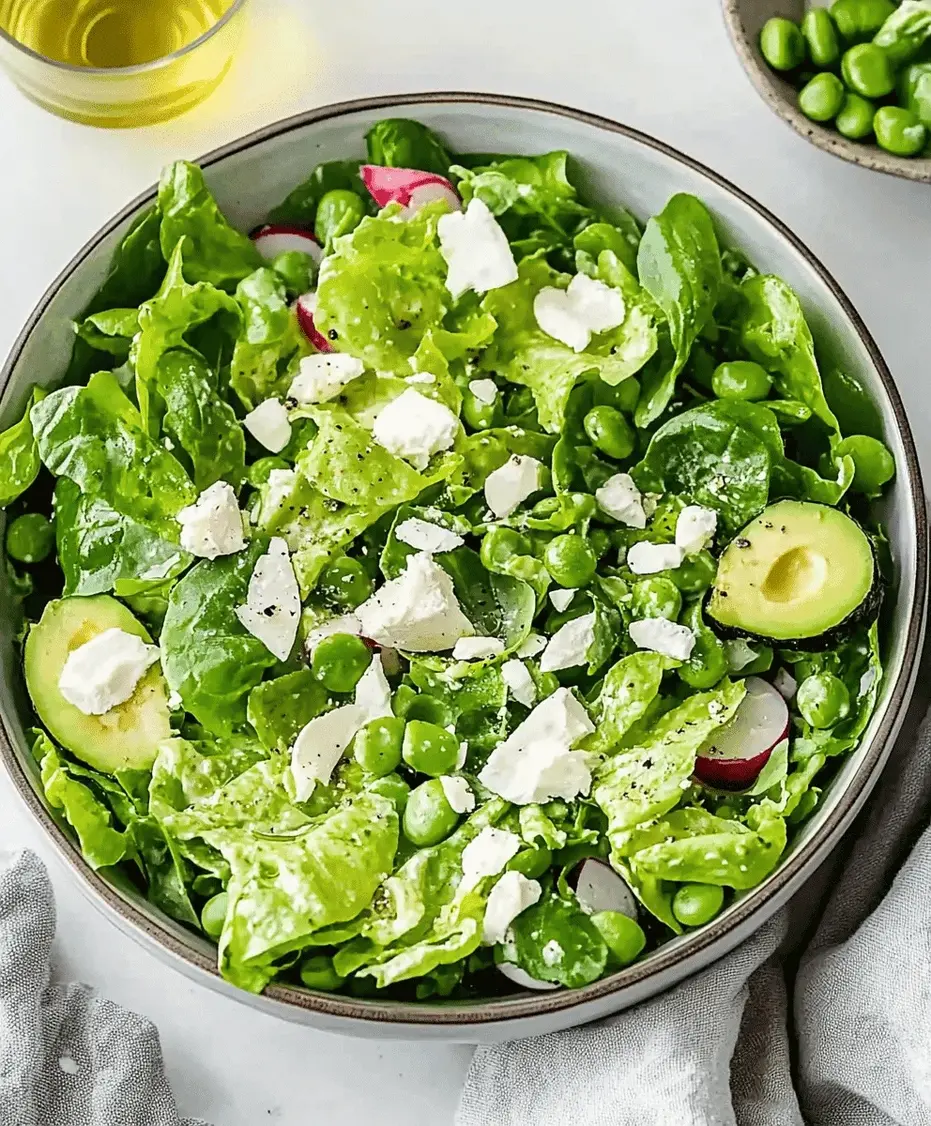
A vibrant, healthy Green Goddess Salad with creamy dressing.

Crafting Your Green Goddess Salad: Step-by-Step

Step 1: Prepare the Veggies

Start by thoroughly washing and drying all your fresh produce. This is crucial for food safety and ensures your salad doesn’t get watery. Chop your romaine lettuce into bite-sized pieces and place them in a large salad bowl. Dice your cucumber and add it to the bowl. Slice the scallions thinly. Halve, pit, and dice your ripe avocado; gently add it to the bowl. If you’re using any optional add-ins like peas or bell peppers, prepare them now and add them in.

Step 2: Whip Up the Dressing

In a small bowl or directly in a blender or food processor, combine the mayonnaise (or Greek yogurt), a generous handful of fresh parsley, chives, and tarragon, freshly squeezed lemon juice, minced garlic, and anchovy paste (if using). Blend or whisk vigorously until the dressing is smooth and creamy. You may need to add a tablespoon of water or buttermilk at a time to reach your desired drizzling consistency. Taste and season with salt and freshly ground black pepper. Remember, the herbs should be the star here, so don’t be afraid to use a good amount!

Step 3: Combine and Toss

Pour about half of the Green Goddess dressing over the prepared salad ingredients. Gently toss everything together until the vegetables are evenly coated. Add more dressing as needed, to your preference. You want every leaf and piece of vegetable to be kissed by that creamy, herbaceous goodness. Serve immediately for the best texture and flavor!

Nutritional Powerhouse

This Green Goddess Salad is a nutritional champion, packed with vitamins, minerals, fiber, and healthy fats. While exact nutritional values can vary based on ingredient portions and brands, a typical serving is:

  • Calories: Approximately 250-350 kcal (depending on mayonnaise vs. Greek yogurt)
  • Protein: Around 5-8g
  • Fat: 18-25g (primarily healthy monounsaturated fats from avocado and olive oil if used)
  • Carbohydrates: 10-15g
  • Fiber: 5-8g

The abundance of fresh herbs and vegetables provides antioxidants, vitamins A, C, and K, and essential minerals like potassium and folate. The avocado adds heart-healthy monounsaturated fats.

Healthier Twists on Green Goddess

Looking to make this salad even lighter or cater to specific dietary needs? Here are some fantastic swaps:

  • Dressing Base: Swap mayonnaise entirely for plain Greek yogurt for a protein and probiotic boost and significantly fewer calories. Silken tofu can also be blended for a vegan, creamy base.
  • Healthy Fats: While avocado is fantastic, a small amount of nuts or seeds like pumpkin seeds or sunflower seeds can add crunch and healthy fats.
  • Protein Boost: Add grilled chicken, shrimp, chickpeas, or lentils to make it a more substantial meal.
  • Vegan Green Goddess: Omit anchovy paste, use avocado or silken tofu as the base, and rely on nutritional yeast for a cheesy, umami flavor if desired.
  • Whole Grains: Serve over a bed of quinoa or farro for added fiber and complex carbohydrates.

Serving Suggestions

The versatility of Green Goddess Salad makes it a star in many scenarios:

  • Light Lunch: Enjoy it on its own for a refreshing midday meal.
  • Side Dish: It’s a brilliant accompaniment to grilled fish, chicken, steak, or even a hearty vegetable soup.
  • Brunch Staple: Serve alongside eggs, toast, or pancakes for a vibrant brunch option.
  • Sandwich/Wrap Filling: The chopped salad can be used as a filling for sandwiches or wraps, adding a burst of flavor and freshness.

Common Mistakes to Avoid

To ensure your Green Goddess Salad is perfection every time, keep these common pitfalls in mind:

  • Not Drying Greens Properly: Excess water dilutes the dressing and makes the lettuce soggy.
  • Over-dressing: Start with less dressing and add more as needed. You want to coat, not drown, the ingredients.
  • Using Wilted Herbs: Fresh, vibrant herbs are crucial for flavor.
  • Adding Avocado Too Early: If dicing avocado far in advance, toss it with a little lemon juice to prevent browning, but it’s best added just before serving to maintain its creamy texture and prevent mushiness.
  • Underspiced Dressing: Taste and adjust seasoning for the dressing; it should be bright and flavorful.

Storing Your Green Goddess Salad

For optimal freshness, it’s best to enjoy your Green Goddess Salad immediately after preparing it. However, if you have leftovers:

  • Store components separately: If possible, store the chopped salad ingredients (without the dressing) in an airtight container in the refrigerator for up to 1-2 days. Keep the dressing separate in another container.
  • Dress just before serving: When ready to eat, combine the salad ingredients with the dressing and toss.
  • Pre-dressed salad: If you must dress the salad ahead of time, be aware that the greens may lose some of their crispness, and the avocado might brown slightly. It will still be edible but less visually appealing and with a softer texture.
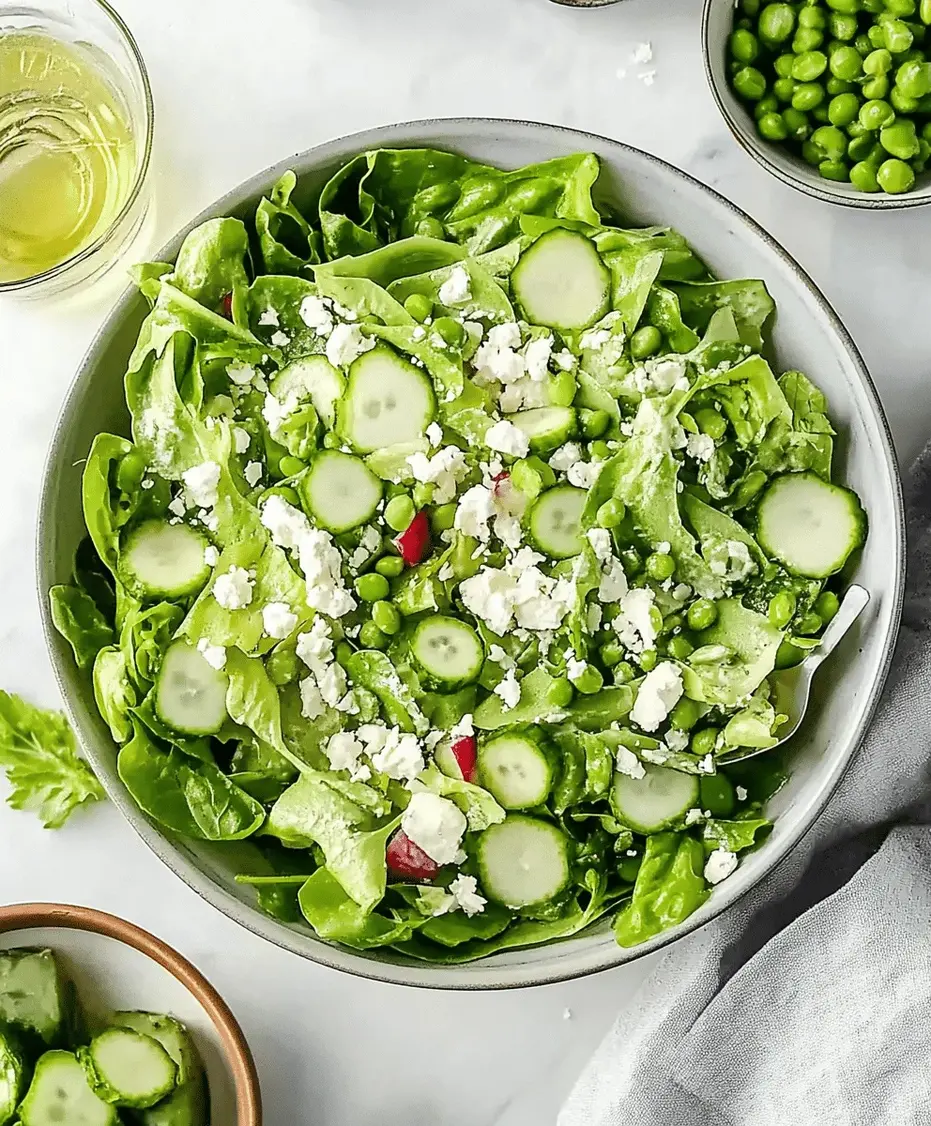
Close-up of a creamy Green Goddess dressing being drizzled over salad ingredients.

Frequently Asked Questions

***What makes the dressing “Green Goddess”?***

The “Green Goddess” name comes from the vibrant green color of the dressing, derived from a generous amount of fresh herbs. The original dressing, created in the 1920s, featured anchovies and mayonnaise, giving it a rich, savory profile.

***Can I use other herbs in the dressing?***

Absolutely! While parsley, chives, and tarragon are classic, feel free to experiment. Basil, dill, mint, or even a bit of cilantro can add unique twists. Just ensure you have a good base of herbs that complement each other.

***Is this salad good for meal prep?***

Yes, with a slight modification. It’s best to store the dressing separately from the salad ingredients and toss them together just before serving to maintain crispness.

***My dressing is too thick. What can I do?***

Simply whisk in more liquid, a tablespoon at a time. Water, buttermilk, or a splash of milk will help thin it out to your desired consistency.

***Can I make this dressing vegan?***

Yes! Replace the mayonnaise or Greek yogurt with a creamy base like avocado, silken tofu, or vegan mayonnaise. Omit the anchovy paste, and consider adding a pinch of nutritional yeast for an umami flavor.

Enjoy Your Fresh Green Goddess Salad!

The Green Goddess Salad is more than just a meal; it’s an experience of vibrant flavors and wholesome nutrition. Whether you’re a seasoned chef or a beginner cook, this recipe offers a rewarding and delicious way to enjoy a bounty of fresh ingredients. So, gather your greens, embrace the herbs, and whip up this sensational salad. We’re confident it will become a favorite in your recipe rotation!
Print

clock clock iconcutlery cutlery iconflag flag iconfolder folder iconinstagram instagram iconpinterest pinterest iconfacebook facebook iconprint print iconsquares squares iconheart heart iconheart solid heart solid icon

Green Goddess Salad Recipe


  • Author: Chef Emy

Description

This Green Goddess Salad recipe is a refreshing and flavorful dish made with crisp veggies and a creamy herb-packed dressing. It’s a nutritious, vibrant salad perfect for any meal, bursting with freshness and ideal for healthy eating.


Ingredients

Scale
  • 1small head green cabbage, finely chopped
  • 1large cucumber, diced
  • 1bunch green onions, sliced
  • ½ cupfresh basil leaves
  • ½ cupfresh spinach
  • ¼ cupchives
  • ¼ cupfresh parsley
  • 2cloves garlic
  • 1small shallot
  • Juice of2lemons
  • ¼ cupolive oil
  • 2 tbsprice vinegar
  • cupnutritional yeast or parmesan
  • ½avocado
  • Salt and pepper to taste

Instructions

    Notes

    For added crunch, top with roasted seeds or nuts.
    Can be stored in the fridge for up to 2 days.
    Add protein like grilled chicken or tofu for a complete meal.

    Nutrition

    • Calories: 180
    • Sugar: 3g

    “`

    Tropical Pineapple Salad Recipe

    “`html

    Tropical Pineapple Salad Recipe

    Dive into the Tropics: Are You Craving a Taste of Sunshine?

    In a world where healthy eating often feels like a chore, aren’t you on the lookout for vibrant, refreshing dishes that feel like a treat? If you’re nodding along, then this Tropical Pineapple Salad recipe is about to become your new best friend. Imagine a burst of sweet, juicy pineapple mingling with the creamy allure of mango, all brought together by a zesty lime dressing that awakens your palate. This isn’t just a side dish; it’s a miniature vacation on a plate, perfect for livening up summer picnics, barbecues, or simply adding a splash of color and vitamin-rich goodness to your everyday meals. It’s incredibly easy to prepare, making it ideal for busy weeknights or spontaneous gatherings. Let’s embark on a culinary journey to the tropics, where every bite is a reminder of sunshine and pure, unadulterated freshness.

    Fresh, Vibrant Ingredients

    The magic of this salad lies in its simplicity and the quality of its core ingredients. We’re focusing on natural sweetness and bright, tropical flavors. Here’s what you’ll need:

    The Star: Juicy Pineapple

    Quantity: 1 ripe pineapple (about 3-4 cups cubed)

    Description: Choose a pineapple that is heavy for its size, with a sweet aroma at the base and golden-yellow skin. The flesh should be firm yet yield slightly to gentle pressure. Its bright, tangy-sweet flavor is the foundation of our salad.

    Substitution: If fresh pineapple is unavailable, canned pineapple chunks (in juice, not syrup) can be used in a pinch. Drain them thoroughly. For an intensified flavor, consider using grilled pineapple, which adds a lovely smoky depth.

    Sun-Kissed Mango

    Quantity: 2 ripe mangoes (about 2 cups cubed)

    Description: Ripe mangoes are a delight! They should feel slightly soft when gently squeezed and have a sweet, fruity fragrance. Their creamy texture and luscious sweetness provide a wonderful contrast to the pineapple’s tartness.

    Substitution: Peaches or nectarines can be a good alternative when mangoes are out of season. Their sweet, slightly acidic profile complements the other fruits well.

    Zesty Lime Dressing

    Ingredients for Dressing:

    • Juice of 2-3 limes (about 1/4 cup) – fresh is best for that vibrant zing!
    • 1 tablespoon honey or maple syrup (adjust to taste) – for a touch of sweetness
    • 1 teaspoon finely grated lime zest – for an extra burst of citrus aroma
    • Optional: A pinch of red pepper flakes for a hint of heat

    Description: This simple dressing acts as a bright, refreshing binder, enhancing the natural flavors of the fruit without overpowering them. The lime juice brings a delightful tang, while the honey or maple syrup balances it with gentle sweetness. The zest adds an aromatic punch that makes the salad truly sing.

    Substitution: Lemon juice or a blend of lime and orange juice can be used. For the sweetener, agave nectar or even a sugar-free substitute can work, though adjust sweetness levels accordingly.

    Optional, But Delicious Additions

    Quantity: Varies based on preference

    Ideas:

    • 1/2 cup fresh mint leaves, finely chopped – for a cool, refreshing note
    • 1/4 cup finely diced red onion – for a subtle savory bite (soak in cold water for 10 mins to mellow its sharpness)
    • 1/4 cup toasted shredded coconut – for a tropical crunch
    • 1/2 cup berries (strawberries, blueberries, raspberries) – for added color and antioxidants
    • 1/4 cup chopped cilantro – for a fresh, herbaceous twist

    Description: These additions can elevate your salad from delightful to extraordinary, adding layers of texture, aroma, and complementary flavors. Mint and lime are classic partners, while a hint of red onion can surprisingly enhance the fruitiness.

    Perfect Timing for Your Tropical Creation

    Prep Time:
    15 minutes
    Cook Time:
    0 minutes (unless grilling pineapple)
    Total Time:
    15 minutes (+ chilling time)

    Compared to many complex recipes, this Tropical Pineapple Salad is a swift delight. The average fruit salad might take a similar amount of time, but the simplicity and impact of these tropical flavors make it stand out. The minimal prep time means you can whip this up whenever a craving strikes or you need a last-minute healthy side dish.

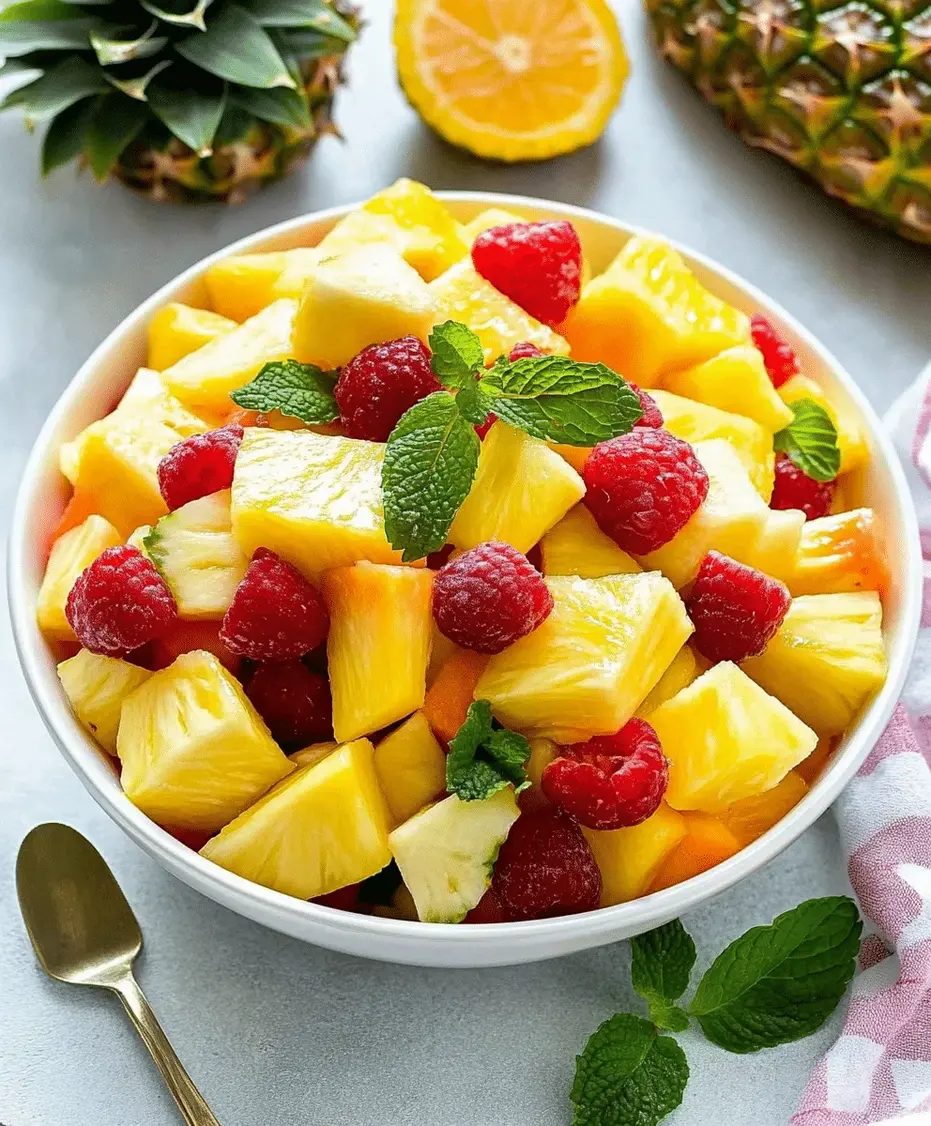
    A close-up view of a vibrant tropical pineapple salad in a serving bowl, showcasing chunks of pineapple and mango, a sprig of mint, and a light dressing.

    Crafting Your Tropical Pineapple Salad: Step-by-Step

    Step 1: Prepare the Tropical Trio

    Begin by preparing your star ingredients. Carefully peel, core, and dice your ripe pineapple into bite-sized cubes (about 1-inch). Do the same for your ripe mangoes, ensuring you get as much of that sweet flesh away from the pit. Aim for uniformity in size for the best texture and visual appeal.

    Step 2: Whisk Together the Zesty Dressing

    In a small bowl, whisk together the fresh lime juice, honey or maple syrup, and lime zest. If you’re using them, add the pinch of red pepper flakes now. Taste and adjust the sweetness or tanginess as needed. A perfectly balanced dressing is key!

    Step 3: Gently Combine the Flavors

    In a large mixing bowl, gently combine the cubed pineapple and mango. If you’re adding any optional ingredients like mint, cilantro, or diced red onion, add them now. Drizzle about half of the lime dressing over the fruit and toss very gently to coat. You want to be careful not to mash the delicate fruit.

    Step 4: Chill and Marry the Flavors

    Cover the bowl and refrigerate for at least 15-30 minutes. This “marrying” time is crucial. It allows the flavors to meld together beautifully and for the fruit to chill to the perfect refreshing temperature. Before serving, give the salad another gentle toss and add more dressing if desired. If you’re adding toasted coconut, reserve it for sprinkling on top just before serving to maintain its crunch.

    Nutritional Sunshine

    This Tropical Pineapple Salad is not only a delight for the taste buds but also a powerhouse of nutrients. While exact values can vary based on fruit size and ripeness, a typical serving is rich in:

    • Vitamin C: Abundant in pineapple and lime, crucial for immune function and skin health.
    • Vitamin A & Beta-Carotene: Primarily from mango, important for vision and cell growth.
    • Fiber: Supports digestive health and helps you feel full.
    • Antioxidants: Fighting free radicals and promoting overall well-being.
    • Hydration: High water content from the fruits contributes to your daily fluid intake.

    Each serving is naturally low in calories and fat, making it a guilt-free indulgence.

    Healthier Swaps for Guilt-Free Indulgence

    Looking to make this tropical delight even healthier? Here are a few flavor-preserving swaps:

    • Sweetener: Instead of honey or maple syrup, use a small amount of agave nectar or a sugar-free liquid sweetener. Start with less and add more to taste.
    • Citrus: While lime is ideal, a mix of lime and orange juice can offer a slightly sweeter citrus profile, potentially reducing the need for added sweetener.
    • Grains/Add-ins: If you’re looking to add substance and fiber, consider adding a small amount of cooked quinoa or amaranth for a surprising textural element and protein boost.
    • Creaminess: For a touch of creaminess without dairy, a tablespoon of unsweetened shredded coconut or a tiny splash of coconut milk in the dressing can enhance the tropical feel.

    Serving Suggestions to Brighten Any Meal

    This versatile salad pairs beautifully with a variety of dishes. Consider serving it:

    • As a refreshing side dish for grilled chicken, fish, or pork.
    • Alongside spicy dishes like curries or tacos to provide a cooling contrast.
    • As a light breakfast or brunch item, perhaps topped with a dollop of Greek yogurt.
    • As a vibrant dessert option, especially on a warm evening.
    • Scooped into hollowed-out pineapple halves for a stunning presentation.

    Avoiding Common Fruit Salad Pitfalls

    To ensure your Tropical Pineapple Salad is always a hit, steer clear of these common errors:

    • Over-mixing: Handle the fruit gently to prevent it from becoming mushy.
    • Underripe Fruit: Using fruit that isn’t ripe will result in a flavorless and tough salad. Patience is key!
    • Too Much Dressing: The dressing should enhance, not drown, the fruit. Start with less and add more as needed.
    • Adding Dressing Too Early: For fruits that can get soggy (like berries if you add them), consider adding them just before serving, or dressing them separately before combining.
    • Not Letting it Chill: Resting the salad allows the flavors to meld, which significantly improves the taste.

    Savoring the Sunshine: Storing Your Salad

    This salad is best enjoyed fresh, as the fruit will continue to soften over time. However, if you have leftovers, store them in an airtight container in the refrigerator. It will typically keep well for 1-2 days. The texture might change slightly, but the flavors will still be delightful. Avoid freezing, as this will greatly alter the texture of the fruit.

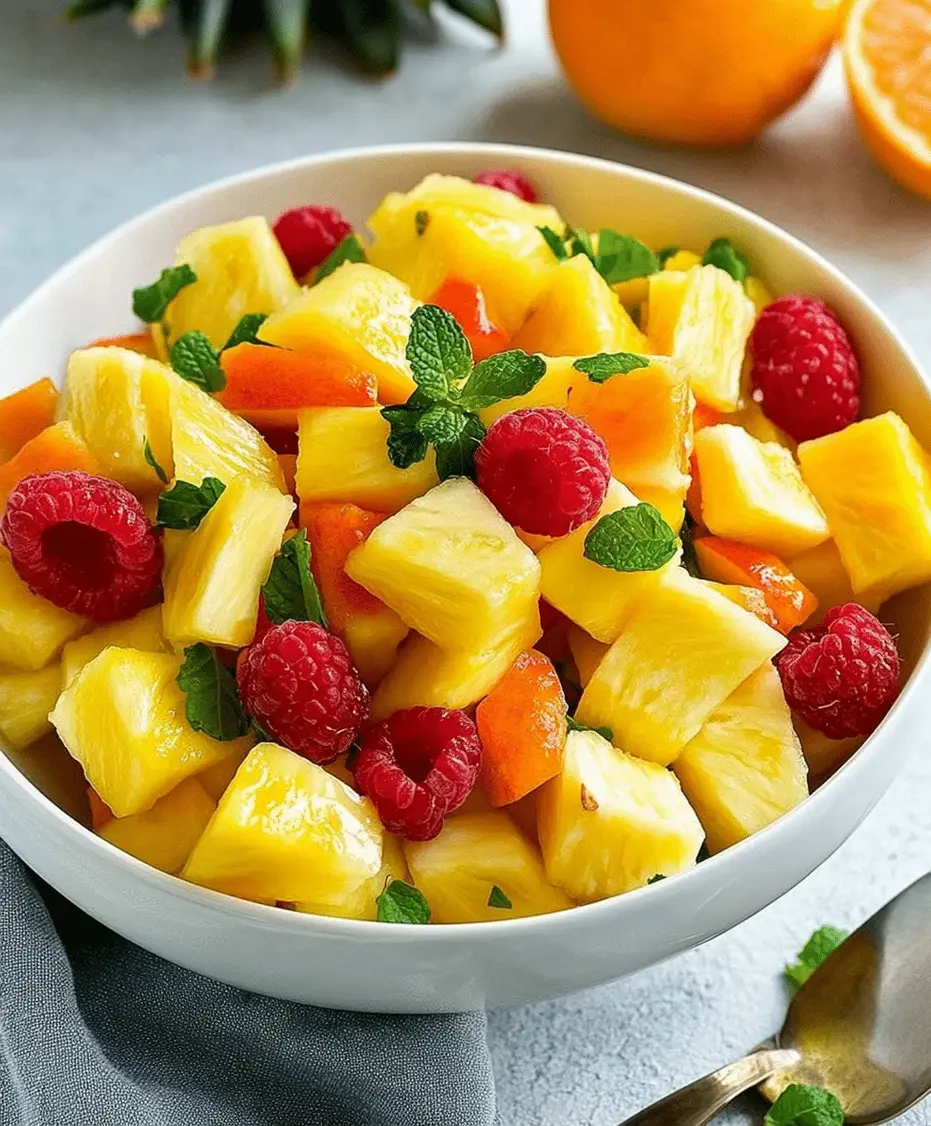
    A refreshing bowl of Tropical Pineapple Salad with mango, pineapple, mint, and a zesty lime dressing, perfect for a summer day.

    Embrace the Tropical Escape

    There you have it – a simple yet sensational Tropical Pineapple Salad that brings the joy and flavor of the tropics right to your kitchen. It’s a testament to how fresh, vibrant ingredients can create something truly spectacular with minimal effort. Whether you’re serving it at a potluck, a barbecue, or just for yourself as a healthy indulgence, this salad promises a burst of sunshine with every spoonful. So, gather your ingredients, get ready to chop, and transport yourself to a tropical paradise. Don’t forget to share your creations and tag us when you make this delightful recipe!

    Frequently Asked Questions

    ***Can I make this salad ahead of time?***

    Yes, you can prepare the fruit and dressing separately a few hours in advance. Combine them about 30 minutes to an hour before serving for the best texture. For longer storage, it’s best to keep them separate until ready to eat.

    ***What other fruits pair well with pineapple and mango?***

    Berries (strawberries, blueberries), kiwi, papaya, oranges, and grapes are all excellent additions that complement the tropical theme.

    ***How can I incorporate a protein source into this salad?***

    You can add grilled chicken or shrimp for a light meal, or top it with toasted nuts like macadamia or almonds for plant-based protein and crunch.

    ***Is it okay to use canned pineapple?***

    Canned pineapple can be used, but opt for those packed in their own juice, not syrup. Drain it very well to avoid a watery salad. Fresh pineapple generally offers superior flavor and texture.

    ***How do I cut a pineapple?***

    To cut a pineapple, slice off the top and bottom. Stand it upright and carefully slice off the rind, following the curve of the fruit. Then, cut it into quarters lengthwise, remove the tough core from each quarter, and dice the flesh into desired pieces.

    ***Can I add a creamy element to the dressing?***

    For a touch of creaminess, you can whisk in a tablespoon of unsweetened coconut cream or a dollop of Greek yogurt (if not vegan) into the lime dressing. Do this just before serving.

    Print

    clock clock iconcutlery cutlery iconflag flag iconfolder folder iconinstagram instagram iconpinterest pinterest iconfacebook facebook iconprint print iconsquares squares iconheart heart iconheart solid heart solid icon

    Tropical Pineapple Salad Recipe


    • Author: Chef Emy

    Description

    This Tropical Pineapple Salad recipe is a vibrant, refreshing dish packed with juicy pineapple, mango, and zesty lime. Ideal for summer picnics or as a light side, this tropical fruit salad brings sunshine to your plate. Fresh, easy to prepare, and full of vitamins—perfect for a healthy lifestyle.


    Ingredients

    Scale
    • 2 cupsfresh pineapple, chopped
    • 1 cupmango, diced
    • 1 cupkiwi, sliced
    • ½ cupstrawberries, halved
    • ½ cupshredded coconut (optional)
    • 2 tbsplime juice
    • 1 tbsphoney or agave syrup (optional)
    • Fresh mint leaves for garnish

    Instructions

      Notes

      Use fully ripe fruits for best flavor.
      Can be made a few hours ahead and chilled in the fridge.
      Customize with your favorite tropical fruits like papaya or banana.

      Nutrition

      • Calories: 120
      • Sugar: 18g

      “`

      Easy Broccoli Salad Recipe

      “`html

      Easy Broccoli Salad Recipe

      Fresh, Flavorful, and Forget-Your-Worries: The Ultimate Easy Broccoli Salad

      Are you searching for that perfect, go-to side dish that’s a guaranteed hit at any gathering? Millions of home cooks are searching for “easy broccoli salad recipes” daily, and for good reason! This Easy Broccoli Salad recipe is a fresh, flavorful masterpiece that combines the satisfying crunch of crisp broccoli florets with the savory allure of bacon, the sharp bite of red onion, and a luscious, creamy dressing. It’s the kind of salad that disappears in a flash, leaving everyone asking for the recipe. Whether you’re heading to a potluck, firing up the grill for a barbecue, or simply craving a light and healthy lunch that doesn’t skimp on taste, this recipe delivers. It’s a healthy, quick, and wonderfully versatile dish that everyone will love.

      What You’ll Need for This Easy Broccoli Salad

      The beauty of this easy broccoli salad lies in its simplicity and the harmonious blend of textures and tastes. Here’s what you’ll need to create this delightful dish:

      Broccoli: The Star of the Show

      • Broccoli Florets: About 6 cups. Opt for fresh, vibrant green broccoli. The florets should be tight and firm. You can also use pre-cut broccoli florets from the grocery store, but make sure they are fresh. Don’t discard the stems! You can chop them finely and add them to the salad for extra crunch and nutrients.

      Bacon: The Irresistible Savory Crunch

      • Bacon: 6-8 slices, cooked until crispy and crumbled. The smoky, salty, crispy bits of bacon are essential for that irresistible flavor explosion. Use your favorite type of bacon – smoked, thick-cut, or even turkey bacon for a lighter option.

      Red Onion: A Zesty Hint of Zing

      • Red Onion: ½ cup, finely chopped. Red onion adds a beautiful color and a sharp, slightly sweet flavor that cuts through the richness of the dressing and bacon. If you find raw onion too pungent, you can soak the chopped onion in ice water for 10-15 minutes to mellow its flavor.

      The Creamy Dream Dressing

      • Mayonnaise: 1 cup. This is the creamy base of our dressing. Full-fat mayonnaise will yield the richest flavor and texture.
      • Apple Cider Vinegar: 2 tablespoons. A touch of acidity is crucial to balance the creaminess and brighten the flavors. White vinegar or red wine vinegar can be used in a pinch.
      • Granulated Sugar: 2-3 tablespoons, or to taste. Sugar balances the tanginess of the vinegar and mayo, enhancing the sweetness of the other ingredients. Adjust this to your preference.
      • Salt: ½ teaspoon, or to taste. Enhances all the flavors.
      • Black Pepper: ¼ teaspoon, or to taste. Freshly ground black pepper is best for a little pep.

      Optional Add-Ins: Personalize Your Salad

      • Sunflower Seeds: ¼ cup, toasted. For an extra layer of nutty crunch and visual appeal.
      • Raisins or Dried Cranberries: ¼ cup. For a touch of sweetness and chewy texture.
      • Shredded Cheese: ½ cup of cheddar or Monterey Jack. Adds a creamy, savory element.
      • Hard-Boiled Eggs: 2, chopped. For added protein and richness.
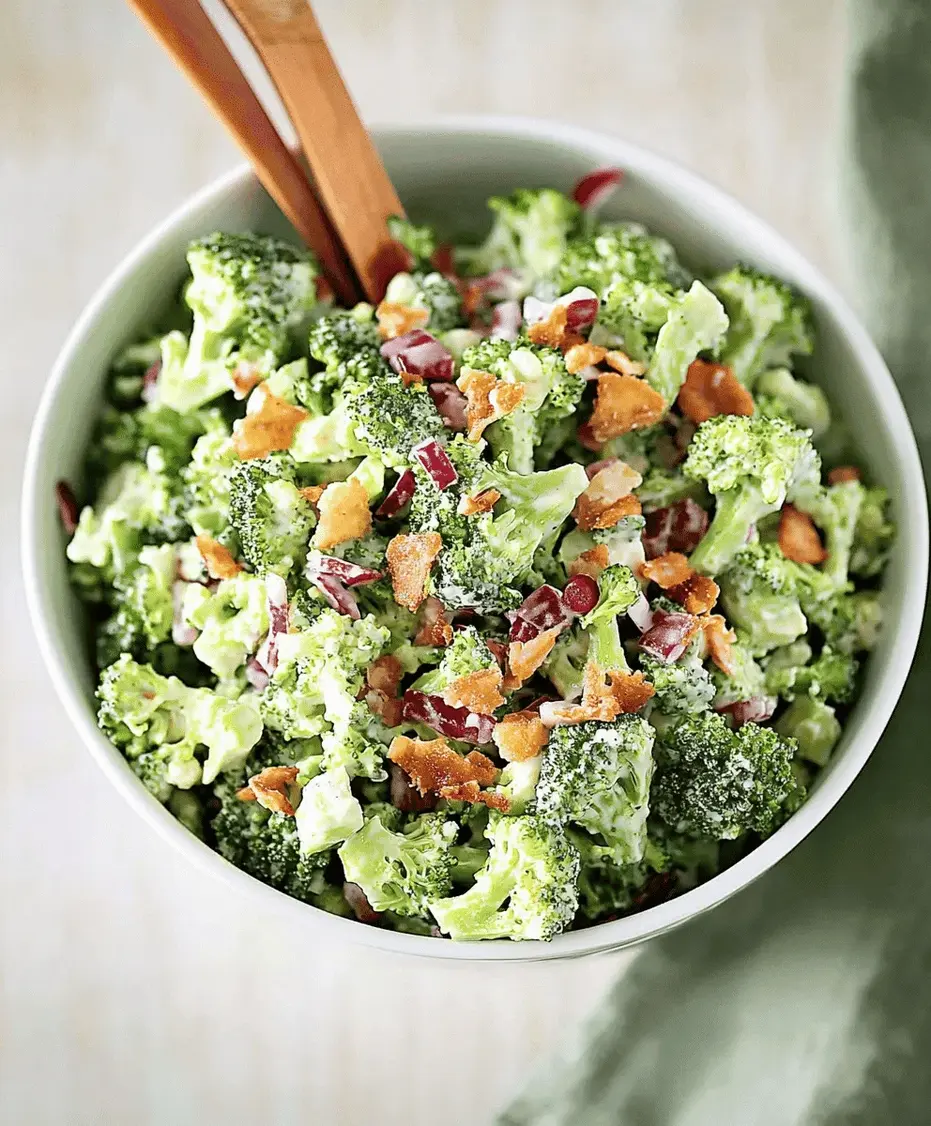
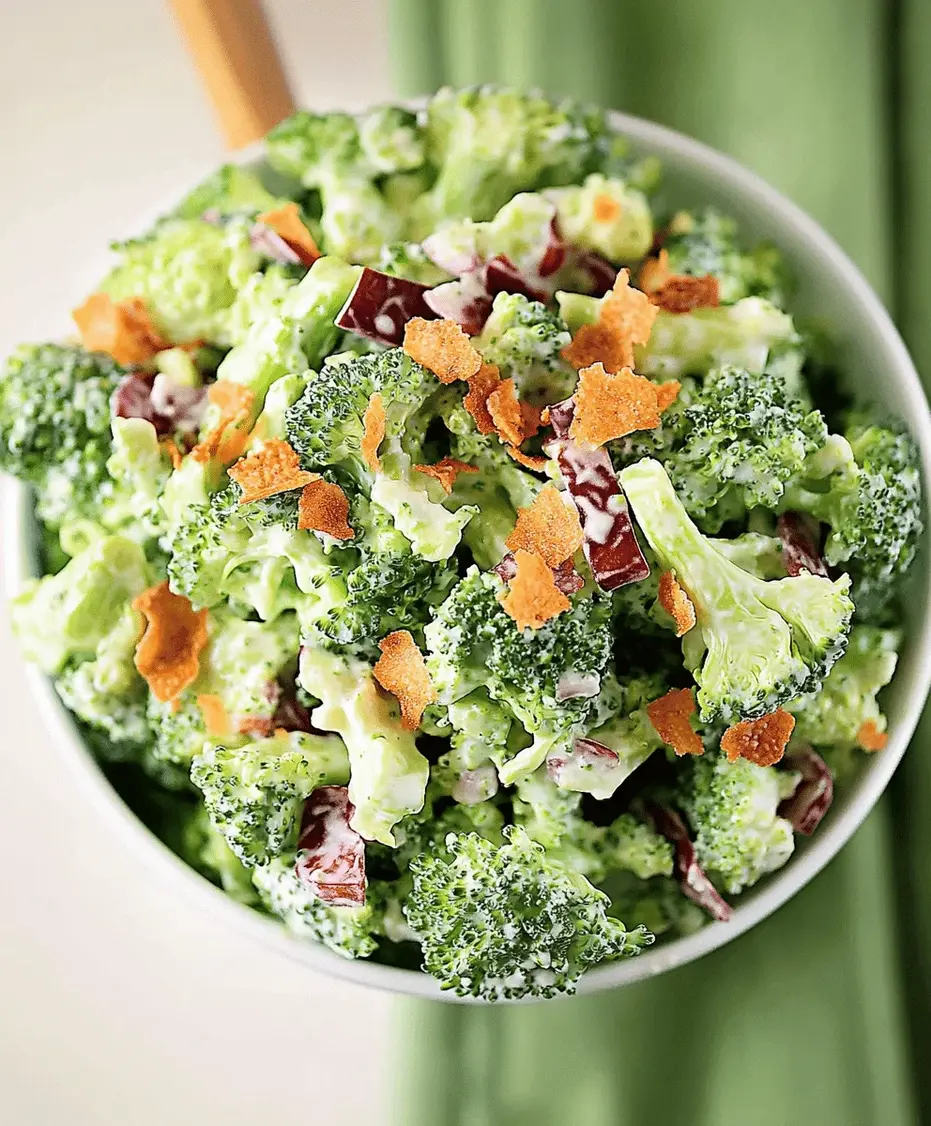
      A beautiful bowl of easy broccoli salad with bacon and red onion.

      How Long Does This Easy Broccoli Salad Take?

      One of the best features of this recipe is its speed and efficiency. It’s designed to be quick, making it perfect for last-minute meal planning or event prep.

      Prep time:
      15 minutes
      Cook time:
      10-15 minutes (for bacon)
      Total time:
      25-30 minutes (plus chilling time)
      Compared to average recipes:
      This recipe is faster than many traditional salad preparations, especially those requiring extensive chopping or cooking of multiple components. The active prep time is minimal, and the chilling time allows for hands-off flavor development.

      Step-by-Step Guide to Your Perfect Broccoli Salad

      Following these simple steps will ensure your Easy Broccoli Salad is a resounding success. Let’s get started!

      Step 1: Prep the Broccoli

      Wash your broccoli thoroughly. Cut the broccoli into bite-sized florets. If you’re feeling adventurous (and want to reduce waste!), finely chop the broccoli stems and add them to the florets. I personally love the texture the stems add, so don’t be afraid to use them! Aim for pieces that are easy to eat with a fork.

      Step 2: Cook the Bacon

      In a skillet over medium heat, cook your bacon slices until they are perfectly crispy. This usually takes about 10-15 minutes, depending on the thickness of your bacon. Once crispy, transfer the bacon to a paper towel-lined plate to drain excess grease. Once cooled slightly, crumble the bacon into small pieces. Reserve a little bit of the bacon grease – about a tablespoon – if you’re feeling indulgent, as it can add an extra layer of savory flavor to the dressing, though it’s entirely optional!

      Step 3: Chop the Red Onion

      Finely chop your red onion. You want small pieces so they integrate well into the salad without being overpowering. If the raw onion flavor is a concern for you, remember the trick of soaking them in ice water for about 10 minutes. Pat them dry thoroughly before adding them to the salad.

      Step 4: Whisk Together the Creamy Dressing

      In a medium bowl, combine the mayonnaise, apple cider vinegar, granulated sugar, salt, and black pepper. Whisk it all together until smooth and well combined. Taste and adjust seasonings as needed – do you want it a bit sweeter? Tangier? Saltier? This is your chance to personalize!

      Step 5: Assemble the Salad

      In a large mixing bowl, combine the prepared broccoli florets, crumbled crispy bacon, and finely chopped red onion. If you’re using any optional add-ins like sunflower seeds, raisins, or cheese, now’s the time to add them in!

      Step 6: Chill and Serve

      Pour the creamy dressing over the salad ingredients. Gently toss everything together until all the components are evenly coated in the dressing. Cover the bowl and refrigerate for at least 30 minutes. This chilling time is crucial; it allows the flavors to meld together beautifully and the broccoli to soften slightly, making it more tender and receptive to the dressing.

      Nutritional Snapshot

      While exact nutritional values can vary based on specific ingredients and portion sizes, a typical serving of this Easy Broccoli Salad (without optional add-ins like cheese) is approximately:

      • Calories: 250-350 kcal
      • Fat: 20-30g (mostly from mayonnaise and bacon, with a good portion being unsaturated fats from broccoli)
      • Carbohydrates: 10-15g (mostly from broccoli and sugar)
      • Protein: 5-10g (primarily from bacon)
      • Fiber: 3-5g (from broccoli)

      Note: Including cheese or using oil-based dressings will alter these numbers.

      Healthier Swaps Without Sacrificing Flavor

      Want to lighten up this classic? You can make smart substitutions without compromising on taste:

      • Lighter Dressing: Substitute half of the mayonnaise with plain Greek yogurt or a lighter, avocado-oil-based mayonnaise. This significantly cuts down on saturated fat and calories while still providing creaminess.
      • Leaner Protein: Use turkey bacon or, for a vegetarian option, crispy pan-fried chickpeas or smoked tofu cubes instead of pork bacon.
      • Reduced Sugar: Gradually reduce the amount of sugar, tasting as you go. The natural sweetness from the broccoli and sweetness from red onion may suffice for some! You can also opt for a sugar substitute if preferred.
      • Added Veggies: Toss in some chopped bell peppers (red, yellow, or orange for color and sweetness) or snap peas for extra nutrients and crunch.

      Serving Suggestions

      This versatile salad is perfect for almost any occasion. Serve it:

      • As a hearty side dish at barbecues and picnics.
      • Alongside grilled chicken, fish, or burgers.
      • As a lighter lunch option, perhaps with a slice of crusty bread.
      • At potlucks and holiday gatherings – it’s a guaranteed favorite!

      Common Mistakes to Avoid

      To ensure your broccoli salad is perfect every time, keep these tips in mind:

      • Over-Chilling: While chilling is important, don’t let it sit out at room temperature for too long, especially if it contains mayonnaise.
      • Dressing Too Soon: If you’re making it way in advance (more than a day), you might want to hold off on dressing some of it, as the broccoli can get a bit soft. However, for a few hours to overnight, it’s fine.
      • Uneven Chopping: Ensure your broccoli florets and onion are cut into roughly uniform, bite-sized pieces for the best texture and eating experience.
      • Not Tasting and Adjusting: Seasoning is key! Always taste your dressing before adding it and adjust salt, sugar, and acidity to your preference.

      Storing Your Delicious Broccoli Salad

      Once prepared, store your Easy Broccoli Salad in an airtight container in the refrigerator. It stays fresh and delicious for up to 3-4 days. The flavors tend to meld and deepen over time, making leftovers just as enjoyable, if not more so!

      Close-up of broccoli salad ingredients being mixed.

      FAQs: Your Broccoli Salad Questions Answered

      ***Can I use frozen broccoli?***

      It’s best to use fresh broccoli for this recipe. Frozen broccoli can become too mushy when thawed and mixed into a salad, losing its desirable crunch.

      ***How can I make the red onion less harsh?***

      Soaking the finely chopped red onion in ice-cold water for 10-15 minutes, then draining and patting it dry, will significantly mellow its sharp, pungent flavor, making it more palatable for those sensitive to raw onion.

      ***How long does the salad need to chill before serving?***

      For the best flavor, allow the salad to chill in the refrigerator for at least 30 minutes to an hour. This allows the flavors to meld. It can be made several hours or even a day in advance.

      ***What can I use instead of mayonnaise?***

      You can use plain Greek yogurt for a lighter, tangier dressing. Some people also use avocado-based mayonnaise or a cashew cream for a dairy-free option.

      ***Can I make this salad ahead of time?***

      Yes! This salad is a fantastic make-ahead option. In fact, it often tastes even better the next day as the flavors have more time to blend. Ensure it’s stored in an airtight container in the refrigerator.

      A Creamy, Crunchy Delight for Every Occasion

      There you have it – an incredibly easy, wonderfully flavorful Broccoli Salad that’s a true crowd-pleaser. It’s proof that healthy and delicious can go hand-in-hand, and that simple ingredients can create something truly special. Whether you’re a seasoned cook or just starting out in the kitchen, this recipe is a winner. Don’t hesitate to customize it with your favorite add-ins and make it your own!

      Ready to whip up this sensational salad? Gather your ingredients and let the deliciousness begin!

      Print

      clock clock iconcutlery cutlery iconflag flag iconfolder folder iconinstagram instagram iconpinterest pinterest iconfacebook facebook iconprint print iconsquares squares iconheart heart iconheart solid heart solid icon

      Easy Broccoli Salad Recipe


      • Author: Chef Emy

      Description

      This easy broccoli salad recipe is a fresh, flavorful side dish made with simple ingredients like crisp broccoli, bacon, red onion, and a creamy dressing. Perfect for potlucks, barbecues, or a light lunch, this healthy and quick salad is packed with crunch and flavor!


      Ingredients

      Scale
      • 4 cupsfresh broccoli florets
      • ½ cupred onion, finely chopped
      • ½ cupcooked bacon, crumbled
      • ½ cupshredded cheddar cheese
      • ½ cupsunflower seeds or sliced almonds (optional)
      • ½ cupdried cranberries or raisins
      • For the Dressing:
      • ¾ cupmayonnaise
      • 1 ½ tablespoonsapple cider vinegar
      • 1 tablespoonhoney (or sugar)
      • Salt and pepper to taste

      Instructions

        Notes

        You can substitute Greek yogurt for half of the mayo for a lighter version.
        Make ahead and store in the fridge up to 3 days.
        Add shredded carrots or chopped apples for extra texture and sweetness.

        Nutrition

        • Calories: 260
        • Sugar: 7g

        “`

        Easy Southern Potato Salad Recipe

        “`html

        Easy Southern Potato Salad Recipe

        Craving That Quintessential Southern Comfort?

        Are you looking for a potato salad recipe that truly embodies the heartwarming, soul-satisfying flavors of the American South? The truth is, many of us associate potato salad with summer picnics, backyard barbecues, and family gatherings. But have you ever wondered why the Southern version holds such a special place in our culinary hearts? It’s the perfect balance of creamy, tangy, and savory, achieved with simple, honest ingredients. This Easy Southern Potato Salad recipe is designed to deliver precisely that experience, bringing the comforting essence of Southern cooking right to your kitchen table. Forget complicated steps and exotic ingredients; this recipe focuses on classic flavors that are both familiar and incredibly delicious. Get ready to master a side dish that will be the star of any meal!

        Gather Your Southern Staples

        The beauty of a classic Southern potato salad lies in its simplicity. We’re focusing on ingredients that shine through with their natural flavors. Here’s what you’ll need:

        • 2 pounds Russet or Yukon Gold Potatoes: These are your foundation. Russets are starchy, yielding a fluffier texture, while Yukon Golds offer a creamy, buttery richness. Either will be delightful!
        • 6-8 large Eggs: Hard-boiled to perfection, these add protein and a wonderful creamy element.
        • 1 cup Mayonnaise: Use a good quality, full-fat mayonnaise for the best creamy texture and classic flavor. Substitution: For a slightly tangier profile, you can use half mayonnaise and half sour cream.
        • 2-3 tablespoons Yellow Mustard: This brings that signature tang and bright, slightly pungent flavor that cuts through the richness. Substitution: Dijon mustard can be used for a more complex, spicy note, but yellow mustard is the classic choice for a reason.
        • 1/4 cup finely chopped Yellow Onion: A little bit of onion adds a subtle sharpness and depth. Substitution: Finely minced red onion can offer a slightly milder, sweeter bite, or chives for a delicate onion flavor.
        • 1/4 cup finely chopped Celery: Provides a delightful crunch and a fresh, slightly vegetal note.
        • 2 tablespoons Sweet Pickle Relish: This is a Southern secret for a touch of sweetness and acidity that balances everything. Substitution: If you don’t have relish, finely chopped sweet pickles with a tiny splash of their brine can work.
        • 1 tablespoon Dill Pickle Juice (optional): A small amount adds an extra layer of tang.
        • 1 teaspoon Salt: Essential for bringing out all the flavors. Adjust to your taste.
        • 1/2 teaspoon Black Pepper: Freshly ground pepper adds a gentle warmth.
        • Paprika or Fresh Parsley for Garnish: For a pop of color and a hint of visual appeal.

        Timing is Everything

        Prep time: 20 minutes
        Cook time: 20-25 minutes
        Total time: 40-45 minutes + chilling time

        Compared to many elaborate potato salad recipes that can take over an hour just for prep, this *Easy Southern Potato Salad* comes together remarkably quickly. The cooking time for the potatoes and eggs is straightforward, and the assembly is a breeze. Allowing it to chill is crucial for the flavors to meld beautifully, so factor in at least 30 minutes to an hour for that!

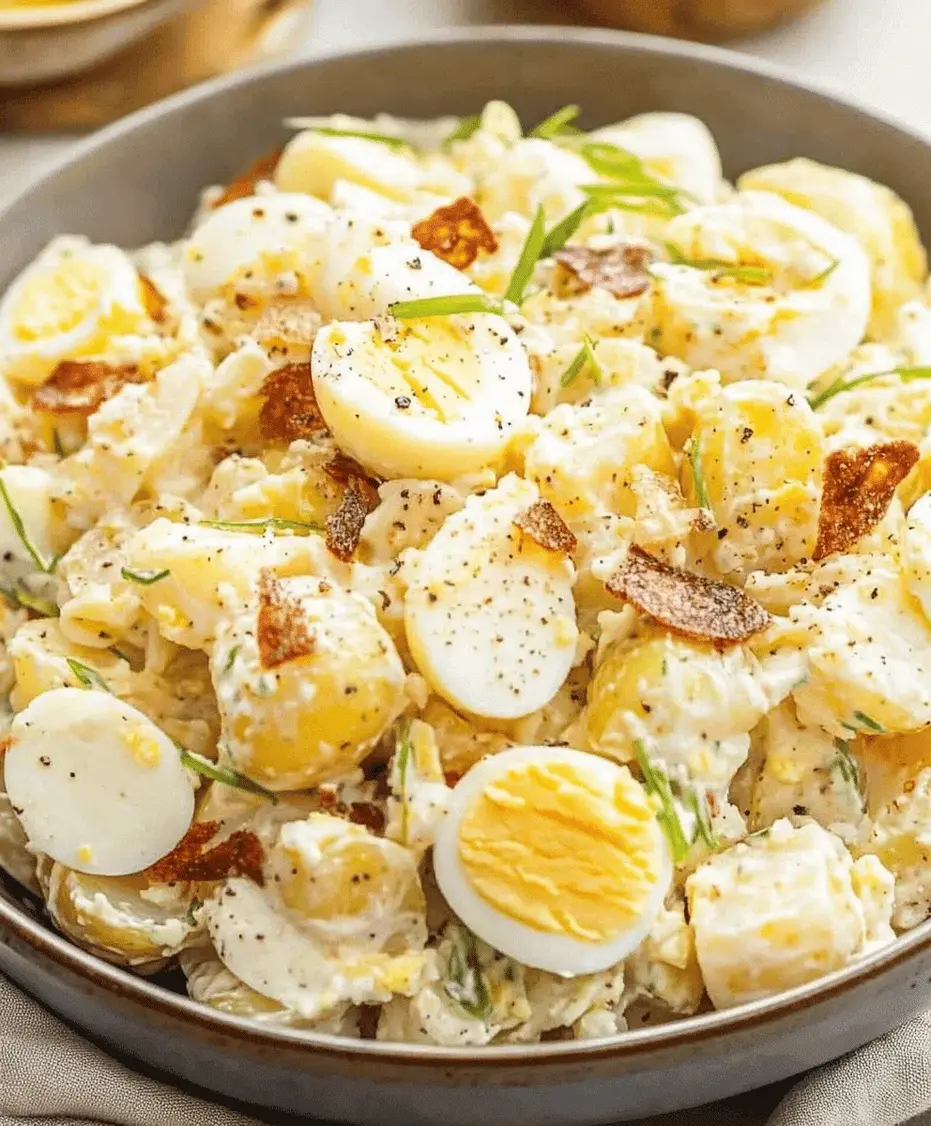
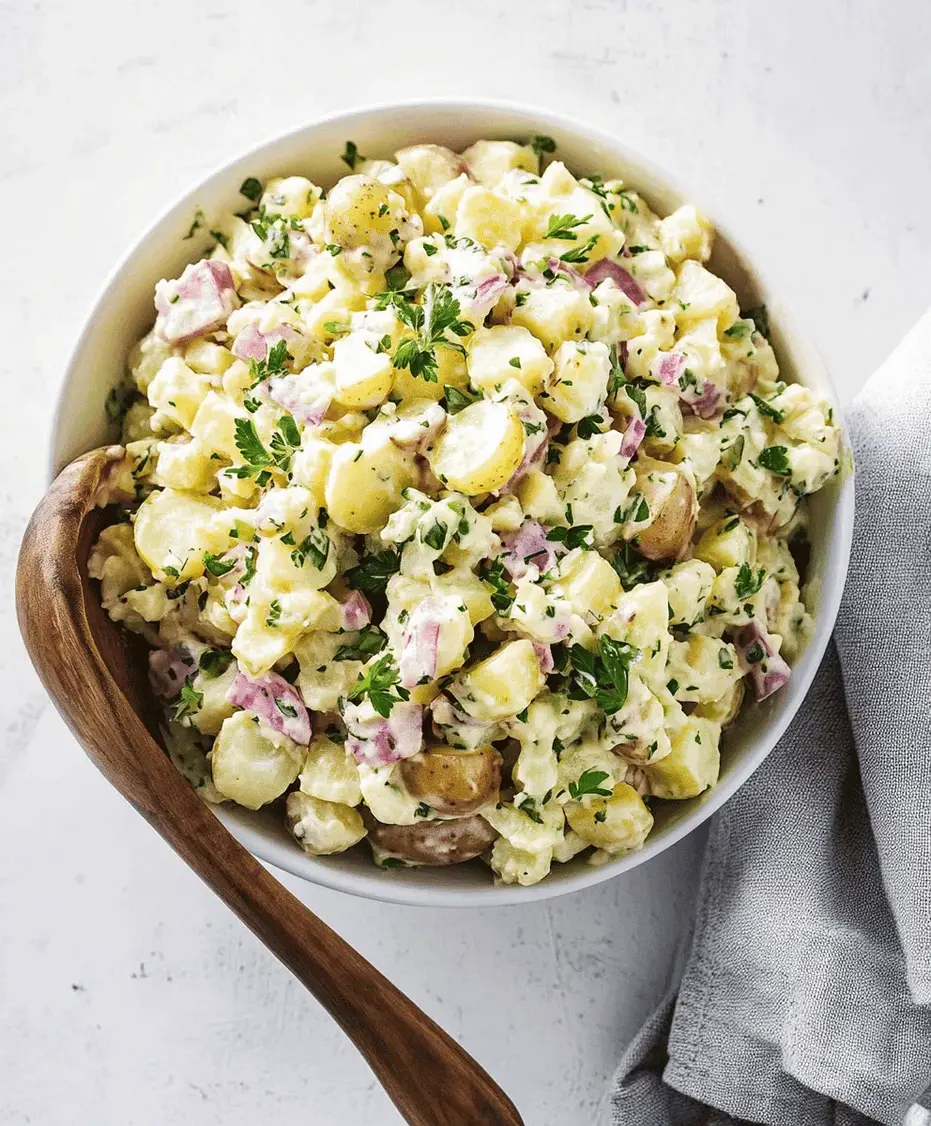
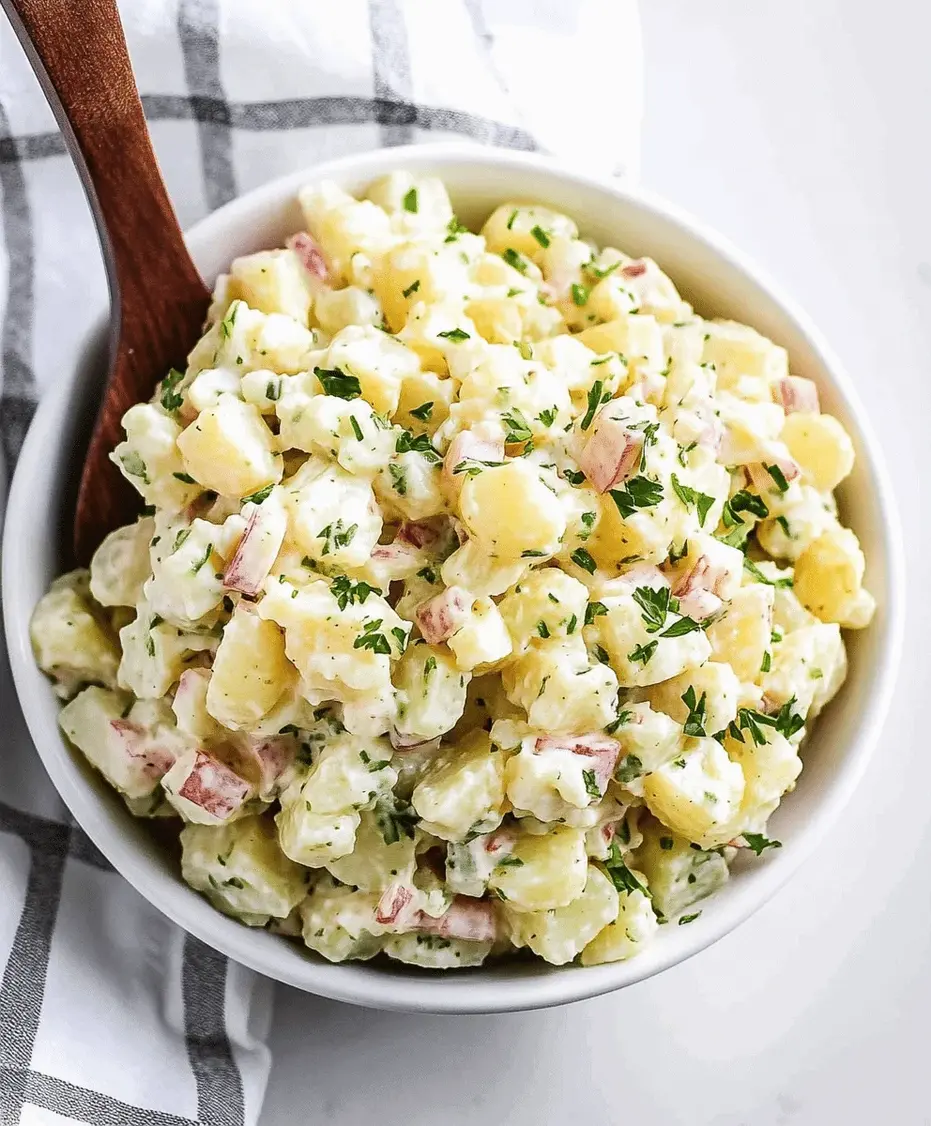
        A close-up of a bowl of creamy Southern potato salad with visible chunks of potato, egg, and flecks of herbs.

        Crafting Your Southern Masterpiece

        Follow these simple steps to achieve potato salad perfection!

        Step 1: Prep the Potatoes

        Start by thoroughly washing your potatoes. You can choose to peel them or leave the skins on for added texture and nutrients – it’s entirely up to you! For this recipe, we’ll cube them into roughly 1-inch pieces. This size ensures they cook evenly and are easy to eat.

        Step 2: Cook the Potatoes

        Place the cubed potatoes in a large pot and cover them with cold water by about an inch. Add a generous pinch of salt to the water. Bring the water to a boil over medium-high heat. Once boiling, reduce the heat to medium and let them simmer for about 15-20 minutes, or until they are tender when pierced with a fork, but not mushy. Simultaneously, place your eggs in a separate pot, cover with cold water, bring to a boil, then turn off the heat, cover, and let sit for 10-12 minutes. Once done, drain the hot water and immediately fill the pot with ice water to cool the eggs completely.

        Step 3: Cool and Chop

        Once the potatoes are tender, drain them very well and let them cool slightly. While they’re cooling, peel and chop your hard-boiled eggs. Some people like to chop their eggs finely, while others prefer larger chunks. Do what makes your heart happy! Once the potatoes are cool enough to handle, you can give them a gentle chop if their shape isn’t uniform, but aim to keep them in bite-sized pieces.

        Step 4: Make the Dressing

        In a large mixing bowl, combine the mayonnaise, yellow mustard, finely chopped onion, chopped celery, sweet pickle relish, and optional dill pickle juice. Add the salt and pepper. Stir everything together until it’s well combined and creamy. Taste the dressing and adjust seasoning if needed. This is your chance to make it perfectly yours – a little more mustard for tang, a touch more relish for sweetness, or extra salt and pepper.

        Step 5: Combine and Chill

        Gently add the cooled, chopped potatoes and chopped hard-boiled eggs to the dressing. Fold everything together carefully with a spatula or large spoon, ensuring not to mash the potatoes. You want to coat every piece without turning it into a paste. Once everything is evenly coated, cover the bowl tightly with plastic wrap and refrigerate for at least 30 minutes, or preferably an hour or two. This chilling time is essential for allowing the flavors to meld and to achieve that signature cold potato salad texture.

        Nutritional Snapshot

        Here’s a general overview of what you can expect per serving (serving size approximately 1 cup):

        • Calories: ~350-450 kcal
        • Fat: ~25-35g
        • Saturated Fat: ~5-8g
        • Carbohydrates: ~25-30g
        • Protein: ~8-12g
        • Sodium: ~400-600mg

        Note: These are estimates and can vary based on specific ingredient brands and quantities used.

        Lighter Southern Twists

        While this recipe is delicious as is, you can make lighter adjustments without sacrificing too much of that beloved Southern flavor:

        • Lighter Mayo: Swap half or all of the full-fat mayonnaise for a reduced-fat version. The texture might be slightly less rich, but the flavor will still be there.
        • Greek Yogurt: Replace up to half of the mayonnaise with plain, non-fat Greek yogurt. It adds creaminess and a tangy note, plus extra protein.
        • Avocado: Mash ripe avocado into the dressing for healthy fats and a boost of creaminess. This will change the color slightly.
        • Reduced Sodium: Opt for low-sodium mustard and adjust salt to taste, using salt substitutes if desired.
        • More Veggies: Amp up the finely chopped celery and onion, or add finely diced bell peppers or even shredded carrots for extra nutrients and texture.

        How to Serve Your Southern Classic

        This Easy Southern Potato Salad is incredibly versatile. It’s a natural partner for:

        • Barbecues and Cookouts: Think grilled chicken, ribs, burgers, and hot dogs.
        • Picnics: Pack it up in a cooler for a delicious portable side.
        • Sunday Dinners: A comforting side for roasted meats like ham or fried chicken.
        • Potlucks: It’s a crowd-pleaser that travels well.

        Always serve it chilled for the best flavor and texture.

        Watch Out for These Potato Salad Pitfalls

        • Overcooking Potatoes: Mushy potatoes are the enemy of good potato salad. Cook them until just tender.
        • Mashing the Ingredients: Mix gently to avoid turning your salad into a gluey mess.
        • Not Chilling Enough: Potato salad needs time for the flavors to meld. Serving it immediately will result in a less flavorful dish.
        • Undersalting: Potatoes are bland on their own. Don’t be shy with the salt, but always taste and adjust.
        • Using Warm Ingredients: Ensure potatoes and eggs have cooled sufficiently before mixing with the dressing to prevent the mayonnaise from breaking.

        Keeping Your Potato Salad Fresh

        Store your Easy Southern Potato Salad in an airtight container in the refrigerator. It’s best consumed within 3-4 days. Due to the mayonnaise, it’s crucial to keep it well-chilled, especially when transporting it to outdoor events.

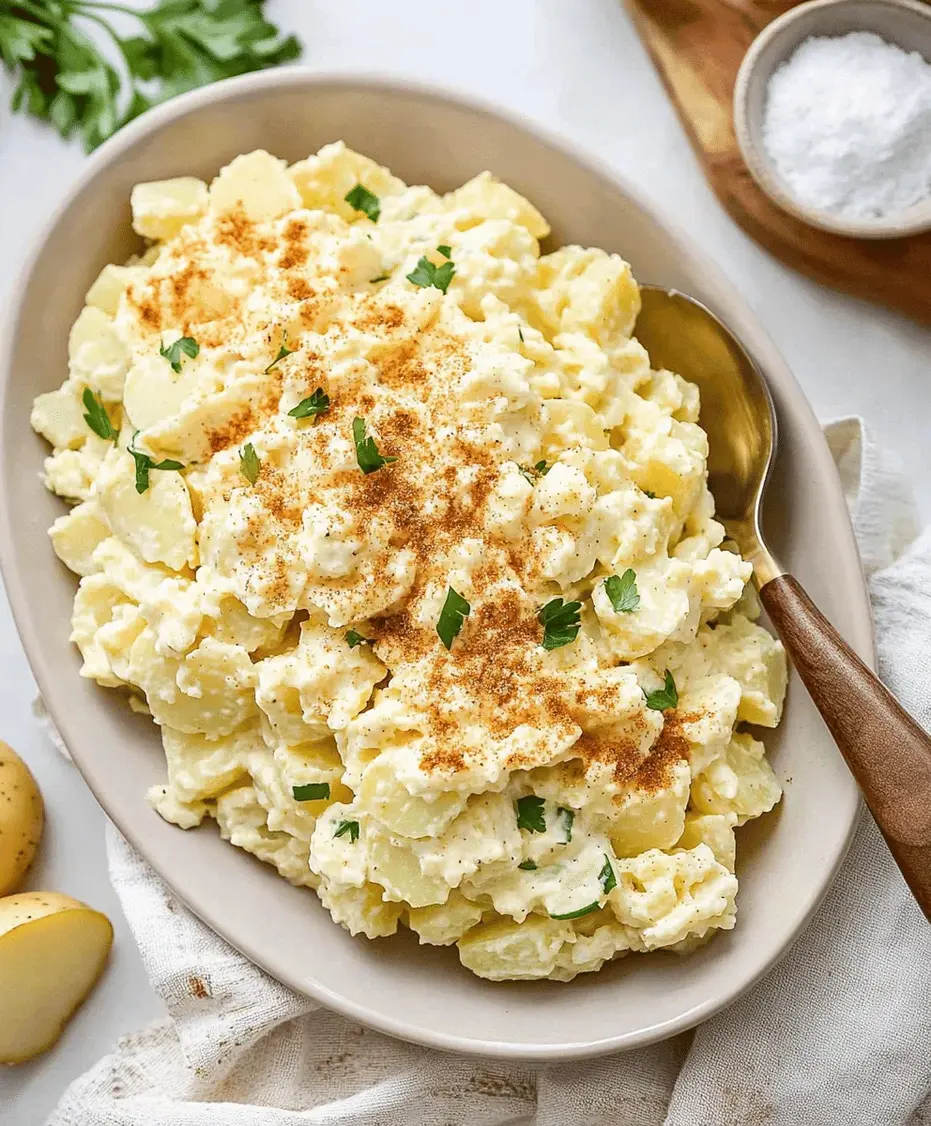
        A serving of Southern potato salad on a plate, garnished with paprika and parsley.

        Frequently Asked Questions

        What kind of potatoes are best for potato salad?

        While russets and Yukon Golds are excellent choices, waxy potatoes like red or fingerling potatoes also hold their shape well and are great if you prefer a less mushy texture.

        Can I make this potato salad ahead of time?

        Absolutely! Potato salad is often better when made a few hours or even a day in advance, as the flavors have more time to develop. Just make sure to store it properly in the refrigerator.

        Why is my potato salad watery?

        This can happen if the potatoes are overcooked and release too much moisture, or if the mayonnaise dressing is too thin. Ensure potatoes are cooked until just tender and drain them well. If your dressing seems too thin, you can add a little more mayonnaise.

        What can I add to Southern potato salad for extra flavor?

        Besides the classic ingredients, some people enjoy adding finely chopped pickles, capers, a dash of hot sauce, or even some crispy bacon bits for an extra layer of flavor and texture.

        How long does potato salad last in the fridge?

        Properly stored in an airtight container, potato salad typically lasts for 3 to 4 days in the refrigerator. Discard if it has been left out at room temperature for more than 2 hours.

        Enjoy a Taste of Southern Hospitality

        There you have it – an Easy Southern Potato Salad recipe that’s packed with comforting flavor and incredibly simple to make. This dish is more than just a side; it’s a representation of warmth, comfort, and shared meals. Whether you’re a seasoned cook or just starting, this recipe is sure to become a go-to. So gather your ingredients, follow these steps, and get ready to impress your friends and family with a classic Southern staple. Don’t forget to share your thoughts and any variations you try in the comments below!

        Print
        clock clock iconcutlery cutlery iconflag flag iconfolder folder iconinstagram instagram iconpinterest pinterest iconfacebook facebook iconprint print iconsquares squares iconheart heart iconheart solid heart solid icon

        Easy Southern Potato Salad Recipe


        • Author: Chef Emy

        Description

        This Easy Southern Potato Salad recipe brings the comforting flavors of the South to your table with simple ingredients like tender potatoes, creamy mayo, and tangy mustard. A perfect side for barbecues, picnics, or Sunday dinners.


        Ingredients

        Scale
        • 3lbs russet potatoes, peeled and diced
        • 1 cupmayonnaise
        • 2 tbspyellow mustard
        • ½ cupchopped celery
        • ½ cupchopped dill pickles or relish
        • ¼ cupchopped red onion
        • 4hard-boiled eggs, chopped
        • 1 tspsalt
        • ½ tspblack pepper
        • ½ tsppaprika (optional, for garnish)

        Instructions

          Notes

          Best served chilled.
          You can add a touch of sugar for a hint of sweetness.
          Adjust mustard for desired tanginess.

          Nutrition

          • Calories: 320
          • Sugar: 2g

          “`

          Easy Potato Salad With Eggs Recipe

          “`html

          Easy Potato Salad With Eggs Recipe

          Craving a Creamy, Comforting Classic? Let’s Make Easy Potato Salad With Eggs!

          Did you know that potato salad is one of the most popular side dishes in the United States, often gracing picnic tables and barbecues? This classic dish evokes feelings of nostalgia and togetherness. If you’re looking for a crowd-pleasing, yet incredibly simple recipe, you’ve landed in the right place. This Easy Potato Salad With Eggs Recipe is a timeless favorite, featuring tender potatoes, perfectly hard-boiled eggs, a luscious creamy dressing, and the satisfying crunch of fresh vegetables. It’s a comforting dish that’s quick to whip up and bursting with flavor, making it ideal for everything from busy weeknight dinners to grand summer gatherings. Get ready to impress your taste buds and your guests with this foolproof recipe!

          The Star Ingredients for Your Perfect Potato Salad

          The beauty of this potato salad lies in its simplicity and the quality of its core ingredients. Here’s what you’ll need to create this delightful dish:

          • Potatoes: 2 pounds waxy potatoes (like Yukon Gold or red potatoes). Opting for waxy varieties ensures they hold their shape beautifully without becoming mushy. Their slightly creamy texture is perfect for soaking up the dressing.
          • Eggs: 6 large eggs. These add richness, protein, and that unmistakable savory depth to the salad.
          • Mayonnaise: 1 cup good-quality mayonnaise. This is the creamy backbone of our dressing. Choose one with a flavor you love, as it truly shines here.
          • Celery: 2 stalks celery, finely chopped. For that essential, refreshing crunch and a subtle aromatic note.
          • Red Onion: 1/4 cup finely chopped red onion. Adds a mild, slightly sweet pungency and a vibrant rosy hue. (Substitution: Shallots offer a gentler flavor.)
          • Dijon Mustard: 1 tablespoon Dijon mustard. This adds a tangy, slightly spicy kick that cuts through the richness of the mayonnaise and eggs, balancing the flavors.
          • Apple Cider Vinegar: 1 teaspoon apple cider vinegar. A touch of acidity brightens all the other flavors.
          • Fresh Dill: 2 tablespoons chopped fresh dill. Its bright, herbaceous flavor is quintessential in potato salad. (Substitution: Fresh parsley works as a milder alternative.)
          • Salt: 1 teaspoon salt, or to taste. Essential for enhancing all the savory notes.
          • Black Pepper: 1/2 teaspoon freshly ground black pepper, or to taste. For a hint of warmth and spice.
          • Optional Garnish: Paprika for color and a pinch of extra dill.

          Timing is Everything: Prep, Cook, and Enjoy

          Prep time:
          20 minutes
          Cook time:
          20-25 minutes
          Total time:
          40-45 minutes
          Average Recipe Time:
          ~60 minutes

          This recipe is designed for efficiency, coming in significantly faster than many traditional potato salad preparations. The total time is around 40-45 minutes, allowing you to get this delicious side dish on the table with minimal fuss.

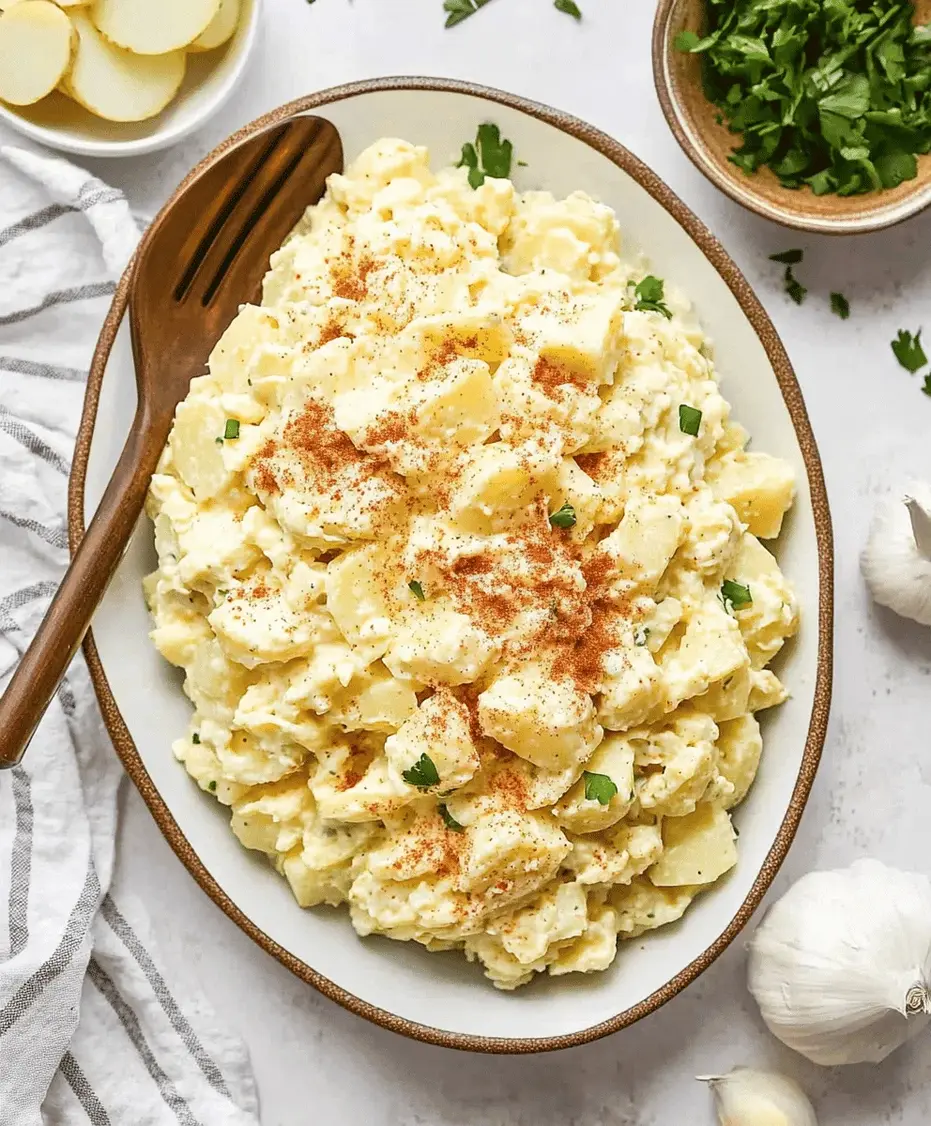
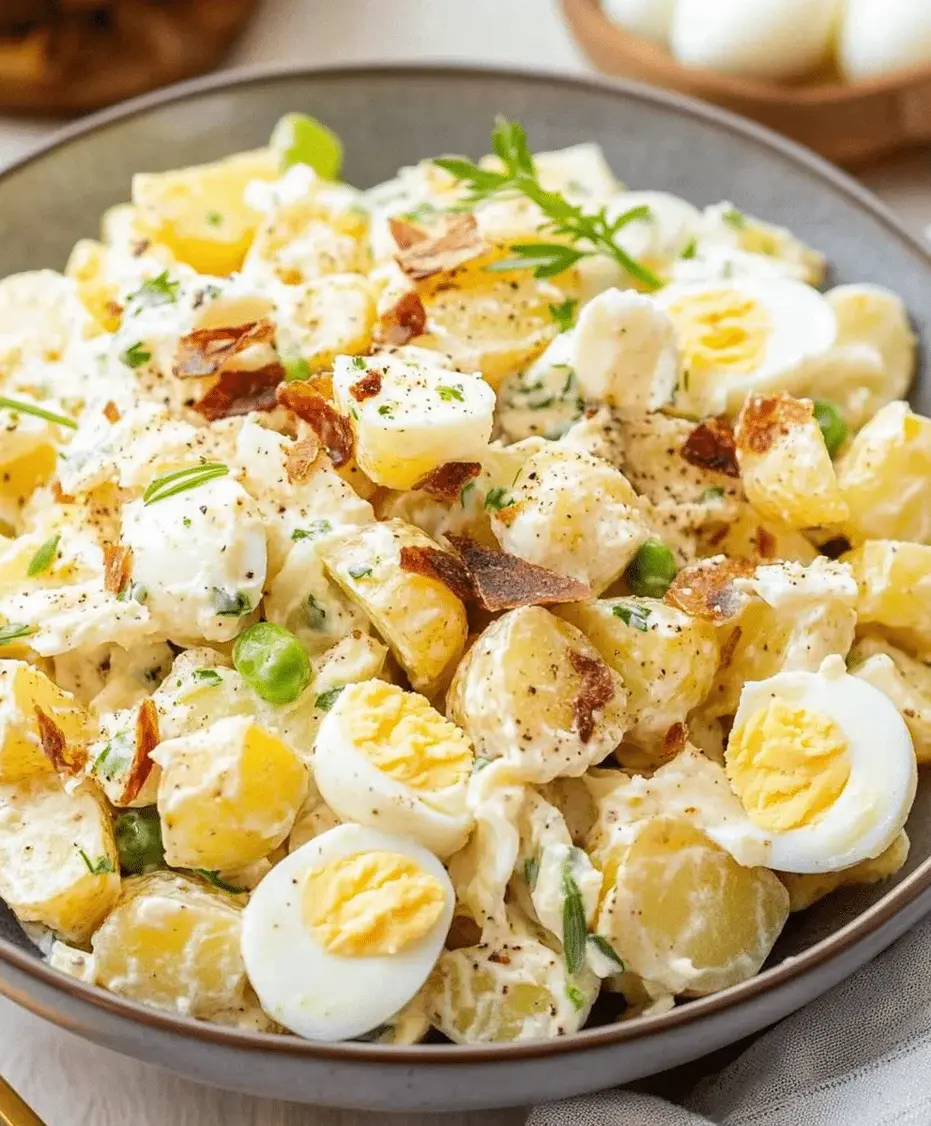
          A beautiful bowl of Easy Potato Salad With Eggs garnished with dill and paprika.

          Step-by-Step Guide to Your Delicious Potato Salad

          Step 1: Perfectly Cook Your Potatoes

          Start by washing your potatoes thoroughly. You can peel them if you prefer a smoother texture, or leave the skins on for added fiber and a rustic feel – just make sure they are well-scrubbed! Cut the potatoes into uniform, bite-sized cubes, about 1-inch in size. This ensures they cook evenly. Place the cubed potatoes in a large pot, cover them with cold water by about an inch, and add a generous pinch of salt. Bring the water to a boil over medium-high heat, then reduce the heat to a simmer. Cook for 15-20 minutes, or until the potatoes are fork-tender but not falling apart. You should be able to easily pierce them with a fork, but they shouldn’t be mushy. Drain the potatoes well and let them cool slightly in the colander for about 10 minutes. This steaming step helps dry them out a bit, preventing a watery salad.

          Step 2: Hard-Boil Your Eggs to Perfection

          While the potatoes are cooking (or cooling), prepare your hard-boiled eggs. Place the eggs in a single layer in a saucepan. Cover them with cold water by about an inch. Bring the water to a rolling boil over high heat. Once boiling, immediately remove the pot from the heat, cover it with a lid, and let the eggs sit for 10-12 minutes. This “steam-basting” method ensures perfectly cooked yolks. After the resting time, carefully drain the hot water and run cold water over the eggs or transfer them to an ice bath for a few minutes. This stops the cooking process and makes them easier to peel. Once cooled, peel the eggs and chop them into bite-sized pieces.

          Step 3: Prepare Your Flavorful Veggies

          Finely chop your celery and red onion. The smaller the dice, the better they’ll meld into the salad without overpowering it. If you’re not a fan of raw onion’s bite, you can soak the chopped red onion in cold water for about 10 minutes, then drain it thoroughly. This mutes its sharpness while retaining its color and crunch. Chop your fresh dill as well. Having all your vegetables prepped and ready to go makes the assembly process smooth and quick.

          Step 4: The Grand Assembly

          In a large mixing bowl, gently combine the slightly cooled, drained potatoes and the chopped hard-boiled eggs. In a separate smaller bowl, whisk together the mayonnaise, Dijon mustard, apple cider vinegar, salt, and pepper until smooth and creamy. This ensures the dressing is well combined before adding it to the potatoes and eggs. Pour about two-thirds of the dressing over the potato and egg mixture. Add the chopped celery, red onion, and fresh dill. Gently toss everything together until the ingredients are evenly coated with the dressing. You want to be thorough but still delicate to avoid breaking up the potatoes too much. Add more dressing as needed, until you reach your desired creaminess. Taste and adjust seasonings – you might need a little more salt or pepper.

          Step 5: Chill and Serve for Maximum Flavor

          For the best flavor, cover the bowl tightly with plastic wrap and refrigerate the potato salad for at least 30 minutes, or preferably 1-2 hours. This allows the flavors to meld together beautifully. Before serving, give it another gentle stir. Garnish with a sprinkle of paprika for color and an extra pinch of fresh dill, if desired. This simple step adds a professional touch!

          Nutritional Highlights of This Classic Dish

          While specific nutritional values can vary based on exact ingredient quantities and brands used, a standard serving of this Easy Potato Salad With Eggs typically offers:

          • Calories: Approximately 300-400 per serving.
          • Fat: Primarily from mayonnaise and eggs, around 25-35g.
          • Carbohydrates: Mostly from potatoes, around 15-20g.
          • Protein: A good source from the eggs, around 8-12g.
          • Fiber: Present, especially if skins are left on potatoes.

          Note: These are approximate values. For precise calculations, use a nutritional calculator with your specific ingredients.

          Smarter Swaps: Healthier Potato Salad Without Sacrificing Taste

          Want to lighten up this classic? Here are a few delicious and flavor-preserving swaps:

          • Mayo Reduction: Use half mayonnaise and half plain Greek yogurt. The yogurt adds creaminess and a tangy flavor, cutting down on fat and calories while boosting protein.
          • Lighter Mayo: Opt for a light or reduced-fat mayonnaise.
          • Mustard Power: Increase the Dijon mustard or add a touch of whole-grain mustard for more flavor punch, allowing you to use a little less mayonnaise overall.
          • Vinegar Boost: A little extra white wine vinegar or lemon juice can add brightness, distracting from a slightly less rich dressing.
          • Veggies Galore: Load up on extra chopped celery, bell peppers, or even some blanched broccoli florets for added nutrients and texture.

          Serving Suggestions: Elevate Your Meal

          This potato salad is incredibly versatile. Serve it:

          • As a classic side dish for barbecued meats, burgers, hot dogs, or fried chicken.
          • Alongside sandwiches or wraps for a hearty lunch.
          • As part of a larger picnic spread or potluck buffet.
          • With grilled fish or shrimp for a lighter meal.

          Common Pitfalls to Avoid for the Best Potato Salad

          To ensure your potato salad is a resounding success:

          • Overcooking Potatoes: Mushy potatoes lead to a sloppy salad. Test for doneness frequently.
          • Undercooking Potatoes: Hard potatoes are unpleasant. Ensure they are tender.
          • Dressing While Hot: Let potatoes cool slightly before adding mayonnaise. Hot potatoes can cause the mayo to break or become oily.
          • Not Seasoning Enough: Potatoes are bland on their own. Don’t be shy with salt and pepper. Remember to season the potato cooking water, too!
          • Overmixing: Be gentle when tossing to maintain the texture of the potatoes and eggs.

          Storing Your Delicious Potato Salad

          Proper storage is key to enjoying your potato salad safely. Store it in an airtight container in the refrigerator. It’s best consumed within 3 to 4 days. Always use clean utensils when serving to avoid introducing bacteria. If you’ve taken it to a picnic, ensure it’s kept chilled in a cooler with ice packs and doesn’t sit at room temperature for more than two hours (one hour if the ambient temperature is above 90°F or 32°C).

          Close-up of creamy potato salad with visible chopped eggs and celery.

          Frequently Asked Questions About Potato Salad

          ***What kind of potatoes are best for potato salad?***

          Waxy potatoes like Yukon Gold, red potatoes, or new potatoes are ideal because they hold their shape well when cooked and tossed, preventing a mushy consistency.

          ***Can I make potato salad ahead of time?***

          Yes! In fact, it’s often better when made ahead. Chilling allows the flavors to meld and deepen. Aim to make it at least an hour or two in advance, or even the day before.

          ***How long does homemade potato salad last?***

          When stored properly in an airtight container in the refrigerator, homemade potato salad typically lasts for 3-4 days.

          ***Can I add other vegetables?***

          Absolutely! Diced pickles, bell peppers, peas, or corn are popular additions that can add extra flavor and texture.

          ***Why is my potato salad watery?***

          This can happen if the potatoes are overcooked and break down, or if they haven’t been drained and cooled sufficiently. Allowing steam to escape from the potatoes after draining can help.

          Your Go-To Classic Potato Salad, Simplified

          There you have it – a straightforward, incredibly satisfying Easy Potato Salad With Eggs Recipe that is bound to become a staple in your culinary repertoire. It’s a testament to how simple, fresh ingredients can create something truly special. Whether you’re a seasoned cook or just starting out, this recipe is foolproof and delivers on flavor and comfort every time. So, don’t wait for the next big event; whip up a batch today and savor the classic taste you know and love!

          Print

          clock clock iconcutlery cutlery iconflag flag iconfolder folder iconinstagram instagram iconpinterest pinterest iconfacebook facebook iconprint print iconsquares squares iconheart heart iconheart solid heart solid icon

          Easy Potato Salad With Eggs Recipe


          • Author: Chef Emy

          Description

          This Easy Potato Salad With Eggs Recipe is a classic side dish made with tender potatoes, hard-boiled eggs, creamy mayo, and crunchy veggies. Perfect for BBQs, potlucks, or weeknight dinners, this comforting recipe is quick to make and full of flavor.


          Ingredients

          Scale
          • 6medium potatoes, peeled and diced
          • 4hard-boiled eggs, chopped
          • 1 cupmayonnaise
          • 1 tablespoonyellow mustard
          • ½ cupdiced celery
          • ½ cupchopped red onion
          • 1 tablespoonapple cider vinegar
          • Salt and pepper to taste
          • Optional: paprika for garnish, chopped dill or parsley

          Instructions

            Notes

            For added flavor, use dill pickles or relish.
            Make ahead of time for better flavor melding.
            Adjust mayo and mustard to your creaminess preference.

            Nutrition

            • Calories: 290
            • Sugar: 2g

            “`

            Hawaiian Potato Salad Recipe

            “`html

            Hawaiian Potato Salad Recipe

            Island Vibes on Your Plate: Unveiling the Hawaiian Potato Salad

            Did you know that potato salad is a beloved side dish in over 70% of summer BBQs across the United States? While classic American potato salad is a hit, are you ready to transport your taste buds to a tropical paradise with a vibrant twist? This Hawaiian Potato Salad recipe is your passport to an island getaway, blending the comforting familiarity of tender potatoes and creamy dressing with the joyful crunch of fresh vegetables and the unexpected delight of macaroni. It’s more than just a side dish; it’s an experience – perfect for luau feasts, casual get-togethers, or simply when you crave a taste of the tropics. Get ready to discover a recipe that’s as delightful to make as it is to devour!

            Gathering Your Tropical Treasures: Ingredients

            The magic of Hawaiian Potato Salad lies in its harmonious blend of textures and flavors. Each ingredient plays a crucial role in creating that iconic island taste.

            Potatoes: The Creamy Foundation

            For that perfect tender, melt-in-your-mouth texture, Yukon Gold or Red Bliss potatoes are your best bet. Their slightly waxy consistency holds up well during cooking and absorbs the creamy dressing beautifully, offering a rich, buttery undertone.

            • 2 lbs Yukon Gold or Red Bliss potatoes, scrubbed clean and cut into 1-inch cubes

            Substitution Note: Russet potatoes can be used, but they tend to be more starchy and might result in a softer salad if overcooked. If using Russets, be extra careful with the cooking time.

            Macaroni: A Chewy Delight

            A signature element of Hawaiian potato salad! The elbow macaroni adds a delightful chewiness and helps to create a more substantial, satisfying salad. Cooked just right, it soaks up the dressing like a sponge.

            • 8 oz elbow macaroni

            Substitution Note: Small shells or ditalini pasta can also be used if elbow macaroni is unavailable. The key is a small pasta shape that will distribute evenly throughout the salad.

            Veggies: The Crisp Counterpoint

            These bring freshness, color, and a vital crunch to balance the creamy elements. Finely diced ensures they integrate seamlessly without overpowering.

            • 1 cup finely diced celery (adds a refreshing crunch and subtle peppery note)
            • 1 cup finely diced red onion (provides a sharp, slightly sweet bite that mellows as it chills)
            • 1/2 cup finely diced carrot (for a touch of sweetness and vibrant color)
            • 1/2 cup frozen peas, thawed (adds pops of sweetness and color)

            Substitution Note: For a milder onion flavor, use green onions or shallots. If carrots are overpowering, you can omit them or grate them finely.

            The Dressing: A Sweet & Tangy Embrace

            This is where the “Hawaiian” flavor truly shines. It’s a masterful balance of creamy, tangy, and subtly sweet notes.

            • 1 1/2 cups mayonnaise (the creamy base)
            • 1/4 cup milk or heavy cream (for a smoother, richer consistency)
            • 2 tablespoons apple cider vinegar (provides the essential tang to cut through the richness)
            • 2 tablespoons granulated sugar (just enough to round out the flavors with a hint of sweetness)
            • 1 tablespoon freshly squeezed lemon juice (adds a brighter, zesty note)

            Substitution Note: For a richer dressing, use all heavy cream. For a tangier dressing, increase the apple cider vinegar slightly. Adjust sugar to your desired sweetness level.

            Seasonings: The Flavor Enhancers

            Simple yet effective seasonings tie all the flavors together.

            • 1 teaspoon salt (or to taste)
            • 1/2 teaspoon black pepper (freshly ground for best flavor)
            • Optional: A pinch of paprika for garnish and a hint of color.

            Crafting Your Culinary Escape: Timing

            This recipe is designed for ease, with most of the time spent on simmering and chilling. Here’s a breakdown compared to average potato salad recipes:

            Prep time: 25 minutes
            (Slightly longer than average due to dicing vegetables finely)
            Cook time: 20-25 minutes
            (Similar to average, focusing on perfectly cooked potatoes and pasta)
            Total time: 45 minutes + chilling time
            (Requires chilling, which is crucial for flavor development, making total active time reasonable and resting time essential)

            A bowl of Hawaiian Potato Salad garnished with paprika.

            Whipping Up a Taste of Aloha: Step-by-Step Instructions

            Follow these simple steps to create your own slice of Hawaiian paradise. The key is to treat each component with care for the best texture and flavor.

            Step 1: Tenderize the Spuds

            Place the cubed potatoes in a large pot and cover them with cold water by about an inch. Add a generous pinch of salt to the water – this seasons the potatoes from the inside out. Bring to a boil over medium-high heat, then reduce the heat to medium and simmer for 15-20 minutes, or until the potatoes are fork-tender but not mushy. You want them firm enough to hold their shape. Drain them thoroughly in a colander and let them steam dry for a few minutes. This step is crucial to prevent a watery salad.

            Step 2: Al Dente Adventures with Macaroni

            While the potatoes are cooking, bring another large pot of salted water to a rolling boil. Add the elbow macaroni and cook according to package directions until precisely al dente – meaning tender with a slight bite. Overcooked pasta will make your salad mushy. Drain the macaroni well and rinse briefly with cool water to stop the cooking process and prevent sticking. Set aside.

            Step 3: The Crunchy Choir of Vegetables

            Finely dice your celery, red onion, and carrot. Ensure they are uniformly small so they integrate well and provide a consistent crunch. If using frozen peas, ensure they are fully thawed. A fine dice is key to achieving the classic Hawaiian potato salad texture where all the ingredients meld beautifully.

            Step 4: Whisking Up the Creamy Dream

            In a medium bowl, whisk together the mayonnaise, milk (or cream), apple cider vinegar, granulated sugar, and lemon juice until smooth and well combined. This creamy concoction is the heart of our salad’s flavor. Taste and adjust seasonings – add more sugar for sweetness, vinegar for tang, or salt and pepper as needed.

            Step 5: The Grand Assembly

            In a large mixing bowl, gently combine the drained, slightly cooled potatoes, cooked macaroni, diced celery, red onion, carrot, and thawed peas. Pour about two-thirds of the dressing over the mixture. Gently fold everything together until just combined, being careful not to mash the potatoes. You want every nook and cranny to be coated in that delicious dressing.

            Step 6: Patience is a Virtue (and Delicious!)

            Taste the salad and add more dressing, salt, or pepper if needed. Cover the bowl tightly and refrigerate for at least 2 hours, or preferably overnight. This chilling time is essential. It allows the flavors to meld beautifully and the ingredients to absorb the dressing fully, transforming a simple mix into a cohesive, flavorful dish. Just before serving, give it another gentle stir. You can add a touch more dressing if it has become too thick from chilling.

            Nourishing Your Explorer’s Spirit: Nutritional Snapshot

            This Hawaiian Potato Salad is a satisfying side dish. While exact nutritional values can vary based on specific ingredients and portion sizes, here’s a general estimate per serving (assuming 8 servings):

            • Calories: Approximately 350-450 kcal
            • Macronutrients: Rich in carbohydrates from potatoes and pasta, with healthy fats from mayonnaise. Contains a moderate amount of protein.
            • Vitamins & Minerals: Provides some potassium from potatoes, and vitamins from the fresh vegetables.

            Note: This is an approximation. For precise dietary tracking, it’s recommended to calculate based on the exact ingredients and brands used.

            Island Flavors, Lighter Footprint: Healthier Alternatives

            Want to lighten up this tropical delight without sacrificing flavor? Here are a few swaps:

            • Lighter Dressing: Replace half of the mayonnaise with plain Greek yogurt for a tangy, protein-boosted alternative.
            • Less Sugar: Reduce the granulated sugar by half or use a natural sweetener like maple syrup or honey sparingly.
            • Extra Veggies: Amp up the diced vegetables – bell peppers, cucumbers, or jicama can add more fiber and nutrients.
            • Whole Wheat Pasta: Opt for whole wheat elbow macaroni for added fiber.

            Perfect Pairings: Serving Suggestions

            Hawaiian Potato Salad is incredibly versatile! It’s a must-have at any summer BBQ, luau, or potluck. Consider serving it alongside:

            • Grilled teriyaki chicken or pork skewers
            • Kalua pig or slow-cooked pulled pork
            • Freshly grilled fish or shrimp
            • Huli huli chicken
            • As a hearty side for burgers or hot dogs

            Navigating the Culinary Currents: Common Mistakes

            Avoid these pitfalls to ensure your Hawaiian Potato Salad is a triumph:

            • Overcooked Potatoes or Pasta: This leads to a mushy, unappetizing texture. Always aim for fork-tender potatoes and al dente pasta.
            • Not Draining Thoroughly: Excess water will make your salad watery and dilute the flavors.
            • Skipping the Chill Time: This is crucial for flavor development. Don’t rush it!
            • Mashing the Potatoes: Gently fold ingredients to maintain distinct textures.
            • Under-seasoning: Taste and adjust salt, pepper, and other seasonings before chilling.

            Preserving the Sunshine: Storing Your Salad

            Proper storage is key to maintaining freshness and food safety. Store your Hawaiian Potato Salad in an airtight container in the refrigerator. It will keep well for 3-4 days. Remember to always use clean utensils when serving to prevent contamination. If the salad seems a bit dry after refrigeration, you can stir in a tablespoon or two of mayonnaise or milk before serving.

            Close-up of Hawaiian Potato Salad texture with visible macaroni and vegetables.

            Your Aloha Adventures: Frequently Asked Questions

            ***Can I make this potato salad ahead of time?***

            Absolutely! In fact, it’s highly recommended to make Hawaiian Potato Salad at least a few hours or even a day in advance. The chilling time is essential for the flavors to meld beautifully and create that classic, cohesive taste.

            ***What kind of mayonnaise is best?***

            Full-fat, good-quality mayonnaise will provide the richest and creamiest base. However, you can use a lighter version if you prefer, or a combination of full-fat mayo and Greek yogurt for a healthier twist.

            ***Can I add other vegetables?***

            Yes! Feel free to customize your salad. Finely diced bell peppers (red or yellow), finely chopped pickles, or even shredded cabbage can add extra flavor and texture. Just ensure they are finely diced to maintain the salad’s texture consistency.

            ***My salad seems a bit dry after chilling. What should I do?***

            This can happen as the ingredients absorb the dressing. Simply stir in a tablespoon or two of extra mayonnaise, milk, or cream before serving until you reach your desired consistency.

            ***How long does it take for the flavors to meld?***

            For best results, aim for at least 2 hours of chilling time. Overnight is even better! This allows the tangy dressing to work its magic on the potatoes and macaroni.

            Embrace the Aloha: Your Hawaiian Potato Salad Awaits!

            This Hawaiian Potato Salad recipe is more than just a dish; it’s an invitation to a tropical celebration. With its delightful balance of creamy, tangy, and sweet flavors, combined with satisfying textures from tender potatoes, chewy macaroni, and crisp vegetables, it’s guaranteed to be a crowd-pleaser. Whether you’re planning a barbecue, a potluck, or just craving a taste of island life, this recipe delivers pure sunshine in a bowl. So gather your ingredients, follow these simple steps, and let the spirit of Aloha fill your kitchen and your next meal!

            Print

            clock clock iconcutlery cutlery iconflag flag iconfolder folder iconinstagram instagram iconpinterest pinterest iconfacebook facebook iconprint print iconsquares squares iconheart heart iconheart solid heart solid icon

            Hawaiian Potato Salad Recipe


            • Author: Chef Emy

            Description

            This Hawaiian Potato Salad recipe blends tender potatoes, macaroni, crunchy veggies, and a creamy, slightly sweet dressing for the perfect island-style side dish. Great for summer BBQs, luaus, or as a tropical twist on a classic favorite.


            Ingredients

            Scale
            • 4medium russet potatoes, peeled and diced
            • 1 cupelbow macaroni
            • ½ cupmayonnaise
            • ¼ cupmilk
            • 2 tspapple cider vinegar
            • 1 tspsugar
            • ½ cupgrated carrots
            • ¼ cupchopped celery
            • ¼ cupchopped sweet onion
            • Salt and pepper to taste
            • Optional: chopped hard-boiled eggs, green peas

            Instructions

              Notes

              Chill overnight for enhanced flavor.
              Add a bit of pineapple for a sweeter tropical twist.
              Use full-fat mayo for creaminess.

              Nutrition

              • Calories: 310
              • Sugar: 3g

              “`

              Shrimp Avocado Salad Recipe

              “`html

              Shrimp Avocado Salad Recipe

              A Burst of Freshness and Flavor

              The Shrimp Avocado Salad recipe is your answer to those weeknight dinner dilemmas or light lunch cravings. This isn’t just any salad; it’s a vibrant explosion of textures and tastes, featuring succulent, perfectly cooked shrimp nestled amongst creamy, ripe avocado, and a medley of crisp, fresh vegetables. It’s a dish that’s as beautiful to look at as it is delightful to eat. Forget bland and boring diet food – this salad is a celebration of wholesome ingredients that naturally align with keto, paleo, and gluten-free lifestyles. Each bite is a satisfying mix of protein from the shrimp, healthy fats from the avocado, and a wealth of vitamins and minerals from the colorful veggies. Whether you’re a seasoned healthy eater or just starting your journey, this recipe promises to be a new favorite. Ready to transform your mealtime with something truly special?

              Ingredients You’ll Need

              Gather these fresh, vibrant ingredients to create your masterpiece. Sensory descriptions are included to guide you on choosing the best produce!

              • 1 lb Large Shrimp: Fresh or frozen (thawed), peeled, and deveined. Look for shrimp that are firm and have a mild, sweet ocean scent, not a strong fishy odor.
              • 2 Ripe Avocados: Should yield slightly to gentle pressure, like a ripe peach. Avoid overly soft or bruised ones. For a perfect texture, they should be creamy and buttery.
              • 1 Red Bell Pepper: Vibrant, glossy skin with a firm texture. It should be sweet and slightly crisp.
              • 1/2 Red Onion: Finely diced. Choose a firm onion with no soft spots. It adds a sharp, pungent bite.
              • 1/2 Cucumber: English or Persian cucumbers are great for their thin skin and fewer seeds. They should be firm and crisp.
              • 1/4 cup Fresh Cilantro: Bright green leaves with a fresh, herbaceous aroma. (Optional, if you’re not a cilantro fan, parsley works too!)
              • For the Dressing:
                • 1/4 cup Extra Virgin Olive Oil: Good quality oil with a fruity, slightly peppery aroma.
                • 2 tbsp Lime Juice: Freshly squeezed from vibrant, juicy limes.
                • 1 tsp Dijon Mustard: For a tangy, emulsifying kick.
                • 1 Clove Garlic: Minced finely.
                • Salt and Black Pepper: To taste. Freshly ground pepper offers the best aroma.

              Substitutions:

              • Shrimp: Grilled chicken breast or firm tofu can be used for a vegetarian/vegan option (adjust cooking time).
              • Avocado: While avocado is key, for a different creamy element, you could add a small amount of crumbled feta cheese (though this would alter the diet-friendliness).
              • Vegetables: Feel free to swap in other crisp veggies like celery, cherry tomatoes, or corn (if not strictly keto).
              • Red Onion: Shallots offer a milder, sweeter onion flavor.
              • Cilantro: Fresh parsley or chives can be used as alternatives.
              • Dressing: Lemon juice can replace lime juice for a different citrus note. A touch of honey or maple syrup can be added for a sweeter dressing (use sparingly for keto).

              Timing is Everything

              Prep time:
              15 minutes
              Cook time:
              5-7 minutes
              Total time:
              20-22 minutes
              Servings:
              4

              Compared to an average complex salad recipe that might take 30+ minutes due to extensive chopping or multiple cooking components, this Shrimp Avocado Salad is remarkably quick. The minimal cooking time for the shrimp and the straightforward assembly make it ideal for busy individuals.

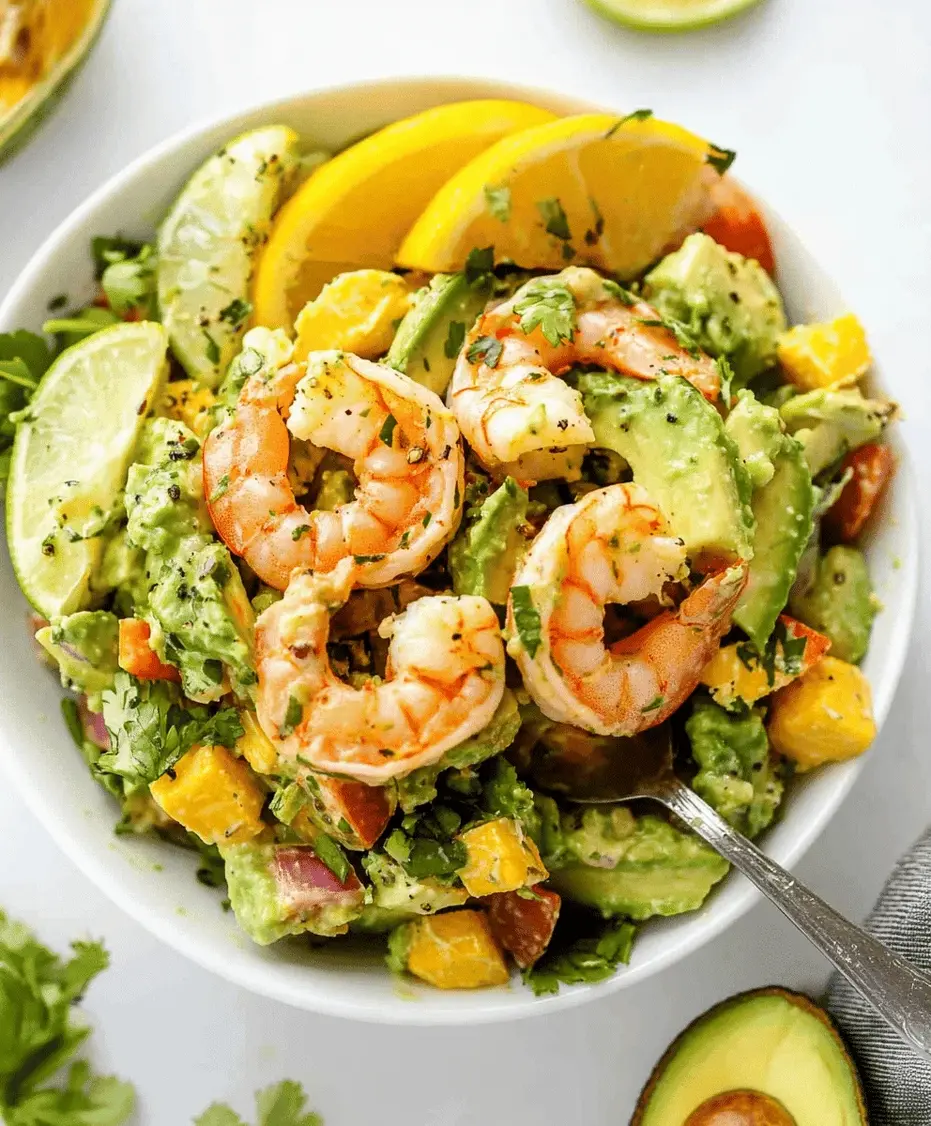
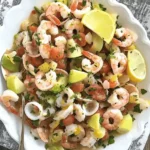
              A vibrant Shrimp Avocado Salad in a serving bowl, showcasing colorful ingredients and a creamy dressing.

              Crafting Your Delicious Salad

              Follow these simple steps to bring this refreshing salad to life!

              1. Peel and Devein Shrimp

              If you’re starting with unpeeled shrimp, now’s the time to get them ready. Gently peel away the shell, leaving the tail on for presentation if you like. Make a shallow cut along the back of each shrimp and use the tip of your knife or a toothpick to remove the dark vein. Rinse the shrimp under cold water and pat them completely dry with paper towels. This is crucial for perfect searing!

              2. Chop Your Vegetables

              While the shrimp are drying, turn your attention to the supporting cast. Finely dice the red bell pepper, making sure to remove all seeds and membranes. Don’t skip the dicing for the red onion – you want small, uniform pieces so every bite gets a hint of its zesty flavor without overwhelming the palate. Slice the cucumber into bite-sized rounds or half-moons. If using fresh cilantro, give it a good chop. Set all your prepared veggies aside in a large serving bowl.

              3. Prepare the Avocado

              For the creamiest texture, it’s best to add the avocado just before serving. Cut the ripe avocados in half, remove the pit, and scoop the flesh into a small bowl. You can either dice it into cubes or slice it. To prevent browning, you can gently toss the avocado pieces with a tiny bit of lime juice right after prepping them.

              4. Whisk Together the Dressing

              In a small bowl or a jar with a lid, combine the extra virgin olive oil, freshly squeezed lime juice, Dijon mustard, and minced garlic. Season generously with salt and freshly ground black pepper. Whisk vigorously or shake the jar until the dressing is well emulsified and creamy. Taste and adjust seasonings as needed – maybe it needs a touch more lime, or a pinch more salt for your liking.

              5. Combine the Salad

              Now for the exciting part! If you’re cooking the shrimp (see below), do that right before combining. For a quick stovetop sear: Heat a tablespoon of oil in a skillet over medium-high heat. Add the dried shrimp in a single layer and cook for 1-2 minutes per side, until pink and opaque. Don’t overcook! Add the cooked shrimp, diced avocado, chopped cilantro (if using), and half of the prepared dressing to the bowl with your chopped vegetables. Gently toss everything together to coat evenly. Be careful not to mash the avocado.

              6. Chill and Serve

              Once everything is gently combined, give it another light toss with the remaining dressing, or serve extra dressing on the side. For the best flavor infusion, let the salad chill in the refrigerator for at least 10-15 minutes. This allows the flavors to meld beautifully. Serve chilled and enjoy the refreshing symphony of tastes and textures!

              Nutritional Highlights

              This salad is a nutritional powerhouse, perfect for those following specific dietary plans. While exact values can vary based on ingredient size and specific brands, a typical serving offers:

              • Calories: Approximately 250-350 kcal
              • Protein: High, around 20-25g (primarily from shrimp)
              • Healthy Fats: Excellent source from avocado and olive oil
              • Carbohydrates: Low, making it ideal for keto and low-carb diets. Fibrous vegetables provide complex carbs.
              • Vitamins & Minerals: Rich in Vitamin C, Vitamin K, Potassium, Folate, and Omega-3 fatty acids.

              Healthier Alternatives & Swaps

              Maintaining flavor while making healthy choices is key. Here are some swaps:

              • Low-Sodium Shrimp: If you’re monitoring sodium, opt for low-sodium shrimp options or rinse regular shrimp thoroughly.
              • Greek Yogurt Dressing: For a lighter, creamy dressing base (if not strictly dairy-free), mix plain Greek yogurt with lime juice, herbs, and a touch of garlic instead of some of the olive oil.
              • Spice it Up: Add a pinch of red pepper flakes to the dressing or a finely diced jalapeño to the salad for a healthy metabolism boost and a kick of heat.
              • Leaner Protein: If shrimp is not on the menu, consider adding grilled chicken breast or firm tofu for a plant-based protein source, ensuring they are seasoned well to complement the other flavors.

              Serving Suggestions

              This Shrimp Avocado Salad is incredibly versatile. Enjoy it:

              • As a light lunch on its own.
              • As a vibrant side dish to grilled fish or chicken.
              • Stuffed into lettuce cups (butter lettuce or romaine work wonderfully) for a no-carb wrap.
              • As a topping for a bed of mixed greens or spinach for an even heartier salad.
              • With a side of gluten-free crackers or a whole-grain baguette for a more substantial meal.

              Common Mistakes to Avoid

              Steer clear of these pitfalls for the perfect salad:

              • Overcooking the Shrimp: Shrimp cook very quickly. Overcooked shrimp become rubbery and tough.
              • Adding Avocado Too Early: Avocado can brown and become mushy if added too far in advance. Add it just before tossing or serving.
              • Under-seasoning: Salads need proper seasoning. Don’t be shy with salt, pepper, and lime juice.
              • Using Unripe Avocados: These will be hard and lack creaminess. Ensure your avocados yield to gentle pressure.
              • Dressing the Salad Too Soon: If you plan on refrigerating for a long time, dress just before serving or serve dressing on the side to prevent wilting.

              Storing Your Salad

              This salad is best enjoyed fresh due to the avocado and crisp vegetables. However, if you have leftovers:

              • Store securely in an airtight container in the refrigerator.
              • It will typically keep for 1-2 days.
              • The avocado may brown slightly, and the vegetables might lose some of their crispness.
              • If you anticipate leftovers, consider storing the dressing separately and adding it just before serving.
              A close-up of Shrimp Avocado Salad garnishes, highlighting fresh cilantro and lime wedges.

              Frequently Asked Questions

              ***Can I make this salad ahead of time?***

              You can prep the vegetables and cook the shrimp a few hours in advance and store them separately. However, it’s best to dice the avocado and toss the entire salad with the dressing just before serving for optimal freshness and texture.

              ***Is this salad good for meal prepping?***

              Yes, with a few adjustments. Prepare all components except the avocado and dressing. Store them in separate containers. When ready to eat, dice the avocado, dress the salad, and combine. This keeps the avocado from browning and the salad components crisp.

              ***Can I freeze this salad?***

              No, this salad is not suitable for freezing. The avocado and fresh vegetables will become mushy and watery upon thawing.

              ***What kind of shrimp is best?***

              Large or jumbo shrimp work well for this recipe as they provide a good bite and hold up nicely in the salad. You can use fresh or frozen (thawed) shrimp. Ensure they are peeled and deveined.

              ***How can I make it spicier?***

              You can add a finely diced jalapeño pepper to the salad, or include a pinch of red pepper flakes or a dash of your favorite hot sauce to the dressing for an extra kick.

              Enjoy Your Healthy and Delicious Creation!

              There you have it – a Shrimp Avocado Salad recipe that’s as nutritious as it is delightful. It’s proof that healthy eating can be incredibly flavorful and satisfying. This dish is perfect for anyone looking for a quick, low-carb meal packed with fresh ingredients and vibrant tastes. Whip it up for lunch, a light dinner, or as a healthy side dish. We’re confident this recipe will become a staple in your kitchen. Give it a try and let us know what you think in the comments below! Happy cooking!

              Print
              clock clock iconcutlery cutlery iconflag flag iconfolder folder iconinstagram instagram iconpinterest pinterest iconfacebook facebook iconprint print iconsquares squares iconheart heart iconheart solid heart solid icon

              Shrimp Avocado Salad Recipe


              • Author: Chef Emy

              Description

              This Shrimp Avocado Salad recipe is a vibrant, healthy dish full of fresh ingredients like juicy shrimp, creamy avocado, and crisp veggies. Perfect for a quick meal, this low-carb salad is packed with protein and nutrients. Great for keto, paleo, and gluten-free diets.


              Ingredients

              Scale
              • 1lb cooked shrimp, peeled and deveined
              • 2ripe avocados, diced
              • 1 cupcherry tomatoes, halved
              • ½red onion, thinly sliced
              • 1cucumber, diced
              • ¼ cupfresh cilantro, chopped
              • Juice of2limes
              • 2 tbspolive oil
              • Salt and pepper, to taste

              Instructions

                Notes

                Best served fresh.
                Use pre-cooked shrimp for a quicker prep.
                You can add jalapeño for a spicy kick.
                Works well as a main dish or side.

                Nutrition

                • Calories: 310
                • Sugar: 3g

                “`

                Italian Seafood Salad Recipe

                “`html

                Italian Seafood Salad Recipe

                Embark on a Mediterranean Culinary Journey

                Are you looking for a dish that transports you to the sun-drenched coasts of Italy with every bite? In a world increasingly filled with complex culinary creations, isn’t it refreshing to find a recipe that’s not only bursting with authentic Mediterranean flavors but is also astonishingly simple to prepare? The Italian Seafood Salad, a celebration of the freshest catches elegantly tossed with vibrant citrus and aromatic herbs, is your answer. This isn’t just a salad; it’s an experience – a refreshing, zesty masterpiece packed with succulent shrimp, tender calamari, and sweet scallops. Imagine serving this at your next holiday gathering or as a light, sophisticated meal on a warm summer evening. This recipe promises to bring the true essence of Mediterranean dining straight to your table, proving that elegance doesn’t need to be complicated.

                A Symphony of Freshness: The Ingredients

                The magic of a truly great Italian Seafood Salad lies in the quality and freshness of its components. Each element plays a crucial role, creating a harmonious balance of taste and texture. Here’s what you’ll need to assemble this coastal delight:

                • 1 lb Mixed Seafood: A combination of shrimp (peeled, deveined, tail-on for presentation), calamari (cleaned, bodies cut into rings, tentacles left whole), and bay scallops.
                  • Sensory Description: The shrimp should be plump and firm, the calamari rings tender yet with a slight bite, and the scallops sweet and delicate.
                  • Substitution: Feel free to substitute with mussels, clams, or even firm fish like cod or halibut, adjusting cooking times accordingly. For convenience, a high-quality frozen mixed seafood blend can be used; ensure it’s fully thawed and patted dry.
                • 1/2 cup Extra Virgin Olive Oil: The heart of the dressing, providing a rich, fruity base.
                  • Sensory Description: Look for a good quality, cold-pressed olive oil with a vibrant green hue and a peppery finish.
                  • Substitution: While extra virgin is preferred, a light olive oil can be used if you prefer a milder flavor.
                • 1/4 cup Fresh Lemon Juice: For that essential zesty brightness.
                  • Sensory Description: Freshly squeezed lemon juice offers a pungent, aromatic, and bright acidity that bottled juice cannot replicate.
                  • Substitution: Lime juice can be used for a slightly different citrus profile, or a combination of lemon and orange juice for a sweeter tang.
                • 2 cloves Garlic: Minced, for a subtle pungent warmth.
                  • Sensory Description: Fresh garlic provides a sharp, aromatic kick that mellows beautifully when mixed.
                  • Substitution: Garlic powder can be used in a pinch, but use sparingly (about 1/4 teaspoon) to avoid an overpowering taste.
                • 1/4 cup Fresh Parsley: Finely chopped, for herbaceous freshness.
                  • Sensory Description: Flat-leaf parsley offers a bright, clean, slightly peppery flavor.
                  • Substitution: Fresh basil or chives can add a different, but equally delicious, herbaceous note.
                • 1/4 cup Fresh Dill: Finely chopped, for a distinctive, slightly anise-like aroma.
                  • Sensory Description: Dill is aromatic and slightly tangy, pairing wonderfully with seafood.
                  • Substitution: If dill isn’t your favorite, more parsley or a hint of tarragon can be used.
                • Salt and freshly ground Black Pepper: To taste, enhancing all the flavors.
                  • Sensory Description: Sea salt enhances sweetness, while freshly ground black pepper adds a subtle warmth and complexity.
                • Optional additions: Thinly sliced red onion, cherry tomatoes (halved), capers, or a pinch of red pepper flakes for a hint of heat.

                Timing is Everything: Prep, Cook, and Savor

                Prep time: 20 minutes
                Cook time: 5-10 minutes
                Total time: 25-30 minutes (plus chilling time)

                Compared to many elaborate seafood dishes, this Italian Seafood Salad is remarkably quick. The total active time is minimal, allowing you to whip up an elegant meal with ease. The recommended chilling time allows the flavors to meld beautifully.

                A vibrant Italian Seafood Salad with shrimp, calamari, and scallops with fresh herbs and lemon

                Crafting Your Italian Seafood Salad: A Step-by-Step Guide

                Let’s dive into the simple process of creating this delightful Mediterranean classic. Don’t be intimidated by cooking seafood; with these straightforward steps, you’ll achieve perfect results.

                Step 1: Prepare the Seafood

                Ensure all your seafood is properly prepped. If using frozen, make sure it’s fully thawed and gently pat it dry with paper towels. This is crucial to prevent the salad from becoming watery. Rinse the fresh shrimp, calamari, and scallops under cold water and pat them dry. For the calamari, if not already done, slice the bodies into 1/2-inch rings and leave the tentacles whole. If your shrimp have tails on for presentation, keep them; otherwise, you can remove them if you prefer a more uniform look.

                Step 2: Cook the Seafood

                This is where high heat and short cooking times are key! Bring a large pot of salted water to a rolling boil. Add the shrimp and cook for just 1-2 minutes, or until they turn pink and opaque. Immediately remove them with a slotted spoon and plunge them into an ice bath to stop the cooking process. Repeat this with the calamari rings and tentacles, cooking for only 1-2 minutes until they are just opaque and slightly firm. Be careful not to overcook, as they will become rubbery. Finally, cook the bay scallops for a mere 30-60 seconds, just until they turn opaque. Drain them quickly. If you are using a mixed seafood blend that requires cooking, cook each type separately according to package directions, ensuring no single type is overcooked.

                Step 3: Chill and Marinate

                Once all the seafood is cooked and has cooled in the ice bath, drain it thoroughly. In a medium bowl, combine the cooked seafood. In a separate small bowl, whisk together the extra virgin olive oil, fresh lemon juice, minced garlic, chopped parsley, chopped dill, salt, and freshly ground black pepper. This is your vibrant dressing. Pour about half of this dressing over the seafood. Gently toss to coat, then cover and refrigerate for at least 30 minutes, or up to 2 hours. This marinating period is essential for the seafood to absorb the zesty, herbaceous flavors.

                Step 4: Dress the Salad

                After the seafood has marinated, remove it from the refrigerator. Taste the seafood and add more salt and pepper if needed. Add any optional ingredients you’re using at this stage, such as thinly sliced red onion, halved cherry tomatoes, or capers. Drizzle the remaining dressing over the seafood and mix gently. This final dressing addition keeps everything bright and fresh.

                Step 5: Combine and Serve

                Arrange the dressed seafood salad on a serving platter or in individual bowls. Garnish with a little extra chopped parsley or a lemon wedge. Serve chilled. The flavors will continue to develop as it sits, making it an excellent make-ahead dish for parties.

                Nutritional Spotlight: Wholesome and Delicious

                This Italian Seafood Salad is not only a treat for your taste buds but also a nutritious choice. It’s rich in lean protein, healthy fats from olive oil, and packed with vitamins and minerals from the fresh herbs and lemon juice. While exact nutritional values can vary based on the specific types and quantities of seafood used, a typical serving (approximately 1 cup) is estimated to contain:

                • Calories: 250-350 kcal
                • Protein: 25-35g
                • Fat: 15-25g (primarily healthy monounsaturated fats from olive oil)
                • Carbohydrates: 5-10g
                • Fiber: 1-2g

                It’s a fantastic way to enjoy a flavorful meal while keeping things light and healthy. Seafood is also an excellent source of omega-3 fatty acids, beneficial for heart and brain health.

                Healthier Twists: Flavor Without Compromise

                Want to make this already healthy dish even lighter? Here are a few swaps that maintain its delicious Italian character:

                • Lighter Oil: Use a high-quality light olive oil or even avocado oil, which has a neutral flavor.
                • More Veggies: Bulk up the salad with finely diced celery, bell peppers (red or yellow for color), or cucumber for added crunch and nutrients without extra calories.
                • Reduced Oil: While crucial for flavor, you can slightly reduce the olive oil and compensate with a bit more lemon juice and a splash of white wine vinegar for acidity if you’re watching fat intake.
                • Herbal Infusion: Experiment with other fresh herbs like tarragon or chives to reduce the need for oil while boosting aromatic complexity.

                Serving Suggestions: Elevate Your Experience

                This versatile Italian Seafood Salad shines in many settings:

                • Appetizer: Serve chilled in small bowls or on lettuce cups for an elegant starter.
                • Light Lunch/Dinner: Pair with crusty Italian bread for dipping, or serve over a bed of mixed greens or arugula.
                • Antipasto Platter: Include it as a star component on a larger antipasto spread with olives, cheeses, and cured meats.
                • Holiday Feasts: Its refined taste and presentation make it a perfect addition to Christmas Eve or other special occasion meals.

                Avoid These Common Pitfalls

                To ensure your Italian Seafood Salad is perfect every time, steer clear of these common mistakes:

                • Overcooking the Seafood: This is the cardinal sin. Seafood cooks very quickly; overcooked seafood becomes tough and rubbery. Stick to the short cooking times specified.
                • Using Bottled Lemon Juice: Fresh lemon juice provides a bright, superior flavor that bottled juice can’t match.
                • Not Drying the Seafood: Wet seafood will dilute your dressing and can make the salad watery and less flavorful.
                • Undermixing Flavors: Don’t skip the marinating time. Allowing the seafood to sit in the dressing is key to infusing it with flavor.
                • Using Low-Quality Olive Oil: The olive oil is a primary flavor component. Invest in a good extra virgin olive oil.

                Storing Your Gem: Keeping it Fresh

                Italian Seafood Salad is best enjoyed fresh, but leftovers can be stored. Keep any seasoned seafood tightly covered in an airtight container in the refrigerator for up to 2 days. Note that the texture of the seafood might slightly change over time, and it’s not recommended to freeze this salad as it can affect the seafood’s texture.

                Close-up of Italian Seafood Salad with fresh parsley and lemon zest

                Frequently Asked Questions

                ***Does the seafood need to be cooked before mixing?***

                Yes, the seafood is briefly cooked to ensure it’s safe to eat and has the perfect tender texture. The cooking process is very quick to prevent overcooking.

                ***Can I use frozen seafood?***

                Absolutely! Ensure that frozen seafood is completely thawed and thoroughly patted dry before cooking. Some high-quality frozen mixed seafood blends work very well.

                ***How long should I marinate the seafood?***

                Marinating for at least 30 minutes allows the flavors to meld beautifully. You can marinate it for up to 2 hours in the refrigerator. Longer marination might start to “cook” the seafood with the lemon juice, altering the texture.

                ***Can I add pasta or rice to this salad?***

                You certainly can! The base Italian Seafood Salad is intended to be light, but for a heartier meal, you can add about 1-2 cups of cooked and cooled small pasta shapes (like orzo or ditalini) or even cooked rice. Adjust the dressing accordingly.

                ***What kind of lemon should I use?***

                Fresh lemons are highly recommended for their vibrant zest and juice. Meyer lemons offer a slightly sweeter, more floral note if you can find them.

                Conclusion

                The Italian Seafood Salad is a testament to the brilliance of simple, fresh ingredients coming together to create something truly spectacular. Its vibrant flavors, light texture, and elegant presentation make it a culinary highlight, perfect for any occasion, from a casual weeknight dinner to a sophisticated holiday spread. So, gather your finest seafood, embrace the fresh herbs and zesty lemon, and prepare to delight your senses with an authentic taste of the Mediterranean. Try this recipe today and bring a little sunshine to your table!

                Print
                clock clock iconcutlery cutlery iconflag flag iconfolder folder iconinstagram instagram iconpinterest pinterest iconfacebook facebook iconprint print iconsquares squares iconheart heart iconheart solid heart solid icon

                Italian Seafood Salad Recipe


                • Author: Chef Emy

                Description

                This Italian Seafood Salad recipe is a refreshing, zesty dish packed with shrimp, calamari, and scallops, tossed in lemon and olive oil. Perfect for holidays or a light summer meal, this seafood salad brings authentic Mediterranean flavors to your table.


                Ingredients

                Scale
                • ½lb shrimp, peeled and deveined
                • ½lb calamari, cleaned and sliced
                • ½lb scallops
                • ¼ cupcelery, diced
                • ¼ cupred onion, thinly sliced
                • ¼ cupred bell pepper, diced
                • ¼ cupfresh parsley, chopped
                • 2cloves garlic, minced
                • Juice of2lemons
                • ¼ cupextra virgin olive oil
                • Salt and pepper to taste
                • Crushed red pepper flakes (optional)

                Instructions

                  Notes

                  For added flavor, marinate overnight.
                  You can add octopus or mussels for variation.
                  Serve over lettuce or with crusty bread.

                  Nutrition

                  • Calories: 220
                  • Sugar: 2g

                  “`

                  Southwest Chicken Wrap Recipe

                  “`html

                  Southwest Chicken Wrap Recipe

                  Craving a Quick, Flavor-Packed Meal? Meet Your New Go-To Southwest Chicken Wrap!

                  Are you tired of sad desk lunches or resorting to takeout when hunger strikes? If you’re on the hunt for a meal that’s both satisfyingly delicious and incredibly easy to whip up, look no further than this vibrant Southwest Chicken Wrap recipe. In a world where busy schedules often dictate our dining choices, finding meals that are packed with flavor, nutrients, and a good dose of protein can feel like striking culinary gold. This isn’t just any wrap; it’s a fiesta in your mouth, bursting with the zesty, smoky, and creamy notes that define Southwest cuisine. Imagine tender, seasoned grilled chicken, hearty black beans, sweet corn, crisp fresh vegetables, all embraced by a warm tortilla and drizzled with a luxuriously creamy southwest sauce. This recipe is designed to be your lunch or dinner savior, offering a high-protein, flavor-loaded experience that will have you coming back for more. Whether you’re a seasoned home cook or just starting out, this Southwest Chicken Wrap is approachable, adaptable, and guaranteed to impress. Let’s dive into creating a dish that’s as beautiful as it is tasty!

                  The Stars of Your Southwest Chicken Wrap

                  The magic of a great wrap lies in its components. Here, we’ve selected ingredients that offer a symphony of textures and tastes. We’ll break them down into categories for clarity, with some suggestions for substitutions if you can’t find exactly what you’re looking for.

                  For the Chicken

                  • 2 boneless, skinless chicken breasts (about 1 lb): We love the lean protein and ease of preparation. (Substitution: Chicken thighs for a richer flavor, or even seasoned tofu for a vegetarian option.)
                  • 1 tablespoon olive oil: For moist, perfectly grilled chicken.
                  • 1 teaspoon chili powder: Adds a mild, smoky heat.
                  • ½ teaspoon cumin: Earthy and warm, it’s a Southwest staple.
                  • ¼ teaspoon paprika: For a touch of sweetness and color.
                  • Salt and freshly ground black pepper to taste: Essential for bringing out all the flavors.

                  For the Filling

                  • 1 can (15 oz) black beans, rinsed and drained: Black beans provide a hearty, fiber-rich base with a subtle, creamy texture. (Substitution: Pinto beans or kidney beans.)
                  • 1 cup frozen or canned corn, drained: Sweet corn kernels add pops of bright, juicy sweetness. (Substitution: Fire-roasted corn for extra depth, or fresh corn kernels cut from the cob when in season.)
                  • ½ red bell pepper, finely diced: For a sweet crunch and vibrant color.
                  • ½ cup chopped fresh cilantro: Adds a bright, herbaceous, zesty note that screams Southwest. (Substitution: Parsley if cilantro is too strong for your palate.)
                  • 4 large whole wheat tortillas or your favorite wraps: The vessel for all this goodness! (Substitution: Spinach tortillas, corn tortillas, or large lettuce leaves for a low-carb option.)

                  For the Southwest Sauce

                  • ½ cup mayonnaise: The creamy base that holds everything together. (Substitution: Greek yogurt for a lighter, tangier sauce, or avocado-based mayo.)
                  • 2 tablespoons lime juice: For a refreshing zing that cuts through the richness.
                  • 1 teaspoon chili powder: To amp up the Southwest flair.
                  • ¼ teaspoon garlic powder: A hint of allium without the bite of fresh garlic.
                  • Pinch of cayenne pepper (optional): For extra heat if you dare!
                  • Salt and pepper to taste.

                  Time to Get Cooking!

                  This recipe is designed for efficiency without sacrificing flavor.
                  Prep Time: 15 minutes
                  Cook Time: 15 minutes
                  Total Time: 30 minutes

                  Compared to the average complex meal preparation time, which can often exceed an hour, this Southwest Chicken Wrap comes in significantly faster, making it ideal for weeknight dinners or busy lunches.
                  Deliciously prepared Southwest Chicken Wrap ready to be enjoyed.

                  Crafting Your Southwest Masterpiece

                  Let’s bring all these incredible ingredients together!

                  Step 1: Prepare the Chicken

                  First things first, let’s get that chicken ready to shine. In a small bowl, whisk together the olive oil, chili powder, cumin, paprika, salt, and pepper. Place your chicken breasts in a shallow dish or a zip-top bag and pour the spice mixture over them. Gently massage the spices into the chicken, ensuring it’s evenly coated. Let it marinate for at least 10 minutes while you prepare the other components, or up to 30 minutes for a deeper flavor.

                  Now, heat a grill pan, outdoor grill, or a skillet over medium-high heat. Cook the chicken for about 6-8 minutes per side, or until it’s cooked through and has lovely grill marks. The internal temperature should reach 165°F (74°C). Once cooked, remove the chicken from the heat and let it rest on a cutting board for about 5 minutes. This resting period is crucial for juicy chicken, as it allows the juices to redistribute throughout the meat. After resting, dice or shred the chicken into bite-sized pieces.

                  Step 2: Make the Southwest Sauce

                  While the chicken is marinating or resting, quickly whip up the creamy Southwest sauce. In a small bowl, combine the mayonnaise, lime juice, chili powder, garlic powder, and cayenne pepper (if using). Whisk until it’s smooth and well combined. Taste and adjust seasoning with salt and pepper as needed. This sauce is your flavor binder, adding a delightful tang and creaminess to every bite.

                  Step 3: Assemble the Wraps

                  Time for the grand finale – assembling your delicious wraps! Lay out your tortillas on a clean surface. If your tortillas are stiff, you can quickly warm them in a dry skillet, microwave, or oven for a few seconds to make them pliable and easier to roll.

                  Now, let’s build. Spread a generous spoonful of the Southwest sauce down the center of each tortilla. Top the sauce with a portion of the diced or shredded chicken, followed by the rinsed black beans and corn. Add a sprinkle of diced red bell pepper and fresh cilantro. Don’t overstuff; you want to be able to wrap them neatly!

                  To wrap, fold in the sides of the tortilla first, then tightly roll from the bottom up. If you want to get fancy, you can even grill the assembled wraps seam-side down for a minute or two in a dry skillet until golden brown and slightly crispy. This extra step adds a delightful crunch and seals everything together beautifully.

                  Nutritional Snapshot

                  While exact nutritional values can vary based on portion sizes and specific ingredients used, here’s a general idea of what one Southwest Chicken Wrap might offer:
                  • Calories: Approximately 450-550 kcal
                  • Protein: 30-40g
                  • Fat: 20-30g
                  • Carbohydrates: 30-40g
                  • Fiber: 5-8g
                  This wrap is a fantastic source of lean protein, making it a satisfying meal that keeps you feeling full. The black beans and whole wheat tortillas contribute to a good fiber count, aiding digestion and promoting satiety.

                  Healthier Twists for a Lighter Bite

                  Looking to lighten things up without sacrificing that incredible Southwest flavor? We’ve got you covered:
                  • For a Lower-Calorie Sauce: Swap the mayonnaise for plain Greek yogurt or a blend of Greek yogurt and avocado. This reduces fat content while adding a pleasant tanginess. You can also thin it out with a little extra lime juice or water.
                  • Leaner Protein: Grill or bake chicken breast instead of pan-frying to reduce added oil. For a plant-based option, use seasoned tofu or chickpeas.
                  • Whole Grains: Opt for 100% whole wheat or sprouted grain tortillas for maximum fiber.
                  • Load Up on Veggies: Add more diced vegetables like jicama, cucumber, or even shredded cabbage for extra crunch and nutrients, and less of the higher-calorie components.
                  • Lettuce Wraps: For a grain-free, low-carb option, use large pieces of crisp lettuce (like romaine or butter lettuce) as your wrap.

                  Serving Suggestions: Elevate Your Wrap Experience

                  These Southwest Chicken Wraps are fantastic on their own, but here are a few ideas to make your meal even more special:
                  • Side Salad: A simple green salad with a light vinaigrette complements the rich flavors of the wrap.
                  • Tortilla Chips & Salsa: For a more indulgent meal, classic tortilla chips and your favorite salsa are a perfect pairing.
                  • Avocado Slices: Extra creamy goodness is always a good idea!
                  • Sour Cream or Greek Yogurt: A dollop on the side for extra creaminess and a touch of tang.
                  • Mexican Rice: If you’re serving this for dinner, a side of fluffy Mexican rice makes it a more substantial meal.

                  Common Mistakes to Avoid

                  To ensure your Southwest Chicken Wrap is a roaring success, steer clear of these common pitfalls:
                  • Overstuffing the Tortilla: This is the number one wrap killer! It leads to a messy eating experience and ingredients falling out. Be generous, but not excessive.
                  • Not Letting Chicken Rest: Skipping the rest period after cooking chicken can result in dry, less flavorful meat. Patience is key!
                  • Using Stiff Tortillas: Cold, stiff tortillas are prone to tearing. Always warm them slightly to make them pliable.
                  • Bland Spicing: Don’t be shy with the chili powder, cumin, and salt when seasoning the chicken. These are the flavor foundations.
                  • Sauce Distribution: Ensure the sauce is spread evenly across the tortilla base, not just dumped in the center, so every bite gets a bit of that creamy goodness.

                  Storing Your Southwest Wraps

                  These wraps are best enjoyed fresh, but if you have leftovers or want to prep ahead:
                  • Assembled Wraps: If you’ve already assembled the wraps, wrap them tightly in plastic wrap or foil. Store in the refrigerator for up to 1-2 days. Note that the tortillas might become a bit soggy over time, especially with wetter ingredients. For best results, assemble just before serving or pack the components separately.
                  • Individual Components: The smartest way to prep ahead is to store the cooked chicken, drained beans and corn, diced veggies, and sauce in separate airtight containers in the refrigerator. This way, you can assemble fresh wraps whenever the craving strikes, and the components will last for 3-4 days.
                  Close-up of ingredients for a Southwest Chicken Wrap, including chicken, beans, corn, and vegetables.

                  Frequently Asked Questions

                  ***Is this recipe spicy?***

                  The spice level is moderate due to the chili powder. If you prefer less heat, omit the cayenne pepper and use mild chili powder. If you love spice, feel free to add more cayenne or a dash of hot sauce to your sauce.

                  ***Can I make the chicken ahead of time?***

                  Yes! The cooked chicken can be made a day or two in advance and stored in an airtight container in the refrigerator. Reheat it gently before assembling the wraps, or serve it cold.

                  ***What kind of chicken is best for wraps?***

                  Boneless, skinless chicken breasts or thighs work best for their ease of preparation and texture. Grilling, pan-searing, or even baking are great cooking methods.

                  ***Can I make this recipe vegetarian or vegan?***

                  Absolutely! For a vegetarian option, substitute the chicken with seasoned and baked tofu or a can of rinsed and drained chickpeas. For a vegan wrap, ensure your mayonnaise is vegan, and follow the same plant-based protein substitutions.

                  Wrap Up Your Delicious Meal!

                  There you have it – a simple yet incredibly satisfying Southwest Chicken Wrap recipe that’s perfect for any occasion. Whether you’re packing a lunch, looking for a quick dinner, or entertaining guests with a fun and flavorful meal, this wrap delivers on taste, texture, and ease. Its customizable nature means you can tailor it to your exact preferences, making it a truly personalizable culinary delight. Don’t wait – gather your ingredients and experience the vibrant flavors of the Southwest today!
                  Print
                  clock clock iconcutlery cutlery iconflag flag iconfolder folder iconinstagram instagram iconpinterest pinterest iconfacebook facebook iconprint print iconsquares squares iconheart heart iconheart solid heart solid icon

                  Southwest Chicken Wrap Recipe


                  • Author: Chef Emy

                  Description

                  This Southwest Chicken Wrap recipe is a delicious and easy meal filled with grilled chicken, black beans, corn, fresh veggies, and a creamy southwest sauce. Perfect for lunch or dinner, it’s a high-protein, flavor-loaded wrap you’ll crave again and again.


                  Ingredients

                  Scale
                  • 2 cupscooked chicken breast, shredded or sliced
                  • ½ cupcanned black beans, rinsed and drained
                  • ½ cupcorn kernels (fresh, canned, or frozen)
                  • ½red bell pepper, diced
                  • ¼ cupred onion, finely chopped
                  • ½ cupshredded cheddar cheese
                  • ¼ cupsour cream or Greek yogurt
                  • 2 tbspmayonnaise
                  • 1 tbsplime juice
                  • 1 tspchili powder
                  • ½ tspcumin
                  • Salt and pepper to taste
                  • 4large flour tortillas
                  • Optional: chopped cilantro, avocado slices, hot sauce

                  Instructions

                    Notes

                    Great for meal prep – keep filling separate and assemble fresh.
                    Substitute Greek yogurt for a lighter version.
                    Add jalapeños or hot sauce for extra heat.

                    Nutrition

                    • Calories: 410
                    • Sugar: 3g

                    “`

                    Pepperoni Pizza Bombs Recipe

                    “`html

                    Pepperoni Pizza Bombs Recipe

                    Craving a Bite-Sized Slice of Heaven?

                    Are you constantly searching for that perfect appetizer that disappears faster than you can say “more, please!”? Look no further than these incredible Pepperoni Pizza Bombs. In a world filled with predictable party snacks, these little flavor-packed delights stand out. They offer all the beloved taste of a classic pepperoni pizza, condensed into a wonderfully chewy, cheesy, and portable bite. Perfect for game nights, birthdays, or just a fun family treat, these pizza bombs are guaranteed to be a crowd-pleaser. Get ready to impress your guests (and yourself!) with a recipe that’s surprisingly easy to make and utterly irresistible.

                    Ingredients You’ll Need

                    The magic of Pepperoni Pizza Bombs lies in their simplicity, using readily available ingredients to create an explosion of flavor. We’re talking about a symphony of warm, doughy biscuit embracing a molten core of cheesy goodness, all topped off with that unmistakable spicy kick of pepperoni. Here’s what you’ll need to bring these delightful bombs to life:

                    • 1 (16.3 ounce) can refrigerated biscuit dough: This is our secret weapon for ease and speed! Use the large, flaky layers variety for extra chewiness.
                      • Substitution: If you can’t find refrigerated biscuits, homemade pizza dough or even crescent roll dough can work in a pinch. You’ll just need to adjust the shaping and baking times.
                    • 1 cup shredded mozzarella cheese: The melty, gooey heart of our pizza bombs. Low-moisture, part-skim mozzarella melts beautifully without becoming too oily.
                      • Substitution: A blend of mozzarella and cheddar, or even Gruyère, can add a delightful twist to the cheese pull.
                    • 1/2 cup mini pepperoni slices: Those little rounds pack a punch of savory, slightly spicy flavor that’s quintessential pizza.
                      • Substitution: Regular pepperoni sliced thinly, or even chopped spicy salami, can add a different dimension of heat and flavor.
                    • 1/4 cup marinara sauce or pizza sauce: For that authentic pizza flavor. A thick sauce works best to avoid sogginess.
                      • Substitution: Pesto or a garlic-herb spread can be used for a different flavor profile.
                    • 1 tablespoon olive oil: For brushing the tops to achieve that perfect golden-brown crisp.
                      • Substitution: Melted butter also works wonders for a rich, caramelized crust.
                    • Optional Toppings: Garlic powder, dried oregano, or Parmesan cheese for dusting.

                    Perfectly Timed Deliciousness

                    Prep time
                    15 minutes
                    Cook time
                    15-18 minutes
                    Total time
                    30-33 minutes

                    Compared to traditional pizza preparation, these Pepperoni Pizza Bombs are incredibly quick! Most pizza recipes involve dough rising and a longer baking time, often upwards of 20-30 minutes at higher temperatures. Our use of pre-made biscuit dough significantly cuts down prep time, and they bake to golden perfection in under 20 minutes, making them ideal for weeknight cravings or last-minute entertaining.

                    A close-up of golden-brown pepperoni pizza bombs arranged on a platter, with some showing a cheesy interior.

                    Let’s Get Cooking!

                    Step 1: Preheat and Prep

                    First things first, let’s get our oven ready to work its magic. Preheat your oven to 375°F (190°C). While the oven heats up, line a baking sheet with parchment paper. This prevents any sticky cheese explosions from adhering to your pan and makes for much easier cleanup. If you don’t have parchment paper, a light greasing of the baking sheet will do.

                    Step 2: Prepare the Biscuit Dough

                    Open that can of refrigerated biscuit dough. You’ll notice the biscuits are usually round. Gently separate them. Now, for each biscuit, you have two options: you can either flatten each biscuit into a thin disc using your hands or a lightly floured rolling pin, or you can carefully cut each biscuit in half horizontally to create two thinner discs. The goal is to create a surface large enough to hold your filling without the dough splitting when you try to enclose it. Aim for a circle about 4-5 inches in diameter for each bomb. Thinner dough will result in a crispier exterior, while slightly thicker dough will be chewier.

                    Step 3: Stuff the Bombs

                    This is where the fun really begins! Take one flattened biscuit disc and place it in the palm of your hand or on a clean surface. Spoon about a teaspoon of marinara sauce into the center. Don’t overdo it, or the sauce might ooze out! Next, sprinkle a generous pinch of shredded mozzarella cheese over the sauce, followed by a few mini pepperoni slices. You want a good balance of all the delicious components.

                    Step 4: Assemble and Bake

                    Now, to seal in all that pizza goodness. Carefully bring the edges of the biscuit dough up and over the filling, pinching them together firmly to create a sealed ball. Ensure there are no gaps where the cheese or sauce can escape during baking. Gently roll the ball in your hands to ensure it’s smooth and well-sealed, then place it seam-side down on the prepared baking sheet. Repeat this process for all your biscuit doughs. Once all the bombs are assembled, brush the tops lightly with olive oil (or melted butter). For an extra flavor boost, sprinkle with garlic powder, dried oregano, or Parmesan cheese. Bake in the preheated oven for 15-18 minutes, or until the bombs are puffed up and beautifully golden brown. The cheese should be melted and oozing slightly from the edges – a sign of pure deliciousness!

                    Nutritional Snapshot

                    While specific nutritional values can vary based on exact ingredients and portion sizes, here’s an estimated breakdown per Pepperoni Pizza Bomb:

                    • Calories: Approximately 150-200 kcal
                    • Protein: 6-8g
                    • Fat: 9-12g
                    • Carbohydrates: 15-20g

                    Note: This is an approximation. For precise counts, calculate based on the specific brands and amounts of ingredients used.

                    Healthier Twists on Pizza Bombs

                    Craving that pizza flavor but looking for lighter options? You can absolutely achieve delicious results with a few smart swaps:

                    • Whole Wheat Biscuits: Opt for whole wheat refrigerated biscuits or use a whole wheat flour blend if making dough from scratch.
                    • Reduced-Fat Cheese: Use part-skim mozzarella or a reduced-fat shredded cheese blend.
                    • Leaner Protein: Swap pepperoni for turkey pepperoni or finely diced grilled chicken breast.
                    • Veggie Power: Add finely chopped, sautéed mushrooms, bell peppers, or spinach to the filling for added nutrients and fiber.
                    • Lighter Sauce: Use a low-sodium marinara sauce or make your own with reduced sugar options.
                    • Portion Control: Be mindful of how many you enjoy, especially if sticking to traditional ingredients.

                    Serving Your Savory Bites

                    These Pepperoni Pizza Bombs are incredibly versatile. Serve them warm, straight from the oven, for the ultimate gooey cheese experience. They are perfect as:

                    • Appetizers: Arrange them on a platter with a side of extra marinara sauce for dipping.
                    • Party Snacks: Their bite-sized nature makes them ideal for game days, holidays, or potlucks.
                    • Kid-Friendly Meals: Kids absolutely adore these! Serve them as a fun component of a lunchbox or a quick dinner.
                    • Light Lunch: Pair 2-3 bombs with a fresh green salad for a satisfying meal.

                    Common Mistakes to Avoid

                    Even with simple recipes, a few common pitfalls can be avoided:

                    • Overfilling: Too much sauce or cheese will cause your bombs to burst open during baking. Stick to the recommended amounts.
                    • Poor Sealing: If the dough isn’t pinched together securely, the filling will leak out. Take your time to ensure a tight seal.
                    • Uneven Baking: Ensure your oven is preheated correctly. If your oven tends to bake unevenly, you might need to rotate the baking sheet halfway through.
                    • Burning the Bottom: Using parchment paper or a Silpat mat prevents the bottoms from becoming too dark and crispy before the tops are golden.

                    Storing and Reheating

                    While best enjoyed fresh, you can store any leftover pizza bombs. Allow them to cool completely. Store them in an airtight container in the refrigerator for up to 2-3 days. Reheat them in a toaster oven or a conventional oven at around 350°F (175°C) for 5-10 minutes, or until warmed through and the cheese is gooey again. Microwaving is an option, but it can sometimes result in a softer, less crispy exterior.

                    A platter of freshly baked pepperoni pizza bombs, some showing melted cheese oozing out.

                    Frequently Asked Questions

                    ***What kind of cheese melts best in pizza bombs?***

                    Low-moisture, part-skim mozzarella is your best bet for a classic, gooey melt. It holds its shape well and doesn’t release too much liquid. Shredded cheddar, provolone, or a blend of Italian cheeses also work wonderfully.

                    ***Can I make these ahead of time?***

                    You can assemble the unbaked pizza bombs and refrigerate them for a few hours. For longer storage, freeze them before baking. To bake from frozen, add a few extra minutes to the baking time. It’s generally best to bake them fresh for optimal texture, but make-ahead options exist!

                    ***My pizza bombs burst open. What did I do wrong?***

                    This usually happens from overfilling the bombs or not sealing the dough edges tightly enough. Ensure you’re using a moderate amount of filling and really pinch those seams shut. Pressing them gently into a smooth ball also helps distribute the filling and reinforce the seal.

                    ***Can I use homemade pizza dough instead of biscuits?***

                    Absolutely! If you have a favorite pizza dough recipe, you can portion it out, flatten it into discs, fill, and seal just like the biscuit dough. You might need to adjust the baking time depending on the thickness of your dough.

                    Your New Go-To Snack!

                    Pepperoni Pizza Bombs are more than just a recipe; they’re a pocket of pure joy. With their simple preparation, delightful cheesy-pepperoni filling, and golden-baked crust, they’re guaranteed to become a favorite in your recipe repertoire. Whether you’re hosting a party, planning a family movie night, or simply need a quick and tasty snack, these pizza bombs deliver on every level. So, gather your ingredients, get ready to stuff and seal, and prepare for a wave of deliciousness! Don’t forget to share your pizza bomb creations with us!

                    Print
                    clock clock iconcutlery cutlery iconflag flag iconfolder folder iconinstagram instagram iconpinterest pinterest iconfacebook facebook iconprint print iconsquares squares iconheart heart iconheart solid heart solid icon

                    Pepperoni Pizza Bombs Recipe


                    • Author: Chef Emy

                    Description

                    These Pepperoni Pizza Bombs are a delicious, cheesy snack made with biscuit dough, gooey mozzarella, and spicy pepperoni. Baked to golden perfection, they make the perfect appetizer or party treat.


                    Ingredients

                    Scale
                    • 1can refrigerated biscuit dough
                    • 20pepperoni slices
                    • 1 cupshredded mozzarella cheese
                    • 2 tbspbutter, melted
                    • 1 tspgarlic powder
                    • 1 tspItalian seasoning
                    • ¼ cupmarinara sauce (for dipping)

                    Instructions

                      Notes

                      For extra flavor, sprinkle Parmesan on top before baking.
                      Substitute biscuit dough with pizza dough for a different texture.
                      Add red pepper flakes for a spicy kick.

                      Nutrition

                      • Calories: 180
                      • Sugar: 2g

                      “`