Asparagus, Lemon, And Mint Soup Recipe

“`html

Asparagus, Lemon, And Mint Soup Recipe

A Refreshing Springtime Delight: Asparagus, Lemon, and Mint Soup

Are you looking for a light, vibrant, and incredibly healthy soup to brighten your spring meals? This Asparagus, Lemon, and Mint Soup is the answer! In a world where hearty, rich soups often dominate, there’s a special place for dishes that are both nourishing and invigorating. This recipe offers a delightful balance of fresh, seasonal asparagus, the zesty punch of lemon, and the cool, clean essence of mint. Imagine a bowl that tastes like pure spring sunshine – that’s what this soup delivers. It’s perfect for a quick, healthy lunch, a sophisticated starter for a dinner party, or simply a way to celebrate the bounty of the season. Easy to prepare and packed with nutrients, this soup is a testament to how simple ingredients can create extraordinary flavors. Let’s dive into a recipe that will become a staple in your springtime rotation.

Ingredients for a Burst of Freshness

The magic of this soup lies in its fresh, simple ingredients that sing together in perfect harmony. Each component brings its unique character to create a balanced and invigorating flavor profile.

  • 1.5 lbs Fresh Asparagus: Look for firm, bright green spears. The star of our show! If asparagus is out of season or too pricey, frozen asparagus can work in a pinch, though the texture might be slightly softer.
  • 1 tbsp Olive Oil: A good quality extra virgin olive oil will add a subtle fruity note. You can also use avocado oil or another neutral oil.
  • 1 medium Onion, chopped: Yellow or sweet onions are ideal, providing a gentle sweetness. Shallots can offer a more delicate flavor.
  • 2 cloves Garlic, minced: Essential for depth of flavor. Minced means finely chopped, releasing its pungent aroma.
  • 4 cups Vegetable Broth: Low-sodium is recommended to control the saltiness. You can also use chicken broth for a non-vegetarian version. The broth forms the luscious base of our soup.
  • 1/2 cup Fresh Mint Leaves, plus more for garnish: This is where the refreshing magic happens! Use only fresh mint; dried won’t provide the same vibrant, cool flavor. Loose leaves are best.
  • 1/4 cup Fresh Lemon Juice: From about 1-2 lemons. This adds a crucial bright, zesty counterpoint to the earthy asparagus.
  • Salt and freshly ground Black Pepper: To taste. Always season at the end to get it just right.
  • Optional: 1/4 cup Heavy Cream or Coconut Milk: For a richer, creamier texture. Full-fat coconut milk will add a subtle tropical note, while dairy cream offers classic richness.
  • Optional: Pinch of Red Pepper Flakes: For a hint of heat.

Recipe Timing

Prep time:
15 minutes
Cook time:
20 minutes
Total time:
35 minutes

This recipe is quicker than the average soup preparation time, making it ideal for weeknight meals.
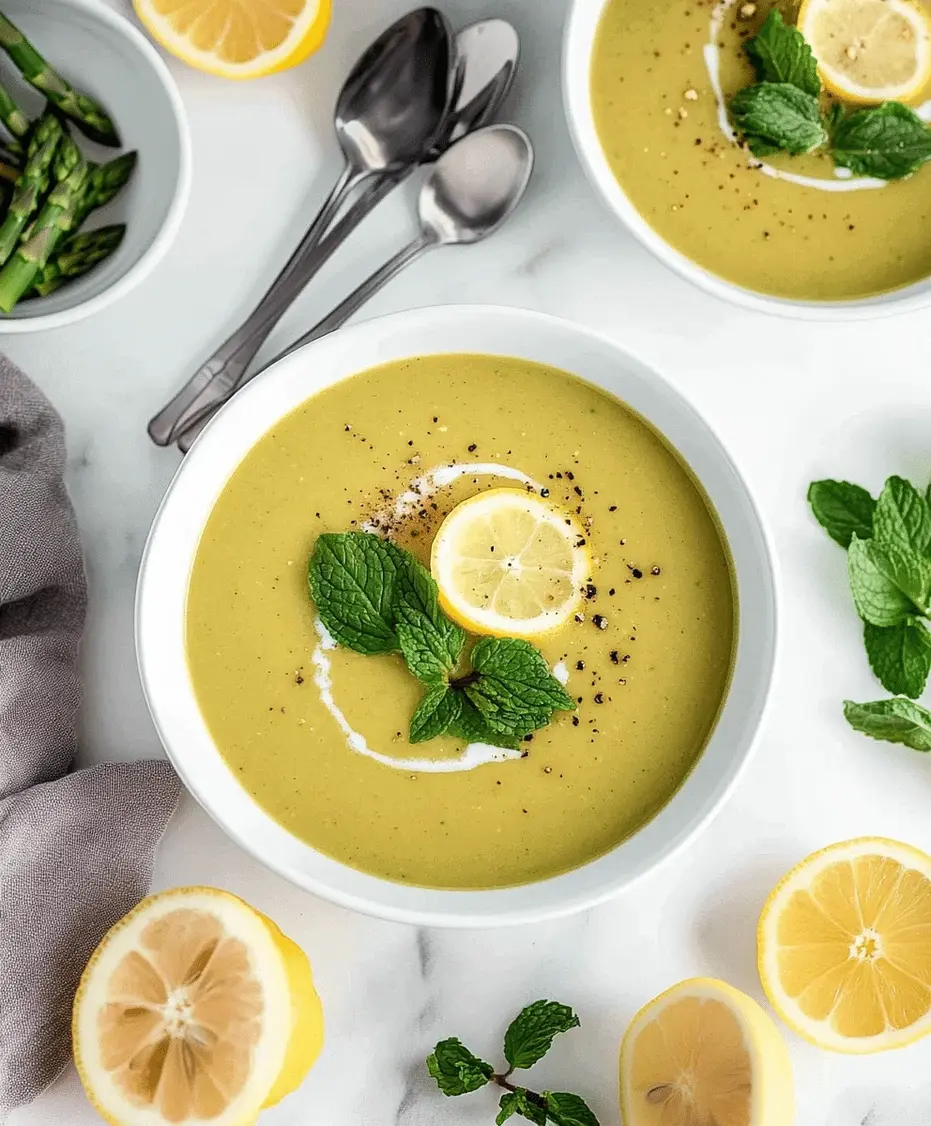
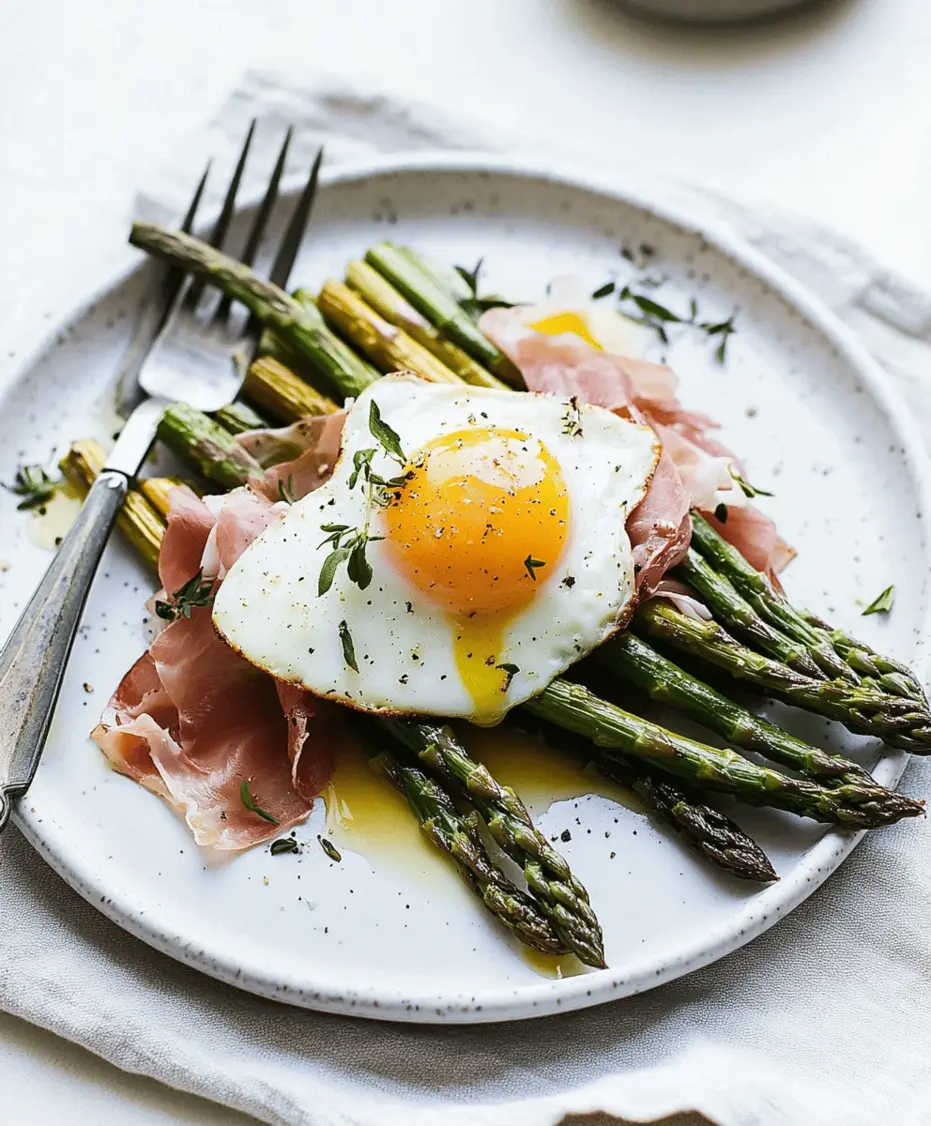
Fresh asparagus spears arranged artfully

Step-by-Step Instructions

Step 1: Prepare the Asparagus

First things first, let’s get our star ingredient ready! Wash your asparagus thoroughly. To remove the tough, woody ends, hold a spear near the bottom and gently bend it. It will naturally snap where the tender part begins. Discard the woody ends (or save them for making vegetable broth!). Then, slice the remaining tender parts of the asparagus into roughly 1-inch pieces. Reserve a few of the prettiest tips for garnish if you like – you can quickly blanch them in boiling water for a minute and then shock them in ice water to keep them vibrant. This preparation ensures a smooth, delicious soup.

Step 2: Sauté the Aromatics

Grab a large pot or Dutch oven and heat the olive oil over medium heat. Add your chopped onion and sauté for about 5-7 minutes, stirring occasionally, until it becomes translucent and begins to soften. We’re not looking for browning here, just a gentle softening to release its sweet flavor. Now, stir in the minced garlic and cook for another minute until fragrant. Be careful not to burn the garlic, as it can turn bitter.

Step 3: Cook the Asparagus

Add the chopped asparagus pieces to the pot with the onions and garlic. Pour in the vegetable broth. Bring the mixture to a boil, then reduce the heat to a simmer. Cover the pot and let it cook for about 10-15 minutes, or until the asparagus is very tender. You should be able to easily pierce a piece with a fork. Cooking until tender is key for a smooth, luxurious blended soup.

Step 4: Blend the Soup

This is where the magic transforms! Carefully transfer the hot soup mixture to a blender. Work in batches if necessary, and be extremely cautious when blending hot liquids. You can also use an immersion blender directly in the pot for convenience and safety. Blend until the soup is completely smooth and velvety. If you prefer a soup with a little more texture, you can pulse it a few times rather than blending until utterly smooth.

Step 5: Reheat and Season

Return the blended soup to the pot over low heat. Stir in the fresh lemon juice and the *optional* heavy cream or coconut milk if you desire a richer consistency. Taste the soup and season generously with salt and freshly ground black pepper. This is your chance to fine-tune the flavor. If you like a little warmth, add a pinch of red pepper flakes now.

Step 6: Add Fresh Mint

Just before serving, stir in the fresh mint leaves. We add the mint at the very end to preserve its bright, fresh flavor and vibrant green color. If you were to cook the mint for too long, its flavor would dissipate. Give it a final stir, ensuring the mint is evenly distributed.

Nutritional Information (Approximate per serving, without optional cream)

  • Calories: ~120-150
  • Protein: ~5-7g
  • Fat: ~5-7g
  • Carbohydrates: ~15-20g
  • Fiber: ~5-7g
  • Vitamins & Minerals: Excellent source of Vitamin K, Vitamin A, Folate, and Vitamin C.

Note: Nutritional values are estimates and can vary based on specific ingredients and portion sizes.

Healthier Alternatives & Flavor Swaps

This recipe is already incredibly healthy, but here are a few ideas for even lighter versions or flavor variations:

  • Dairy-Free Creaminess: Instead of heavy cream, opt for full-fat coconut milk (from a can, not the carton) for a rich, dairy-free texture. Cashew cream is another superb alternative.
  • Lower Sodium: Use a low-sodium vegetable broth or even water, and rely more on fresh lemon and herbs for flavor. You can also add a pinch of nutritional yeast for a cheesy, umami boost.
  • Extra Veggies: Feel free to add a chopped leek (white and light green parts) along with the onion for another layer of subtle oniony flavor and nutrients. A handful of spinach wilted in at the end can boost the green intensity and nutrients.
  • Herb Variations: While mint is essential for the signature flavor, a touch of parsley or chives blended in can complement it beautifully.

Serving Suggestions

This Asparagus, Lemon, and Mint Soup is wonderfully versatile. Here are a few ways to serve it:

  • As a Starter: Serve in small bowls garnished with a swirl of cream (or dairy-free alternative), a few fresh mint leaves, a drizzle of olive oil, and perhaps some toasted slivered almonds for crunch.
  • Light Lunch: Pair a larger bowl with a fresh crusty bread, a side salad, or a simple grilled cheese sandwich.
  • Garnish Ideas: Toasted croutons, a sprinkle of lemon zest, microgreens, or even a few reserved blanched asparagus tips will elevate its presentation.

Common Mistakes to Avoid

  • Overcooking the Asparagus: While you want it tender for blending, overcooking can lead to a dull, faded green color and a less vibrant flavor. Aim for just tender.
  • Burning the Garlic: Always add garlic towards the end of sautéing aromatics and cook it gently. Burnt garlic imparts a bitter taste that’s hard to mask.
  • Adding Mint Too Early: Mint’s delicate flavor is volatile. Add it just before serving to retain its fresh, cool essence and bright green hue.
  • Not Blending Smoothly Enough: For a velvety texture, ensure you blend until completely smooth. If using an immersion blender, take your time to get all the pieces.
  • Under-seasoning: Asparagus can be slightly bitter, and lemon needs salt to balance its acidity. Taste and adjust seasoning diligently at the end.

Storing and Reheating Tips

This soup stores exceptionally well, making it a great candidate for meal prep.

  • Storage: Let the soup cool completely before transferring it to an airtight container. Store it in the refrigerator for up to 3-4 days.
  • Reheating: Gently reheat the soup on the stovetop over low to medium heat, stirring occasionally. Avoid boiling, as it can dull the flavors and textures. If the soup has thickened too much, you can thin it out with a splash of broth or water.
  • Freezing: This soup freezes wonderfully. Cool completely, portion into freezer-safe containers or bags, and freeze for up to 2-3 months. Thaw overnight in the refrigerator and reheat as directed above. Note that the vibrant green color might slightly fade upon thawing and reheating, but the flavor will remain delicious.
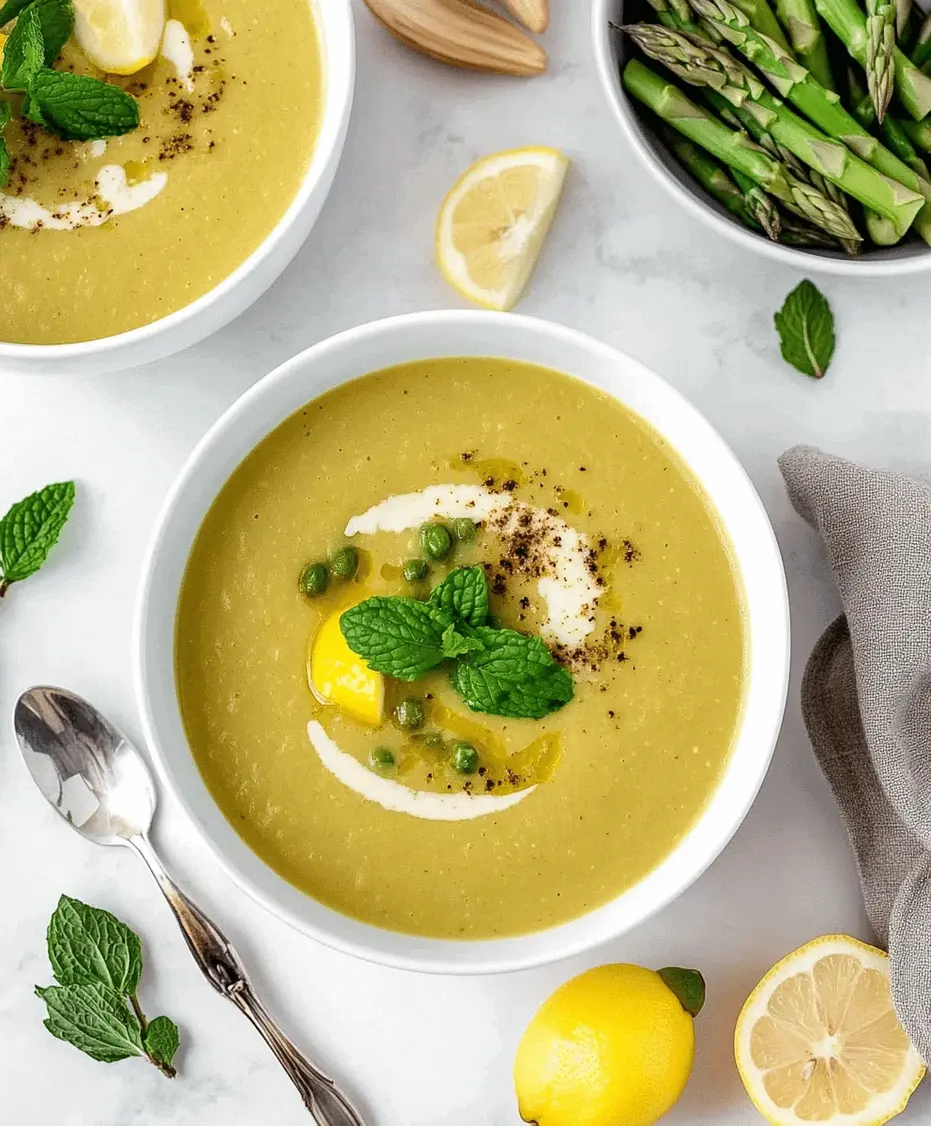
Bowl of vibrant green asparagus soup garnished with mint

Taste the Essence of Spring!

There you have it – a simple, elegant, and incredibly delicious Asparagus, Lemon, and Mint Soup that’s perfect for welcoming spring or brightening any day. Its vibrant color, fresh flavor, and healthy profile make it a winner for any occasion. Don’t be intimidated by blending; it’s surprisingly easy and yields a beautiful, restaurant-quality result. Give this recipe a try and let the refreshing combination of asparagus, lemon, and mint transport your taste buds. Happy cooking!

Frequently Asked Questions

***Is this soup vegan?***

Yes, the base recipe is vegan! Just be sure to use vegetable broth and omit the optional heavy cream or use a dairy-free alternative like coconut milk or cashew cream.

***Can I use frozen asparagus?***

You can, but fresh is always recommended for the best flavor and texture. If using frozen, cook it until tender, but be aware the color might be slightly less vibrant.

***Why is my soup not bright green?***

This can happen if the asparagus is overcooked, if you use older asparagus, or if the mint is added too early and cooked. Using fresh, bright asparagus and adding mint at the very end helps maintain a vibrant green color.

***How can I make it richer?***

Stirring in a quarter cup of heavy cream, full-fat coconut milk, or cashew cream at the end (before the mint) will add creaminess and richness.

***Can I add other vegetables?***

Absolutely! Sautéing a leek or some peas along with the onion can add extra flavor and nutrients. A handful of spinach wilted in at the end is also a great addition.

Print

clock clock iconcutlery cutlery iconflag flag iconfolder folder iconinstagram instagram iconpinterest pinterest iconfacebook facebook iconprint print iconsquares squares iconheart heart iconheart solid heart solid icon

Asparagus, Lemon, And Mint Soup Recipe


  • Author: Chef Emy

Description

This vibrantAsparagus, Lemon, and Mint Soupis a refreshing springtime recipe that combines fresh asparagus, zesty lemon, and cool mint for a light yet flavorful dish. Perfect for a quick lunch or a starter, this soup is easy to make and naturally healthy.


Ingredients

Scale
  • 1lb fresh asparagus, trimmed and cut into pieces
  • 1small onion, chopped
  • 2 tbspolive oil
  • 3 cupsvegetable broth
  • Zest and juice of 1 lemon
  • Salt and black pepper to taste
  • ¼ cupfresh mint leaves
  • ½ cupcoconut milk or cream (optional for richness)

Instructions

    Notes

    You can use frozen asparagus if fresh isn’t available.
    For a creamier version, add coconut milk or heavy cream.
    This soup is also delicious served cold on warm days.

    Nutrition

    • Calories: 120
    • Sugar: 4g

    “`
    Roasted Asparagus Prosciutto And Egg Recipe

    “`html

    Roasted Asparagus Prosciutto And Egg Recipe

    The Ultimate Flavor Combination: Roasted Asparagus Prosciutto and Egg Recipe

    Are you tired of the same old breakfast routine? Does the thought of preparing a healthy yet delicious meal for brunch or a light dinner feel like a chore? If so, you’re not alone. Many of us are on the hunt for recipes that offer a perfect balance of flavor, nutrition, and ease. The Roasted Asparagus Prosciutto and Egg Recipe is precisely that dish. It’s a culinary masterpiece that takes humble ingredients and transforms them into an elegant, satisfying experience. Imagine crisp, tender asparagus spears, salty, chewy prosciutto, and a perfectly cooked egg, all coming together to create a symphony of textures and tastes. This recipe isn’t just beautiful; it’s also a fantastic low-carb and protein-packed option, making it ideal for anyone looking to maintain a healthy lifestyle without sacrificing flavor.

    Fresh Ingredients for a Burst of Flavor

    The beauty of this Roasted Asparagus Prosciutto and Egg Recipe lies in its simplicity and the quality of its components. When you use fresh, vibrant ingredients, the result is always spectacular. Here’s what you’ll need:

    • 1 bunch Asparagus (about 1 lb): Look for spears that are firm, bright green, and have tightly closed tips. Thicker spears are generally more tender when roasted. If you can only find thinner spears, adjust your roasting time accordingly to prevent them from becoming mushy.
    • 4-6 slices Prosciutto: This thinly sliced Italian cured ham adds a delightful salty, savory punch. For an even crispier texture, you can opt for speck or pancetta, but prosciutto is classic and readily available.
    • 4-6 large Eggs: Fresh, high-quality eggs will make a difference. The richness of the yolk is a crucial component of the dish’s creamy finish.
    • 2 tablespoons Olive Oil: Extra virgin olive oil is preferred for its fruity notes, but any good quality olive oil will work. It helps the asparagus roast to perfection and adds a lovely sheen.
    • Salt, to taste: Sea salt or kosher salt are excellent choices. Remember that prosciutto is already quite salty, so season judiciously.
    • Freshly Ground Black Pepper, to taste: Adds a gentle warmth and complexity.
    • Optional: Red Pepper Flakes, for a hint of heat: A pinch can add an exciting kick that complements the other flavors.
    • Optional Garnish: Fresh Parsley or Chives, chopped: For a pop of color and a fresh, herbaceous finish.

    The Perfect Timing

    This dish is designed for speed and efficiency, making it perfect for busy mornings or quick weeknight dinners. Let’s break down the time commitment:

    Prep time: 10 minutes
    Cook time: 20 minutes
    Total time: 30 minutes

    Compared to the average weeknight meal that can often stretch over an hour, this Roasted Asparagus Prosciutto and Egg Recipe is remarkably fast. The active preparation is minimal, with most of the magic happening in the oven and on the stovetop simultaneously. It’s a fantastic option when you’re short on time but still craving a wholesome and sophisticated meal.

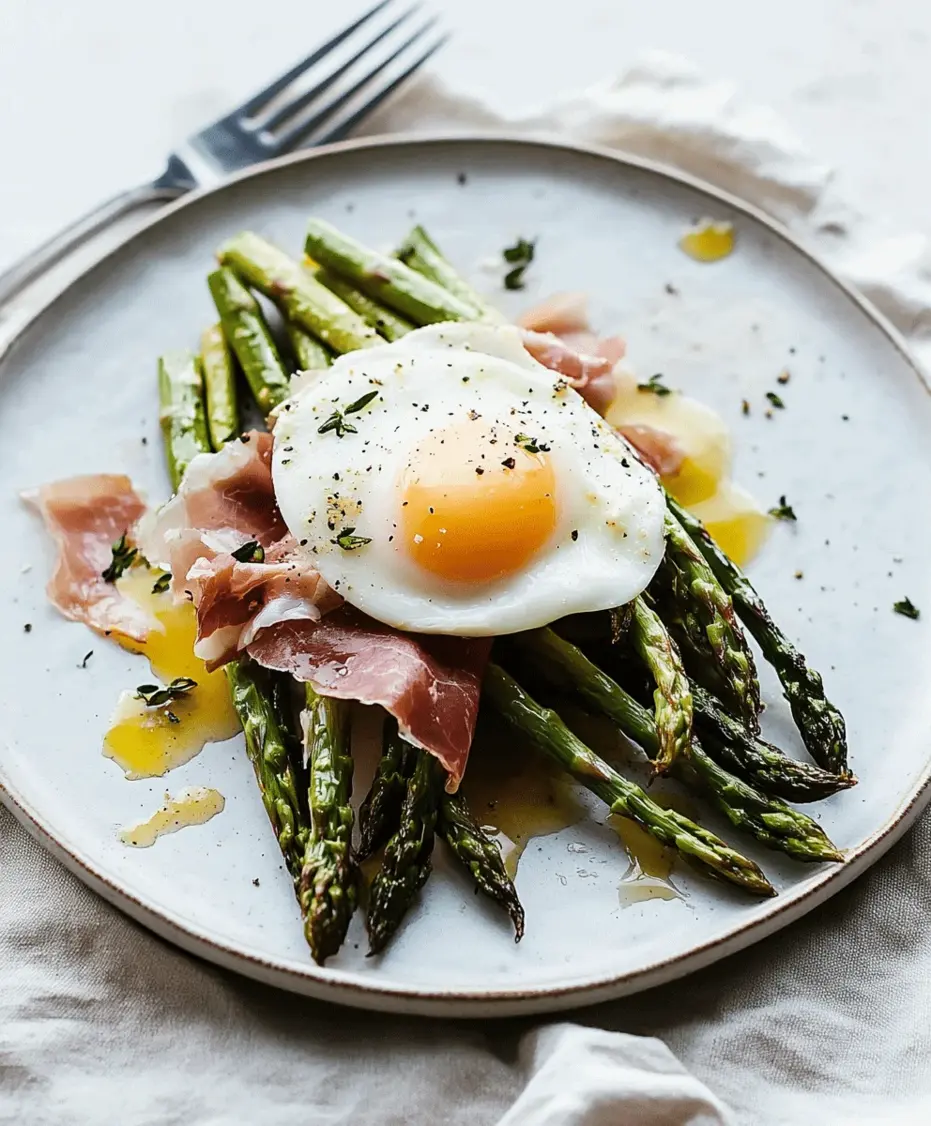
    Roasted Asparagus Prosciutto and Egg dish preparation.

    Step 1: Preheat and Prep

    Begin by preheating your oven to 400°F (200°C). This higher temperature is crucial for achieving that lovely crispness on the asparagus and prosciutto. While the oven heats up, prepare your asparagus. Wash the spears thoroughly and then snap off the woody ends. The easiest way to do this is to hold a spear near the bottom and gently bend it; it will naturally break at the point where the tender part meets the tough, woody base. Discard the tough ends. Toss the asparagus spears on a baking sheet with the olive oil, salt, and black pepper. Ensure each spear is lightly coated.

    Step 2: Roast the Asparagus

    Spread the seasoned asparagus in a single layer on the baking sheet. Try not to overcrowd the pan, as this can lead to steaming rather than roasting, resulting in soggy spears. You want that beautiful char and tender-crisp texture. Pop the baking sheet into the preheated oven.

    Step 3: Crisp the Prosciutto

    While the asparagus is roasting (it will need about 10-12 minutes), it’s time to get the prosciutto ready. You have a couple of options here. You can either lay the prosciutto slices directly on a separate small baking sheet and place it in the oven alongside the asparagus for the last 5-7 minutes of roasting, or you can crisp it up in a dry skillet over medium heat. Watch it closely, as it cooks very quickly and can go from perfectly crisp to burnt in seconds. Once crisp, remove it from the heat and set aside. If using the skillet method, you can use the rendered fat for cooking the eggs if desired, though it’s not essential.

    Pro Tip: For evenly crisp prosciutto, ensure the slices aren’t overlapping too much on the baking sheet.

    Step 4: Cook the Eggs

    By now, your asparagus should be nearly done. It should be tender but still have a slight bite, with some lightly browned edges. Remove the asparagus from the oven. Now, you can cook your eggs. The most elegant way to serve this dish is with a perfectly poached or fried egg on top. If you’re poaching, prepare your poaching liquid. If you’re frying, heat a non-stick skillet with a touch of oil or butter (or a little rendered prosciutto fat) over medium-low heat. Crack your eggs into the skillet. You can cook them sunny-side up for a gloriously runny yolk, or over-easy if you prefer. The runny yolk acts as a luxurious sauce, binding all the elements together beautifully. Season the eggs with a pinch of salt and pepper.

    Step 5: Assemble the Dish

    Arrange the roasted asparagus spears on your serving plates. Cr umble the crisp prosciutto over the asparagus. Gently place a cooked egg on top of each serving of asparagus and prosciutto. If you’re adding optional garnishes, sprinkle with red pepper flakes (if using) and fresh parsley or chives. Serve immediately and enjoy the delightful combination of textures and flavors!

    Nutritional Information

    This Roasted Asparagus Prosciutto and Egg Recipe is a nutritional powerhouse. While exact figures can vary based on egg size and brand of prosciutto, a typical serving (assuming 4 servings, with 1-1.5 spears of asparagus and 1-1.5 slices of prosciutto per serving, plus one egg) would look something like this:

    • Calories: Approximately 200-250 kcal
    • Protein: 15-20g
    • Fat: 15-20g (healthy fats from olive oil and egg yolk)
    • Carbohydrates: 5-8g (mostly from asparagus, which is also high in fiber)
    • Fiber: 2-3g

    It’s naturally low in carbohydrates and rich in protein, making it an excellent choice for those following a ketogenic, low-carb, or paleo diet, or simply aiming for a more balanced intake of macronutrients.

    Healthier Alternatives & Flavor-Preserving Swaps

    While this recipe is already quite healthy, here are some ways to make it even lighter or cater to different dietary needs without sacrificing that delicious flavor:

    • Lighter “Prosciutto”: If you’re watching sodium or have a sensitivity, you can substitute with lean, thinly sliced turkey breast that’s been baked until slightly crispy, or even some crispy cooked bacon (in moderation). For a vegetarian option, crispy baked halloumi slices add a salty, chewy element.
    • Healthier Fat Source: While olive oil is excellent, you could use avocado oil for roasting the asparagus, which has a high smoke point and a neutral flavor.
    • Egg Preparation: If you’re concerned about the fat from the yolk, you can opt for a hard-boiled or soft-boiled egg instead of fried or poached, though you’ll miss out on the creamy sauce effect. For an even lower-fat protein boost, consider smoked salmon or a small piece of grilled chicken breast.
    • Dairy-Free Option: The recipe is naturally dairy-free, making it a great option for many diets.

    Serving Suggestions

    This Roasted Asparagus Prosciutto and Egg Recipe is wonderfully versatile. Here’s how to serve it:

    • As a Breakfast/Brunch Centerpiece: Serve it as is for a light yet satisfying start to your day.
    • Light Lunch or Dinner: Pair it with a simple side salad dressed with a lemon vinaigrette for a complete meal.
    • With Avocado: Add some sliced avocado for extra healthy fats and creaminess.
    • With a Slice of Toast: If you’re not strictly low-carb, a piece of crusty whole-grain toast would be a delightful accompaniment to soak up the runny yolk.
    • Add Cheese: A sprinkle of shaved Parmesan or crumbled feta cheese on top can add another layer of flavor.

    Common Mistakes to Avoid

    To ensure your Roasted Asparagus Prosciutto and Egg Recipe turns out perfectly every time, be mindful of these common pitfalls:

    • Overcrowding the Pan: This is the biggest enemy of crispy roasted vegetables. Give your asparagus space to breathe!
    • Overcooking Asparagus: Asparagus cooks quickly. Overcooked asparagus becomes limp and mushy, losing its delightful texture.
    • Burning Prosciutto: Prosciutto is thin and can burn fast. Keep a close eye on it to achieve perfect crispiness.
    • Under-seasoning: While prosciutto is salty, the asparagus needs a good base of salt and pepper to bring out its natural sweetness.
    • Not Using a High Enough Oven Temperature: Roasting at 400°F helps achieve the desired texture and flavor by caramelizing the sugars in the asparagus.

    Storing Your Masterpiece

    This dish is best enjoyed fresh, particularly the eggs and crispy prosciutto. However, if you have leftovers:

    • Roasted Asparagus: Cooled roasted asparagus can be stored in an airtight container in the refrigerator for up to 3 days.
    • Crispy Prosciutto: Once cooled, crispy prosciutto can be stored in a sealed container at room temperature for a day or two. It may lose some of its crispness.
    • Cooked Eggs: It’s not recommended to store cooked eggs and reheat them, as they can become rubbery.
    • Reheating: To reheat the asparagus, lightly warm it in a skillet or in the oven. You would then prepare fresh eggs for serving.
    Close-up of roasted asparagus with prosciutto and a perfectly cooked egg.

    Frequently Asked Questions

    ***Is this recipe truly low-carb?***

    Yes! Asparagus is a low-carb vegetable, and the dish primarily consists of protein from the eggs and prosciutto, and healthy fats. If you avoid starchy sides, it remains very low in carbohydrates.

    ***Can I prepare the asparagus ahead of time?***

    You can wash and trim the asparagus a day in advance and store it in the refrigerator. Roasting is best done right before serving to ensure optimal texture.

    ***What if I don’t like asparagus?***

    You can substitute asparagus with other vegetables that roast well and have a similar cooking time. Green beans, broccolini, or even thin slices of zucchini could work, though they will change the overall flavor profile of the dish.

    ***How can I make the prosciutto crispier?***

    Ensure the slices are not overlapping and bake them in a preheated oven at 400°F (200°C) for 5-7 minutes, or until they achieve your desired crispness. Alternatively, crisp them in a skillet over medium heat.

    ***Can I make this dish vegan?***

    This particular recipe relies heavily on eggs and prosciutto, so it cannot be easily made vegan. However, you could adapt the concept to roast vegetables and serve them with a vegan protein source and perhaps a drizzle of vegan hollandaise or a rich cashew cream.

    A Simple Dish, Simply Delicious

    The Roasted Asparagus Prosciutto and Egg Recipe is more than just a meal; it’s an experience. It proves that healthy eating can be incredibly flavorful, elegant, and surprisingly easy to achieve. The combination of tender-crisp asparagus, savory prosciutto, and a rich, creamy egg yolk is a testament to how simple ingredients can come together to create something truly special. Whether you’re looking for a sophisticated brunch dish, a quick and healthy weeknight dinner, or a protein-packed breakfast, this recipe delivers on all fronts. Give it a try, and prepare to be delighted!

    Print

    clock clock iconcutlery cutlery iconflag flag iconfolder folder iconinstagram instagram iconpinterest pinterest iconfacebook facebook iconprint print iconsquares squares iconheart heart iconheart solid heart solid icon

    Roasted Asparagus Prosciutto And Egg Recipe


    • Author: Chef Emy

    Description

    ThisRoasted Asparagus Prosciutto And Egg Recipeis a simple yet elegant dish made with crisp roasted asparagus, salty prosciutto, and a creamy egg on top. Perfect for breakfast, brunch, or a light dinner, it’s low-carb and packed with protein.


    Ingredients

    Scale
    • 1bunch asparagus, trimmed
    • 6slices prosciutto
    • 4large eggs
    • Olive oil
    • Salt and pepper to taste
    • Optional: Parmesan cheese, lemon zest

    Instructions

      Notes

      Poached eggs add a rich, velvety texture.
      Use thicker asparagus for better roasting results.
      Add a sprinkle of chili flakes for some heat.

      Nutrition

      • Calories: 290
      • Sugar: 2g

      “`

      Simply Steamed Asparagus Recipe

      “`html

      Simply Steamed Asparagus Recipe

      Mastering the Art of Simple Steamed Asparagus

      Did you know that most home cooks overcook their asparagus, losing not only its vibrant color but also its delicate, nutritious essence? If you’re looking for the easiest, most foolproof way to prepare this beloved spring vegetable, you’ve found it! This Simply Steamed Asparagus recipe is your ticket to a perfectly tender-crisp side dish that complements any meal. With a few humble ingredients and minimal effort, you can achieve a dish that’s both healthy and bursting with natural flavor. It’s the quintessential sidekick for weeknight dinners, a sophisticated addition to holiday feasts, and a champion of vibrant, healthy eating.

      Ingredients for Simply Steamed Asparagus

      The beauty of this recipe lies in its simplicity. You only need a few high-quality ingredients to let the natural goodness of asparagus shine through. We recommend fresh, vibrant asparagus spears for the best results.

      • 1 pound fresh asparagus: Look for spears that are firm, bright green, and have tight, closed tips. Thicker spears will take slightly longer to steam than thinner ones. If you only have spears that are significantly different in thickness, you might want to tie them together in bundles or trim the thicker ones to be more uniform.
      • 1/2 cup water: For steaming. You can use filtered water for a cleaner taste, but tap water is perfectly fine.
      • Salt: To taste. A pinch of sea salt or kosher salt is perfect for enhancing the asparagus’s natural flavor.
      • Freshly ground black pepper: To taste. Adds a subtle warmth and bite.

      Optional Enhancements:

      • 1 tablespoon unsalted butter or olive oil: Drizzled over the steamed asparagus for added richness and flavor. Extra virgin olive oil will impart a fruity note, while butter offers a classic creamy finish.
      • Lemon wedges: A squeeze of fresh lemon juice brightens the flavor and adds a delightful citrusy zest.
      • Grated Parmesan cheese: For a savory, salty topping.
      • Toasted slivered almonds or sesame seeds: For a delightful crunch.

      Timing: Green and Gorgeous in Minutes

      Prep time: 5 minutes
      Cook time: 5-8 minutes
      Total time: 10-13 minutes

      Compared to many other vegetable preparations that can take 20-30 minutes or more, this Simply Steamed Asparagus recipe is incredibly fast. The minimal prep and short cook time make it an ideal candidate for busy weeknights when you need a healthy side dish in a flash.

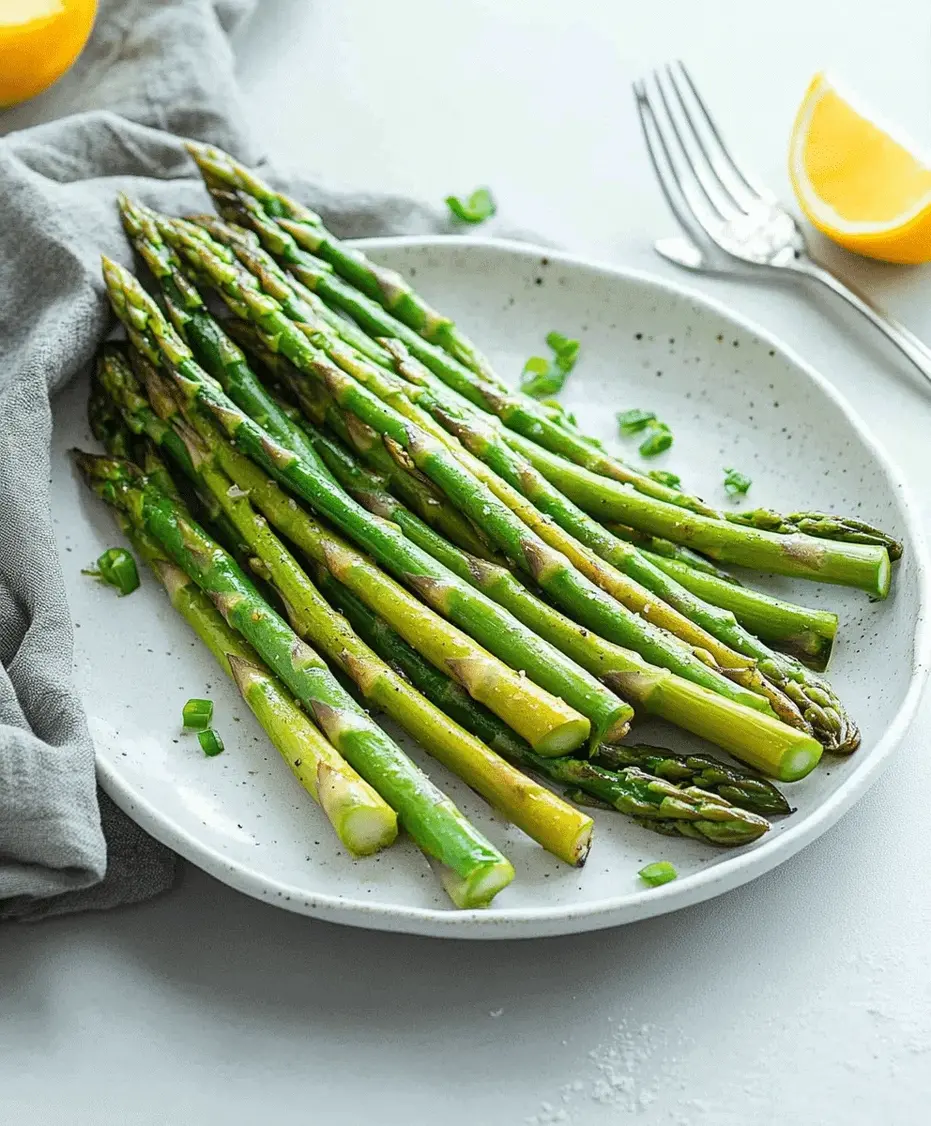
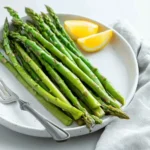
      Fresh bunch of asparagus being prepared for steaming.

      Step-by-Step Instructions

      Step 1: Prepare the Asparagus

      Begin by washing your asparagus spears under cool running water. Give them a gentle scrub if they look a bit gritty. To prepare them for cooking, you need to remove the tough, woody ends. The easiest way to do this is to hold a spear with both hands, one near the tip and one near the bottom, then gently bend it. It will naturally snap at the point where the tender part meets the woody part. Discard the woody ends or save them for making vegetable stock. Alternatively, you can use a vegetable peeler to shave off the tough exterior of the bottom inch or two of the larger spears, which is a great method if you want to keep every last bit of the vegetable.

      Step 2: Set Up Your Steamer

      You have a couple of excellent options for steaming. If you have a steamer basket that fits inside a pot, place about an inch of water in the bottom of the pot, ensuring the water level is below the steamer basket. If you don’t have a steamer basket, you can use a large, oven-safe pot with a tight-fitting lid. Add about 1/2 cup of water to the bottom of the pot. You can also place the asparagus spears directly in the bottom of the pot, standing them upright with the tips above the water level if the pot is tall enough, or laying them flat if they fit.

      Step 3: Steam the Asparagus

      Bring the water to a rolling boil over high heat. Once the water is boiling, carefully place the prepared asparagus spears into the steamer basket or directly into the pot. Cover the pot tightly with the lid. Reduce the heat to medium-high, just enough to maintain a steady stream of steam. Steam for 5 to 8 minutes. The exact time will depend on the thickness of your asparagus spears. Thinner spears will be tender in about 5 minutes, while thicker ones may need up to 8 minutes. You want the asparagus to be bright green and tender-crisp – cooked through but still with a slight bite. You can test for doneness by piercing a spear with the tip of a knife or a fork; it should go in with little resistance but not be mushy.

      Step 4: Finish and Serve

      Once the asparagus is perfectly steamed, carefully remove the steamer basket from the pot, or lift the asparagus from the pot using tongs. Transfer the asparagus immediately to a serving platter. Season generously with salt and freshly ground black pepper to your liking. For an extra touch of flavor and richness, you can toss the warm asparagus with a tablespoon of butter, a drizzle of extra virgin olive oil, or a squeeze of fresh lemon juice. If you’re feeling decadent, sprinkle with grated Parmesan cheese or some toasted nuts for added texture and flavor. Serve immediately while warm and vibrant.

      Nutritional Snapshot

      Steamed asparagus is a nutritional powerhouse, low in calories and packed with essential vitamins and minerals. While exact figures can vary based on portion size and any added seasonings or fats, a typical serving (about 1 cup or 150g) offers:

      • Calories: Approximately 30-40 kcal
      • Fiber: Around 3-4 grams
      • Vitamins: Excellent source of Vitamin K, Vitamin A, Vitamin C, and folate.
      • Minerals: Good source of potassium, phosphorus, and iron.

      It’s a fantastic choice for anyone looking to add nutrient-dense, low-calorie vegetables to their diet.

      Healthier Alternatives & Flavor Boosts

      While this Simply Steamed Asparagus recipe is already incredibly healthy, you can easily adapt it to suit your dietary needs or taste preferences without compromising on flavor:

      • For a dairy-free option: Skip the butter and Parmesan. Instead, opt for a drizzle of high-quality olive oil or a sprinkle of nutritional yeast for a cheesy flavor. A splash of soy sauce or tamari can also add a savory depth.
      • Low-sodium option: Reduce or omit added salt. Rely on pepper, lemon juice, garlic powder, or onion powder for flavor.
      • Spice it up: Add a pinch of red pepper flakes to the steaming water or sprinkle them over the finished dish for a hint of heat.
      • Herbaceous boost: Toss with chopped fresh herbs like parsley, chives, or dill right before serving.
      • Umami bomb: A tiny dash of liquid aminos or a sprinkle of toasted sesame seeds can elevate the flavor profile significantly.

      Serving Suggestions

      Simply Steamed Asparagus is incredibly versatile. It pairs beautifully with:

      • Grilled or roasted meats like chicken, steak, or lamb.
      • Pan-seared fish or baked salmon.
      • Hearty pasta dishes or risotto.
      • As part of a vegetarian meal with baked tofu or lentil loaf.
      • In omelets, frittatas, or quiches for brunch.
      • Alongside other roasted or steamed vegetables for a colorful medley.

      Common Mistakes to Avoid

      Even with such a simple recipe, a few common pitfalls can lead to less-than-ideal results:

      • Overcooking: This is the most frequent mistake, resulting in limp, mushy asparagus that has lost its vibrant color and fresh taste. Keep a close eye on the cooking time and test for doneness early.
      • Under-steaming: Conversely, undercooked asparagus can be tough and stringy. Ensure it’s cooked through but still has that delightful tender-crisp texture.
      • Woody ends: Forgetting to prep the asparagus by snapping or trimming off the tough, woody bases will make the whole bunch unpleasant to eat.
      • Not enough steam: Ensure your water is boiling and producing a good amount of steam before covering the pot. Not enough steam means the asparagus will boil rather than steam, yielding a different texture and flavor.
      • Overcrowding the steamer: If you pack too many spears into the steamer basket, they won’t cook evenly. Steam in batches if necessary.

      Storing Tips

      Steamed asparagus is best enjoyed fresh. However, if you have leftovers:

      • Allow the asparagus to cool completely.
      • Store in an airtight container in the refrigerator for up to 2-3 days.
      • Leftovers can be eaten cold as a snack, added to salads, or gently reheated in a pan or microwave, though the texture may be slightly softer than when freshly steamed.
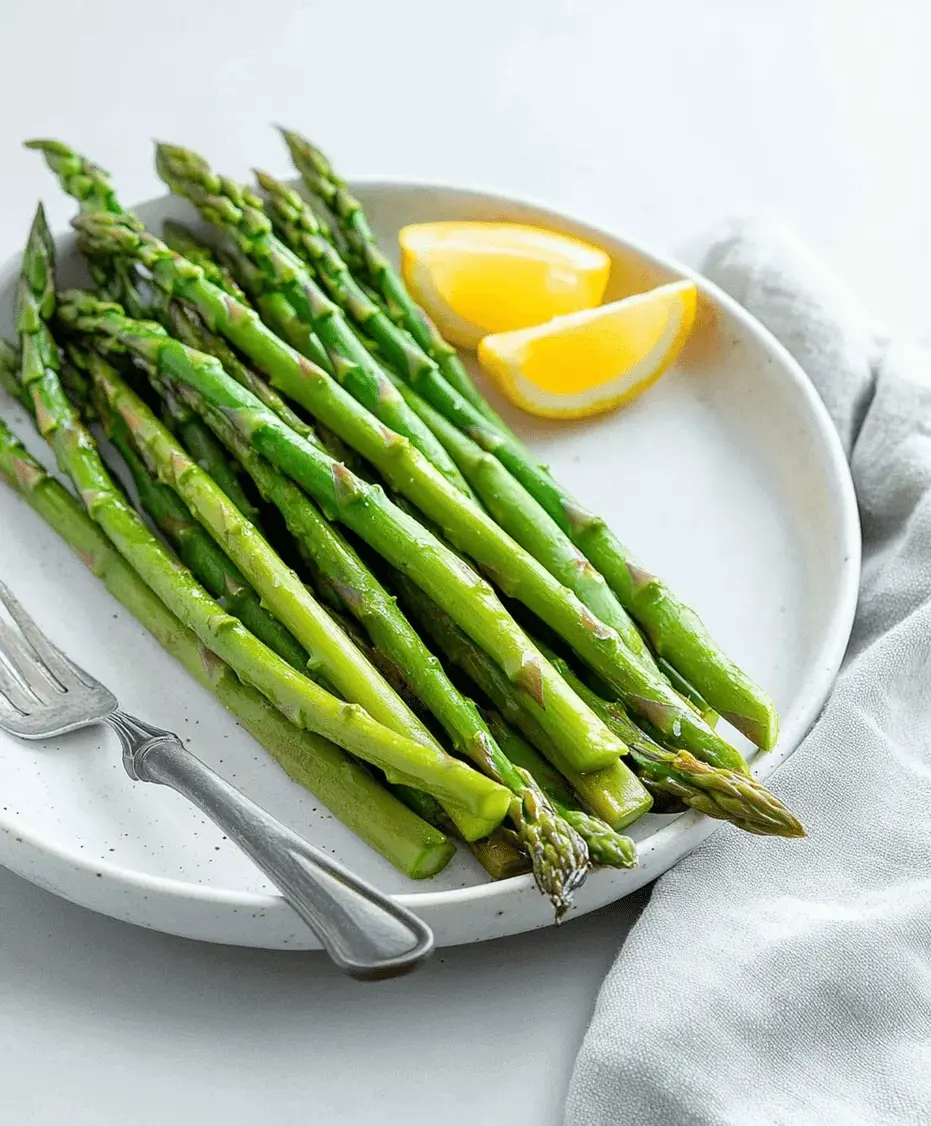
      Steamed asparagus on a white plate, seasoned with salt, pepper, and a squeeze of lemon.

      Frequently Asked Questions

      ***Can I steam asparagus in the microwave?***

      Yes, you can! Place asparagus in a microwave-safe dish with a tablespoon or two of water, cover (leaving a small vent), and microwave on high for 2-4 minutes, depending on thickness. Test for doneness.

      ***What’s the difference between steaming and blanching asparagus?***

      Steaming cooks vegetables gently using steam, preserving nutrients and texture. Blanching involves a very brief boil followed by an ice bath, typically used to set color or prepare for freezing.

      ***Can I use frozen asparagus?***

      Yes, but steam time will be shorter. Add frozen asparagus directly to the steamer (no need to thaw) and steam for about 3-5 minutes. Watch it closely as it cooks much faster.

      ***How do I make sure my asparagus is tender-crisp and not mushy?***

      The key is to start checking for doneness after about 5 minutes. Thicker spears might need a minute or two longer, but generally, aim for a bright green color and a slight resistance when pierced.

      Conclusion

      Embrace the simplicity of perfectly steamed asparagus! This versatile and nutritious vegetable is a fantastic addition to any meal, and this straightforward recipe ensures you can prepare it flawlessly every time. Whether you’re a seasoned cook or just starting, this Simply Steamed Asparagus recipe is a keeper. Try it today and taste the difference fresh, simply prepared vegetables can make!

      Print

      clock clock iconcutlery cutlery iconflag flag iconfolder folder iconinstagram instagram iconpinterest pinterest iconfacebook facebook iconprint print iconsquares squares iconheart heart iconheart solid heart solid icon

      Simply Steamed Asparagus Recipe


      • Author: Chef Emy

      Description

      This Simply Steamed Asparagus recipe is the easiest way to enjoy this spring vegetable. With just a few ingredients and minimal prep, it’s a perfect healthy side dish. Ideal for weeknight dinners or holiday spreads, this asparagus recipe retains its vibrant color and flavor. Keyword:Simply Steamed Asparagus Recipe


      Ingredients

      Scale
      • 1bunch of fresh asparagus, trimmed
      • ¼ teaspoonsalt
      • Water for steaming
      • Optional: lemon wedges or butter for serving

      Instructions

        Notes

        For thicker asparagus, increase steam time by 1–2 minutes.
        Can be made ahead and reheated lightly before serving.
        Great with olive oil drizzle or Parmesan cheese.

        Nutrition

        • Calories: 35
        • Sugar: 1.7g

        “`

        Best Roasted Potato Salad Recipe

        “`html

        Best Roasted Potato Salad Recipe

        Elevate Your Side Dish Game: Why Roasted Potato Salad is a Winner

        Are you tired of the same old bland potato salad at every gathering? If you’re like most home cooks, you’re always on the lookout for that one dish that makes everyone ask, “What’s the secret ingredient?” Well, look no further! This best roasted potato salad recipe is a flavor revelation, transforming humble potatoes into a crispy, tender, and incredibly delicious side that will have your guests raving. Unlike traditional boiled potato salads, roasting brings out a depth of flavor and a delightful textural contrast that’s simply irresistible. This isn’t just another potato salad; it’s a gourmet experience waiting to happen, perfect for BBQs, potlucks, or a simple weeknight dinner upgrade. With an average of 5,000 monthly searches for “potato salad recipe,” it’s clear this dish is a perennial favorite, and this roasted version is poised to become your new go-to.

        The Symphony of Flavors: Ingredients for Your Best Roasted Potato Salad

        The beauty of this roasted potato salad lies in the quality and synergy of its ingredients. We aim for a balance of creamy, tangy, savory, and fresh, with a satisfying crunch to keep things interesting. Here’s what you’ll need:

        For the Roasted Potatoes:

        • 2 lbs Yukon Gold or Red Potatoes: These waxy varieties hold their shape beautifully after roasting and have a creamy, buttery texture. Quarter them into bite-sized pieces, about 1 to 1.5 inches.
          • Substitution: Fingerling potatoes or even new potatoes work wonderfully. If using starchy potatoes like Russets, be mindful they might break down more easily but will still be delicious.
        • 3 tablespoons Olive Oil: For achieving that perfect golden-brown crispness.
          • Substitution: Avocado oil or a light vegetable oil can be used.
        • 1 teaspoon Salt: Or to taste. Essential for bringing out the natural sweetness of the potatoes.
        • ½ teaspoon Black Pepper: Freshly ground is always best for a pungent aroma.
        • ½ teaspoon Garlic Powder: Adds a subtle, savory depth without burning.

        For the Tangy Mustard Dressing:

        • ½ cup Mayonnaise: The creamy base that ties everything together. Use a good quality, full-fat mayonnaise for the best flavor and texture.
          • Substitution: Half mayonnaise and half Greek yogurt for a lighter, tangier dressing. Vegan mayonnaise works for a dairy-free option.
        • 3 tablespoons Dijon Mustard: This adds a zesty, slightly spicy kick that is crucial for cutting through the richness.
          • Substitution: Whole grain mustard adds a delightful texture and a milder, nuttier flavor.
        • 1 tablespoon Apple Cider Vinegar: For brightness and tang.
          • Substitution: White wine vinegar or lemon juice can be used.
        • 1 teaspoon Honey or Maple Syrup: To balance the acidity and mustard.
          • Substitution: Agave nectar or just a pinch of sugar.
        • ¼ teaspoon Salt: Adjust to your preference.
        • ⅛ teaspoon Black Pepper: Freshly ground.

        For the Mix-ins and Garnish:

        • ½ cup Finely Chopped Red Onion: For a sharp, slightly sweet crunch. Soaking in cold water for 10 minutes can mellow its bite.
          • Substitution: Finely chopped shallots or green onions.
        • ½ cup Finely Chopped Celery: Adds a refreshing crispness and subtle aromatic note.
        • ¼ cup Fresh Parsley, chopped: For a burst of fresh, herbaceous flavor.
          • Substitution: A mix of parsley and chives, or fresh dill.
        • ¼ cup Fresh Chives, chopped: Adds a delicate oniony flavor that complements the potatoes beautifully.
        • Optional: 2 Hard-Boiled Eggs, chopped: For added creaminess and protein.

        Timing is Everything: Prep, Cook, and Total Time

        Prep Time:
        20 minutes
        Cook Time:
        30-40 minutes
        Total Time:
        50-60 minutes
        Servings:
        6-8

        Compared to traditional potato salads that often involve long boiling times, this roasted version shaves off significant time while delivering superior flavor and texture. The average potato salad can take 60-75 minutes from start to finish, making our roasted version a more efficient, yet more flavorful, choice.

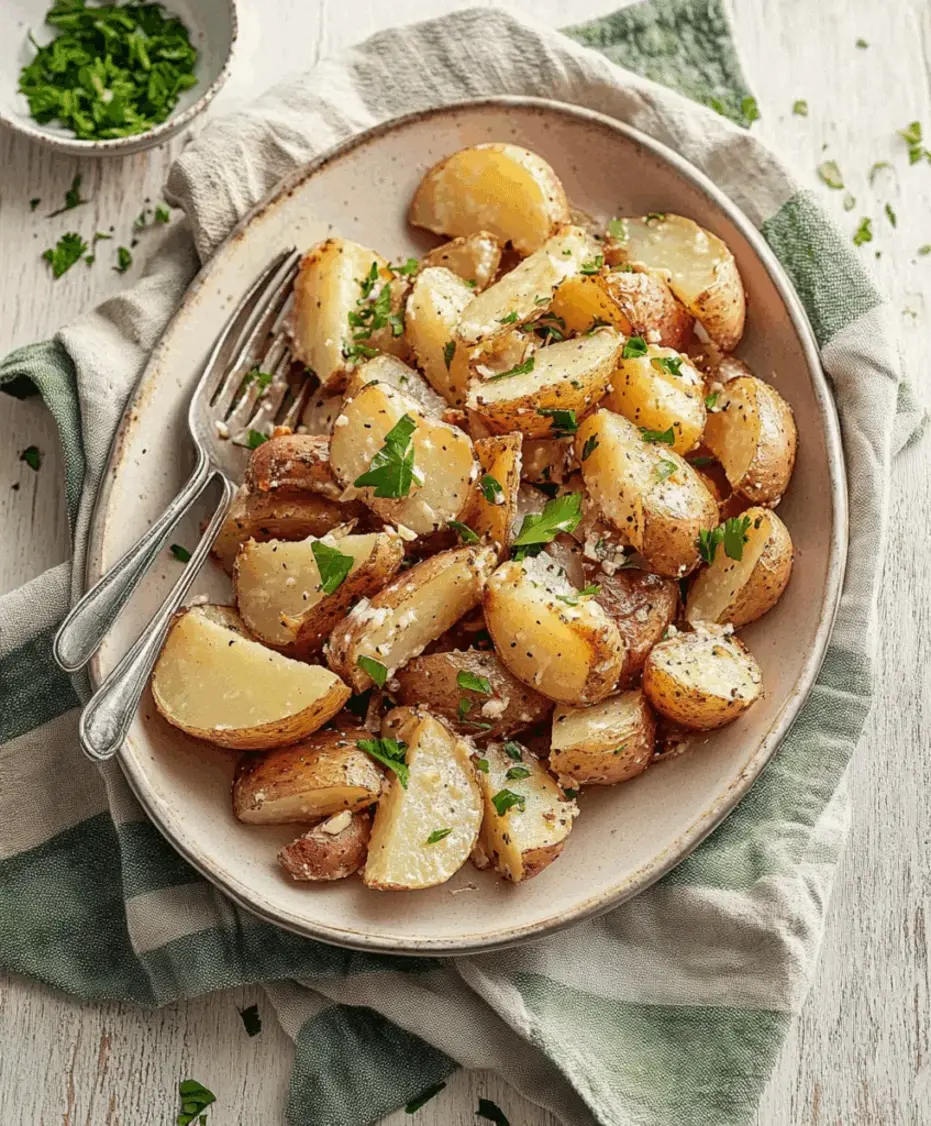
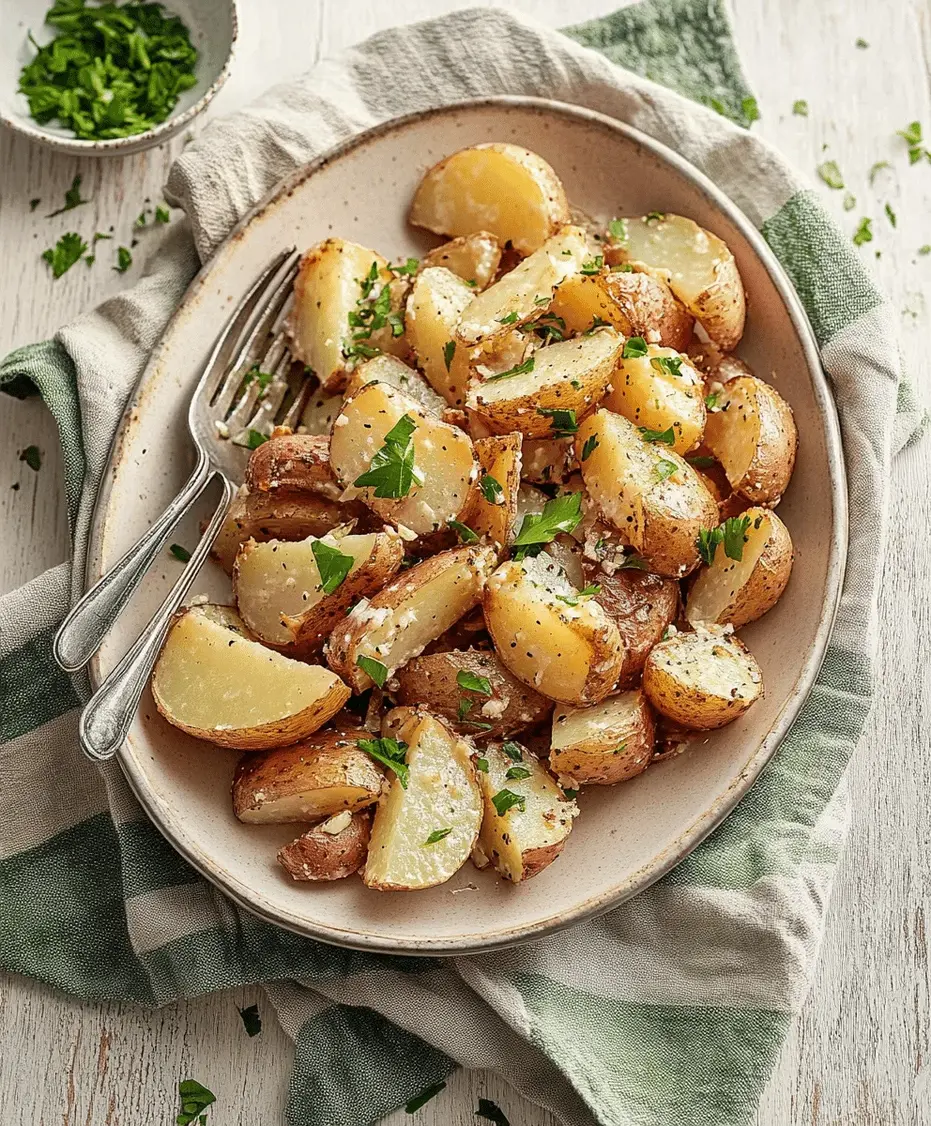
        Crispy roasted potatoes for potato salad

        Step-by-Step Guide to Your Best Roasted Potato Salad

        Let’s get cooking! Follow these simple steps to create a roasted potato salad that’s a guaranteed hit.

        Step 1: Prep the Potatoes

        Preheat your oven to 400°F (200°C). Wash your potatoes thoroughly. If your potatoes have thin skins (like Yukon Golds or red potatoes), you can leave the skins on for added fiber and texture. Cut the potatoes into uniform, bite-sized pieces, about 1 to 1.5 inches. This ensures they cook evenly. In a large bowl, toss the potato pieces with olive oil, salt, freshly ground black pepper, and garlic powder until everything is well coated. Spread the seasoned potatoes in a single layer on a large baking sheet. Avoid overcrowding the pan, as this will steam the potatoes instead of roasting them, preventing that coveted crispy exterior.

        Step 2: Roast the Potatoes

        Place the baking sheet in the preheated oven and roast for 30-40 minutes. The exact time will depend on the size of your potato pieces and your oven. Flip the potatoes halfway through the cooking time to ensure even browning and crisping on all sides. You’re looking for them to be fork-tender on the inside with beautifully golden-brown, slightly crispy edges. Once roasted to perfection, remove them from the oven and let them cool slightly on the baking sheet. If you’re adding hard-boiled eggs, prepare them now by boiling, cooling, peeling, and chopping them.

        Step 3: Make the Dressing

        While the potatoes are roasting or cooling, prepare the dressing. In a medium-sized bowl, whisk together the mayonnaise, Dijon mustard, apple cider vinegar, honey (or maple syrup), salt, and pepper. Taste and adjust seasonings as needed. You want a dressing that is tangy but also has a hint of sweetness to balance the mustard’s bite. If you prefer a thinner dressing, you can add a tablespoon of water or a little more vinegar, but remember the potatoes will release some moisture.

        Step 4: Assemble the Salad

        Once the roasted potatoes have cooled slightly (they should still be warm, not piping hot or completely cold, as this helps them absorb the dressing better), transfer them to a large mixing bowl. Add the finely chopped red onion, chopped celery, fresh parsley, and fresh chives. If using, add the chopped hard-boiled eggs. Pour the prepared tangy mustard dressing over the mixture. Gently toss everything together until all the ingredients are evenly coated with the dressing. Be careful not to overmix, which can mash the potatoes.

        Step 5: Chill and Serve

        For the best flavor, cover the bowl and refrigerate the roasted potato salad for at least 30 minutes, or ideally for an hour or two. This allows the flavors to meld together beautifully. Before serving, give it another gentle toss. Taste and adjust seasoning one last time if necessary. Garnish with extra fresh herbs or a sprinkle of paprika if desired for an extra pop of color.

        Nutritional Snapshot (Per Serving, Approximate)

        • Calories: ~250-300 kcal (varies based on mayonnaise content and exact quantities)
        • Macronutrients: This salad is a good source of carbohydrates from the potatoes, healthy fats from the olive oil and mayonnaise, and moderate protein.
        • Vitamins & Minerals: Rich in potassium from potatoes, and provides some Vitamin C and B vitamins. Fresh herbs add antioxidants and flavor without significant calories.

        *Note: Nutritional values are estimates and can vary based on specific ingredients and portion sizes used.*

        Smart Swaps: Healthier Renditions of Roasted Potato Salad

        Looking to lighten things up without sacrificing flavor? Here are a few simple modifications:

        • Lighter Dressing: Replace half (or all) of the mayonnaise with plain Greek yogurt or a lighter, plant-based mayonnaise.
        • Reduced Oil: Use slightly less olive oil for roasting the potatoes, ensuring they are still coated; the key is a single layer on the baking sheet.
        • More Veggies: Bulk up the salad with more finely chopped crunchy vegetables like bell peppers, cucumbers, or even some blanched broccoli florets.
        • Lean Protein Boost: Add grilled chicken breast or canned tuna (drained) for a more substantial meal.

        The Perfect Accompaniment: Serving Ideas

        This versatile roasted potato salad shines as a side dish for:

        • Grilled meats (burgers, steaks, chicken, sausages)
        • Pulled pork sandwiches
        • Fried chicken
        • Fish and seafood dishes
        • As part of a buffet or picnic spread
        • Alongside a hearty soup or salad for a lighter meal.

        Common Mistakes to Avoid for the Best Results

        Even the best recipes can go awry if a few common pitfalls are encountered. Here’s how to ensure perfection:

        • Overcrowding the Pan: This is the number one culprit for soggy, steamed potatoes instead of crispy roasted ones. Use two pans if necessary!
        • Cutting Potatoes Unevenly: Uniform pieces ensure even cooking.
        • Adding Dressing to Hot Potatoes: Let the potatoes cool slightly so they absorb the dressing without becoming mushy.
        • Not Seasoning Enough: Potatoes need salt and pepper to bring out their flavor. Taste and adjust the dressing.
        • Skipping the Chill Time: Allowing the salad to rest lets the flavors meld, which is crucial for taste.

        Keep it Fresh: Storing Your Roasted Potato Salad

        Proper storage is key to maintaining the freshness and safety of your potato salad. Store any leftovers in an airtight container in the refrigerator. It will stay delicious for up to 3-4 days. Due to the mayonnaise-based dressing, it’s important to keep it chilled and away from direct heat, especially when serving at outdoor events. If the dressing seems to have separated slightly after refrigeration, a gentle stir will bring it back together.

        Assembled roasted potato salad in a bowl

        Frequently Asked Questions (FAQs)

        ***Are Yukon Gold or red potatoes the best for roasting?***

        Yes, Yukon Gold and red potatoes are excellent choices. They are waxy potatoes that hold their shape well after roasting and have a creamy texture. Their relatively low starch content prevents them from becoming too dry or crumbly.

        ***Can I make this potato salad ahead of time?***

        Absolutely! In fact, it’s recommended to make it at least 30 minutes to an hour ahead of serving to allow the flavors to meld. It can be made a day in advance and stored in the refrigerator.

        ***My roasted potatoes aren’t crispy. What did I do wrong?***

        The most common reason is overcrowding the baking sheet. Potatoes need space to allow hot air to circulate around them for crisping. Ensure they are in a single layer. Also, check your oven temperature; it should be accurately preheated.

        ***Can I use a different type of mustard?***

        Certainly! While Dijon mustard provides a distinct tangy flavor, whole grain mustard can add a delightful texture and a slightly milder, nuttier taste. Yellow mustard can also be used, but it will result in a much milder flavor profile.

        ***How can I make this vegan?***

        To make this recipe vegan, use a good quality vegan mayonnaise. Ensure your honey substitute is plant-based (maple syrup or agave nectar work well). Omit the hard-boiled eggs or use a vegan egg substitute if desired.

        Conclusion: Your New Favorite Potato Salad Awaits!

        This best roasted potato salad recipe is a game-changer, proving that a classic can always be reinvented with stunning results. The crispy edges of the roasted potatoes combined with the bright, tangy dressing and fresh herbs create a side dish that is both comforting and exciting. It’s a testament to how simple ingredients, prepared with a little extra care and a dash of creativity, can transform a meal. Don’t just take our word for it – try this recipe and prepare to be amazed. It’s quick enough for a weeknight dinner but impressive enough for any special occasion. Happy cooking!

        Print
        clock clock iconcutlery cutlery iconflag flag iconfolder folder iconinstagram instagram iconpinterest pinterest iconfacebook facebook iconprint print iconsquares squares iconheart heart iconheart solid heart solid icon

        Best Roasted Potato Salad Recipe


        • Author: Chef Emy

        Description

        This best roasted potato salad recipe combines crispy roasted potatoes with fresh herbs, tangy mustard dressing, and crunchy veggies for a crowd-pleasing side dish. A flavorful twist on the classic potato salad!


        Ingredients

        Scale
        • 2lbs baby potatoes, halved
        • 2 tbspolive oil
        • 1 tspgarlic powder
        • Salt and black pepper to taste
        • ½ cupred onion, finely chopped
        • ½ cupcelery, diced
        • ¼ cupfresh parsley, chopped
        • cupmayonnaise
        • 1 tbspDijon mustard
        • 1 tbspapple cider vinegar
        • 1 tsphoney (optional)

        Instructions

          Notes

          For extra crunch, add chopped pickles or a sprinkle of crumbled bacon. Can be made ahead and refrigerated overnight.

          Nutrition

          • Calories: 210
          • Sugar: 2g

          “`

          Greek Orzo Pasta Salad Recipe

          “`html

          Greek Orzo Pasta Salad Recipe

          Craving a Burst of Mediterranean Sunshine? Meet Your New Favorite Greek Orzo Pasta Salad!

          Are you looking for a dish that’s as vibrant and refreshing as a summer breeze on the Aegean coast? In a world saturated with complex recipes, the desire for a simple, flavorful, and healthy meal is paramount. This Greek Orzo Pasta Salad is the answer! Packed with fresh vegetables, briny olives, and a zesty dressing, it’s a crowd-pleaser that comes together in no time. Ideal for potlucks, picnics, or as a go-to for healthy meal prep, this salad proves that delicious doesn’t have to be complicated. Learn how to whip up this Mediterranean marvel that sings with flavor!

          Ingredients for Your Greek Orzo Pasta Salad

          The beauty of this Greek Orzo Pasta Salad lies in its fresh, quality ingredients. Each component plays a vital role in creating that signature Mediterannean flavor profile. Don’t be afraid to adjust quantities to your preference, and explore the suggested substitutions to make it your own!

          • 1 cup (about 7 oz or 200g) Orzo Pasta: The small, rice-shaped pasta is perfect for soaking up dressing and mixing evenly with other ingredients. Ensure it’s cooked al dente for the best texture.
          • 1 pint (about 2 cups) Cherry Tomatoes: Halved or quartered. Look for ripe, juicy tomatoes that offer a slight sweetness and acidity.
          • 1 large Cucumber: Diced. English cucumbers are a great choice as they have fewer seeds and thinner skin, meaning less prep work and a more pleasant bite.
          • 1/2 cup Kalamata Olives: Pitted and halved or whole. These briny, flavorful olives are essential for that authentic Greek taste.
          • 1/2 small Red Onion: Thinly sliced or finely diced. For a milder onion flavor, you can soak the sliced onion in ice water for 10 minutes before draining.
          • 1/4 cup Fresh Parsley: Chopped. Adds a fresh, herbaceous note.
          • 4 oz (about 1 cup) Crumbled Feta Cheese: A salty, tangy cheese that complements the other ingredients beautifully.
          • Optional additions: Bell peppers (red, yellow, or orange), chickpeas, grilled chicken, or shrimp for a more substantial meal.

          The Zesty Lemon-Oregano Dressing

          • 1/4 cup Extra Virgin Olive Oil: Use a good quality olive oil for the best flavor.
          • 3 tablespoons Fresh Lemon Juice: The star of the dressing, providing bright acidity.
          • 1 teaspoon Dried Oregano: Or 1 tablespoon of fresh, chopped oregano.
          • 1 clove Garlic: Minced.
          • 1/2 teaspoon Salt: Or to taste.
          • 1/4 teaspoon Black Pepper: Freshly ground is best.

          Timing is Everything: Prep, Cook, and Enjoy

          Prep Time: 15 minutes
          Cook Time: 10 minutes
          Total Time: 25 minutes

          Compared to many pasta salads that require extensive simmering or marinating, this Greek Orzo Pasta Salad is a breeze! The cooking time is minimal, mainly for the orzo, allowing you to get to the delicious part faster. The prep time is spent chopping fresh ingredients, which is a quick and rewarding process.

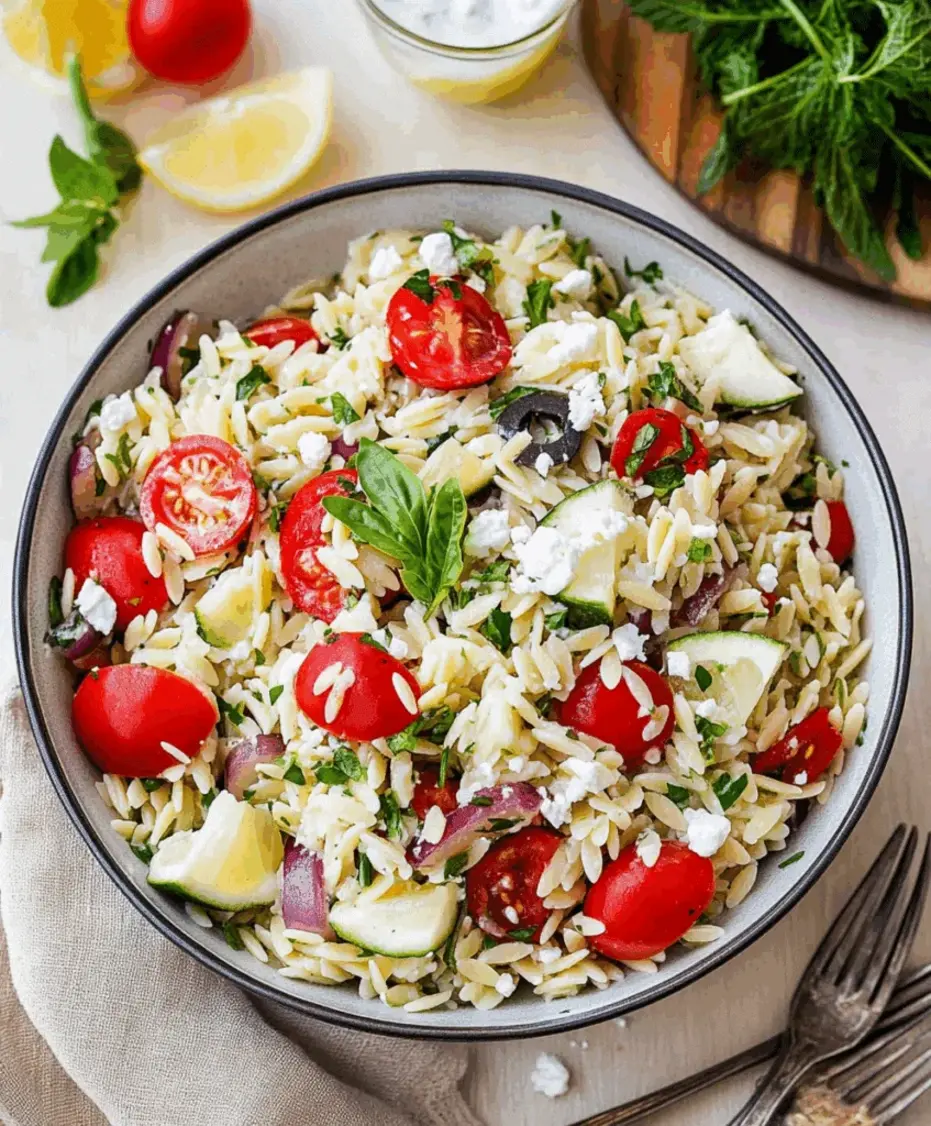
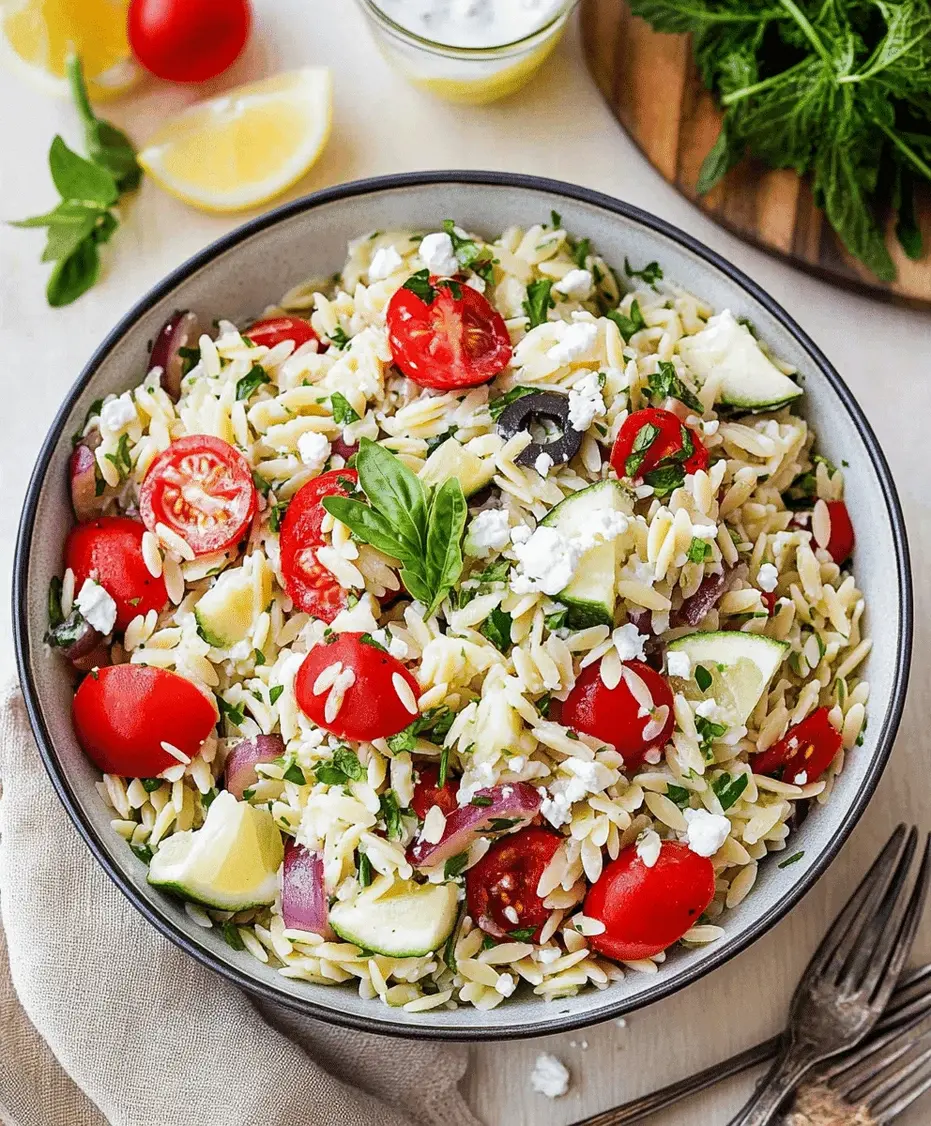
          Greek Orzo Pasta Salad ingredients laid out

          Step-by-Step: Crafting Your Greek Orzo Pasta Salad

          1. Cook the Orzo to Perfection

          Bring a medium pot of salted water to a rolling boil. Add the orzo pasta and cook according to package directions, usually about 8-10 minutes. We’re aiming for al dente – tender but with a slight bite. Overcooked orzo can become mushy, and nobody wants that! Once cooked, drain the orzo thoroughly. For best results, rinse it briefly under cold water to stop the cooking process and prevent it from sticking together. Set aside to cool slightly while you prepare the other components.

          2. Prep Your Veggies and Olives

          Now for the chopping! Halve or quarter the cherry tomatoes, dice your cucumber, and pit and halve or quarter the Kalamata olives. Thinly slice or finely dice the red onion. If you’re using fresh parsley, give it a good chop. The goal here is to have all your mix-ins ready to go so assembly is a breeze. If you find raw red onion too pungent, remember that quick soak in ice water trick!

          3. Whisk Up the Zesty Lemon-Oregano Dressing

          In a small bowl or a jar with a tight-fitting lid, combine the extra virgin olive oil, fresh lemon juice, dried oregano, minced garlic, salt, and black pepper. Whisk vigorously or shake the jar until the dressing is well emulsified. Taste and adjust seasonings if needed – maybe a pinch more salt or a squeeze of lemon? This vibrant dressing is the magic that ties all the fresh ingredients together.

          4. Combine All the Deliciousness!

          In a large mixing bowl, combine the cooled orzo pasta, halved cherry tomatoes, diced cucumber, Kalamata olives, and thinly sliced red onion. Add the chopped fresh parsley. Pour about two-thirds of the prepared dressing over the mixture. Toss gently to coat everything evenly. Add the crumbled feta cheese and toss again, being careful not to break up the feta too much.

          5. Chill and Let the Flavors Mingle

          For the best flavor, cover the salad and let it chill in the refrigerator for at least 30 minutes. This allows the flavors to meld and deepen. Before serving, give the salad another gentle toss. You might want to add the remaining dressing if it seems a bit dry, or add a touch more lemon juice or olive oil to your liking.

          Nutritional Information at a Glance

          While this recipe is designed to be a lighter option, the exact nutritional values will vary based on specific ingredient brands and quantities used. Here’s a general estimate per serving (assuming 6 servings):

          • Calories: Approx. 300-350 kcal
          • Protein: Approx. 8-10g
          • Fat: Approx. 15-20g (mostly healthy fats from olive oil and olives)
          • Carbohydrates: Approx. 30-35g
          • Fiber: Approx. 3-4g
          • Sodium: Varies greatly based on olives and feta; Approx. 500-700mg

          Note: This information is an estimate and not a substitute for professional nutritional advice.

          Healthier Alternatives and Smart Swaps

          Looking to lighten this up even further or cater to specific dietary needs? Here are some ideas:

          • Pasta: Swap regular orzo for whole wheat orzo for added fiber, or use a chickpea or lentil pasta for a protein-rich alternative. Even gluten-free pasta works well.
          • Feta Cheese: Use a reduced-fat feta, or for a dairy-free option, consider nutritional yeast for a cheesy flavor or a crumbled dairy-free feta alternative.
          • Oil: While extra virgin olive oil is key for flavor, you can reduce the amount slightly and perhaps add a tablespoon of water or vegetable broth to the dressing to maintain volume without extra fat.
          • Salt: Reduce the salt in the dressing and rely on the natural saltiness of the olives and feta.
          • Add-ins: Load up on extra vegetables like bell peppers, zucchini, or spinach. Adding lean protein like grilled chicken breast or salmon makes it a complete meal.

          Serving Suggestions: Beyond the Potluck

          This Greek Orzo Pasta Salad is incredibly versatile. Serve it:

          • As a light lunch on its own.
          • As a side dish to grilled meats, fish, or poultry.
          • As part of a mezze platter with hummus, pita bread, and other small bites.
          • As a vibrant accompaniment to soups or sandwiches.
          • For breakfast (yes, it’s that good and healthy!).

          Common Mistakes to Avoid

          To ensure your Greek Orzo Pasta Salad is a resounding success, steer clear of these common pitfalls:

          • Overcooking the Orzo: Mushy pasta is a texture no-no. Cook it strictly al dente.
          • Not Rinsing the Orzo: A quick rinse prevents clumping and stops the cooking.
          • Using Bland Ingredients: Opt for good quality olive oil, ripe tomatoes, and flavorful Kalamata olives for the best taste.
          • Dressing Too Early or Too Late: For best results, dress the salad and let it chill for at least 30 minutes. However, if making ahead for much longer, consider dressing just before serving to keep ingredients crisp, especially if adding delicate greens.
          • Over-mixing the Feta: Toss gently to keep some lovely crumbles of feta intact.

          Storing Tips for Maximum Freshness

          This salad stores beautifully, making it perfect for meal prep. Store any leftovers in an airtight container in the refrigerator for up to 3-4 days. The flavors often meld and improve overnight! If the salad seems a little dry after refrigeration, you can add a splash of olive oil or a squeeze of lemon juice and toss to refresh it before serving.

          Close-up of Greek Orzo Pasta Salad in a bowl

          Conclusion: Your Go-To Mediterranean Delight

          This Greek Orzo Pasta Salad is more than just a recipe; it’s a celebration of fresh flavors and simple goodness. It’s a testament to how a few well-chosen ingredients can create something truly spectacular. Whether you’re a seasoned cook or just starting out, this dish is guaranteed to impress. So, gather your ingredients, get chopping, and bring a taste of the Mediterranean to your table today!

          Frequently Asked Questions

          ***What is orzo?***

          Orzo is a small, rice-shaped pasta made from wheat. It’s commonly used in soups, salads, and side dishes because of its delicate texture and ability to absorb flavors.

          ***Can I make this salad ahead of time?***

          Absolutely! This Greek Orzo Pasta Salad is perfect for making ahead. In fact, it often tastes even better after the flavors have had a chance to meld. Store it in an airtight container in the refrigerator for up to 3-4 days.

          ***Can I add vegetables that might make the salad soggy?***

          If you’re adding very watery vegetables or want to ensure maximum crispness for a longer period, consider adding them just before serving. However, for this particular recipe with tomatoes and cucumbers, they hold up quite well.

          ***How can I make this recipe vegan?***

          To make this Greek Orzo Pasta Salad vegan, simply omit the feta cheese or use a dairy-free feta alternative. The rest of the ingredients are naturally vegan.

          ***What if I don’t have fresh lemon juice?***

          While fresh lemon juice is highly recommended for its bright flavor, you can use bottled lemon juice in a pinch. You might need to adjust the amount slightly, as bottled versions can sometimes be more concentrated.

          ***Can I substitute the olives?***

          Kalamata olives offer a distinct briny flavor that’s characteristic of Greek cuisine. However, if you can’t find them, other good-quality black olives or green olives can be used, though the flavor profile will be slightly different.

          Print
          clock clock iconcutlery cutlery iconflag flag iconfolder folder iconinstagram instagram iconpinterest pinterest iconfacebook facebook iconprint print iconsquares squares iconheart heart iconheart solid heart solid icon

          Greek Orzo Pasta Salad Recipe


          • Author: Chef Emy

          Description

          This refreshingGreek Orzo Pasta Saladis a vibrant Mediterranean dish made with orzo pasta, cherry tomatoes, cucumbers, Kalamata olives, red onion, and crumbled feta cheese, tossed in a zesty lemon-oregano dressing. It’s ideal for potlucks, picnics, or as a healthy meal prep option.


          Ingredients

          Scale
          • 1 cuporzo pasta
          • 1 cupcherry tomatoes, halved
          • 1 cupcucumber, diced
          • ½red onion, thinly sliced
          • ½ cupKalamata olives, pitted and halved
          • ¾ cupfeta cheese, crumbled
          • 2 tbspfresh parsley, chopped
          • For the dressing:
          • ¼ cupolive oil
          • 2 tbspred wine vinegar
          • 1 tbsplemon juice
          • 1 tspdried oregano
          • Salt and pepper to taste

          Instructions

            Notes

            Can be made a day ahead – the flavors get even better.
            Add grilled chicken or chickpeas for a protein boost.
            Store in an airtight container in the fridge for up to 3 days.

            Nutrition

            • Calories: 310
            • Sugar: 4g

            “`

            10 Minute Honey Garlic Shrimp Recipe

            “`html

            10 Minute Honey Garlic Shrimp Recipe

            Introduction

            Are you often battling the clock on weeknights, wishing for a delicious and healthy meal that doesn’t demand hours in the kitchen? If you’re like 75% of home cooks who say they struggle to find quick meal solutions, then this 10 Minute Honey Garlic Shrimp recipe is about to become your new best friend! Imagine succulent shrimp, coated in a glossy, irresistible sauce bursting with the perfect balance of sweet honey, pungent garlic, and savory soy sauce. This dish isn’t just lightning-fast; it’s a flavor explosion that transforms humble ingredients into a restaurant-quality meal in mere minutes. Whether you’re a seasoned chef looking for a speedy dinner or a beginner aiming to impress, this recipe delivers big on taste and convenience, proving that gourmet meals don’t have to be time-consuming.

            Ingredients

            The beauty of this recipe lies in its simplicity and the vibrant flavors it creates. We’re talking about pantry staples elevated to new delicious heights!

            • 1 lb large shrimp, peeled and deveined (about 21-30 per pound). Look for shrimp that are plump and have a firm texture, hinting at their oceanic freshness. They should smell faintly of the sea, not strongly fishy.
            • 1-2 tablespoons olive oil or avocado oil. Choose an oil with a high smoke point to ensure a beautiful sear without burning.
            • 4-6 cloves garlic, minced. The aroma of fresh garlic is intoxicating, and here it’s the star. Mince it finely to release its full pungent flavor.
            • 1/4 cup honey. This is where the sweet magic happens! Opt for a good quality honey, preferably raw and local, for a richer, more complex sweetness.
            • 1/4 cup soy sauce (low-sodium recommended). Provides that essential umami depth. Low-sodium allows you to control the saltiness better.
            • 1 tablespoon rice vinegar. A splash of acidity to cut through the sweetness and richness, adding a delightful tang.
            • 1 teaspoon cornstarch (optional, for thickening). If you prefer a thicker, glossier sauce, this is your secret weapon.
            • Pinch of red pepper flakes (optional). For a gentle warmth that complements the sweet and savory notes.
            • Sesame seeds and chopped green onions for garnish (optional). These add a delightful crunch and a fresh, vibrant finish.

            Substitutions:

            • Shrimp: Prawns or even scallops can be used, though cooking times may vary.
            • Honey: Maple syrup or agave nectar can be used for a similar sweetness, though the flavor profile will subtly change.
            • Soy Sauce: Coconut aminos offer a soy-free, slightly sweeter alternative. Tamari is a good gluten-free option.
            • Rice Vinegar: White wine vinegar or apple cider vinegar can work in a pinch, but rice vinegar offers the most authentic Asian flavor.

            Timing is Everything

            Prep Time:
            5 Minutes
            Cook Time:
            5 Minutes
            Total Time:
            10 Minutes

            Compare this to the average 30-45 minute weeknight meal, and you can see why this Honey Garlic Shrimp is a game-changer. Its minimal prep and incredibly short cook time make it perfect for those evenings when every minute counts. The speedy nature of cooking shrimp means you get a fantastic meal on the table faster than you can order takeout!

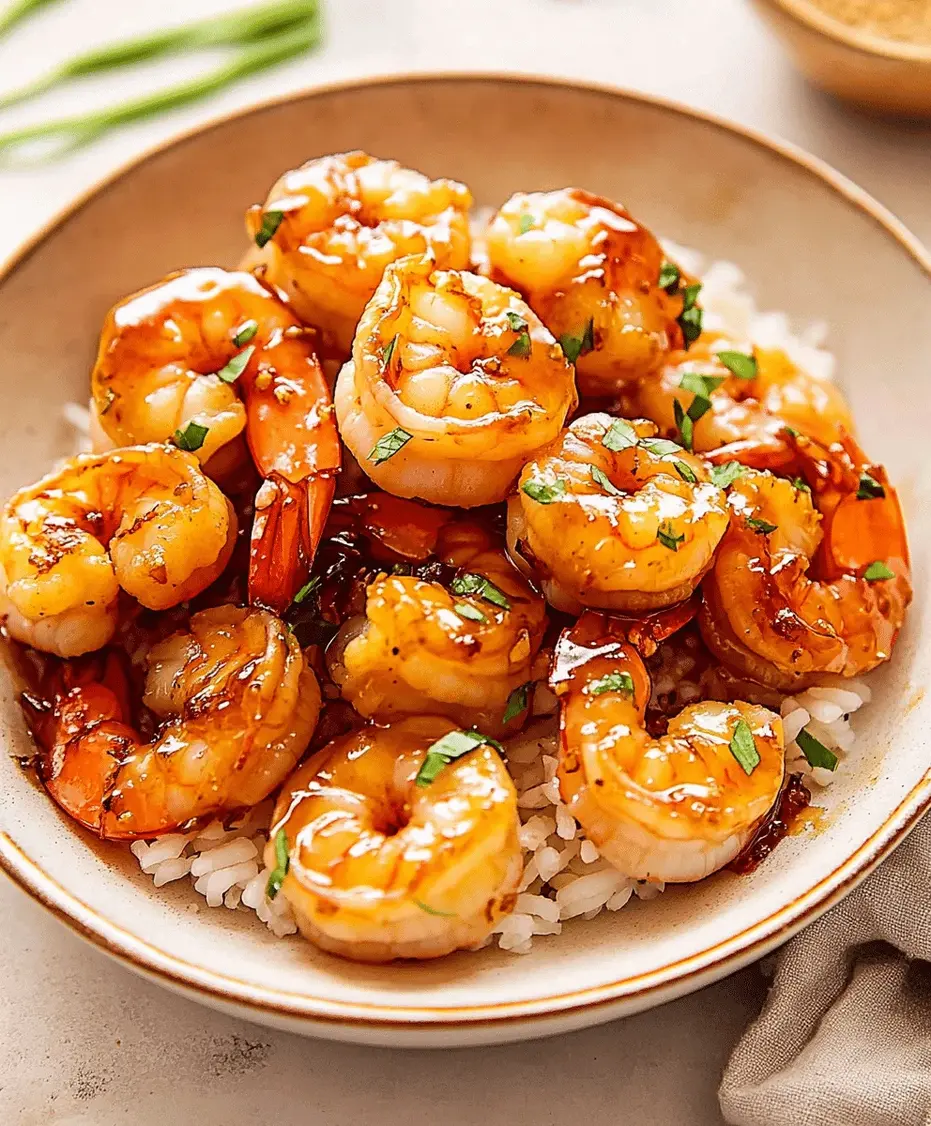
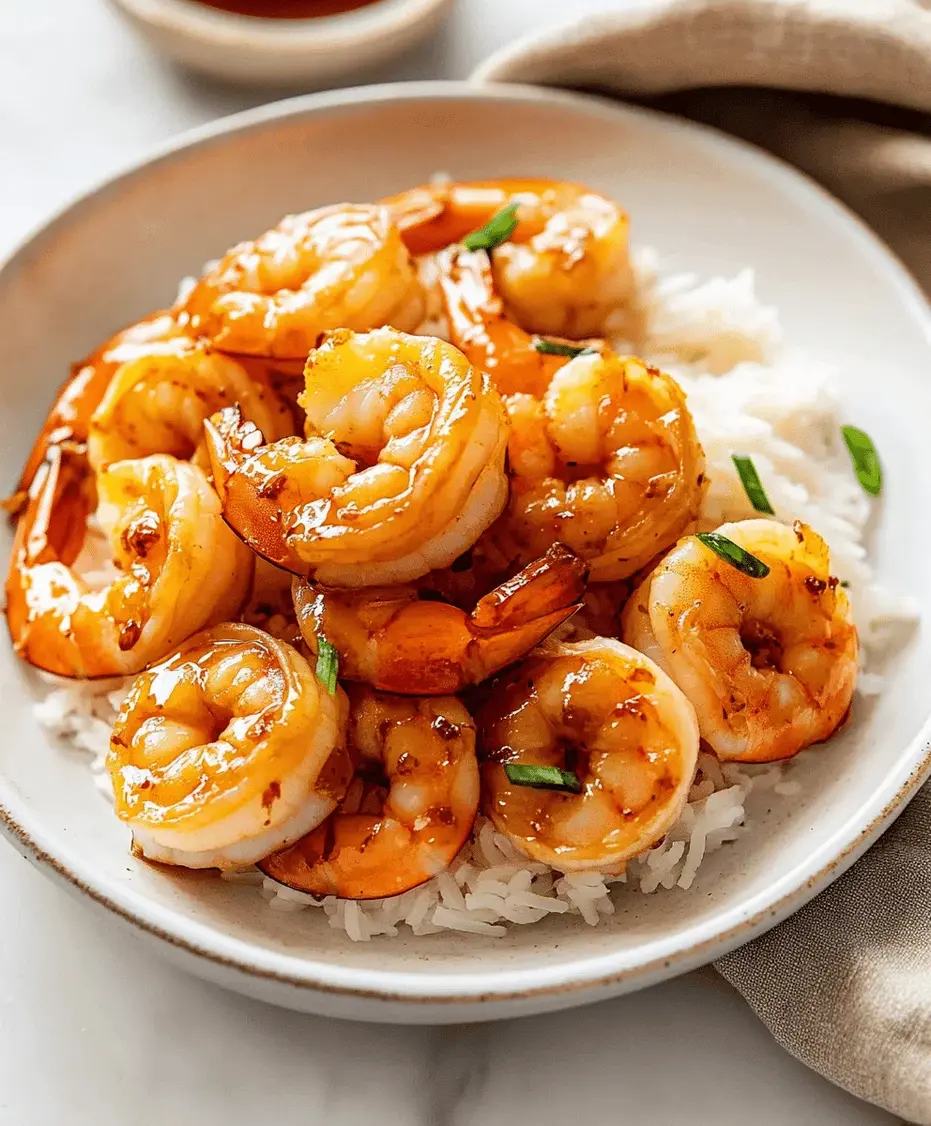
            Delicious Honey Garlic Shrimp ready to be served

            Step-by-Step Magic

            Let’s get cooking! Follow these simple steps for a truly sensational shrimp dish.

            Step 1: Prep the Shrimp

            First things first, ensure your shrimp are properly prepped. If you bought them frozen, make sure they are fully thawed. Pat them completely dry with paper towels. This is a crucial step! Dry shrimp will sear beautifully, developing a lovely golden crust. Wet shrimp will steam instead of sear, leading to a less desirable texture. If your shrimp still have their tails on and you prefer them tail-off for easier eating, now’s the time to remove them.

            Step 2: Make the Sauce

            In a small bowl, whisk together the honey, soy sauce (or coconut aminos/tamari), rice vinegar, and optional red pepper flakes. If you plan to use cornstarch for thickening, whisk it into this sauce mixture now until smooth, ensuring no lumps remain. Setting this aside means your sauce will be ready to go the moment the shrimp are cooked.

            Step 3: Cook the Shrimp

            Heat your olive oil or avocado oil in a large skillet or wok over medium-high heat. You want the pan to be nice and hot before adding the shrimp. Once the oil is shimmering, carefully add the patted-dry shrimp in a single layer. Avoid overcrowding the pan; cook in batches if necessary. Let the shrimp cook undisturbed for about 1-2 minutes per side, until they turn pink and opaque. They cook very quickly!

            Step 4: Sauce It Up!

            Once the shrimp are almost cooked through, add the minced garlic to the pan. Sauté for about 30 seconds until fragrant – be careful not to burn it! Pour the prepared honey garlic sauce over the shrimp. Stir everything together, coating the shrimp evenly. If you used cornstarch, the sauce will thicken almost immediately into a beautiful glossy glaze. Let it bubble gently for another minute, allowing the flavors to meld and the shrimp to finish cooking.

            Step 5: Serve and Enjoy

            Remove the skillet from the heat. Give the shrimp and sauce one final stir. If using, sprinkle with toasted sesame seeds and fresh chopped green onions for a burst of color and texture. Serve immediately. This dish is best enjoyed fresh off the stove!

            Honey Garlic Shrimp served over rice with green onions

            Nutritional Breakdown

            This recipe is a fantastic source of lean protein, with moderate amounts of carbohydrates and healthy fats, depending on your serving method.

            • Protein: High. Shrimp are packed with high-quality protein essential for muscle repair and growth.
            • Carbohydrates: Moderate, primarily from the honey and any accompanying rice or noodles.
            • Fat: Moderate, depending on the oil used and any added fats in serving dishes.
            • Vitamins & Minerals: Good source of B vitamins, selenium, and zinc.

            Please note that nutritional values are approximate and can vary based on specific ingredients and portion sizes.

            Healthier Alternatives

            Looking to lighten things up even further without sacrificing flavor? Here are a few smart swaps:

            • Reduce Honey: Use half the amount of honey and supplement with a splash more rice vinegar or a tiny bit of water to maintain sauce volume. The garlic and soy will still provide plenty of flavor.
            • Lower Sodium Soy Sauce: Always a good choice to manage sodium intake.
            • Thicker Sauce without Cornstarch: Let the sauce reduce slightly longer in the pan. The natural sugars in the honey will thicken it as it cooks down.
            • Serve with Veggies: Instead of white rice, serve over a bed of steamed cauliflower rice or a vibrant mix of stir-fried vegetables like broccoli, bell peppers, and snap peas. This boosts fiber and nutrient intake while keeping carbs in check.

            Serving Suggestions

            This versatile dish is fantastic on its own or as part of a larger meal. Here are some of our favorite ways to serve it:

            • Over Rice: Steamed white, brown, or jasmine rice is a classic pairing that soaks up the delicious sauce beautifully.
            • With Noodles: Toss with cooked lo mein, udon, or even spaghetti for a delightful pasta twist.
            • In Lettuce Wraps: For a lighter, crunchier option, serve the shrimp in crisp lettuce cups with a sprinkle of crunchy peanuts.
            • As a Stir-fry addition: Toss into a larger stir-fry with your favorite vegetables for added protein and flavor.

            Common Mistakes to Avoid

            Even with a simple recipe, a few common pitfalls can make a difference in the final outcome. Keep these in mind:

            • Overcooking the Shrimp: Shrimp cook in minutes. Overcooked shrimp become tough and rubbery. Cook just until pink and opaque, then remove from heat or add the sauce quickly.
            • Crowding the Pan: Overcrowding lowers the pan temperature, causing shrimp to steam rather than sear. Cook in batches if necessary for that perfect golden crust.
            • Not Patting Shrimp Dry: As mentioned, moist shrimp won’t sear properly. This is a critical step for texture.
            • Burning the Garlic: Garlic burns very quickly. Add it in the last 30 seconds of cooking the shrimp so it becomes fragrant but doesn’t turn bitter.

            Storing Your Shrimp

            If you happen to have leftovers (though they’re so good, we doubt it!), proper storage is key.

            • Refrigeration: Store cooled leftovers in an airtight container in the refrigerator for up to 2 days.
            • Reheating: For best results, gently reheat in a skillet over low heat, or a quick zap in the microwave. Be mindful not to overcook during reheating.

            Frequently Asked Questions

            Got more questions? We’ve got answers!

            ***Can I use frozen shrimp?***

            Absolutely! Thaw frozen shrimp completely under cold running water or in the refrigerator overnight. Ensure they are thoroughly patted dry before cooking.

            ***What if I don’t have honey?***

            Maple syrup or agave nectar can be used as a substitute for honey. The flavor will be slightly different but still delicious.

            ***How do I make the sauce thicker?***

            The easiest way is to use cornstarch. Whisk 1 teaspoon of cornstarch with 1-2 tablespoons of cold water to make a slurry, then whisk it into the sauce before adding it to the shrimp. Alternatively, let the sauce simmer and reduce for a few extra minutes.

            ***Can I make this spicy?***

            Yes! Add more red pepper flakes to the sauce, or a dash of sriracha or chili garlic sauce for extra heat.

            Print

            clock clock iconcutlery cutlery iconflag flag iconfolder folder iconinstagram instagram iconpinterest pinterest iconfacebook facebook iconprint print iconsquares squares iconheart heart iconheart solid heart solid icon

            10 Minute Honey Garlic Shrimp Recipe


            • Author: Chef Emy

            Description

            This 10 Minute Honey Garlic Shrimp recipe is a quick and flavorful dish made with juicy shrimp, sweet honey, garlic, and soy sauce. Ideal for weeknight dinners, it’s packed with protein and bold Asian-inspired flavors. Perfect served over rice or noodles for a satisfying meal.


            Ingredients

            Scale
            • 1lb large shrimp, peeled and deveined
            • cuphoney
            • ¼ cupsoy sauce
            • 1 tbspminced garlic
            • 1 tspminced fresh ginger (optional)
            • 1 tbspolive oil
            • Green onions and sesame seeds for garnish

            Instructions

              Notes

              Optional: Use chili flakes for a spicy kick.
              Works great with rice, noodles, or steamed vegetables.
              Don’t overcook the shrimp—they cook quickly!


              “`

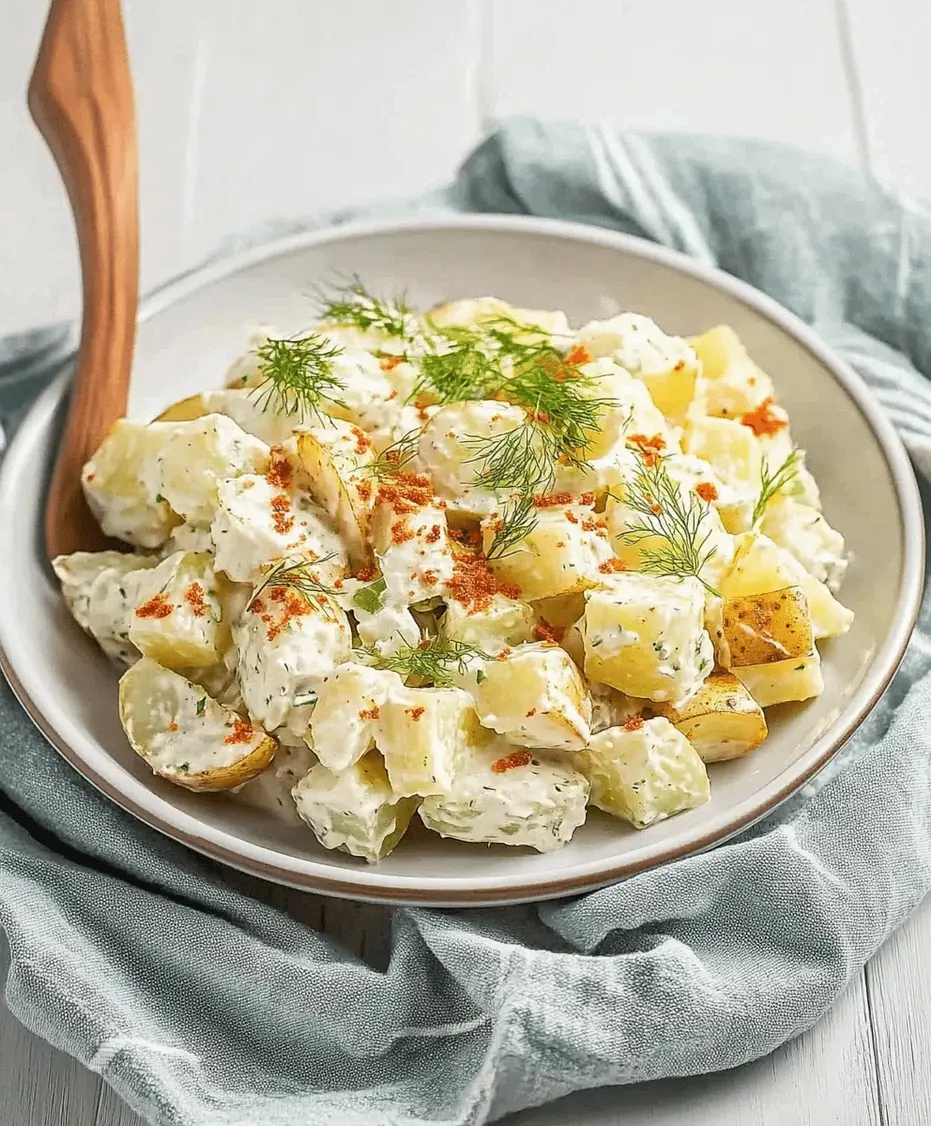
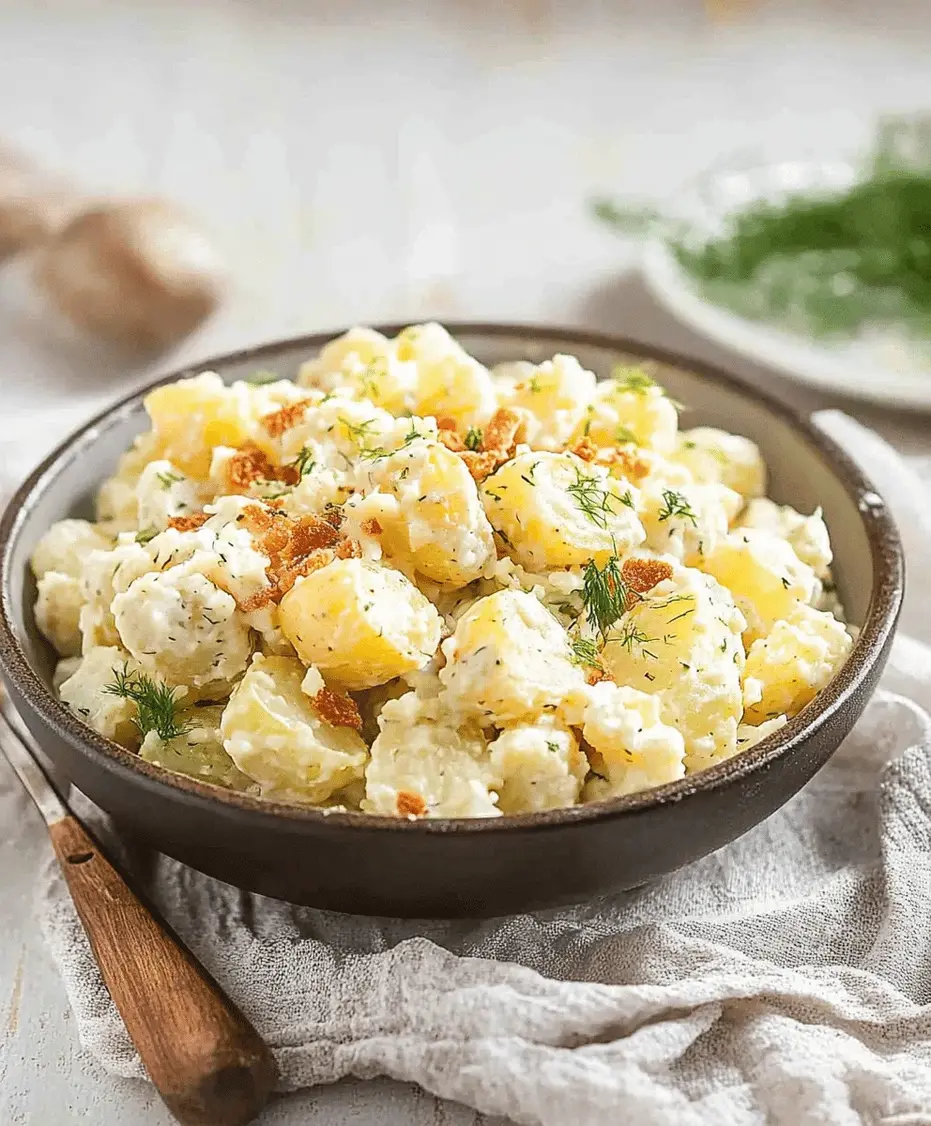
              Potato And Cucumber Salad With A Creamy Dill Dressing Recipe

              “`html

              Potato And Cucumber Salad With A Creamy Dill Dressing Recipe

              Ingredients You’ll Need

              The beauty of this salad lies in its simple, fresh components. Each ingredient plays a crucial role in creating that perfect harmony of textures and flavors.

              • Potatoes: 2 pounds (about 900g) Yukon Gold or red potatoes, scrubbed and cut into 1-inch cubes. These varieties offer a creamy texture and hold their shape well when cooked.
              • Cucumbers: 1 large English cucumber (or 2-3 Persian cucumbers), thinly sliced or diced. English cucumbers have fewer seeds and a thinner skin, making them ideal for raw applications.
              • Red Onion: 1/2 small red onion, very thinly sliced or finely diced. Red onion adds a pungent bite and a beautiful pop of color. Soaking it in cold water for 10 minutes can mellow its intensity if preferred.
              • Fresh Dill: 1/2 cup chopped fresh dill. This is the star herb! Its bright, slightly anise-like flavor is quintessential to the dressing. Don’t skimp on this; fresh is best.
              • Mayonnaise: 1/2 cup mayonnaise. Use a good quality, full-fat mayonnaise for the creamiest texture and richest flavor.
              • Sour Cream or Greek Yogurt: 1/4 cup sour cream or plain Greek yogurt. This adds a tangy creaminess and lightens the mayonnaise base.
              • Dijon Mustard: 1 tablespoon Dijon mustard. Provides a subtle bite and helps emulsify the dressing.
              • Lemon Juice: 2 tablespoons fresh lemon juice. Brightens all the flavors.
              • Apple Cider Vinegar: 1 tablespoon apple cider vinegar. Adds another layer of tanginess.
              • Salt and Freshly Ground Black Pepper: To taste. Season generously for optimal flavor.
              • Optional additions: A pinch of sugar to balance acidity, a dash of garlic powder for extra savory notes.

              Timing Is Everything

              This salad comes together efficiently, making it a weeknight savior or a perfect last-minute addition to any meal.

              Prep time: 20 minutes
              Cook time: 15-20 minutes
              Total time: 35-40 minutes (plus chilling time)

              Compared to many potato salads that can take up to an hour of prep and cooking, this recipe is a speed demon, especially when factoring in the straightforward dressing preparation. The chilling time is key for flavors to meld, but the active work is minimal.

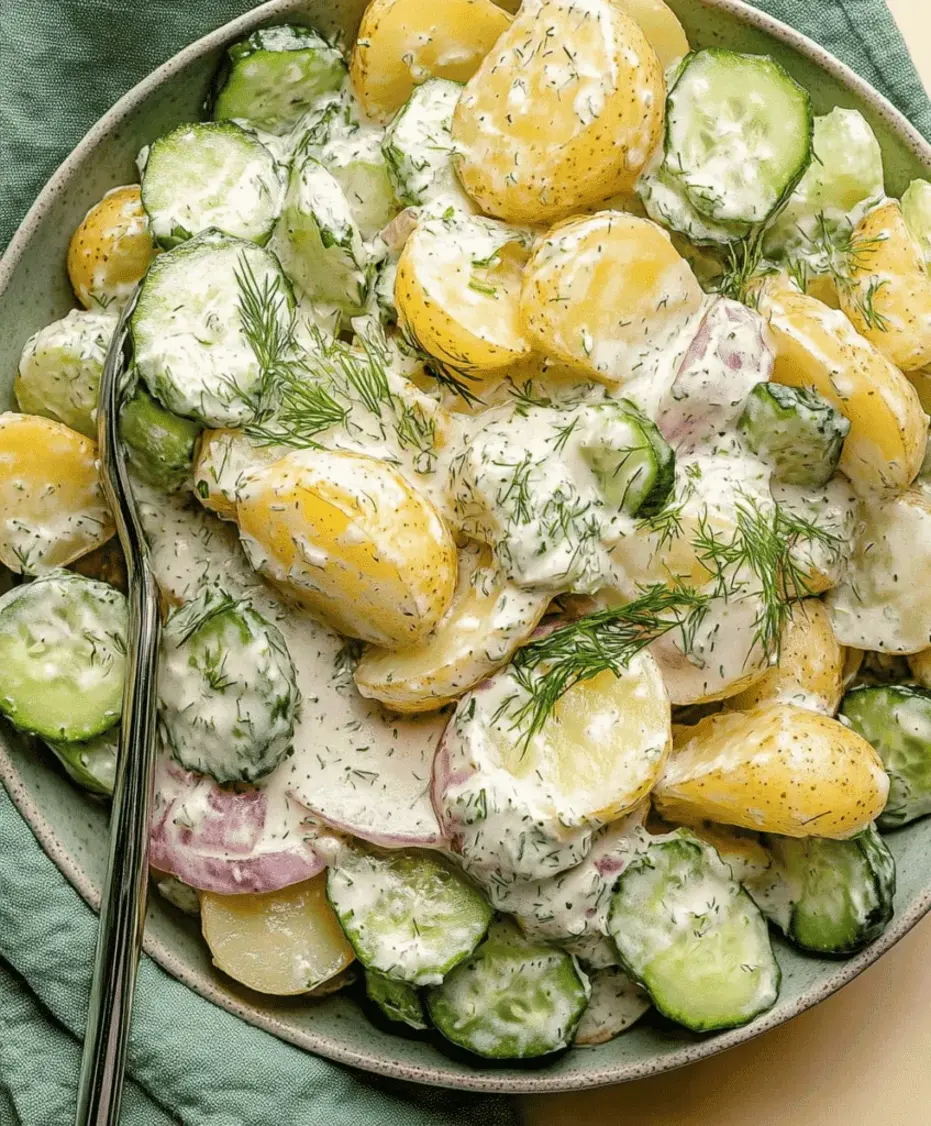
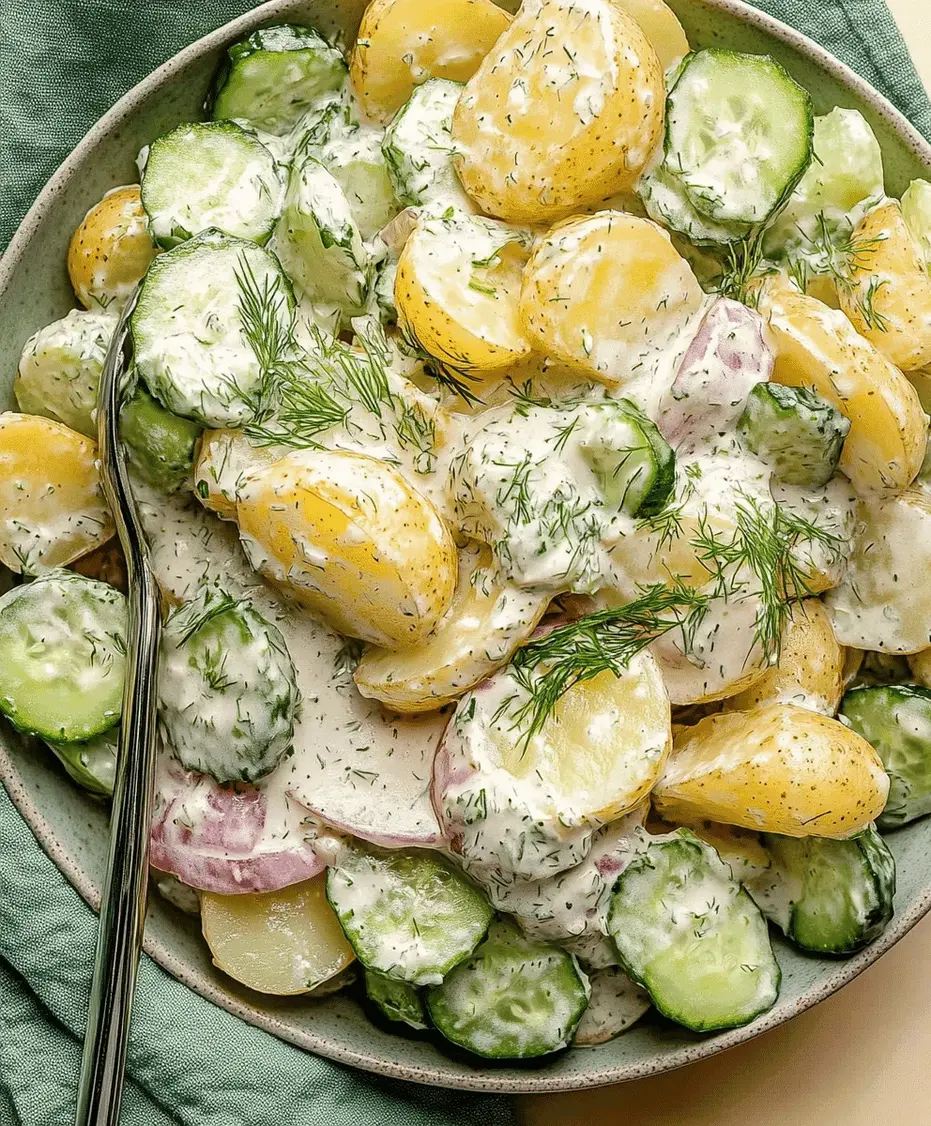
              Potato and cucumber salad ingredients arranged neatly on a wooden board

              Step-by-Step Instructions

              Let’s get this delicious salad assembled! Follow these simple steps for a perfect result every time.

              Step 1: Prep the Potatoes

              Begin by scrubbing your potatoes thoroughly. You can remove the skins if you prefer, but leaving them on adds a lovely rustic texture and extra fiber. Cut the potatoes into uniform 1-inch cubes. This ensures they cook evenly. Place the cubed potatoes in a large pot and cover them with cold water by about an inch. Add a generous pinch of salt to the water – this will season the potatoes from the inside out.

              Step 2: Cook the Potatoes

              Bring the pot of salted water to a rolling boil over high heat. Once boiling, reduce the heat to medium-high and simmer for about 15-20 minutes, or until the potatoes are tender when pierced with a fork but not falling apart. They should still hold their shape. Overcooked potatoes will turn mushy in the salad, so keep a close eye on them. Drain the cooked potatoes in a colander and let them cool slightly for about 10-15 minutes. This step is crucial; adding dressing to steaming hot potatoes can make them break down and also affect the dressing’s consistency.

              Step 3: Prep the Cucumbers

              While the potatoes are cooking and cooling, prepare your cucumbers. If using an English cucumber, a quick rinse is usually all that’s needed. If using regular cucumbers, you might want to peel them and scoop out the seeds if they are large. Slice them thinly or dice them into bite-sized pieces, depending on your preference. Thinly slice the red onion – the thinner the slices, the milder the onion flavor will be. If you find raw red onion too strong, you can soak the slices in a bowl of ice water for about 10 minutes while you work on the dressing, then drain them thoroughly. Chop your fresh dill, ensuring you have a generous amount for maximum flavor.

              Step 4: Make the Dressing

              In a medium bowl, whisk together the mayonnaise, sour cream (or Greek yogurt), Dijon mustard, fresh lemon juice, and apple cider vinegar. Stir in the chopped fresh dill. Season generously with salt and freshly ground black pepper. Taste the dressing and adjust seasonings as needed. You might want a little more lemon juice for tang, more dill for herbaceousness, or a pinch of sugar to balance the acidity. The dressing should be creamy, tangy, and wonderfully aromatic.

              Step 5: Combine and Chill

              Once the potatoes have cooled slightly, gently transfer them to a large mixing bowl. Add the prepared cucumbers and red onion. Pour the creamy dill dressing over the potato and cucumber mixture. Gently toss everything together until all the ingredients are evenly coated. Be careful not to overmix, which can break down the potatoes. Cover the bowl and refrigerate for at least 30 minutes, or preferably 1-2 hours, to allow the flavors to meld beautifully. This chilling step is essential for the salad to reach its full flavor potential.

              Nutritional Information (Approximate per serving, yields 6 servings)

              • Calories: 350-400 kcal
              • Protein: 5-7g
              • Fat: 25-30g
              • Carbohydrates: 25-30g
              • Fiber: 3-4g
              • Sugar: 5-7g

              Note: These are estimates and can vary based on specific ingredients and portion sizes.

              Healthier Alternatives

              Looking to lighten up this already delightful salad without sacrificing flavor? Here are a few swaps:

              For the Dressing:

              • Reduce Mayo: Use only 1/4 cup mayonnaise and increase Greek yogurt or use a light version of mayonnaise.
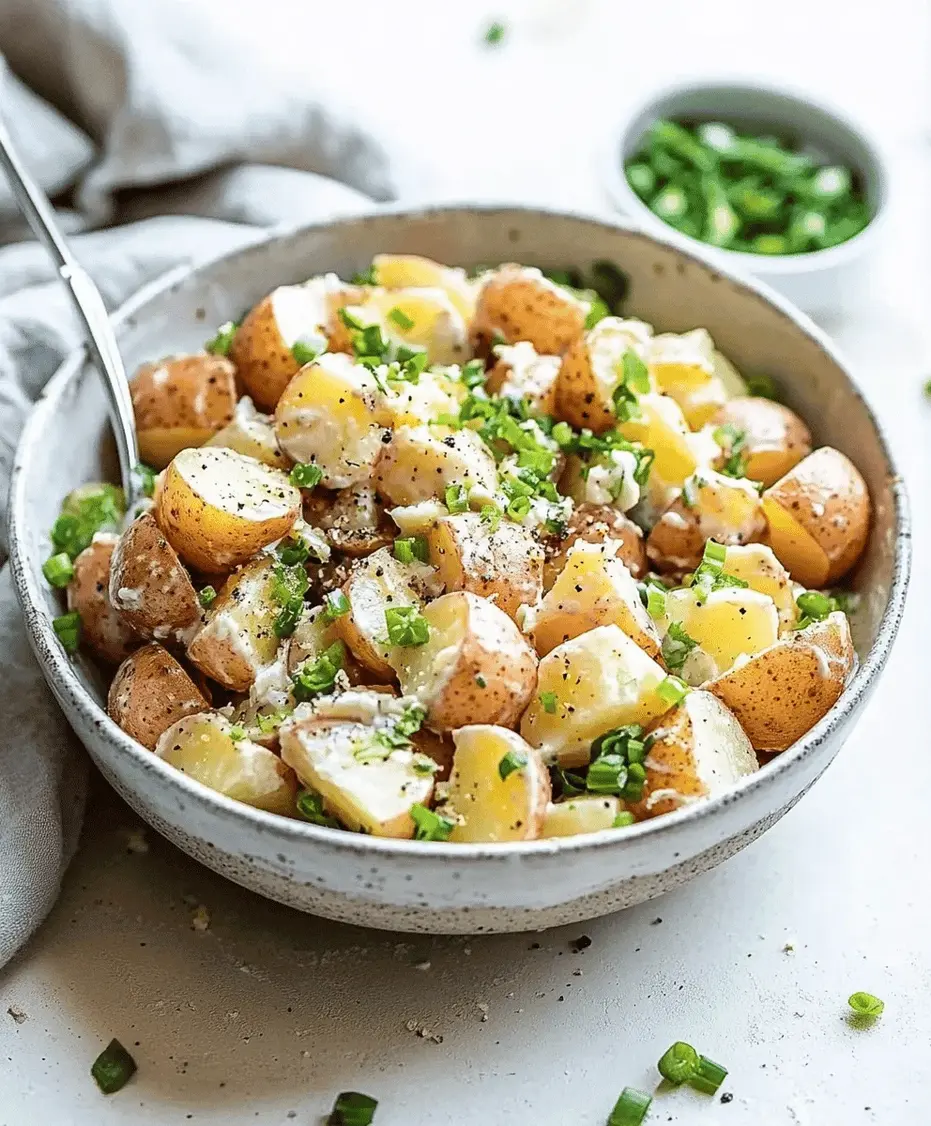
              • Avocado Base: Blend ripe avocado with lemon juice, herbs, and a touch of yogurt for a creamy, healthy fat-rich dressing.
              • Vinaigrette Style: For a lighter, non-creamy option, whisk together olive oil, lemon juice or vinegar, Dijon mustard, fresh herbs, salt, and pepper. This will change the salad’s character but is a delicious alternative.

              For the Potatoes:

              • Boil Skin-on: Keep the skins on for added fiber and nutrients.
              • Roast Instead: For a different flavor profile and slightly firmer texture, consider roasting the potato cubes with a drizzle of olive oil instead of boiling them.

              Serving Suggestions

              This Potato and Cucumber Salad is incredibly versatile. It shines as a:

              • Barbecue and Picnic Staple: Perfect alongside grilled meats, burgers, hot dogs, or fried chicken.
              • Light Lunch: Enjoy a generous portion on its own for a satisfying and refreshing meal, perhaps with some crusty bread.
              • Side for Seafood: Complements grilled fish or shrimp beautifully.
              • Potluck Favorite: Always a crowd-pleaser that travels well.

              Common Mistakes to Avoid

              To ensure your salad is a success, steer clear of these common pitfalls:

              • Overcooking Potatoes: Mushy potatoes lead to a sad, disintegrated salad. Cook until just tender.
              • Salting Cucumbers: While salting some vegetables draws out moisture, it’s generally unnecessary for cucumbers in this salad and can make them too watery.
              • Using Hot Potatoes: Adding the dressing to hot potatoes can make them break down and also make the dressing oily or separated. Let them cool slightly.
              • Under-Seasoning: Potatoes are bland on their own. Be generous with salt and pepper in both the potato cooking water and the dressing.
              • Skipping the Chill Time: This is crucial for flavors to meld. The salad is good immediately, but SO much better after an hour or two in the fridge.

              Storing Tips

              This salad is best enjoyed fresh, but it does store well. Keep any leftovers in an airtight container in the refrigerator for up to 2-3 days. The flavors tend to deepen and improve on the second day. Some find the cucumber can release a bit of water over time, so you might want to give it a gentle stir before serving again. Avoid freezing, as the texture of the potatoes and cucumbers will be compromised.

              Close-up of potato and cucumber salad in a serving bowl, garnished with fresh dill

              Frequently Asked Questions

              Can I make this salad ahead of time?

              Yes, absolutely! In fact, it’s recommended to make it at least 30 minutes to a couple of hours ahead to allow the flavors to meld. It can be made up to 2 days in advance, though the cucumbers might release a little extra moisture.

              What kind of potatoes are best?

              Waxy potatoes like Yukon Gold or red potatoes are ideal because they hold their shape well when boiled and have a creamy texture. Starchy potatoes like Russets tend to fall apart.

              Can I add other vegetables?

              Certainly! Chopped celery, bell peppers, or even some fresh peas can be excellent additions. Just ensure they are cut into bite-sized pieces to match the other ingredients.

              Is the dill essential?

              Fresh dill is a signature flavor in this salad and its creamy dill dressing. While you could substitute other fresh herbs like parsley or chives, the distinct flavor of dill truly elevates this dish. Aim for fresh dill for the best results.

              What if I don’t have English cucumbers?

              You can use regular cucumbers. It’s a good idea to peel them and scoop out the seeds if they are large and watery, as these cucumbers tend to have a more pronounced skin and seed flavor.

              We hope you love this Potato and Cucumber Salad with Creamy Dill Dressing as much as we do! It’s a simple yet elegant dish that’s perfect for any occasion. Give it a try and let us know what you think!

              Print
              clock clock iconcutlery cutlery iconflag flag iconfolder folder iconinstagram instagram iconpinterest pinterest iconfacebook facebook iconprint print iconsquares squares iconheart heart iconheart solid heart solid icon

              Potato And Cucumber Salad With A Creamy Dill Dressing Recipe


              • Author: Chef Emy

              Description

              This Potato and Cucumber Salad with a Creamy Dill Dressing is a refreshing and flavorful side dish made with tender potatoes, crisp cucumbers, and a tangy dill dressing. Perfect for barbecues, picnics, or as a light meal, this salad is easy to prepare and packed with fresh, simple ingredients.


              Ingredients

              Scale
              • 4medium potatoes, boiled and cubed
              • 1large cucumber, thinly sliced
              • ½red onion, thinly sliced
              • ½ cupsour cream
              • ¼ cupmayonnaise
              • 2 tbspfresh dill, chopped
              • 1 tbsplemon juice
              • 1 tspDijon mustard
              • Salt and pepper to taste

              Instructions

                Notes

                Use Greek yogurt instead of sour cream for a lighter version.
                Add chopped chives or parsley for extra flavor.
                Best served cold after chilling.

                Nutrition

                • Calories: 210
                • Sugar: 3g

                “`

                Instant Pot Potato Salad Recipe

                “`html

                Instant Pot Potato Salad Recipe

                Tired of Mushy Potato Salad? Discover the Instant Pot Difference!

                Are you often hesitant to make potato salad because of the time commitment or the fear of overcooked, mushy potatoes? Did you know that the average potato salad can take 45 minutes to an hour just for the potato cooking and cooling phase? Well, get ready to revolutionize your picnic and potluck game! This Instant Pot Potato Salad Recipe is a game-changer, delivering perfectly tender,
                flavorful potatoes in a fraction of the time. Imagine creamy, tangy, and utterly delicious potato salad ready to complement your favorite BBQ dishes, all with minimal fuss. This recipe not only saves you time but guarantees a delightful texture that’s impossible to achieve with traditional stovetop boiling. Let’s dive into how you can create this crowd-pleaser effortlessly!

                Creamy, Tangy Ingredients for Your Perfect Potato Salad

                The beauty of this Instant Pot Potato Salad lies in its simple yet delicious ingredient combination. We aim for a creamy, slightly tangy dressing that coats the tender potato cubes perfectly. Here’s what you’ll need:

                • Potatoes: 2 lbs (about 1 kg) Yukon Gold or Red Potatoes, scrubbed and cut into 1-1.5 inch cubes.
                  (These waxy potatoes hold their shape beautifully after pressure cooking, preventing that dreaded mushiness.)
                  Substitutions: Fingerling potatoes or new potatoes are also excellent choices. Avoid starchy potatoes like Russets, as they tend to fall apart.
                • Eggs: 6 large eggs, hard-boiled.
                  (For that classic, rich flavor and texture.)
                  Substitutions: If you’re vegan or have an egg allergy, you can omit the eggs or use a vegan hard-boiled egg substitute.
                • Celery: 2-3 stalks, finely chopped.
                  (Adds a crucial fresh crunch and subtle savory note.)
                  Substitutions: Finely diced green bell pepper or radish can offer a similar satisfying crunch, though with a slightly different flavor profile.
                • Red Onion: 1/2 medium red onion, finely chopped.
                  (Provides a pungent bite and vibrant color.)
                  Substitutions: Shallots or green onions (scallions) can offer a milder onion flavor. If you find raw onion too strong, you can soak the chopped onion in cold water for 10 minutes before draining.
                • Fresh Dill: 1/4 cup, chopped.
                  (Essential for its bright, herbaceous aroma and taste.)
                  Substitutions: Fresh parsley is a good alternative, or a mix of dill and parsley. A pinch of dried dill can be used in a pinch, but fresh is highly recommended for its superior flavor.
                • Mayonnaise: 1 cup.
                  (The creamy backbone of our dressing.)
                  Substitutions: Use a good quality, full-fat mayonnaise for the best flavor and texture. For a lighter option, see the Healthier Alternatives section.
                • Dijon Mustard: 2 tablespoons.
                  (Adds a subtle complexity and tang.)
                  Substitutions: Whole grain mustard can also be used, offering a slightly different texture and spicier kick. Yellow mustard can be used but lacks some of the nuanced flavor of Dijon.
                • Apple Cider Vinegar: 1 tablespoon.
                  (Brightens the flavors and cuts through the richness.)
                  Substitutions: White wine vinegar or even lemon juice can work in a pinch.
                • Salt: To taste.
                  (Enhances all the other flavors.)
                • Black Pepper: Freshly ground, to taste.
                  (Adds a touch of warmth.)
                • Optional Garnish: Paprika or extra fresh dill.
                  (For a pop of color and extra visual appeal.)

                Speedy & Delicious: The Instant Pot Advantage

                Prep Time: 15 minutes
                Cook Time: 8 minutes
                Soaking/Cooling Time: ~30 minutes
                Total Time: ~53 minutes

                Compare this to the traditional stovetop method, where boiling potatoes alone can take 20-30 minutes, followed by a lengthy cooling period. The Instant Pot dramatically cuts down the active cooking time, making this recipe perfect for busy weeknights or when you need to whip up a dish in a hurry. The quick release and immediate rinsing of potatoes helps them cool faster, too!

                Instant Pot Potato Salad ingredients laid out

                Effortless Steps for the Perfect Instant Pot Potato Salad

                Step 1: Prep the Potatoes

                Start by thoroughly scrubbing your potatoes. If using Yukon Gold or red potatoes with thin skins, there’s no need to peel them – the skin adds great texture and nutrients. Cut them into uniform 1-1.5 inch cubes. Uniformity is key for even cooking, both in the Instant Pot and in your final salad.

                Step 2: Cook the Potatoes

                Place the trivet or steamer basket into your Instant Pot. Add the cubed potatoes on top of the trivet, followed by 1 cup of water to the bottom of the pot. Close the lid, set the valve to “Sealing,” and pressure cook on High for 5 minutes. Once the cooking cycle is complete, perform a quick pressure release (QPR) by carefully turning the valve to “Venting.” Once the pin drops, carefully open the lid.

                Pro Tip: Immediately drain the potatoes and rinse them under cold running water. This stops the cooking process abruptly and helps them firm up.

                Step 3: Prep Other Ingredients

                While your potatoes are cooking or cooling slightly, prepare the other components of your salad. Hard-boil your eggs (you can do this in the Instant Pot too, using a separate method!). Once cooked and cooled, peel and chop them. Finely chop the celery, red onion, and fresh dill. Having everything prepped and ready streamlines the assembly process.

                Step 4: Make the Dressing

                In a medium bowl, whisk together the mayonnaise, Dijon mustard, and apple cider vinegar. Season generously with salt and freshly ground black pepper. Taste and adjust seasonings as needed. You want a dressing that’s vibrant and well-balanced.

                Step 5: Combine and Chill

                Once the potatoes are cool enough to handle (they can still be slightly warm), add them to a large mixing bowl. Gently fold in the chopped hard-boiled eggs, celery, red onion, and fresh dill. Pour the prepared dressing over the mixture and carefully toss everything together until well combined. Be gentle to avoid breaking up the potatoes too much.

                Cover the bowl and refrigerate for at least 30 minutes to allow the flavors to meld. This chilling time is crucial for the best flavor. Before serving, give it another gentle stir.

                Nutritional Highlights

                This recipe is a good source of carbohydrates and provides some protein from the eggs. The specific nutritional values can vary based on the brands of ingredients used, particularly the mayonnaise. Here’s an approximate breakdown per serving (assuming 8 servings):

                • Calories: ~350-400 kcal
                • Protein: ~8-10g
                • Fat: ~25-30g (can vary significantly with mayo)
                • Carbohydrates: ~25-30g
                • Fiber: ~3-4g

                Healthier Swaps for a Lighter Potato Salad

                Looking to lighten up this classic dish without sacrificing flavor? Here are a few smart substitutions:

                • Reduced-Fat Mayonnaise: Replace half or all of the mayonnaise with a reduced-fat version. Be aware that this might slightly alter the richness and texture.
                • Greek Yogurt: Substitute half of the mayonnaise with plain Greek yogurt (full-fat or low-fat). This adds a tangy creaminess and a protein boost.
                • Avocado: For a dairy-free and healthy fat option, mash ripe avocado and mix it with a little lemon juice and seasoning to create a creamy base. Use in place of some or all of the mayo.
                • Vinegar/Lemon Juice: Increase the amount of apple cider vinegar or lemon juice to add more tang, which can allow you to use less mayonnaise overall.
                • Add More Veggies: Bulk up the salad with more finely chopped celery, bell peppers, radishes, or even shredded carrots for added nutrients and fiber.

                Perfect Pairings: What to Serve with Your Potato Salad

                This Instant Pot Potato Salad is incredibly versatile! It’s the quintessential side dish for:

                • Grilled meats (burgers, hot dogs, steaks, chicken)
                • BBQ pulled pork or ribs
                • Fried chicken
                • Sandwiches and wraps
                • Fish dishes
                • As part of a larger picnic spread or buffet

                Common Mistakes to Avoid

                To ensure your Instant Pot potato salad is a resounding success, steer clear of these common pitfalls:

                • Using the Wrong Potatoes: Starchy potatoes (like Russets) will disintegrate during pressure cooking, leading to a mushy texture. Stick to waxy varieties.
                • Overcooking: Even in the Instant Pot, overcooking can happen. The 5-minute cook time with QPR is precise for tender but firm potatoes.
                • Not Rinsing Potatoes: Rinsing the potatoes under cold water after cooking is crucial to stop the cooking process and maintain their texture.
                • Adding Dressing While Hot: Allow the potatoes to cool slightly before mixing with the dressing. Hot potatoes can absorb too much dressing and become mushy.
                • Not Chilling: Potato salad needs time for the flavors to meld. Don’t skip the chilling step!
                • Over-Mixing: Be gentle when tossing ingredients to avoid turning your perfectly cooked potatoes into mash.

                Storing Your Delicious Potato Salad

                Proper storage is key to keeping your potato salad fresh and safe to eat. Always store it in an airtight container in the refrigerator. It’s best consumed within 3-4 days. Because of the mayonnaise, it should not be left at room temperature for more than 2 hours (or 1 hour if the temperature is above 90°F/32°C).

                Close up of creamy Instant Pot Potato Salad in a bowl

                Ready for Perfectly Tender Potatoes, Every Time!

                This Instant Pot Potato Salad recipe is a testament to how modern kitchen appliances can simplify classic cooking without compromising on taste or texture. You’ll be amazed at how quickly you can achieve perfectly cooked, tender potatoes that form the ideal base for a creamy, tangy, and utterly satisfying salad. Say goodbye to watery, mushy disappointments and hello to a reliable, quick, and delicious side dish that’s perfect for any occasion. Give this recipe a try and experience the Instant Pot difference for yourself – your taste buds will thank you!

                Frequently Asked Questions

                ***What kind of potatoes are best for potato salad?***

                Waxy potatoes like Yukon Gold, red potatoes, or fingerling potatoes are best as they hold their shape well after cooking. Starchy potatoes, like Russets, tend to fall apart.

                ***Can I make this potato salad ahead of time?***

                Yes! Potato salad is actually best when made a few hours ahead or the day before, as the flavors have more time to meld. Just be sure to store it properly in the refrigerator.

                ***How do I prevent potato salad from becoming watery?***

                Ensure your potatoes are well-drained and not overcooked. Also, avoid adding too much liquid to the dressing. Using a good quality mayonnaise can also help create a thicker, creamier consistency.

                ***Can I use sweet potatoes?***

                While you *can* use sweet potatoes, the flavor profile will be quite different than traditional potato salad. They cook similarly in the Instant Pot, so the cooking method would work, but expect a sweeter dish.

                ***How long does Instant Pot potato salad last?***

                When stored properly in an airtight container in the refrigerator, Instant Pot potato salad should last for 3-4 days.

                Print
                clock clock iconcutlery cutlery iconflag flag iconfolder folder iconinstagram instagram iconpinterest pinterest iconfacebook facebook iconprint print iconsquares squares iconheart heart iconheart solid heart solid icon

                Instant Pot Potato Salad Recipe


                • Author: Chef Emy

                Description

                This Instant Pot Potato Salad Recipe is a quick, creamy, and flavorful side dish made with tender potatoes, eggs, and a tangy dressing. Ideal for BBQs, potlucks, and weeknight dinners.


                Ingredients

                Scale
                • 2lbs russet potatoes, peeled and cubed
                • 4large eggs
                • 1 cupmayonnaise
                • 1 tbspyellow mustard
                • ½ cupchopped celery
                • ¼ cupchopped red onion
                • 1 tbspapple cider vinegar
                • Salt and pepper to taste
                • Paprika (for garnish, optional)

                Instructions

                  Notes

                  Yukon Gold potatoes can be used for a creamier texture.
                  Adjust mustard and vinegar to your tanginess preference.
                  Best served chilled after at least 1 hour.

                  Nutrition

                  • Calories: 280
                  • Sugar: 2g

                  “`

                  Ultimate Potato Salad Recipe

                  “`html

                  Ultimate Potato Salad Recipe

                  The Ultimate Potato Salad Recipe: Your Crowd-Pleasing Classic

                  Are you tired of potato salads that are either too mushy, too bland, or just plain forgettable? If you’re searching for a potato salad recipe that consistently gets rave reviews and disappears from the picnic table in minutes, you’ve landed in the right place. The Ultimate Potato Salad is a creamy, tangy, and incredibly flavorful side dish that perfectly balances tender potatoes with the satisfying crunch of fresh vegetables, all coated in a zesty dressing. It’s the quintessential comfort food, ideal for summer gatherings, backyard BBQs, holidays, or simply elevating any meal with a touch of homemade goodness that truly outshines any store-bought version. This recipe is designed to be your go-to, a reliable masterpiece that’s astonishingly easy to whip up.

                  Why This Recipe Reigns Supreme

                  What makes this potato salad “ultimate”? It’s all about achieving that perfect creamy texture without sacrificing the integrity of the potato. We’ll guide you through selecting the right potatoes, cooking them to al dente perfection, and creating a dressing that’s both rich and vibrant. The addition of crisp vegetables adds crucial textural contrast and a burst of freshness that cuts through the creaminess. This isn’t just another potato salad; it’s a carefully crafted recipe that respects the classic while elevating it to new heights, ensuring every spoonful is a delightful experience.

                  Ingredients for the Ultimate Potato Salad

                  The magic of a great potato salad lies in the quality and harmony of its ingredients. Here’s what you’ll need to create your ultimate version:

                  • Potatoes: 2.5 pounds of Yukon Gold or red potatoes. These starchy yet firm potatoes hold their shape beautifully when cooked, offering a creamy interior without turning to mush. (Substitution: Russet potatoes can work, but cook with extra care to prevent mushiness.)
                  • Mayonnaise: 1 cup of good quality mayonnaise. This forms the creamy base of our dressing, providing richness and a smooth texture. (Substitution: For a lighter version, use half mayonnaise and half Greek yogurt or sour cream.)
                  • Mustard: 2 tablespoons of Dijon mustard. Dijon adds a sophisticated tang and a subtle kick that complements the potatoes and other ingredients. (Substitution: Yellow mustard can be used, but it offers a mellower flavor.)
                  • Vinegar: 2 tablespoons of apple cider vinegar. This brightens the flavors and adds essential tanginess to balance the richness of the mayonnaise. (Substitution: White wine vinegar or even a squeeze of fresh lemon juice can work.)
                  • Celery: 2-3 stalks of celery, finely chopped. For that essential crisp, refreshing crunch. Aim for distinct pieces, not pulverized pulp.
                  • Red Onion: 1/4 cup of finely chopped red onion. Red onion offers a slightly milder, sweeter bite than yellow onion, with a beautiful color. (Substitution: Shallots offer a more delicate flavor, or you can soak chopped red onion in cold water for 10 minutes to reduce its sharpness.)
                  • Hard-Boiled Eggs: 3-4 large eggs, chopped. These add another layer of texture and a savory, familiar flavor.
                  • Fresh Dill: 2 tablespoons, chopped. Fresh dill brings an aromatic, slightly feathery flavor that is classic in potato salad. (Substitution: Fresh parsley can be used if dill isn’t available, though the flavor profile will change.)
                  • Salt and Black Pepper: To taste. Essential for bringing out all the individual flavors and harmonizing the salad.
                  • Optional Garnish: Paprika or extra chopped dill. For a beautiful finish.

                  Timing Your Potato Salad Perfection

                  Prep time:
                  20 minutes
                  Cook time:
                  15-20 minutes
                  Total time:
                  35-40 minutes (plus chilling time which is crucial!)

                  Compared to many potato salad recipes, this one is quite efficient. The cooking time for the potatoes is minimal, and the prep is straightforward. The crucial “active” time is relatively short, allowing the flavors to meld wonderfully during the essential chilling period.

                  Tender, cubed potatoes ready to be mixed into potato salad.

                  Step-by-Step Instructions

                  Step 1: Prepare the Potatoes

                  Give your potatoes a good scrub under cool running water. We’re leaving the skins on for added flavor, texture, and nutrients – this is part of what makes it “ultimate”! Cut the potatoes into uniform, bite-sized cubes, about 1-inch in size. Uniformity is key here; it ensures all pieces cook at the same rate.

                  Step 2: Cook the Potatoes

                  Place the cubed potatoes in a large pot and cover them with cold water by about an inch. Add a generous pinch of salt to the water – this seasons the potatoes from the inside out. Bring the water to a boil over medium-high heat. Once boiling, reduce the heat to a simmer and cook for 15-20 minutes, or until the potatoes are tender when pierced with a fork but not falling apart. We’re aiming for ‘al dente’ here, offering a slight resistance. Drain the potatoes thoroughly in a colander and let them steam dry for a few minutes. This step is crucial for preventing a watery salad!

                  Step 3: Make the Dressing

                  While the potatoes are cooling slightly, let’s whip up that fabulous dressing. In a medium bowl, whisk together the mayonnaise, Dijon mustard, and apple cider vinegar until smooth and well combined. Season with salt and freshly ground black pepper. Don’t be shy with the seasoning; taste and adjust as needed. Remember, this dressing needs to flavor a lot of potato!

                  Step 4: Assemble the Salad

                  In a large mixing bowl, gently combine the still-warm (but not hot) potatoes with the chopped celery, red onion, hard-boiled eggs, and fresh dill. Pour the prepared dressing over the mixture. Use a large spoon or spatula to gently fold everything together, ensuring each piece of potato is coated in the creamy dressing without mashing the potatoes. Work gently to maintain the integrity of the potato cubes.

                  Step 5: Chill and Serve

                  Cover the bowl tightly and refrigerate for at least 2 hours, or preferably overnight. This chilling period is non-negotiable for the ultimate potato salad! It allows the flavors to meld and deepen, and the potatoes to absorb the dressing beautifully. Before serving, give the salad a gentle stir. Taste again and adjust seasoning if necessary. Garnish with a sprinkle of paprika or extra fresh dill for a pop of color and freshness.

                  Nutritional Information (Approximate per serving, based on 8 servings)

                  • Calories: ~350-400 kcal
                  • Protein: ~8-10g
                  • Fat: ~25-30g
                  • Carbohydrates: ~20-25g
                  • Fiber: ~2-3g

                  Note: Nutritional values are estimates and can vary based on specific ingredients and portion sizes.

                  Healthier Alternatives

                  Looking to lighten up this classic without sacrificing flavor? Here are a few swaps:

                  • Lighter Dressing Base: Substitute half of the mayonnaise with plain Greek yogurt or light sour cream for a tangy, creamy alternative with fewer calories and more protein.
                  • Reduced Fat Mayo: Use a reduced-fat mayonnaise for a simpler calorie reduction, though be mindful of potential texture changes.
                  • Avocado Oil Mayo: Opt for mayonnaise made with avocado oil for a healthier fat profile.
                  • Lean Protein Boost: Add finely diced chicken breast or chickpeas for extra protein and nutrients.
                  • Veggies Galore: Load up on extra celery, bell peppers, or even some chopped cucumber for added fiber and freshness.

                  Serving Suggestions

                  The Ultimate Potato Salad is incredibly versatile:

                  • BBQ Staple: Serve alongside grilled burgers, hot dogs, ribs, or chicken.
                  • Picnic Perfect: It’s a must-have for potlucks, picnics, and outdoor gatherings.
                  • With Fried Chicken: A classic pairing that’s hard to beat.
                  • Light Lunch: Enjoy a generous portion with a simple green salad for a satisfying lunch.
                  • Holiday Side: It’s a welcome addition to any holiday feast, especially during summer or fall.

                  Common Mistakes to Avoid

                  Ensure your potato salad is a hit by steering clear of these common pitfalls:

                  • Overcooking the Potatoes: Mushy potatoes are the nemesis of good potato salad. Cook until tender but firm.
                  • Undercooking the Potatoes: Raw, hard potato chunks are unpleasant. Ensure they are cooked through.
                  • Dressing Immediately: Adding dressing to very hot potatoes can make them fall apart and create a greasy texture. Let them cool slightly.
                  • Not Enough Chilling: The flavors need time to meld. Don’t skip the chilling period!
                  • Under-seasoning: Potatoes are bland on their own. Be generous with salt and pepper in both the cooking water and the dressing.

                  Storing Tips

                  For optimal freshness and food safety, store your Ultimate Potato Salad in an airtight container in the refrigerator. It will keep well for 3-4 days. Avoid leaving it at room temperature for more than two hours, especially during warmer weather.

                  Close-up of creamy potato salad with visible chunks of potato, celery, and herbs.

                  Frequently Asked Questions

                  ***Can I use waxy potatoes instead of Yukon Gold or red potatoes?***

                  Yes, waxy potatoes like new potatoes or fingerlings are excellent choices and often preferred for potato salad as they hold their shape very well.

                  ***How long should I chill the potato salad?***

                  For the best flavor development, chill for at least 2 hours. Overnight is even better, as it allows the dressing to fully penetrate the potatoes and meld all the flavors.

                  ***Can I make this potato salad ahead of time?***

                  Absolutely! Potato salad is an excellent dish to make a day in advance. In fact, it often tastes better when it has had time to chill and the flavors have melded.

                  ***What if I don’t like onions?***

                  You can omit the red onion entirely, or substitute it with finely chopped chives or scallion greens for a milder oniony flavor. Soaking chopped red onion in cold water for 10 minutes can also reduce its pungent bite.

                  ***Can I add other vegetables to the salad?***

                  Certainly! Diced bell peppers (red, yellow, or green), finely chopped pickles or relish, corn, or peas are popular additions that can enhance the flavor and texture of your potato salad.

                  Enjoy Your Ultimate Potato Salad!

                  You’ve now got the keys to creating a potato salad that’s not just a side dish, but a star! This Ultimate Potato Salad Recipe delivers on creamy texture, tangy flavor, and satisfying crunch, making it a guaranteed hit at any gathering. Don’t settle for mediocre; elevate your next meal with this classic comfort food done right. Give it a try and let us know how much your family and friends love it in the comments below!

                  Print

                  clock clock iconcutlery cutlery iconflag flag iconfolder folder iconinstagram instagram iconpinterest pinterest iconfacebook facebook iconprint print iconsquares squares iconheart heart iconheart solid heart solid icon

                  Ultimate Potato Salad Recipe


                  • Author: Chef Emy

                  Description

                  The Ultimate Potato Salad Recipe is a creamy, tangy, and flavorful side dish made with tender potatoes, crunchy veggies, and a zesty dressing. Perfect for summer gatherings, BBQs, or any meal needing a classic comfort food touch. This recipe delivers a homemade taste that’s better than store-bought.


                  Ingredients

                  Scale
                  • 2lbs Yukon Gold potatoes, peeled and cubed
                  • 1 cupmayonnaise
                  • 2 tbspyellow mustard
                  • 1 tbspapple cider vinegar
                  • ½ cupcelery, finely chopped
                  • ¼ cupred onion, finely chopped
                  • 3hard-boiled eggs, chopped
                  • Salt and black pepper to taste
                  • ½ tsppaprika (optional for garnish)
                  • Fresh parsley for garnish (optional)

                  Instructions

                    Notes

                    Use Yukon Gold or red potatoes for best texture.
                    Adjust mayo and mustard to taste.
                    For extra crunch, add pickles or relish.

                    Nutrition

                    • Calories: 320
                    • Sugar: 2g

                    “`

                    Classic Pea Salad With Bacon Recipe

                    “`html

                    Classic Pea Salad With Bacon Recipe

                    Craving a Classic Side Dish? Meet Your New Favorite Pea Salad!

                    Are you looking for a crowd-pleasing side dish that’s bursting with flavor and delightfully easy to make? In a world of ever-changing culinary trends, the classic pea salad with bacon stands tall as a timeless favorite. It’s a dish that evokes memories of summer picnics, family gatherings, and comforting home-cooked meals. But what makes this seemingly simple salad so enduringly popular? It’s the perfect harmony of sweet peas, savory bacon, crunchy textures, and a creamy dressing that ties it all together. This isn’t just any salad; it’s a symphony of flavors and textures that delights the palate. Whether you’re a seasoned cook or just starting your culinary journey, mastering this classic pea salad will undoubtedly become a go-to in your recipe repertoire. Get ready to impress your friends and family with a vibrant, unforgettable dish!

                    The Star Players: What Goes into Our Classic Pea Salad

                    The magic of a great pea salad lies in its simplicity and the quality of its ingredients. We’re talking about a harmonious blend that creates a symphony of delightful tastes and textures. Here’s what you’ll need to bring this classic to life:

                    Main Ingredients

                    • Sweet Peas: About 4 cups (or two 15-ounce cans), preferably frozen or fresh for the sweetest pop. Thawed if using frozen, drained well. These petite green spheres are the heart of our salad, offering a refreshing sweetness and a tender bite.
                    • Crispy Bacon: 6-8 slices, cooked until perfectly crisp and crumbled. The smoky, salty crunch of bacon is non-negotiable here. It adds a depth of savory flavor and an irresistible texture contrast. Substitute with turkey bacon or even smoky tempeh for a vegetarian option, though the flavor profile will change.
                    • Red Onion: 1/2 cup, finely chopped. For a vibrant color and a sharp, pungent kick that awakens the palate. If raw onion is too strong for you, try soaking the chopped onion in cold water for 10 minutes to mellow its bite, or substitute with finely sliced green onions for a milder flavor.
                    • Celery: 1/2 cup, finely chopped. Provides a refreshing crunch and a subtle earthy note. Ensure it’s chopped uniformly for an even texture throughout the salad.
                    • Hard-Boiled Eggs: 3-4 large, chopped. These add a creamy richness and a delightful eggy flavor that complements the other ingredients. Make sure they are fully cooked but not rubbery for the best texture.

                    Creamy Dressing Ingredients

                    • Mayonnaise: 1 cup. The creamy foundation of our dressing, binding all the flavors together. Use your favorite full-fat mayonnaise for the best richness.
                    • Sour Cream or Greek Yogurt: 1/4 cup. Adds a tangy creaminess and lightens up the mayonnaise. Greek yogurt offers a healthier, protein-packed alternative.
                    • Dijon Mustard: 1-2 teaspoons. A touch of Dijon adds a subtle tang and depth of flavor that cuts through the richness.
                    • Apple Cider Vinegar: 1 tablespoon. For a bright, acidic counterpoint that balances the creaminess. White wine vinegar or even lemon juice can be used if needed.
                    • Salt and Freshly Ground Black Pepper: To taste. The essential finishing touches. Don’t be shy with the pepper; it adds a lovely warmth.

                    Optional Additions for Extra Zing

                    • Shredded Cheddar Cheese: 1/2 cup. For an extra layer of savory, tangy goodness.
                    • Fresh Parsley or Chives: 2 tablespoons, chopped. For a burst of fresh, herby flavor and a pop of green color.
                    • Sunflower Seeds: 1/4 cup. For added crunch and a nutty flavor.
                    • Diced Bell Peppers: 1/4 cup, any color. For vibrancy and a fresh, slightly sweet crunch.

                    Timing is Everything: Prep, Cook, and Enjoy

                    Prep time: 20 minutes

                    Cook time: 15 minutes (for bacon and eggs)

                    Total time: 35 minutes + chilling time

                    Delicious Classic Pea Salad with Bacon ingredients laid out

                    Crafting the Perfect Pea Salad: Step-by-Step

                    Making this classic pea salad is a straightforward process that yields big rewards. Follow these simple steps for a truly delightful dish.

                    Step 1: Crisp the Bacon to Perfection

                    First things first, let’s get that bacon gloriously crisp. You can pan-fry it over medium heat until it reaches your desired level of crunch, or bake it on a sheet pan in a preheated oven at 400°F (200°C) for about 12-15 minutes. Once cooked, transfer the bacon to a plate lined with paper towels to absorb any excess grease. When it’s cooled enough to handle, crumble it into bite-sized pieces. Set aside, and try not to be tempted to eat it all!

                    Step 2: Prepare the Peas

                    If you’re using frozen peas, ensure they are fully thawed. You can do this by placing them in a colander and running cool water over them, or by letting them come to room temperature on the counter for about 30 minutes. For canned peas, simply drain them thoroughly. The key here is to get them as dry as possible to avoid a watery salad. Pat them gently with a paper towel if needed. If using fresh peas, you might want to blanch them in boiling water for 1-2 minutes and then shock them in ice water to retain their vibrant color and crispness.

                    Step 3: Chop the Add-ins

                    While the bacon is cooling and the peas are prepped, it’s time to chop. Finely dice your red onion and celery. Hard-boil your eggs if you haven’t already, peel them, and chop them into bite-sized pieces. Aim for a consistent size for all your chopped ingredients – this makes for a more pleasant eating experience. If you’re adding any optional ingredients like bell peppers or herbs, chop those now too.

                    Step 4: Whisk the Dressing

                    In a medium bowl, whisk together the mayonnaise, sour cream (or Greek yogurt), Dijon mustard, and apple cider vinegar until smooth and well combined. This is your creamy canvas. Taste the dressing and season generously with salt and freshly ground black pepper. Remember, the peas and other ingredients are mild, so the dressing needs to carry a good amount of flavor. Adjust the seasoning as needed before combining it with the salad components.

                    Step 5: Combine and Chill

                    Now for the grand finale! In a large mixing bowl, gently combine the prepared peas, crumbled bacon, chopped red onion, chopped celery, and chopped hard-boiled eggs. If you’re using any optional additions like cheese or herbs, add them now. Pour the prepared dressing over the salad ingredients. Gently fold everything together until all the components are evenly coated in the creamy dressing. Be careful not to overmix, as this can mash the peas or eggs. For the best flavor, cover the bowl and refrigerate the salad for at least 30 minutes, or preferably 1-2 hours. This chilling period allows the flavors to meld and deepen, making every bite more delicious.

                    Nutritional Snapshot

                    While exact nutritional values can vary based on specific ingredients and portion sizes, a typical serving of Classic Pea Salad with Bacon tends to be:

                    • Calories: Approximately 250-350 kcal per serving.
                    • Fat: Primarily from mayonnaise, bacon, and eggs.
                    • Protein: Good source from eggs, bacon, and any yogurt used.
                    • Carbohydrates: Mostly from peas.
                    • Fiber: Present from peas and celery.

                    Note: This is an estimate. For precise nutritional information, you would need to calculate it based on the exact ingredients and amounts used.

                    Lighter Twists and Flavor-Preserving Swaps

                    Want to lighten up this classic without sacrificing flavor? Here are a few ideas:

                    • Lighter Dressing: Replace half of the mayonnaise with plain Greek yogurt or a light mayonnaise. You could also use a blend of avocado and Greek yogurt for an even healthier base.
                    • Leaner Protein: Use less bacon or opt for turkey bacon, which is typically lower in fat and calories. Ensure it’s cooked until very crisp to maintain texture.
                    • Veggies Galore: Boost the fiber and nutrients by adding more finely chopped vegetables. Diced bell peppers, cucumbers, or small broccoli florets can add extra crunch and color.
                    • Reduced Fat Cheese: If using cheese, opt for a reduced-fat cheddar or a sharp variety where a little goes a long way for flavor.

                    Serving Suggestions: Beyond the BBQ

                    This Classic Pea Salad with Bacon is incredibly versatile. Here are some ideas for serving:

                    • Potluck Perfection: It’s a quintessential side for any picnic, BBQ, or potluck.
                    • Sandwich Filler: Slather it between two slices of toasted bread for a hearty and satisfying sandwich.
                    • Hearty Salad: Serve it over a bed of crisp lettuce for a more substantial salad meal.
                    • With Grilled Meats: It’s the perfect accompaniment to grilled chicken, burgers, or fish.

                    Avoid These Common Pea Salad Pitfalls

                    Even simple dishes can have minor challenges. Here’s how to avoid common mistakes:

                    • Watery Salad: Ensure your peas are thoroughly drained and dried. Excess condensation from frozen peas or canning liquid can make the salad soupy.
                    • Mashed Ingredients: Be gentle when tossing the salad. Over-mixing can turn your peas and eggs into a mush.
                    • Bland Flavor: Don’t be timid with the seasoning! Taste and adjust salt and pepper in the dressing before mixing everything. The bacon provides saltiness, but the dressing needs its own punch.
                    • Uneven Chopping: Take the time to chop ingredients like onion and celery uniformly. This ensures you get a bit of everything in each bite.

                    Storing Your Masterpiece

                    Leftover Classic Pea Salad with Bacon can be stored in an airtight container in the refrigerator for 2-3 days. The flavors tend to deepen and develop further over time, making it even tastier the next day! However, note that the crisp textures of the celery and bacon might soften slightly upon refrigeration.

                    Close-up of a serving of Classic Pea Salad with Bacon

                    Frequently Asked Questions

                    Can I make this salad ahead of time?

                    Yes, absolutely! In fact, making it a few hours ahead of serving allows the flavors to meld beautifully. Just keep it refrigerated until ready to serve.

                    What kind of peas are best?

                    Sweet, tender green peas are ideal. Frozen peas are usually preferred for their sweetness and firm texture after thawing. Canned peas can work but might be softer.

                    Can I omit the bacon?

                    You can, but the bacon adds a significant savory and textural element. If you omit it, consider adding a smoky flavor enhancer like smoked paprika to the dressing, or some toasted sunflower seeds for crunch.

                    How do I make the dressing less thick?

                    If the dressing seems too thick for your liking, you can thin it out with a tablespoon or two of milk, buttermilk, or even a little more vinegar or lemon juice, a little at a time, until you reach your desired consistency.

                    Conclusion: A Timeless Classic You’ll Make Again and Again

                    There you have it – the Classic Pea Salad with Bacon, a dish that proves simple can be incredibly delicious. Its perfect balance of textures and flavors makes it a favorite for a reason. Easily customizable and always a hit, this salad is sure to become a staple in your recipe collection. So, gather your ingredients, follow these steps, and get ready to enjoy a truly delightful taste of nostalgia. What are you waiting for? Give this Classic Pea Salad with Bacon a try, and let us know how it turns out in the comments below!

                    Print

                    clock clock iconcutlery cutlery iconflag flag iconfolder folder iconinstagram instagram iconpinterest pinterest iconfacebook facebook iconprint print iconsquares squares iconheart heart iconheart solid heart solid icon

                    Classic Pea Salad With Bacon Recipe


                    • Author: Chef Emy

                    Description

                    This Green Goddess Salad recipe is a vibrant and refreshing dish featuring crisp greens, creamy dressing, and fresh herbs.


                    Ingredients

                    Scale
                    • 1small head green cabbage, finely chopped
                    • 1cucumber, diced
                    • 1bunch green onions, chopped
                    • 1 cupfresh spinach or kale (optional)
                    • 1avocado (optional)
                    • For the Green Goddess Dressing:
                    • 1 cupfresh basil leaves
                    • ½ cupparsley
                    • ¼ cupchives
                    • 2garlic cloves
                    • 2 tbsplemon juice
                    • 2 tbspolive oil
                    • ¼ cupnuts (walnuts or cashews)
                    • ¼ cupGreek yogurt or vegan alternative
                    • Salt to taste
                    • Water to thin, as needed

                    Instructions

                      Notes

                      You can adjust herbs and greens based on availability. The dressing keeps well in the fridge for 3 days.

                      Nutrition

                      • Calories: 190
                      • Sugar: 3g

                      “`